
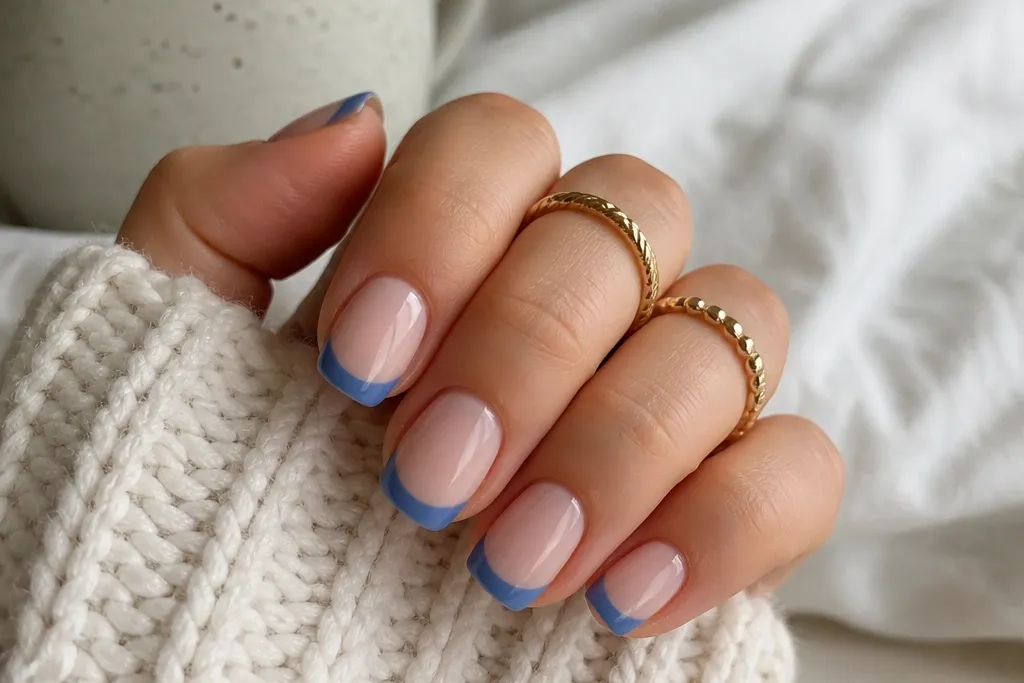
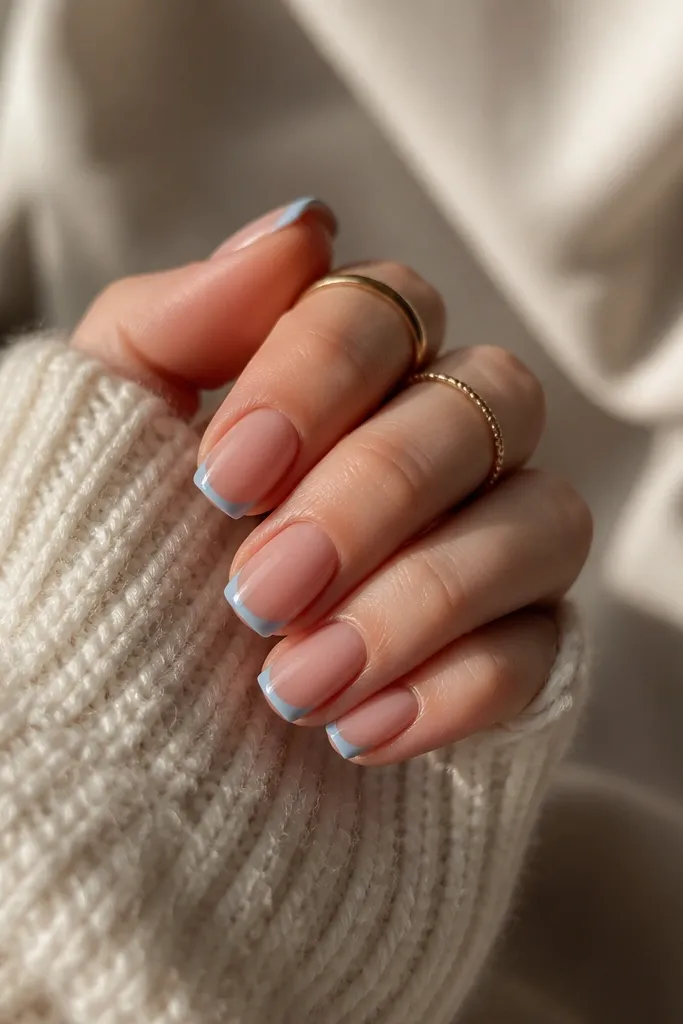
1. Powder Blue Micro French on Short Square
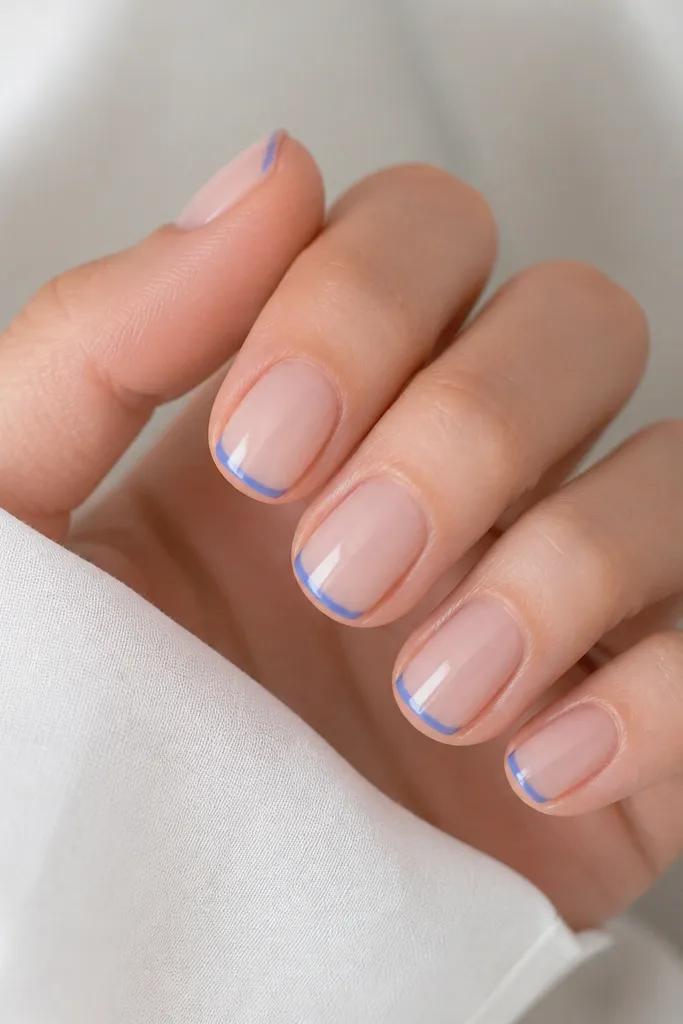
This is the set I reach for when I want blue French tips that look expensive but still feel cozy. The secret is the micro French width — it keeps the square tips from looking blocky. Use a sheer base so your nail bed shows through, which makes the blue look softer. I’ve worn this on hands with shorter nail beds and it still looks balanced because the tip is controlled and the white stays creamy, not chalky.
File your nails straight across for a true short square, then lightly roughen the surface with a 180-grit buffer. Apply a sheer milky pink base in two thin coats, curing fully between coats if you’re using gel. Paint the blue French tip with a fine brush, keeping the line narrow and centered, then cap the free edge with a thin layer of top coat. Finish with glossy top coat for that “just done” look and cure or dry fully.
If your smile line looks wobbly, place a small dot of blue at each corner first, then connect them with the brush.
Don’t make the French tip too wide on short squares — it makes the nails look stubby.
2. Periwinkle Blue French with Milky White V-Cut Corners
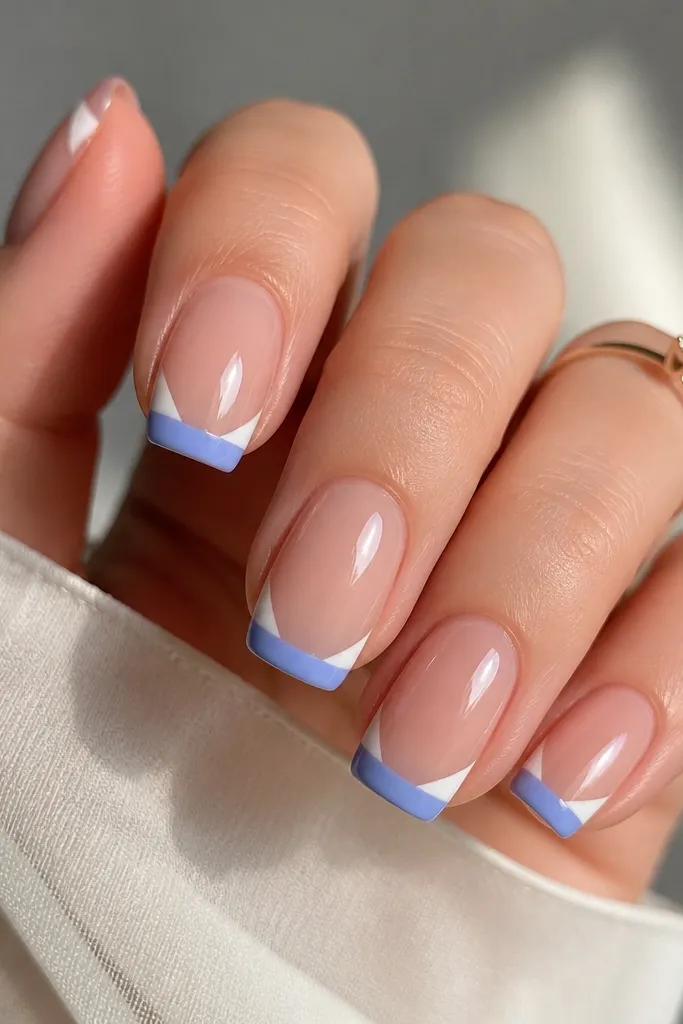
The V-cut corners are what turn a basic French tip into something that looks intentional. Periwinkle reads cozy and soft next to milky white, and the angled corners give your square shape a cleaner frame. This one flatters medium skin tones especially well because the blue doesn’t overpower the nail bed. I’ve also done it on pale skin and it still looks gentle, as long as you keep the white milky instead of pure white.
Prep and shape your square nails, then apply a sheer nude base. Paint a consistent periwinkle French tip across all nails, keeping the smile line slightly higher in the center for symmetry. With a small detail brush, add two tiny milky white V corners where the blue meets each sidewall. Clean up with a cotton swab dipped in acetone before top coat, then seal with two thin layers of glossy top coat.
Editor's noteUse a detail brush with a shorter bristle length so the V corners stay crisp.
Watch outSkip thick white triangles — they look heavy and make the French line look messy.
3. Sky Blue French with White Outline Border
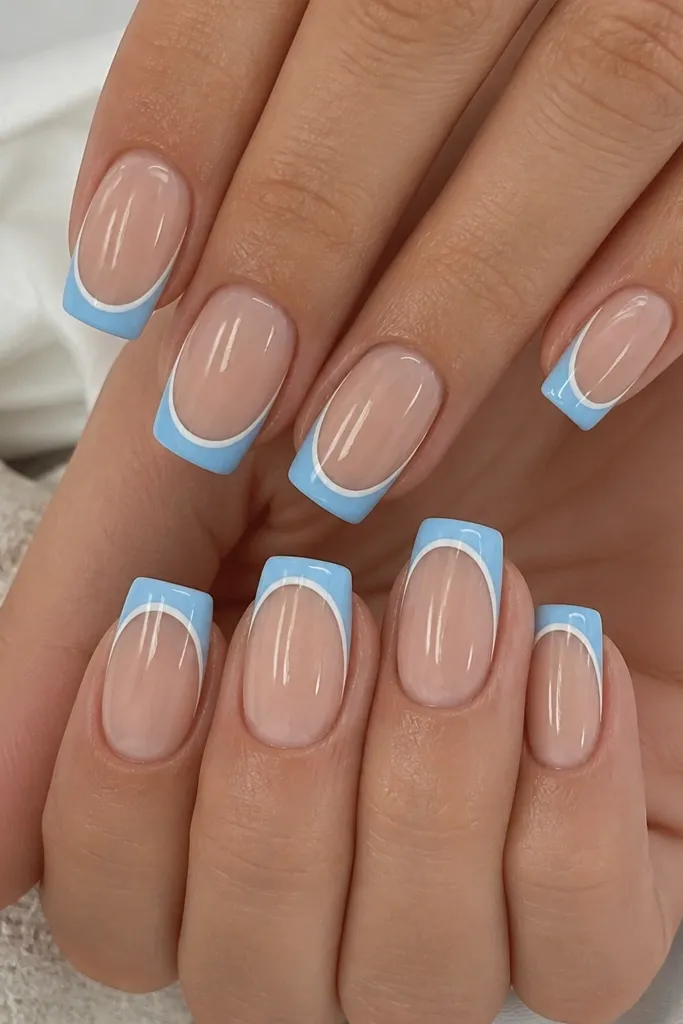
This design looks classy because the white outline makes the blue tip look “framed.” The thin border is cozy rather than loud when you keep it under 0.5 mm. Sky blue plus a beige nude base is flattering on warm and neutral undertones because the base warms the whole set. I’ve worn this to brunch and to a work event — the outline makes it feel polished even with a short square length.
Start with a nude-beige base and cure/dry it fully. Paint the sky blue French tip first, staying inside your sidewall line. Then, using a striping brush, trace the edge of the smile line with a thin milky white outline, leaving a small gap so the white doesn’t smear into the blue. Finish with glossy top coat and cap the tip edge so the border doesn’t lift.
Editor's noteIf the white outline bleeds, let the blue cure longer before you outline it.
Watch outDon’t outline the entire tip surface — keep it only along the smile line.
4. Classic Blue French with Thick White Smile Stripe
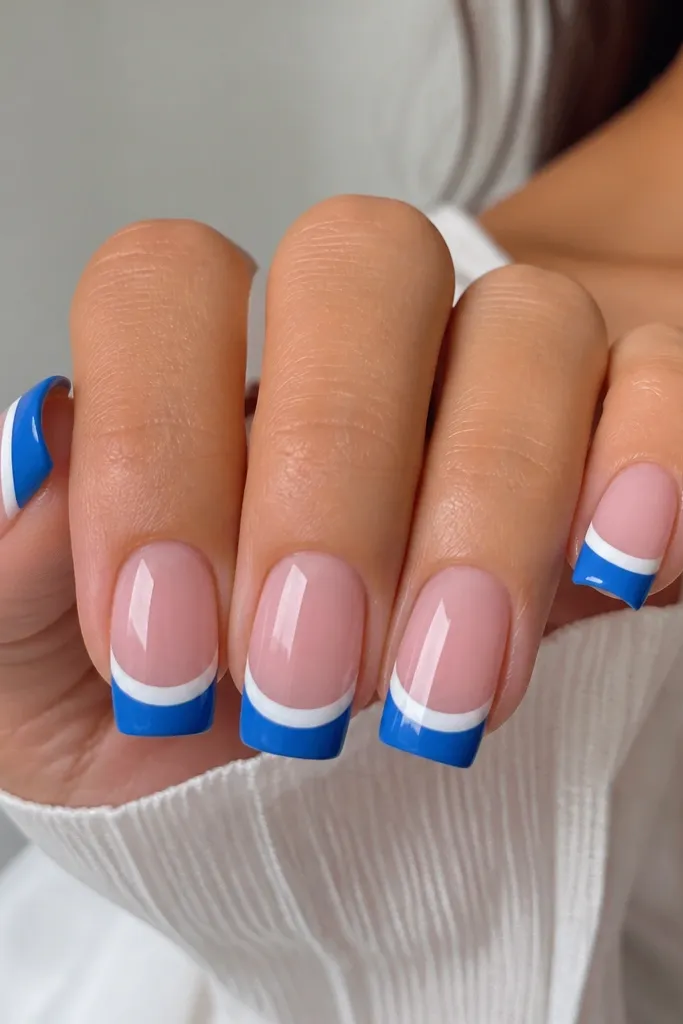
I love this version when I want a cozy French that still feels graphic. The thick white stripe acts like a soft highlight, so the set reads like winter candy without looking childish. This flatters hands that have slightly wider nail beds because the white stripe adds a horizontal balance across the center. If you have short nails, keep the stripe not too high so it doesn’t shrink the nail visually.
Apply a translucent pink base in two thin coats. Paint your blue French tips in one smooth layer, then clean the sides with a thin brush. Add the thick white stripe on top of the blue smile line, using a striping brush and steady pressure so it stays even across all nails. Seal with glossy top coat, then check the edges and re-cap any spots that feel raised.
Editor's notePractice the arc on one nail first — the arc height is where this design wins or fails.
Watch outDon’t make the white stripe too close to the cuticle; keep it on the smile line area.
5. Blue French Ombre Fade into White Tip
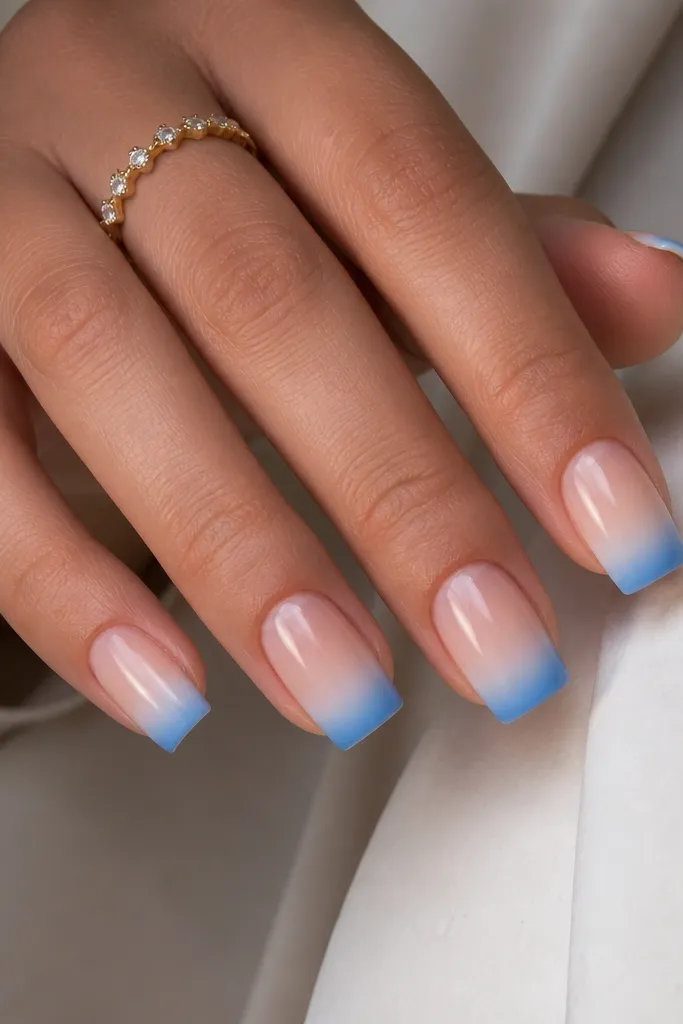
An ombre French is cozy because it blends like knit fabric — no hard lines. The fade from blue to milky white softens the contrast and makes your nails look longer. I’ve done this for vacation photos and it looks flattering on every skin tone because the nude base keeps it grounded. For square nails, you need a smooth gradient across the free edge so the corners don’t look patchy.
Start with a sheer nude base. Sponge a small amount of deeper blue on the very tip area, then blend upward toward the smile line using a makeup sponge — keep blending light passes. While it’s still slightly tacky (or after drying, depending on your system), add milky white above the blue fade and blend again so the transition stays smooth. Finish with glossy top coat and cap the free edge carefully.
Use a dense makeup sponge and wipe it on a paper towel first so the gradient goes on thin.
Skip heavy layers — thick ombre looks like paint blobs on square edges.
6. Bi-Color French with Blue Top Half and White Bottom Half
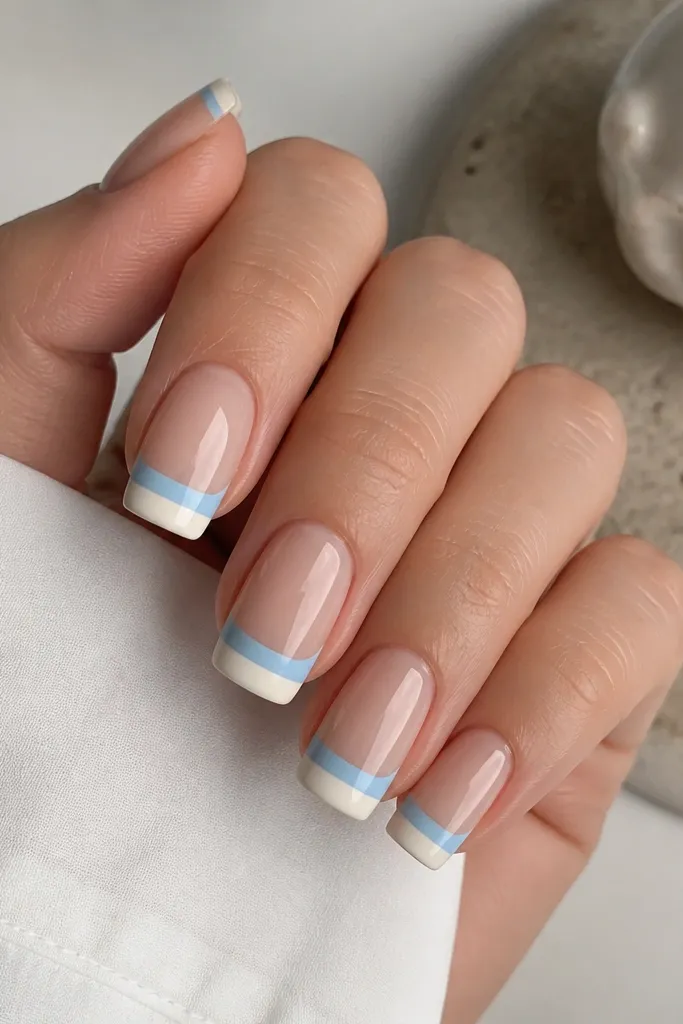
This one looks classy because it’s clean and architectural. The horizontal split gives you a different vibe than a normal smile line and it still feels cozy because the colors are soft. It flatters long fingers because the split adds structure, but it also works on shorter nails if you keep the tip height modest. The key is crisp straight lines — this design lives or dies on edge control.
Use a nude or pale pink base, then paint a soft blue French tip in the top half, keeping the line straight across. Let that set, then add creamy white to the bottom half of the French area with a steady hand. Clean the cuticle-side edge with a small brush dipped in acetone so the split stays sharp. Seal with glossy top coat, and run the brush lightly along the free edge to lock everything in.
Editor's noteA striping brush plus a steady wrist beats a wide brush for this straight split.
Watch outDon’t freehand the split without a guide — it will drift and look uneven.
7. Blue French with White Star Dot Accent on Ring Finger
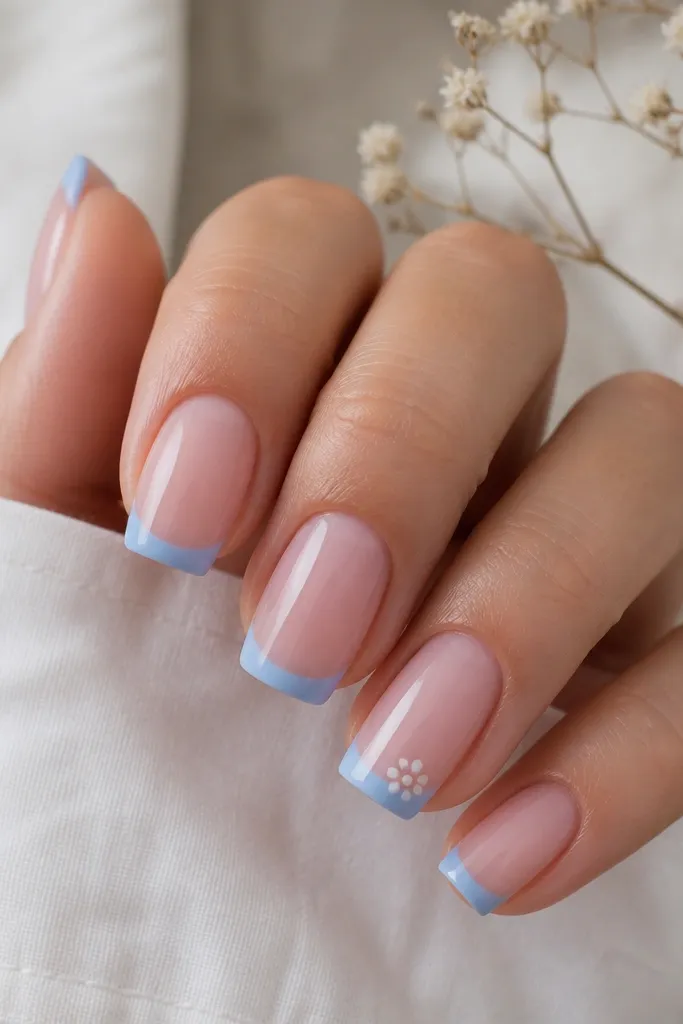
This is the “cozy but not boring” combo I keep coming back to. The star dot accent is small enough to feel sweet, not themed, and it adds interest without turning the set into nail art overload. Blue French tips make your nails look neat even when you’re busy. On olive and medium skin tones, the milky white star pops just enough without looking harsh.
Paint your sheer pink base first. Do a smooth blue French tip on each nail with a fine brush. On the ring finger, add a tiny five-dot star in milky white near the center of the blue area, then add a dot of clear gel on top if you want it to look slightly raised. Finish with glossy top coat on all nails, curing/drying fully so the dots don’t smear.
Use a dotting tool that matches the nail size — too big and the star turns into a blob.
Don’t add accents on every nail — it ruins the classy balance.
8. Matte Periwinkle French with Glossy Milky White Arc
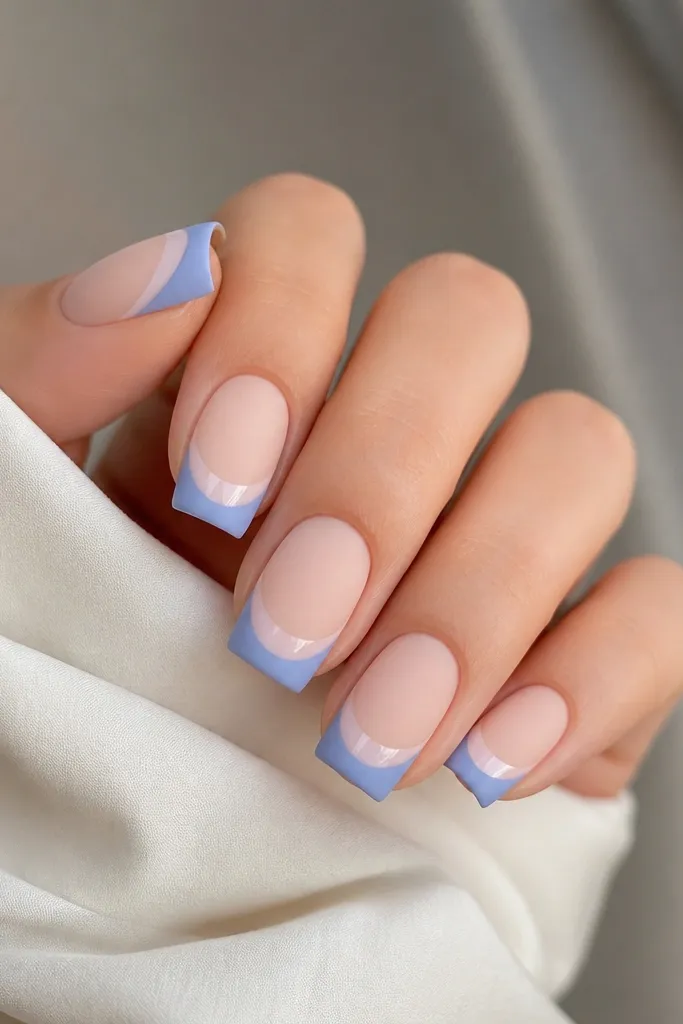
Matte blue is cozy in a way gloss can’t touch — it looks like soft fabric. The glossy milky white arc adds contrast and makes the set feel styled, not flat. This is flattering on dry or textured nail beds because matte hides minor shine unevenness. If you have short square nails, keep the arc thin so your free edge still looks clean.
Start with a nude base and cure/dry it. Paint periwinkle French tips and then apply a matte top coat over everything except the white arc area. For the arc, paint a thin milky white line on the smile area and then seal it with glossy top coat only on top of that line. Avoid flooding the matte — keep the glossy arc crisp, then cap the edges with a thin matte coat around it.
Editor's noteLet the matte top coat fully dry before adding the glossy arc so the line doesn’t bleed.
Watch outDon’t make the arc thick — it can look like a sticker edge on matte.
9. Blue French with White Lace-Style Edge Using Striping Tape
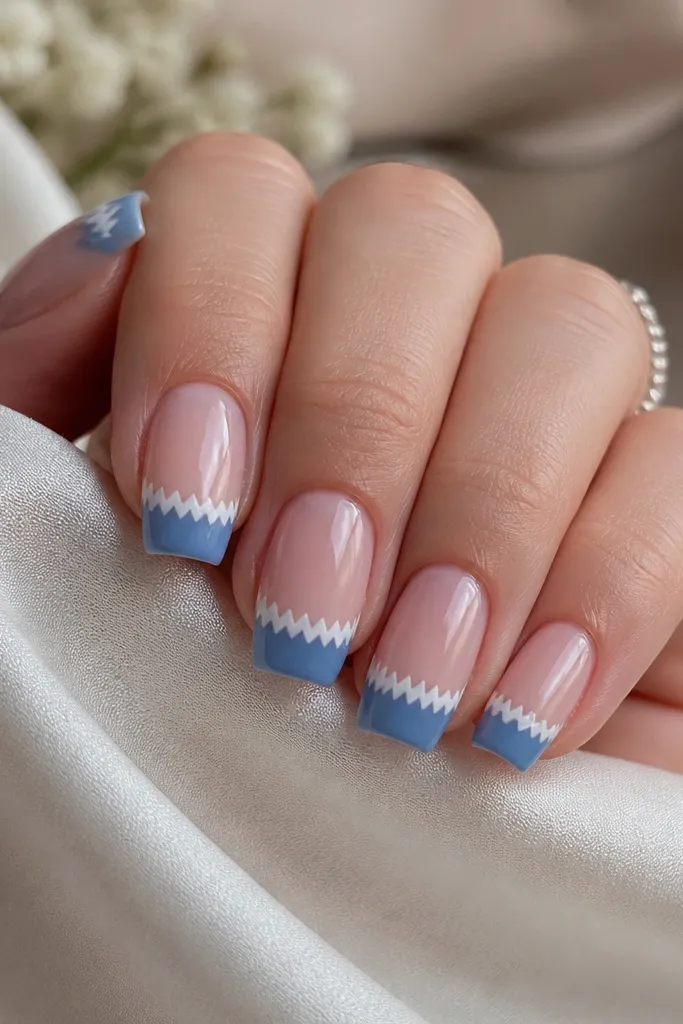
Lace-edge French tips look fancy but still cozy because the pattern is delicate and stays inside the tip. The striping tape method gives you repeatable zigzags that look like lace trim instead of random swirls. This flatters hands with slender nail beds because the lace edge visually adds detail along the sides. I’ve done this for weddings and it looks clean even in close-up photos.
Use a sheer nude base, then paint your blue French tips. Apply a thin striping tape along the smile line area, but angle it slightly so it creates tiny peaks and valleys when you remove it. Brush milky white over the exposed areas, then remove the tape carefully while the paint is still workable. Seal with glossy top coat, and check the corners for any sharp tape lines that need smoothing.
Editor's notePress the tape down firmly at the sidewalls so the white edge is crisp.
Watch outDon’t use thick tape — it leaves chunky edges that look DIY.
10. Blue French with White Half-Moon Negative Space
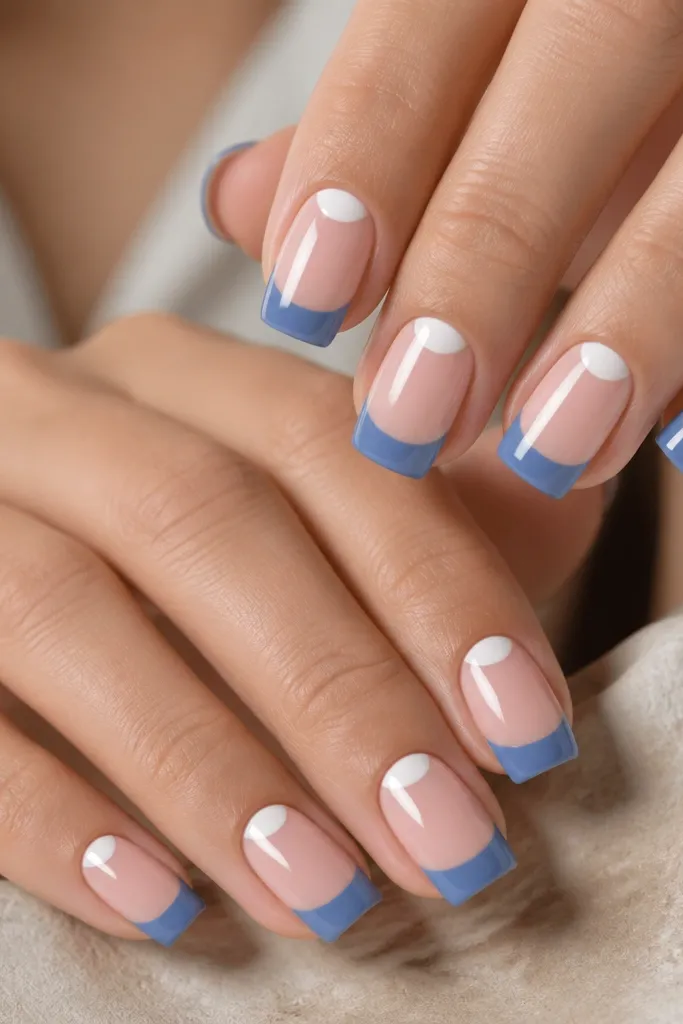
This is a cozy take on the half-moon trend because the blue French keeps it grounded. The white half-moon highlight creates depth and makes the nail look fuller. It’s especially flattering on hands with thin nail beds because the blue tip and half-moon balance the visual weight. I like it with a creamy white so it looks soft, not neon.
Apply a nude base. Paint the blue French tips first, leaving a small area at the smile line where you want the half-moon. Place a small curved stencil (or use a half-moon guide sticker) and fill the half-moon with milky white, then remove the guide right away. Clean the edges with a thin brush and acetone, then seal with glossy top coat and cap the free edge.
If you don’t have half-moon stickers, use a small circle punch piece of tape for a quick stencil.
Don’t make the half-moon too big — it turns the French into a cuticle design.
11. Classic Blue French with White Dot Grid on One Nail
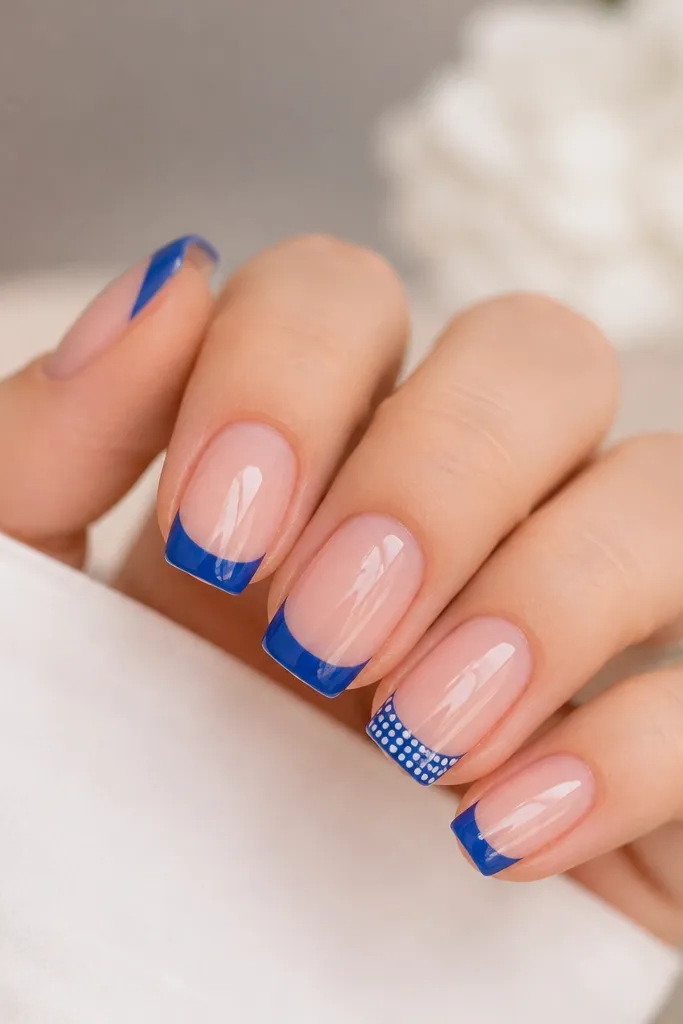
A dot grid is cozy because it feels like a soft pattern on knit or wrapping paper. Keeping it on one nail keeps the set classy and wearable. The blue gives you the French structure, while the white dots add texture without looking like heavy nail art. This looks great on medium-length square nails because the accent area fits nicely on the tip.
Paint a sheer pink base and do your blue French tips on all nails. On the accent nail, draw a light boundary with a thin brush so the dots stay inside the tip. Use a dotting tool to place milky white dots in a grid, then add a few extra dots along the corners to make the pattern look intentional. Seal everything with glossy top coat, and cure/dry fully so the dots don’t smear.
Editor's noteCount your rows before you start so the grid looks even across the accent nail.
Watch outAvoid a grid that touches the nail edges — leave a small blue margin for neatness.
12. Blue French with White Swirl Tips and Clear Jelly Base
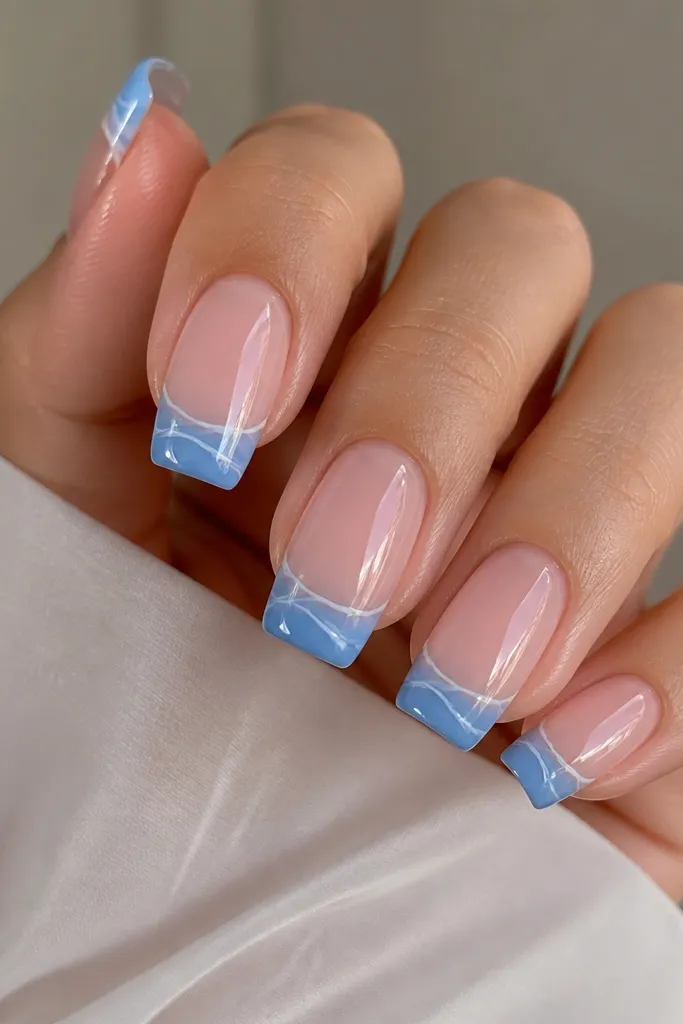
Jelly bases make blue French tips feel cozy and fresh because they look see-through and soft. The white swirls add movement, but they’re thin enough to stay elegant. I like this for people who hate thick nail layers — it looks lighter, even when it’s fully built. On fair skin, the jelly base gives a clean, airy look; on deeper skin tones, it still reads glossy and smooth.
Start with a clear jelly base tinted slightly pink (or use clear + a hint of pink gel). Paint a semi-opaque blue French tip, leaving the jelly base visible. With a liner brush, draw a thin milky white swirl along the smile line on each nail — keep the swirl lines about 0.5 mm wide. Add top coat and cap the free edge so the swirl detail stays sealed.
Editor's noteThin liner brush + slow strokes gives you swirls that look hand-drawn, not streaky.
Watch outDon’t overfill the swirls — too much white line makes the tip look messy.
13. Denim Blue French with White Stitch Line
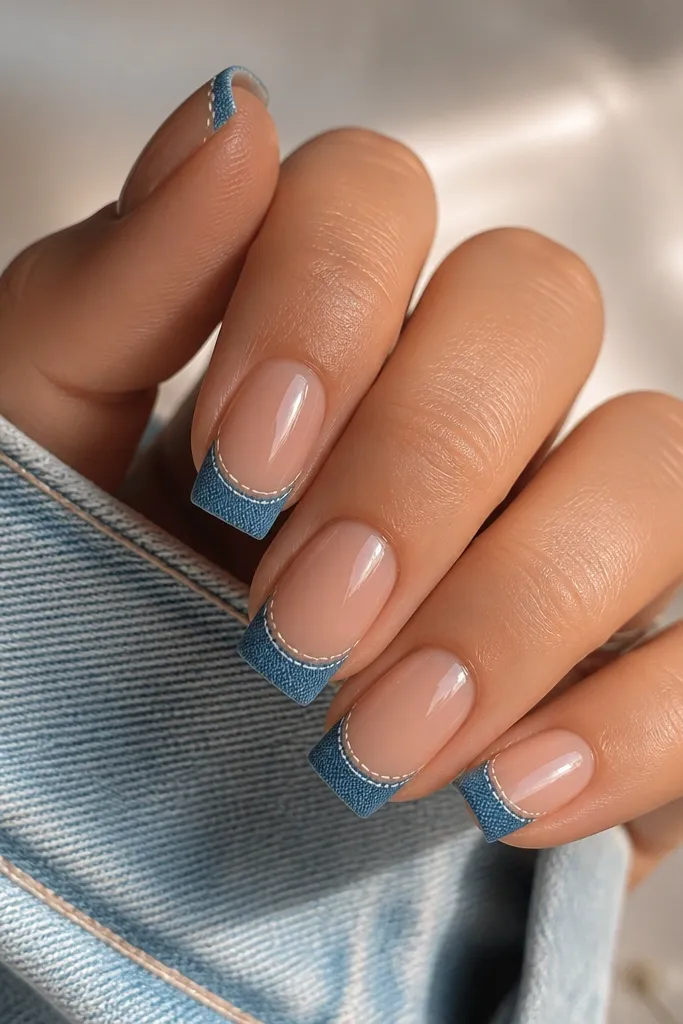
Denim blue French tips have that cozy, lived-in vibe without looking like a costume. The white stitch line makes it feel tailored, especially on square nails where the edge is crisp. I’ve worn this style with sweaters and denim outfits and it looks like your nails match your clothes in the best way. It also flatters short square nails because the stitch line stays near the free edge and doesn’t take over the nail bed.
Prep and apply a sheer nude base. Paint denim blue French tips — if your blue is flat, add one thin layer of a denim-texture gel or a blue that already has slight depth. Use a striping brush to draw a thin milky white stitch line right along the smile line, but add tiny breaks to mimic stitching. Seal with glossy top coat and run a careful pass along the sidewalls to keep the stitch line crisp.
Use a striping brush with a pointed tip so the stitch gaps look deliberate.
Skip a solid continuous white border — stitching needs those small breaks to feel real.
14. Blue French with White Half-Stripe and Tiny Bow Accent
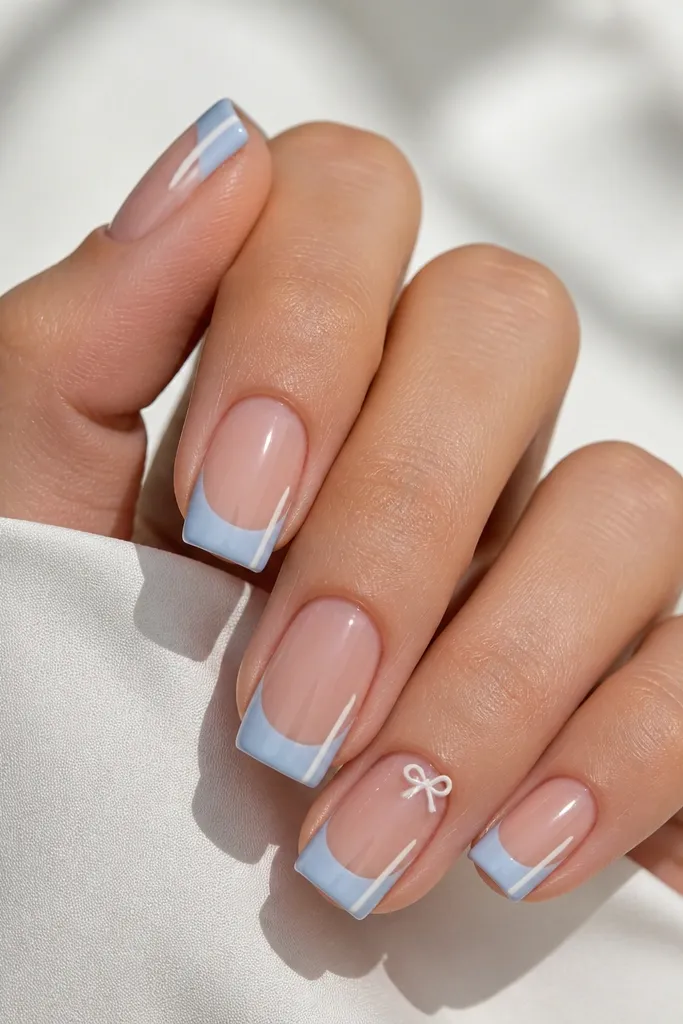
This set is cozy because it mixes clean French structure with a little softness at the base. The white half-stripe keeps the look graphic, while the tiny bow makes it feel cute without being overly childish. I like it on medium skin tones because the white bow stands out cleanly against the nude base. Keep the bow small — the whole point is “girly detail,” not “character nail.”
Apply a nude base and paint the blue French tips evenly. On one designated nail, add a white half-stripe starting at the smile line and taper it slightly toward one side edge using a thin liner brush. On the ring finger, create a tiny bow: two small milky white loops and a small center knot, placed near the cuticle line but not touching it. Cure/dry, then seal with glossy top coat, making sure the bow edges are fully coated so it doesn’t lift.
Editor's noteIf your bow looks lumpy, build it in two thin layers instead of one thick blob.
Watch outDon’t place the bow too high — it can look like it’s floating.
15. Porcelain Blue French with Thin Gold Pinstripe and Clear Cuticle Halo
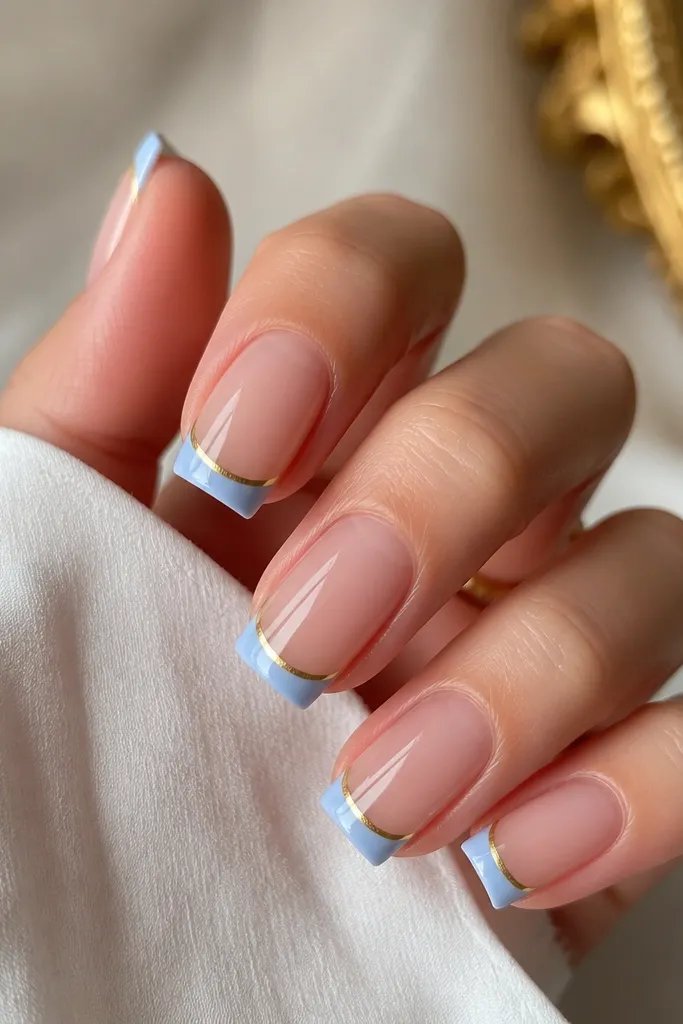
This look is classy because the blue stays light and controlled, and the gold pinstripe gives it a jewelry-like finish instead of a busy pattern. I did this on short square nails and the thin French line made my fingers look longer without adding length. The clear cuticle halo is the secret — it creates a “frame” effect that keeps the blue from feeling heavy. If you like blue French but hate thick white tips, this is the version that feels polished and grown-up.
Step 1 — Apply a clear base coat and cure. Leave the cuticle area bare enough to keep that halo look, then place the porcelain blue French tip so it starts a tiny distance away from the cuticle line. Step 2 — Use a striping brush with gold gel to paint one thin pinstripe parallel to the smile line on top of the blue, then cure it flat. Step 3 — Add a clear glossy top coat, pulling it slightly over the gold so the stripe feels smooth, not raised. Step 4 — Clean up the sides with a small brush dipped in gel cleanser before curing the final time so the edges stay razor sharp.
Editor's noteUse a striping brush that is already stained slightly blue or gold — it lays down smoother lines than a brand-new brush that fights the gel.
Watch outSkip thick gold lines — if the pinstripe is wider than the brush tip, it turns into a block and stops looking like jewelry.



