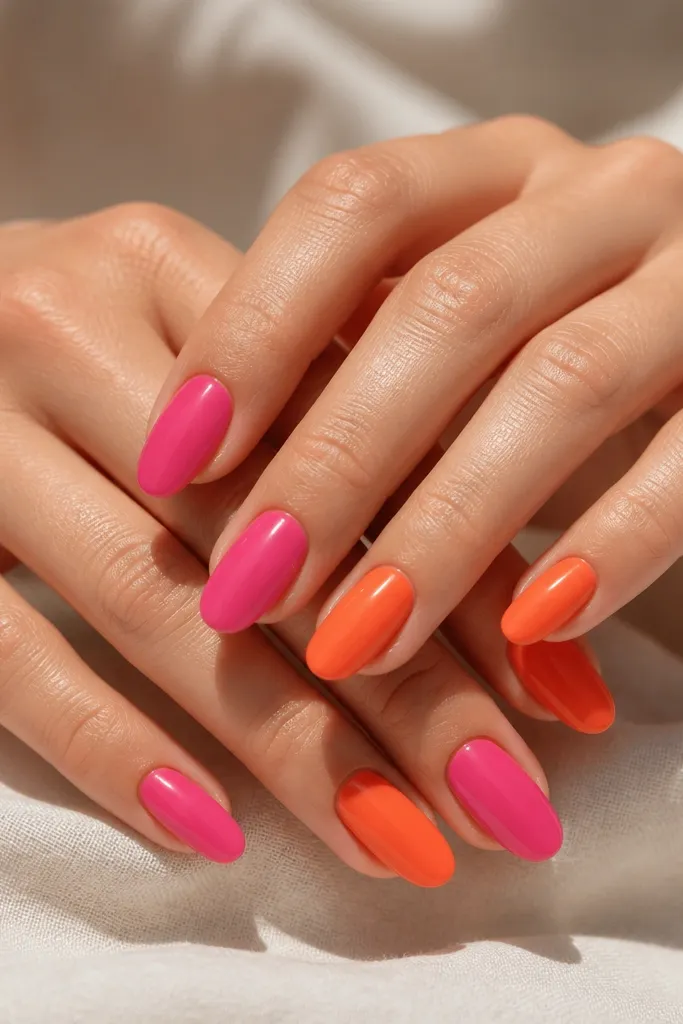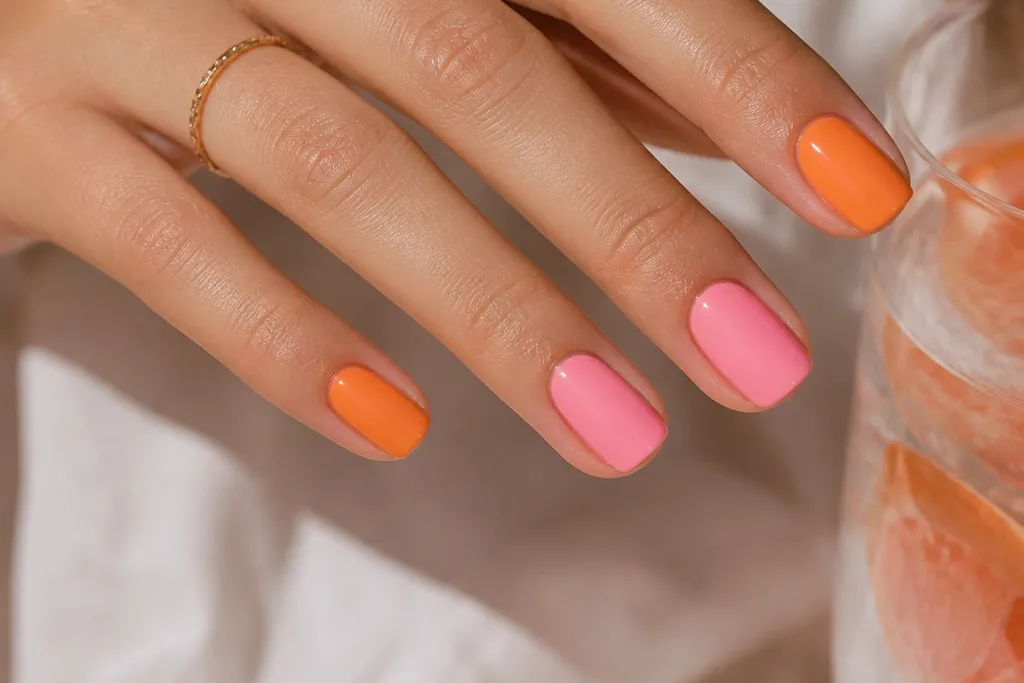
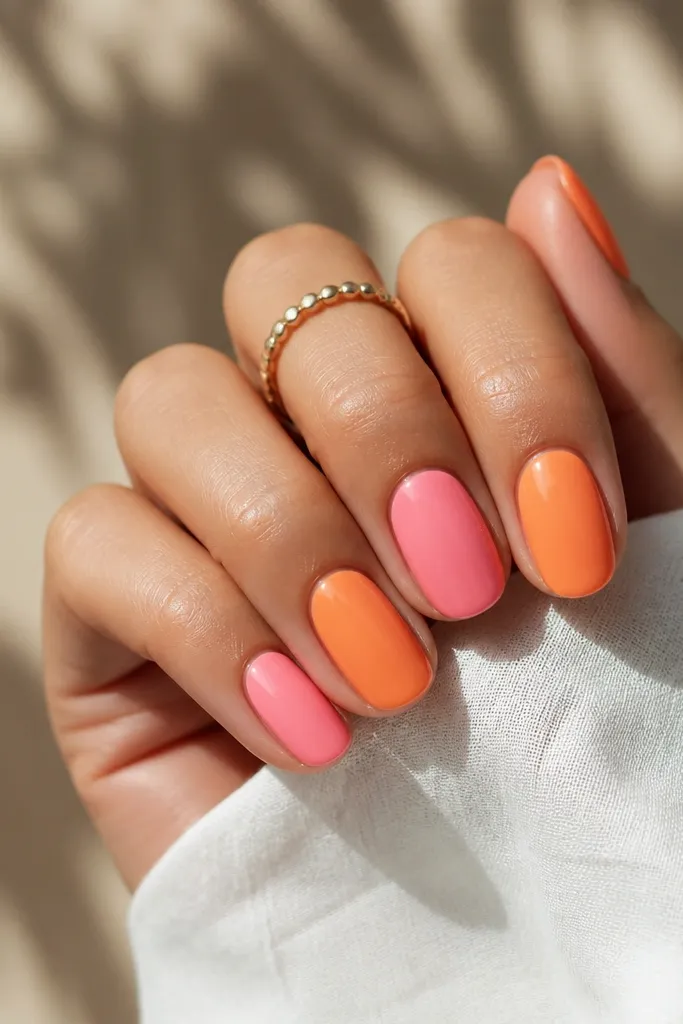
1. Half-Moon Orange Base With Pink Dots
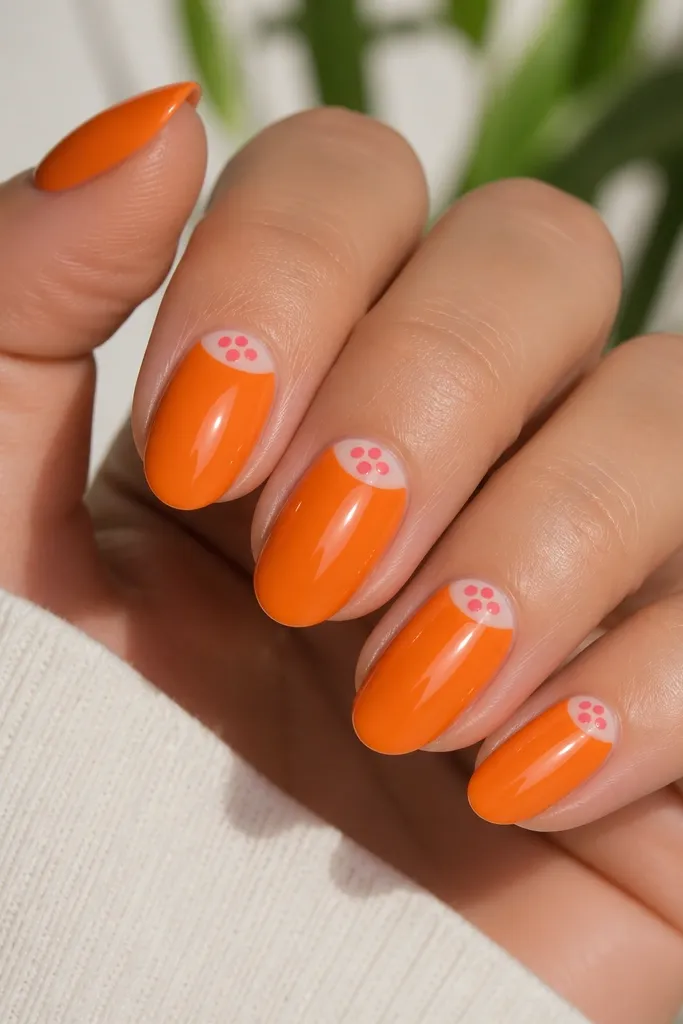
Start by applying a base coat, then paint the full nail with opaque coral-orange in two thin coats. Use a small half-moon stencil or freehand with a thin striping brush to leave a small negative-space half-moon near the cuticle. Cure each coat fully, then add three pink dots using a dotting tool — place them close to the half-moon so the dots read as a cluster. Finish with two layers of glossy top coat, focusing extra attention on the orange edges.
I love this one because the half-moon hides uneven cuticles and makes your mani look intentional even if your nail beds vary. The orange base is a warm coral-orange that looks bright on fair to deep skin, and the pink dots add a soft pop without covering the whole nail. This design looks especially good on short almond or squoval nails where you don’t want a long tip. It also flatters hands with wider nail beds because the negative space at the cuticle balances the width.
Watch outDon’t flood the cuticle area — thick polish makes the half-moon edge look messy.
Editor's noteIf your dots look too big, touch the dotting tool to a paper towel once before you pick up polish.
2. Micro-French With Pink Tips Over Orange
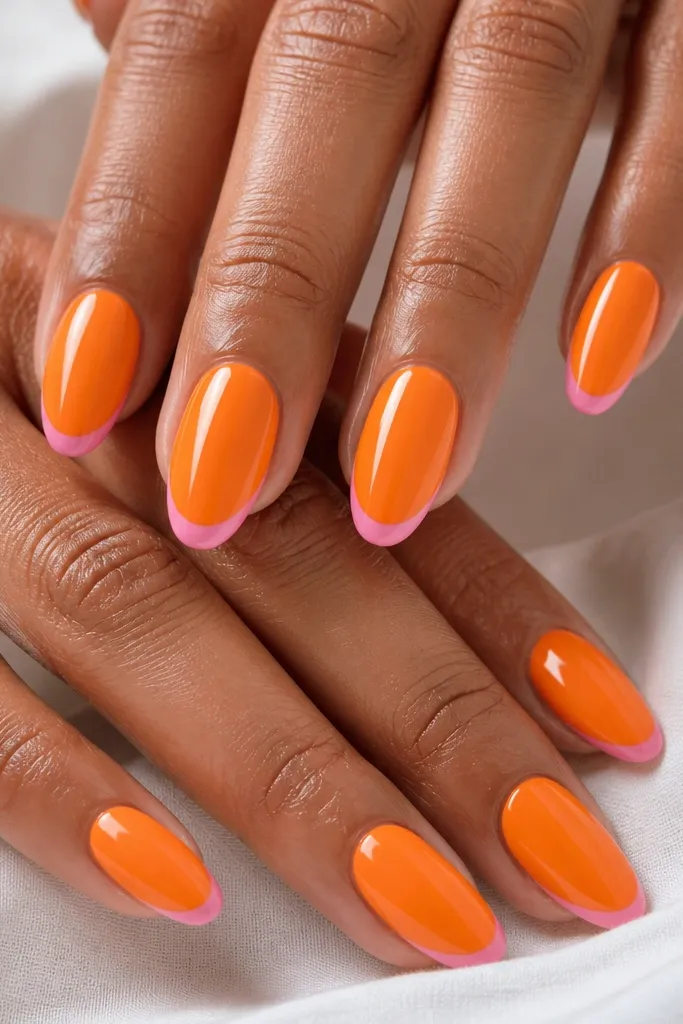
This is my go-to when someone says they want Orange And Pink Nails easy but they’re scared of freehand art. Micro-French gives you a clear structure: orange does the heavy lifting, and pink only paints the tip line. The thin French works on most skin tones and looks clean on both short and medium nails. It’s also flattering if your nails have slight ridges because the design keeps the color placement controlled.
Paint the nail with coral-orange in two thin coats and cure fully. Using a striping brush, draw a micro-French line about 1 to 2 millimeters from the tip, then fill the very edge with pink. Keep the pink area narrow so it doesn’t overpower the orange — stop before you reach the sides. Clean up around the cuticle with a brush dipped in acetone, then seal with a glossy top coat.
Use tape to set the French height if you’re doing this at home — press tape only at the tip edge so it doesn’t tug your base color.
Avoid thick French lines; they catch light unevenly and look clunky.
3. Diagonal Orange-To-Pink Split With Clear Center
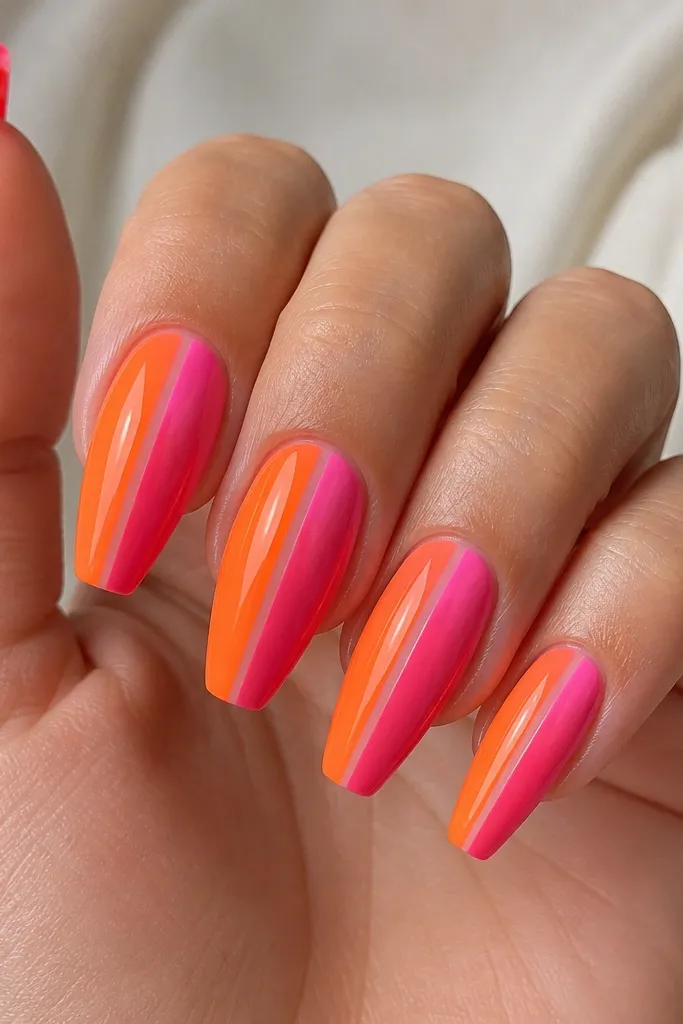
The diagonal split looks graphic and fresh, and the clear center makes it feel lighter than full coverage. Orange on one side flatters warm undertones, while the hot pink keeps it playful without turning dull. This is best on coffin and almond because the diagonal line elongates the nail. If your hands have short fingers, the diagonal helps the eye move upward instead of widening at the cuticle.
Apply a base coat, then paint the left half of the nail orange and the right half pink, keeping the diagonal line crisp. Leave a thin negative-space stripe in the middle by using striping tape as a guide — press tape down lightly and remove after curing the first color. Cure, then remove tape and touch up the edges with a fine brush. Finish with one thin top coat to lock in the stripe, then a second glossy layer.
If the diagonal line wobbles, correct it with a small brush dipped in acetone right after you place the pink.
Don’t skip the negative-space stripe — full coverage makes the design look heavier and less “easy.”
4. Orange Gradient With Pink Cloud Tips
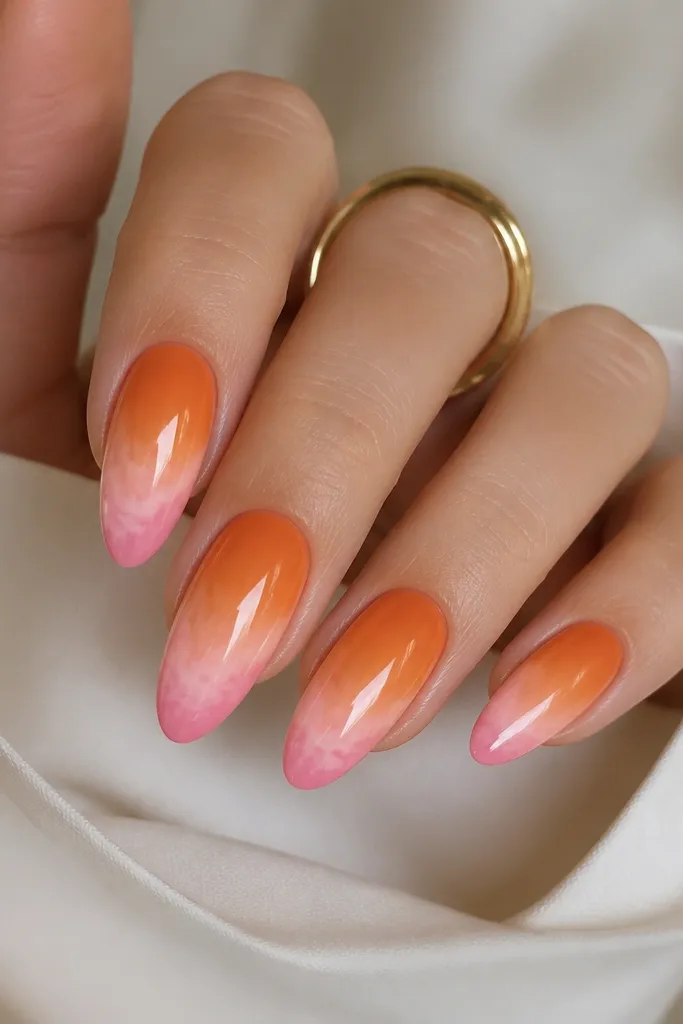
Paint the whole nail orange as your base, then use a sponge with a lighter orange to fade near the free edge. Tap off excess polish on a paper palette so you don’t get harsh blobs. Once the gradient is dry, sponge pink only on the top third to form a cloud tip, then blend the edge by tapping lightly. Seal with a glossy top coat; add one extra coat if the sponge makes the surface feel textured.
This one looks like nail salon airbrushing but you can do it with a makeup sponge. The orange gradient gives dimension, and the pink cloud tip adds a dreamy summer vibe without needing detailed art. It flatters hands because the gradient creates a vertical illusion, especially on almond and medium-length nails. If your nail beds are slightly flat, the soft cloud tip brings movement and light reflection.
Watch outDon’t press the sponge hard; it lifts pigment and can streak your orange base.
Editor's noteUse a small sponge cut into a triangle — it gives you a cleaner edge for the pink cloud.
5. Pink Swirl Over Orange Half Nails
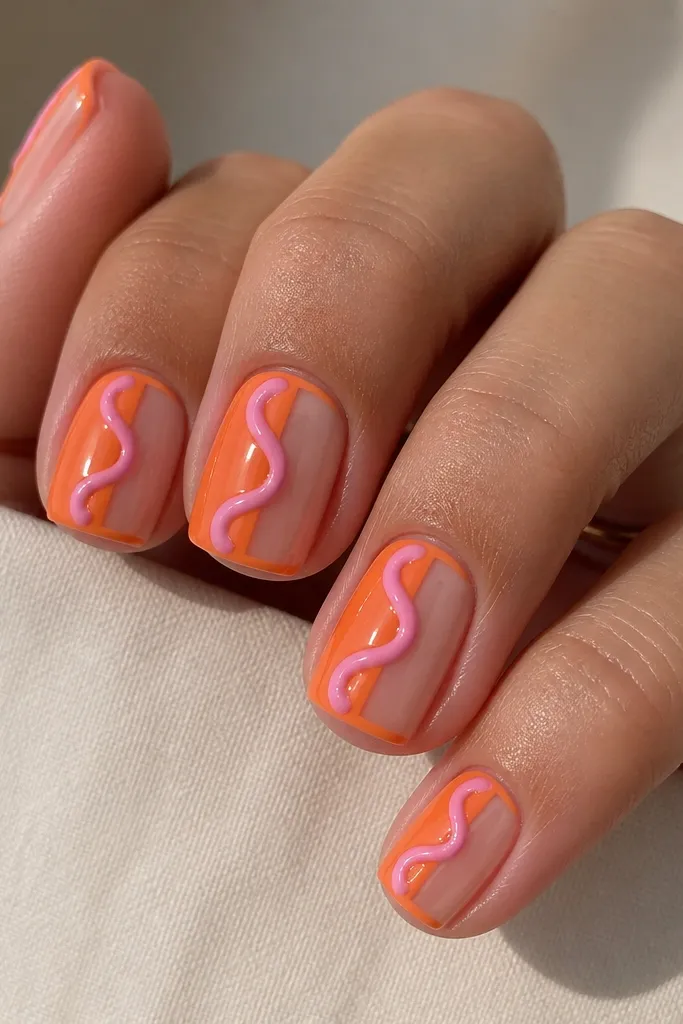
Swirls look hard, but this layout makes them manageable because you’re only drawing one shape over a defined orange area. The pink swirl acts like a ribbon and adds motion, while the orange gives a warm summer base. This works well on short square nails because the swirl adds interest without needing length. It also looks good on fair and medium skin because the pink reads bright, not washed out.
Paint the right half of each nail fully orange, leaving the left half as negative space. After curing, outline the border between orange and negative space with a thin orange line if you want extra sharpness. Load a striping brush with pink and draw a single thick swirl that starts near the cuticle edge and loops toward the tip, keeping the swirl width about half the nail. Finish with two coats of top coat to smooth the swirl lines.
Practice the swirl on one nail first; once you like the curve, repeat it on the rest.
Don’t make the swirl too close to the sidewalls — it can look cramped on short nails.
6. Orange Marble Lines With Pink Accents
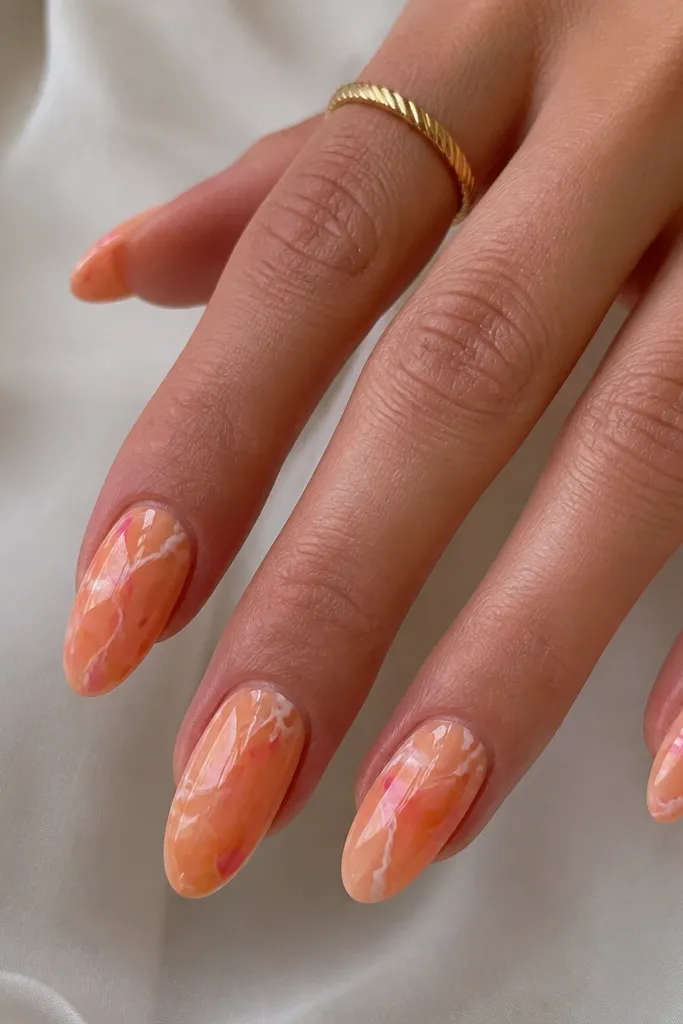
Use an orange base polish in two coats and cure. Then use a liner brush with light pink or white to draw thin, wiggly lines across the nail — don’t cover the whole surface, just create a few channels. Add tiny pink streaks or dots along one or two lines so the pink feels intentional. Cure, then seal with a glossy top coat, and add a second top coat if you feel any ridges from the liner.
Marble can look messy, but this version is controlled: orange does the main coverage, thin lines add movement, and pink only appears as small highlights. The thin white lines keep the orange from feeling flat, and the pink accents make it feel summer-ready. This is flattering on almond because marble lines naturally follow the nail curve. It also looks great on hands that have a little more texture because glossy marble catches light smoothly.
Watch outAvoid full marble coverage; it kills the easy look and takes longer than it should.
Editor's noteKeep your marble lines thin — thick lines make it look like stickers.
7. Pink Dot Grid On Orange Base
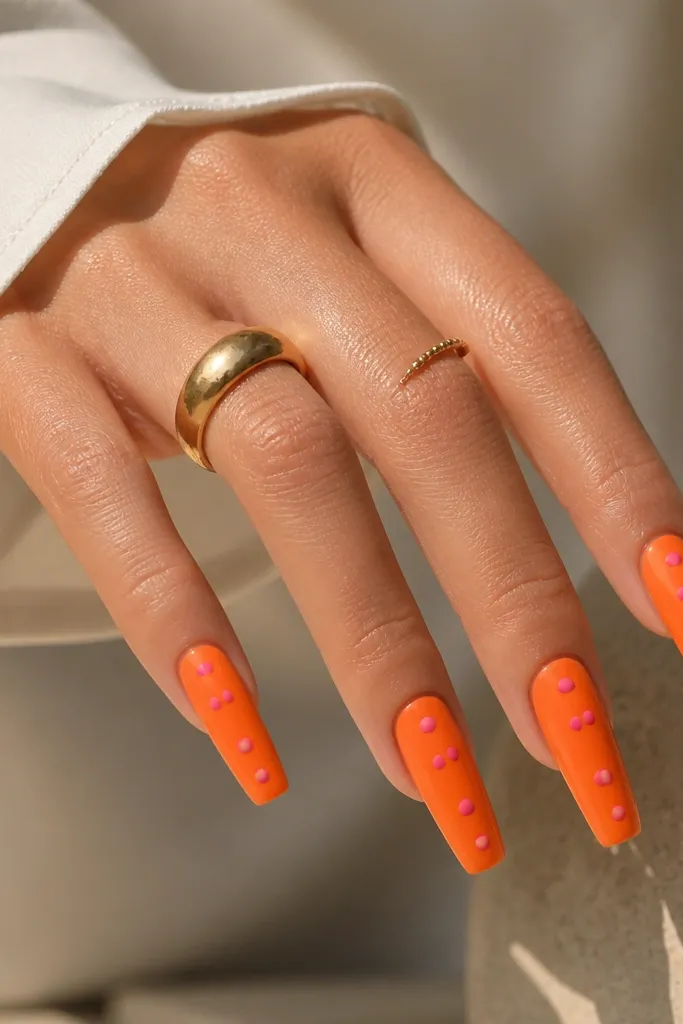
Paint the full nail orange in two thin coats and cure. Use a dotting tool to place dots in rows — I like spacing the dots about one dot-width apart. Start with two rows across the middle, then add one row near the tip corner areas. Cure and finish with a glossy top coat that lightly levels the dot texture.
A dot grid looks designed without requiring fine art skills. The orange base stays bold, and the pink dots give a playful, modern pattern that still reads clean. This flatters longer nail shapes like coffin and stiletto because the grid gives a structured focal point. If your skin tone is deeper, the pink looks extra bright against orange, especially under sunlight.
Watch outDon’t crowd the dots near the cuticle — it makes the pattern look busy.
Editor's noteIf you want perfect spacing, mark three small guide points with a toothpick before you start dotting.
8. Orange Base With Pink Outline French
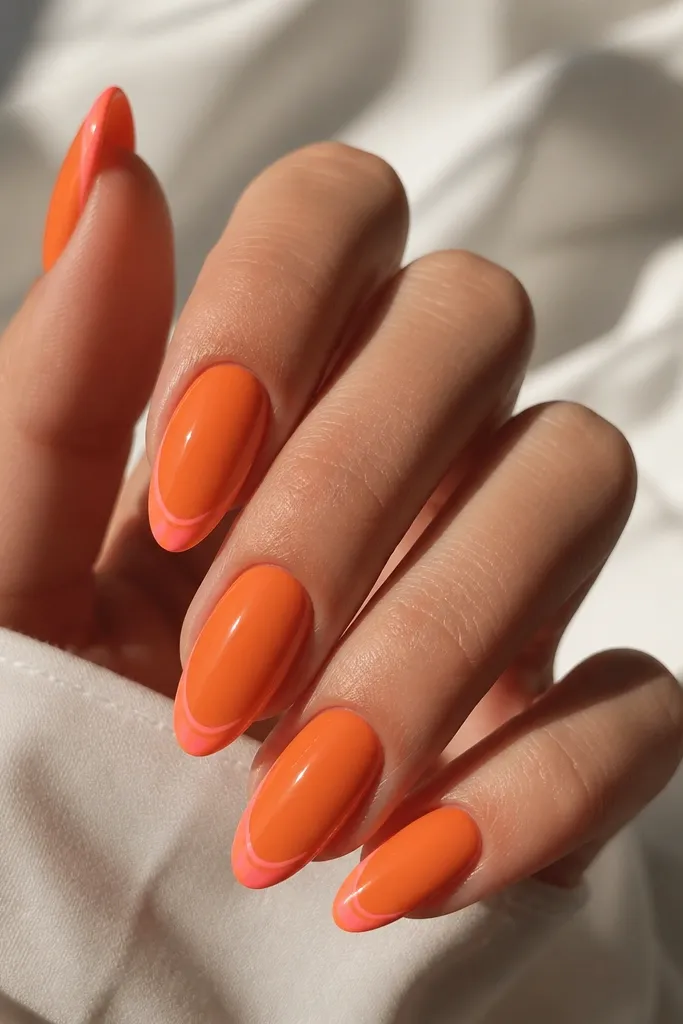
Apply orange base in two coats and cure. Then take a striping brush and draw a thin pink curve at the tip, tracing where a French would sit but keeping the inside orange. You can make the outline slightly thicker at the outer edges for a salon look. Clean the edges with acetone on a flat brush, then top coat twice.
This is the easiest way to get the French look without filling in a big pink tip. The pink outline gives you that “done” look, while the orange stays smooth and full coverage. It’s flattering on almond and squoval because the outline follows the natural curve of the nail. I also like it on shorter nails because it doesn’t shorten the nail visually the way a wide tip can.
Watch outDon’t overwork the outline — too many passes make the line bleed.
Editor's noteOutline French looks best when the pink is opaque — choose a pink that covers in one coat or you’ll get thin, streaky lines.
9. Pink Half-Moon Cuticle Accent On Orange
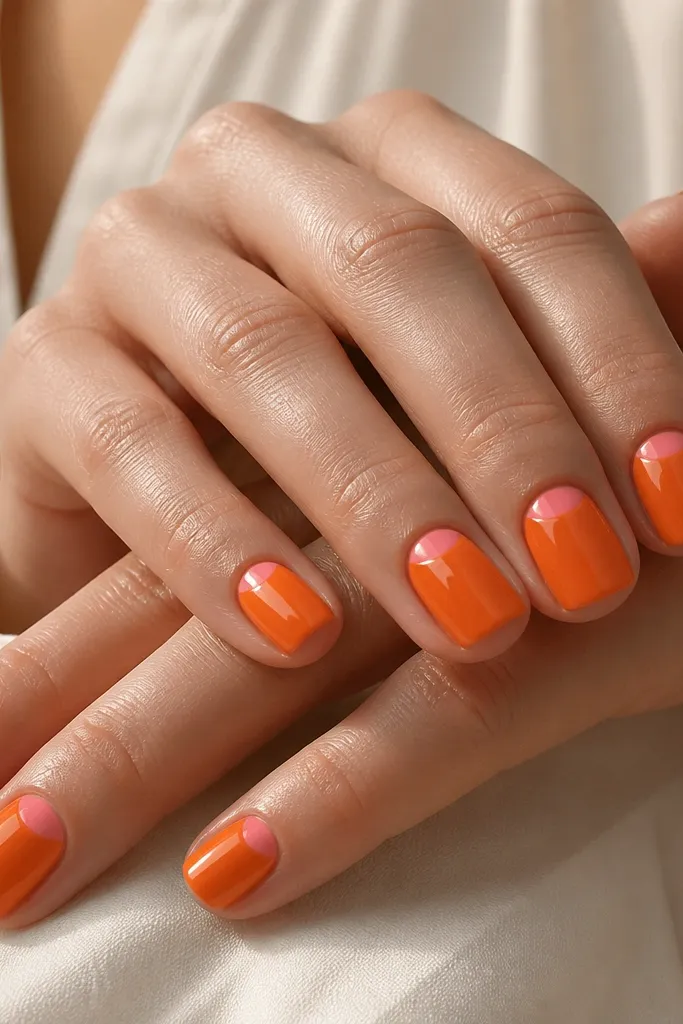
Paint orange in two thin coats and cure. Using a small half-moon stencil or a steady freehand, place a small pink crescent at the cuticle edge, leaving the center of the nail orange. Cure, then add one thin top coat to lock it in. Finish with a second glossy coat, keeping it even so the crescent looks smooth, not raised.
This is the “easy but looks expensive” mani. The pink half-moon is tiny, so you’re not battling symmetry across the whole nail. Orange makes the background warm and summery, and the pink at the cuticle brightens your hands. It’s especially flattering if your nails have slight discoloration at the cuticle area because the pink draws attention to the shape. It also works on every length because the accent is small.
Watch outDon’t let pink touch your cuticle skin — it will lift faster.
Editor's noteIf your pink half-moon looks uneven, rotate the nail and place the brush from the side — it makes the curve cleaner.
10. Orange And Pink Checker Stripe Tips
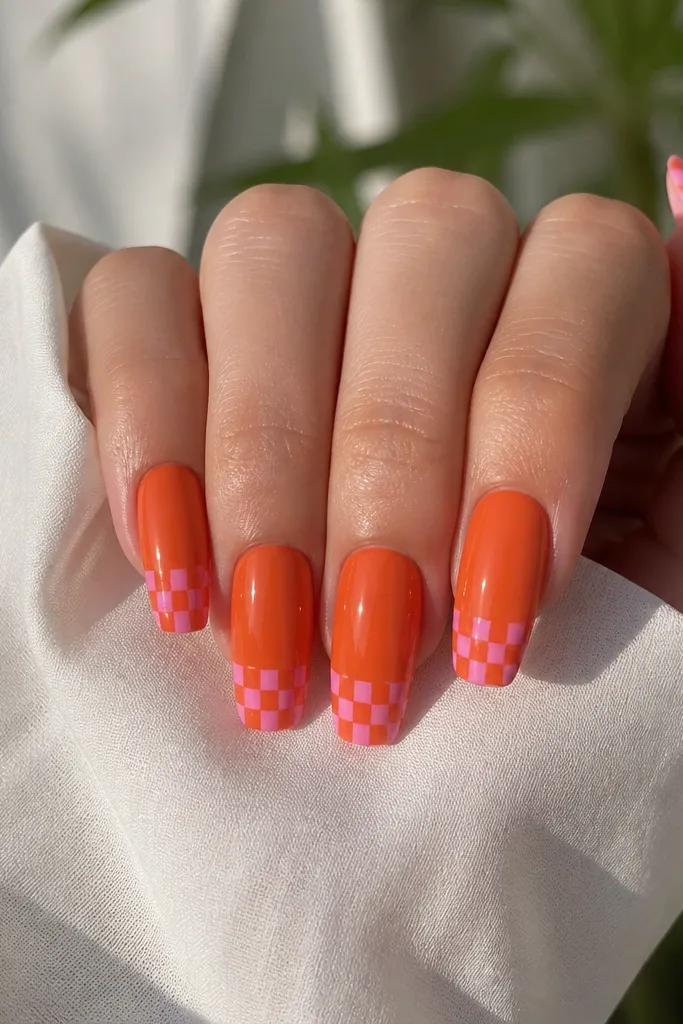
Checker tips look fun and graphic, and they hide small imperfections because the pattern repeats. The orange base keeps it cohesive, while the pink squares add that summery pop. This design is best on medium coffin or almond where you have enough tip area to place small squares. It flatters hands because the checker grid pulls attention to the nail tip without making the nail look wide.
Start with an orange base in two coats and cure. At the tip, place small squares using a striping brush and a steady hand — aim for squares about 1 to 2 millimeters wide. Alternate pink and orange squares starting from the center, then fill outward. Cure and clean edges with a thin brush dipped in acetone. Seal with two glossy top coats for crisp pattern edges.
Use a nail art dotter or the end of a bobby pin to create square corners by tapping and refining with a liner brush.
Don’t make the squares too big on short nails — the pattern spreads and looks messy.
11. Pink Jelly Top On Orange Fade
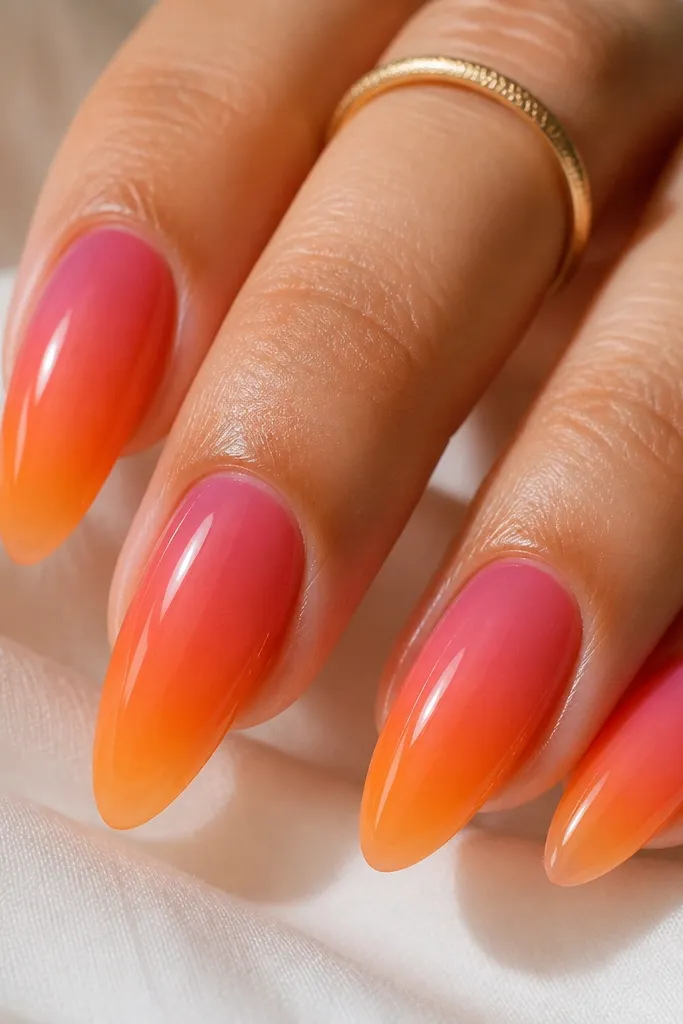
Paint orange in two thin coats. Then sponge a lighter orange or white-tinged orange near the tip to create a fade. Next, apply pink jelly only on the top third — thin layers are key, so it doesn’t turn patchy. Cure after each layer, then finish with a thick glossy top coat that levels the jelly cap.
This one looks like a “glossy candy” manicure. The orange fade gives warmth and depth, and the pink jelly overlay makes it look glassy without needing perfect lines. It flatters any nail shape, but it’s especially pretty on almond because the soft cap follows the curve. On medium to deep skin, the jelly pink glows under light. It also photographs well because the top layer catches highlights.
Watch outAvoid applying jelly all the way down — it erases the orange depth.
Editor's noteIf your jelly is too sheer, do two thin layers instead of one thick layer.
12. Orange Base With Pink Diagonal Ribbon
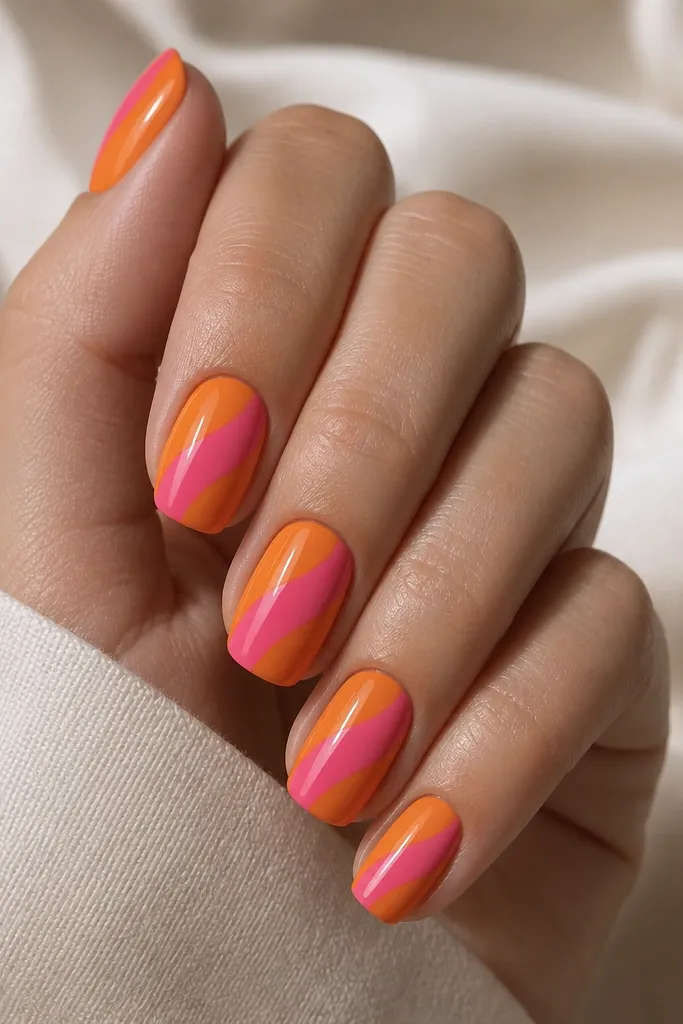
Diagonal ribbons make nails look longer because the line pulls the eye upward. The pink ribbon is bold against orange, but the controlled width keeps it easy. This works on squoval and almond, and it looks great on hands with shorter nails because the ribbon creates a vertical focus. If you want something that still feels playful for summer but not too loud, this is it.
Apply orange base in two coats and cure. Use striping tape to map a diagonal line — place tape from near the cuticle on one side to near the tip on the other. Paint the ribbon area pink, remove tape after curing, then touch up with a liner brush. Add a thin top coat first, then a second thicker coat to smooth the ribbon edge.
Keep the ribbon width about the same as your pinky nail’s natural groove — it looks balanced on most nail sizes.
Don’t freehand the ribbon on your first try — tape gives the cleanest result fast.
13. Pink Flower Petals On Orange Side Accent
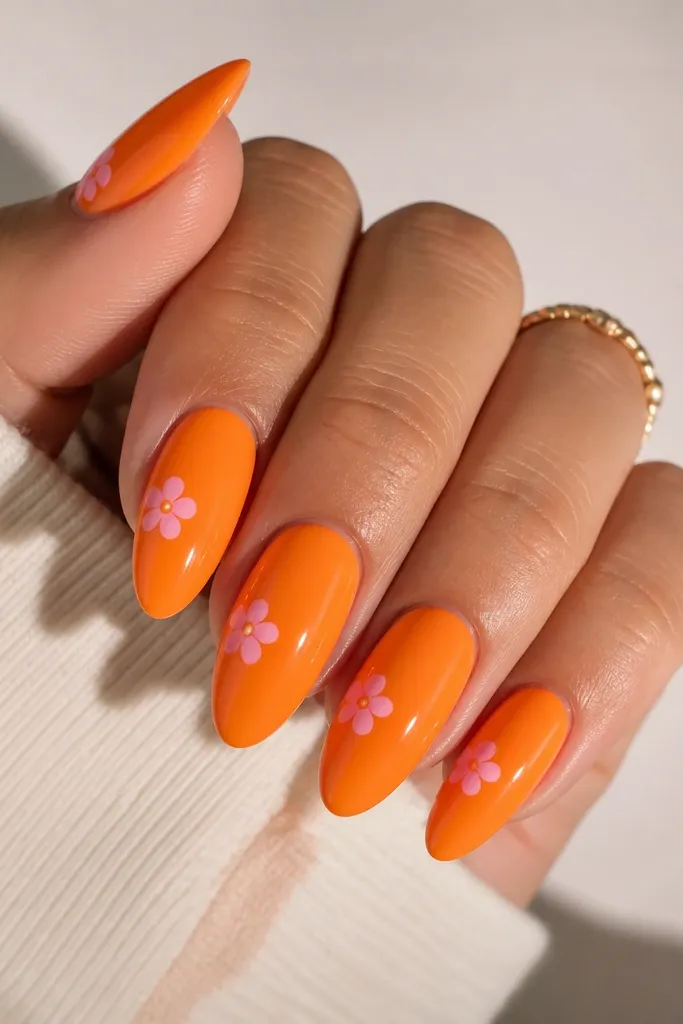
Small flowers look sweet, and placing them on the side keeps the nail from feeling busy. The orange base makes the pink petals pop, and the flower gives a focal point that feels more special than plain color. This works best on almond and medium nails where there’s enough space for five petals without crowding the tip. It’s flattering on hands with wider nail beds too because the flower sits off-center.
Paint orange in two coats and cure. Decide where the flower lives — I put it on the left side for thumb, right side for index, and alternate for rhythm. Use a dotting tool to place five pink dots in a circle, then tap them into petal shapes with the tip of the tool. Add a tiny orange or white dot in the center for the middle. Seal with two glossy top coats.
Use a toothpick dipped in top coat to slightly drag each petal dot into a teardrop shape.
Avoid a big flower — if it covers half the nail, it stops looking easy.
14. Orange And Pink Half-and-Half With Tiny Hearts
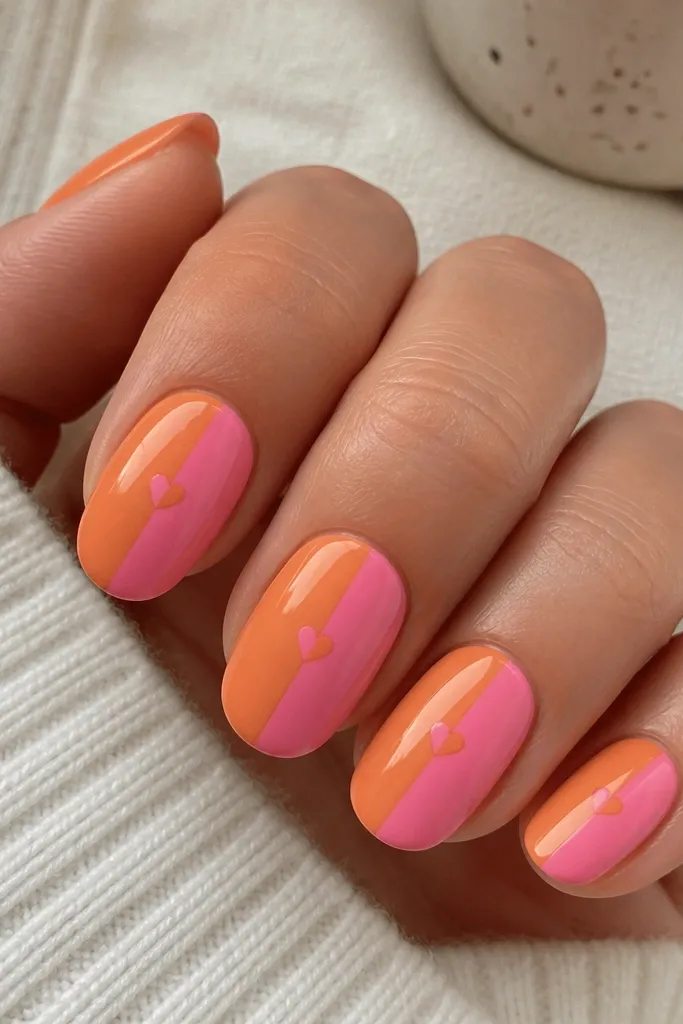
Half-and-half is bold, and adding tiny hearts makes it feel romantic without turning into complicated nail art. The clean seam makes the mani look crisp, and the small hearts give just enough detail. This looks great on oval and almond shapes because the seam follows the natural curve. If you have short nails, keep the hearts small and centered so they don’t overpower the length.
Start with two separate base colors: paint the left half orange and the right half pink. Use striping tape to keep the seam straight — remove tape after each color is cured. Once both colors are set, use a fine liner brush to draw two small hearts near the center seam. Cure and add glossy top coat in two layers to protect the seam and keep the hearts smooth.
For hearts, place the bottom point first, then pull two lines up to form the lobes.
Don’t let the tape smudge your base color — press lightly and remove carefully.
15. Orange Aura Nails With Pink Inner Glow
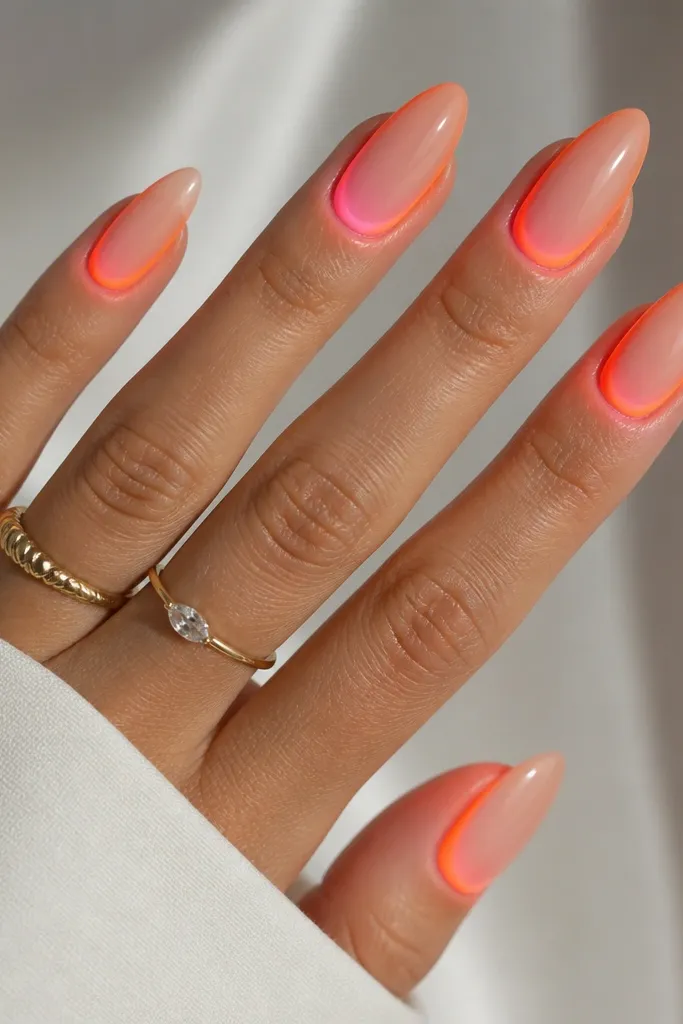
Paint an orange base in one to two thin coats and cure. Sponge a slightly lighter orange around the cuticle area, blending outward so it fades toward the middle. Then sponge a small amount of pink right in the center of the aura, keeping it tight and bright. Cure and seal with a glossy top coat, adding a second coat to smooth sponge texture.
Aura nails look like a glow-up, but you can do them with sponge work. Orange creates the outer warmth, and pink adds a bright inner ring that makes the nail look lit from within. This design flatters hands with small nail beds because the glow starts at the cuticle and visually widens the center. It’s also beautiful on fair and olive skin tones because the pink ring adds life without overpowering.
Watch outAvoid using too much pink — a thick pink ring looks like a sticker instead of glow.
Editor's noteIf the aura looks too strong, dab the sponge on a paper towel and try again — less pressure gives a softer glow.
16. Orange Base With Pink "Soda Pop" Micro Dots
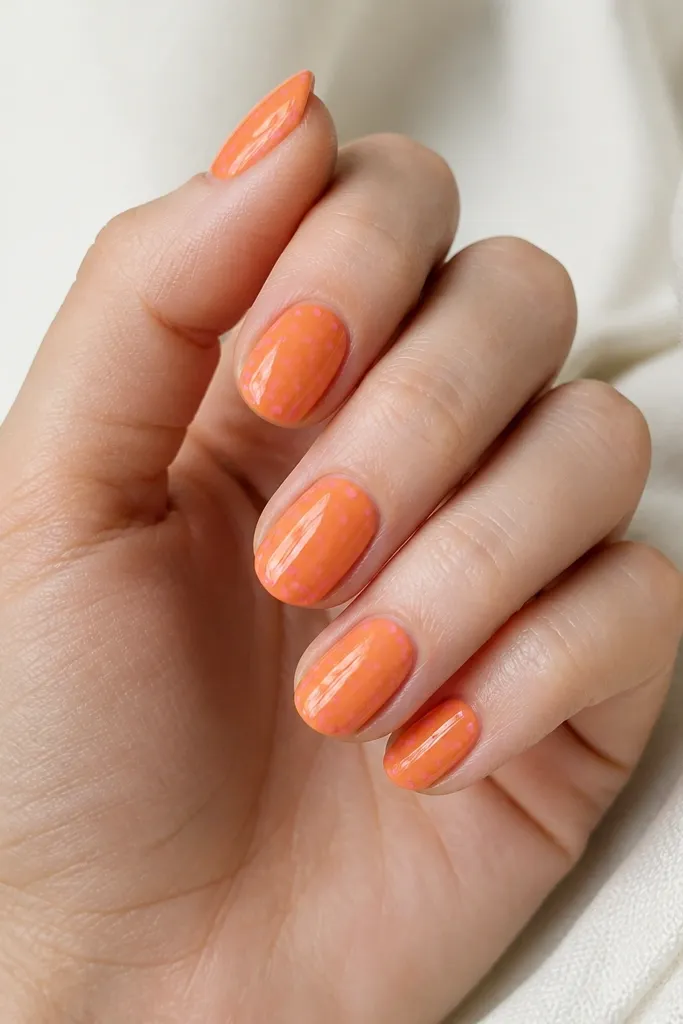
Apply orange in two thin coats and cure. Use a dotting tool with a small tip to place micro pink dots across the nail — start near the middle and add a few clusters toward the tip. Keep dot spacing consistent by loading less polish on the tool each time. Cure, then top coat twice so the dots look smooth under the shine.
Micro dots are one of the quickest ways to make solid orange feel designed. Pink micro dots look like sprinkles, and the tiny scale makes the mani look polished instead of chaotic. This works on short nails because the dots fill space without needing length. It also flatters all skin tones because the dot pattern creates brightness at the fingertips.
Watch outDon’t make the dots too large — big dots look like you dropped paint.
Editor's noteTo keep dots uniform, wipe your dotting tool on a lint-free wipe between nails.
17. Pink And Orange Reverse French With Clear Gap
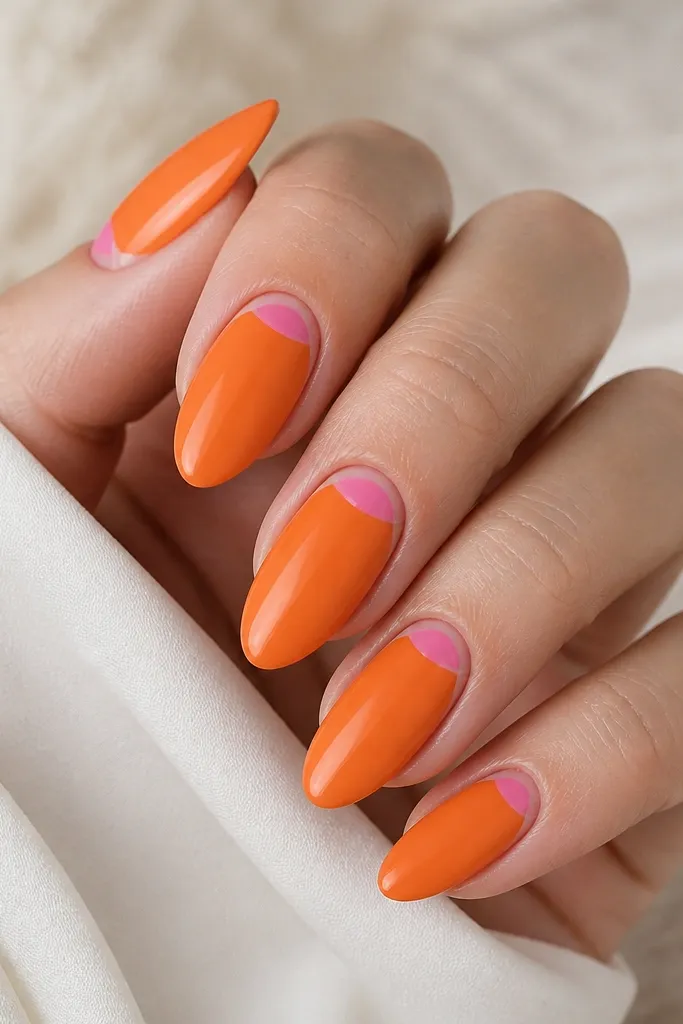
Reverse French looks chic, and the clear gap makes it feel lighter and cleaner. Pink sits at the cuticle like a frame, while orange holds the main color. This is flattering on almond and oval shapes because the arc matches the natural nail curve. It also works great for people who hate bright tips but still want a fun summer color combo.
Paint orange base in two thin coats and cure. Then draw a reverse French arc in pink at the cuticle area, leaving a thin clear gap between the pink arc and the orange. You can use a half-moon stencil or freehand with a fine brush. Cure, then add a thin top coat to seal, and a second glossy coat for shine.
If your pink arc gets wobbly, wipe the brush clean and straighten the curve before curing — acetone cleanup is your friend.
Avoid a thick reverse French arc — it makes the cuticle area look bulky.
18. Orange Marble With Pink Vein Lines
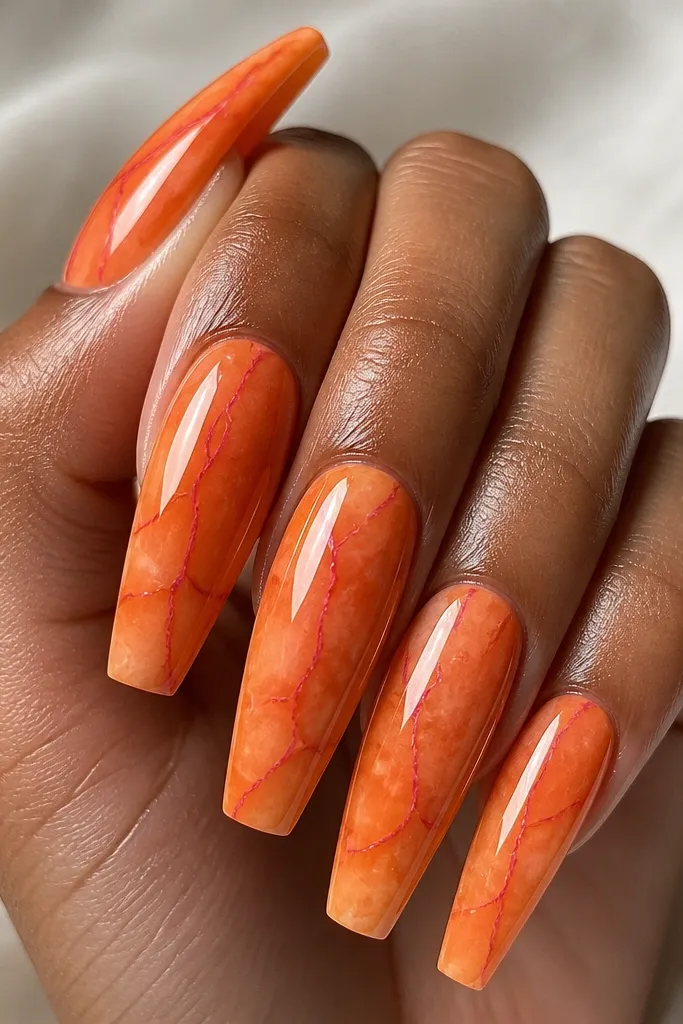
This marble version flips the usual color logic: orange is the base, and pink shows up as the veins. It looks more modern than white-vein marble, and the pink lines make it feel summery without being loud. Coffin and almond shapes look best because the veins can run lengthwise and guide the eye. It also flatters hands because the line direction makes nails look longer.
Start with an orange base in two coats and cure. Use a thin liner brush to draw a few vein lines — I keep it to 3 to 5 veins per nail so it stays easy. Load the liner with pink and trace over parts of the orange veins, leaving some orange showing. Add a glossy top coat in two layers so the veins look like they’re under glass.
Use a slightly diluted pink (one drop top coat mixed into polish) for cleaner, thinner veins.
Don’t draw too many veins — the pattern turns into clutter fast.
19. Pink Outline Stars On Orange Tips
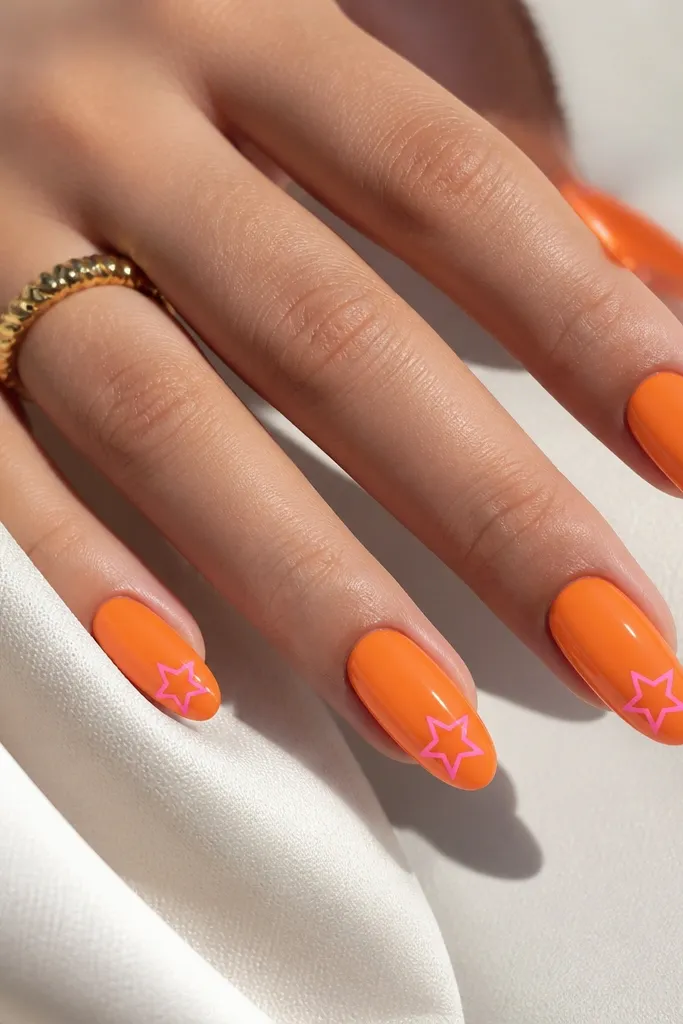
Paint orange base in two coats and cure. Using a thin liner brush, draw one small star outline near the tip — place it slightly off-center for a more natural look. If you want symmetry, keep star size consistent across nails, about 2 to 3 millimeters wide. Cure and then top coat twice to smooth the outline and prevent snagging.
Outline stars feel playful and a little retro, and they’re easier than filled shapes. Orange behind the star keeps the nail bold, while pink outlines keep the art light enough to look neat. This design is great for almond and oval nails because stars sit naturally near the tip curve. It also looks good for parties or summer events when you want fun without full coverage art.
Watch outAvoid thick star outlines; they catch and make the mani feel uneven.
Editor's noteIf you mess up one star, paint over it with orange while it’s still tacky, then redraw.
20. Orange Base With Pink Waterfall Tip
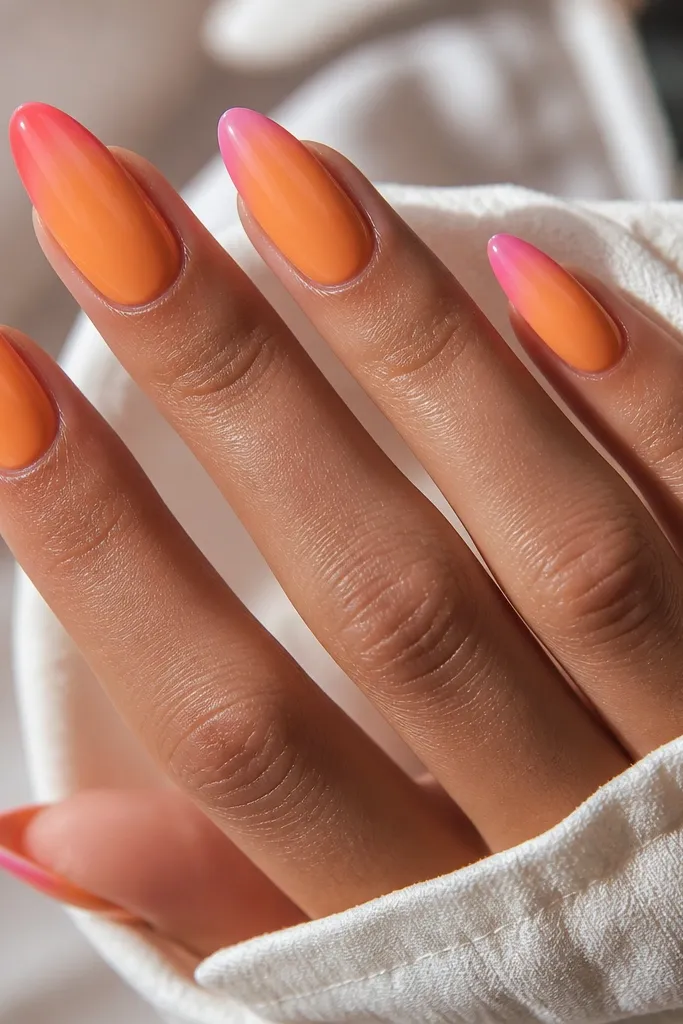
Apply orange base in two coats and cure. Paint pink at the free edge, but keep it thicker in the center and taper toward the sides with short curved strokes. Use a sponge or brush to blend the border where pink meets orange so there’s no hard line. Cure fully and seal with a glossy top coat in two layers, focusing on the tip edge for durability.
A waterfall tip looks like movement, and the orange base makes the pink feel more dynamic. The center-thick shape gives a slimming effect on almond nails, which is why I like it for longer lengths. Pink stays bright but not overwhelming because it’s concentrated at the tip. This design works for medium to deep skin tones especially well, since the contrast reads sharply in sunlight.
Watch outDon’t make the waterfall too wide — it can look like a smear on shorter nails.
Editor's noteTo blend the border, wipe your brush on a lint-free wipe, then gently drag along the edge once.
21. Pink And Orange Half-Stripe Accent On Each Nail
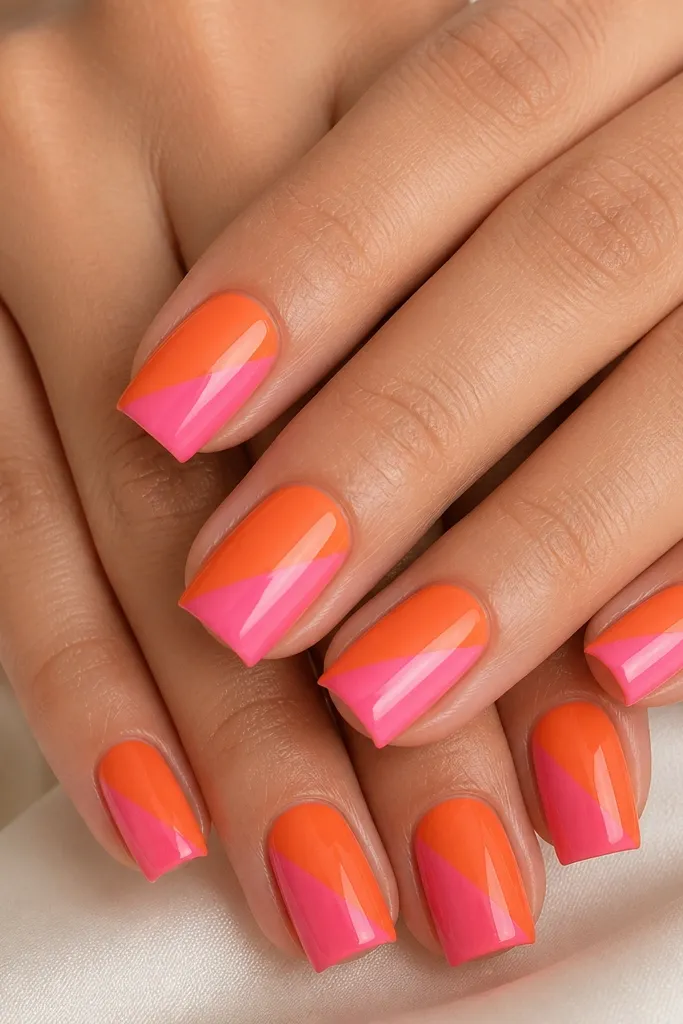
This design is easy because the accent is always the same size, just rotated across nails. Orange gives you a strong base, and the pink half-stripe adds a clean graphic pop. It’s flattering on short square and squoval because the stripe pulls attention toward the center. I’ve done this for friends with busy schedules — it looks styled even when you’re not doing full nail art.
Paint orange in two thin coats and cure. Place a pink stripe using striping tape or a guide line with a striping brush — keep it to half the nail length so it stops around the middle. Rotate the stripe direction on each nail slightly so the set feels intentional. Remove tape carefully, cure, then top coat twice for a smooth finish.
If you’re using tape, press it down only at the stripe edges so it doesn’t leave a ridge in your orange.
Avoid stripes that touch the sidewalls — it makes the nails look wider.
22. Orange Tips With Pink Outline Hearts
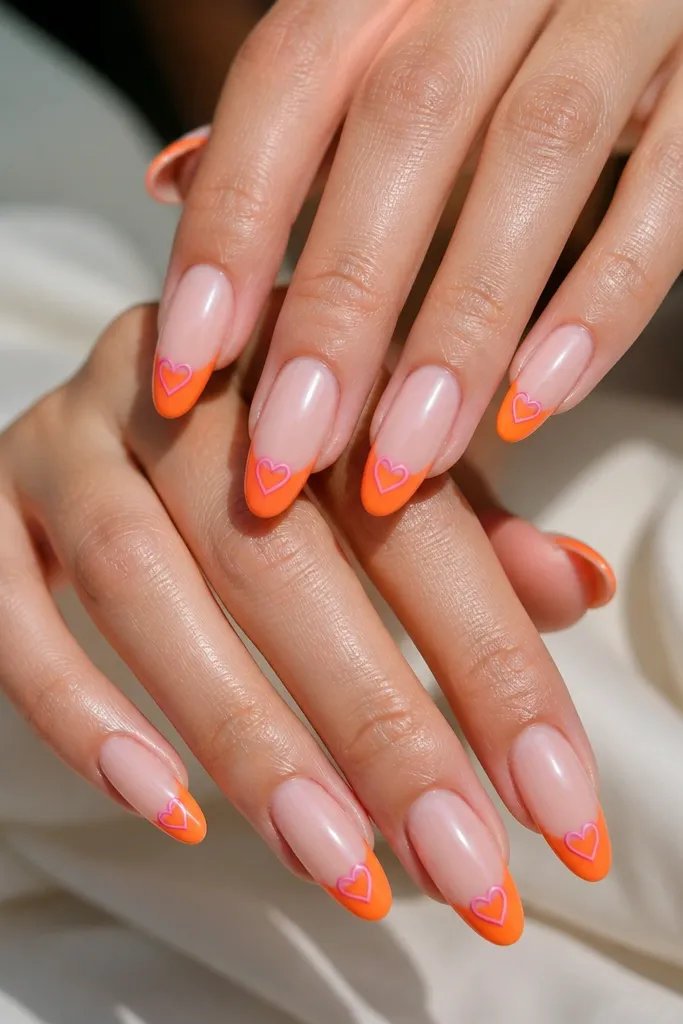
This is a cute twist on French tips that keeps the mani light. Clear or nude base makes your hands look fresh, and the orange tip band gives the summer color. Pink outline hearts are small enough to feel easy, and the outline style makes it look crisp instead of messy. It’s flattering on almond and oval, especially if you like shorter lengths but still want a sweet detail.
Start with a sheer nude base or clear builder gel for a clean foundation, then cure. Paint an orange tip band across the free edge, leaving the rest nude — use a striping brush to keep the band straight. Draw one pink outline heart per nail on the orange band, centered and about 2 millimeters tall. Cure and seal with a glossy top coat, using a thicker second coat to protect the heart edges.
For quick hearts, use a heart stamp if you have one, then outline lightly with pink polish for a sharper look.
Don’t fill the hearts solid — outlined hearts look cleaner and take less time.
23. Pink And Orange Ombre With Tiny White Sparkle
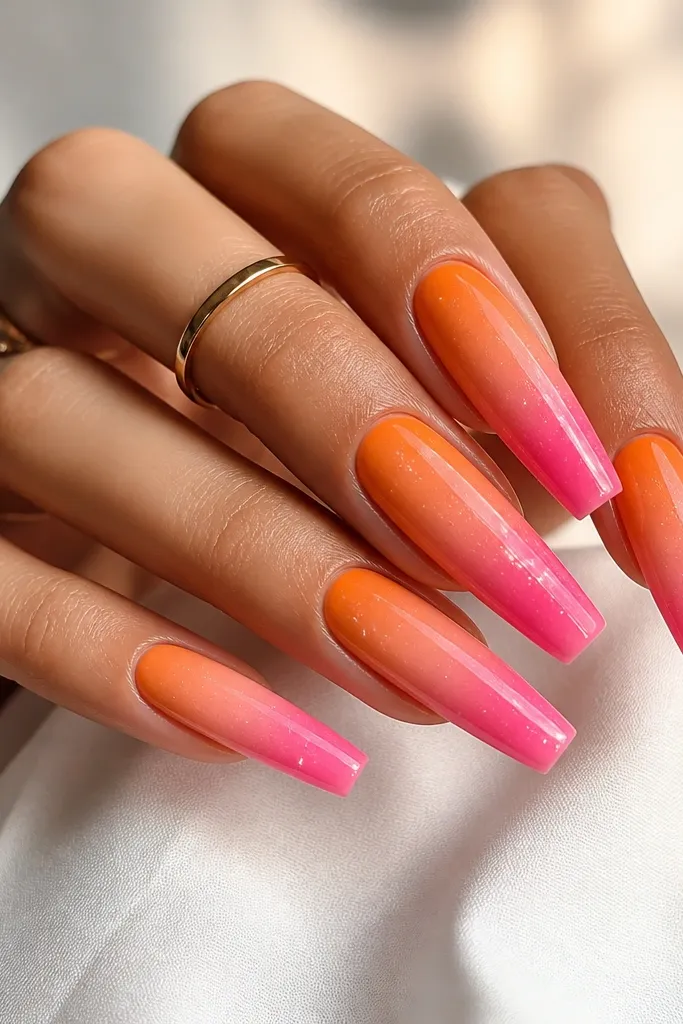
Paint a base coat, then sponge orange at the cuticle area and blend into pink toward the tip using a makeup sponge. Keep blending at the center — don’t let the colors separate into stripes. Once you like the fade, add a few tiny white sparkles with a dotting tool near the pink region. Cure and seal with a glossy top coat in two layers so the ombre looks smooth.
An orange-to-pink ombre is the quickest way to make the color combo look intentional. The gradient blends the colors so you don’t have to align sharp lines. Tiny white sparkles make the pink area feel like summer night sky without adding heavy art. This looks best on coffin and long almond because the gradient has room to fade smoothly. It flatters hands by creating a smooth color transition that draws attention to the center of the nail.
Watch outAvoid too much sparkle — three to six dots per nail look intentional, twenty looks messy.
Editor's noteFor cleaner ombre, sponge on thin layers and cure between layers instead of one heavy pass.
24. Orange Base With Pink Side French Tips
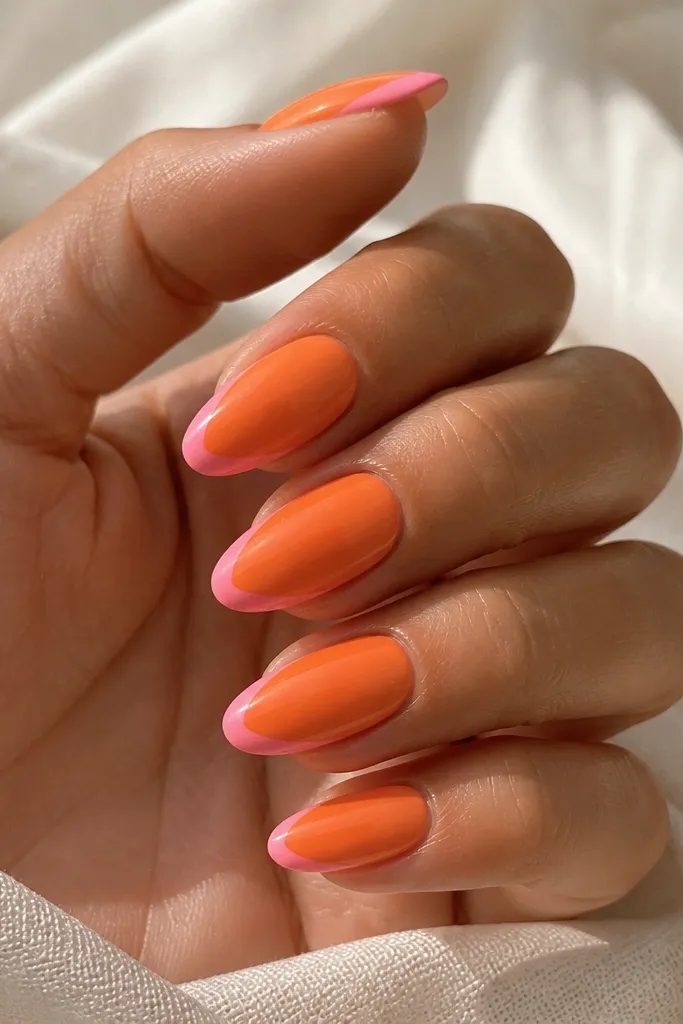
Apply orange base in two coats and cure. Use a striping brush to paint pink curves at the tip corners, stopping before the center of the nail. Make the left and right curves mirror each other — use the nail’s natural sidewall as your guide. Cure and clean any edge blur with a small brush dipped in acetone. Top coat twice to seal the curves and keep the finish glossy.
Side French tips look fancy but they’re simpler than full tips because you paint less surface area. Orange stays dominant, and pink only frames the outer edges so it makes nails look slimmer. This is flattering on almond and even short squoval because it visually narrows the nail while keeping the summer color. I’ve worn this to work and then to dinner — it reads polished without feeling like loud party nails.
Watch outDon’t extend the pink to the center — that turns it into a full tip and loses the slimming effect.
Editor's noteIf the curves get uneven, place a tiny dot of pink at the tip corner first, then connect the dot with short brush strokes.
25. Pink Brushstroke Over Orange With Glossy Edges
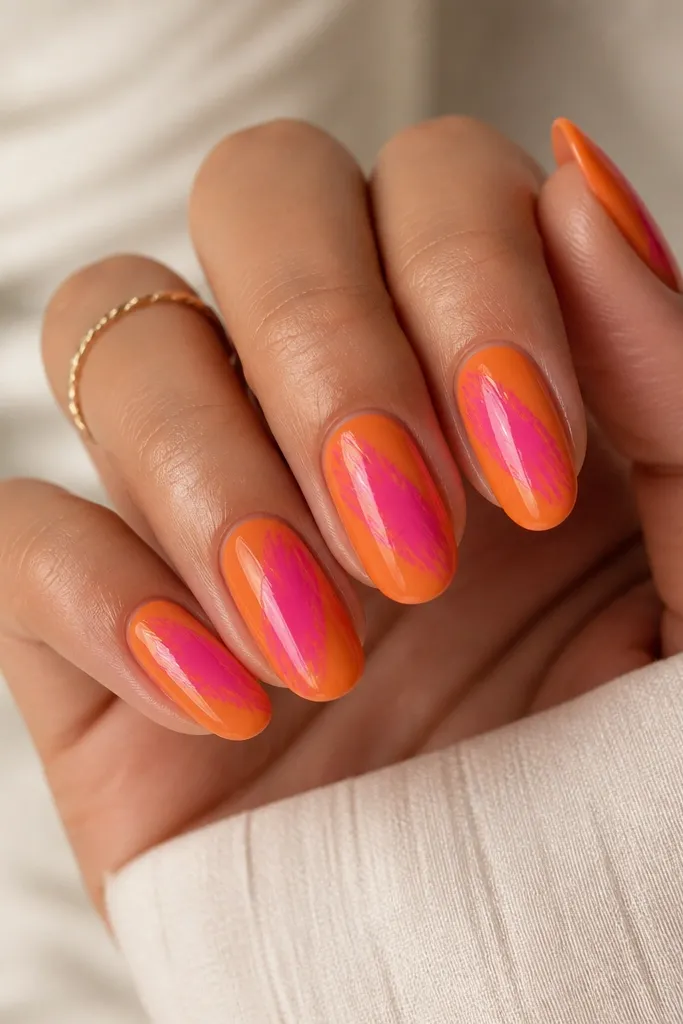
Paint orange base in two thin coats and cure. Load a flat nail art brush with pink polish and paint one diagonal stroke across the center, leaving some orange showing at the edges. Keep the stroke wide enough to be visible but not so wide it covers the whole nail. Cure, then apply a thin top coat first to lock the brushstroke, followed by a second glossy coat for shine and smoothness.
Painterly brushstrokes look artistic, but you can keep them easy by doing just one stroke per nail. Orange underneath makes the pink look brighter, and the uneven edge adds texture that looks good under gloss. This works best on oval and almond because the nail curve makes the stroke look natural. It’s also forgiving on nails with slight ridges because the top coat smooths everything.
Watch outDon’t over-layer the brushstroke — too many coats can muddy the color and remove the painterly edge.
Editor's noteThin your pink slightly with top coat if it looks too opaque — a semi-sheer stroke looks more modern.