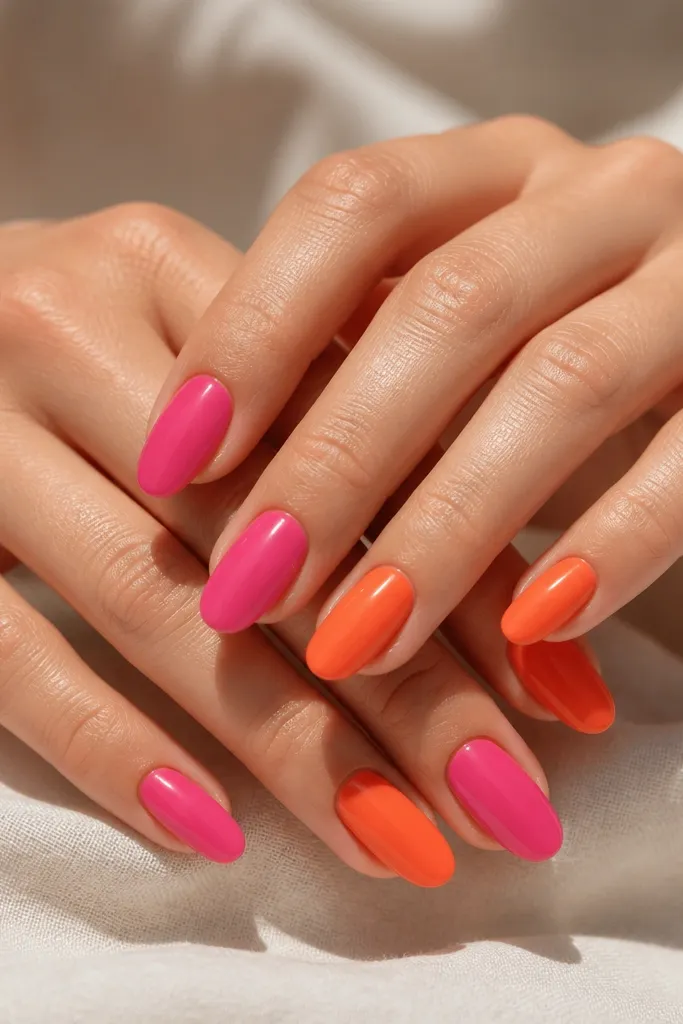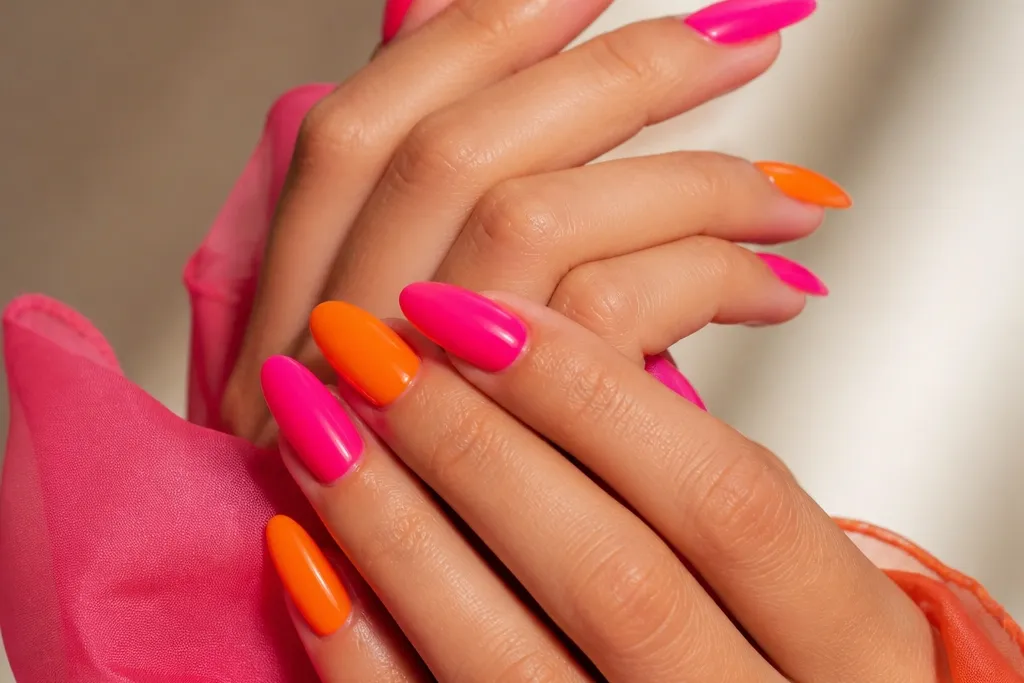

1. Hot Pink Base With Tangerine Micro-French Tips
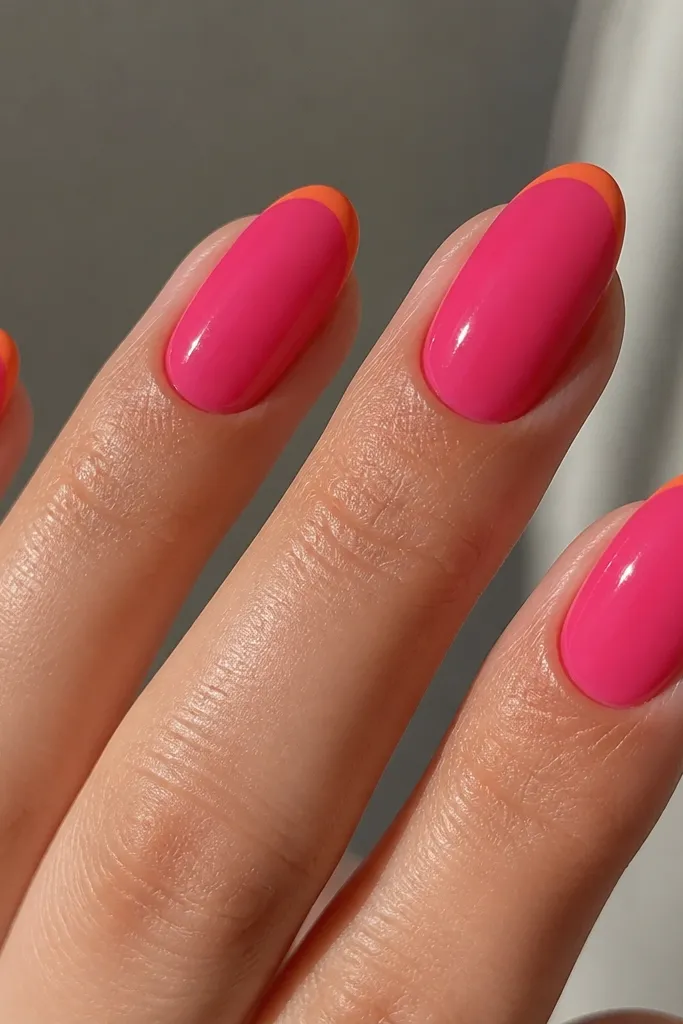
This is the bold glam look when you want bright colors but still want it to feel clean and wearable. The hot pink base grabs attention right away, and the micro-French keeps the orange from taking over. I love it on medium almond because the tip curve lets the orange line look sharp instead of blotchy. It flatters most skin tones because hot pink reads vivid without turning dull. For everyday wear, it’s loud enough to get compliments but controlled enough to not feel costume-y.
Start by applying two thin coats of bright hot pink gel, curing each coat fully. Next, place a micro strip of French guide tape about 1-2 mm below the free edge, then paint tangerine orange inside the guide and cure. Remove the tape while the gel is still cured so the edge stays crisp. Finally, topcoat everything with a thicker layer on the tips and cap the free edge so the orange line doesn’t chip first.
If your orange looks streaky, build it in two thinner orange coats instead of one heavy coat.
Skip a wide French band — on short nails it makes the colors look like they smeared.
2. Diagonal Pink-to-Orange Ombre With Clear Negative Space
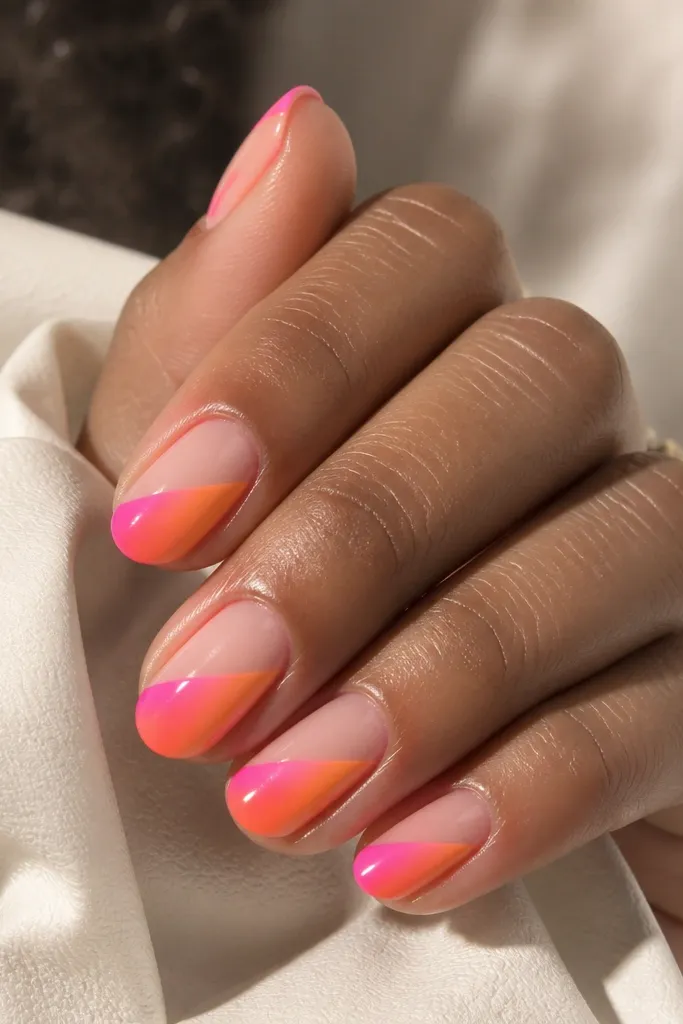
This one looks high-end because the negative space breaks up two loud colors. The diagonal fade makes your nails look longer, and the clear triangle keeps the design from feeling heavy. I’ve worn this on short squoval and it still pops since the negative shape gives your eye a rest. It works well for warm and cool skin tones because both pink and orange are bright, and the clear area keeps it balanced. For parties, it reads glam without needing extra rhinestones.
Start with a sheer nude or builder gel base, then paint a clear triangular area using a thin striping tape mask. Sponge-blend bright pink on one side, then lightly tap tangerine orange where the diagonal meets, keeping the transition soft. Cure carefully, then remove the tape and clean the edges with a small brush. Finish with a glossy topcoat and cap the diagonal fade edges so the pigment stays smooth.
Editor's noteUse a makeup sponge that’s slightly damp, not wet — it gives a smooth fade instead of dots.
Watch outDon’t skip the tape mask — freehand ombre with both colors usually smears at the center.
3. Peachy Tangerine Half-Moons Over Hot Pink
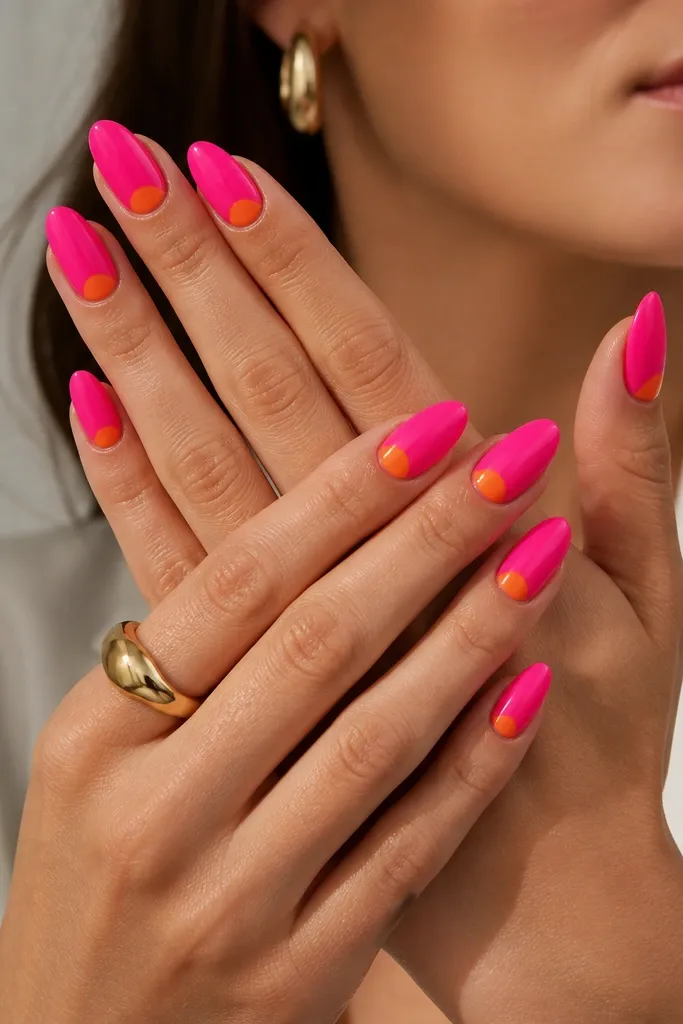
Half-moons are my go-to when I want bright glam but still want it to look neat at the cuticle as it grows. Hot pink gives the main color hit, and tangerine half-moons frame your nail bed. This design flatters hands with longer nail beds because the cuticle area looks intentional. On shorter nails, it still works because the half-moon pulls attention upward. It’s also great for people who hate tiny details since the shape is simple and repeatable.
Apply two coats of hot pink and cure fully. Use half-moon nail stencils or cut your own thin vinyl curve, then place them so they cover only the cuticle arc. Paint tangerine orange inside the stencil, cure, then remove the stencil slowly. Add one topcoat layer, then use a fine liner brush with acetone to clean any edge that got onto the skin.
Editor's noteFor extra crisp cuticles, wipe your stencil edges with a lint-free wipe before applying them.
Watch outAvoid thick stencil edges — they leave a ridge that looks cheap under light.
4. Hot Pink Jelly With Orange Shattered Confetti
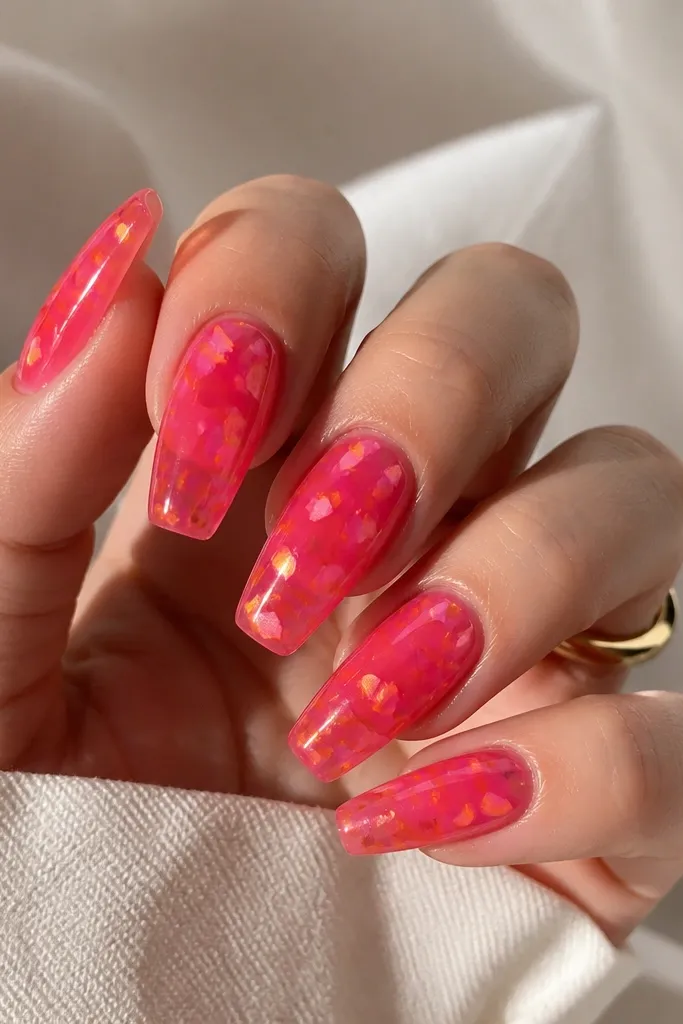
Jelly polish makes bright colors look more expensive because it has that juicy, glassy depth. The orange shattered confetti adds movement, and the randomness keeps it from looking like a sticker sheet. I like this on coffin because the flatter surface makes the shards sit clean instead of stacking weirdly. It flatters both fair and deeper skin tones since the jelly base looks luminous. This is a bold glam pick for nights out, festivals, and photos where you want texture.
Start with a jelly hot pink gel in two thin coats, curing between coats so it stays translucent. Sprinkle orange confetti shards lightly — don’t dump them; you want gaps so the jelly shows. Press each piece gently with a silicone pusher, then cure. Seal with a thick clear builder gel or strong topcoat in two layers, making sure the shards are fully covered so they don’t snag.
Editor's noteIf the shards lift, add a thin layer of clear gel first, then place shards while it’s tacky.
Watch outDon’t skip the thick seal — uncovered shards catch on hair and clothes immediately.
5. Tangerine Orange Marble Veins On Hot Pink
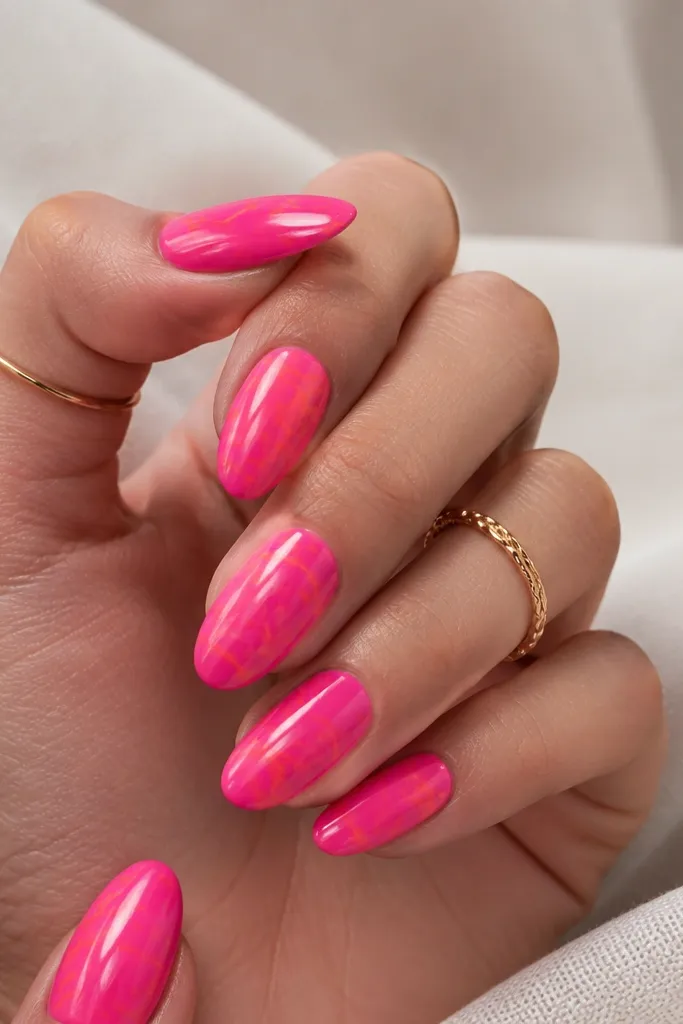
Marble nails look bold because they look detailed, but the color palette stays simple. Hot pink is the base, and tangerine orange veins give that “stone” effect without turning into mud. This design looks best when the veins are thin and slightly uneven, like real stone. It flatters short to medium nails because the detail is concentrated in the center. For workdays, it still reads fun if you keep the veins subtle rather than heavy.
Apply two coats of hot pink gel and cure. Add a thin layer of clear gel so the surface is slightly grippy. Use a striping brush with tangerine orange to draw one main vein down the nail, then add smaller branches that stop before the edges. Cure, then topcoat with a smooth layer and cap the tip edges to keep the surface glassy.
Practice the vein pattern once on a nail swatch so you know how your brush lays down thin lines.
Avoid thick marble lines — they make it look like orange paint blobs.
6. Bright Pink Chrome With Orange Foil Edge
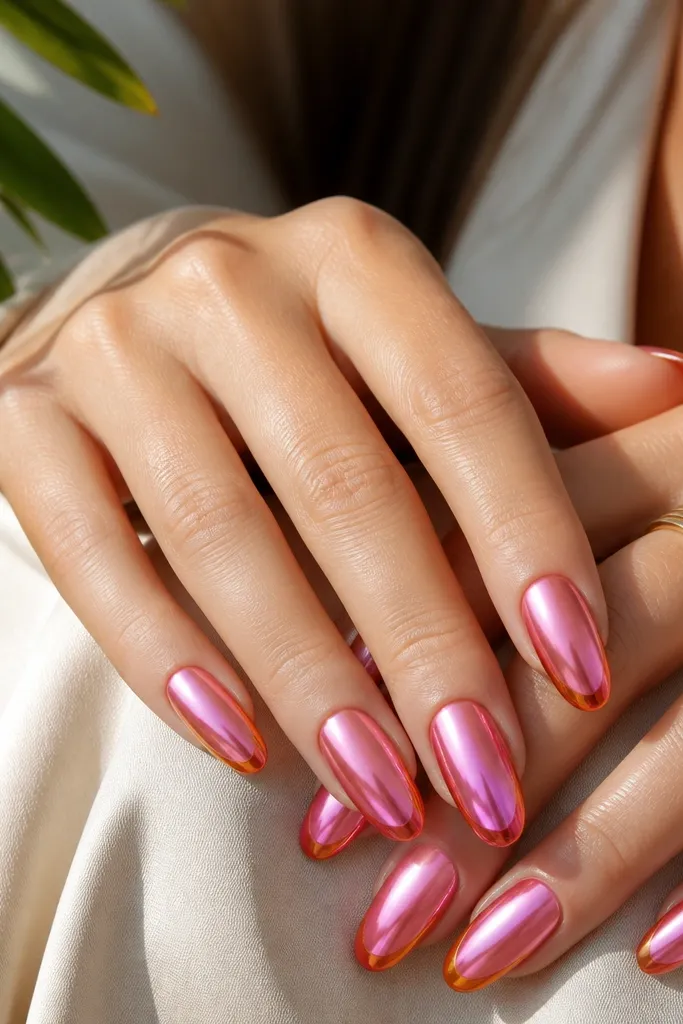
Chrome changes the whole vibe because bright pink turns into a reflective, almost holographic look. Adding a thin orange foil edge makes it feel like jewelry instead of nail polish. This is one of the most flattering options for medium almond or coffin because the chrome catches light across the curve. It looks great on most skin tones, especially if you wear gold or mixed-metal jewelry. If you want bold glam that still feels polished, this is it.
Apply a pink chrome base: two coats of bright pink gel, cure, then apply chrome tack gel and cure again until it’s ready for powder. Buff bright pink chrome powder over the tack layer and wipe off excess. For the orange foil edge, use striping tape to create a thin diagonal or side curve near the tip, then press orange metallic foil into tack gel and cure. Remove tape, then topcoat lightly if your chrome system requires it (some chrome needs a special topcoat).
If the chrome looks patchy, your tack layer is usually off — follow the cure time on your chrome kit exactly.
Don’t cover chrome with a thick standard topcoat — it can dull the mirror finish.
7. Orange and Pink Flame Tips On Nude Base
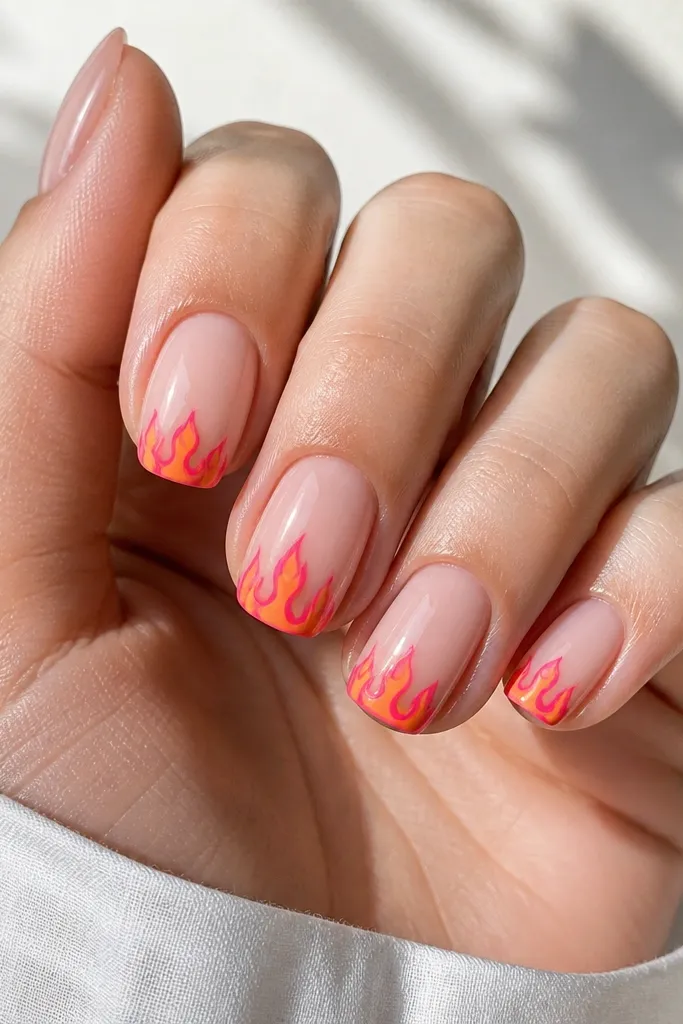
Flames look bold because they create motion, but the nude base keeps them from being too loud. The trick is layering orange behind and bright pink on top so the flames have depth. I like this on short squoval because the shape holds the flame tips without making them too pointy. It flatters hands that need a clean base — nude makes the nail bed look longer. This design also works for casual days because the color is concentrated at the tips.
Start with a sheer nude gel that matches your skin undertone, then cure two coats. Use a fine flame stencil or freehand with a nail art brush to paint orange flames on the tip area, letting the flames reach the sides but not the corners. While orange is tacky, add bright pink flame shapes on top, smaller and slightly offset. Cure and seal with a glossy topcoat, then wipe the brush with acetone before cleaning the sidewalls.
Editor's noteUse a dotting tool for the flame “base dots” — it makes flame edges look more natural fast.
Watch outSkip overloading the flames with paint — thick flames look like melted candy.
8. Hot Pink Swirl Cuticle Lines With Tangerine Dots
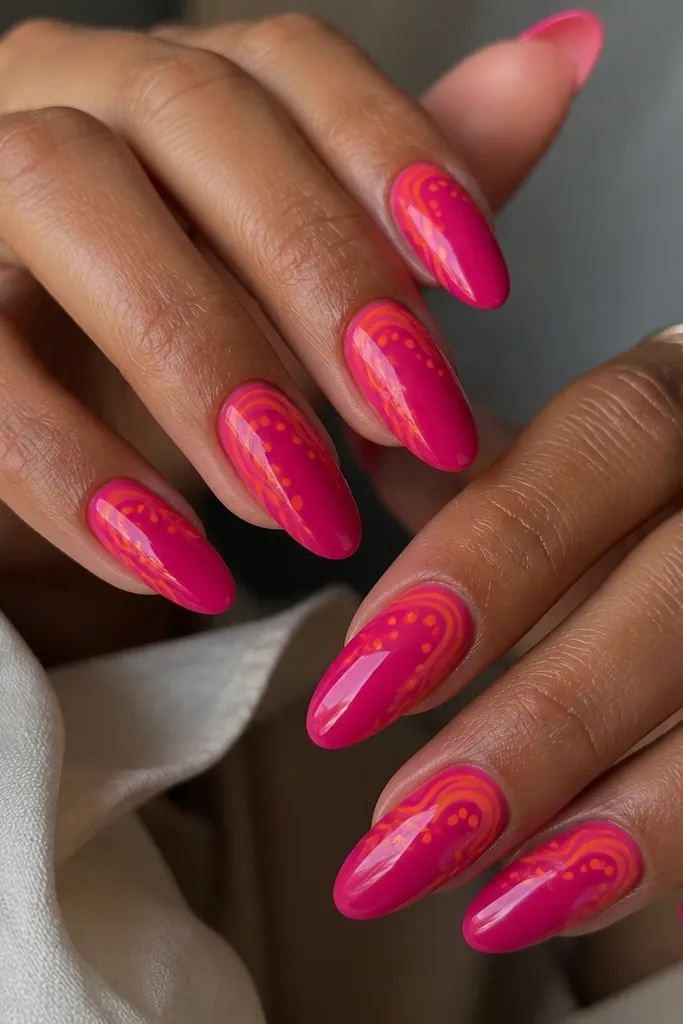
This is a cute bold glam option when you want movement but not full coverage art. The hot pink base keeps everything consistent, while the orange swirl lines and dots add a playful pop. I like it on almond because the curved swirl looks like it follows the nail’s natural arc. It also flatters hands with wide nail beds since the swirl draws the eye toward the center. Wear it for brunch, birthdays, or any time you want bright energy without heavy layering.
Paint two coats of hot pink gel and cure. With a thin liner brush, draw a curved swirl line starting near the cuticle center and sweeping toward the side, using tangerine orange. Add small dots along the swirl using a dotting tool, keeping dot size consistent across nails. Cure, then topcoat with a smooth layer and use a cleanup brush around the cuticle so the lines stay sharp.
Editor's noteKeep your swirl line thin — thick swirls hide the nail curve and make it look crowded.
Watch outDon’t place dots randomly across the whole nail — cluster them around the swirl for a cleaner look.
9. Tangerine Orange Gloss With Bright Pink Reverse French
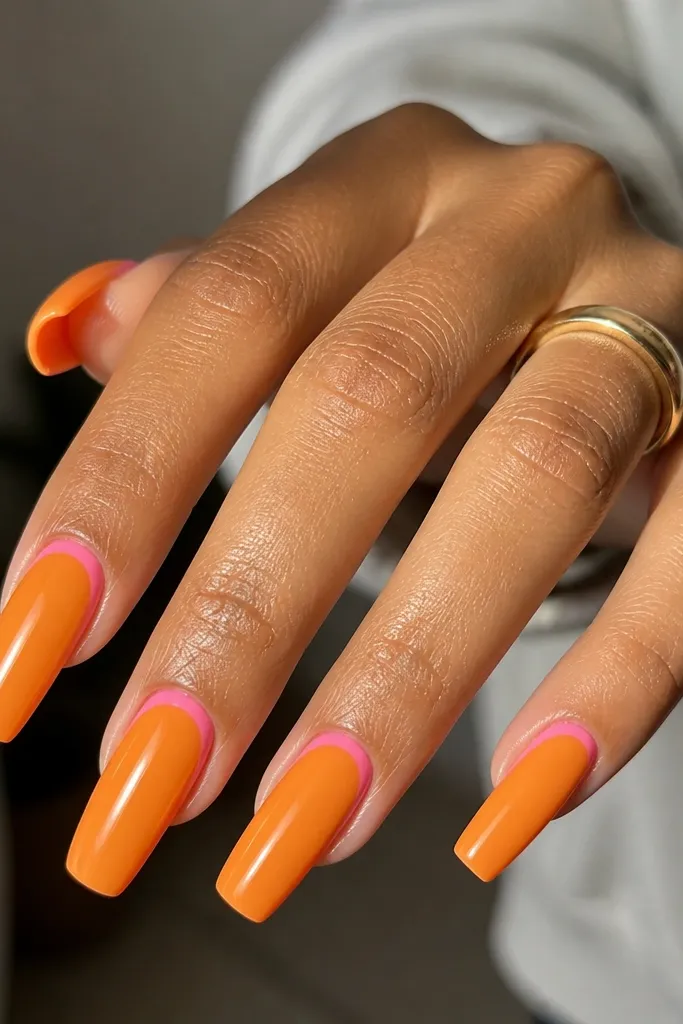
Reverse French is a bold glam trick because it frames the cuticle and makes the nail look designed, not just painted. Tangerine orange is the main color, and the bright pink arc adds a second hit without covering the whole nail. This flatters hands with short nail beds because the cuticle line visually lifts the shape. It also looks great on deeper skin tones since orange and hot pink both stay bright instead of dull. It’s a strong pick for parties because the contrast reads instantly in flash photos.
Apply two coats of tangerine orange gel and cure. Place a reverse French stencil or make a thin arc with striping tape so it sits right at the cuticle line without touching skin. Paint bright pink inside the arc, cure, and remove the stencil carefully. Finish with topcoat, then cap the free edge with a thin swipe so chips don’t start at the tip.
Editor's noteIf your cuticle arc is too wide, redo it — a thin arc always looks more expensive.
Watch outAvoid letting the reverse French touch the skin — it grows out messy fast.
10. Bright Pink And Orange Checkerboard Accent Nails
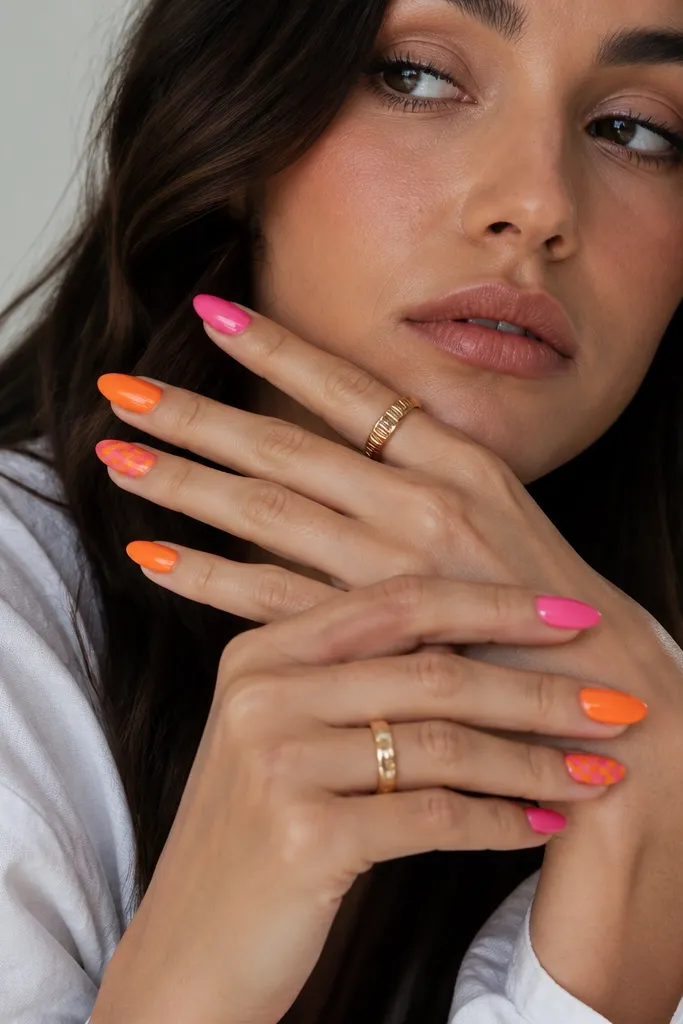
Checkerboard nails feel bold because they’re graphic and clean, and the contrast looks sharp even at arm’s length. I like doing it as accent nails because it keeps the manicure from feeling busy while still giving you that glam factor. This works on every shape, but it looks especially crisp on short squoval where square patterns stay readable. It flatters most skin tones because the colors are high-contrast and bright. It’s also a great choice if you’re new to nail art and want a pattern that’s easy to repeat.
Paint all nails either bright pink or tangerine orange as your base, using two coats each. For the checkerboard accents, apply a base first (either pink or orange), cure, then use striping tape to section the nail into a grid. Alternate painting small squares with the other color, curing after each color application. Remove tape after curing and topcoat over everything. Clean the edges with a brush dipped in acetone to keep the checker lines crisp.
Editor's noteMake your squares slightly wider than you think so the pattern stays visible after topcoat.
Watch outSkip tiny squares — they blur into a muddy look once you add topcoat.
11. Orange Linework Over Bright Pink Jelly
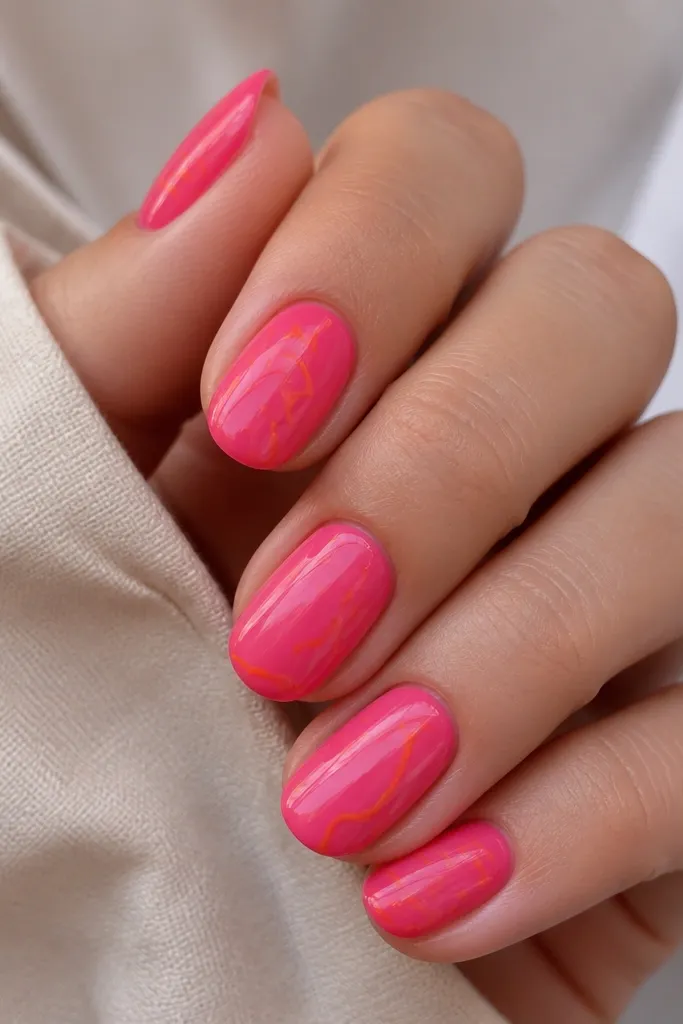
Linework is bold glam that looks artsy without being chaotic. The jelly pink base gives glow, and thin orange lines add structure and interest. I’ve done this on medium almond and it looks like modern art — light catches the jelly and the lines stay crisp. It flatters hands with narrow nail beds because line spacing elongates the nail. For everyday, you can keep the lines minimal; for a party, add one extra zigzag near the tip.
Start with jelly bright pink gel in two thin coats, curing each time for a glossy translucent look. Add a thin layer of clear gel, then use a fine liner brush to draw orange curves and zigzags from cuticle toward the center. Keep line thickness consistent — think “marker,” not brush strokes. Cure and topcoat with a smooth layer, then cap the tip edges carefully so the linework doesn’t peel at the free edge.
Editor's noteUse gel liner in a fine tip bottle if you hate cleaning brushes between colors.
Watch outDon’t crowd the nail with lines — spacing makes it look intentional.
12. Bright Pink And Orange Half-Solid, Half-Gloss Marble Accent
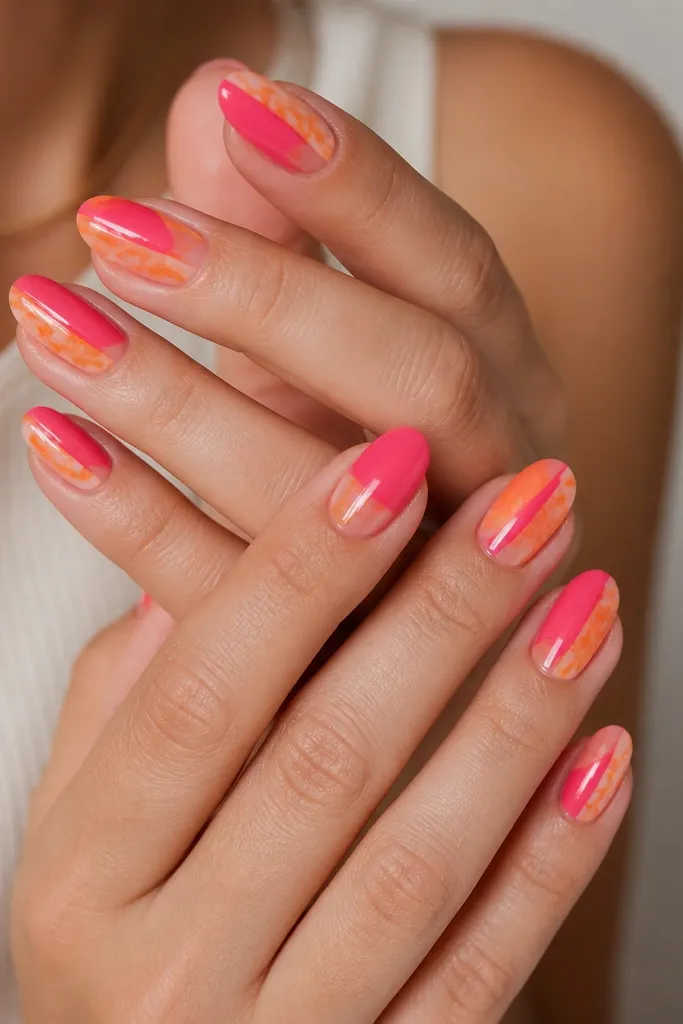
This split approach gives you bold glam with a “designer” feel because the textures differ side by side. Bright pink reads strong and clean on one half, while orange marble on the other half adds softness and depth. I like this on coffin because the vertical split makes the nail look longer. It’s flattering when you want your nails to look sleek rather than chunky. If you wear bright outfits, this manicure matches without clashing since the palette is the same two colors.
Paint half the nail bright pink using striping tape to mask a straight vertical line, then cure. On the other half, paint a sheer base or clear gel, then drag tangerine orange into it with a marbling tool for thin streaks. Remove the tape after curing so the split line stays sharp. Cure fully, then topcoat generously to smooth the marble texture and make the finish glassy.
For a clean split, press the tape down with a silicone cuticle tool so gel doesn’t bleed under it.
Skip a wobbly split line — straight reads bold; crooked reads messy.
13. Orange Aura Fade Around Hot Pink Center
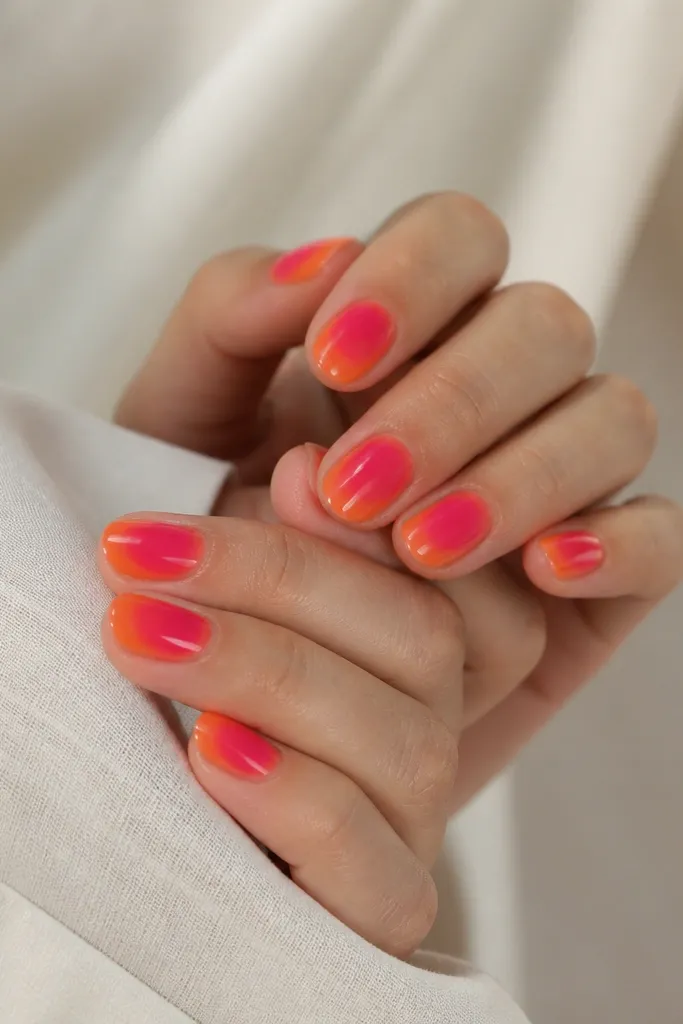
Aura nails look bold because they’re soft gradients, but the hot pink center keeps it graphic. The orange halo gives depth and makes the center pink look even brighter. I’ve done this on almond and it looks like a neon sign, especially under warm lighting. This flatters hands with shorter nails because the aura pulls attention to the middle and makes the nail look longer. It’s also great if you want bold glam without super fine line art.
Apply two coats of sheer nude or clear builder gel and cure. Sponge a thin ring of tangerine orange around the center area, leaving the outer edges clearer, then cure. Add bright hot pink in the exact center as a smooth oval, then cure again. Topcoat with a glossy layer, making sure the gradient transitions stay smooth and don’t get over-thickened.
Use a small sponge wedge so you control the aura size — too big makes it look like a stain.
Don’t push the sponge hard — that creates harsh dots instead of a glow.
14. Bright Pink And Orange Dot Gradient Tips
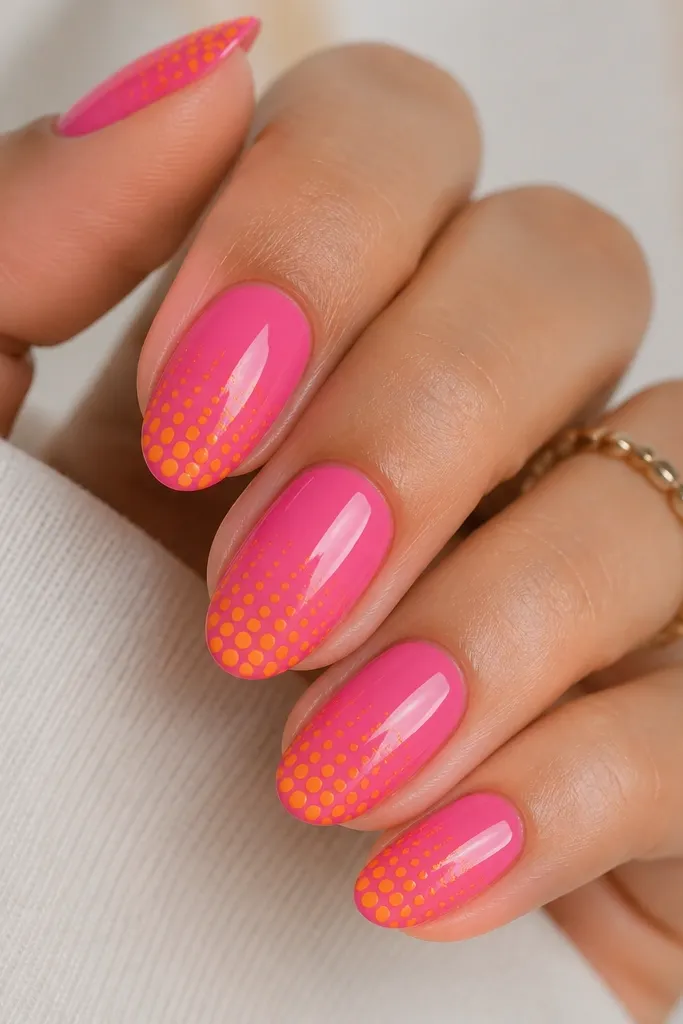
Dot gradients look playful but still glam because they’re structured. The bright pink base anchors the look, and orange dots at the tip create a “confetti fade” that feels intentional. This is one of the easiest ways to do nail art without tape. It flatters short to medium nails because the dot pattern pulls the eye to the tip. For skin tones, it works because hot pink stays vivid and the dots add warmth without turning the whole nail orange.
Paint two coats of bright pink and cure. Take a dotting tool and place the largest tangerine orange dots near the free edge, then work upward with slightly smaller dots as you move toward the mid-nail. Keep the dot spacing consistent across nails so it looks designed. Cure and add topcoat, pressing gently over the dots so they settle smooth and don’t catch on fabric.
Editor's noteIf your dots smear, wipe your dotting tool with acetone and dry it — gel dots need a clean tip.
Watch outSkip uneven dot sizes across the same nail — mismatched dots look accidental.
15. Orange And Pink Cuticle Sparkle With No Glitter Mess
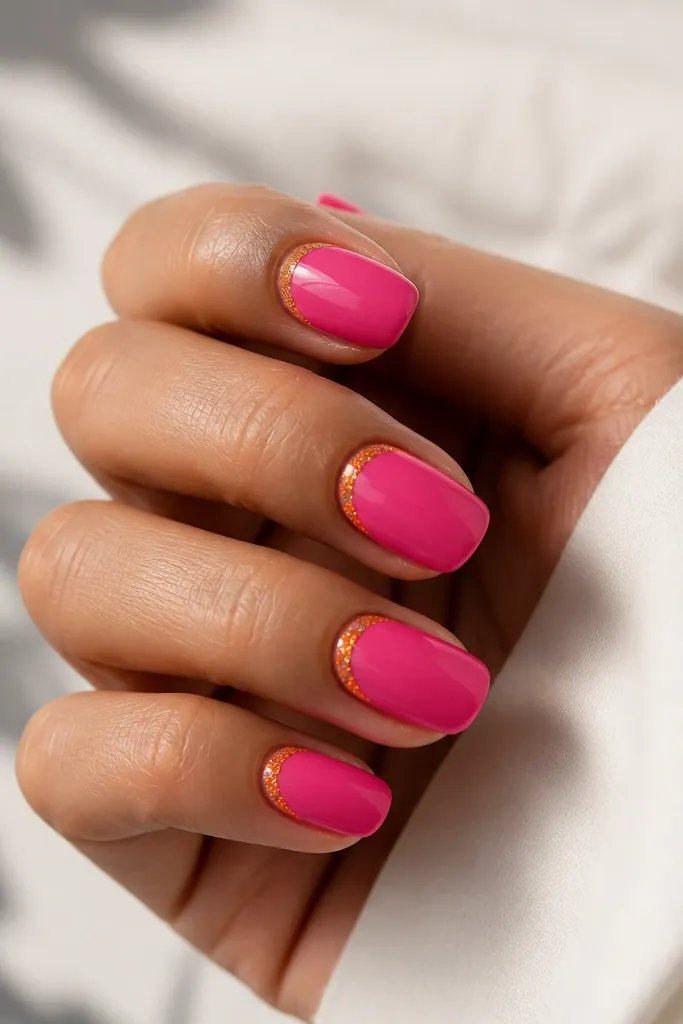
This is bold glam that stays tidy because the sparkle is limited to the cuticle arc. Bright pink makes the background look smooth, while orange glitter adds the flash you want in photos. I like it on almond and squoval because the cuticle area is visible and the arc frames the nail shape. It also flatters hands that have a slightly uneven cuticle since the arc draws the eye upward. If you hate glitter fallout, this design is controlled and easy to maintain.
Apply two coats of bright pink gel and cure. Use a small half-moon stencil or a thin strip of tape to mask a narrow cuticle arc. Apply orange glitter gel inside the arc, then sprinkle fine orange glitter on top for density, curing after. Remove the stencil and wipe any stray glitter from the sidewalls. Finish with a thick topcoat only after the glitter is fully sealed so it doesn’t shed.
Editor's notePress glitter in with a silicone tool — it locks better than letting it float.
Watch outDon’t put glitter all over the nail — it ruins the clean bright look and grows out messy.