
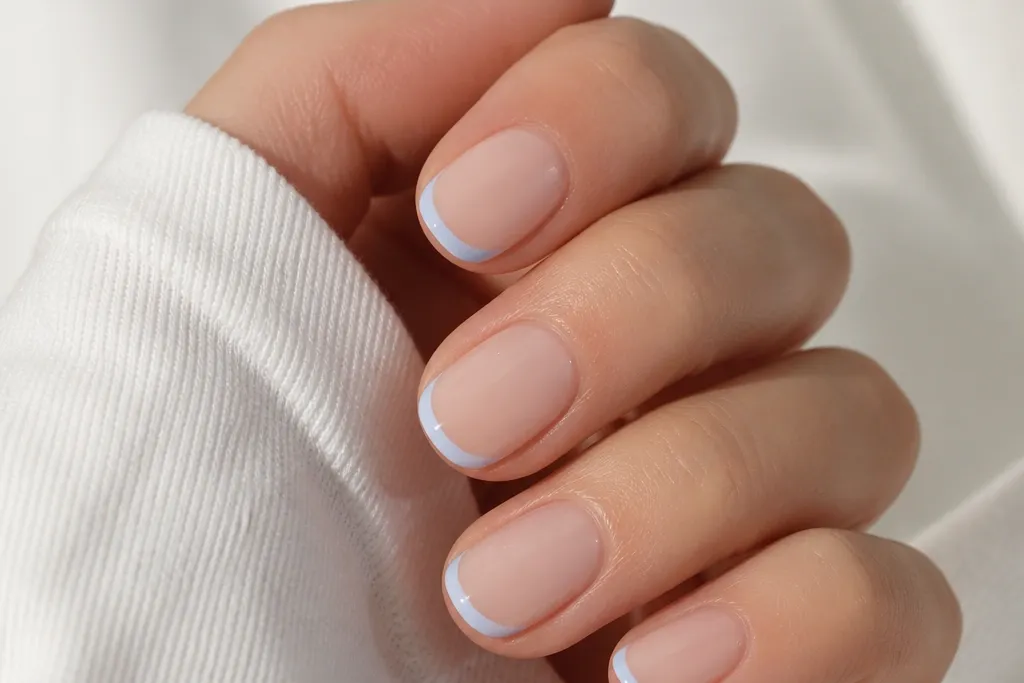
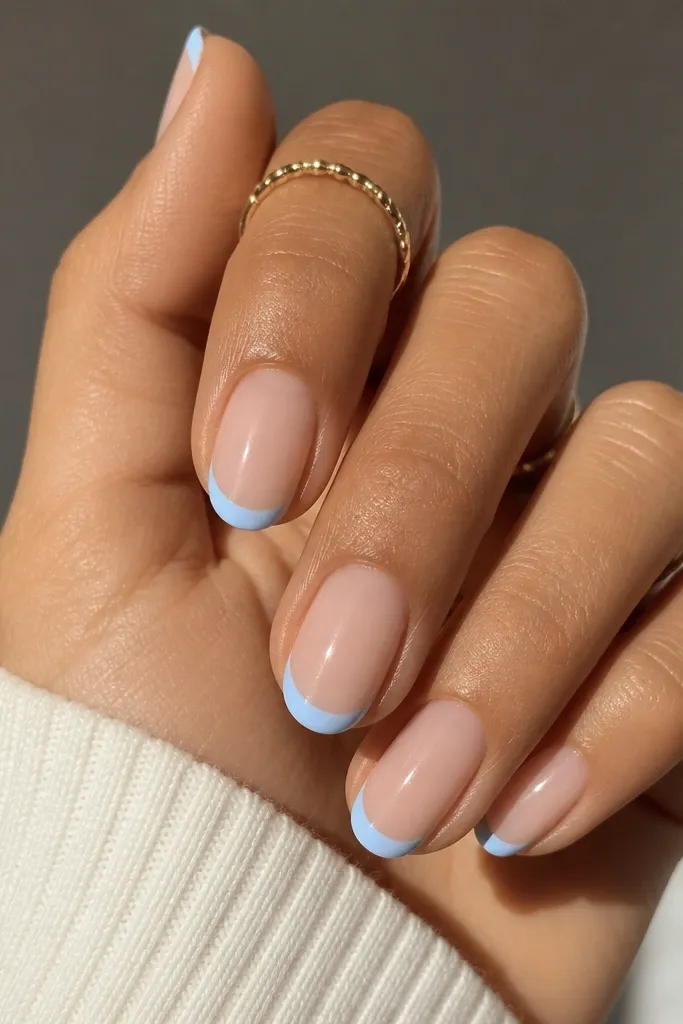
1. Classic Micro French Sky Blue on Short Squares
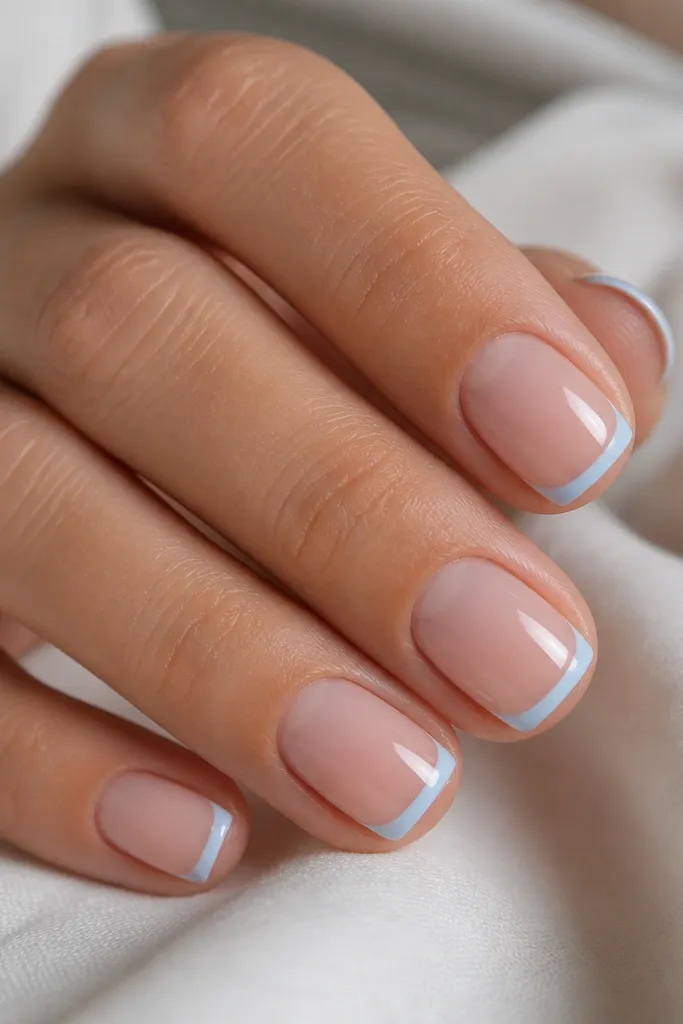
This is the French tip version I reach for when I want “done” nails but I’m not trying to baby them. The nude base is sheer enough to look like your natural nail bed, and the sky blue tip stays narrow so it grows out gracefully. On short squares, the tight smile curve makes your nail look wider and flatter in a good way, which is flattering if your nail beds are a bit narrow. The glossy finish also hides tiny texture around the cuticle, which matters on low-maintenance sets. I’ve worn this to work, and it still looks tidy after a week because the blue line doesn’t get thick at the edges.
Start by pushing back cuticles and buffing the surface lightly so the gel bonds. Apply a thin layer of sheer nude builder gel or soak-off base gel, then cure. With a fine brush, paint a micro French line in baby sky blue, keeping the tip width about 1.5-2 mm and the curve tight. Cap the free edge with a clear top coat, then cure again and do a second thin top coat over the tip surface for extra corner protection.
Use a striping brush that’s slightly splayed — it helps you keep the line even without digging into the base.
Skip a thick tip on short nails — it looks heavy and regrowth turns into a visible shelf.
2. Sheer Blush Base With Milky Baby Blue French Tips
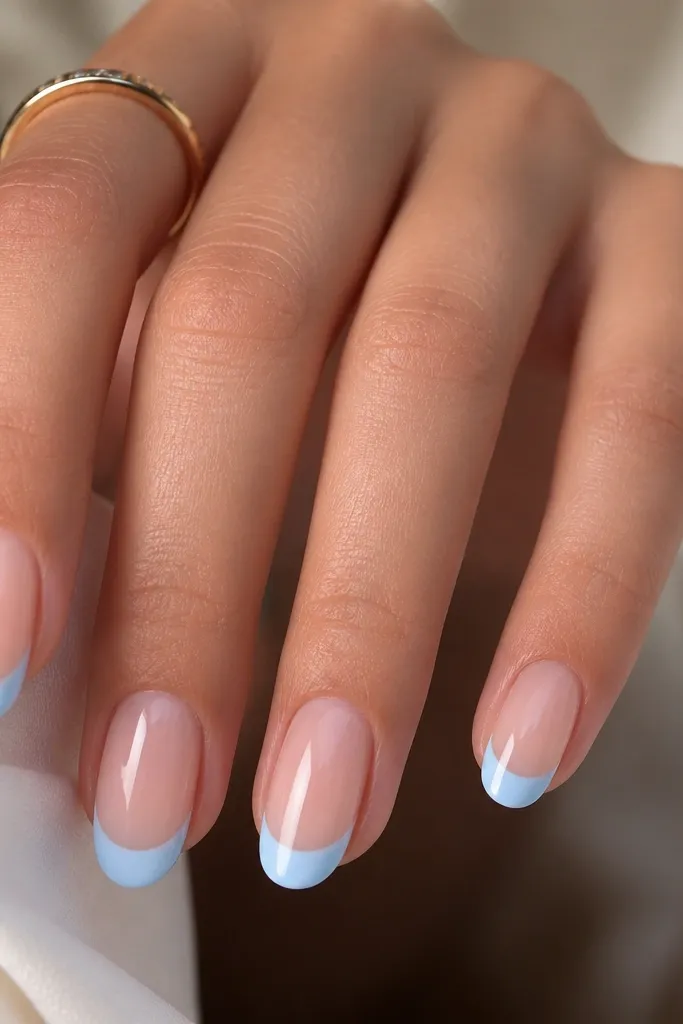
Milky baby blue is forgiving. It covers uneven nail tone without looking like a stripe, so your manicure stays pretty even if your nails are a little patchy. I like pairing it with a sheer blush base because it warms the overall look and flatters fair to medium skin tones, especially if you have cool undertones that make pure white tips look stark. The milky opacity also hides small chips at the edge longer than a fully transparent blue. This one feels sweet without going childish, and it photographs well in indoor lighting.
Apply a sheer blush base gel in two thin coats so it stays translucent but even, then cure. Paint the French tips using milky baby blue gel, keeping the line smooth and the edge sealed to the nail outline. Place the smile curve slightly closer to the cuticle than you think — about 0.5-1 mm closer — so it still reads as French after growth. Finish with a thick top coat layer, then cap the free edge and cure thoroughly.
If your milky blue is too streaky, add a second thin coat instead of trying to fix it with one thick layer.
Don’t use a watery blue — it turns into patchy dots right where you need crisp coverage.
3. Half-Moon Baby Blue French on Natural Almonds
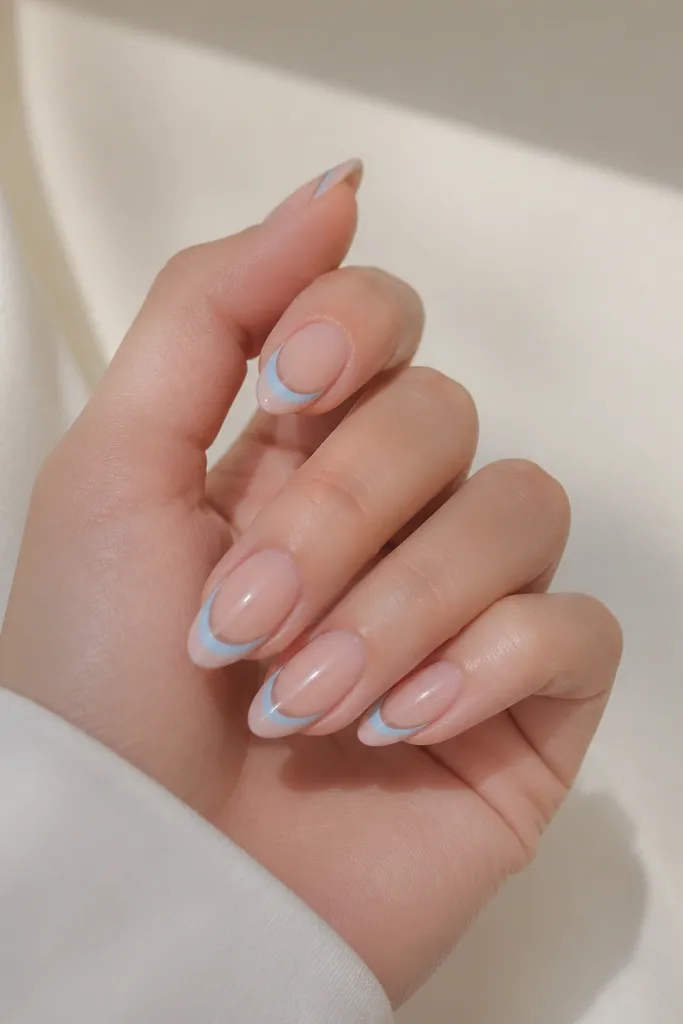
This style is low-maintenance because it’s not a full tip block. The baby blue sits like a soft crescent near the free edge, so even if the line shifts as your nail grows, it still looks like intentional nail art. Almond nails make the crescent shape look elegant and elongating, especially if you have wider nail beds and want a slimmer look. The nude base keeps it wearable, and the crescent placement draws attention to your nail shape more than your regrowth line. I’ve done this on nails that don’t like full coverage — it looks clean without heavy pigment.
Editor's noteTo keep the crescent symmetrical, mark the center point of your nail with a tiny dot using the brush tip before painting the curve.
Start with a nude base gel in a glossy finish and cure. Use a small nail art brush to paint a thin baby blue crescent at the very edge, leaving a gap of nude between the crescent and the sidewalls. Keep the crescent height about 1/3 of the tip area so it doesn’t swallow the nail. Seal with top coat over the crescent and cap the free edge with clear gel.
Watch outAvoid painting the crescent too high — it starts to look like a thick half-moon manicure instead of a French variation.
4. Baby Blue French Tips With Nude Negative Space Corners
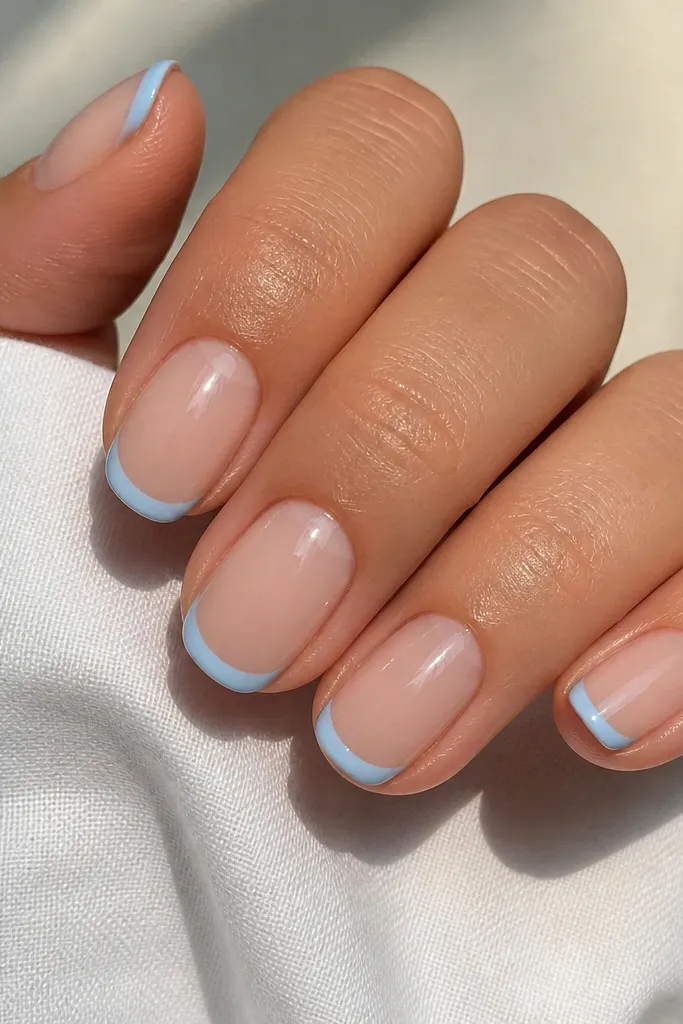
Negative space makes this French tip look modern and hides imperfections. The baby blue line only covers the center of the tip, and the nude corner gaps make the design look deliberate instead of like a chip. If you have ridges, the nude corners also reduce how much pigment you need to lay down across the widest part of your nail. This flatters almost every hand because it visually narrows the nail and makes fingers look longer, especially on medium-short lengths. It’s also a great option when you want French tips but your nails aren’t perfectly even.
Apply a sheer nude base gel and cure completely. Paint a baby blue French line across the center of the tip, then stop about 1 mm before each sidewall so you keep two tiny nude triangles. Connect the line smoothly to the side edges without overfilling the corners. Top coat over everything, then go back with a thin brush to tidy the edges before curing.
Use painter’s tape as a guide for the side stop — press it lightly near the sidewall to keep your corner gaps consistent.
Don’t overwork the corners with multiple coats — it thickens the line and makes the design look clumpy.
5. Two-Tone Blue French Tips With a Thin White Outline
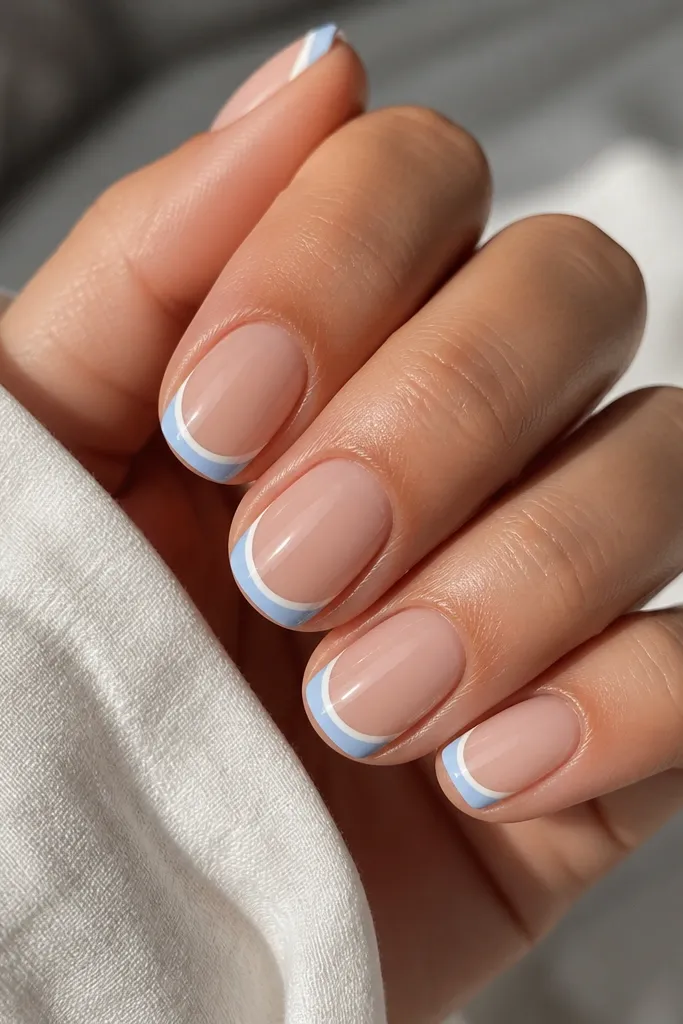
Adding a hairline white outline makes baby blue pop without making the set look heavy. The outline tricks your eye into seeing a sharper French curve, which means regrowth reads cleaner. I like this for medium skin tones and deeper undertones because the white line gives definition even when the blue looks softer. It’s also great if you’ve had French tips look “muddy” before — the white creates crisp separation. This manicure feels fresh for spring and still looks good in winter because the contrast is controlled.
Start with a nude base gel, cured and glossy. Paint the French smile curve with baby blue gel, keeping the tip width around 2 mm. Cure, then use a striping brush to trace the edge of the smile line with a thin white gel line — just one pass. Finish with top coat, and cap the free edge so the outline doesn’t catch and peel.
If your white outline looks thicker than a pencil line, clean up with a gel wipe on a flat brush before curing.
Skip thick white — it turns the look into a bulky two-color mani instead of a refined outline.
6. Baby Blue French Tips on a Milky Nude Gel Base
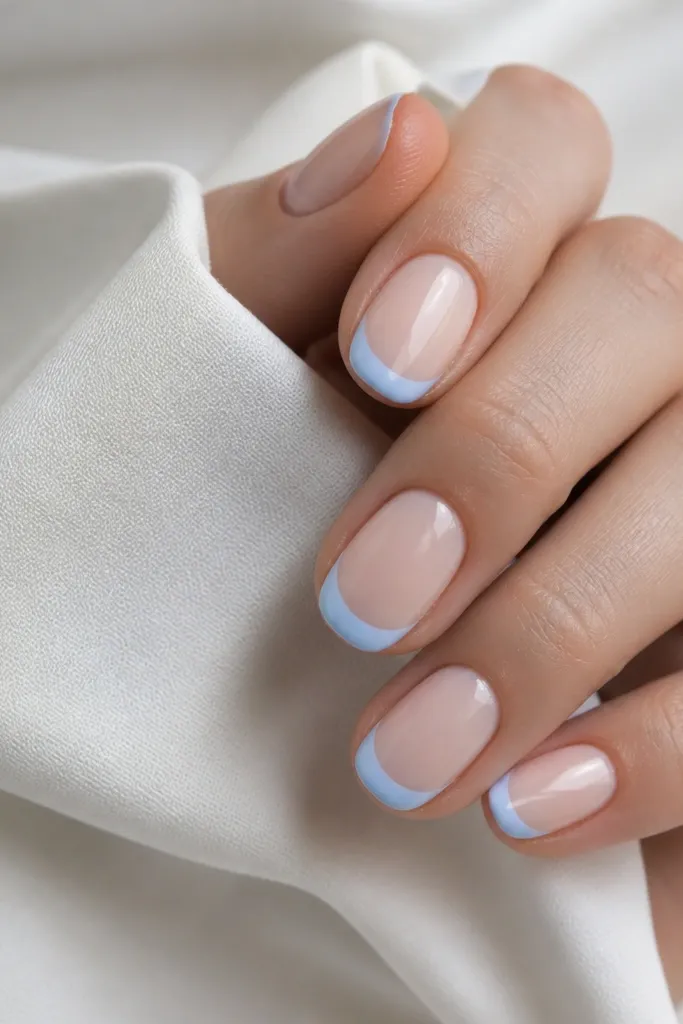
A milky nude base is my go-to when I want the French tips to look smooth even on nails with slight staining. The base evens everything out so the baby blue looks clean and consistent from nail to nail. This works well if your nails are slightly uneven in tone, or if your cuticles sit a little higher and you need coverage near the base. Milky nude is flattering across skin tones because it’s not too pink and not too beige. The rounded smile curve keeps it soft, and the glossy top coat makes it feel “salon,” not DIY.
Editor's noteUse a milky nude with a slight pink tint if your skin reads more warm — it keeps the whole set from looking gray.
Apply milky nude gel in two thin layers, curing each. Then paint baby blue French tips with a rounded smile curve that follows your natural nail edge. Keep the tip line consistent — aim for the same starting point across all fingers. Seal with a glossy top coat and cap the free edge; run the brush along the sides too so the gel doesn’t lift at corners.
Watch outAvoid sheer nude if your nails have visible staining — the blue will highlight it through the base.
7. Matte Baby Blue French With Glossy Nude Base
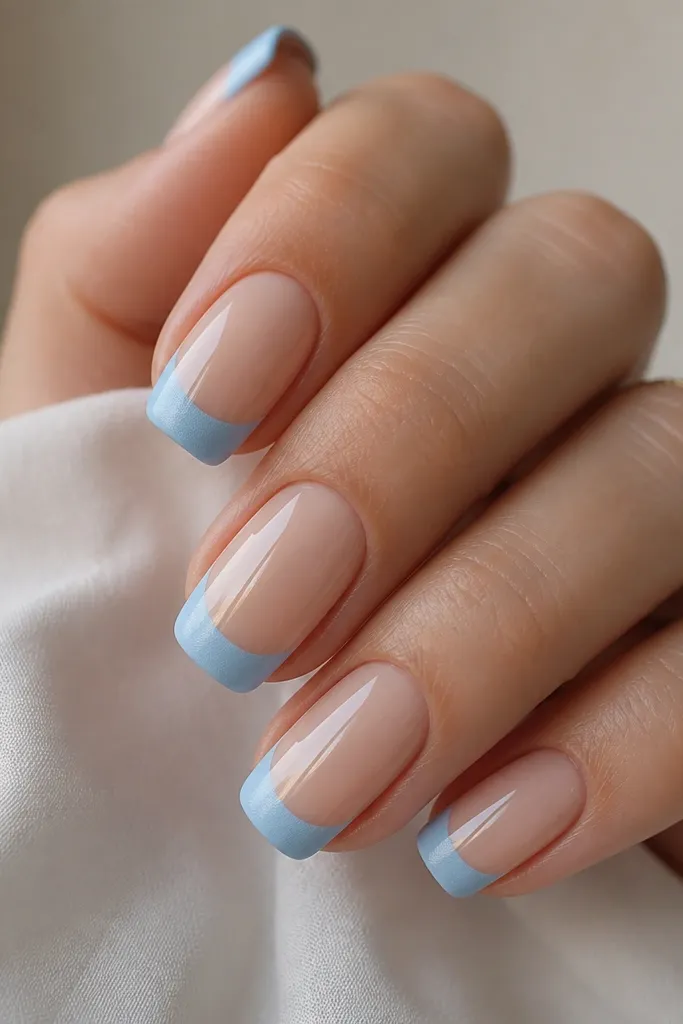
This is the one I wear when I’m tired of everything looking shiny. Matte baby blue on the tips looks soft and expensive, and it makes the French line look more forgiving if it’s not perfectly perfect. The glossy nude base keeps the manicure grounded and makes your hands look fresh. It flatters people with dry nail texture because matte hides micro-surface issues on the tip area more than glossy does. I’ve also noticed it photographs well because matte reduces glare. If you hate smudges, matte is your friend — fingerprints don’t show as much on the tips.
Editor's noteMask the nude near the smile line with a tiny dab of petroleum jelly if you’re doing this at home — it helps you keep matte only on the tips.
Do your base first: apply glossy nude gel and cure. Paint the baby blue French tips and cure, then apply matte top coat only on the blue area — avoid coating the nude base with matte. If your matte top coat is too runny, do two thin coats instead of one thick one. Finally, cure and check under a light at an angle to make sure the nude stays glossy.
Watch outDon’t matte the whole nail — matte over nude can make your hands look dull and show cuticle texture.
8. Glazed Baby Blue French Tips With Micro-Shimmer Base
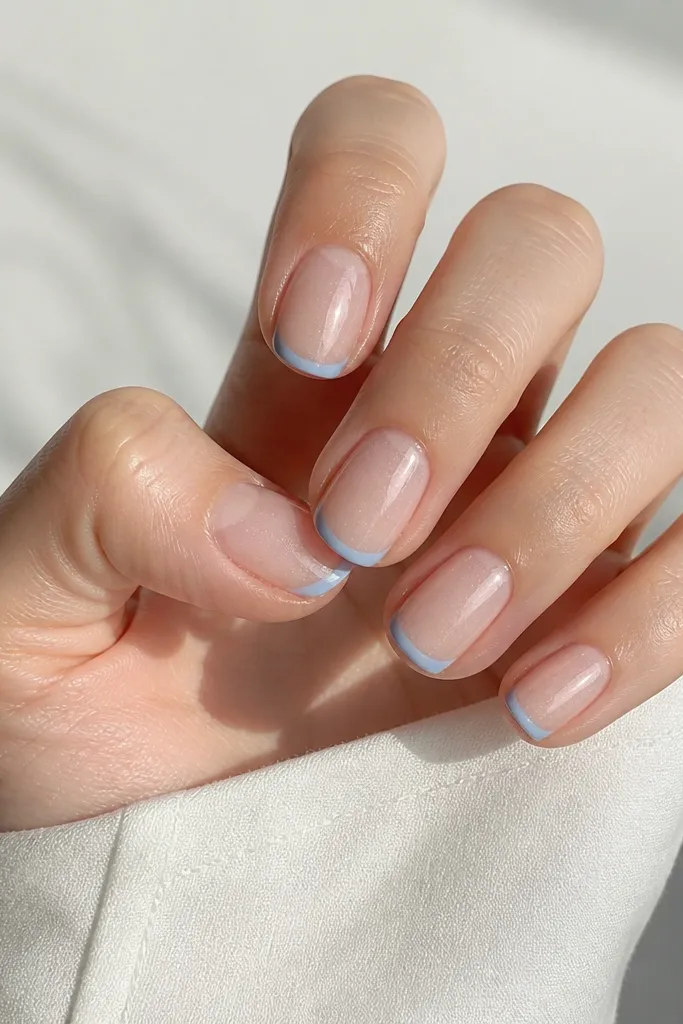
This one looks like you had a spa manicure, but it’s low-maintenance because the shimmer hides tiny wear. The micro-shimmer base keeps the nails looking lively even if your top coat dulls a bit by day 5. Baby blue French tips stay crisp, and the glazed gloss makes the line look smooth. This is a great option if you’re wearing a cool-toned outfit or silver jewelry — the blue and shimmer look synchronized. On fair skin, it reads airy; on deeper skin, it stands out without needing neon contrast.
Editor's noteIf the shimmer looks too strong, reduce it by mixing the topper into your nude gel instead of applying straight glitter.
Apply a nude gel base with a slight micro-shimmer — I use a sheer topper mixed into nude gel so it doesn’t turn sparkly. Cure, then paint baby blue French tips with a thin brush, keeping the curve tight. Spread top coat evenly, then cap the tips. For extra staying power, do a second top coat on only the tips after the first is cured.
Watch outSkip chunky glitter bases — they snag and make the French line look messy.
9. Baby Blue French Tips With Tiny Heart Accent on Ring Fingers
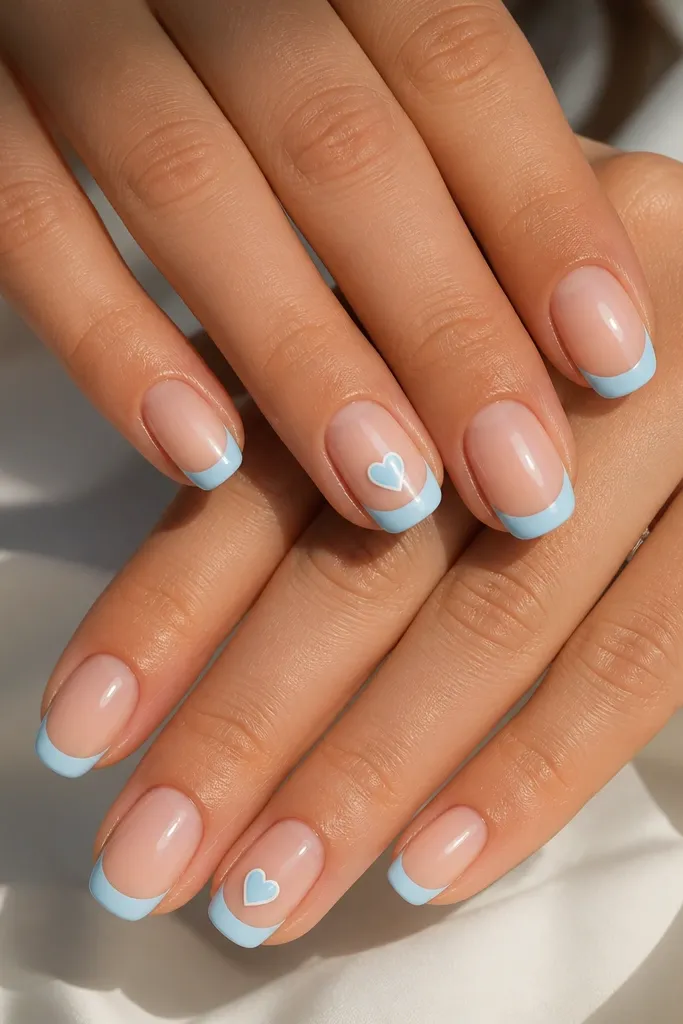
A single tiny heart makes the set feel sweet without turning it into cartoon nails. I place the heart near the smile line so it looks like it’s part of the French, not floating on top. This flatters hands because the accent draws the eye toward the center of your nail. If you wear rings, this also pairs nicely because the heart mirrors the shape and scale of jewelry details. Low-maintenance tip: the hearts are small enough that if they dull slightly, it still reads intentional.
Editor's noteUse gel paint for the heart, not polish — gel stays crisp and doesn’t smear when you swipe top coat over it.
Start with a nude base gel and cure. Paint baby blue French tips thin and even across all fingers. On ring fingers only, add a tiny white heart using a dotting tool, then outline it with a fine baby blue gel line. Cure and seal with top coat, keeping the heart covered so it doesn’t catch on fabric.
Watch outAvoid large hearts — they chip faster and make the manicure feel bulky on short nails.
10. Baby Blue French Tips With One Micro Rhinestone Line
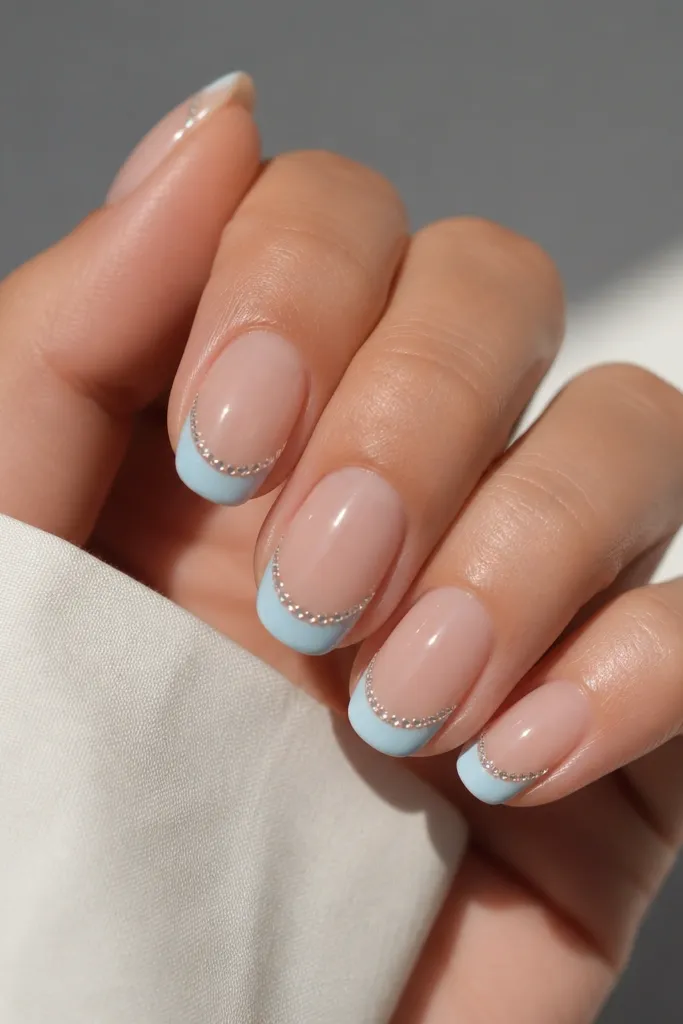
A single rhinestone line makes French tips look fancy even when the blue is simple. It works because the rhinestones sit on the brightest part of the nail — the smile curve — so your manicure catches light as you move. I like tiny stones in a straight line rather than clusters; straight looks cleaner and regrowth doesn’t make it look messy as quickly. This flatters almost everyone, especially if you have long fingers and want that “jewelry manicure” effect without painting complicated details. It’s also great for events because you get sparkle without adding more color.
Editor's noteIf your rhinestones keep sliding, chill them on a cold palette for 30 seconds before picking them up — they grip easier.
Paint your nude base gel and cure. Apply baby blue French tips thin and crisp. Before top coat, place tiny clear rhinestones along the smile line using rhinestone gel or a dot of clear builder gel; press gently so they sit flush. Cure, then apply top coat carefully over the stones in two thin layers so they don’t lift at the edges.
Watch outDon’t use large stones — they make the line look chunky and snag on sleeves.
11. Baby Blue French Tips With Negative Space Outline at the Sides
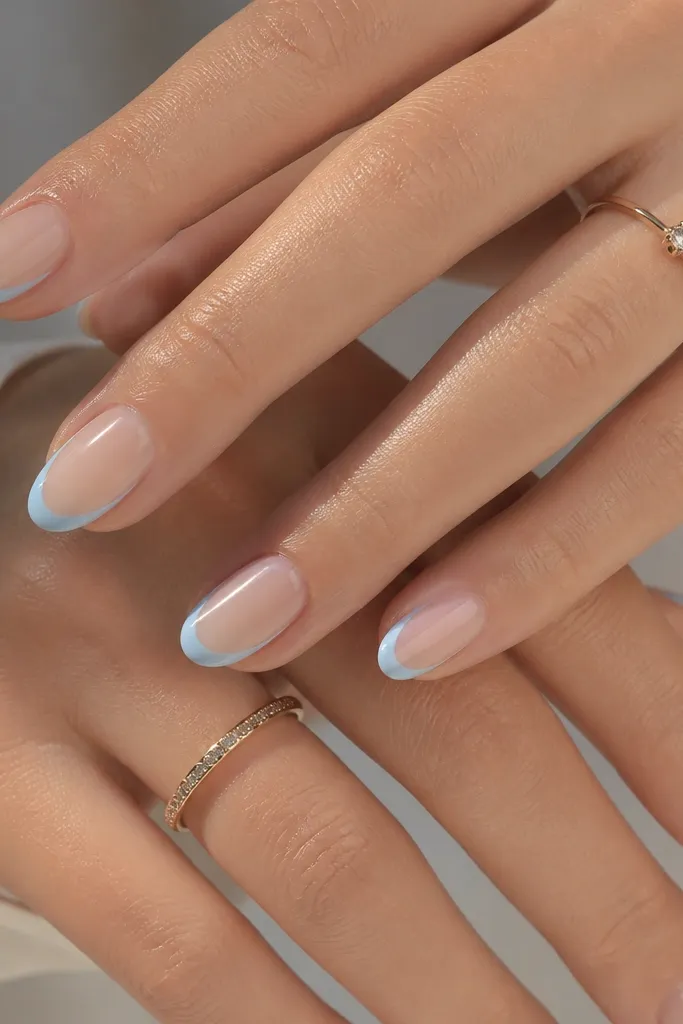
This is my favorite when you want French tips but your nails look slightly uneven at the sides. The baby blue covers the center and creates a subtle side outline, while the nude streaks keep the design from getting too wide. It makes fingers look longer and keeps the tip from looking like a block. The effect is especially flattering on hands with short nail beds because the negative space gives breathing room. It also hides small application differences because the nude streaks break up any tiny asymmetry.
Editor's noteKeep the side blue line about half the thickness of the center French line for a balanced look.
Use a sheer nude base gel and cure. Paint baby blue French tips across the center with a thin brush. Then, lightly drag the blue toward each sidewall just a little, stopping before the edge so nude streaks remain. Seal with top coat and cap the tip; run top coat along the side outline so the gel doesn’t lift.
Watch outAvoid filling the entire tip width — it makes the French look heavy and harder to maintain.
12. Baby Blue French Tips With Tiny Dot Fade on the Cuticle Side
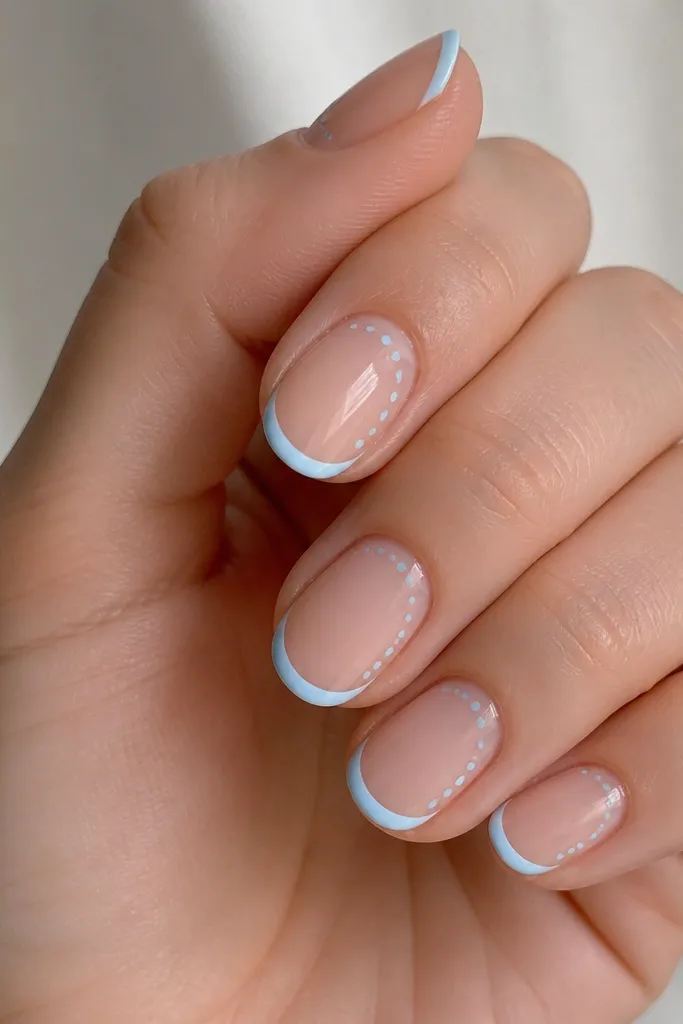
This is low-effort nail art that still looks styled. The dots are placed near the cuticle side, so they distract from any regrowth line and make the manicure look intentional. I like this on oval nails because the dots follow the natural curve and soften the overall shape. The baby blue stays consistent, so it doesn’t feel like extra colors are fighting. If you’re someone who hates bold art but wants something more than plain French, this is your sweet spot.
Editor's noteUse fewer dots than you think — 3 dots looks more high-end than a full line.
Start with a nude base gel and cure. Paint baby blue French tips thin and even. Using a dotting tool, add 3-4 tiny baby blue dots along one side near the cuticle, making the dot size smaller as you move down. Cure and apply top coat, keeping the dots sealed so they don’t snag.
Watch outDon’t put dots directly at the cuticle line — it can look like polish bleed when it grows out.
13. Baby Blue French Tips With Micro Glitter Top Only on the Smile
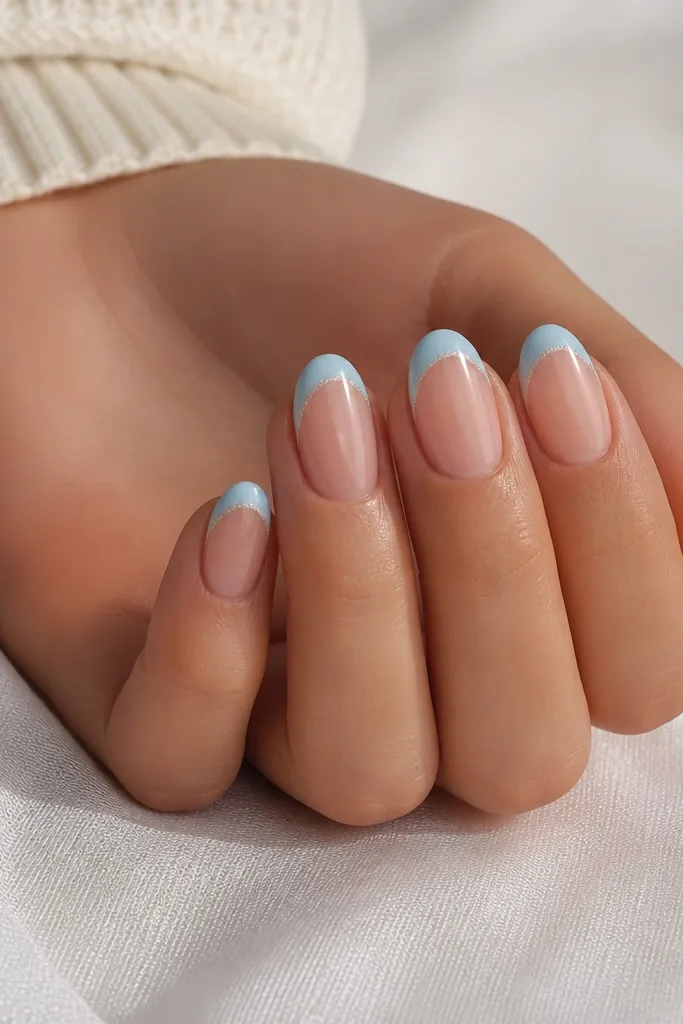
Micro glitter on only the smile curve turns a plain French into a “night out” manicure without making maintenance harder. The glitter hides minor dullness in the top coat and keeps the tip looking fresh as it wears. I use a fine glitter topper that doesn’t look chunky, and it stays controlled because it’s limited to the center smile. This flatters medium to deep skin tones because it adds light where your nails naturally draw attention. It also looks cute with gold or silver jewelry because glitter reflects both.
Apply nude base gel and cure. Paint thin baby blue French tips and cure. Then, use a small brush to dab a micro glitter gel topper only along the smile curve, about 1 mm wide, and cure. Finish with a clear top coat layer to smooth it out and cap the free edge.
If glitter looks too textured, add a clear gel smoothing coat over it before the final top coat.
Skip full glitter tips — they chip and grow out looking uneven.
14. Baby Blue French Tips With White Cloud Overlays on One Nail Per Hand
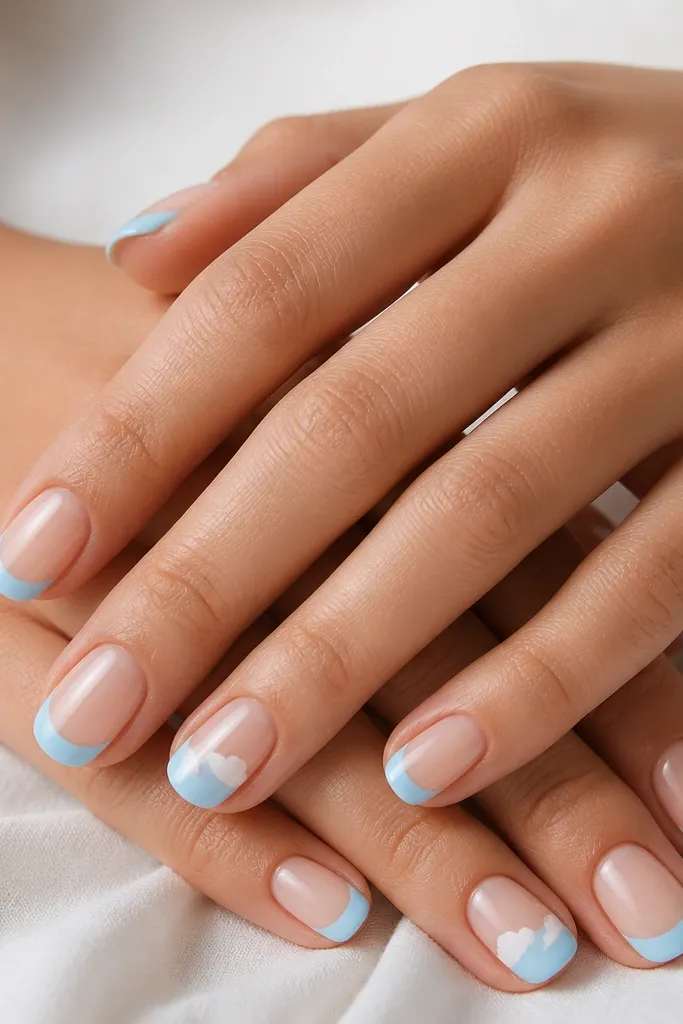
Cloud overlays make baby blue feel dreamy, but placing it on only one nail keeps it wearable. I like this for short-to-medium nails because the cloud puffs are scaled down and don’t overwhelm the nail bed. It flatters hands that look better with soft shapes than sharp lines. The cloud sits on top of the blue, so it hides tiny brush strokes and makes the accent look intentional even if it’s slightly imperfect. This is a good option if you want a playful look for weekends but still need it to pass at work.
Editor's noteUse a makeup sponge for the cloud edges — it makes the puffs look soft instead of painted hard.
Start with nude base gel and cure. Paint baby blue French tips thin and crisp on all nails. On the accent nail (ring finger or middle finger), paint small white cloud puffs across the lower half of the French area using a sponge or a cloud brush — keep them irregular but small. Add a clear top coat layer to smooth the clouds and cap the tip edges.
Watch outDon’t add clouds on every nail — it turns into a theme and makes touch-ups harder.
15. Baby Blue French Tips With Glossy Clear Base and No Nude Tint
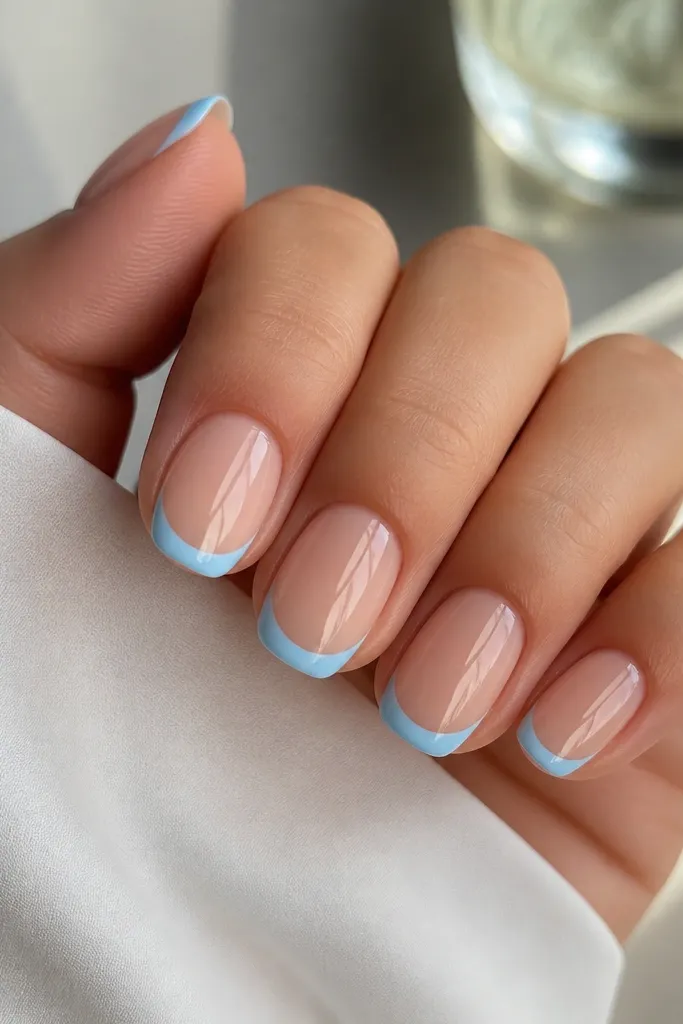
A clear glossy base gives the most “freshly done” look when your nails are already in decent shape. The baby blue line sits on top of your natural nail tone, so it reads clean and airy. This is flattering if your nail beds are naturally pink and you want the manicure to look light, not opaque. Because the base is clear, you can see the nail shape and it makes the French tip look more precise. Low-maintenance part: clear bases show less “masking” wear, and the French line stays the main focus.
Editor's noteIf the blue looks too stark on your nails, choose a slightly warmer baby blue instead of icy.
Buff and prep your nails, then apply a clear builder gel base in a thin layer and cure. Paint baby blue French tips with a fine brush, keeping the line about 1.5-2 mm wide. Cure and then apply top coat over the whole nail, making sure you cap the tip edge. If your natural nails are uneven in tone, add a second thin clear layer before painting the French so the blue looks consistent.
Watch outAvoid clear bases if your nails are stained — the blue will highlight the discoloration.
16. Baby Blue French Tips With Reverse Half-Moon Accent at the Side
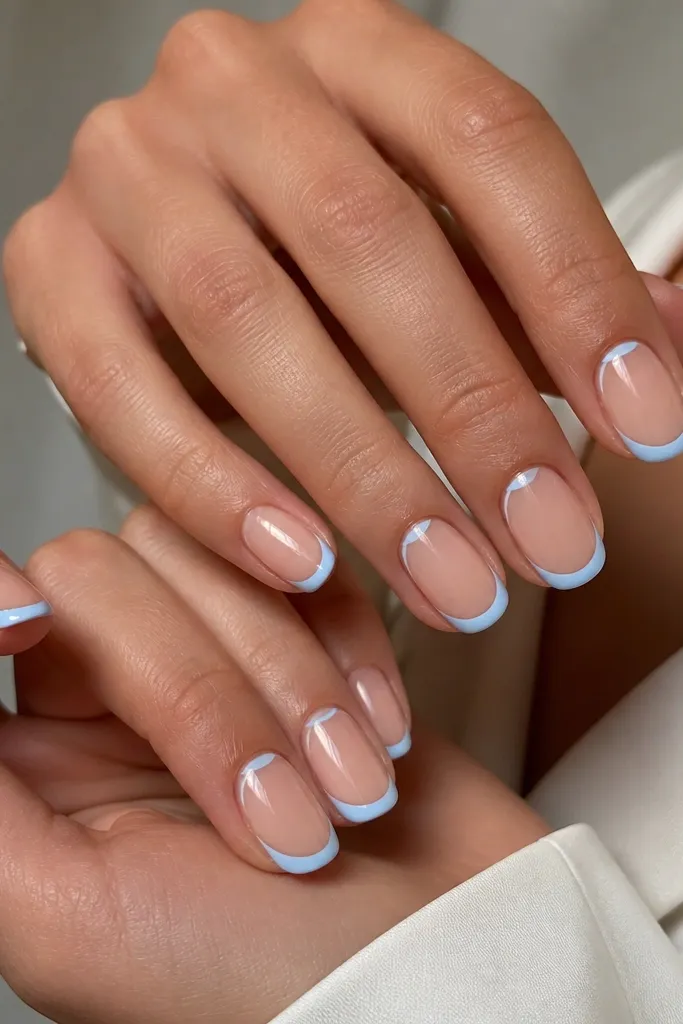
Reverse half-moons add a design element without turning the whole set into a full art manicure. The accent sits near the cuticle side, so it looks balanced with the tip and makes the nail look styled from every angle. I like this on oval or almond nails because the side placement follows the curve and keeps the design from looking like a random dot. The baby blue stays consistent, and the reverse shape makes the manicure feel unique even though you’re using the same colors. It’s also low-maintenance because the accent is small and easy to replicate on new sets.
Start with a nude base gel and cure. Paint baby blue French tips thin and even. On each nail, use a tiny brush to paint a reverse half-moon accent on one side near the cuticle, about the size of a small pea tip, then fill lightly. Cure and top coat, pressing the top coat around the accent so it seals.
Place the reverse half-moon slightly closer to the sidewall than the center — it looks more intentional and less like a mistake.
Don’t make the reverse half-moon too big — it competes with the French tip and looks busy.
17. Baby Blue French Tips With Diagonal Baby Blue Micro Lines
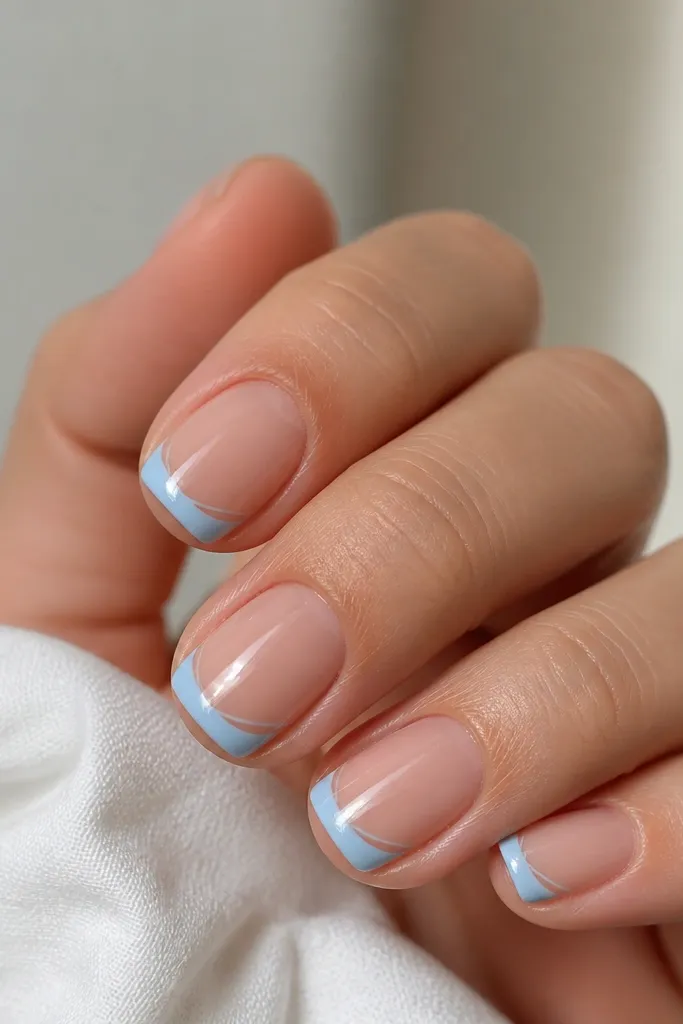
Diagonal micro lines make French tips look graphic but still simple. The lines add movement, and because they’re thin, they don’t require perfect symmetry to look good. This is especially flattering on short nails because diagonals trick the eye into length, and the French curve still anchors the look. I’ve seen this work beautifully on hands with bitten edges because the lines distract from small imperfections at the tip. It feels modern and clean, not artsy-chaotic.
Apply nude base gel and cure. Paint baby blue French tips with a standard smile curve, keeping the tip width around 2 mm. Then add one thin diagonal baby blue line on the French area using a striping brush, starting near the center and angling toward one sidewall. Add a second diagonal line only if your nail is wide enough; otherwise keep it to one. Cure and finish with a glossy top coat over everything.
If you want it extra low-maintenance, keep the diagonal lines the same angle on every nail so your set looks consistent even as it grows.
Avoid thick diagonal lines — they turn into a stripe and look like tape marks.
18. Baby Blue French Tips With Tiny Bow Charm Look (Painted)
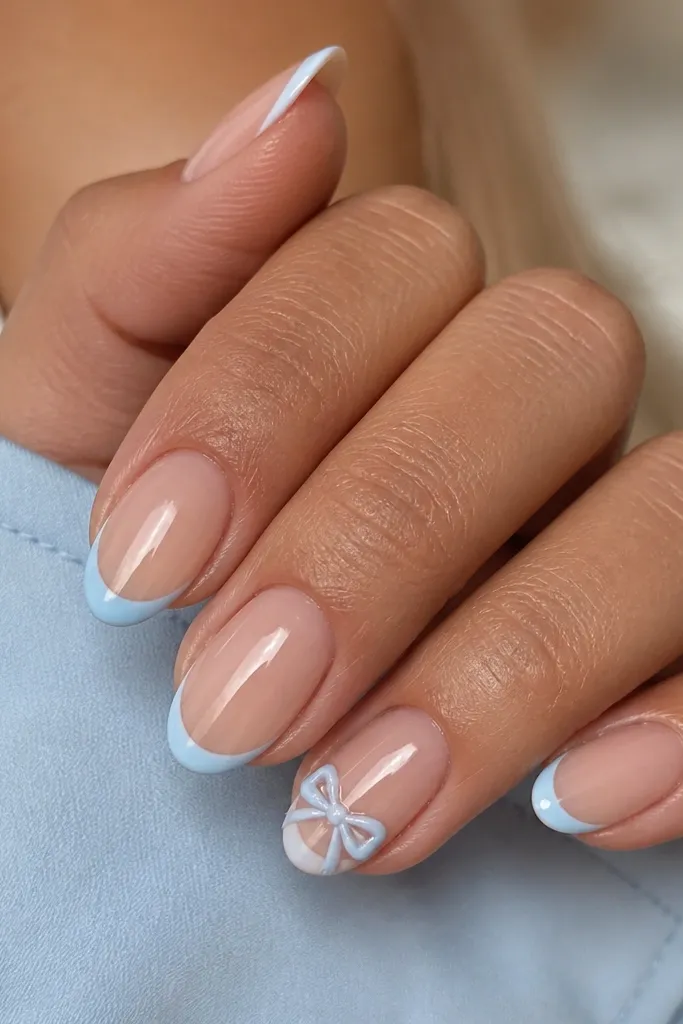
A painted bow gives you that “cute accessory” vibe without needing an actual charm that can snag. The bow sits near the smile curve, so it looks connected to the French tips and doesn’t feel pasted on. This flatters hands by adding shape near the tip, which draws attention away from cuticle dryness. I like it on short-to-medium nails because the bow can be scaled down and still read clearly. If you’re attending a bridal shower or a birthday dinner, this is an easy way to make baby blue feel special.
Editor's noteUse gel that self-levels for the bow center so it stays smooth instead of bumpy.
Start with a nude base gel and cure. Paint baby blue French tips thin and even. On the ring finger accent, paint two small loops for the bow using baby blue gel, then add a tiny white knot in the center. Add a thin clear gel layer over the bow to give a slight dome so it catches light. Cure and seal with top coat over the entire nail, paying attention to the bow edges.
Watch outDon’t make the bow wide — small bows look intentional, wide bows look like sticker art.
19. Baby Blue French Tips With Ombre Fade Into Nude
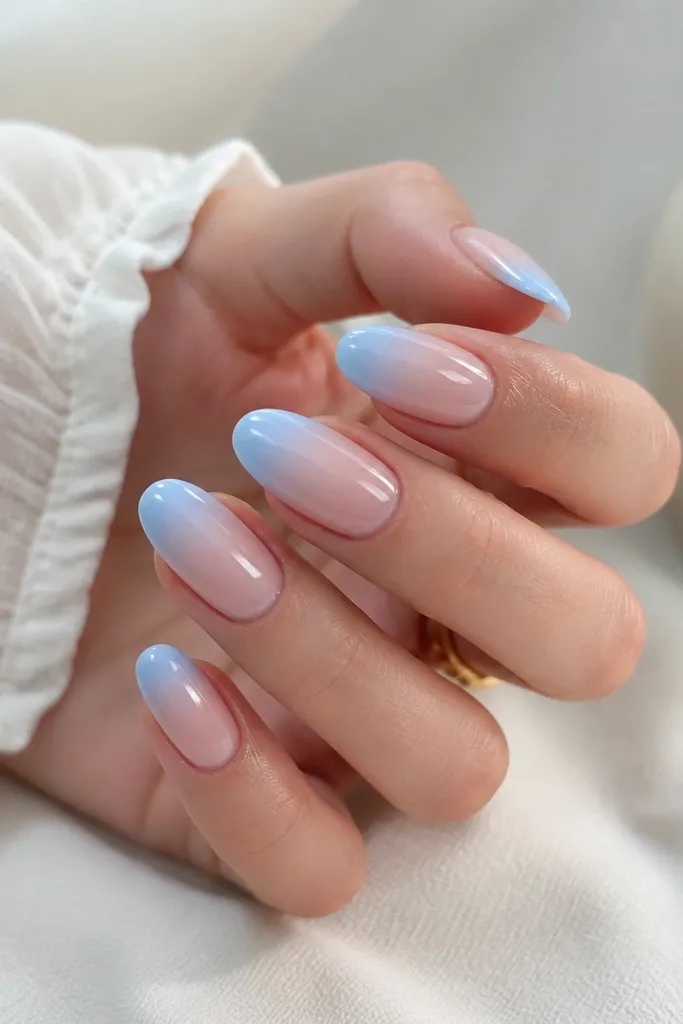
An ombre French is low-maintenance because the transition is forgiving. Instead of a hard border, the blue diffuses into the nude base, so regrowth doesn’t create a crisp line that looks messy. This flatters hands with dry nail texture because the gradient smooths the visual texture near the tip. I like it on oval nails and short almond shapes because the fade looks natural and elongating. The key is keeping the fade subtle — you’re not making a full ombre manicure, just a soft tip effect.
Apply a nude base gel and cure. Paint baby blue gel at the tip edge, then blend upward with a clean makeup sponge or an airbrush if you have one. Keep the blue strongest at the free edge and fade to almost nude by about 1/3 of the way up the nail. Cure and repeat if you need more opacity. Finish with glossy top coat and cap the free edge.
Blend on the nail, not on the palette — it gives you better control over how fast the color fades.
Avoid a high-contrast ombre — if the blue climbs too far up, it won’t look like a French tip.
20. Baby Blue French Tips With Micro Cuticle Line (Thin Detail)
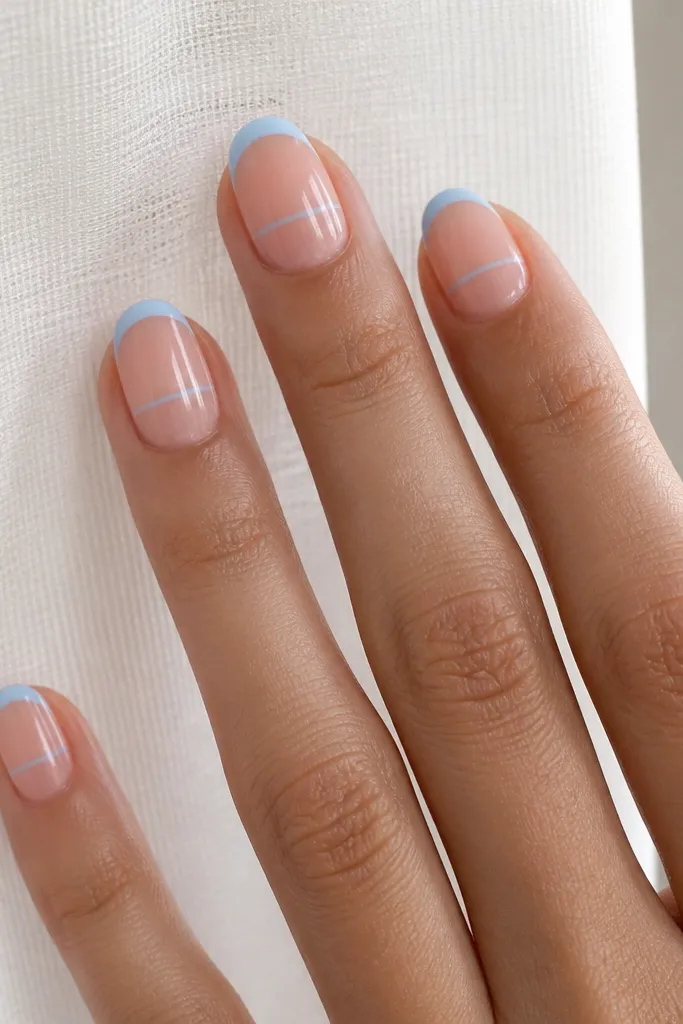
This is the kind of detail that makes French tips look “designer” without adding much work. The micro line near the cuticle gives your nails a framing effect, and it balances the tip color so the set looks intentional even when your nails grow. I like it on round and oval shapes because the line looks neat and clean. It flatters hands with smaller nail beds too, because the detail draws the eye to the center. Low-maintenance upside: if the line softens slightly over time, it still reads as a design, not a mistake.
Editor's noteUse a guide dot on each nail — place two dots where the line should start and stop, then connect them.
Start with a nude base gel and cure. Paint baby blue French tips thin and even. Using a striping brush, draw a straight baby blue line across the center of the nail about 2-3 mm below the cuticle, keeping it under 0.5 mm thick. Cure and top coat over it, making sure the top coat is smooth so the line doesn’t feel raised.
Watch outSkip a thick cuticle line — it can look like polish overflow.
21. Baby Blue French Tips With White Marble Vein Accent
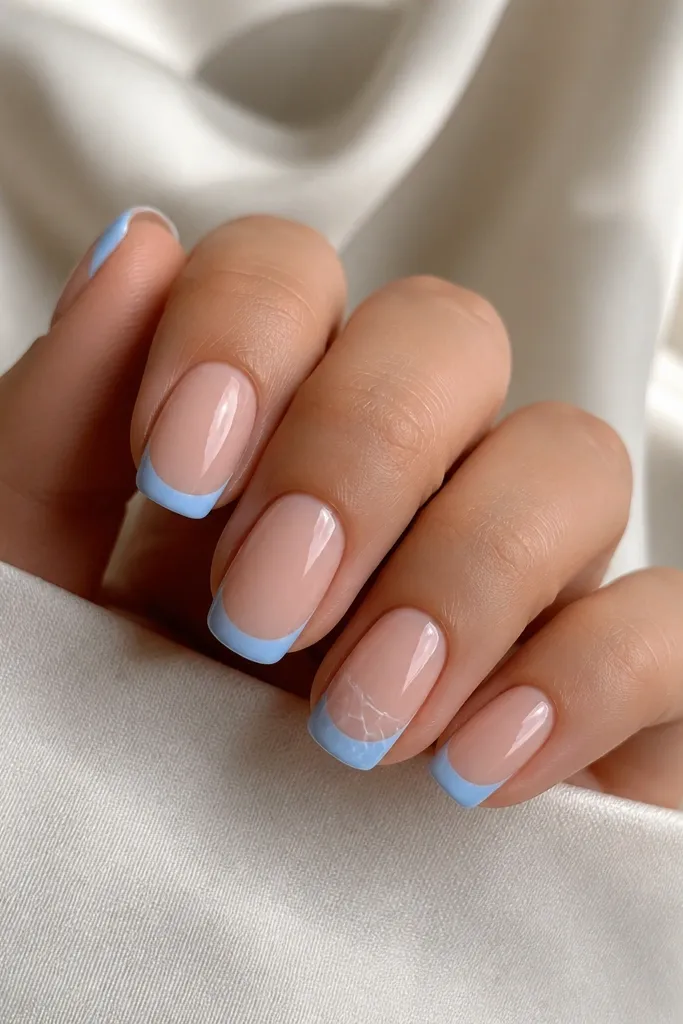
Marble accents make baby blue look elevated but still soft. I keep it to one accent nail so it doesn’t turn into full-on nail art that needs constant fixing. The white veins are thin and airy, which keeps the manicure looking light on short nails. This works well on fair and medium skin tones because the white lines contrast gently. If you wear lots of neutral outfits, marble gives you interest without changing your wardrobe. Low-maintenance part: marble hides tiny brush mistakes because veins look organic.
Paint nude base gel and cure. Apply baby blue French tips thin on every nail. On the accent nail, paint a milky white veil across the lower half of the blue, then drag a few thin white lines through it using a marbling tool or toothpick. Keep the veins random but spaced so they don’t blur. Cure and seal with glossy top coat in two thin layers to lock the marble texture down.
Do the marble after the blue is fully cured so the veins don’t muddy.
Don’t add thick marble patches — they look heavy and make the tip edge lift.
22. Baby Blue French Tips With Tiny Pearl Dot on One Corner
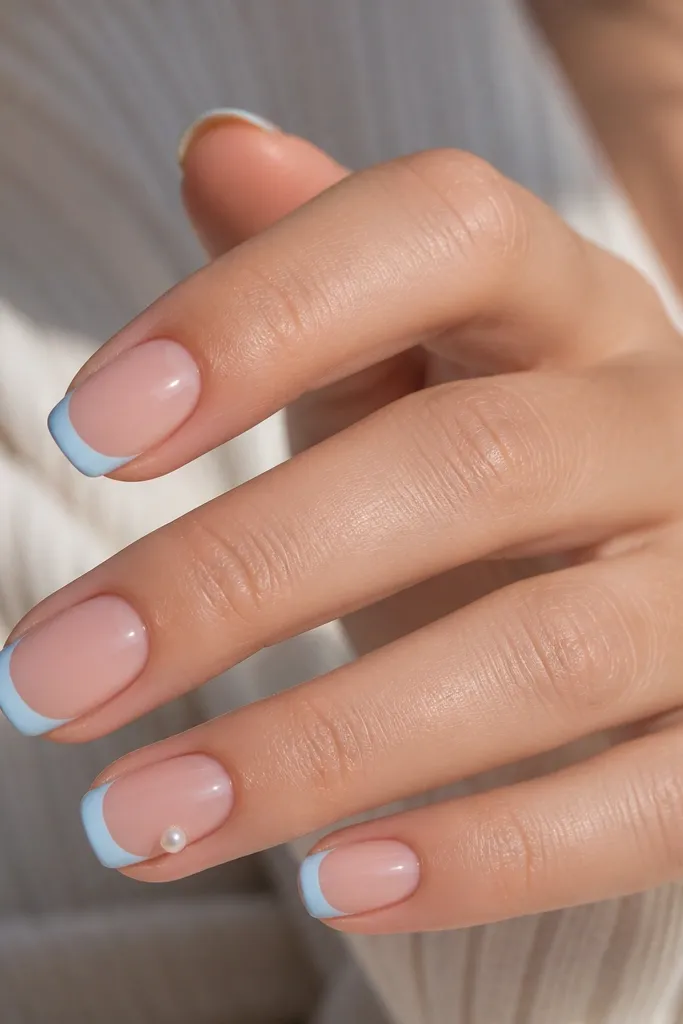
A single tiny pearl makes baby blue feel bridal without being formal. I place it on one corner of the smile curve so it looks like a highlight on jewelry, not a sticker. This flatters hands because it draws attention to the tip area, which is usually where nails look best. It also works on short nails because the pearl is small enough to stay secure and not overpower the shape. If you’ve got a ring you love, this pearl pairs nicely and makes your manicure look coordinated.
Editor's noteIf you’re using real pearls, rough up the underside lightly with a fine file so the gel grips better.
Do your nude base gel and cure. Paint baby blue French tips thin and crisp. On the ring finger accent, place one tiny pearl or pearl-like dot near the smile curve on a side corner using rhinestone gel or a dab of clear builder gel. Cure and then apply top coat, making sure the pearl is fully sealed so it doesn’t catch on fabric. Cap the free edge once more for extra durability.
Watch outAvoid multiple pearls — three or more starts to look crowded on a French tip.
23. Baby Blue French Tips With Clear Jelly Top Over the Tips
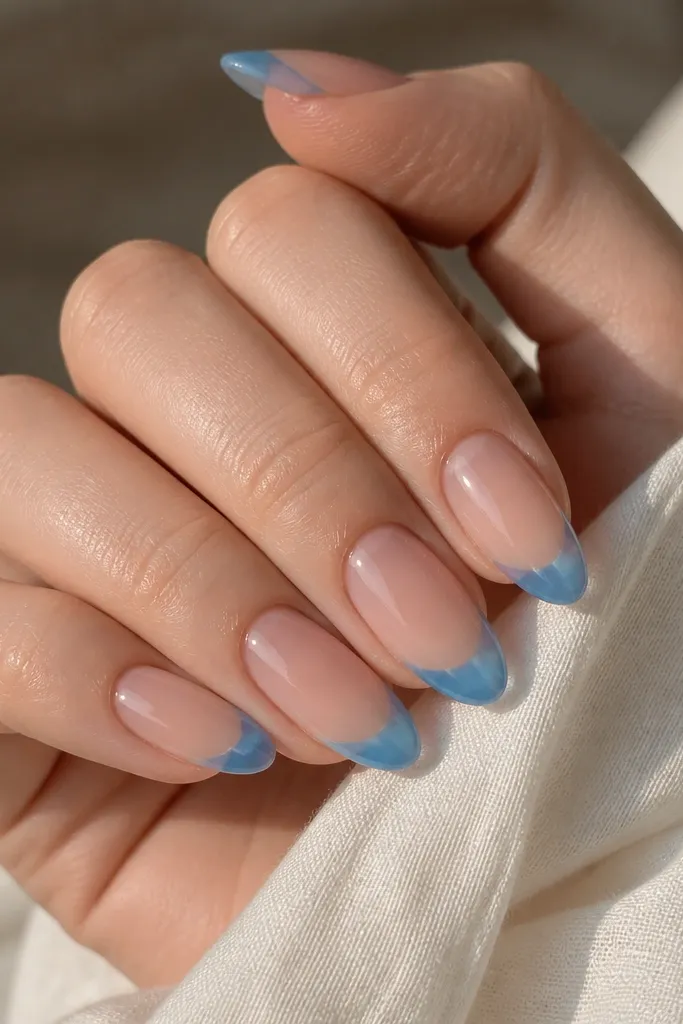
Jelly top makes baby blue look softer and more dimensional, and it’s low-maintenance because it smooths the surface. The blue stays bright, but the jelly finish makes the tip edge less harsh as it grows out. This is flattering if you like a “glossy nail salon” look and you don’t want a thick opaque tip. It also works great for medium skin tones because the jelly adds a glow effect rather than sharp color blocking. When your top coat wears down, the jelly still keeps the tips looking smooth.
Apply a nude base gel and cure. Paint baby blue French tips slightly thinner than usual so the jelly layer doesn’t look too thick. Cure, then apply a clear jelly gel over just the French tip area, extending it a tiny bit over the smile curve. Cure again and finish with a regular top coat over the whole nail for overall shine and to seal the edges.
Keep the jelly layer thin — one thick coat can look uneven around the smile curve.
Don’t skip sealing the sidewalls — jelly layers can lift if the edges aren’t capped.
24. Baby Blue French Tips With Glitter Cuticle Halo (Micro Amount)
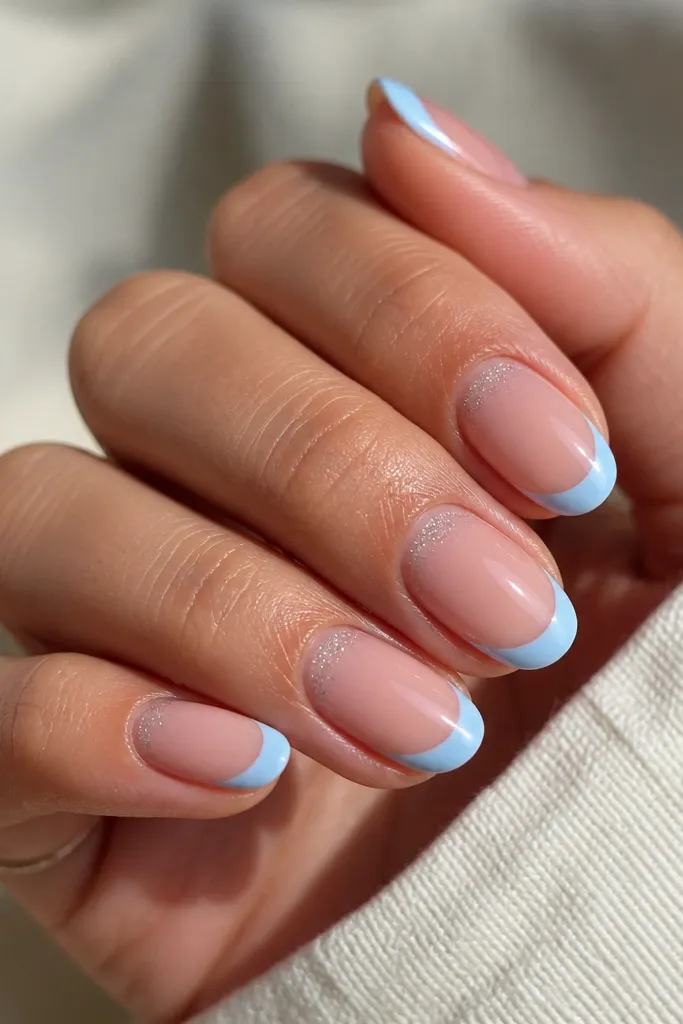
A tiny glitter halo near the cuticle makes the manicure feel polished even if your hands get lots of wear. It also hides the moment when the cuticle line grows out, because glitter draws attention and blends the transition. I keep the halo micro — just a thin ring — so it doesn’t look like you dusted the whole nail. This flatters almost every nail shape, especially if your cuticles are dry or your nail bed is slightly uneven. The blue tips stay the hero, and the halo adds sparkle in a controlled way.
Editor's noteUse a dotting tool to place glitter — it gives you a round halo instead of a scattered mess.
Start with a nude base gel and cure. Paint baby blue French tips thin and even. Apply a small amount of fine micro glitter gel around the cuticle, leaving a clean margin so it doesn’t flood onto skin. Cure and then top coat over the nail, making sure the glitter area is sealed smoothly. Cap the free edge of the tips to keep the French line from peeling.
Watch outAvoid getting glitter onto the skin — it lifts faster and makes the grow-out look messy.
25. Baby Blue French Tips With Thin Outline Only on the Edge
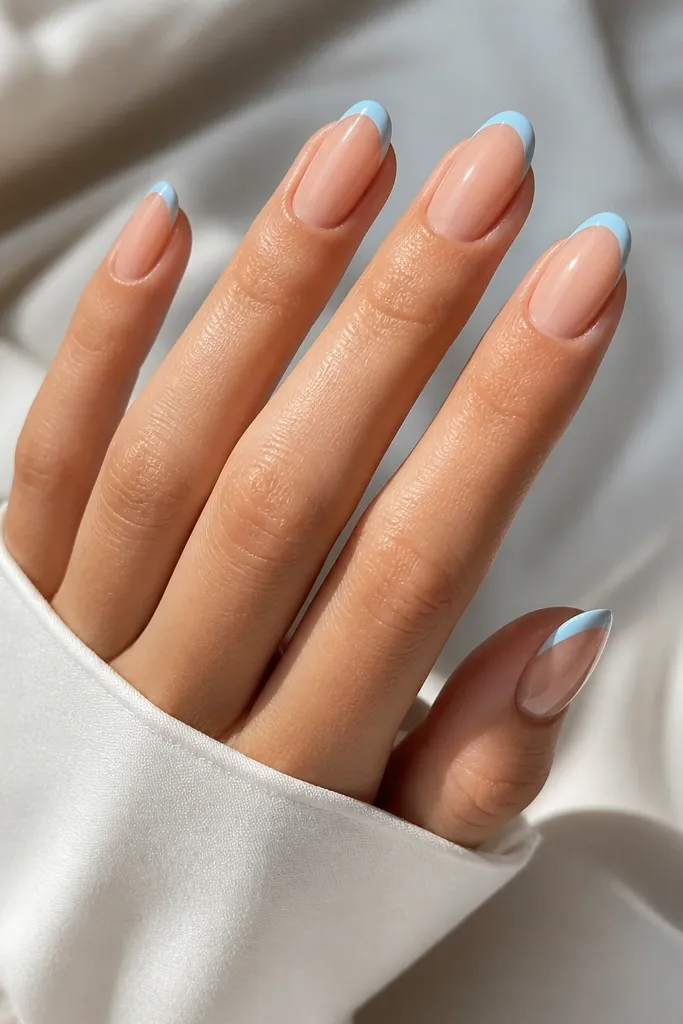
This is the most low-maintenance French look when your nails are short and you don’t want pigment on the whole tip. Baby blue only outlines the smile curve, so you’re using less color and less gel — which means fewer places to chip. It flatters short nails because it keeps the tip light and visually expands the nail bed without adding bulk. I also like it for hands where the nail surface is slightly uneven; outlining only the edge hides small dips. It’s clean, graphic, and it grows out without turning into a thick border.
Editor's noteIf you struggle with shaky lines, practice on one nail first — once you get the curve, replicate on the others.
Apply a nude base gel and cure. Paint the French smile curve outline with baby blue gel, keeping the outline line thickness under 0.5 mm. Leave the center of the tip nude so the design stays airy. Cure and then apply top coat over everything, sealing the outline into the gel so it doesn’t lift at the edges. Cap the free edge with clear top coat for durability.
Watch outAvoid filling the center with blue — outline-only is the part that keeps it low-maintenance and light.



