
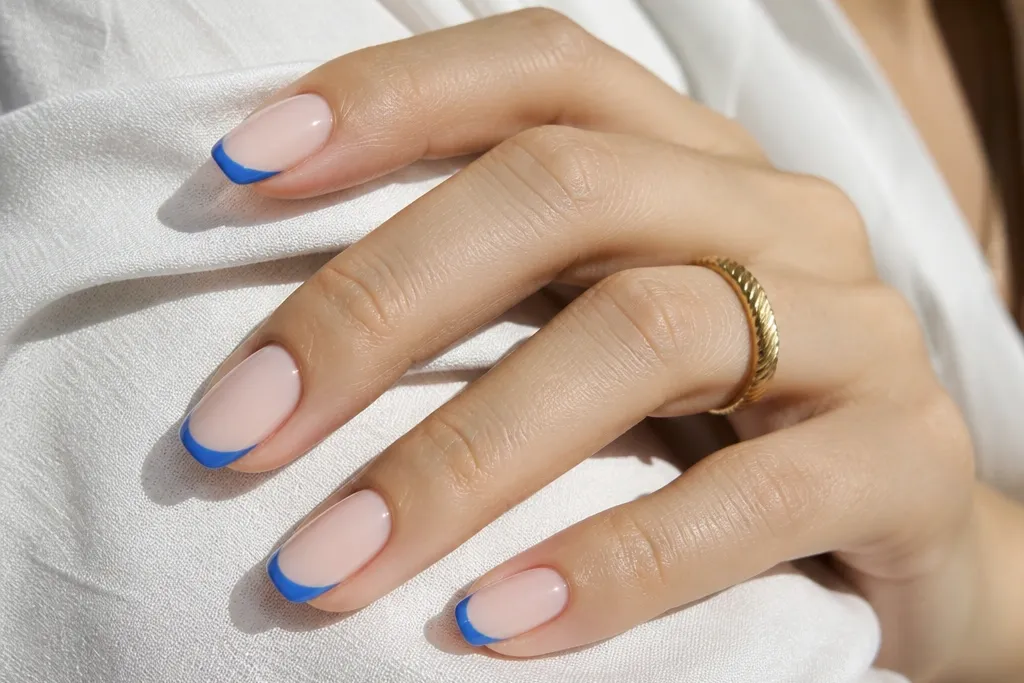
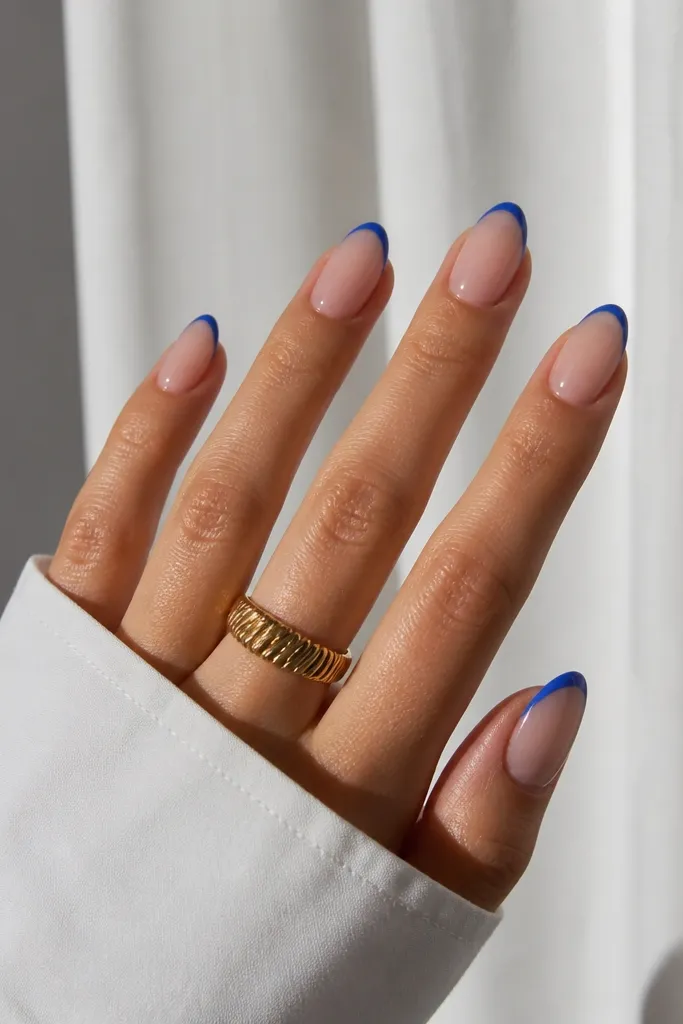
1. Micro Cornflower French on Short Squoval
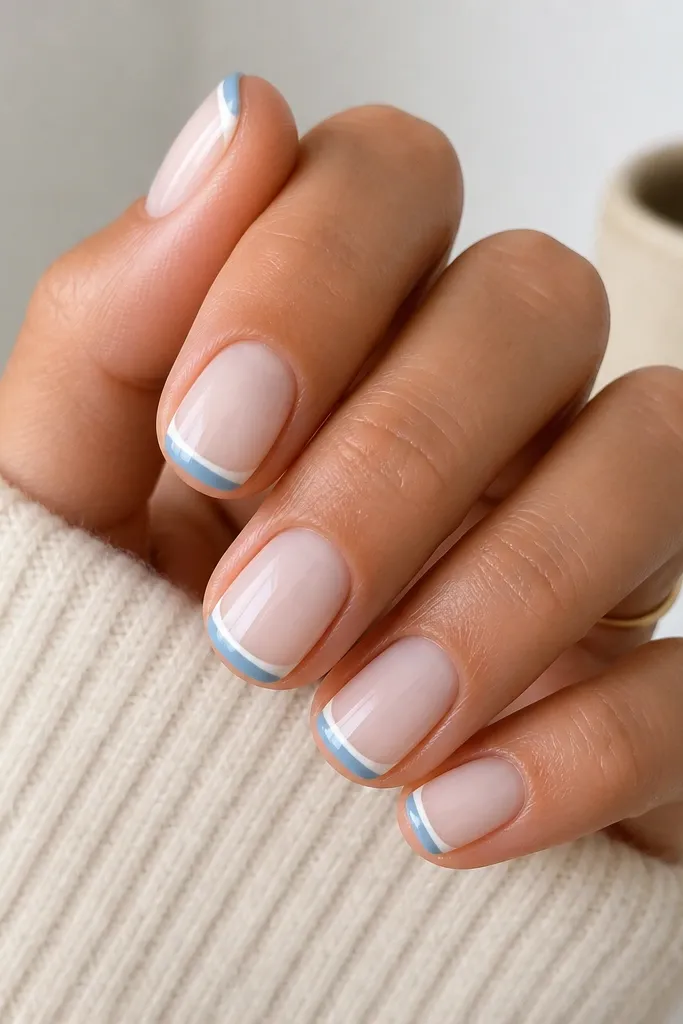
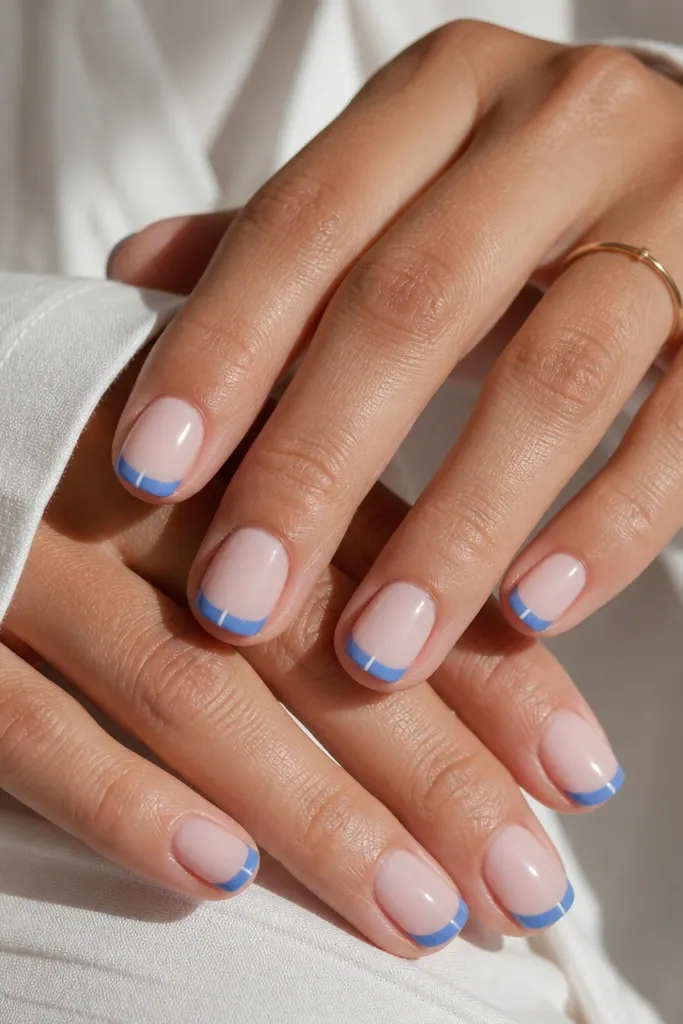
This look is for when you want blue French tips but you still want your nails to look “put together” instead of loud. The base is a milky nude sheer, so your nail beds show through and the blue stays clean and airy. The cornflower blue tip is kept narrow, about 1.5-2 mm at the widest point, which makes it feel modern and minimalist. The thin white line under the blue adds dimension without turning into a chunky accent.
Start by filing your squoval tips so the corners are softened but still defined. Apply a milky nude sheer gel and cure fully. Paint a micro French tip in cornflower blue — keep the smile line crisp and make the widest part near the center. After curing, add a thin opaque white line right under the blue edge on each nail, then seal with a high-gloss top coat.
Use tape or a French guide if your smile line tends to drift; pull the guide before curing so the edge stays sharp.
Avoid a thick blue tip or you’ll lose the modern minimalist look.
2. Cozy Milky White Base with Sky-Blue Half Smile
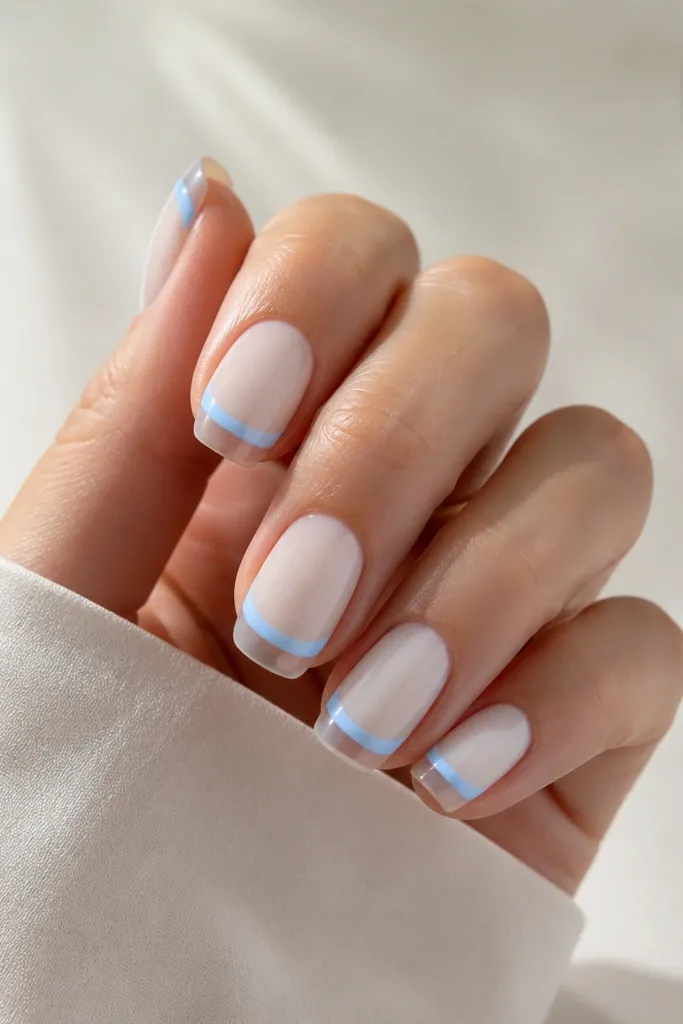
This one reads cozy because the base is milky and opaque, but it stays modern because the blue is limited to a half-smile arc. The sky-blue arc creates a soft curve that flatters fingers that look a little flat — the arc lifts the eye upward. I like it on medium-short lengths because the open space makes the nails look longer. It also looks great on warmer undertones because the milky white neutralizes yellowing.
Start with a milky white base — apply two thin coats so it looks smooth, not chalky. Cure each coat. Then paint a sky-blue half smile arc across the top edge of the nail, leaving the lower free edge without blue. Finish by tracing the arc edges with a tiny white line if you want extra crispness, then seal with a glossy top coat.
Editor's noteIf the milky white looks streaky, use thinner coats and cure longer — 60 seconds per layer usually fixes it.
Watch outSkip painting the entire tip blue; that turns it into a plain French instead of this airy half-smile.
3. Navy Micro Tips with One White Dot Accent
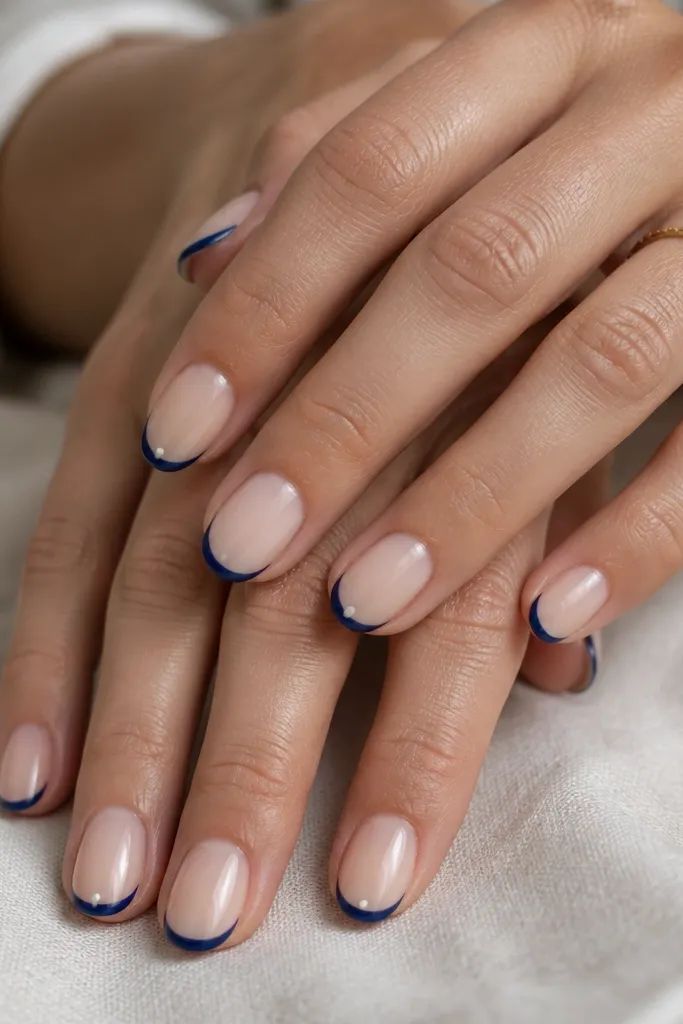
Navy makes minimalist French tips feel more grown-up, and micro tips keep it from looking heavy. The single white dot is small enough to feel intentional, not decorative. This is the design I reach for when I want something clean for work but still cute for nights out. The dot placement near the outer edge visually lengthens the nail bed, which is flattering if your nails are naturally short.
Apply a sheer nude base and cure. Paint navy micro French tips with a thin brush — keep the smile line sharp and the tip width about 1.5-2 mm. Cure and check for evenness under a lamp. On the ring fingers only, place one tiny opaque white dot about 1 mm from the outer corner on top of the navy tip. Finish with a glossy top coat to lock everything in.
Editor's noteUse a dotting tool with a smaller ball than you think — the dot should be the size of a pinhead.
Watch outAvoid putting dots on every nail; it stops reading minimalist fast.
4. Blue French with White "Smile Shadow" Line
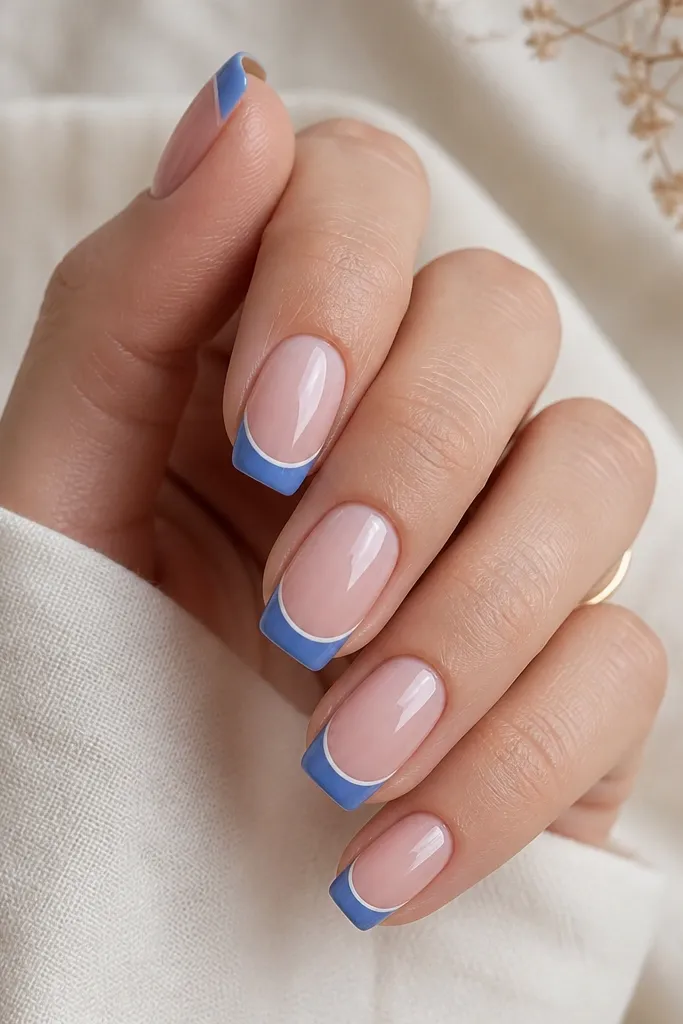
This look is modern because the white line is placed like a shadow — it defines the curve without adding extra shapes. The medium cornflower blue tip gives you that classic French polish, while the white line makes the smile line look sharper and more expensive. It flatters most nail beds because it adds structure right where your eye naturally looks. If your nails stain easily, the sheer pink base helps keep things bright.
Start with a sheer pink base and cure. Paint the cornflower blue French tip with a smooth arc; keep the tip width around 2.5-3 mm for squoval. Cure and wipe tacky residue if your gel system requires it. Then use a liner brush to draw a thin white line right under the smile line, tracing the curve. Seal with a glossy top coat.
Editor's noteFor a clean shadow line, let the blue fully cure and harden before you draw the white — it won’t smear.
Watch outDon’t make the white line thick; a thick line looks like a second French tip.
5. Glazed Blue Tips on Sheer Nude Almond
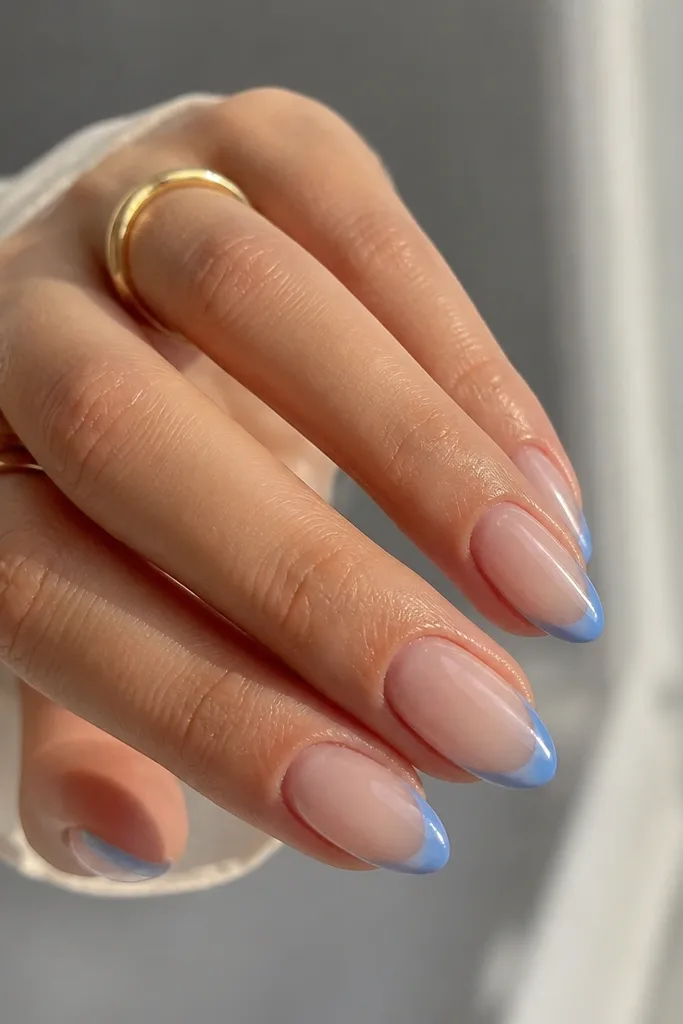
This is the “cozy but fancy” version of minimalist French tips. The glazed effect comes from layering blue tones — a lighter blue in the center and a darker blue at the edges. It looks soft and dimensional instead of flat, and the glossy top coat makes the surface look like glass. Almond nails benefit because the curved shape pairs well with a gradient that follows the tip arc. It’s a great choice if you want blue tips that don’t look too flat on camera.
Apply a sheer nude base and cure. Paint the French tip with a light blue first, keeping it within the smile line. Then, before curing the final layer, add a thin ring of darker blue along the outer edge and near the center curve. Cure fully, then top coat with a thick glossy layer for the glazed look. If you see streaks, do a second top coat rather than repainting the blue.
Editor's noteUse a gel that self-levels — it makes the gradient look smooth without extra blending.
Watch outAvoid using matte top coat on this design; it kills the glazed effect.
6. White Base with Cornflower U-Shaped Tip
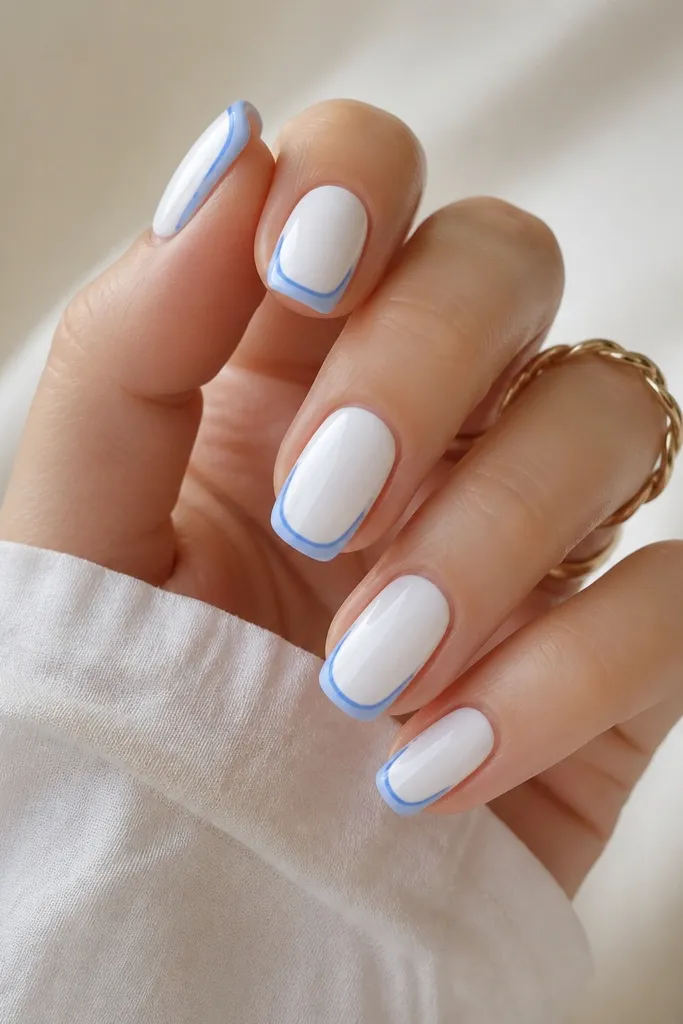
If you love clean contrast, this one is for you. The opaque white base makes the cornflower blue outline pop, while the U-shape gap keeps it airy and modern. It looks great on short to medium nails because the open interior makes the nail look longer and less crowded. This design also hides minor nail ridges because the white base is solid and smooth.
Start by applying two thin coats of opaque white base, curing each. Once fully cured, paint a U-shaped cornflower blue outline that hugs the tip curve but leaves the inside area white. Keep the outline thickness around 1.5-2 mm. Cure and inspect from the side to ensure the outline is even. Finish with glossy top coat to smooth out the edges.
Use a liner brush and rest your hand on a table so the U shape stays symmetrical.
Don’t fill the entire tip blue; the open U shape is what keeps it minimalist.
7. Blue Tips with Micro White Corner Lines
This design adds a crisp, graphic detail without adding bulk. The micro white corner lines create a subtle “frame” effect, which makes the blue look intentional and neat. It flatters short square nails because it balances the width of the square shape. If you wear bold rings, this style keeps your nails interesting while still reading minimalist.
Apply a sheer nude base and cure. Paint narrow cornflower blue French tips with a thin smile line, about 1.5-2 mm wide at the center. Cure. With a liner brush, draw two micro white lines at the outer corners of the blue tip — each line should be about 1 mm long. Seal with glossy top coat.
Editor's noteIf corner lines wobble, place the brush down lightly and pull — don’t drag across the blue.
Watch outAvoid thick corner lines; they turn into a chunky accent quickly.
8. Satin Sky-Blue French on Milky Nude
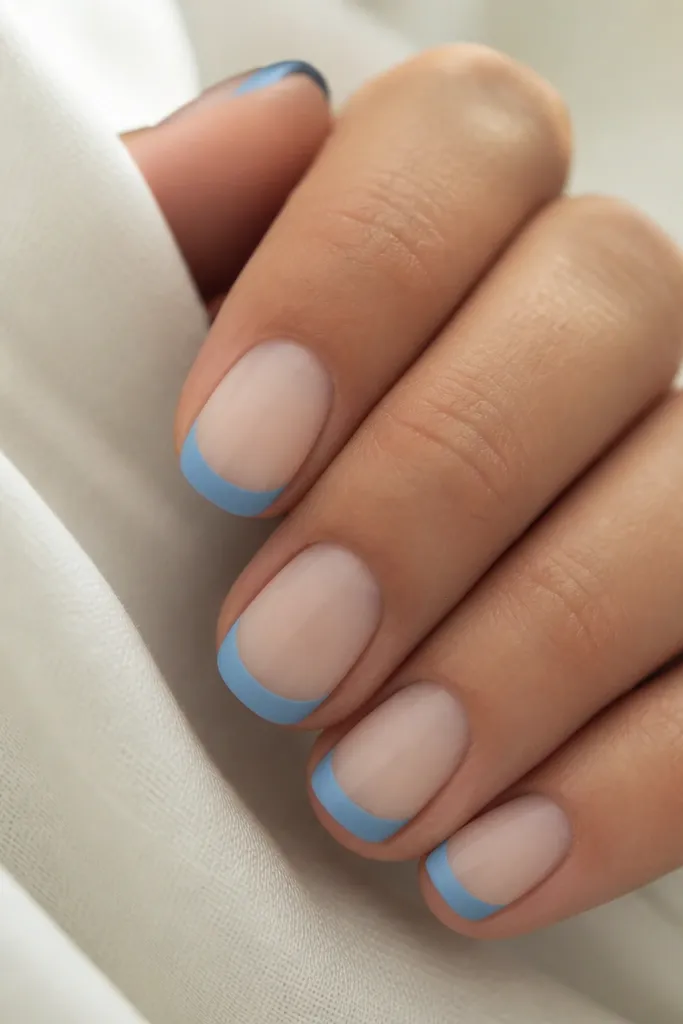
Satin finish makes even a simple French tip feel cozy. The sky-blue is lighter and looks calm against a milky nude base, which keeps the design wearable. On my hands, satin makes the blue look less loud and more “soft morning” than “bright day.” This is perfect if you want minimalist nails that don’t scream for attention in photos.
Start with milky nude base and cure. Paint sky-blue French tips with a narrow width of about 2-2.5 mm for squoval. Cure and wipe if needed. Apply a satin top coat only over the blue tips — you can keep the base area glossy if you like contrast. Cure again and check the surface under light so it doesn’t look patchy.
Use a satin top coat designed for gel systems; regular matte top coat can look dusty on blue.
Skip full satin on every layer if your polish chips — satin shows wear sooner than gloss.
9. Classic Blue French with Thin White Border
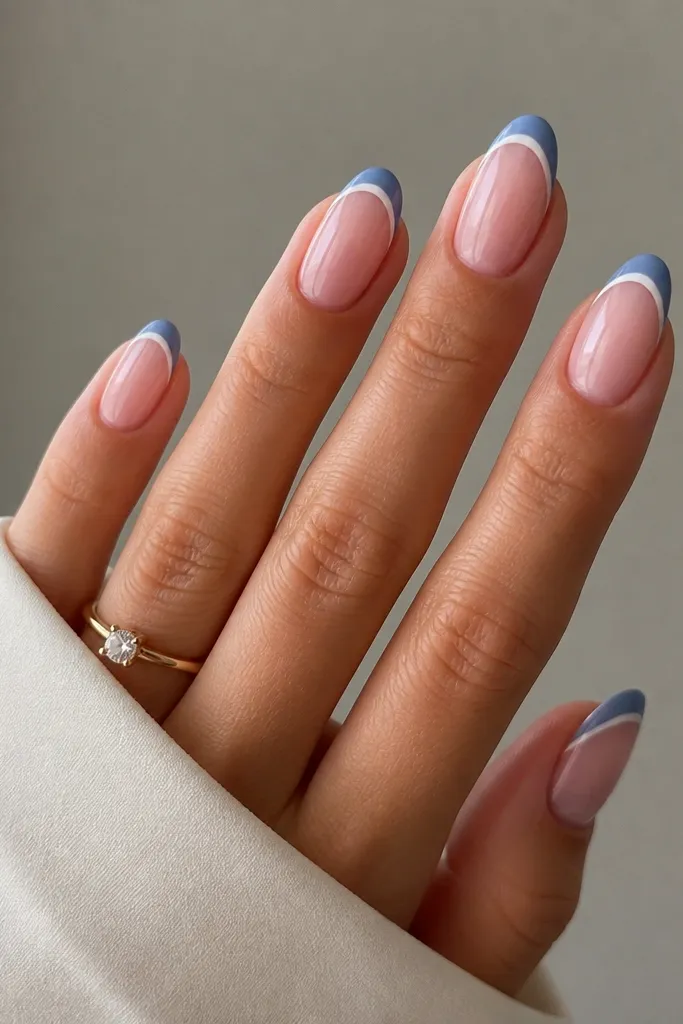
This is the cleanest “classic meets modern” combo. The blue tip stays classic in shape and coverage, and the thin white border along the inner edge sharpens the curve. It flatters hands with longer nail beds because it frames the tip area. I also like it on medium almond because the inner border follows the almond curve and looks balanced.
Apply sheer pink base and cure. Paint the blue French tip in a classic shape, about 3 mm at the widest point on medium almond. Cure fully. Then draw a thin white border along the inner edge of the blue tip — don’t paint over the whole tip, just outline the inside curve. Seal with glossy top coat.
Editor's noteOutline first with white, then fill the blue only if you’re using gel — it keeps the border crisp.
Watch outDon’t overfill the white border; thick borders look like a two-color French instead of a refined frame.
10. Two-Tone Blue Fade French on Short Almond
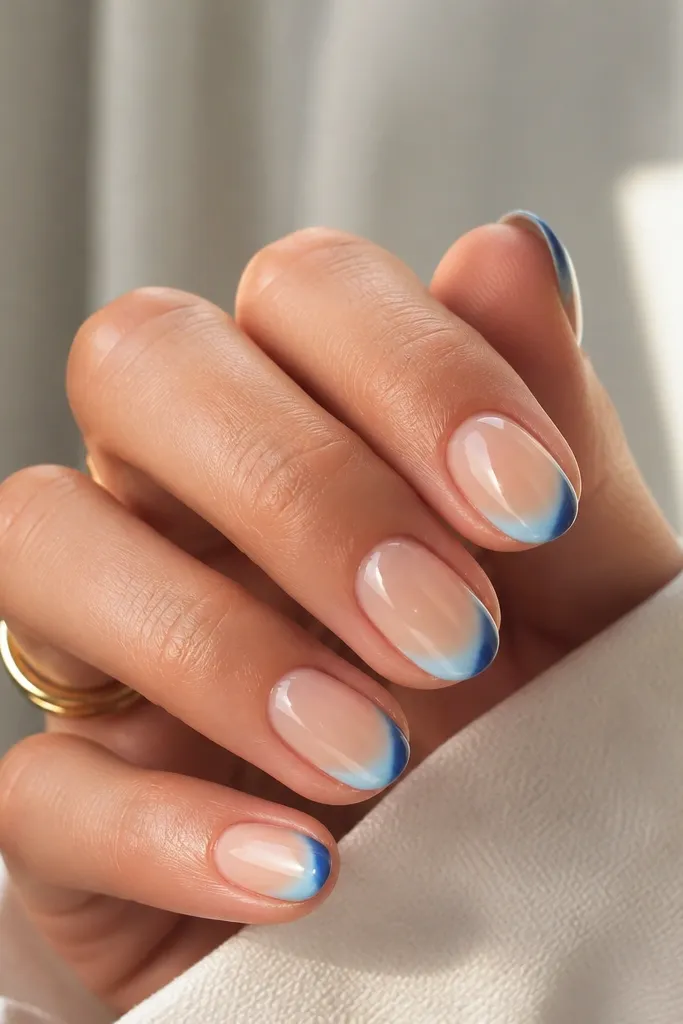
A two-tone fade makes French tips look more expensive without adding extra shapes. The lighter baby blue in the center gives a fresh, open look, while the deeper blue at the outer edges adds structure and makes the nail look slimmer. This works especially well on short almond because the fade follows the curvature and visually elongates. If you hate thick lines, this is your minimalist answer.
Prep and apply a sheer nude base. Paint the tip area with baby blue first, keeping it centered. Add deeper blue at the outer corners and slightly blend toward the center with a clean brush edge — keep the blend subtle. Cure, then top coat with high gloss. If you want extra crispness, add a thin white line at the smile line after the blue cures.
Editor's noteBlend with the very edge of the brush — heavy blending makes the tip look cloudy.
Watch outAvoid using too many layers of gradient; it can make the tip bulkier than you want.
11. Blue French with White Micro Waves on Ring Fingers
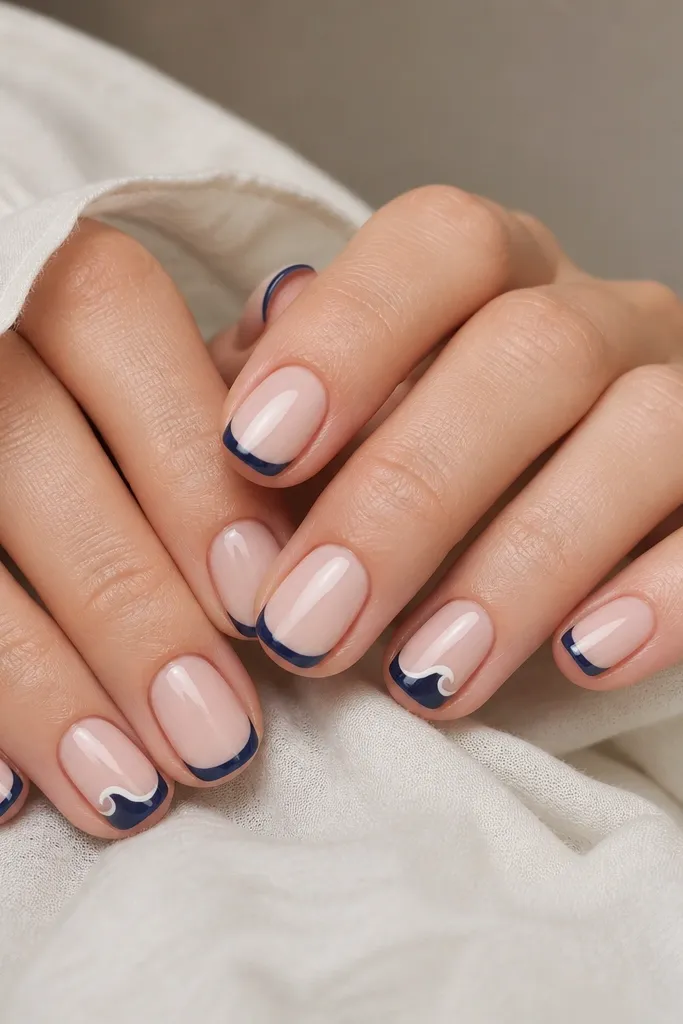
This is minimalist with personality. The base design is pure navy micro French, but the ring fingers get tiny white wave details that look like a soft winter pattern. It flatters because the waves are small and only on two nails, so your other nails stay clean. I like this for cozy weekends because it feels playful without turning into nail art chaos.
Apply sheer nude base and cure. Paint navy micro French tips, about 1.5-2 mm wide, and cure. Draw a thin white line under the smile on every nail. On the ring fingers, replace the straight white line with micro waves — each wave should be about 0.5-1 mm tall. Seal with glossy top coat.
Editor's notePractice the wave stroke on a paper towel first so you get the rhythm before touching the nail.
Watch outDon’t add waves on every nail; it stops reading minimalist fast.
12. Powder Blue Tips with Negative Space Center
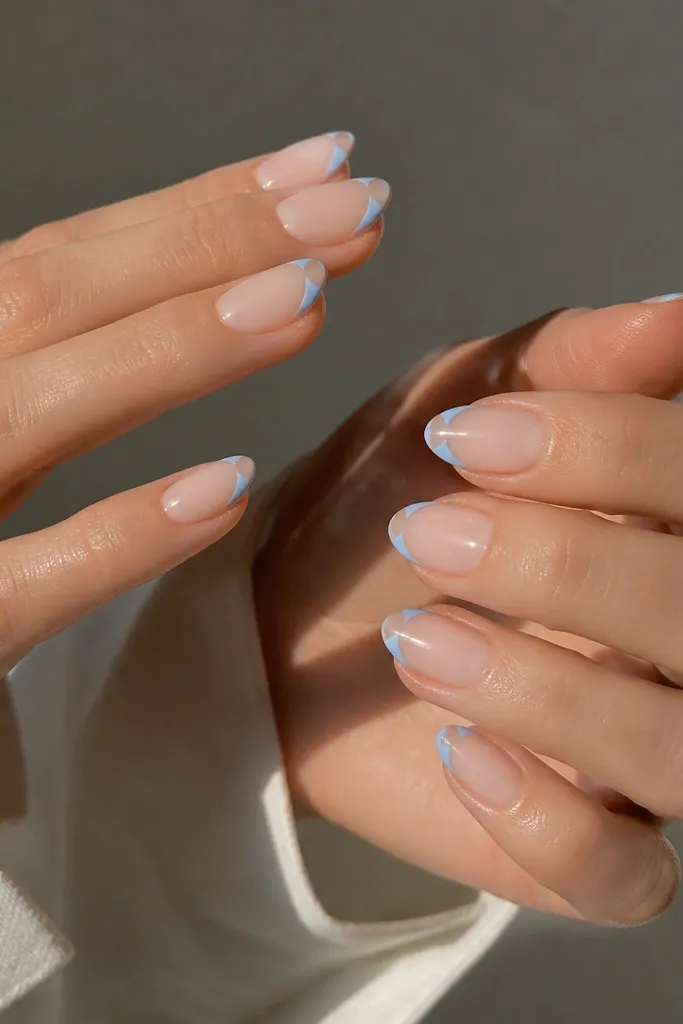
Negative space is the secret weapon for modern minimalist nails. The powder blue is painted along the sides and top curve, but the center stays nude, which makes the nail look longer and slimmer. This is flattering on hands with wider nail beds because the nude center visually narrows the shape. It also looks good with any skin tone since the negative space keeps everything light.
Apply sheer nude base and cure. Paint powder blue along the outer edges of the tip and along the smile line, leaving a small oval gap in the center. Keep the gap about 1 mm wide on short nails. Cure and check symmetry. Optionally add a thin white outline along the smile line for extra definition, then top coat glossy.
Editor's noteUse a small brush and steady hand — the negative space edges should be clean, not feathered.
Watch outAvoid smudging the edges into the nude base; it reads messy instead of intentional.
13. Blue French with Mini White Star at Cuticle Side
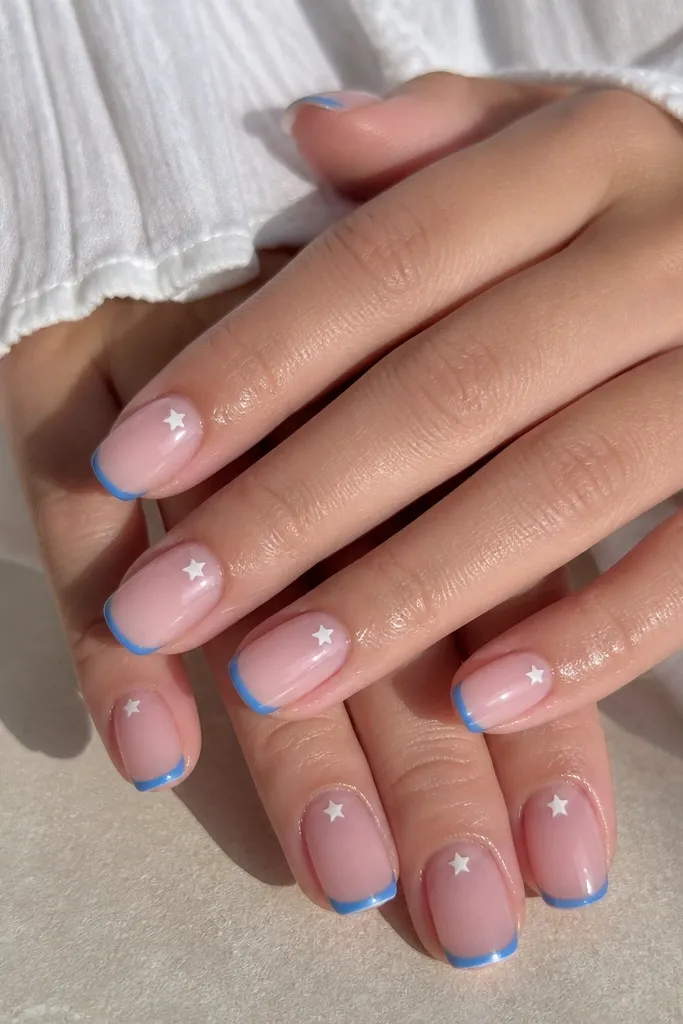
A micro star turns minimalist French tips into something you can wear on dates, not just errands. The star placement near the cuticle balances the tip color and keeps your eye moving upward. It flatters shorter nails because the star draws attention toward the upper half of the nail bed. I use opaque white for the star so it looks crisp against the sheer base.
Apply sheer pink base and cure. Paint narrow blue French tips, about 2-2.5 mm at the widest point. Cure and wipe if needed. With a liner brush, paint a tiny opaque white star on each nail near the cuticle, placing it slightly toward the outer side. Seal with glossy top coat and cure fully.
If you can’t hand-draw a star cleanly, use a dotting tool for the points and connect them lightly.
Avoid a large star; it will overpower the minimalist French.
14. Monochrome Navy French with One White Stripe
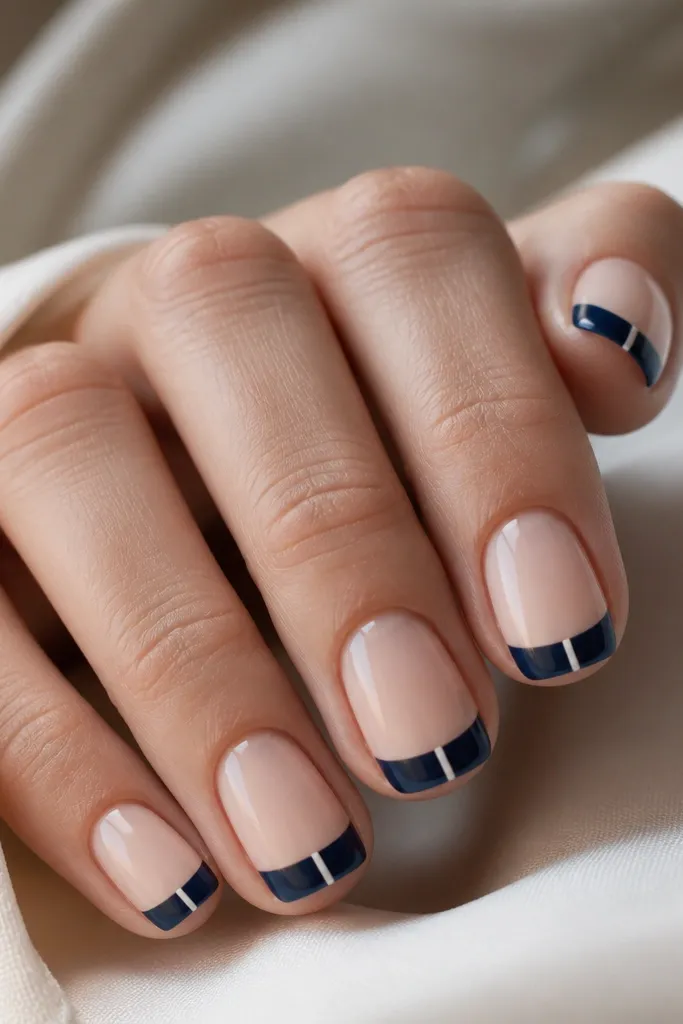
This one looks modern because it keeps the design linear. The vertical white stripe gives a “tailored” look and makes fingers look a bit longer — especially on shorter nail shapes like short square. It’s also easy to wear with everything because it’s mostly one color. The stripe is thin, so it doesn’t read like nail art, it reads like a design detail.
Prep and apply sheer nude base. Paint navy French tips in a medium width of about 2.5-3 mm and cure. Add a single thin white stripe in the center of each navy tip, starting at the smile line and stopping before the very bottom of the tip. Cure and top coat with glossy for crisp edges.
Editor's noteKeep the stripe centered by placing a tiny dot at the top first, then draw down from it.
Watch outDon’t make the stripe too wide; thick stripes look like stripes on a toy.
15. Blue and White Diagonal French on Soft Square
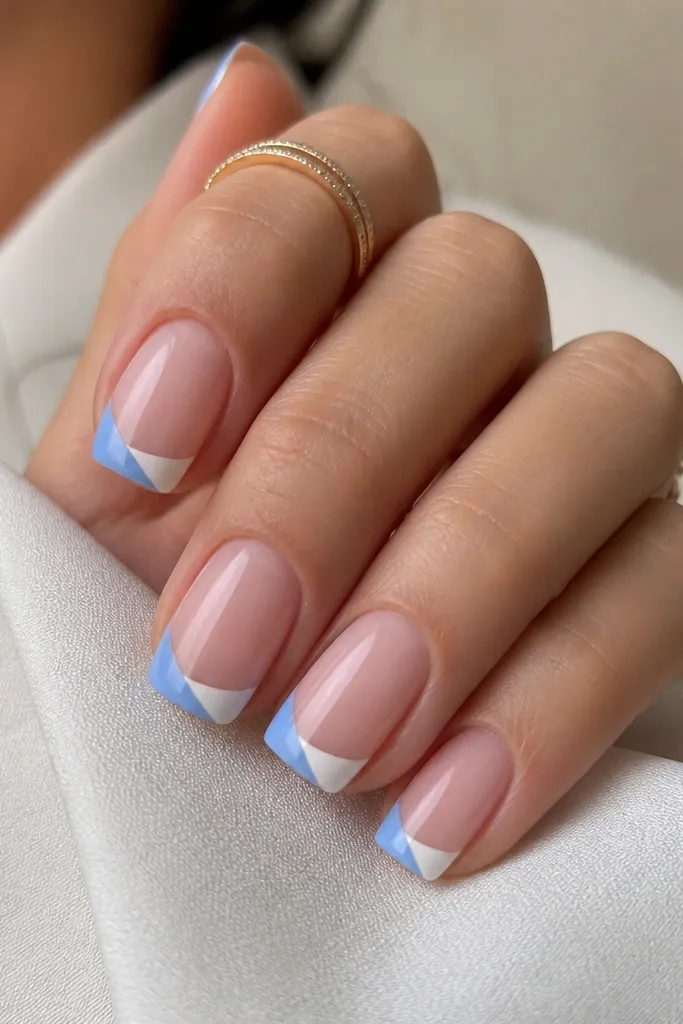
Diagonal tips read modern because they break the straight-line symmetry of classic French. The split between blue and white keeps it airy, and the soft square shape makes the diagonal line look intentional instead of harsh. I like this on hands that have short, wide nails because the diagonal line creates a slimming effect. The key is a sharp meeting line — it should look like two colors cut with scissors.
Apply sheer nude base and cure. Paint the base French area with a sheer layer so the diagonal line doesn’t drag. Then paint one side of the tip blue and the other side opaque white, meeting at a crisp diagonal line. Keep the diagonal from lower outer corner to upper inner corner. Cure and seal with glossy top coat.
Editor's noteUse a striping brush and tape a guide on one side if your diagonal tends to curve.
Watch outAvoid blurry color edges; the diagonal has to be clean to look high-end.
16. Tiny Blue Corner French on Milky Nude
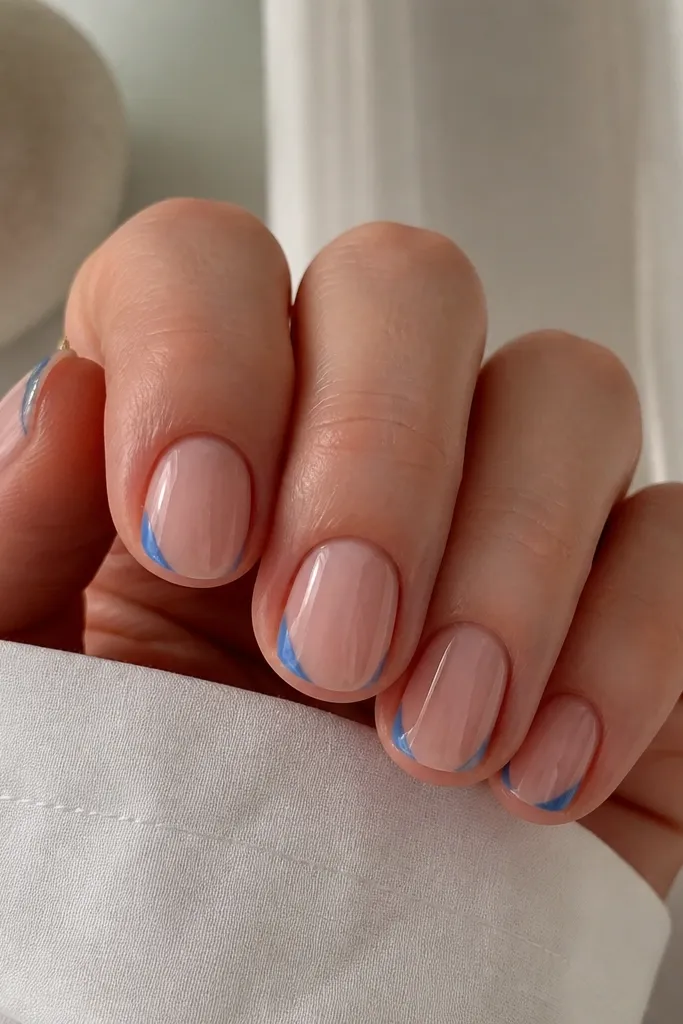
This is minimalist in the most literal sense — the blue only lives at the corners. That makes your nails look lighter and longer because you keep negative space across the tip. It flatters rounded nails and short nail beds because it doesn’t add width at the free edge. If your hands are always in gloves or you want subtle nails, this is the one.
Start with a milky nude base and cure. Using a thin brush, paint blue corner arcs on both sides of the nail tip, leaving the center nude. Keep each corner arc narrow, about 1-1.5 mm from the edge. Cure and check the balance across nails. Finish with glossy top coat so the nude center looks smooth.
Editor's noteUse a small amount of blue on the brush — corner arcs should be crisp, not filled in thick.
Watch outAvoid painting a full smile line; that removes the corner-only effect.
17. Blue French with White "Cuticle Halo"
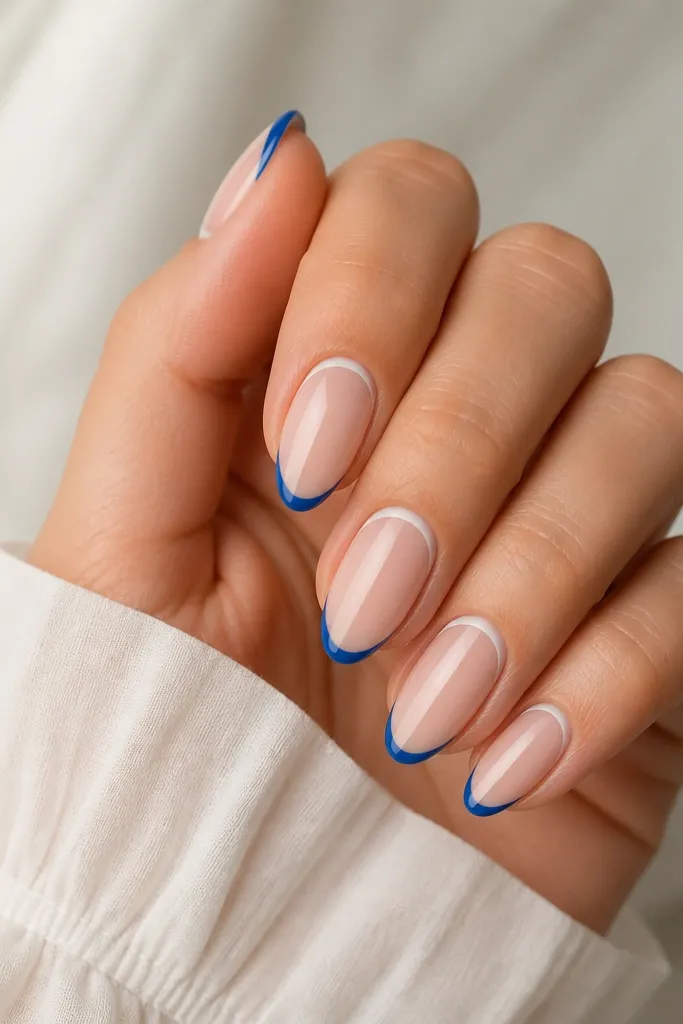
This design frames the nail twice: once at the tip with blue and once near the cuticle with a white halo. The result looks balanced and intentional, which is why it still reads modern even with two colors. The white halo makes the nail bed look cleaner and can visually even out uneven cuticle lines. It flatters almond and squoval shapes because the halo follows the natural curve.
Apply sheer nude base and cure. Paint narrow blue French tips, about 2-2.5 mm wide, and cure. With a liner brush, draw a thin white arc under the cuticle on each nail, leaving a tiny gap from the side walls so it looks airy. Cure and top coat glossy. If the halo feels too bright, reduce the thickness of the white line.
Editor's noteDo the halo after the blue cures so you can keep the lines separate and clean.
Watch outDon’t let the halo connect to the sides; that makes the nail look boxed in.
18. Ombre Blue Tips with White Fade Edge
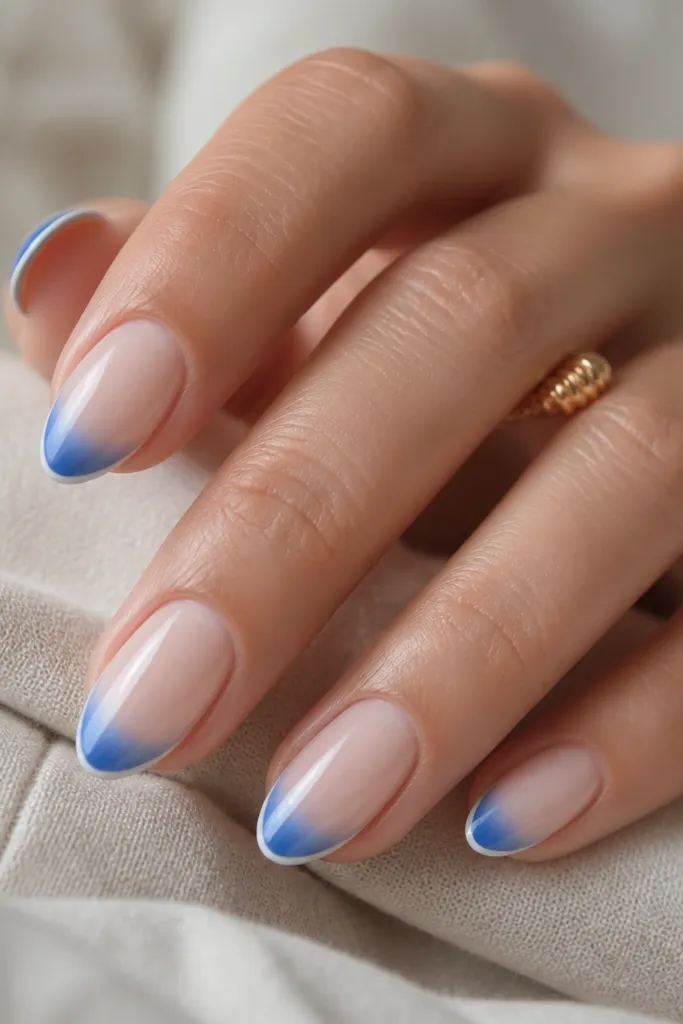
This is cozy because the fade is soft, but it stays minimalist thanks to the limited white detail. The white fade line at the very edge acts like a highlight, so the blue looks cleaner and more defined. Almond nails look especially good here because the fade follows the curve and makes the tip look smoother. If you’ve had French tips look too blocky before, this ombre version fixes that.
Apply sheer nude base and cure. Paint the outer edge of the tip deep blue and blend toward the center with a lighter blue — keep it subtle so it doesn’t look like a gradient manicure. Cure. Then, at the very edge of the tip, swipe a thin opaque white line as a highlight and cure again. Finish with glossy top coat to lock the fade.
Blend while the gel is still workable; once it’s tack-free, gradients get muddy.
Avoid a harsh line between deep and light blue; it needs to melt, not step.
19. Blue French with Micro White "Dew" Specks
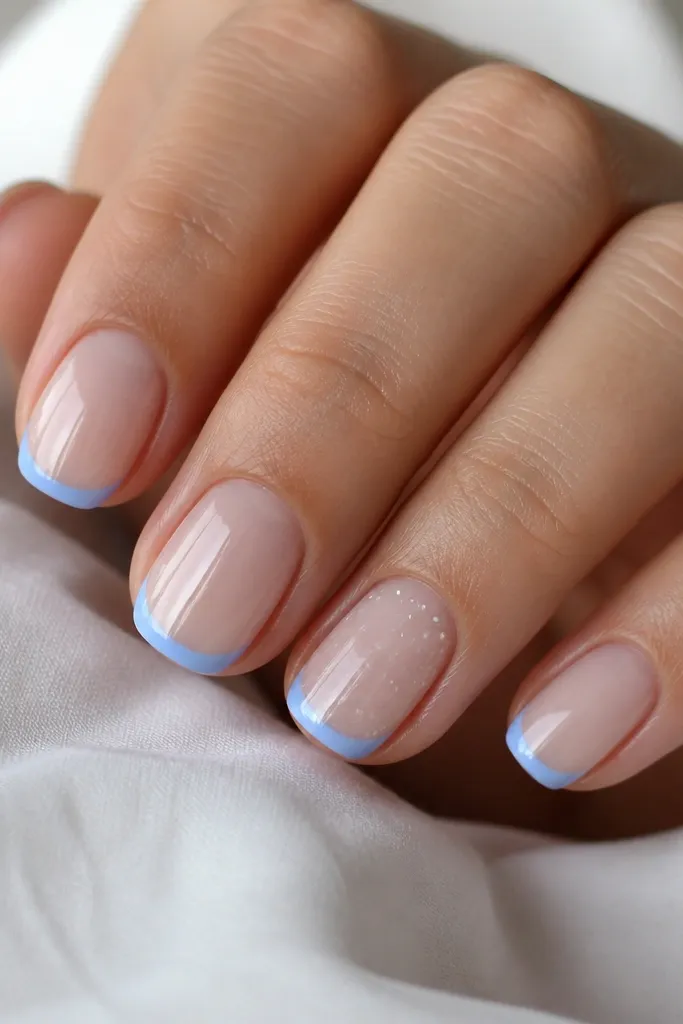
Micro specks feel cozy when they’re sparse. The blue stays the main design, and the specks add texture without taking over. I like this on two accent nails because it looks like you planned it, not like you missed a spot. It flatters hands that look good with light textures and it photographs well because the specks catch the light under gloss.
Apply sheer nude base and cure. Paint narrow cornflower blue French tips and cure. On two chosen nails, use an ultra-light touch with opaque white gel to place 5-8 micro specks near the center of the blue tip. Keep the specks small, about 0.5 mm, and spaced so you still see mostly blue. Seal with glossy top coat.
Editor's noteUse a toothpick or the smallest dotting tool; drag the point lightly so you get a dot, not a blob.
Watch outAvoid heavy speck coverage; it turns into full-on confetti nails.
20. Two-Line French with Slim Blue Top Line
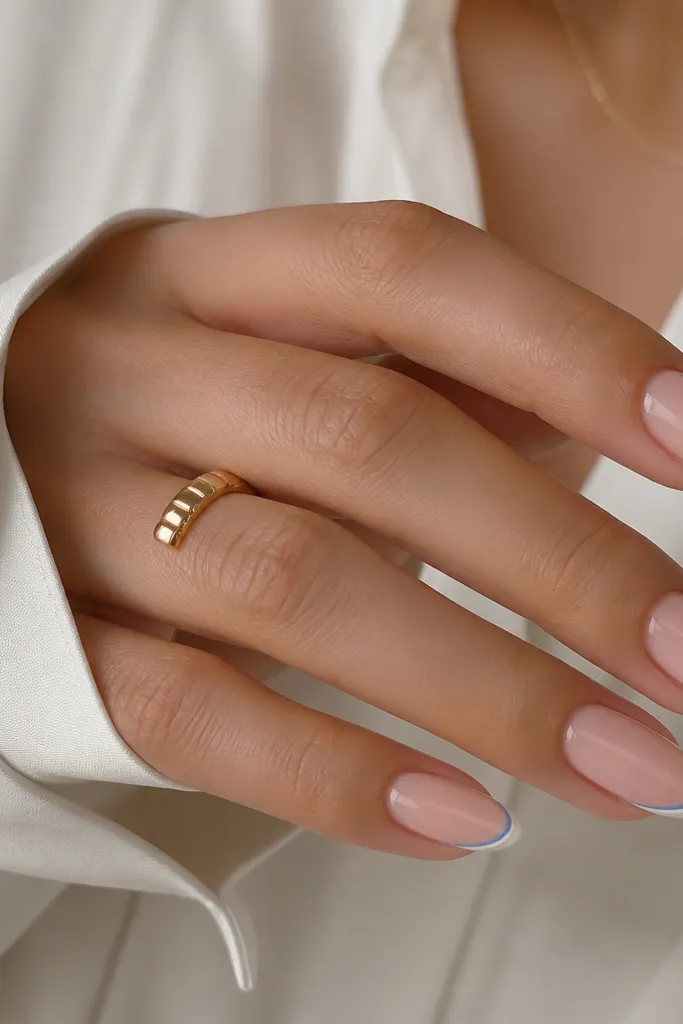
This is minimalist French tip design with a twist: the blue is the top line, not the whole tip. It looks clean because you’re controlling contrast with two thin strokes. The slightly thicker white line underneath gives the blue something to sit on, so it looks crisp instead of floating. This flatters medium almond nails because the two lines follow the natural almond curve and make the tip area look longer.
Start with a sheer pink base and cure. Paint a thin opaque white line just above the free edge, following the smile curve. Cure. Then paint a slim cornflower blue line right at the very tip edge — keep it thinner than the white line. Cure and top coat glossy.
Editor's noteUse a liner brush and wipe it on a paper towel first so you get a controlled line thickness.
Watch outAvoid making both lines the same width — it loses the “designed” look.
21. Blue French with White Outline Only on Accent Nails
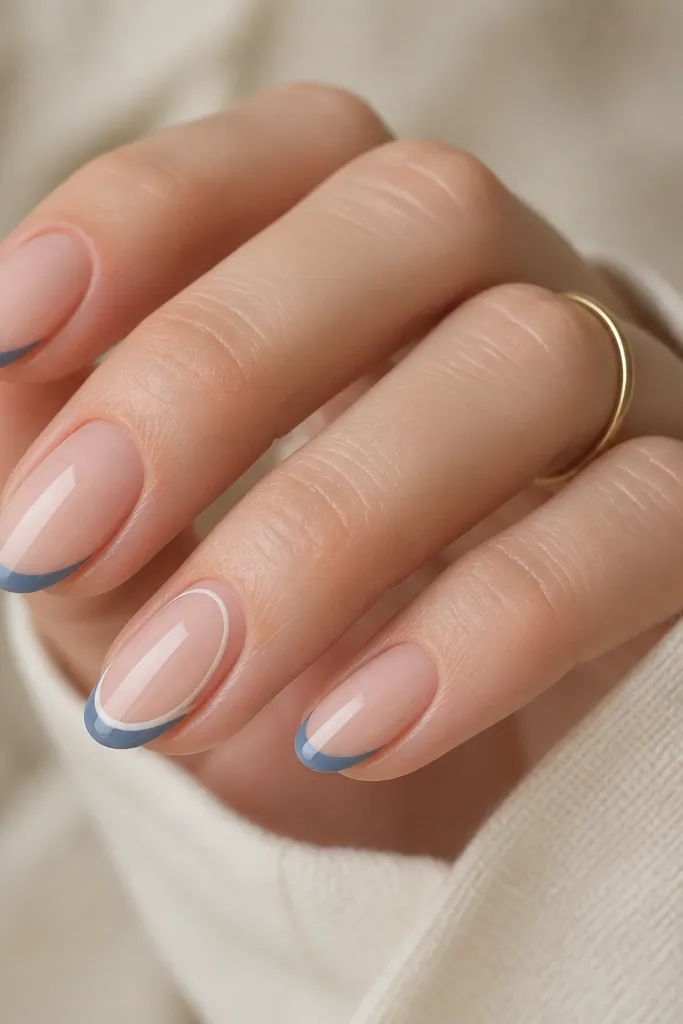
This design is how you keep minimalist nails from looking repetitive. The main nails are plain blue French tips, while the accent nails get a thin white outline around the smile line. The outline makes the accent nails look more polished and gives your set a focal point without adding bulk. It flatters almond shapes because the outline follows the curve and makes the tip look precise.
Apply sheer nude base and cure. Paint simple blue French tips on all nails, narrow at 2-2.5 mm and cure. On ring fingers or whichever nails you want to highlight, add a thin opaque white outline tracing the smile line — do not fill the whole tip, just outline. Cure and seal with glossy top coat across all nails.
Editor's notePick the accent nails before you start painting; it helps you keep the set consistent.
Watch outDon’t outline every nail — it stops being minimalist and starts looking busy.
22. Deep Navy French with White Inner Corner Cut
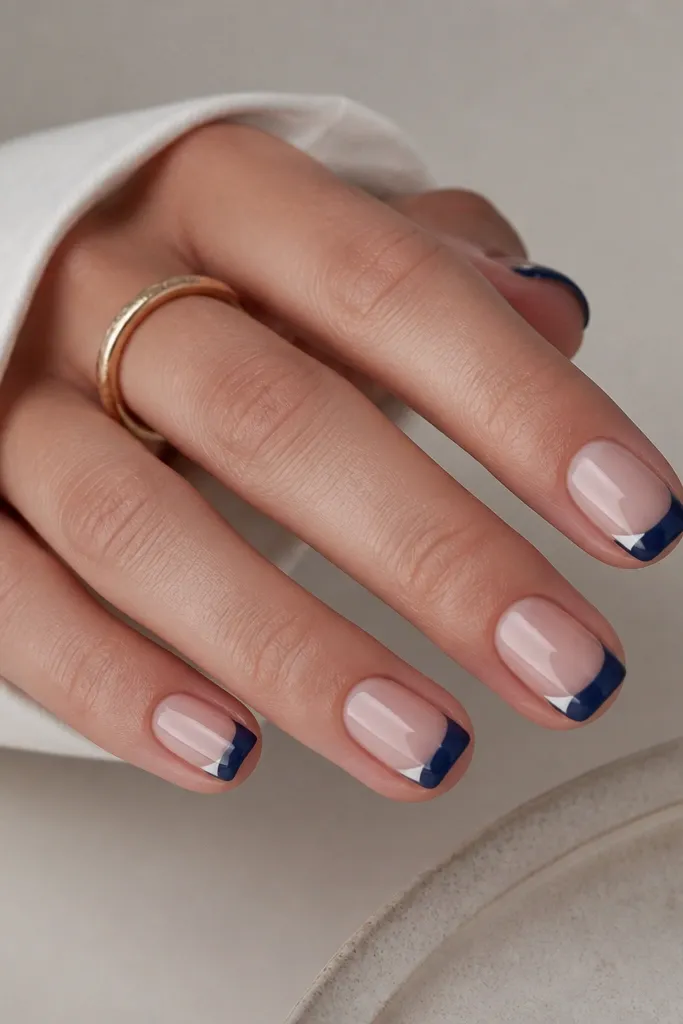
The “inner corner cut” detail looks sharp and modern, like clean tailoring. Deep navy gives contrast and holds up well against warm skin tones, while the white cut adds a crisp highlight. This is flattering on short square nails because the cut creates a slight narrowing effect near the sides. I use this when I want something that still feels minimalist but not boring.
Apply sheer nude base and cure. Paint deep navy French tips with a medium width around 2.5-3 mm and cure. With a liner brush, paint a tiny opaque white shape at each inner corner of the tip — think small triangle or cut-out, about 1 mm wide. Keep it clean and separate from the main blue fill. Seal with glossy top coat.
Use a steady hand and keep the white cut small; bigger cuts make the design look like a mistake.
Avoid messy edges at the inner corners; smudges make it look unintentional.
23. Cornflower French with White Tip Edge Only
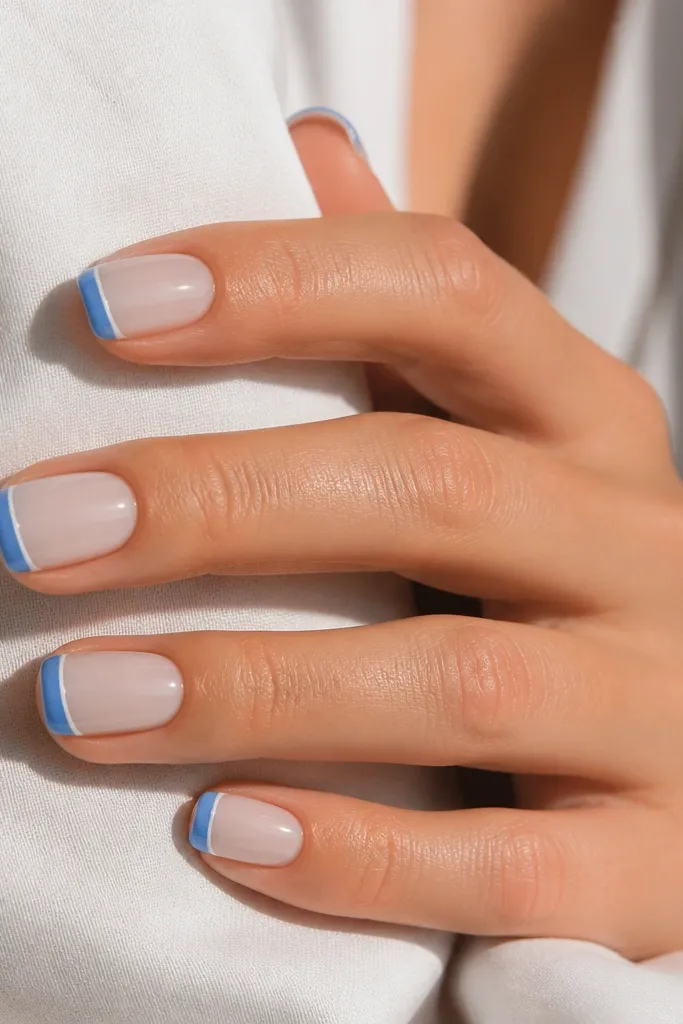
This is a classic French tip idea with one modern detail: a white edge line. It makes the blue feel brighter and more defined, especially under daylight. Because the white is only at the extreme edge, it keeps the design minimalist and avoids extra patterning. It flatters nails that are slightly uneven at the free edge because the white line visually defines where the tip ends.
Apply sheer milky nude base and cure. Paint cornflower blue French tips in a standard width, about 3 mm on squoval, and cure. Then paint a thin opaque white line along just the free edge of the tip — keep it straight and even across each nail. Cure and finish with glossy top coat for a clean glass look.
Editor's noteIf your edge line wobbles, do it in two passes — first place dots, then connect them with a light brush stroke.
Watch outDon’t add white along the sides too; the white edge line should stay at the very tip.
24. Blue French with White Center Stripe on Long Short Nails
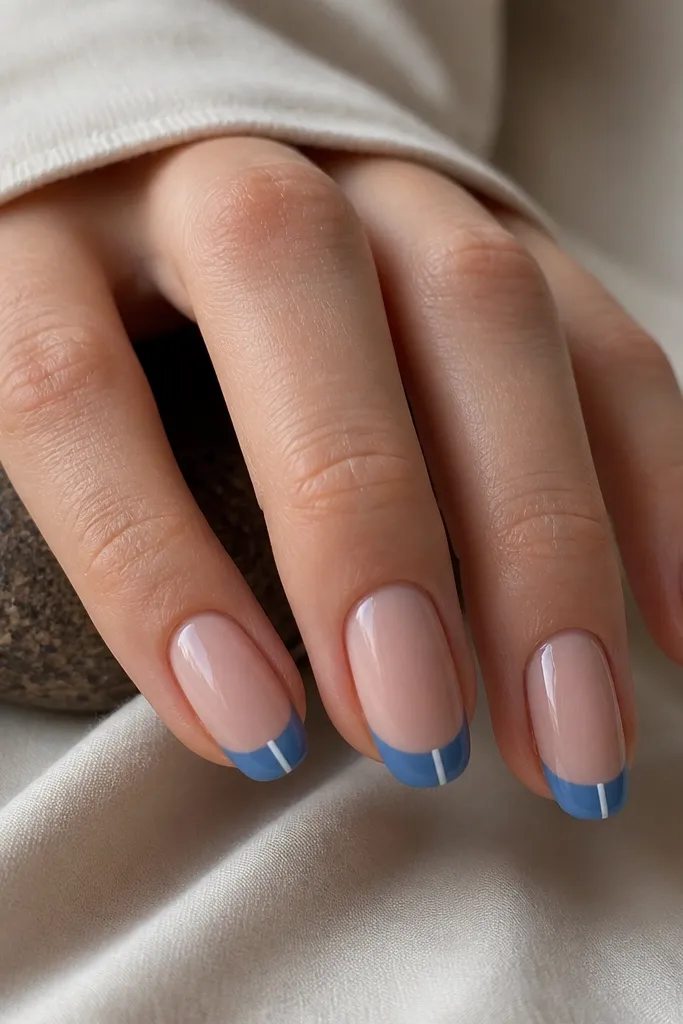
This looks sleek because the center stripe creates a straight visual line. It’s a flattering choice when your nails are a little uneven at the sides — the stripe draws the eye to the center. The blue stays calm, and the white stripe keeps it crisp. I like this on medium-short length because the stripe has enough space to look intentional.
Apply sheer nude base and cure. Paint blue French tips with a narrow-to-medium width around 2.5-3 mm and cure. Using a liner brush, draw a straight opaque white stripe starting at the smile line and stopping about 1 mm above the bottom edge. Cure and top coat glossy.
Editor's noteUse a guide dot at the top of where the stripe starts so the line stays straight.
Watch outAvoid curved stripes; straight looks modern, curved looks accidental.
25. Blue French with White Micro Half-Moon Underlay
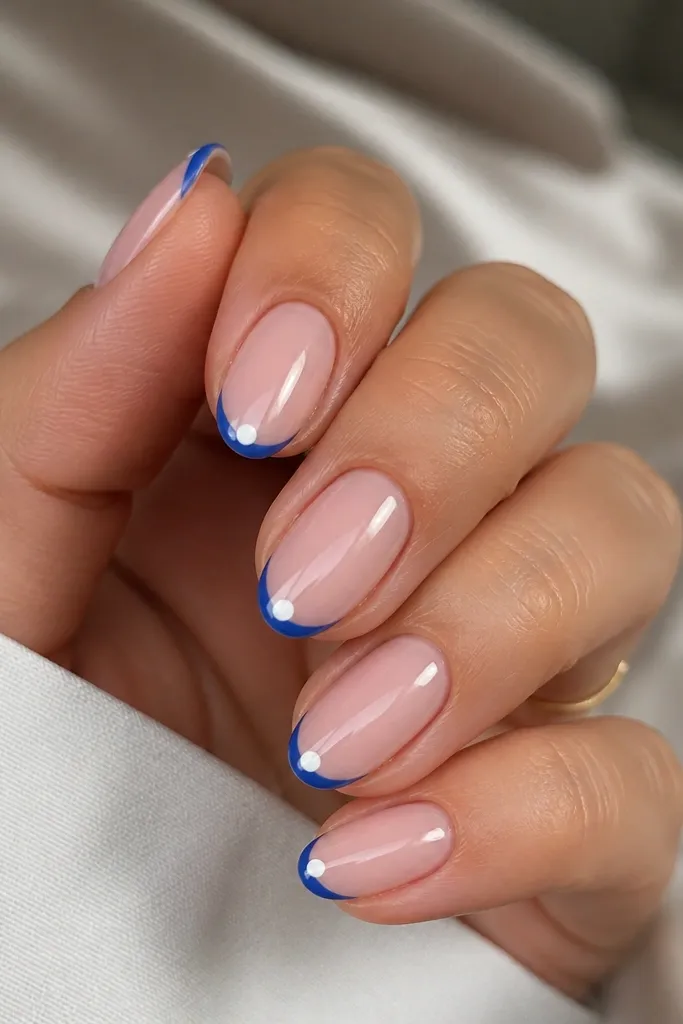
The micro half-moon underlay gives the French tip a “layered” look without adding thickness. It makes the smile line look more dimensional and gives a cozy, soft contrast. Centered half-moons flatter almond shapes because they match the curve of the nail. This is a great option if you like French tips but hate when the smile line looks too flat.
Apply sheer pink base and cure. Paint narrow blue French tips, about 2-2.5 mm wide, and cure. With a liner brush, paint a tiny opaque white half-moon centered under the smile line — about 1.5-2 mm wide. Cure and seal with glossy top coat.
Editor's noteKeep the half-moon small; a larger moon becomes a full accent shape quickly.
Watch outAvoid placing the half-moon too low; it should sit right under the smile line.



