
1. Inky Navy Micro French on Nude Blush
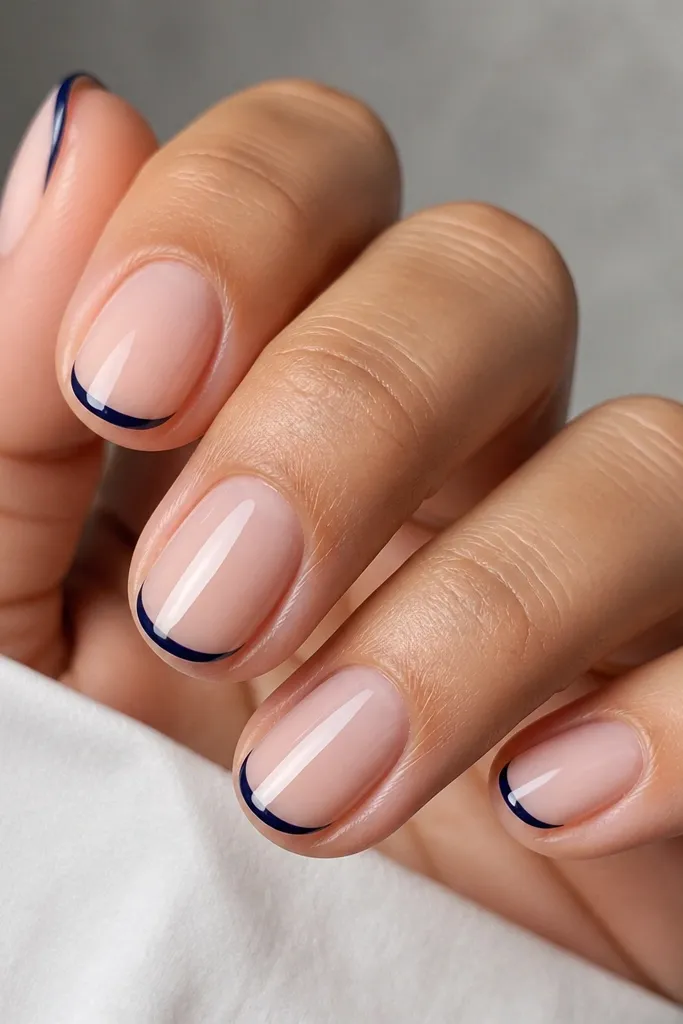
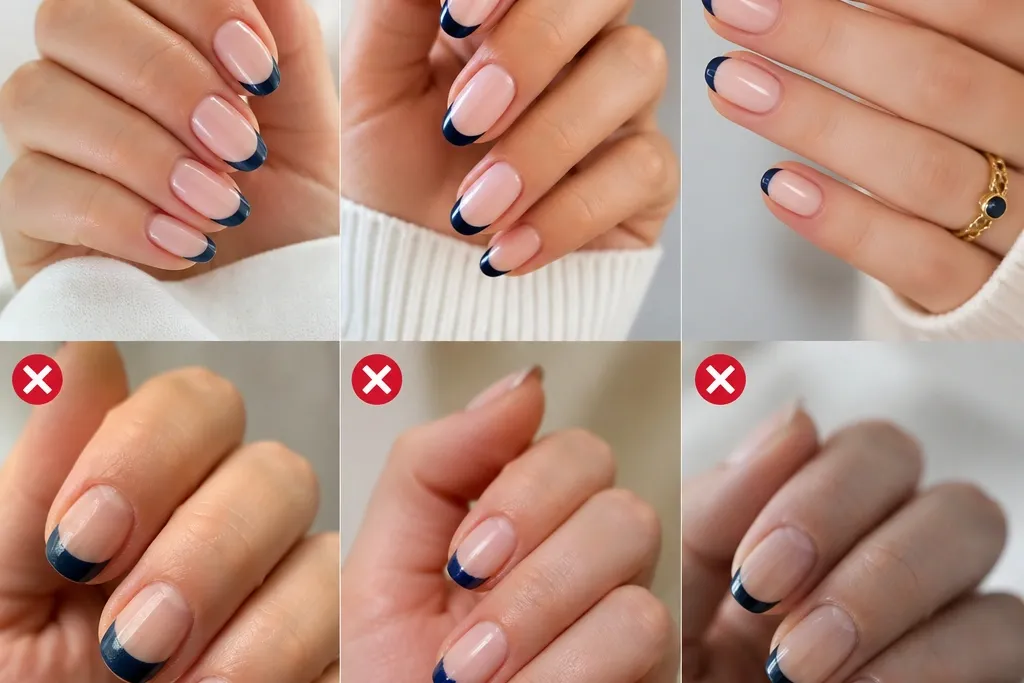
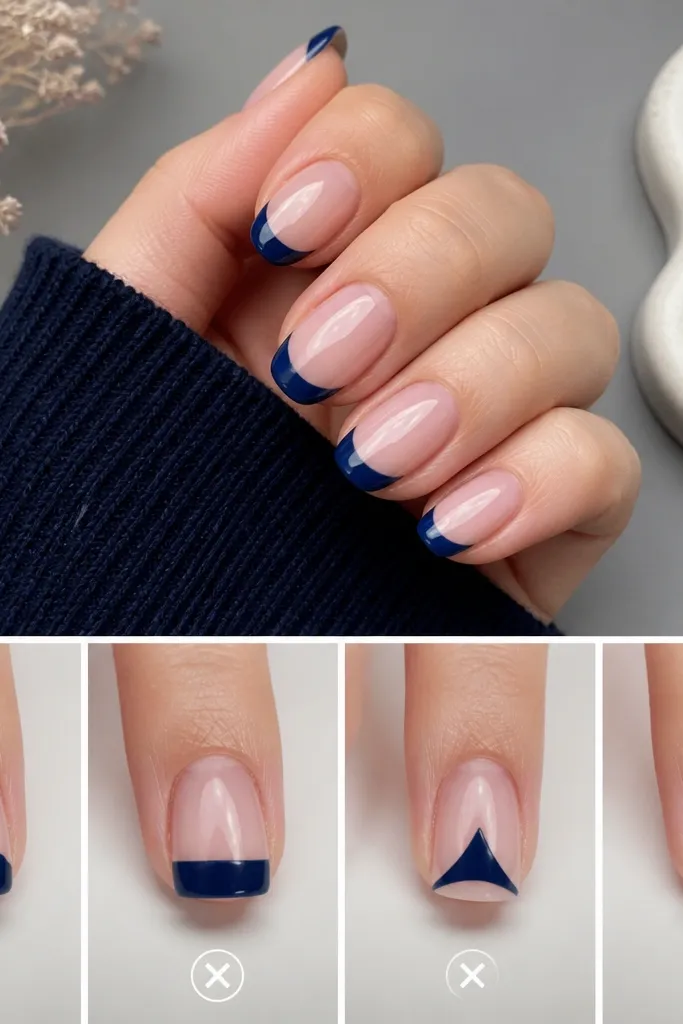
This one is for when you want navy French tips that look expensive without looking heavy. The nude blush base is sheer enough to keep your nails looking longer, and the inky navy stays readable even on short nails. I like oval here because the curved tip line mirrors the natural shape of your nail bed. It flatters fair to medium skin tones especially well, and it looks great with everyday outfits because it doesn’t steal attention from your hands. The secret is the micro width — you’re painting a line, not a plate.
Start by applying your nude blush base in two thin coats. Let each coat cure fully if you’re using gel, then wipe with a lint-free pad if you see any tacky residue. For the tip, place a tiny dot of navy at the center of the free edge, then use a striping brush to draw the smile line in one smooth curve. Fill the tip with a second pass, keeping it around 1.5-2 mm at the widest point. Finish with a high-gloss top coat, and cap the free edge by dragging the top coat over the nail tip.
If your navy looks streaky, do a second thin navy coat instead of thickening the first. Thick navy makes the line look fuzzy when it levels.
Avoid using a dusty or sky-blue navy; it turns patchy and makes the French line look like it’s fading.
2. Navy Gloss French with a White Razor-Cut Edge
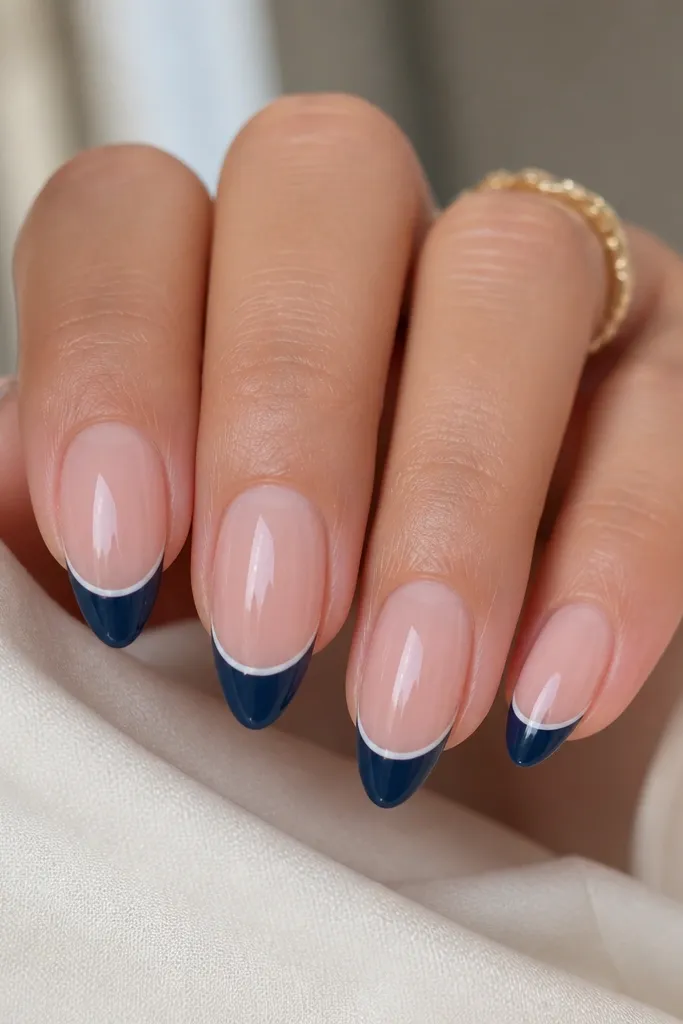
This set makes navy look brighter and cleaner because the white line creates a crisp boundary. I love it on almond nails because the curve has room to look precise. The glossy nude base keeps everything light, while the navy tip adds that deep contrast. It looks especially good on warm skin tones because the white pops without turning ashy. This is also a great option for parties or date nights because the thin white edge catches light and makes your tips look freshly done.
Start with two coats of sheer nude gel or polish, then cure/dry fully and apply a thin top coat. Use a striping brush to paint the navy tip first, keeping the smile line tight and centered. After the navy is fully set, use a dotter or fine liner brush to draw a single thin white line just under the navy edge, staying parallel to the smile curve. Let the white dry/cure, then seal with one careful top coat over the entire nail and especially over the white line. If you see any raised texture, lightly buff the top coat surface before the final cure.
Use white gel that is opaque in one coat. If your white needs three layers, it will thicken the smile line.
Avoid painting the white edge before the navy is fully cured; the colors smear and the boundary looks messy.
3. Matte Navy French on Milky Nude
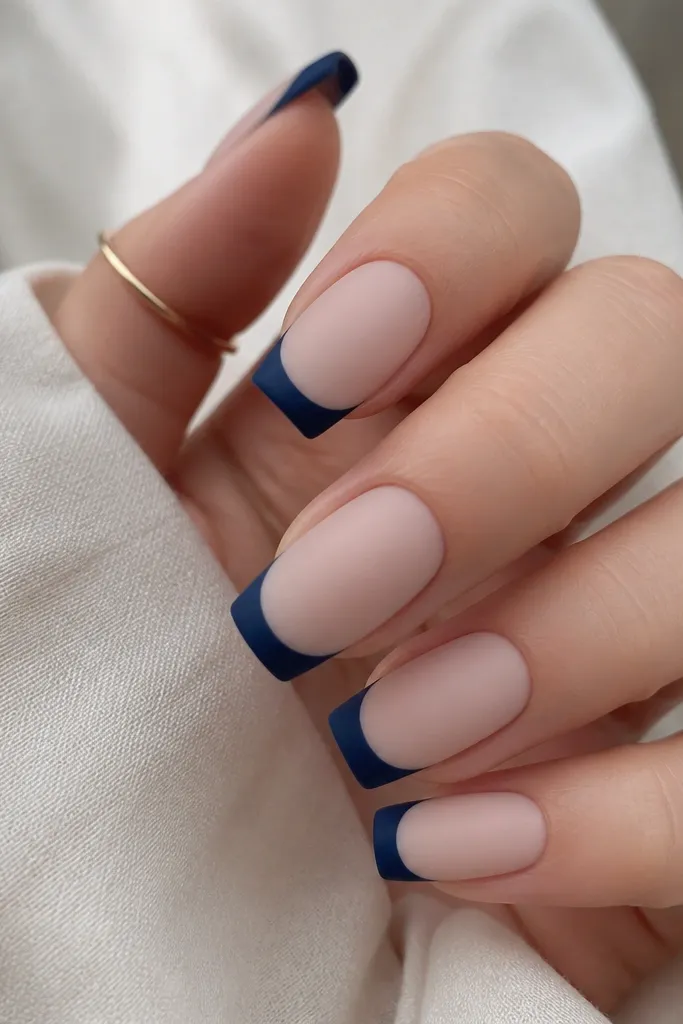
Matte navy French tips look softer but still bold. The milky nude base keeps the nail from looking washed out, and matte hides tiny imperfections better than high-gloss. I like squoval because the flat sides make the navy tip look intentional rather than rounded. This style flatters most skin tones, but it’s especially flattering on medium and deeper tones because navy stays strong against milky nude. It also works well for workdays because matte nails look polished without being shiny.
Start with a milky nude base that has good coverage; two thin coats are better than one thick one. Apply matte top coat on the base after cure/dry. For the French tip, paint navy slightly wider than micro French, about 2.5-3 mm at the widest point, and keep the smile curve smooth. Once the navy is set, apply matte top coat over the tip too — don’t mix gloss on top of matte unless you want a two-finish look. Finish by cleaning around the cuticle with a small brush and remover so the matte edge stays crisp.
If matte top coat makes your navy look gray, switch to a navy polish/gel with a deeper pigment. Some mattes mute color more than others.
Avoid mixing a glossy navy tip with a matte base; the contrast reads cheap when the edges aren’t perfectly sealed.
4. Navy French with Thin Silver Foil at the Smile
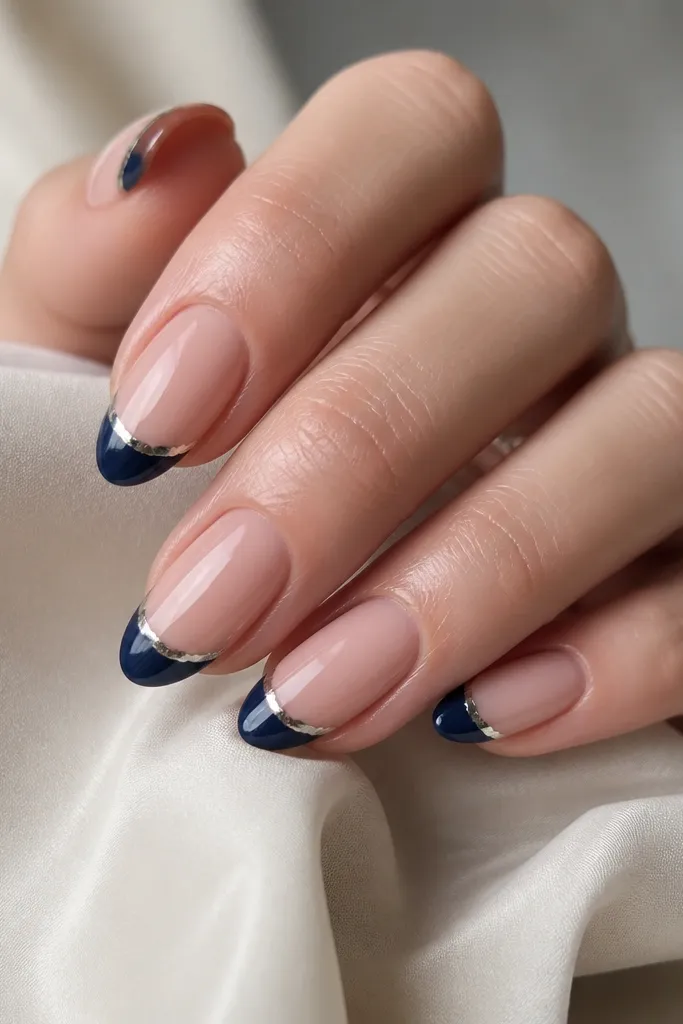
This is my go-to when you want navy French tips to look “done” without adding bulky gems. The thin silver foil at the smile line makes the curve look intentional and gives you that jewelry effect. Almond nails show off the foil line well because the nail tapers toward the tip, and the foil stays crisp. It flatters fair and cool undertones because silver brightens the navy instead of turning it dull. For events like weddings, it also looks clean because foil reads more refined than chunky glitter.
Start by applying a glossy sheer pink or nude base in two thin coats. Cure/dry fully, then paint your navy French tips with a steady smile curve. While the top coat is still tacky (or use foil adhesive if you’re not using gel tack), place a thin strip of silver foil exactly along the navy edge — I aim for a line that’s about 0.5-1 mm thick. Press gently with a silicone tool and trim any extra foil with a small nail scissors or file. Seal with one or two thin coats of top coat, focusing on the foil area so it doesn’t lift.
Use foil strips, not loose foil bits. Bits wander and your smile line loses symmetry fast.
Avoid putting foil too far onto the nude base; it blurs the French separation and makes it look like random sparkle.
5. Reverse French Navy Half-Moons with Nude Tips
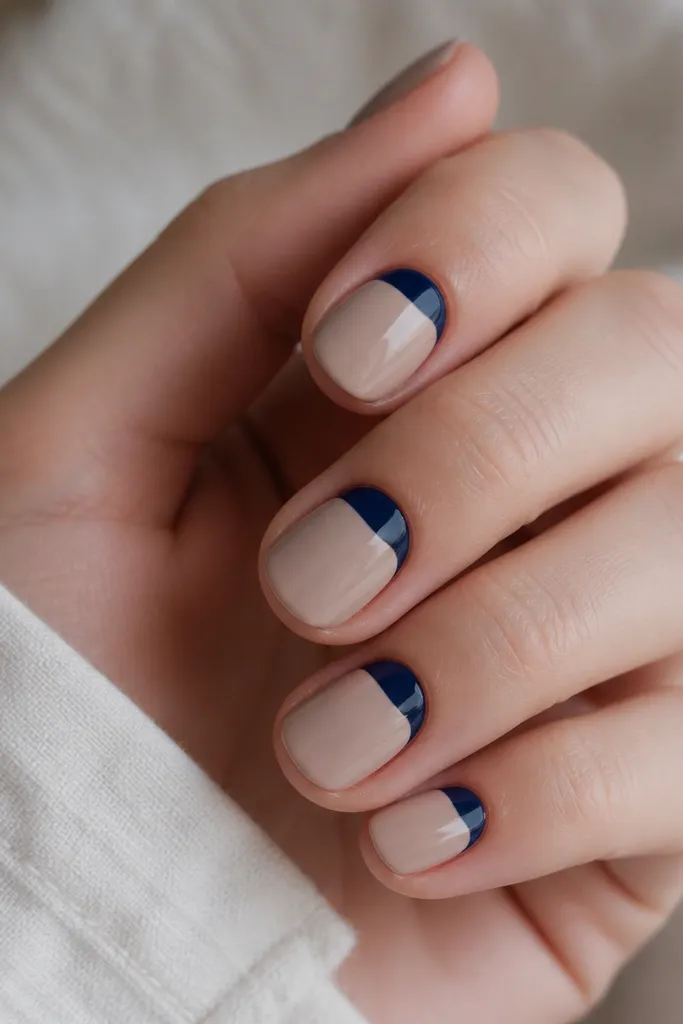
Reverse French feels modern and it’s forgiving if your tip line isn’t perfect. By putting navy at the half-moon near the cuticle, you draw the eye upward and the nail looks tidier. I like round nails for reverse French because the half-moon shape matches the natural cuticle curve. This style flatters hands with shorter nail beds because it balances the proportions. It also works great for people who bite or peel — you can keep the navy at the cuticle area where growth is less noticeable.
Apply a glossy nude base in two thin coats, then cure/dry fully. Use a small curved brush to map the half-moon shape — start at the center cuticle and work to the sides, keeping the navy curve parallel to your cuticle line. Fill the half-moon with navy, keeping the thickness even, then remove any stray smudges with a cotton swab dipped in remover. If you want a traditional French look too, keep the free edge nude — no tip color. Seal with a glossy top coat and cap the free edge lightly so it doesn’t chip.
Use a cuticle pusher to gently lift the skin at the corners before painting. You’ll get a cleaner half-moon edge.
Avoid dragging navy too close to the nail skin. If it floods the cuticle, it lifts and looks messy after a few days.
6. Navy French Tips with Negative Space Cutouts
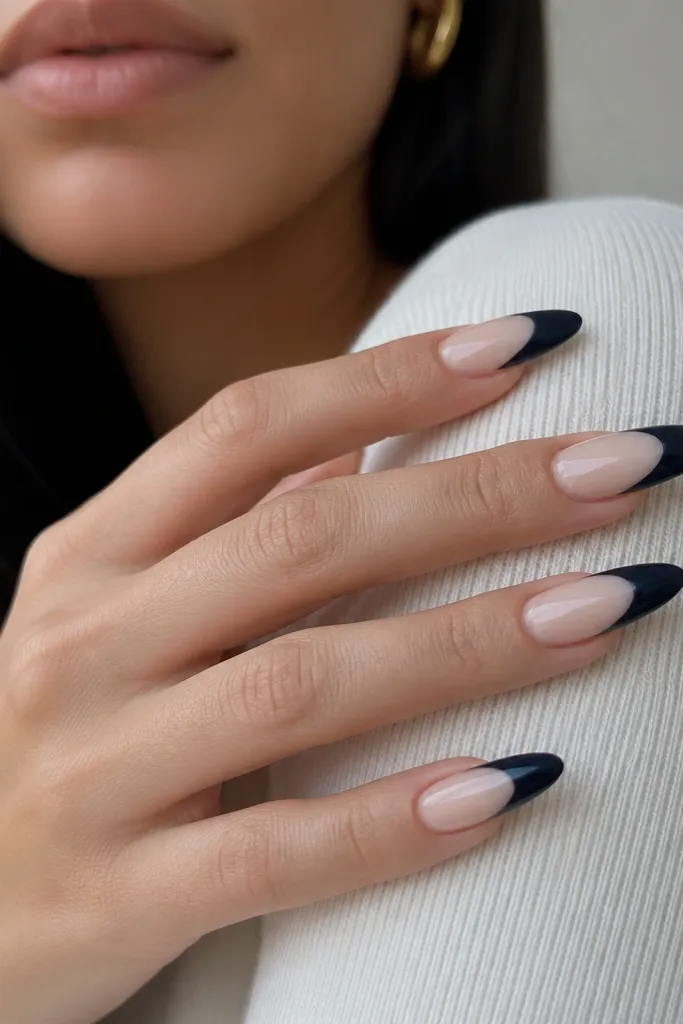
Negative space makes navy French tips look lighter and more graphic. The cutout near the smile line gives your nails a “designed” look without adding extra color coverage. I love this on long almond nails because the curved C-shape has enough room to look intentional. It flatters medium to deep skin tones because the nude window shows contrast and keeps the navy from overpowering your hands. It also photographs beautifully because the negative space catches light and creates depth.
Start with a sheer nude base and cure/dry fully. Paint the navy tip in a C-curve so you leave a consistent negative-space gap near the center of the smile line. Use your brush to sharpen the edges of the cutout — don’t leave it rounded. After the navy is set, check the symmetry by looking at the nails from the side; adjust one edge with a tiny liner brush if needed. Finish with a glossy top coat, and be extra careful over the cutout area so it stays smooth.
If your cutout edges look wobbly, place a tiny amount of remover on a thin brush and clean the negative-space boundary before curing.
Avoid a cutout that’s too wide. Wide cutouts make the tips look like they’re missing rather than designed.
7. Navy French with Micro Glitter Fade at the Tip
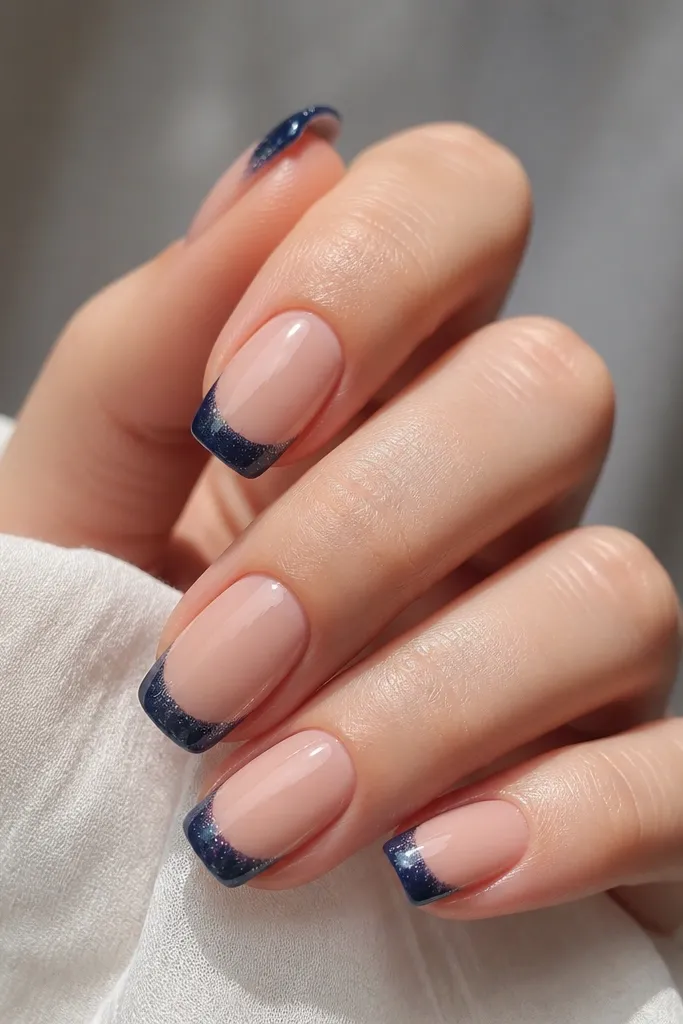
This one is for navy French tips that need a little sparkle without turning into full glitter. The micro glitter at the free edge makes your nails look like they shimmer when you move your hands, and it still keeps the French shape neat. I prefer squoval here because the tip edge is broad enough to blend the glitter into the navy without looking patchy. It flatters most skin tones, and the silver-blue glitter works especially well with cool undertones. The fade also hides tiny application lines because glitter fills in texture.
Start with a glossy nude base in two coats. Paint your navy French tip first, leaving a tiny strip at the very edge unfilled so you can blend glitter in. While the navy is still tacky (or apply a thin layer of clear gel at the tip edge), press micro fine glitter only along the outer edge and sweep it slightly inward with a clean brush. Use a second top coat to smooth the glitter and prevent it from catching on clothing. Cure fully and cap the free edge with top coat so glitter doesn’t shed.
Editor's noteUse micro glitter, not chunky glitter. Chunky pieces lift and make the smile line look uneven.
Watch outAvoid glitter that covers the whole navy tip — it turns into a glitter manicure and loses the French contrast.
8. Navy Marble French Tips with White Vein Lines
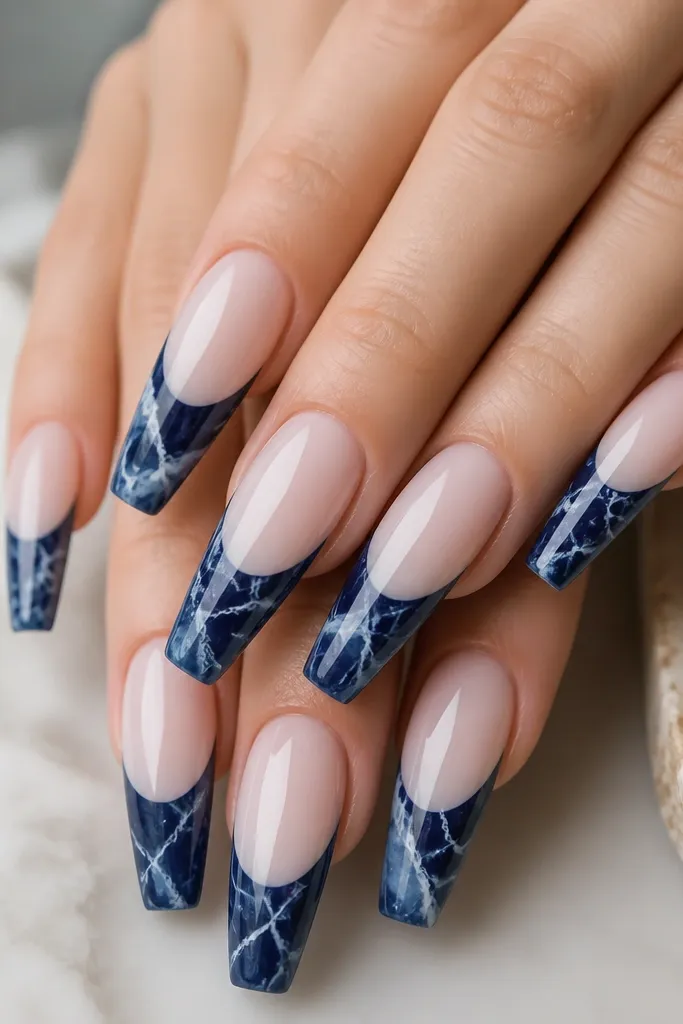
Marble French tips look high-end because they add movement, but the trick is keeping the smile line sharp. The milky nude base makes the marble veins pop without looking stark. Coffin nails are perfect because the tip area is wide enough for veining to show. This style flatters fair, medium, and deeper skin tones because navy holds the pattern together. I like it for weekends and photo days because it looks detailed even in natural light.
Apply a milky nude base and cure/dry. Paint a solid navy French tip first, then use a thin liner brush with white gel to draw a few vein lines starting near the smile curve. Add tiny offshoots and feather the veins slightly by dragging the brush tip lightly through the surface while it’s still workable. Use a clean brush to keep the outer edge of the navy crisp — don’t let the marble spill onto the nude. Finish with a glossy top coat in two thin layers so the marbling looks smooth, not bumpy.
Editor's noteDo the veins in 2-4 lines per nail. Too many lines make it look like scribbles.
Watch outAvoid marble that bleeds over the edge. If the navy outline isn’t sealed, it looks like smudged paint.
9. Navy French Tips with Tiny Matte Dot Stars
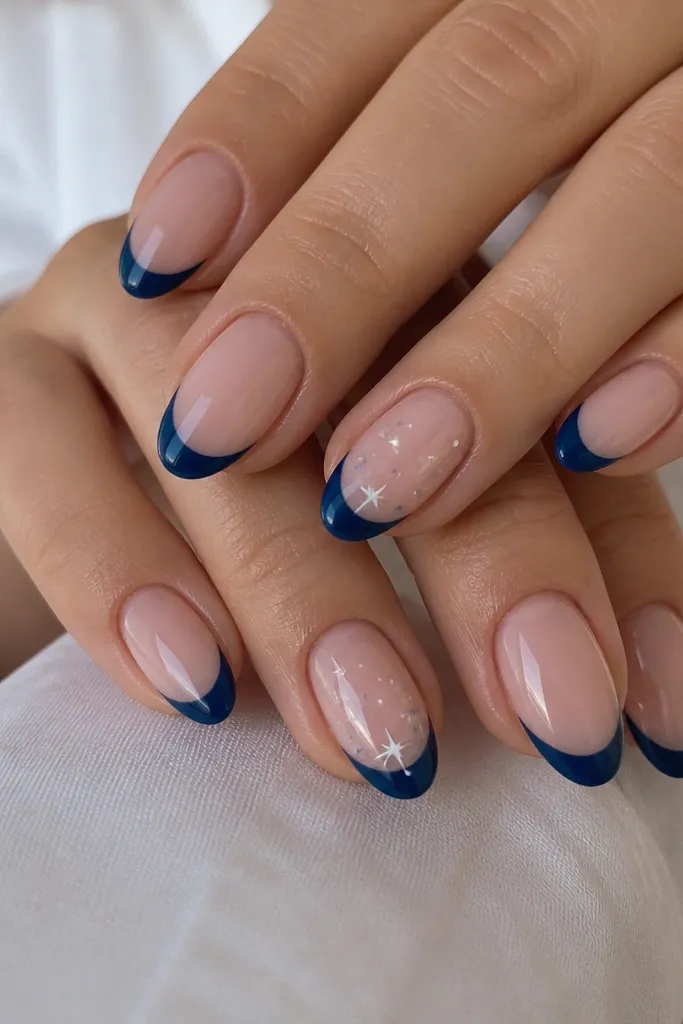
Tiny dot stars make navy French tips feel playful while staying classy. The navy stays bold and the matte dots add texture, so your nails don’t look flat. I like doing this on almond nails because the curve near the smile line gives the dots a natural “placement zone.” It flatters almost everyone because the dots are small and you don’t need heavy contrast. This is a good option when you want something fun for birthdays or casual nights out but you still want the French structure.
Start with a glossy nude base and cure/dry. Paint navy French tips and keep the smile line crisp. For the star dots, use a dotter with matte white and matte light gray — place 4-6 dots near the smile curve on accent nails only. Add one slightly larger dot at the center to give the star cluster a focal point. Seal everything with a top coat, but keep the dots matte by skipping matte-friendly top coat over them if your dots start to dull — you can use a micro-clear gloss only around the dots if needed.
Editor's noteUse matte dots on only one or two nails per hand. Too many nails with stars looks busy and the French tip loses its clean vibe.
Watch outAvoid big glitter stars. Large shapes over navy French tips look like stickers and lift at the edges.
10. Navy French with Diagonal Accent Line
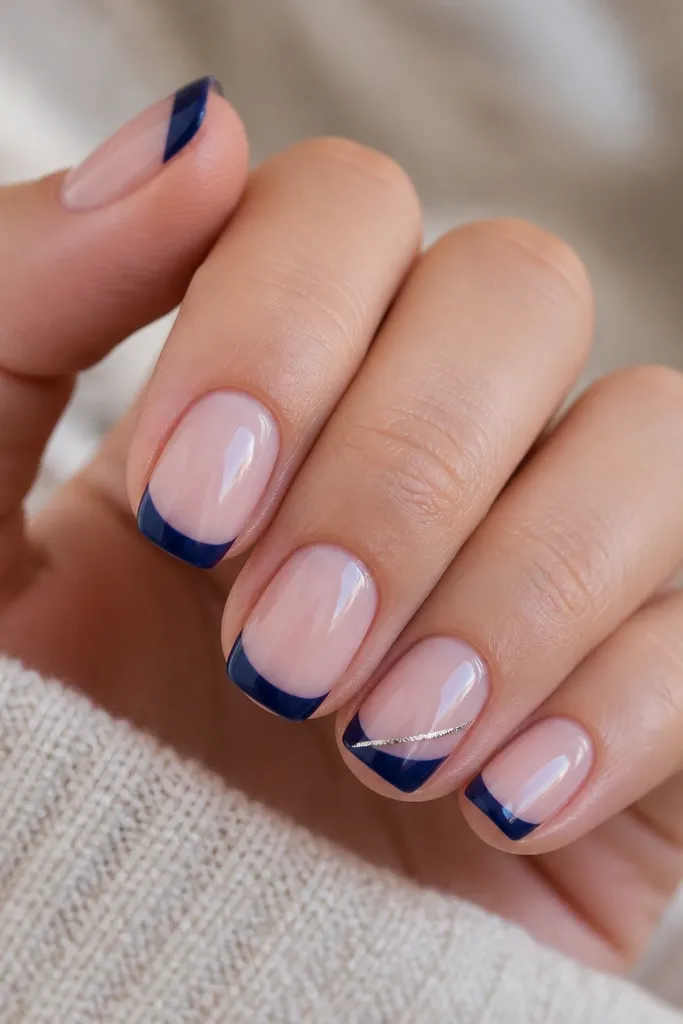
A diagonal accent line gives your French tips motion without changing the structure. The navy does the heavy lifting, and the silver line adds a sleek detail that looks sharp on camera. Squoval nails are a sweet spot because the flat corners make the diagonal line look clean rather than wavy. This style flatters hands with wider nail beds because the accent line can visually narrow the nail. I wear this for work too because it looks polished even when you don’t want full bling.
Paint your nude base and cure/dry. Apply navy French tips with a standard smile curve. On the accent nails, use a striping brush to draw a diagonal line inside the navy, starting about halfway between the smile curve and the sidewall and ending near the outer edge of the tip. Keep the line thickness around a single brush stroke — roughly 0.5 mm. Seal with top coat, and run the brush along the diagonal line edge to prevent lifting.
If the diagonal line wobbles, wipe the brush clean and redraw in one confident stroke. Fixes look better when you redo than when you drag through wet paint.
Avoid placing the diagonal line outside the navy tip area. It cuts across the nude and makes the French separation look sloppy.
11. Navy French with Ombre Blue-to-Navy at the Tip Edge
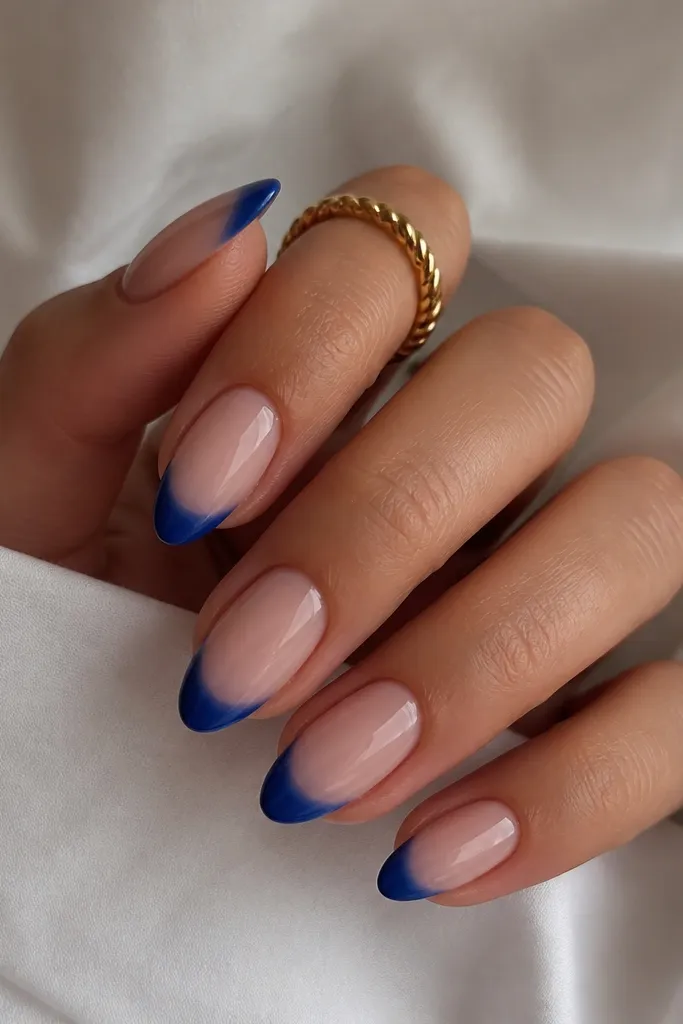
Ombre French tips look soft and modern because the color transition removes any “hard line” issues. I use a royal blue as the lighter shade and blend into deep navy so it still reads French. Almond nails are great because the gradient can follow the nail curve naturally. This flatters fair and medium skin tones because royal blue brings brightness, and it flatters deeper skin tones too because navy stays grounded. It also works for people who struggle with painting a perfect smile line since the gradient hides tiny imperfections.
Start with a glossy nude base and cure/dry fully. Paint a thin layer of lighter royal blue at the smile curve area, then use a makeup sponge or ombre brush to blend it toward the free edge. Add deep navy at the outer half of the tip and blend the two colors where they meet. Keep the transition smooth and stop before it reaches the sidewalls too thick. Seal with a glossy top coat and wipe the brush clean often so you don’t drag pigment into the nude.
Use a small sponge piece and dab, don’t swipe. Swiping makes streaks that look like makeup on nails.
Avoid a harsh ombre boundary. A visible line between royal blue and navy makes it look like two separate polishes.
12. Navy French with Pearlized Nude Base and Navy Pearl Tips
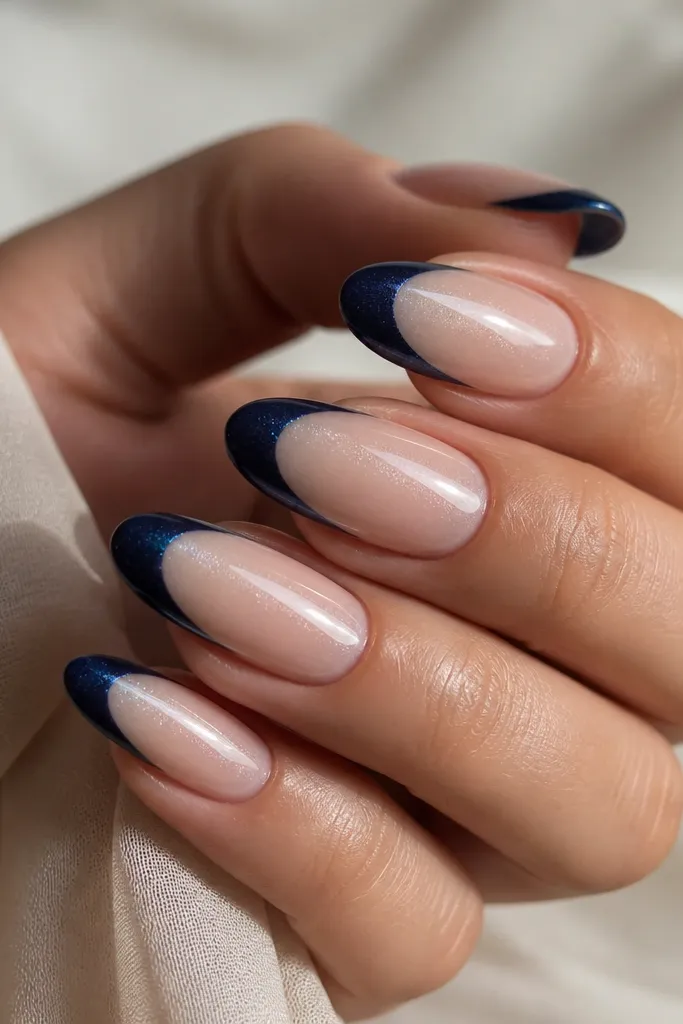
Pearlized bases make navy feel more luxe because the background already has glow. Then the pearl-finish navy tips add a refined sparkle without glitter chunks. I like long oval nails because the pearl finish looks best on smooth surfaces and gives a soft, even reflection. This style flatters fair to deep skin tones because pearls don’t fight your undertone — they just brighten the whole set. It’s perfect for holiday parties, but it doesn’t look costume-y.
Start with a pearlized nude base in two thin coats and cure/dry fully. Paint navy pearl tips with a steady smile line, keeping the tip width around 2-3 mm for medium length. If the pearl navy is sheer, do a thin first coat and cure, then add a second coat just on the tip area. Clean the edge with a small flat brush dipped in remover to sharpen the separation line. Finish with a pearl-friendly top coat — one that keeps the pearly texture and doesn’t turn everything mirror-smooth.
Editor's noteIf your pearl top coat makes the navy look gray, switch to a gloss top coat and let the navy’s own pearl do the shimmering.
Watch outAvoid matte top coat over pearl navy. It kills the reflection and makes the navy look flat.
13. Navy French with Faux Cuticle Ribbon (Double Smile)
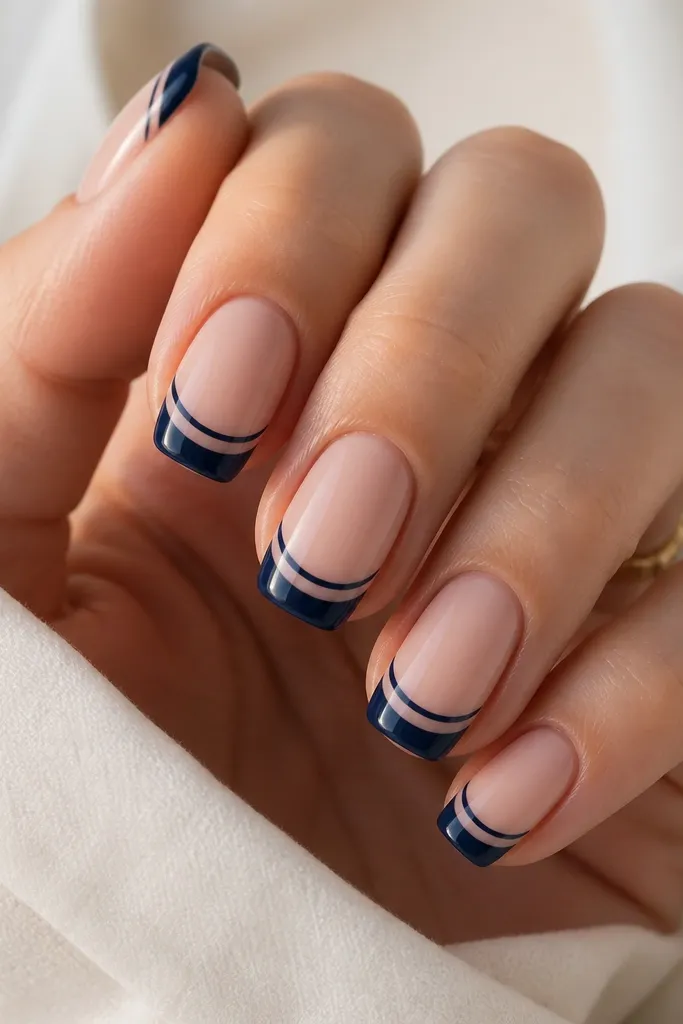
A double smile turns basic navy French into something you notice immediately. The faux ribbon sits above the main navy tip so it looks like a stacked detail, not a second random line. I like squoval for this because the parallel lines stay straight across the nail width. It flatters hands with shorter nails because the ribbon line adds structure without needing extra length. This style also looks great on people who want a French manicure but hate when the smile line is too thin.
Apply your glossy nude base and cure/dry. Paint the main navy French tip first, then let it set enough that you don’t smear it. With a fine liner brush, draw a second thin navy line above the smile curve, keeping it parallel and spaced about 0.8-1.2 mm from the main edge. Fill nothing here — it’s a single line detail. Clean the cuticle and side edges, then top coat carefully over both lines to lock them down.
Editor's noteUse painter’s tape on the back of your hand as a height gauge. Dip the liner brush and keep the second line at the same height across nails.
Watch outAvoid a second line that’s too thick. Thick double lines look like a border stuck on top.
14. Navy French with Chrome Edge Only
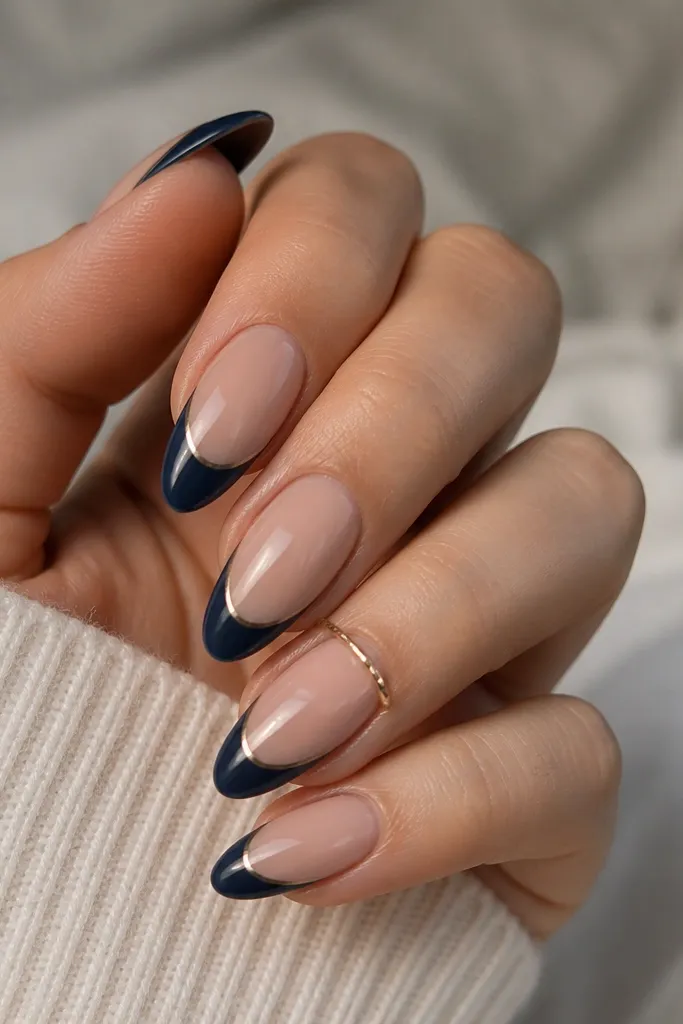
Chrome at the edge makes the French tip look crisp and jewelry-like. The trick is using chrome only on the perimeter so the center stays smooth and deep navy. Almond nails are perfect because the edge is naturally curved and chrome follows that curve nicely. This flatters all skin tones, but it looks especially striking on medium and deep tones because the chrome reflects light back to your hands. It’s a great option when you want a bold navy set that still looks clean and not “too much.”
Start with a glossy nude base and cure/dry. Paint your navy French tips with full opacity — two thin navy coats if needed. Once cured, apply a small amount of gel adhesive or chrome transfer base only along the outer edge of the navy tip, about 0.5-1 mm wide. Press chrome powder or foil onto that edge, then buff off the excess gently. Seal with top coat — if your top coat dulls chrome, use a chrome-safe top coat or a light layer only over the chrome band.
Editor's notePractice on one nail first. Chrome placement is easier when you’ve already found the exact edge thickness you like.
Watch outAvoid chrome over the whole navy tip. Full-chrome tips turn into a chrome manicure and lose the French shape.
15. Navy French Tips with White Marble Speckle Overcoat
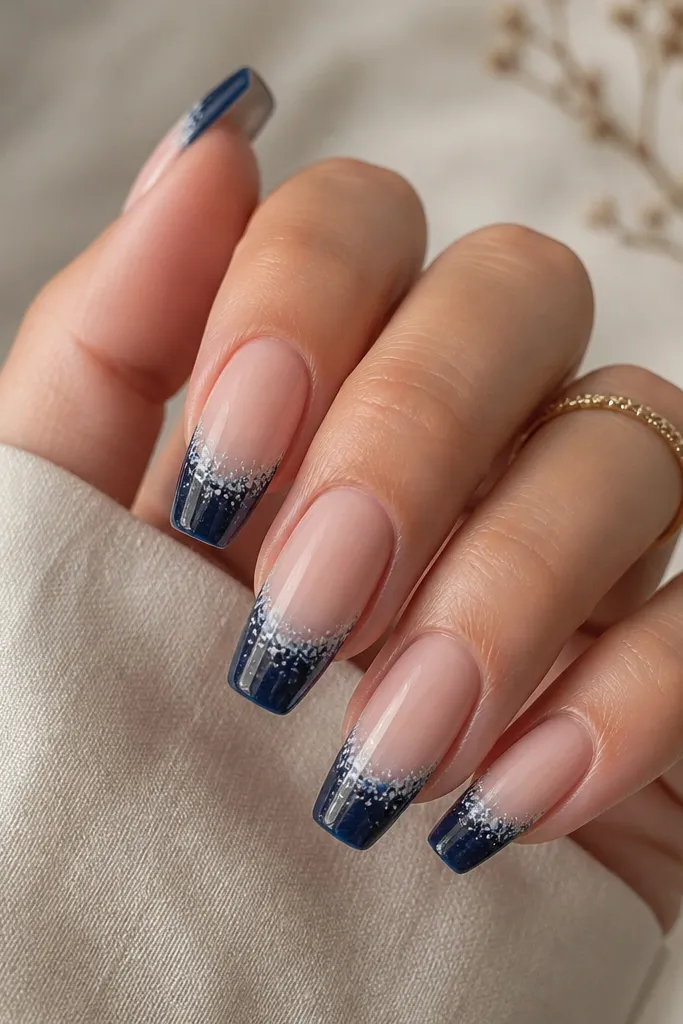
Speckle marble over a navy French tip looks detailed but still wearable. The solid navy gives you the clean French silhouette, and the speckles add texture so it doesn’t look flat. I like coffin nails because the tip area is wide, and the speckle pattern can spread naturally without crowding. This style works on fair, warm, and deep skin tones because the white speckles act like highlights. It’s also forgiving: if one speckle cluster lands a little off, the pattern still reads intentional.
Start with a glossy nude base and cure/dry fully. Paint solid navy French tips and cure completely. Then, using a thin brush or old toothbrush technique, flick white gel or polish speckles — start near the smile line and pull fewer speckles toward the outer edge. For extra control, use a toothpick to place a few tiny streaks instead of relying only on flicking. Seal with a glossy top coat in two thin layers so the speckles don’t look raised or textured.
Keep a paper towel nearby and test your flick strength. Too much force turns it into big white blobs.
Avoid speckling before the navy is fully cured. Wet navy turns speckles into smears and ruins the crisp edge.



