
1. Cobalt Micro-French with Mirror Chrome
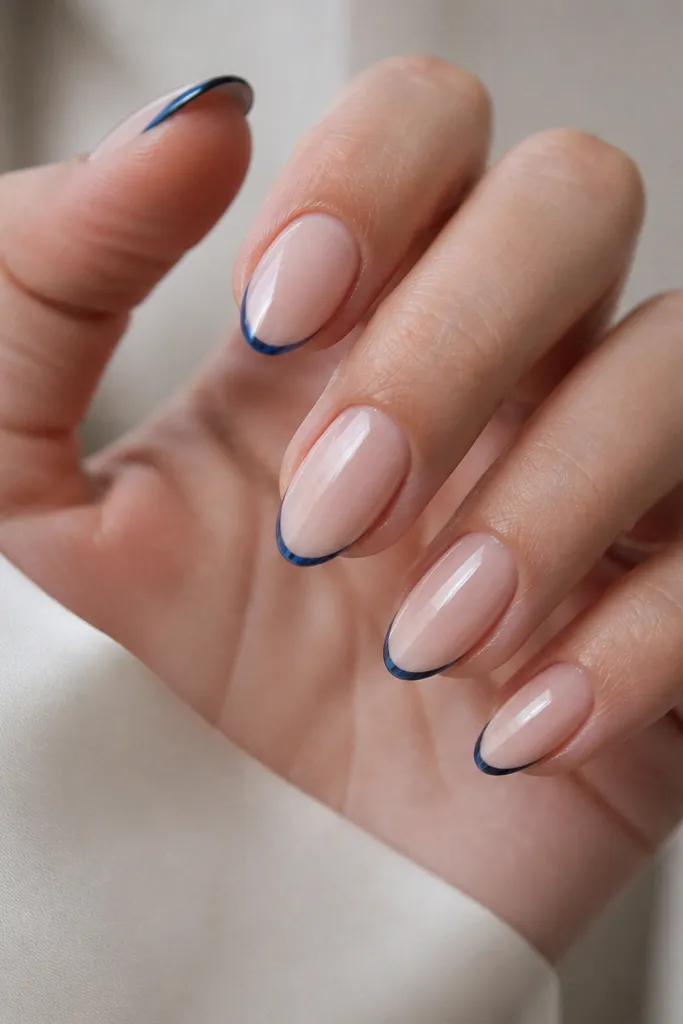
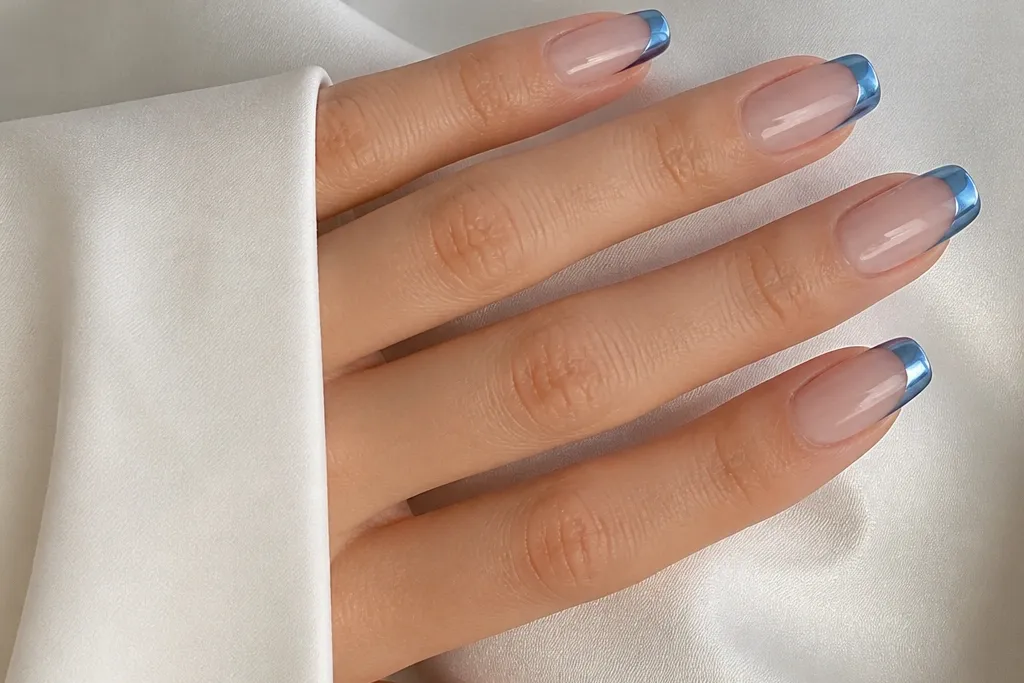
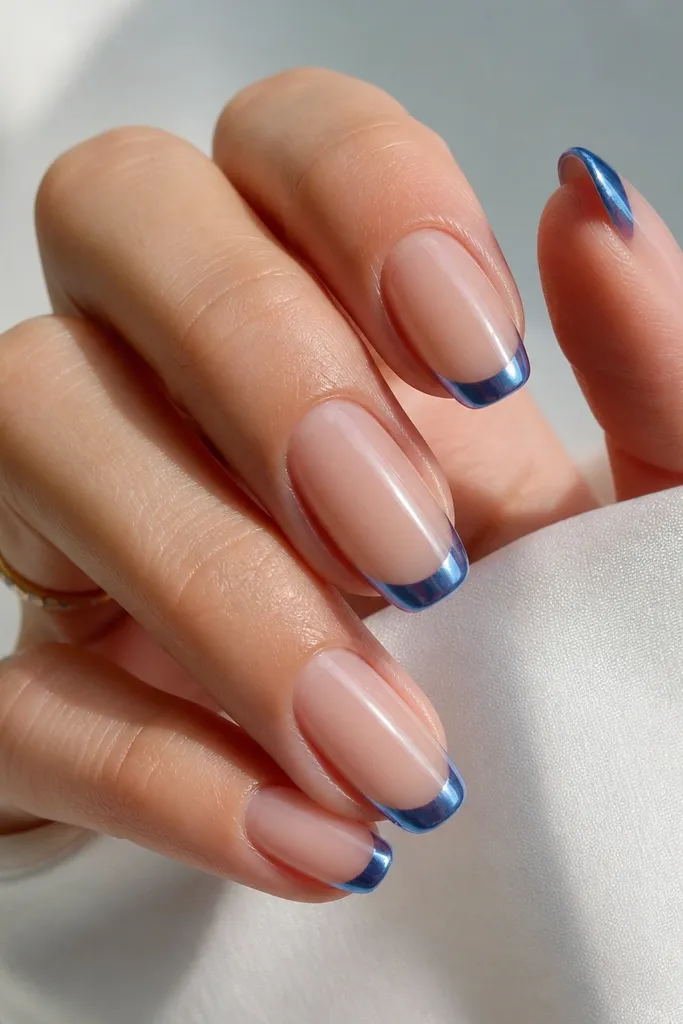
This look is all about restraint. A micro French tip keeps the nail looking longer, and the cobalt blue stays crisp against a sheer nude base. When you add mirror chrome only on the blue, it turns the tip into a bright “edge highlight” that reads clean in bright daylight and in indoor lighting. I wear this one when my hands need to look polished but I don’t want heavy sparkle. It flatters most skin tones, especially light to medium — the cool blue makes warm undertones look more even.
Start by prepping your nails and applying a sheer nude base gel (thin coat, cure fully). Use French strips or a guide to paint a narrow cobalt line, then do a second thin blue pass until it’s opaque at the tip edge. Buff the blue lightly only if you’re using powder chrome, then press chrome powder onto the blue while the surface is tacky — press and lift, don’t smear. Seal with two top coats, and cap the free edge on each nail so the chrome doesn’t lift.
Editor's noteIf your blue line looks streaky, try a slightly thicker second pass instead of adding more product to the brush. It makes the smile line look intentional.
Watch outAvoid overworking the chrome after it’s pressed — you’ll dull the reflection and pull up the edges.
2. Denim Blue French with Silver Chrome Edge
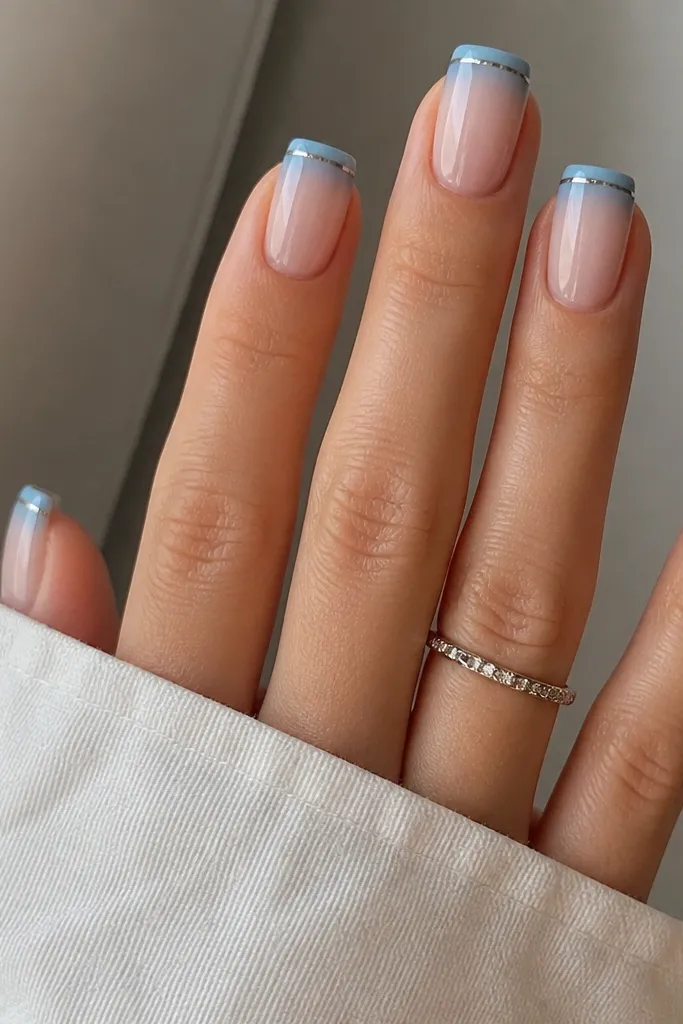
This one gives you the “seasonal evergreen” feel because the denim blue reads casual, but the silver chrome edge makes it look finished. The blue sits as a solid French, then the silver chrome is only at the outer rim, like a thin frame. That framing effect makes your nails look sharper and helps the tips look neat even with minor growth. I like it on square or short almond nails because the straight edge shows the contrast without looking busy. It’s flattering on deeper skin tones too — denim blue stays visible without turning too dark.
Paint a milky nude base and cure. Create a classic French tip in denim blue, using a guide for a straight, even smile line. After curing, apply chrome on just the outer 1/3 of the tip — you can do this by tapping powder onto a small section or brushing on chrome gel and keeping it tight to the edge. Finish with a glossy top coat that fully covers the border so the chrome stays locked.
Use a smaller brush than you think you need for the chrome edge. A tiny line looks expensive; a wide line looks like a sticker.
Don’t put chrome over the whole blue tip if you want a clean denim look — full chrome will make the blue look flatter.
3. Periwinkle Blue Chrome French with Milky Base
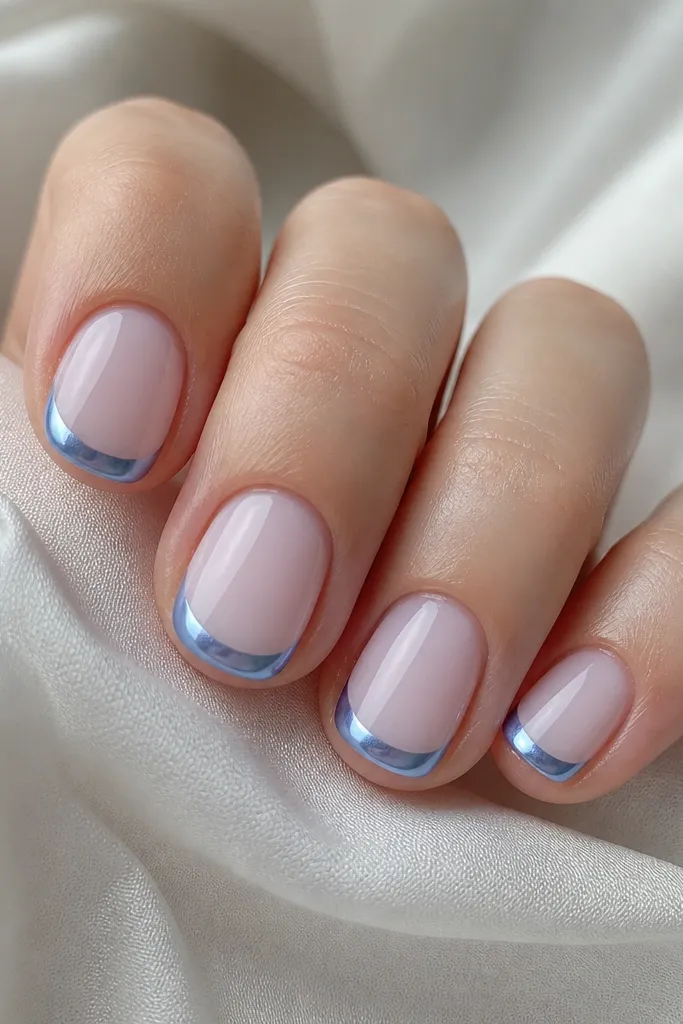
Periwinkle is the blue that looks gentle without going childish. With a milky pink base, the chrome reflection looks like frosted glass — you get shine, but it still feels soft enough for everyday. This set works great when your nails are short because the milky base visually balances the tip, so the manicure doesn’t look bottom-heavy. I’ve worn it to weddings and office days, and the color doesn’t clash with gold jewelry. It’s also forgiving if your smile line isn’t perfect — the milky base hides unevenness.
Start with a milky pink base gel in two thin layers so it’s opaque but not thick. Create a rounded French tip with a curved guide and paint periwinkle blue, then cure. Press blue chrome powder onto the blue surface while it’s tacky, then brush off the loose powder gently. Seal with a top coat in two passes, and cap the free edge carefully since short nails take more knocks.
If your smile line is slightly uneven, even it out by thickening the blue only at the thinnest spots. Do not re-paint the whole tip.
Avoid a super-clear base with periwinkle chrome — it can make the blue look icy and too stark.
4. Royal Blue French Tips with Holographic Chrome Top
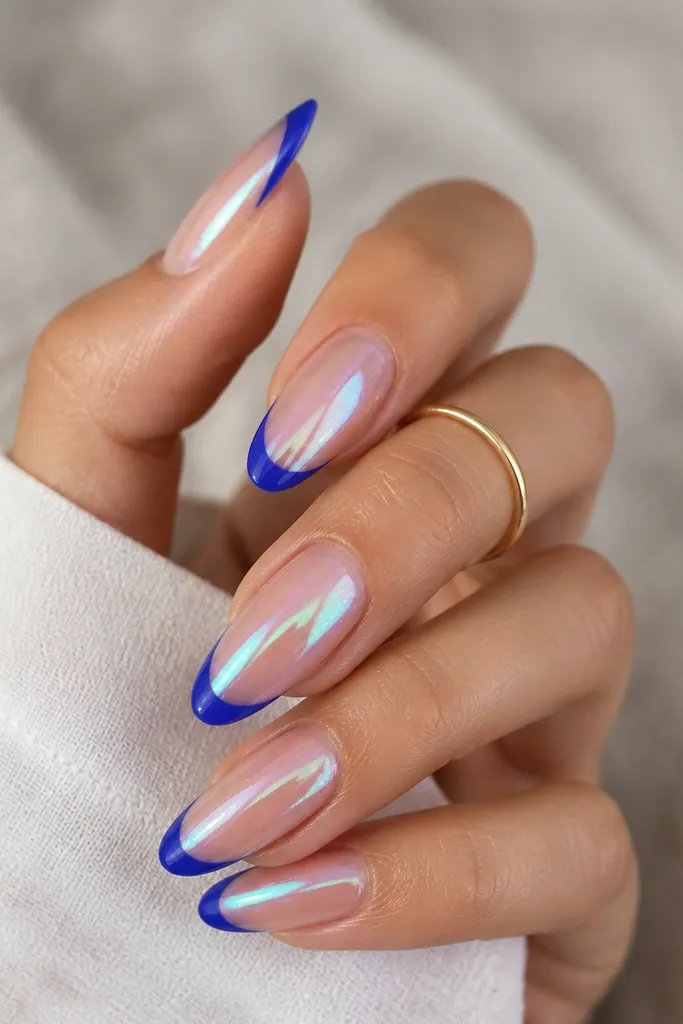
Royal blue can be tricky, but chrome makes it look intentional instead of harsh. The holographic shift adds a “moving light” effect when you turn your hand, so it doesn’t look like a flat blue line. I like this for evenings and holiday events because it catches flash photos without needing glitter. The sheer nude base keeps it clean and modern. This look suits most skin tones, but it’s especially flattering if your undertone runs warm — the holographic shift balances it.
Apply a sheer nude base gel and cure, then map your smile line with a French guide. Paint royal blue onto the tip in two thin layers for full opacity at the edge. Cure fully, then apply holographic chrome (either mixed in a chrome gel or pressed as powder depending on what you have) only on the blue area. Seal with a glossy top coat, and press the top coat into the tip edge so the holographic layer doesn’t lift.
Editor's noteTake one hand under a lamp before you cure the top coat. If the holographic shift looks weak, add one more thin chrome layer on the blue edge.
Watch outDon’t use a matte top coat on holographic chrome French tips unless you want a dull look.
5. Blue Chrome French Fade from Tip to Center
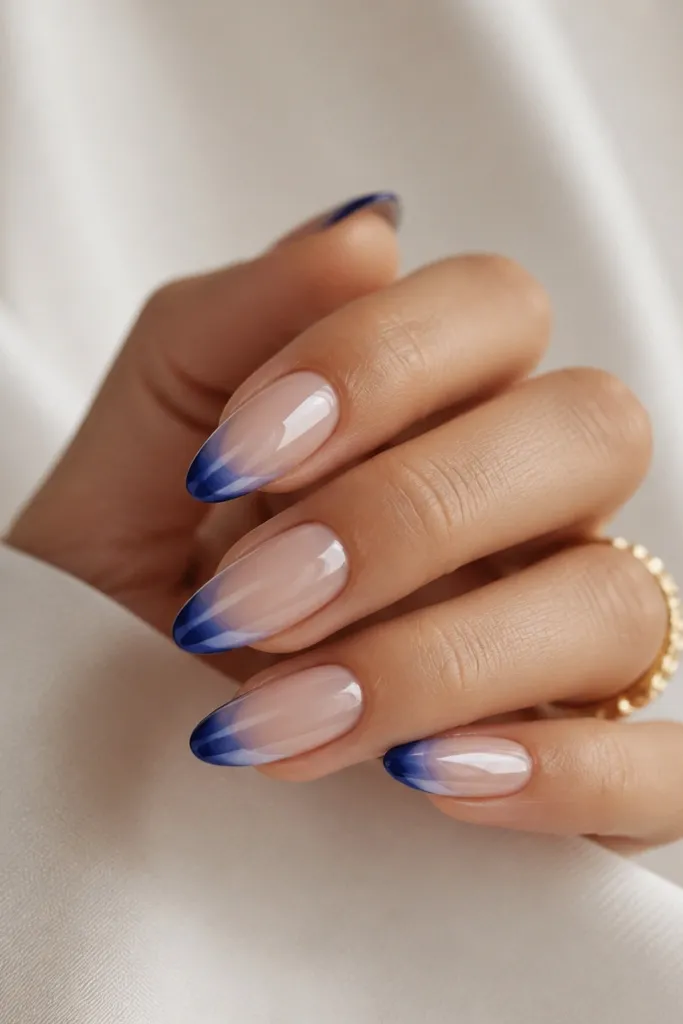
This is the version I reach for when I’m bored with a hard line. The fade softens the French tip and makes the blue look like it’s glowing out from the edge. Chrome on the whole tip-to-center area gives you that mirror effect, but the gradient keeps it from looking too blunt. It flatters longer nails and also works if you’re growing them out because the center glow draws the eye upward. On darker skin tones, the gradient looks especially smooth and expensive.
Start with a sheer nude base and cure. Paint the French tip area in a deep cobalt starting at the outer edge, then use a sponge (or a makeup wedge) to lightly blend the blue inward before curing. When the blend is set, add a tacky layer over the blue and press chrome powder to cover the gradient area — press lightly so the fade stays soft. Finish with two top coats, and cap the free edge twice.
Editor's noteUse a damp sponge, not wet. Wet sponge creates puddles and kills the gradient.
Watch outAvoid blending after chrome is applied. The powder will smear and you’ll lose the fade.
6. Powder-Pressed Blue Chrome French on Nude Jelly Base
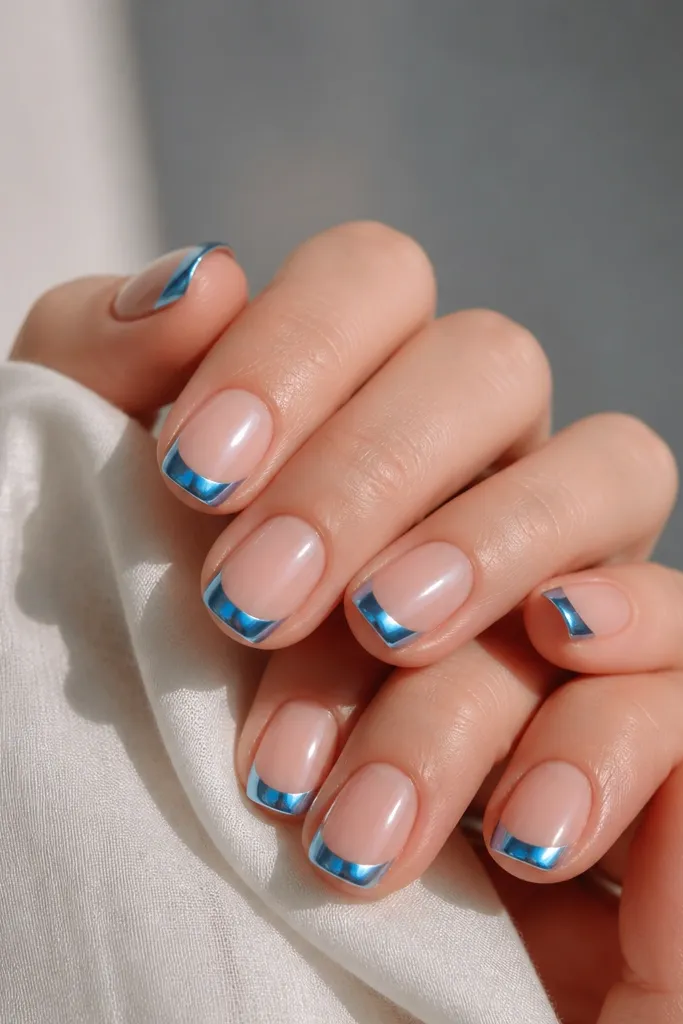
Jelly nude bases look like your nails but better, and they make blue chrome look deeper. The translucency adds dimension under the chrome, so the blue doesn’t look flat. This set looks great for spring and summer, but it also works in winter because the base is still neutral and the chrome stays reflective. I like it on squoval nails because the shape gives you a softer edge than almond. It’s forgiving on staining too — the jelly base hides tiny unevenness better than a fully opaque nude.
Apply a nude jelly base in a thin coat and cure, then repeat for the exact opacity you want (I stop at “slightly see-through”). Use a French guide to paint a medium-width blue tip in cobalt or denim blue, cure. Add tack gel over the blue tip only, then press chrome powder until it’s fully mirrored. Seal with a glossy top coat and cap the tip edges — jelly bases can lift around the sides if you miss the corners.
Editor's noteIf you see gaps in the chrome, press again with a dry applicator — don’t add more blue gel.
Watch outAvoid thick jelly layers — they make the chrome top feel bumpy and it catches on fabric.
7. Blue Chrome French with Tiny Crystal at the Outer Corner
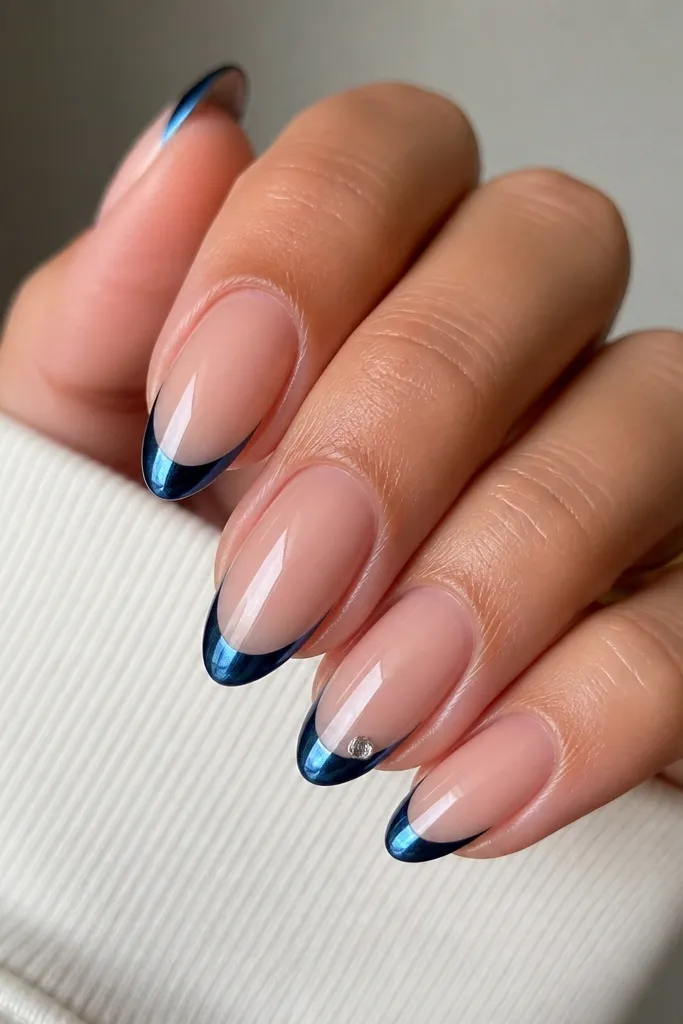
A single crystal at the outer corner turns French tips from “pretty” into “date night.” The chrome does the heavy lifting for shine, and the tiny stone gives you a second sparkle point without covering the nail. I like clear crystals over blue stones here because the chrome already gives you the blue — the clear gem just reflects everything else. This set flatters hands with short to medium nails because the crystal placement pulls attention outward and makes the tip look wider. It’s also great for people who want bling but hate full rhinestone nails.
Do a sheer nude base and cure. Paint and cure your blue French tips, then apply chrome only to the blue area. After chrome is sealed with a thin top coat (so you don’t disturb it), place one small crystal using a dot of builder gel or nail glue at the outer corner of the smile line. Cure, then apply a final top coat over the crystal so the edges are smooth.
Use a crystal that’s small enough to look like a highlight, not a cluster. I aim for sizes around 1.5-2 mm.
Don’t glue crystals directly onto unsealed chrome — they pop loose because the surface is too slick.
8. Classic Blue French with No-Chip Gel Top Coat (Chrome-Free)
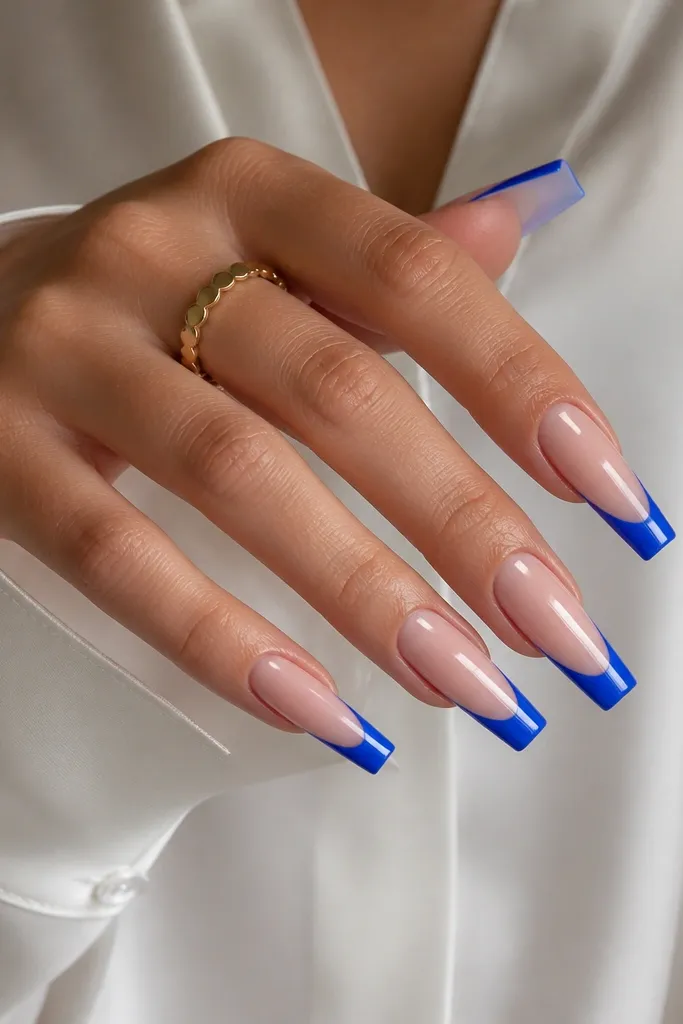
If you hate chrome mess or you want a more “real” nail look, this is the classic French version I trust. The blue is still bold, but the finish is glassy and smooth instead of mirror. I use this when I need my nails to look formal but not flashy, like job interviews or client meetings. It flatters long nail shapes because the thicker smile line creates a strong frame. The blue looks good on fair, medium, and deep skin tones as long as the nude base matches your undertone.
Apply a sheer nude base gel and cure. Paint blue French tips in two thin layers, keeping the smile line consistent across nails using a guide. Cure each layer fully — impatience is what causes streaky tips. Finish with a high-shine no-chip gel top coat, then cap the free edge and wipe the tacky residue if your top coat requires it.
Editor's noteChoose a blue that matches your undertone — cobalt for cool undertones, a slightly softened denim blue for warmer undertones.
Watch outAvoid skipping cuticle cleanup — gel top coat will trap tiny smudges and the manicure looks messy fast.
9. Blue Chrome French Tips with Negative Space Half-Moon
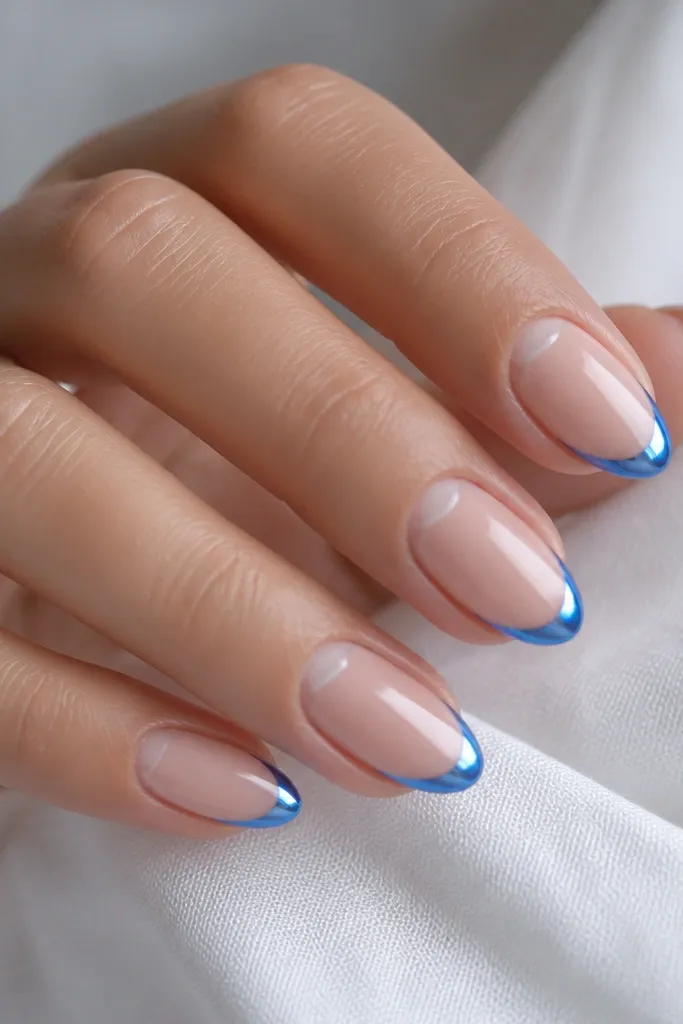
Negative space makes French tips look modern and lighter on the hand. The half-moon cutout keeps your nail bed visible, so the blue chrome tip doesn’t feel heavy even when it’s mirror-bright. This set is my go-to when I want something stylish without adding art that grows out weird. It flatters hands where the nail bed is shorter because the visible half-moon gives you extra balance. The chrome still catches light, so you get shine without turning the whole nail into a solid block.
Start with a sheer nude base and cure. Use a small half-moon sticker or cut a guide from French tape to mask the cuticle area, leaving the negative space clean. Paint your blue French tip around the mask, cure, then apply chrome only on the blue. Remove the mask carefully after curing, then top coat in two layers and cap the free edge.
Press the half-moon mask down with a lint-free wipe so blue doesn’t creep underneath.
Avoid pulling off the mask too soon. If the gel is under-cured, it smears the negative space.



