
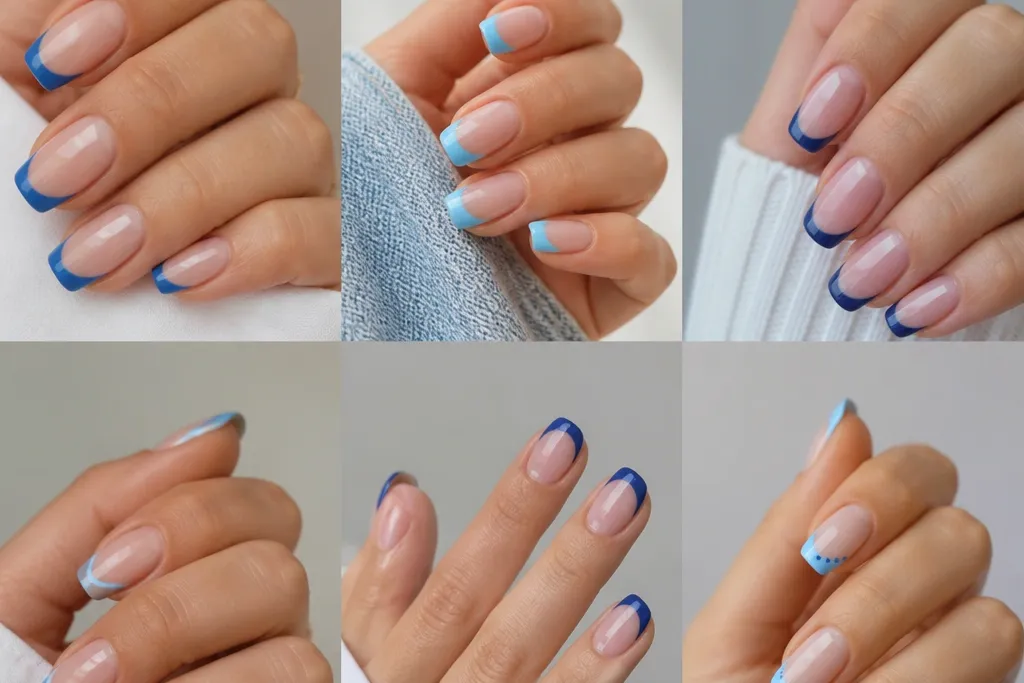
1. Denim Micro French With White Dot Orbit
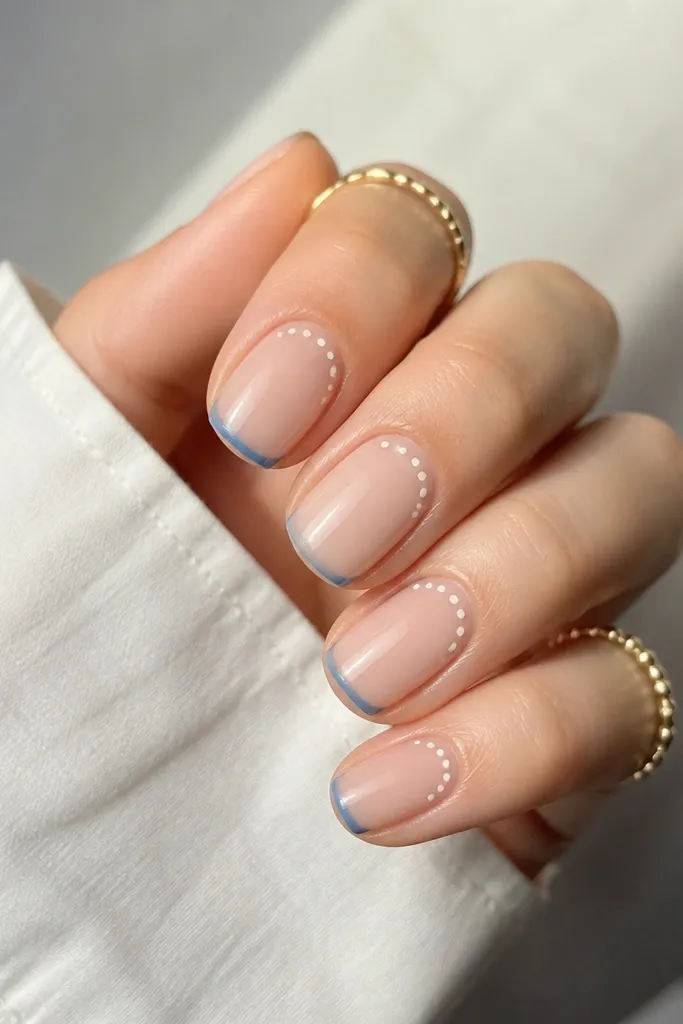
I love this one because the denim blue stays modern without looking loud, and the dot orbit gives it movement even when the tip is super thin. I did it on my short squoval nails and the orbit sits high enough that it doesn’t crowd the nail bed. The white dots make the blue look sharper, especially against warm undertones where plain denim can look a little muted. This design suits everyday wear, but it still reads “done” because the dot placement is intentional. The styling principle is contrast: keep the French line narrow, then add texture with tiny dots instead of widening the blue.
Start with a sheer nude base and let it dry fully. Apply a French stencil so the tip curve sits about 1.5-2 mm from the free edge, then paint the tip with denim-blue polish or gel and cure. Remove the stencil carefully while the blue is still set enough to hold shape. With a dotting tool, place 4-6 tiny white dots in a loose arc near the outer corner, then seal everything with a glossy top coat.
Editor's noteUse a dotting tool with a smaller ball than you think you need; micro dots look cleaner than chunky ones.
Watch outDon’t flood the stencil with polish — thick product makes the blue line bleed.
2. Periwinkle French Fade Into Nude Cloud
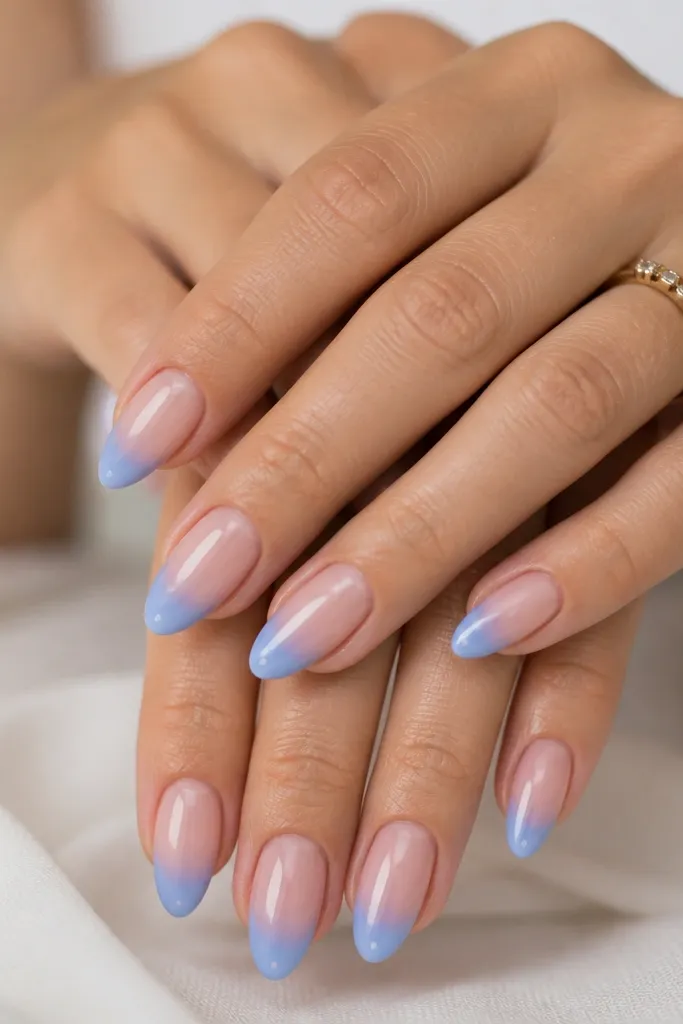
This is the “I want blue but I don’t want a hard line” version. The periwinkle fade looks airy and flattering on medium almond because the gradient follows the nail’s shape. I wore this when my hands were a little dry and the fade hid imperfections better than a strict French border. For deeper skin tones, periwinkle looks bright and fresh, especially under daylight and flash. The principle here is blending: you keep the blue concentrated at the tip and fade it upward so the nail still looks long.
Start by painting a sheer nude base and smoothing the edges with one steady brush stroke. Sponge-paint periwinkle from the tip inward using a makeup sponge, keeping the first pass only on the very edge of the nail. Without reloading the sponge, blend upward lightly with 2-3 gentle taps, then cure or let it dry. Finish with a tiny dot of clear glitter gel at the center of the tip and top coat over everything.
Practice the sponge pressure on one finger first — light taps give the best cloud effect.
Avoid dragging the sponge around the nail; that turns the fade into streaks.
3. Classic White Base With Navy French and Tiny Star
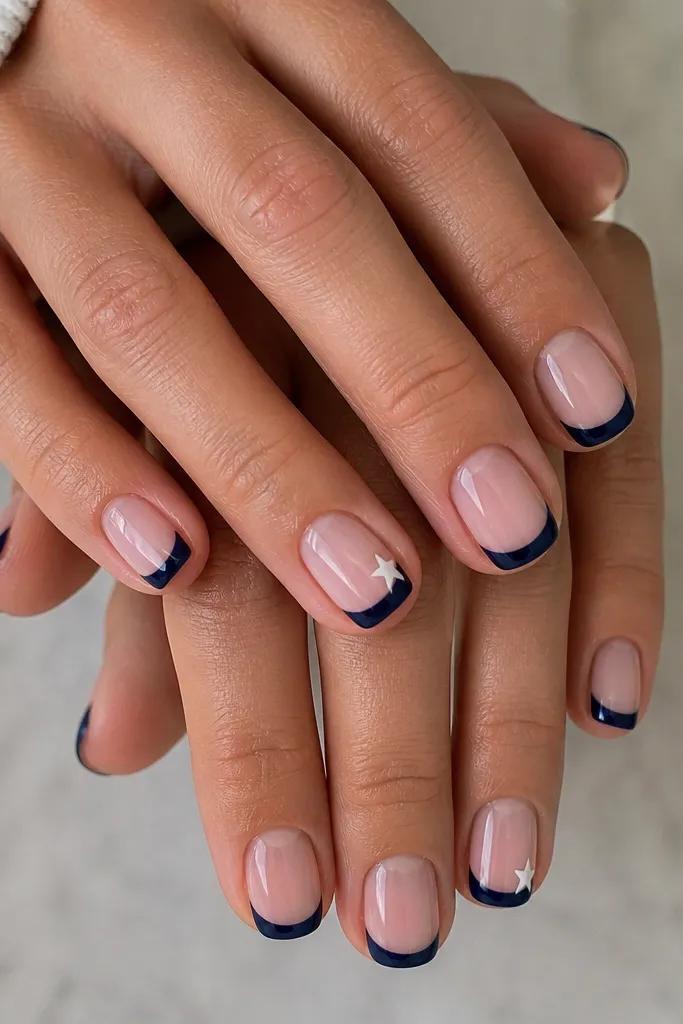
This one is classic but not boring. The navy French tip has that strong, clean edge, and the tiny white star adds a playful detail without stealing the show. I like it most on short squoval because the star sits in the sweet spot where it looks intentional, not crowded. On warm undertones, navy gives a cool contrast that makes the skin look even. The styling principle is restraint: one small symbol on a couple nails looks better than scattering stars across all ten.
Paint a sheer pink base and cure/dry completely. Use a striping stencil or painter’s tape to mark the French curve, then apply navy polish to the tips and cure. For the star, use a small star stencil or a fine liner brush and paint a single white star near the outer corner, about 1 mm away from the side wall. Seal with a high-gloss top coat, then wipe any tacky residue if you’re doing gel.
Editor's noteIf your star looks lopsided, draw a quick V shape first, then fill the points — it’s faster than trying to paint it in one go.
Watch outDon’t choose a star size bigger than the tip’s width; big stars make short nails look busy.
4. Sky Blue French With Micro Heart at Cuticle Corner
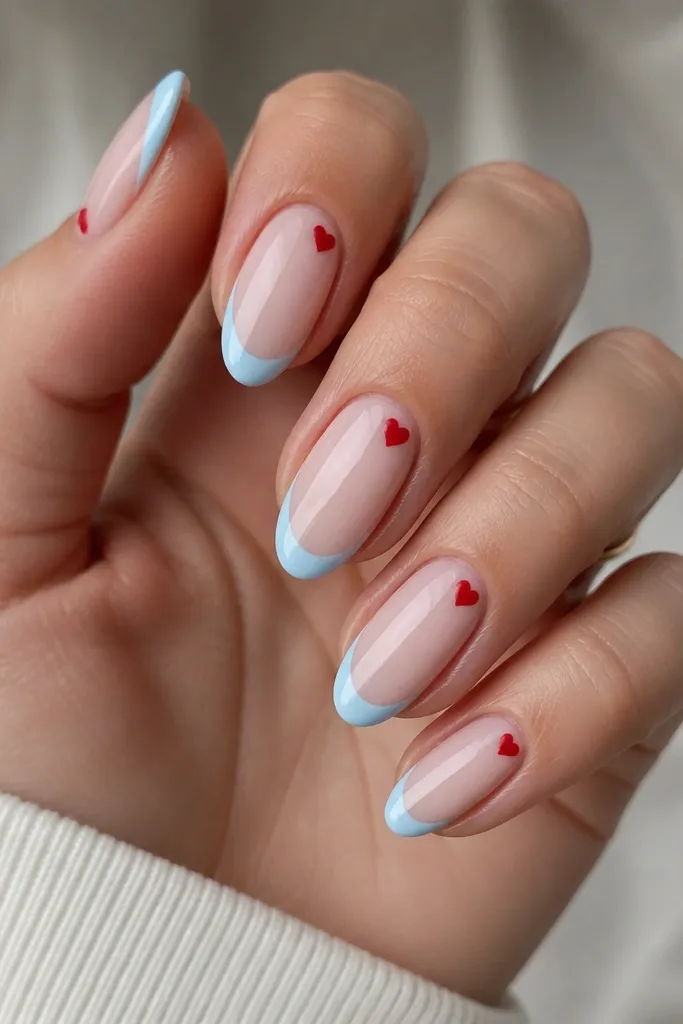
This is my go-to when I want French tips but also want a romantic wink. The micro heart at the cuticle corner keeps the design from competing with the blue tip, so the nail still feels sleek. I did this on medium almond and the heart looks sharp because there’s enough space near the cuticle to place it cleanly. Red against sky blue is a punchy color pair that pops on almost every skin tone, especially in photos. The principle is placement: tiny art near the cuticle reads cute without making the tips feel heavy.
Start with a sheer nude base and make sure the cuticle area is smooth. Create the French tips with a stencil and paint sky blue, curing fully before you remove the stencil. With a dotting tool or toothpick, place a small red dot, then add two smaller dots beside it to form the heart shape, and gently connect them with the tip of the brush. Cure/dry, then apply a glossy top coat in thin layers so the heart edges stay crisp.
Use gel polish for the heart if you’re clumsy with regular polish; it holds its shape better under the lamp.
Don’t put the heart in the center of the nail — it makes the whole look feel top-heavy.
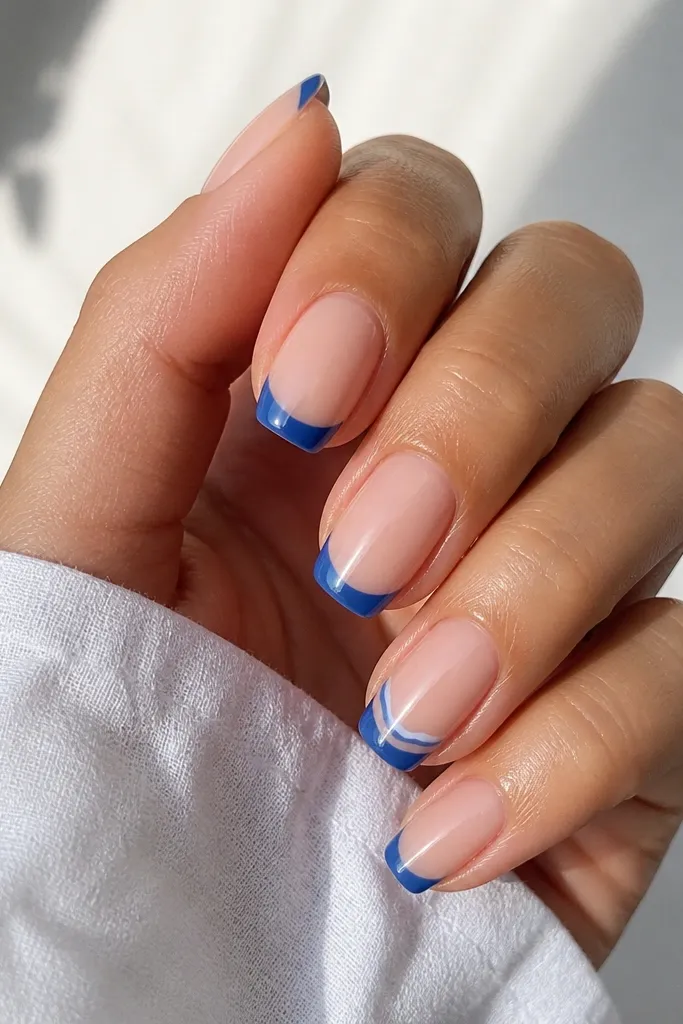
5. Royal Blue French With White Lace Stripe
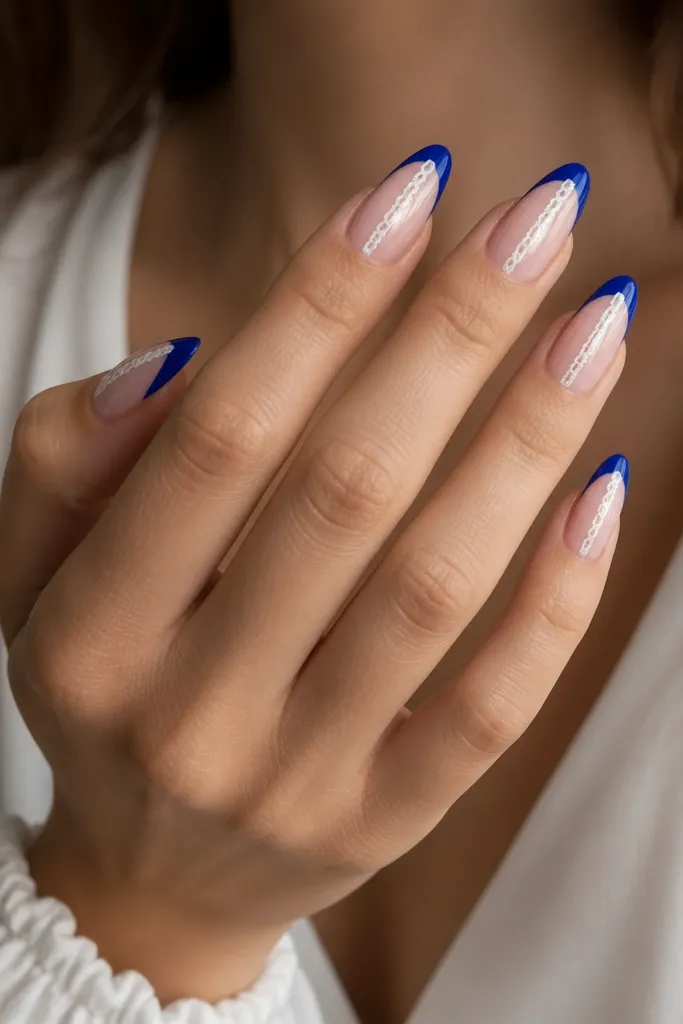
This is the “dressy French” look that still works with jeans. Royal blue is bold, and the single white lace stripe breaks it up so it doesn’t feel like a solid block. I like this on almond because the stripe naturally follows the nail’s curve, which makes it look longer. On medium to deep skin tones, royal blue turns almost jewel-like under glossy top coat. The principle is line work: one thin stripe beats lots of small lace bits for a cleaner finish.
Apply a sheer nude base and cure/dry. Tape off a thin French line at the tip, paint royal blue, and cure/dry. Use a fine liner brush with white polish to draw a narrow vertical lace stripe from the tip edge toward the middle, about 1-2 mm wide. Add tiny “loop” marks along the stripe with the brush tip, then top coat carefully so the loops stay raised-free.
Editor's noteIf your lace marks look shaky, do them as short dashes, not full curves — it looks like lace faster.
Watch outAvoid thick lace lines; they make the design look like a sticker.
6. Blue Chrome French With Clear Outline
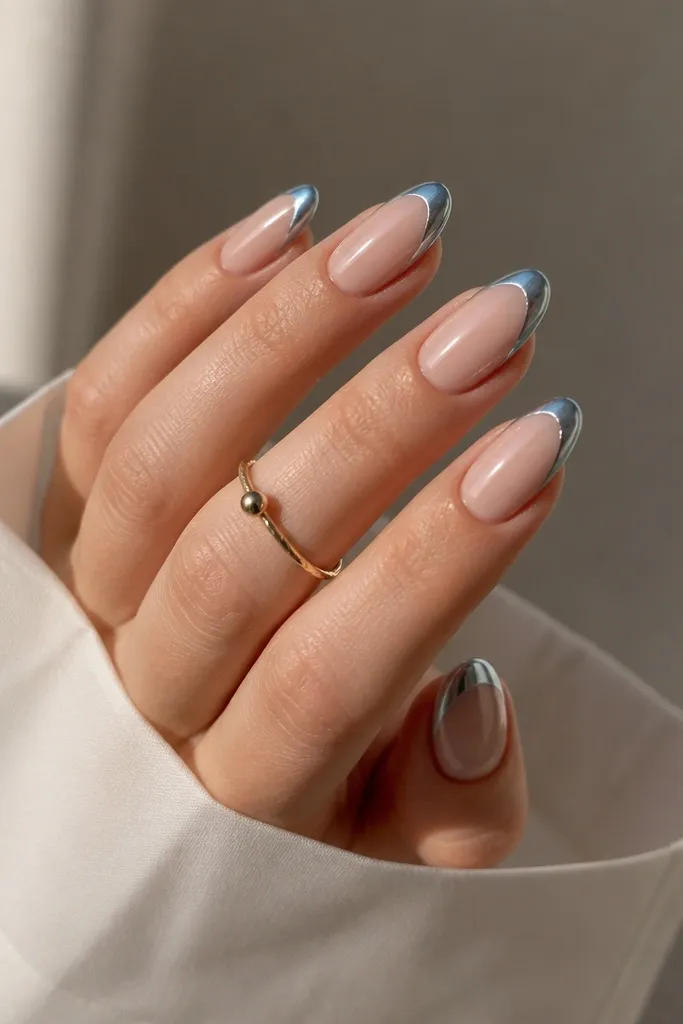
Chrome tips look expensive when you keep the shape crisp. The clear outline adds that “cut glass” effect that I always notice in salon nails, but you can do it at home. I wore this on medium almond and it looked best with a super glossy base because chrome reflects light and shows brush marks. On fair to light-medium skin, blue chrome reads icy; on deeper skin it reads more electric. The principle is double definition: chrome fills the tip, and the clear outline sharpens the edge.
Start with a nude base and cure/dry completely. Create French tips with a stencil and paint blue chrome gel or base, cure, then apply blue chrome powder and rub off excess. Use clear gel or a clear builder gel with a fine brush to trace the French curve as an outline, then cure. Finish with a smooth top coat that doesn’t dull the chrome too much, and wipe any residue.
Rub chrome powder longer than you think — 15-20 seconds per nail makes it look even.
Don’t skip the clear outline; without it, chrome can look like a flat sticker.
7. Denim Blue French With White Bow on One Accent Nail
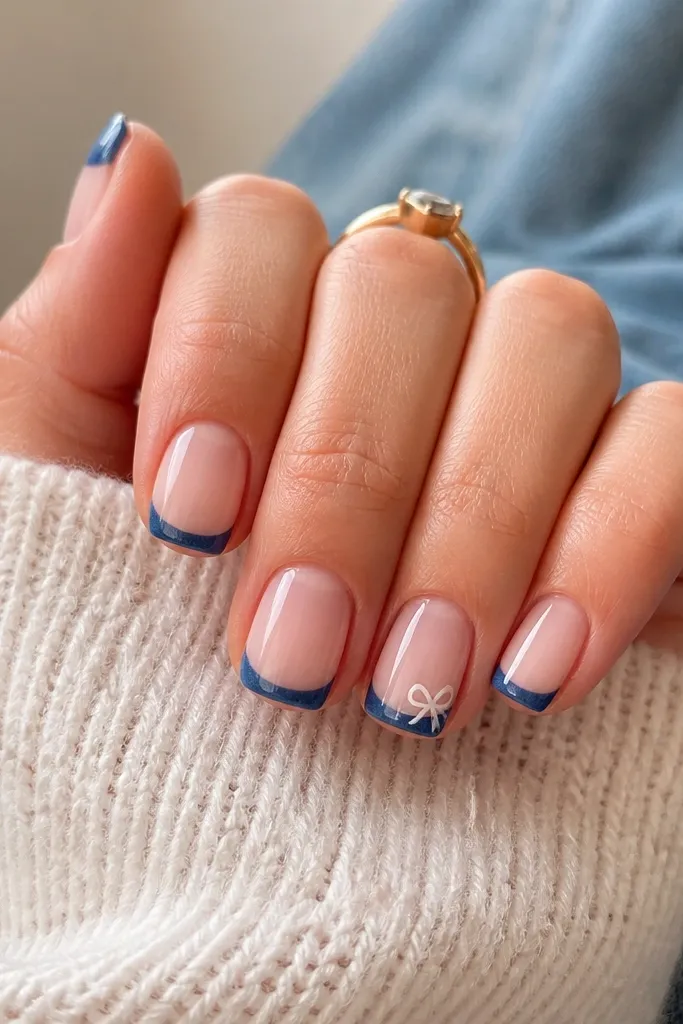
Bows can look childish, but this one looks clean because it’s tiny and placed only on one accent nail. Denim blue keeps the bow from feeling too sweet, and the white bow gives a crisp focal point. I did this on short squoval because the bow sits nicely on the outer corner without needing extra nail length. It’s flattering for hands that are wider at the knuckles since the tip is thin and the bow stays compact. The principle is focus: one nail gets the charm, the rest stay classic.
Paint a sheer nude base and cure/dry. Apply tape or a stencil for the French tips, then paint denim blue and cure. On one accent nail, place two small white teardrop shapes on the outer half of the tip to form the bow loops, then add a tiny white dot in the center for the knot. Use a toothpick to connect edges cleanly, then seal with top coat over the bow.
Editor's noteMake the bow loops slightly angled toward each other; symmetrical bows look more natural when they’re not perfectly mirrored.
Watch outDon’t put bows on every nail — the charm turns into clutter fast.
8. Navy French With Silver Foil Half-Moon
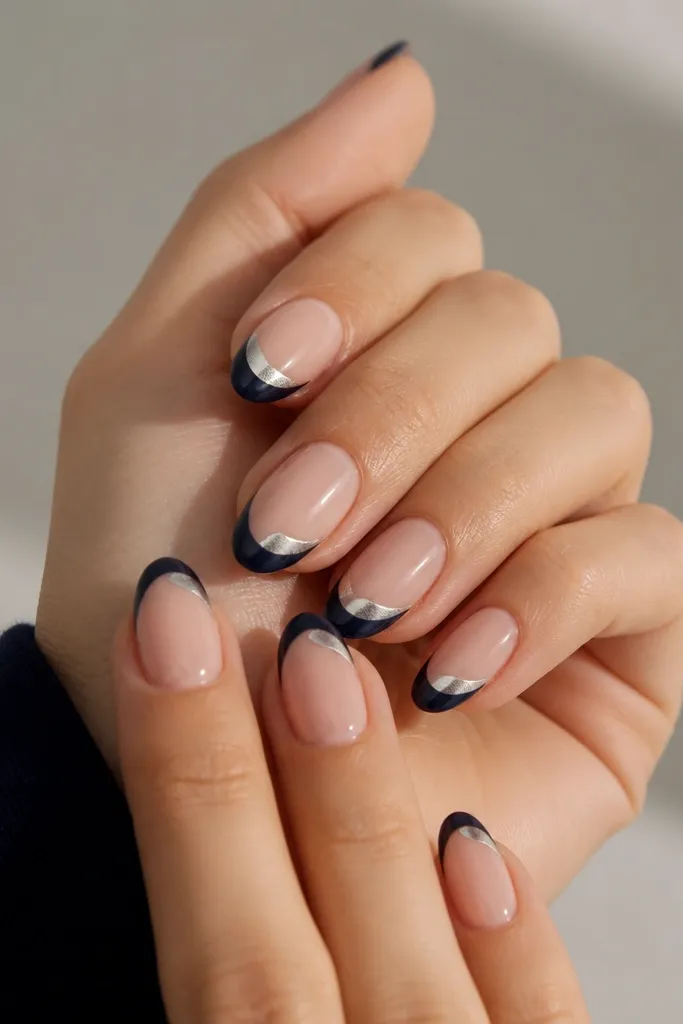
This is a strong look for nights out that still feels wearable. The foil half-moon sits right in the middle of the blue tip, so it looks balanced and doesn’t drag the eye across the nail. I did it on medium almond and the crescent shape follows the nail curve, which makes the tip look intentional and not random. Silver foil reflects light in a way that flatters most skin tones, especially under cooler lighting. The principle is using one metallic shape instead of lots of glitter — it stays clean.
Start with a sheer nude base. Create navy French tips with a stencil and cure. Cut small pieces of silver foil (you want irregular, torn edges), then press the foil onto the center of each tip using tacky gel or foil glue; cure if your system needs it. Gently press again so the foil follows the curve, then seal with two thin top coats to smooth the surface.
Editor's noteTrim foil with small nail scissors so you don’t get big sharp edges sticking up.
Watch outDon’t press foil too hard; it can smear and muddy the navy underneath.
9. Powder Blue French With Tiny Glitter Fade Line
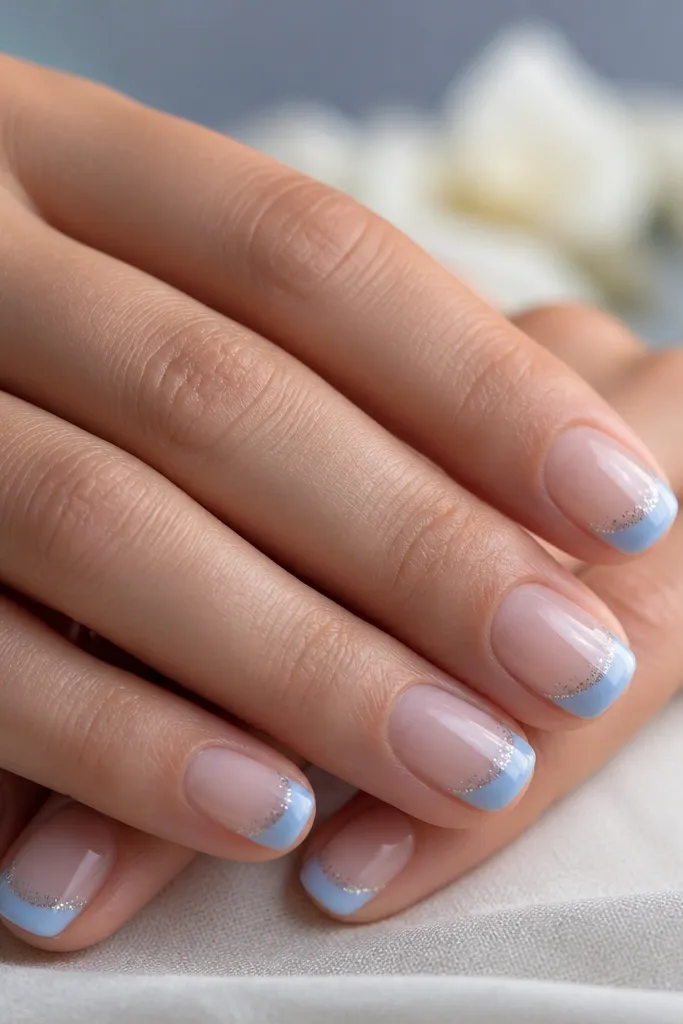
This one looks like a boutique manicure because the glitter is controlled. Powder blue gives a softer base than navy, and the glitter fade line adds shimmer without turning into full glitter tips. I did it on short nails and it still lengthened the look because the glitter line stays narrow. On warm undertones, powder blue makes hands look fresh, and the silver glitter catches light even when your outfit is plain. The principle is a single glitter stripe: narrow, placed right on the French line, then feathered.
Apply a sheer nude base and cure/dry. Use a stencil for a thin powder-blue French tip, then cure. While the top layer is still tacky (or using a thin gel stripe), place a small band of fine silver glitter along the inside edge of the blue tip. Feather it inward with a clean brush so it fades, then cure and finish with glossy top coat.
Editor's noteUse a flat makeup brush to remove extra glitter from the sides — it makes the nails look salon-clean.
Watch outAvoid thick glitter bands; they make the French line lose definition.
10. Blue French With White Marble Corner
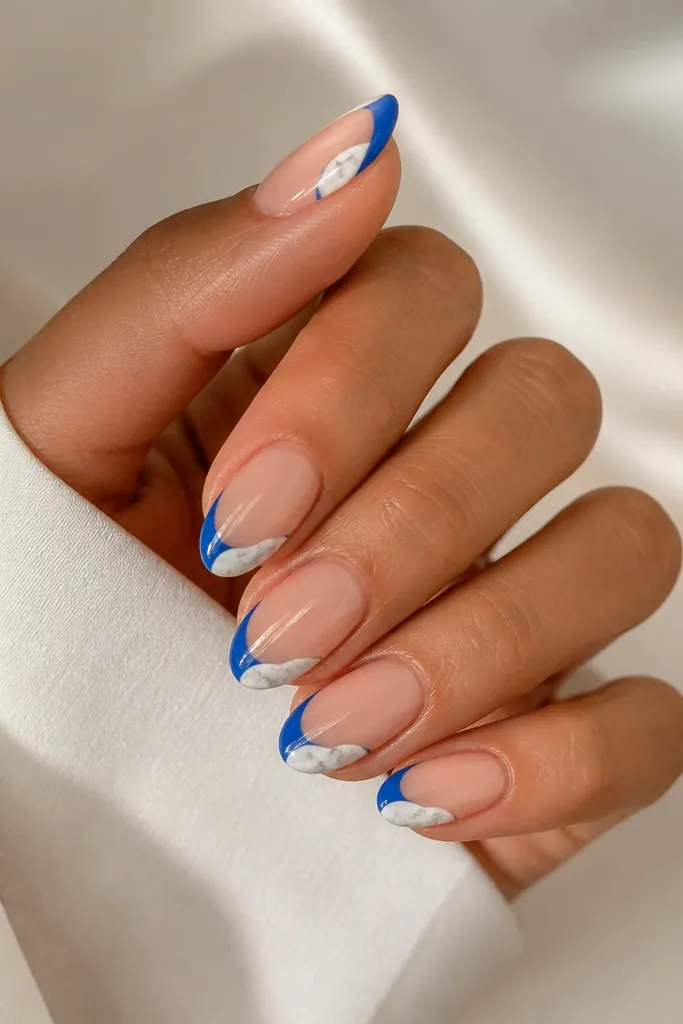
Marble corner accents look high-end because they’re small and irregular. I like this design when I want a twist on French tips without painting full marble across the nail. The blue tip gives the color, and the marble corner adds depth and texture. It flatters short to medium lengths because the patch stays near the outer edge, which visually narrows the nail. The principle is corner placement and thin veining — marble works when it’s not too big.
Start with a nude base and cure/dry. Paint blue French tips with a stencil and cure. For the marble, dab a tiny white gel patch on the outer corner, then add a few thin gray lines with a liner brush to mimic veining. Use a toothpick to gently blend one or two edges so it looks natural, then cure and seal with glossy top coat.
Use gray polish that’s slightly blue-gray; it matches denim and periwinkle better than warm brown-gray.
Don’t make the marble patch wider than the sidewalls; it turns the nail into a block.
11. Cobalt French With Orange Dot Accent Line
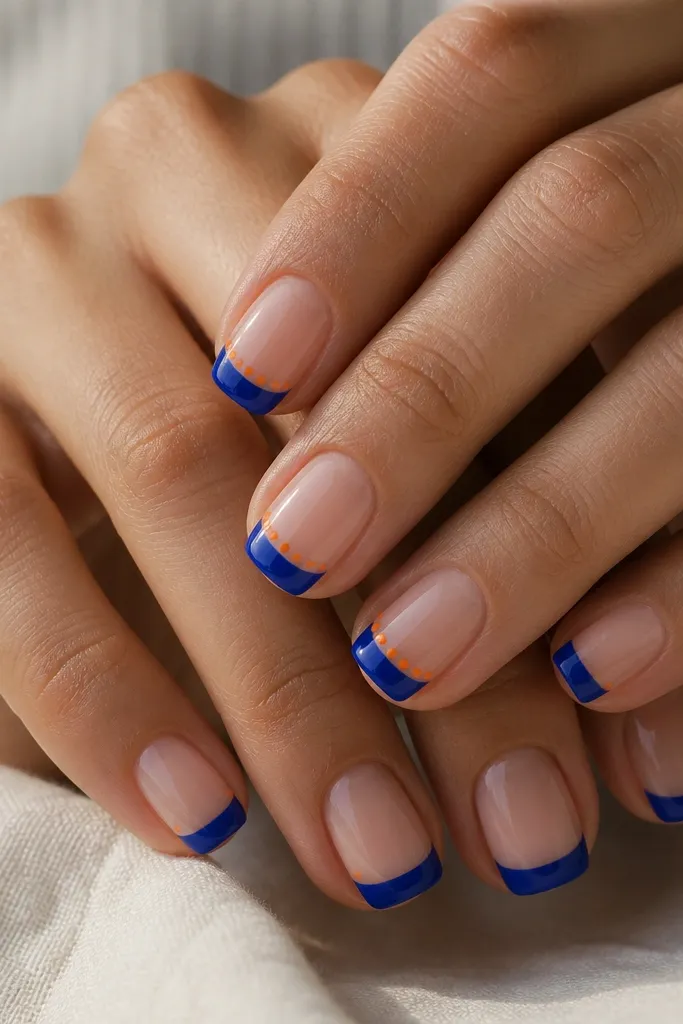
Cobalt plus orange looks bold but clean when you keep the orange tiny and placed like a guide line. I wore this to a casual dinner and people kept asking if it was nail art stickers. It works on short squoval because the dot row stays near the edge and doesn’t cover the nail bed. On medium to deep skin, cobalt reads strong and the orange pops without needing extra glitter. The principle is using a second color as an outline — dots act like punctuation.
Paint a sheer nude base and cure/dry. Apply cobalt French tips with a stencil, then cure. On two accent nails, place a single dot row along the inner edge of the blue tip — start near the center and work to the sidewalls, keeping spacing even. Use a dotting tool for consistent dot size, then top coat.
Editor's noteIf your dots smear, let the cobalt fully cure and then top coat only after the orange is dry.
Watch outAvoid orange dots larger than the white French line you want; big dots make it look messy.
12. Blue French With Negative Space Half Moon
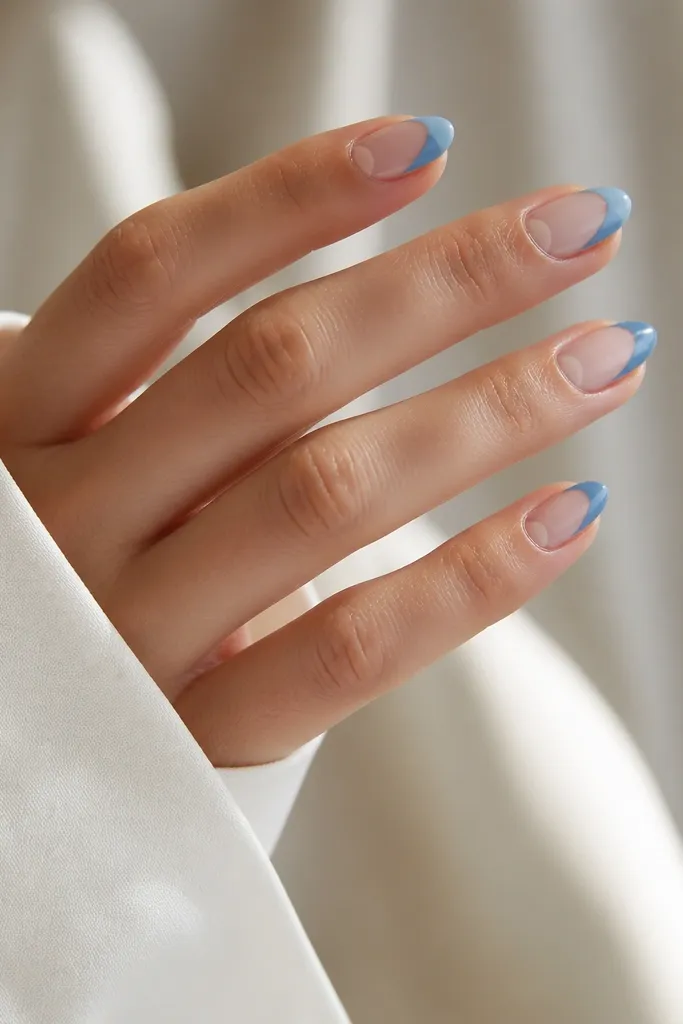
Negative space makes blue French tips look modern and sharp. I like the half-moon version because it keeps the design airy and makes nails look longer, especially on medium almond. The nude base shows through, so it’s flattering on hands with dry cuticles too since the focus is on shape, not coverage. Cool blues like royal or navy look crisp against nude, and the negative space keeps it from feeling heavy. The principle is leaving clean gaps — don’t cover everything with blue.
Start with a nude base and cure/dry. Use tape to block off a half-moon area near the cuticle on each nail, leaving it unpainted. Paint the French tip area with navy or royal blue, then cure. Remove tape while the polish is fully set, then add a glossy top coat over everything, keeping the negative-space area clean and glossy.
Press the tape down firmly along the edge so you get a crisp negative-space border.
Avoid freehand half-moon edges if you’re rushing; uneven negative space reads cheap.
13. Periwinkle French With White Feather Tip
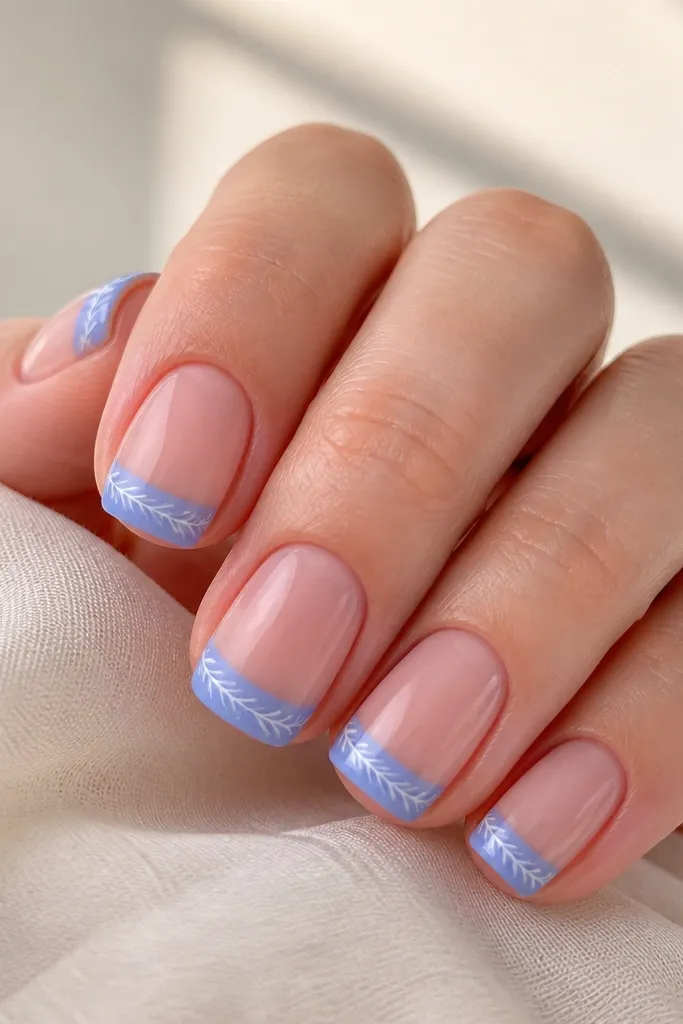
Feather tips look delicate, and periwinkle makes them feel light instead of dramatic. This design flatters short nails because the feather is drawn inside the blue tip area, so it adds detail without extending length. On fair skin, the white stands out cleanly; on deeper skin, the periwinkle gives enough contrast so the feather still reads. I did this for a spring event and it photographed really well because the feather lines catch the glossy light. The principle is micro line art: thin, repeated strokes that follow the tip curve.
Paint a sheer nude base and cure/dry. Apply periwinkle French tips with a stencil, then cure. With a fine liner brush, draw a central white feather stem line from the middle of the tip downward slightly, then add short angled strokes on both sides. Keep each branch stroke thin and spaced so it doesn’t turn into a scribble. Top coat carefully, one slow coat, so the lines stay crisp.
Editor's noteUse white gel polish for feather lines if you can — it levels more smoothly than regular polish.
Watch outDon’t thicken the feather lines; thick lines flatten the feather effect.
14. Blue French With Gold Stud Outer Corner
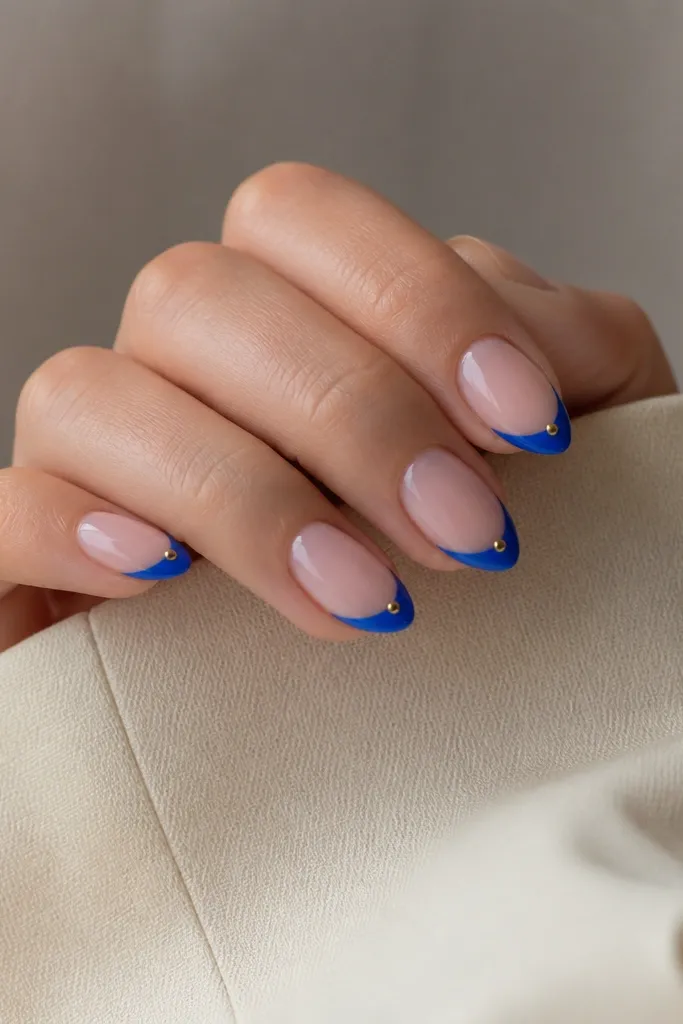
Studs look best when you use just one per nail and keep the rest clean. The gold stud at the outer corner gives a sharp focal point, and the blue tip stays the main color. I did this on medium almond because there’s space for the stud to sit without hitting the sidewall. It’s flattering on hands with slightly wider nail beds since the stud draws the eye outward and balances the shape. The principle is one hardware accent: small, placed, then sealed.
Start with a nude base and cure/dry. Apply bright blue French tips with a stencil and cure. Place a tiny gold stud (the smallest you can find) on the outer corner of each tip using a dot of clear gel or nail glue; press lightly and cure. Finish with top coat, and if you feel a ridge, add a second thin top coat over the stud to smooth it.
If you can feel the stud snag on fabric, add one more thin top coat and cure again.
Avoid using oversized studs; they make French tips look bulky.
15. Navy French With Silver Line Double-Edge
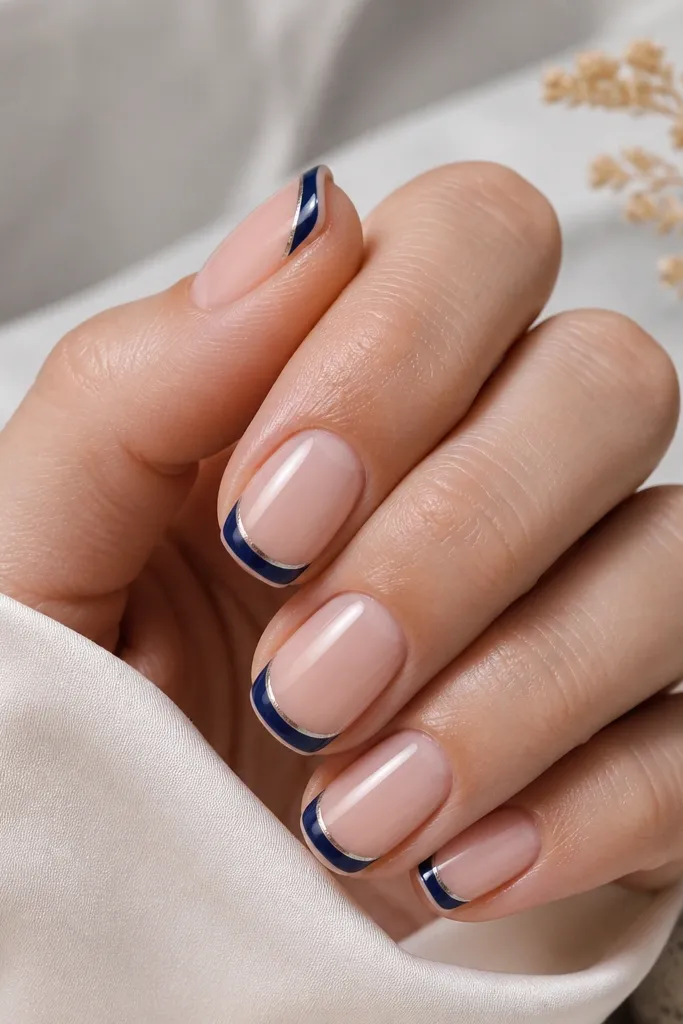
This is the cleanest way I’ve found to make navy French look expensive without adding glitter. The double silver edge mimics the look of a metallic outline on the tip and instantly makes the manicure look sharper. I wore it on short squoval and it didn’t overwhelm because the silver lines are thin and tucked close to the blue. On almost any skin tone, silver pops, but it’s especially flattering on warm undertones because it cools the overall look. The principle is tight spacing: lines must sit close to the blue edge, not floating far away.
Apply a sheer nude base and cure/dry. Use a stencil for navy French tips and cure. With a fine liner brush, paint a thin silver line just inside the blue edge — leave a tiny navy margin. Then add a second micro line along the outer edge of the tip, if you want extra drama; cure. Finish with glossy top coat.
Editor's noteWipe your brush on a paper towel before the silver line so it doesn’t pool.
Watch outAvoid sloppy silver lines that cross the stencil edge; they blur the French curve.
16. Blue Ombré French With White Side Stripes
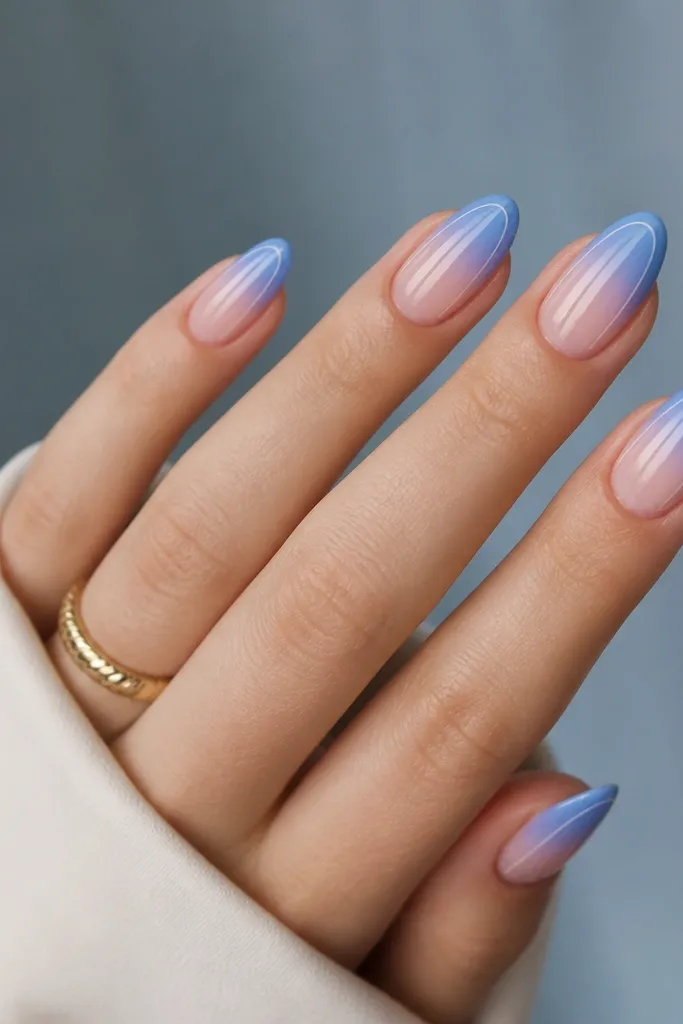
This design looks like salon ombré, but it’s built for speed. The white side stripes frame the nail and make the blue fade look intentional and centered. I like it on medium almond because the stripes follow the almond taper and make the nail look longer. On deeper skin tones, the white stripes keep the design bright so it doesn’t look dull. The principle is framing: the stripes guide the eye while the ombré does the color work.
Start with a sheer nude base and cure/dry. Sponge-blend blue from the tip up about a third of the nail, keeping the center slightly deeper than the sides. With a fine brush, draw a thin white stripe along each side of the nail, starting near the middle and stopping before the cuticle. Cure/dry, then top coat with glossy finish to smooth the ombré texture.
Use striping tape to get straight side stripes — press it on, paint, then remove while the stripe layer is still tacky.
Don’t place stripes too close to the cuticle; it makes the nail look shorter.
17. Turquoise French With White Dot Checkers on Accent Nails
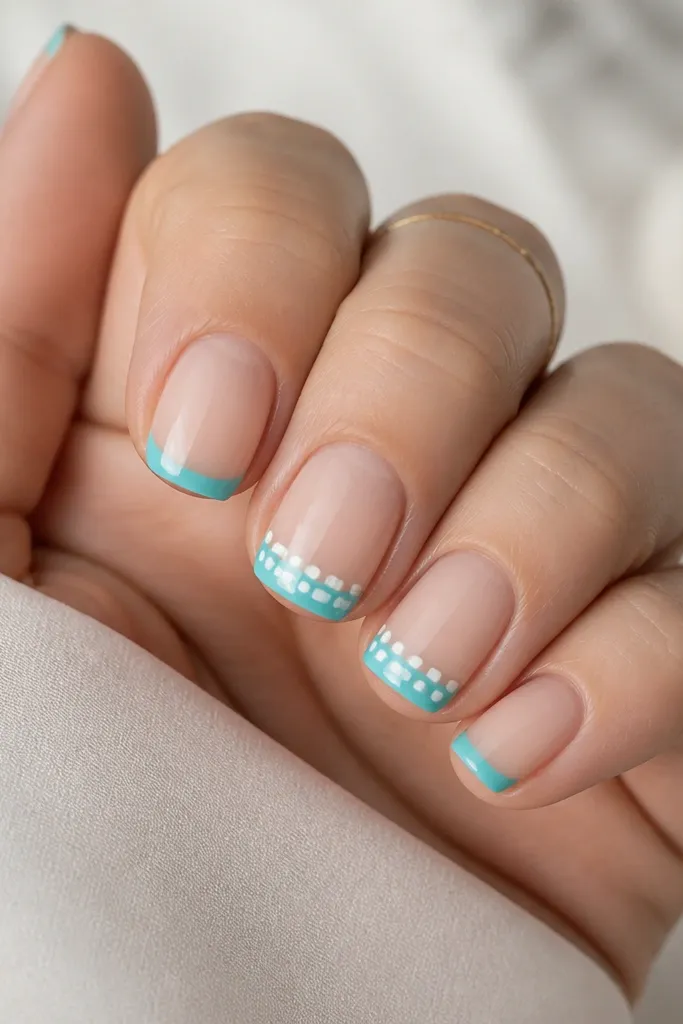
Checker dots look fun, and turquoise makes them feel summer without turning neon. I used this when I wanted something playful but still neat — the checker area is small, so it doesn’t look like a pattern overload. On short squoval, the checker sits inside the tip zone and keeps the nail looking tidy. It flatters light to medium skin tones because turquoise is bright, and the white dots stay crisp against it. The principle is scale: keep the checker grid small so it reads as design, not noise.
Paint a sheer nude base and cure/dry. Apply turquoise French tips with a stencil and cure. On accent nails, place white dots in a grid — think 3 columns by 2 rows across the upper third of the blue tip. Use a dotting tool to keep dot size consistent, then cure/dry again. Finish with a glossy top coat, one careful pass to avoid dragging dots.
Editor's noteMark two reference dots first (top-left and bottom-right), then fill in — it keeps the grid even.
Watch outAvoid uneven dot spacing; random spacing makes it look accidental.
18. Royal Blue French With Tiny Pearl at Tip Edge
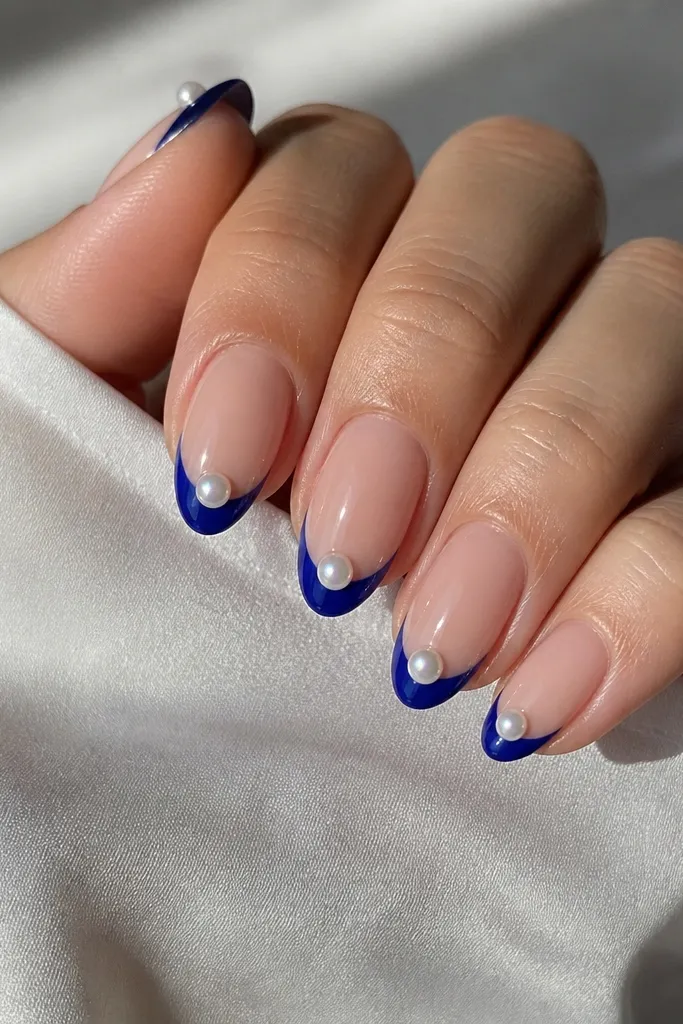
Pearls make blue French tips look like jewelry, but only when the pearl is tiny and placed on the exact edge line. The royal blue gives that deep backdrop, and the pearl catches light like a highlight. I did this on medium almond and it looked best because the tip edge is smooth and gives the pearl a stable spot. On fair and warm undertones, the pearl’s iridescence balances the blue’s coolness. The principle is precision placement: one pearl per nail, centered on the tip line, then sealed cleanly.
Start with a nude base and cure/dry. Use a stencil for royal-blue French tips and cure. While the top layer is tacky (or use nail glue for regular polish), place one tiny iridescent pearl at the center of the tip edge — press lightly so it sits flat. Cure or let set, then top coat in thin layers to lock it down without flooding around it.
Editor's noteIf the pearl lifts at the edges, add a micro dot of clear gel around it and cure again.
Watch outDon’t bury the pearl under thick top coat; it can look cloudy.
19. Blue French With White Chevron Corner
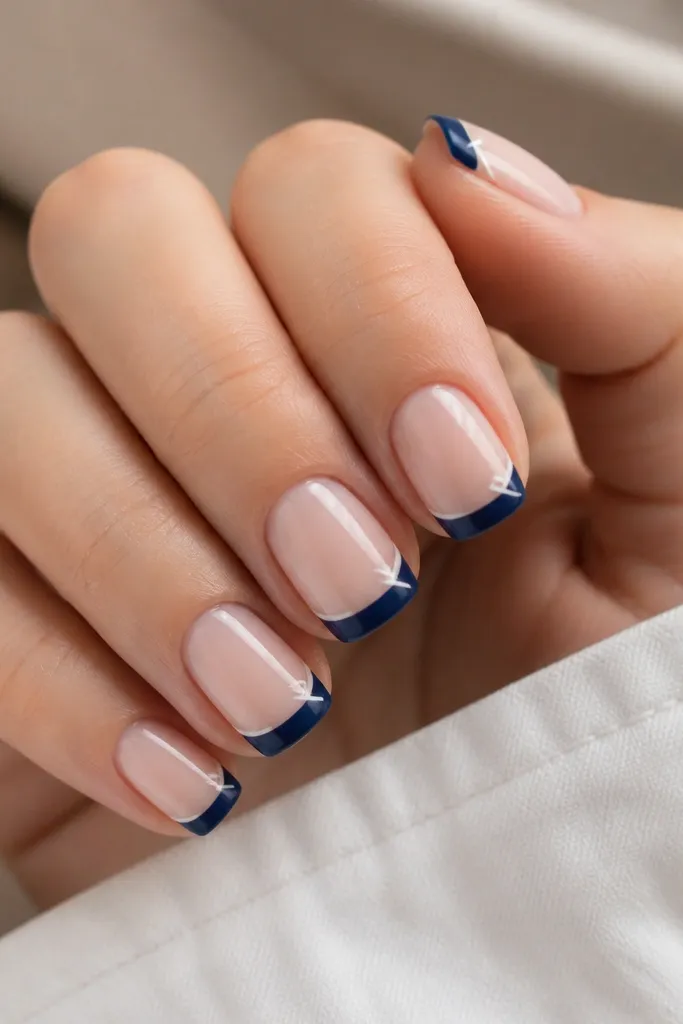
Chevron at the corner gives structure and makes French tips look graphic. I like it on short squoval because the chevron stays small and pulls the eye diagonally, which makes the nail look more tapered. Navy plus white is crisp and works on almost every skin tone, especially when your base is glossy and smooth. This design is also easy to repeat once you find your chevron angle. The principle is angle control: keep the chevron inside the tip zone and use sharp edges, not curvy lines.
Apply a sheer nude base and cure/dry. Create navy French tips with a stencil and cure. With a fine liner brush, paint a small white chevron using two diagonal lines that meet at a point aimed toward the nail center. Add a tiny highlight line if you want (optional), then top coat. Use a second top coat if the chevron sits slightly raised so it feels smooth.
Practice the chevron on a spare nail first — once you match the angle, the rest are quick.
Avoid thick chevrons; they cover the blue tip and kill the clean French shape.
20. Ice Blue French With Silver Micro Glitter Tips
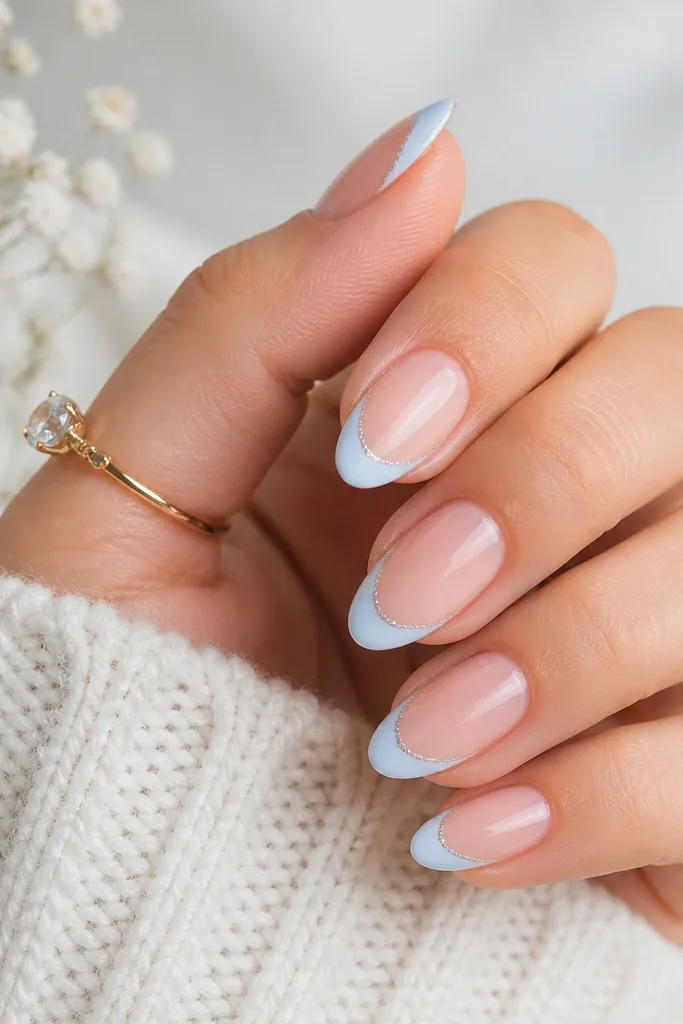
This one is for when you want blue French tips to look icy without doing full glitter. The ice blue base is soft, and the silver micro glitter only at the edge adds sparkle that doesn’t look chunky. I did this on medium almond and it made my nails look longer because the glitter stays at the extreme tip. It’s flattering on all skin tones because silver reflects light broadly, and ice blue doesn’t overpower. The principle is edge-only glitter: concentrate shimmer at the boundary, not across the whole tip.
Start with a sheer nude base and cure/dry. Apply ice-blue French tips with a stencil and cure. Add a thin layer of clear gel at the very outer edge of the blue tip, then tap on fine silver micro glitter and cure. Clean up the sides with a small brush, then seal with glossy top coat in one smooth layer.
Editor's noteUse a tapping motion for glitter; it keeps the edge crisp and prevents fallout on your cuticles.
Watch outDon’t mix in chunky glitter — it makes the frost line look heavy.



