
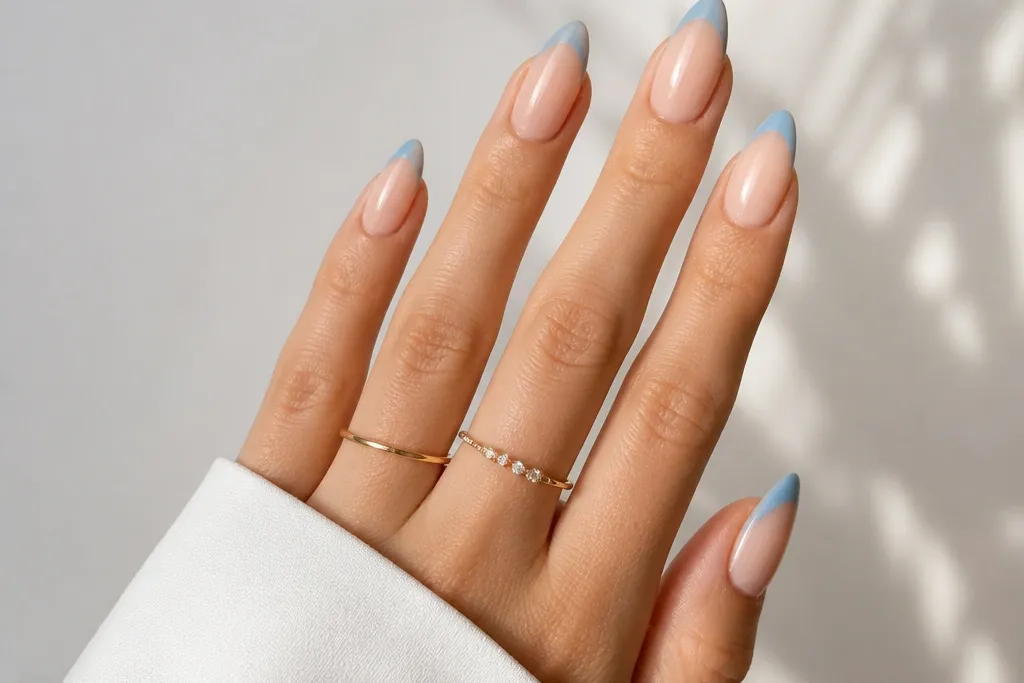
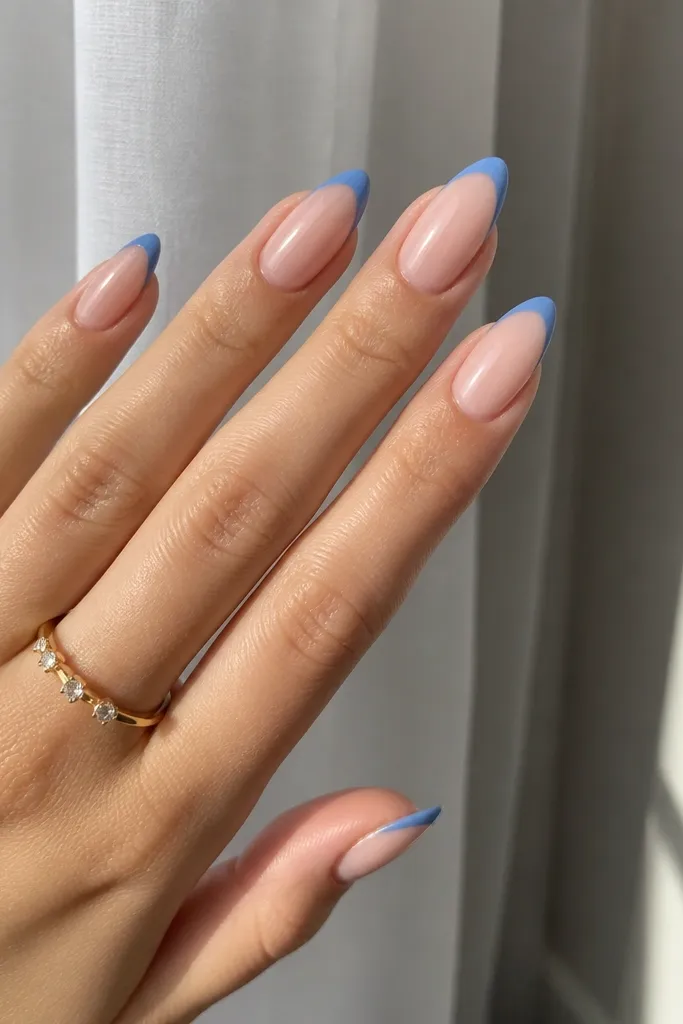
1. Cornflower Micro-French Almond
This is the blue French set I reach for when I want “pretty” instead of “loud.” The cornflower blue is soft and slightly matte-looking under the light, which keeps it from overpowering an almond shape. A nude pink base with a glossy top coat makes the blue look crisp and fresh, especially on fair to medium skin tones. On longer almond nails, the micro-width makes your nail look longer; on shorter almonds, it keeps the tip from cutting the nail in half.
Start by prepping and shaping your almond so the sidewalls taper evenly and the tip is narrow, not round. Paint a nude pink base, then cure. With a striping brush, draw a thin smile line where the free edge begins, keeping the curve light and symmetrical. Fill the space between the line and the tip with the same cornflower blue, staying about 1.5-2 mm wide at the widest point, then cure. Finish with a glossy topcoat and cap the free edge so the French line feels smooth when you run your finger over it.
If your blue bleeds, wipe the brush on a paper towel once before you touch the nail — it keeps the line sharp.
Avoid thick French bands on short almonds; they make the nail look wider and shorter.
2. Denim Navy Classic French Almond
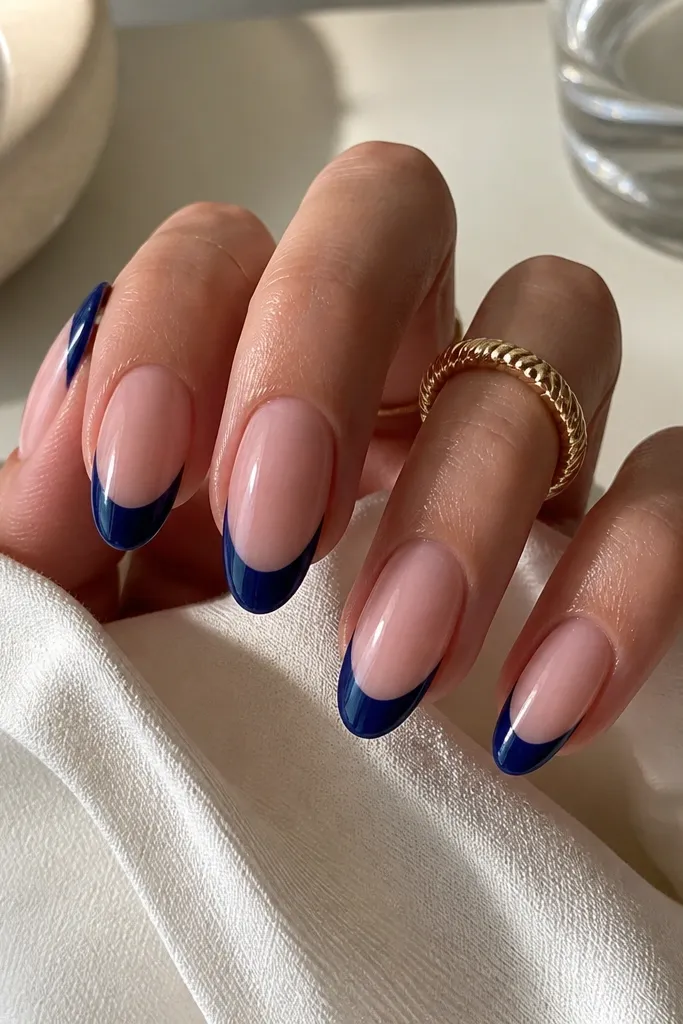
Denim navy looks expensive because it reads clean and structured, especially against nude. The key is keeping the French tip even from sidewall to sidewall — almond nails show uneven placement fast. This set flatters most skin tones because navy sits in a “cool” range and doesn’t clash with warm undertones. It’s also a great choice for office days because it feels polished without sparkle.
Apply a nude base gel or polish and cure fully. Use a nail guide strip (or hold a thin card against the nail) to map the French curve, then paint the navy tip in one smooth section per nail. Build the navy opacity in two thin coats instead of one thick coat — it keeps edges crisp. Cure after each coat, then check the sides for gaps and patch with a tiny brush. Seal with a glossy topcoat, making sure to cap the very tip.
For a sharper look, place the French line slightly lower than you think, then let it widen naturally toward the center.
Don’t let the navy touch the cuticle; keep it only on the free edge for that classic French look.
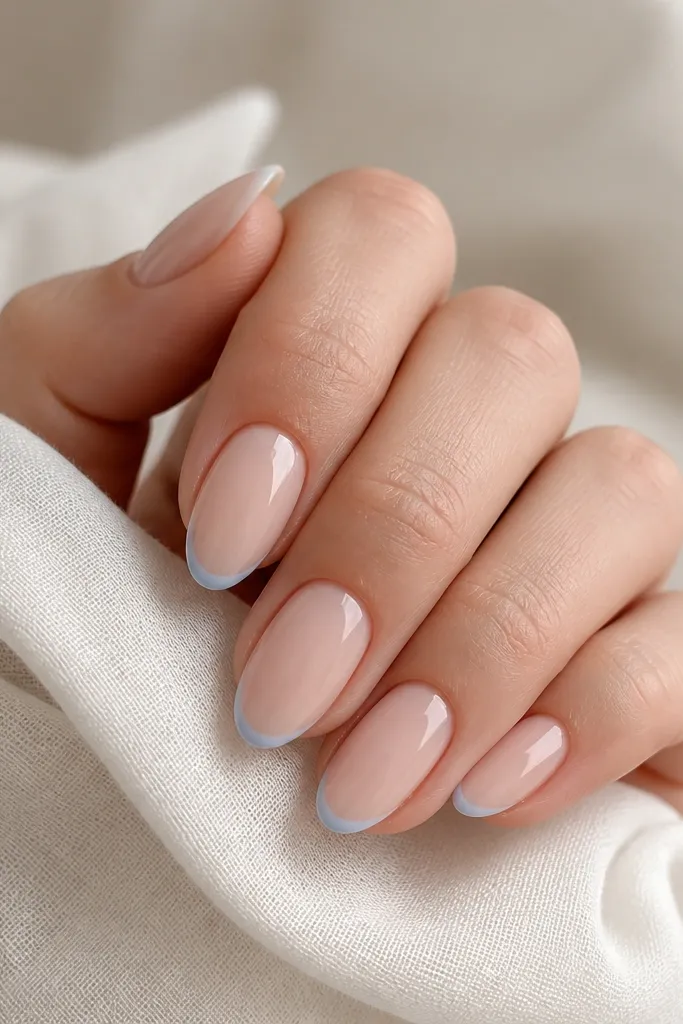
3. Icy Periwinkle French + Clear Negative Space
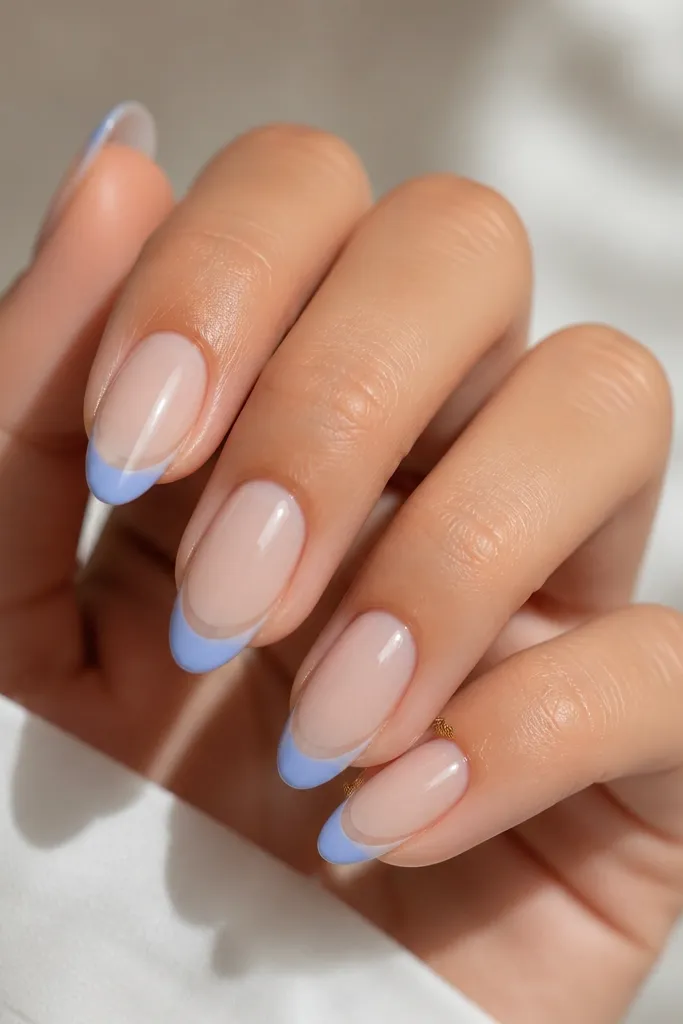
This one looks airy because it keeps a clear negative-space line between the nude and the blue. Icy periwinkle is bright but still soft, so it works for everyday and photos in winter light. The clear gap makes the almond shape look longer, which is why it’s flattering on shorter nail beds too. If you like the French idea but hate “heavy” tips, this design gives you the same framing without the bulk.
Start with a sheer nude or milky base so the nail still shows through. With a gel striping brush, paint the periwinkle only on the free edge area, stopping a hair’s width above where you want the clear gap. Cure, then go back and define the inner edge of the blue with a second thin coat so it stays crisp. Add a glossy topcoat but keep it light over the negative-space line so it doesn’t disappear. Finish by lightly capping the free edge only.
Use a small dotting tool to place a tiny drop of base gel at the inner edge if your blue keeps drifting inward.
Avoid flooding the inner edge with topcoat; that’s what can blur the negative space.
4. Blue Matte French With Glossy Tip Cap
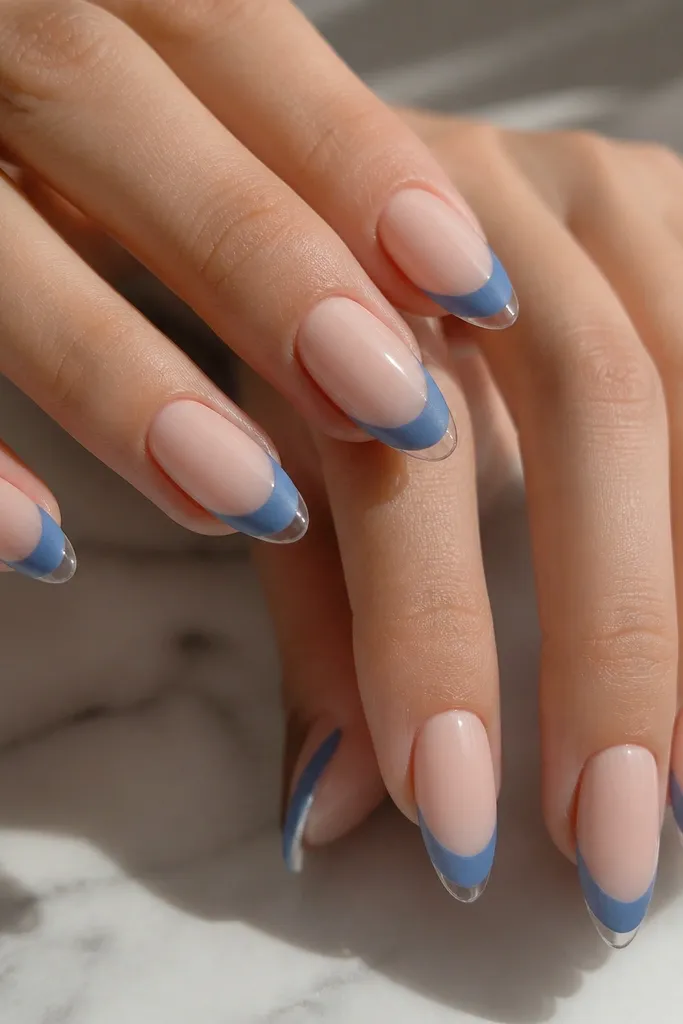
Mixing matte French with a glossy cap makes the blue look dimensional without adding gems. The matte finish hides streaks, so it’s forgiving if your line isn’t perfect. A glossy cap at the tip catches light and makes the almond point look sharper. This set looks great on medium and deeper skin tones because matte blues pop against warm nudes. It’s also perfect if your nails get scuffed — matte tends to show less wear than high-shine color.
Paint a nude base and cure. Apply blue French tip gel in a thin layer and cure, then apply a matte topcoat over the whole nail except the very tip edge. Cure again, then add a tiny amount of regular glossy topcoat only on the tip to create that cap. Use a gentle “drag” motion to keep the gloss confined to the last 1-2 mm of the free edge. Cure and check that the cap feels smooth when you touch it.
Editor's noteIf you want extra clean separation, paint the glossy cap last with a micro brush and wipe the brush tip on a lint-free wipe first.
Watch outDon’t matte the whole nail if you want it to look glam; it can read flat in photos.
5. Royal Blue French + Silver Micro-Stripe
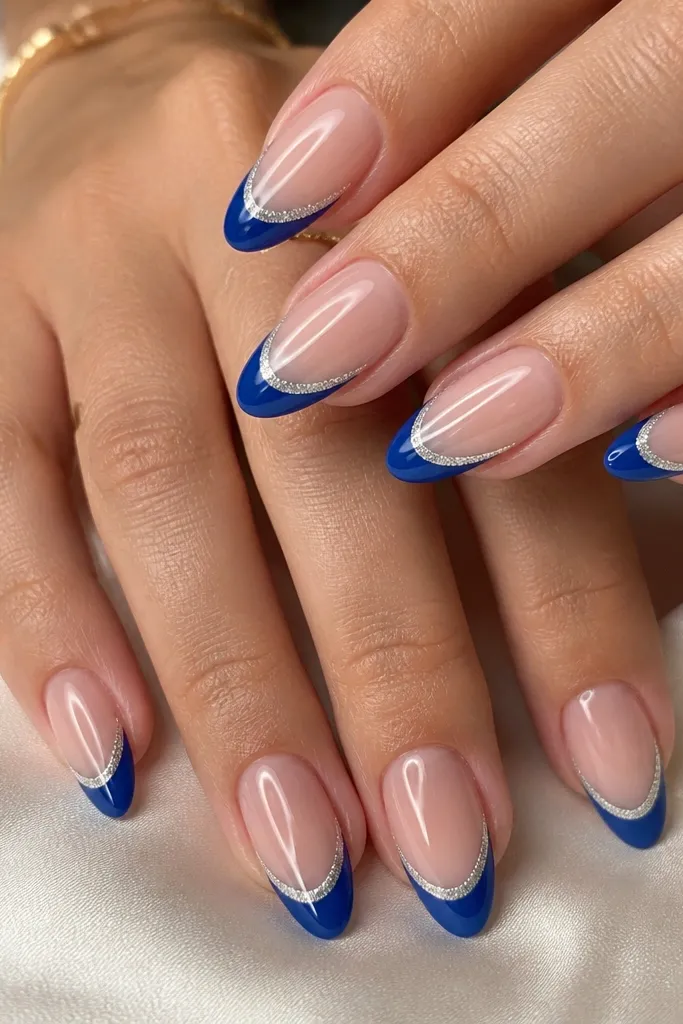
This is a simple upgrade that looks like salon work. The royal blue is bold, and the silver micro-stripe gives the French line a “jewelry” feel. It flatters hands with warm and cool undertones because silver bridges both, and royal blue gives clear contrast. I like it for events because it reads crisp even if you don’t add rhinestones.
Start with a nude base, then cure. Paint the royal blue French tip with a thin brush, keeping the band about 2-2.5 mm at the widest point. Cure. With a gel liner brush, draw a straight micro-stripe just inside the inner edge of the blue, using silver chrome gel or metallic striping polish. Cure again, then topcoat with a glossy layer, making sure the stripe is sealed so it doesn’t snag.
Use chrome gel sparingly — one thin stripe looks cleaner than a thick metallic line.
Avoid placing the silver stripe too far from the blue edge; it should look like a detail, not a second tip.
6. Baby Blue French With Tiny White Dot Center
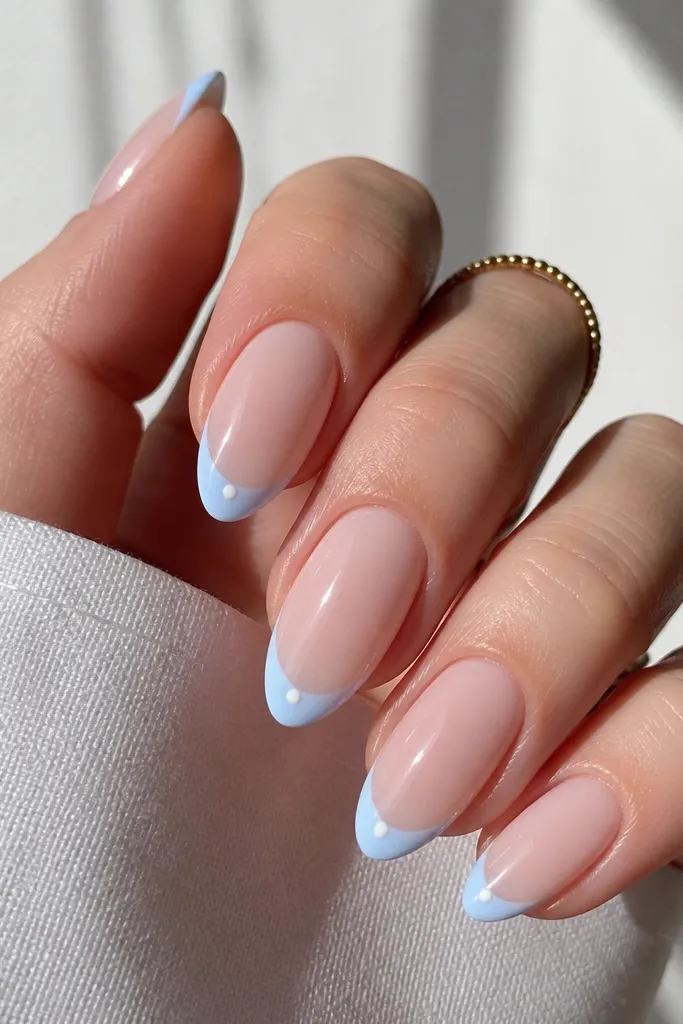
The dot makes the blue French tip feel playful but still classy. Baby blue is light and flattering, especially on fair skin, but it also looks sweet on deeper tones when paired with a nude base that matches your undertone. The dot pulls attention to the center of the almond, which elongates the look. This design works great for brunch, birthdays, and casual weekends when you want something cute without glitter.
Apply nude base gel and cure. Paint baby blue French tips, keeping the curve smooth and the width around 2 mm. Cure. Use a dotting tool loaded with opaque white gel to place one dot exactly at the center of each blue tip, then cure. Finish with a glossy topcoat, and cap the dot with a thin layer so it doesn’t feel raised.
If the dot looks too big, touch it lightly with a clean brush tip — it shrinks the bead before curing.
Don’t add dots on every nail if your tips are already wide; it makes the set look busy.
7. Ocean Blue French With White Wave Edge
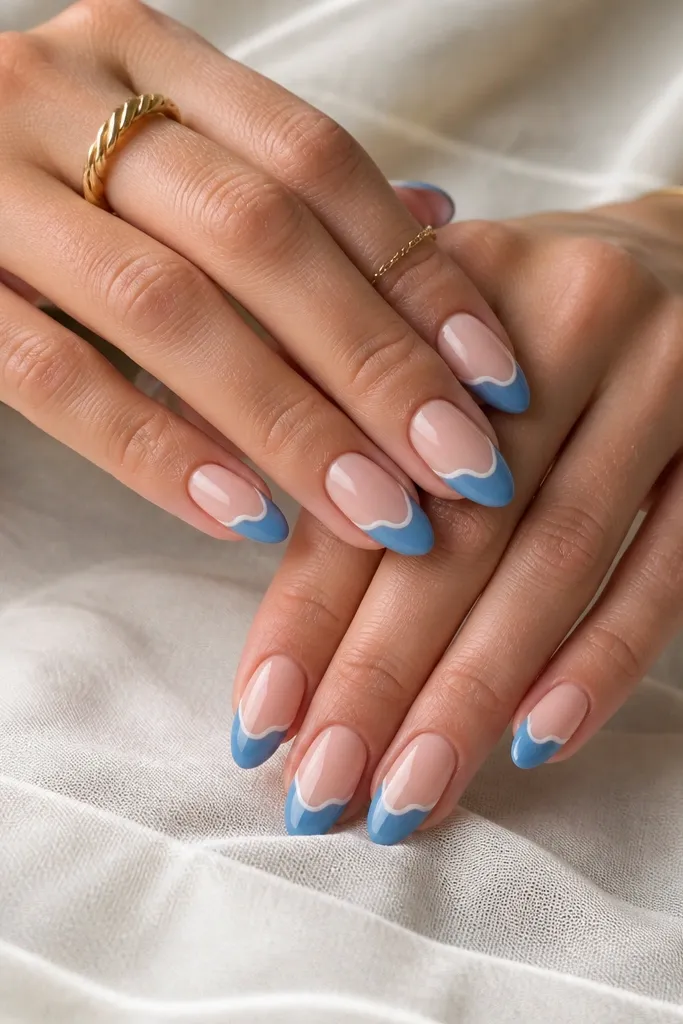
This one looks like a tiny coastline. The ocean blue base is deeper than baby blue, and the white wave line adds movement without needing full nail art. It flatters hands because the wave sits near the inner edge, guiding the eye along the almond shape. I’ve worn this for vacation photos and it reads great in sunlight because the glossy top makes the wave line pop.
Start with a nude base and cure. Paint ocean blue on the free edge, keeping the band narrow and consistent. Cure, then use a liner brush to paint a thin white wave along the inner edge of the blue, like a little “waterline.” Cure again. Topcoat with glossy gel and cap the free edge so the wave doesn’t catch on fabric.
Practice the wave on a scrap nail first — a small S-curve looks natural, while big loops look cartoonish.
Avoid thick white waves; thin lines look more like water and less like a sticker.
8. Midnight Blue French With Star Confetti
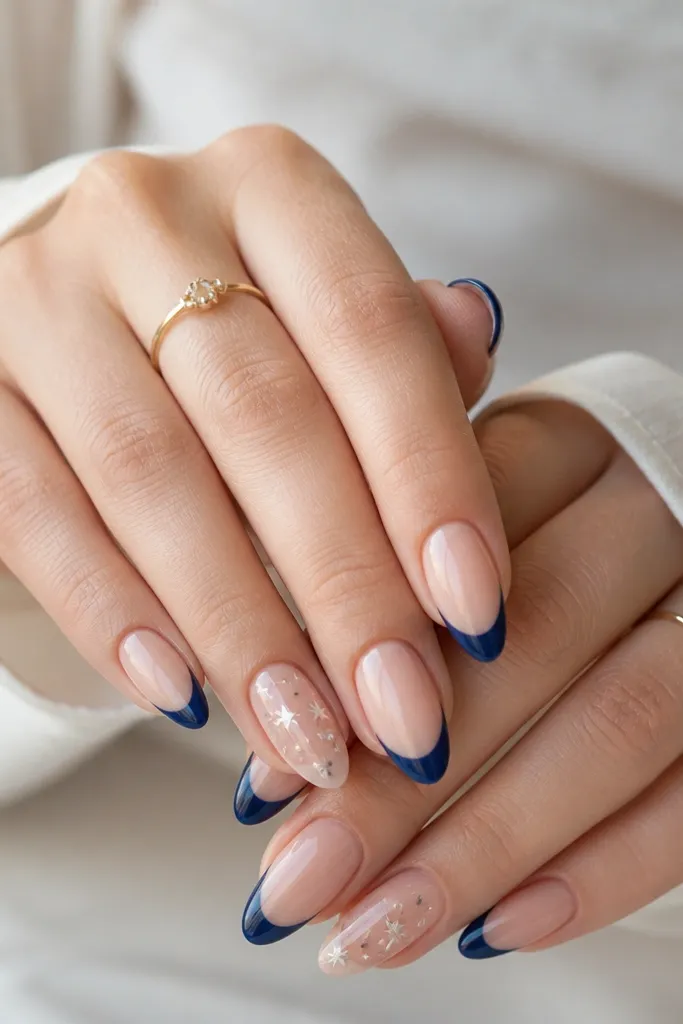
Midnight blue is dramatic, and the star confetti makes it feel like night sky without going full glitter. I like doing stars only on the ring fingers because it keeps the set wearable and prevents it from looking like costume nails. This flatters almost every skin tone because the white stars create instant contrast. If you have short almond nails, the stars still read clearly because the blue tip stays clean and the details are tiny.
Paint nude base and cure. Apply midnight blue French tips, keeping edges crisp and width about 2-2.5 mm. Cure. On ring fingers (or thumbs), add tiny stars using a nail art stencil or small star dotting technique: place one white star, then add a smaller silver star next to it. Cure and then topcoat all nails with a glossy layer, sealing around the stars so they don’t snag.
Editor's noteUse a matte top only on the stars if you want extra texture contrast; otherwise keep it glossy for maximum sparkle.
Watch outDon’t scatter large stars across every nail; it kills the “easy glam” vibe.
9. Blue Chrome French Almond
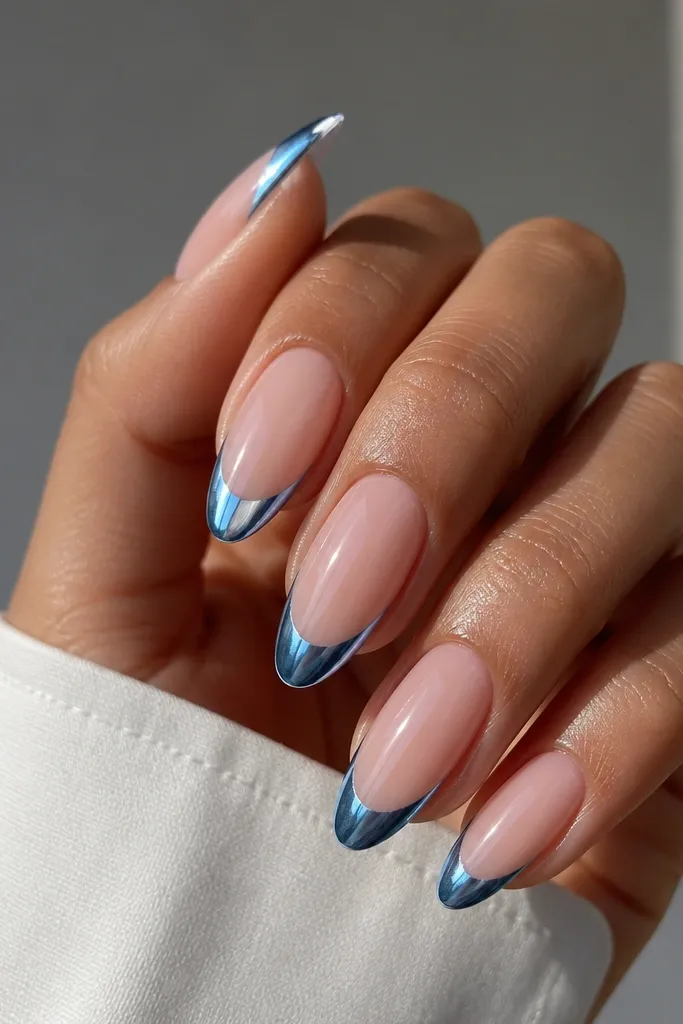
Chrome French tips look like you paid extra money, even when the design is simple. The blue chrome shifts from steel blue to icy blue depending on angle, which makes almond nails look extra sharp. This works on fair to deep skin tones because chrome reflects undertones and doesn’t clash. If you’re doing a quick set for a party, this is the one I’d pick when you want “wow” without painting a full mural.
Start with nude base gel and cure. Apply a thin layer of blue chrome gel or apply a dark blue underlayer if your chrome is more translucent, then cure. Paint the French tip shape — keep it centered and taper toward the tip. Apply chrome powder with a sponge applicator, then buff lightly so only the French tip is mirrored. Cure and seal with a glossy topcoat; if your topcoat is too thick, it can dull chrome, so apply a thin layer.
Editor's noteWipe your sponge applicator on the edge of the container before you touch the nail to avoid stray chrome dust.
Watch outAvoid using a thick topcoat over chrome; it can turn mirror shine into dull haze.
10. Periwinkle French With Silver Half-Moon at Base
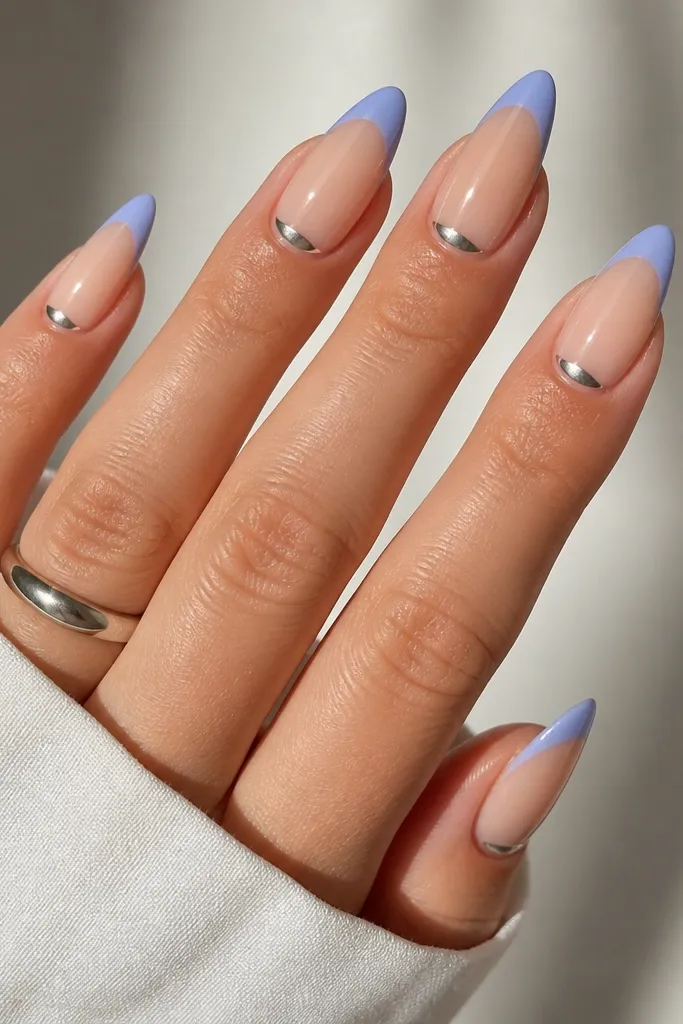
The half-moon at the base makes the French tip feel intentional and gives a “frame within a frame” effect. Periwinkle stays soft, and silver at the cuticle area makes the hands look cleaner and more polished. This set flatters short almond nails because the half-moon draws the eye to the nail bed, not just the tip. It also looks great on warm and neutral undertones because silver doesn’t fight the nude base.
Apply sheer nude base and cure. Paint periwinkle French tips, keeping the tip width around 2 mm and the smile line thin. Cure. Use a small liner brush to paint a tiny silver half-moon right at the cuticle line, leaving a small gap so it doesn’t touch the skin. Cure again, then add glossy topcoat and cap the free edge.
If your half-moon wanders, use a small piece of tape as a guide and remove it right after you paint while the gel is still wet.
Don’t make the half-moon too big; large moons make the nail look shorter.
11. Royal Blue French Ombre Fade Into Nude
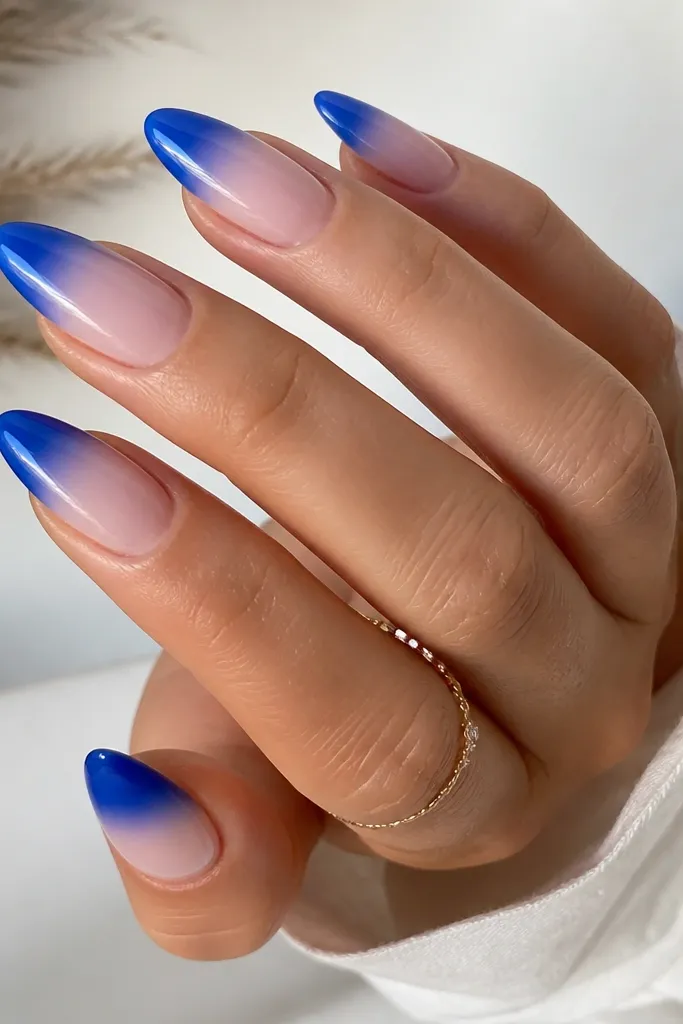
This is the French version of an ombre — no harsh line, just a smooth gradient. Royal blue fades into nude in a way that makes almond nails look extra long because the color transition is soft. It flatters hands that have slightly uneven nail beds since the fade hides minor shape differences. I like it for everyday glam because it still looks neat when your nails grow out.
Start with nude base and cure. Sponge on royal blue gel at the very tip area, then blend upward about 1/3 of the nail using a makeup sponge or ombre sponge. Keep the darkest part at the free edge and avoid dragging too far toward the cuticle. Cure. If needed, add a second thin sponge layer for more saturation at the tip. Finish with glossy topcoat and cap the free edge.
Editor's noteUse a small sponge piece and press lightly — heavy pressure causes muddy edges.
Watch outAvoid blending too high; if the blue reaches the cuticle, it stops looking like French.
12. Blue French With Rhinestone Corner Accent
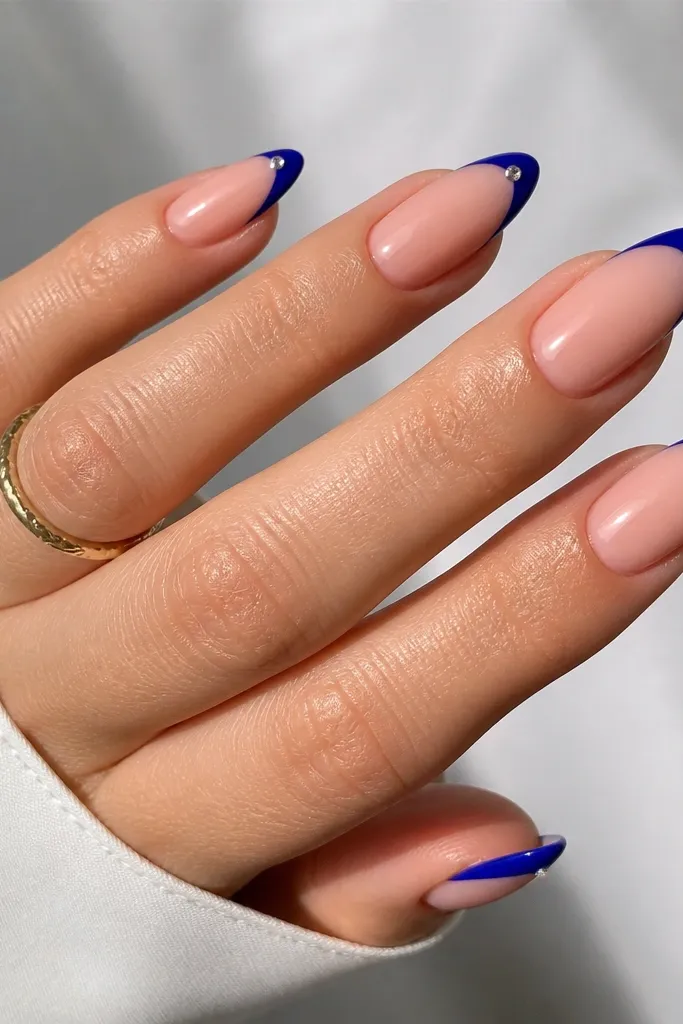
A single rhinestone at the outer corner makes the set feel special without turning it into a full bling manicure. Cobalt blue is bright and clean, so the rhinestone catches light against a strong color. This flatters almond nails because the corner stone follows the natural angle of the tip. I’ve worn this for weddings and dinners, and it photographs well because the stone sits where light hits naturally.
Paint nude base and cure. Apply cobalt blue French tips, keeping the band about 2.5-3 mm wide and crisp. Cure. On each nail, place one small rhinestone at the outer corner of the blue tip — not the center — and use clear gel or rhinestone glue to anchor it. Cure under the lamp. Topcoat with glossy gel, but keep the topcoat thin over the stone so it doesn’t look cloudy.
If your rhinestone pops up, add a tiny amount of clear gel directly on the stone base before curing.
Don’t put stones at the inner corner too; it makes the French curve look unbalanced.
13. Navy French With Light Blue Diagonal Slash
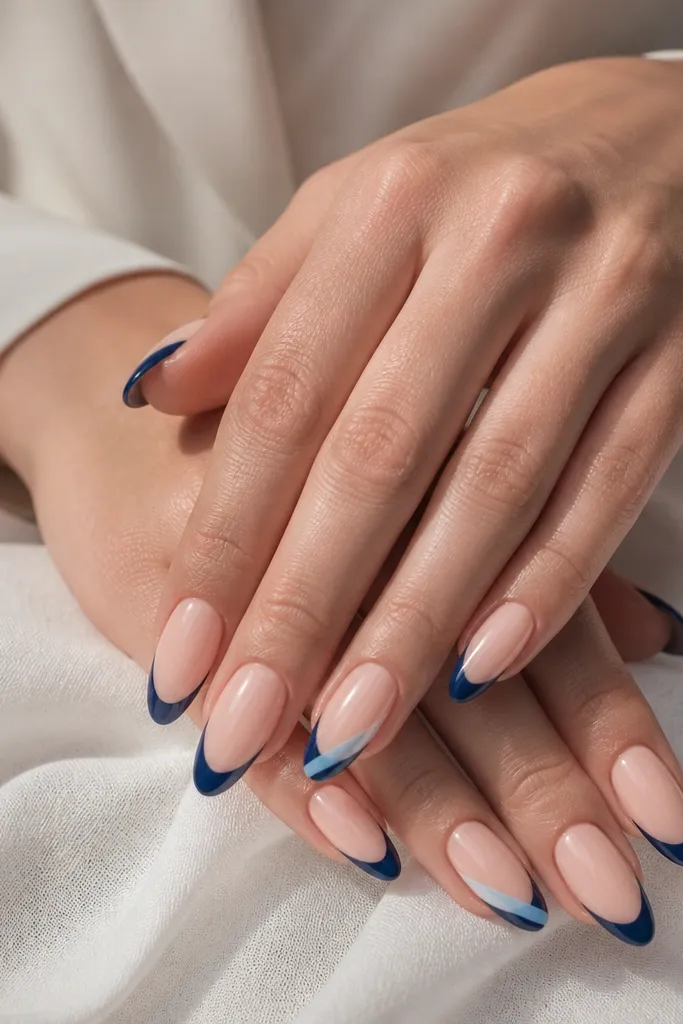
The diagonal slash breaks the usual French symmetry in a flattering way. Navy French gives structure, and the light blue slash adds movement like a sports stripe. I like this on medium and long almond nails because the diagonal line has enough space to look intentional. This set flatters hands that want something different but still wearable — the slash is only on accent nails so it stays classy.
Apply nude base and cure. Paint navy French tips on all nails with a crisp curved smile line. Cure. On ring fingers (or one accent nail), draw a diagonal line across the navy using light blue gel — aim from lower left of the tip toward upper right, staying within the French area. Cure, then add a second thin coat on the diagonal if you need opacity. Finish with glossy topcoat on all nails, sealing the diagonal so it feels smooth.
Editor's noteUse nail art tape to get a straight diagonal; remove it right after painting while the gel is still wet.
Watch outAvoid making the diagonal too thick; a thick slash can look like a mistake cover-up.
14. Blue French With White Outline Like a Sticker
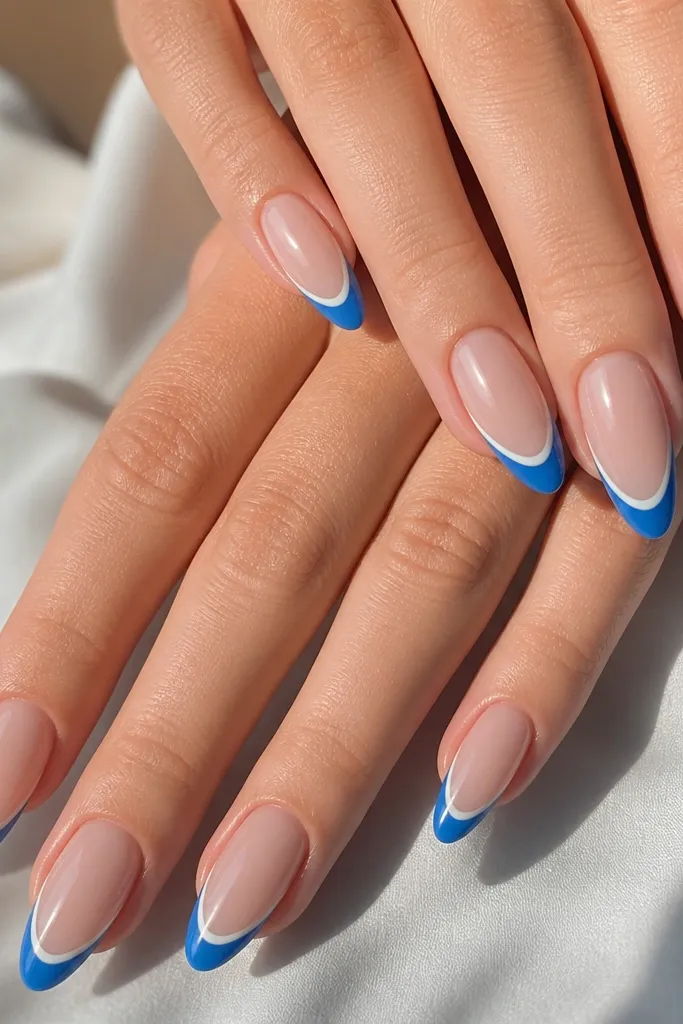
This design looks sharp because the white outline creates a clean edge, like a sticker printed on your nail. Bright blue stays playful, and the outline makes the French line look extra crisp in photos. It flatters almond nails because the outline follows the natural curve and highlights the taper. I like it for summer events and festivals because it reads fun but still neat.
Start with nude base and cure. Paint the bright blue French tip, keeping the center slightly thicker for a smooth arc. Cure. With a micro liner brush, trace a thin white line along the inner edge of the blue, leaving a tiny gap so the two colors stay separated. Cure again. Seal with glossy topcoat, and cap the free edge so the outline doesn’t catch on hair or fabric.
If the white line looks wobbly, clean the brush with gel remover and fix it before curing — once cured it’s harder to refine.
Don’t outline the outer edge too; that’s what makes it look like a thick cartoon border.
15. Blue French With Tiny Heart at Tip Center
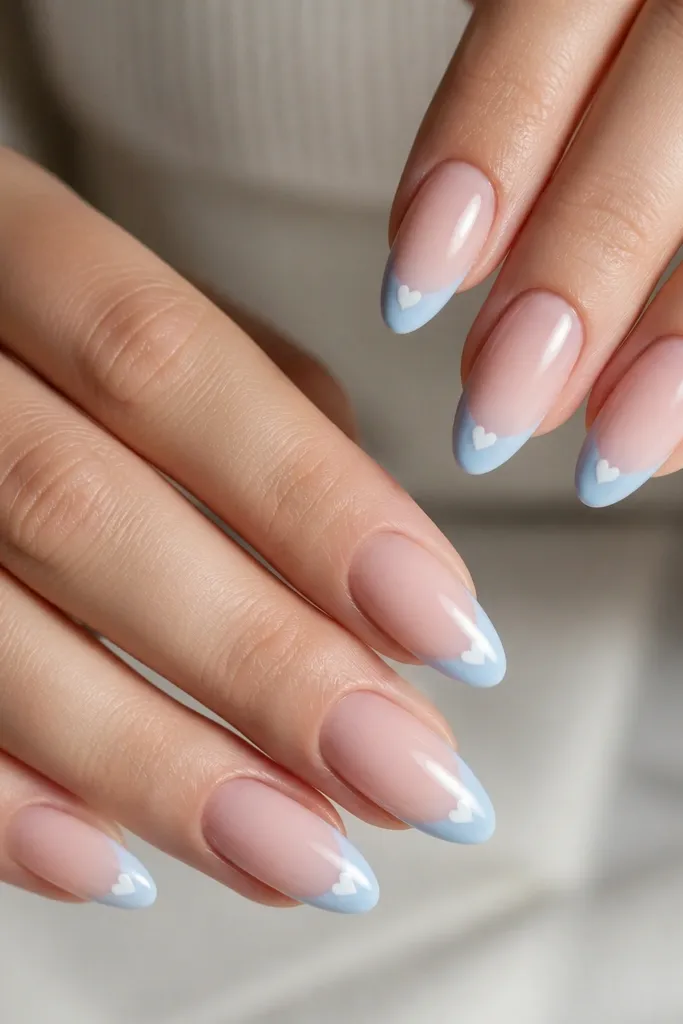
A tiny heart makes the almond French look sweet without adding heavy art. Sky blue is light and youthful, and white hearts pop cleanly on the tip area. This set flatters shorter almond nails because the heart sits in the narrowest part of the tip, so it looks like a focal detail instead of a bulky decoration. It’s also perfect for Valentine season, anniversaries, and cute everyday looks.
Apply nude base and cure. Paint sky-blue French tips with a narrow band around 2 mm and cure. Use a dotting tool and a fine brush to shape a small heart: place two tiny dots close together, then drag a thin line down between them to form the point. Cure. Add glossy topcoat over everything, and cap around the heart so it feels flat when dry.
Make the heart smaller than you think; hearts that are too big look childish on almond tips.
Avoid hearts on all nails if your French tip is already wide; it can feel crowded.
16. Midnight Blue French With Opal Glitter Fade
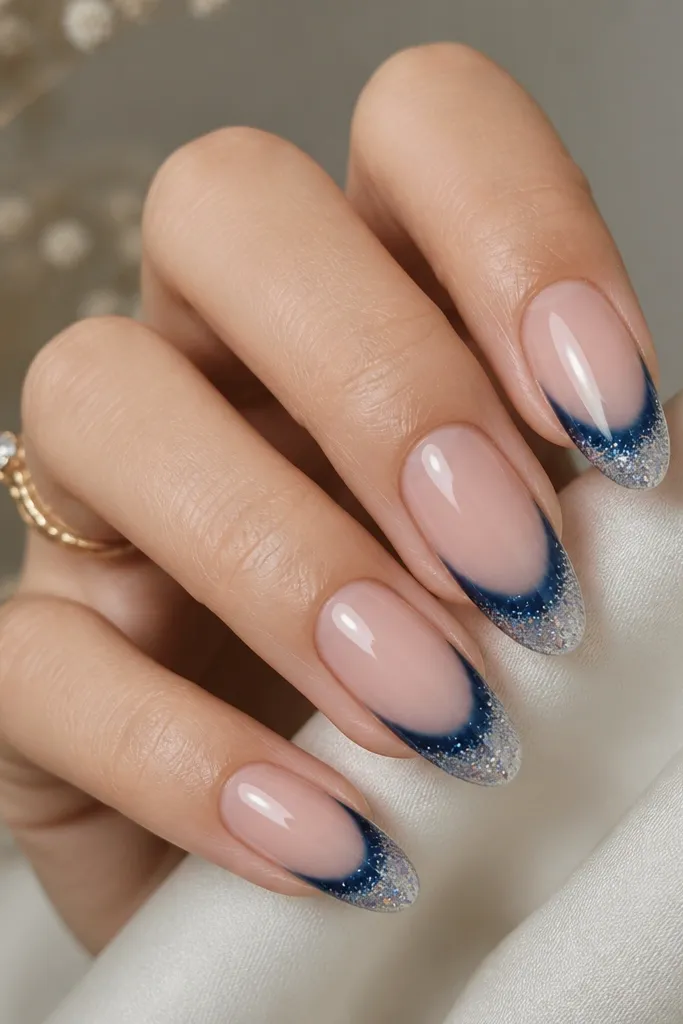
This set gives you sparkle where it matters — at the edge. Midnight blue anchors the look, while opal glitter fade makes the tip catch light like ice. It flatters most nail shapes and looks especially good on almond because the taper makes the fade look intentional rather than messy. I wore a version of this to a holiday party and got compliments on how “clean” it looked compared to full glitter nails.
Start with nude base and cure. Paint a midnight blue French tip, keeping the color solid at the center and a bit softer toward the inner edge. Cure. Using a small sponge, press opal glitter gel only on the last 1-2 mm of the free edge, blending slightly into the blue. Cure, then topcoat glossy and cap the tip so the glitter doesn’t feel gritty.
Editor's noteIf glitter catches on fabric, add one extra thin topcoat layer and cure fully.
Watch outAvoid full glitter coverage across the whole tip; keep it only at the outer edge for a refined look.
17. Blue French With Aurora Chrome Accent on One Nail
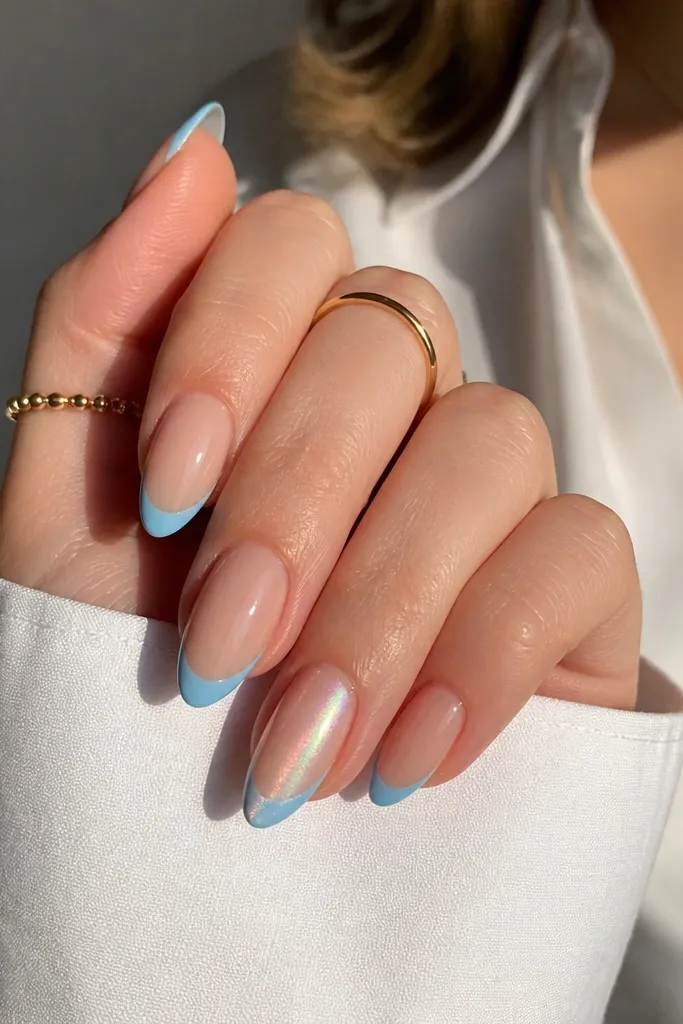
When you add aurora chrome on just one nail, the set looks like you planned it. The rest of the nails stay clean with a classic blue French, and the accent nail shifts from blue to greenish tones depending on the light. This flatters hands because the eye has one place to land — the accent — while the French keeps everything cohesive. It’s great for photos because the chrome catches the flash and looks expensive.
Do nude base on all nails and cure. Paint your standard blue French tips on every nail, keeping the width consistent at about 2.5 mm. Cure. On the accent nail, apply an aurora chrome powder over the blue tip area only, then buff gently so it stays concentrated at the tip. Cure and seal with glossy topcoat on all nails, sealing around the chrome so it doesn’t shed. Keep the accent nail’s French curve aligned with the others so it looks like part of the same design.
Editor's notePick an accent nail you love to show off, like your ring finger, since it becomes the focal point.
Watch outDon’t add aurora chrome to multiple nails with bold French; it can turn the set into glitter overload.
18. Blue French With Micro Glitter Dot Line
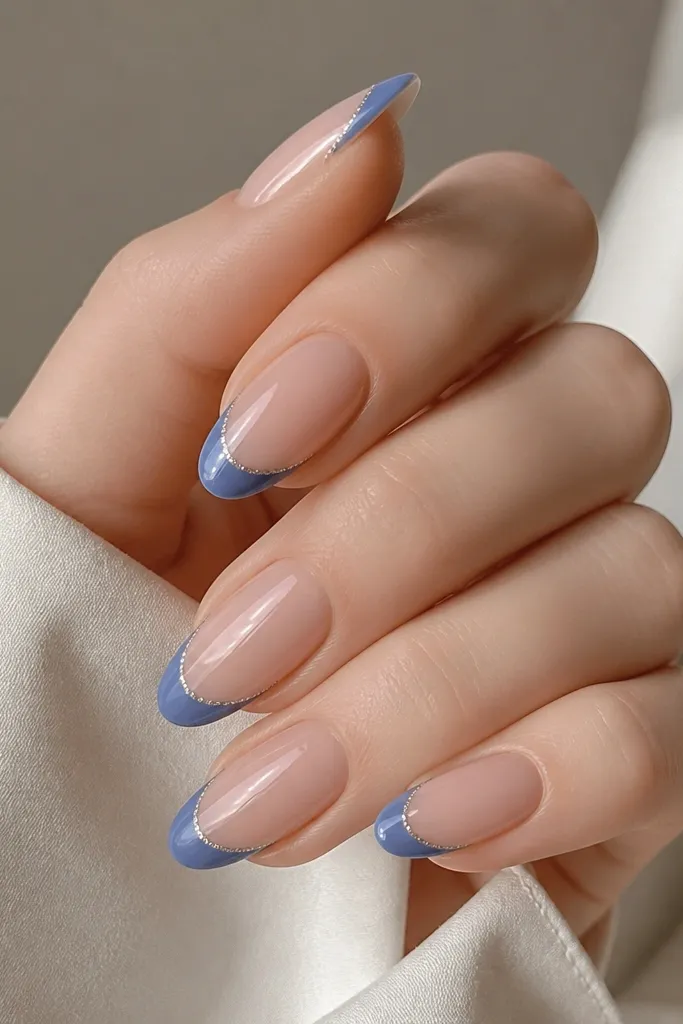
This set uses texture instead of big art. The micro glitter dot line sits just inside the French curve, so it looks like a tiny sparkle border. It flatters almond nails because the dots follow the taper and keep the tip from looking flat. I like this for nights out when you want sparkle that still looks neat at close range.
Apply nude base and cure. Paint medium blue French tips, keeping the band around 2.5 mm and curing. Load a dotting tool with fine glitter gel or glitter polish and place small dots in a line parallel to the inner edge of the blue — about 1 mm inside. Cure. Topcoat with glossy gel and cap the free edge, keeping the topcoat thin so the glitter dots stay visible.
Use fine glitter, not chunky — chunky glitter makes dot lines look messy fast.
Avoid dotting too low on the nail; if the line drops toward the center, it stops reading as French.
19. Blue French With Half-Top Glossy Stripe
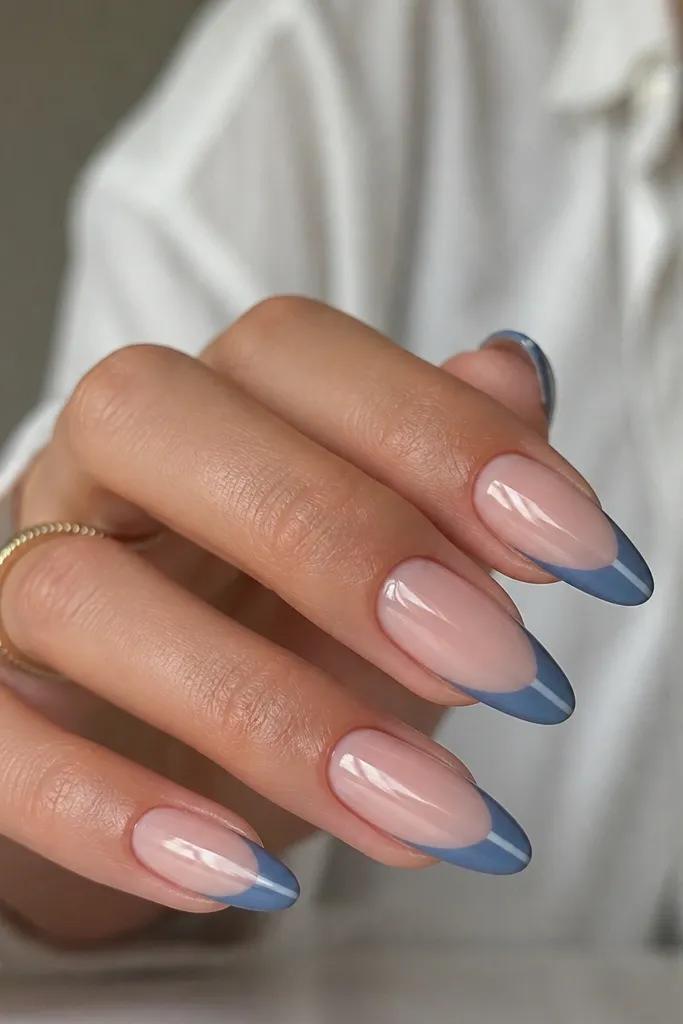
A glossy stripe through a satin blue tip looks sleek and graphic. The satin finish gives the blue a soft, velvety look, while the glossy stripe catches light like a highlight. This flatters almond nails because the stripe follows the nail’s natural centerline and makes the shape look extra narrow. I’ve used this for work and it still looks fun, not formal.
Start with nude base and cure. Apply blue satin finish to your French tips by using a satin topcoat over the blue, then cure. With a striping brush, paint a thin glossy stripe down the center of the French area using glossy topcoat or clear gel, avoiding the sides. Cure. Seal the whole nail with a final thin glossy topcoat if needed, but keep the center stripe glossy enough to stand out. Cap the free edge and check the stripe under a lamp for a clean highlight.
Editor's noteKeep the stripe thin — a thick stripe can look like a crack line instead of a design.
Watch outDon’t use too many finishes on every nail; this works because it’s one highlight.
20. Cerulean Blue French Almond With Reverse Half-Moon Cutout
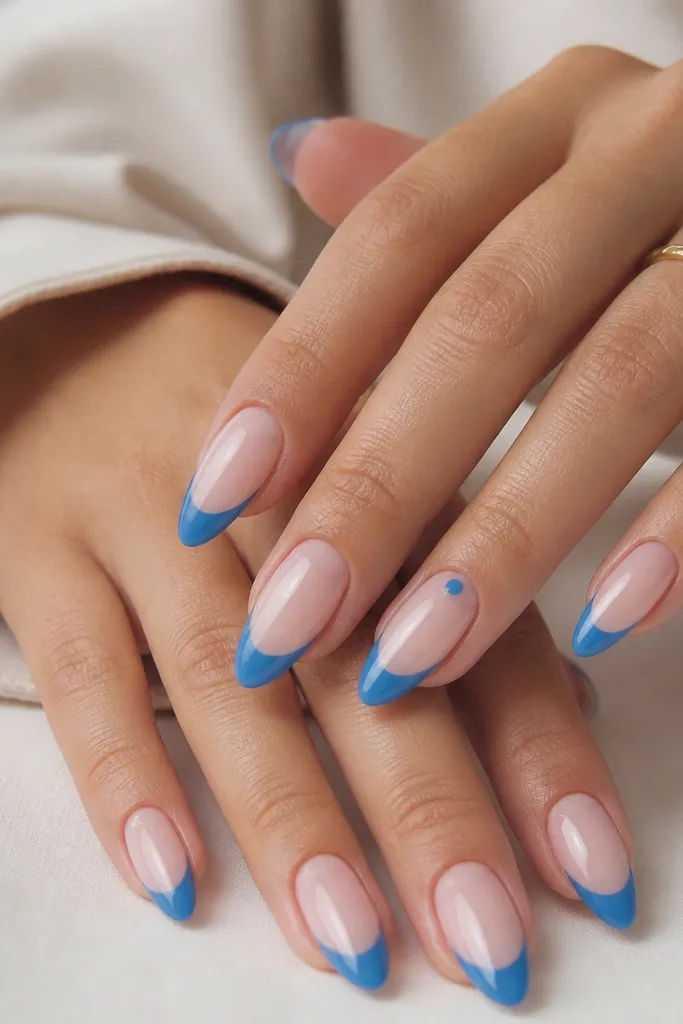
This look flips the usual French layout by adding a reverse half-moon cutout at the nail base, so your eye has two “frames” — the crescent near the cuticle and the French tip at the free edge. The cerulean blue reads bright without going neon, and it looks extra crisp on almond because the shape narrows the tip line. I like it for quick glam because the negative space keeps it from looking heavy, even with bold blue. It also photographs really well since the crescent catches light differently than a full solid base.
1) Paint a thin nude base and let it cure fully, then use a reverse French guide sticker (or cut your own from thin nail vinyl) to mask a half-moon crescent at the base. 2) Brush on cerulean blue for the French tip, keeping the blue line parallel to the smile line and leaving a tiny nude gap on each side so it looks intentional, not messy. 3) Remove the vinyl while the blue is still slightly tacky so the edge stays sharp, then cap the tip with a clear gel layer. 4) Seal everything with glossy top coat, making sure you lightly drag the brush over the cutout edge so it feels smooth under your finger.
Editor's noteIf your half-moon looks wobbly, don’t repaint. Add a second thin cerulean outline on the French tip to balance the composition and make the crescent feel deliberate.
Watch outAvoid thick, goopy blue at the tip — it bleeds into the cutout and turns the crescent edge cloudy.



