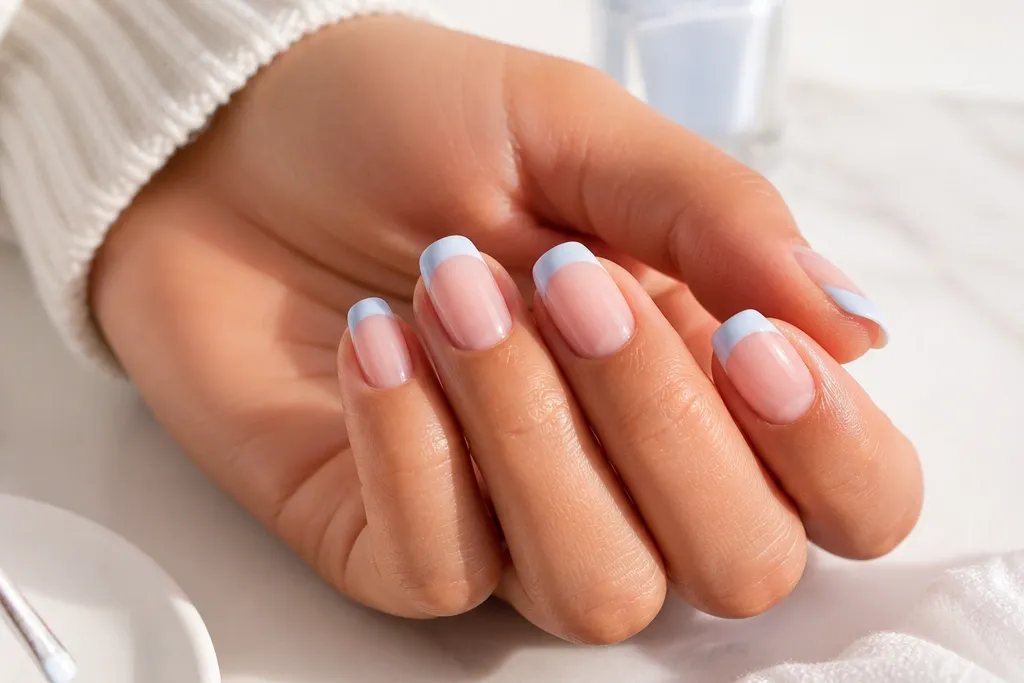
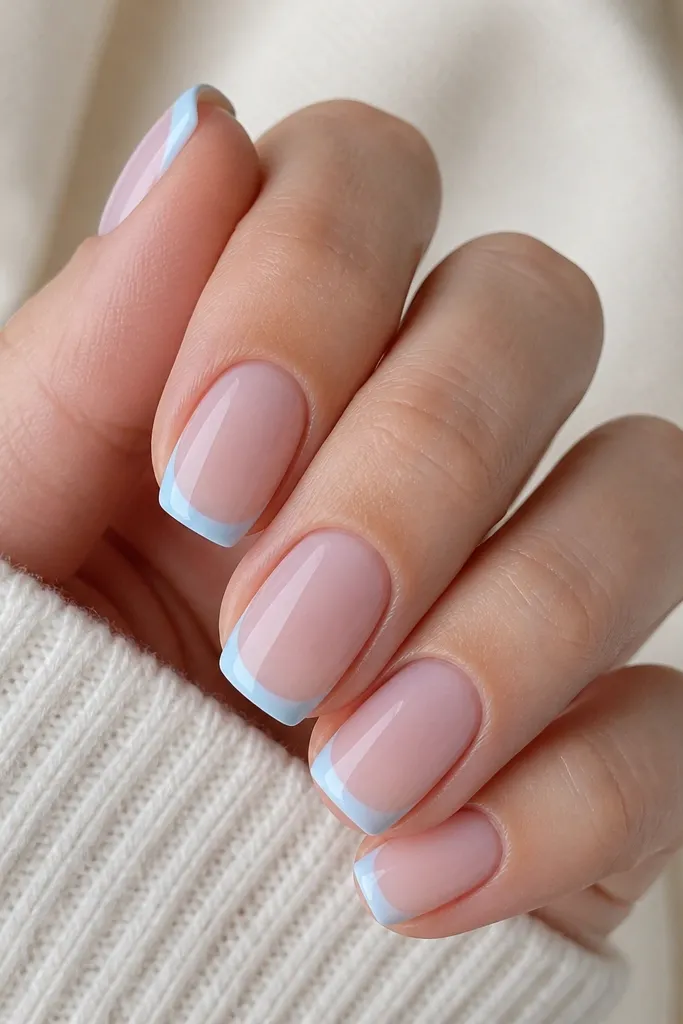
1. Powder Periwinkle Micro French on Short Squares
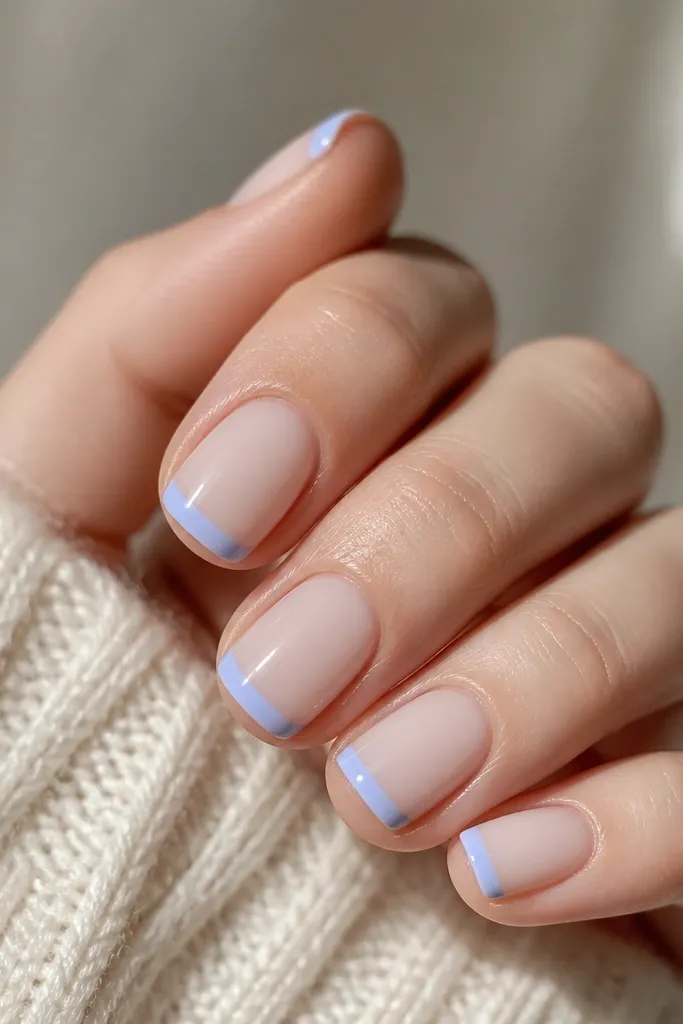
This one looks soft without turning your nails into a block of color. The powder periwinkle is light enough to stay dreamy, but it still has enough pigment to show on a nude base. I like it on short squares because the tip line stays even and your hands look tidy fast. If your nail beds run a little short, micro French adds length without making your tips too heavy. It also works for fair to medium skin tones because the blue reads cool and clean against the nude.
Editor's noteIf your tape lifts, press it down with a flat silicone tool before painting. That extra second keeps the blue edge sharp.
Start by pushing back cuticles and buffing the surface just enough to remove shine. Apply a milky nude base (thin coat), then cure. Place striping tape across the free edge so the blue tip will be about 1.5 mm wide, keeping the tape parallel to your smile line. Paint powder periwinkle over the exposed area in two thin coats, remove the tape while the last coat is still slightly tacky, then clean up the sides with a small brush dipped in acetone. Finish with a glossy top coat and cap the free edge.
Watch outDon’t use a sheer blue that needs 4+ coats — it turns the tip edge fuzzy.
2. Icy Sky French with Nude Jelly Base
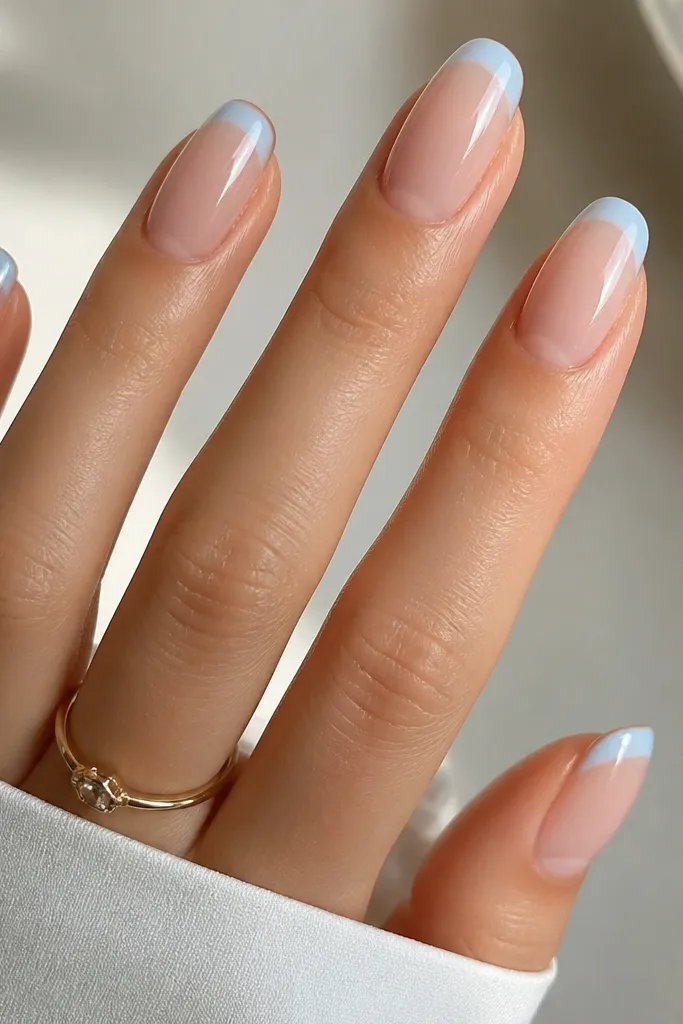
This set has that “fresh manicure” look because the nude jelly base gives a soft glow under the blue. Icy sky blue reads like winter light, and the slightly thicker center makes the tip look dimensional instead of flat. Oval nails are forgiving for beginners since the curve hides tiny asymmetries. It flatters fingers with longer nail beds and also helps medium-length nails look more delicate. On warm skin tones, the cool blue balances the warmth and keeps the overall look clean.
Editor's noteUse a kitchen timer for curing — rushing is why the blue looks cloudy near the edges.
Apply a nude jelly base in thin layers until it looks even but still see-through. Cure fully. Use a size-3 detail brush to paint icy sky blue along the free edge, starting at one side dot and finishing at the other side dot. Keep the line slightly thicker in the middle so it mimics the natural nail arc. Let it level for 30-60 seconds, then cure. Seal with a glossy top coat and run the brush across the tip edge to lock it down.
Watch outDon’t paint the blue right up to the cuticle; keep it about 0.5 mm away for a crisp French line.
3. Baby Blue French Tips with Thin Outline
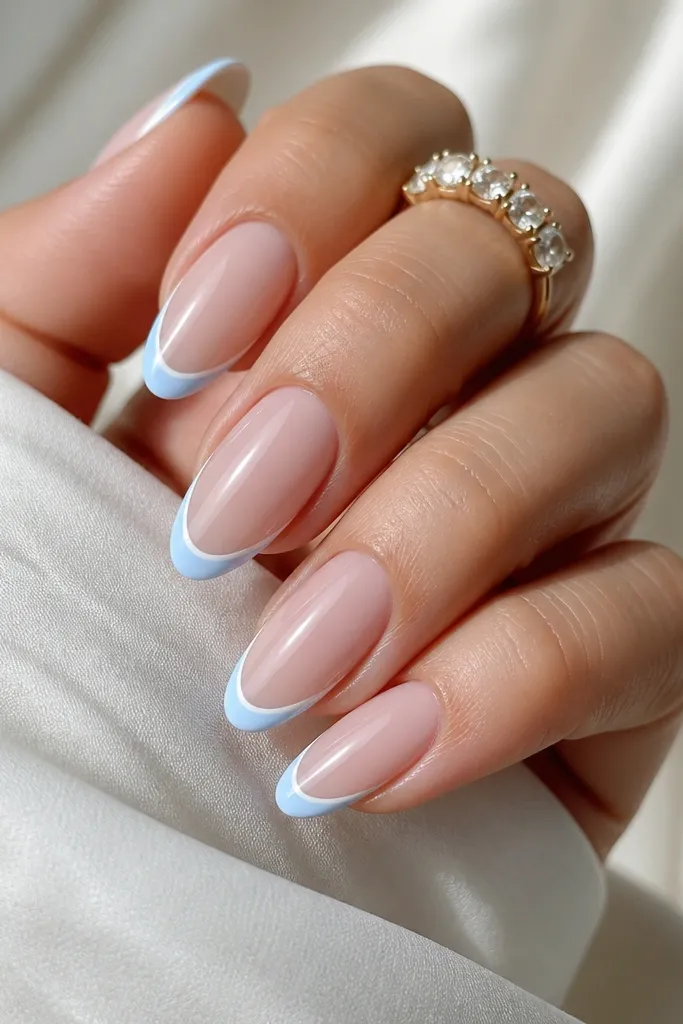
The secret here is the tiny outline. Baby blue alone can look flat in certain lighting, but a thin white border makes the tip look crisp and “finished.” Almond shape makes the outline look extra clean because the tip line tapers naturally. This design flatters hands that look a bit wide at the knuckles because the almond taper draws the eye upward. It also suits almost every skin tone since baby blue is gentle and white outline adds brightness.
Editor's noteIf your white line gets thick, wipe your liner brush once on a lint-free pad before the outline pass.
Start with a milky nude base and cure. Paint a medium-thin French tip with baby blue, keeping the top edge aligned with your smile line. Cure. Then, using a striping brush or liner brush, run a thin white line along the very edge of the blue tip — just one pass, no back-and-forth. Cure again. Finish with glossy top coat, and cap the free edge so the white outline doesn’t chip first.
Watch outDon’t double outline on day one; thick borders look like nail art stickers.
4. Light Blue French Ombré Fade at the Smile Line
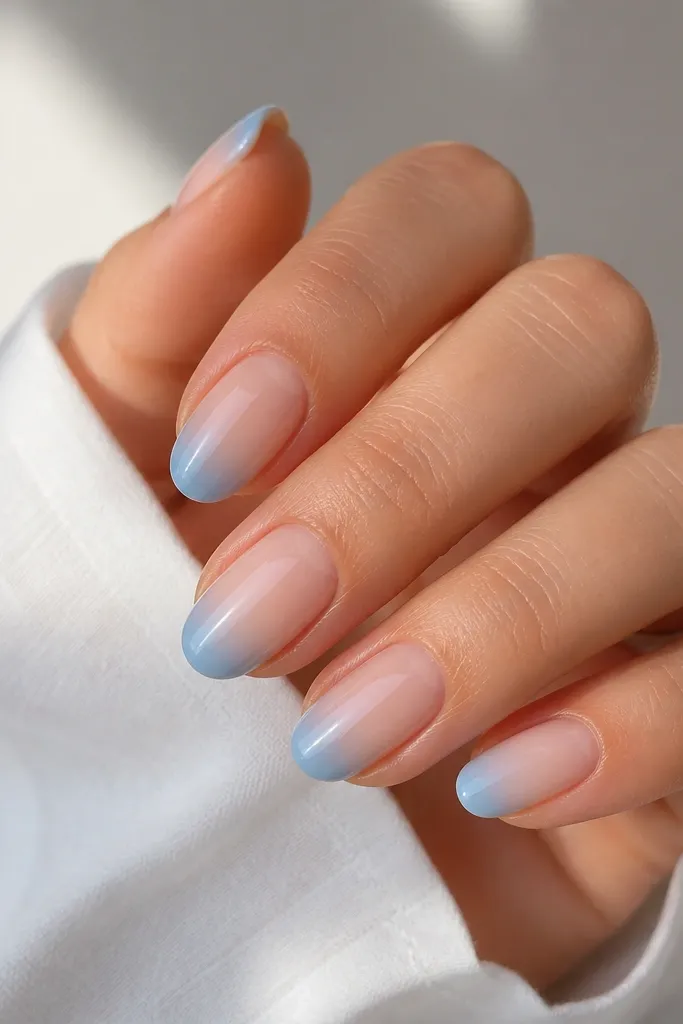
This is for when you want dreamy but not sharp. The fade softens the French line so it looks blended, like watercolor. I use a slightly deeper light blue at the tip edge, then feather it upward with a sponge so the center stays airy. Oval nails make the ombré look natural because the taper gives you a built-in gradient. It works beautifully on fair, neutral, and medium skin tones because the nude base keeps the look balanced.
Apply a nude base and cure. Sponge a thin layer of deeper light blue onto the tip edge, staying within the French zone. Before it fully cures, use a clean makeup sponge or small blending sponge to tap and fade the blue upward toward the smile line. Add a second thin layer if needed, then cure. Finish with glossy top coat and ensure the tip edge is fully sealed.
Use a damp sponge (barely) for feathering — dry sponges leave speckled texture.
Don’t overwork the sponge; too many taps create a grainy look.
5. Two-Tone French with Powder Blue and White Half-Moon
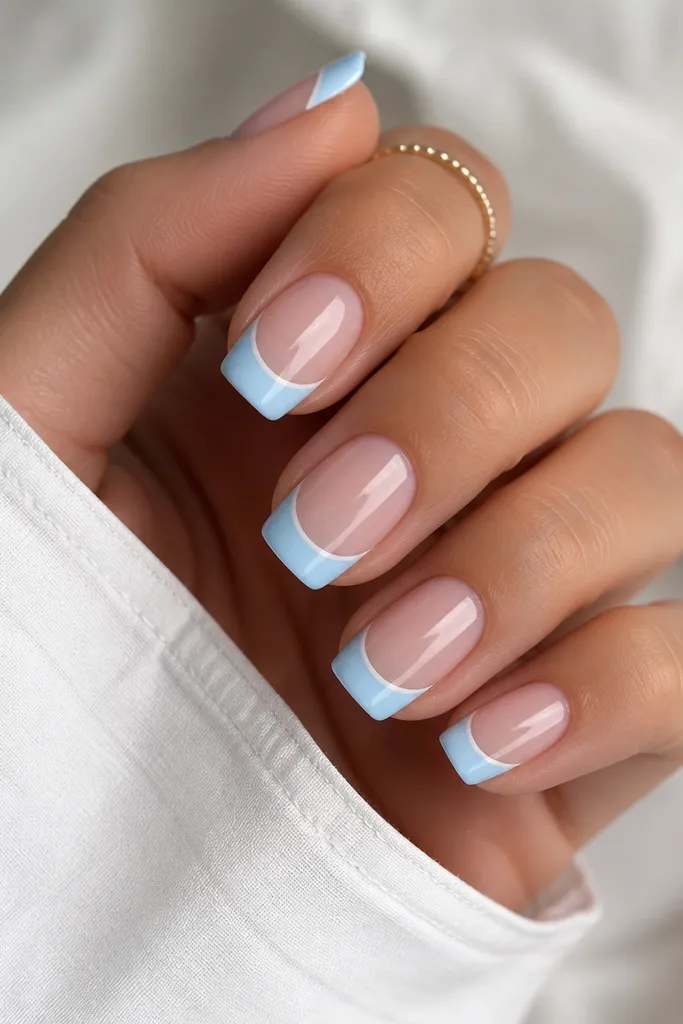
This style adds a little graphic interest without getting busy. The powder blue tip is the main event, and the white half-moon at the start of the tip makes it look intentional, like a reverse French detail. Square nails keep the half-moon tidy, which helps beginners. It’s flattering for hands that want structure — the white curve lifts the eye. I’ve worn it on both cool and warm skin tones and it always reads clean because the colors are light and separated.
Start with a milky nude base and cure. Paint the French tips powder blue, keeping the tip width around 2-2.5 mm. Cure. With a white gel or polish, use a small liner brush to draw a thin half-moon at the top edge of the blue, centered and following your smile curve. Cap the design with top coat and wipe the underside of the nail so it doesn’t peel.
If the half-moon is wobbly, use a tiny strip of tape to mark the curve, then remove it before you paint the white.
Don’t make the half-moon too thick — it turns into a blunt band.
6. Sky Blue French with Micro Glitter Dust at the Tip Edge
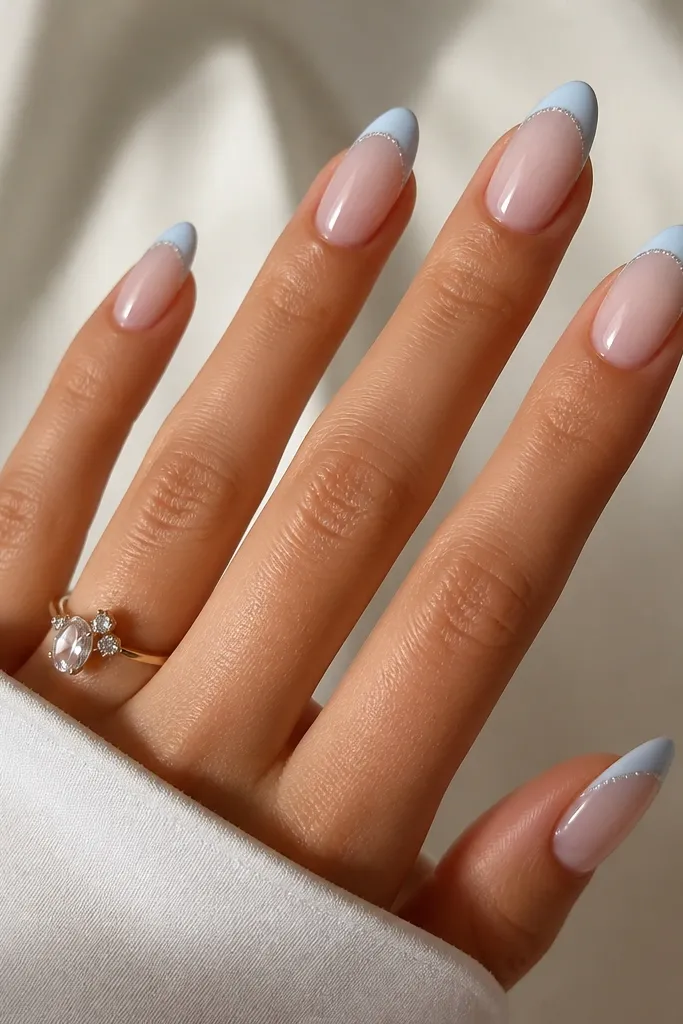
This design looks pricey in low light because the glitter is concentrated where the light hits. The base tip is a smooth light sky blue, and the glitter dust sits as a narrow border so you don’t get chunky texture across the nail. Almond nails make the sparkle look delicate instead of harsh. It flatters short nails too because the glitter line adds a “highlight” on the free edge. For skin tones, it works because glitter reflects both warm and cool light evenly.
Apply a nude base and cure. Paint light sky blue French tips with a clean brush, cure. While the blue is fully cured, add a tiny amount of fine holographic glitter gel or loose glitter mixed with clear gel right along the outer edge of the tip. Use a dotting tool or the tip of a liner brush to keep the glitter line thin. Cure and finish with a glossy top coat that smooths the glitter.
Use fine glitter only — chunkier glitter catches on hair and makes the manicure feel rough.
Don’t put glitter across the whole tip; it looks gritty and grows out fast.
7. Pastel Blue French with Tiny White Dots at the Corners
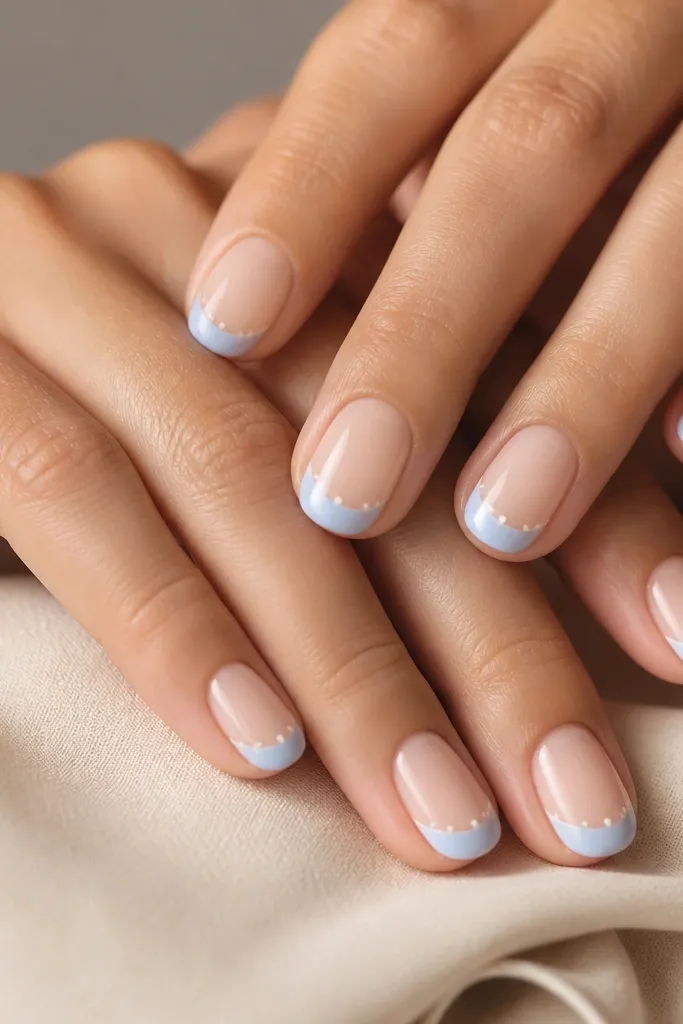
The dots give it a playful, “cute but clean” vibe. I place the dots right at the corners of the French smile line so they look like little accents, not random confetti. Short oval nails are perfect for beginners because the shape hides small brush slips. This works well for everyday wear and looks great in photos since the dots catch light. On any skin tone, the white dots brighten the blue and make the whole set look crisp.
Start with a milky nude base and cure. Use a French stencil or tape to paint pastel blue tips about 2 mm wide and cure. Dip a dotting tool into white gel and place one small dot near each corner of the smile line, staying inside the tip area. Cure again. Seal with top coat and lightly drag the brush from side to side to smooth any dot edges.
If you don’t have a dotting tool, use the end of a bobby pin with a tiny amount of gel.
Avoid large dots — they make the tips look crowded and childish.
8. Light Blue French with Negative Space Center
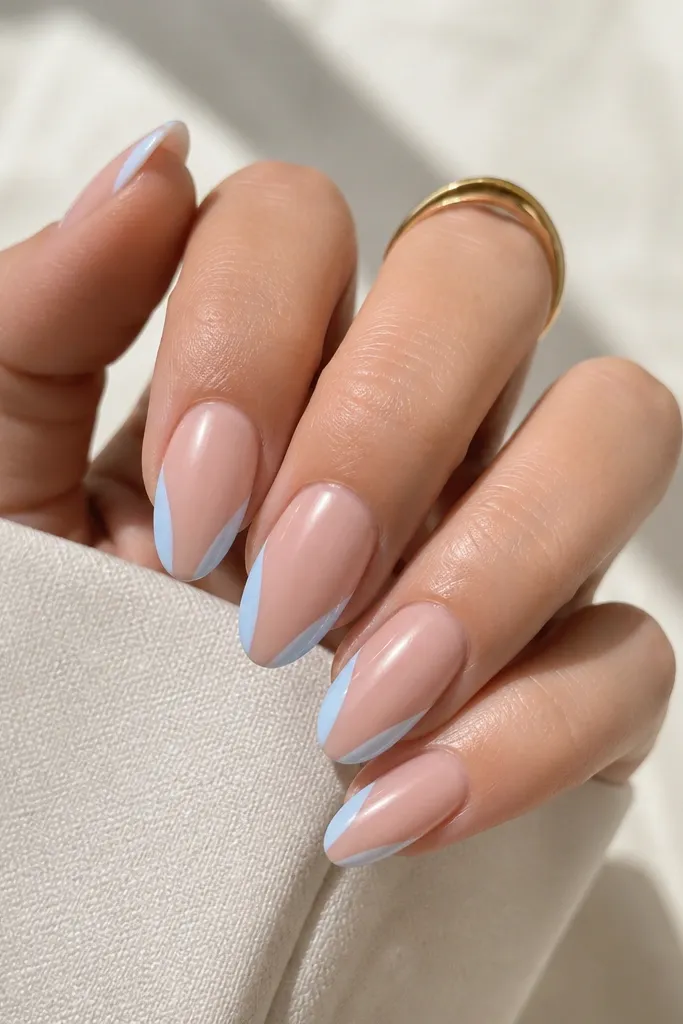
Negative space makes French tips look modern and gives your nails a lighter feel. The light blue only on the sides creates a slimming effect, especially on almond shapes. This design is flattering if your nails tend to look short because the clear center visually lengthens the tip line. It also looks great on hands with short nail beds since you’re not painting a full band. For skin tones, the nude center blends so the blue reads as a framing detail.
Apply a sheer nude base that matches your skin tone closely, then cure. Tape two narrow strips on each side of the nail tip, leaving the center exposed. Paint light blue along the exposed side strips and cure. Remove tape carefully, then clean edges with a fine brush. Finish with glossy top coat, making sure the center negative space stays smooth and sealed.
Use thin tape — thick tape leaves a ridge that shows under top coat.
Don’t overfill the sides; keep the blue narrow so the negative space stays intentional.
9. Frozen Blue French with Porcelain White Marble Veins
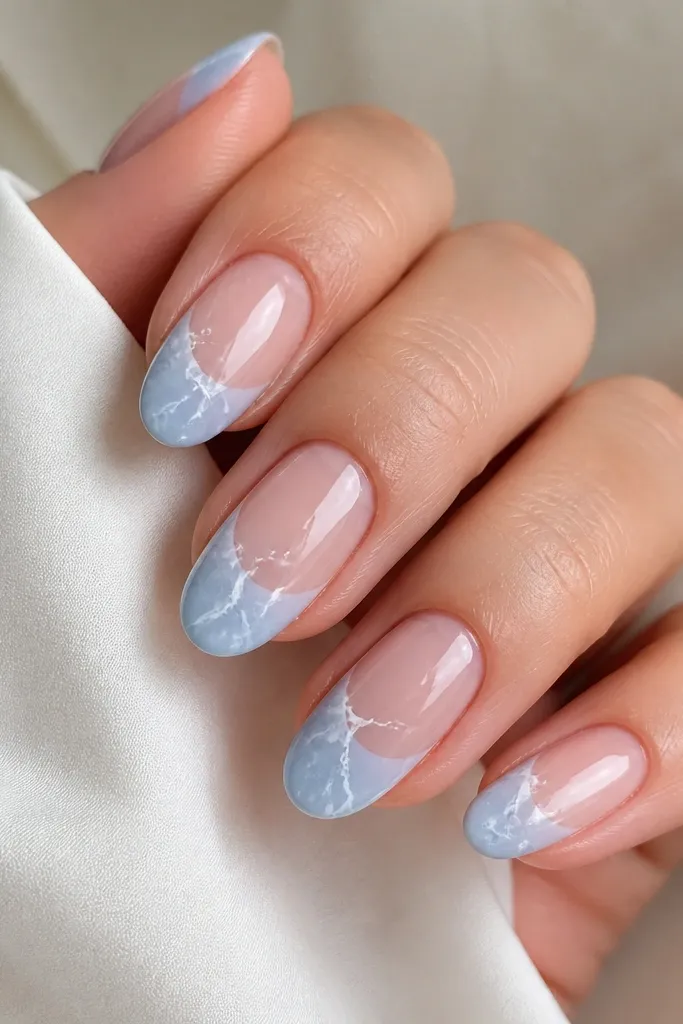
Marble veins make the blue look expensive without needing rhinestones. I use icy light blue as the base and then pull thin porcelain white lines through it so the lines look trapped in the color. Oval nails help the marble look fluid instead of jagged. This set flatters longer fingers because the diagonal lines guide the eye. On medium and deeper skin tones, the cool blue pops and the white veins keep it bright.
Lay down a nude base and cure. Paint icy light blue tips and cure. With a thin liner brush, drag porcelain white gel into the blue in 3-5 thin streaks per nail, varying angles. Add a couple tiny offshoot lines so it looks like marble, then cure. Top coat with a slightly thicker gloss to smooth the marble texture and cap the tip edge.
Wipe your liner brush between nails so the veins stay thin and controlled.
Don’t blob the white — thick marble lines look like paint splatters.
10. Light Blue French with Shimmer Topcoat Only on Tips
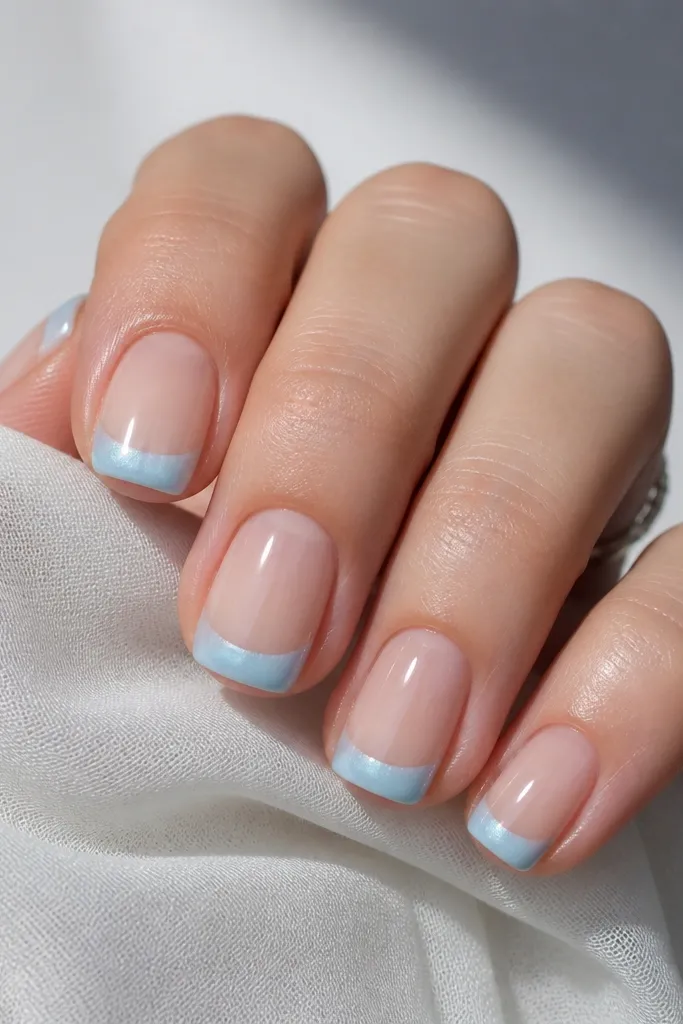
This design creates a two-texture look that feels modern. The light blue is a smooth base, then a shimmer topcoat only on the tips makes them look like they’re lit from above. Short square nails make the boundary between matte and shine look sharp. It’s flattering for everyday because you don’t need tiny art details — just clean placement. This also works well on hands that show dry cuticles since the nude base stays neat and the shine pulls attention to the tip.
Editor's noteUse a separate brush for shimmer topcoat so you don’t contaminate your matte finish.
Apply nude base and cure. Paint light blue French tips and cure. If you want the matte look, use a matte top coat over the whole nail except the tips, or use a semi-matte blue. Now apply a normal glossy top coat only on the tip area, blending slightly over the blue edge. Cure and check the boundary under a lamp to make sure it’s clean.
Watch outDon’t put shimmer across the whole nail; it can look like glitter overload.
11. Blue French with White "Smile" Line Accent
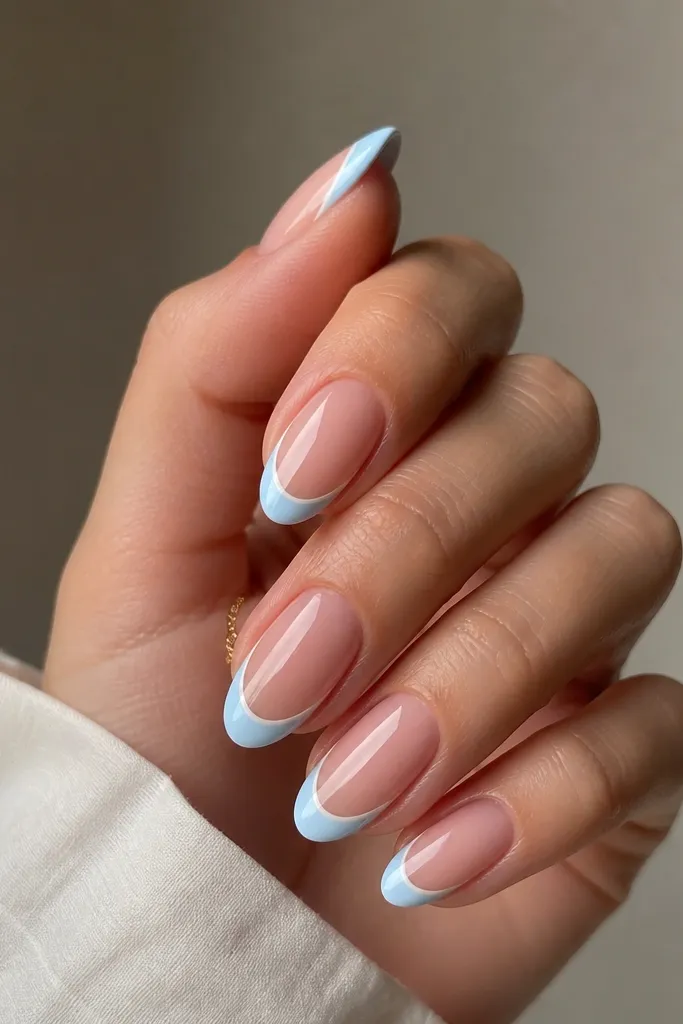
This is the clearest way to make a French tip look professional. The white smile line separates the nude base from the blue tip and makes the curve look deliberate. I like it on almond nails because the smile line naturally follows the taper and looks elegant even when your hands aren’t perfectly steady. It flatters most nail beds because the white line adds crisp definition. On fair skin, it looks fresh and airy; on deeper skin tones, the white line gives high contrast.
Editor's noteIf your white line splits, reload the brush with a tiny amount of gel and redo while it’s still tacky.
Start with a milky nude base and cure. Paint light blue French tips with a stencil so the width is consistent at about 2-3 mm. Cure. Then paint a thin white line along the top edge of the blue, following the curve — one smooth stroke per side and one final connect. Cure again. Add glossy top coat and cap the free edge to protect the line.
Watch outAvoid thick white — it turns into a border sticker look.
12. Robin's Egg Blue French with Tiny Star Specks
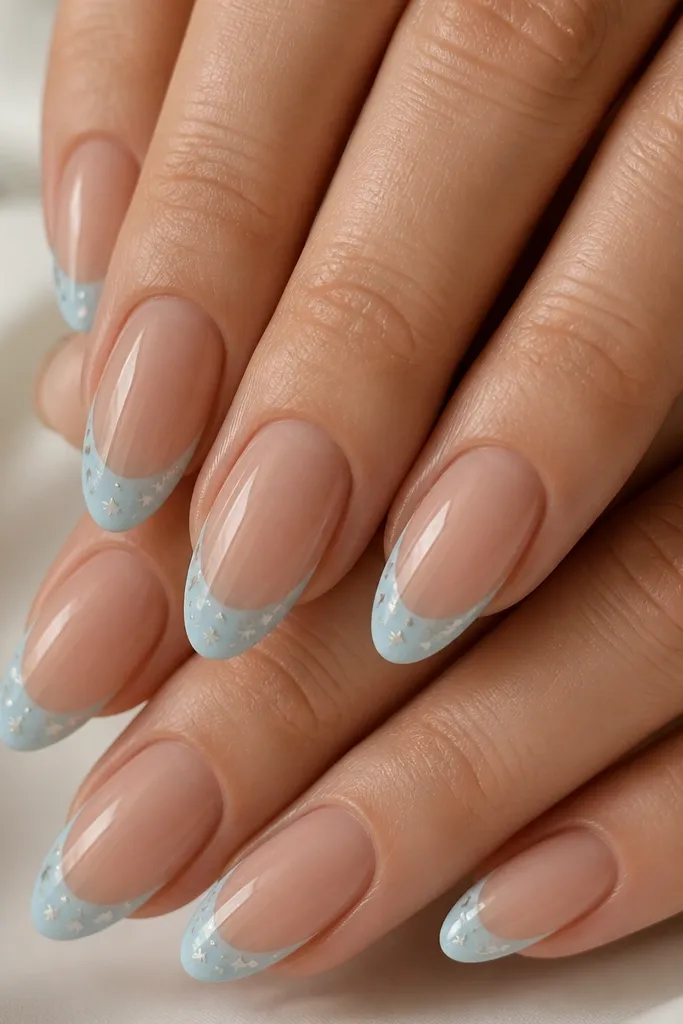
Star specks make light blue feel fun without adding heavy art. I keep the stars sparse and mostly near the outer edge so the tips still read as French tips first. Almond nails give the stars space to look cute instead of crowded. This set looks great for birthdays, date nights, or any time you want a little sparkle that isn’t rhinestone-heavy. It works across skin tones because the white stars stay bright and the pale silver catches light.
Apply nude base and cure. Paint robin’s egg blue French tips, cure. Use a star dotting tool or a small dotting stamp to place a few tiny stars in white and pale silver along the outer third of the tip. Cure and then apply glossy top coat carefully, using a slow brush pass so the top coat doesn’t smear the specks.
Use a light touch with the stamp so stars stay small — big stars look like decals.
Don’t scatter stars all over the blue band; it stops looking like French tips.
13. Cornflower Blue French with Frosted Half-Dip
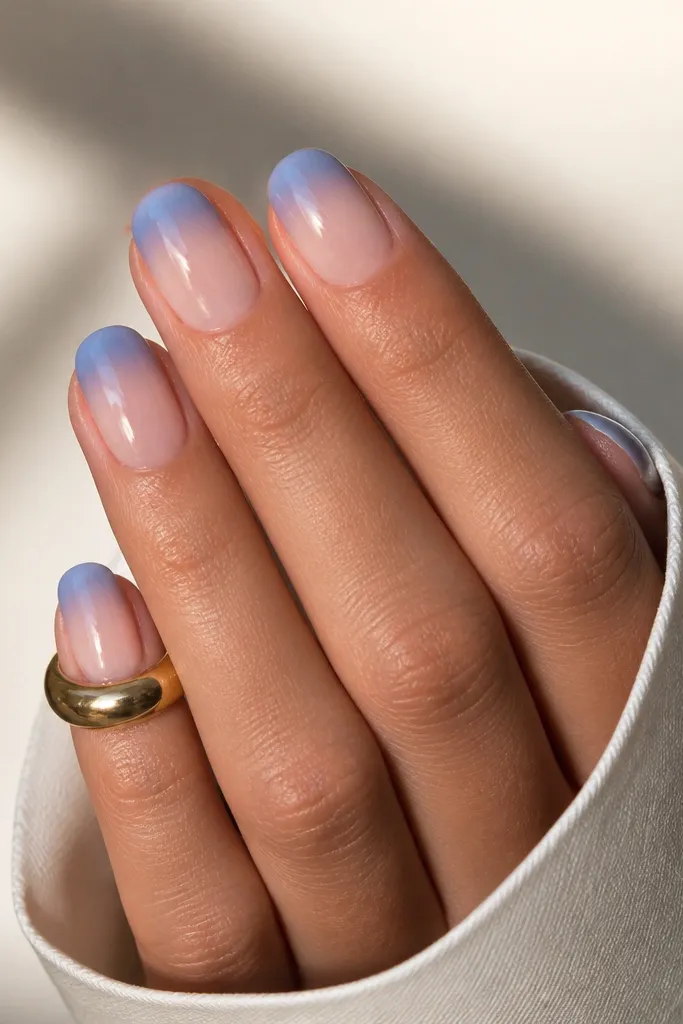
A frosted half-dip gives you that “snowy” look without full ombré complexity. Cornflower blue is brighter than baby blue, so it reads clearly even on camera. I like this on short ovals because the rounded tip makes the frosted band look like it belongs. It’s flattering on hands that want a bold color but still want it soft. For skin tones, it’s strong enough for deeper tones and still gentle on fair skin.
Editor's noteTest the frosted effect on one nail first — the sponge layer changes how opaque it looks.
Apply a nude base and cure. Paint a cornflower blue French tip, then wipe the brush lightly so the lower edge is thinner. Use a sponge to dab a slightly lighter frosted blue or add a frosty topcoat only to the upper part of the tip — about half the height of the blue band. Blend with gentle taps, cure. Finish with glossy top coat overall if you want it smooth, or keep the frosted look by only glossing the center edge.
Watch outDon’t make the frosted band too high; it should feel like a top highlight, not a separate section.
14. Light Blue French with Tiny Pearl Beads at the Base
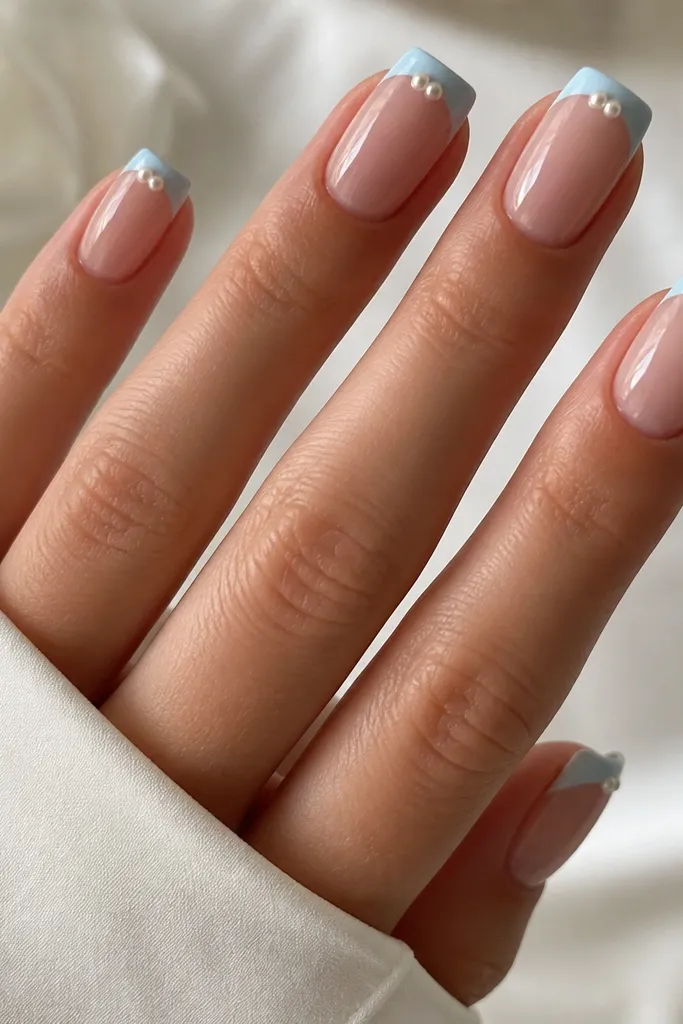
Pearl beads add texture and make the French tip look bridal or dressy without turning into a full rhinestone set. I place pearls at the base of the blue tip so the center stays clean and your nail still looks long. Square nails work well because the pearls sit flat and the tip line stays straight. This is flattering for hands that like a little glam but don’t want heavy bling. It looks great on fair to medium skin tones, especially with silver jewelry.
Start with a milky nude base and cure. Paint light blue French tips using tape for a straight edge, cure. Dot a tiny amount of clear gel at the top center of each tip and place one small pearl bead per nail (or two very small beads if you want extra sparkle). Cure with firm pressure so the beads don’t lift. Seal with glossy top coat, focusing on the bead edges and the tip edge for durability.
Use beads that are small enough to sit under top coat without creating a bump.
Don’t glue pearls after top coat — they pop off because the surface stays too slick.
15. French Tips with Light Blue Skittle Accent on One Nail
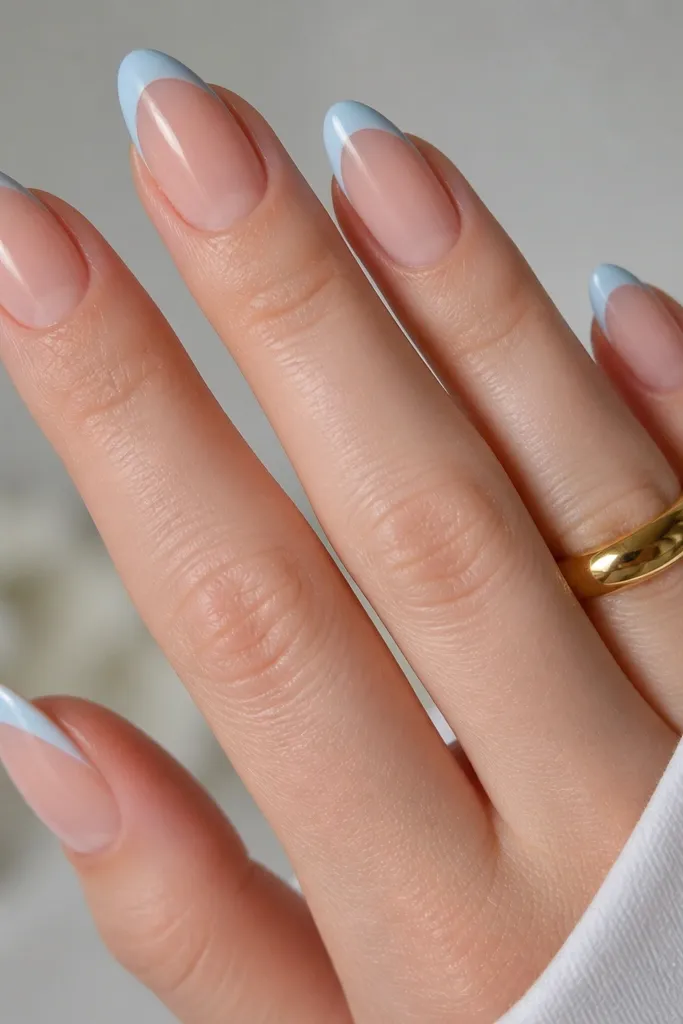
This set keeps everything beginner-friendly but adds a twist so it looks styled, not random. The skittle accent nail is where you get to play: diagonal stripes over light blue give movement and make the set feel intentional. Almond nails make the accent look smooth because the stripes sit inside the tip area cleanly. It flatters almost everyone because four nails stay simple and one nail carries the detail. On warm skin tones, the cool blue accent brings balance and makes your hands look fresh.
Paint four nails with milky nude base and tape on a light blue French tip, cure. On the accent nail, paint the same light blue tip, cure, then use thin striping tape to create 2-3 diagonal stripe bands across the tip. Paint white over the stripes, remove tape carefully, and cure. Finish all nails with glossy top coat so the accent nail matches the shine level of the French tips.
Keep the accent nail’s stripes thin. Thick stripes make the tip feel like a sticker.
Don’t add patterns to every nail — it reads messy and hard to maintain.
16. Powder Blue French with Micro Heart Outline
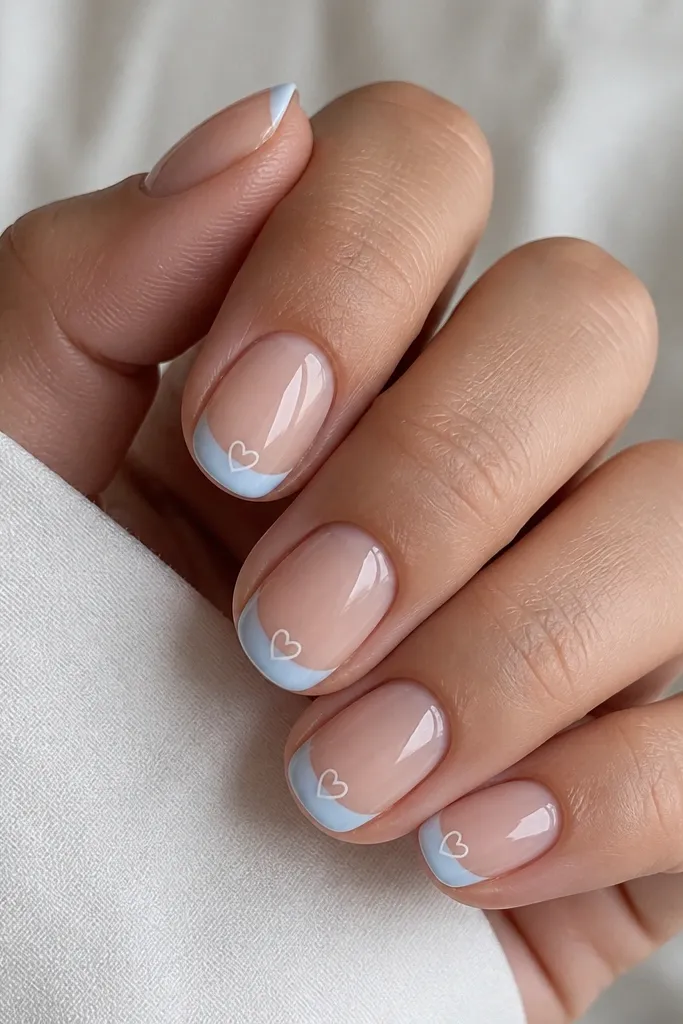
Hearts make light blue feel sweet without needing big nail art. The trick is to keep the heart tiny and placed right at the center of the French smile line, so it looks like a signature detail. Short oval nails make the heart look proportionate and cute. This design flatters hands with smaller nail beds because the heart doesn’t overpower the nail. It also works for fair, neutral, and medium skin tones because the white outline stays crisp.
Editor's notePractice the heart on a spare nail tip or a piece of clear plastic first so your curve matches every nail.
Apply nude base and cure. Tape the French tips and paint powder blue, cure. Using a liner brush, draw a small heart outline in white right at the top edge of the blue — leave a tiny gap so the heart looks like an outline, not a filled shape. Cure again. Seal with glossy top coat, making sure the brush covers the heart edges so it doesn’t snag.
Watch outAvoid filled hearts that are too thick — they look like blobs on a small tip.
17. Light Blue French with Thin Glitter Line at the Center
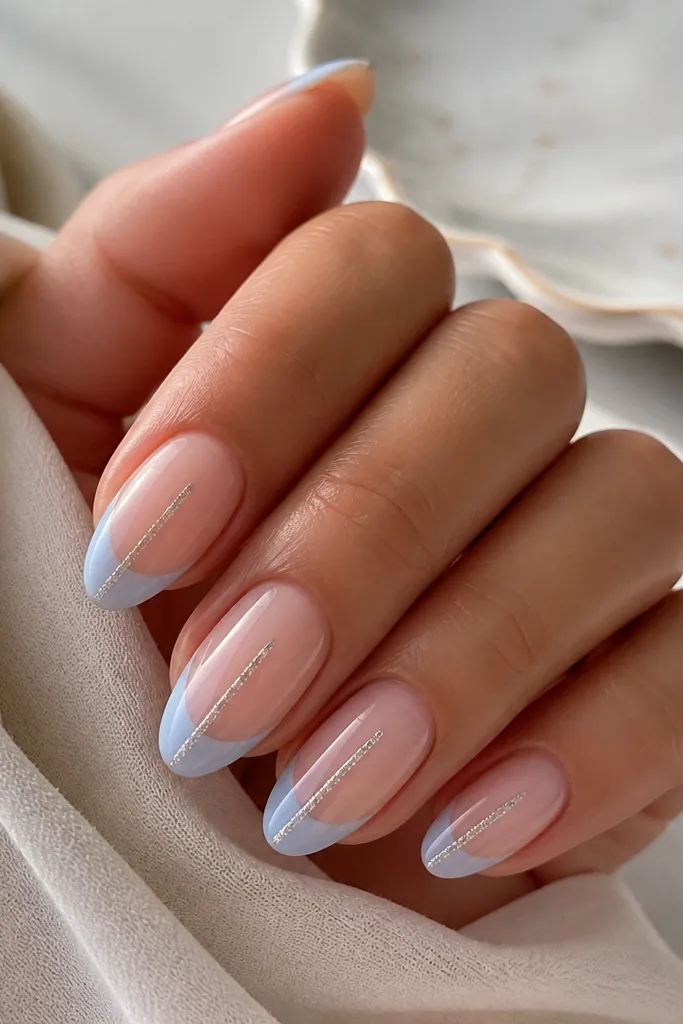
A center glitter line makes your nails look longer because it pulls the eye upward. The light blue stays the main color, and the glitter line is a narrow highlight instead of a full sparkle layer. Almond nails help this effect because the nail already tapers, so the center line looks extra clean. This works on hands with shorter nails because the vertical line gives you extra visual length. It also looks great on camera because it catches light straight on.
Editor's noteUse a glitter that is fine enough to disappear under top coat. Chunky glitter makes the line feel raised.
Apply nude base and cure. Paint light blue French tips with tape, cure. Add a thin strip of clear gel in the center of each tip, then press fine silver or pale holographic glitter into that gel line. Use a striping brush to keep it narrow — about 0.5 mm. Cure and then add glossy top coat over the whole nail to smooth the glitter and seal the edges.
Watch outDon’t center the glitter too high into the nude area. Keep it inside the tip zone.
18. Sky Blue French with White Lace-Like Lines (Beginner-Friendly)
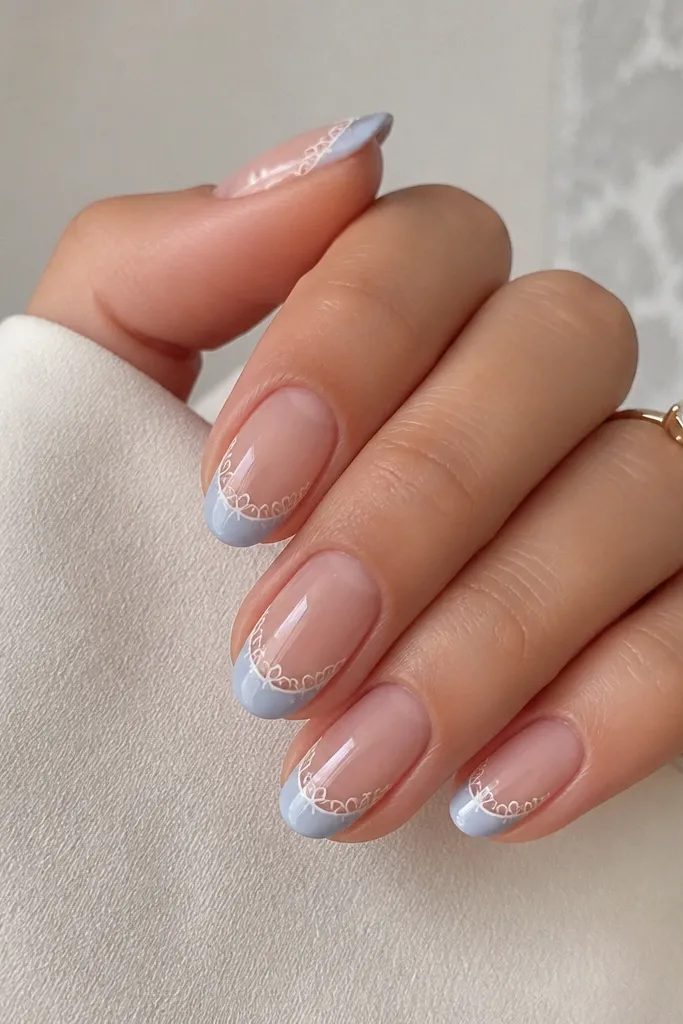
This gives you a lace vibe without the hard part of freehand lace. The white lines are thin and mostly near the outer edges of the tip, so the center stays clean and the nail still looks wearable. Oval nails make the lace pattern look airy. I like it for events because the lace effect reads classy even with a simple light blue base. It flatters most skin tones because the white lines create contrast and the blue stays soft.
Editor's noteIf your lace lines get wobbly, use a thin strip of tape to mark where the outer lace should start, then remove it before painting.
Start with nude base and cure. Paint light sky blue French tips, cure. Use a striping brush to draw 3-4 thin white curved lines near each side of the tip, then add tiny cross lines to connect them — like a simplified lace grid. Keep it sparse so you can still see the blue through the white. Cure and apply glossy top coat, especially over the lace lines to lock them down.
Watch outDon’t fill the whole tip with lace. Dense lace makes it look heavy and messy.
19. Light Blue French with Watercolor Cloud Edge
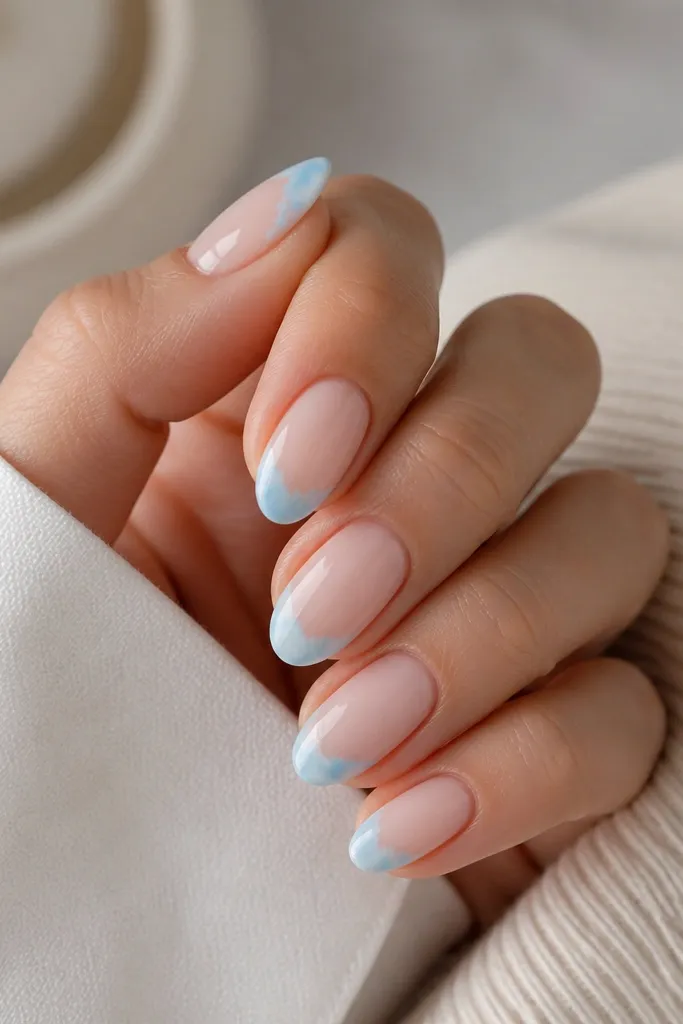
This one is for you if you want French tips that look airy instead of sharply outlined. The watercolor cloud edge makes the blue blend into the nude, so small mistakes at the smile line don’t show as much. Short almond nails are perfect because the shape already has a soft curve. It flatters hands that look dry because the glossy top coat plus cloud edge hides uneven cuticle transitions. On any skin tone, the cloud effect looks gentle and romantic.
Editor's noteUse a tiny sponge piece (smaller than a dime). Bigger sponges smear too much and blur the shape.
Apply nude base and cure. Paint the French tip light blue, but stop the blue slightly lower than your final smile line. Now take a small makeup sponge and dab a lighter blue or a touch of white near the top edge of the blue, blending upward into the nude. Keep blending until you see a soft cloud boundary. Cure fully and finish with glossy top coat to smooth everything.
Watch outDon’t try to make the cloud edge perfectly even. Slight irregularity is what makes it look watercolor.
20. Mist Blue French with Clear Glassy Base and Frosted Tips
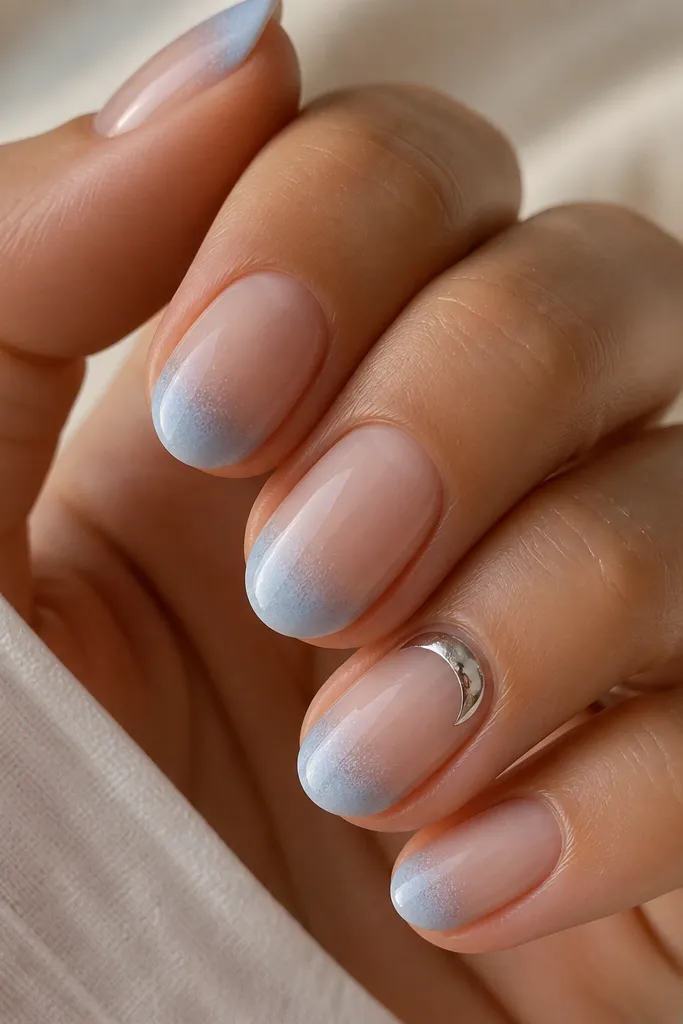
This look is dreamy because the base stays see-through and glossy, so the light bounces off your nails instead of looking flat. The French tips are light blue but finished frosty, which makes them feel like real “winter” color instead of regular polish. I like it on short almond or short squoval because the frosted tip gives shape without needing long length. It also hides small imperfections at the smile line since the matte-frost texture softens edges. If you’re a beginner, the clear base makes it easier to judge where to stop the color.
First, prep and prime like you mean it: push back cuticles, lightly buff shine, then wipe with alcohol. Apply a thin layer of clear builder gel or a clear rubber base, cure it, then add a second thin coat so the surface looks evenly glassy. Next, place a guide for your French line using a striping tape or a French-tip stencil, then apply misty light blue gel only on the tip area. Cure, then lightly dust the frosted effect by wiping the tip with a small amount of matte topcoat or a frost powder (I use a fine “ice” powder) and cure again. Finish with clear gloss only on the base — keep the frosted texture on the tips by not spreading gloss over them.
To keep the frosted texture from getting patchy, wipe the brush on a paper towel before you touch the tip area. Cure in short bursts if your lamp runs hot so the frost stays even.
Don’t paint the light blue too thick at the smile line — it makes the matte look bulky and the French edge looks messy.