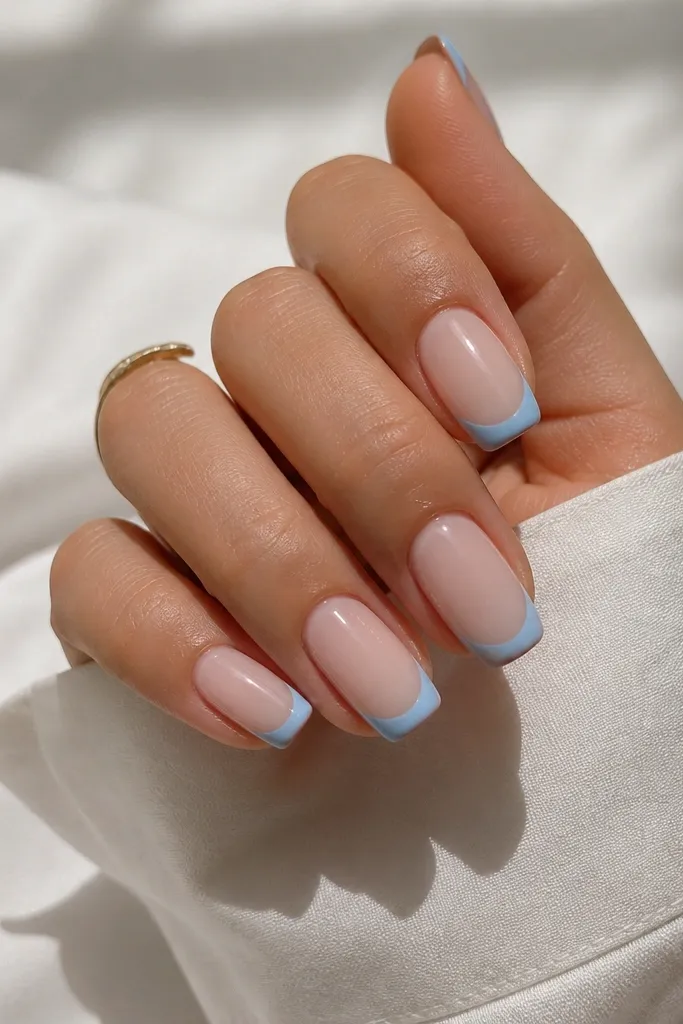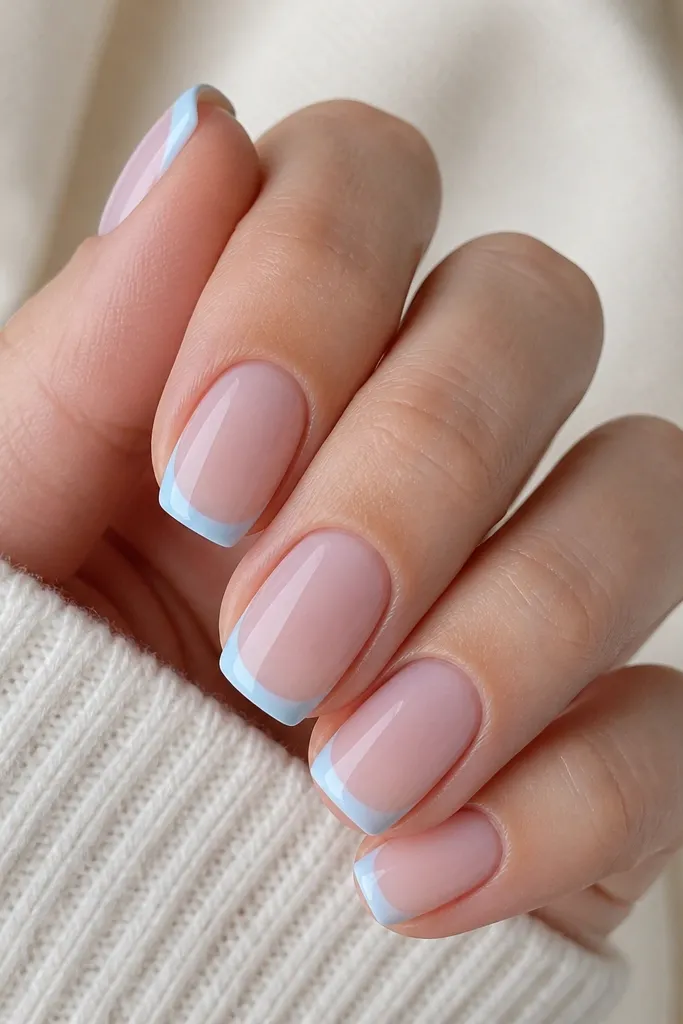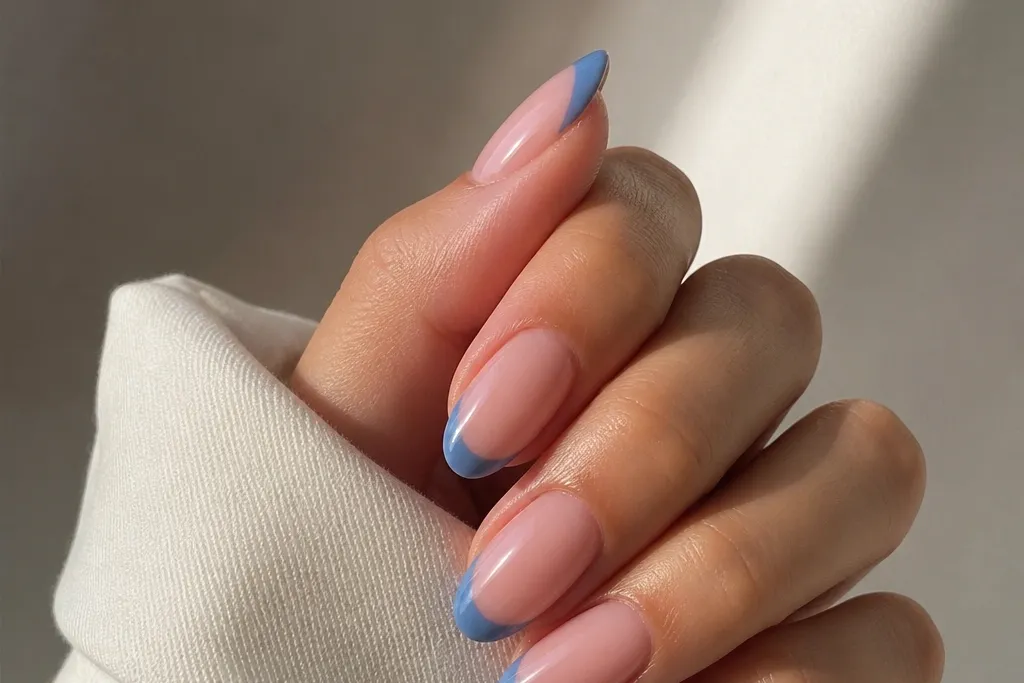

1. Icy Cornflower Micro French on Milky Nude
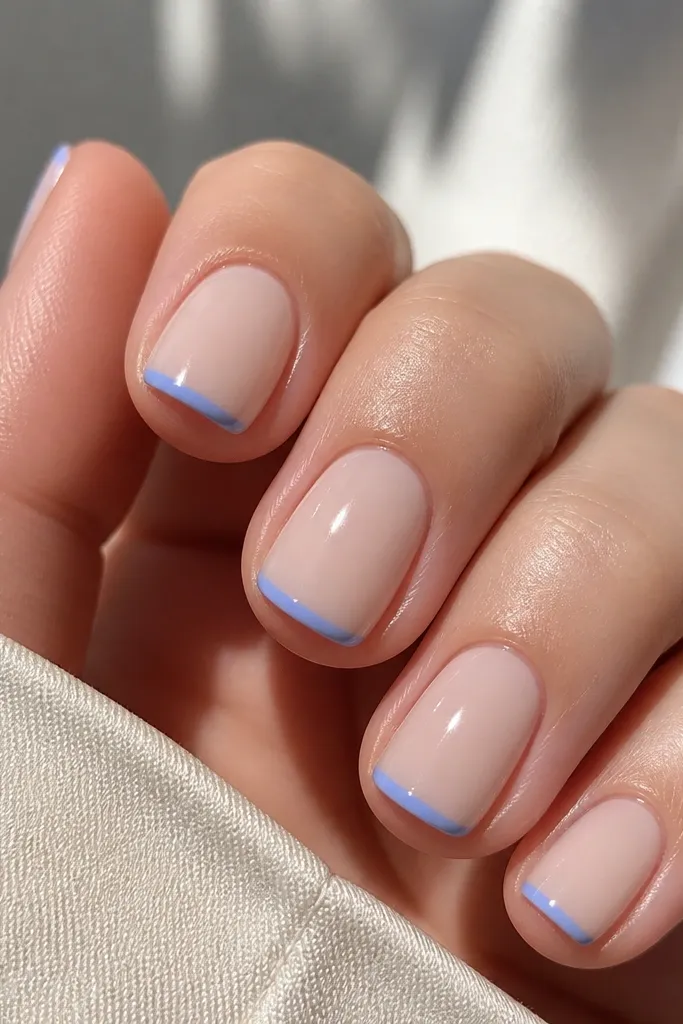
This is the "fresh manicure" version of blue French. The milky nude base stays translucent so your natural nail still shows, and the icy cornflower blue tip reads bright without looking heavy. I like it on short squoval because the micro tip keeps the nail from looking stubby. On light to medium skin tones, the cool blue makes hands look whiter and more even; on deeper skin tones, it still works when you keep the tip narrow and the base slightly pink.
Start by pushing back cuticles and buffing the shine off your nail bed, then apply a sheer milky nude base gel or polish in two thin coats. Cure each coat fully if you're using gel. Next, use a fine striping brush and paint a micro French line - place the smile curve so it matches your cuticle curve, then keep the blue band about the width of a credit card edge (thin, even). Finally, cap with a glossy top coat and cure for the full time so the blue stays sharp.
Editor's noteIf your line wobbles, paint the smile curve first with a dotting tool, then connect the dots with the brush.
Watch outAvoid painting the blue too thick on short nails because it turns the set into a blocky stripe.
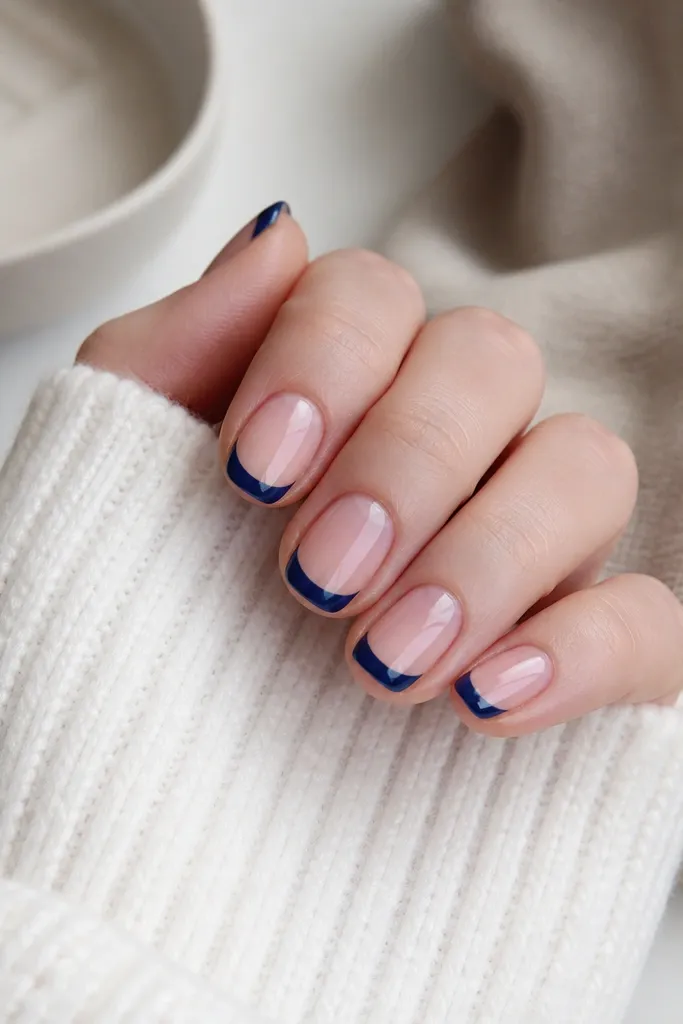
2. Denim Navy Classic French with Sheer Pink Base
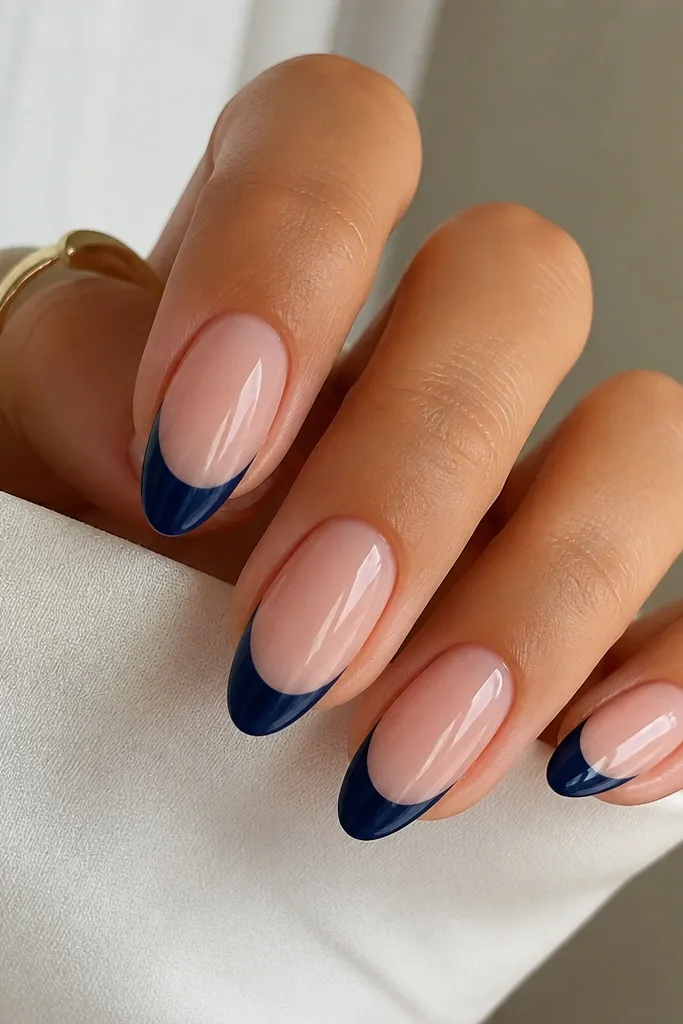
Denim navy French is the one I reach for when someone wants blue but doesn't want "bright art." The sheer pink base keeps it soft, and the navy tip gives definition that looks clean in photos and real life. It flatters most skin tones because denim navy sits between cool and warm - it doesn't clash. I've worn this on myself for office weeks and it never looks too loud.
Prep the nails, then apply a sheer pink builder base or nude gel in two thin coats for an even glass look. Cure, then place French guide stickers if you're newer - just to hold the smile line height. Paint denim navy from the sidewalls inward, keeping the curve smooth and the center slightly higher. Cure again and finish with glossy top coat, making sure the top coat touches the tip edge to prevent peeling.
Editor's noteFor extra neatness, wipe your brush with cleanser and "pull" the blue into the smile line instead of dragging side-to-side.
Watch outDon't let the navy touch the cuticle - leaving a tiny gap keeps it looking salon-clean.
3. Royal Blue French Fade into Clear at the Edge
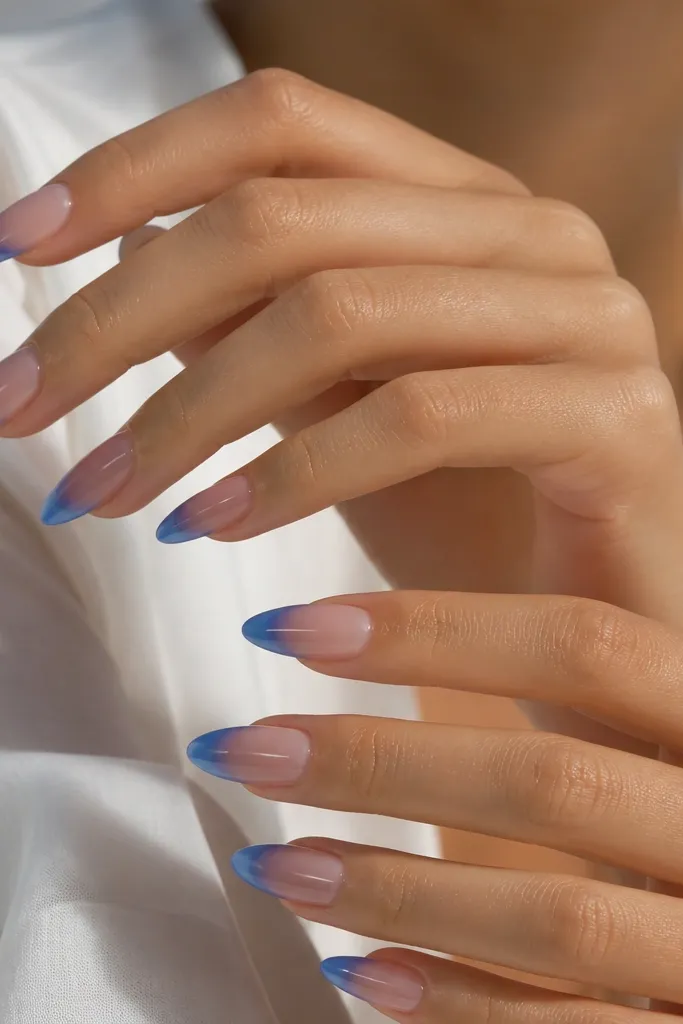
This one looks expensive because it's not a flat stripe. Royal blue fading into clear makes the tip feel lighter and gives a "glow" effect, especially on longer almond nails. I use it when I want the blue to look airy instead of harsh. It flatters slender nail beds and looks great on hands that already have long fingers - the fade keeps things balanced.
Start with a clear or very sheer base gel and cure it fully. Then, with a medium flat brush, load royal blue gel and place the darkest color at the center of the tip. Feather the edges outward with a clean brush wiped in cleanser until you get a smooth fade. Cure, then top coat in two passes: one from the base to the tip, and a second light coat just to level the gradient.
Editor's noteUse a makeup sponge for the fade if you're working with gel polish that levels slowly - do tiny taps from center outward.
Watch outAvoid overworking the fade after you cure because it can create streaks instead of a soft gradient.
4. Sky Blue Half-Moon French on Sheer Nude
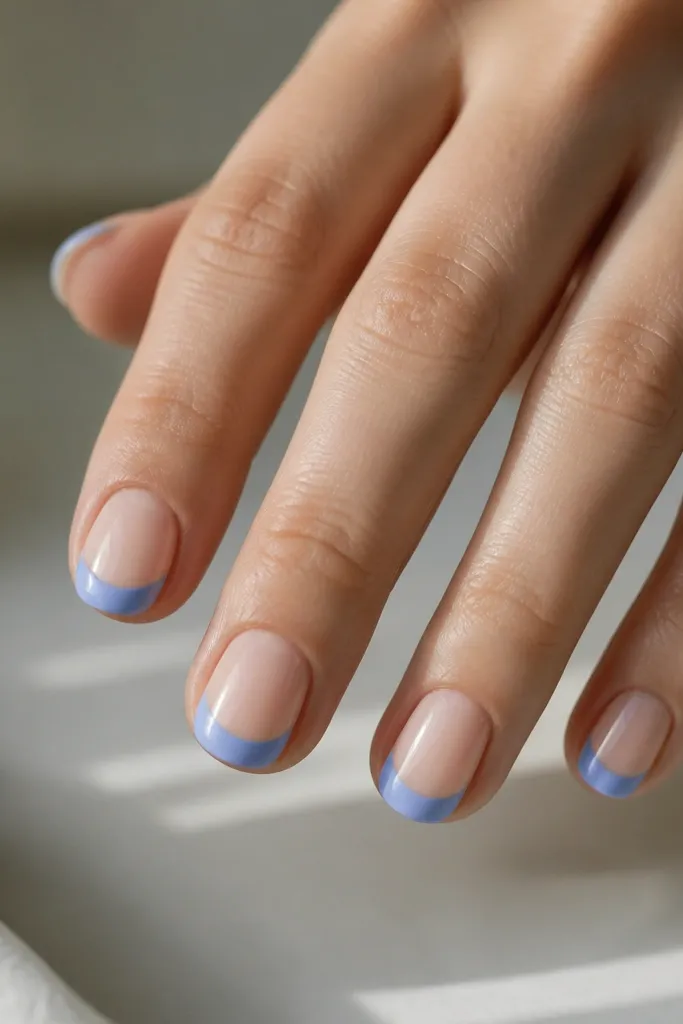
Half-moon French in sky blue looks playful and very "clean girl" without trying too hard. The crescent sits near the free edge, so the blue feels intentional but still light. I like it for short nails because it visually elongates without covering the whole tip. It also looks great on medium to deep skin tones because the sky blue stays bright against a sheer base.
Apply a sheer nude base gel in two thin coats and cure fully. Next, use a small French stencil or a curved nail guide to place the crescent height - keep it centered on each nail. Paint sky blue inside the stencil area, then slightly blend the edges with a clean brush so the crescent looks smooth. Cure and seal with a glossy top coat, paying attention to the crescent border so it doesn't catch on fabric.
Editor's noteIf you don't have stencils, use a thin strip of tape and trim it into a narrow curve for a DIY guide.
Watch outDon't make the crescent too wide on short nails or it starts to look like a thick stripe.
5. Cobalt Blue French with Tiny Silver Studs at the Corners
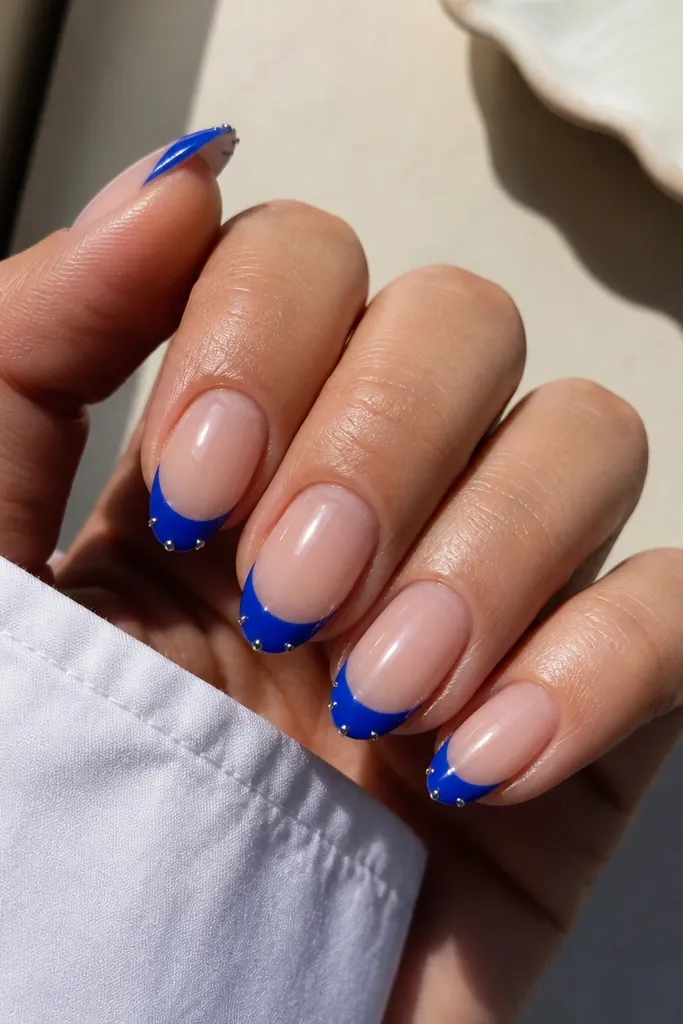
Cobalt plus micro studs is a combo that reads "special" without a full glitter set. The cobalt blue is strong and crisp, and the studs at the corners mimic light catching on the smile line. I recommend this for nights out, weddings, or any time you want your nails to look intentional in flash photos. On lighter skin, the silver looks bright; on deeper skin, the cobalt stays rich and the studs still pop.
Start with a sheer nude base gel and cure. Paint cobalt French tips with a steady curved stroke - aim for a classic smile line, not a straight band. While the blue is still tacky (right after curing if you use gel studs, or after applying a small drop of gel), place two tiny silver studs at the outer corners of the tip. Press lightly with a dotting tool, cure, then top coat carefully around the studs so they stay secure.
Editor's noteUse a toothpick to move studs into place; fingers are too big and smudge the gel.
Watch outAvoid using oversized studs because they make the blue tip look cluttered.
6. Periwinkle French with White Micro Line Accent
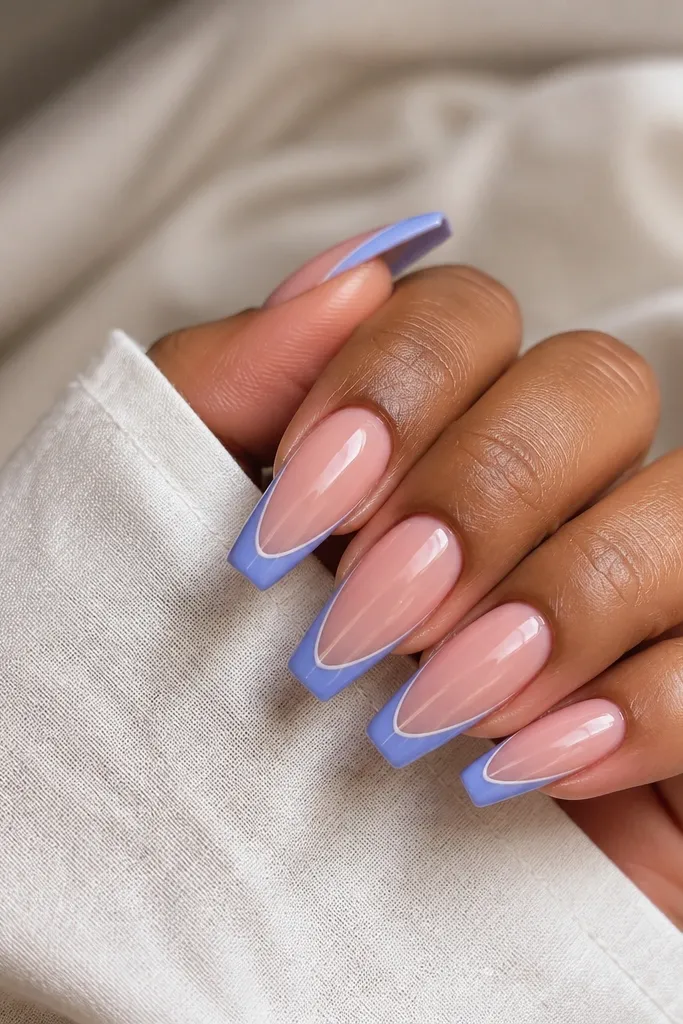
This design adds a "framing" effect. Periwinkle is softer than royal blue, and the tiny white line makes the tip look sharper, like it's outlined. I like it on coffin and almond because the extra border shows up clearly. It flatters hands by making the tip look crisp and slightly slimmer - great if you think your nails look wide.
Apply a translucent pink base gel, cure, then paint the periwinkle French tip in one smooth stroke per nail. Keep the smile line aligned and let the blue cover the free edge evenly. After curing, use a liner brush with white gel polish to add a micro line just inside the blue edge - leave a tiny gap so it looks clean, not messy. Cure again and finish with glossy top coat.
Editor's noteWipe your liner brush on a lint-free wipe before picking up white gel so it stays thin.
Watch outDon't flood the white line - if it's too thick, it turns into a stripe instead of a crisp accent.
7. Blue Marble French Tips on Clear Gel Base
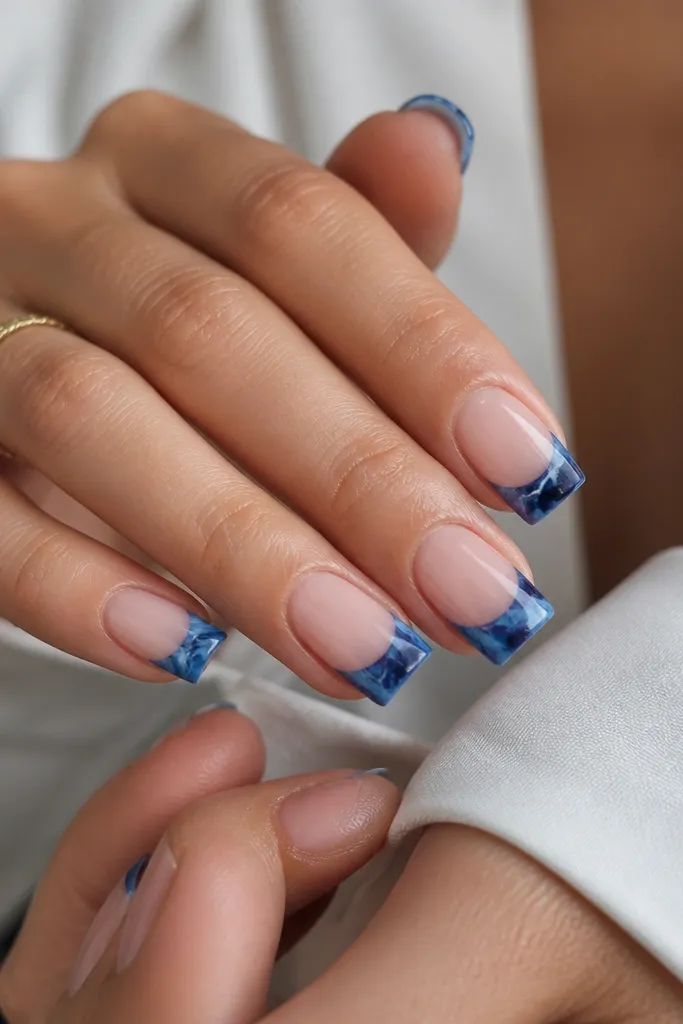
Marble French looks good because it hides tiny brush imperfections. The clear base keeps it airy, and the blue marble tips bring movement without needing glitter. I've done this for clients who hate flat solid tips because marble feels more custom. It looks great on medium skin tones and also on fair skin because the veining adds contrast.
Start with a clear gel base and cure. For each nail, paint a French tip area with a medium blue jelly gel, then while it's still tacky, drag in darker navy with a toothpick in short lines. Add thin white veining using a nail art brush - less is more, keep the veins delicate. Swirl once more lightly, cure, then top coat with a thick glossy layer so the marble looks smooth and not raised.
Editor's noteIf your marble gets muddy, clean your toothpick between nails and keep the white veining thin.
Watch outAvoid using too many colors in one tip or it turns gray instead of marbled blue.
8. Blue French with Negative Space Triangle at the Tip
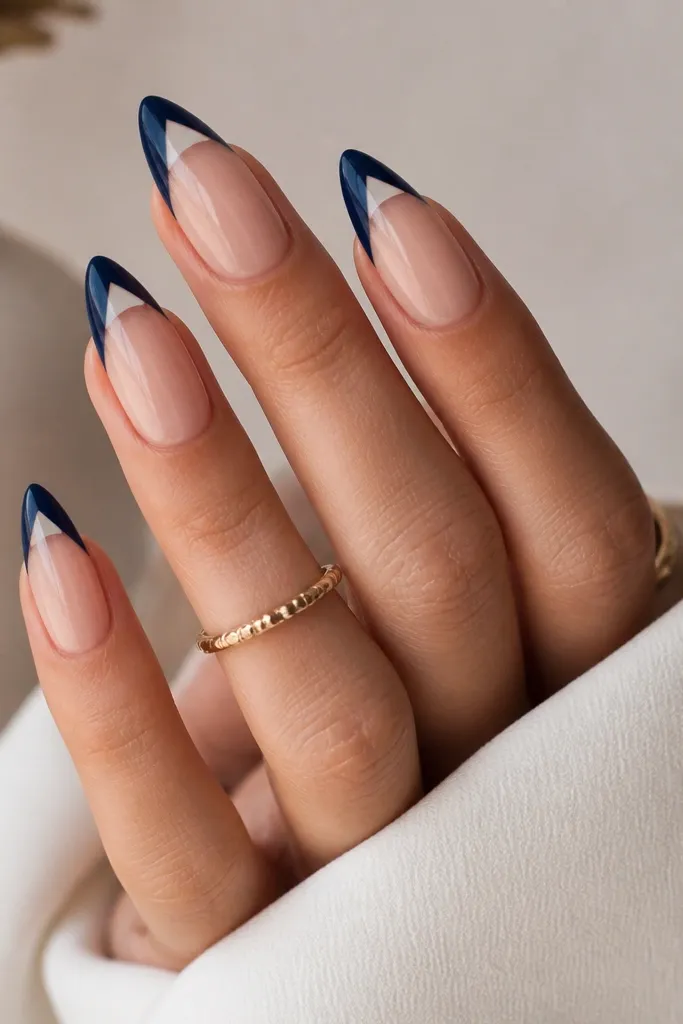
This is the geometric French version that looks modern. The negative space triangle breaks up the blue and makes the nail look longer because your eye has a cutout to travel through. I like it on almond because the triangle shape echoes the nail point. It flatters hands with slightly wider nail beds because the cutout visually narrows the center.
Apply a nude base gel and cure. Use a stencil or tape to mask a small triangle near the center of the free edge - the triangle should point toward the center of the nail. Paint the French tip area deep blue around the triangle, then carefully remove the stencil while the gel is still manageable (or cure if you used peel-off guides that don't smear). Cure fully, then top coat and check the triangle edges - add a tiny clear gel bead at the triangle boundary if you see a rough spot.
Editor's notePress the tape down with a silicone tool so gel doesn't creep under the edges.
Watch outDon't make the triangle too close to the cuticle or it starts to look like a mistake, not a design.
9. Glazed Blue French with Chrome Outline
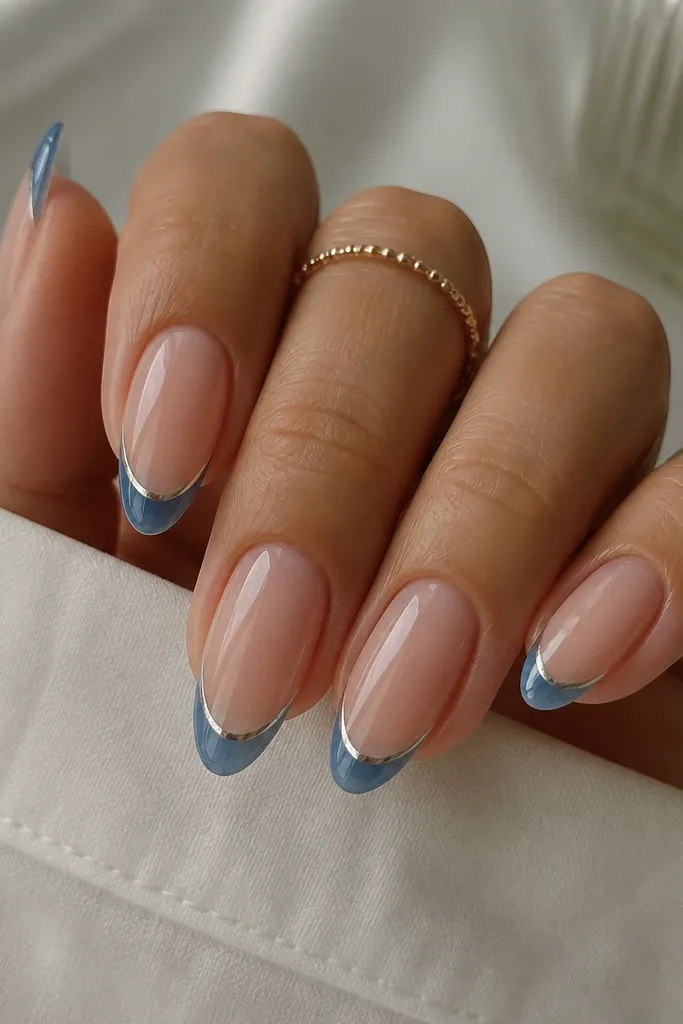
Chrome outline makes blue French look like jewelry. The glazed blue gel gives depth, and the mirror line along the tip edge makes it pop even in daylight. This works best when the blue is a medium shade like cornflower or cobalt - too pale and the chrome disappears, too dark and it looks harsh. It's flattering for everyday because the base stays nude and the effect stays at the tip.
Prep and apply a sheer nude base gel, cure. Paint the French tips with glazed blue jelly gel in two thin layers so the blue looks dimensional. Cure each layer fully. Then apply chrome powder or chrome gel to a thin strip along the tip edge - use a liner brush or a striping tape to keep it straight. Clean off excess chrome, cure if needed, and top coat with a high-shine top coat that won't dull chrome.
Editor's noteUse a matte-free top coat near the chrome line; some top coats dull chrome fast.
Watch outAvoid stacking too much chrome gel - thick chrome looks gritty instead of mirror-smooth.
10. Blue French Tips with White Daisy Dots
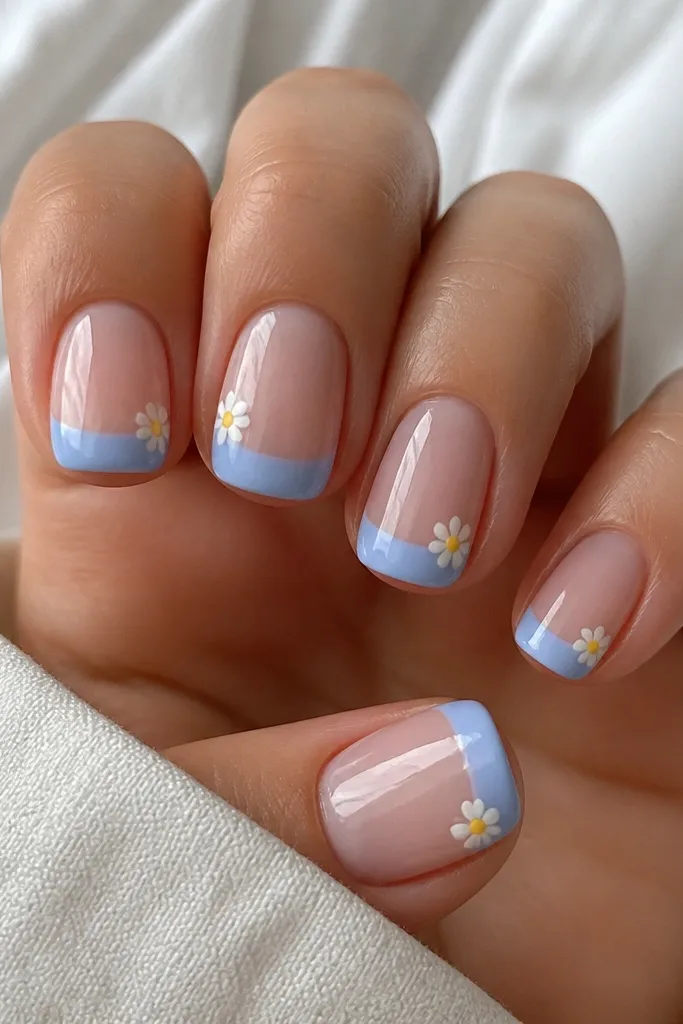
Daisy dots make blue French feel fresh and springy without going full nail art across the whole nail. The sky blue tip is light, so the white flowers read clearly. I like this for casual events, birthdays, and beach weekends because it looks cute from a distance. It also flatters short nails because the art is small and sits in the tip area.
Start with a sheer base and cure. Paint a sky blue French tip with a slightly rounded smile line. Add daisy petals using a dotting tool: place five small white dots around a center point, then add a tiny yellow dot in the middle. Let it dry or cure, then top coat over everything carefully so the flowers stay smooth.
Editor's noteUse a white gel with a dense pigment so the petals don't look translucent.
Watch outAvoid giant flowers on short nails; they steal space from the French shape.
11. Navy Blue French with Matte Top and Glossy Tip Edge
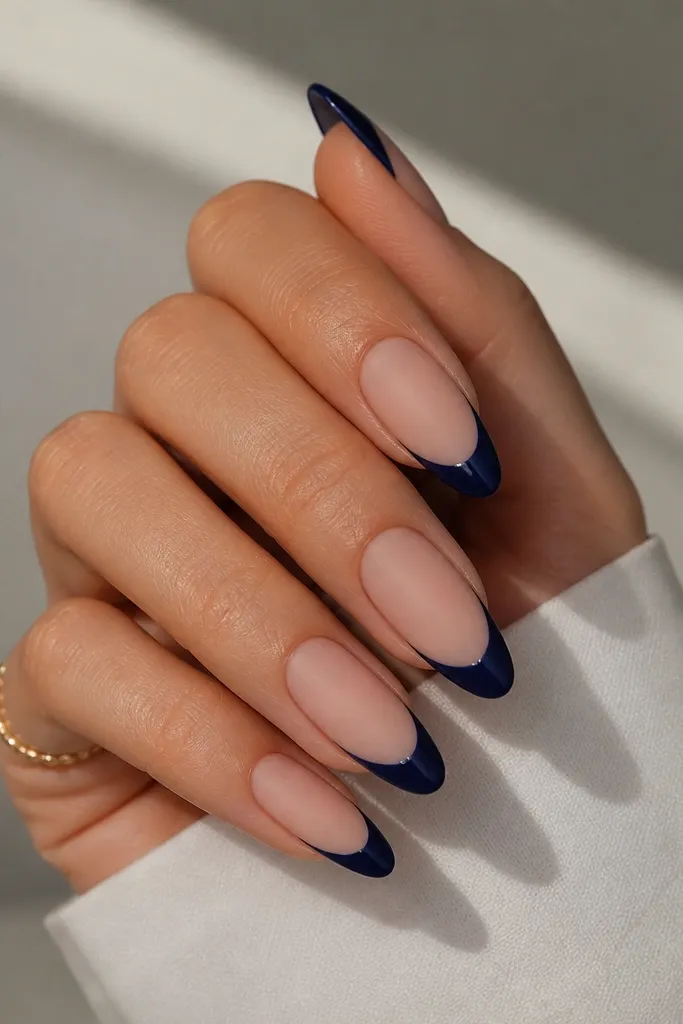
Matte navy French looks chic and slightly edgy. The matte finish mutes the blue, so it feels softer than glossy cobalt. The glossy border at the very edge keeps it from looking flat - it catches light and makes the tip line look intentional. This is flattering on longer almond because matte makes the nails look longer and smoother, especially on hands with dry texture.
Apply a nude base gel and cure. Paint navy blue French tips and cure. Use matte top coat over the entire nail, but keep a strip at the tip edge for glossy - I do this by placing a thin strip of tape along the edge after the matte cures, then applying glossy top coat only on that border. Remove the tape, cure glossy if required, and check for any matte smears near the border.
Editor's noteIf your matte top coat grabs, wipe the brush with cleanser and work in thin coats.
Watch outAvoid matte over studs or raised art; it makes texture look dirty.
12. Cyan Blue French with Micro Glitter at the Smile Line
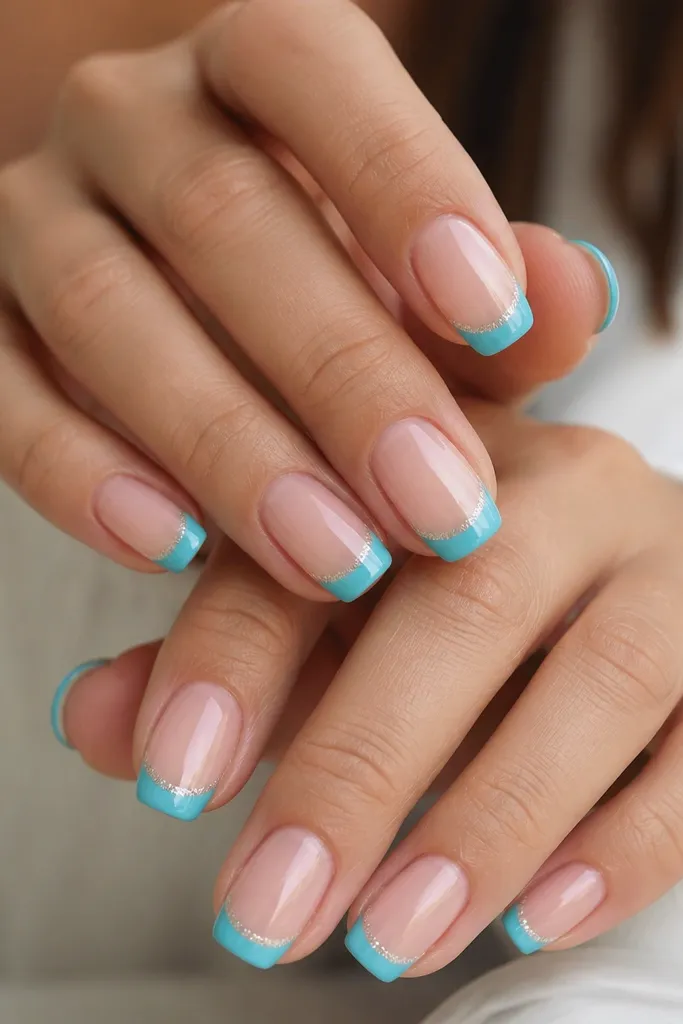
This is where blue French turns "party" without looking like full glitter. Cyan is bright but still cool, and the micro glitter sits exactly where the eye goes - on the smile line. I like it for holiday photos, date nights, and events where you want sparkle but not chunky bling. It flatters short to medium lengths because the glitter line creates a visual highlight without adding bulk.
Apply a sheer pink base gel, cure. Paint cyan French tips carefully with a medium-thin brush and cure. Mix or use a premade fine silver micro glitter gel, then brush a tiny amount along the smile line only - you want a dusting, not a thick layer. Cure, then top coat gently, spreading top coat away from the glitter line first so it stays concentrated.
Editor's noteUse a small fan brush to remove loose glitter before top coat so it doesn't spread.
Watch outDon't put glitter across the whole tip or it stops reading as French.
13. Periwinkle Blue Reverse French on Clear Base
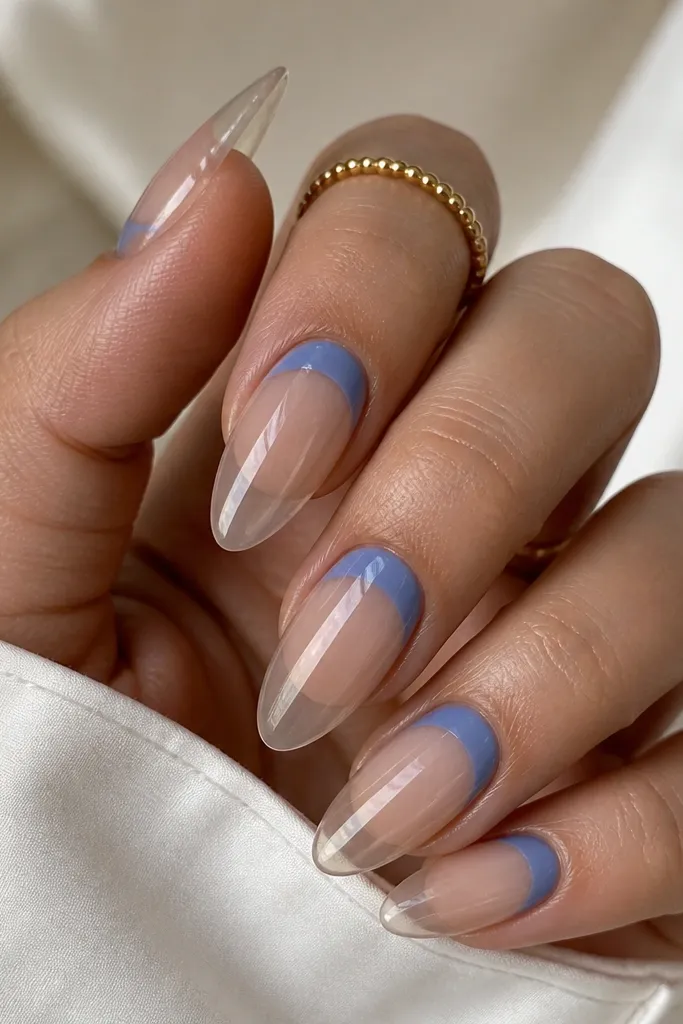
Reverse French in periwinkle feels fresh and a little unexpected. Instead of painting the free edge, you paint the cuticle curve, which makes the nail look longer and cleaner. Clear base keeps it light and modern, and periwinkle stays soft enough for everyday. I've used this for people who want blue but hate the look of thick French tips on their nails.
Start with a clear base gel and cure. Paint periwinkle along the cuticle curve - keep the band narrow, about the width of a thin eyeliner line, and leave a small gap so it doesn't flood the skin. Use a detail brush and follow your cuticle shape, then clean the edges with a gel wipe on a small brush dipped in cleanser. Cure fully and seal with a glossy top coat.
Editor's noteIf you're worried about flooding, do the blue in two thin coats rather than one thick coat.
Watch outAvoid painting reverse French too high onto the skin; it looks messy fast.
14. Royal Blue Double French with Thin Inner Line
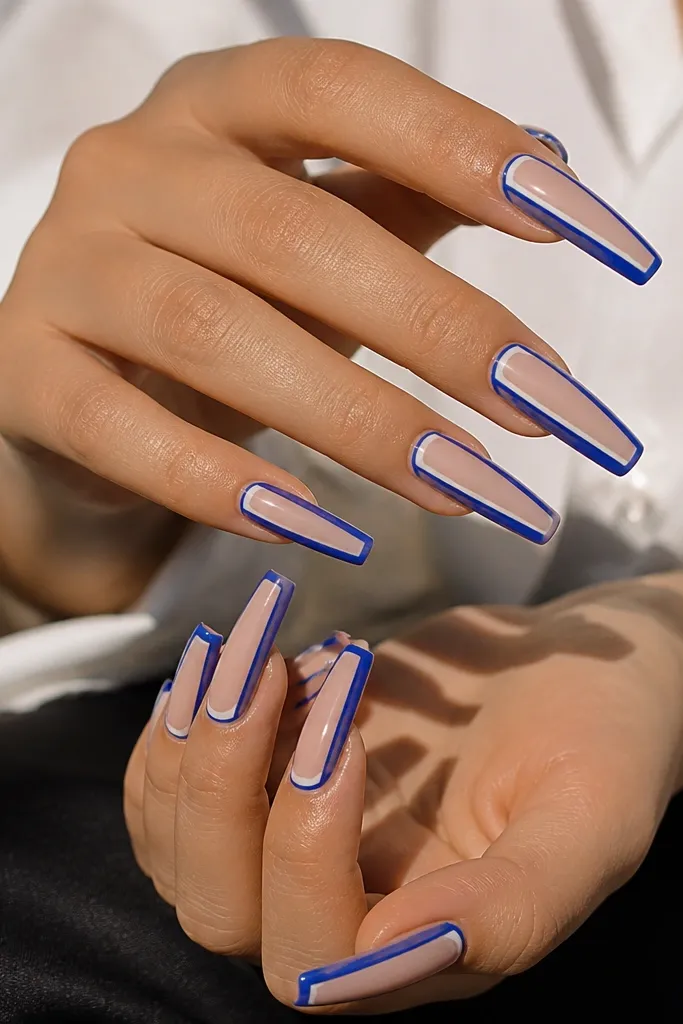
Double French makes your nails look styled even when you keep the rest simple. The outer band gives the color statement, and the inner line adds a tailored, architectural feel. I like royal blue here because it holds crisp edges and doesn't look washed out next to a nude base. This works best on longer coffin or almond because you need space for two lines without crowding.
Apply nude base gel and cure. Paint the outer French band royal blue first, with a smooth smile line and even thickness. Cure. Then, add a thinner inner line using a striping brush - keep it parallel to the outer band and centered. Cure again and top coat fully, making sure the top coat fills any tiny ridges from the inner line.
Editor's noteUse a striping brush with a short, firm tip so your inner line stays straight.
Watch outDon't make the inner line too thick or it turns into a single chunky stripe.
15. Blue French Skittle Accent on One Nail
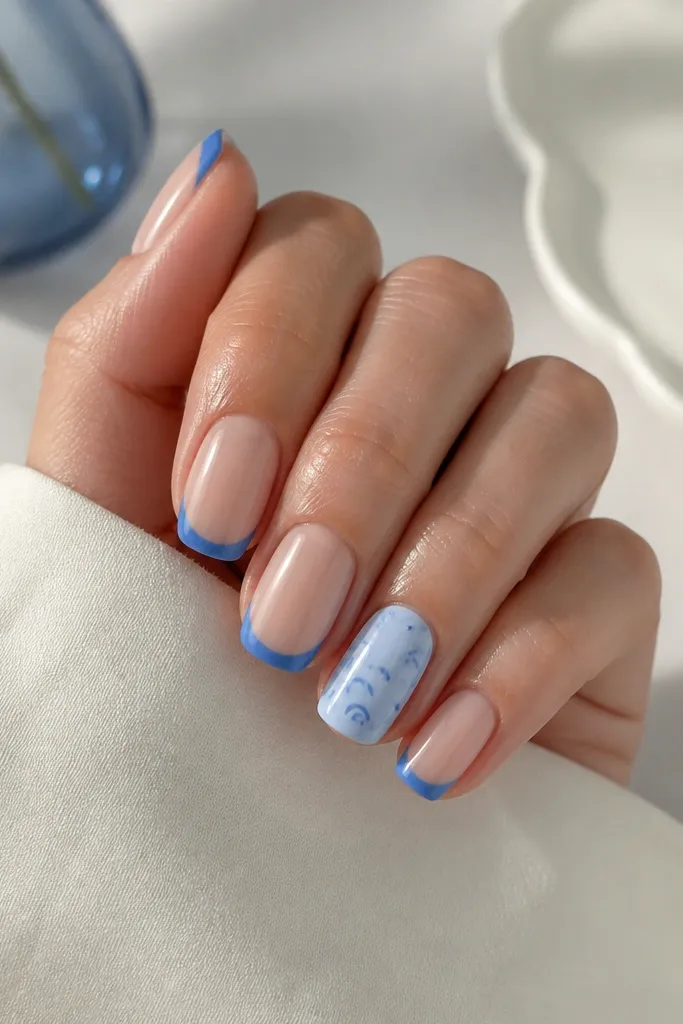
Skittle accents keep a French set from feeling repetitive. The base French stays consistent, and one nail gives you that "look at me" moment without turning the whole set into chaos. I like using two close blues like medium blue plus icy blue so it still looks coordinated. It flatters any nail length because the accent is small and you keep the majority classic.
Paint all nails with the same nude base gel and cure. Apply the same classic blue French tips on each nail, matching smile line height across fingers. Pick one accent nail and swap the tip color - for example, use icy blue and add a tiny dot cluster near the smile line or a small half-moon. Cure and top coat all nails together so the shine is uniform.
Editor's noteKeep the accent nail's design within the French tip area only - it prevents the set from looking cluttered.
Watch outAvoid mixing totally different colors like teal with navy and bright pink in the same set; it stops reading as aesthetic.
16. Baby Blue French with Tiny White Stripes on Each Side
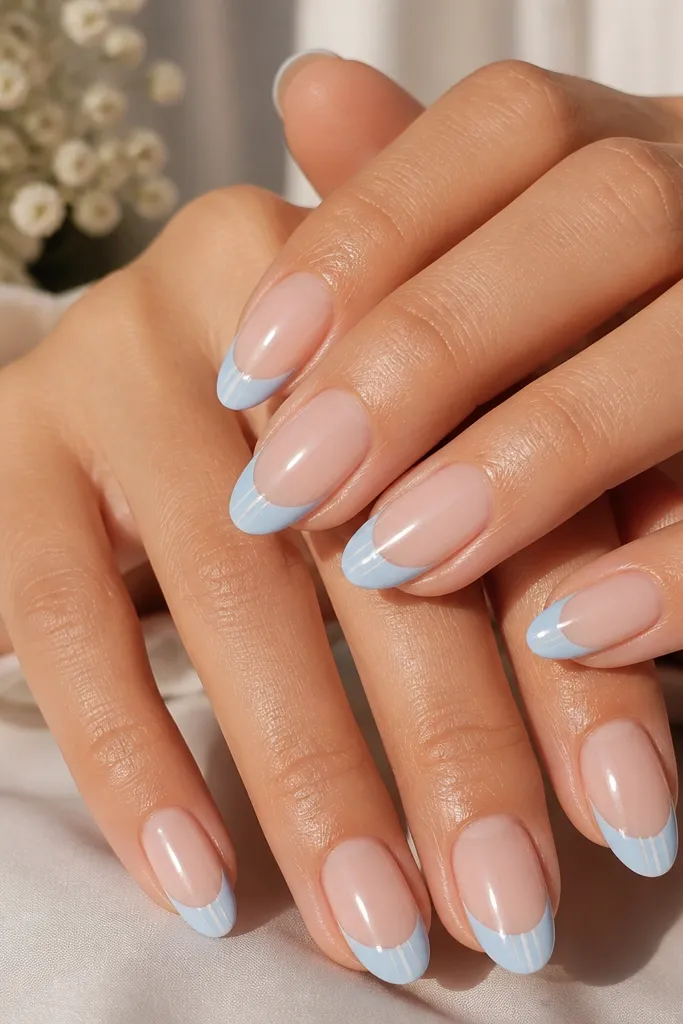
This design looks clean because the white stripes act like side borders. Baby blue stays light and friendly, and the stripes add shape definition without needing a full pattern. I recommend it for medium almond and squoval because the stripes sit neatly near the sidewalls. It flatters hands by making the nail look a bit narrower and longer, especially if your nails tend to look wide at the tip.
Start with a sheer nude base gel, cure. Paint baby blue French tips with a crisp smile line and cure. With a liner brush, add one tiny white stripe on the left side of the blue tip and one on the right - keep each stripe the width of a hair and keep them the same height. Cure and seal with glossy top coat, making sure the stripes are fully covered but not thickened.
Editor's noteIf stripes spread, let the blue cure fully and add the white on top - it gives you more control.
Watch outAvoid drawing stripes too close to the center or it looks like random lines instead of a border.
17. Navy Blue French with Matte Blue-to-Clear Ombre Top
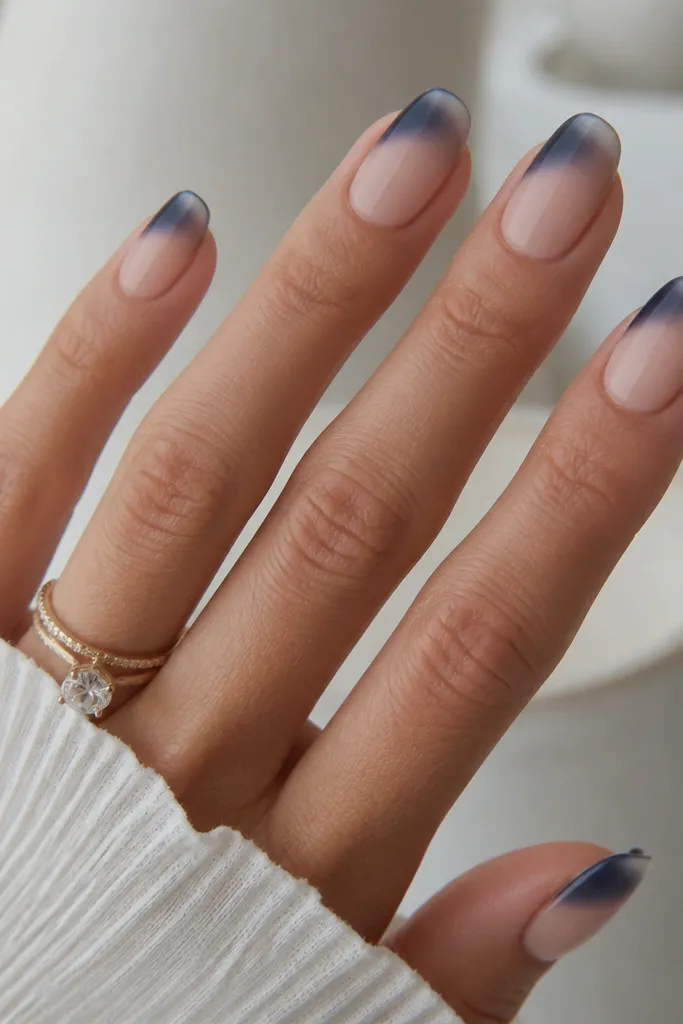
This is a texture-and-fade hybrid that makes blue French feel modern. Matte navy looks soft and velvety, but the clear glossy fade keeps the tip from looking heavy. I like it for short to medium nails because the fade gives length and the matte gives style. It flatters all skin tones because the color is deep and the fade keeps the set light.
Apply nude base gel and cure. Paint navy blue French tips and cure. For the fade, use a small brush to pull the navy slightly outward so it thins toward the tip edge, then cure. Apply matte top coat only over the navy portion, then apply glossy top coat on the very tip edge where it fades into clear - you can mask with a tiny strip of tape if you want a clean boundary.
Editor's noteTest the matte boundary on one nail first so you like the contrast before you do all of them.
Watch outDon't matte the whole nail if you want a sharp French look; matte can make the tips look flat.
18. Icy Blue French with Silver Foil Flakes in the Tip
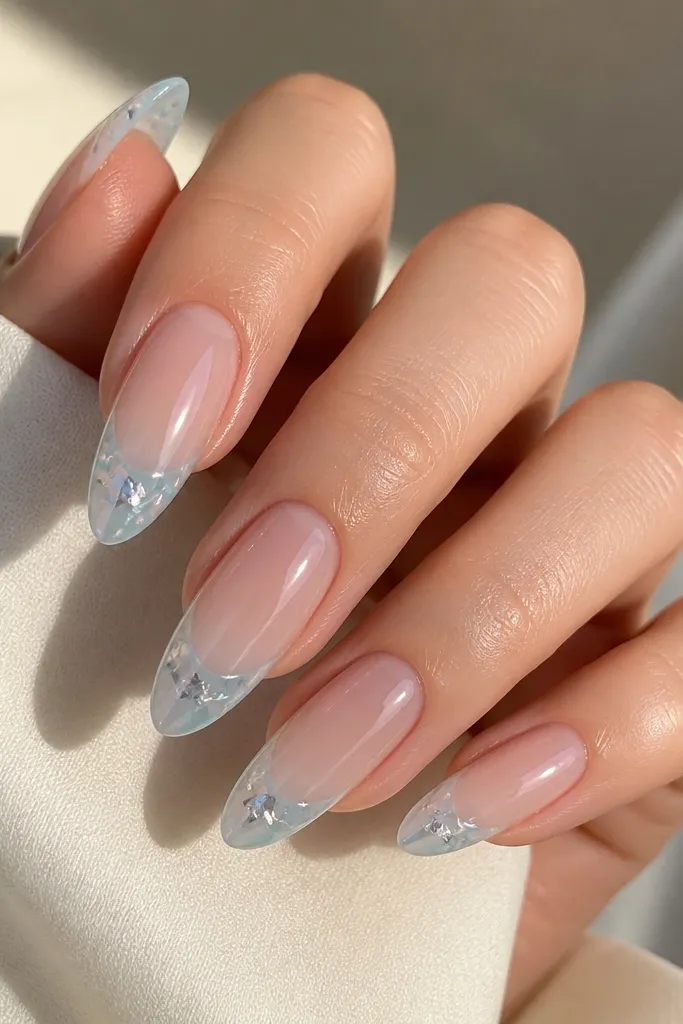
Foil flakes make icy blue look like it has dimension instead of paint. The irregular silver pieces reflect light and give that frosty effect, especially in winter photos. I like this on long almond because the tip has enough surface to place flakes without overcrowding. It flatters both fair and deep skin tones because the icy blue stays bright and the silver adds contrast.
Prep, then apply a sheer nude base gel and cure. Paint icy blue French tips and leave the surface slightly tacky before curing if your system allows it. Press tiny silver foil flakes into the tacky blue, then cure once the flakes are placed. Finish with a glossy top coat in a thin layer first, then a second layer to smooth over any raised edges.
Editor's noteUse tweezers to place foil flakes; your fingers are too warm and can smear gel.
Watch outAvoid adding too many flakes - if the tip is 80% foil, it reads messy instead of frosty.
19. Blue French with Micro Rhinestone Line at the Smile
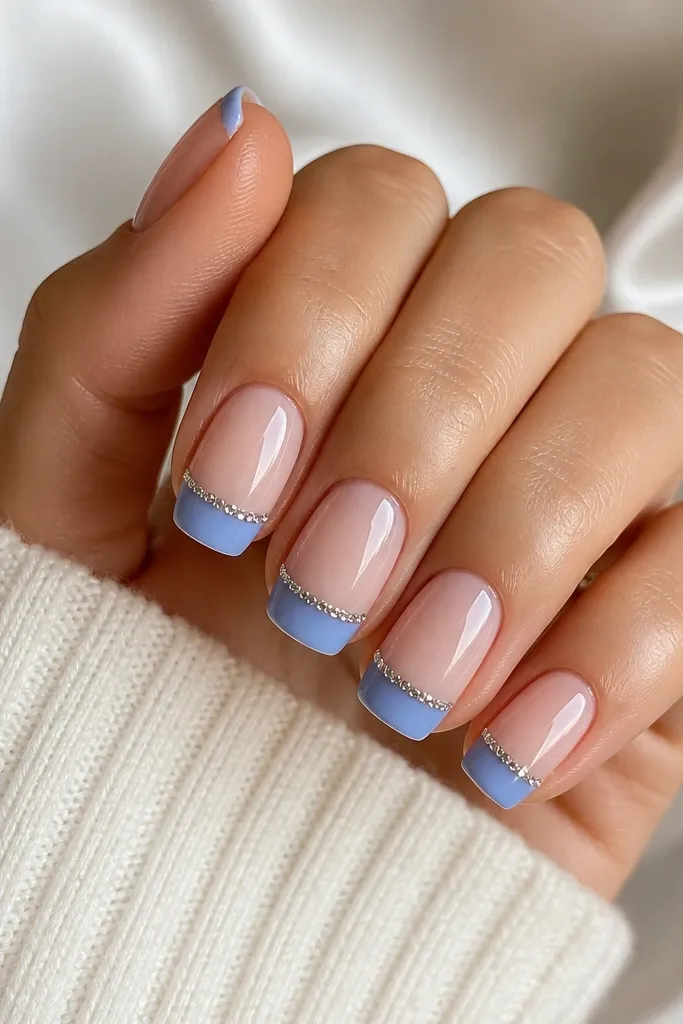
A micro rhinestone line gives you that "expensive manicure" look without covering the whole nail. The stones sit exactly where the eye lands - the smile line - so your French looks intentional even if your application isn't perfect. I prefer medium blue for this because it gives contrast to the stones and doesn't look washed out. This works for events, but it also looks nice for work when you keep the stones small and only on the French curve.
Start with a nude base gel, cure. Paint medium blue French tips and cure, then apply a thin stripe of clear gel right along the smile line. Place micro rhinestones in a straight line using a rhinestone picker, then press each one gently. Cure and seal with top coat, but keep your top coat thin so you don't flood between stones and dull the sparkle.
Editor's noteCount stones as you go - spacing looks better when you keep the same number per nail.
Watch outAvoid big rhinestones on a French smile line; they make the curve look uneven.
20. Cobalt Blue French with White Dot Confetti
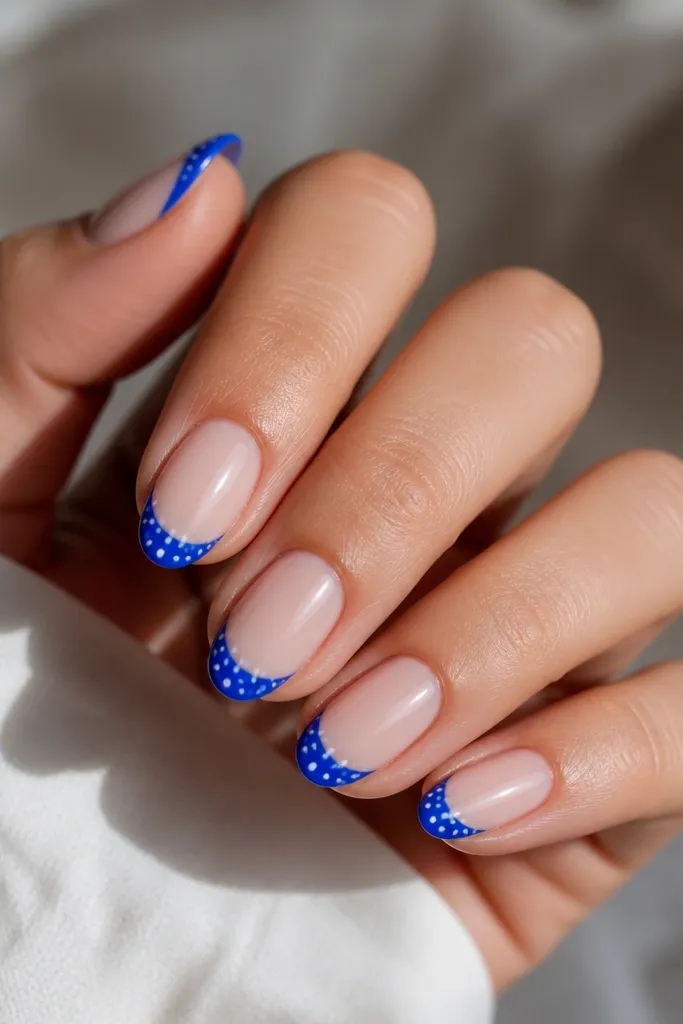
Confetti dots make cobalt feel playful instead of bold. The white dots add texture at a distance, so even when you're just scrolling past, your nails read as designed. Short almond is perfect here because the confetti stays on the tip and doesn't crowd the nail bed. I've worn this to casual dinners and it looks cute with denim or a simple black outfit.
Apply a sheer nude base gel and cure. Paint cobalt French tips with a classic smile line and cure. Use a dotting tool to place tiny white dots randomly but evenly - aim for 6 to 10 dots per nail depending on size. Let it dry or cure if using gel dots, then top coat with a glossy layer that smooths the dots without covering them completely.
Editor's noteKeep your dot sizes consistent - use the same end of your dotting tool for every nail.
Watch outDon't use big dots or heavy clusters or it turns into a blob instead of confetti.