
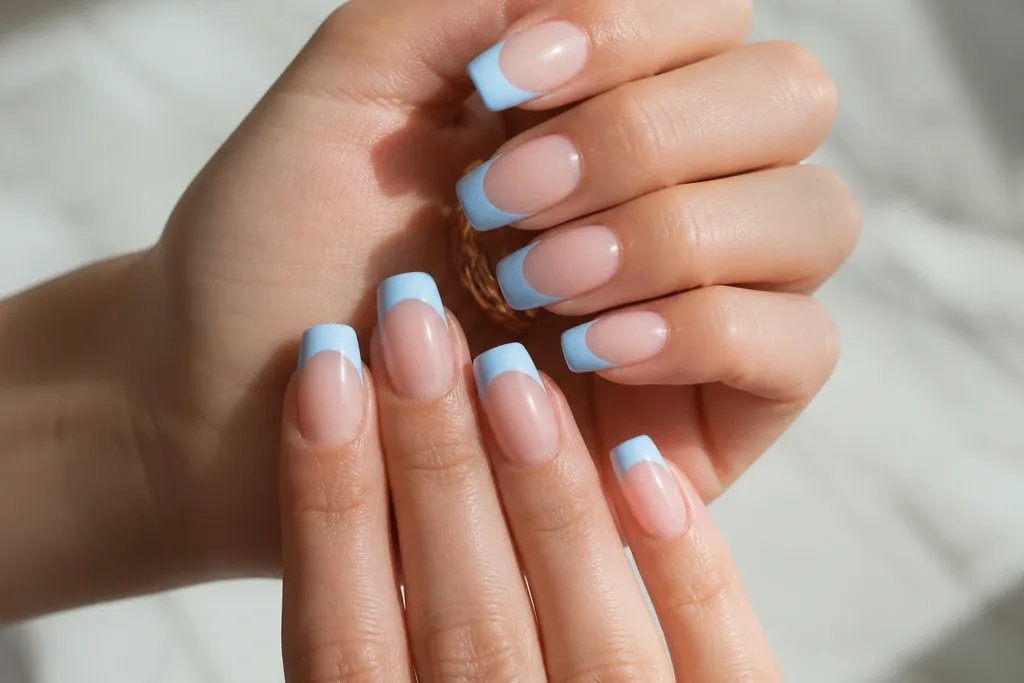
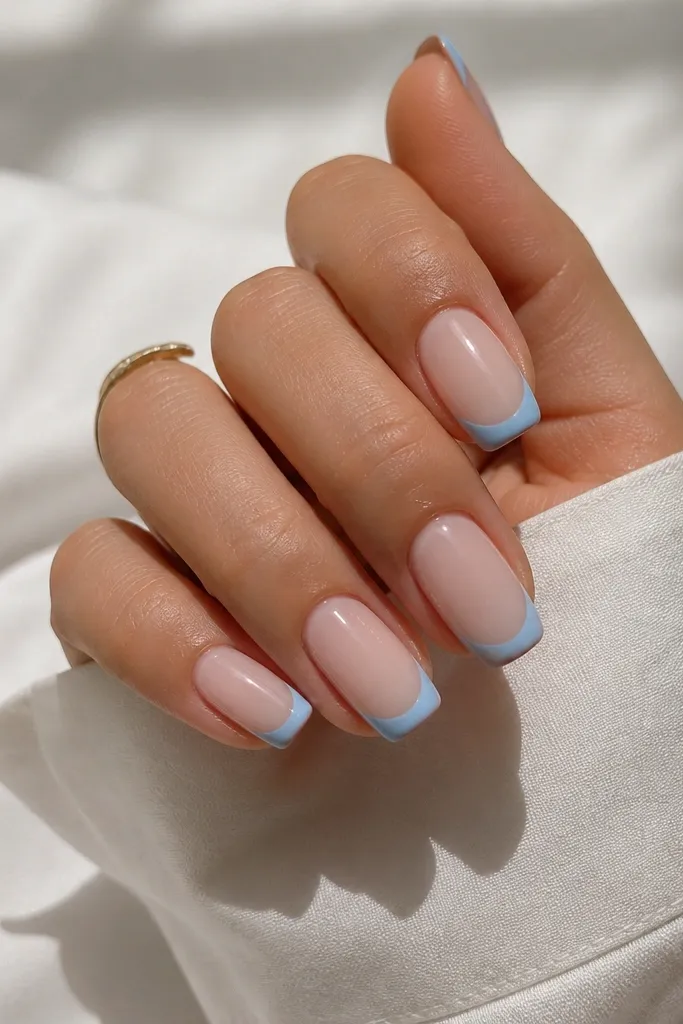
1. Icy Sky Blue Micro Smile on Short Square
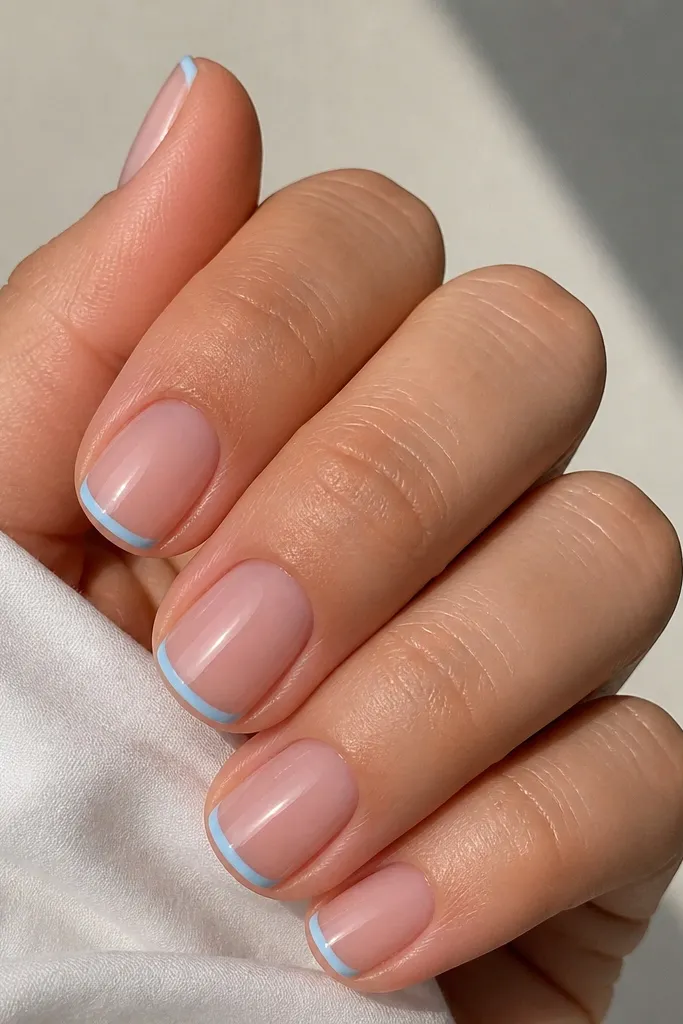
This is the version I reach for when I want French tips to look expensive on short nails. The base is a sheer nude or milky beige so the icy sky blue reads bright without looking heavy. The smile line is small — it sits close to the tip edge — which keeps the nail looking longer. It flatters straight-across nail beds and makes hands look tidy for office days, not just parties.
Start by pushing back cuticles and buffing the nail surface lightly so the base doesn’t peel. Apply a sheer nude base, then cure. Use a striping brush to paint a very thin sky blue line along the free edge, keeping the blue only in the tip zone. Add a second thin coat of sky blue if you see any streaks, then clean the sidewalls with a lint-free wipe and a little isopropyl. Finish with a high-gloss topcoat and cap the free edge.
If your blue looks chalky, you’re using too much polish in one pass. Wipe the brush on the bottle rim and do two thin coats.
Avoid painting the tip too wide — it makes short nails look shorter.
2. Sky Blue French with Milky White Base on Medium Almond
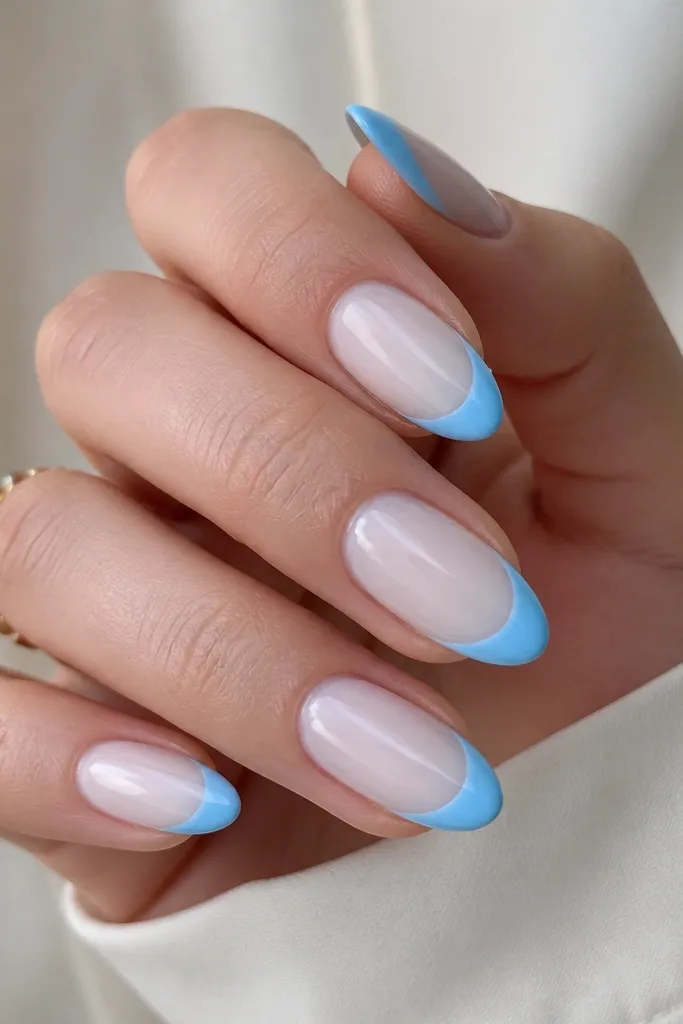
Milky white under sky blue makes the tip look like it’s glowing from within. On medium almond nails, the curve of the smile line should match the almond taper so the blue doesn’t look like a straight band. This set flatters olive and neutral skin tones because the cool blue pops without clashing. For events, it reads polished even when you don’t add gems.
Editor's noteUse a nail guide strip or a flexible French stencil to keep the curve matching across fingers.
Apply a milky white base in thin layers until it looks even but still slightly translucent. Cure fully. Then paint the French tips in sky blue starting from one side of the nail, pulling the brush toward the center with a gentle smile. Keep the tip thickness consistent, slightly thinner near the cuticle. Cure, then apply topcoat and wipe any tacky residue for a glassy finish.
Watch outDon’t let the blue touch the sidewalls — a tiny gap makes it look clean, not messy.
3. Two-Tone Sky Blue Ombre French on Long Coffin
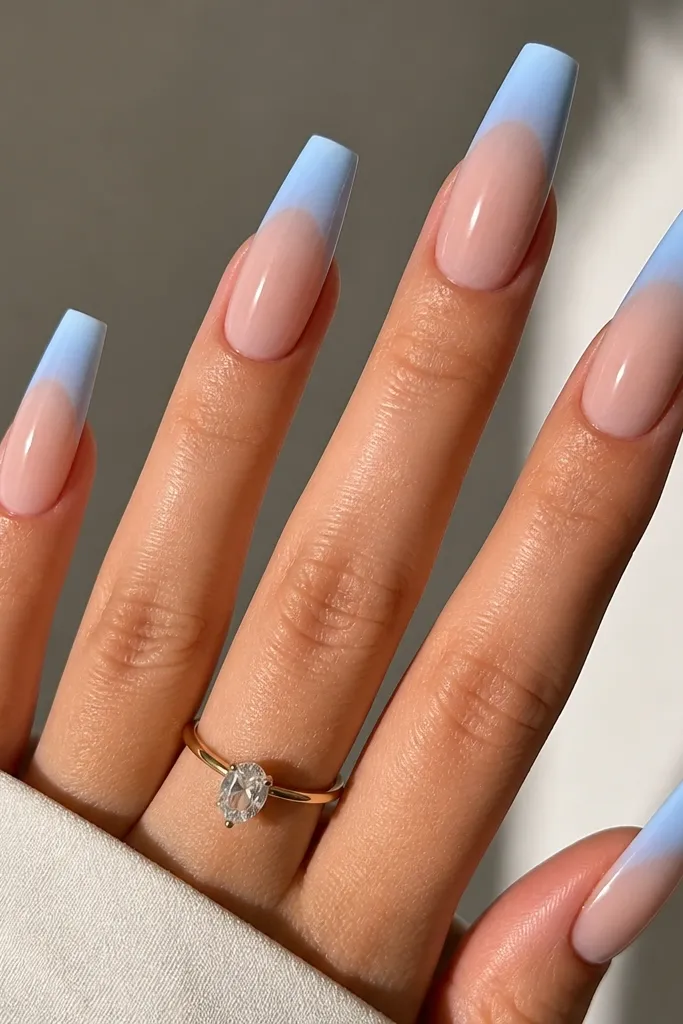
This is a luxe trick: you create depth inside the French tip without adding glitter. The ombre is subtle — lighter right at the free edge, deeper toward the smile line — so it looks expensive in close-up photos. Long coffin nails handle the blend because you have enough surface to feather the color. It looks especially good on hands with longer nail beds and works for date night or summer weddings.
Editor's noteFeather with a nearly dry brush — if the brush is wet, the blend will flood and blur the smile line.
Start with a sheer nude base and cure. Paint the French tip area with the deeper sky blue first, staying inside the tip zone. Without curing the whole thing, lightly feather the outer edge with a brush loaded with lighter icy sky blue, then cure. Clean the edges with a small liner brush dipped in cleaner, then topcoat twice for a smooth glass finish.
Watch outAvoid a harsh line between the two blues; it should melt, not stripe.
4. Sky Blue French Outline with Clear Negative Space
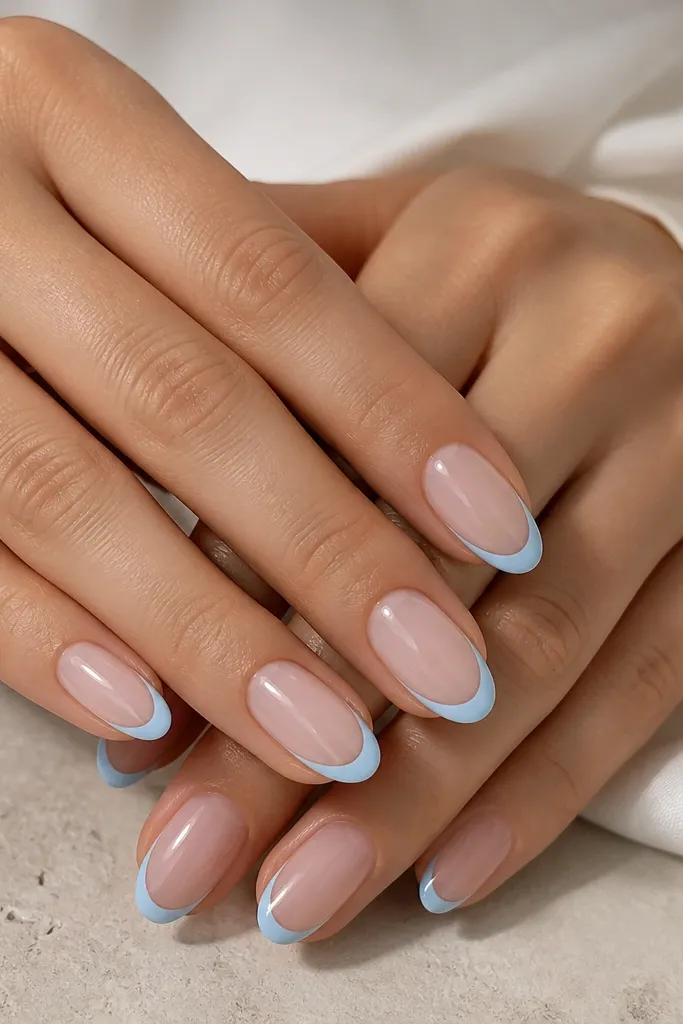
Negative space makes French tips look high-end because the design looks intentional, not painted over. The outline is sky blue, but the center stays clear or very sheer so the nail doesn’t feel bulky. Oval nails benefit most because the shape naturally frames the outline and makes the tip look airy. This works great for short-to-medium nails because the clear center keeps the eye moving lengthwise.
Editor's noteOutline first, fill second only if you want more opacity. Outlining alone looks more luxe than full coverage.
Apply a sheer nude base and cure. Use a thin brush to draw the outer tip perimeter in sky blue, then repeat the inner smile line lightly so you get a clean outline. Keep the center unpainted, or dab a single translucent coat if you want more coverage. Cure and topcoat, then cap the free edge so the outline doesn’t chip.
Watch outDon’t overfill the center — that turns it into a regular French tip fast.
5. Soft Sky Blue French with Micro Glitter Fade at Tip Edge
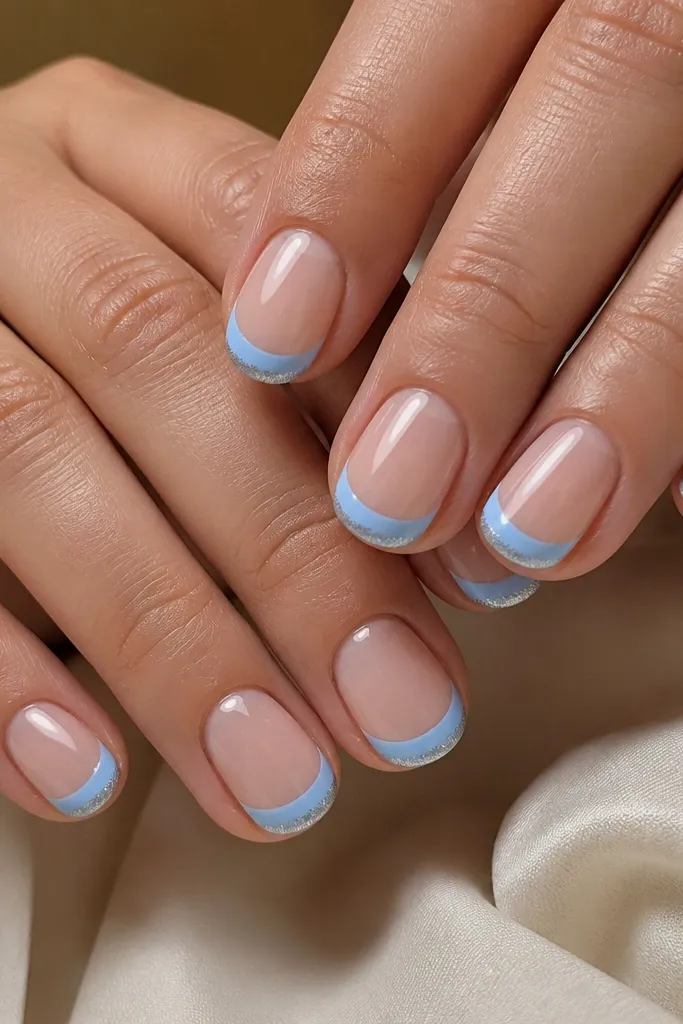
This is glitter you can wear without it looking costume-y. The sky blue stays clean, and the micro glitter sits only at the free edge so it catches light when you move your hands. Rounded nails look sweet with this because the curve blends naturally into the sparkle. It flatters most skin tones, and it’s perfect for parties where you want shine without heavy gems.
Editor's noteUse micro glitter that looks like dust under bright light. Chunky glitter kills the luxe look.
Start with a sheer nude base and cure. Paint the French tips with solid sky blue in two thin coats, then cure. Add a tiny strip of clear gel at the very edge of the tip and sprinkle micro fine glitter, then press lightly and cure. Remove excess glitter from the sides and finish with a smooth topcoat that seals the edge.
Watch outAvoid getting glitter onto the nail sides — it makes cleanup messy and looks cheap.
6. Sky Blue French with Pearlized Base on Stiletto
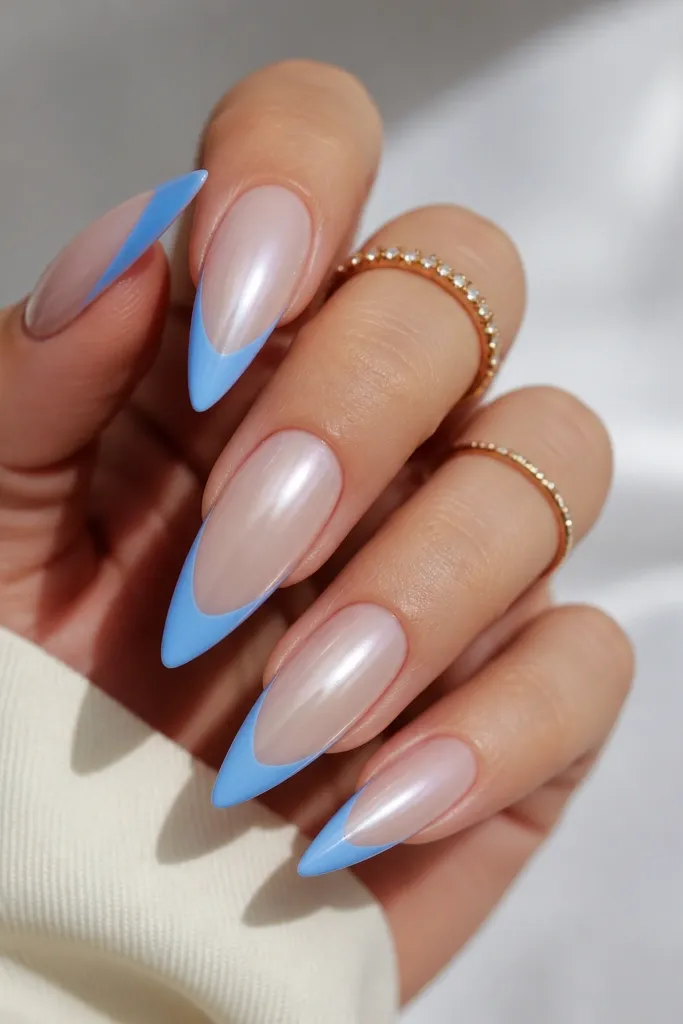
Pearlized base turns a simple sky blue French tip into something that looks like jewelry. On stiletto nails, the tip can be bolder because the shape already reads dramatic, but the smile line should stay crisp. The pearl shift makes the base look expensive even when the lights hit from different angles. This one looks best on hands with longer fingers or longer nail beds, since the stiletto shape draws the eye upward.
Apply a pearly nude base (not glittery, more like soft sheen) and cure. Paint sky blue French tips with a sharper smile line, keeping the tip width slightly wider at the center. If your blue is too opaque, use a sheer sky blue and build with a second thin coat. Clean around the cuticle with a small brush, cure, then seal with a thick, glossy topcoat that smooths the stiletto points.
If your stiletto tips look uneven, place a dot of gel at each side of the smile line first, then connect the dots with one controlled stroke.
Don’t use matte topcoat. Matte makes the pearl base look dull.
7. Sky Blue French on Square with Reverse Tint at Sides
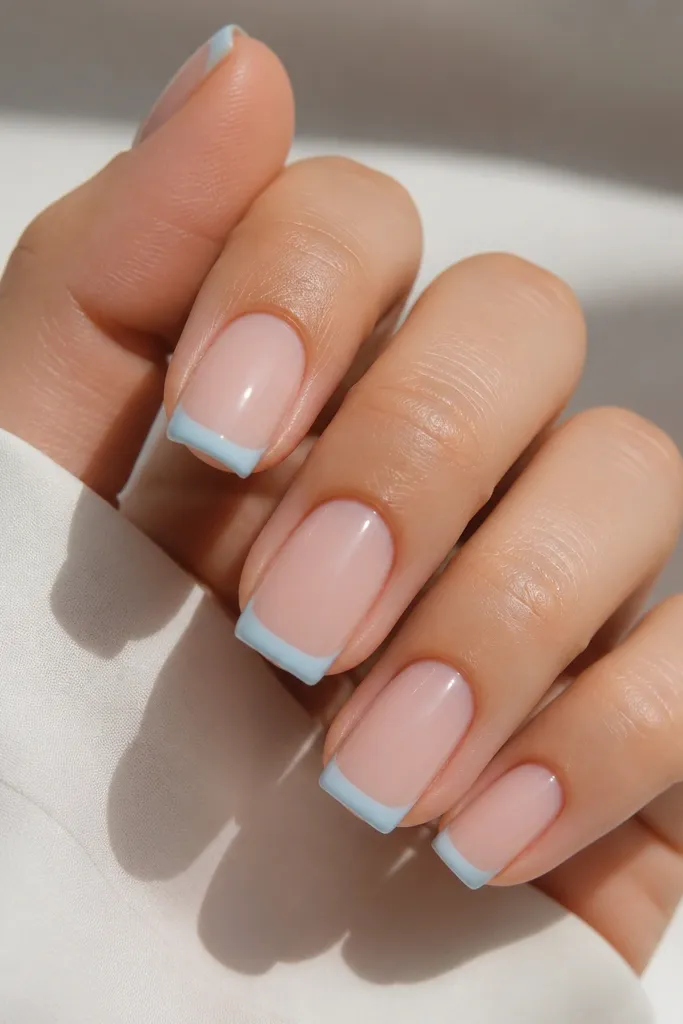
This is a clean way to add dimension without adding thickness. The main French tip is sky blue, while a whisper of the same blue tints the sidewalls near the tip. That side tint makes the nail look more structured and polished, especially on square nails that can look flat. It’s also a great option if your nails have visible ridges — the slight side color helps mask the texture.
Editor's noteUse less product on the liner brush than you think. Side tint should be a shadow, not a stripe.
Start with a ridge-filling base if you need it, then cure. Paint the French tip in sky blue with a standard smile curve for square nails. Then, using a very small liner brush, touch a thin line of sky blue just on the left and right sidewalls near the tip edge. Blend the line by lightly brushing downward once, then cure. Finish with glossy topcoat and cap the free edge.
Watch outAvoid dragging the side tint toward the middle — it will look like smudges.
8. Pastel Sky Blue French with Negative Cuticle Halo
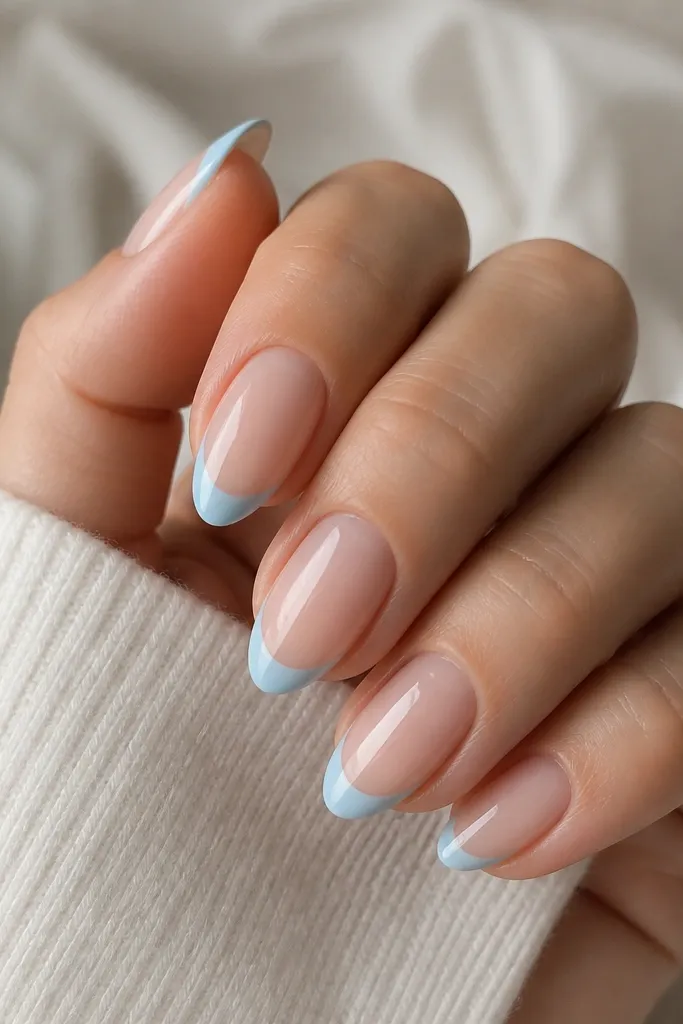
The halo effect makes your French tips look custom-made. Instead of filling the entire tip area, you keep a small clear crescent just under the smile line, which creates separation and depth. Pastel sky blue looks soft and expensive with this because the clear halo keeps it airy. This flatters almond nails and looks especially good on hands with shorter nail beds because the eye gets a defined shape.
Editor's noteCarve the halo while the polish is still tacky so the edge stays crisp.
Apply sheer nude base and cure. Paint a thin sky blue French tip, staying close to the free edge. Then, before adding any second coat, use a clean liner brush with remover to carve a tiny crescent of negative space under the smile line. Cure, then add a second thin sky blue coat only on the tip area, not the halo. Seal with topcoat and check side angles for any blue bleed.
Watch outAvoid wide halos — too much negative space makes it look unfinished.
9. Sky Blue French with Micro Thin White Base Line
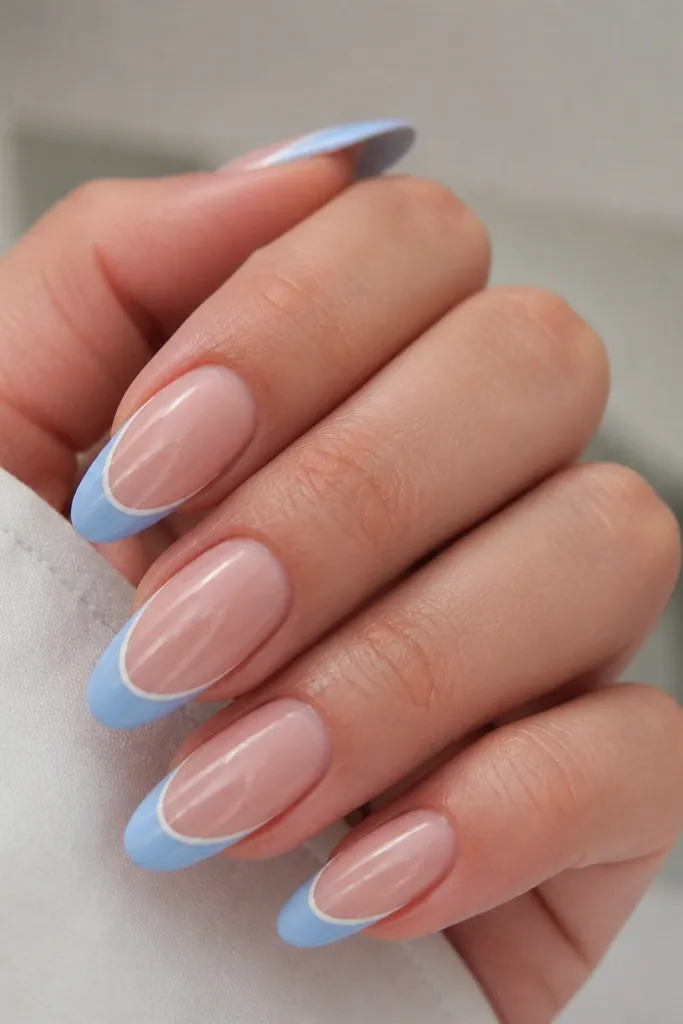
This layered border is the trick that makes sky blue look more expensive. The micro white line acts like a highlight under the blue, so the sky tone reads brighter and cleaner. It’s gorgeous on long oval nails because the layered border follows the natural curve and adds depth without bulk. If you want your French tips to look like salon work, this is one of the easiest upgrades.
Editor's noteUse a liner brush with a tiny amount of white gel so you don’t flood the smile line.
Start with a sheer nude base and cure. Paint the micro white line first — it should be a hair-thin strip right under where the smile line will be, then cure if needed. Next paint the sky blue French tip over the white line, keeping the blue slightly thinner at the cuticle edge. Add a second thin sky blue coat for opacity, then topcoat twice for a smooth, glassy surface.
Watch outDon’t make the white line too thick or it turns into a chunky two-color French.
10. Sky Blue French with Matte Base and Glossy Tips Combo
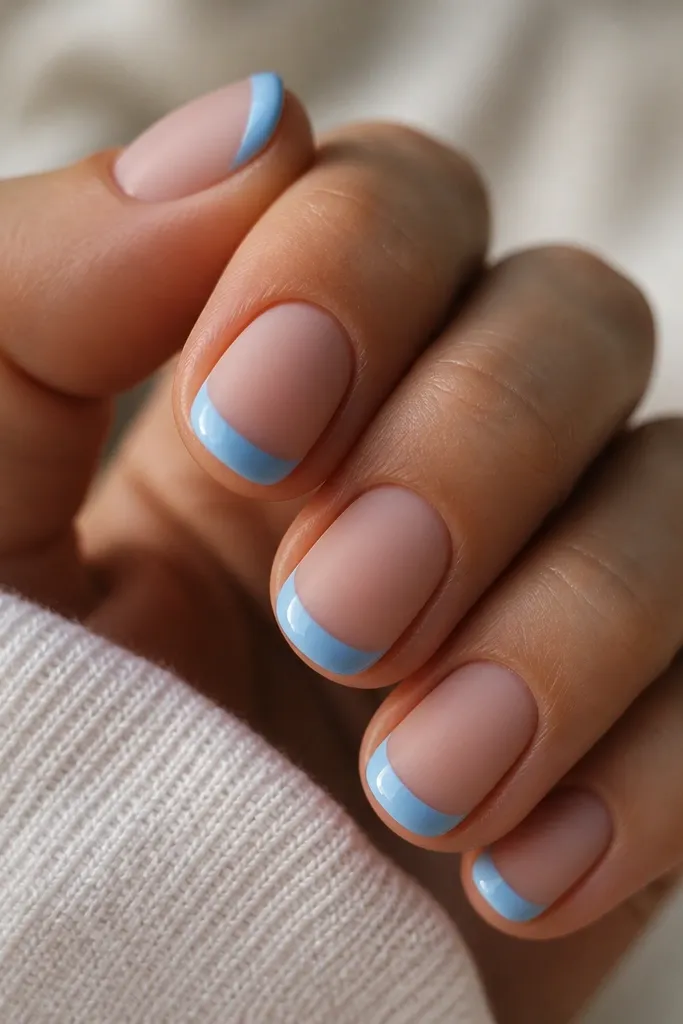
Texture contrast looks luxe because your nails have depth even without gems. Matte base hides tiny imperfections, while glossy sky blue tips look crisp and clean. Rounded nails with this combo look extra flattering because the shine stays only on the tip where your hands move. This is a great choice if you hate how glossy bases show every tiny ridge.
Editor's noteMask the base with a small piece of tape while you paint the tips so the glossy topcoat doesn’t creep.
Apply a matte nude base gel and cure, then avoid touching it. Paint glossy sky blue French tips only on the free edge area, using two thin coats and curing between coats. Cap the tip edge with the same glossy topcoat so it doesn’t look jagged. Finish by leaving the base matte and only topcoating the tips — keep the topcoat off the matte area to preserve the contrast.
Watch outDon’t matte the tips or the whole look loses the high-end contrast.
11. Sky Blue French with Crystal Clear Overlay at Smile Line
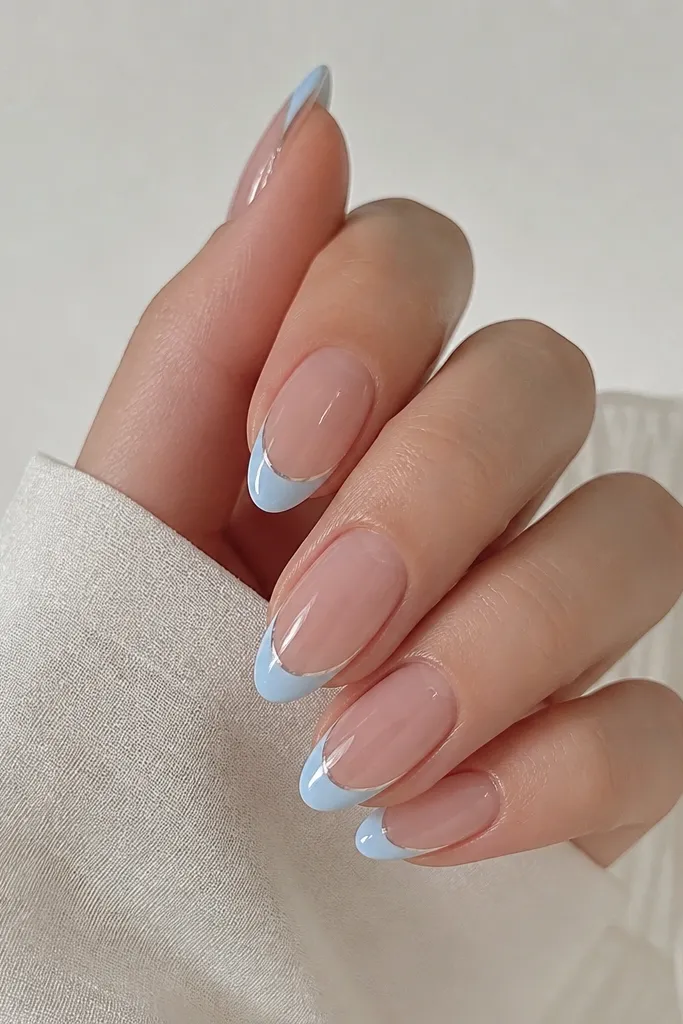
A clear overlay at the smile line makes the curve look razor-defined. It’s like giving the smile a glass frame, so your tip edge stays crisp even as the nails grow out. This works best on medium almond and long oval shapes because the smile line has enough room to look intentional. It’s also flattering on hands with slightly uneven nail beds because the clear overlay smooths the transition.
Editor's noteUse a flat brush and pull the clear gel in one direction — multiple passes create ridges.
Start with a sheer nude base and cure. Paint the sky blue French tip in two thin coats and cure. Then apply a thin layer of crystal clear gel right along the top edge of the smile line (not the whole tip), using a flat brush to keep it smooth. Cure, wipe, and topcoat over everything for a uniform shine.
Watch outAvoid overloading the clear overlay; thick clear gel looks bulky.
12. Sky Blue French with Silver Foil Confetti at Cuticle Corner
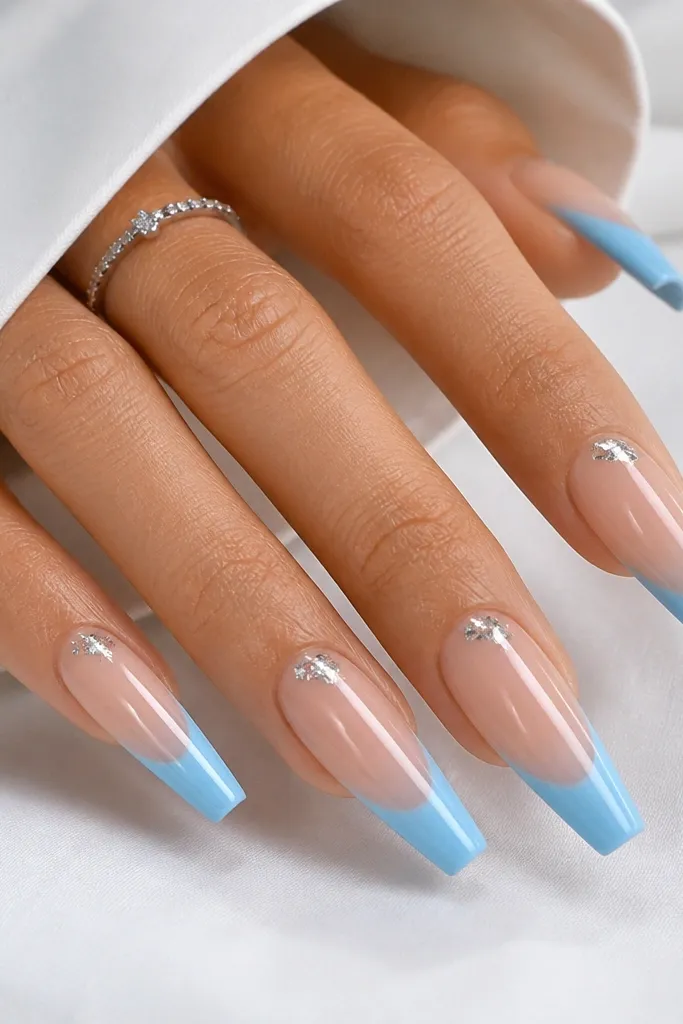
Foil at the cuticle corner makes the design feel tailored and photo-friendly. The silver sits near where light hits as you move, while the sky blue stays clean and bright. I like this for long coffin nails because the negative space around the foil makes the foil look intentional, not random. It flatters warm and cool skin tones because silver always reads crisp with sky blue.
Editor's noteKeep the foil cluster tiny — think a grain-sized group, not a sticker patch.
Apply sheer nude base and cure. Paint the sky blue French tips in two thin coats, keeping the smile line even. For the foil, apply a tiny dab of clear gel at the cuticle corner (left or right, not centered), then press small silver foil pieces into the gel. Cure and topcoat carefully, using two thin topcoat layers so the foil edges don’t lift.
Watch outAvoid placing foil in the middle of the nail — it competes with the French tip.
13. Sky Blue French with Pearl Dot at Each Ring Finger
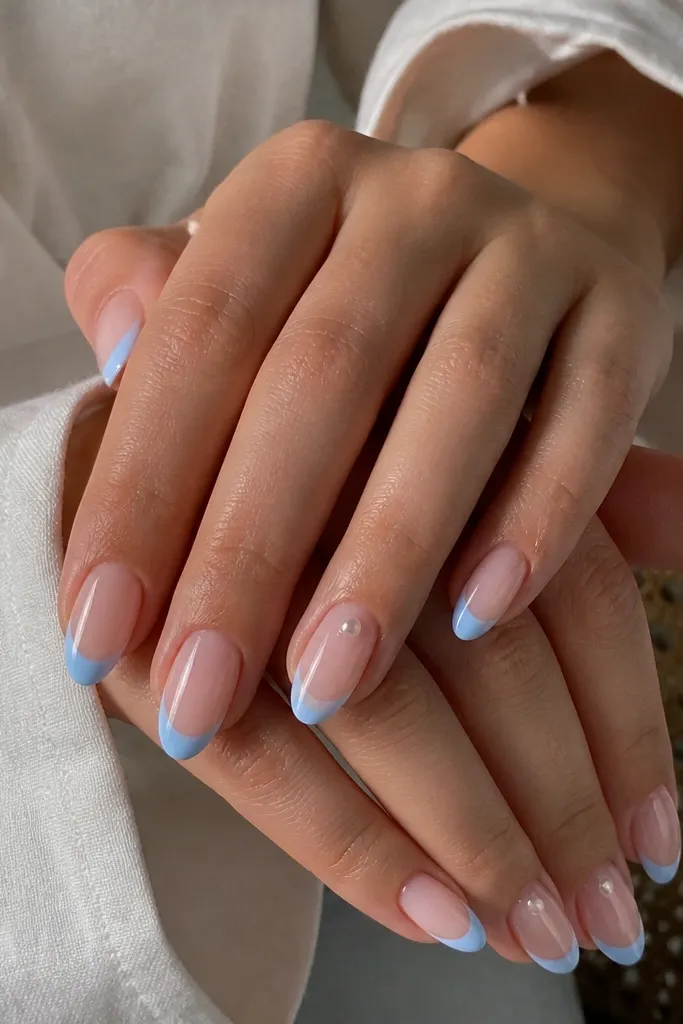
One pearl dot is the easiest way to make French tips look high-end without turning them into a theme. The pearl sits near the cuticle so it catches light as your hand moves, and the rest stays clean for a luxe feel. This set looks best on medium oval or almond because the pearl placement follows the nail’s natural curve. I’ve worn this to bridal events and it always looks expensive in photos.
Paint French tips in sky blue on all nails with two thin coats and cure. Choose one ring finger per hand. On that nail, apply a tiny dot of clear gel near the cuticle corner, press a pearl dot into it, then cure. Finish with topcoat over the pearl base area — avoid flooding the edges so the pearl stays secure and not cloudy.
Use pearl dots that are slightly smaller than a pinhead so they look like jewelry, not craft beads.
Avoid adding pearls to every nail — it turns into a busy manicure fast.
14. Sky Blue French with Thin Diagonal Micro Line Accent
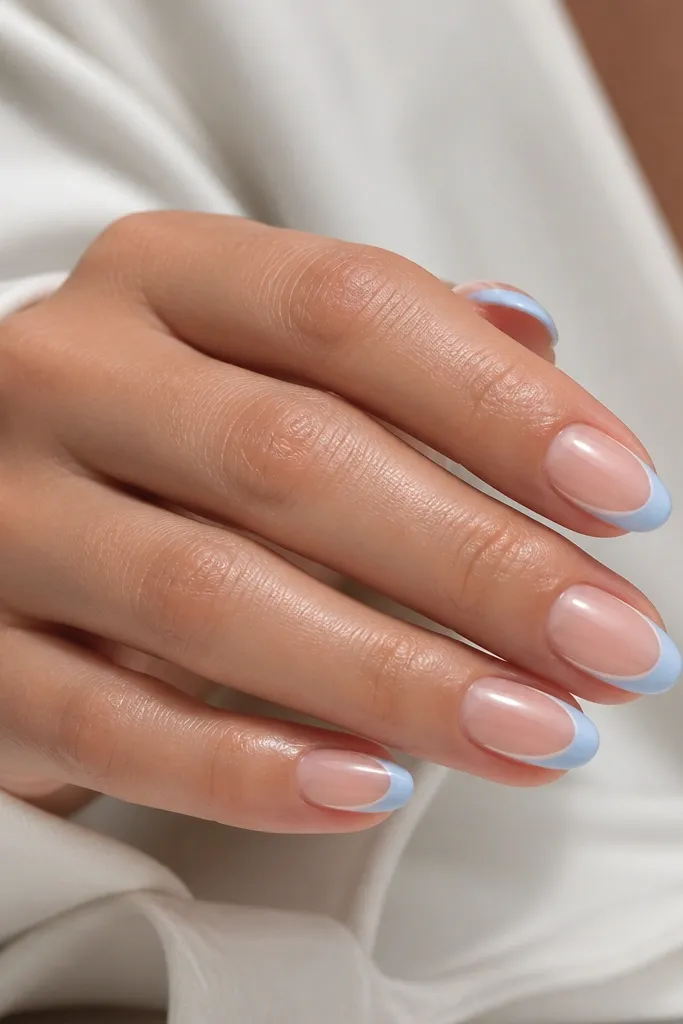
This accent gives the manicure movement without changing the classic French structure. The diagonal micro line makes the tip look longer and adds a custom detail that reads luxe in close-ups. It works well on short almond because you need visual interest that doesn’t add bulk. The white line keeps it crisp and clean next to icy sky blue.
Apply sheer nude base and cure. Paint sky blue French tips in two thin coats. For the accent, use a liner brush and add one thin diagonal line that starts near the outer edge of the tip and ends near the smile line center. Cure and topcoat, keeping the line sealed so it doesn’t catch on fabric.
Draw the line with the brush tip, not the belly — the belly makes it look thick.
Avoid thicker accents — they look like marker lines instead of nail art.
15. Sky Blue French with Sheer Baby Blue Jelly Tip
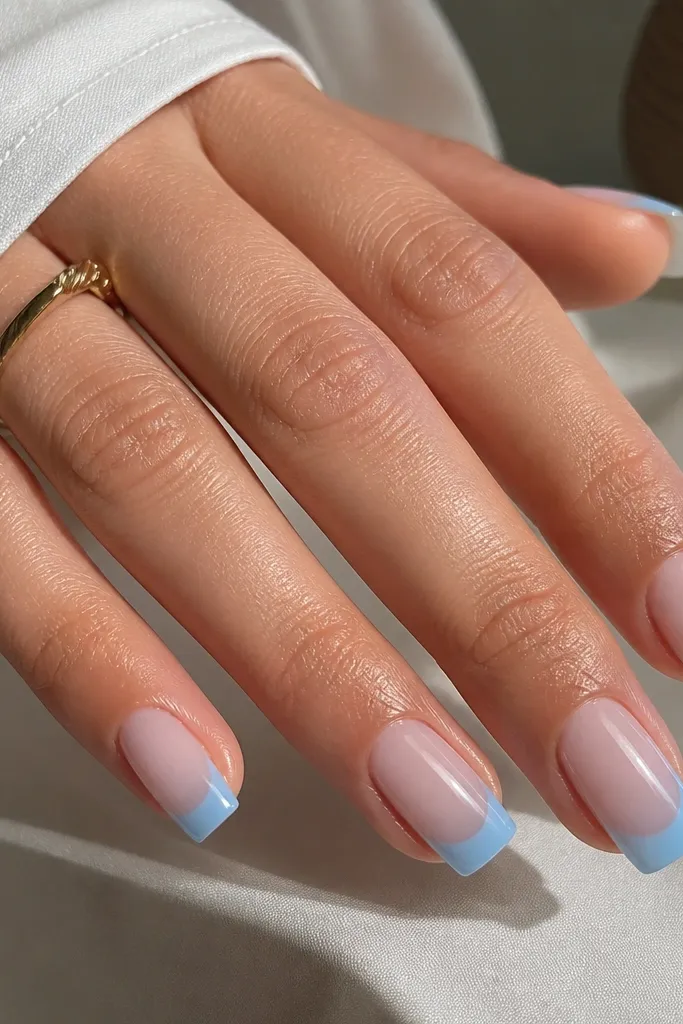
Jelly tips look luxe because they glow and show depth, not just color. Instead of opaque sky blue, you use a sheer baby blue jelly that lets the nail bed show through just enough. Square nails benefit because the jelly tone keeps edges looking smooth and modern. This works for everyday wear and also for summer because it looks light on the hand.
Editor's noteIf the jelly pools at the sides, wipe the brush on a lint-free wipe before you apply.
Start with a sheer nude base and cure. Apply a jelly baby blue to the French tip area in one thin coat, cure, then add a second coat only if you need more coverage. Keep the smile line smooth and slightly wider at center for an even look. Finish with a glossy topcoat that levels out the jelly texture and caps the free edge.
Watch outAvoid opaque sky blue over a jelly vibe — it kills the glow.
16. Sky Blue French with Aura Center Glow
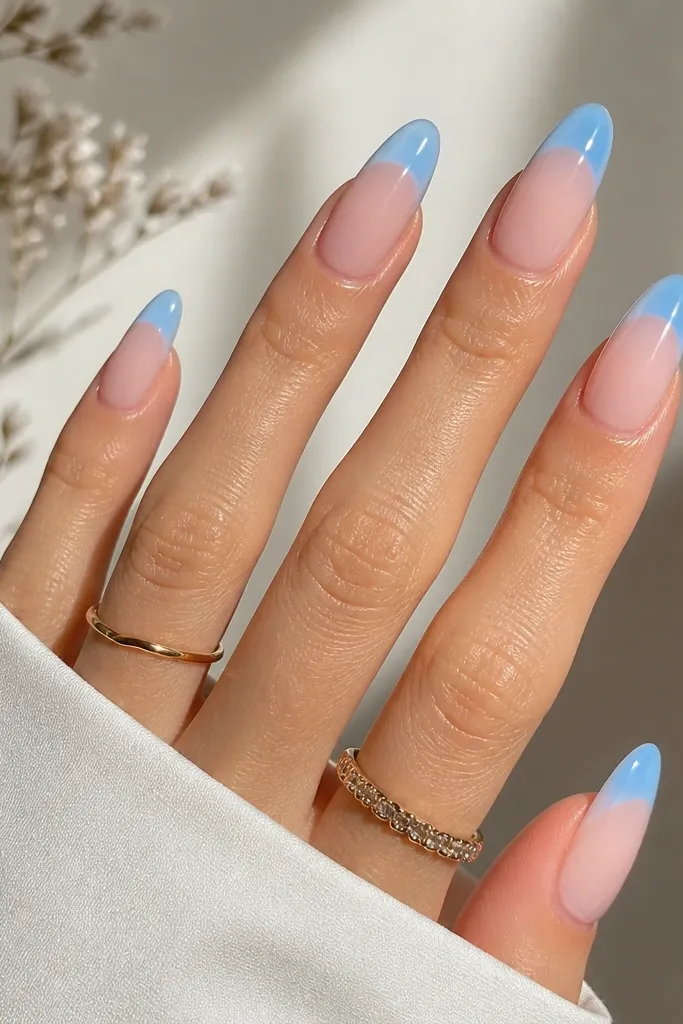
Aura glow makes the French tip look like it has dimension and depth, not just a flat color block. The center glow is light sky blue that fades toward the smile line edges, so the tip looks like a gradient spotlight. This is stunning on long oval because the center glow naturally follows the nail’s length. It flatters hands that look best with softer curves rather than sharp stiletto shapes.
Editor's noteUse a light touch with the sponge — one tap per nail keeps the glow controlled.
Paint a standard sky blue French tip in two thin coats and cure. Then take a slightly lighter icy sky blue and dab it in the very center of the tip, blending outward with a small blending sponge or a soft brush. Keep it light and airy — you should still see the base of the tip beneath. Cure, clean any blur at the edges, then apply topcoat for a smooth glass finish.
Watch outAvoid blending too far down toward the nail bed or it turns into a full aura manicure.
17. Sky Blue French with Tiny White Dot Cluster at Tip Apex
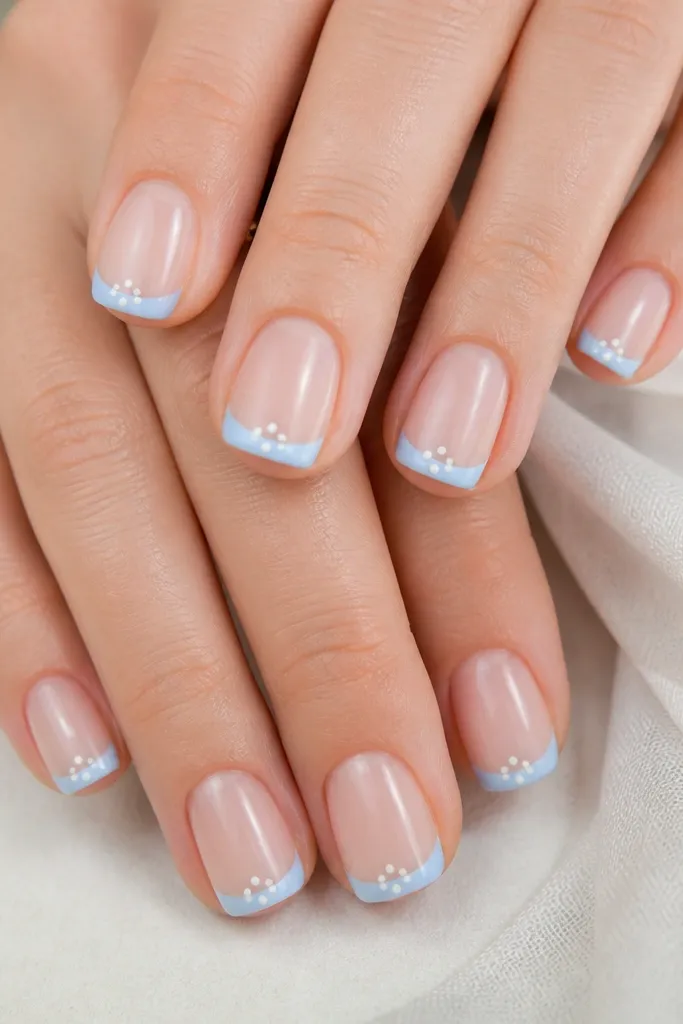
This looks like a mini design signature and it’s surprisingly flattering. The tiny white dots at the apex create a focal point that makes the tip look sharper and more intentional. Short square nails can sometimes look plain with classic French; the dot cluster adds interest without making the tip wider. It also photographs well because the dots reflect light against the sky blue.
Start with a sheer nude base and cure. Paint the sky blue French tip in two thin coats and cure. With a dotting tool, place three tiny white dots in a tight cluster at the center of the tip apex — one dot slightly higher than the others. Cure again, then topcoat twice to seal the dots so they don’t catch on clothing.
If your dots look too big, wipe the dotting tool on a paper towel first to remove product.
Avoid placing dots too close to the smile line; keep them on the tip surface.
18. Sky Blue French with Silver Chrome Half-Moon Shine
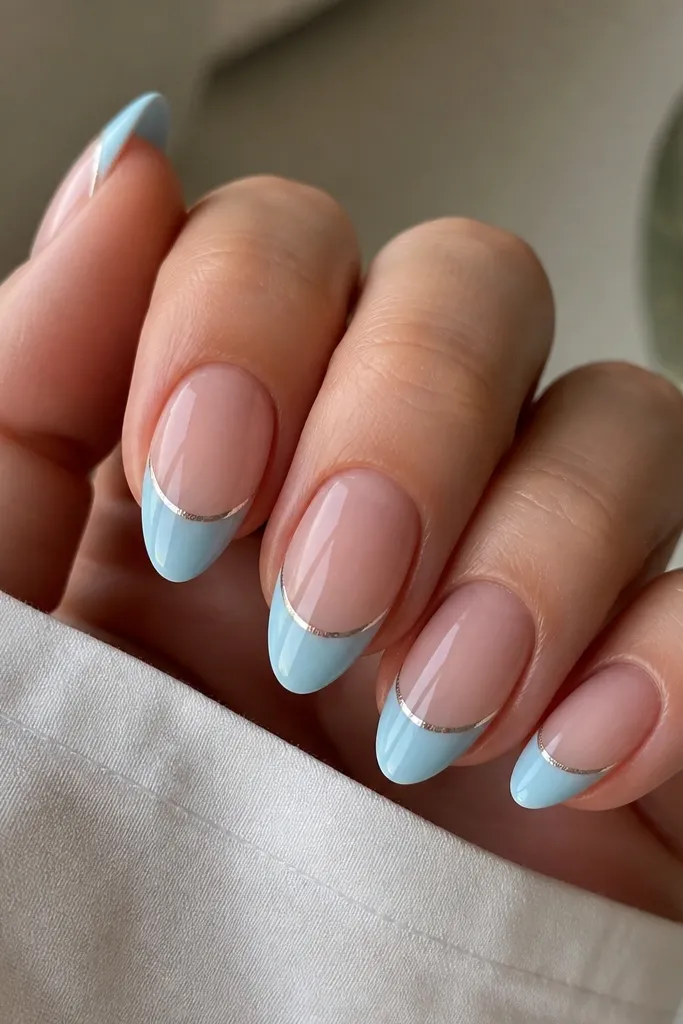
Chrome under the smile line gives the French tip a salon finish because it adds a reflective arc. The silver half-moon sits under the sky blue, so it looks like a highlight ribbon rather than a separate accessory. Almond nails are perfect for this because the smile curve and half-moon align naturally. I’ve worn this on nights out and the chrome catches flash photography like crazy.
Editor's noteDo chrome right after the blue is cured, while you’re still set up to work fast and clean.
Apply sheer nude base and cure. Paint sky blue French tips and cure. Then apply a small amount of chrome gel or sticky base under the smile line at the center only, and press silver chrome powder into that half-moon area. Brush off excess carefully, then seal with a topcoat that’s compatible with chrome (use a thin layer first, cure, then a second).
Watch outAvoid thick topcoat right away — it can dull chrome.
19. Sky Blue French with Fine Line Art Cloud on One Accent Nail
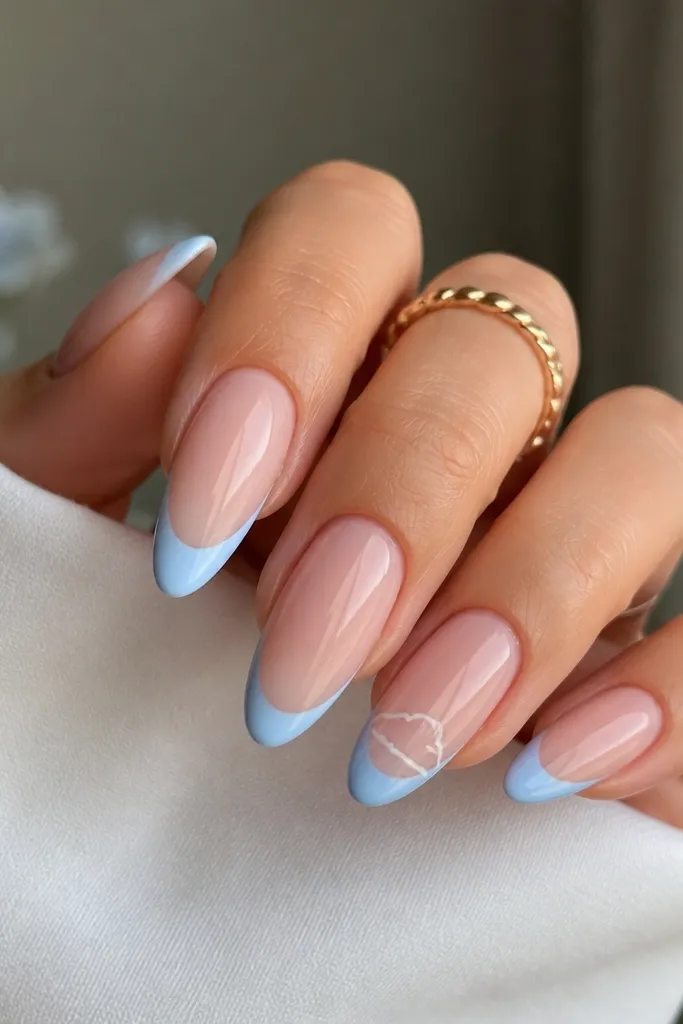
A single fine line art accent keeps it luxe because the rest stays classic. The cloud line art works with sky blue and reads airy instead of childish when you keep the lines thin and minimal. I usually do this on the ring finger or middle finger so the design has a clear focal point. Long oval nails make the cloud look balanced because the tip width stays consistent.
Editor's notePractice the cloud on a paper nail tip or scrap plastic first so your line stays confident.
Paint sky blue French tips on all nails with two thin coats and cure. On the accent nail, use a fine liner brush with white gel or polish to draw a small cloud — three rounded puffs and a gentle base line — inside the tip area near the center. Keep the cloud lines thin and leave some sky blue space around it. Cure, then apply topcoat over everything carefully, using a slow brush to avoid streaks on the line art.
Watch outAvoid thick outlines — they look like cartoon stickers.
20. Sky Blue French with Crystal Rhinestone Strip at Outer Edge
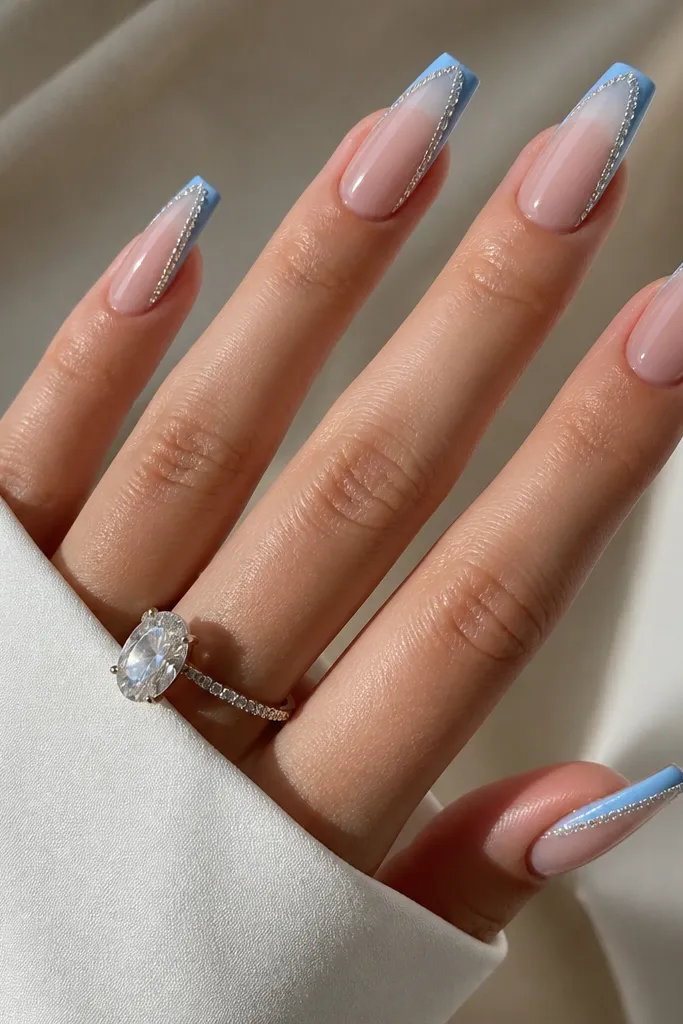
A rhinestone strip along the outer edge makes the manicure look dressed up without covering the whole tip. The sky blue stays smooth, and the crystals only catch light at the sides where your hands naturally move. Coffin nails are perfect because the outer edge is long enough for the stones to sit evenly. This is a great pick for weddings, birthdays, or any night out where you want your hands to shine in photos.
Editor's noteUse the smallest stones you can — a tiny strip looks luxe; bigger stones look heavy fast.
Start with a sheer nude base and cure. Paint glossy sky blue French tips in two thin coats and cure. Apply a thin line of clear gel along just the outer edge of the tip, then place tiny clear rhinestones one by one with tweezers. Press lightly and cure. Finish with topcoat, using a careful thin coat to seal the stones without flooding and causing cloudy edges.
Watch outAvoid putting rhinestones on the entire smile line — it turns into a glam overload.
21. Sky Blue French with Reverse Ombre Base to Tip
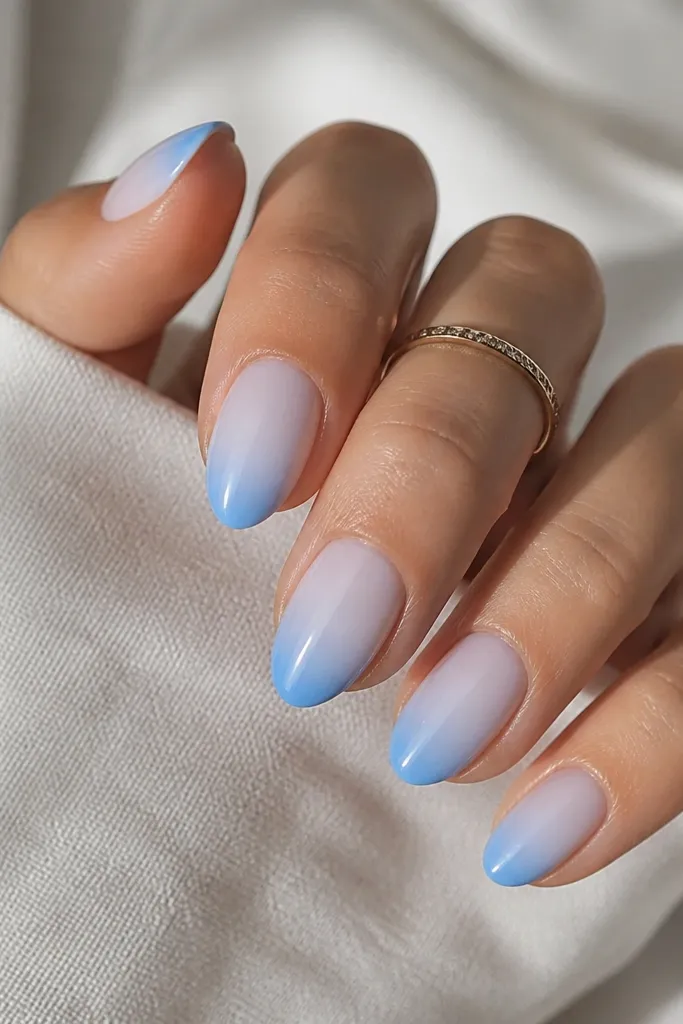
Reverse ombre is a different take on French that still reads as sky blue tips. Instead of keeping the base nude, you fade sky blue upward from the tip so your nails look like they have a custom dye job. Short almond nails benefit because the gradient creates the illusion of longer nail beds. This one looks especially good on fair to medium skin tones because the cool blue blends smoothly.
Apply a sheer nude base, then sponge a very light sky blue near the cuticle area and blend downward toward the tip zone. Do not go all the way to the free edge yet. Next, paint the French tip area with stronger sky blue in two thin coats, blending the top of the tip into the sponge fade. Cure, then topcoat with a glossy layer that smooths the gradient boundary.
Blend the gradient with a damp sponge, then wipe the brush tip on a lint-free wipe to keep the fade soft.
Avoid hard lines between gradient and tip — it should look blended, not striped.
22. Sky Blue French with Micro Swirl Accent at Sidewall
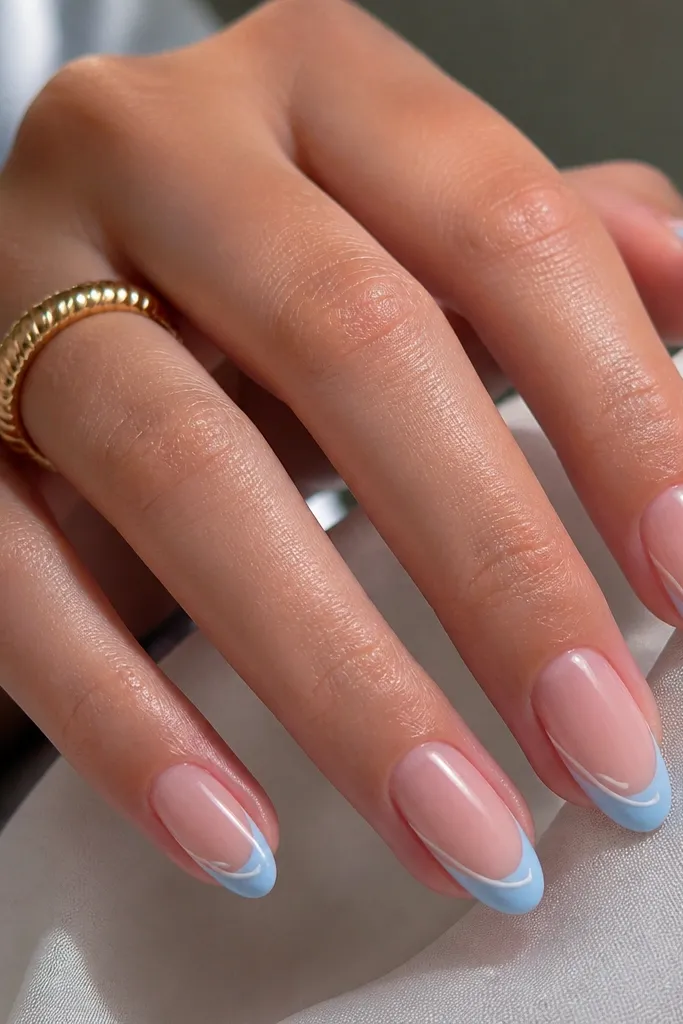
Micro swirl accents add personality while staying clean. The swirl sits near the sidewall, which makes your manicure look like it was designed for your nail bed rather than copied from a template. White swirls keep the look crisp against icy sky blue, and they don’t compete with the French curve. This style flatters oval and almond shapes because the sidewall has enough room for a tiny detail.
Editor's noteIf the swirl looks wobbly, redo it immediately. Don’t try to correct after it cures.
Apply sheer nude base and cure. Paint sky blue French tips with a smooth smile line and cure. With a liner brush, draw a tiny white swirl near the outer sidewall of the tip area — keep it short, like a comma shape. Cure and inspect from the side angle to confirm it doesn’t smear onto the free edge. Seal with glossy topcoat and cap the tip edge.
Watch outAvoid swirls that touch the smile line — it makes the tip edge look messy.
23. Sky Blue French with Clear French Base and Blue Tip Only
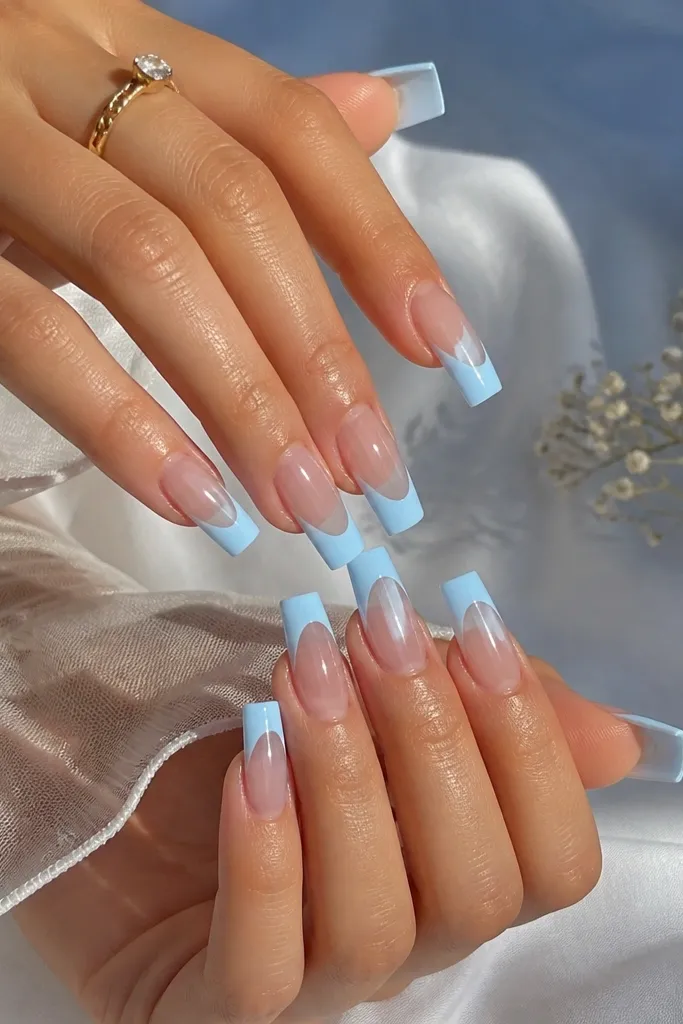
Clear base French tips look extra luxe because the nail reads like glass. When you keep the base totally clear, the sky blue tip becomes the only color, so it looks intentional and clean. Long square nails benefit because the see-through base makes the nail bed look longer and more structured. This is also a good choice if you like a minimalist look but still want something bright.
Editor's noteIf your blue looks too opaque on clear base, use a slightly sheerer sky blue and build slowly.
Use a clear builder gel or clear base coat and cure. Apply sky blue only to the French tip zone, keeping the smile line crisp with a striping brush. Build opacity in two thin coats so it doesn’t flood and shrink the smile line. Clean any seepage on the sidewalls with a fine brush and cleaner. Finish with a thick glossy topcoat and cap the free edge.
Watch outAvoid tinted bases under clear — it makes the French look like a regular nude set.
24. Powder Blue French Tips with Porcelain White Smile + Glossy Seal
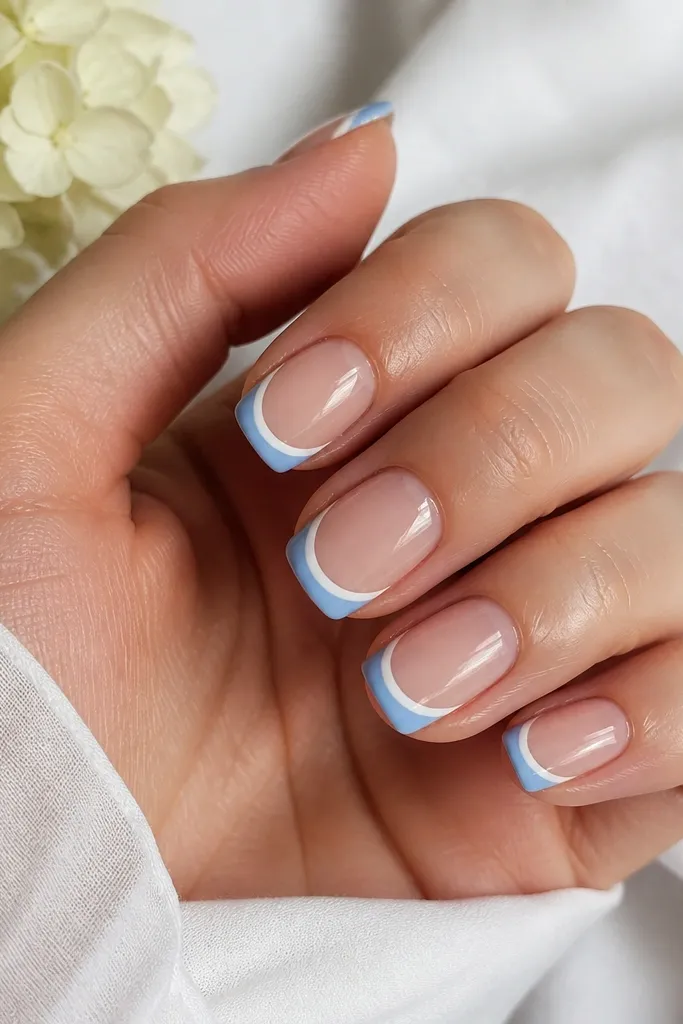
This one looks luxe_high_end because the two-tone effect is controlled: sheer nude base, powder sky blue tip, and a porcelain white smile line that sits right at the boundary. I’ve worn this with a plain gold ring and it still reads polished because the white line catches light differently than the blue. The powder blue is lighter than a typical sky blue, so it feels soft instead of loud. The glossy seal makes the French edge look sharper, not bubbly or chalky, which is where a lot of DIY versions go wrong.
Editor's noteMix a tiny amount of milky white into your smile-line polish if it’s too opaque — you want porcelain, not snowstorm white.
Start with a sheer nude base layer and cure fully, then paint a thin powder sky blue French tip. Keep the tip curve consistent by using a striping guide or a French-tip sticker only for the first placement, then freehand the rest. While the blue is still tacky (or after you’ve cured and lightly buffed), add the porcelain white smile line — a thin band that mirrors the blue curve, thicker in the middle by about a hair. Clean the edges with a small brush dipped in remover, then cure again. Finish with two coats of high-gloss top coat, wiping the brush edges clean so the shine stays even from cuticle to tip.
Watch outDon’t paint the smile line too wide, or it turns into a blocky stripe that ruins the French shape.
25. Sky Blue French Tips with Clear Jelly Cuticle Frame and Frosted Center
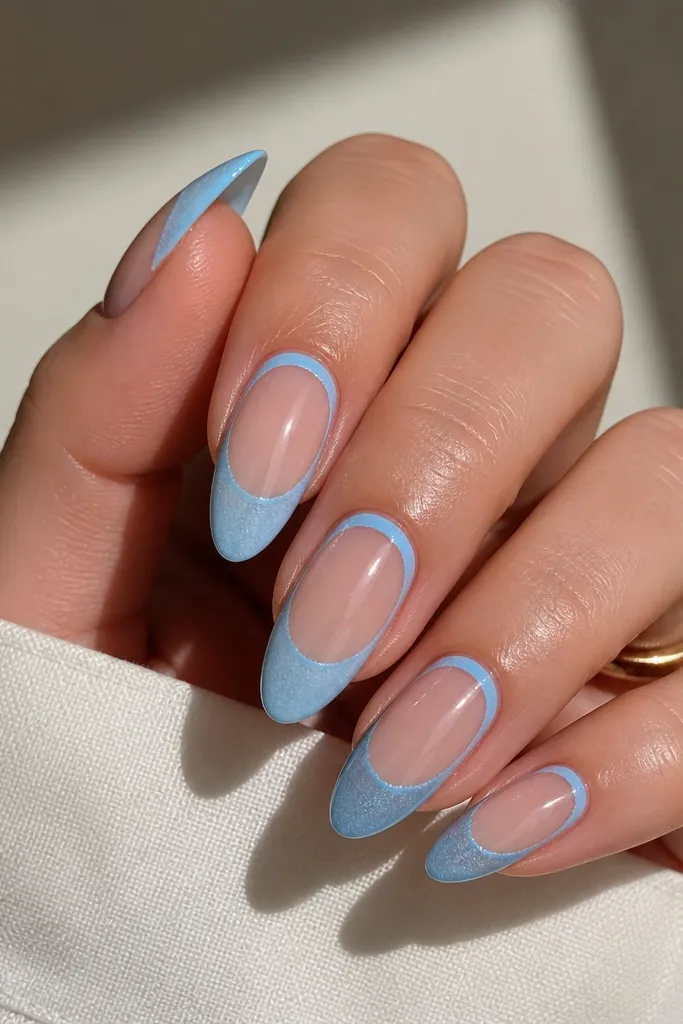
This design reads expensive because it adds a frame instead of just a tip. The clear jelly cuticle outline makes the nail look layered, like there’s depth under the polish, and it frames your nail bed in a flattering way. The frosted center on the French tip gives texture without looking chunky, so the manicure looks intentional in both daylight and indoor light. I like it when I’m tired of standard French curves — it still feels clean, but it’s not the same old two-color look.
Editor's noteUse a liner brush with a tiny reservoir of polish so your jelly frame stays crisp and doesn’t bleed into the nude base.
Prep the nail and apply a sheer nude base, then cure. Paint a clear jelly patch around the cuticle area — think a rounded window shape — and outline its edges with sky blue using a fine detail brush. Cure the jelly outline, then build the French tip with sky blue while leaving the outermost edges slightly smoother and the center more opaque. To get the frosted center, dab a frosty top coat (or a fine shimmer top coat) only in the middle of the sky blue tip and feather it outward with light taps. Seal everything with a glossy top coat, keeping it off the frosted center so the texture stays visible.
Watch outSkip thick jelly — if the cuticle frame is too heavy, it looks like a ridge instead of a clear window.



