1. Cobalt micro-French on short almond nails
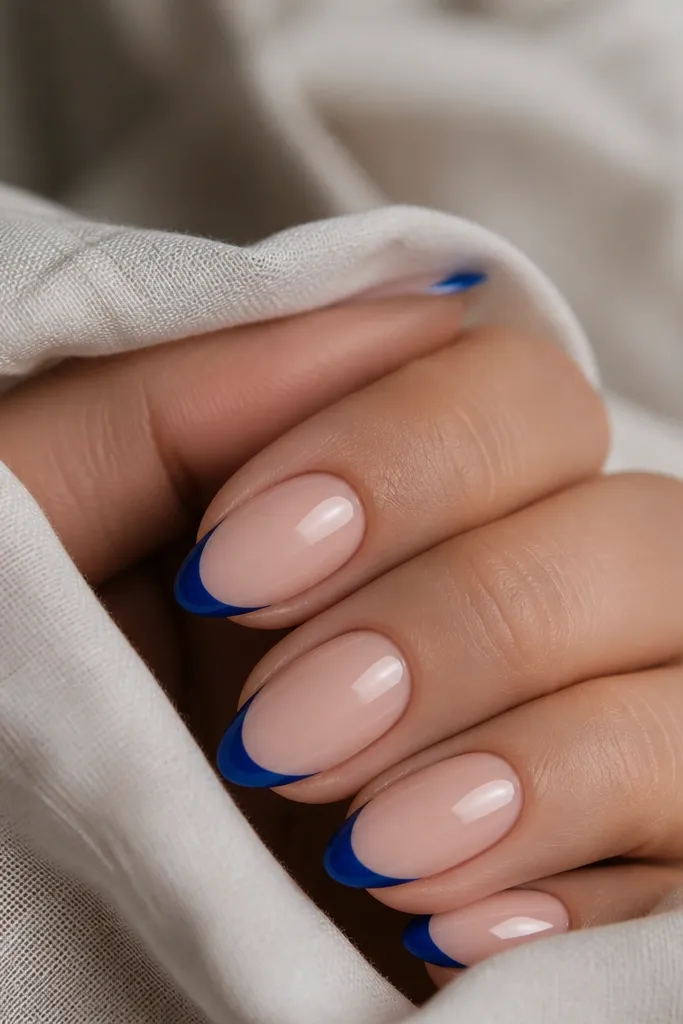
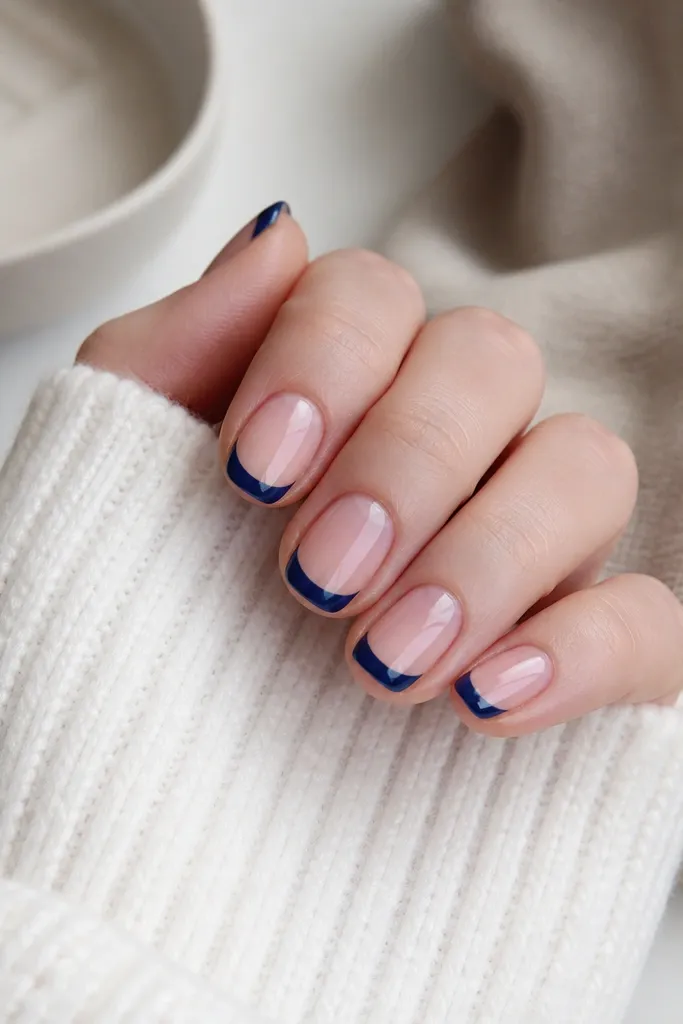
This is the version I do when I want the blue to look sharp but still wearable. The nude base is sheer enough that your nail bed color shows through, which makes the cobalt tip look even brighter. On short almond nails, a micro-French keeps the proportions from shrinking your fingers. Cobalt flatters warm and cool undertones because it has that true blue punch, but it looks especially clean on pinky nudes. The styling principle is contrast without bulk - thin blue keeps your nail line sleek.
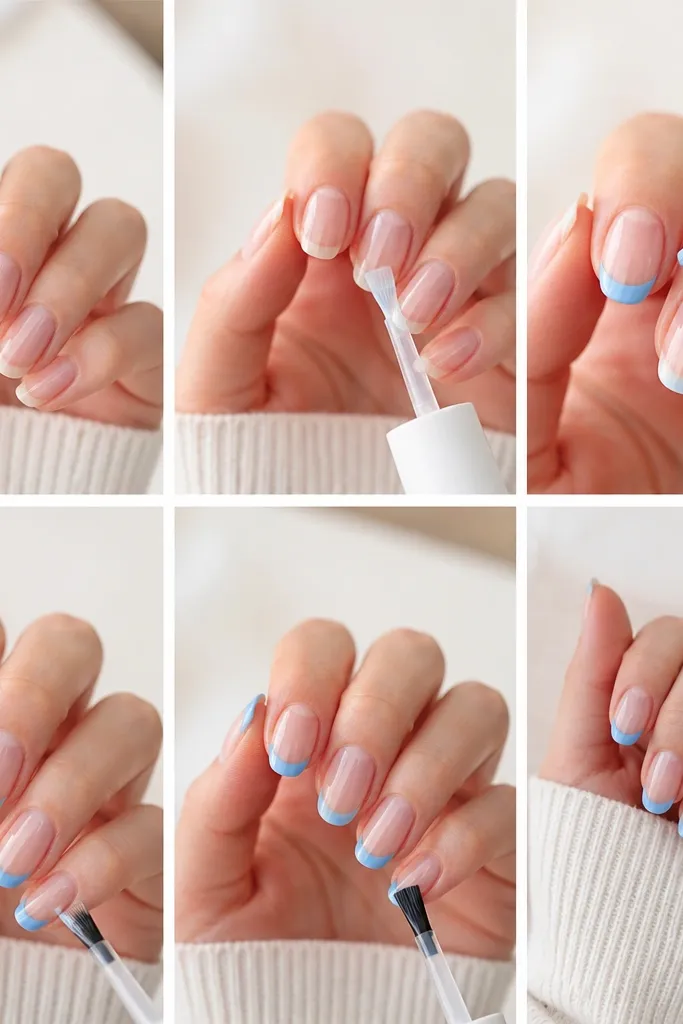
Start by pushing back cuticles and buffing the surface lightly so the base coat grips. Apply a sheer nude base coat in two thin layers, then cure fully. Dip a liner brush into cobalt polish or gel, and place a tiny dot of blue at the center of the tip. Pull the brush to the left edge first to form one guide line, then pull to the right edge to match the curve. After the first blue layer dries or cures, add a second thin pass to fully cover any gaps and smooth the top of the tip. Finish with glossy top coat and cap the tip edge for extra wear.
Editor's noteIf your blue line looks wobbly, paint the guide lines first with the brush barely touching the nail, then connect them with a lighter second stroke.
Watch outSkipping a second blue layer makes cobalt look streaky and patchy.
2. Periwinkle French tips on medium squoval
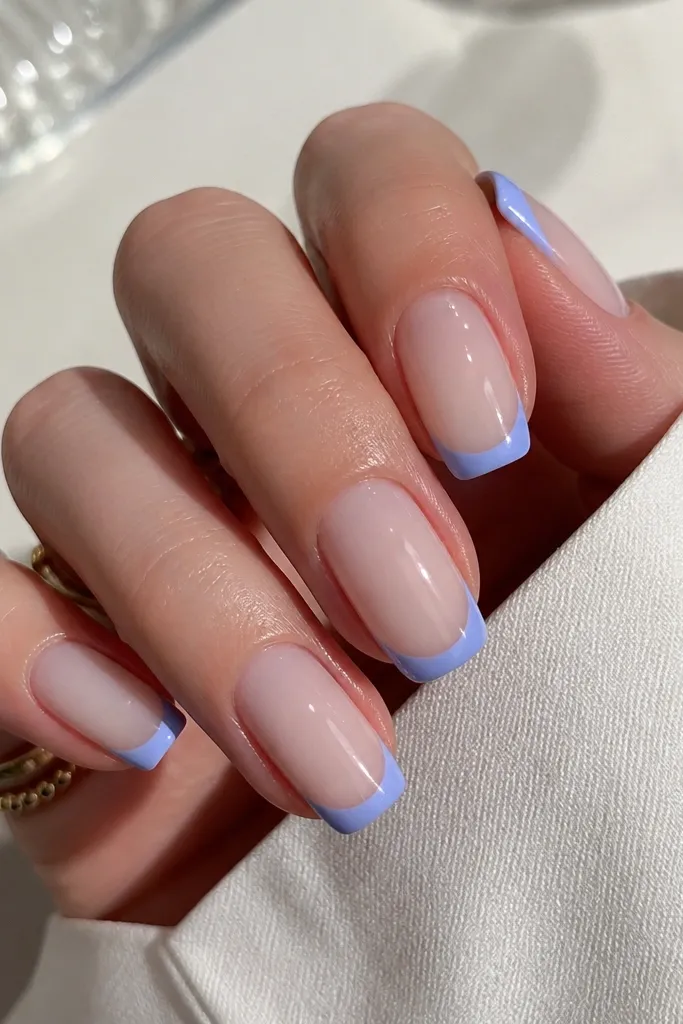
Periwinkle is my go-to when I want blue to look airy instead of bold. The milky nude base blurs the nail bed slightly, which makes the blue look smoother and more "painted," not opaque-sticker. Medium squoval nails handle a thicker French tip well because the corners stay tidy without overextending. This shade flatters cooler undertones and also looks great on olive skin because it reads soft, not harsh. The styling principle is gentle color separation - the base is creamy, so the blue feels like it floats on top.
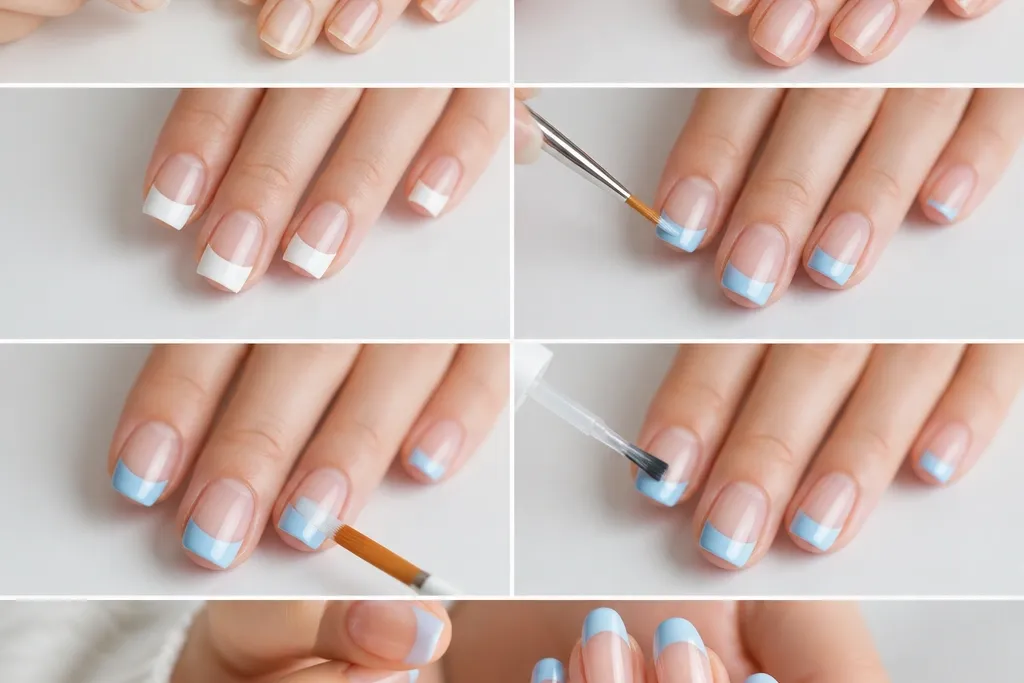
Start with a milky nude base by using a sheer pink gel or polish with a tiny bit of white mixed in if you're doing regular polish. Apply two thin coats and cure or dry completely. Use nail tape strips or pre-cut French guides to set the curve - place them so the tape edge hits where you want the blue to start. Brush periwinkle onto the exposed tip area in one layer, then remove guides only after the blue is dry enough not to smear. Add a second pass for full coverage and to thicken the tip slightly at the center. Seal with a glossy top coat and clean the edges with a small brush dipped in remover.
Editor's noteFor the cleanest guide curve, press the tape down with a silicone tool so it sticks flat, then run your topcoat brush along the tape edge before painting.
Watch outLetting the blue cure while the tape is still stuck can peel the edge and leave ragged corners.
3. Two-tone French: navy outline with light blue fill
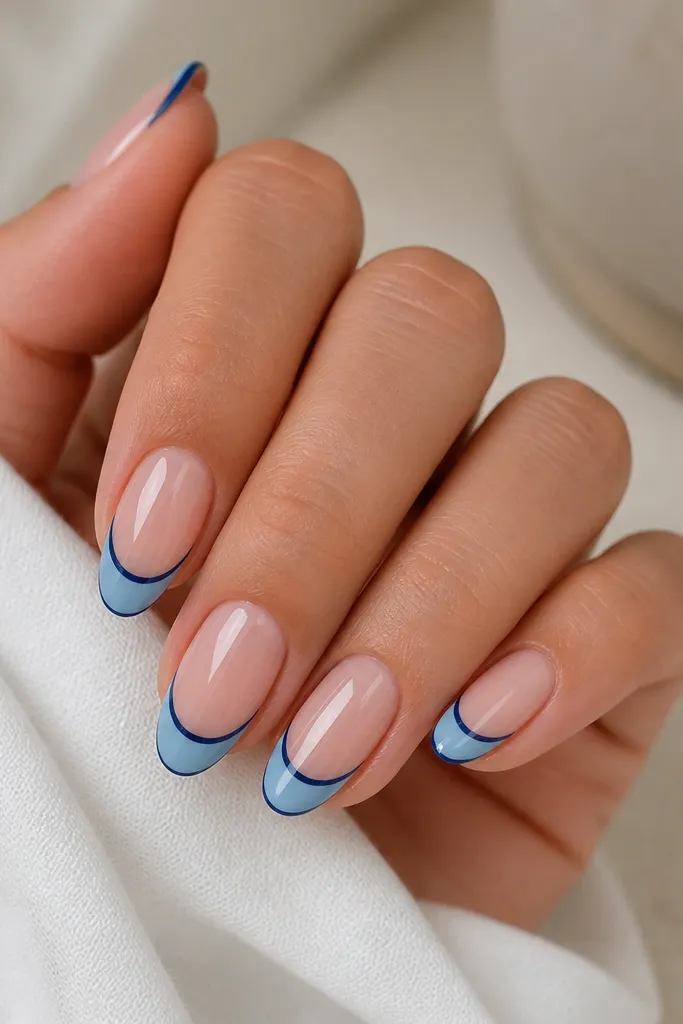
This design looks harder than it is, and it's perfect when you want the blue tip to look "designed" without using nail art decals. The navy outline gives structure, so the light blue fill doesn't blur at the edges. I love it on medium to long nails because the outline reads like a frame and makes the nail look longer. It flatters most skin tones because the navy has neutral depth, and the sky blue stays bright. The styling principle is framing - you draw the boundary first, then fill inside it cleanly.
Apply a sheer nude base and cure fully. Use a liner brush to paint the navy outline along the French curve, starting at one side and stopping at the other, leaving a tiny gap inside. Cure or let the navy dry completely so you don't lift it with the next color. Then fill the tip area with sky blue, working from the center outward so the edges meet the navy line. Add a second fill layer if you see any translucency at the tip edge. Finish with glossy top coat, and run the brush along the sidewalls to lock the outline in place.
Editor's noteUse a liner brush with a pointed tip, not a flat one - it keeps the navy line thin and even.
Watch outTrying to paint light blue directly over wet navy usually smears the outline.
4. Blue micro-lace tips with negative space border
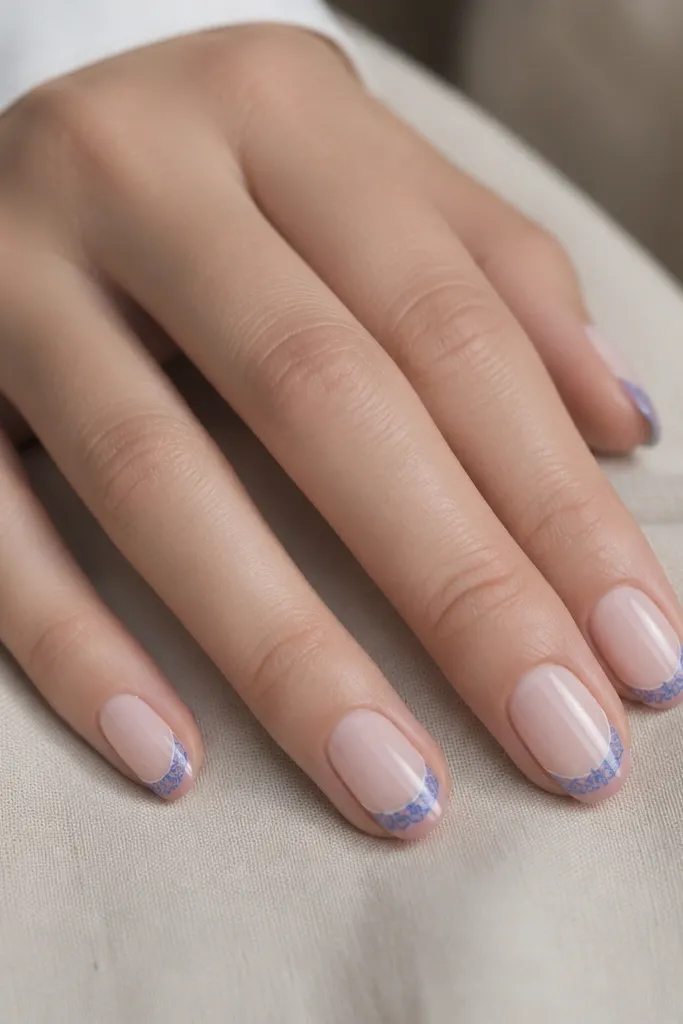
This is for the days you want French tips that look soft and artsy. The negative space border keeps the design light and prevents the blue from looking heavy. I use a fine striper brush for the lace effect so the lines stay thin and crisp. It flatters short nails because the pattern stays in the top third, so your nail still looks neat. The styling principle is restraint - fewer blue marks look more intentional than filling the whole tip solid.
Start with a sheer nude base and cure. Paint a very thin blue line at the very edge of the tip to mark the boundary. Then, using a dotting tool or the tip of a pin, place tiny blue dots in a row along the boundary. Connect some dots with short lines to form a lace-like repeat, leaving gaps so the negative space shows. Cure again and check for any thick spots, then top coat lightly so you don't blur the pattern. Finish with a glossy top coat in a thin layer for shine without flattening the lace texture.
Editor's noteIf your lace lines look thick, wipe your brush on a paper towel before touching the nail.
Watch outCovering the lace with an extra-thick top coat can make the pattern look cloudy.
5. Ice-blue French on clear jelly base
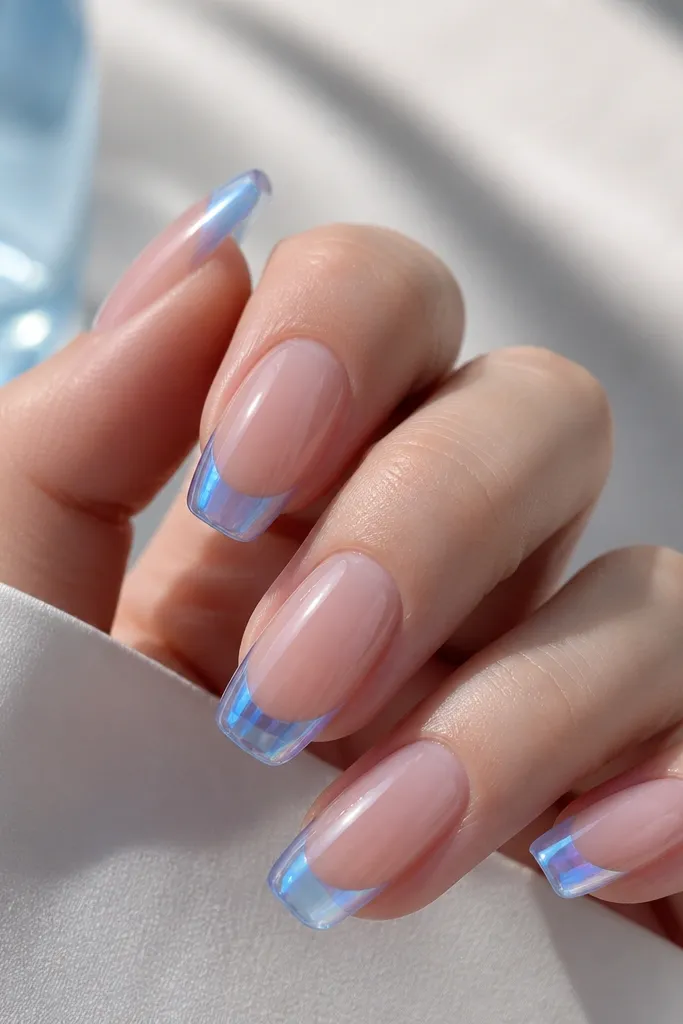
Clear jelly bases make blue tips look like they're suspended, not painted on top. Ice-blue reads cool and glowy, and the semi-transparency gives a fresh, "frosted glass" feel. This design looks best on longer squoval nails because you get more surface for the jelly to show. It flatters hands with visible nail ridges because the jelly base smooths the look. The styling principle is optical depth - clear base plus bright blue gives that dimensional glow.
Apply a thin layer of clear jelly base and cure. Place a sheer nude tint only if you want warmth; otherwise keep it purely clear. Paint ice-blue onto the tip in two thin layers, keeping the first layer slightly translucent so the jelly shows through. Let the first layer cure fully, then add the second layer to even out opacity. Use a liner brush to clean the edges right at the sidewalls so the blue line stays sharp. Seal with a high-gloss top coat, and cap the free edge so the jelly layers don't lift.
Editor's noteFor a cleaner curve, rest your pinky finger on the table and keep the wrist steady while you paint the smile line.
Watch outDoing thick ice-blue in one coat makes it look chalky instead of glassy.
6. Royal blue French with gold foil accent ring finger
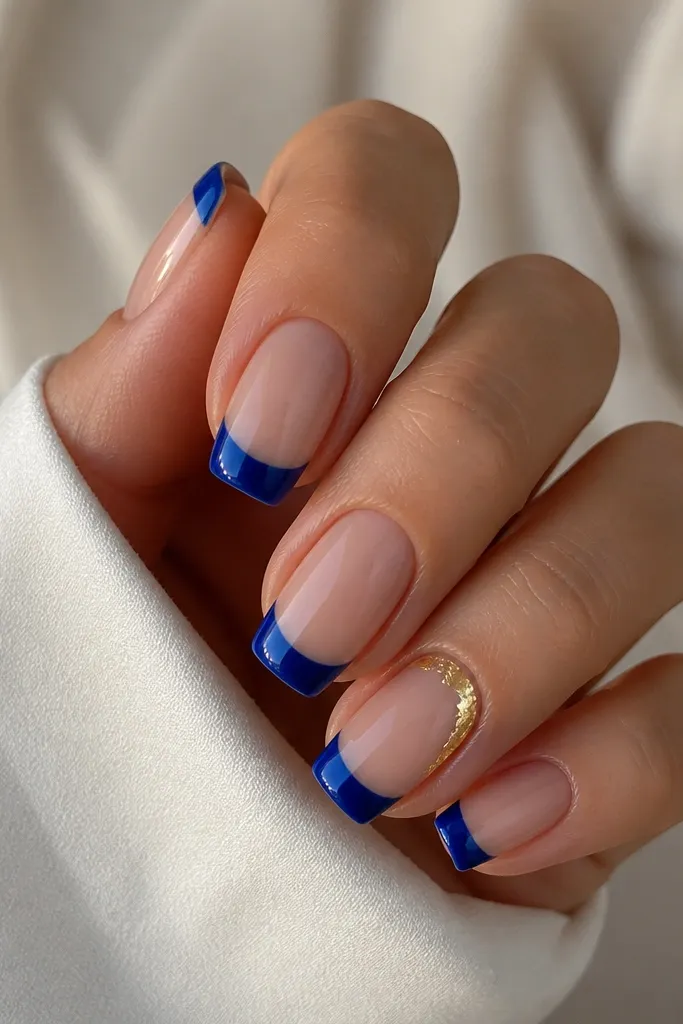
Royal blue is richer than cobalt, and it looks expensive with gold foil because the gold warms the color. I like adding foil only on one nail so the set still reads clean, not cluttered. This works on medium nails and looks great for events, photos, or when you want your manicure to match gold jewelry. It flatters most skin tones because royal blue is deep and the gold brings a warm highlight. The styling principle is one accent - one pop of gold makes the French tips look intentional.
Paint all nails with a sheer nude base and cure fully. Apply royal blue French tips in two thin layers, keeping the tip width about one-third of the nail length. For the ring finger, leave the base as normal, then add a small dab of clear builder gel or tacky base near the cuticle on one side. Press gold foil into that tacky spot and tap off the excess. Clean the foil edges with a small brush dipped in remover and cure again. Finish every nail with glossy top coat, then lightly buff the surface only if you see foil bumps.
Editor's noteCut foil into smaller pieces with scissors so it lays flat instead of folding over itself.
Watch outAdding foil on every nail makes the French line look messy and defeats the clean French look.
7. Powdery baby-blue French tips with matte top coat
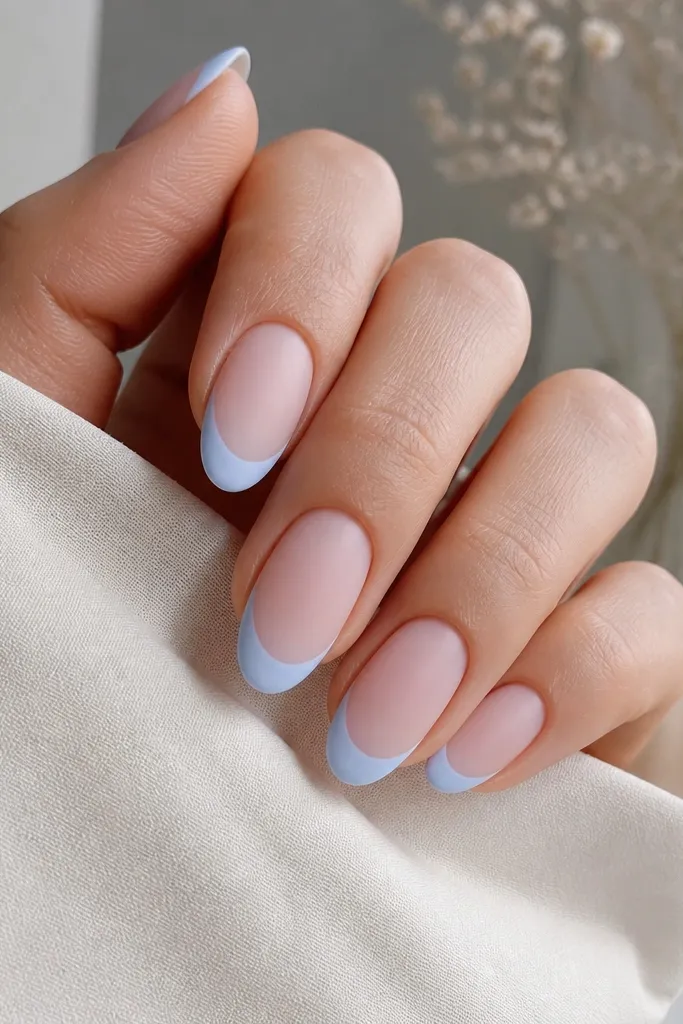
Matte top coat changes blue completely. Baby blue turns from bright and glossy to soft and velvety, which makes it feel more casual and "cute" instead of bold. A sheer pink base keeps the overall look light, so your hands don't look washed out. This works especially well on short to medium nails because matte hides tiny imperfections in the surface. The styling principle is finish control - matte makes the color look calmer and more wearable.
Prep and buff lightly, then apply a sheer pink base in two thin coats. Cure fully. Paint the baby-blue tips in two passes for opacity, keeping the curve consistent across nails. Let the last blue layer cure fully, then apply matte top coat in one smooth layer, avoiding overworking the surface. If you get streaks, recoat instead of trying to fix by rubbing. Clean the edges with a lint-free wipe and remover on a small brush.
Editor's noteIf your matte top coat turns patchy, shake it gently and apply in one direction only.
Watch outPutting matte top coat over wet or under-cured gel can cause dull spots and stickiness.
8. Blue French with thin white smile line
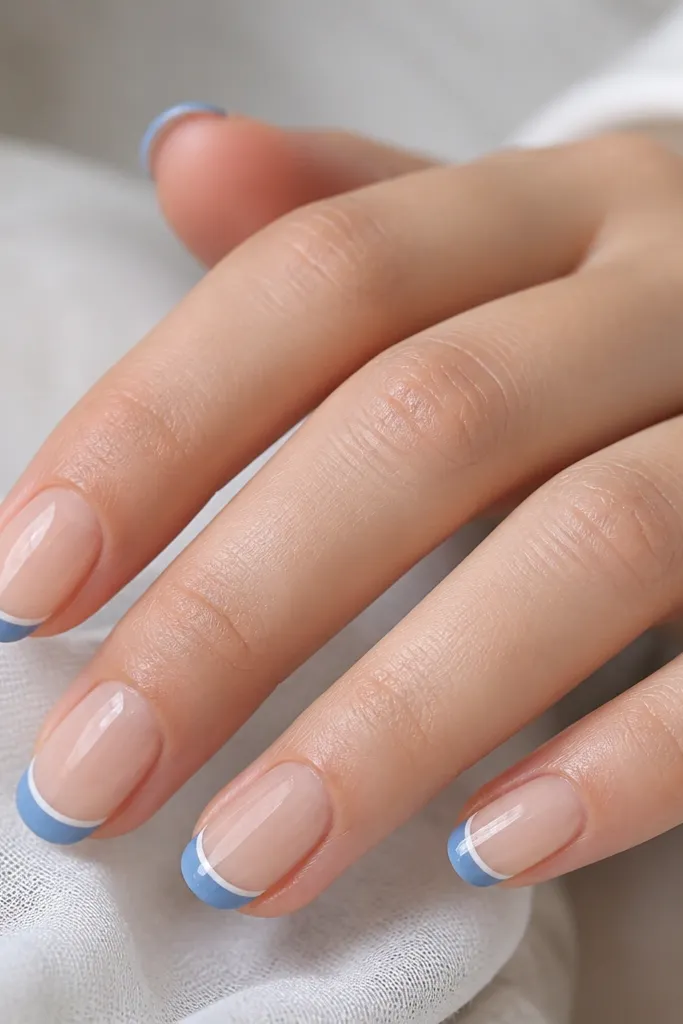
This is the "clean girl" version that still has personality. The thin white smile line makes the blue look sharper and more defined, like a border. I do this when my blue polish is slightly translucent - the white fixes that by adding an extra layer of contrast. It looks great on almond and squoval shapes because the double line follows the nail curve nicely. The styling principle is layered separation - white sits between nude and blue for crisp structure.
Start with a sheer nude base and cure. Paint the blue tip first in one thin layer, then cure. Using a fine striping brush, draw a thin white line along the upper edge of the blue smile curve, keeping it straight and narrow. Cure again so the white sets cleanly. Add a second thin blue pass if you need to deepen the tip, but keep it from flooding over the white line. Finish with glossy top coat and cap the tip edge.
Editor's noteUse a striping brush with a long handle so you can control pressure and keep the white line thin.
Watch outSkipping the cure between blue and white makes the colors bleed and the border stops looking crisp.
9. Sky-blue French with diagonal side accents
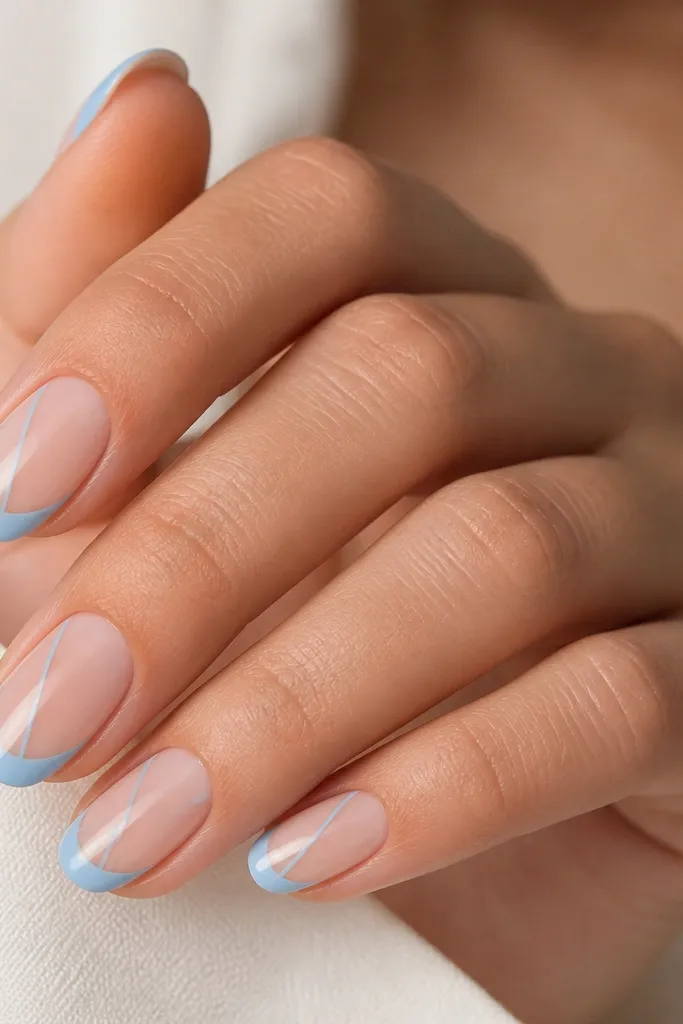
Diagonal accents make your French tips look more modern without turning into full nail art. Keeping the accent the same sky-blue as the tip ties everything together so it still reads cohesive. This style looks best on medium nails because there's enough space for the diagonal without cutting off the nail shape. It flatters hands with shorter nail beds because the diagonal line draws the eye upward. The styling principle is directional lines - the diagonal slash makes the nails look longer and sharper.
Apply a sheer nude base and cure. Paint sky-blue French tips in two thin layers, keeping the curve neat. With a liner brush, add a diagonal line starting at one sidewall near the top of the blue tip and pulling toward the center, stopping before the tip edge. Repeat on the other side if you want a symmetrical look, or keep it one-sided for a more editorial feel. Cure, then seal with glossy top coat so the diagonal lines look smooth and protected. Clean around the cuticle with a small brush and remover so the diagonal stays crisp.
Editor's noteIf your diagonal looks uneven, mark the starting point with a dot using the brush tip, then connect the dot with one confident stroke.
Watch outAdding diagonal lines after thick top coat makes them smear and look fuzzy.
10. Sapphire French tips with tiny rhinestone at cuticle corner
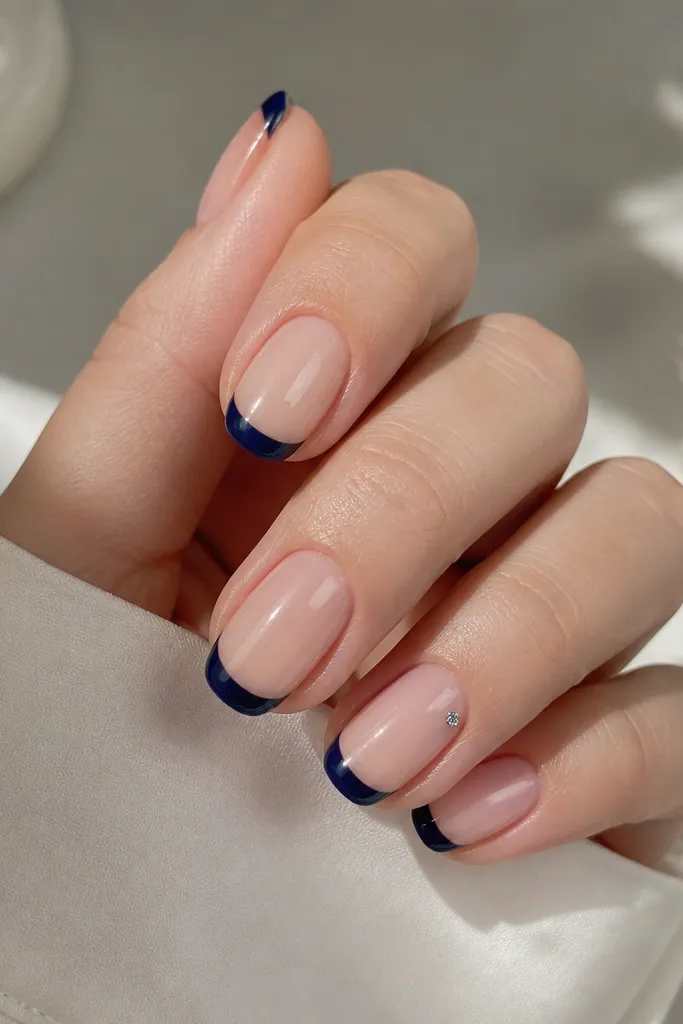
Sapphire looks deeper than royal blue and it shines under light, so it's a good pick if you want that "sparkle without effort" vibe. A single rhinestone at the outer cuticle corner makes the nail look lifted and polished. I keep it to one nail or one corner because more stones start to look like costume jewelry. This design is flattering on medium to long nails because the cuticle corner detail has room to read clearly. The styling principle is micro-bling - one reflective point adds dimension while the French tips stay clean.
Prep nails, then apply a nude base and cure. Paint sapphire-blue French tips in two thin layers and cure fully. For the rhinestone nail, dab a tiny amount of clear tacky gel or nail glue near the cuticle outer corner, not in the center. Place one small rhinestone with tweezers, then press lightly so it sits flat. Cure according to your gel instructions or let glue set fully. Finish with glossy top coat, but keep the top coat around the rhinestone thin so it still catches light.
Editor's noteUse rhinestones sized around 1.5-2.0 mm for this placement so they look like a detail, not a blob.
Watch outOver-gluing makes the stone sit higher and can snag on hair or clothes.
11. Blue French with ombre fade into the nude base
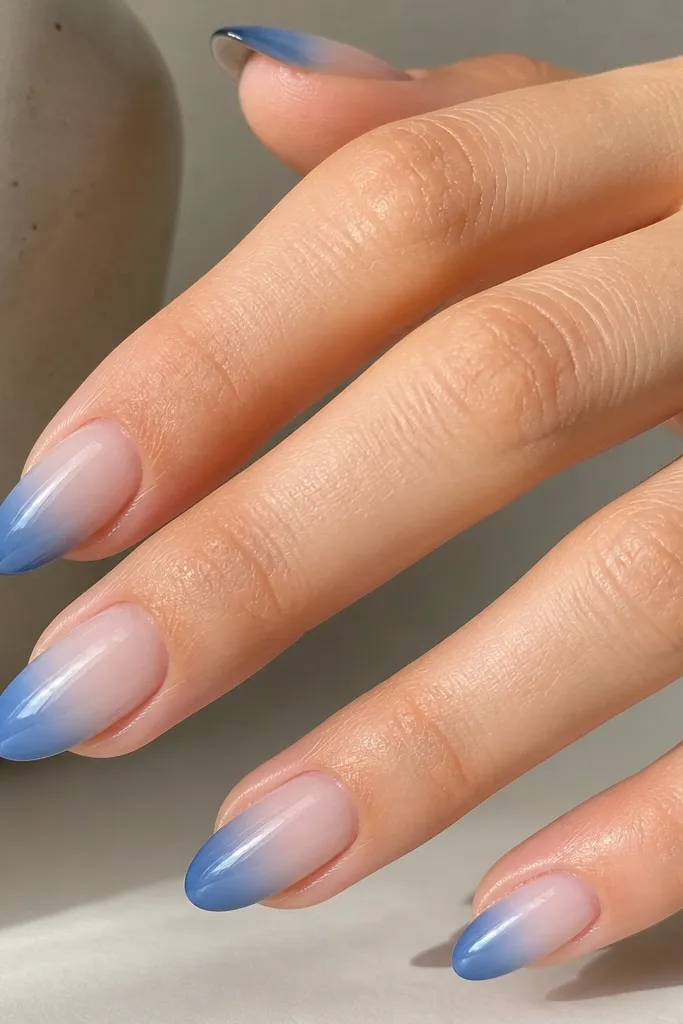
This is a softer French that still reads blue. Instead of a hard line, the blue fades into the nude base, so the manicure looks airy and less "painted on." I use it when I want a manicure that grows out nicely because there's no sharp boundary. It flatters all nail lengths, but it looks especially good on medium almond because the gradient follows the curve naturally. The styling principle is blending - you build the blue with a sponge so the transition stays smooth.
Start with a sheer nude base and cure. Pour a small amount of blue polish or gel onto a palette. Use a makeup sponge or ombre sponge and dab blue onto the tip area, starting at the free edge and dragging slightly upward to create the fade. Add a second layer with lighter pressure to deepen the tip without over-darkening the fade. Clean the sides with a brush dipped in remover or wipe gel with a lint-free wipe. Finish with glossy top coat, and cure fully so the gradient doesn't dull.
Editor's noteUse fewer dabs and more light pressure - sponge work looks best when you build the gradient slowly.
Watch outTrying to blend with a brush over wet sponge pigment usually muddy-airs the transition.
12. Blue French with thin negative-space curve inside
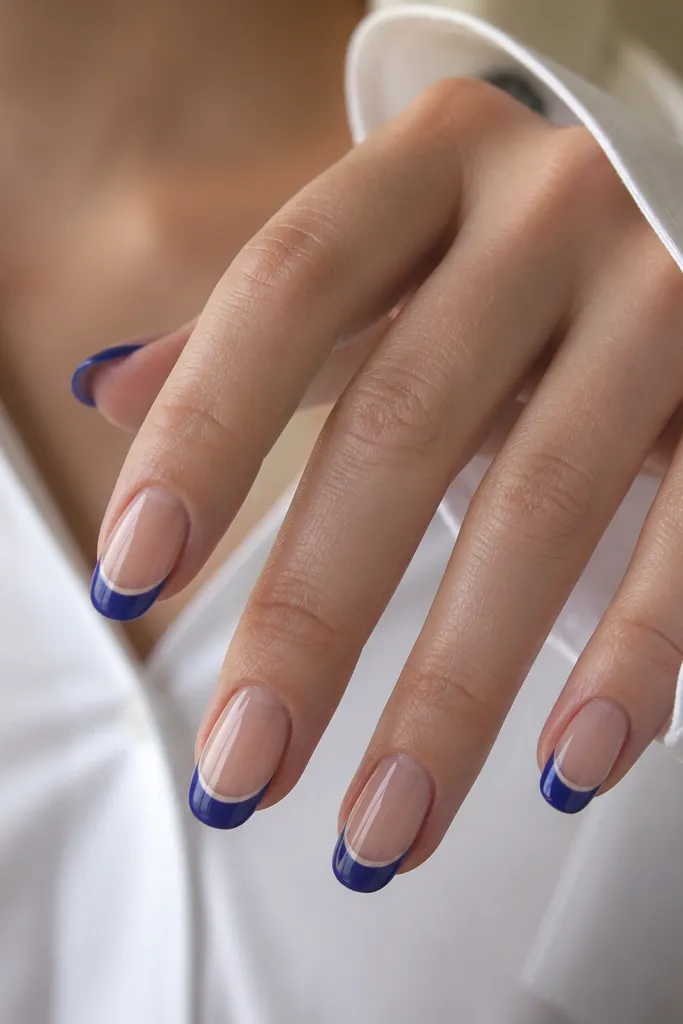
This hollow line trick makes the French tip look like a design element instead of plain color. The negative space inside adds a graphic, modern feel and it hides minor thickness differences in your tip painting. It's a great option when you want something a little different but still easy to do with tape. I like it on medium squoval because the inside curve looks balanced. The styling principle is a controlled gap - the negative space is what makes the shape look intentional.
Apply a sheer nude base and cure. Lay French guides or a thin strip of tape so it defines the outer edge of your tip. Paint the blue tip in two thin layers and cure. For the inner negative space, add a second thin strip of tape slightly inside the blue curve, leaving a narrow gap, then gently paint over the outer area so you don't flood the gap. Remove both tapes only after the blue layer is fully set. Clean the inside edges with a tiny brush and top coat once everything is crisp.
Editor's notePress tape down firmly with a silicone tool so the edges seal and the negative gap stays clean.
Watch outRemoving tape while the blue is still soft leaves jagged edges that look messy.
13. Blue French on nude base with pearl top shimmer
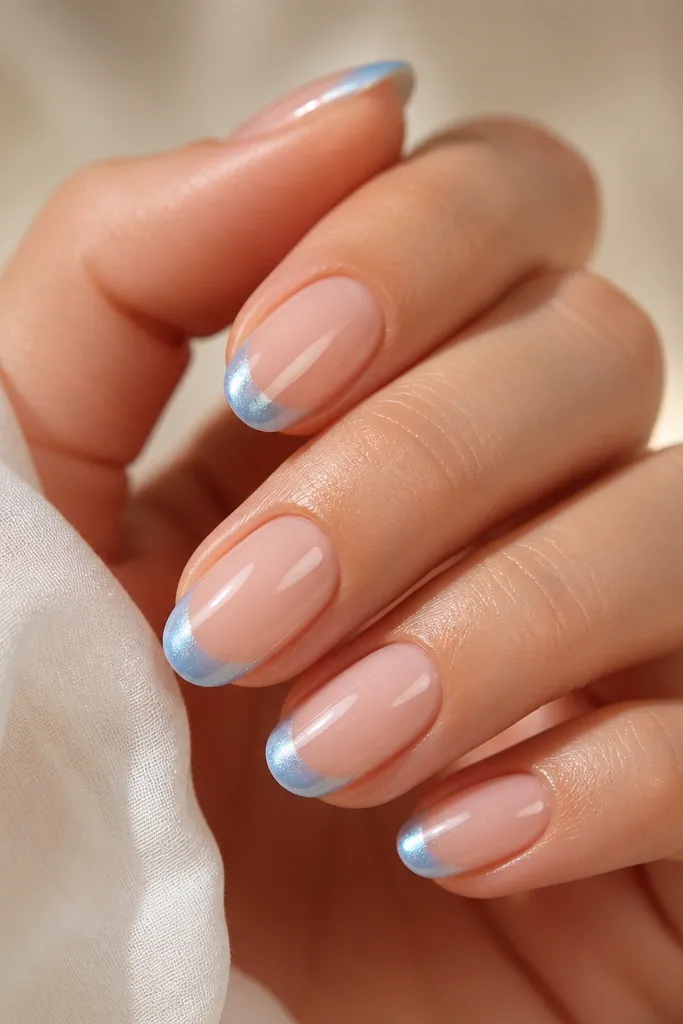
Pearl shimmer over blue makes it look like it has depth, not just color. The base stays nude, so your nails look clean and healthy, while the tips do the "pretty" part. I use this when I want the French to work for day and night because the shimmer shows up more in sunlight and under indoor lights. It flatters most skin tones because pearl is a universal neutral sparkle. The styling principle is light layering - shimmer goes on top after the French line is already crisp.
Prep and apply a sheer nude base, cure fully. Paint your blue French tips in two thin layers and cure. Then brush a pearl shimmer top coat mainly over the tip area, keeping it off the nail bed so the shimmer doesn't blur the nude look. If your shimmer top coat is thick, thin it slightly with a clear gel base or use a smaller amount. Seal with one more thin clear top coat over the entire nail for an even finish. Cure and wipe tacky residue if your system requires it.
Editor's noteApply shimmer with a flat brush and keep strokes short so it doesn't streak across the nail bed.
Watch outOverloading shimmer can make the blue look cloudy instead of bright.
14. Blue French with glossy gel thickness at the tip edge
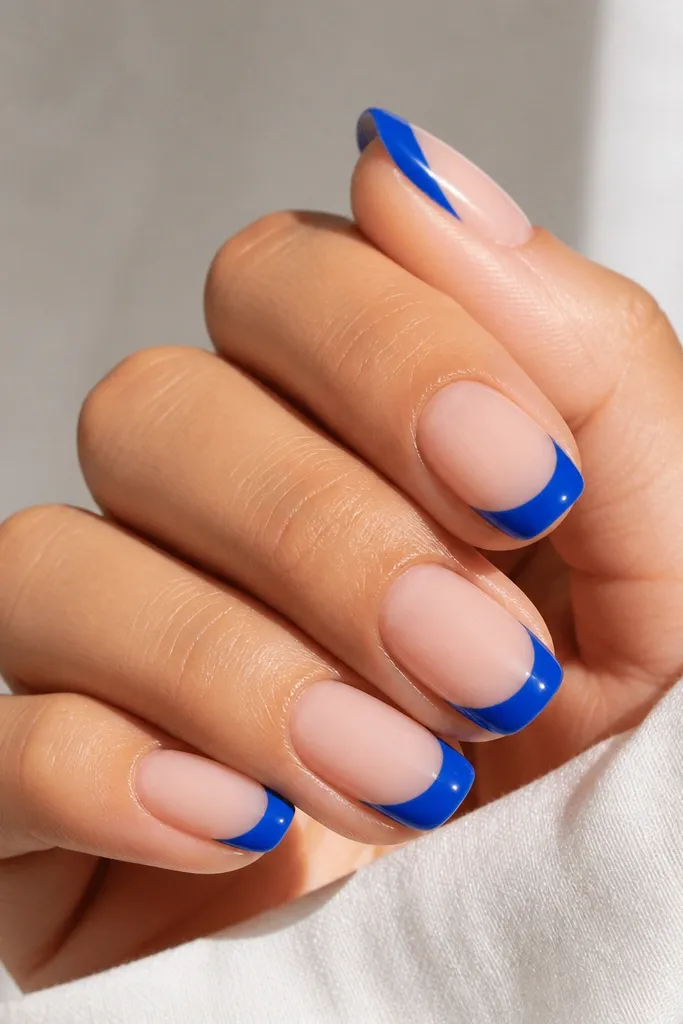
When you want salon-level polish, the surface matters. This look uses a slightly domed gel top layer over the blue tip so the smile line reads sharp and glassy. I do it when my nails are slightly uneven because the doming smooths the light reflection. It's best on medium nails because you need enough tip surface to dome without making it bulky. It flatters all undertones since the blue is the star. The styling principle is curvature - a smooth dome makes the French edge look intentional and clean.
Apply a nude base and cure fully. Paint blue French tips in two thin coats and cure. Wipe the surface lightly with alcohol or gel prep so the next layer grips. Add a small amount of clear builder gel or thick clear top coat only on the blue tip area, then spread it just to the outer curve of the smile line. Cure until it's fully set, then file very gently to refine the dome shape. Finish with glossy top coat to lock everything in and cap the free edge.
Editor's noteIf you file the dome, use a 180-grit file and stop as soon as it looks smooth - too much filing thins the glass effect.
Watch outSkipping the dome layer makes the tip line look flat and less "high-end."
15. Cobalt French tips with a micro heart on one accent nail
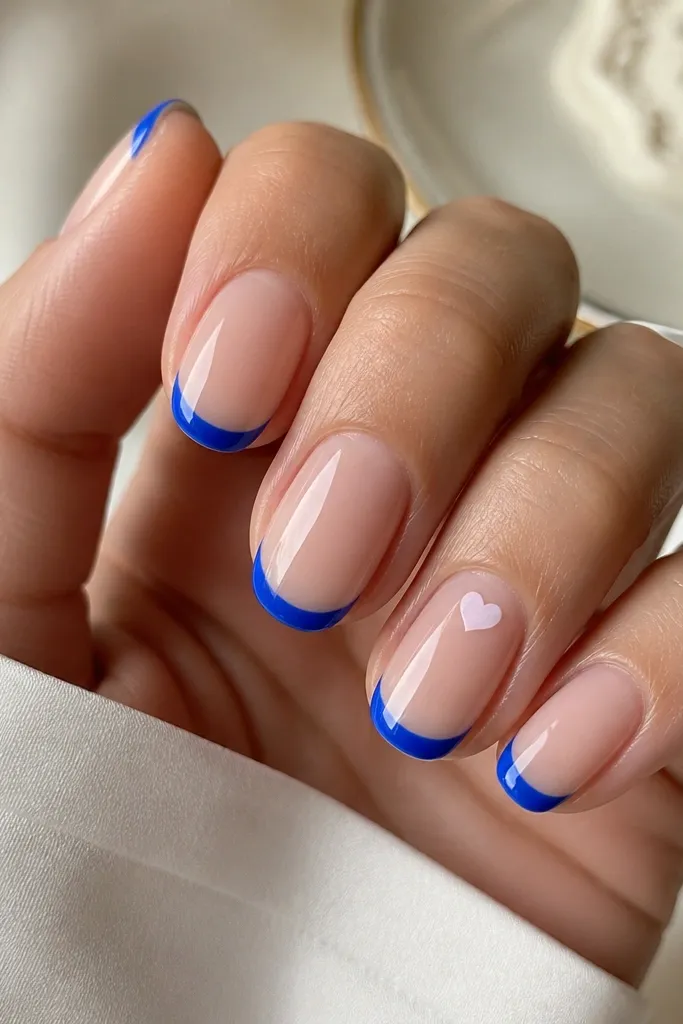
A tiny heart turns a French manicure into something you can wear without feeling overdone. I place it on one nail only because the French tips already have a bold color - the heart is a small wink. Cobalt makes the heart pop, especially if the heart is white or a lighter periwinkle. This works on short, medium, and long nails, but it looks best on short nails because the heart stays proportionate. The styling principle is single accent placement - one small detail keeps the set playful and clean.
Start with a sheer nude base and cure. Paint cobalt French tips on all nails in two thin layers and cure. Choose one accent nail and use a dotting tool to place two tiny dots for the heart sides, then connect them with a thin liner brush into a small V shape. Clean up the heart edges with a brush dipped in remover so it stays sharp. Cure again and apply glossy top coat over the entire nail, keeping the coat thin so the heart lines don't blur.
Editor's noteUse a dotting tool tip size that's smaller than your heart idea - tiny hearts look intentional, big ones look cartoonish.
Watch outAdding hearts on multiple nails turns the manicure into full nail art and loses the French simplicity.