
1. Micro Smile Royal Blue French on Soft Squoval
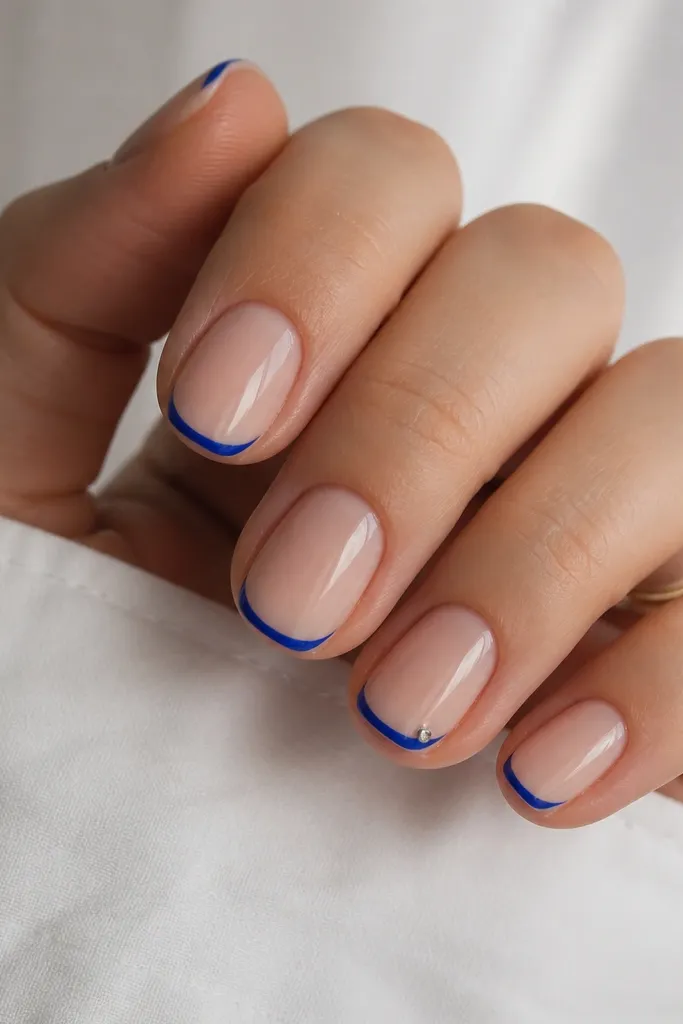
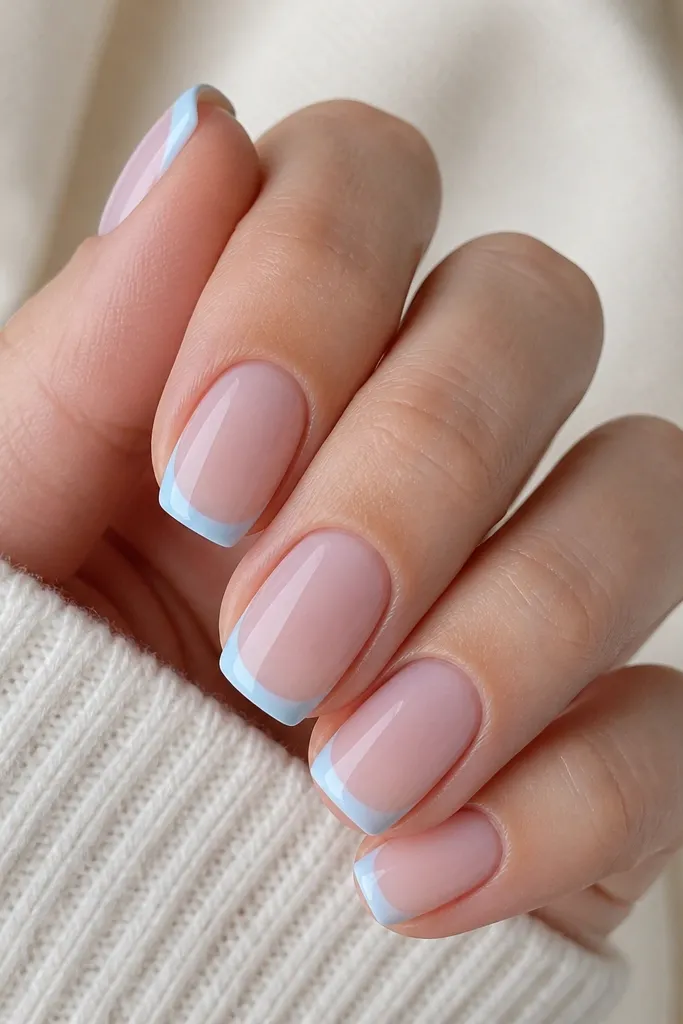
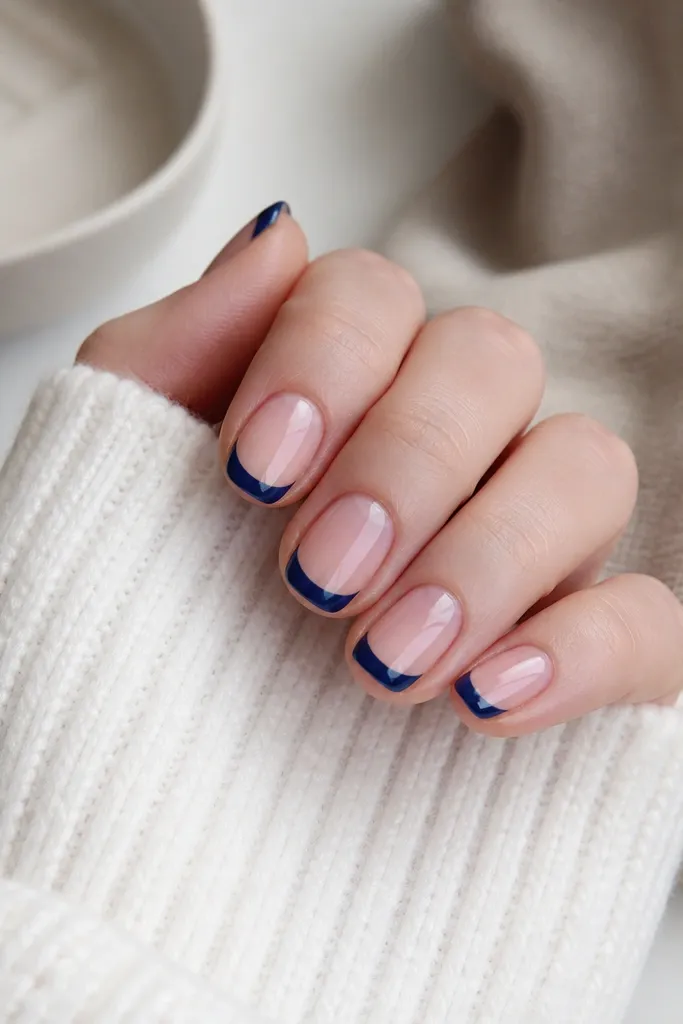
This is the set I reach for when my nails are short and I still want the "length" illusion. The nude base stays clear and the royal blue tip is scaled down so it doesn't swallow the nail bed. On soft squoval, the rounded edges help the thin arc look intentional instead of like a stripe job. Royal blue looks best here when it's truly opaque - you want to see solid color in one pass. The single silver dot gives a little sparkle without adding bulk, so it stays flattering for smaller nail beds and short fingers.
Start by shaping your nails to soft squoval - corners rounded, free edge even. Push back cuticles gently, then apply two thin coats of nude base gel or polish, curing each coat if you're using gel. Place nail guides near the tips, then paint a thin royal blue smile line - keep it about 1.5 to 2 mm wide at the center. Use a fine liner brush to taper the blue toward both side walls so the tip looks pointed at the free edge. Finish with a glossy top coat, then add the silver dot only on the outer corner of one nail using a dotting tool.
Editor's noteIf your blue is streaky, do two thin layers instead of one thick layer so the edge stays razor-clean.
Watch outAvoid a wide French tip on short nails - it makes the nail bed look smaller even with perfect color.
2. Royal Blue Half-Moon French with Nude Cuticle
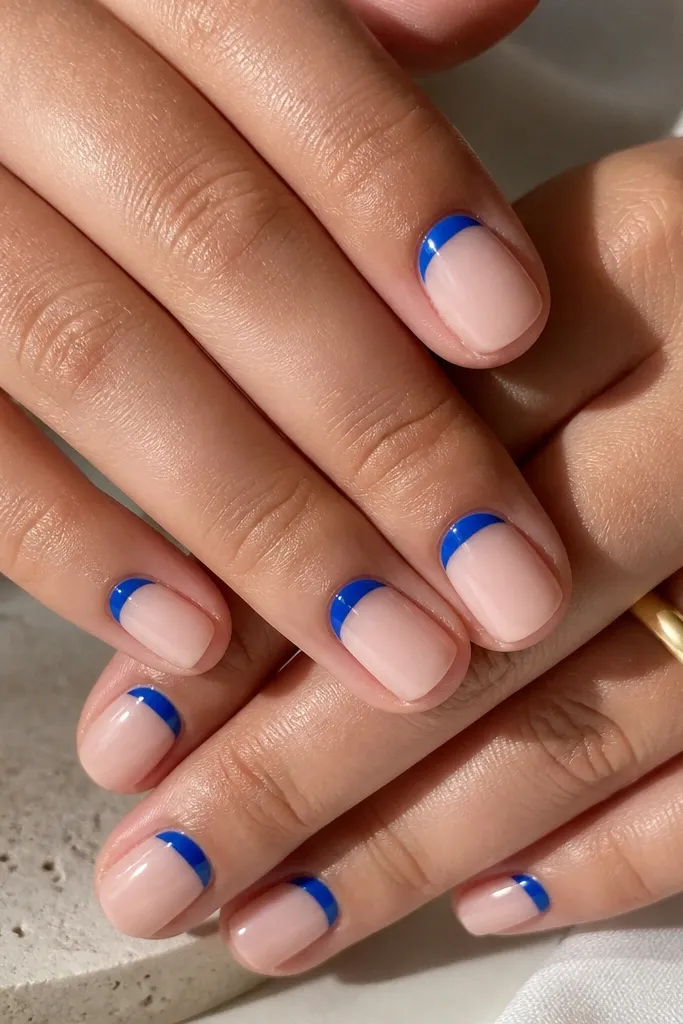
This one flips the focus upward, so the eye travels across your nail without needing a wide tip. A royal blue half-moon at the cuticle makes short nails feel balanced and "styled," because the color sits near where your nail naturally curves. The nude stays light, which keeps small nail beds from looking crowded. On warm or olive skin tones, this looks especially good because the nude base warms the overall look. For everyday wear, it reads classy because there's no extra pattern fighting the shape.
Prep and shape first, then apply a sheer nude base - I like a jelly nude that's semi-transparent. Use a half-moon stencil or freehand with a fine liner brush to paint the royal blue crescent at the cuticle, keeping it narrow so it doesn't touch the side walls. Cap the crescent edges so the line stays smooth and doesn't snag. Leave the rest of the nail nude - no extra French tip on top. Seal everything with a glossy top coat, then check under bright light for any halo around the crescent and fix with a tiny cleanup brush dipped in alcohol.
Editor's noteUse a small detail brush to sharpen the crescent corners - that's where the "expensive" look comes from.
Watch outDon't overfill the crescent - thick blue at the cuticle makes short nails look wider than they are.
3. Royal Blue French with Clear Negative Space V-Edge
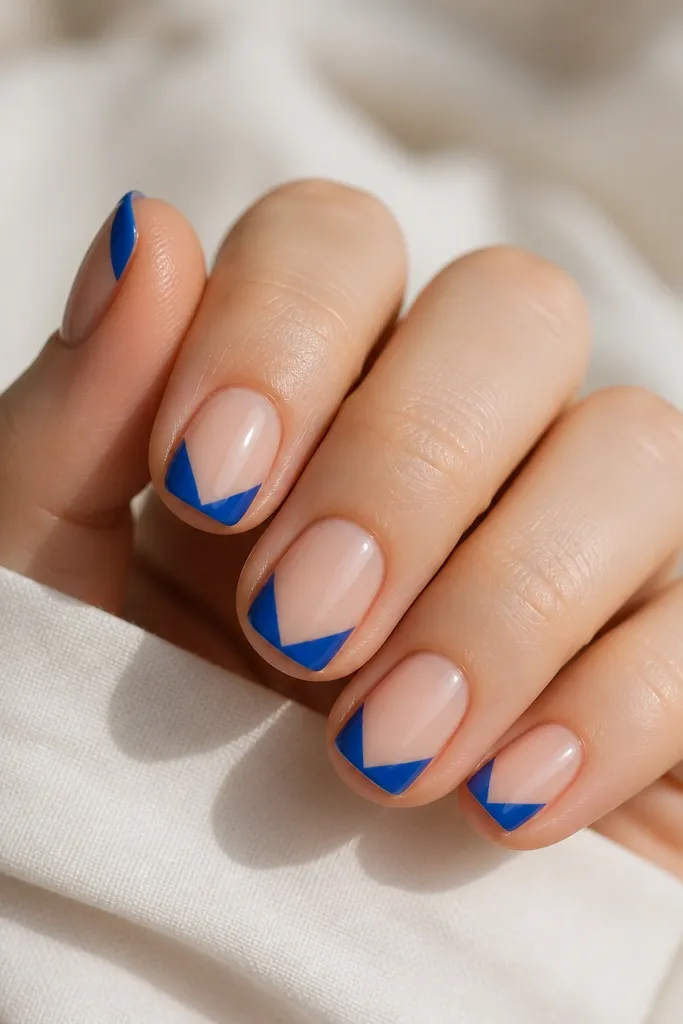
The negative space V is the cheat code for small spaces. It visually lengthens the nail because your eye follows the V down the center, instead of reading the tip as one flat block of color. The royal blue is solid on the outer edges, so the look stays graphic and clean. This flatters hands with shorter nail beds because it creates a vertical focal point. If you like modern nail art but hate busy patterns, this one feels polished and intentional.
Start with a clear nude or sheer milky base so the nails look smooth and even. Paint two thin royal blue "side panels" along the French arc - leave the center area bare. Use a striping brush to pull the center lines into a sharp V that reaches toward the free edge without touching the nail's center ridge. Keep the blue width slightly wider at the outer corners and thinner toward the V point. Finish with top coat, making sure the V stays clear and doesn't get foggy from excess product.
Editor's noteIf the V gets messy, clean the center line first with a brush and alcohol before you cure or top coat.
Watch outAvoid filling the V with blue or glitter - that kills the length illusion.
4. Thin Royal Blue French with Silver Edge Outline
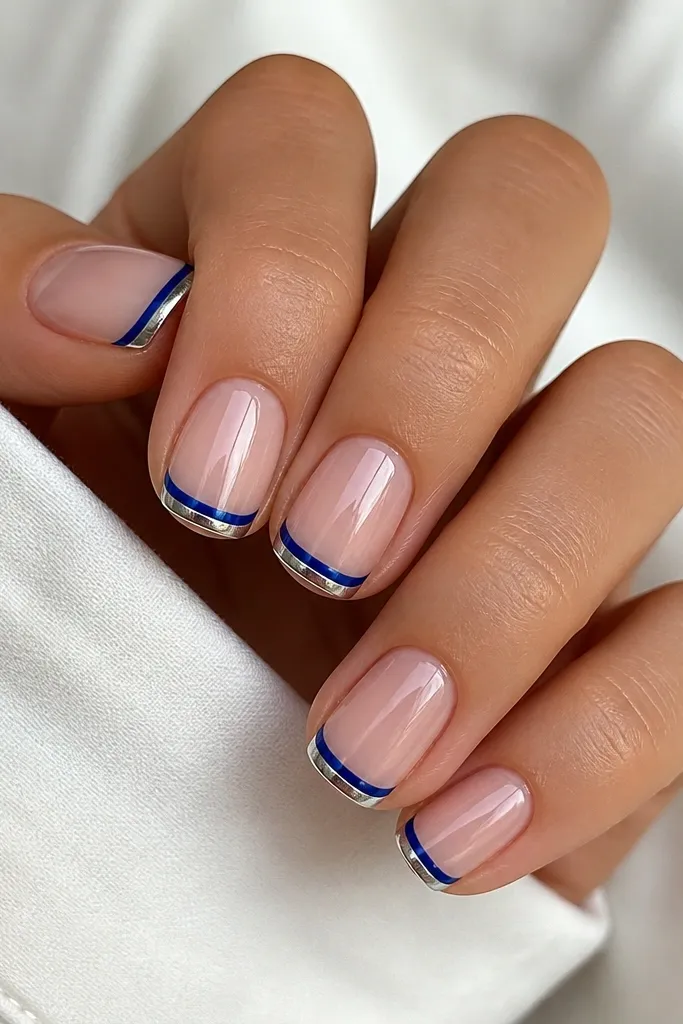
This design looks fancy because the silver edge creates separation - it tells your eyes where the tip ends. With thin royal blue, the nail still reads as long, and the silver line adds crisp contrast without adding extra bulk. I like it on square-short because the straight edges make the outline look sharp. If you're on the fair-to-medium skin side, the silver pops and makes the blue look even more saturated. For photos, it catches light without needing glitter everywhere.
Apply a nude base in two thin coats and cure or dry fully. Use nail guides to paint a thin royal blue French tip - keep the center width around 1.5 mm. Once the blue is dry, use a fine liner brush with silver gel or chrome pen to trace the outer edge of the tip, not the inner edge. Leave the inner edge clean so the silver reads like a frame. Seal with a glossy top coat, and wipe any chrome dust with a lint-free wipe after curing.
Editor's noteUse silver gel if you want it to stay sharp - chrome powder can smear if you rush the top coat.
Watch outDon't add a silver line on both inner and outer edges - it turns into a thick border fast on short nails.
5. Royal Blue French Tips with Micro Rhinestone Corners
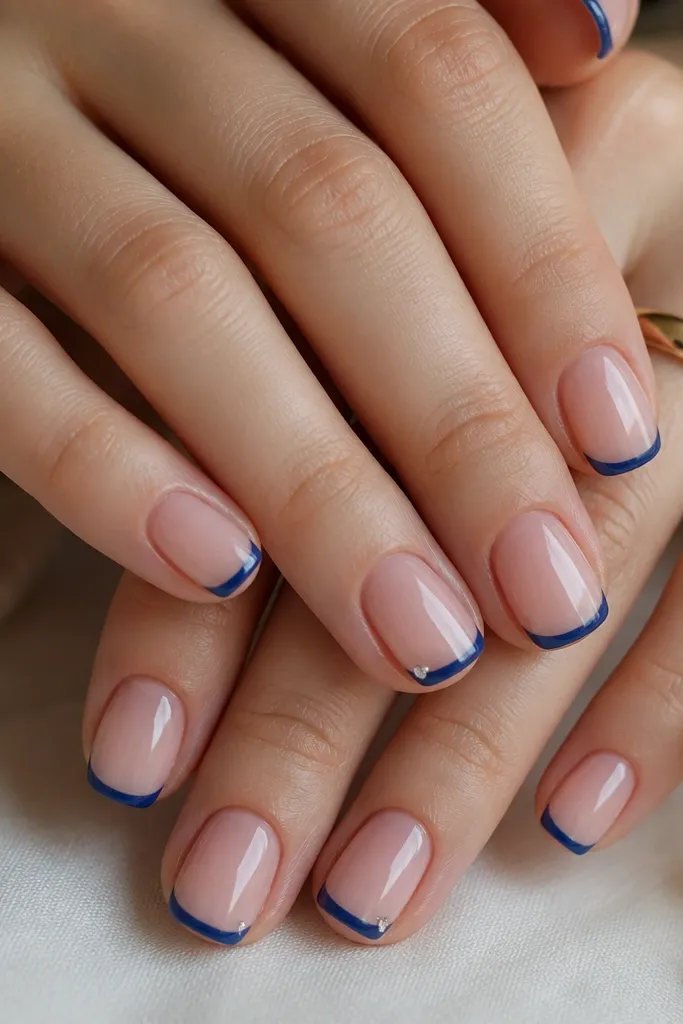
Rhinestones can either look elegant or heavy, depending on placement. Here, they sit at the corners of the royal blue tip, which makes the sparkle look like it's extending the curve rather than stacking on top. The nude base keeps it airy, and the thin French keeps your nails from looking chunky. This works great on hands with short, wide nail beds because corners add structure. If you're dressing up for dinner or a party, you get sparkle without turning your manicure into a full rhinestone set.
Prep and base coat first, then paint a sheer nude base. Use guides to create a thin royal blue arc, keeping it narrow at the center and slightly thicker at the sides. While the blue is still tacky (or use a tiny dab of clear gel where the stones go), place micro rhinestones at the outer corners only on two nails. Press lightly with a dotting tool so the stone sits flat. Cap the area with top coat, making sure you don't flood the stones - just cover the base.
Editor's noteUse micro stones (1.0 to 1.5 mm) - anything bigger looks like you're wearing pebbles on short nails.
Watch outAvoid placing rhinestones in the middle of the tip - it makes the nail feel shorter.
6. Royal Blue French with Nude Skittle Accent
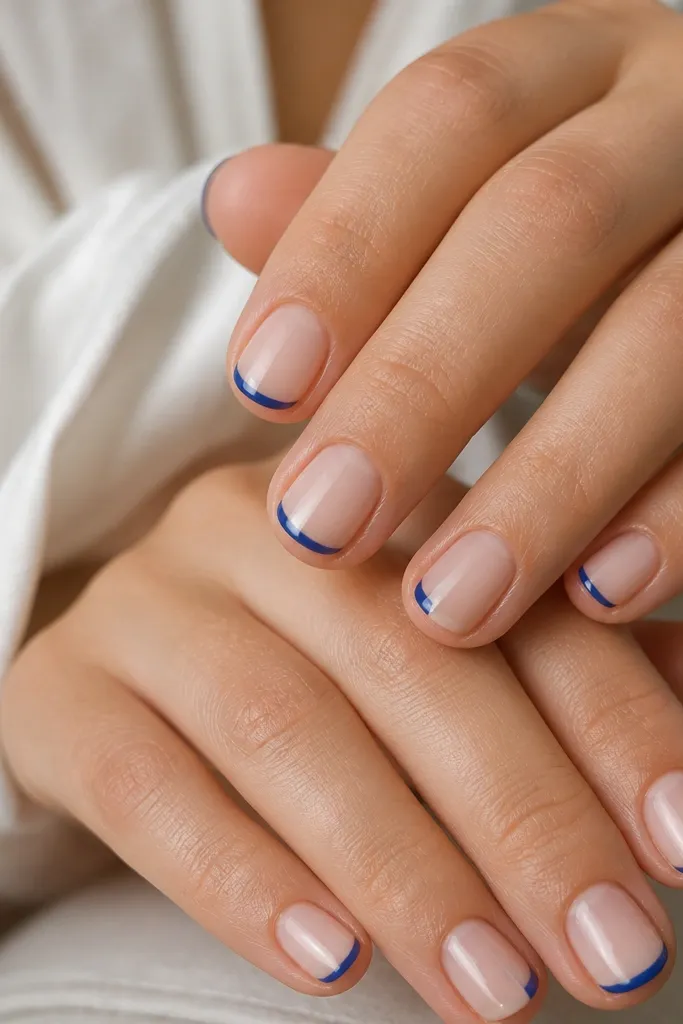
Skittles work when the accent is small and tied to the same color family. Here, you keep the royal blue French on most nails, then you tweak two nails with a nude negative panel that echoes the tip shape. That keeps the manicure cohesive while stopping it from looking repetitive. This is flattering for small nail beds because negative space prevents the set from feeling too heavy. It also works if your nails have slight shape differences - the skittle accent hides tiny asymmetry.
Start with a consistent nude base and a thin royal blue French on all nails using guides. On two accent nails, paint the royal blue tip as usual, then use a fine brush to remove a small strip of blue at one side of the tip, leaving a nude panel. Make the panel follow the arc so it looks like intentional design, not a mistake. Keep the nude panel width about the thickness of a gel brush bristle line. Top coat everything, then check the side profile to ensure the negative space area stays smooth.
Editor's noteIf you're removing blue, do it with a cleanup brush and alcohol before the polish fully sets so you don't tear the base.
Watch outDon't add a full extra accent design on top of the French - it turns into clutter on short nails.
7. Royal Blue French with Tiny White Dot Line
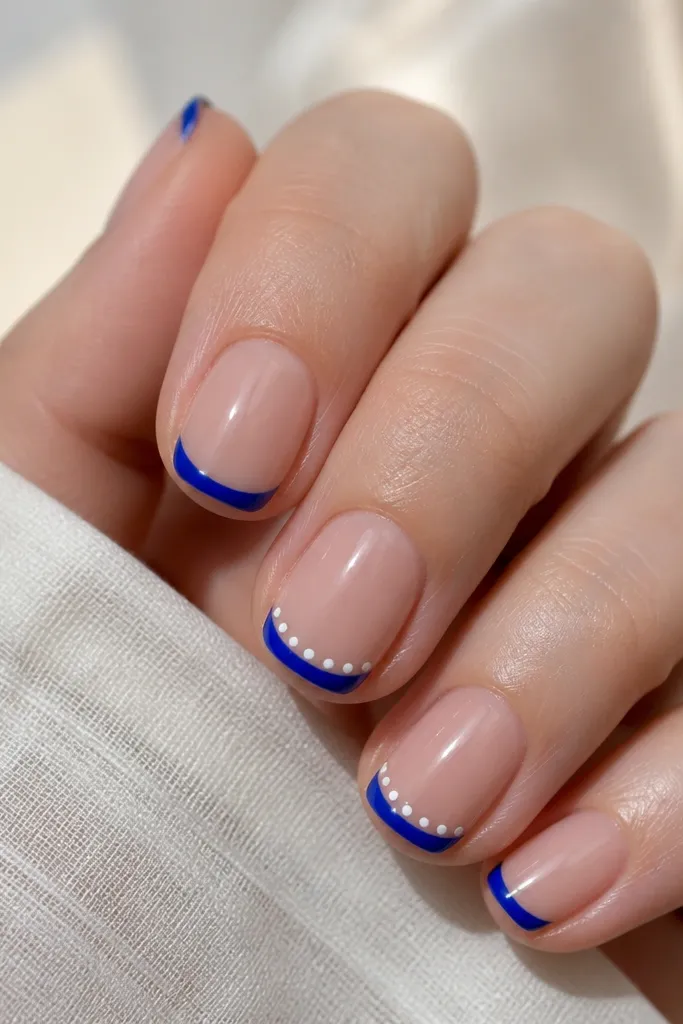
This is a subtle way to add "motion" without widening the tip. The tiny white dot line sits under the royal blue, creating a second thin visual boundary that keeps the eye in the right place. I like it because it looks cute and clean in daylight, not like you're wearing thick stickers. It flatters short nails because the dots are small and the French stays narrow. On medium skin tones, the white dots brighten the whole set and make the blue look extra crisp.
Apply nude base and cure/dry. Paint a thin royal blue French tip on all nails using guides or a steady freehand. On two accent nails, after the blue is fully set, use a dotting tool with white gel or polish to place dots in a shallow arc just under the blue line - about 0.5 to 1 mm apart. Keep the dot row short, spanning only the center third of the nail so it doesn't crowd the cuticle. Seal with a glossy top coat and cure again if needed.
Editor's noteUse the smallest dotting tip you have; big dots make the nail look wider.
Watch outAvoid placing dots across the whole nail - the pattern will overpower the small-space effect.
8. Royal Blue French with Matte Nude Base and Glossy Tips
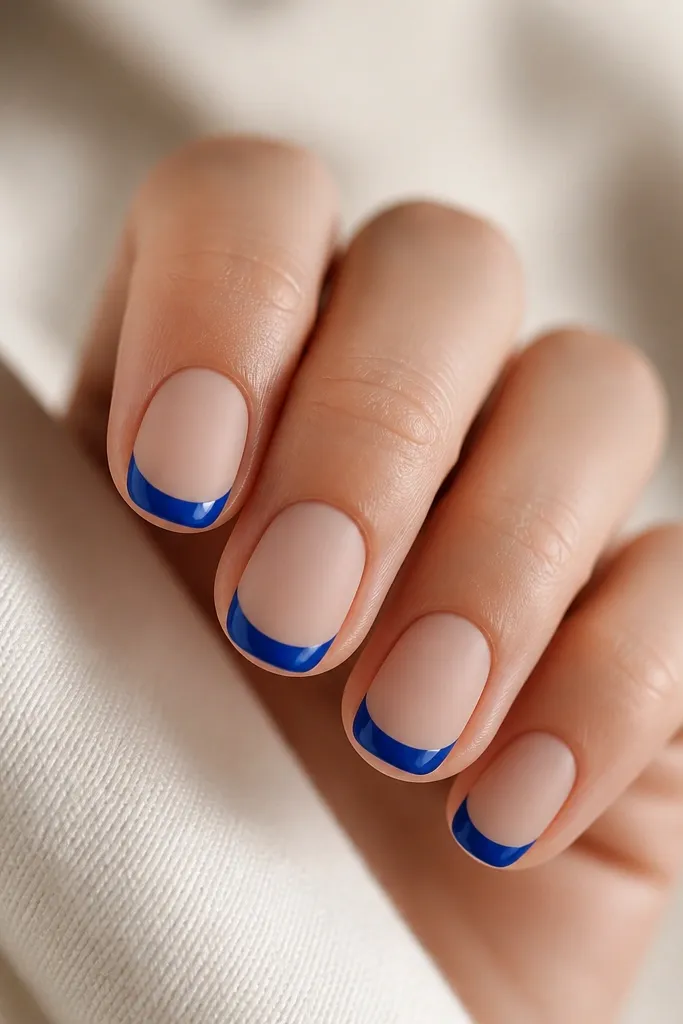
Mixing finishes is one of the easiest ways to make short French tips look styled instead of plain. The matte nude base hides tiny ridges and makes the royal blue feel sharper, while the glossy blue tip catches light at the free edge. This combo makes the tips look slightly raised, which adds dimension without adding width. It looks great on hands with dry cuticles because the matte base makes everything look smoother. For a clean, modern vibe, this is my go-to.
Start with a smooth matte-friendly nude base. Paint and cure two thin coats of nude, then finish that base with a matte top coat (or use a matte base if your system has one). Next, paint your thin royal blue French tips on top of the matte - keep the arc narrow and clean. Don't cover the whole nail with glossy top coat; only brush glossy top coat on the royal blue tips. Cure or dry fully, then check edges for any matte-to-gloss smudging and wipe with a lint-free pad if needed.
Editor's noteIf your blue looks patchy over matte, let the matte set fully and do two thin blue coats.
Watch outAvoid glossy top coat over the entire nail - you lose the contrast that makes this design feel intentional.
9. Royal Blue French with Pearl Half-Drops
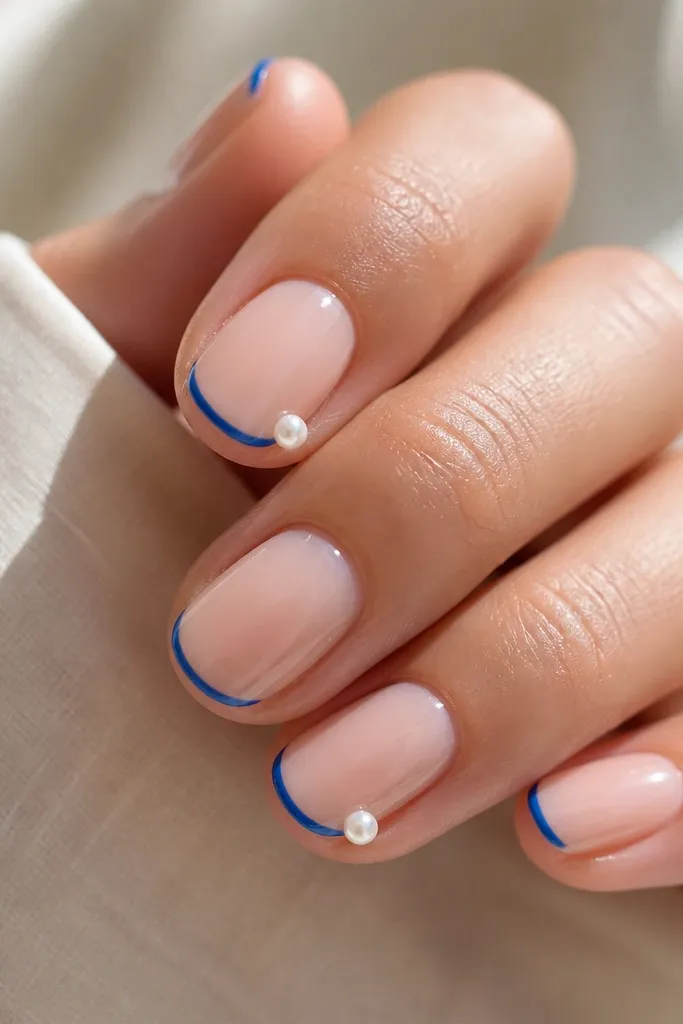
Pearls give a soft counterpoint to royal blue, which is why this works even on short nails. The half-drop shape sits at the corners, so it doesn't take up the center of the nail where you want the illusion of length. The creamy white pearls also make blue look deeper and more expensive. This is flattering for cooler skin tones and anyone who wants a wedding-guest vibe without going all-out with glitter. Keep the rest of the nails clean so the pearls don't overpower the space.
Prep and apply sheer nude base. Paint a thin royal blue French tip on every nail, keeping the arc shallow. Choose two accent nails and place pearl half-drops at the outer corners of the blue tip - use nail glue made for flat-back embellishments. Press gently so the pearls sit snug, then cap around them with a clear gel or top coat, dragging the brush lightly over the edges to prevent snagging. Cure, then do a final glossy top coat over the entire nail for an even shine.
Editor's noteUse a toothpick to position pearls - it gives you more control than tweezers on tiny nails.
Watch outAvoid placing pearls too close to the center line - it makes the tip look shorter.
10. Royal Blue French with White "Stitch" Detail
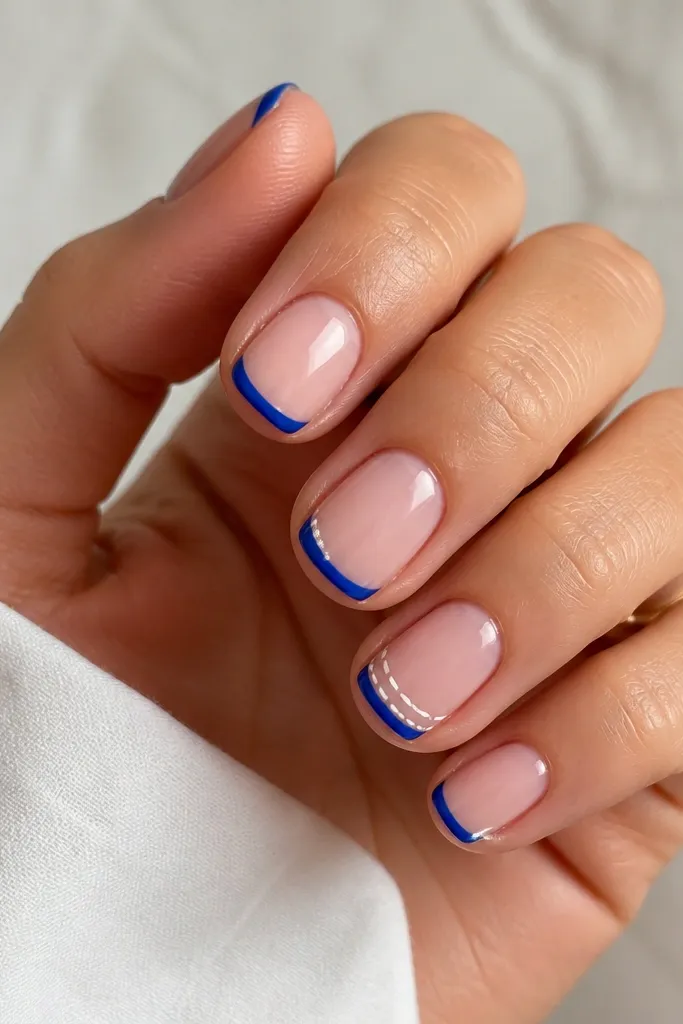
Stitching details make French tips look like a fashion design, and they stay flattering on small nail beds when the lines are thin. The white stitch sits along the outer edge of the royal blue, so it adds texture without adding width. I like this for people who want something a little different from dots or rhinestones. It flatters short nails because the pattern stays at the tip boundary, guiding the eye to the free edge. On medium to deep skin tones, white looks crisp and makes the royal blue stand out.
Apply nude base and cure/dry. Paint thin royal blue French tips on all nails with guides. On two accent nails, use a striping brush with white gel/polish to add a thin single line along one side of the tip, then a second line just next to it - like a stitch channel. Add tiny dash marks between the lines every 1-2 mm using the tip of the brush or a dotting tool. Seal with glossy top coat, being careful not to flood the stitched lines so they stay defined.
Editor's noteIf the white bleeds, cure for a shorter time before adding details, then cure again after top coat.
Watch outAvoid thick white lines - they turn into a solid stripe and lose the stitch effect.
11. Royal Blue French with One-Line Gold Foil at the Side
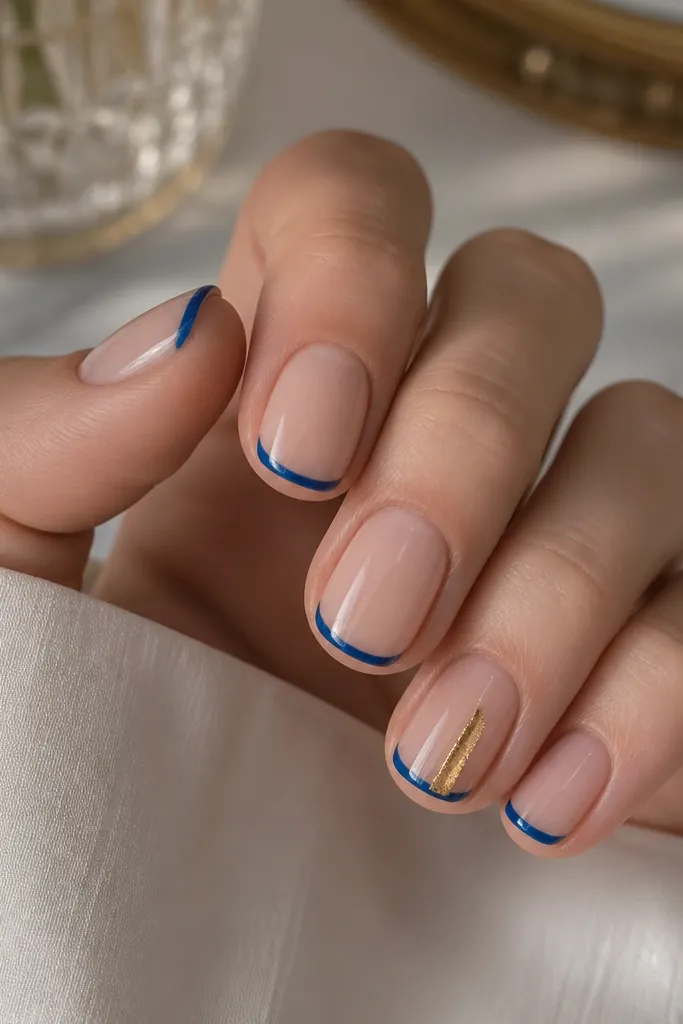
Gold foil adds a "jewelry" look without spreading across the whole set. Because the foil line starts at the outer corner of the royal blue tip, it reinforces the shape and keeps the eye moving upward and outward. This makes short nails feel longer because your gaze travels along that one clean line. It's especially flattering if your nails have slight asymmetry because the line draws attention where you want it. For parties or date nights, it looks expensive even with minimal effort.
Start with a nude base and thin royal blue French tips on all nails. Choose one accent nail and apply a tiny amount of gold foil adhesive or a strip of gel where you want the line. Place gold foil so it forms a single narrow strip - about 0.5 to 1 mm wide - starting at the outer corner of the blue tip and going down one-third of the nail. Press with a silicone tool so it grabs, then remove excess foil carefully. Top coat over the foil line gently to avoid spreading it.
Editor's noteCut the foil strip with scissors first - it keeps the line narrow on short nails.
Watch outAvoid foil on every nail - it makes the set look busy and shrinks the nail bed visually.
12. Royal Blue French with Ombre Blue Fade at the Tip Edge
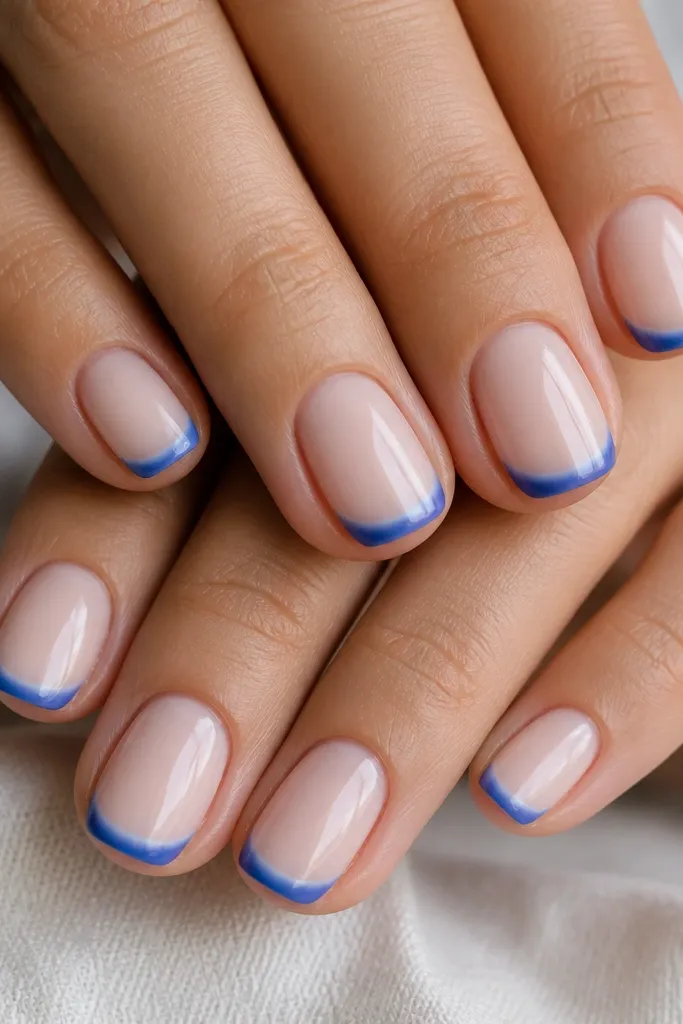
A blue fade keeps the tip from looking like a solid block, which is the biggest problem on small nail spaces. When the outer edge is deeper and the center is lighter, the nail reads longer because there's a gentle highlight toward the free edge. Royal blue still stays the star, but the gradient makes it feel softer and more wearable. This flatters hands with slightly wider nail beds because the fade visually narrows the tip. If you want something that looks salon-done but not loud, this is it.
Apply nude base and cure/dry. Paint a thin arc of royal blue at the very edge of the tip, focusing on the outer perimeter. With a makeup sponge or ombre brush, dab a lighter blue or the same blue thinned with a clear gel to fade inward from the side walls toward the center. Keep the center of the tip slightly lighter so it looks like a highlight. Clean up the smile line edges with a brush dipped in alcohol, then seal with glossy top coat.
Editor's noteUse a tiny sponge piece - large sponges create a foggy gradient on short nails.
Watch outAvoid heavy blending over the whole nail - the fade should stay in the tip zone.
13. Royal Blue French with Clear Jelly Center Strip
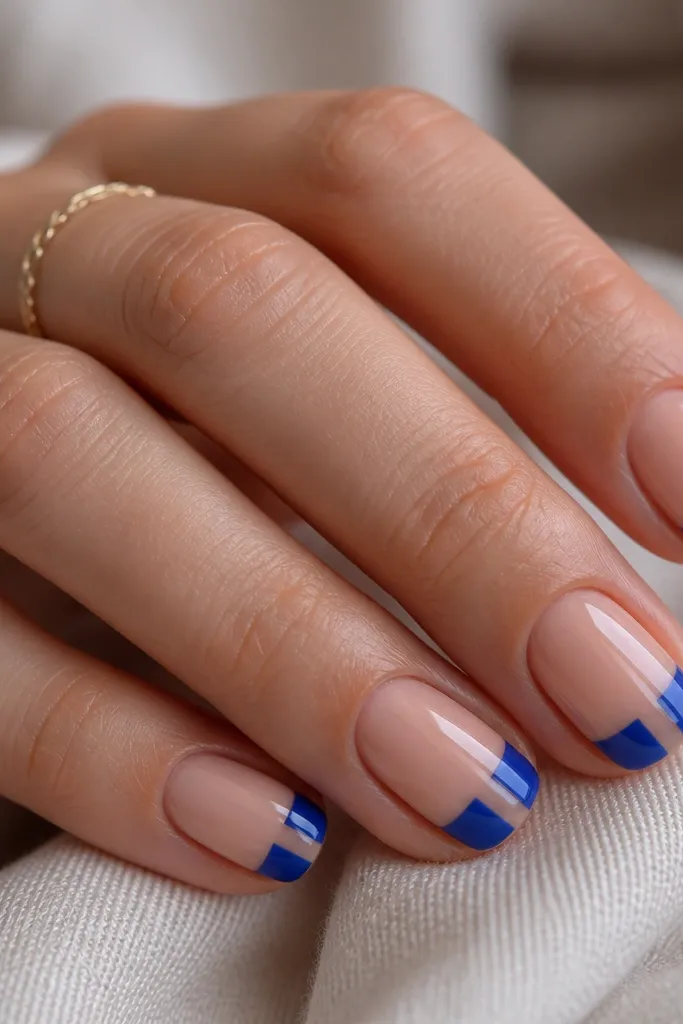
This is the cleanest way I've found to create negative space that still looks "filled in." The clear jelly center strip stops the tip from becoming one solid color stripe, which is what makes short nails look shorter. Royal blue on the sides adds contrast, while the clear center adds dimension and keeps the nail feeling light. This flatters nearly everyone because it's symmetrical and simple. It also looks great with a glossy top coat because the jelly catches light at the free edge.
Start with a smooth nude base so the clear strip has a nice background. Paint thin royal blue French arcs on both sides of the free edge, leaving a centered gap. Apply a clear jelly gel or thick clear top coat in the center strip only, using the brush to keep it straight and narrow - about 1 mm wide. Cap the blue and jelly edges lightly so the transition feels smooth. Cure fully, then apply glossy top coat over everything to lock in shine.
Editor's noteIf your clear strip floods, wipe the brush on a paper towel before you place the jelly.
Watch outAvoid making the clear strip too wide - it turns into a gap instead of a lengthening detail.
14. Royal Blue French with Tiny Diagonal Accent at Outer Corner
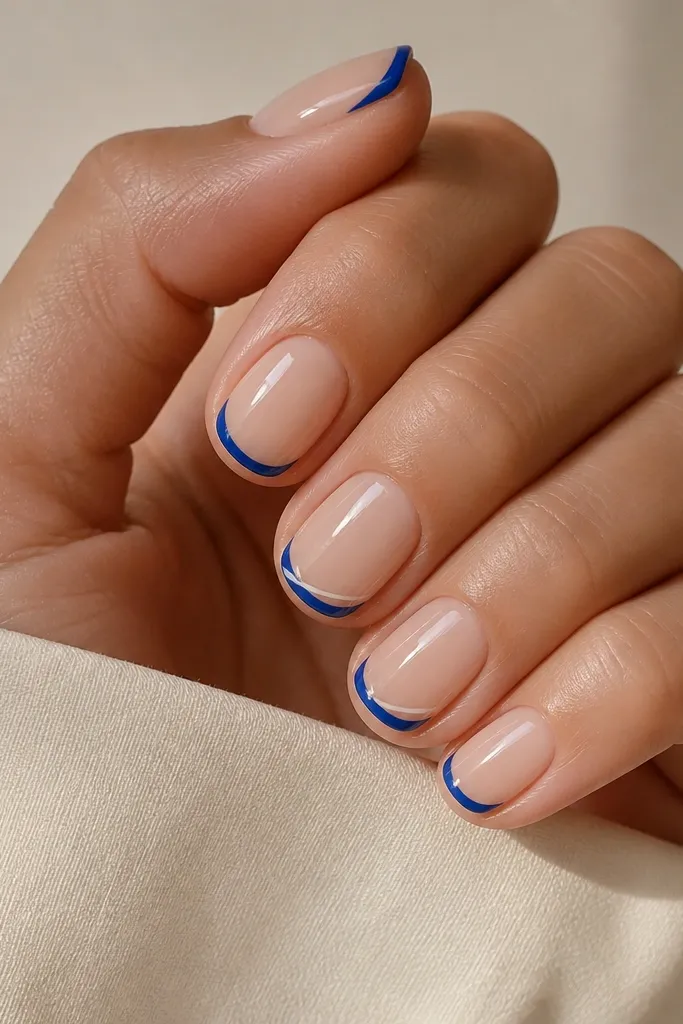
A diagonal accent changes the way the nail reads because it adds a little angle. When it starts at the outer corner of the royal blue tip, it visually guides the eye toward the free edge, which is what you want on short nails. The white line keeps it crisp and bright, without adding bulk like glitter would. This looks good on short square and squoval shapes because the diagonal sits cleanly against the side walls. It's also a great choice if you want a "graphic" manicure that still feels wearable.
Apply nude base and paint thin royal blue French tips on all nails. Choose one accent nail and use a nail art striping brush to draw a tiny diagonal white line - start at the outer corner of the blue tip and angle down about 2-3 mm. Keep the line thin, roughly the width of a hairline. If you want extra definition, add a second parallel line only 0.5 mm away, but only if it stays neat. Finish with glossy top coat, making sure the diagonal stays sharp and doesn't spread.
Editor's notePractice the angle on a paper nail guide first - your wrist will remember the slant.
Watch outAvoid thick diagonal lines - they cover too much of the small tip area.
15. Royal Blue French with Gold Micro Triangle at Tip Center
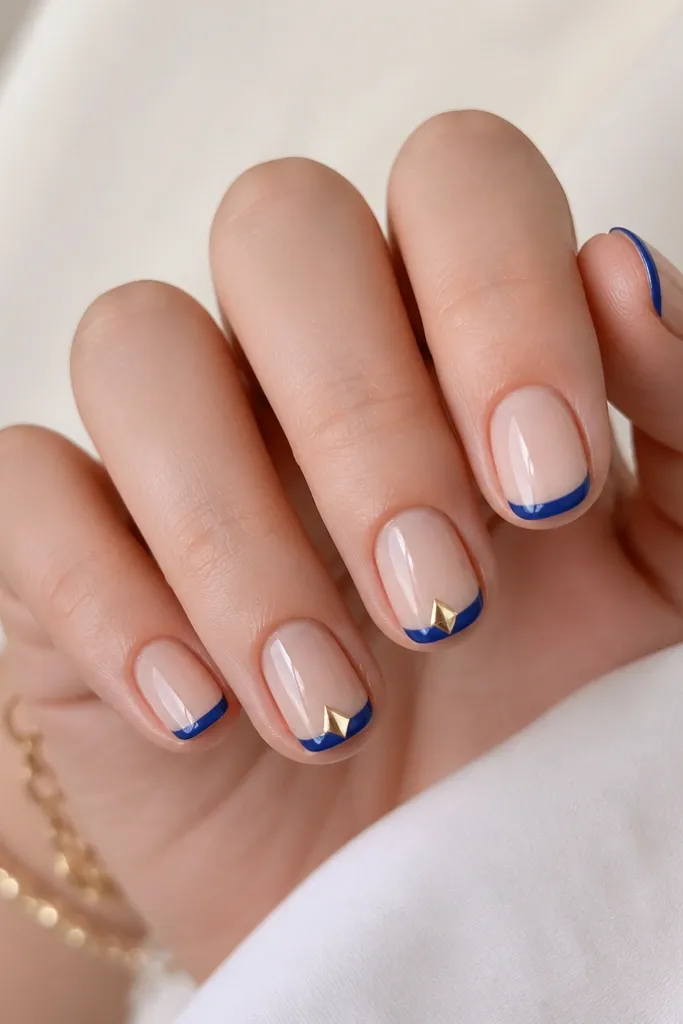
A micro triangle is graphic, but it works on short nails because it's tiny and placed dead center. The triangle points downward toward the free edge, which reinforces the length illusion you get from a narrow French tip. The gold adds warmth and keeps royal blue from looking too cold or flat. This is flattering for hands that look best with clean, geometric shapes - especially if you like minimal nail art. It also looks good for workdays because it reads as "detail," not "decoration."
Start with a nude base and paint thin royal blue French tips using guides or careful freehand. On two nails, add a gold micro triangle at the tip center. You can do this with a tiny gold foil piece pressed into place or with a gold gel/polish triangle painted by hand. Keep the triangle small - about 1.5 to 2 mm wide at the base - and point it toward the free edge. Seal with glossy top coat, and cap the edges so it doesn't catch on fabric.
Editor's noteUse gold foil if you want the triangle to look crisp instantly - painting triangles can get wobbly on short nails.
Watch outAvoid a large triangle - it overwhelms the tip and makes the nail look shorter.