
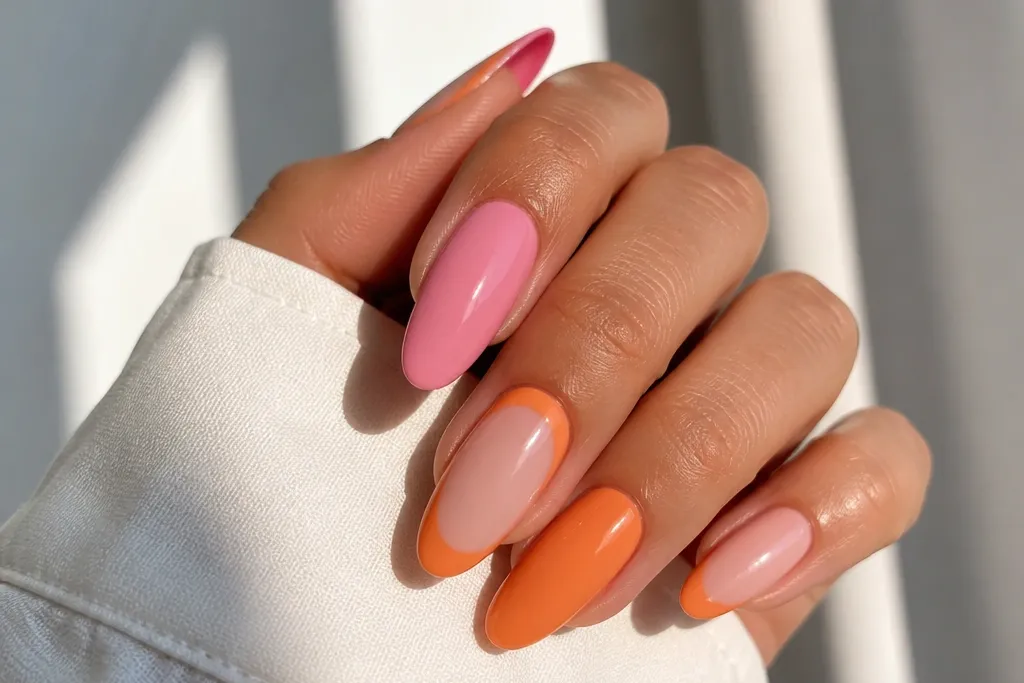
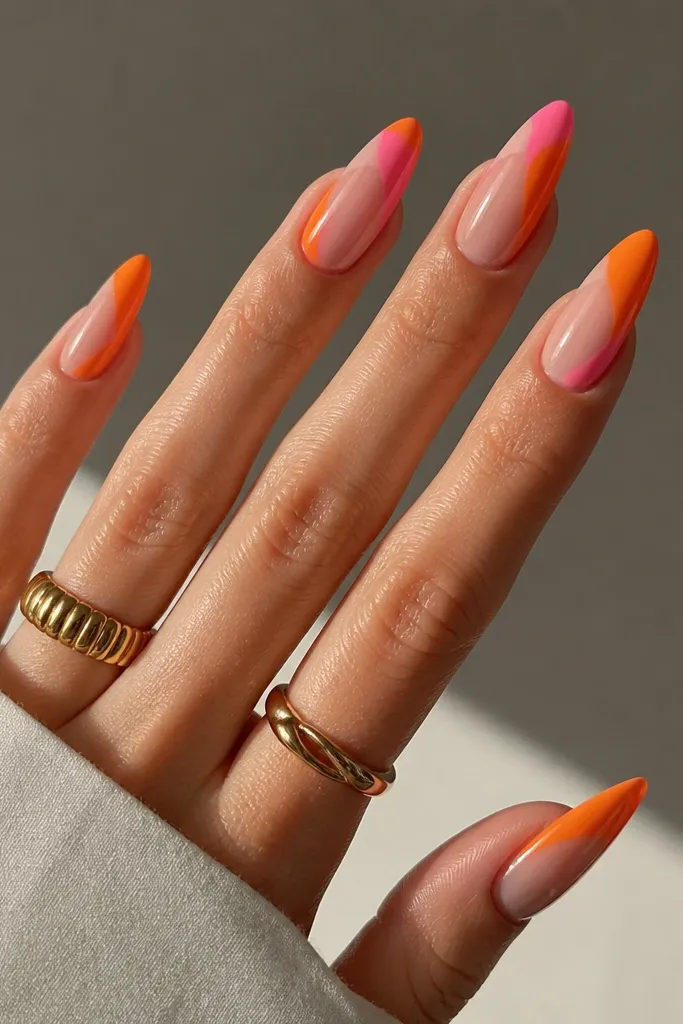
1. Sunset French Fade on Medium Almond
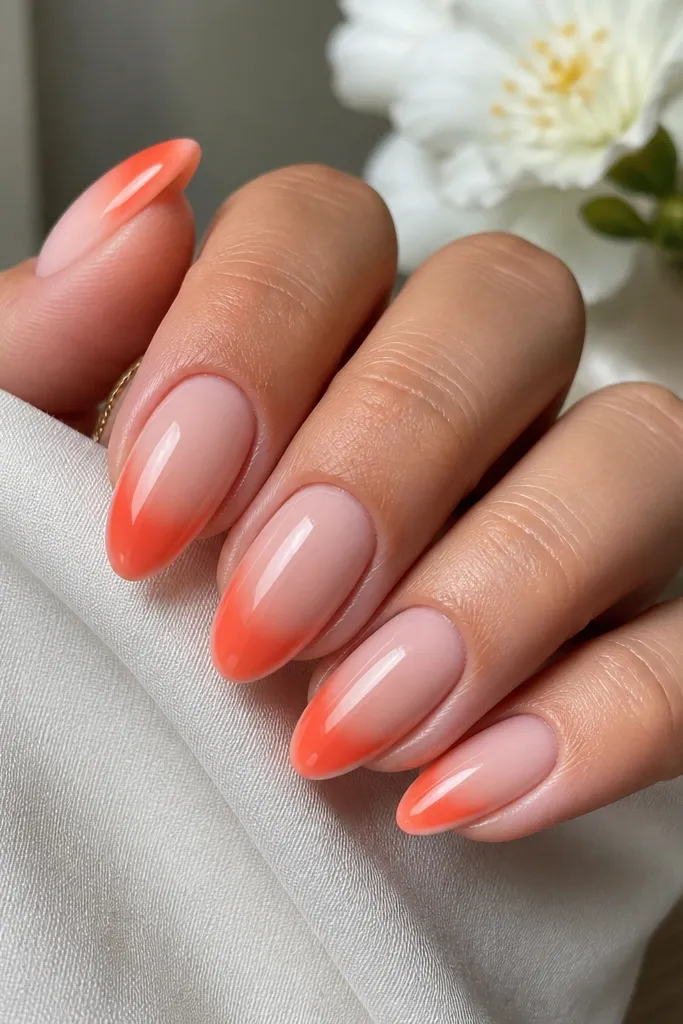
This one looks like a sunset without trying too hard. You get a milky pink base that flatters every skin tone, then a curved French fade that sits right where your nail naturally bends. I’ve worn it on fair and deep skin — the contrast stays clean because the base is sheer and the orange is placed only at the tip. The fade is the whole point: it should look airbrushed, not painted in stripes.
Start by having your tech build the acrylic with a milky pink base layer and keep the free edge about 3/8 inch. Then paint the smile line first — a thin coral outline where the tip starts — and blend tangerine orange from there toward the very edge. Make the fade thicker at the outer corners and lighter in the center so it follows the almond curve. Finish with a glassy top coat and cure fully so the surface reflects light smoothly.
Editor's noteAsk for a “reverse gradient” feel — lighter in the center, stronger at the sides — it makes the nails look longer.
Watch outAvoid a hard, straight French line; it reads like a sticker instead of a fade.
2. Orange Cuticle Glow with Bubblegum Pink Base
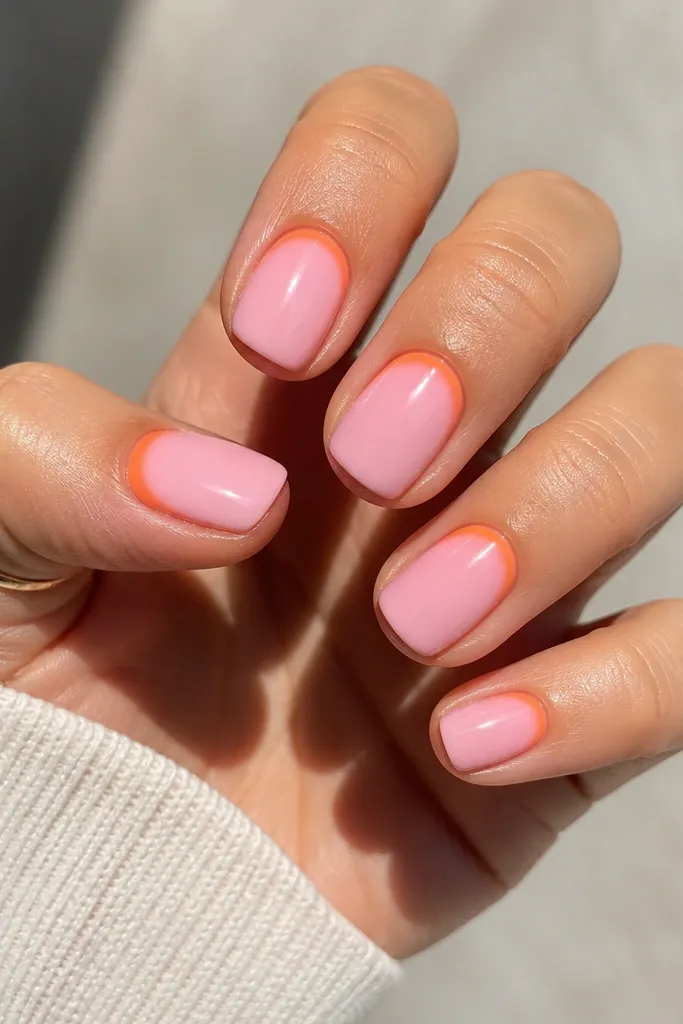
Cuticle-focused designs make your hands look more lifted. Bubblegum pink gives a fresh, friendly vibe, and the orange crescent adds warmth without covering the whole nail. This works especially well if your nail beds are shorter because the orange line visually “frames” the nail and draws the eye upward. I like it for everyday — it looks styled even when you wear no jewelry.
Start with a bubblegum pink acrylic overlay, kept slightly sheer near the cuticle so it looks like your natural nail. Then use an orange gel to paint a narrow crescent directly along the cuticle line, leaving a thin pink gap between the crescent and the sidewalls. Blend the orange outward with a dry brush so it fades by mid-nail. Seal everything with a thick glossy top coat so the cuticle glow looks smooth.
Editor's noteUse a liner brush — 000 size — and keep the crescent width under 1mm for a crisp glow.
Watch outSkip covering the entire cuticle; full orange around the base looks heavy and can look messy when it grows.
3. Pink Marble Veins Over Tangerine Base
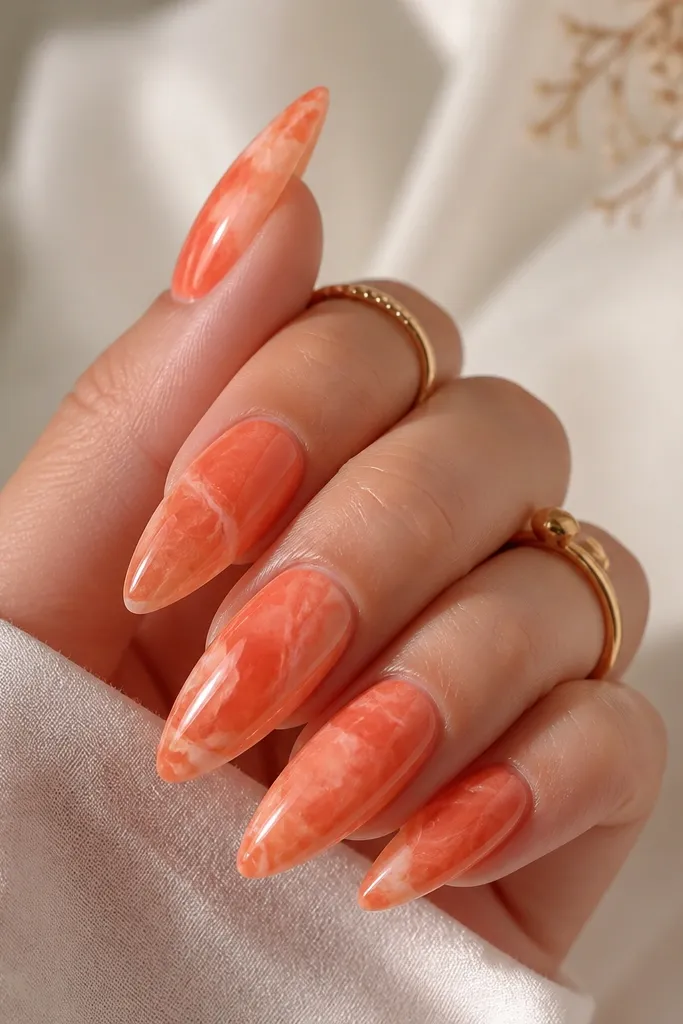
This is the combo for people who want movement. The tangerine base stays bright, and the pink marble veins give it that “designer stone” look. It flatters warmer undertones because orange is already your friend, and the pink veining keeps it playful instead of aggressive. The marble works best on longer almond because the veins need space to arc naturally with the nail shape.
Start with a smooth tangerine orange base layer, slightly translucent so it doesn’t look like a solid sticker. Then drag thin pink gel lines through the surface — don’t outline the whole nail, just create a few flowing veins. Use a tiny dot tool to break the lines in spots, and add soft white-pink wisps to make the marble feel airy. Top coat with a high-gloss layer and cap the free edge so the veins stay locked in.
Editor's noteKeep your marble veins uneven — one thick, two thin, one broken — that irregularity is what sells it.
Watch outDon’t make perfectly symmetrical veins; symmetry reads cheap on marble nails.
4. Orange Jelly Tips with Milky Pink Base
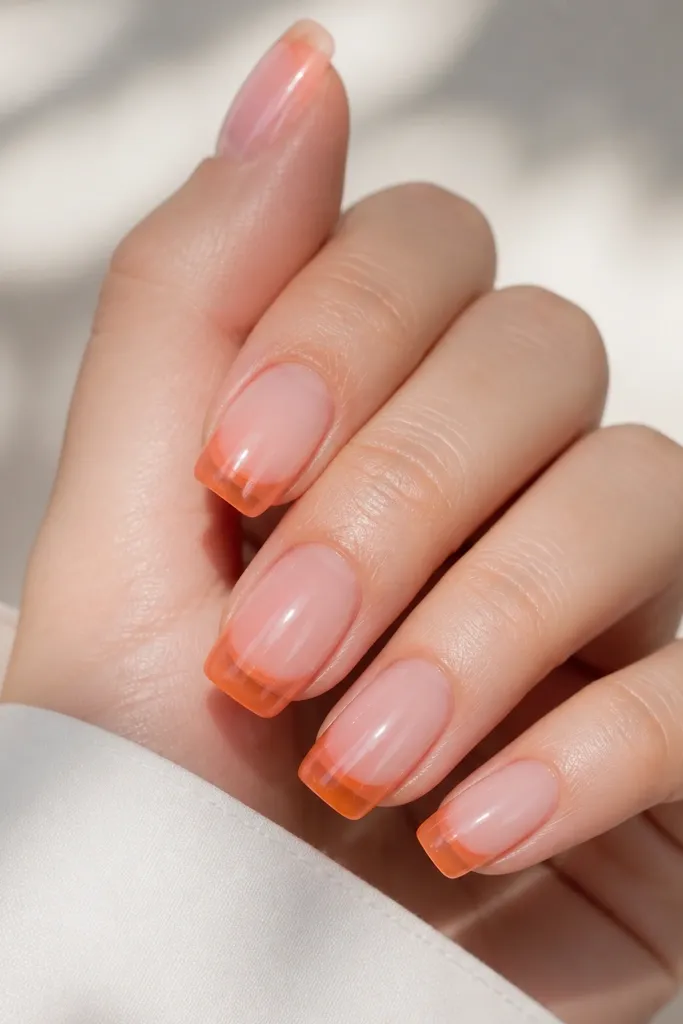
Jelly tips look glossy even before you add any extra art. The milky pink base makes the orange feel softer, and the translucent layering creates depth like candy glass. This is a flattering look for short nails because the jelly effect tricks the eye into thinking the tip is smoother and longer. It also looks great on hands with visible ridges because the finish hides texture.
Start with a milky pink base that’s opaque in the center but slightly sheer near the cuticle. Then build the jelly tips by layering tangerine orange gel in three thin coats, curing between each layer. Leave the very edge slightly more saturated, and keep the middle of the tip more see-through. Cap with a glossy top coat and gently file the sides so the jelly edge looks smooth, not bumpy.
Editor's noteUse thin layers instead of one thick one; thickness makes jelly tips look cloudy.
Watch outSkip matte top coat on this design — it kills the jelly illusion.
5. Two-Tone Sidewall Stripes
Sidewall stripes make nails look sharp and clean without heavy art. The sheer nude-pink base matches your skin so the orange reads like a highlight, not a block of color. Tangerine and coral together give you warmth from two angles — it looks intentional even when you wear it to work. I use this when someone wants color but doesn’t want rhinestones.
Start with a sheer nude-pink base that’s smooth and evenly cured. Then place a thin tangerine stripe on one sidewall and a slightly thinner coral stripe on the other, keeping the stripes straight and parallel. Leave a tiny gap of base color between the stripe and the sidewall edge so it looks crisp. Finish by sealing with a glossy top coat and lightly buff the surface to remove any streaks from the brush.
If your stripes wobble, stop and wipe the brush — clean straight lines matter more than perfect symmetry.
Don’t paint stripes across the whole nail face; sidewall placement is what makes it look luxe.
6. Pink Ombre with Orange Floating Speckles
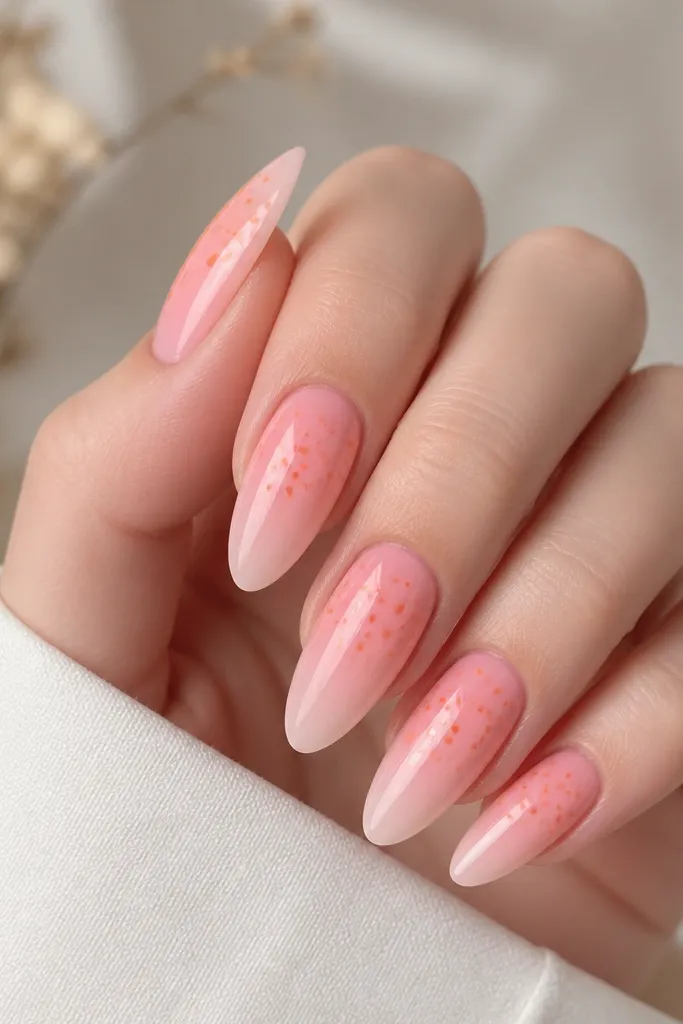
This design looks airy because the orange stays in small dots instead of a full gradient. The pink ombre gives the nail a smooth base, and the orange speckles add sparkle without glitter. It’s flattering because the main color is still pink, which brightens hands, while the orange is like a highlight. I like this for spring events and casual nights out.
Start with a pink ombre base: build a slightly darker bubblegum pink near the cuticle and fade toward a sheer pink at the tip. Then use a dotting tool to place orange speckles — keep them mostly in the upper half and vary sizes from micro dots to slightly larger circles. Add a few speckles near the sidewalls so the pattern looks balanced on the almond curve. Seal with glossy top coat, and avoid piling extra gel over the dots so they don’t smear.
Let the ombre cure fully before speckling — it keeps the dots crisp.
Don’t overdo the speckles on every nail; pick 4-5 nails for the pattern and keep the rest clean.
7. Orange Mirror Chrome Outline on Pink Base
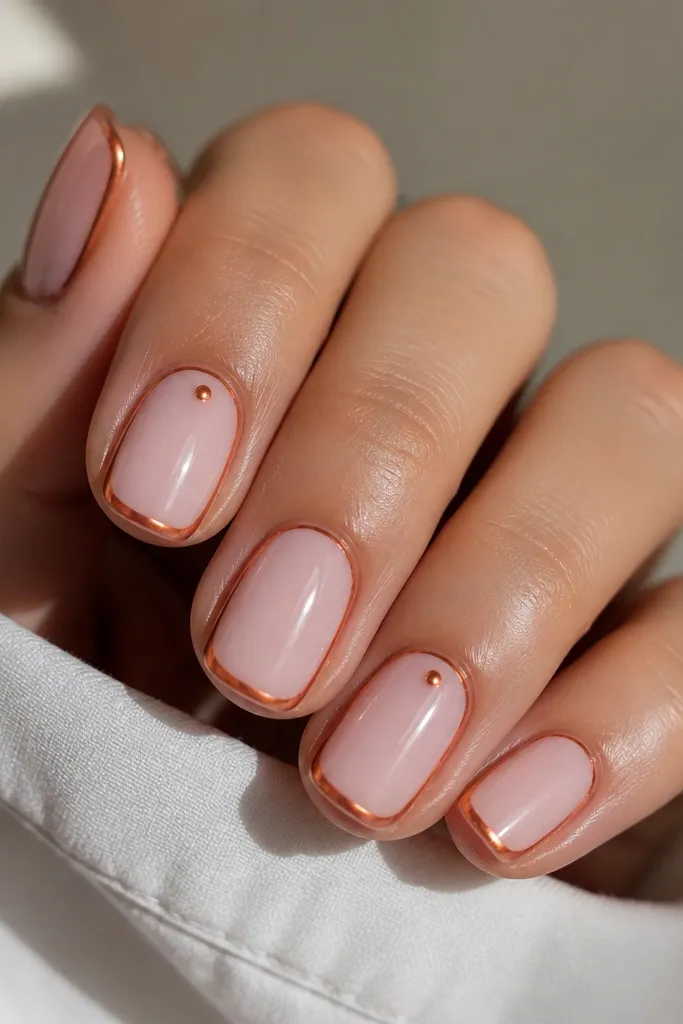
Mirror chrome outlines look expensive because they catch light like jewelry. The pink base keeps it sweet, and the orange chrome adds a warm metal edge that stands out in photos. This is great if you want the mani to look “done” for events but still wearable day-to-day. It flatters most skin tones because pink is the anchor and the chrome is controlled to lines and dots.
Start with a smooth soft pink acrylic or gel base. Then apply a thin strip of orange chrome gel or adhesive outline along the perimeter — follow the natural nail edges, not a perfect rectangle. Dust chrome powder over the outline and press lightly so it grabs only where you placed product. Add one small chrome dot near the cuticle on two nails for variation, then top coat carefully (use a top coat compatible with chrome so it doesn’t dull).
Editor's noteUse less outline than you think — a thin border reads sharper than thick metallic paint.
Watch outDon’t cover the whole nail in chrome; it turns the mani into a solid mirror, not a stylish outline.
8. Pink and Orange Checker Accent Tips
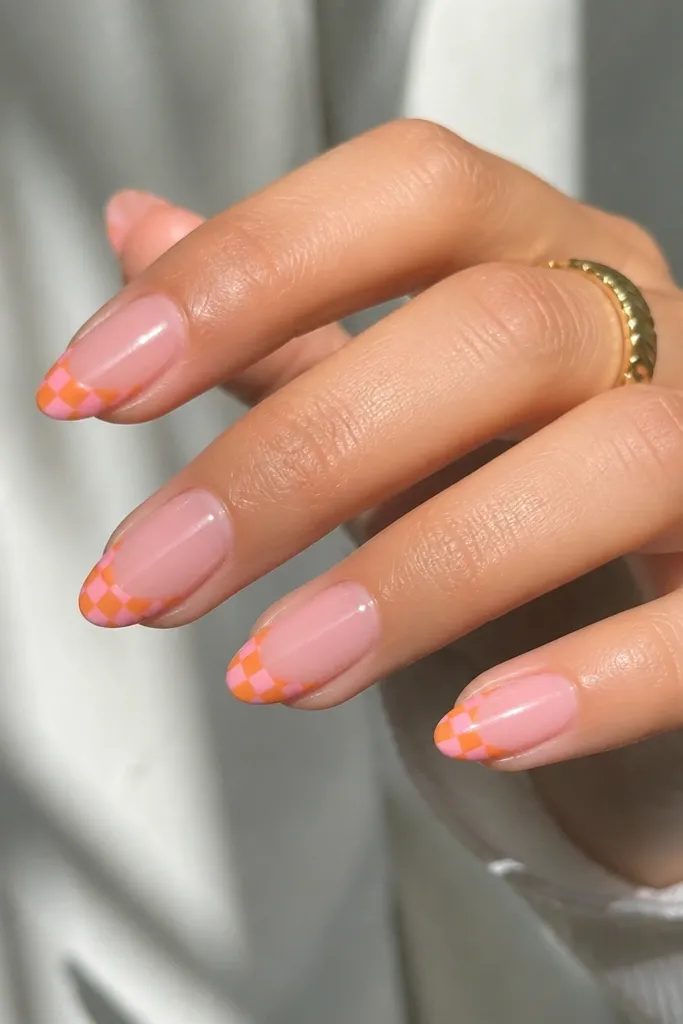
Checker tips look playful but still neat when the pattern band is small. The milky pink base makes the colors pop without turning loud, and the orange/pink squares create a graphic moment at the tip. This is flattering on medium almond because the tip area is wide enough for small squares. I recommend this if you like nail art but you hate heavy 3D pieces.
Start with a milky pink base and keep it glossy. Then paint a thin orange band at the very tip area, about 2-3mm tall, and let it cure. Use a fine striping brush to add small pink squares inside that orange band, alternating squares across the width. Finish with a glossy top coat that fully covers the edges of the squares so they don’t catch on hair.
Editor's noteUse a nail art tape strip to block straight lines while you paint the squares.
Watch outSkip large squares; big checks make tips look childish fast.
9. Orange Swirl Lines on Milky Pink
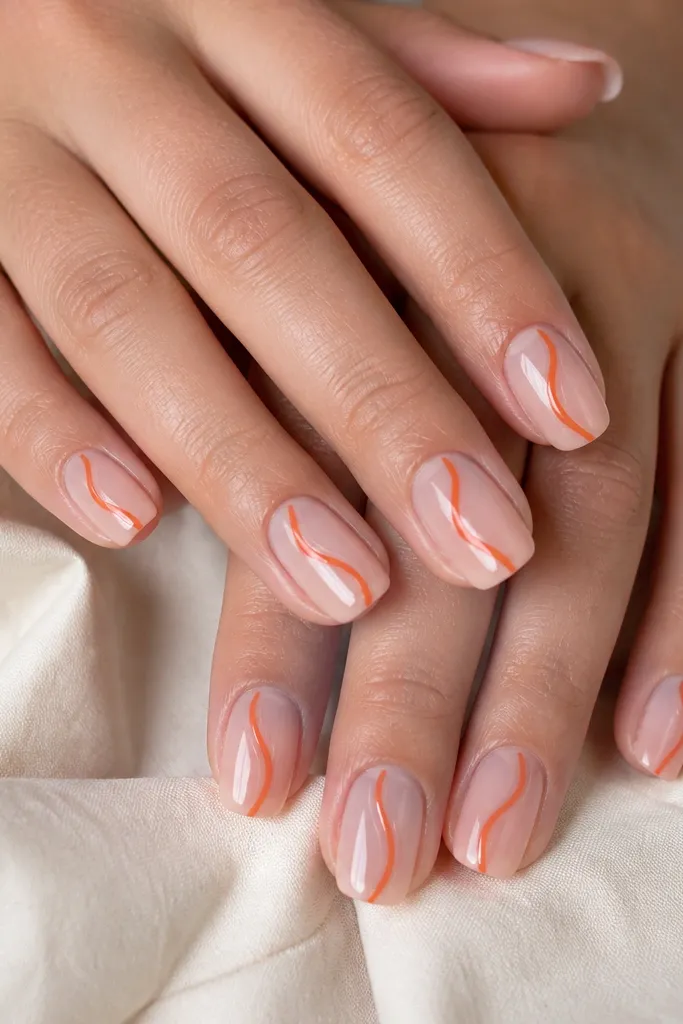
Swirl lines are one of the easiest ways to make this color combo look custom. The milky pink base keeps things soft, and orange swirls give you motion without clutter. This works well on short nails because the design stays light and doesn’t need a lot of surface area. If your nails curve slightly, the swirls help hide that curve because they follow it.
Start with a milky pink base that’s opaque enough to look smooth, not streaky. Then use a striping brush to draw one orange swirl line that begins near the cuticle, curves through the middle, and ends near the sidewall. Add a second thinner swirl line on a few nails only, so the set feels intentional. Seal with glossy top coat and make sure the swirls are fully coated so they stay slick.
Editor's notePractice the swirl on a spare nail tip — the curve is muscle memory once you find your wrist angle.
Watch outDon’t fill the swirl area with extra dots; it makes the nail busy.
10. Pink and Orange Half-Moon Negative Space
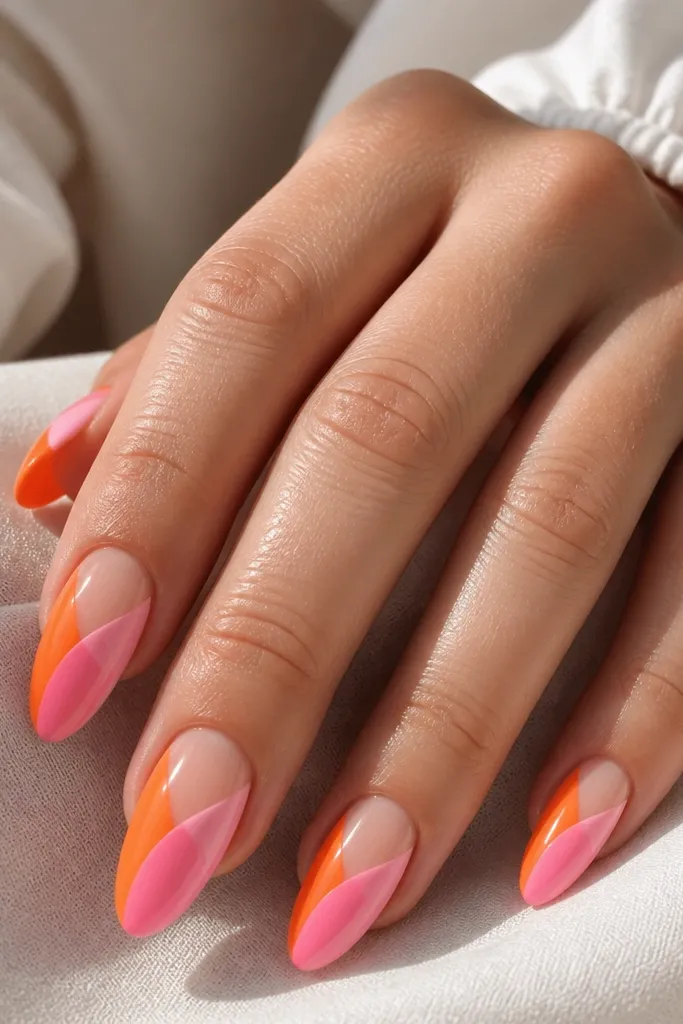
Negative space makes acrylic art look clean instead of painted over. The half-moon cutout keeps the center of the nail light, and the pink/orange split gives a graphic, modern look. This flatters hands because it visually lengthens the nail bed and makes the cuticle area look intentional. I love it for birthdays and summer dinners because it looks photo-ready without glitter.
Start with a nude-pink base and keep the cuticle area slightly underfilled so you can control the negative space. Then paint a half-moon area in orange on one side of the cuticle and pink on the other, leaving the center cutout clear. Use a thin brush to define the edge of the half-moon so it doesn’t bleed into the cutout. Finish with a glossy top coat and cap the free edge to keep the design from chipping at the tip.
Use a cuticle stencil or a small round brush to get a smooth half-moon curve.
Don’t make the half-moon too big; oversized cutouts make the nail look like it’s missing polish.
11. Orange Gradient Base with Pink Outline Tips
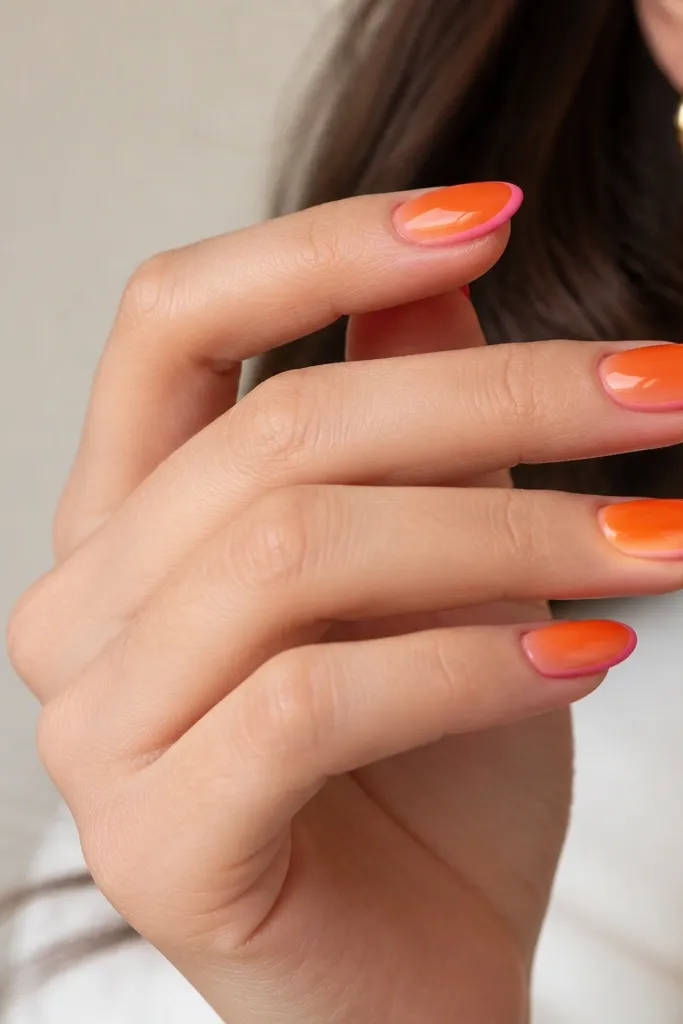
This design flips the usual rule and it looks sharp. Orange as the main base gives warmth, and the thin pink outline tip makes the nail look polished and structured. It flatters cooler undertones too because the pink outline adds balance. I’ve seen this look great on both short almond and medium almond because the outline defines the tip shape.
Start by building an orange gradient base: deepen the orange near the cuticle and blend toward a lighter peach at the tip. Then, after curing, draw a thin pink line along the smile curve at the tip, leaving a small gap between the line and the edge. Keep the outline consistent thickness so it looks like a border. Top coat with gloss and make sure the line is fully sealed so it won’t snag.
Editor's noteUse a gel liner and wipe the brush edge on the palette so the outline line stays thin.
Watch outAvoid thick outline lines; they make the manicure look heavy and mask the gradient.
12. Pink Base with Orange Galaxy Micro-Glitter
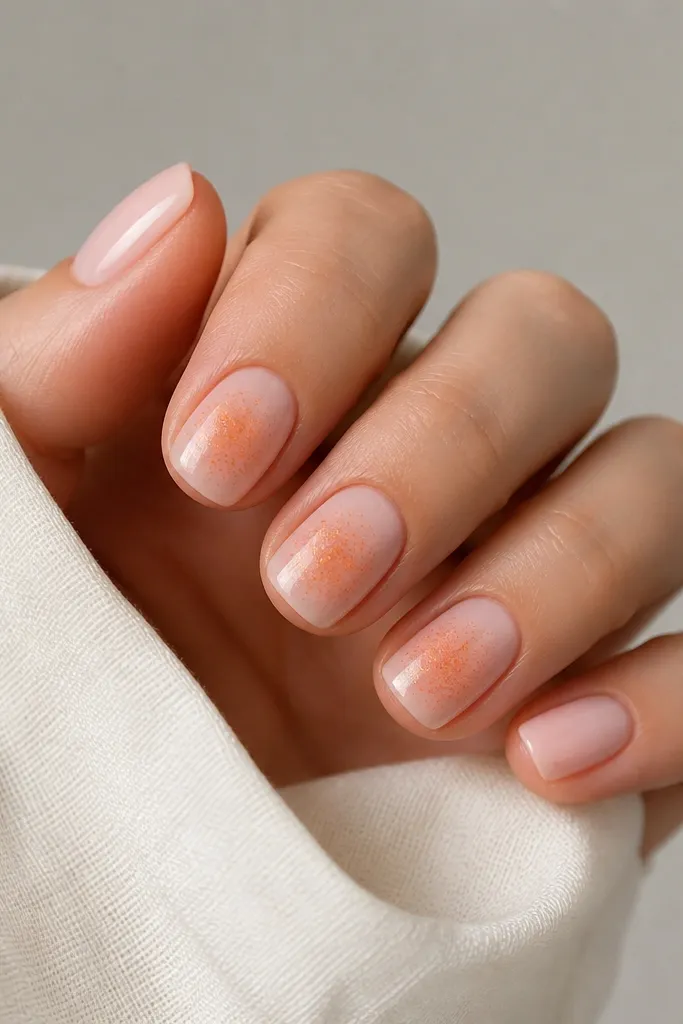
Galaxy glitter looks best when it’s controlled, not scattered everywhere. Pink keeps it sweet, and orange micro-glitter gives a warm starfield effect that still feels wearable. This is a great choice if you want sparkle but you hate chunky glitter that catches on sweaters. It also photographs well because the micro particles catch light in tiny flashes.
Start with a soft pink base and fully cure it. Choose 2-3 nails for the galaxy and apply orange micro-glitter in a small cluster near the center, then gently feather outward with a clear gel so it fades. Add a couple of tiny dot “stars” using orange glitter gel with a dotting tool. Seal with a glossy top coat in a thicker layer over the glitter area so the texture feels smooth.
Feather with clear gel, not more glitter — it makes the fade look natural.
Don’t use chunky glitter; it makes the galaxy feel scratchy and sloppy.
13. Orange and Pink Lipstick Swatch Accent
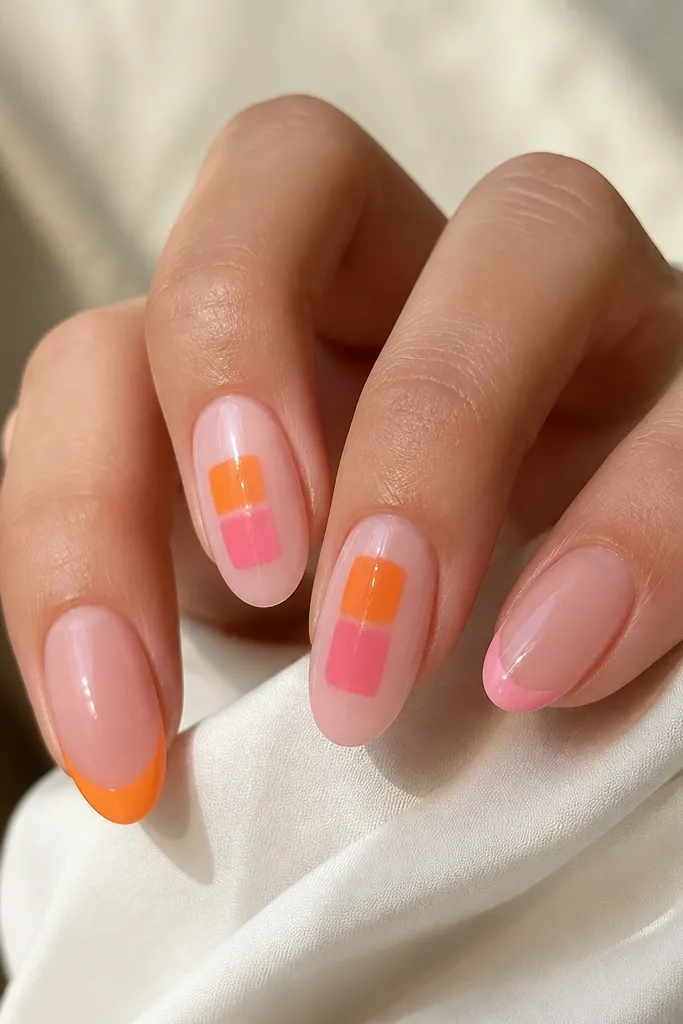
This is a fun “beauty products” look that still feels clean. The glossy clear-pink base makes it modern, and the swatch blocks give you a graphic pop without needing tiny details. It flatters any skin tone because the base is neutral and the swatches are bold but contained. I love it for people who wear makeup and want their nails to match the vibe.
Start with a clear-pink glossy base on all nails. Pick two accent nails and paint a rectangular orange swatch on the lower half, then stack a pink swatch slightly offset on top so the edges overlap. Soften the edges with a small brush dipped in clear gel so the swatches look like ink, not stickers. Finish with top coat over everything and cap the free edge.
Editor's noteOffset the swatches by 1-2mm — perfect alignment looks like a template.
Watch outSkip hard, unblended edges — that’s what makes it look like you printed a design instead of painted nails.
14. Pink Ombré Tip with Orange Outer Edge
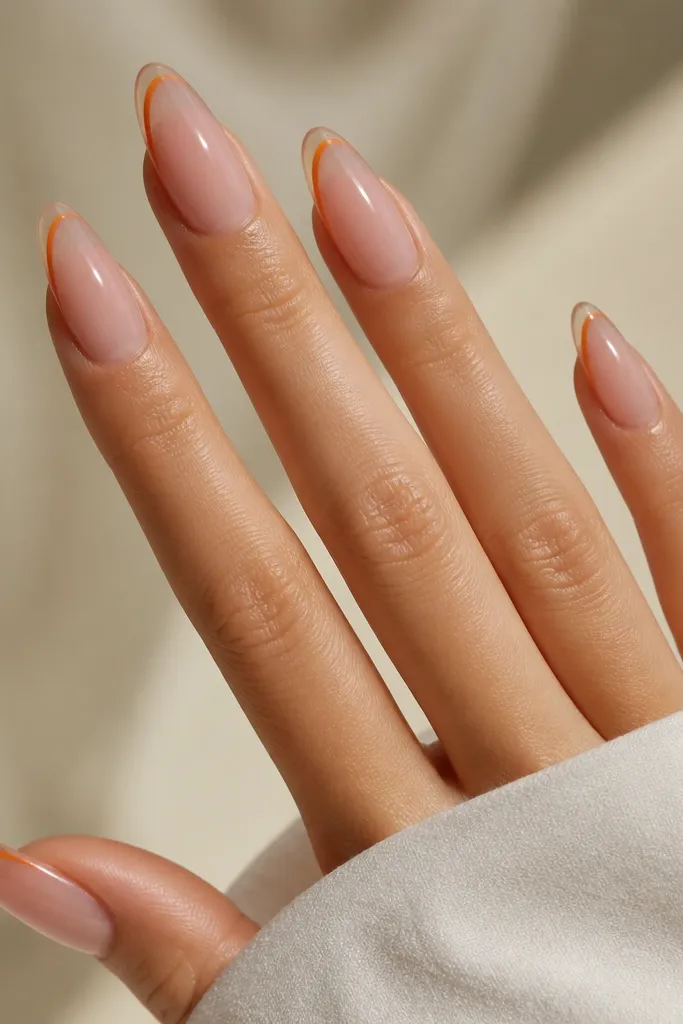
This is my go-to when someone wants pink to stay the main character. The pink ombré tip gives softness, and the orange outer edge adds a “sun-kissed” frame without covering the whole tip. It’s flattering because the orange sits where your eye already reads the nail shape, so your nails look longer and cleaner. It also works well for formal events because it stays minimal.
Start with a milky pink base that’s smooth and glossy. Then create an ombré at the tip by fading pink down toward a sheer base, keeping the center of the tip lighter. Use a liner brush to paint a thin orange stripe along the outer edge only — from mid-tip to the very end. Seal with a thick glossy top coat and file the edges so the stripe doesn’t catch.
Editor's noteKeep the orange stripe under 1mm — thin framing looks intentional.
Watch outDon’t add orange to the inner edge too; it breaks the “frame” effect.
15. Orange Blossom French with Tiny Pink Dots
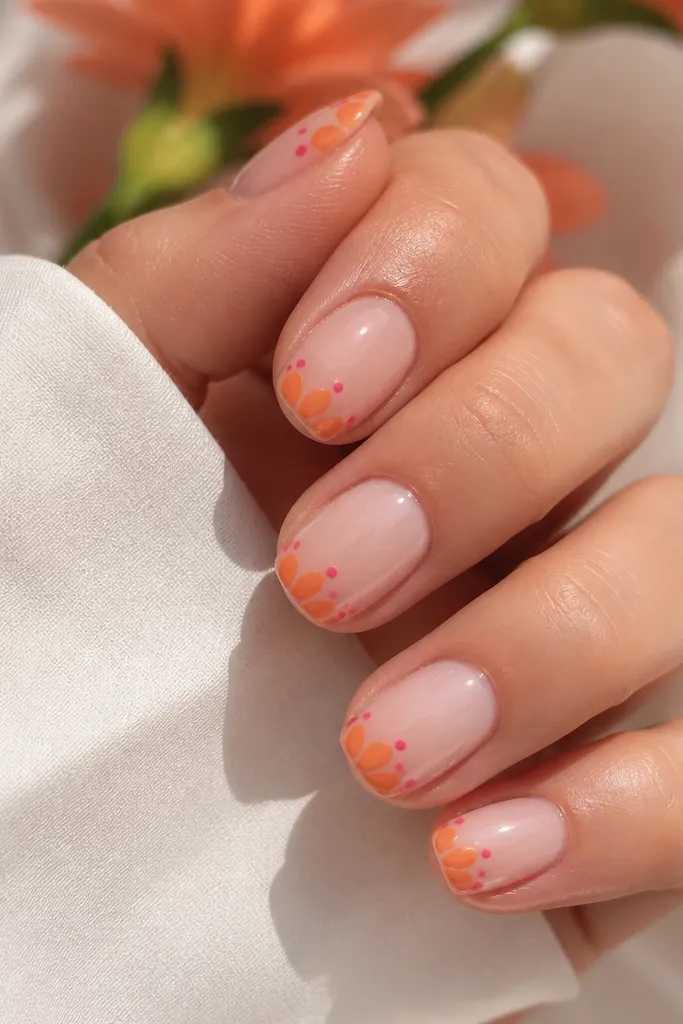
Blossom French feels cute without turning into cartoon art. The orange tip shape looks like little petals, and the tiny pink dots add a playful finish that still looks neat. This flatters short nails because the design stays concentrated at the tip and doesn’t require lots of space. I’ve done this for weddings and it still looks fresh because it’s not heavy glitter.
Start with a milky pink base and keep the surface smooth. Then paint an orange tip shape that has two or three slight “petal humps” across the smile curve, like a soft flower edge. Add tiny pink dots right under the orange edge on two nails for contrast. Finish with a glossy top coat and cap the tip so the petal edges don’t chip.
Editor's noteUse a dotting tool for the petals too — tap lightly to create the bumps instead of trying to freehand curves.
Watch outAvoid big dots; tiny dots look like decoration, big dots look like mistakes.
16. Pink Base with Orange Side Fade and Clear Center
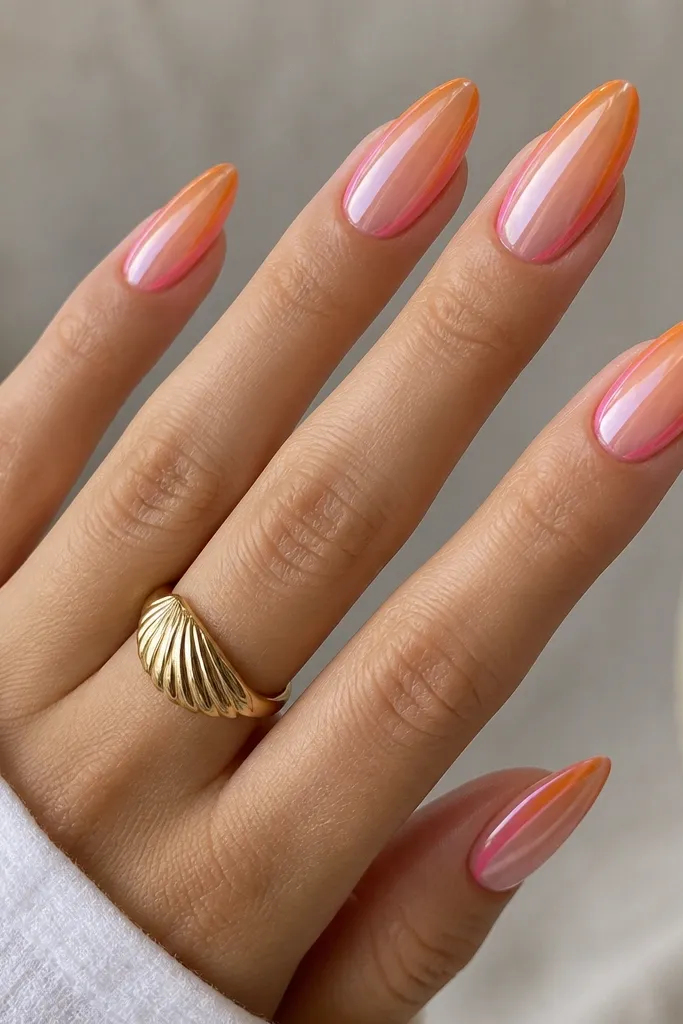
This design uses negative space like a frame, so it looks modern and clean. The pink base softens everything, while the orange side fade adds warmth without filling the whole nail. The clear center panel makes the nail look longer and slimmer, which is a win if you have wider nail beds. I’ve seen it look great on medium almond because the center panel follows the nail’s natural symmetry.
Start with a clear or nude base and mask the center area with a thin strip of tape or gel barrier so it stays clear. Apply pink gel on both sides and blend up toward the cuticle. Then add orange on the outer edges and fade inward toward the clear center, keeping the fade soft. Remove the barrier carefully after curing and finish with glossy top coat.
If you don’t have barriers, use tape and pull it slowly — fast removal smears edges.
Don’t flood the clear center with color; it ruins the slimming effect.
17. Orange and Pink Diagonal Checker Half Cut
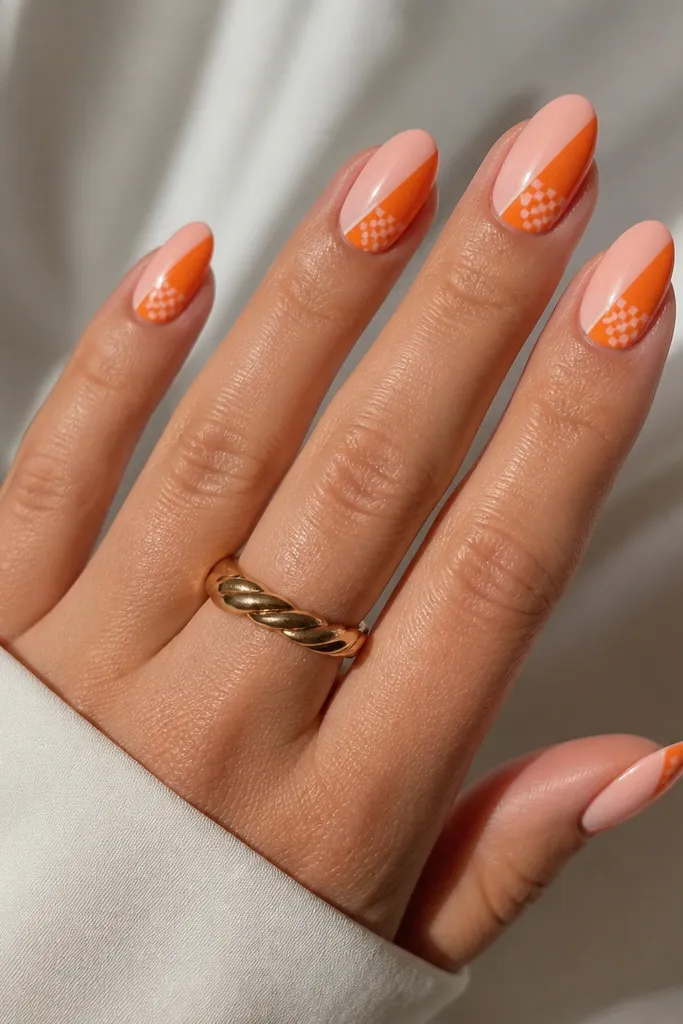
Diagonal splits look bold and clean when the lines are sharp. The milky pink half keeps it flattering, and the orange half adds warmth. The tiny checker triangle at the tip gives texture without making the whole nail look busy. This is a strong choice for nights out because it reads like nail art even from a distance.
Start with a milky pink base across the whole nail, then paint a diagonal half in tangerine orange using a striping brush. Let it cure so the split stays crisp. On the orange side, create a small triangle at the tip and add tiny alternating squares in pink and orange, keeping the triangle about 2mm tall. Seal with glossy top coat and cap the diagonal edges to prevent lifting.
Use a striping brush with gel on one side only — it keeps the diagonal edge clean.
Avoid fuzzy diagonals; if the line isn’t crisp, it looks like smudged nail polish.
18. Orange Ombre with Pink Heart at the Cuticle
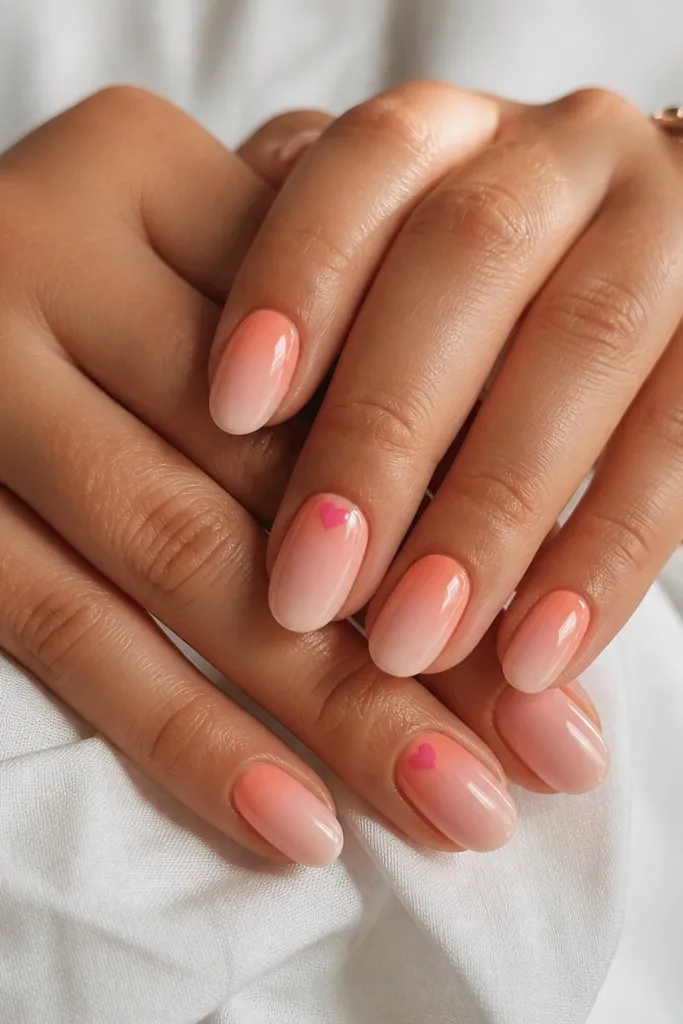
Hearts at the cuticle look sweet but not childish when the heart is small and centered. The orange-to-pink ombré gives a soft romantic background, and the pink heart ties the whole set together. I like this for date nights because it looks playful in close-up shots. It also flatters short nails because the ombré handles the length illusion while the heart stays compact.
Start with an orange ombré base: place orange at the cuticle area and blend into milky pink toward the tip. Keep the gradient smooth and avoid harsh lines. Then pick two accent nails and paint a tiny pink heart centered at the cuticle — about the size of a sesame seed. Outline the heart lightly if needed, then fill it in with pink gel and cure. Finish with glossy top coat and cap the heart area so it doesn’t feel raised.
Editor's noteCenter the heart by measuring the nail width — eyeballing can make it drift.
Watch outSkip big hearts; large hearts crowd the cuticle and look bulky.
19. Pink Gloss Base with Orange Micro-Line Art
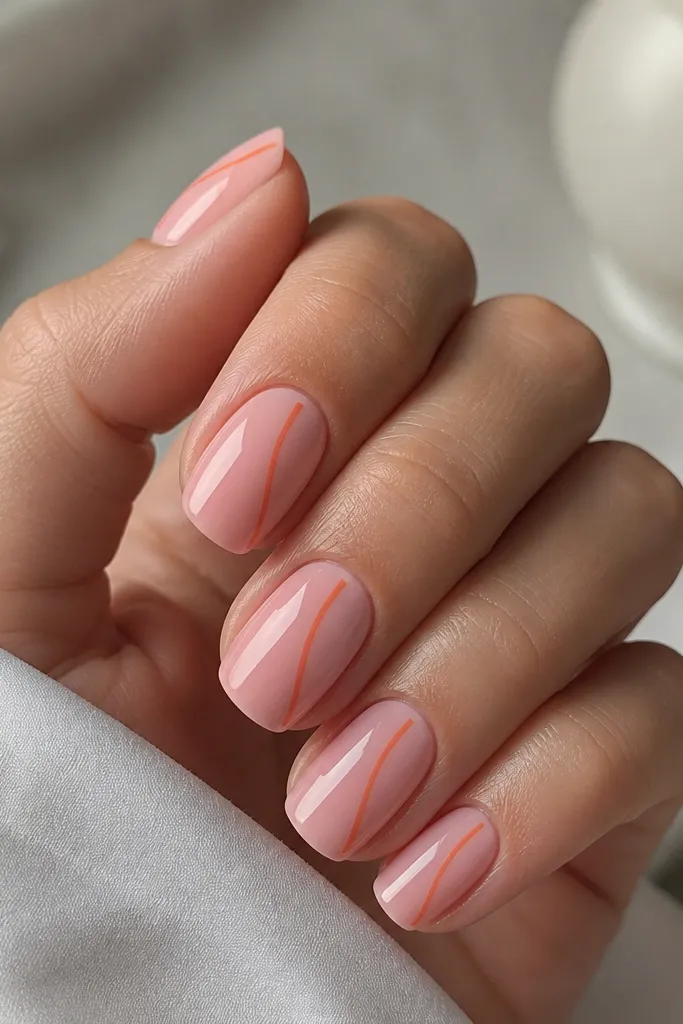
Minimal line art makes this color combo feel grown-up. The glossy pink base is smooth and flattering, and the orange micro-lines add just enough contrast to look stylish. This works great if you want a mani that matches both casual outfits and office wear. I also like it for people who hate thick layers because line art stays thin and doesn’t feel bulky.
Start with a fully opaque glossy pink base, cured and smooth. Use a fine liner brush to draw one straight orange line from mid-nail toward the tip on each nail. Then add one curved line that connects toward the sidewall, keeping the lines about 0.5mm thick. Vary the curves slightly across nails so it doesn’t look copy-pasted. Top coat over the design with a smooth, even layer so the lines look sealed under glass.
Editor's noteIf the liner bleeds, wipe the brush on a lint-free pad — less gel on the brush fixes it fast.
Watch outDon’t stack multiple line patterns on every nail; keep it consistent or it turns chaotic.
20. Peachy Pink Base With Tangerine Flame Tips
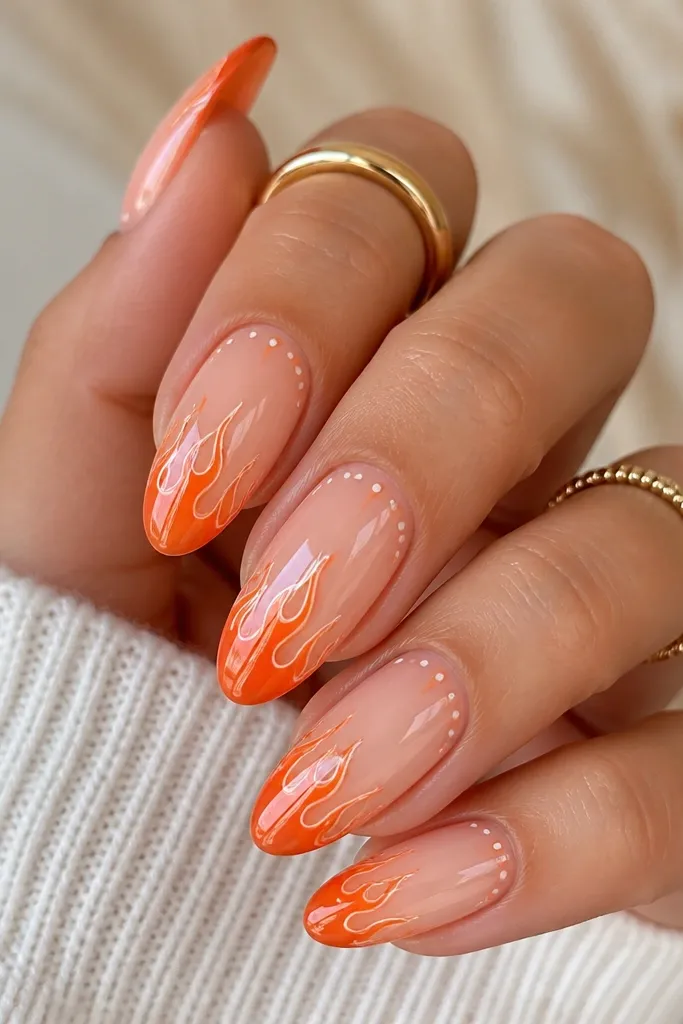
This look is bright without feeling loud because the base stays peachy and soft, then the tips bring the drama. I like flame tips because they have natural movement — the jagged shapes catch light differently as your hand moves, so it never looks flat. The tangerine color sits warmer than orange, which makes your skin look healthier in photos. A few tiny white sparks keep it from looking like one solid block of color and make the flames feel intentional, not messy. It also photographs well because the contrast is strongest at the tip where the camera focuses.
Start with a peachy pink acrylic base and build it to a smooth, even thickness at the center of the nail. Cure fully, then use a thin striping brush to map the flame shapes in tangerine — keep the widest part near the tip and taper inward. Add a second layer of tangerine only where the flame “ridges” would be, then pull a tiny bit of peach-pink back into the edges so the flames look like they burn into the base. With a micro detail brush, place thin white lines along the outer flame edges and add 2-3 tiny orange dots close to the cuticle on one or two nails. Finish with a glossy top coat in two thin layers, letting each layer level out before curing.
Editor's noteUse striping tape as a guide for the flame direction on your first nail, then freehand the rest to match the same flow.
Watch outSkip thick flame paint — if the tangerine layer sits too heavy, it will catch on hair and feel bumpy even under top coat.



