
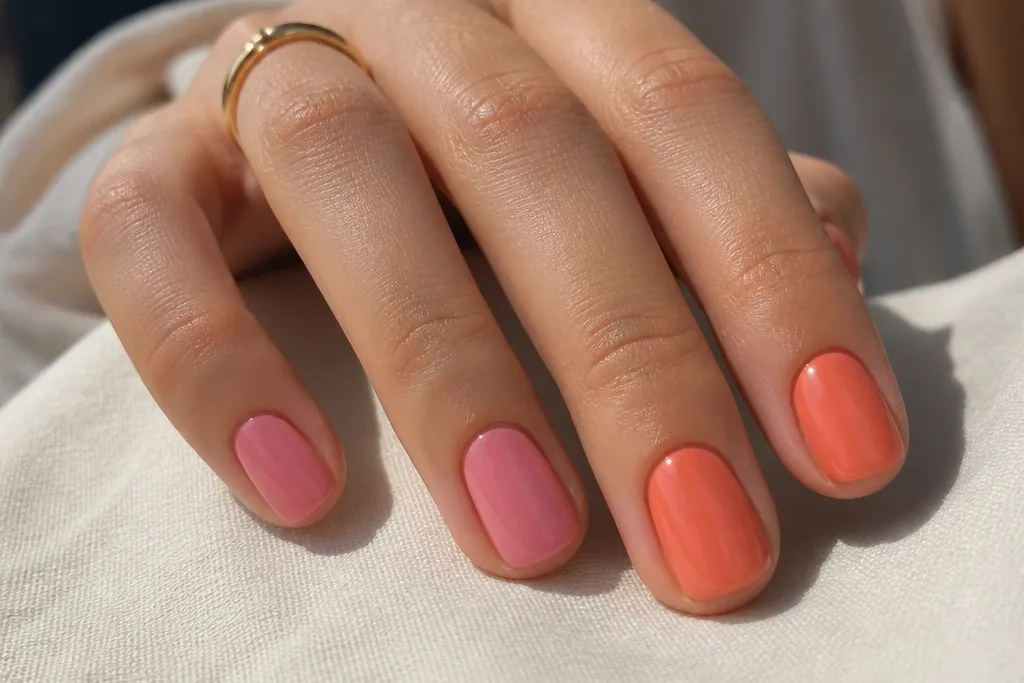
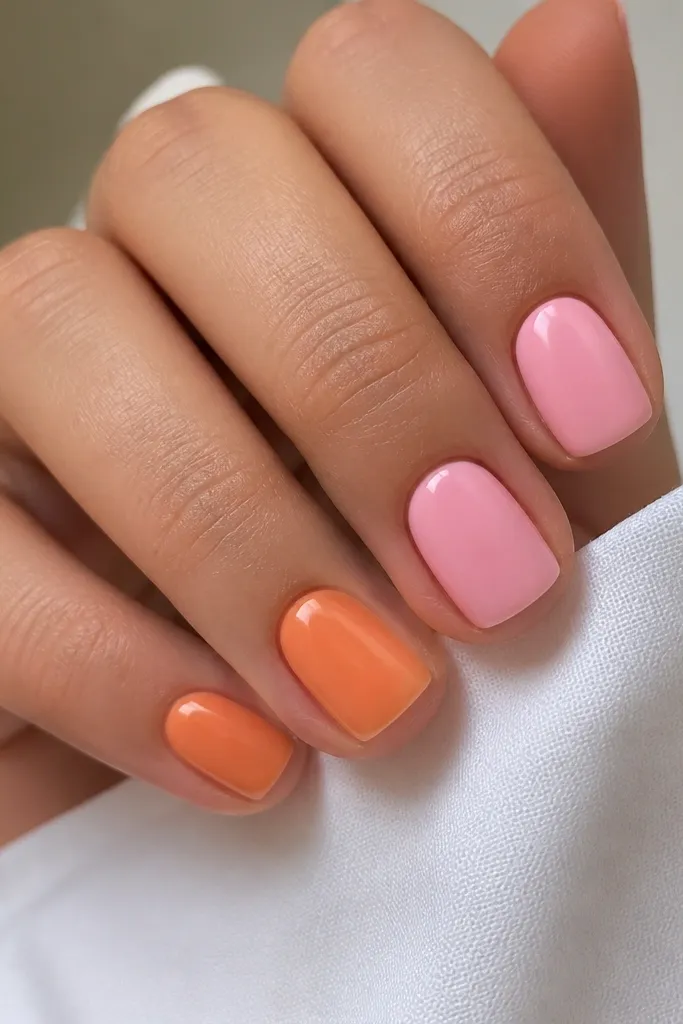
1. Micro French with Pink Base and Thin Orange Smile
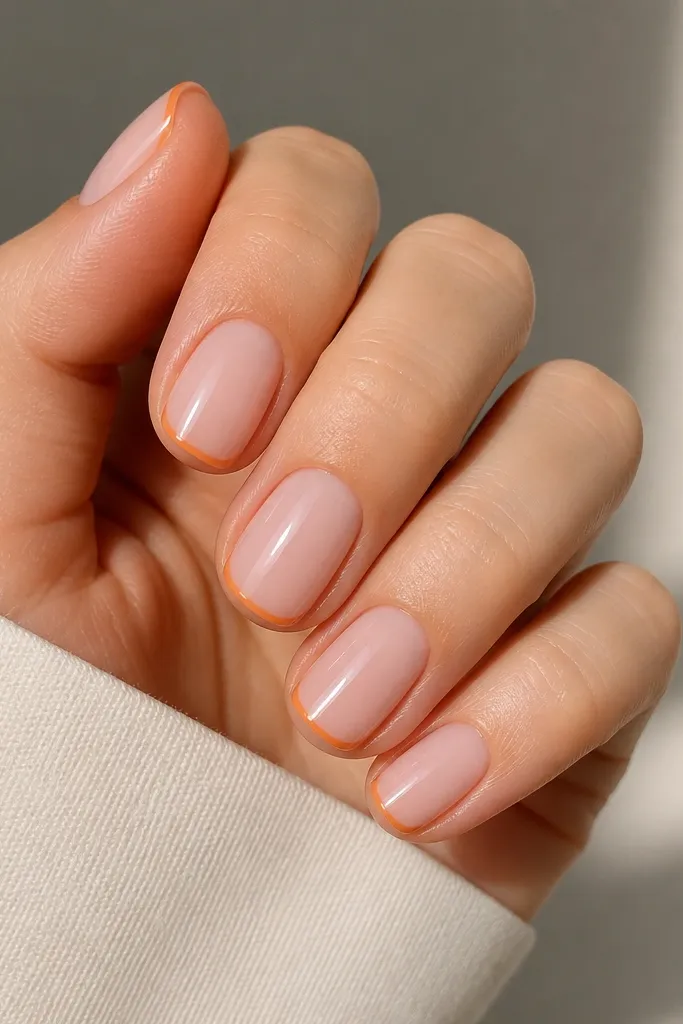
This is the “I did my nails” look that still fits short nails. Start with a sheer pink base so your nail bed looks continuous, then add a micro French tip that’s narrow enough to avoid making the nail look wider. Orange at the very tip draws attention to the center without covering the whole nail. I like it on fair to medium skin because the pink looks airy and the orange reads warm but not neon. It’s also a safe pick for work because there’s no busy pattern.
Start by painting two thin coats of sheer pink gel or polish, keeping the cuticle line tidy. Then place a French guide or use tape to mark the tip curve — leave about 1 mm of the pink showing under the line. Paint a thin orange smile line, filling only that band, and keep the ends slightly higher than the center for a lifted look. Finish with a glossy top coat so the orange line looks sharp, not fuzzy.
If your orange line looks thick, wipe the brush on the palette first — thin orange always looks cleaner on short nails.
Avoid painting orange all the way to the sidewalls; it makes short nails look blunt.
2. Diagonal Split Half-Moon Corner in Orange
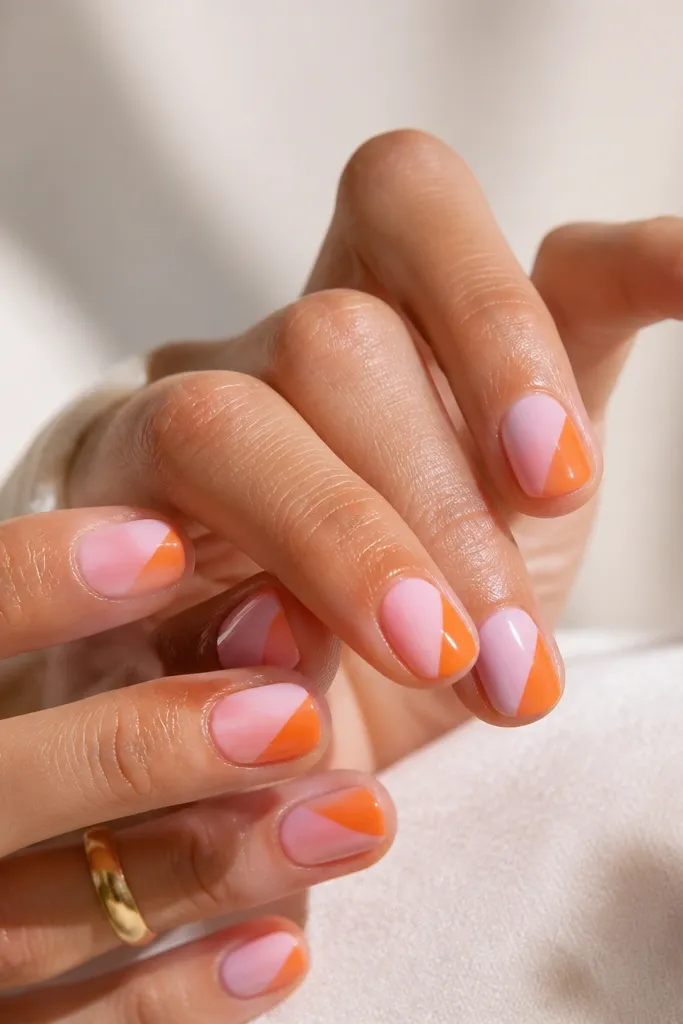
Diagonal placement is my go-to for short nails because it creates a natural visual line that pulls the eye upward. Pink stays as the overall background, and orange only takes a corner, so you still see the nail bed. The tiny half-moon curve at the meeting point keeps the design from looking like a hard sticker. This one flatters hands with shorter nail beds because it adds structure without covering everything. It also looks great with warm undertones because orange sits close to skin warmth.
Editor's noteUse a nail art liner brush for the diagonal edge — it lets you keep the orange wedge about 2-3 mm wide.
Paint two coats of glossy pink, then let it fully level. Use striping tape to mark a diagonal from the lower left corner to a point near the upper center of the nail. Fill that triangle with orange and carefully peel the tape while the orange is still tacky (if gel) or right after it’s set (if regular polish). Finally, clean the half-moon edge with a small brush dipped in acetone-free polish remover and seal with top coat.
Watch outSkip freehand diagonals if you’re rushing; uneven angles make short nails look messy fast.
3. Peachy Orange Top Stripe over Pink Jelly
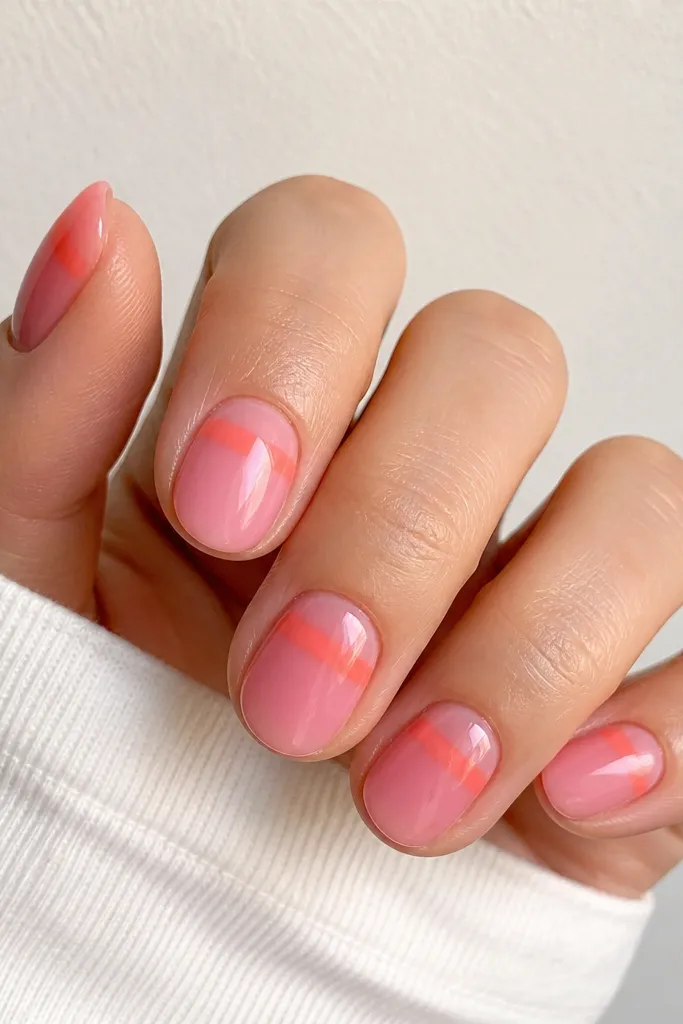
This design works because it uses a single stripe as a “highlight” across the nail, which makes short nails look styled without adding length. The pink jelly base gives that juicy, slightly translucent look that flatters most skin tones, especially if you’re fair and want something that doesn’t look chalky. Orange is kept to one band, so it reads as intentional, not cluttered. I’ve worn this to events where I didn’t want heavy art but still wanted color that shows up in photos. It also looks good when your cuticles are a bit dry because jelly pink hides imperfections.
Editor's noteIf your stripe looks streaky, load less polish on the brush and do two lighter passes.
Start with a jelly-pink base in two coats, making sure it’s glossy and not too thick. Next, use a striping brush to paint one orange band across the top third of the nail — keep it about 2 mm tall on short almond. Let it dry fully, then go back with a second thin orange pass only if you need coverage. Finish with a high-gloss top coat to blend the stripe edges and make the orange look smooth.
Watch outDon’t place the stripe too low; low stripes shorten short nails visually.
4. Orange Dot Cluster with Pink Negative Space
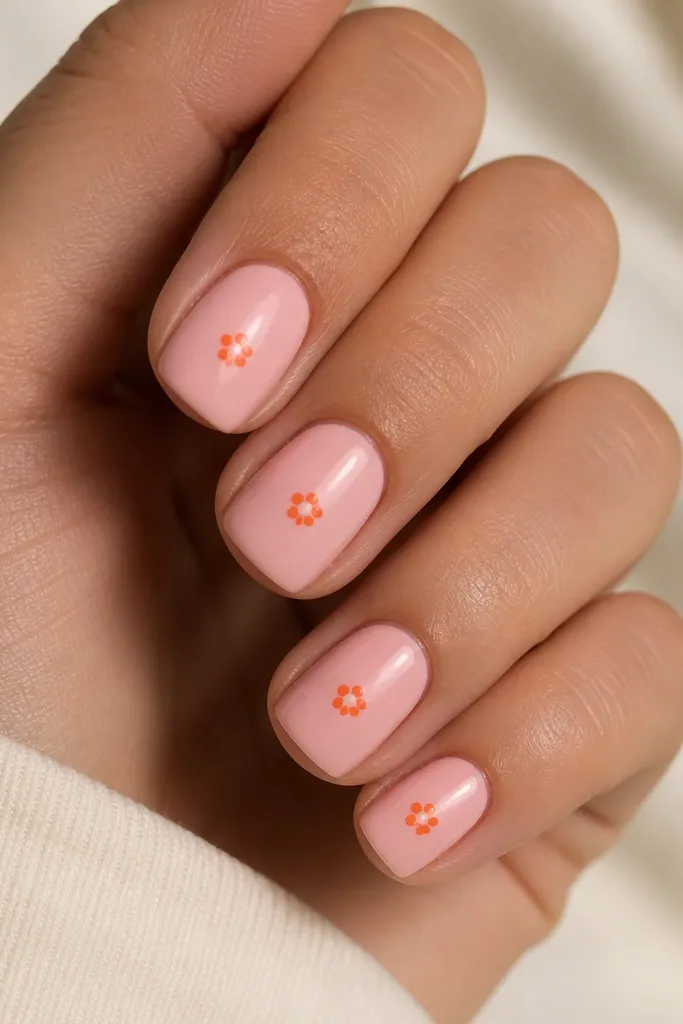
Dots are the easiest way to make nail art look intentional on short length. The orange cluster gives a focal point, and leaving pink gaps keeps the design from feeling heavy. I like this on hands where you want minimal art but still want color that pops — the orange dots catch light even with a glossy top coat. This also flatters different skin tones because the pink base is neutral enough, while orange adds warmth. It’s a great everyday choice when you don’t want to spend time on detailed lines.
Paint two coats of glossy pink and let it level. Use a dotting tool — I use the medium ball — and place one orange dot in the center, then four around it leaving pink space between. If you want a cleaner look, wipe the dotting tool between nails. Seal with top coat, and keep the top coat brush gentle so it doesn’t smear the dot edges.
Use a contrasting orange that’s opaque, not sheer, so the dots look like clean circles.
Avoid dragging the dot after it lands; that turns perfect dots into blobs on short nails.
5. Pink Half-Moon Cuticle with Orange Center Line
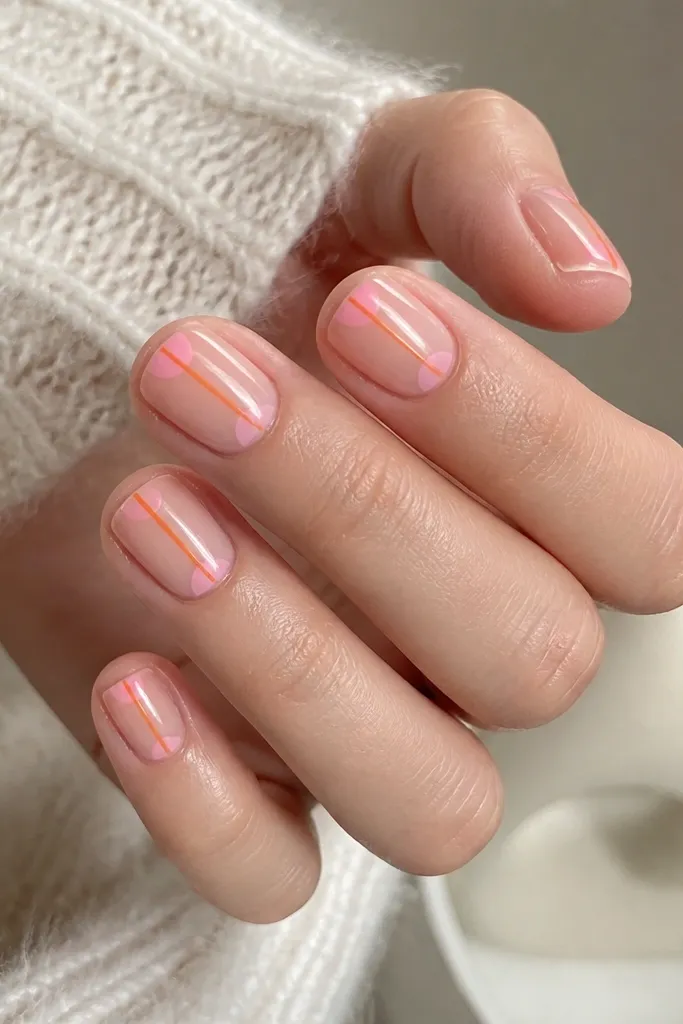
This one mimics the look of a manicure that’s been done professionally because the lines are controlled and placed at natural focal points: cuticle and center. The pink half-moon makes your nail bed look taller, and the thin orange center line pulls the eye straight down. On shorter nails, straight lines are your friend. It’s flattering on most skin tones because the base stays close to your natural nail color, and orange adds warmth without going neon-crazy. I wear this when I want something clean but still playful.
Start with a sheer nude-pink base so the nail looks smooth and even. With a small striping brush, paint a half-moon at the cuticle in pink, staying about 1 mm away from the sidewalls. Then paint a thin orange line down the center, stopping 1 mm before the tip. Clean edges with a detail brush dipped in remover, then top coat for a glassy finish.
If your orange line looks uneven, check it from above under a lamp — straighten while the polish is still tacky.
Don’t let the orange line touch the half-moon; overlapping color at the cuticle can look messy.
6. Orange Marble Tips over Pink Base (No-Swipe Method)
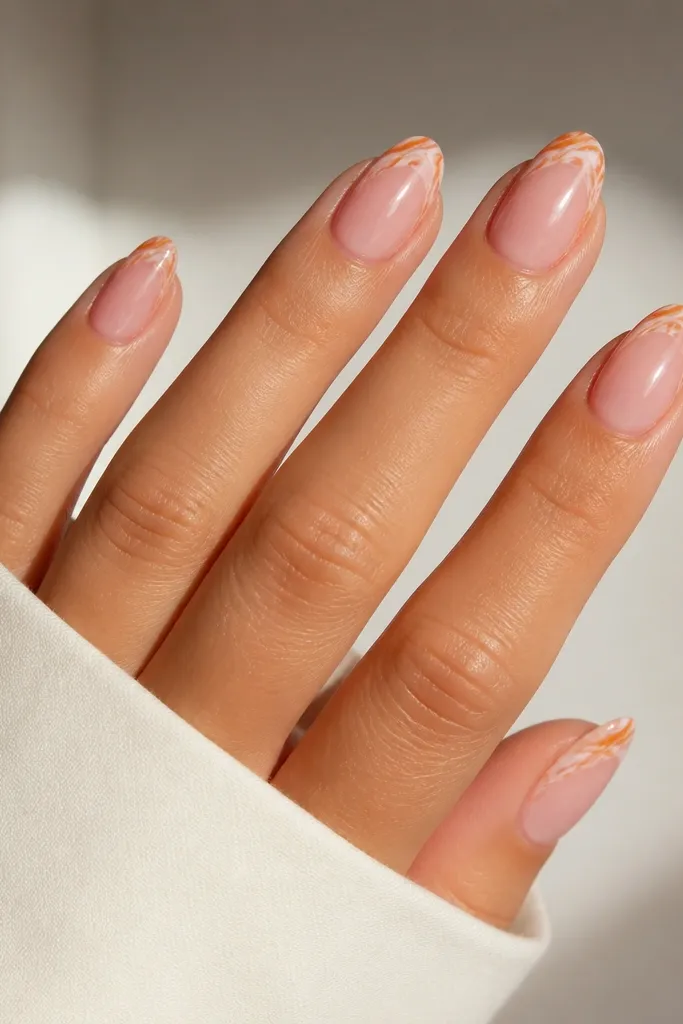
Marble looks hard, but the short-tip version is manageable and looks expensive. By keeping marble only on the tip, you get movement without covering the whole nail. Pink base keeps it soft and wearable, while orange marble adds heat and dimension. This works especially well if your nails are slightly uneven in shape because the marble pattern draws the eye away from tiny ridges. It also photographs beautifully because the swirls catch light at the tip. I’ve done this on short almond when I wanted something more artsy than a French tip.
Paint two coats of glossy pink and let cure fully. For the marble tips, dab a small amount of orange onto a plastic palette and mix with a few drops of clear gel or top coat so it’s fluid, not thick. Use a small detail brush to place irregular orange patches on the top third to tip area, then swirl lightly with the brush tip. Add thin white lines only where you want contrast, then seal with top coat.
Keep marble pieces small — on short nails, big swirls look crowded and shorten the look.
Skip the full nail marble; it makes short nails look busy and smaller.
7. Pink-and-Orange Alternating Diagonal Stripes (Tape Crisp)
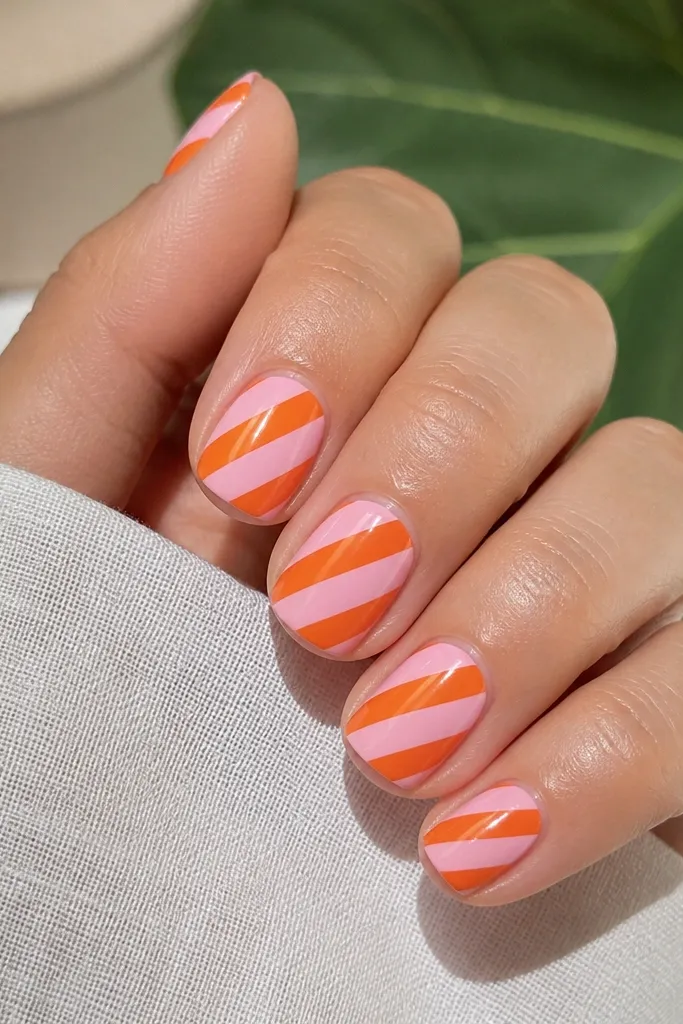
Alternating stripes look like a salon manicure because the lines create structure. Using tape gives you that clean, graphic vibe that flatters short length — the angles draw attention upward. Pink is the base, so the look stays soft, and orange stripes add punch without needing extra art. This is a great pick for summer outfits and casual days because it looks playful but still neat. On medium to deep skin tones, the orange shows up vividly against pink and doesn’t fade into the background.
Paint the whole nail with pink and let it dry completely. Apply striping tape diagonally to create two bands — aim for a consistent angle across nails. Paint orange over the exposed band sections, then remove tape after the polish sets enough that it won’t smear. Add a second thin orange layer if needed for full opacity. Finish with a glossy top coat to lock the edges in.
Measure by eye using your nail center — keep stripe width around 1.5-2 mm on short nails.
Avoid thick tape lines; they leave gaps that look messy after top coat.
8. Orange Outline French on Pink Sheer Base
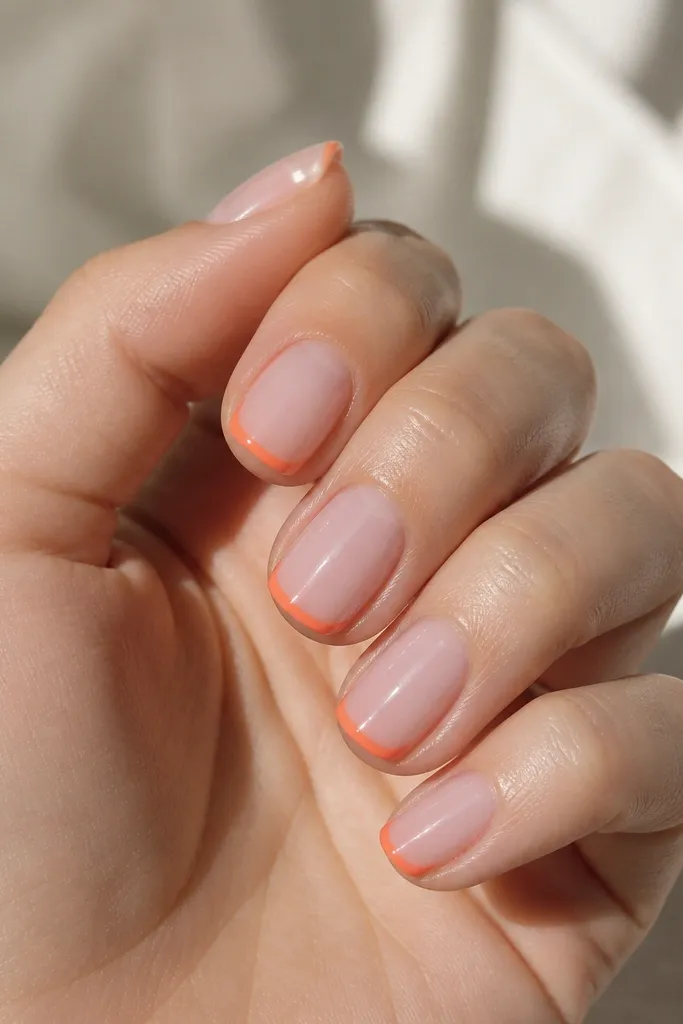
Outline French is one of the cleanest ways to do orange on short nails. You’re painting less orange, so it doesn’t overwhelm the nail bed, and the outline still creates that “tip” focus. Pink sheer keeps everything airy and flattering, especially if your nails are short and you want them to look longer. The orange outline also makes hands look tidy in photos because there’s a clear boundary at the tip. I do this when I want a manicure that looks sharp even if I’m not adding gems or extra details.
Editor's noteIf the outline looks shaky, use a dotting tool to place tiny orange points along the curve, then connect them lightly with the brush.
Start with a sheer pink base in two thin coats. Use a French guide or a steady French brush to paint just the outline at the tip — keep the line about 1 mm thick. Let it dry, then add a second coat of orange outline only where the line looks patchy. Clean around the edges with a thin brush, then seal with glossy top coat.
Watch outDon’t fill the tip solid; thick orange on short nails can look heavy.
9. Pink Ombré Fade into Orange Tips
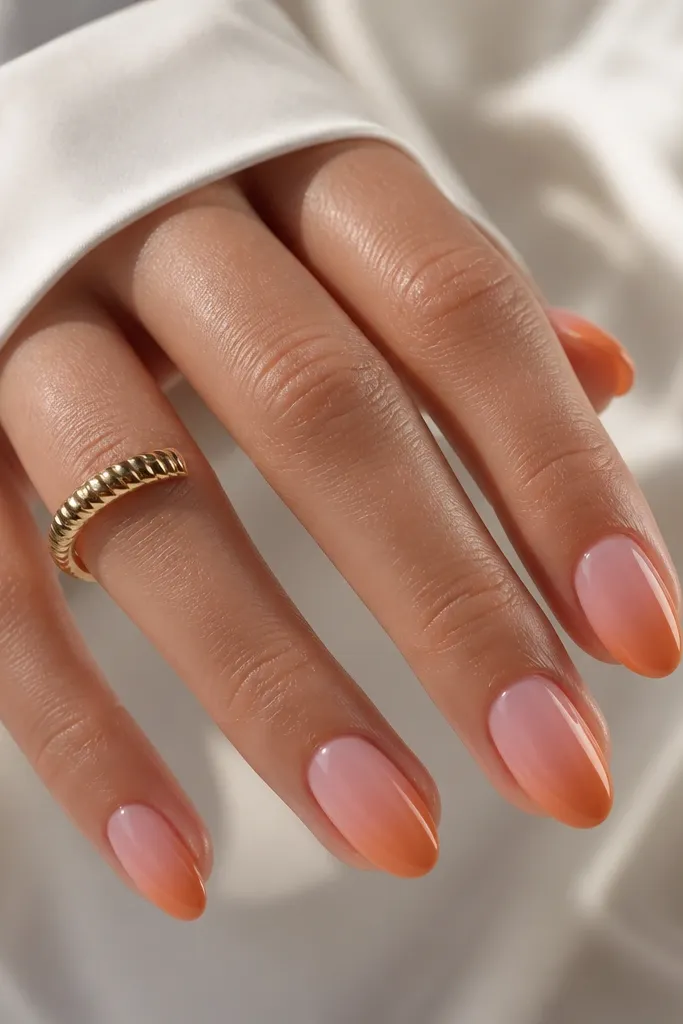
Ombré is one of the few styles that can make short nails look softer and longer at the same time. The key is the fade: pink near the cuticle keeps your nail bed looking tall, while the orange only appears at the very end. I like a smooth, blended transition because harsh lines can shrink short nails. This works on fair, medium, and deep skin tones because pink and orange are both warm — they sit close to skin undertones and don’t look icy. It also feels more wearable than full orange nails.
Paint a base coat, then apply a light pink base in two coats. For blending, sponge a small amount of orange onto a makeup sponge and press it onto the tip area, starting low and building upward toward the middle. Wipe the sponge clean between nails so the fade stays smooth. Add a thin layer of clear gel or top coat over the transition to even it out, then finish with glossy top coat.
Use a dabbing motion, not swiping — swipes streak and ruin the fade on short nails.
Skip too-dark orange at the very edge; it makes the tip look blunt.
10. Orange Triangle Accent on Pink Half-Nude Base
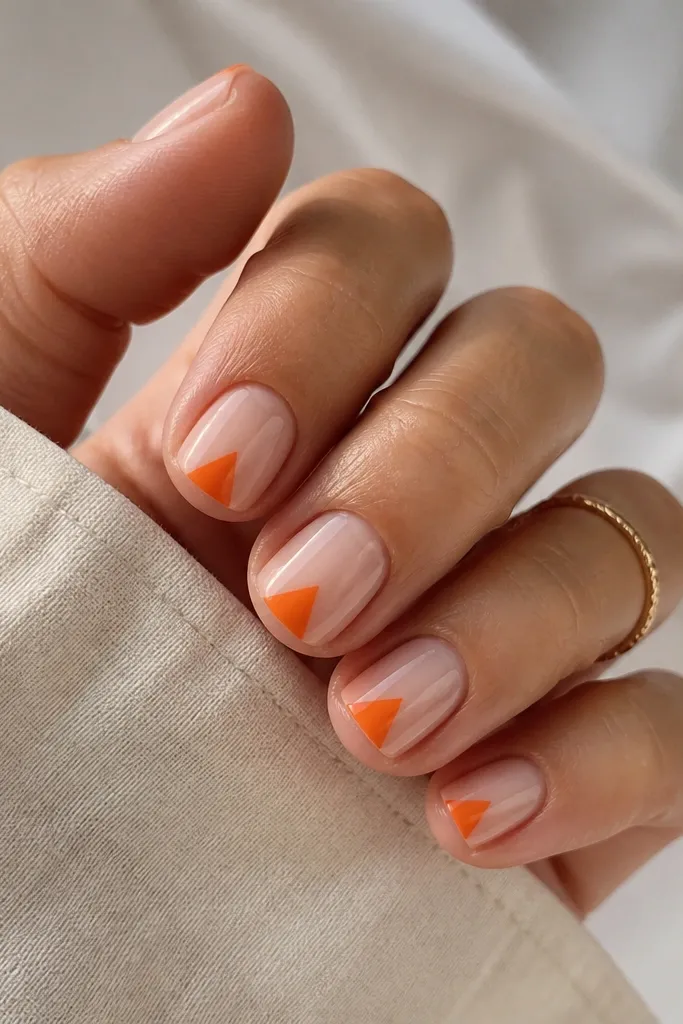
Triangles look graphic and modern, and on short nails they’re great at creating an illusion of length. The triangle points inward, so your eye travels toward the center rather than stopping at the tip. I use a half-nude sheer pink base so the orange triangle pops without making the whole nail feel loud. This is a flattering look for all skin tones because the base is close to natural nails and the orange is the only strong color. It’s also perfect if you like geometric looks but hate tiny details.
Editor's noteKeep the triangle symmetrical across nails — consistency is what makes geometric art look expensive.
Start with a sheer pink nude base, two thin coats. Use tape to mask a triangle at the tip — about 3 mm tall on short nails, with the point ending around the middle of the nail. Paint the triangle orange, remove tape while it’s still slightly tacky, and clean the edges with a detail brush. Finish with top coat for a smooth, sealed edge.
Watch outDon’t make the triangle too wide; wide triangles turn into blocks on short nails.
11. Pink and Orange Checkerboard on Two Nails Only
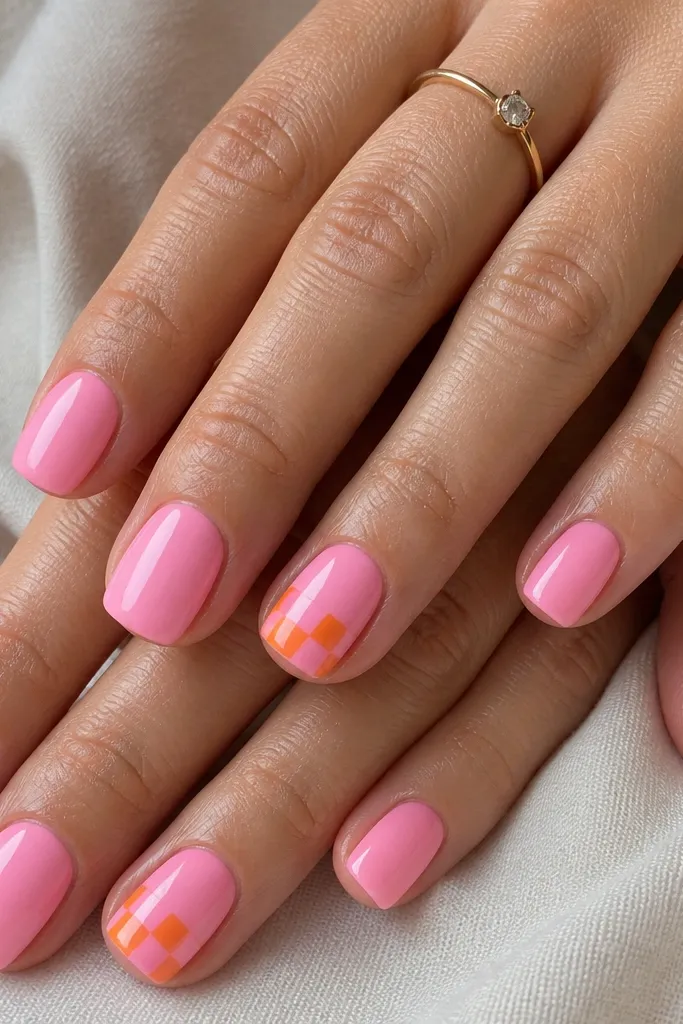
Checkerboard works best when you limit it. On short nails, a full set of checks can look busy, but two accent nails give you the fun without clutter. Pink and orange squares look playful and youthful, and keeping the pattern only on the top third makes the design readable. I like this for birthdays and holidays because it looks like nail art even when your nails are short. It also flatters hands with wider nail beds because the squares break up the width visually. If you’re new to nail art, starting with only two nails is the easiest way to get it right.
Paint all nails with glossy pink. Pick two accent nails and add a thin orange base layer only on the top third so the checkerboard has contrast. Use striping tape to create a grid of small squares, about 1.5 mm each, then alternate orange and pink squares by painting over the masked sections. Remove tape carefully and seal with top coat.
Use tape for the grid; freehand checks on short nails look wobbly fast.
Avoid putting checks near the cuticle; it crowds the nail bed on short length.
12. Orange Swirl Corner with Tiny Pink Dot Center
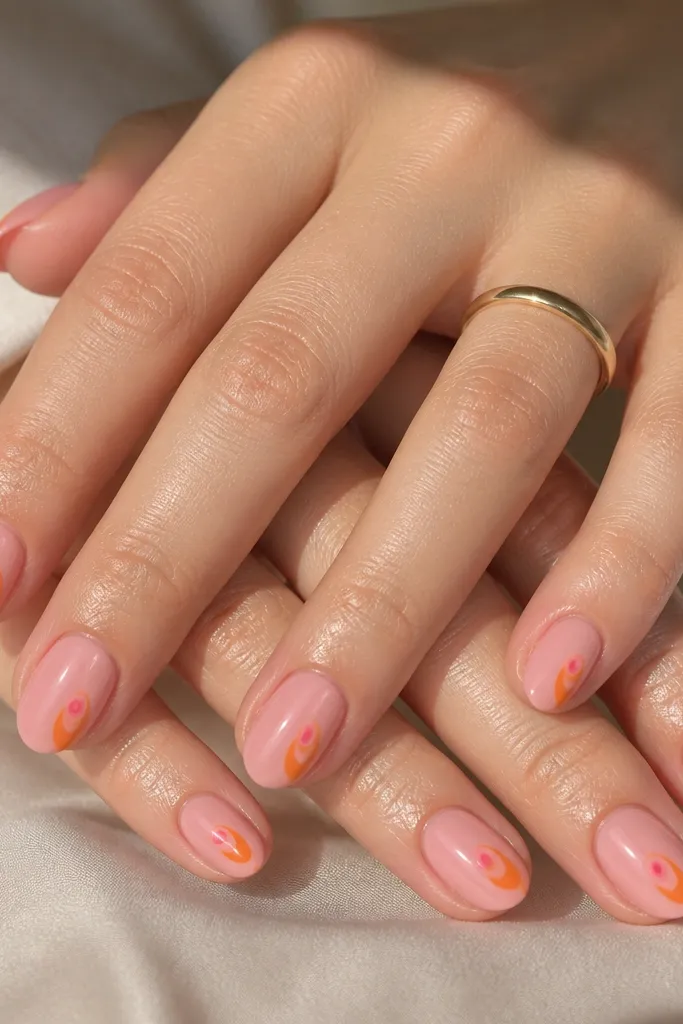
This design feels artsy without taking over your whole manicure. The orange swirl sits in the corner, which keeps it tight and readable on short nails. The tiny pink dot in the center pulls the swirl into the pink base so it looks intentional, not like random placement. I’ve worn this with short nails when I wanted a little “character” but still wanted my hands to look clean. It flatters most skin tones because the base is soft and the swirl stays small. It also works well when your nail shapes vary slightly because the swirl is contained.
Editor's notePlace the swirl on alternating corners across nails so the set looks balanced.
Start with two coats of glossy pink. Use a detail brush to paint a small orange swirl in the upper corner — keep it about 3-4 mm long. While the orange is slightly tacky, place a tiny dot of pink in the swirl center using a dotting tool or the brush tip. Clean the edges around the swirl with a liner brush and finish with top coat.
Watch outSkip oversized swirls; on short nails they look like smudges.
13. Orange Glossy Accent Line on Matte Pink Base
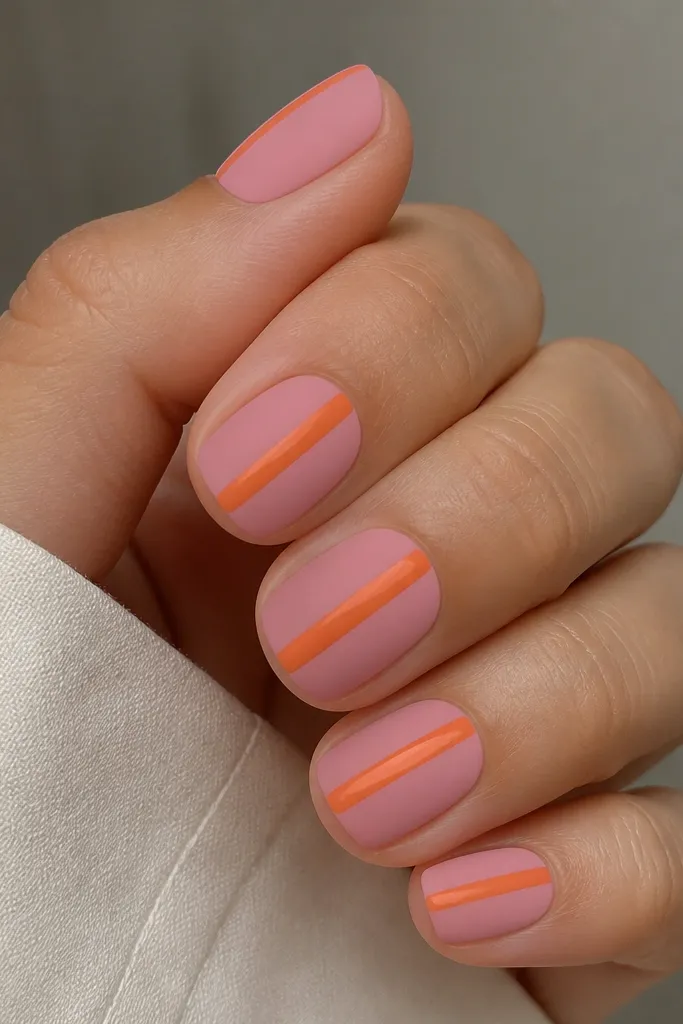
Mixing matte and gloss is how you get that “why does this look professional?” effect on short nails. The matte pink hides small imperfections and keeps the base calm, while the glossy orange line catches light and makes nails look sharper. The center placement elongates the nail visually, which is exactly what you want with short length. I use this when I want something modern and a little edgy without adding tiny art pieces. It works across skin tones because the contrast is in the finish, not in complicated color mixing.
Paint two coats of matte pink and let it fully dry so it stays truly matte. With a striping brush, paint a thin orange line down the center — keep it narrow, about 1-1.5 mm. Seal the line with a glossy top coat only on the orange stripe area, then apply matte top coat over the rest of the nail. If you only have one top coat, use glossy top coat everywhere, but keep the orange line thin so it still reads as an accent.
Use a liner brush reserved for orange polish; matte base + glossy line is sensitive to streaks.
Don’t skip the matte dry time; if pink isn’t fully dry, the orange line drags.
14. Orange Half-Nail with Pink Edge Fade (Soft Coverage)
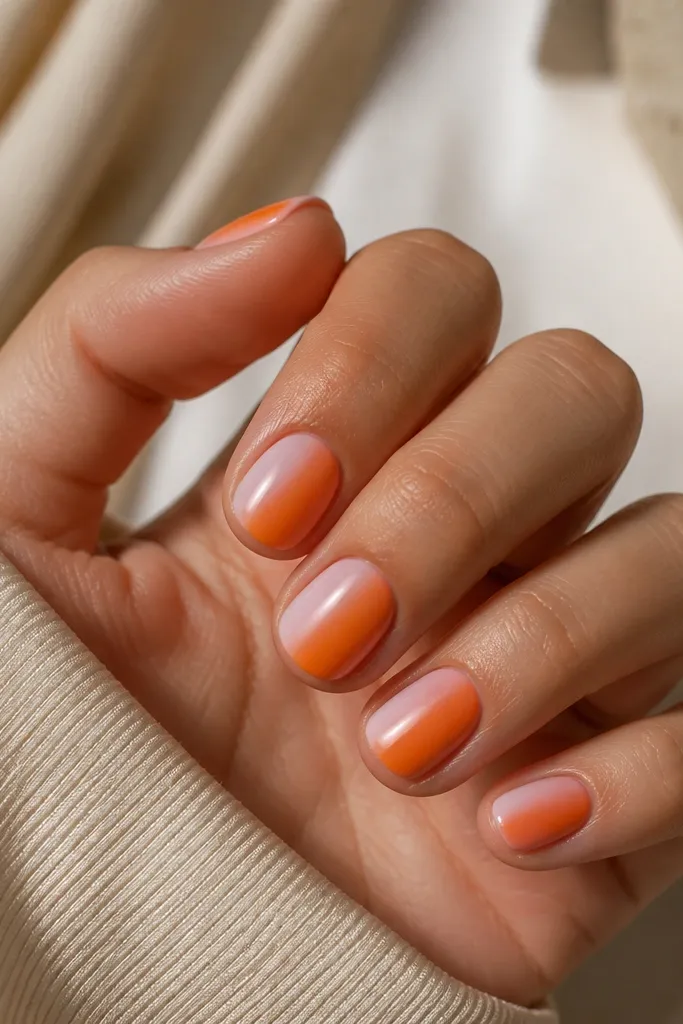
Half-nail coverage is bold, but the soft fade makes it wearable on short nails. Orange on one side gives you a strong color hit, while the pink edge fade keeps the manicure from looking harsh or too wide. I like this on short nails because it looks like a design, not a full polish change. It flatters hands with uneven nail shapes since the fade disguises tiny dips along the edge. If you wear warm-toned outfits, orange next to pink looks especially cohesive.
Editor's noteStart with less orange than you think — you can build, but you can’t un-spread the fade.
Apply two coats of pink as your base. Sponge a small amount of orange onto a makeup sponge and press it onto the right half of the nail, then slightly feather the sponge toward the center to soften the boundary. Wipe sponge and repeat for each nail so the fade stays controlled. Once the orange is set, go over the orange area with a thin orange brush pass to even out coverage. Finish with glossy top coat to smooth the transition.
Watch outAvoid a hard straight line between colors; it makes short nails look cut-off.
15. Tangerine Glow Gel Base with Pink Speckle Dots and Orange Ring Tip
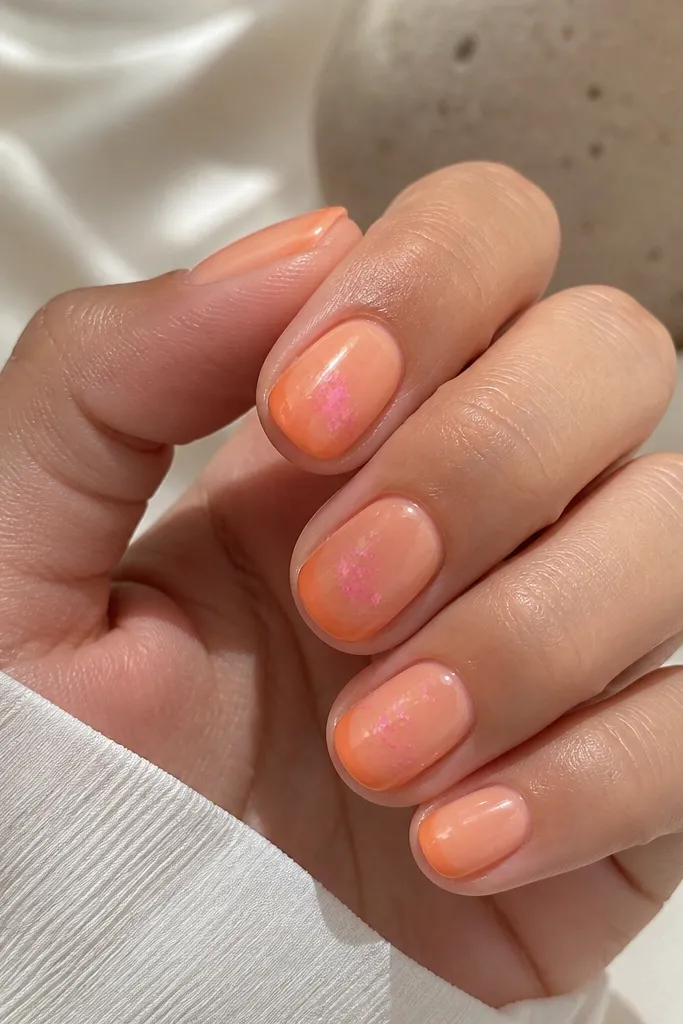
This one looks like candy light — the base is sheer and warm, so your nail still shows through, which keeps short nails from feeling heavy. The pink speckle dots are small enough to read as texture, not busy art, and they land right where your eye rests. The orange ring at the tip gives you a clean graphic finish without needing a full French curve. I like it because it grows out better than straight stripes; the ring reads as a design element even when the free edge shortens.
Editor's noteFor speckles, wipe your dotting tool on a lint-free wipe between nails so the dots stay tiny. If the ring looks shaky, do it in two passes — place the outline first, then thicken only one side.
Start with a sheer tangerine gel base. I paint a thin layer, cure, then add a second thin layer only on the center so it stays translucent at the edges. While it’s tacky after the second cure, tap a dotting tool lightly loaded with opaque pink polish to place 6-10 tiny speckles per nail, leaving gaps so it looks airy. Next, build the orange ring. Use a fine liner brush and place a thin circle just inside the tip line, not on the very edge, so it doesn’t chip as fast. Cure, then go back with the same orange to thicken one side of the ring slightly for that halo effect. Seal with a glossy top coat in two thin coats. First coat is to lock everything down, second coat is for shine and smoothness over the ring so it doesn’t catch on fabric.
Watch outDon’t flood the ring at the tip or it will feel raised and chip within a week.



