
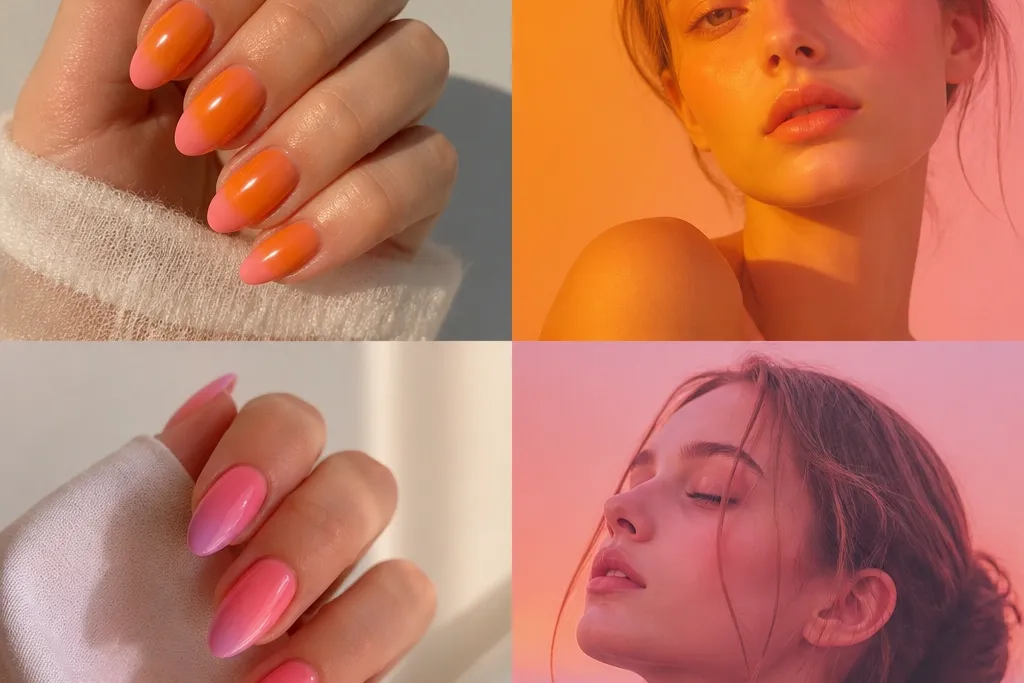
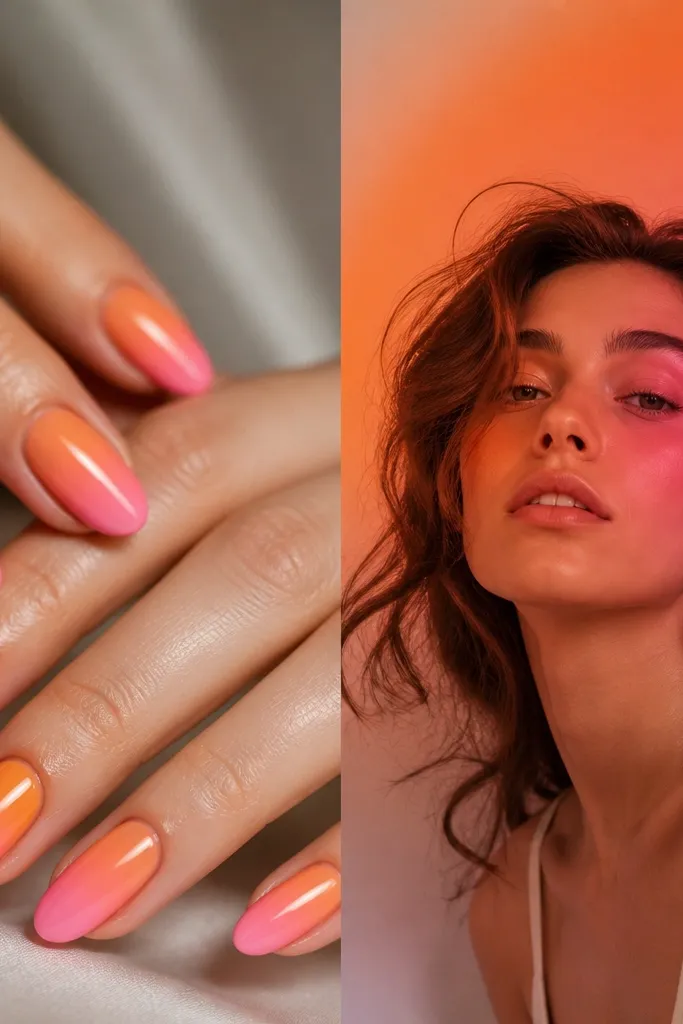
1. Coral Cuticle Ombre to Bubblegum Tips
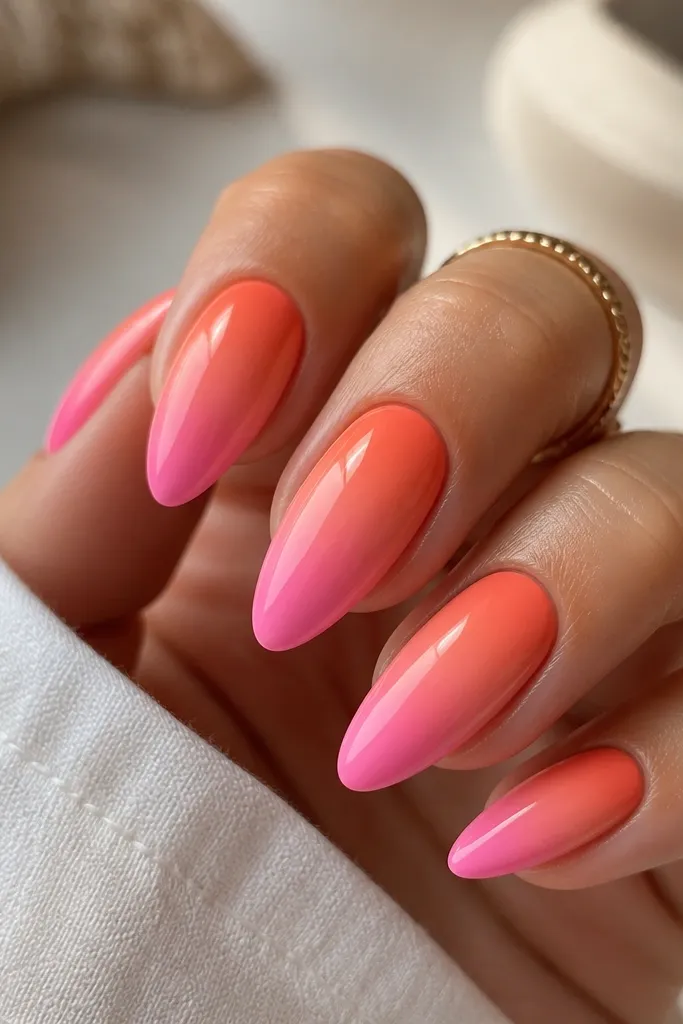
This is the cleanest everyday version of Orange And Pink Ombre Nails vs aura because it keeps the gradient readable on real hands. Start with a warm coral-orange near the cuticle so the orange doesn’t go muddy, then fade into bubblegum pink at the tip. The almond shape makes the gradient look longer, which flatters petite hands and also balances broader fingers by adding a vertical line. I like this for spring outfits and when you want “put together” without tiny details. The key principle is a tight blend zone near the cuticle so your nail beds still look tidy.
Start by pushing back cuticles and buffing the shine off your nail plate lightly, then apply a rubber base coat. Paint coral-orange gel at the cuticle area, leaving about 1-2 mm of clear space where the orange meets skin. Use a makeup sponge lightly dabbed with bubblegum pink, then stamp over the orange where you want the transition. With a thin gel brush, drag the blend just once through the middle to smooth the line, then cure. Finish with a glossy top coat in a thin layer, cap the free edge, and cure again.
Keep the orange area slightly smaller than you think — the pink will look brighter and the ombre won’t look heavy.
Don’t overwork the blend with the sponge; too many dabs create speckled texture that looks cheap.
2. Sunset Ombre with Orange Fade and Pink Pop
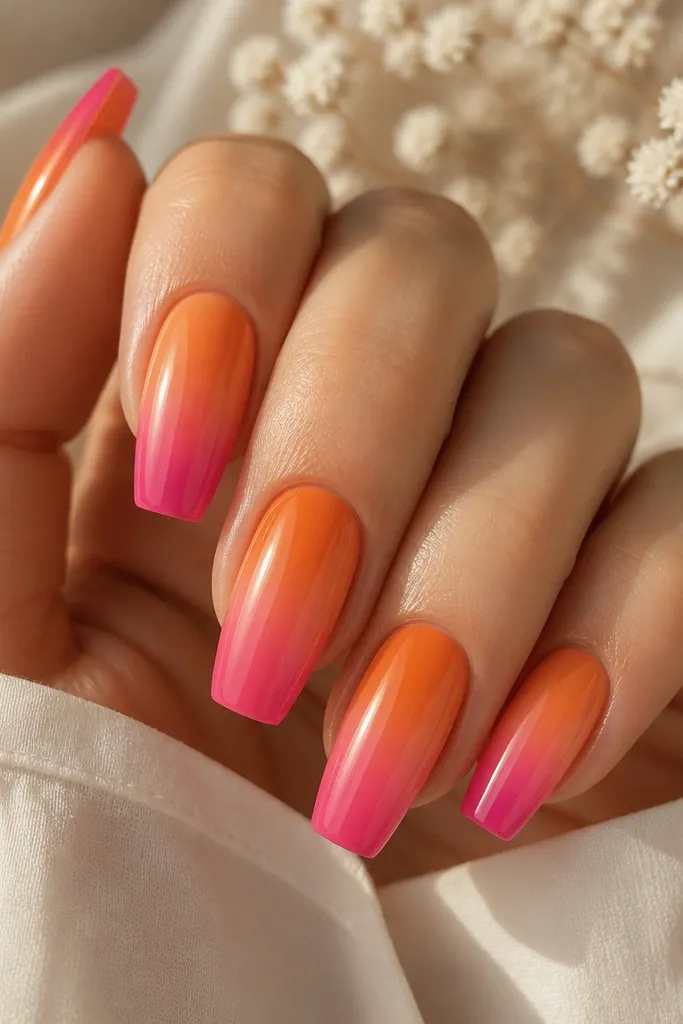
This one looks like a sunset on your nails, but it’s still wearable. The trick is using three shades: orange at the cuticle, peach in the center, and hot pink at the tip. That extra middle shade prevents the orange and pink from fighting each other, which is the main reason ombre can look dirty. Coffin nails make the hot pink tip look bold, so it flatters longer nail beds and makes short fingers look more elongated. I wear this when I want a statement that still matches everything from denim to sundresses.
Apply a base coat and cure, then paint orange gel from the cuticle to about 1/3 of the nail. Dab peach gel in the center using a sponge, then blend the edges with a flat brush. Add hot pink at the very tip, staying within the last 15-20% of the nail length. Use a clean brush to feather the boundary between peach and hot pink, then cure in short bursts so the gel doesn’t flood. Top coat glossy and cap the tip.
Editor's noteIf the transition looks harsh, add one micro layer of peach in the middle and cure — it fixes most ombre “steps.”
Watch outDon’t skip the peach middle shade; orange-to-hot-pink jumps usually look streaky.
3. Peachy Orange Ombre on Milky Nude Base
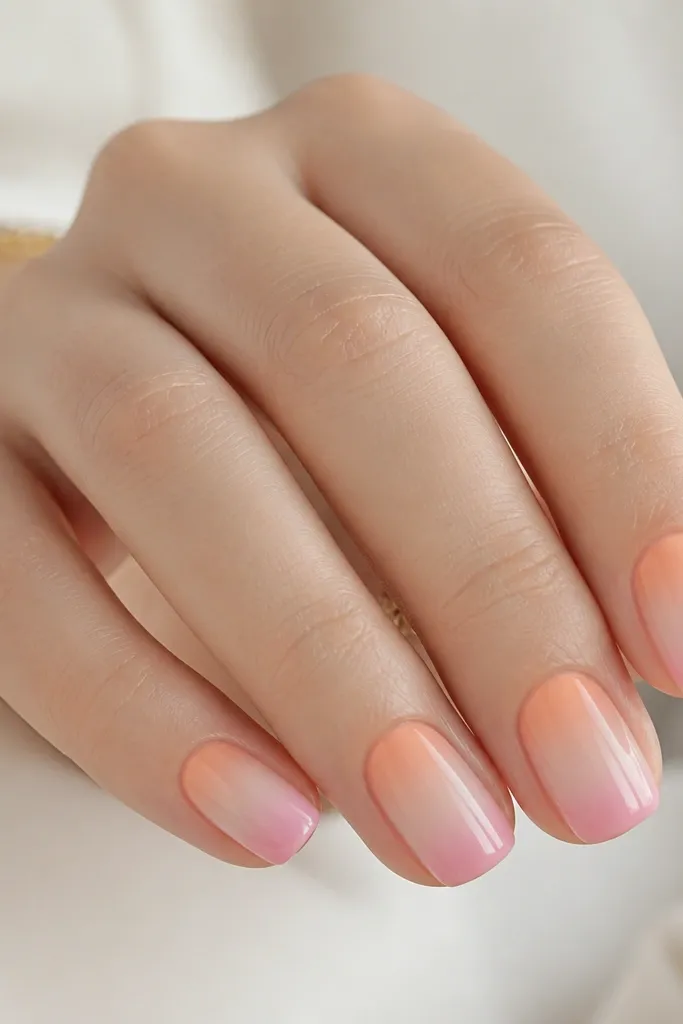
Milky nude bases make orange and pink look calmer, and this set proves it. Because the base is semi-sheer, the ombre looks like color traveling through glass, not opaque paint. This flatters medium to deep skin tones because the nude base doesn’t wash out your nail bed; it adds warmth instead. Short squoval keeps it practical for daily life — the gradient still shows even when your nails are practical length. The key principle here is using opacity control: orange should be semi-opaque, not fully opaque, for that airy look.
Apply a milky nude gel base and cure. Paint peachy orange gel at the cuticle area and stop around 1/4 of the nail length, keeping it thin. Use a sponge with soft pink gel to blend from the orange outward, then feather the outer edge so it fades smoothly. If the ombre looks too strong, paint one thin layer of milky nude over the transition and cure to soften it. Finish with a glossy top coat and cure fully.
Editor's noteAsk your gel bottles for “milk” or “sheer nude” — you want translucence, not a cream white.
Watch outAvoid fully opaque orange on a milky base; it creates a hard color block.
4. Orange Tips to Pink Cuticle Reverse Ombre
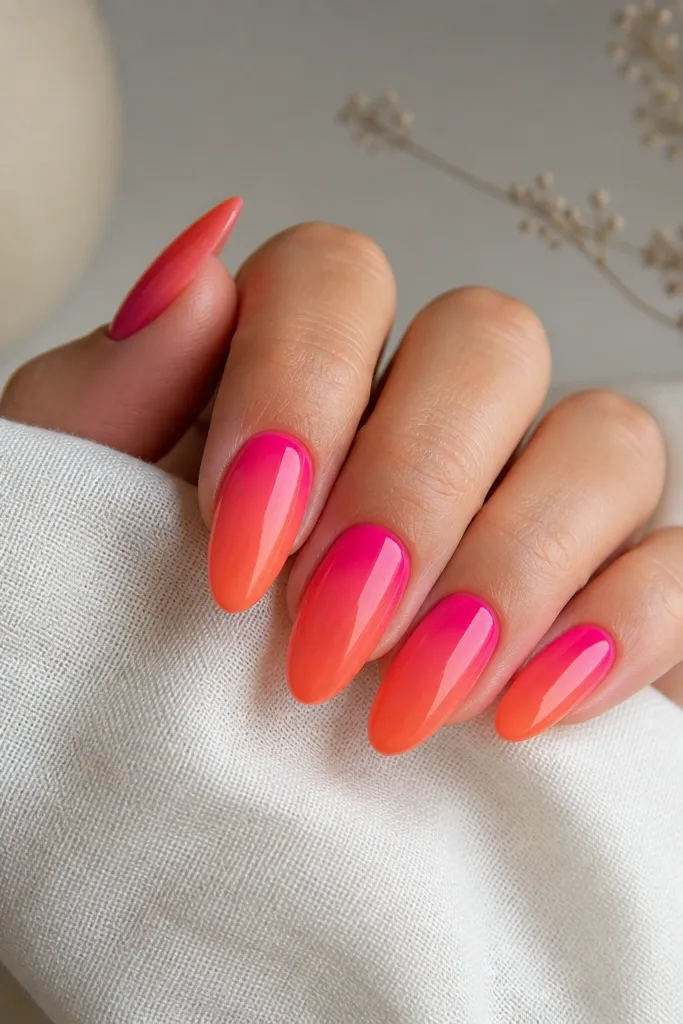
Reverse ombre is the one I reach for when I want the set to look different from standard cuticle-to-tip ombre. Hot pink at the cuticle makes the nail bed look brighter and can make your fingers look more awake, especially if your skin tone runs cool. Coral-orange toward the tips adds warmth without overpowering. Almond shape keeps the gradient clean and makes the orange tips look like a soft flame. The principle is placement: keep the brightest color at the cuticle for a lifted look.
Start with a base coat and cure, then apply hot pink gel at the cuticle area, leaving the sidewalls clean. Blend coral orange in the next section using a sponge, then feather the edge with a brush. Make the gradient width about the same from side to side so it looks intentional. Cure after each color step so the gel doesn’t mix into a single muddy layer. Top coat glossy and cap the free edge.
Editor's noteUse a thin brush to clean the cuticle line — reverse ombre shows mistakes at the base more than regular ombre.
Watch outDon’t let hot pink creep too far down; if it takes over half the nail, it stops looking like reverse ombre.
5. Ombre with Micro Glitter at the Tip Fade
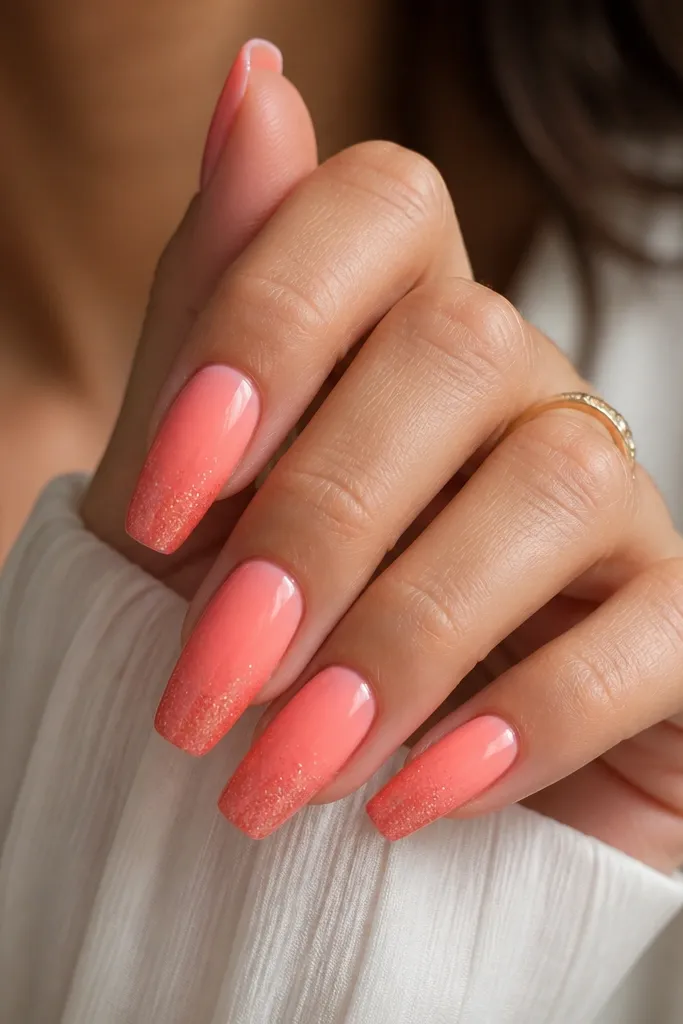
This is the “date night” version of Orange And Pink Ombre Nails vs aura because it gives movement when you move your hands. Micro glitter at the tip keeps the orange-to-pink gradient intact while adding sparkle only where the eye naturally lands. This works for most skin tones because the glitter reflects light, not pigment — it doesn’t fight your nail bed. Coffin nails make the glitter look intentional, and the fade keeps it from looking like chunky glitter glued on. The principle is that the glitter should be lighter than you think — fine particles read expensive.
Paint your coral-to-pink ombre first using either sponge or brush blend, then cure. Apply a thin layer of clear gel at the tip only, about 20-25% of the nail length. Sprinkle micro glitter over that wet gel, then tap off excess and cure. Use a clean thin brush to drag clear gel upward just enough to blend the glitter edge. Finish with a glossy top coat in a slightly thicker layer over the glitter to smooth texture.
If your glitter feels gritty, add one extra top coat layer and cure; it levels the surface.
Avoid chunky glitter — it ruins the smooth gradient and makes the set look like costume nails.
6. Matte Aura Glow with Orange Halo Center
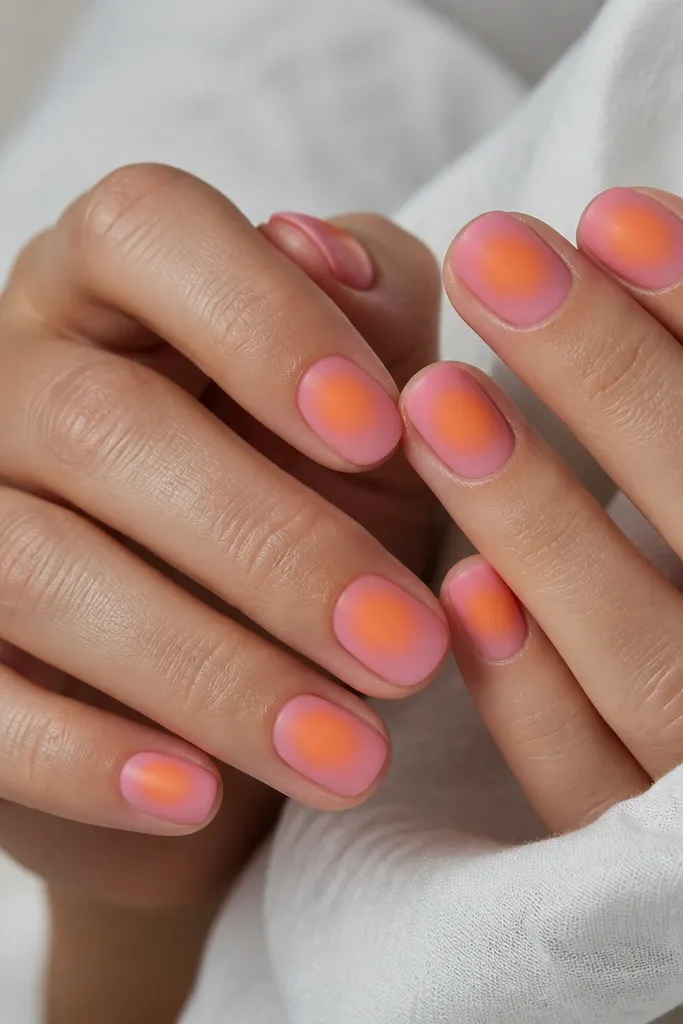
Aura nails look best when you keep them misty, not stripe-y, and matte helps you see the fade. This version uses an orange halo in the center and lets pink take over the outer edges. On oval nails, it looks like a warm sunrise cloud, and the matte finish makes it feel more modern. This flatters hands that already have dry-looking skin because the matte reduces harsh reflections and hides minor nail plate texture. The principle is soft diffusion: you want the halo to blur into the base, not sit on top like a stamp.
Start with a sheer pink base gel and cure. Mix orange gel with a tiny drop of clear gel so it spreads easily, then place it in the center using a makeup sponge dab. Stipple outward into the pink with a second sponge tip loaded with more sheer pink, keeping the edges light. Cure, then top with a matte top coat, focusing on sealing the center glow without dragging it. Clean around the cuticle with a small brush dipped in gel cleanser.
Practice the stipple on a nail tip first — matte aura forgives less than glossy.
Avoid thick orange in the center; thick gel makes the aura look like a blob.
7. Glossy Aura with Pink Halo and Orange Smoked Outer
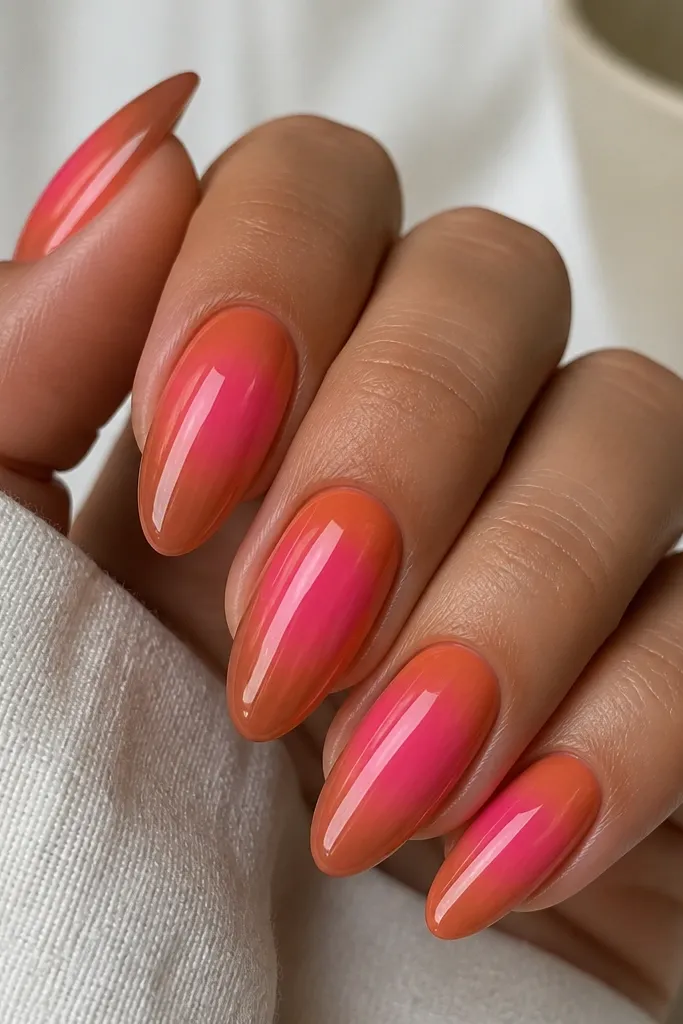
This aura version flips the usual color order and makes it look extra dimensional. Bright pink in the center reads like a glowing core, and the orange smoke around it gives warmth without turning the set into a solid block. Glossy top coat makes the center look lifted, which is flattering on almond nails and helps hands look longer. It also works well for medium skin tones because the orange smoke adds a golden warmth that doesn’t overpower. The principle is contrast control: the center should be the brightest point.
Use a sheer nude or sheer pink base and cure. Add pink gel in the nail center with a sponge dab, then immediately blend the outer edges using a second sponge lightly loaded with orange. Keep the orange slightly diluted so it fades instead of sitting as pigment. Cure and inspect under a lamp; if the aura edge looks too sharp, add a super thin layer of clear gel and blend again. Finish with a glossy top coat, and cap the tip.
Editor's noteIf your aura looks too dark, wipe the outer sponge on a paper towel — less pigment equals better glow.
Watch outDon’t drag the sponge across the nail; stipple only.
8. Orange-Pink Ombre with Negative Space Arc
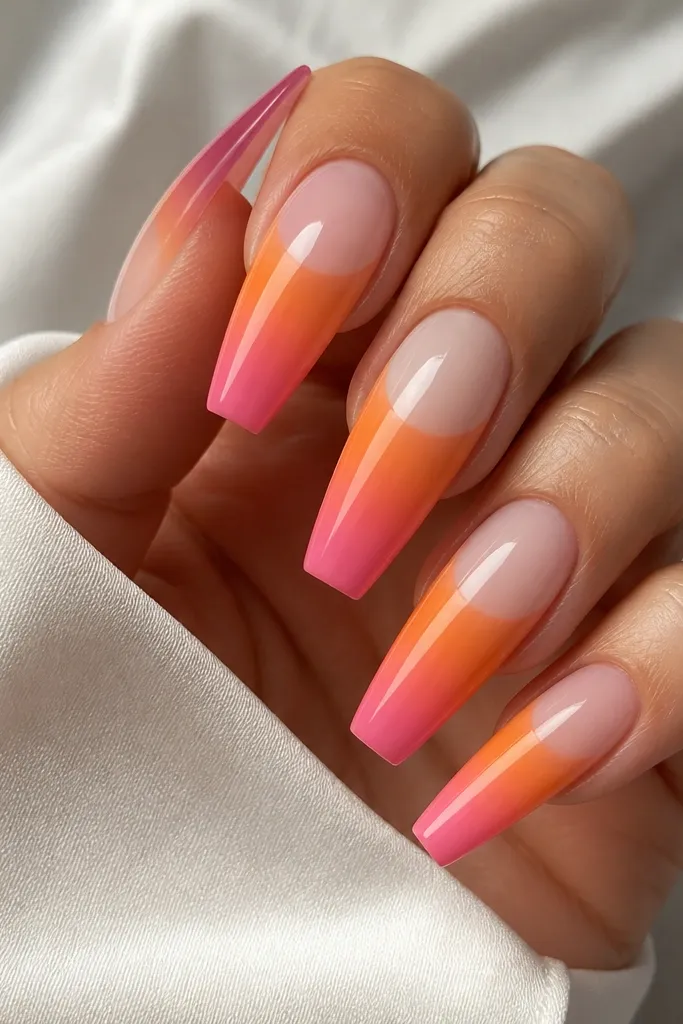
This is one of the few ombre designs that looks fresh even after weeks of growth because the negative space stays readable. You get the orange-to-pink gradient where it belongs, and the clear arc keeps the set light. I like it on coffin nails because the curved line looks like a wave and makes the nail look custom. It flatters hands with shorter nail beds because the negative space gives the illusion of extra length. The principle is leaving one crisp “window” so your eyes have a clean design line.
Apply a sheer base gel and cure. Paint orange-to-pink ombre on the lower half of the nail, keeping the blend smooth and stopping at the arc height. Use a thin striping brush to map a curved negative-space arc, then erase any color that hits that arc using a gel-lifter brush or cleanup brush. Cure again. Top coat glossy over the ombre area, careful not to flood the negative space where you want it clear.
Editor's noteUse a striping brush to define the arc before you top coat; top coat makes mistakes harder to fix.
Watch outAvoid thick negative-space edges; they look like you taped the nail.
9. Diagonal Orange-to-Pink Ombre Slant
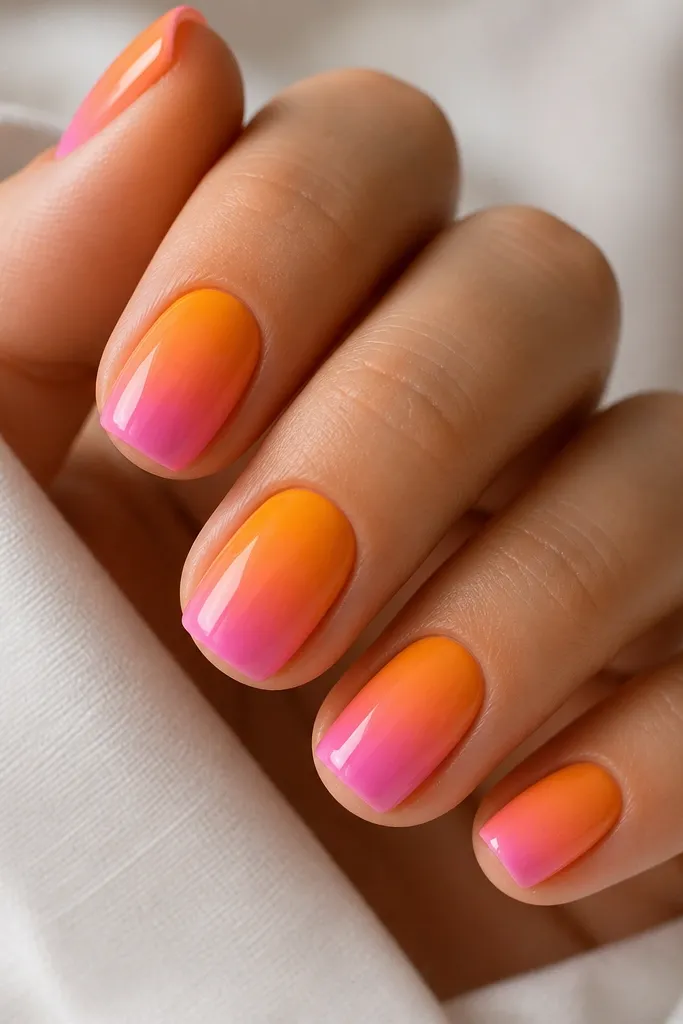
Diagonal ombre makes your nails look sharper and more stylized than the straight cuticle-to-tip version. It also makes your fingers look slimmer because the visual line travels across the nail instead of sitting in the center. This is a great option if you have uneven nail beds — the diagonal placement distracts from small asymmetries. The orange-to-pink transition stays readable because the blend is continuous along one edge. The principle is that diagonal gradients need a clean boundary line and a gentle feathering, not a hard stripe.
Start with a base coat and cure. Paint orange gel on one side near the cuticle, then fade it across the nail toward the center. Add pink gel on the opposite side near the tip and blend toward the center using a sponge with very light pressure. Use a thin brush to smooth the diagonal edge so it looks like one flowing stroke. Cure and apply glossy top coat, capping the free edge.
Keep the diagonal line slightly off-center — centered diagonals can look like a mistake on short nails.
Avoid heavy pigment at the center; it makes the diagonal look like two colors stacked.
10. Aura Corner Glow on Glossy Nude Base
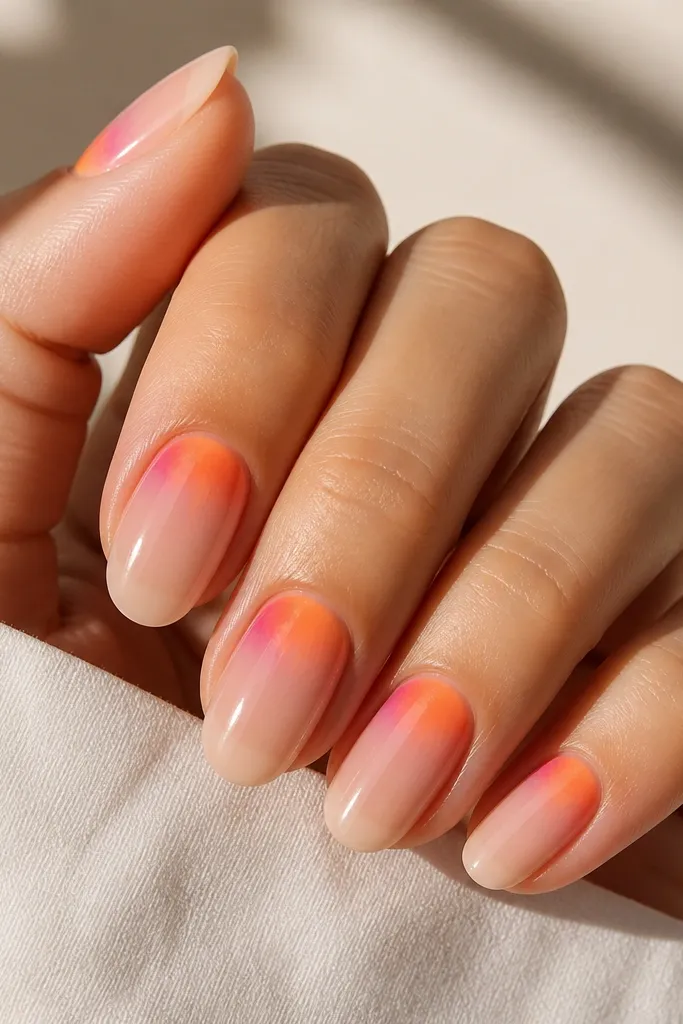
Corner aura is a clever twist that looks intentional even if your blending isn’t perfect, because the halo is smaller. The brightest glow near the corner makes the nail look like it has a light source, which flatters hands for both casual and dressy settings. It works well on oval nails because the corner placement follows the shape. Orange brings warmth, pink keeps it playful, and the nude base keeps everything clean. The principle is scale: smaller halo areas are easier to control.
Apply a glossy nude gel base and cure. Dab orange gel in the corner near the cuticle with a tiny makeup sponge, then stipple outward to soften. Add a small amount of pink around the orange center, then lightly blend the boundary by stippling again. Cure, then check the halo edge under a lamp. Top coat glossy and cap the tip.
Editor's noteUse a smaller sponge piece than you think; big sponges create halos that cover too much nail.
Watch outAvoid placing the halo dead center if you want a cleaner look; center halos show uneven edges.
11. Ombre with Orange-to-Pink Reverse French Tip
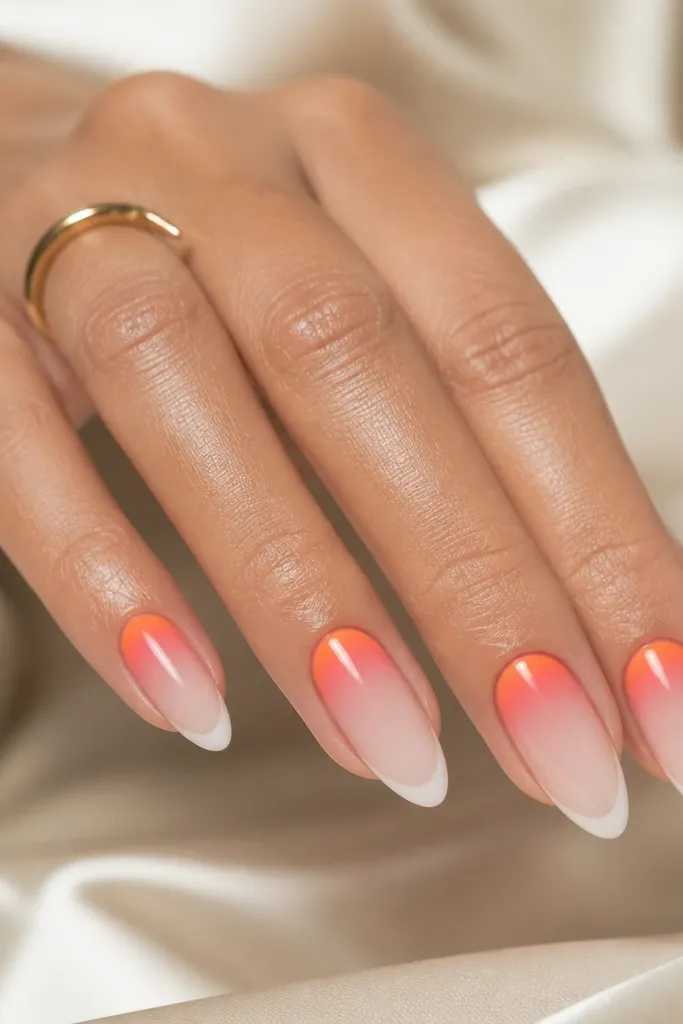
This design gives you the elegance of a French tip but keeps the fun gradient. The cuticle-to-tip ombre is limited to the “reverse French” band, so it looks neat and professional. It flatters fingers because the sheer middle makes the nail bed look longer and calmer. For skin tones, it works because the orange-to-pink band is warm and the sheer area keeps the set airy. The principle is clean negative space boundaries — sharp edges make the gradient look salon-done.
Start with a sheer base gel and cure. Paint orange gel in the reverse French band at the cuticle area, then blend into pink as you move toward the tip, keeping the band width consistent. Use a striping brush to define the outer edge of the band so it stays crisp and straight. Cure, then apply top coat glossy over the band and sheer area, avoiding flooding the defined lines. If the band looks too opaque, add one thin sheer layer to soften.
Pull the band edge with a steady hand using light pressure; heavy pressure drags gel and blurs the French line.
Avoid thick band coverage; if the gradient band takes over the whole nail, it stops looking like a French twist.
12. Aura + Ombre Hybrid One-Nail Accent
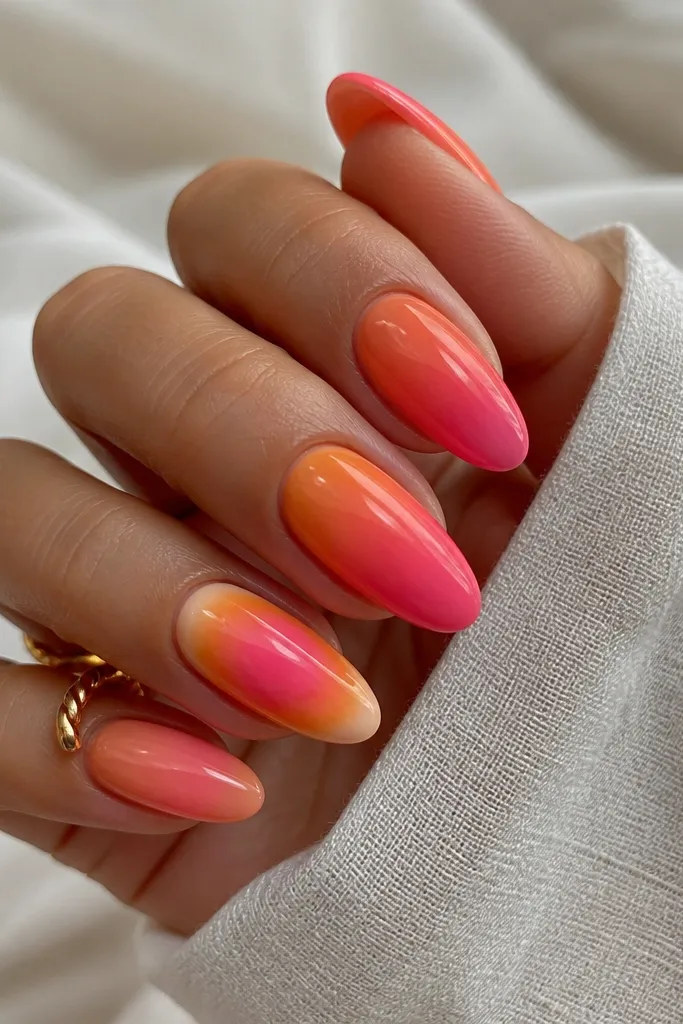
This is my favorite way to combine Orange And Pink Ombre Nails vs aura without committing to both on every nail. The ombre nails keep the look wearable and clean, while the aura accent adds that soft-glow art vibe. It flatters most hands because the majority of nails have a straightforward gradient, which makes your nails look cohesive. The accent nail becomes the focal point, so tiny imperfections on the aura blend are less noticeable. The principle is balance: keep one nail as the “art,” not all ten.
Do the ombre on most nails first: coral at the cuticle blending into pink at the tip on a sponge or brush. On one accent nail, use a sheer base and build the aura in the center with a stipple sponge. Place pink in the center, then feather orange outward with a second sponge dab, keeping the edges soft. Cure each layer, then top coat glossy on all nails. Match the intensity by using the same pink shade and the same orange shade across both techniques.
Editor's noteIf you’re unsure, start with aura on the ring finger only. It looks intentional and you’ll still get the wow factor.
Watch outAvoid using different pink undertones between nails; mismatched undertones make the set look sloppy.
13. Soft Airbrush Aura with Peach Edge Fade
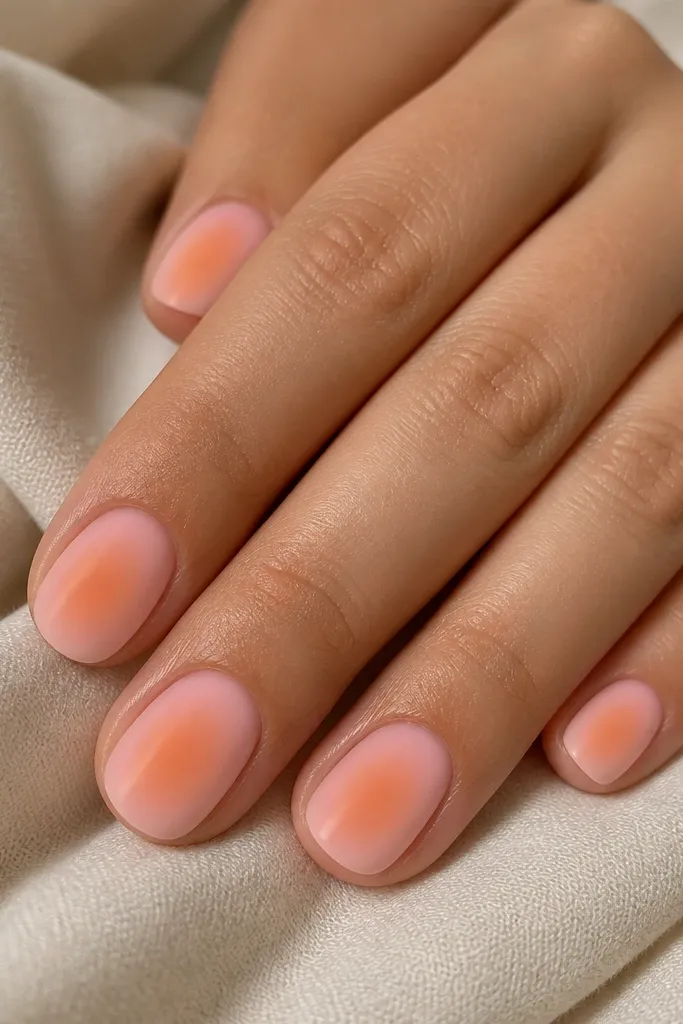
This aura version looks like a real airbrush because the edge fades into the base instead of staying opaque. I use it when I want something “glowy” but not loud. The peach edge is the secret — it bridges orange and pink so the aura doesn’t split into two blocks. This flatters hands that prefer subtle nail art, and it looks great on short oval because the fade fills the nail without needing extra length. The principle is dilution: thin gels and light stippling create that smoky fade.
Apply a sheer base and cure. Dab a diluted orange-pink mix in the center, then stipple outward with a sponge loaded with peach, staying very light. Add one more ultra-thin layer of pink in the center if you want more glow, then cure. Keep the final aura edge almost transparent by wiping off extra pigment from the sponge between dabs. Finish with a matte top coat, which makes the fade look even smoother.
Editor's noteUse a clear gel to thin your aura color; it spreads without turning patchy.
Watch outAvoid building the aura too thick on the first layer; you lose the airbrush effect.
14. Orange-to-Pink Ombre with Thin White Lightning Line
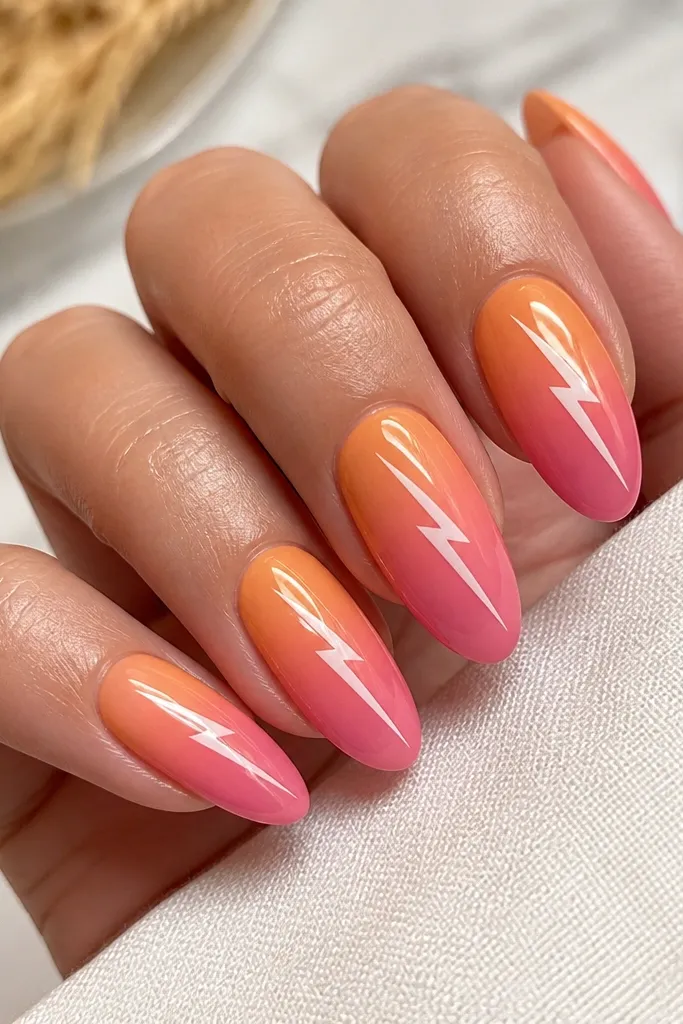
This is for when you want the ombre to look fun without turning into full nail art. The thin white line gives your eye a sharp design element, which makes the gradient look intentional. It flatters longer almond nails because the lightning bolt looks clean and doesn’t crowd the cuticle. For skin tones, white always pops, and the orange-to-pink gradient keeps it warm instead of icy. The principle is contrast: keep the art line thin so it doesn’t overpower the ombre blend.
Paint your orange-to-pink ombre first and cure, keeping the gradient smooth. Use a striping brush to draw a thin lightning bolt across the center, starting at the left side near mid-nail and breaking toward the right. Cure the white line. Add top coat glossy carefully — don’t flood over the lightning or it will blur. If the line spreads, wipe the surface with gel cleanser and re-top coat with a thinner layer.
Draw the lightning once, cure, then refine with a second pass if needed. Repeated drawing smears the ombre.
Avoid thick white strokes; thick lines look like nail stickers.
15. High-Contrast Ombre with Tangerine to Fuchsia
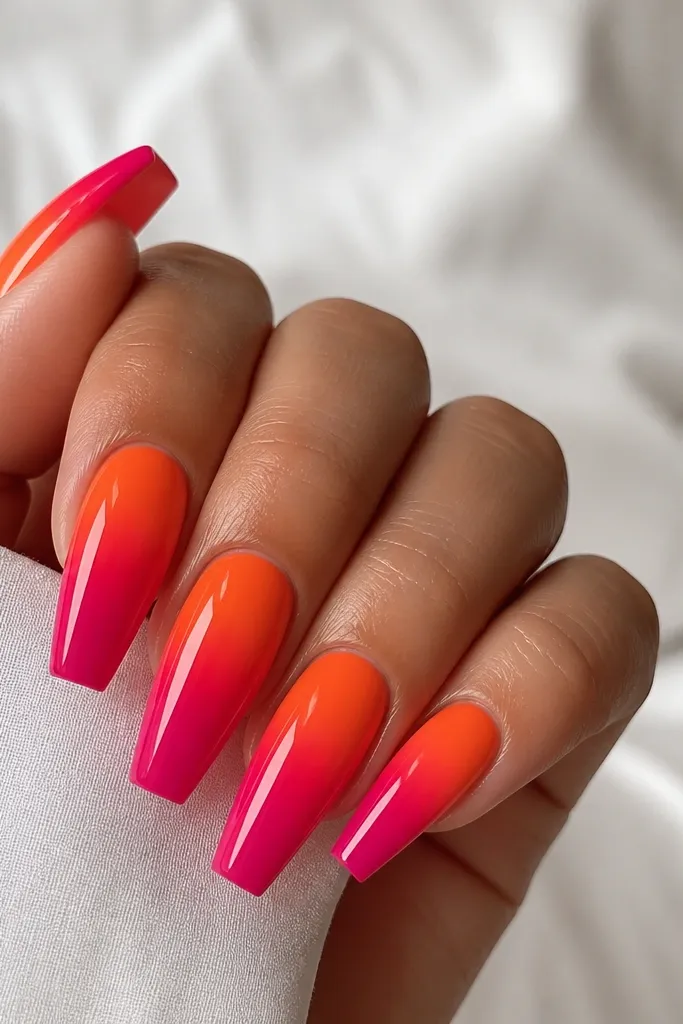
If you want the set to look bold in daylight, this is it. Tangerine-to-fuchsia has enough contrast that your nails look graphic, not washed out. It flatters fair to medium skin tones because the fuchsia pops, and it still looks good on deeper skin tones because the orange is warm rather than yellow. Coffin nails handle the intensity well — the extra length gives the gradient space to breathe. The principle is keeping the blend smooth while letting the colors stay saturated.
Apply base coat and cure. Paint tangerine orange at the cuticle and blend down to about half the nail using a sponge. Apply fuchsia gel at the tip, covering the last third, then feather upward into the orange with a clean brush. Cure. If the transition looks too sharp, add a thin “bridge” layer of tangerine mixed with clear gel in the middle and cure again. Top coat glossy and cap the tips.
Editor's noteUse a thinner top coat than you think; thick top coat can make high-contrast gradients look like a single block.
Watch outAvoid mixing fuchsia and orange directly on the nail; mix on the palette or brush for control.
16. Aura Halo with Thin Orange Outline Edge
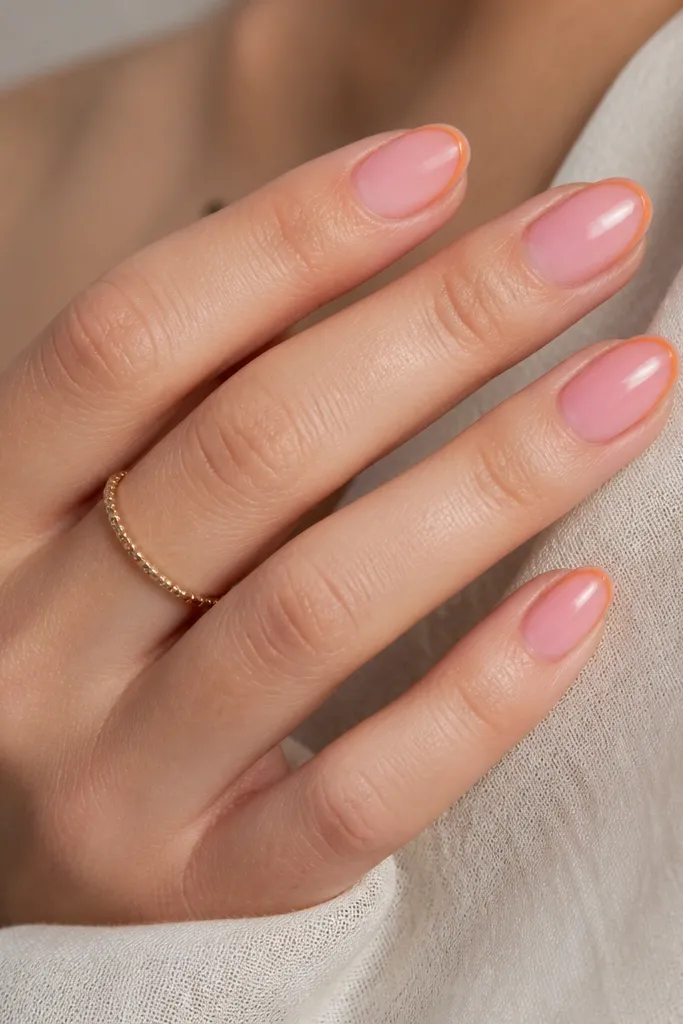
This aura style looks more polished because the thin orange outline gives structure. Instead of a full smoky orange halo, you get a pink glow in the center and a clean frame that makes the aura feel intentional. It flatters hands with shorter nails because the outline defines the shape, so the nail looks longer. I like it on oval and squoval because the outline follows the curve neatly. The principle is using aura for the glow and line work for the geometry.
Start with a sheer nude or sheer pink base and cure. Build the pink aura in the center with a sponge dab, then feather outward with a tiny amount of clear gel so it fades softly. Once cured, use a fine detail brush to draw a thin orange outline along the outer edge of the nail, staying about 0.5 mm away from the cuticle. Cure again. Top coat glossy, and avoid touching the orange outline with the brush too much to prevent smearing.
Editor's noteIf your outline looks uneven, place the brush at the sidewall first and pull toward the tip; sidewalls guide your hand.
Watch outAvoid thick outlining; it makes the aura look like a sticker border.
17. Ombre Watercolor Fade with Peachy Orange Wash
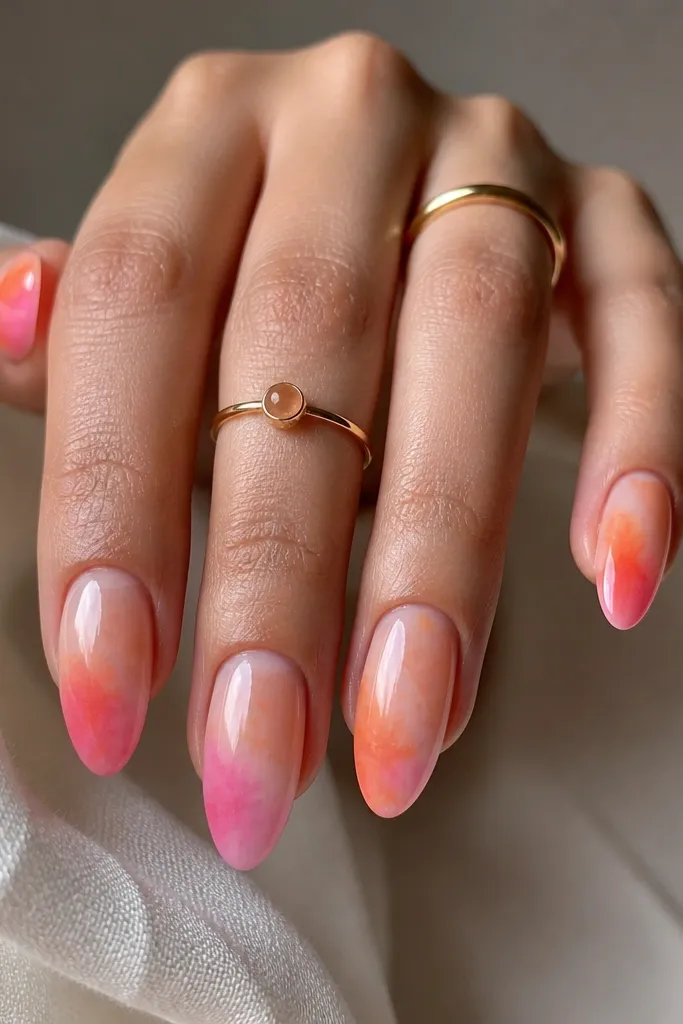
Watercolor ombre is the softest way to wear Orange And Pink Ombre Nails vs aura style colors. The orange is diluted so it looks like a wash, then pink appears as a lighter tint toward the tip. This flatters hands that don’t like super opaque nail polish and makes short nails look gentle instead of heavy. It also looks great for weddings or vacations because it looks clean even up close. The principle is opacity layering: build color in thin layers so the edges stay soft.
Apply base coat and cure, then paint a very thin peachy orange layer at the cuticle area. Using a sponge, dab diluted pink into the tips while the orange is still cured and set — keep the sponge light so you don’t overbuild texture. Blend once with a brush by pressing gently through the transition, then cure. Add one more thin layer of pink at the tip if you want more intensity. Seal with glossy top coat, keeping the layer thin so the watercolor edge stays soft.
Editor's noteThin your orange with clear gel, not more pigment; diluted pigment stays smooth.
Watch outAvoid thick gel layers — they kill the watercolor look and create streaks.
18. Pink Center Ombre with Orange Outer Shading
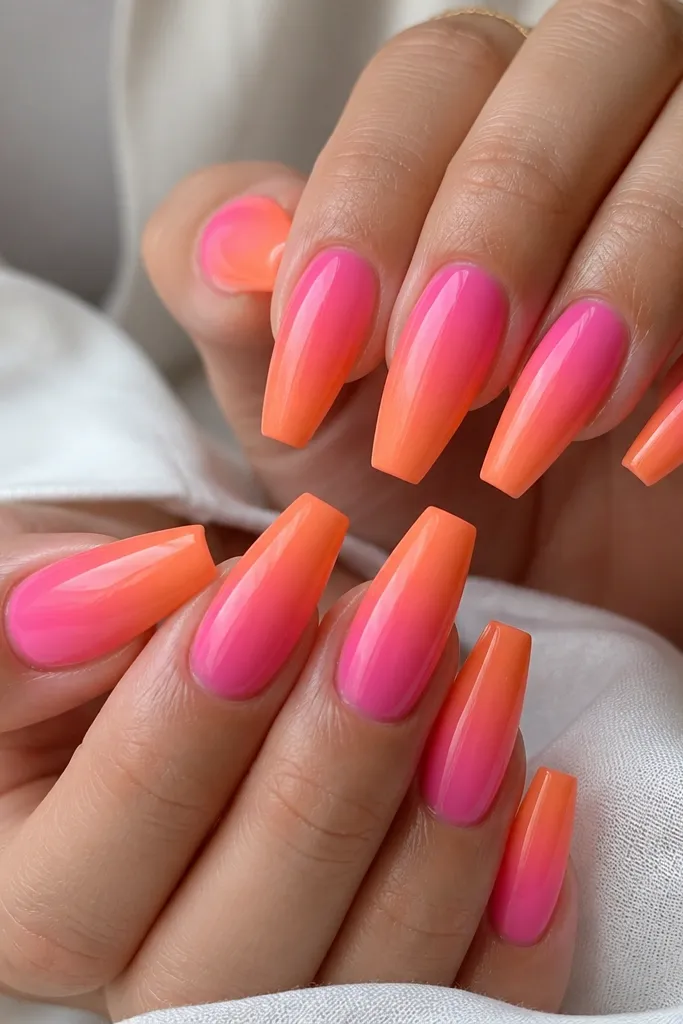
This design looks like ombre with a built-in highlight. Pink in the center makes the nail look like it has a soft spotlight, and orange on the sides adds warmth without making the whole nail too orange. It’s flattering on hands where the nail plate has slight ridges — the center highlight draws attention away from texture. Coffin nails make the center-to-sides effect look intentional and graphic. The principle is directional shading: place color where you want the visual focus.
Start with base coat and cure, then apply pink gel in the center strip of the nail, about 40% of the width. Sponge orange gel onto the side areas, then blend toward the center using a brush in small strokes. Feather the orange so it fades as it approaches the tip, keeping the center pink stronger. Cure each nail, then top coat glossy. If you need more center pop, add one thin extra pink layer in the middle only.
Editor's noteUse a striping brush to keep the pink center strip straight; it’s the whole look.
Watch outAvoid blending orange all the way to the center; you’ll lose the spotlight effect.
19. Ombre with Orange Cuticle Sparkle and Pink Fade
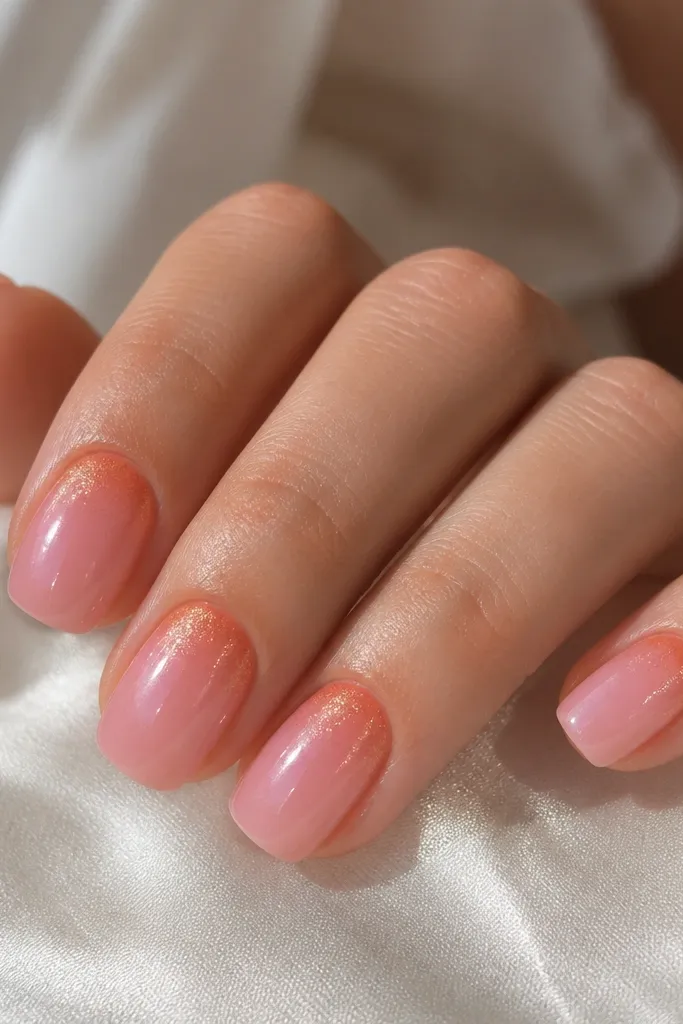
Cuticle sparkle is the quickest way to make ombre look like you spent more time than you did. The orange shimmer at the base catches light when you move your hands, and the pink fade keeps it sweet instead of harsh. This flatters nearly everyone because it draws attention to the base of the nails, which is where hands look most “finished.” Short squoval is perfect because the sparkle stays compact and doesn’t look heavy. The principle is concentration: sparkle lives in a small zone, then fades into smooth color.
Apply base coat and cure, then paint a soft pink ombre from mid-nail to the tip. For the cuticle zone, add orange fine shimmer gel in a thin circle around the cuticle, leaving a clean edge at the sidewalls. Blend the shimmer edge into the pink with a tiny brush, then cure. Finish with glossy top coat, sealing the shimmer so it doesn’t snag. Clean around cuticles with a brush and gel cleanser before final cure.
Editor's noteIf shimmer lifts when you wash hands, add one extra top coat layer only over the cuticle zone.
Watch outAvoid chunky glitter at the cuticle; it catches on hair and looks messy fast.



