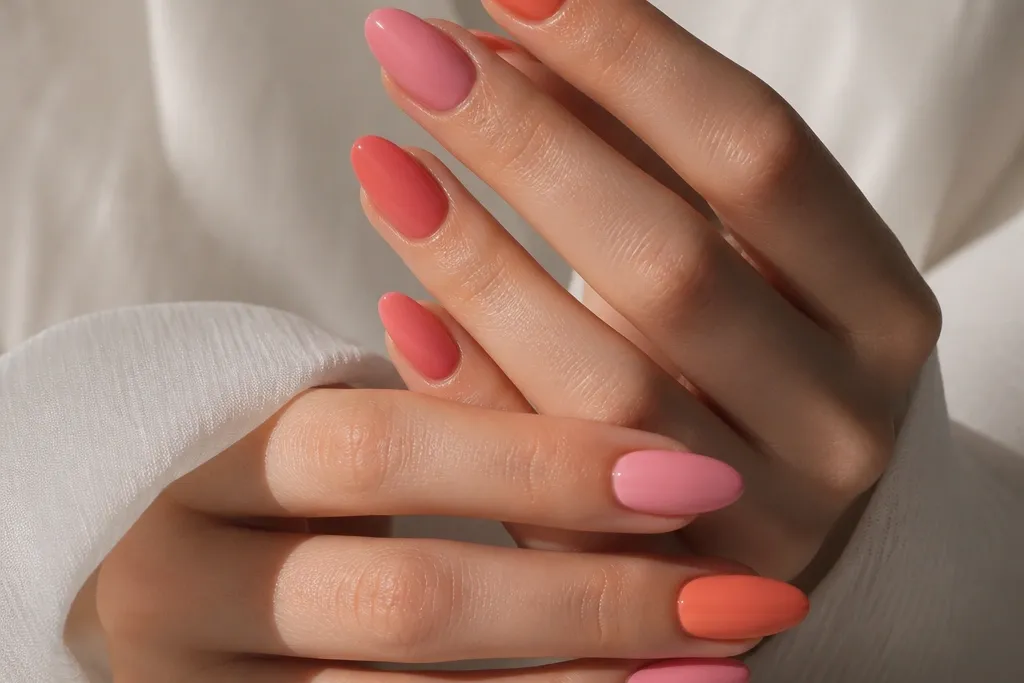
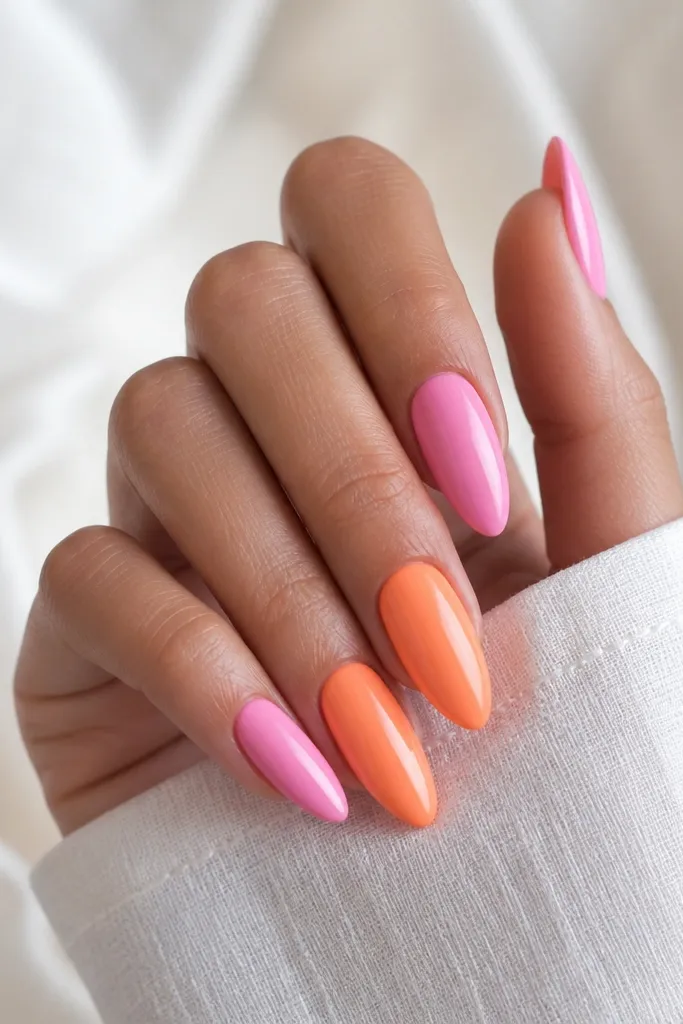
1. Blush-to-Tangerine Cuticle Ombre Almonds
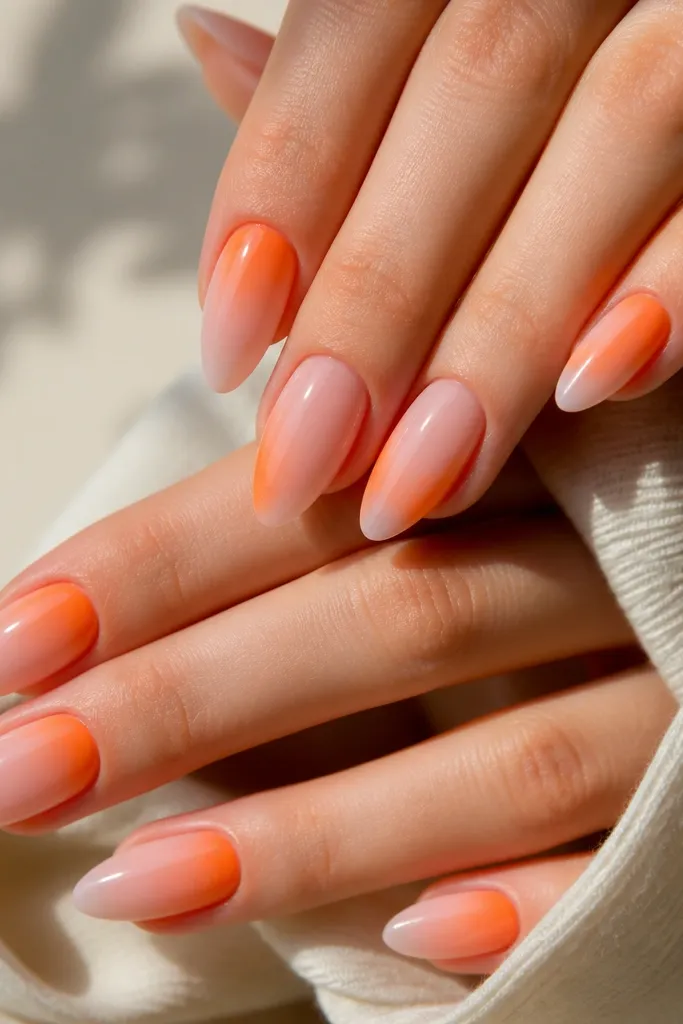
This design starts with a sheer-to-opaque blush pink near the cuticle, then fades into tangerine orange around the lower half of the nail. The orange looks like warmth coming up from under your skin, not like a sticker slapped on. I love it on medium to deep skin tones because the orange pops without turning neon, and it also flatters shorter almond shapes since the fade is concentrated near the cuticle. For fair skin, keep the orange slightly lighter (more peach, less red) so it doesn't overpower your natural undertone. The almond shape makes the gradient look elongated and gives your fingers a smooth, tapered line.
Start by prepping and lightly buffing the nail surface, then apply two thin coats of blush pink (opaque enough to cover ridges but not thick). Sponge the tangerine orange from the lower cuticle area outward - press lightly, then dab again until you see a soft transition. Use a small detail brush to clean the outer edge so the orange stays on the perimeter. Finish by sealing with a glossy top coat and cap the free edge with the top coat. If you want extra polish, add a second top coat after 2-3 minutes to smooth the gradient texture.
Editor's noteUse a makeup sponge cut into a small square so you don't drag orange across the whole nail.
Watch outAvoid a hard line where pink ends and orange begins - that's what makes this look like two separate colors.
2. Peach French Tip With Pink Skirt
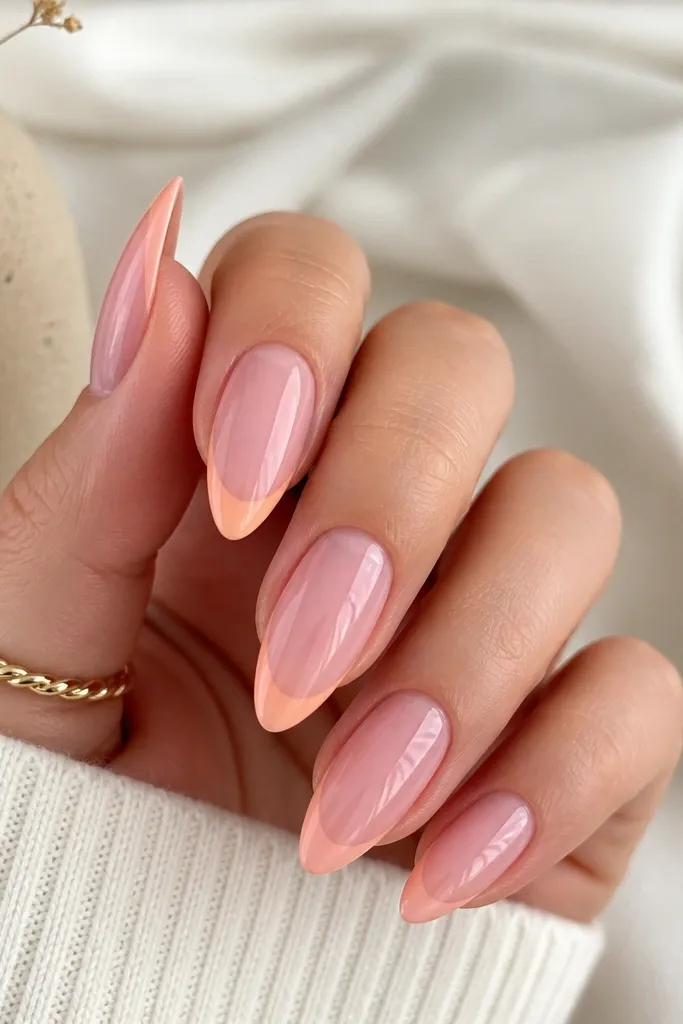
A French tip is the fastest way to make Pink And Orange Almond Nails gorgeous because it frames the nail and keeps the look tidy. Here, the base is a milky pink that blends upward into a softer "skirt" at the tip, while the tip itself is a peach-orange line. This flatters hands that need a length illusion because the smile line follows the almond curve and visually stretches the nail bed. I've done it for work events where bright colors can feel too loud - this reads fresh instead of flashy. Fair and medium skin tones look especially good with peach-orange since it stays warm but not red.
Paint two coats of milky pink, letting it self-level so the surface looks smooth under the top coat. With striping tape or a French guide, place a thin line of peach-orange right at the tip edge, keeping it about 1 mm away from the sidewalls. Blend the area just under the tip with a second, lighter pink or the milky base using a detail brush - you want a gentle fade, not a full ombré. Remove any guides carefully, then apply glossy top coat and cap the free edge. Clean up the sides with a flat brush dipped in acetone for sharp edges.
Editor's noteMake the peach line slightly thicker in the center and thinner at the corners - it matches the almond taper.
Watch outSkip thick French tips; thick paint makes almond shapes look bulky instead of sleek.
3. Orange-Side Half Moons on Blush Almonds
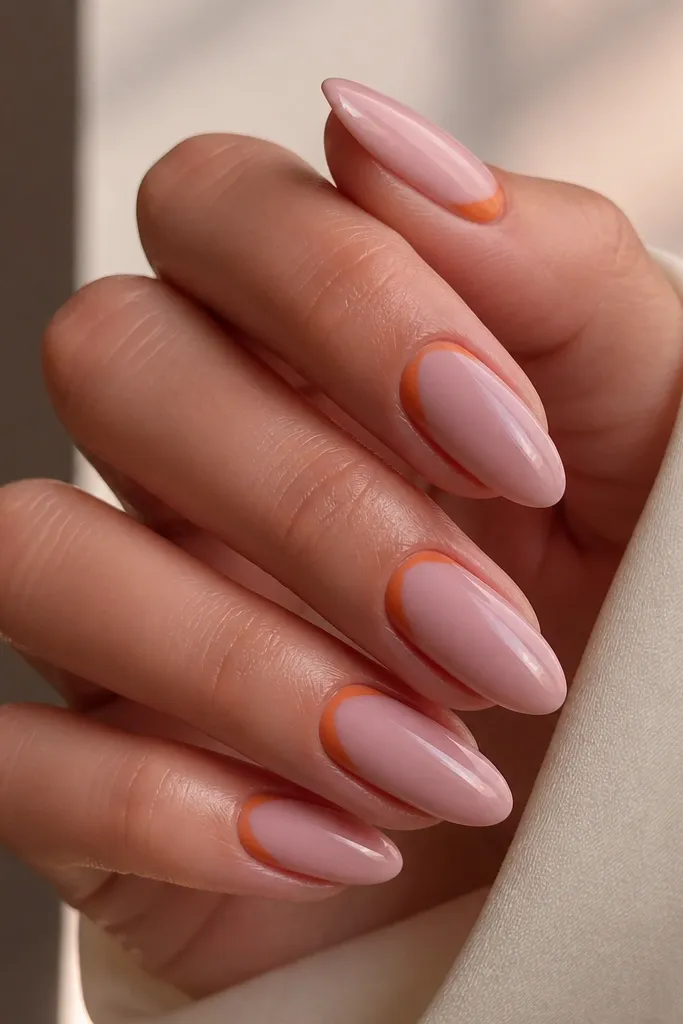
Half moons are a cheat code for looking styled without covering the whole nail. This version keeps a blush pink base while orange half-moons sit on the inner and outer cuticle corners, leaving the middle cuticle clean. The effect is sculptural - it makes your nails look neatly shaped and gives your fingers a lifted look. I've worn this on short almond and it still looks intentional because the orange is placed where the eye naturally checks shape. It also works across skin tones: fair looks bright and fresh, while deeper skin tones get a warm contrast that doesn't wash out.
Start with two coats of glossy blush pink and make sure the cuticle area is smooth (no bumps). Use a small liner brush to paint orange half-moons on each side of the cuticle, stopping before the center. Blend the orange slightly outward with the brush tip so it looks like part of the nail, not a hard sticker line. Clean any edge mistakes with a tiny brush and acetone. Finish with one glossy top coat, then cap the free edge.
Editor's noteOutline the half-moon first in thin orange, then thicken it - you'll get cleaner symmetry.
Watch outDon't bring the orange into the center cuticle; that turns it into a blocky color patch.
4. Tangerine Swirl Over Pink Milk Base
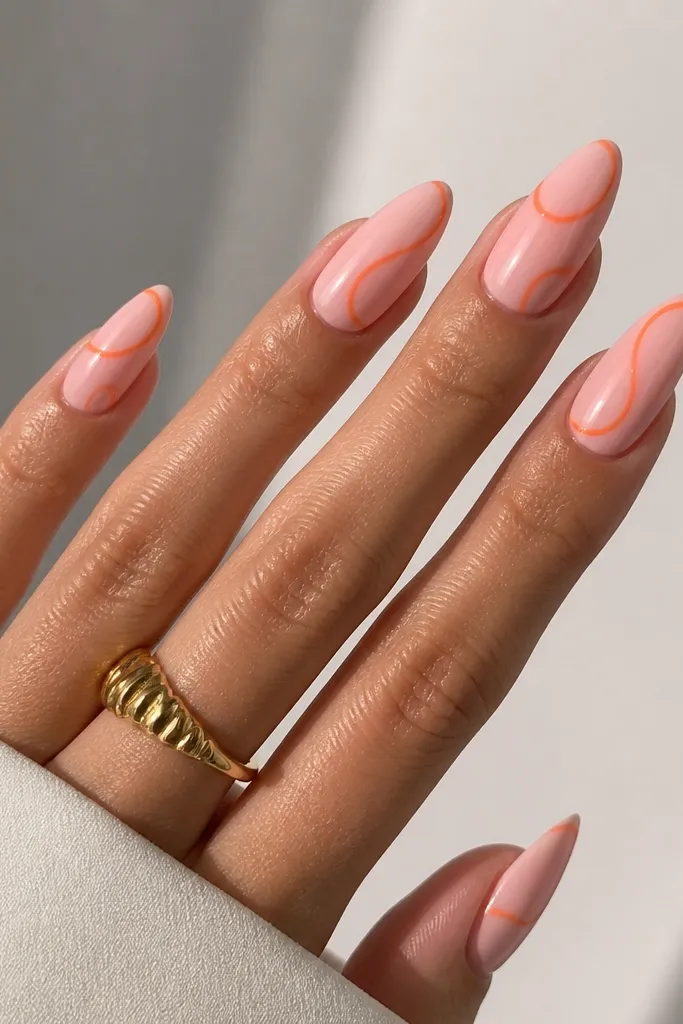
Swirls add movement, and orange swirls look extra flattering on almond because the curve follows the nail's natural taper. The base here is a pink milk (milky, not fully opaque) so the orange line reads like it's drawn with light. I like this on medium and deeper skin tones because the milky pink holds the warmth and keeps orange from looking harsh. For fair skin, use a slightly warmer pink-milk to avoid the design reading too stark. This one is a great pick for dates, parties, or photos where you want something more interesting than an ombré.
Apply two coats of pink milk and let it dry until tack-free, then top with a thin layer of base gel if you're using gel (it helps the line glide). Paint a thin tangerine orange swirl with a liner brush: start near the lower cuticle, curve outward across the center, then taper toward the outer tip. Keep the line width consistent - if the brush gets too loaded, wipe it on a lint-free wipe and restart. Add a second pass only where you need more opacity, then seal with glossy top coat. Cap the sides and free edge so the swirl doesn't catch on hair or fabric.
Editor's noteUse a liner brush with a pointed tip (not a flat art brush) for that hairline swirl look.
Watch outSkip chunky swirl lines; thick orange makes almond nails look shorter.
5. Orange Dot Confetti on Rosy Pink Almonds
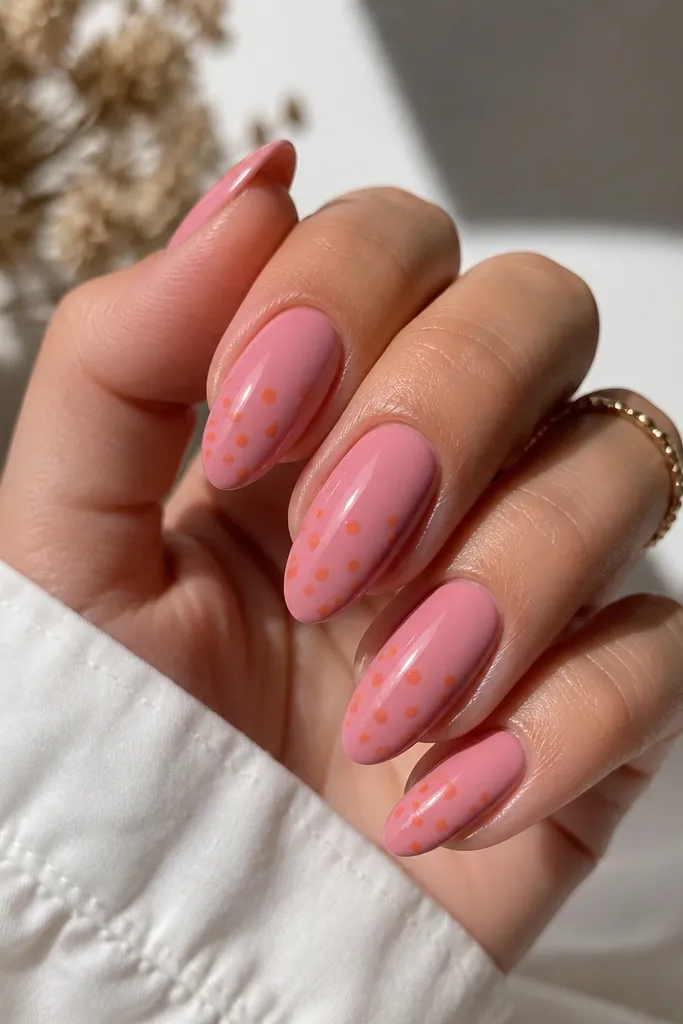
Confetti dots are playful but still wearable when the dots are small and clustered. This design uses a rosy pink base (slightly deeper than blush) with tiny orange dots placed in a loose band across the middle. The warm dots draw attention to the center of the nail, which makes the almond shape look even longer. I've used this for vacations and casual events where you want color but not full coverage. It's also beginner-friendly because dots hide small brush mistakes - as long as you keep dot size consistent.
Paint two coats of rosy pink and let it fully level. Dip a dotting tool or the end of a bobby pin into orange polish and test dot size on a paper towel first. Place dots in a diagonal-friendly band - start with three dots on the outer half, then mirror with two or three on the inner half. Leave small gaps so the pink base still shows through. Finish with glossy top coat and check the surface under a light - you want smooth dots, not bumps.
Editor's noteMake your orange dots slightly lighter than your main orange shade so they look like highlights.
Watch outDon't scatter dots randomly across the whole nail; it turns into clutter fast.
6. Peony Pink Base With Orange Outline Tips
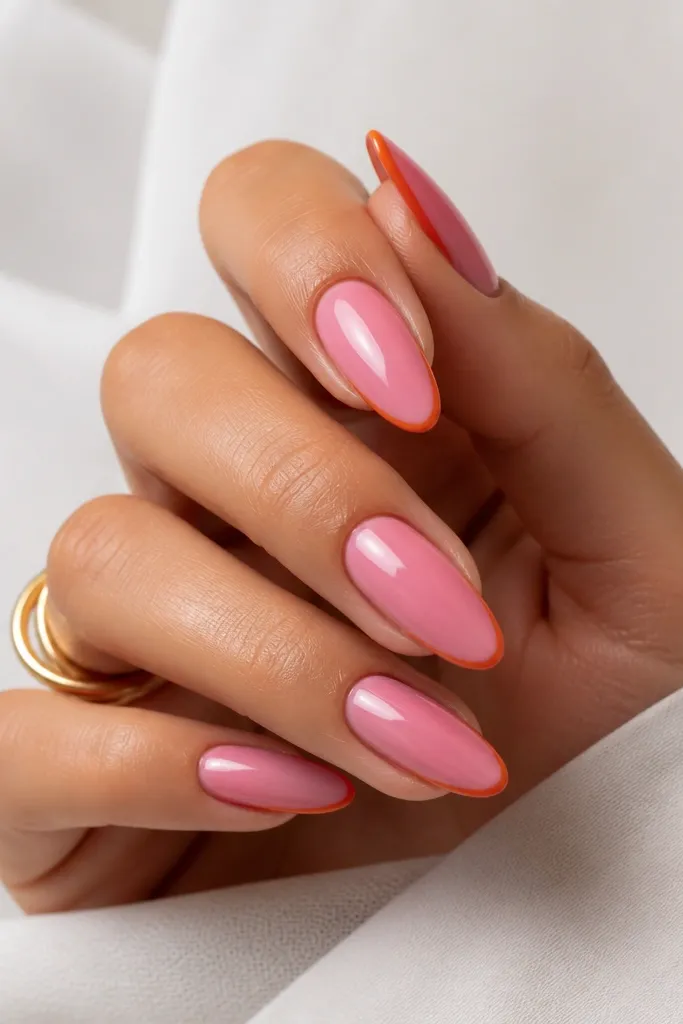
This is the "clean but not boring" version of Pink And Orange Almond Nails gorgeous. The base is a peony pink - think rosy with a hint of purple - and the orange only outlines the tip edge as a second line. The double-border effect makes your nails look sharper and more sculpted, and it flatters hands that already have strong nail beds because the outline adds definition. I like it for everyday wear because it looks styled even if you're not into full art. On fair skin, peony pink makes the orange look golden; on deeper skin tones, it adds a soft contrast without going icy.
Apply two coats of peony pink, then let it dry fully. Paint a thin orange line along the tip edge, staying inside the free edge by about 0.5 mm so it looks crisp. If you want extra depth, add a second orange line just under the first line, leaving a tiny pink gap between them. Clean up the edge with a flat brush and acetone. Seal with glossy top coat and cap the free edge so the outline stays smooth.
Editor's noteUse painter's tape as a guide for the first orange pass, then freehand the second line for control.
Watch outAvoid thick orange borders - they make the tip look heavy on almond.
7. Sheer Pink Base With Tangerine Watercolor Fade
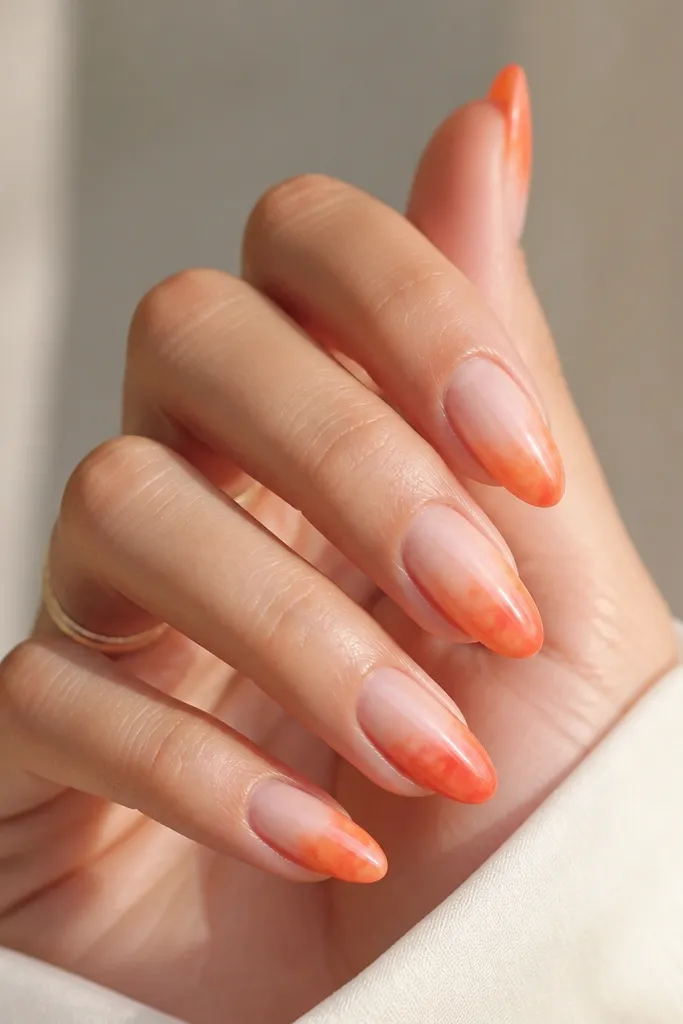
Watercolor fades make orange look airy instead of blunt. This one starts with a sheer pink base so your natural nail shows through, then the tangerine orange blooms at the tips like a soft stain. I like it on medium-length almond because the tip area has enough real estate for the "wash" effect. Fair skin looks dreamy with lighter tangerine, while deeper skin tones can handle a slightly deeper orange-peach so it shows up on camera. This design also hides minor nail imperfections because the sheer base smooths the look.
Apply a sheer pink base in two thin coats, letting each coat self-level. Load a small brush with tangerine orange and lightly tap it at the tip - don't paint in a solid stroke. Blend outward using a clean brush dampened with a tiny bit of cleanser (or topcoat if you're working with gel) so the edges go soft. Add one more tap for intensity only at the outer corners. Finish with glossy top coat, and cap the tips carefully to keep the watercolor from catching.
Editor's noteDo the orange in two light layers instead of one heavy layer for a more natural watercolor spread.
Watch outDon't fully cover the tip; the magic is in the soft, translucent edge.
8. Pink Marble With Orange Vein Accents
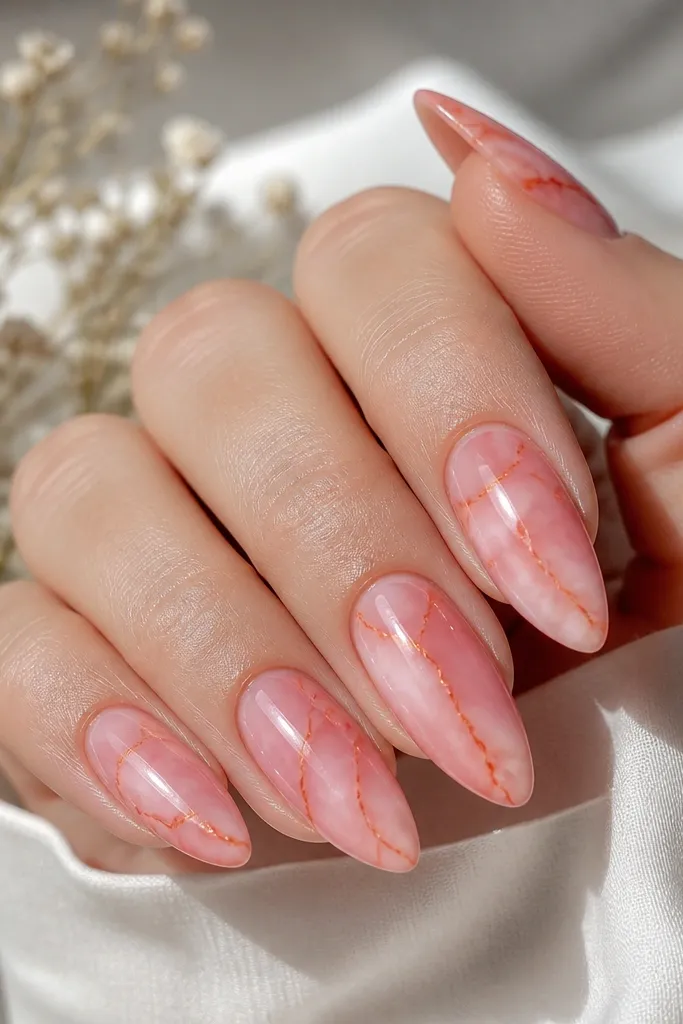
Marble nails look hard to do, but orange-vein marble is manageable if you keep the pattern light. The base is pink marble with white and blush movement, and orange shows up as thin veins that cross the marble like warm cracks. This flatters basically everyone because the marble pattern adds depth without needing a lot of coverage. I've worn it on hands with shorter nail beds and it still looks elongated because the veins travel diagonally. For photos, orange veins pick up warm light and make the nails look like they're glowing from within.
Paint a pink marble base using a pink base coat, then add faint white swirls with a sponge or thin brush. Use a toothpick or liner brush to drag through the swirls lightly so they connect like marble. Now add orange veins: draw 2-3 thin lines diagonally across each nail, then lightly blur the edges by dragging one pass of a clean brush. Keep the veins narrow so the pink marble stays the main background. Seal with glossy top coat and cap the free edge to keep the marble lines from lifting.
Editor's noteUse orange gel polish with a thinner consistency for veins so they don't blob.
Watch outSkip thick marble blobs; they look like paint splatter instead of stone.
9. Orange Outline Half-Pedi French on Almonds
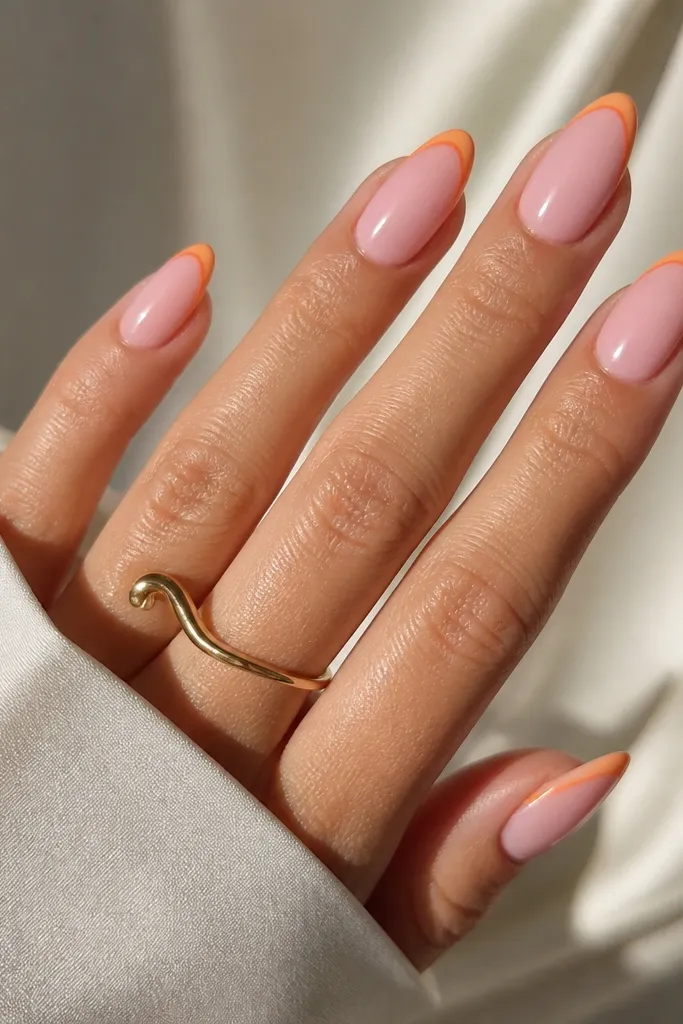
This design takes the French tip and makes it feel modern by limiting the orange outline to the outer half. The pink base stays smooth and the orange border curves with the almond shape, so your nails look extra sculpted. I like this for people who want orange but don't want full coverage on every nail. It's also flattering when your nail beds are uneven, because the outline draws attention to the shape rather than the length. Fair to medium skin tones look especially good because the orange border reads like a warm frame.
Start with two coats of smooth pink base, slightly sheer if you want a softer look. Place a thin orange line along the outer half of the tip, stopping around the center of the nail - keep it curved, not straight. Add a second orange line just inside the first line to make the outline look crisp. Fill nothing in the center of the tip; let the pink show through for the half-pedi effect. Top coat with glossy finish and cap the free edge.
Editor's noteUse a wide French guide strip to get the curve right, then remove it before you add the second line.
Watch outDon't extend the orange outline past the center; that breaks the half-pedi look.
10. Coral Pink Base With Tangerine Gradient Tips
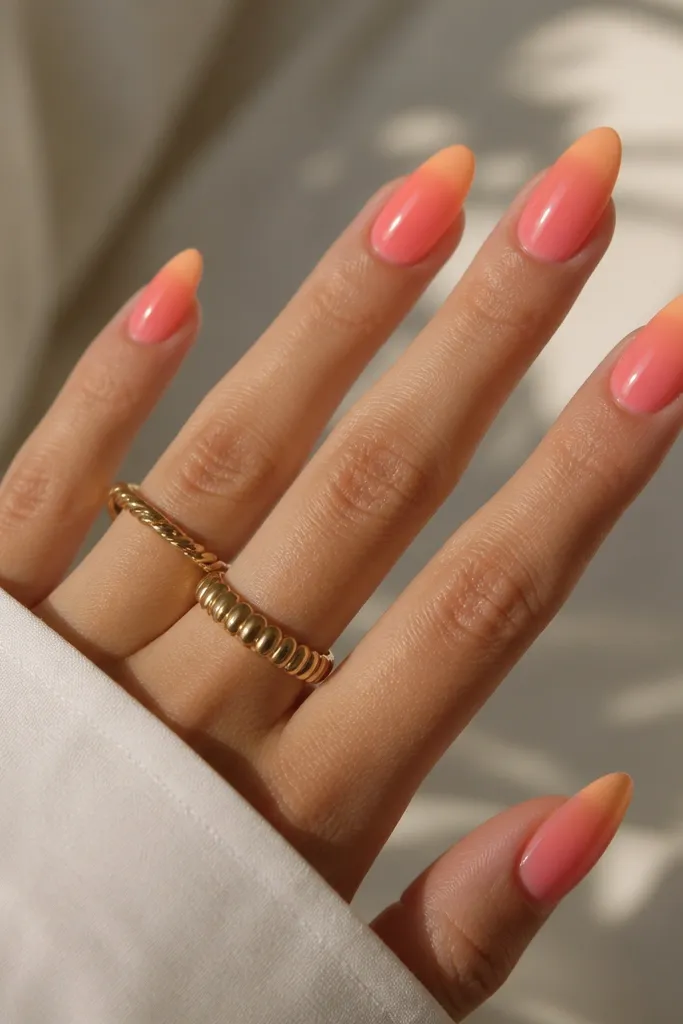
If you want the orange to look like it's sunlit, do a mid-nail gradient tip. The base is coral-pink (deeper than blush), and the orange starts around the middle so the transition looks intentional. This makes fingers look longer because the eye follows the gradient down the almond. I've worn this to outdoor weddings and it still looks good when the light hits - the orange stays warm instead of going flat. It's especially flattering on medium and deeper skin tones where coral-pink already matches the undertone.
Apply two coats of coral-pink and let it fully cure or dry. Sponge tangerine orange starting around the middle of the nail, then soften toward the tip with a light blend so the very tip is more peach than orange. Use a small brush to clean the sidewalls so the gradient doesn't creep. Add a second thin layer only if the orange looks too faint. Finish with glossy top coat and cap the free edge so the gradient stays smooth.
Editor's noteBlend in small arcs from side to side; it keeps the gradient even across the almond curve.
Watch outAvoid starting the gradient too low; if it begins only at the tip, it looks like a simple ombré sticker.
11. Pink Chrome Shimmer With Orange Edge Glow
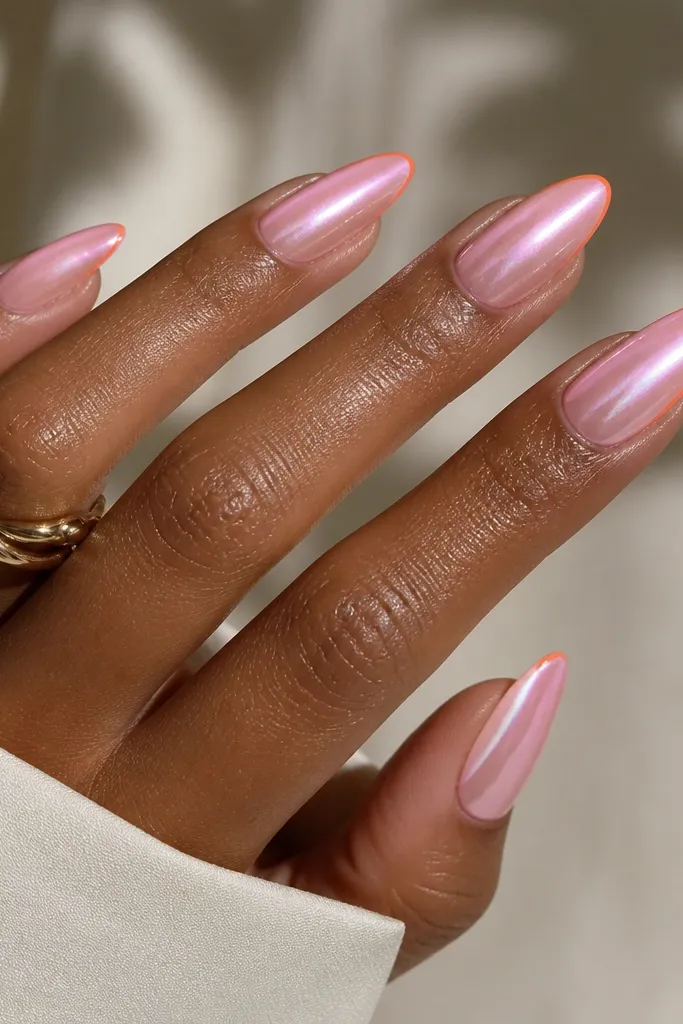
Chrome makes this combo look instantly polished, and the trick is keeping the orange in a thin "edge glow." The nails start with a pink chrome layer that reflects light as soft rose, and orange appears as a narrow line along the outer edge and tip curve. This looks amazing in photos because the chrome catches every angle, and the orange adds warmth without turning the nails into a solid block. I like it for parties and nights out, but it's still neat enough for day events. On fair skin, pink chrome looks icy-cute; on deeper skin tones, it looks like rose gold and the orange line reads like a warm highlight.
Apply a pink chrome base (or a pink gel polish plus chrome powder) and cure fully. With a fine liner brush, paint a thin orange line along the outer edge of each nail, then curve it slightly at the tip - keep the line about 0.5 mm wide. For more glow, add a second pass over the line lightly to increase opacity. Wipe off any stray chrome dust near the line so it doesn't muddy the orange. Seal with a high-shine top coat designed for chrome so the reflect stays crisp.
Editor's noteDo the orange line after chrome is cured so you don't smear the powder into the orange.
Watch outSkip thick orange chrome lines; they look metallic and flat instead of glowing.
12. Orange Jelly Accent Nail With Pink Base Almonds
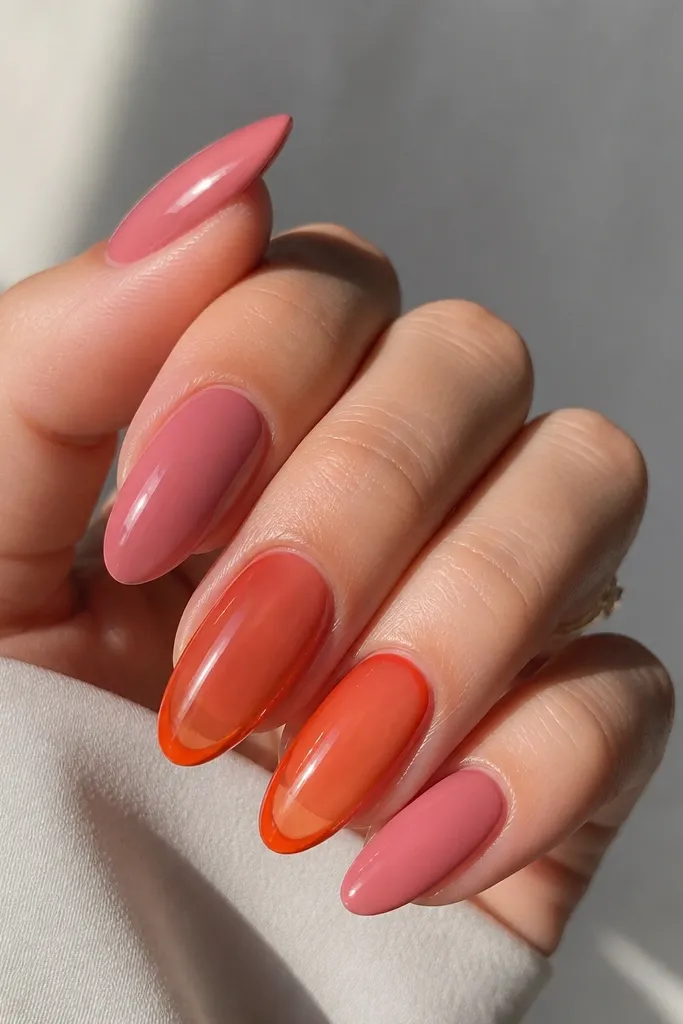
Accent nails keep the look fresh and let orange feel intentional. This set uses a glossy pink base on most nails, then one or two nails get an orange jelly coat - translucent, slightly see-through, with a brighter orange edge. The jelly finish makes orange look juicy and soft, not harsh, and it works for both short and medium almond. I've done this on hands that look better with less pattern because it keeps the design from overwhelming your nail bed. It's also a great choice if you want variety without changing your whole manicure every week.
Start with two coats of glossy pink on all nails, making sure the surface is smooth. Choose one accent nail per hand and apply orange jelly polish in thin layers, curing between coats if you're using gel. Build the center slightly lighter by wiping the brush after each pass, then deepen the outer edge with another thin layer. Add a tiny touch of lighter peach jelly near the tip for a highlight effect. Finish with glossy top coat on all nails and cap the free edge.
Editor's noteUse jelly polish instead of opaque orange when you want the manicure to look soft and expensive.
Watch outDon't make every nail orange jelly - the set stops looking curated fast.
13. Pink and Orange Micro Floral on Almond Tips
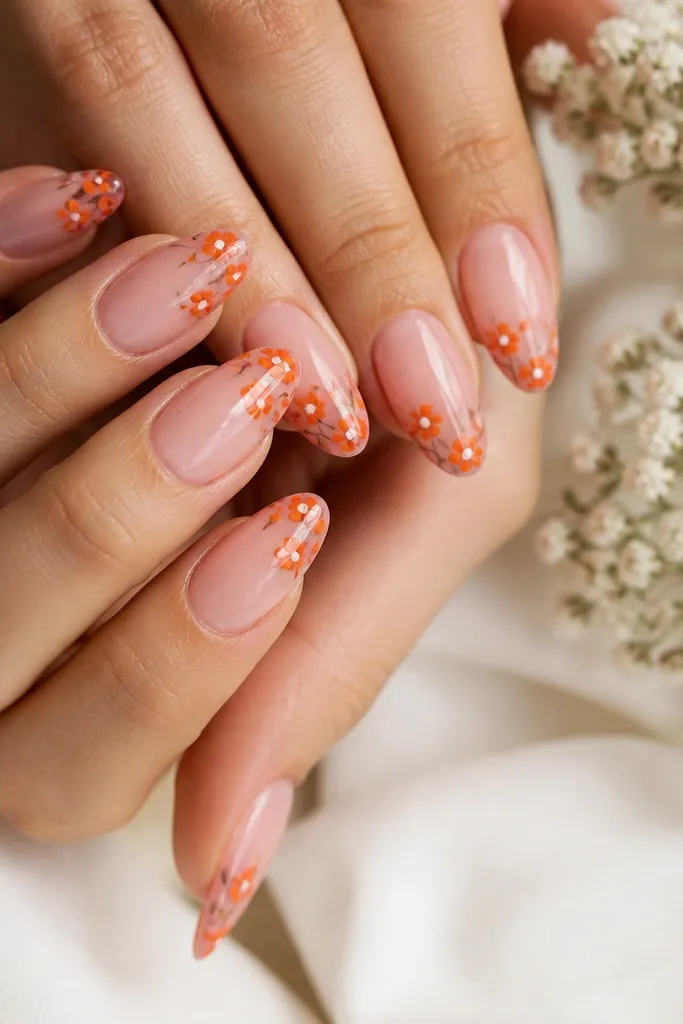
Micro florals look sweet, but they only work when the scale stays small. This design has a glossy pink base and tiny orange flower clusters placed on the outer tip area, with a couple of fine stem lines. I like it because the floral sits where the almond tapers, which makes the flowers look like they're blooming outward. It flatters hands that want a feminine touch without full nail art coverage. Fair and medium skin tones look extra cute with white centers, while deeper skin tones can skip the white and use a lighter peach center for contrast.
Paint two coats of glossy pink and let it dry completely. Using a dotting tool, place a small orange petal cluster near the outer tip - 4-5 dots around a center. Add a tiny white or peach dot in the middle, then drag a thin liner brush to create one or two stems that curve along the almond. Keep the flowers to one cluster per nail to avoid clutter. Seal with glossy top coat and press gently at the edges so the art stays flat.
Editor's noteUse a nail art brush with a very fine tip and keep your flowers to one "bloom" per nail.
Watch outDon't put full flowers across the whole nail; tips only look clean on almond.
14. Pink Ombre With Orange Glitter Fade Tips
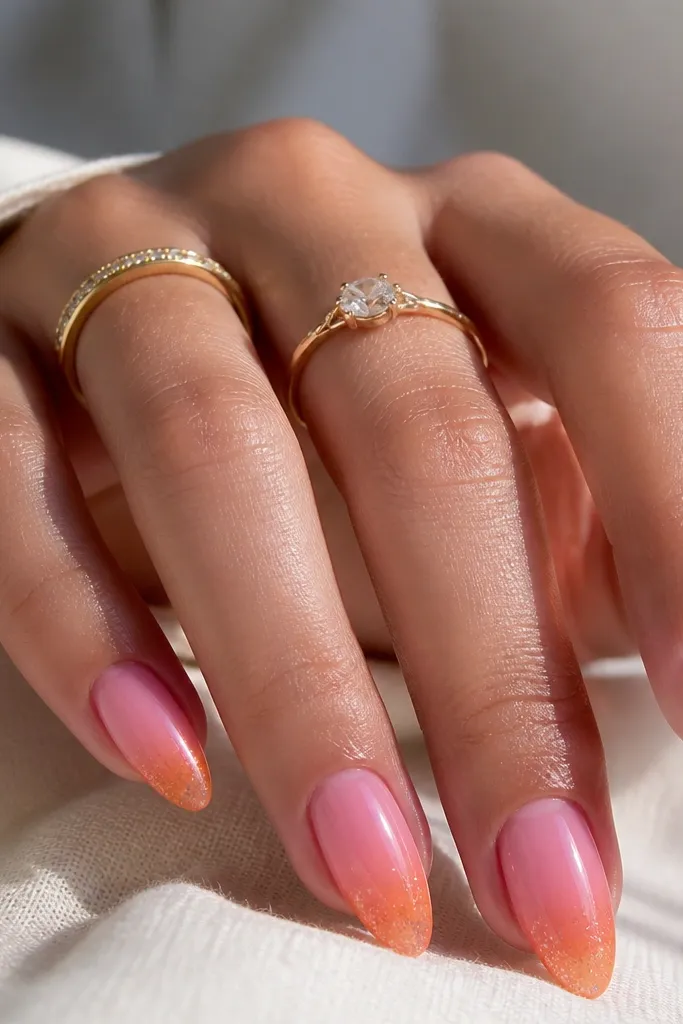
This is for when you want Pink And Orange Almond Nails gorgeous with sparkle that doesn't look messy. The base is a smooth pink ombré that transitions into orange near the tip, then you add a glitter fade only on the last 2-3 mm. The glitter makes the orange look like it's catching light, not like it's sitting on top. I've worn this to birthdays and night dinners, and it still looks neat because the glitter is controlled to the tip. It flatters longer almond the most, but you can scale it down for medium length by shrinking the glitter zone.
Apply two coats of pink base, then sponge or brush a soft orange ombré starting around the mid-tip and fading to the very edge. Let that layer dry or cure fully. With a small flat brush, press orange glitter only at the tip edge, blending upward just slightly so the glitter fades. Tap off excess glitter with a clean brush so it doesn't spill into the pink area. Seal with a glossy top coat in two thin layers, curing between coats if needed, and cap the free edge.
Editor's noteIf glitter feels gritty, use a top coat that's made for glitter and apply it slowly so it levels.
Watch outSkip heavy glitter coverage; thick glitter makes almond tips look rough.
15. Orange Micro Stripe Over Pink Marble Base
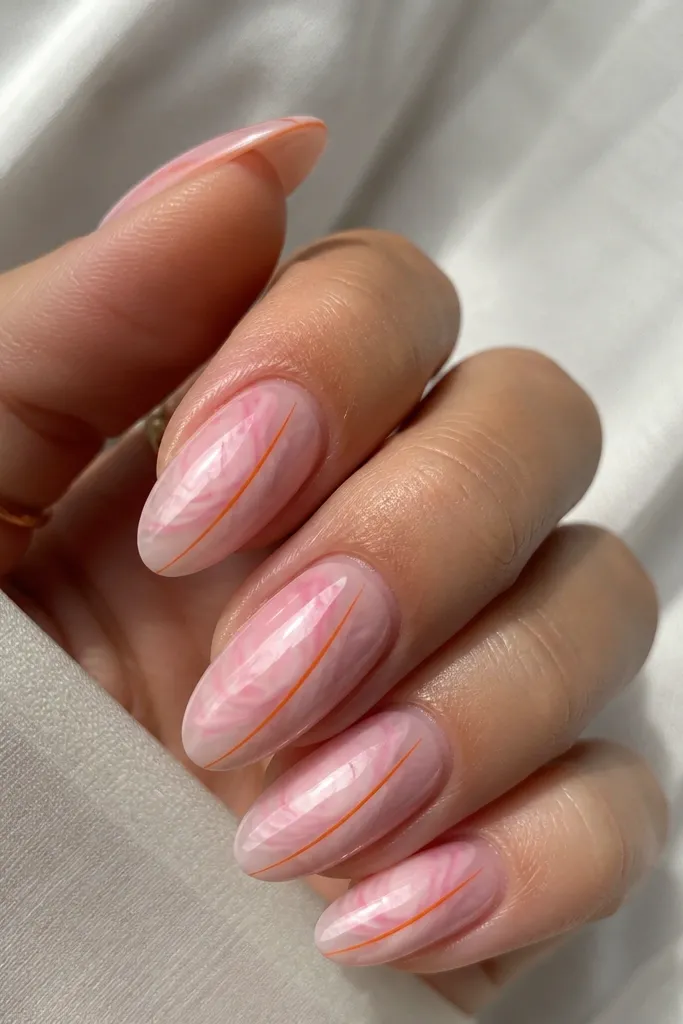
Micro stripes give you design impact without taking over the whole manicure. The base is pink marble (soft blush and white movement), and orange shows up as one ultra-thin stripe that runs diagonally from near the cuticle toward the tip. This placement makes the nail look longer and keeps the color pairing classy. I like it on all skin tones because marble softens the contrast, and the orange line acts like a warm signature. If you're tired of full ombré every time, this is the "same vibe, new look" version.
Paint a pink marble base using a pink base coat plus thin white swirls, then gently blend so it looks like stone. Let it fully dry, then draw one thin orange micro stripe with a liner brush - keep it straight enough that it looks intentional, but leave a slight natural curve to match almond shape. Add a second tiny orange line only if you want more intensity, but keep spacing consistent. Clean the line edges with a fine brush and acetone so it stays crisp. Finish with glossy top coat and cap the free edge.
Editor's noteDrag the brush once, then stop. Going back and forth usually makes the stripe thicker than you planned.
Watch outDon't add multiple stripes across every nail; two patterns fighting for attention looks messy.