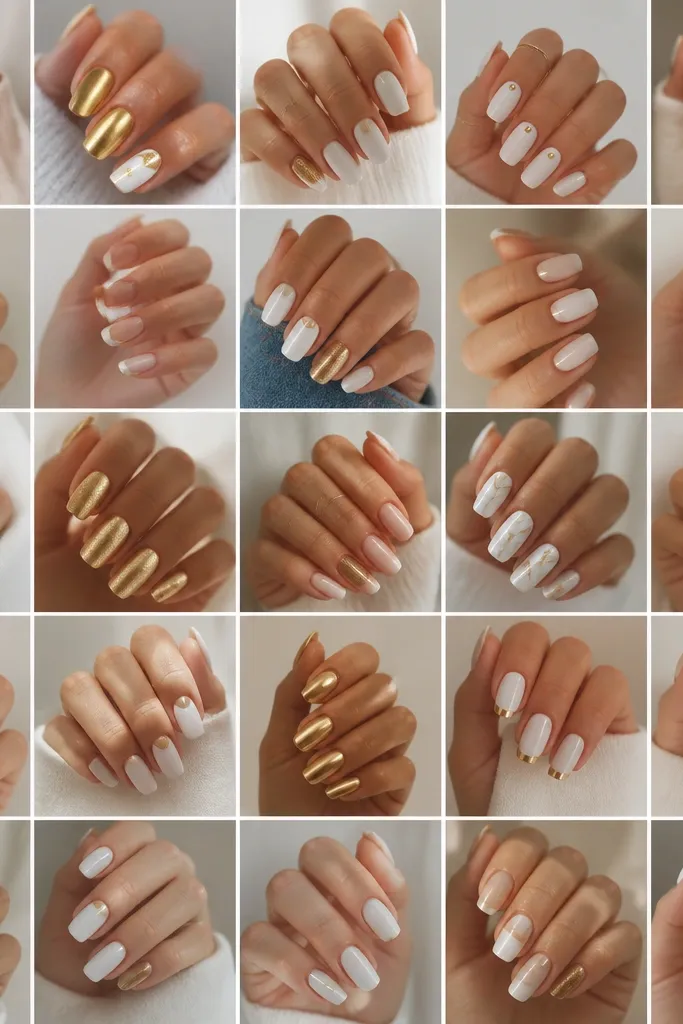
1. Milky White Base With Gold Half-Moons
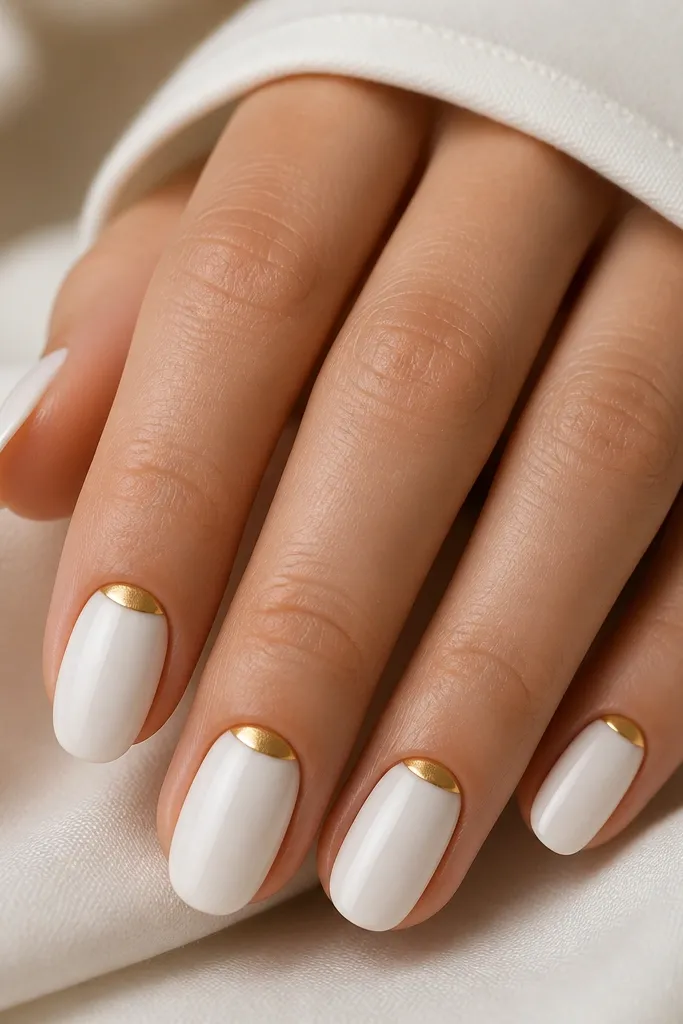
Start by applying base coat and then two thin coats of milky white gel, curing each coat fully. Use a small striping brush to paint a gold half-moon at the cuticle — aim for a shape that follows your natural nail curve, about one-third of the nail width. Cure the gold carefully, then tidy edges with a brush dipped in cleaner. Finish with a glossy topcoat, and pay extra attention to sealing the gold edges so it doesn’t lift.
I love this one because it looks like you spent money on nail art without covering your whole manicure in tiny details. Start with a milky white that looks creamy (not chalky), then place a gold half-moon at the cuticle — it frames your nail bed and makes fingers look longer. The warm gold crescent catches light when you type or hold a mug, so it feels Christmas-y in a quiet way. This flatters most skin tones because the white softens and the gold adds warmth. It’s also forgiving on short nails since the gold sits near the natural growth area.
Watch outAvoid a thick gold crescent that overflows the cuticle — it can look bulky and messy instead of crisp.
Editor's noteIf your cuticles get dry, apply cuticle oil after you finish topcoat — the half-moons look sharper against hydrated skin.
2. White French Tips With Thin Gold Lines
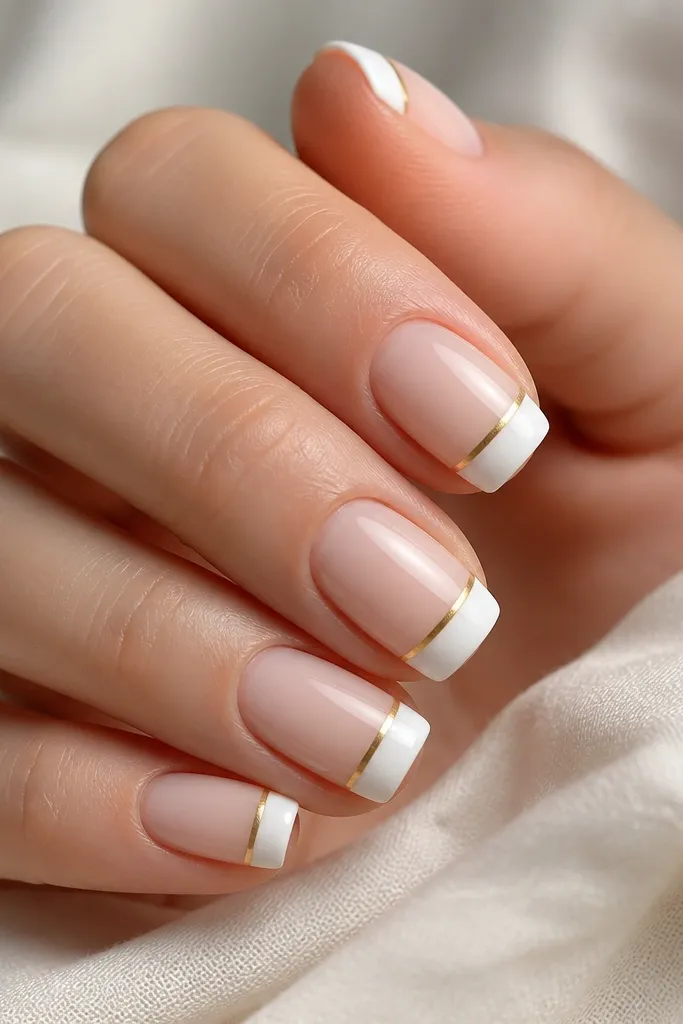
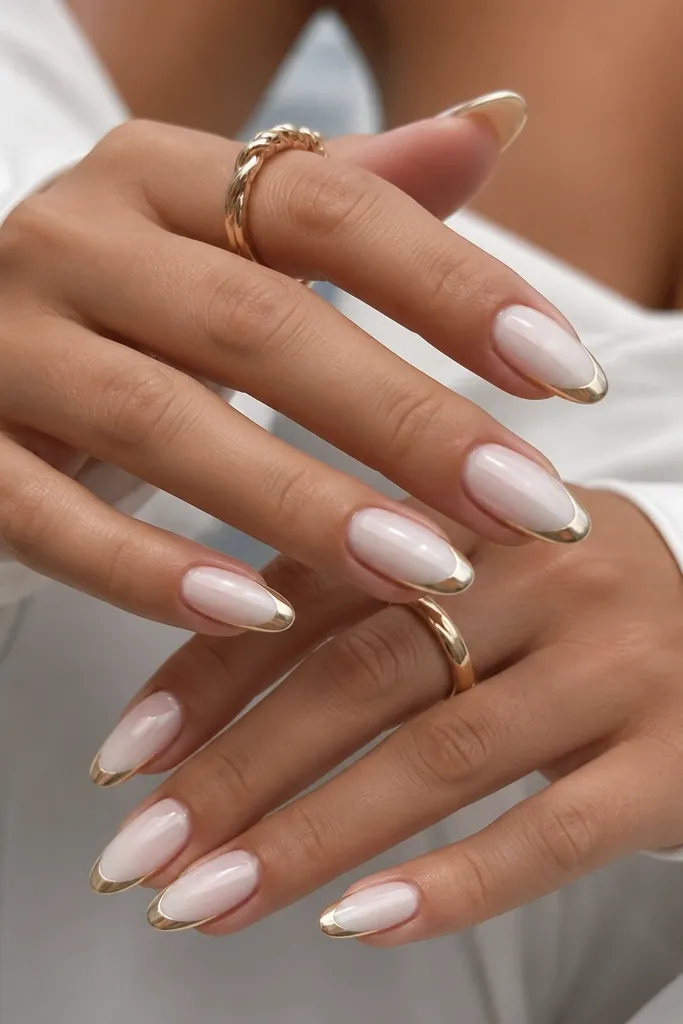
Start with a base coat, then apply a sheer milky base if you want a softer look, followed by two coats of milky white for the tip. Use striping tape or a guide card to get a neat French line, then cure. With a fine liner brush, paint a thin gold stripe right along the boundary of the French tip — keep it centered so it doesn’t drift. Seal everything with two coats of glossy topcoat, curing each coat fully.
This set feels cozy because it keeps the shape familiar and lets the gold act like a holiday ribbon. The white French tip should be milky, with a slightly rounded edge, so it looks soft instead of harsh. The gold line is thin — think 0.5-1 mm — and it makes your nails look dressed up even if your outfit is simple. I wear this when I want my manicure to match gold earrings or a watch without turning it into full-on glitter. It works great on medium and longer almond or coffin nails because the stripe has room to sit cleanly.
Watch outSkip chunky gold paint — thick stripes reflect light in a way that can look uneven.
Editor's noteUse striping tape for one nail first, then remove and adjust the tape before you do the rest — it prevents uneven French edges.
3. Gold-Leaf Speckled Snow on Milky White
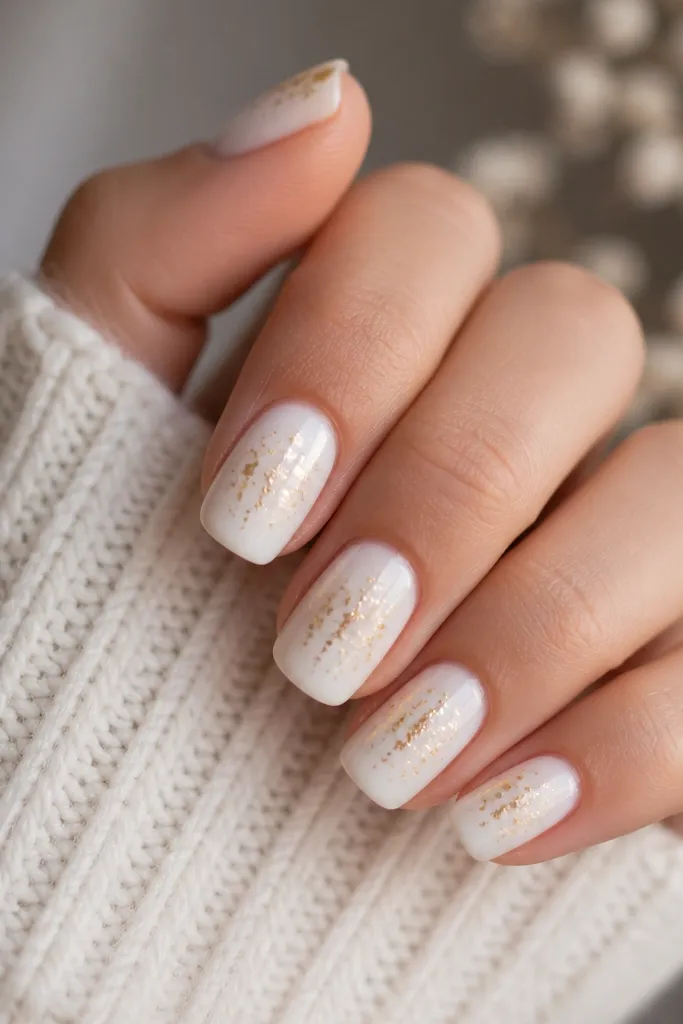
This is my go-to when I want Christmas nails that still look soft and not overly graphic. Gold leaf flakes look like warm “snow sparkle” because they’re irregular and textured, not perfectly uniform. The milky white base keeps the flakes from looking too loud, and the gold distribution makes it feel like a pattern from nature. It flatters hands because the white makes skin around the nails look even and the flakes add dimension without needing tiny lines. This is especially pretty on oval and almond nails where the speckles can spread naturally.
Start with base coat and two coats of milky white gel, fully cured. Apply a thin layer of gold leaf adhesive (or tacky gel top layer) to the nail center area, not the whole nail. Use tweezers to place gold leaf flakes, then press gently so they grab — leave some negative space so it looks airy. Finish with glossy topcoat in two layers to smooth over sharp edges of the leaf.
If you hate flakes snagging, do a slower topcoat application and cap the free edge carefully.
Don’t cover the entire nail in gold leaf — it turns into metallic noise instead of cozy sparkle.
4. White Cable Knit Lines With Gold Button Dot
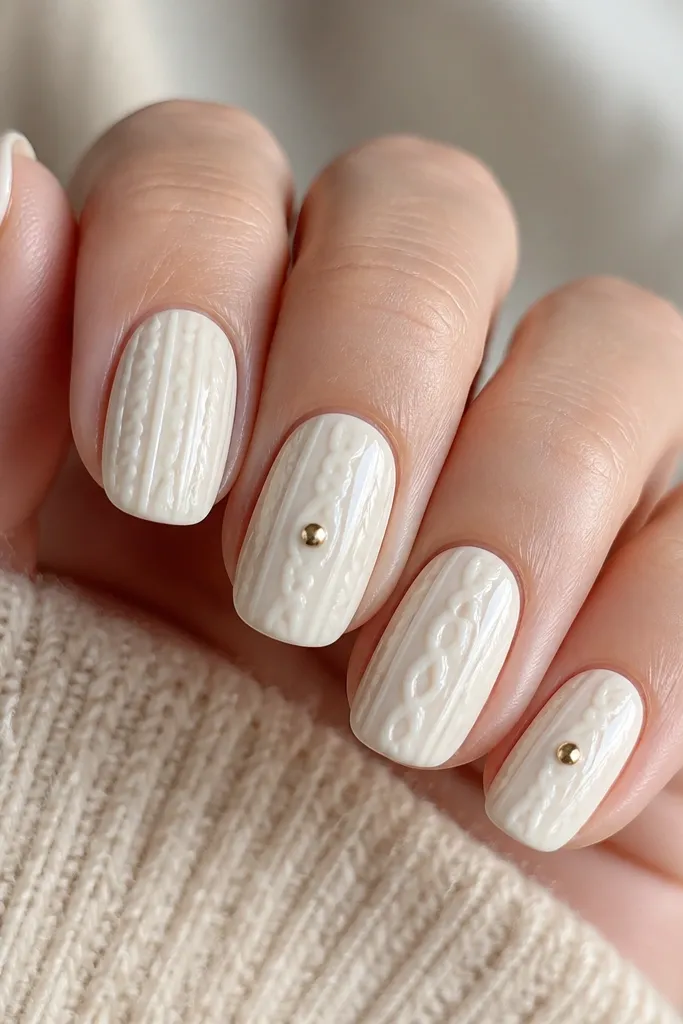
Cable knit nails give you that sweater-cozy feeling immediately, and white keeps it clean for Christmas. The best version uses a slightly raised gel line so the texture shows when light hits. I keep the gold to one dot, usually near the middle or cuticle area, because one “button” looks intentional and cute. This design flatters shorter nails too since the pattern lines draw the eye upward. It also looks great for warm skin tones because the gold dot adds warmth without changing the white base.
Start with a milky white base in two thin coats. Use a liner brush to draw cable knit lines with white gel — make two vertical lines and connect them with small diagonal crossovers, then slightly thicken the center of each line before curing. Add the gold button dot on one or two nails using a dotting tool, then cure. Topcoat with two glossy layers, and be gentle around the raised lines so the texture stays visible.
Practice the cable pattern on a fake nail first — the rhythm is easier than trying to freestyle on your hand.
Avoid painting the knit lines too thin — they disappear under topcoat and look like random streaks.
5. Negative Space Ornament Arch With Gold Outline
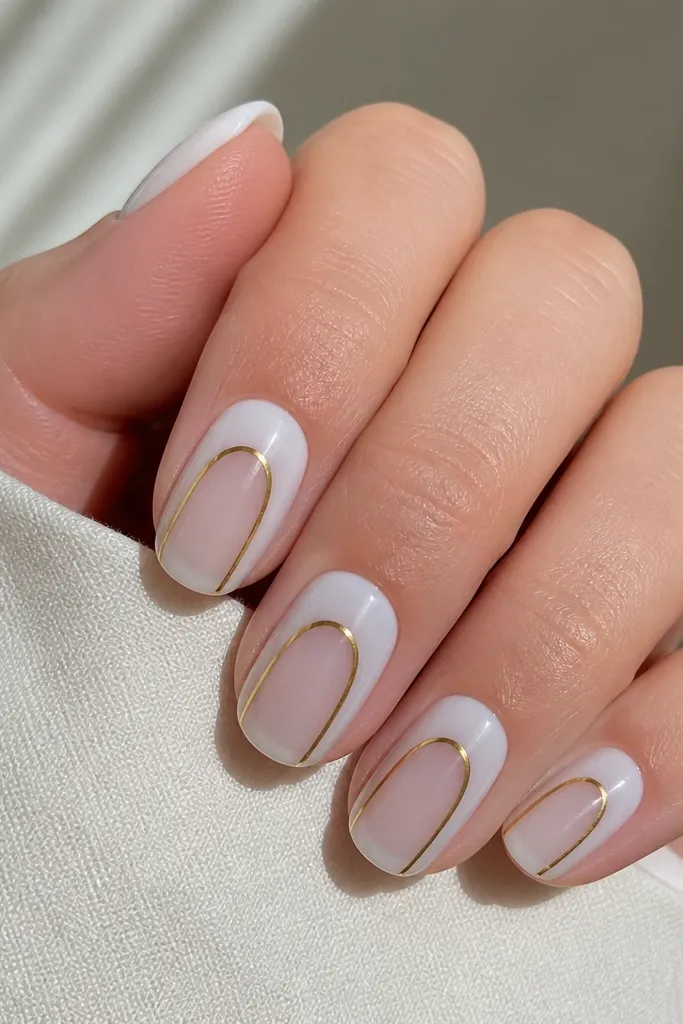
Apply base coat and two coats of milky white gel. With a striping brush, map an arch that starts near one sidewall and lands near the other, leaving a gap in the middle for negative space. Use gold gel to outline the arch — keep the line consistent thickness and cure. If your gold bleeds, wipe the brush clean and go back for a second pass only on the outline edges. Finish with glossy topcoat, focusing on sealing the outline.
This one looks like a tiny ornament hanging inside your nail. The negative space gives it a modern feel, and the gold outline makes it read clearly from across the room. I like it because it doesn’t require glitter or heavy stamping; it’s all about crisp lines. It’s flattering because the arch shape narrows the center and makes fingers look longer. If you have uneven nail beds, negative space can actually look better than filling everything in with opaque color.
Watch outDon’t make the arch too wide — if it spans the whole nail, it starts to look like a stripe, not an ornament.
Editor's noteUse painter’s tape as a guide for the arch start points so both hands match.
6. White Marble Veins With Foil Gold Accents
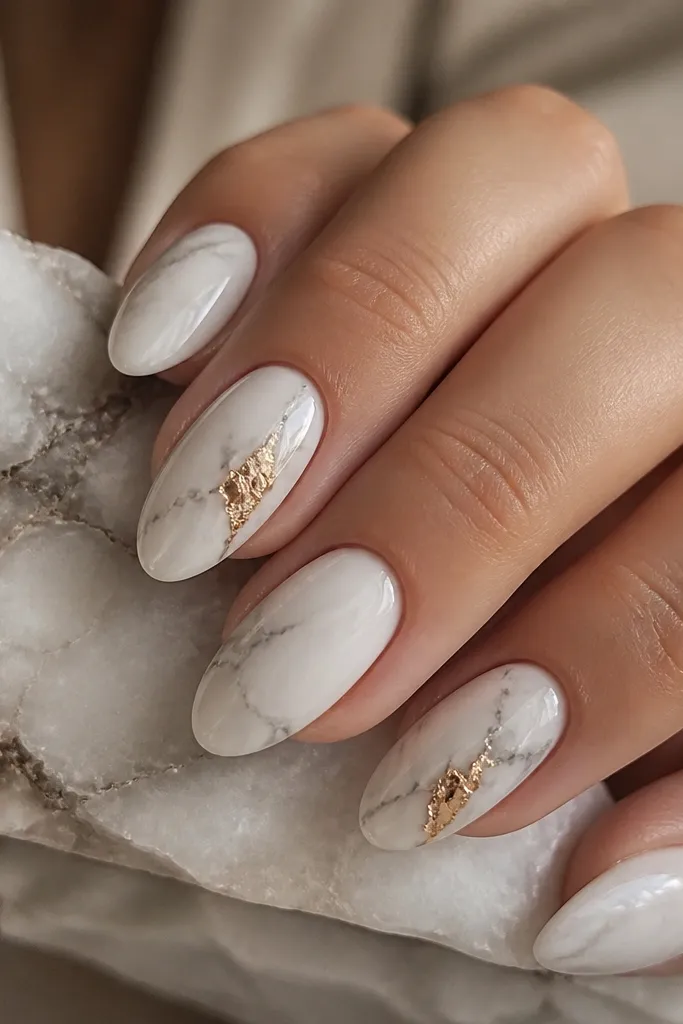
Start with two coats of milky white gel and cure fully. Use a thin brush and a translucent gray-white gel (or diluted white) to drag wispy veins across the nail, then lightly blend edges with a clean brush before curing. Add gold foil only at the vein intersections on one or two nails so the effect looks intentional. Press foil gently and seal with two glossy topcoat layers to keep the surface smooth.
Marble nails feel cozy because they look like winter stone, not just holiday decoration. The white marble veins should stay soft — think smoke-gray, not dark charcoal — so the set stays warm and wearable. Foil gold accents make the marble feel festive without turning it into glitter overload. This design flatters longer nails and also looks great on medium shapes because the veins can follow the nail’s length. If you like a slightly more grown-up holiday look, this is the one I reach for.
Watch outAvoid dark marble colors — they make white and gold look more like Halloween stone than Christmas cozy.
Editor's noteKeep the veins uneven — marble looks fake when every line is the same thickness.
7. Gold Chrome Half-Sheen Over White Base
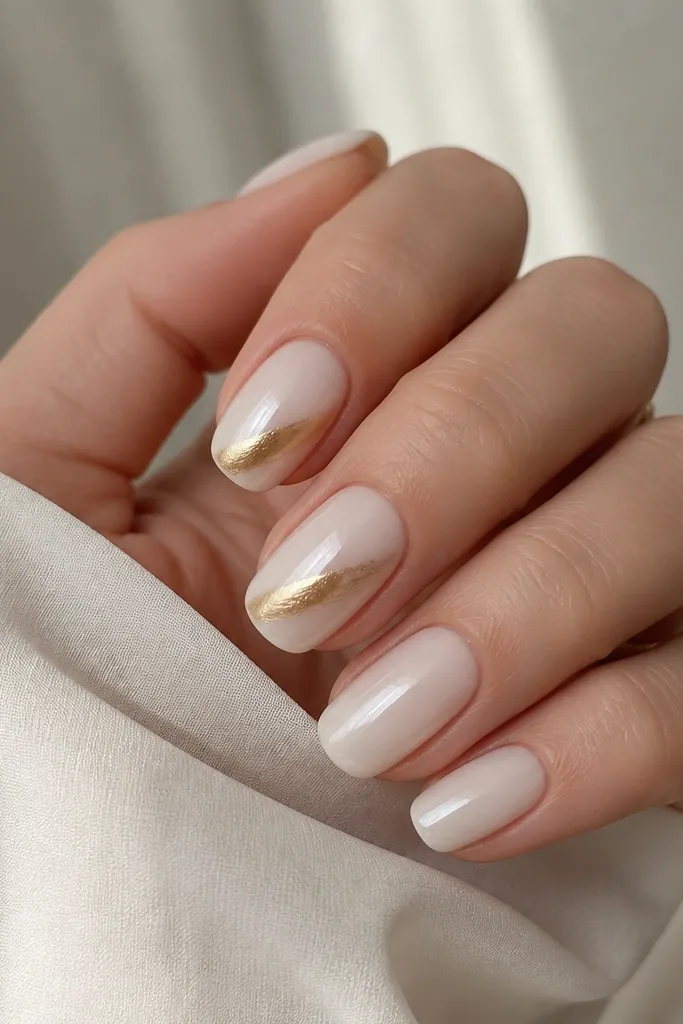
Chrome gives you that “holiday lights” effect, and when you keep it to a diagonal sweep it stays chic instead of loud. The milky white base acts like a soft background so the gold looks warm and reflective, not yellow-green. I like this pattern on almond and square nails because the diagonal line makes the nail look slimmer. It’s flattering on hands with shorter nail beds because the sweep adds a long visual line. This is a great choice for parties where your hands will be under indoor lighting.
Apply base coat and two coats of milky white gel on every nail. On accent nails, paint a thin patch of tacky clear base where you want the chrome sweep, then use gold chrome powder or foil to apply it with a sponge applicator. Blend the chrome edge with gentle buffing so it fades into the white instead of stopping abruptly. Cure, then add glossy topcoat — I use a gel topcoat that doesn’t dull chrome too much. Clean up around the edges with a small brush and alcohol.
Test the sweep angle on one nail first — 30 degrees looks best on most nail beds.
Skip heavy topcoat right away — too much product can dull the chrome and make it look flat.
8. White Snowflake Stamps With Tiny Gold Centers
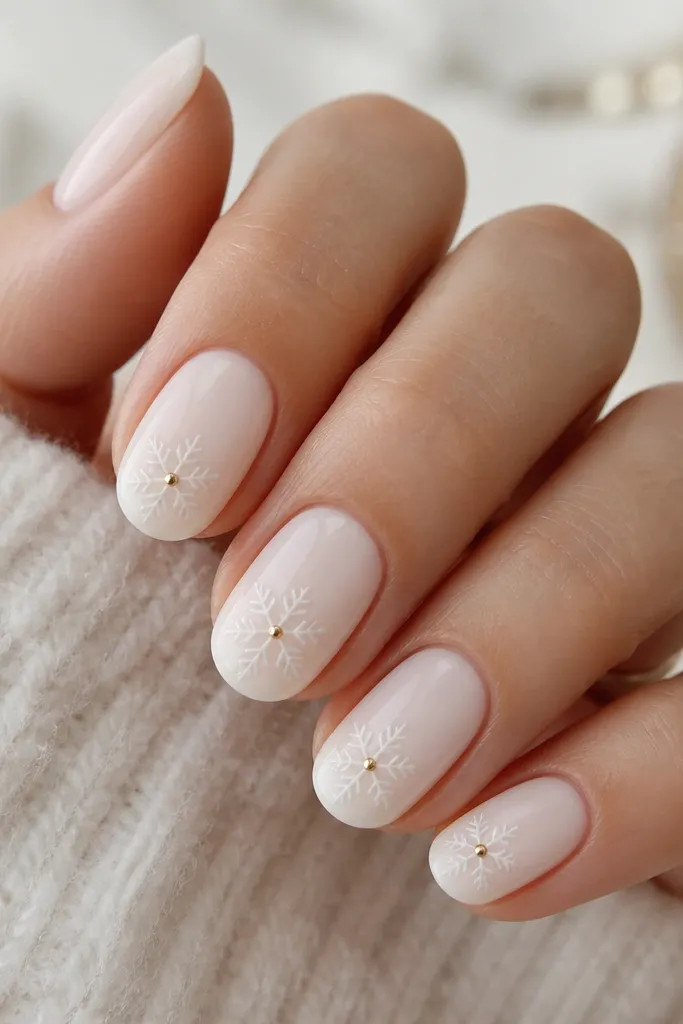
Stamping snowflakes looks clean when the background is consistent, and the gold dot makes each snowflake feel like it has a warm core. I like this for people who want Christmas nails but hate messy freehand lines. The milky white base keeps the stamp from looking gray or stark. It also flatters shorter nails because the snowflake placement near the tip makes the nail look intentional without crowding the cuticle. On medium skin tones, the gold center pops without looking too bright.
Start with base coat and two thin coats of milky white gel. Use a snowflake stamping plate and white stamping gel or white polish to stamp each nail near the tip, leaving a small gap from the sidewalls. Dot a tiny amount of gold gel into the center of each snowflake with a dotting tool, then cure. Seal with one or two glossy topcoat layers, and cap the free edge so the stamp doesn’t lift.
Press the stamper firmly for a full second — snowflakes need solid contact to look crisp.
Don’t smear the stamp — if you drag even a little, the snowflake turns into blobs.
9. Gold Foil Confetti Over White Glitter Base
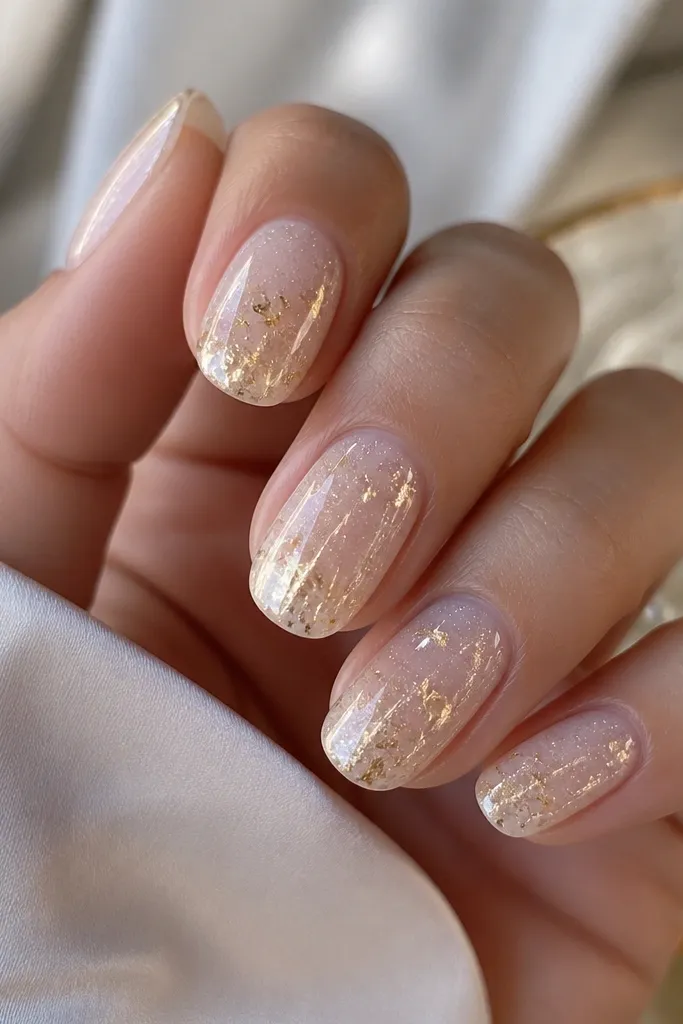
This is the cozy version of “party nails.” The key is a sheer white glitter base that looks like frost, then warm gold foil confetti that adds dimension. It’s festive without looking like you dumped straight glitter everywhere. I wear this for holiday dinners because it looks pretty in flash photography but still soft in daylight. It flatters hands with lots of movement because the foil catches light at different angles. If you like sparkle but hate chunky glitter texture, this hits the sweet spot.
Paint a sheer white glitter gel base in two thin coats, curing each coat. While the base is tacky or you apply a tacky layer, press small bits of gold foil in random clusters — don’t place them in a perfect line. Cure and then use glossy topcoat in two layers to smooth the foil and prevent snagging. If your foil sticks up, add a slightly thicker topcoat only over those spots. Finish with cuticle oil to make everything look clean.
Use smaller foil pieces than you think you need — big chunks look heavy on short to medium nails.
Skip thick glitter layers — they look bumpy and can chip faster.
10. White Ombré Tips With Warm Gold Fade
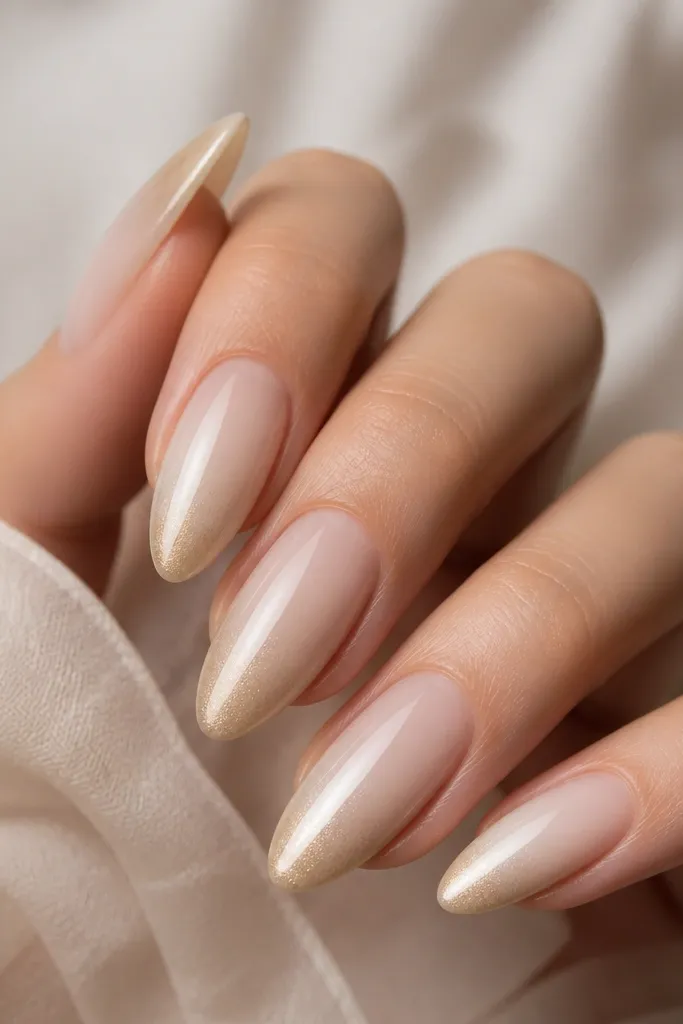
Start with a sheer nude or milky sheer base, then apply milky white gel at the tips using a makeup sponge for a smooth fade. Blend in thin layers until the tip is opaque and the mid-nail is semi-sheer. For the gold, apply gold gel only at the very tip edge and blend upward slightly with a clean sponge. Cure each layer, then seal with glossy topcoat in two coats.
Ombré looks cozy because it mimics the gradient of sunrise on winter mornings. Keep the base sheer, then build milky white at the tips for softness. The gold fade along the tip edge adds a holiday glow without needing gold lines all over. This design looks flattering on oval nails because the fade naturally rounds the shape. It also hides small imperfections in the nail surface because gradients blur them.
Watch outAvoid harsh lines between white and nude — if it looks striped, blend one more thin layer.
Editor's noteWipe your sponge lightly between nails so the gold doesn’t turn muddy.
11. Gold Dotted Reindeer Antlers on Milky White
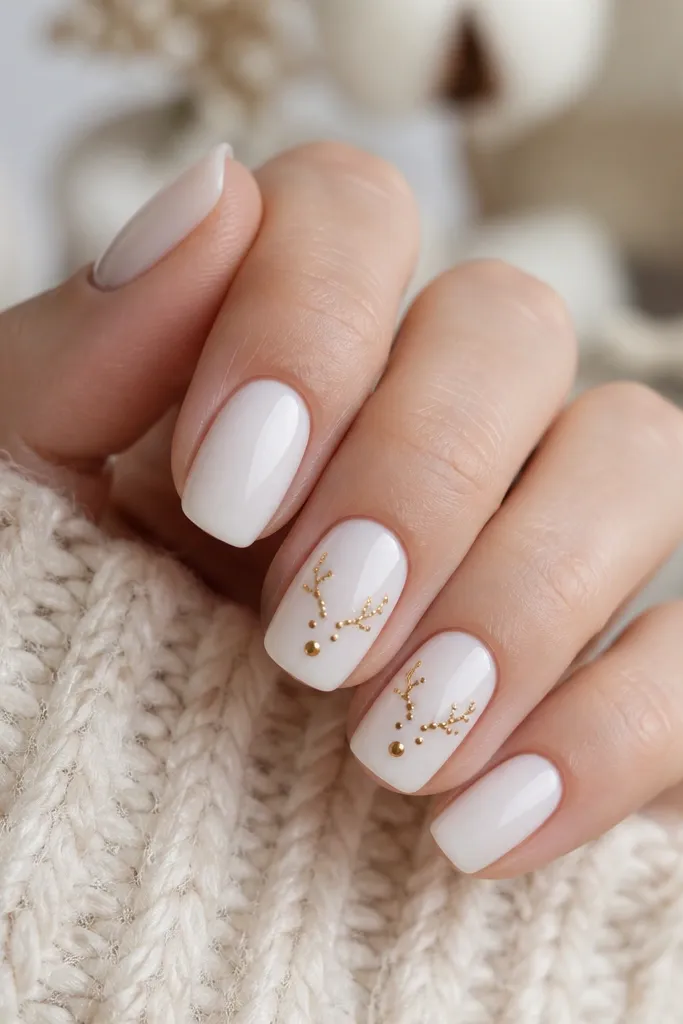
Start with base coat and two coats of milky white gel. For accent nails, use a dotting tool to place small gold dots in an antler branching shape — two branches up, one branch down, with a tiny head dot. Connect dots with a fine gold liner gel if you want cleaner lines, then cure. Add a glossy topcoat and cap the edges so the dots don’t catch on sweaters.
Dotted antlers look cute and cozy because they feel like a sweater pattern, not a cartoon. The gold stays warm and minimal, and the milky white keeps it from looking too busy. I like this when you want Christmas nails that aren’t obvious reindeer faces — just the antlers hint at the season. It flatters all nail shapes because the antlers can be scaled to your nail width. If you have short nails, place the antlers higher toward the tip so they don’t crowd your cuticle.
Watch outSkip thick gold lines — dots look best when they stay delicate and crisp.
Editor's noteMake the antlers slightly asymmetrical — real antlers aren’t perfectly symmetrical.
12. White Pearl Drops With Gold Halo
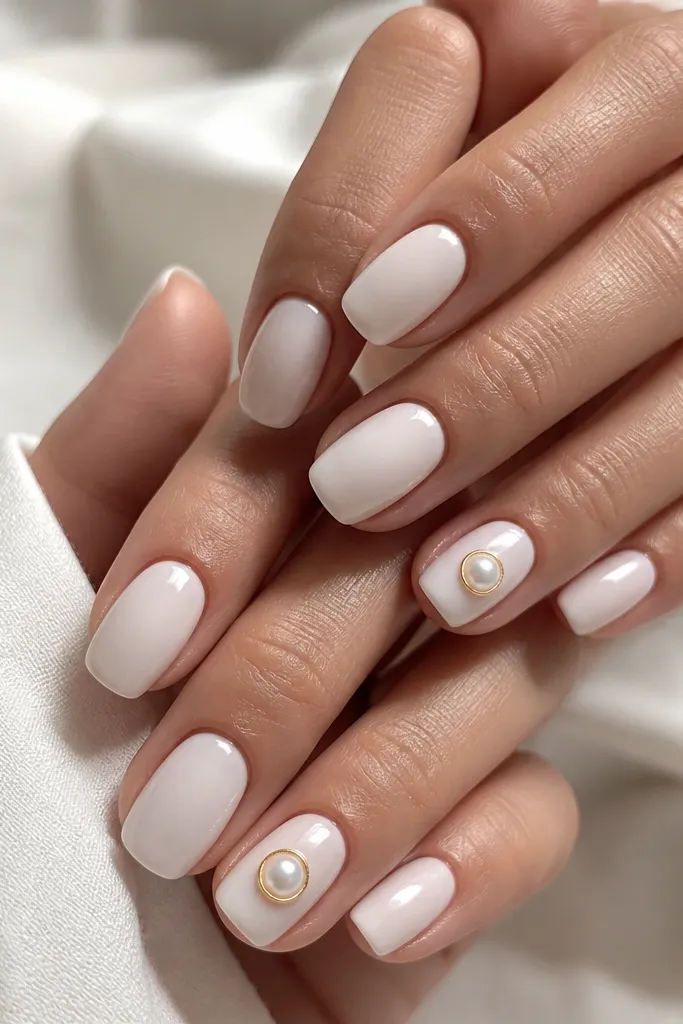
Pearl details scream cozy Christmas without needing glitter. I use a raised pearl gel dot in soft white, then outline it with a tiny gold ring so the pearl looks like it has a warm frame. The contrast between milky white and metallic gold looks expensive in daylight and flash. This is flattering because it draws attention to the center of the nail, which can make nail beds look more balanced. It’s also a great pick if you like texture but hate glitter mess.
Apply base coat and two coats of milky white gel. On one or two accent nails, place a pearl gel dot using a dotting tool — keep it centered and small, about the size of a sesame seed. Cure as directed, then paint a thin gold halo around the pearl using a fine brush. Cure again and finish with glossy topcoat, applying a little extra around the halo to smooth any edges.
Press the topcoat brush gently over the pearl so it looks rounded, not flat.
Don’t make the gold halo too thick — thick rings can look like a sticker.
13. Gold Line Art Ornaments on White Negative Tips
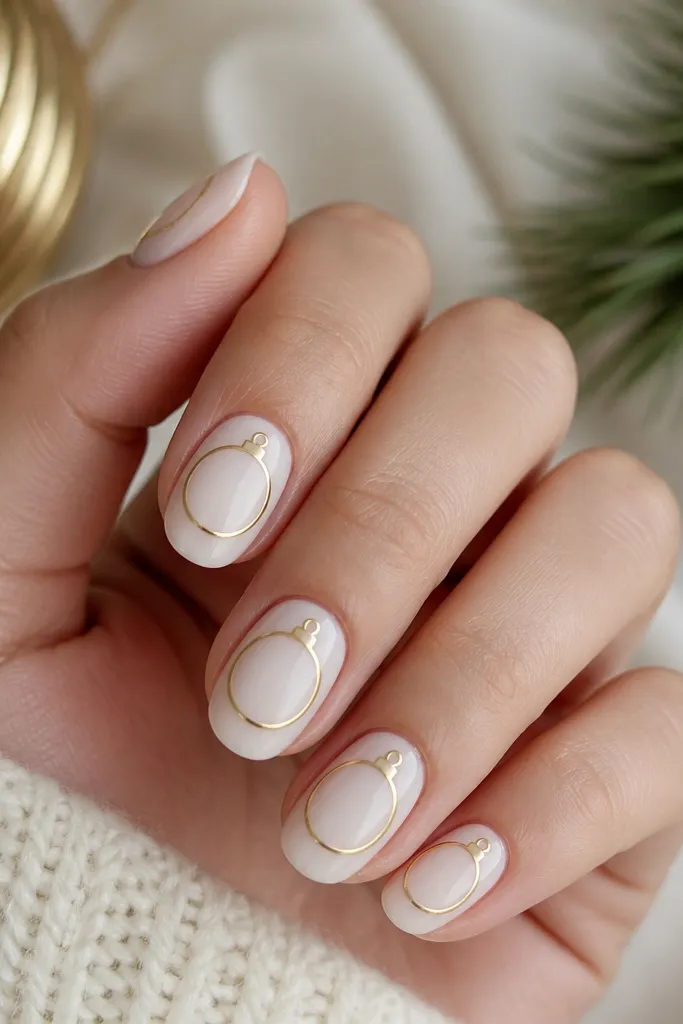
Line art ornaments feel modern and cozy because they look like holiday doodles. The thin gold lines keep it delicate, while the milky white base makes the ornaments pop. I like this when you want Christmas nails that don’t rely on stamping plates or foil placement. It flatters smaller nail beds because the ornament shapes can be scaled down to fit without crowding. This also looks great if you wear long sleeves often — the design stays neat, not bulky.
Start with base coat and two coats of milky white. Leave a tiny amount of the tip area slightly sheer or lighter if you like that negative-tip look — you can do this by using a sponge and stopping short of the free edge. Use a fine liner brush to draw gold ornament lines: a small loop, a rounded bulb shape, and maybe a tiny stripe in the center. Cure and then add glossy topcoat, sealing the lines with careful strokes.
Keep the ornaments all the same orientation — rotate your hand the same way each nail so the loop sits evenly.
Avoid shaking your hand mid-stroke — wobbly line art reads messy fast.
14. White Velvet-Look Nails With Gold Foil Edge
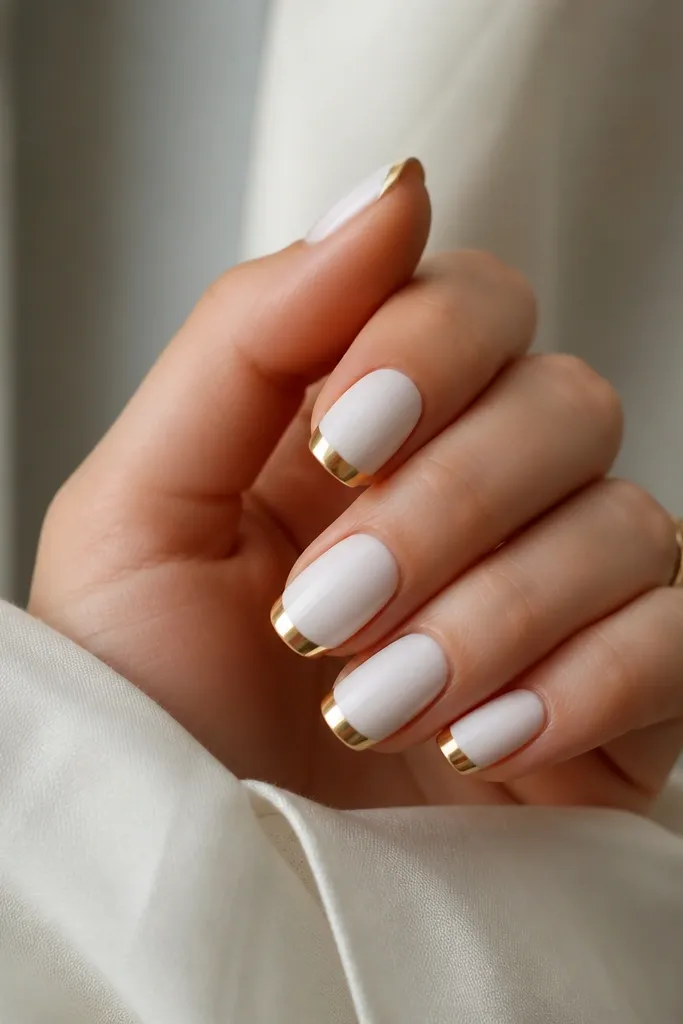
Velvet-look nails feel cozy because they look like knit texture, even though they’re smooth. The matte white also makes gold foil look warmer and more candle-like. I do this when I want a Christmas manicure that doesn’t look shiny and loud. It’s flattering because matte finishes hide minor surface texture better than glossy ones. This works on short to medium nails because the gold edge can be thin and still visible.
Apply base coat and two coats of milky white gel. Use a velvet-matte topcoat if you have one, curing it so the surface turns soft and matte. Add gold foil only at the free edge using adhesive — place small foil pieces and press them along the tip border. Seal with a matte-safe topcoat over the gold edge so it stays smooth but keeps the matte look.
Use smaller foil pieces near the corners so you don’t get gaps at the sidewalls.
Avoid glossy topcoat over the velvet — it kills the cozy texture.
15. Gold Foil Ribbon Across Milky White
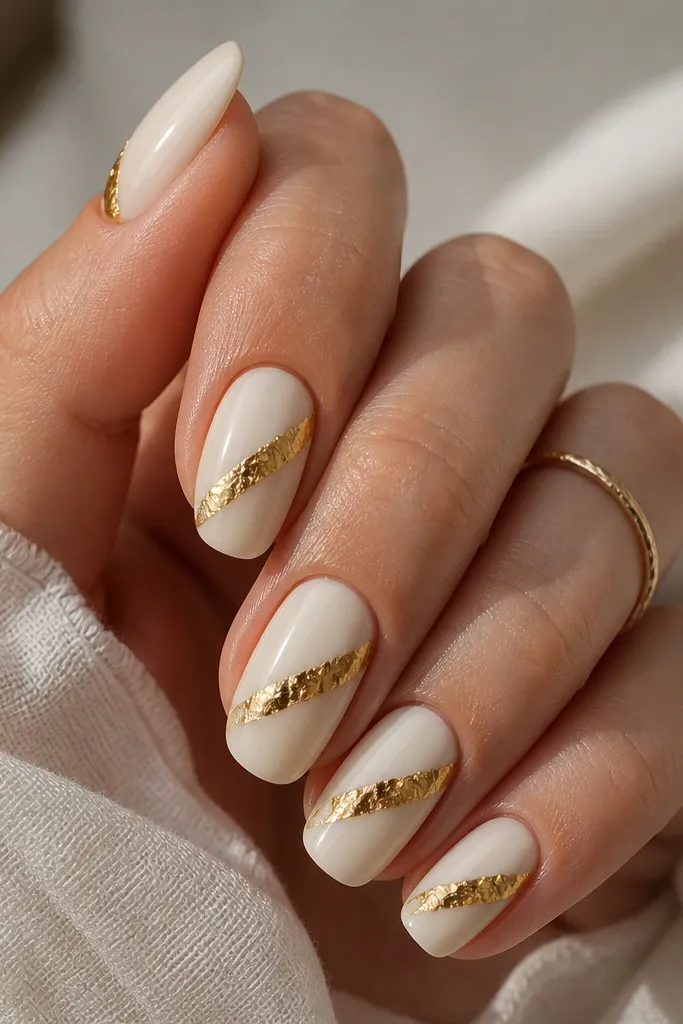
Start with base coat and two coats of milky white gel. Apply a thin tacky layer or gold foil adhesive where the ribbon will go, then place gold foil strips diagonally across the nail. Use a silicone tool to press the foil down and trim excess at the free edge with a file. Cure and then topcoat with two glossy layers so the foil edges feel smooth.
A ribbon across the nail feels like wrapping paper, and it’s instantly Christmas. The key is placement: center the ribbon so it looks like a diagonal sash, not a random stripe. Foil edges add charm because they don’t look machine-perfect, and the milky white base keeps it cozy instead of flashy. This flatters hands because diagonal lines create length. It also works well on medium almond nails where there’s enough space for the ribbon to sit cleanly.
Watch outDon’t run the ribbon too close to the cuticle — it makes the nail look top-heavy.
Editor's noteMake the ribbon slightly narrower in the middle — it looks more like fabric, less like tape.
16. White Glitter Frost With Gold Micro Dots
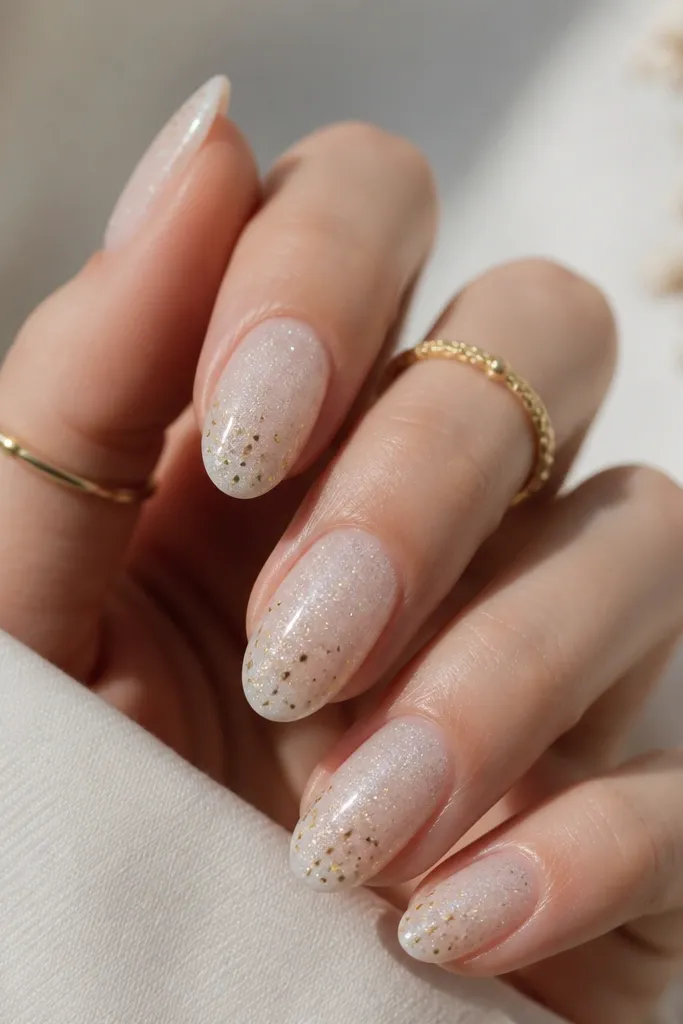
Apply a sheer white glitter gel in two thin coats, curing each coat. While the surface is slightly tacky, place micro gold dots with a dotting tool — start near the tips and leave the center mostly clear. Cure and then seal with glossy topcoat, focusing on encapsulating the glitter so it doesn’t catch. If you get too many dots, wipe one area and re-place fewer dots — the spacing is what makes it look expensive.
This is the “cozy window frost” look, and it’s one of the most wearable white-and-gold sets I’ve done. The glitter should be fine and sheer, so you don’t feel gritty texture. Gold micro dots add sparkle without taking over the design, and they look good even when your nails are short. It flatters a range of skin tones because the base is light and the gold is warm. If you want Christmas nails that look good at work and still feel festive at night, this is it.
Watch outAvoid big gold dots — they turn a delicate frost into a heavy polka-dot look.
Editor's noteUse a light hand with the dotting tool — press once, lift straight up, and keep the dot size consistent.
17. White And Gold Stained Glass Candy Cane Angles
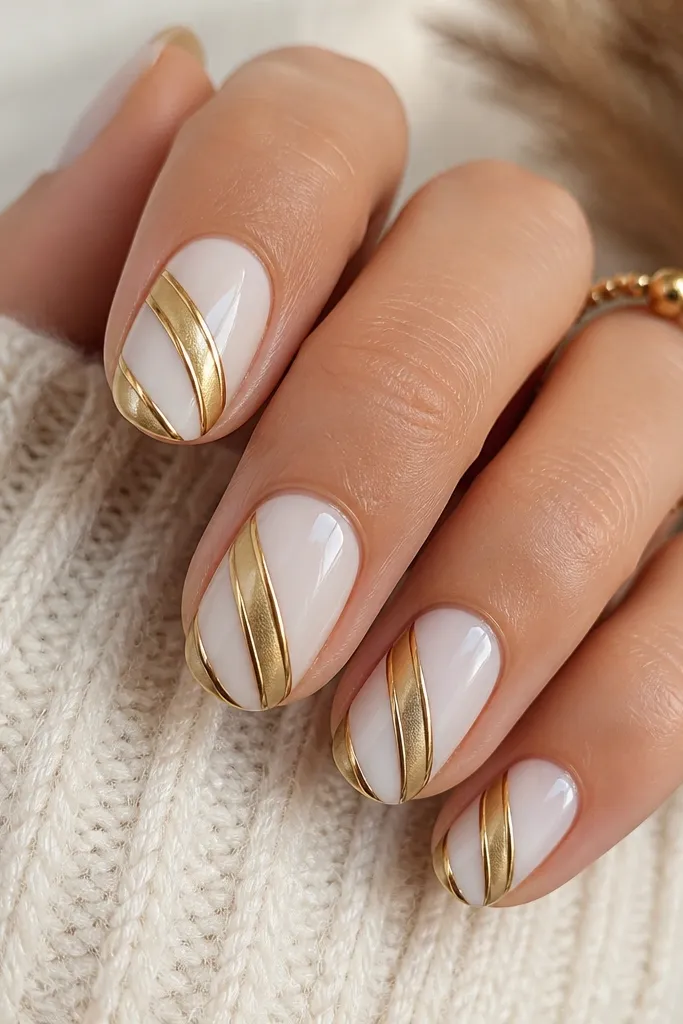
Candy cane nails can look childish, but this stained-glass version feels cozy and grown-up. You get the holiday diagonal energy, and the gold gel acts like the “glue” lines in stained glass. Keeping white as the main color makes it softer, while the gold outlines keep it crisp. This flatters medium-length nails and looks sharp on both almond and square shapes. It’s also great if you want a clear Christmas theme without using red, which can clash with some winter outfits.
Start with a milky white base in two coats. Use a striping brush to draw two diagonal white stripe shapes that leave negative space between them. Fill the gap lines with gold gel so it outlines the candy cane angles — keep the gold thickness consistent. Cure, then topcoat with glossy gel, making sure the gold lines are sealed so they don’t snag.
Use painter’s tape to set the diagonal angle before you paint — it makes both hands match fast.
Avoid red — it shifts the vibe away from white-and-gold cozy and can look off with your gold jewelry.
18. Gold Star Sparkle Near Cuticle on Milky White
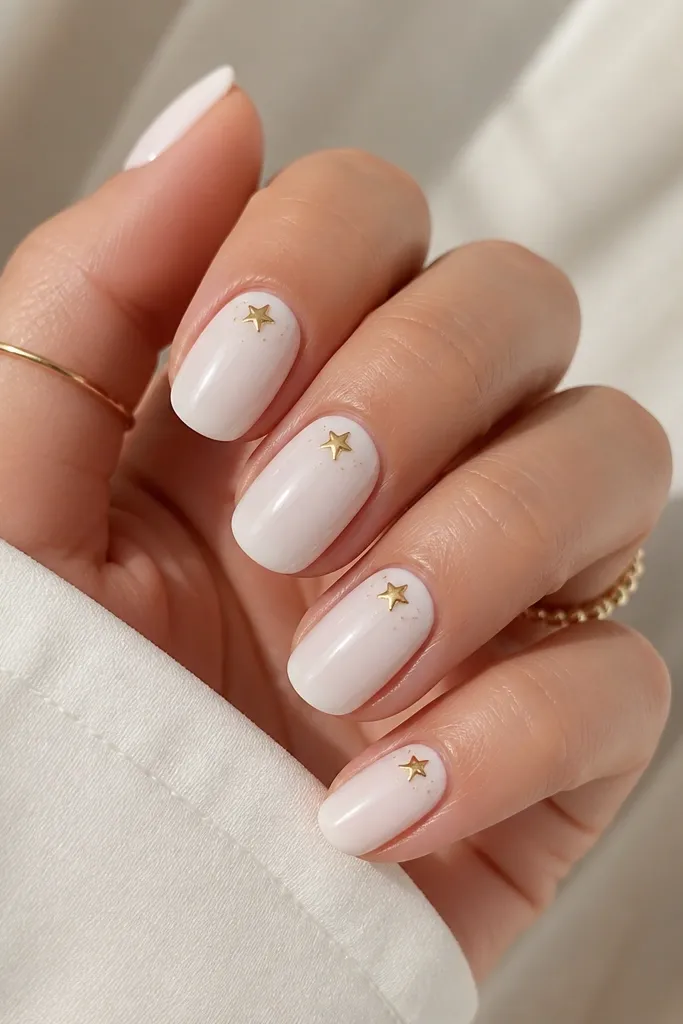
Apply base coat and two coats of milky white gel. Use a star nail art tool or a small stencil to place a gold star near the cuticle — keep the star centered and about 2-3 mm wide. Cure the gold and then add a micro layer of gold glitter gel only on the star points if you want extra sparkle. Finish with glossy topcoat, sealing around the star edges carefully.
Stars near the cuticle look extra cozy because they feel like tiny ornaments hanging close to your skin. The milky white background keeps the design soft, and the gold star gives you that warm holiday shine. I like this for everyday wear because it’s festive without requiring full coverage glitter. It flatters short nails because the stars sit in the upper third, which visually lengthens the nail. It also pairs beautifully with gold rings because the star repeats that sparkle.
Watch outSkip oversized stars — big shapes near the cuticle can look heavy and crowd the nail.
Editor's noteIf you don’t have a star tool, use a fine liner brush and draw two diagonal strokes, then connect the points with short lines.
19. White And Gold Confetti French Tips
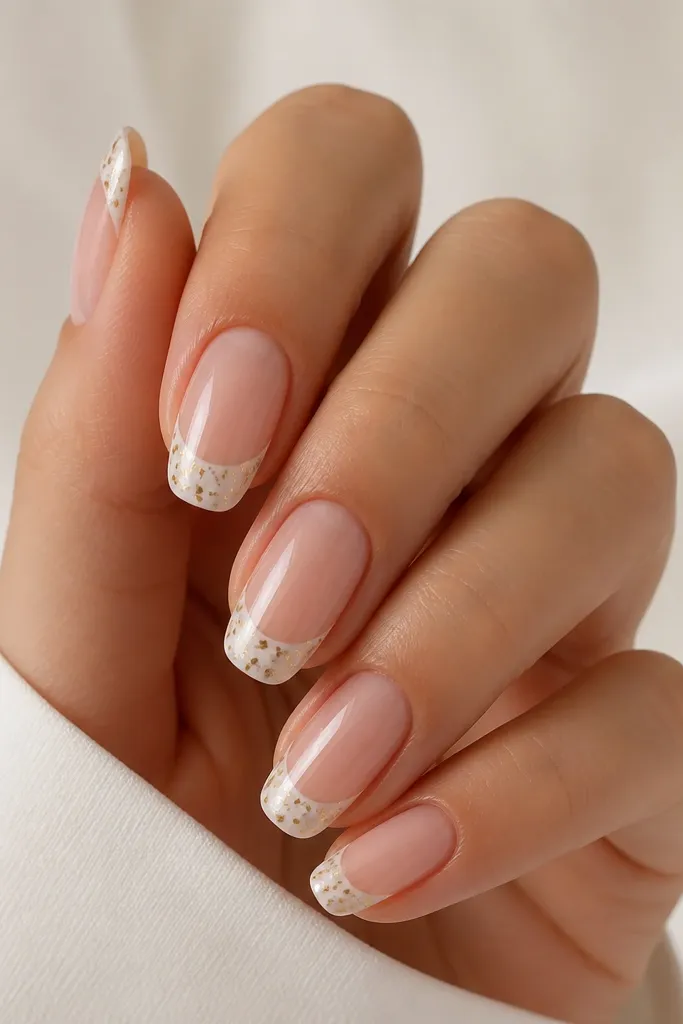
Start with base coat and a sheer nude or milky sheer base. Paint the French tips in milky white with a guide, curing each nail. While the tip area is tacky, sprinkle tiny gold confetti pieces and press lightly so they adhere. Cure, then cap everything with glossy topcoat in two layers, making sure the confetti is fully sealed at the free edge.
This is a playful Christmas manicure that still looks neat because the confetti stays inside the French tip area. The base stays simple, so your hands look polished instead of chaotic. The gold confetti adds cozy sparkle, like little flecks of wrapping paper under warm light. I like this on square and short almond nails because the French tip shape gives structure. It also hides chips better than full glitter because only the tip has the texture.
Watch outDon’t leave any confetti unsealed — snagging makes even a pretty set look cheap fast.
Editor's noteKeep the confetti pieces small — you want sparkle, not chunky bits.
20. Gold Foil Smudge Accent on Milky White Half-Sets
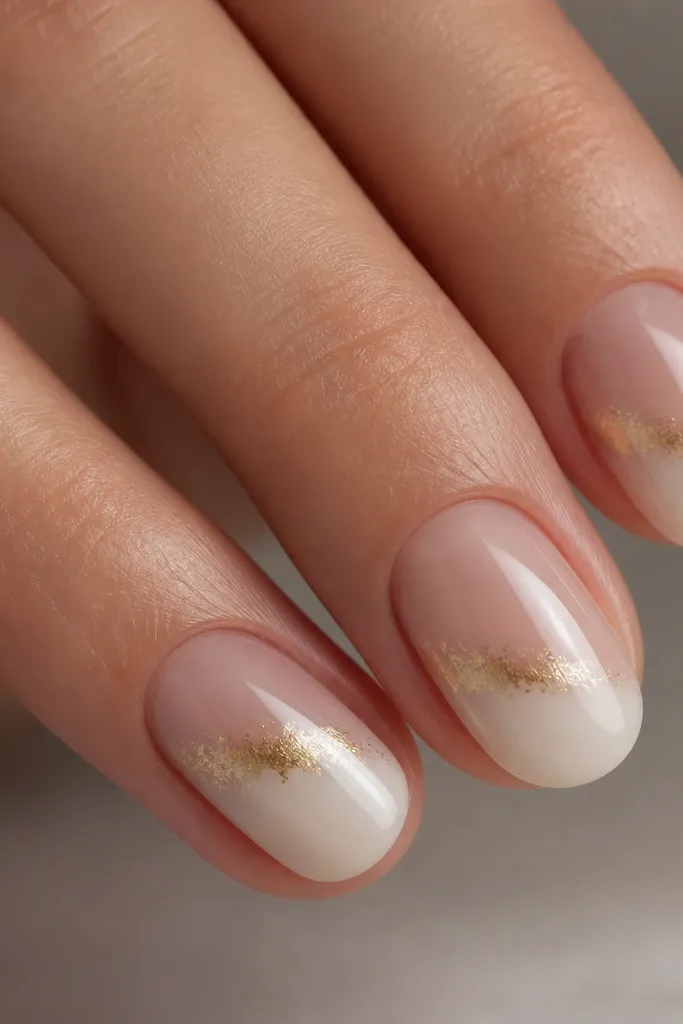
Half-set nails look cozy because they feel like a winter color-block without being loud. The gold foil smudge at the boundary is the holiday detail, and it looks like a warm light leak. I like it because it’s easy to keep balanced: you only need one placement point, and it works on short nails too. This is flattering on most skin tones because the nude half keeps the hand looking light and clean. It also grows out better since the design already has separation lines.
Apply base coat and a sheer nude layer first, curing. Paint the lower or upper half with milky white gel — use a makeup sponge or a flat brush to keep the line slightly soft. Add gold foil smudge right on the boundary using adhesive so the foil sits where the colors meet. Press, cure, then finish with glossy topcoat, sealing the foil edges and smoothing the boundary.
Blend the half-set line with a sponge just once — over-blending makes it look muddy.
Avoid a perfectly straight boundary — it reads like a sticker instead of a soft design.