1. Champagne Milky Base With Half-Moon Gold
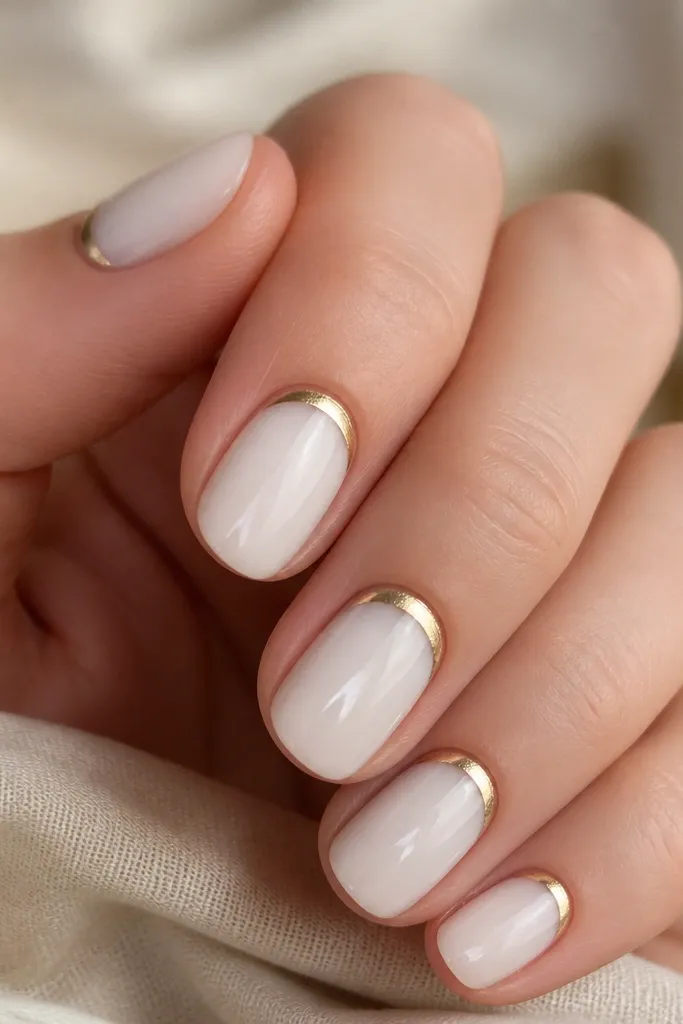
This set uses milky white that looks like yogurt — opaque, not stark. The gold sits in a half-moon at the cuticle, which makes nails look neat even when your growth starts showing. I chose champagne gold because it flatters warm undertones and doesn’t look icy against skin. It looks extra good on short nails because the gold shape frames the base and gives a lifted feel.
Start by applying a milky white gel in 3 thin coats, curing each coat so it stays smooth and even. Clean up the cuticle edge with a small brush dipped in gel cleanser, then add a thin base of gold foil gel or gold chrome powder just where the half-moon will sit. Use a half-moon stencil if you need a guide, or paint freehand with a fine liner brush for a crisp crescent. Finish with glossy top coat, and cap the free edge.
Editor's noteWhen you place the half-moon, keep it slightly thicker in the center — it looks more like jewelry and less like a sticker.
Watch outAvoid spreading gold all the way to the sides of the nail; it makes short nails look wider.
2. Milky White French With Thin Leaf-Gold Tips
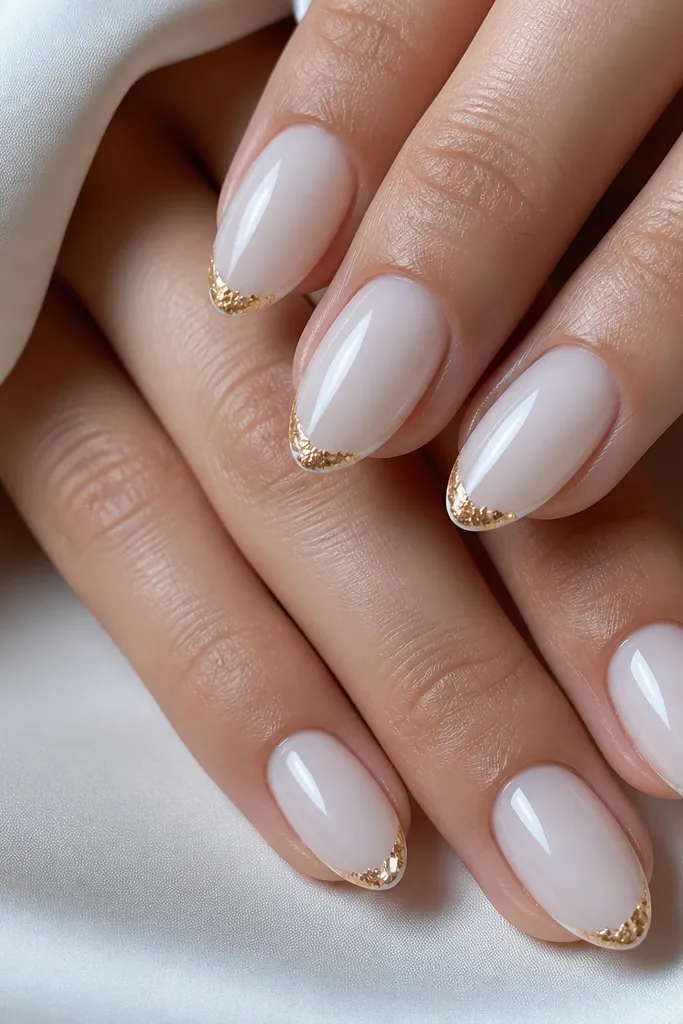
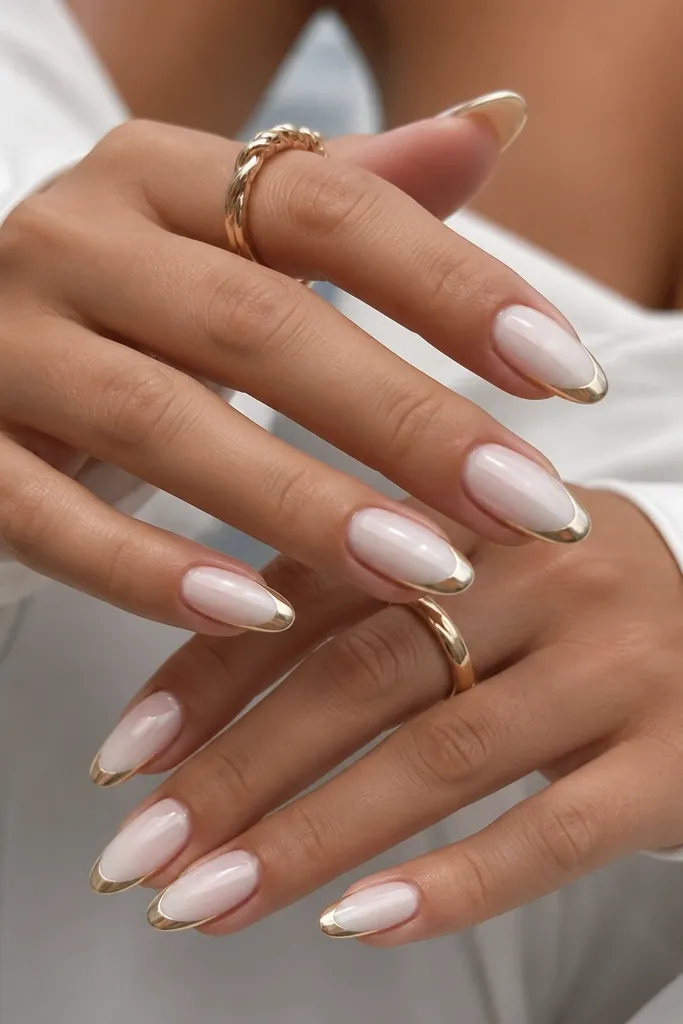
This is the “my nails look expensive but I didn’t do much” look. The milky white base stays soft and creamy, while the thin French line keeps everything structured. Gold leaf at just the tip corners adds dimension without covering the whole nail. It flatters hands with longer fingers and also works on shorter nails if you keep the French line narrow.
Apply milky white as a full coverage base, then paint a thin French line using striping tape as a guide. Peel the tape while the top coat is not cured yet if you’re using gel tape methods, or remove carefully right after painting. Add tiny pieces of gold leaf on the outer corners of the tip, pressing them down with a dotting tool and sealing with a clear gel layer. Cap the tip and finish with a high-shine top coat.
Press the gold leaf with minimal pressure; too much force flattens it and kills the sparkle.
Don’t make the French too wide — chunky tips fight the milky softness.
3. Milky White With Gold Micro-Glitter Underlay
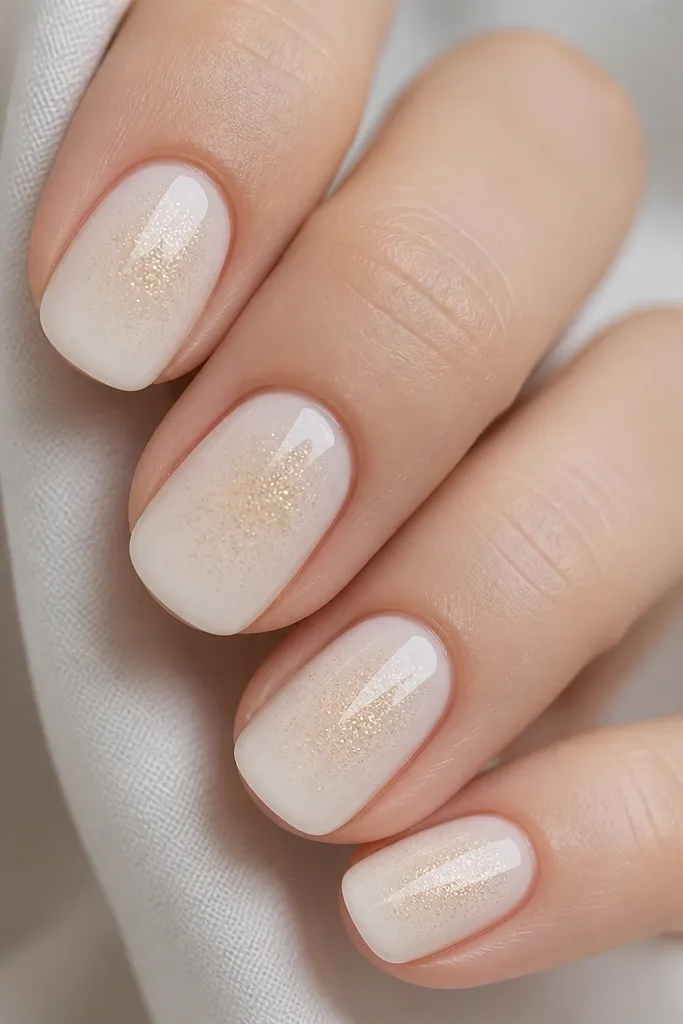
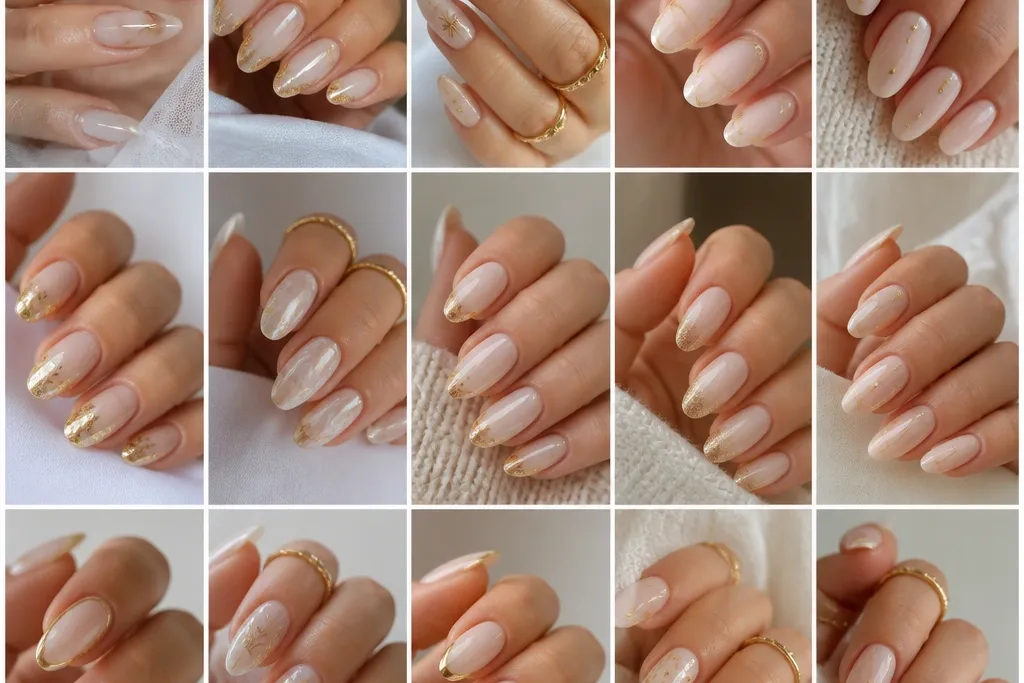
This one fixes the “milky white looks flat” problem. The gold micro-glitter is trapped under the top finish, so you get glow when your hands move, not gritty texture. I like it for everyday wear because it doesn’t scream for attention, but it still looks like you tried. It flatters most skin tones because the gold is fine and warm rather than yellow.
First, paint milky white in 2 coats and cure well. Before your final milky coat, dab a small amount of fine gold glitter gel in the center of each nail using a sponge tip. Then cover with one more milky coat so the glitter looks like it’s inside the polish, not on top. Seal everything with a thicker top coat and cure fully, making sure the free edge is capped.
Editor's noteUse a sponge applicator — brush glitter clumps and makes the underlayer look heavy.
Watch outAvoid chunky glitter; it makes milky white look dirty instead of luminous.
4. Gold Chrome Stripe Down the Middle
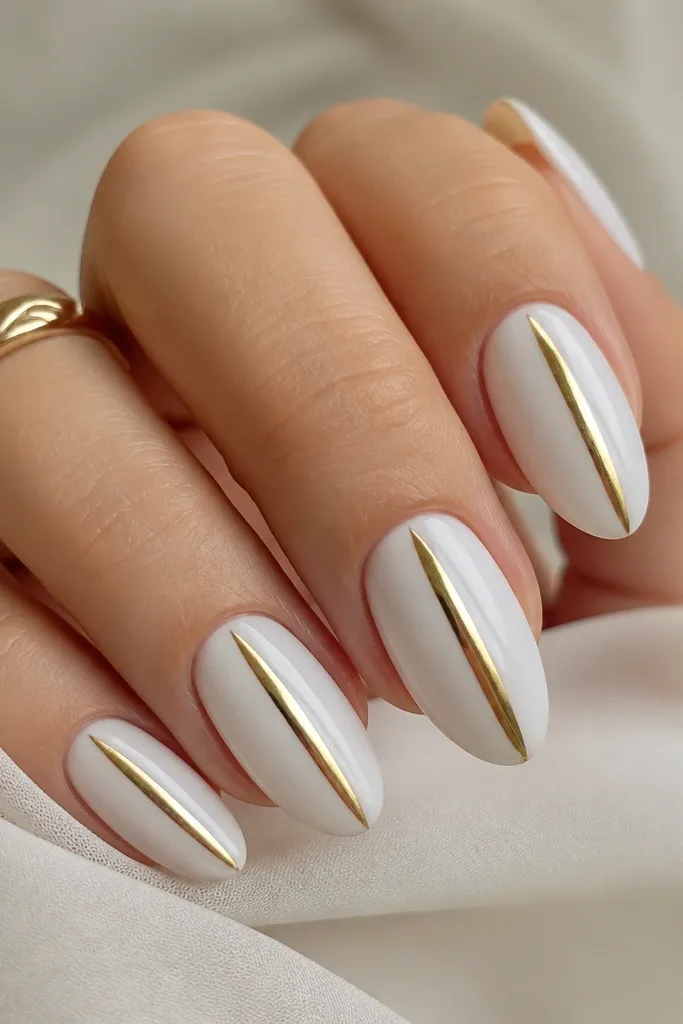
A single gold chrome stripe is my go-to when I want nails to look longer. The milky white gives you that soft, clean canvas, and the chrome line pulls your eye straight down. Mirror chrome is more dramatic than gold foil, so it looks best when your gold line is narrow and crisp. This is flattering on hands that need a bit of elongation — especially if your nails are medium length already.
Paint milky white in 3 thin coats, curing each one. Use a striping brush or a thin nail vinyl strip to mark the center line, then apply gold chrome powder over a tacky gel stripe. Burnish gently for a smooth mirror finish, then remove any vinyl carefully. Cover with top coat, but use a slightly thicker pass over the stripe so it doesn’t dull too much.
Keep the stripe centered — even a tiny shift makes the nail look off-balance.
Don’t use a wide stripe; wide chrome makes milky white look busy.
5. Milky White Marble With Warm Gold Veins
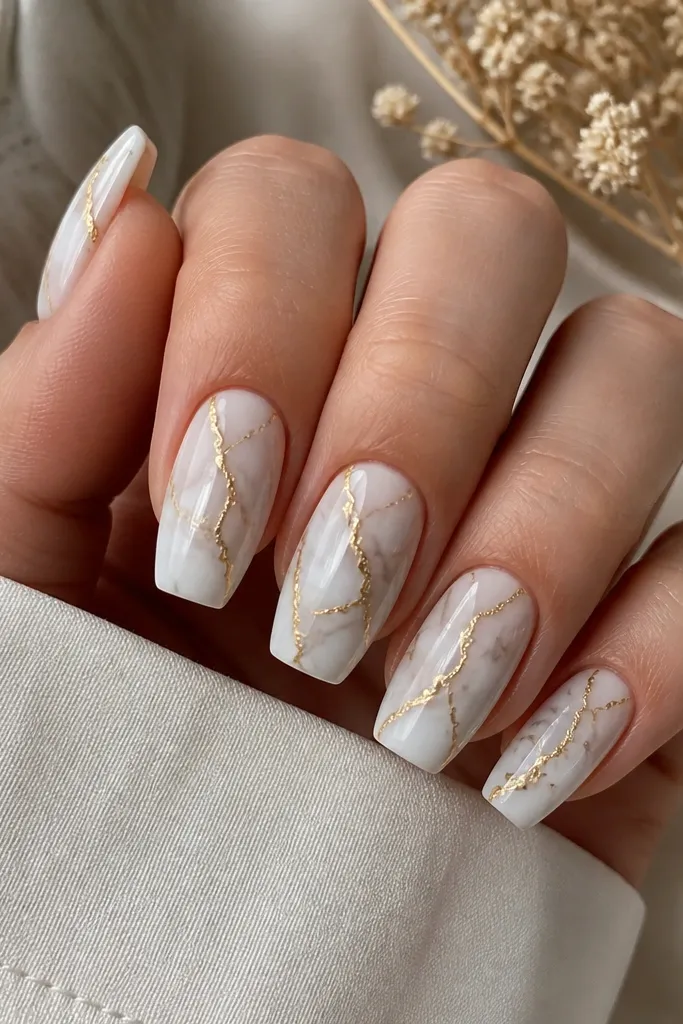
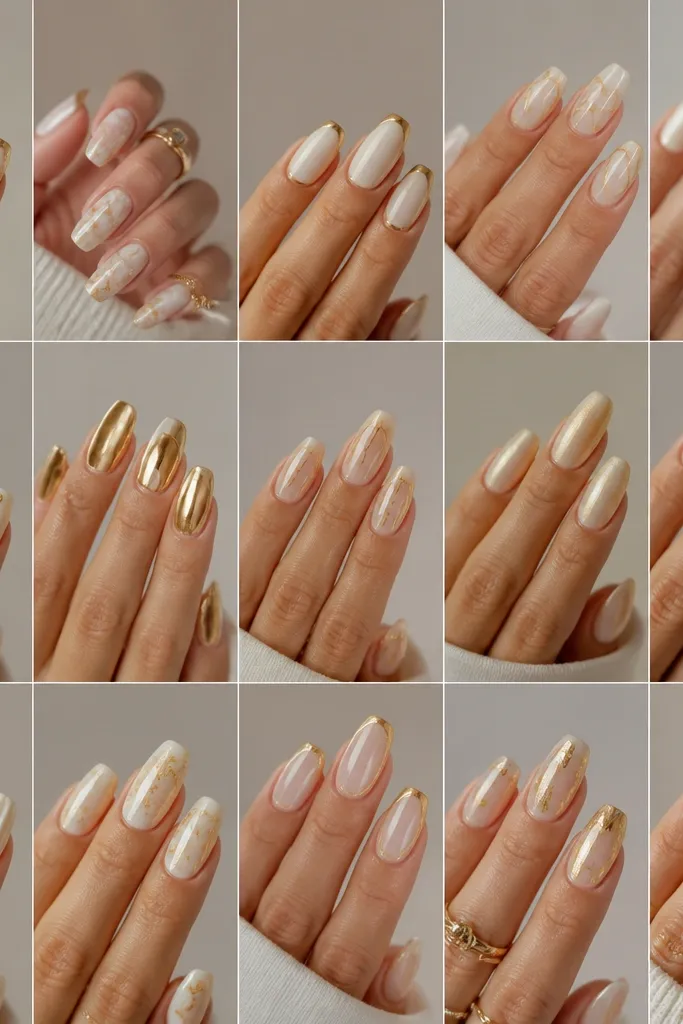
Marble nails look hard until you do them with milky gel and thin gold lines. The milky white base keeps the marble light, and the gold veins add that “stone jewelry” effect. I use warm gold instead of bright yellow because it looks more natural against the white. This set is flattering for special nights and also works for winter because the marble reads clean, not icy.
Start with milky white as the full base and cure. Add a translucent milky-gray gel on the back of a silicone mat, then drag a thin marbling tool through it with a few quick swipes. Lightly tap and swirl the pattern onto each nail, keeping it airy. Draw gold lines over the strongest marble veins with a fine liner brush using gold gel, then seal with a clear gel top coat.
Editor's noteKeep the marble movement toward the tip; it makes the nail look longer than marble centered near the cuticle.
Watch outAvoid thick gold veins; they look like paint instead of marble cracks.
6. Milky White Skittle With One Gold Accent
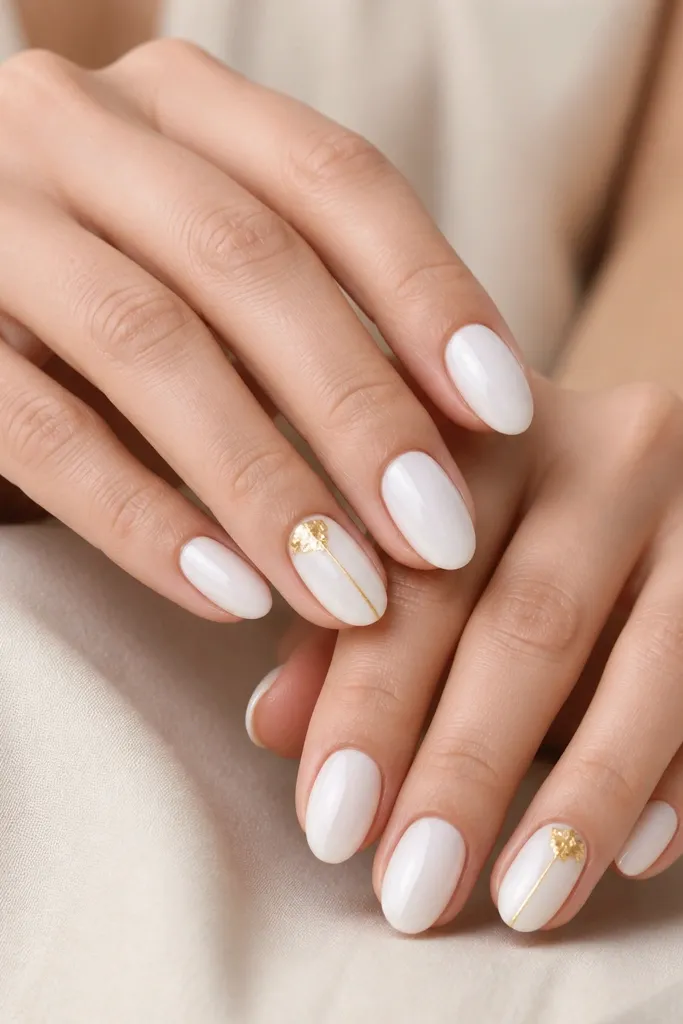
This is for when you want the look but you don’t want every nail covered. The milky white keeps your hands bright and tidy, and the one gold accent makes the set feel intentional. Foil clusters near the cuticle look especially good because they catch light right when you move your hands. This flatters any nail length and works well if you’re growing your nails out.
Paint all nails milky white in 2 to 3 thin coats, curing each. Choose one nail per hand as the accent. On the accent nail, place a small gold foil cluster at the cuticle and add a thin gold line running from mid-nail to the tip using gold striping tape or a liner brush. Seal with top coat, making sure the gold edges are fully covered to prevent lifting.
Match the accent placement on both hands so your eyes read it as a planned design, not random.
Avoid adding gold to multiple nails; it stops looking curated and starts looking messy.
7. Milky White With Gold Dotted Cuticle Outline
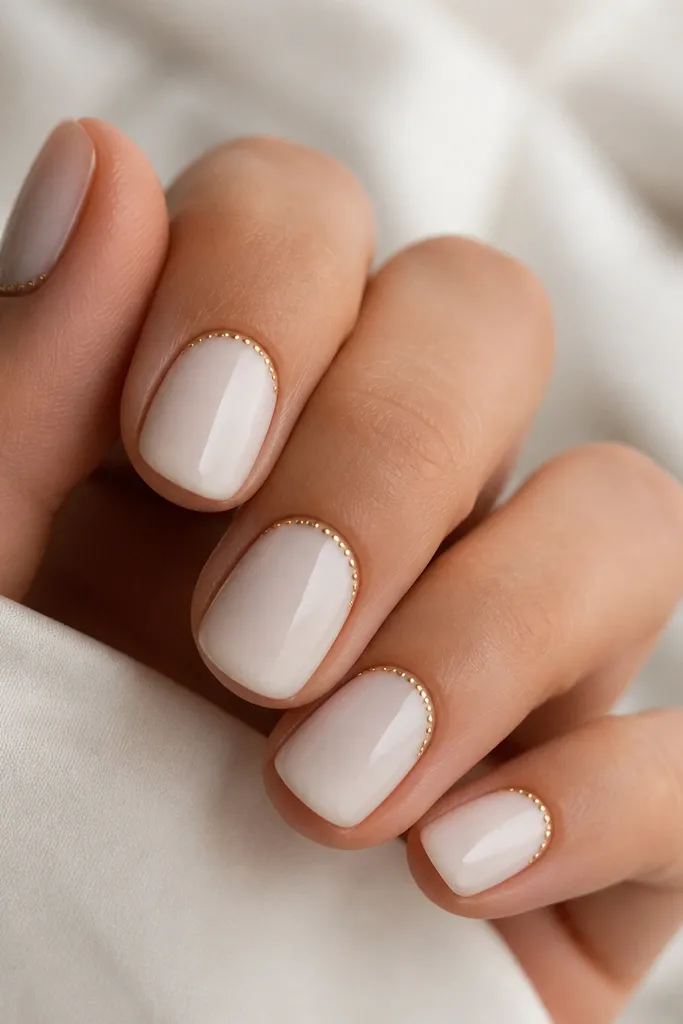
Micro dots around the cuticle give a manicure that looks detailed without using heavy designs. Milky white keeps the base soft and forgiving, while the dotted gold outline adds a clean border. This looks great on hands with shorter nails because the dot ring visually frames the nail bed. I also like it for office days — it reads polished, not party.
Apply milky white in 3 thin coats for full opacity. Use a dotting tool and gold gel to place dots along the cuticle curve, leaving a tiny gap at the corners so it doesn’t flood. Connect the dots lightly with a second layer of gold gel only where needed, keeping the outline thin. Top coat over the dots carefully so they stay raised just enough to catch light.
Editor's noteIf your dots smear, let the gold gel sit for 10-20 seconds to get tackier before you place them.
Watch outAvoid a thick cuticle border; it makes the manicure look bulky and older.
8. Soft Milky White With Gold Outline French
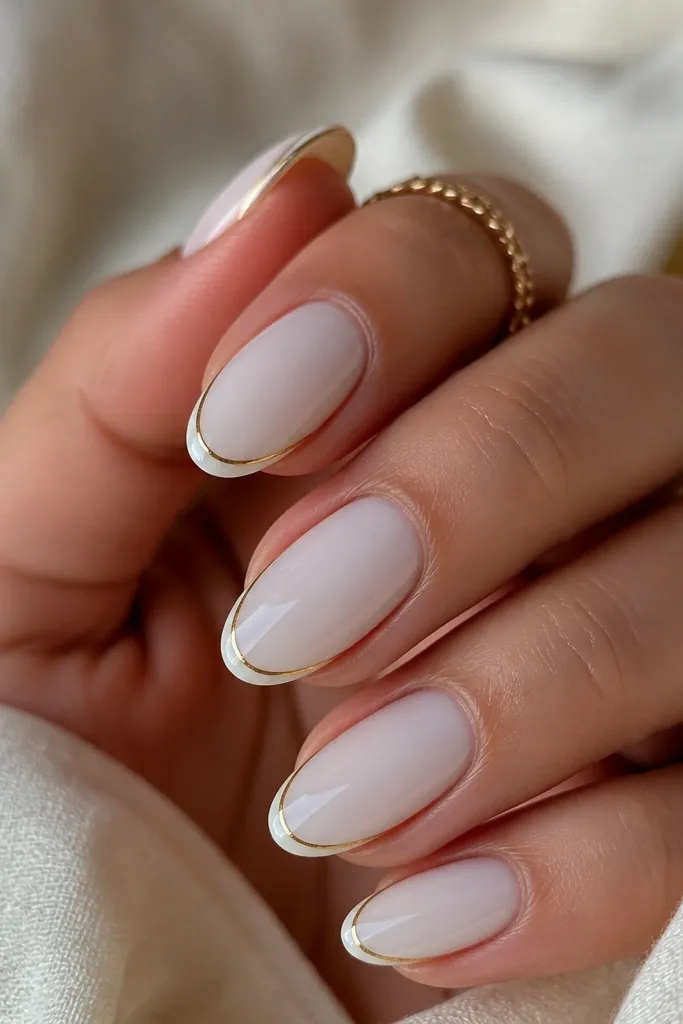
This look is all about restraint. Milky white gives you the clean, creamy base, and the gold outline French adds definition without heavy coverage. It flatters hands that have slight nail ridges because the milky base hides them, and the outline draws attention to the tip shape. It also works well for people who don’t like foil or glitter texture.
Paint milky white and cure in 2-3 thin coats. Use a French guide sticker to create the smile line, then remove it and outline the curve with gold gel using a fine liner brush. Keep the gold outline about the thickness of a hair — too thick looks like a sticker border. Finish with a smooth top coat and cap the free edge.
If the outline looks shaky, touch up only the ends first — a perfect center isn’t as important as symmetry at the corners.
Avoid filling the entire tip with gold; the outline effect is the point.
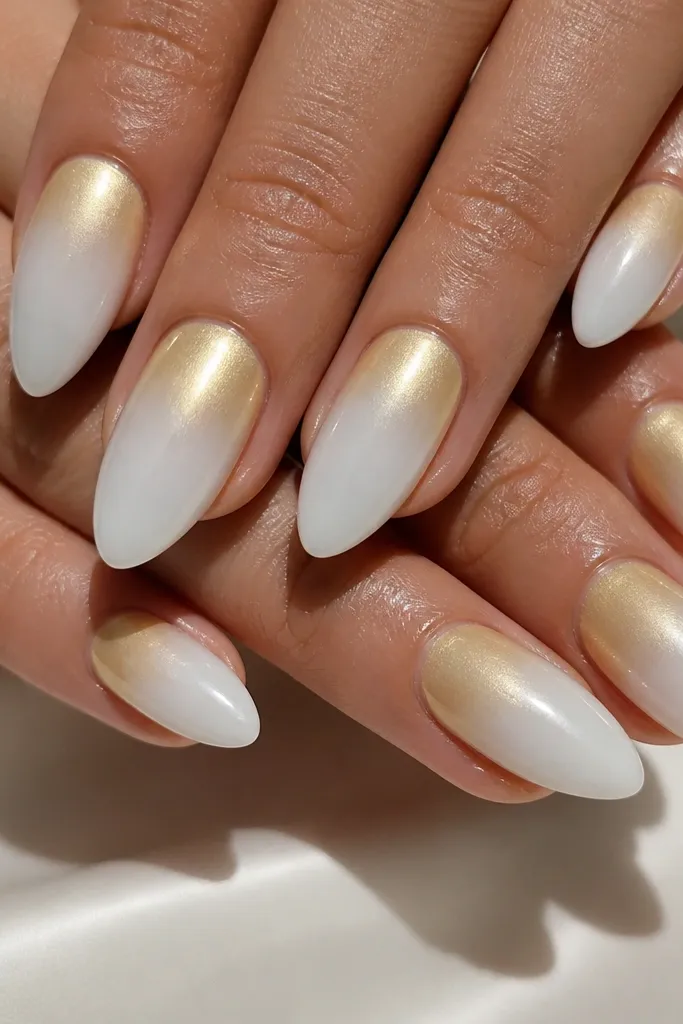
9. Milky White Ombré Into Gold Foil Fade
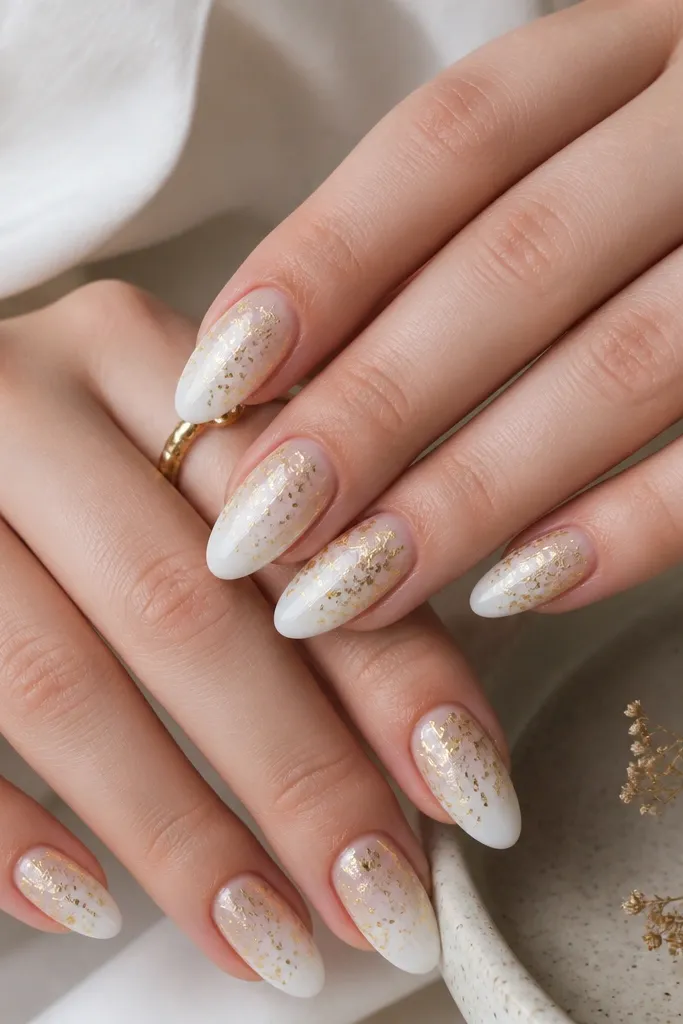
Ombré into gold foil looks like a sunrise over your nails. The milky white base stays clean, and the gold fade reads modern because it’s not a hard line. I like this for medium almond because the gradient has room to move without looking messy. It flatters fair to deep skin tones because the gold sits on top of white and warms everything up.
Start with milky white at the cuticle in 2-3 thin coats. For the gold fade, apply a clear tacky gel in the top third only. Press gold foil into the tacky area and keep re-pressing in small sections so it blends. Use a sponge to lightly tap the transition area, then seal with a gel top coat in 2 layers for smoothness.
Editor's notePlace the strongest foil density near the tip center; it makes the ombré look intentional from all angles.
Watch outAvoid going too low with the foil; if gold reaches the mid-nail, milky white disappears.
10. Milky White With Gold Half-Glitter Accent Nail
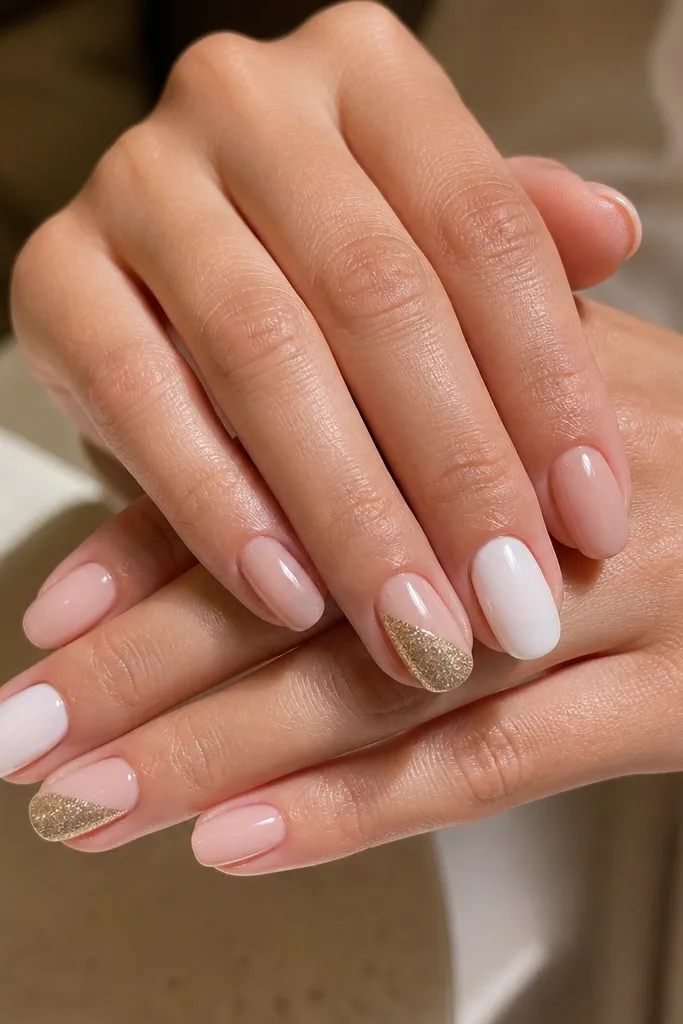
Diagonal half coverage is flattering because it creates motion and makes the nail look slimmer. Milky white keeps the contrast crisp, and gold micro glitter adds sparkle without texture. I like this for date nights because it looks subtle until you turn your hands. It works on both short and medium lengths; on short nails, keep the diagonal line tight so it doesn’t cut the nail too wide.
Paint all nails milky white and cure. On the accent nail, use striping tape to mark a diagonal split. Apply gold micro glitter gel on the glitter side and cure, then remove tape after curing if you’re using gel-friendly tape. Cover with top coat, and add an extra thin top coat around the diagonal seam so it feels smooth.
Burnish the glitter side gently with a silicone tool before sealing — it evens the sparkle.
Avoid thick glitter gel; it makes the diagonal seam look raised and sloppy.
11. Milky White With Gold Negative Space Triangle
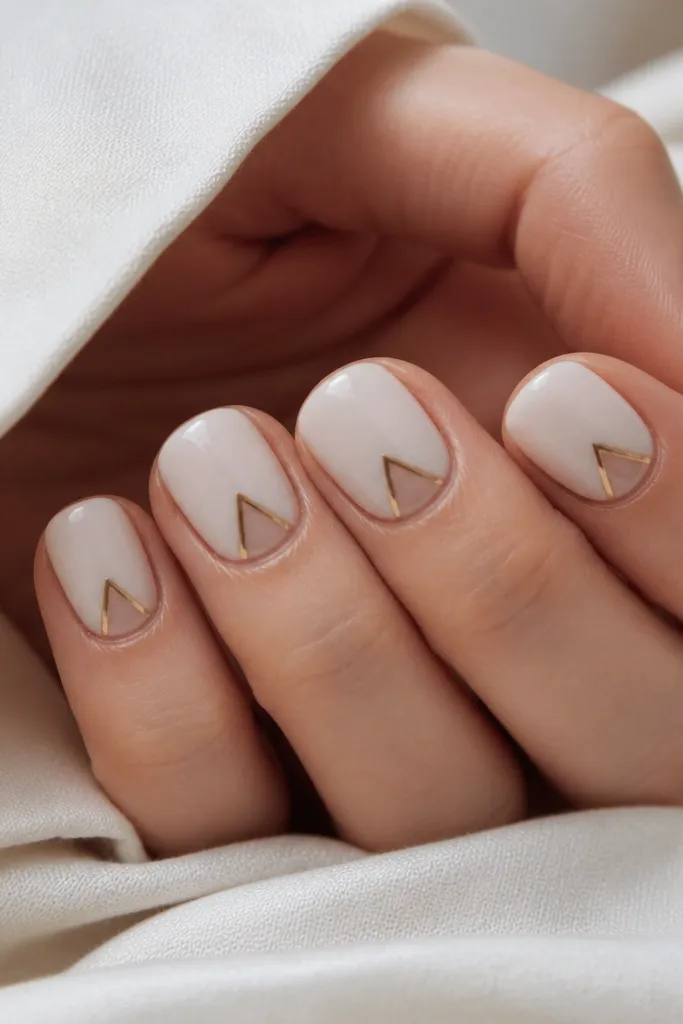
Negative space triangles make nails look graphic and clean. The milky white fills most of the nail, but the clear triangle keeps it modern and stops the design from feeling heavy. Gold outlining the triangle adds polish like a tiny frame. This looks great on squoval and short square because the shape mirrors the nail geometry.
Apply milky white base in 2-3 thin coats and cure fully. Place a small triangle guide using thin striping tape or a triangle nail stencil. Paint clear negative space by leaving the triangle area uncovered, then outline the triangle with gold gel using a fine liner brush. Cure, remove the stencil, and seal with a smooth top coat in two thin layers.
Editor's noteMake the triangle slightly closer to the tip than the center; it lengthens the nail visually.
Watch outAvoid a triangle that’s too big; large negative space makes the nails look unfinished.
12. Milky White With Gold Crosshatch Lines
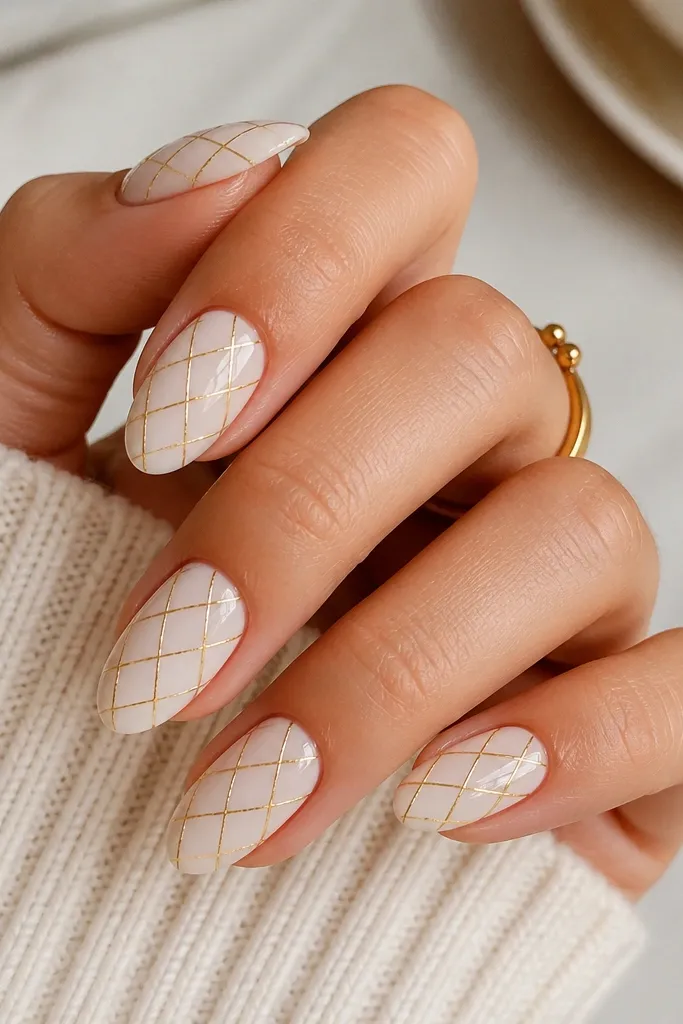
Crosshatch lines are a good way to add interest without using glitter or foil clusters. Milky white makes the gold lines look crisp, not muddy. I use a fine tape lattice method because it keeps the lines straight and the spacing even. This looks great for workwear and events because it reads graphic and tidy on camera.
Paint milky white and cure in 2-3 thin coats. Apply thin striping tape diagonally across the nail, then add a second set of diagonal lines in the opposite direction to form the lattice. Brush gold gel over the taped lines, then cure. Peel the tape after curing and add top coat to seal the edges so the lattice doesn’t lift.
Editor's notePress the tape down firmly along the sidewalls so gold gel doesn’t creep underneath.
Watch outAvoid thick lines; chunky gold gel makes the lattice look like stripes instead of a pattern.
13. Milky White With Gold Crackle Overcoat
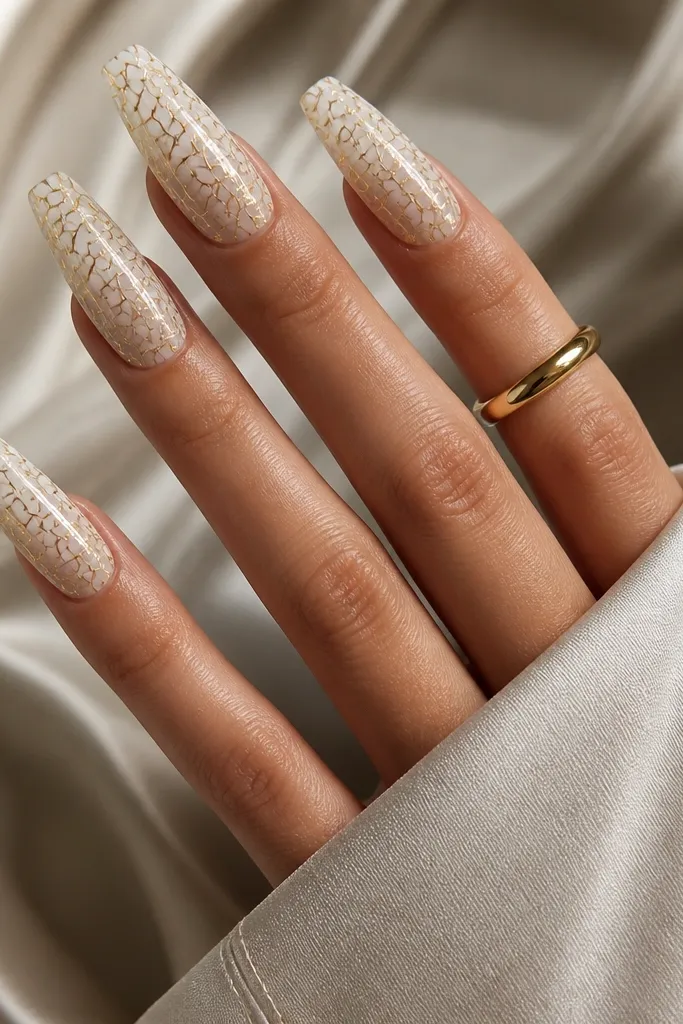
Crackle is one of the fastest ways to make milky white look “done.” The gold crackle lines create movement and texture, but because the base is opaque milky white, the final look stays clean. I like it most on longer shapes because the crackle pattern has space to spread. It’s also flattering on medium-deep skin tones because the gold reads warm and bright instead of muted.
Paint milky white in 3 thin coats and cure until fully set. Apply a gold crackle gel over the milky base — keep it even but not thick. Cure, then add a clear top coat layer to smooth the surface if your crackle gel leaves texture. Check the edges; if any crackle gel got onto the sidewalls, clean it with a gel-safe brush and cleanser before curing top coat.
Use a light hand with crackle gel — thicker layers create big breaks that look messy.
Avoid applying crackle over a tacky-under-cured base; it smears the pattern.
14. Milky White With Gold Aura Glow Around the Cuticle
Aura effects look dreamy, but they still need control. Milky white gives you a clean center, and the gold aura around the cuticle makes your nail bed look larger and lifted. I like this on hands that have slightly uneven nail beds because the glow draws focus toward the center. It flatters both cool and warm undertones because the gold is diffused, not harsh.
Start with milky white and cure. Apply a small amount of clear tacky gel right around the cuticle, then tap gold chrome powder into that tacky ring. Use a fluffy brush to blend the edges so it fades, not blobs. Seal with a top coat that doesn’t dull too much; apply one thin coat, cure, then a second for shine.
Editor's noteKeep the aura smaller than you think. A tight halo looks expensive; a wide one looks like you spilled gold.
Watch outAvoid rubbing the chrome directly with a finger; it can streak and leave bare patches.
15. Milky White Glass Nails With Gold Studded Halo
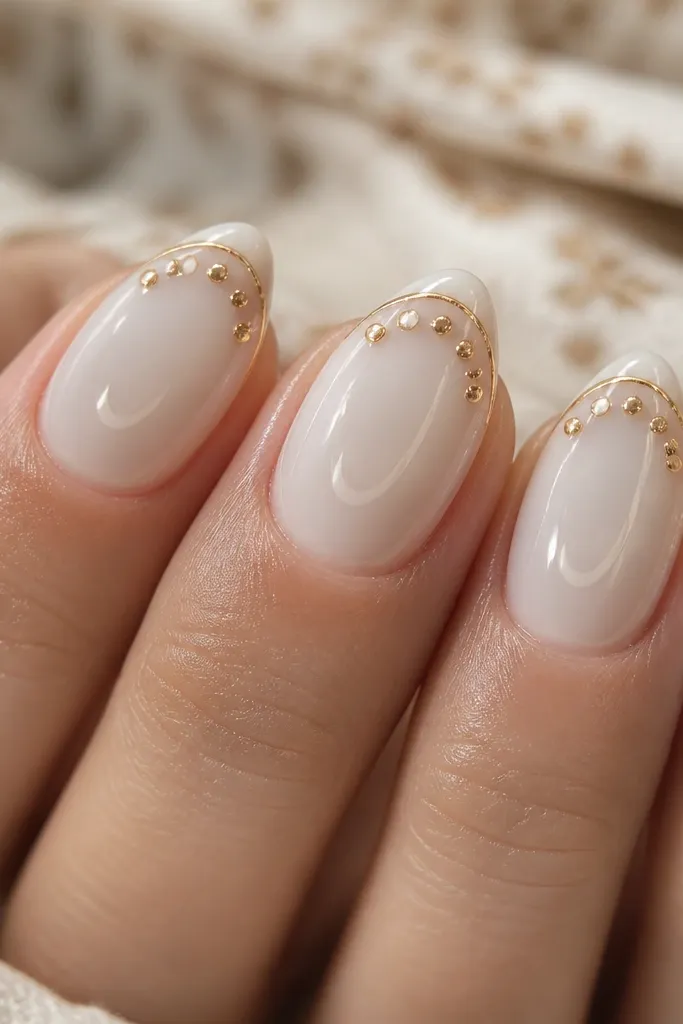
I tried this when I wanted milky white that still looked expensive under indoor lighting, not chalky. The trick is using a sheer milky base over a clear builder so the nail looks like it has depth, like frosted glass. Then you add a thin gold ring right at the cuticle line, not a full border, so your eye reads it as a clean frame. The tiny studs in a broken halo make it feel jewelry-level without looking busy. It works because the milky glow softens the gold and keeps the whole set airy.
Start by prepping and filing to an almond shape with a slightly longer free edge, about 2.5-3 mm past your fingertip. Apply a thin clear builder layer, cure, then sponge or paint a sheer milky white gel over it so you keep visible translucency. For the halo, use a striping brush with gold gel and draw a thin arc around the cuticle, leaving a small gap on one side. Place 4-6 micro studs with tweezers along that arc, spacing them unevenly so it looks natural, then cure. Seal everything with a glossy top coat in two thin layers, curing fully between coats so the studs stay crisp.
Editor's noteIf your halo looks wobbly, mark the cuticle curve lightly with a dot of gold gel first, then connect the dots in one smooth pass.
Watch outSkip thick milky layers over a clear base — they turn glass into opaque white and kill the glowing depth.