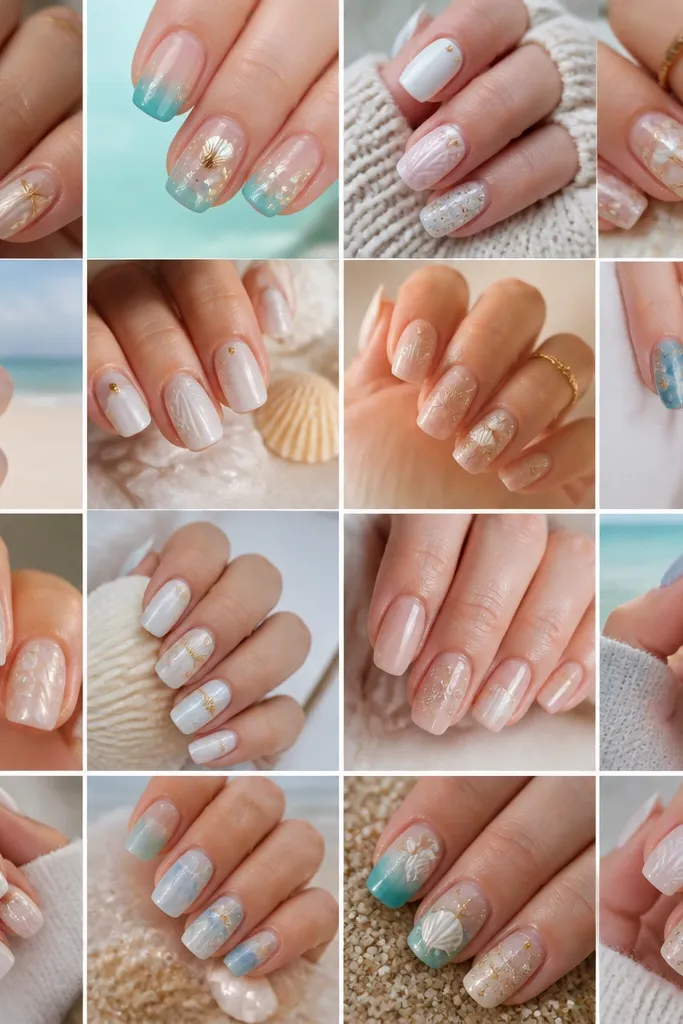
1. Milky Nude Shell With One Ridge Highlight
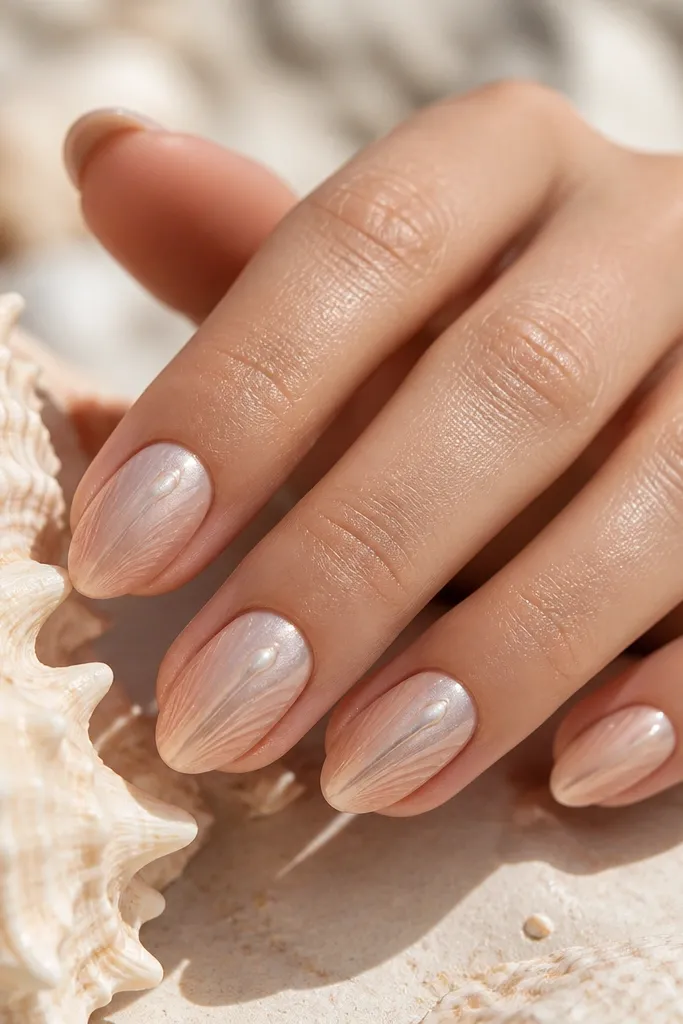
This one is my go-to when someone says they’re “bad at nail art.” The milky nude base makes the whole set look expensive because it smooths out the nail tone. The shell is drawn with pale pink ridges, then one narrow white highlight line sits near the top of the curve to mimic light hitting the shell. It flatters medium to warm skin tones because the base is close to your natural color and the pink reads soft, not harsh.
Start by applying a sheer milky nude gel base to all nails and cure fully. On the accent nail (ring finger or index finger), paint a small curved shell shape with pale pink gel, leaving a little negative space on one side. Add two or three gentle ridges using the same pale pink, then use a detail brush to drag one thin white line along the top ridge. Finish with a thick glossy top coat on every nail.
Editor's noteUse a gel paint that self-levels — it helps your ridges look even without repeated brush passes.
Watch outDon’t add multiple bright white lines; two or three ridges plus one highlight looks realistic, while lots of highlights look chalky.
2. Scallop Edge Seashell French Tips
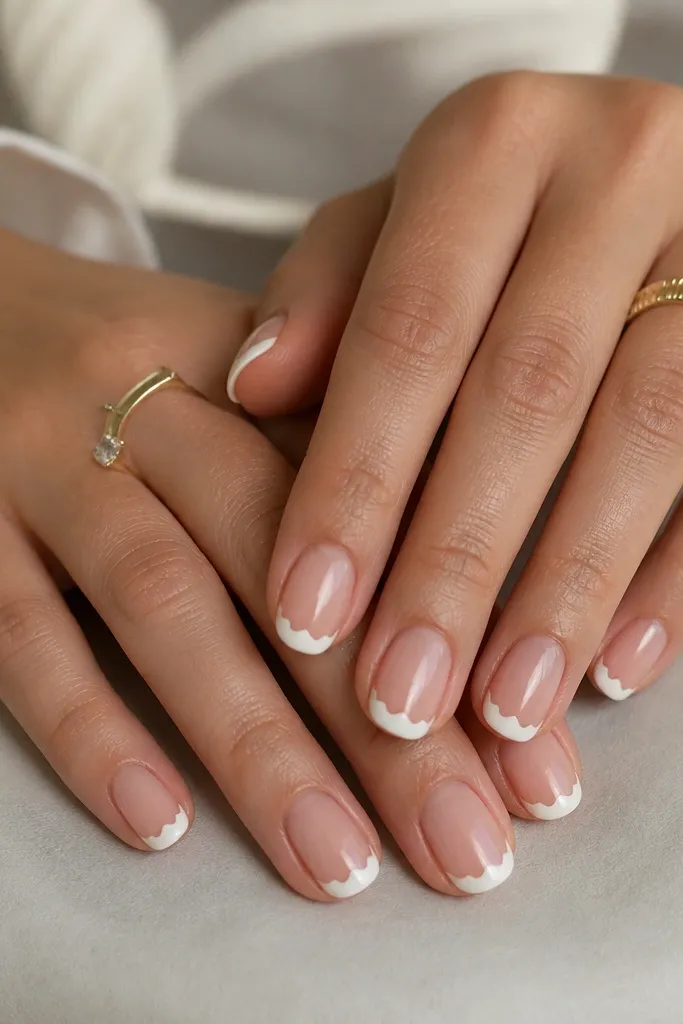
French tips are easy because you already know where the line goes. This version adds scallops, which look like the wavy edge of a shell without needing a full shell drawing. A sheer pink base makes your nails look longer and the soft white tip keeps it beachy instead of wintery. This design looks great on short nails because the scallops create a visual edge that draws the eye outward.
Paint a sheer pink base and cure, then place a thin strip of striping tape slightly below your tip line for a guide. Brush soft white gel on the taped tip area, then pull the tape up while the gel is still workable if your brand allows clean lift. Use a dotting tool to press tiny half-moon scallops along the tip edge, spacing them evenly from sidewall to sidewall. Cure, then top coat all nails with a glossy layer.
If your scallops look uneven, add one tiny pale pink dot between scallops to blend the spacing.
Don’t make the tip too thick; chunky white gel on short nails makes the scallops look like blobs.
3. Sky Blue Waterline Shells
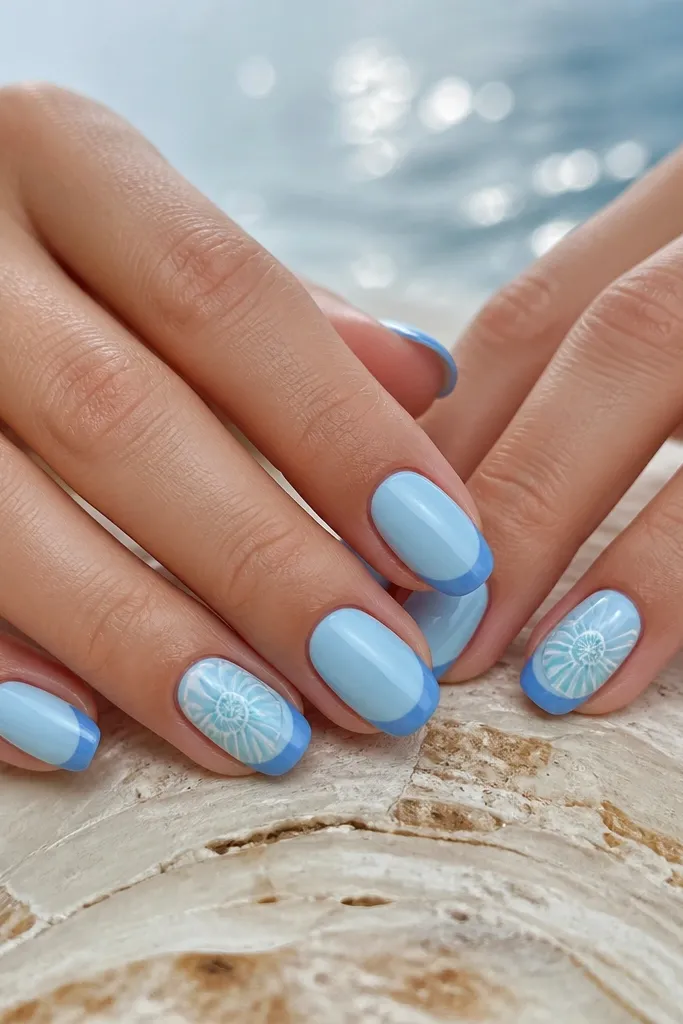
This set looks like the moment the tide line hits a shell — calm blue with a clear edge. The darker waterline band gives structure, and the shell spiral adds the seashell identity. I like sky blue for beginners because it covers evenly and hides brush streaks better than super pale pastels. It also flatters cool undertones and makes hands look fresh for daytime wear.
Apply sky blue gel as the base color and cure. With a liner brush, paint a narrow darker blue band across the top third of the nail, keeping it slightly curved to match the nail shape. On one or two accent nails, draw a small spiral using thin white gel, starting at the center and looping outward. Add one tiny pale teal dot at the end of the spiral line, then seal with glossy top coat.
Editor's noteUse a damp lint-free wipe to clean your brush between spiral turns so the lines stay sharp.
Watch outDon’t overfill the spiral; if the spiral becomes a thick blob, it stops reading as a shell.
4. Pearl White Ombré With Shell Dots
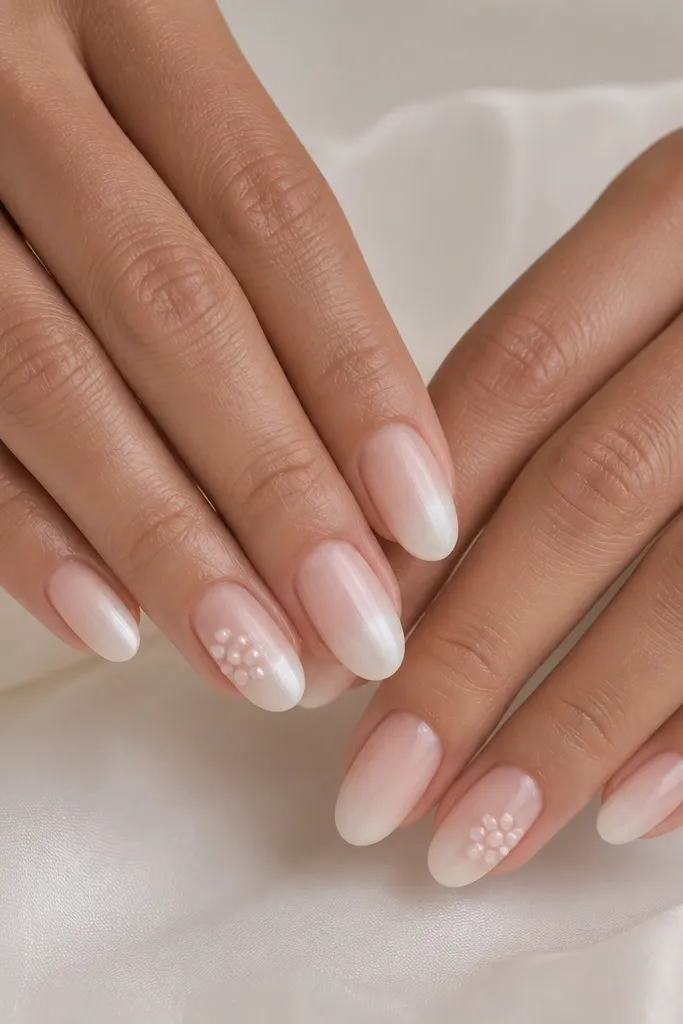
Pearl white ombré looks dreamy because it blends softly instead of requiring perfect line work. The dot clusters mimic the bumpy texture on many shells, and the pearl shimmer makes it look like jewelry. This is flattering on almost every skin tone because the nude-to-pearl transition keeps things light and clean. It also works for short nails since the ombré elongates the finger.
Start with a sheer nude base and cure. Sponge pearl white gel from mid-nail to tip using a small makeup sponge; keep the cuticle area clear for a smooth gradient. On the ring fingers, place three dot clusters: one larger dot in the center and two smaller dots on each side using a pale blush gel. Add a micro dot of pearl shimmer on top of the center dot, then cure and top coat.
Do two thin sponge layers instead of one thick layer to avoid streaky gradients.
Don’t push pearl gel too close to the cuticle; it can look like a halo stain.
5. Soft Pink Shell Spiral On Milky Base
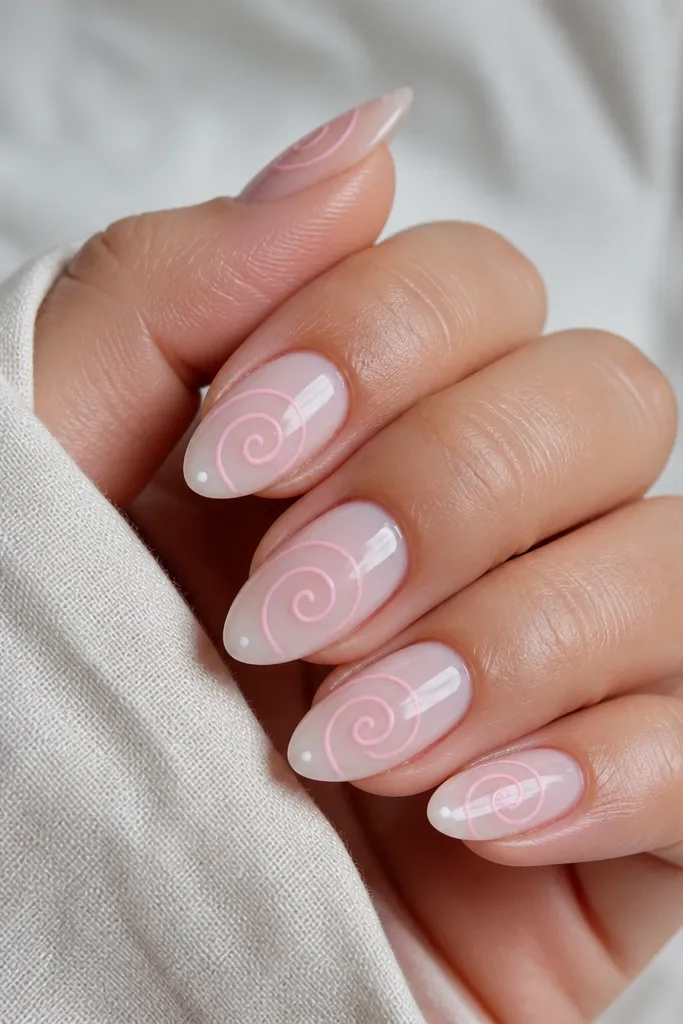
A single spiral is the easiest way to get the shell look without filling the whole nail. The milky base keeps the background calm, and the soft pink spiral reads like a conch without getting busy. I like this for everyday wear because it looks intentional even when your lines aren’t perfectly symmetrical. It suits fair to deep skin tones because the spiral color sits clearly on top of the sheer milky layer.
Apply milky sheer gel to all nails and cure. Using a detail brush, draw a spiral line in soft pink starting near the center of the nail — not the cuticle — and loop toward the tip. Add one tiny white dot where the spiral ends, then drag the dot slightly into a short highlight curve. Cure again and finish with glossy top coat.
Lightly sketch the spiral with a thin gel line first, then thicken it only where you want emphasis.
Don’t draw the spiral too close to the sidewalls; it can look cramped and messy.
6. White Shell Ridged Accent With Nude Base
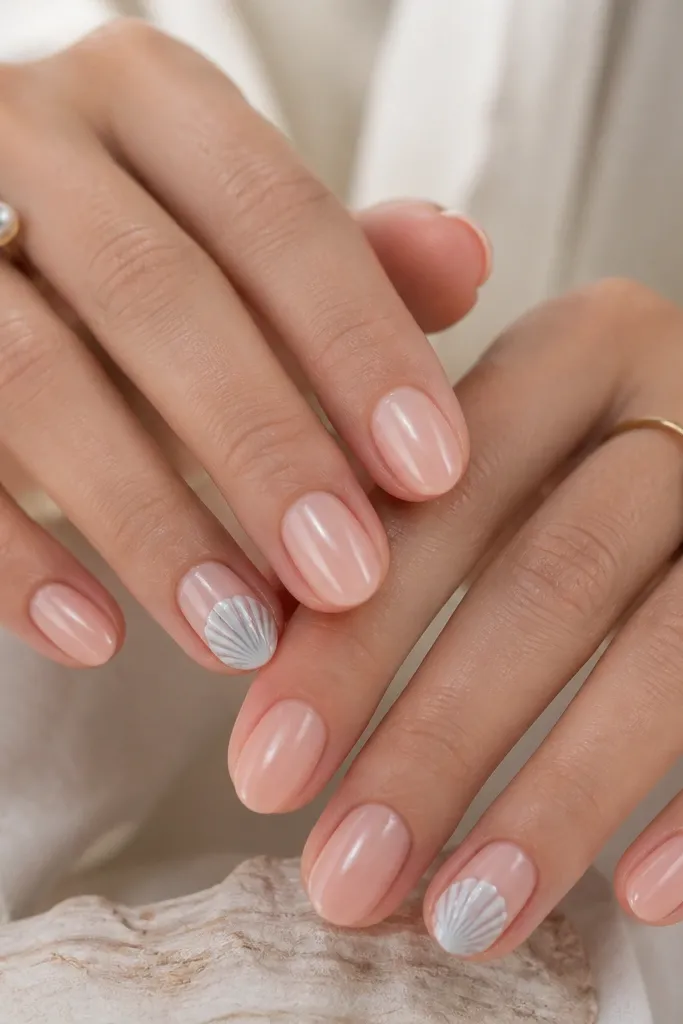
This design looks “nail salon” because it uses ridges, not just a shell outline. The nude base keeps it wearable, and the ridged white shell gives texture through color shading. I’ve worn this to weddings and it photographs well because the ridges catch light under the top coat. It’s also flattering if you have shorter nails because the shell sits centered and draws the eye vertically.
Paint a nude base and cure. On the accent nail, draw a big curved shell outline in white gel, leaving a small gap at the top for a highlight. Add three ridges inside the shell using a slightly gray-blue gel, keeping each ridge evenly spaced. Use a thin brush to add a bright white highlight stroke on the top ridge, then top coat thickly and cure.
Use a gel that’s slightly translucent for the gray-blue ridges so they look like shadow, not a second outline.
Don’t make all ridges the same brightness; variation is what makes the shell look dimensional.
7. Beach Sand Glitter Cuticle Halo
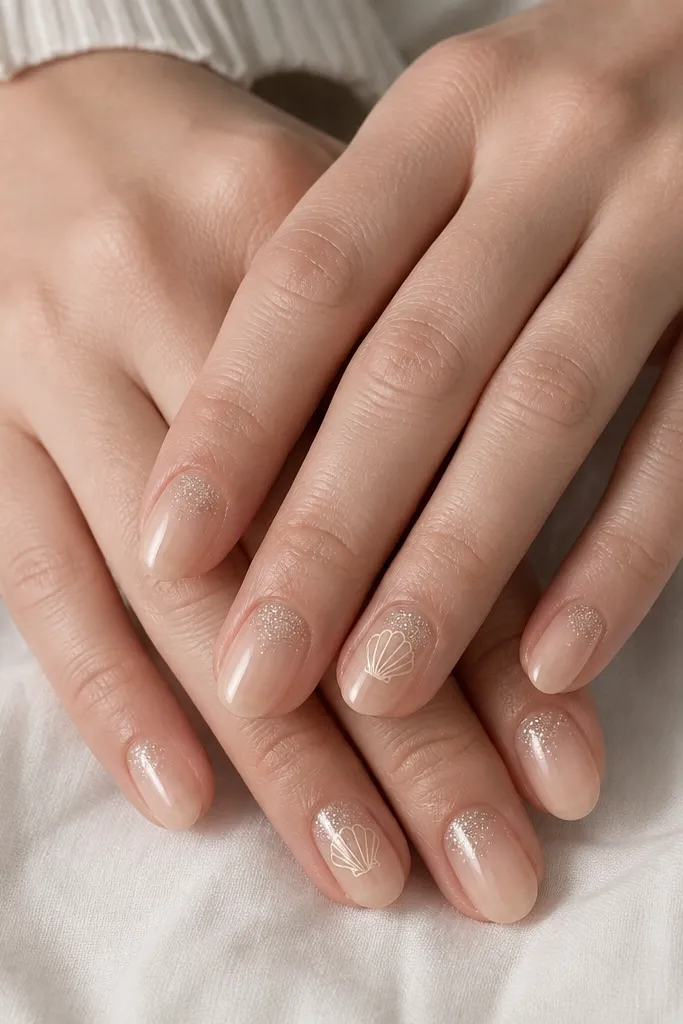
This is a beginner-friendly way to get that beach sparkle without drawing a full shell scene. The cuticle halo makes the set look like you’re wearing jewelry on your hands. The warm champagne shimmer reads like sand under sunlight, and the tiny shell outline gives the theme. It looks great for short nails and for hands that need a clean, polished look.
Start with a sheer nude gel base and cure. Apply a thin layer of clear or tacky gel around the cuticle, then sprinkle warm champagne micro-glitter and tap off excess. Blend the glitter outward with a soft brush so it fades, then cure. On the ring finger, draw a small shell outline in pale beige near the center, add one tiny white highlight dot, and seal with top coat.
Editor's noteTo keep glitter from catching fabric, press a thin top coat over glitter before your final thick coat.
Watch outDon’t load glitter all the way to the tip; it stops reading as sand and starts reading as random sparkles.
8. Ocean Teal Ombré With White Shell Lines
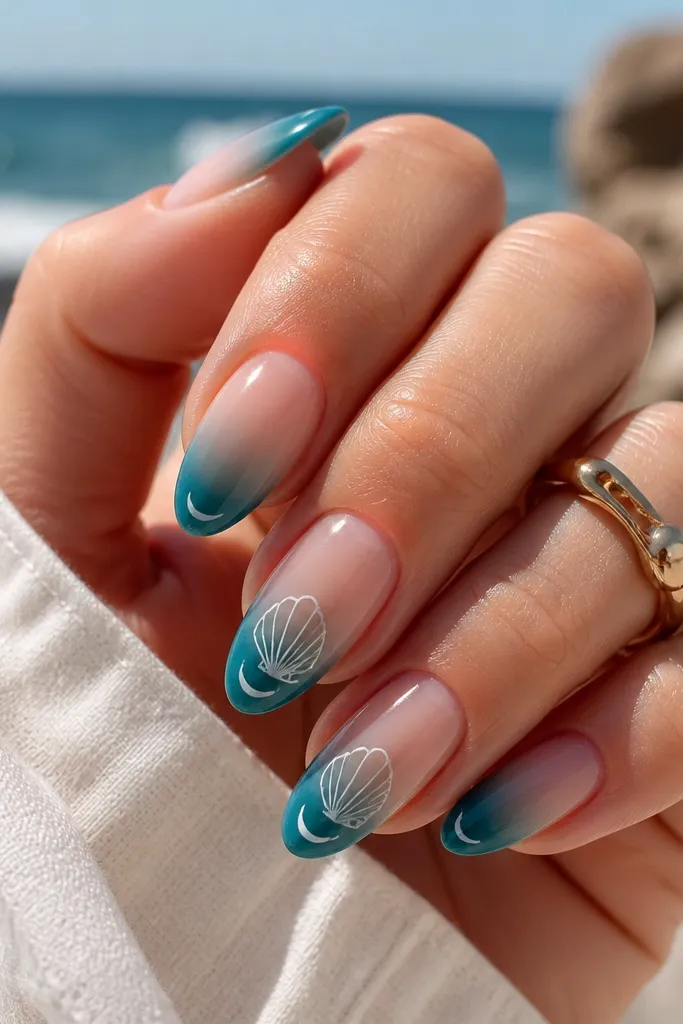
Teal ombré looks beachy fast because your eye reads it as water. The white shell lines pop against teal, so you don’t need super detailed art to get the theme. This is best on medium-length nails where the ombré has space to blend, but it can work on short nails if you keep the ombré subtle. It flatters hands with warm undertones because teal brings out the contrast.
Apply sheer nude base and cure. Sponge ocean teal gel from mid-nail to tip, keeping the transition soft and slightly uneven for a natural “water” feel. On accent nails, draw one shell curve near the center using white gel, then add two thin parallel ridges that follow the curve. Add a small crescent highlight near the tip on the ridge, cure, and finish with glossy top coat.
Editor's noteMist your sponge lightly with alcohol before loading polish so the blend stays airy, not muddy.
Watch outDon’t use pure neon teal; it overpowers the shell lines and makes it look like candy.
9. Pastel Shell Confetti On Milky Pink
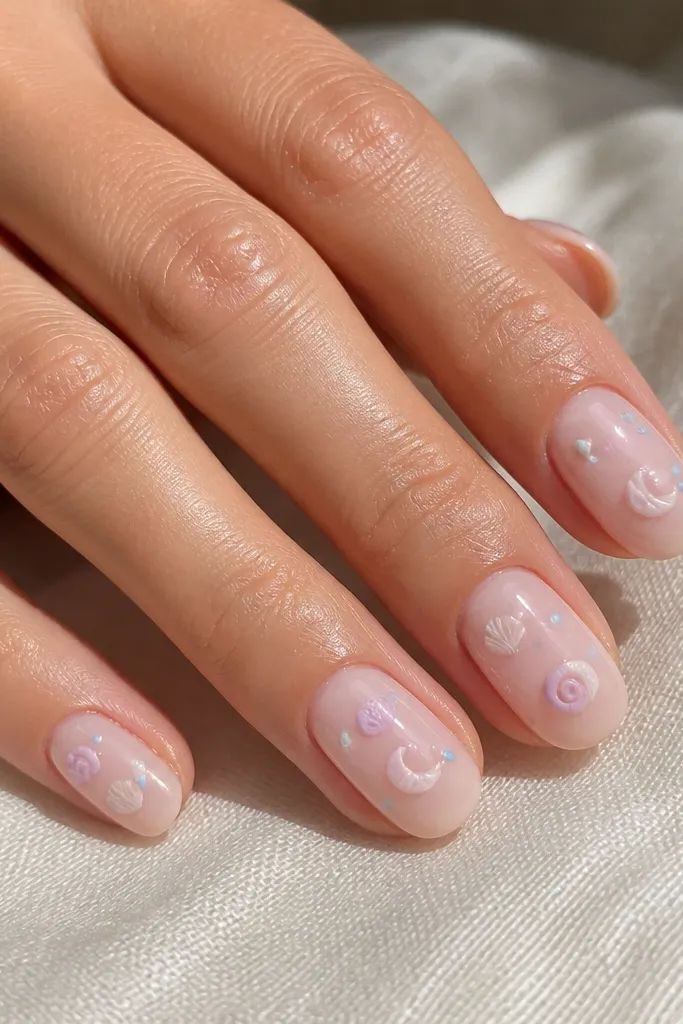
This is the “I don’t want to draw one big shell” option. Tiny shell confetti gives you movement and beach texture without demanding perfect symmetry. The milky pink base makes everything cohesive, and pastel accents keep it soft for daytime. I’ve done this on clients who hate thick nail art because it stays light and still looks fun in photos.
Paint milky pink gel on all nails and cure. Using a dotting tool, place small white crescents randomly across each nail, then add tiny pale blue dots next to them. With a detail brush, draw one tiny lavender swirl on two nails per hand, keeping it smaller than a dime. Cure and seal with top coat, making sure the confetti edges get coated so they don’t snag.
Scatter in a diagonal pattern — it makes the set look intentional instead of accidental.
Don’t crowd the cuticle area with confetti; it can look messy right where your skin shows.
10. Pearl Chrome Seashell Tips
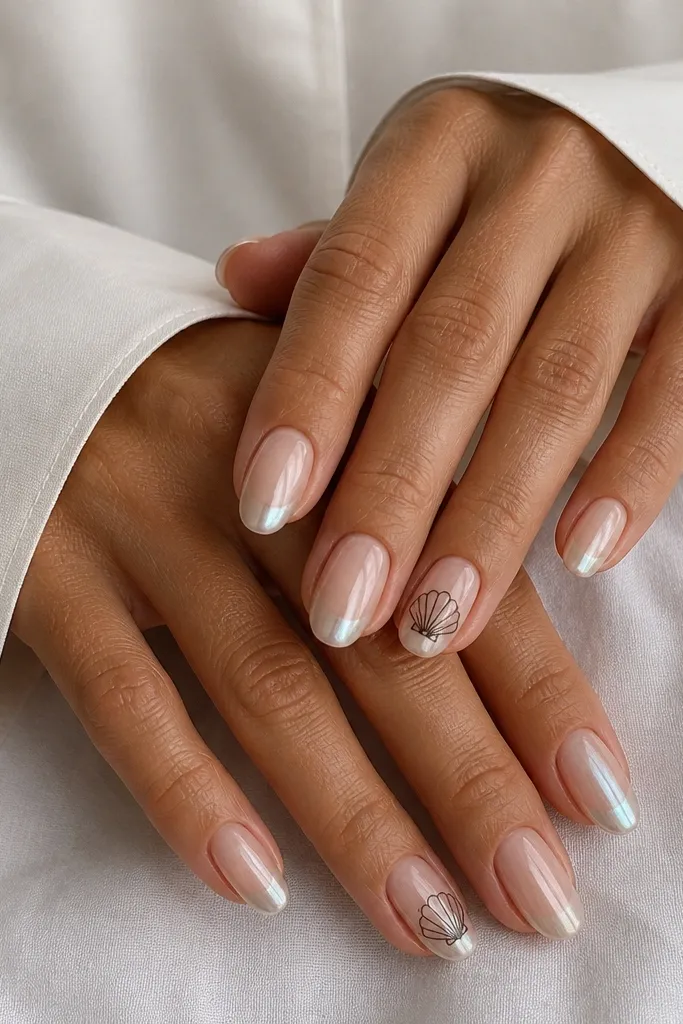
Chrome tips instantly read “special” and the seashell lines keep it from looking like a generic manicure. Pearl chrome has a soft, beachy sheen compared to high-gloss silver, and it photographs beautifully. The tiny ridge line on accent nails gives you the theme without adding bulk. This looks best on medium almond or short square because chrome needs a clean tip boundary.
Apply sheer nude base and cure. Use a chrome gel base on the tips only, then apply pearl chrome powder and buff lightly once cured. On the ring fingers, draw a tiny curved shell ridge line in a warm gray-brown so it doesn’t look too harsh. Add one thin white highlight dot on the ridge and top coat with a non-wipe glossy top coat.
If chrome dulls, apply a thin layer of top coat and cure longer on the tips for a glassy finish.
Don’t top coat with a matte top coat; chrome + matte kills the shell shine.
11. Two-Tone Shell Half-Moons
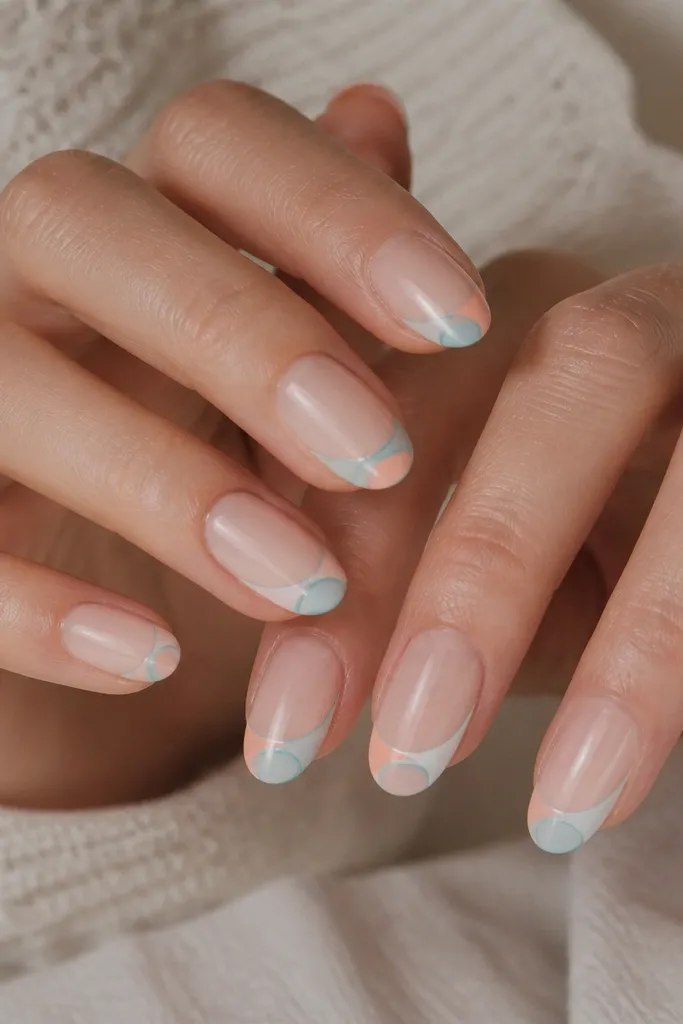
Half-moons are a beginner’s cheat code because you’re drawing simple shapes, not detailed ridges. The two-tone layering creates depth, like stacked shell edges. Pale peach plus milky white looks warm and beachy, and the thin teal outline gives it that ocean pop. This design is flattering on short nails because the half-moons sit near the tip and visually extend the nail.
Start with a sheer nude base and cure. Near the tip on each nail, place a pale peach half-moon using a dotting tool or brush, then cure briefly if needed. Layer a milky white half-moon on top so it overlaps slightly, then draw a thin teal outline following the outer curve. Cure again and finish with glossy top coat.
Editor's noteUse a striping brush for the teal outline; it keeps the line hair-thin and clean.
Watch outDon’t outline in thick teal — it turns into a cartoon border instead of a shell edge.
12. Beach Waves + Tiny Shell Corner
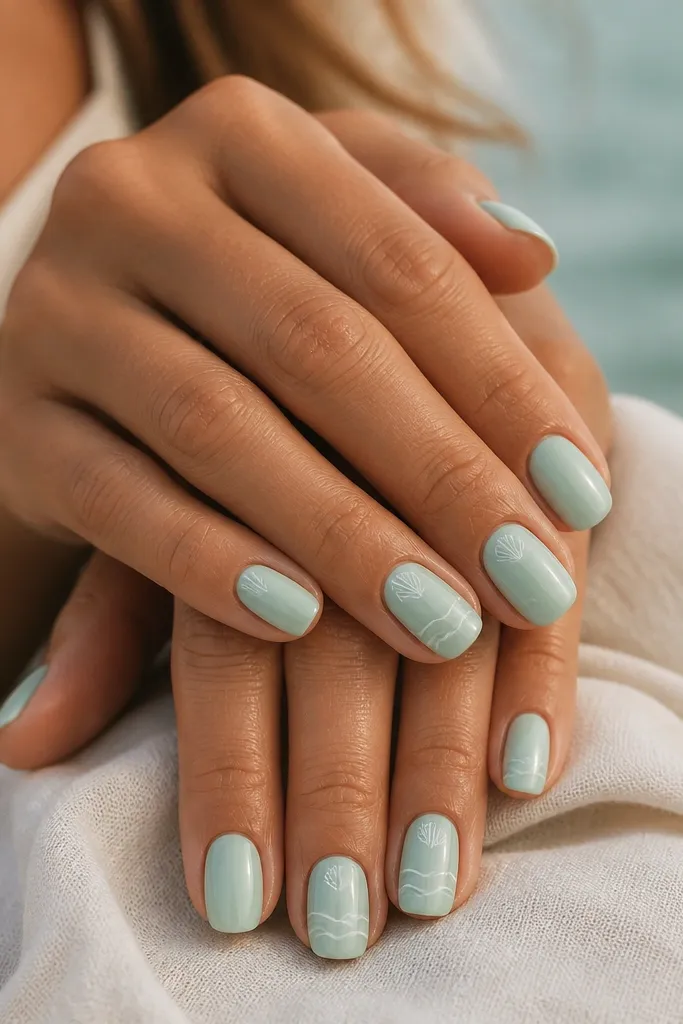
This is for people who want a beach look but dread filling the whole nail with art. The wave lines are quick and forgiving, and the tiny shell corner detail makes it feel themed. Seafoam is an easy color to work with because it’s not super opaque, so brush marks blend into the background. It looks great on medium to deep skin tones because the white lines show clearly.
Paint seafoam gel on all nails and cure. On accent nails, use a liner brush to paint two or three horizontal wavy lines in white across the lower half of the nail. On the remaining nails, draw a tiny shell outline in white in the upper corner near the cuticle, then add one small highlight dot inside. Cure and top coat glossy so the waves look smooth.
Editor's noteKeep the waves at the same height on each accent nail so the set looks intentional.
Watch outDon’t add waves on every nail; it turns into “swoopy lines” instead of a beach manicure.
13. Shell Lace In Negative Space
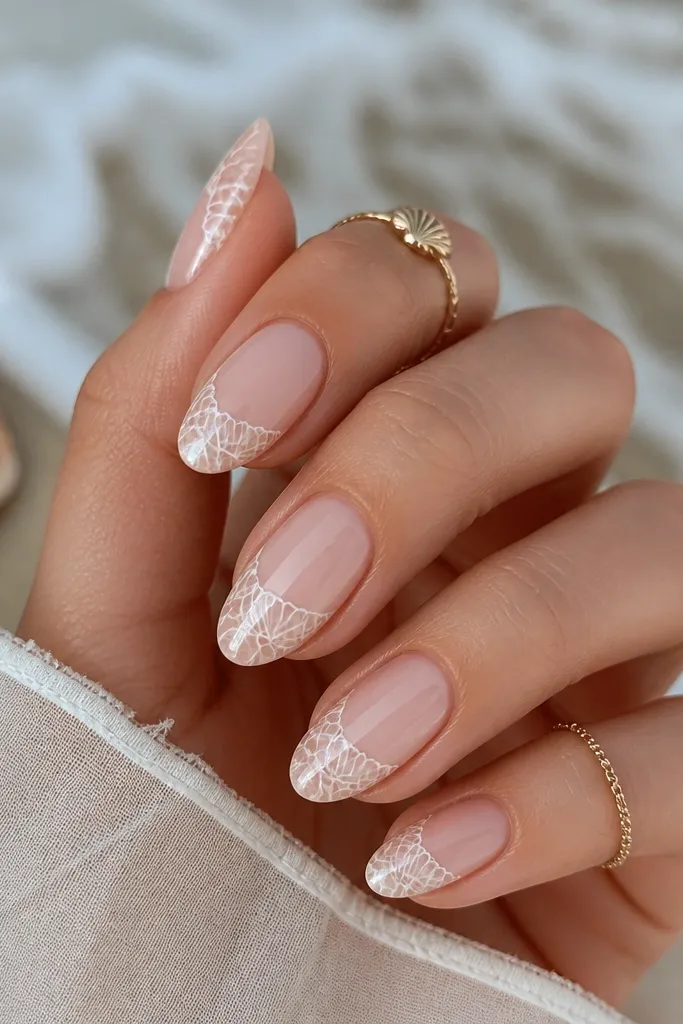
Negative space is the trick that makes shell art look neat even if your lines aren’t perfect. Thin white “lace” shell patterns mimic shell texture and look airy. I like this when I want the manicure to feel light and not too heavy. It flatters every skin tone because the nude base matches your hand, and the white lines stay crisp.
Apply a sheer nude base and cure, leaving no extra color on the nail surface. On accent nails, draw a shell outline in thin white gel, then add mini scallops along one side using the dotting tool. Connect the scallops with thin line segments so it looks like lace ridges, not thick stripes. Cure and finish with a glossy top coat, making sure the lines are sealed without flooding the design.
Editor's noteUse fewer lines than you think — lace looks best when there’s breathing room.
Watch outDon’t fill the lace pattern with solid white; it loses the airy shell effect.
14. Sea Glass Green With Transparent Shell Outline
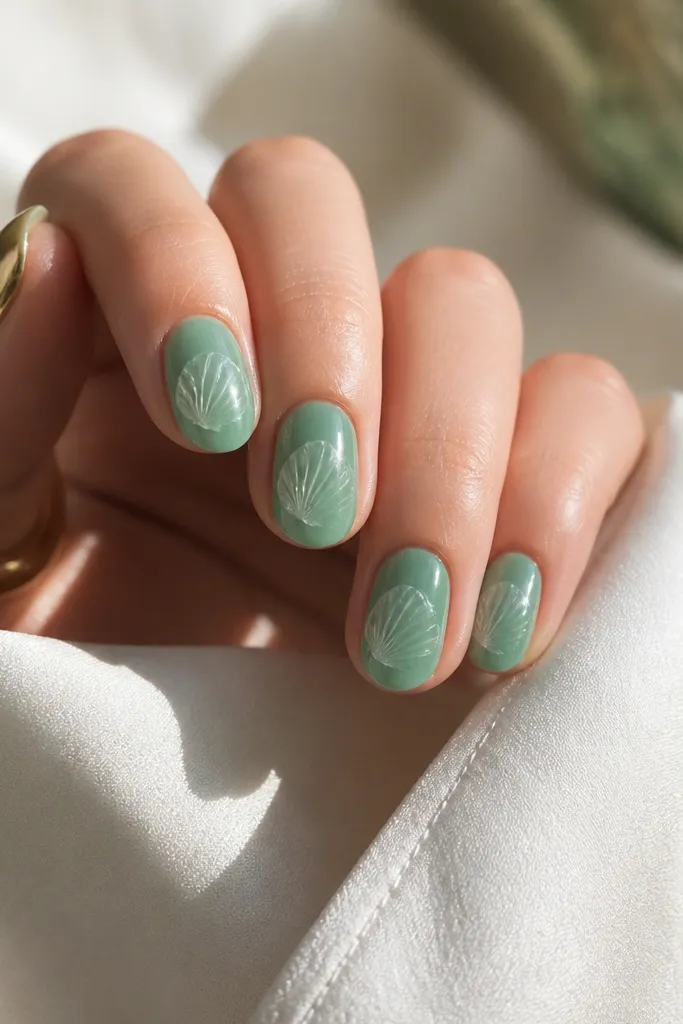
Sea glass green looks like it came from the shoreline, and the transparent shell outline keeps it from looking heavy. The trick is using a slightly sheer gel for the outline so it looks like light passing through the shell. This design looks good on people who want something calmer than glitter but still beachy. It also looks flattering on short nails because the shell outline stays tidy and centered.
Paint sea glass green gel and cure. On each nail, draw a simple shell outline using a pale mint gel that’s not fully opaque — apply two thin passes if needed. Add two or three inner ridge lines using lighter white gel, then drag a single curved highlight stroke near the top of the shell. Cure and top coat glossy.
Editor's noteIf your outline looks too opaque, mix your white gel with a clear gel to thin it.
Watch outDon’t use thick black-brown for the outline; it makes sea glass look like stained glass instead of shell.
15. Starfish Accent With Coral Shell Lines
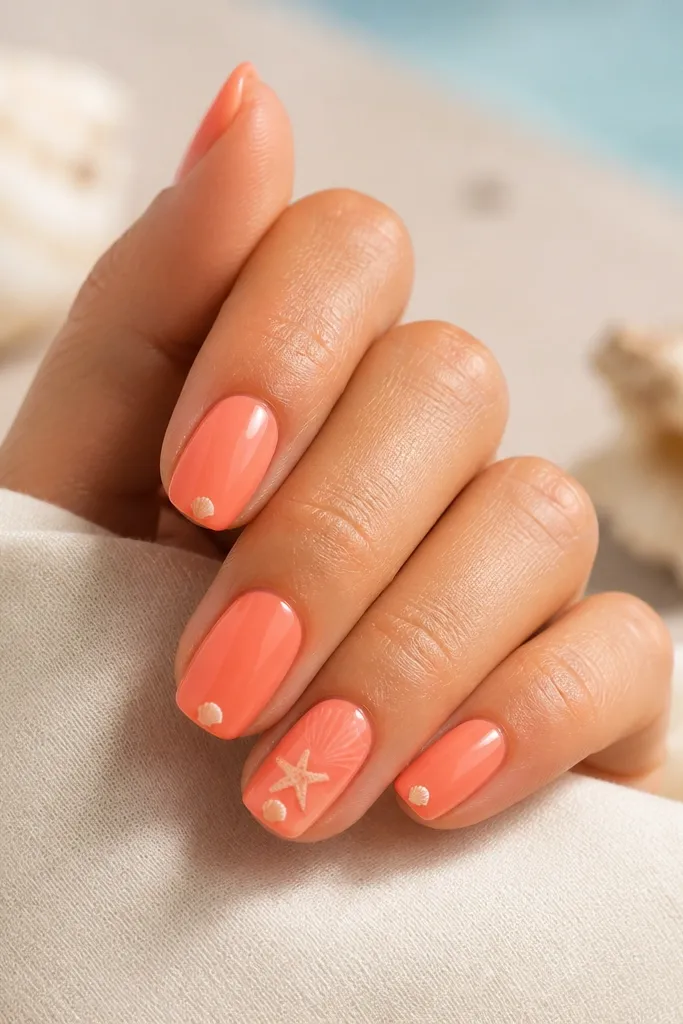
Coral-peach makes the whole manicure feel like warm sun, and the starfish accent gives you beach identity instantly. The shell lines radiating lightly keep it from looking like a sticker-only manicure. This is a good pick for vacations and summer parties because coral looks lively on most skin tones. I’ve worn it with gold jewelry and it always looks like the manicure matches the outfit.
Apply coral-peach gel base and cure. On the ring finger, paint a small starfish shape in pale cream using a detail brush, then draw short coral lines radiating from the starfish center like shell ridges. On the other nails, place one tiny shell dot near the tip using a pale cream gel, then add a single highlight dot. Cure and top coat thickly to smooth any edges.
If you use a sticker starfish, paint a thin layer of coral gel under the sticker so it blends, not floats.
Don’t put a starfish on every nail; it stops reading as an accent.
16. Shell Gradient With Micro Glitter Fade
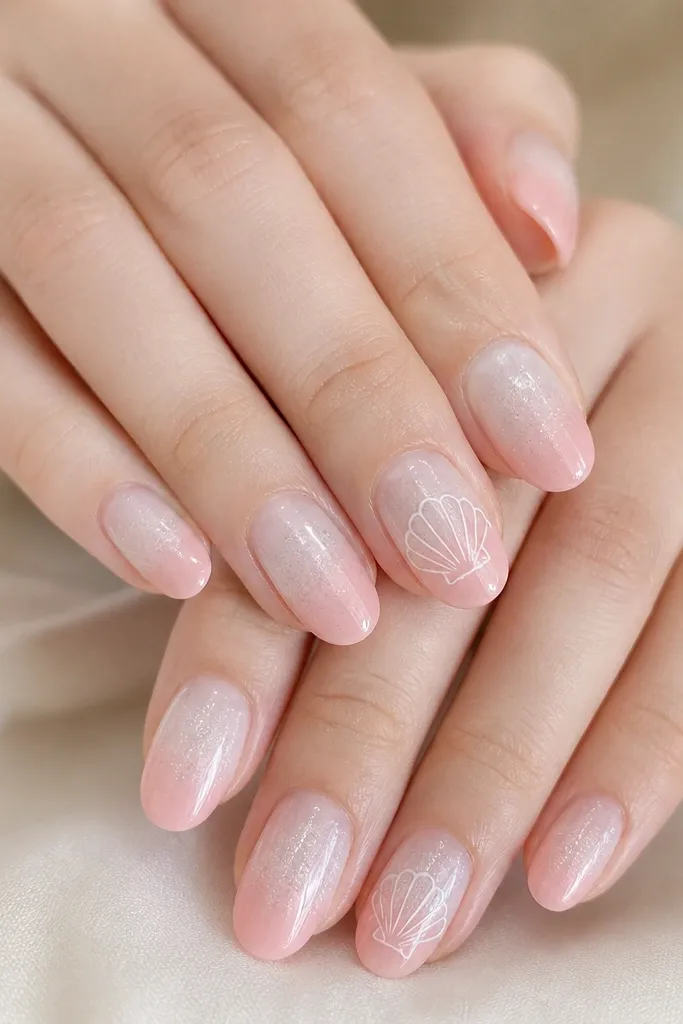
A gradient plus micro glitter looks like ocean light hitting the shell surface. The glitter fade is key — it should feel like shimmer in the water, not a dusting that covers everything. This design works for beginners because the gradient can be slightly imperfect and still looks intentional. It flatters hands that look best in light colors because it stays soft and bright.
Start with a sheer white or milky base and cure. Sponge a pale pink gradient from mid-nail to tip, blending until the transition is smooth. Add micro glitter only in the mid-nail area using a small brush, then fade it by lightly brushing clear gel over the edges. On accent nails, draw a thin white shell outline and cure, then top coat glossy.
Use a small fan brush to clean up stray glitter along the sidewalls before curing.
Don’t stack glitter on top of the gradient; it turns gritty and catches on hair.
17. Seafoam Marble Shell Swirls
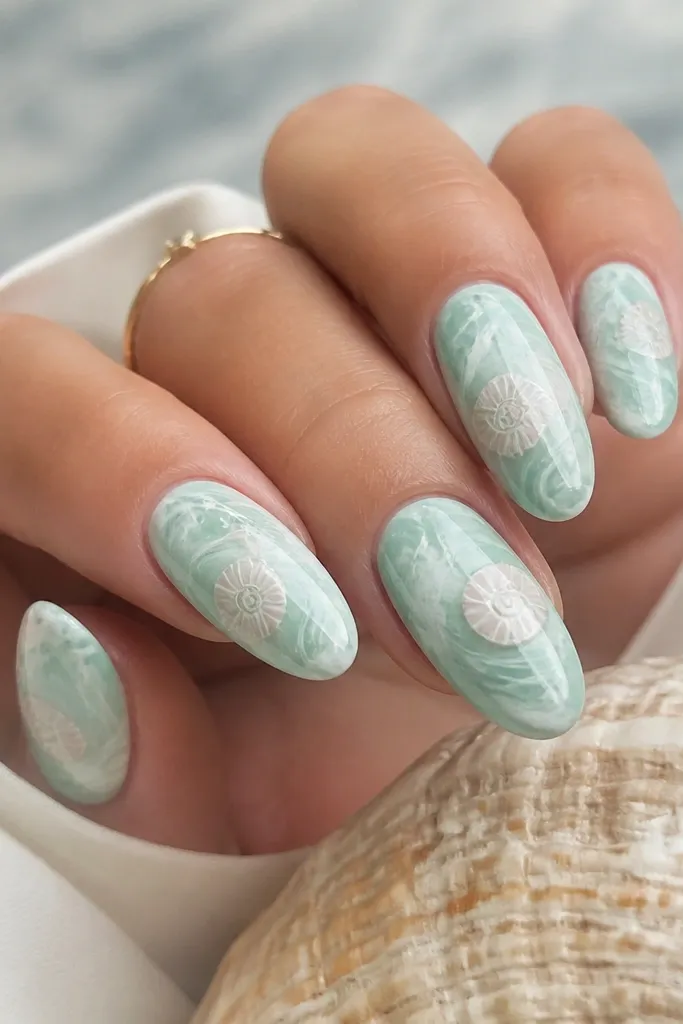
Marble looks fancy, but you can do it without advanced skills by using gel paint and a quick swirl technique. The seafoam base ties it to the ocean, while the shell swirl gives it a specific beach identity. This set flatters people who like artsy manicures but don’t want heavy 3D texture. It also looks great on almond nails because the marble lines follow the nail curve.
Paint seafoam as a base and cure. Drop small dots of white gel and pale pink gel onto the surface, then drag them gently with a toothpick to make marble swirls. On top, draw a faint shell swirl line in pale pink, adding one thin white highlight ridge near the outer curve. Cure and seal with glossy top coat, making sure the marble is smooth.
Editor's noteKeep the marble swirls bigger than you think; tiny swirls look muddy under top coat.
Watch outDon’t overwork the marble; too many passes smear it into one gray mess.
18. Shell Ridged Stripe With Foil Edge
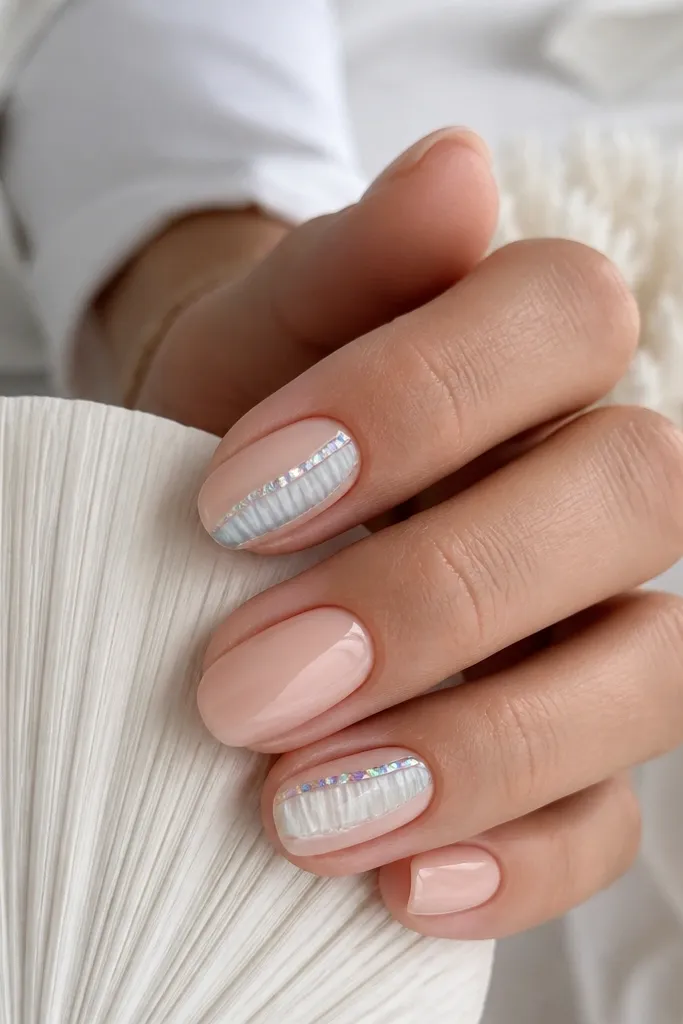
This one uses a foil edge to mimic the iridescence you see in some shells. The vertical stripe makes it feel modern instead of overly cutesy, and ridges keep it from looking like plain stripes. I like it for medium nail lengths because the stripe has room to move. It flatters hands with longer nail beds and looks extra good with silver rings.
Apply nude base and cure. On accent nails, paint a vertical shell stripe in white gel down the center third of the nail. Add gray-blue ridges inside the stripe using a detail brush, spacing them evenly. Place a thin strip of iridescent foil along one side of the stripe, then press gently with a silicone tool. Cure and top coat glossy, but keep the foil edge from getting flooded by wiping the brush tip.
Editor's noteIf foil lifts at the edge, add a thin top coat layer and cure again just on that nail.
Watch outDon’t cover foil completely with thick gel — it dulls the shine.
19. Pink Shell Petals On Clear Base
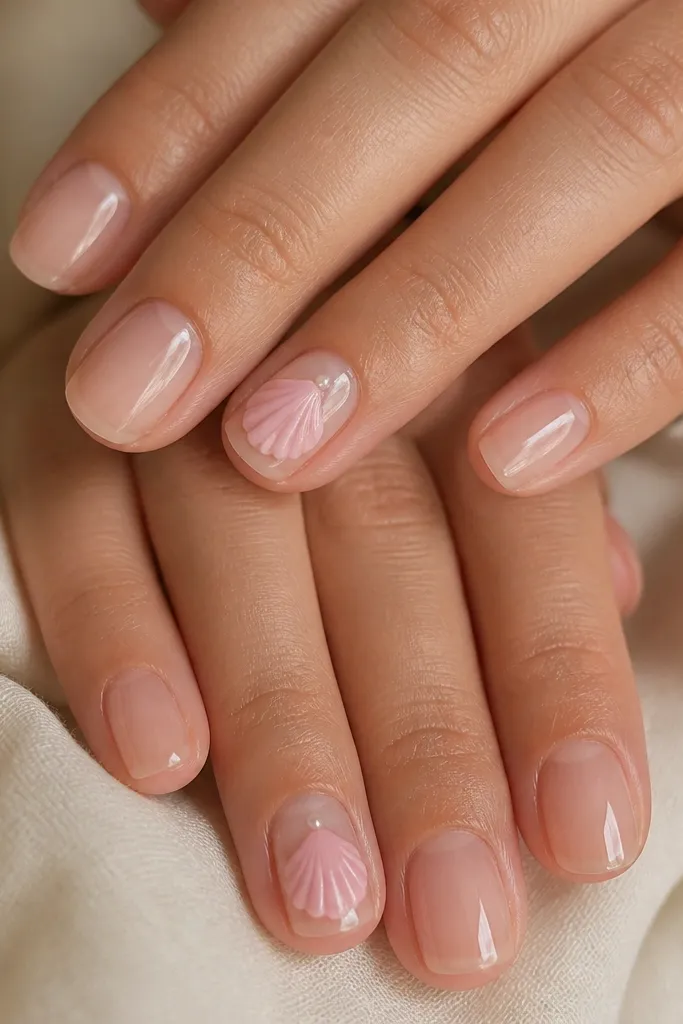
Petal shapes mimic the layered look of certain shells and look soft instead of cartoonish. Using a clear base makes the petals look like they’re floating, which is a huge win for beginners because you don’t have to perfect the background. This design looks stunning on short almond nails and on people who like minimal color but still want something dreamy. It flatters fair and medium skin tones especially well because pink sits clean on clear.
Apply clear base gel and cure. On accent nails, create a rosette by placing five to six small pink petal shapes using a dotting tool, starting with one center dot and building outward. Leave tiny gaps between petals so the shell texture reads as layered. Add one tiny white highlight dot on the top petal and a small curved white stroke near the edge of the rosette. Cure and finish with glossy top coat.
Editor's noteUse a slightly translucent pink gel so the petals look like layered shell, not solid stickers.
Watch outDon’t make petals too big; large rosettes on short nails look like blobs.
20. Brown Sand Dots With White Shell Outline
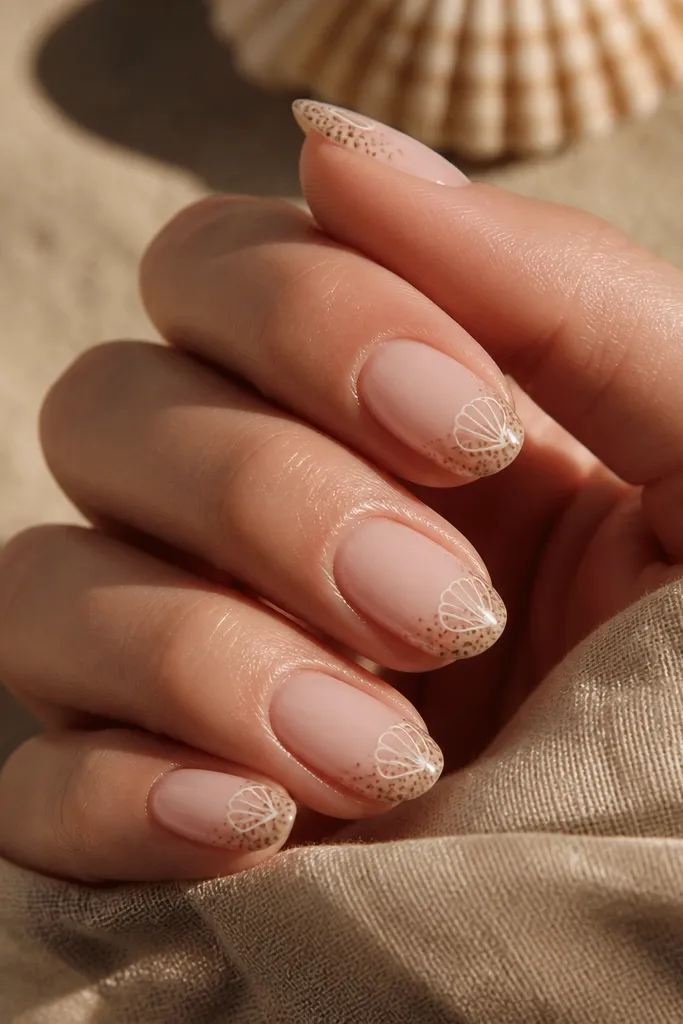
This is a grounded beach look — sand, not sea. Brown dots in a warm nude base give you that “shore” vibe without needing a full beach scene. The thin white shell outline ties it back to seashell nails so it doesn’t just look like polka dots. I’ve worn this set when I wanted something neutral but still special, and it looks good with both casual denim and linen.
Paint sheer nude base and cure. Use a dotting tool to place small warm brown dots near the middle and toward the tip on each nail. On one or two accent nails, draw a simple shell outline in thin white gel, then add a short curved highlight stroke near the top curve. Cure and top coat glossy, making sure the dots are sealed so they don’t catch.
Editor's noteMatch dot size across nails — even if spacing varies, consistent dot diameter keeps it clean.
Watch outDon’t use dark espresso brown; it reads too heavy and makes the manicure look dirty.
21. Teal Outline Shells Over Nude With Glossy Depth
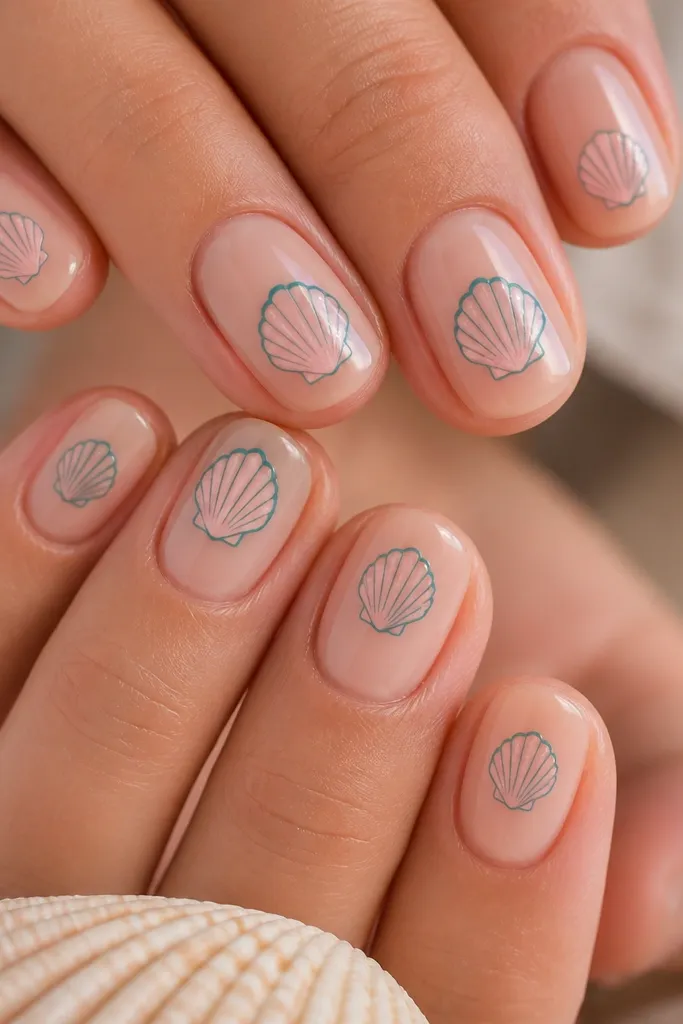
Teal outlines make shells look crisp because the color defines the shape even if your fill lines are light. The pale pink ridges inside keep it soft and beachy. I like this for beginners because outlining is easier than shading — you’re drawing one clear contour line. This set also flatters a wide range of skin tones since nude is the neutral and teal is the pop.
Apply nude base and cure. On each nail, draw a small curved shell outline using thin teal gel, keeping the shell centered. Fill the inside with pale pink ridges using a detail brush — just two or three lines. On the accent nails, thicken the teal outline slightly and add a tiny white highlight dot on the top ridge. Cure and finish with glossy top coat, using a slightly thicker coat on the shell area for depth.
Editor's noteIf teal bleeds, wipe your brush on a lint-free wipe before touching the nail.
Watch outDon’t overfill the shell interior; too much pink turns it into a colored patch instead of ridges.
22. Iridescent Shell Flake Accent On Milky Base
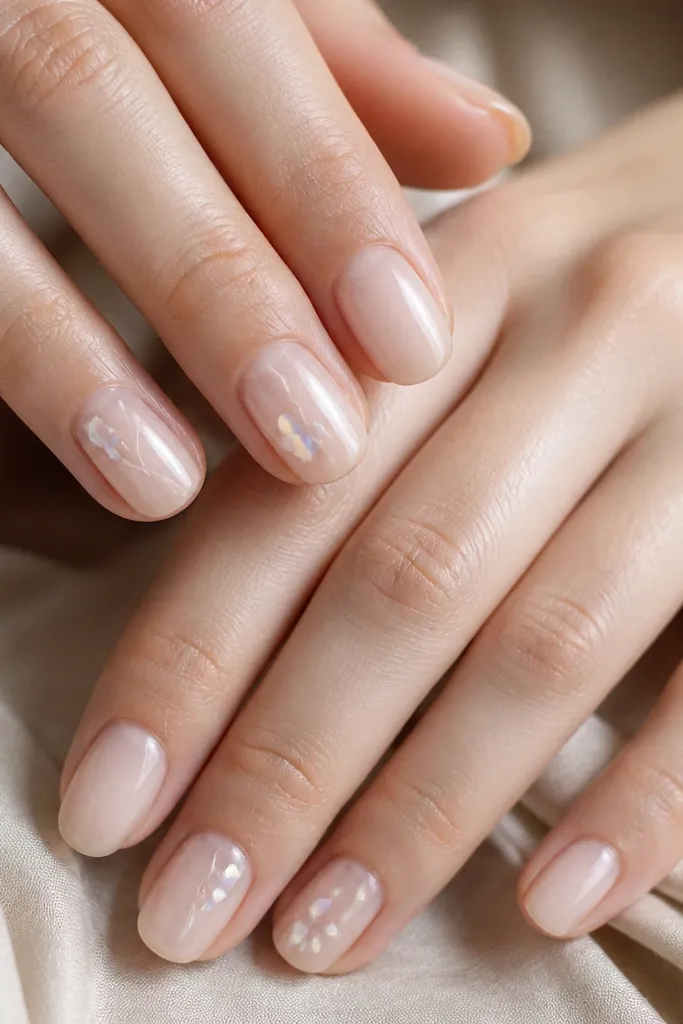
Flakes give you instant shell texture without drawing every ridge. The iridescent pieces catch light like real shell surfaces, and the milky nude base keeps them from looking chaotic. I like this design for parties because it looks subtle in low light and sparkly when you move. It also looks great on short nails because the flakes are placed in a small zone, not spread everywhere.
Apply milky nude base and cure. On accent nails, paint a small patch in clear gel near the center of the nail. Place iridescent flakes on top using tweezers, then press gently so they sit flat. Draw a thin white ridge line underneath or beside the flakes to guide the eye. Cure and top coat glossy in two thin passes so flakes don’t lift.
For flatter flakes, use a slightly tacky layer before placing them — they grab better.
Don’t cover flakes with gel so thick that they sink; they lose their shine.
23. White Shell Outline With One Blue Bubble Dot
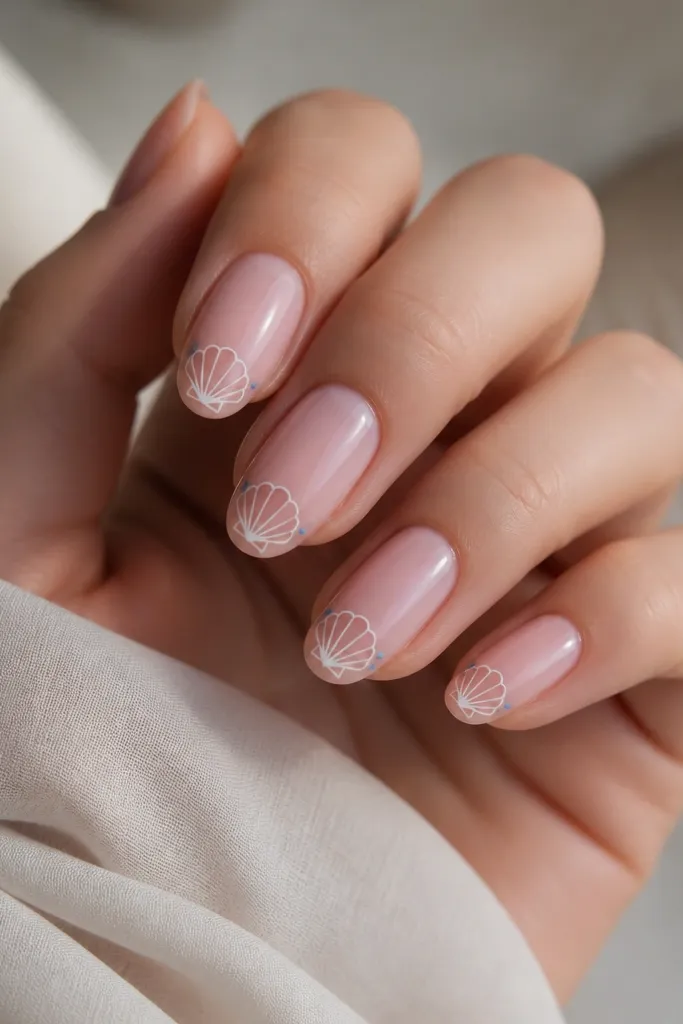
This is a minimalist beach look that still reads as seashell nails. The thin white outline keeps the design clean, and the single blue bubble dot adds motion like underwater bubbles. I like it because it takes about 10 minutes per hand once you get the shell shape down. It looks good on short nails and on people who hate glitter.
Paint sheer pink base and cure. Draw a thin white shell outline on each nail near the tip, centered and slightly curved to match the nail shape. Add one small blue dot beside the shell outline using a dotting tool — keep it one dot, not a cluster. Cure and seal with glossy top coat, then run the brush along the sidewalls to lock the edges.
Use a slightly darker blue than your base sea colors so the bubble dot pops.
Don’t add multiple blue dots; one bubble looks intentional, many looks random.
24. Shell Ridges Over Pastel Gradient (Lavender to Peach)
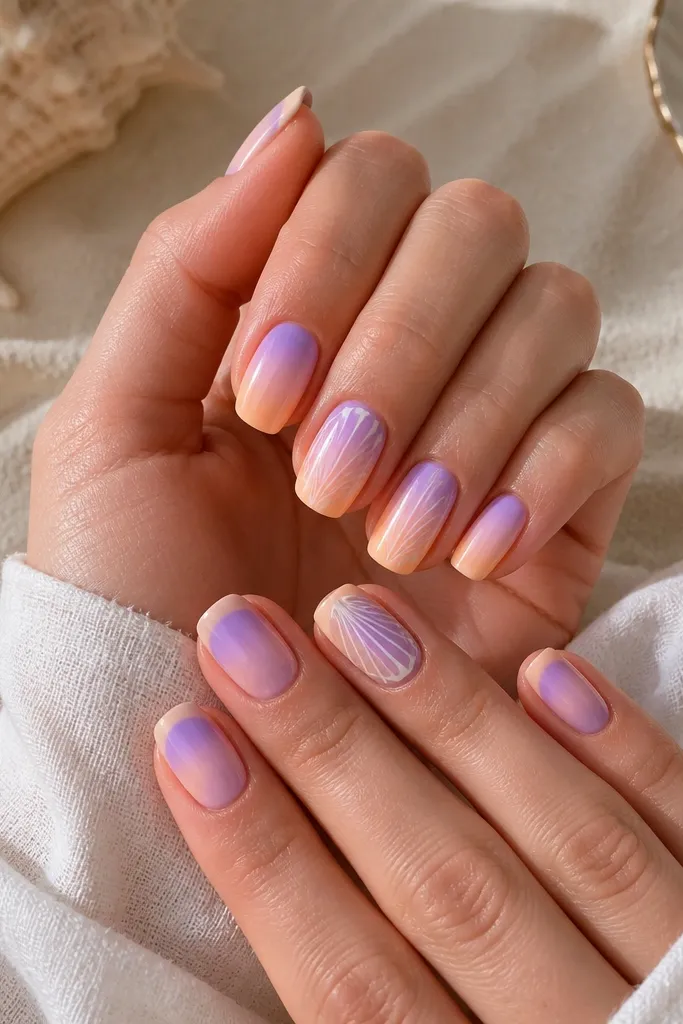
Pastel gradients make shells look like they’re sitting under colored glass. The lavender-to-peach combo feels like sunset beach light, and the white ridges look crisp over the two-tone background. This set flatters hands that look best with lighter colors, and it photographs beautifully in daylight. I recommend it for medium length nails where the gradient has space to show.
Apply a clear base if your gradient needs more control, then sponge lavender gel at the cuticle area and peach gel near the tip. Blend with a makeup sponge until you get a soft transition. On accent nails, draw vertical-ish shell ridges in white gel — think three to four ridges following the nail curve. Add one thin white highlight line at the top of the ridges, cure, and top coat glossy.
If your gradient turns muddy, keep it to two colors and use thin sponge layers.
Don’t draw ridges too low on the nail; you want the highlight to catch light near the upper half.
25. Seafoam French With Shell Center Dot
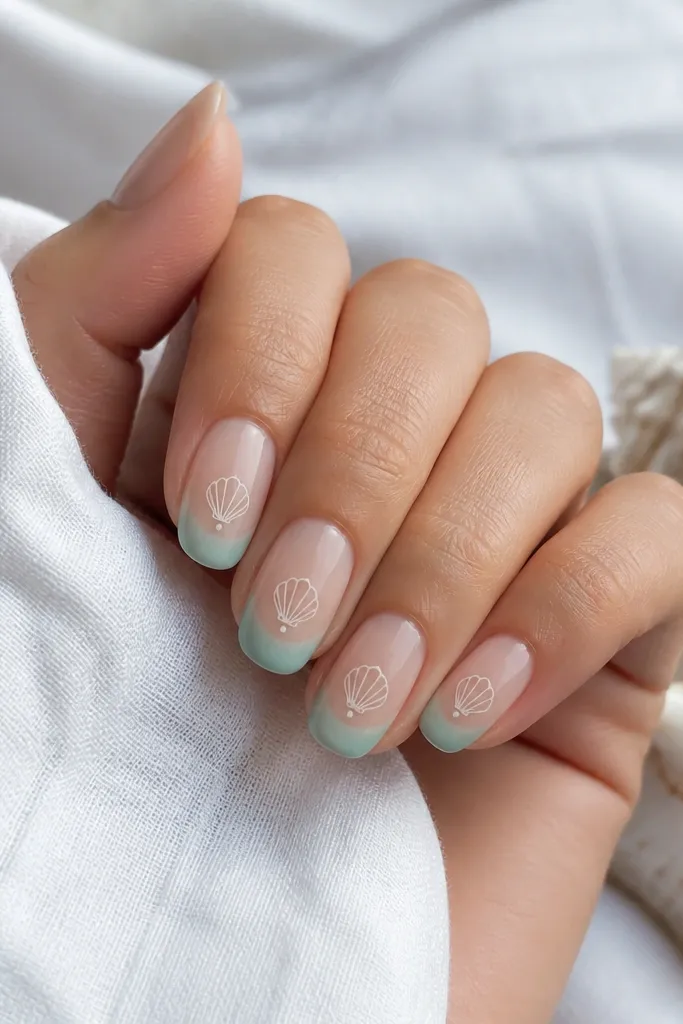
French tips plus a tiny shell detail is the fastest way to look “done” without heavy art. Seafoam is the easiest ocean color because it’s bright but not neon, and it makes your hands look clean. The small shell outline in the center keeps the manicure from becoming just a color-block. This works for beginners because you only draw one small shell per nail.
Paint a sheer nude base and cure. Use striping tape to create a clean French line — place it at the tip edge you want, then paint seafoam over the tape. Remove tape and cure. On each nail, draw a tiny shell outline in white gel in the center, then add one white dot highlight near the top ridge. Finish with glossy top coat.
Press tape down firmly at the free edge so you don’t get a jagged French line.
Don’t skip top coat on the tape edge area; it’s where chips start.