
1. Milky Pink Shell Ridges with One Pearl Dot
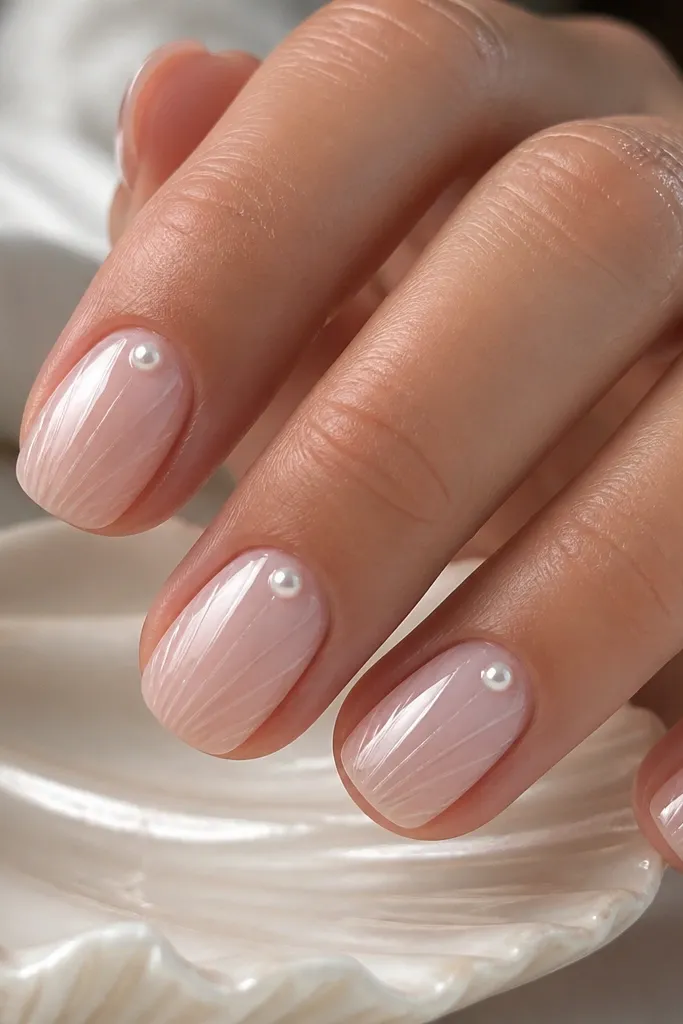
Start with a milky pink base that’s semi-transparent, like a soft strawberry milkshake, so the shell ridges look like they’re sitting under glass. I like this on fair to medium skin because the pink warms the hand without turning neon. The ridges are the real secret: you want many thin arcs, not thick lines, so light bounces across them. Finish with one pearl dot per nail to mimic the natural shell center — it makes the set look intentional even when you’re using basic supplies.
First, paint two thin coats of milky pink, letting each coat dry fully. Then use a striping brush or the side of a detail brush to pull curved ridges: start close to the cuticle and arc toward the free edge, keeping the spacing even. Add the pearl dot by tapping a dotting tool with glossy white or pearl gel in the center of each nail. Finally, seal with a thick, glassy top coat, making sure the ridges get coated so they look smooth.
Editor's noteIf your ridges look streaky, wipe excess paint off your brush on a paper towel before you pull the arcs.
Watch outDon’t make the ridges too wide — thick lines read as nail art stickers instead of shell texture.
2. Pink Gradient Shell Veins (Cuticle Pale, Tip Rosy)
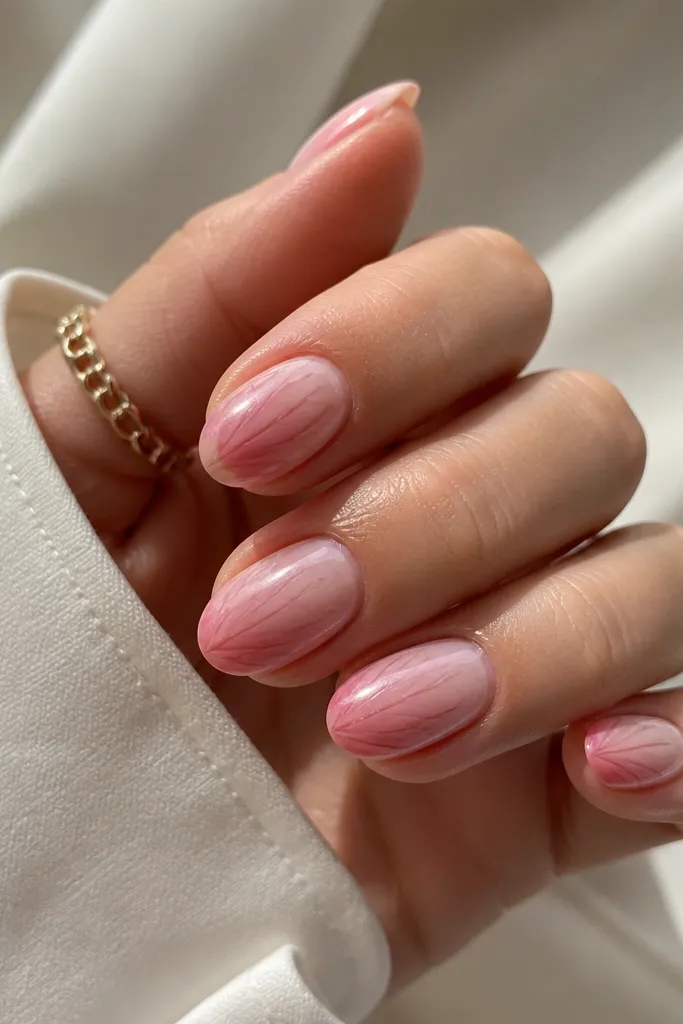
This one flatters hands because the gradient makes your nails look longer and cleaner. The cuticle is pale, so it brightens your skin tone, and the rosy tips add warmth without looking like a harsh ombre. The “veins” effect works best when the shell lines are a shade darker than the base, so you get depth. I wear this for casual weekends and it still reads special because the texture is subtle, not loud.
First, sponge a cuticle-to-tip gradient: pale pink near the base, rosy pink at the tips, blended with a makeup sponge. Keep the gradient smooth by doing two light passes instead of one heavy one. Then paint thin shell-vein curves in a slightly darker rose gel or polish, always following the nail’s natural curve. Seal with a high-gloss top coat twice if you used regular polish, so the surface stays slick.
Use a damp sponge for blending — dry sponging creates fuzzy edges that ruin the shell illusion.
Skip black or charcoal lines; dark outlines make it look like sketchy doodles.
3. Shell Half-Moon Tips with Soft Blush Outline
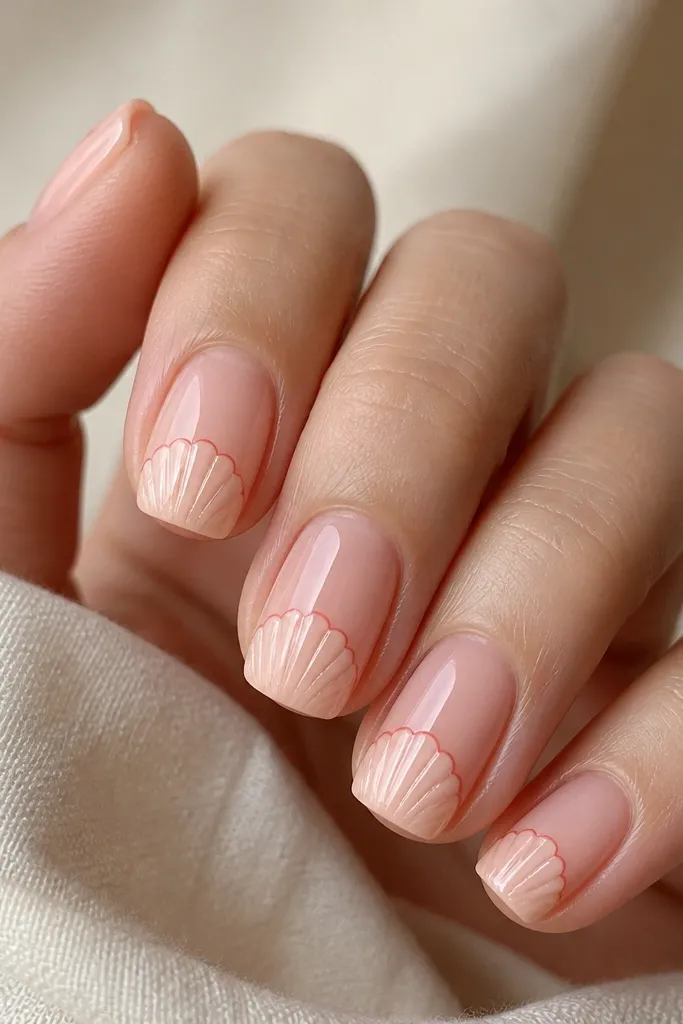
Half-moon tips are the most forgiving seashell layout because your pattern only needs to be perfect on the top third of the nail. This looks amazing on short nails and wide nail beds because the shell shape naturally concentrates attention near the tip. The blush outline gives dimension, but it stays soft so the set still feels “pink seashell” instead of graphic. If you like nail art but don’t want every nail to be busy, this is the one.
First, paint a sheer nude-pink base and let it dry completely. Then draw a soft half-moon at the tip with pale blush, and fill the half-moon with tiny curved ridges using a thin brush. Add a second outline line just outside the half-moon edge in a slightly darker blush for contrast. Finish with a glossy top coat, focusing on the shell tip so the ridges look smooth.
Use nail tape to mark the half-moon curve if your hands shake — peel it off right after painting the outline.
Don’t bring the half-moon pattern too far down the nail — it shortens the look.
4. Pearl Chrome Seashell Center Stripe
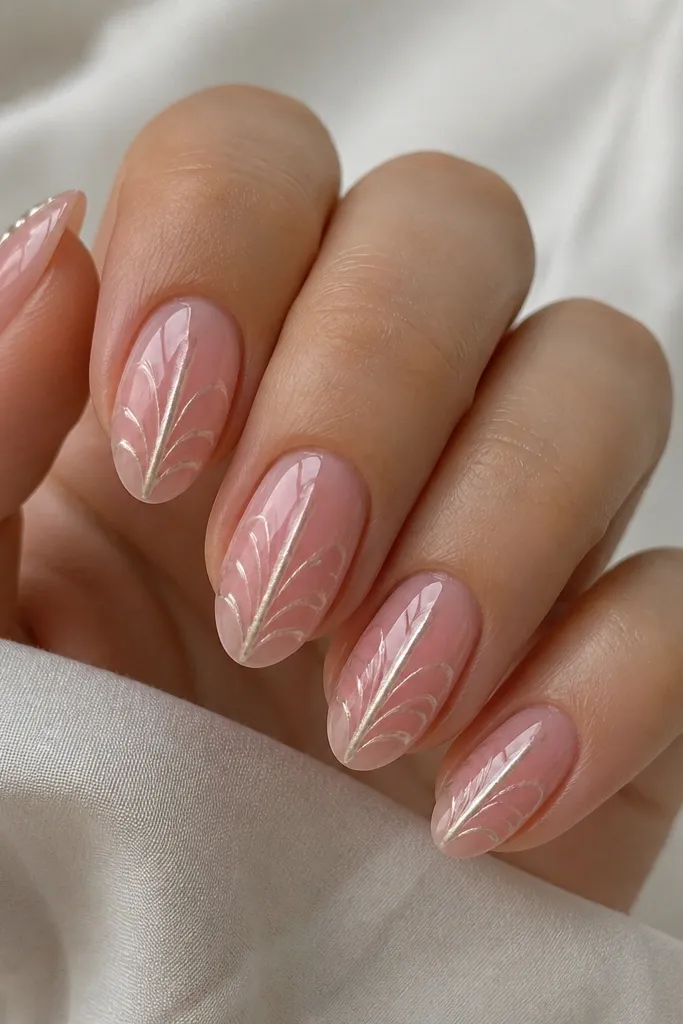
A center stripe is my go-to when I want seashell nails to look expensive without covering the whole nail. Pearl chrome gives that shell-glass sparkle, and the center placement elongates your fingers. This is flattering for almost every skin tone because the chrome reads neutral-pink rather than yellow. The small arcs around the stripe keep it from looking like plain chrome — it’s still seashell, just minimal.
First, apply two thin coats of sheer pink, then top coat and cure/dry it so the chrome lays smoothly. Press pearl chrome powder or apply pearl chrome gel in a straight center stripe, keeping it narrow (about 1/8 of the nail width). Add shell arcs with a fine brush: tiny U-shaped curves that touch the stripe and fade out toward the sides. Seal with a non-wipe glossy top coat so the chrome stays bright.
If chrome dulls when you seal, use a top coat made for chrome or add a thicker layer over just the stripe after curing.
Don’t chrome the whole nail; it looks like a generic manicure and loses the shell shape.
5. Blush Ombre with Tiny Shell Dot Clusters
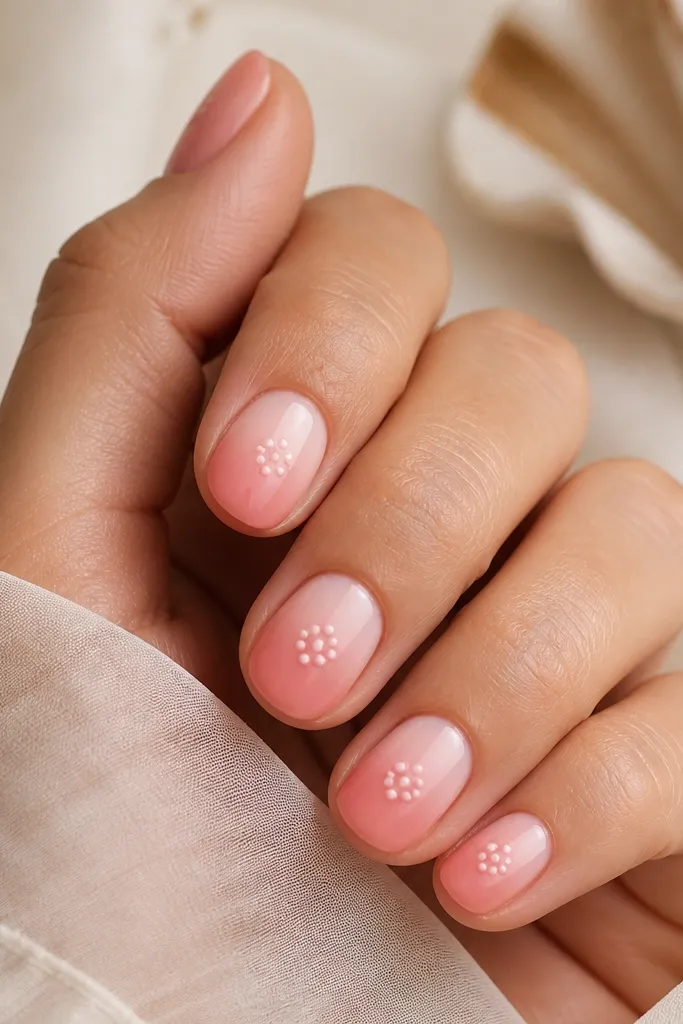
Dot clusters mimic the pitted texture of real shells, and this layout looks cute even with basic tools. The blush ombre makes your nails look softer and more wearable than bright pink. I like it on hands with shorter fingers because the ombre pulls the eye upward, and the dot clusters stay compact. It’s also beginner-friendly because you’re not drawing long ridges.
First, sponge or airbrush a blush ombre: pale blush at the cuticle, slightly deeper blush at the tips. Then make dot clusters with a dotting tool: place 4-6 tiny dots in a loose oval near the center of each nail. Add 1 or 2 slightly larger dots as the “highlight” of the cluster using glossy white or pearl polish. Finish with two coats of thick top coat for a smooth, rounded texture.
Let each dot cluster set for 60 seconds before top coat so the dots don’t smear.
Don’t space the dots too far apart — the shell texture disappears.
6. Rose Quartz Shell with Milky Base and White Ridges
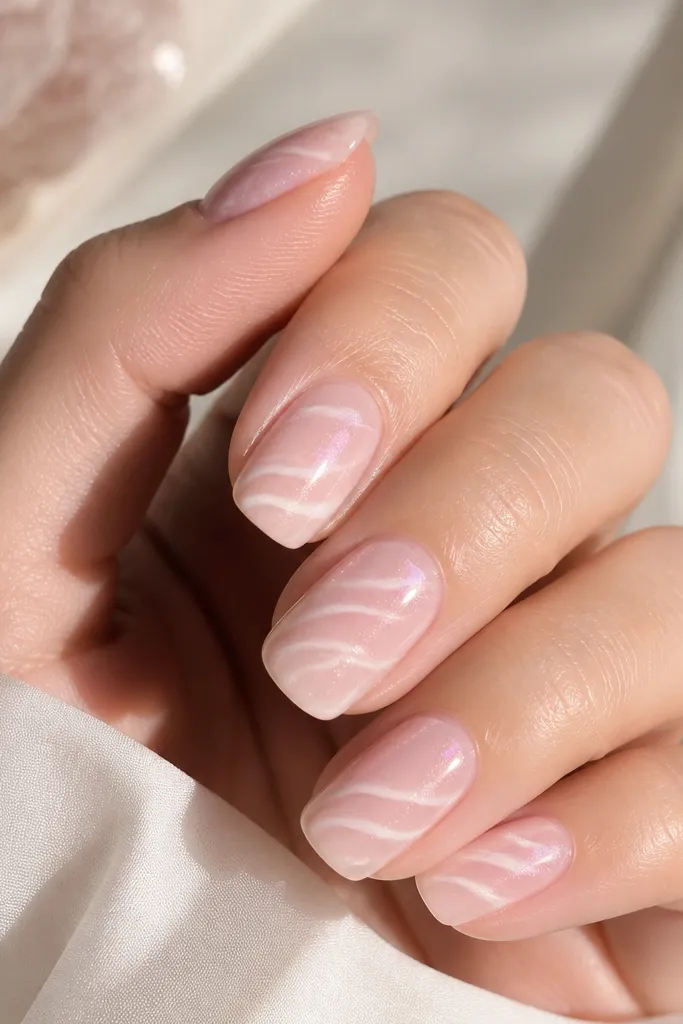
This is the “rose quartz” version of seashell nails, and it looks gorgeous in daylight. The milky base keeps it soft, while the white ridges add the bright, shell-like edges that catch light. I like it for medium to deep skin tones because the white ridges pop without turning stark when you keep the base sheer. It also photographs well since the ridges create natural highlights.
First, apply a milky pink base and add a thin shimmer top coat if you have one (a pink pearl shimmer). Then paint white ridges diagonally using a detail brush, keeping the lines thin and slightly uneven like natural shell growth. Add a second pass of white only along the ridge edges so they look raised. Seal with a glossy top coat to lock the ridges down and smooth the surface.
Use a white gel that’s slightly translucent instead of opaque — it looks more like shell glass.
Avoid drawing perfect straight lines; shells don’t grow that way.
7. Soft Pink Shell Border Around the Nail Edge
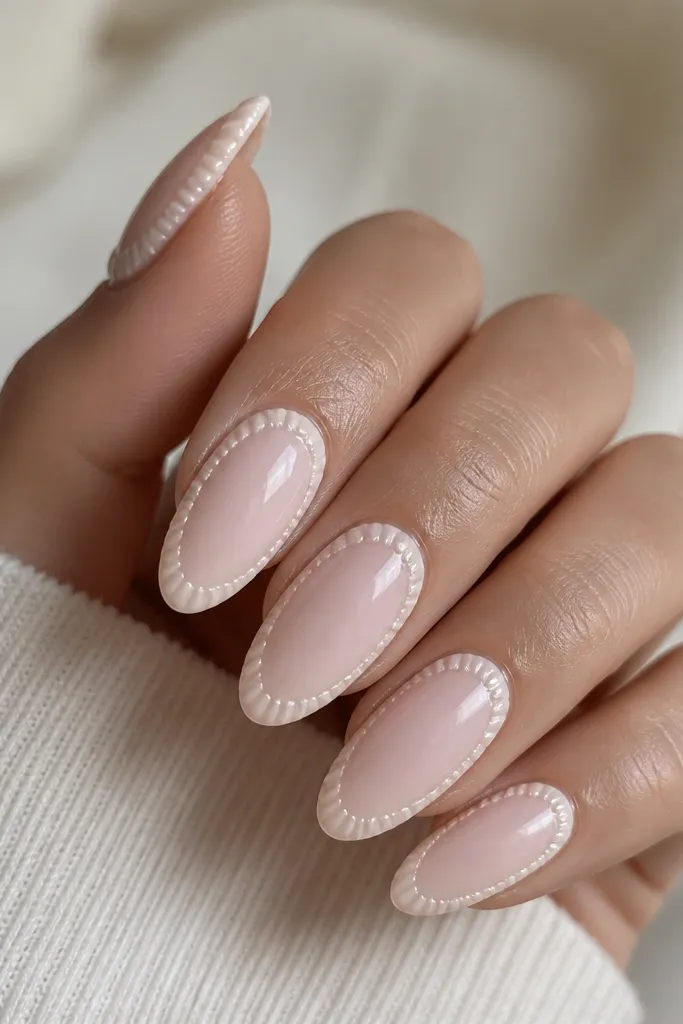
A border design makes seashell nails feel clean and “put together” even when your art skills are still growing. It also flatters hands with bitten or uneven cuticles because your eye is pulled to the neat rim. The key is keeping the border thin and using micro ridges rather than bold lines. This looks great for office days and dinners because it’s subtle from across the room and detailed up close.
Start with a creamy sheer pink base, then top coat lightly and dry. Use a fine brush to draw a thin outline around the nail edge, leaving the center open. Fill just the border area with micro curved ridges, like tiny commas, following the outline curve. Apply a glossy top coat and cap the free edge so the border stays smooth through wear.
Editor's noteIf your border looks shaky, anchor your first line at the center of the sidewalls and work outward.
Watch outDon’t over-thicken the border; thick outlines make it look like a sticker.
8. Pastel Coral Seashell Fade with Silver Dot Highlights
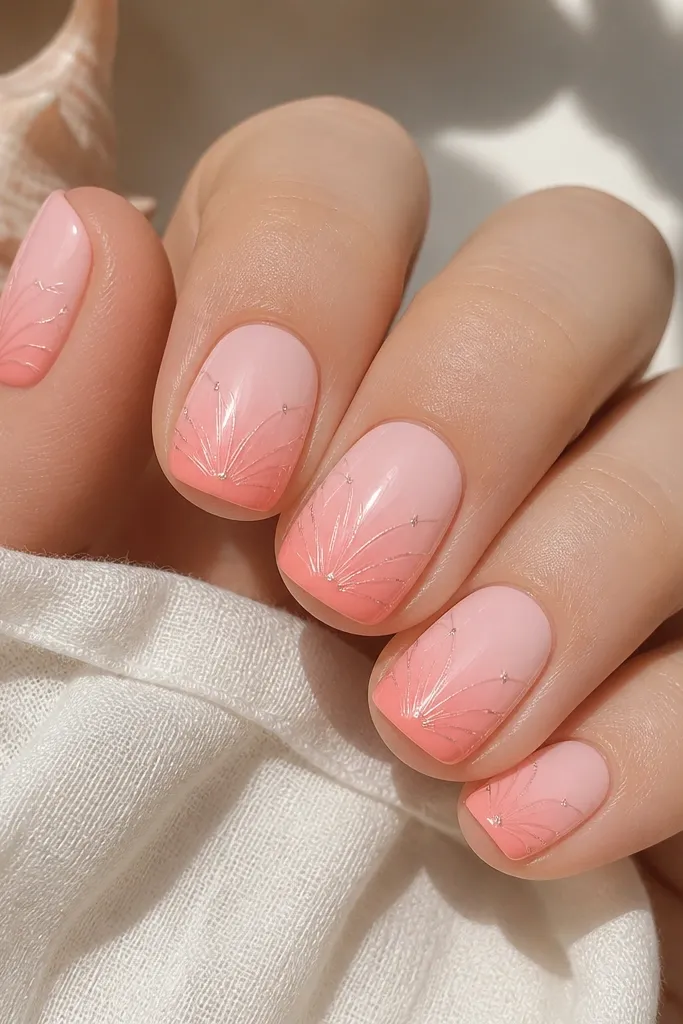
This one is for the “beach day but still girly” mood. The coral fade warms up your hands, and the silver dots act like tiny shell specks. I’ve worn this with gold jewelry and it still looks balanced because the base stays pink-first. The shell ridges are kept light, so the whole set stays airy instead of heavy.
First, sponge a pastel fade: creamy pink at the cuticle, pastel coral at the tip, blended in the middle. Then draw thin shell ridges in pale peach, starting near the cuticle and stopping before the sidewalls so the fade stays visible. Place tiny silver dot highlights where two ridges meet, one or two per nail. Seal with a glossy top coat, and add a second clear coat to smooth over the dots.
Editor's noteUse a silver gel pen or a dotting tool with metallic polish — regular glitter can turn gritty.
Watch outAvoid big chunky glitter dots; they catch on fabric and lift faster.
9. Pink Seashell French Tips with Micro Ridged Edge
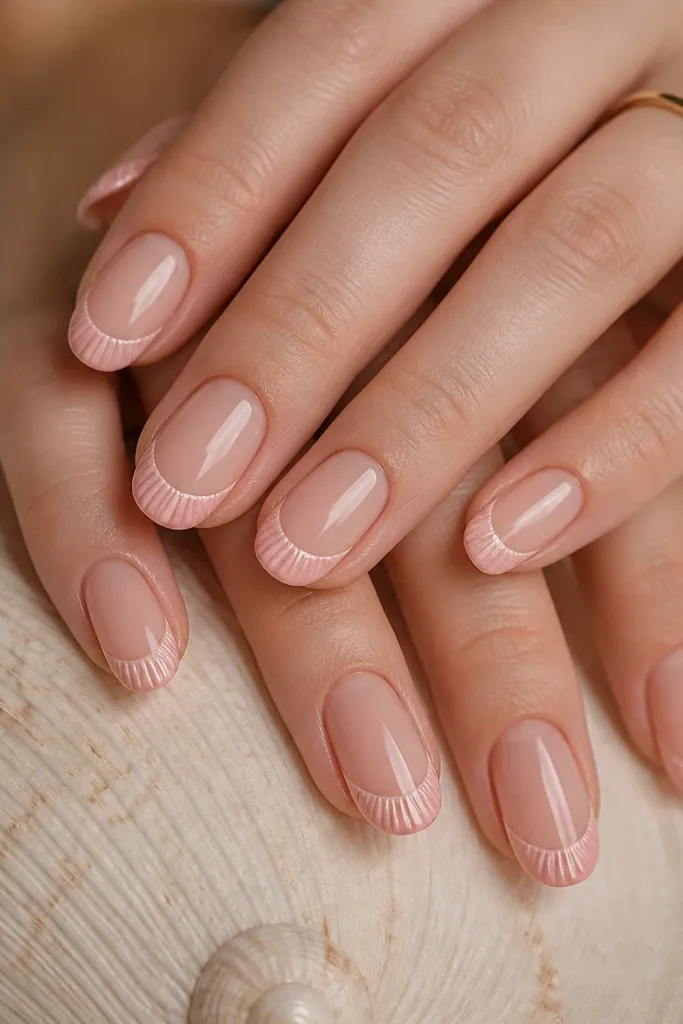
French tips are the easiest way to make seashell nails look “clean” on a budget. The sheer nude base keeps it natural, while the pink French edge gives a consistent shell area to work on. Micro ridges along the tip edge create that shell texture without needing 3D charms. This set is flattering for short nails because the smile line defines the tip and makes them look sharper.
Paint a sheer nude-pink base in two thin coats. Use tape or a French guide to create a soft pink smile line on the tips. Fill the French area with micro ridges: draw tiny curved lines that follow the smile curve, leaving a little negative space between ridges. Finish with a glossy top coat and cap the tip edge so the ridges don’t snag.
If your ridges flood the smile line, do the ridges first and then re-paint the outer edge for a crisp border.
Don’t paint a thick French tip; it makes the ridges look buried.
10. Sheer Pink Base with White Shell Spiral on Accent Nail
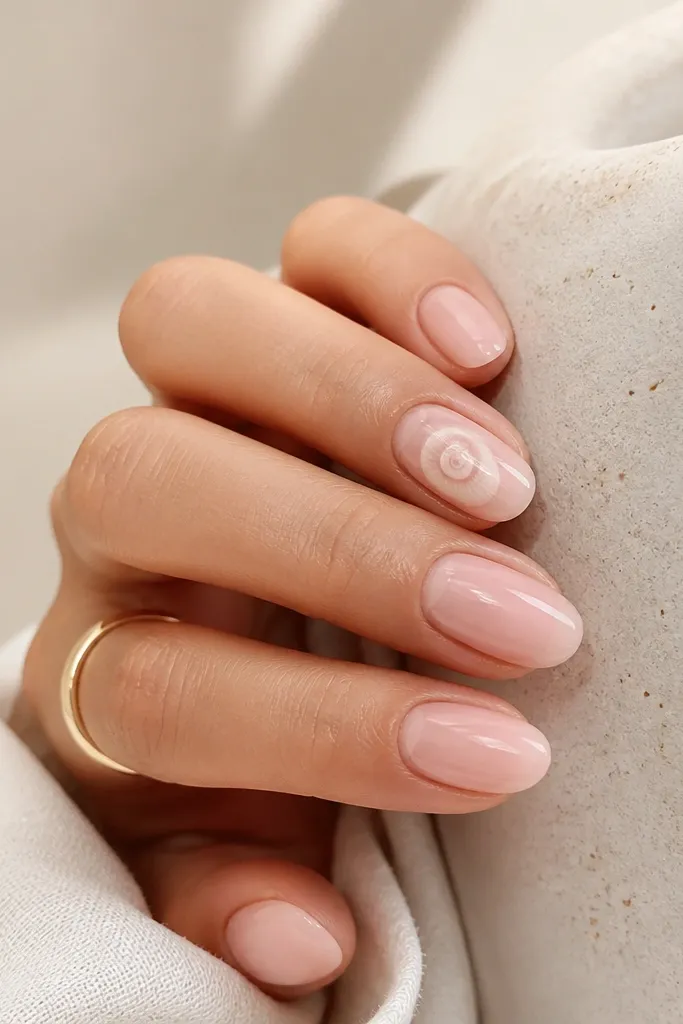
This is the set I recommend when you want seashell nails but don’t want to risk messing up every nail. A spiral looks like a shell coil, and it reads clearly even if your lines aren’t perfect. The sheer pink base keeps it wearable, and the white spiral makes it look crisp in photos. I love this on people who prefer minimal nail art but still want a theme.
Start with a sheer pink base on all nails and seal with a glossy top coat. Pick one accent nail and draw a spiral using a dotting tool and a thin brush: start with a small dot near the center, then add a curving line around it. Shade lightly with translucent milky white or a milky pink gel so the spiral has depth. Seal the accent nail with extra top coat to smooth over the spiral ridges.
Practice the spiral on a spoon first — the curve needs one confident motion.
Don’t add multiple accent spirals; two accents can turn the look into clutter.
11. Pink Shell Scales with Fine Brush Overlapping Arcs
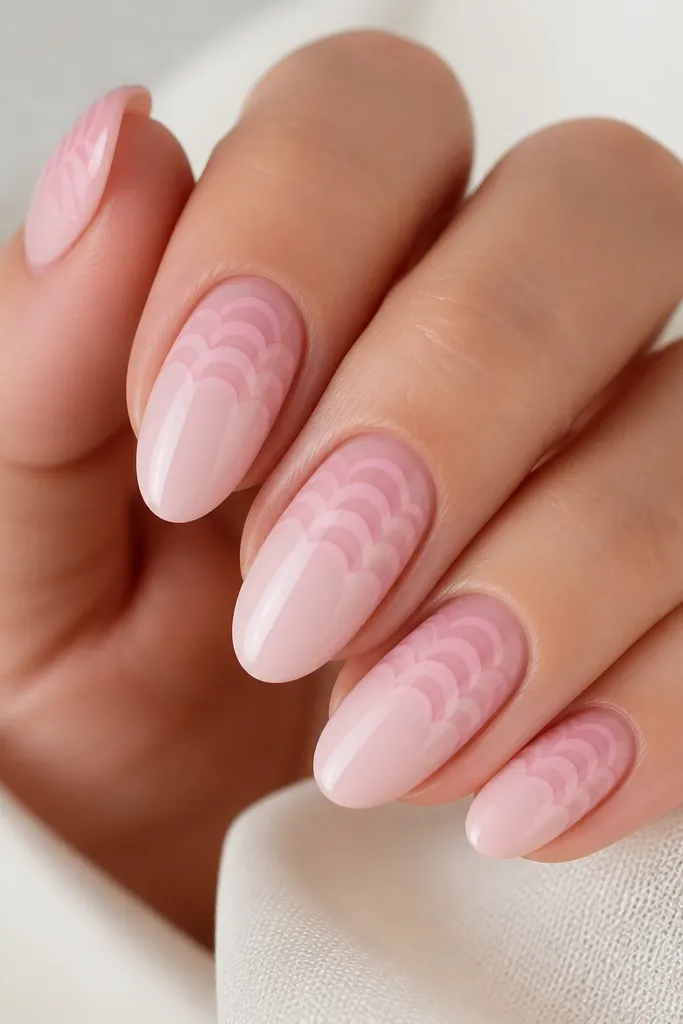
Shell scales are different from ridges — they look more like overlapping shell plates, and that texture is super flattering on almond shapes. The overlapping arcs create a curved, armored effect that makes nails look structured. Keep the scale color just a shade darker than the base and it stays classy instead of harsh. This works for fair and medium skin tones because the pinks stay soft and reflective.
First, paint a pastel pink base and let it dry fully. Then use a fine brush to draw overlapping arcs starting from the cuticle area toward the center — like fish scales but looser. Keep each arc about 1-2 mm tall and align them so they create a gentle curve across the nail. Seal with a glossy top coat, and add a second coat over the scale area so the texture looks smooth and not raised.
Use the brush tip, not the belly of the brush — it gives cleaner arc edges.
Avoid huge scales; they look like scales from a costume instead of shell texture.
12. Blush Marble Seashell with Vein Ridges
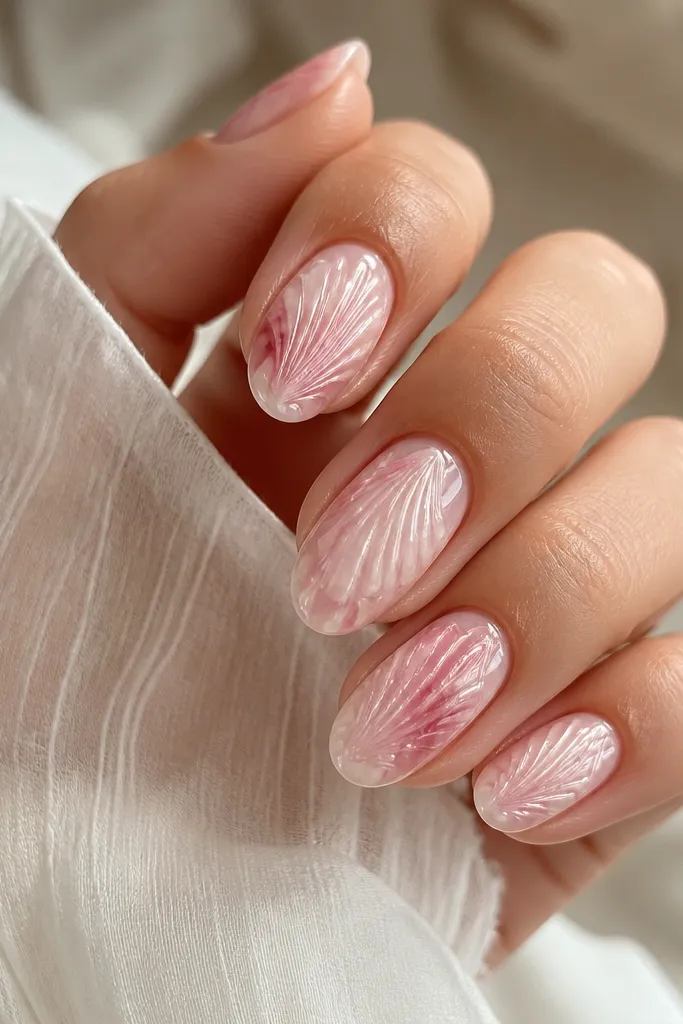
Marble plus ridges sounds busy, but it actually looks expensive because the marble gives you depth and the ridges guide the eye. I like this for medium to deep skin tones because the rose streaks add warmth and the white ridges brighten the center. The trick is keeping the marble within the pink family, not bringing in gray or muddy tones. The ridges then “lock” the seashell theme onto a pattern that already feels oceanic.
First, create a blush marble base using two pinks: a pale milky pink and a deeper rose. Tap them together with a small brush or sponge so you get soft swirls, then let it dry fully. Add thin white ridges down the center using a detail brush, keeping them curved and slightly uneven. Finish with glossy top coat, and add one more coat after 5 minutes so the marble looks liquid-smooth.
Editor's noteIf your marble looks messy, place the deeper rose only on two or three swirls per nail, not everywhere.
Watch outSkip gray tones; they make blush marble look dirty on nails.
13. Pink Seashell Chrome Tips with Milky Base
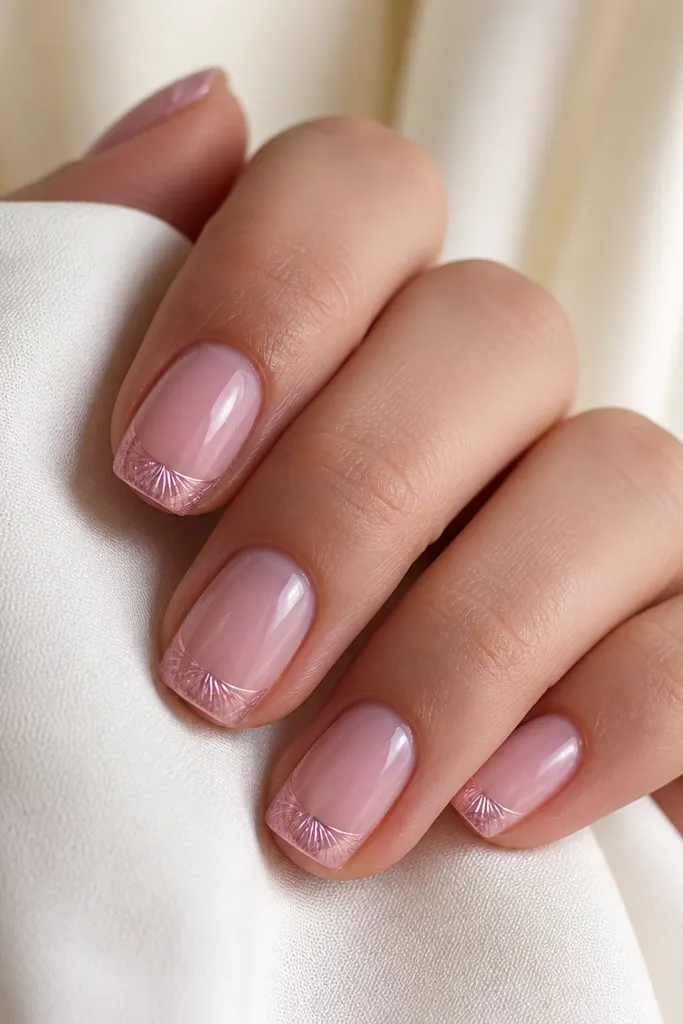
Chrome tips make seashell nails look like jewelry, and you don’t need a lot of product to get the effect. The milky pink base keeps the set soft, while the chrome at the tip creates that shell-glass shine you see on beach stones. This is flattering on short nails because the reflective tip makes fingers look longer. It’s also great for parties because chrome holds attention even with simple ridges.
Paint milky pink base in two thin coats, then seal with a glossy top coat. Apply pink chrome gel or press chrome powder only on the tip area, keeping it to the top third. Use a fine brush with translucent white to draw a few shell ridges across the chrome, then seal again with glossy top coat. If you’re using regular polish, do an extra clear coat to keep chrome from dulling.
Editor's noteKeep the chrome edge clean by using tape for the tip boundary and remove it right away.
Watch outDon’t drag chrome across the whole nail while it’s wet — it smears and looks patchy.
14. Tiny Seashell Conch Lines in Bubblegum Pink
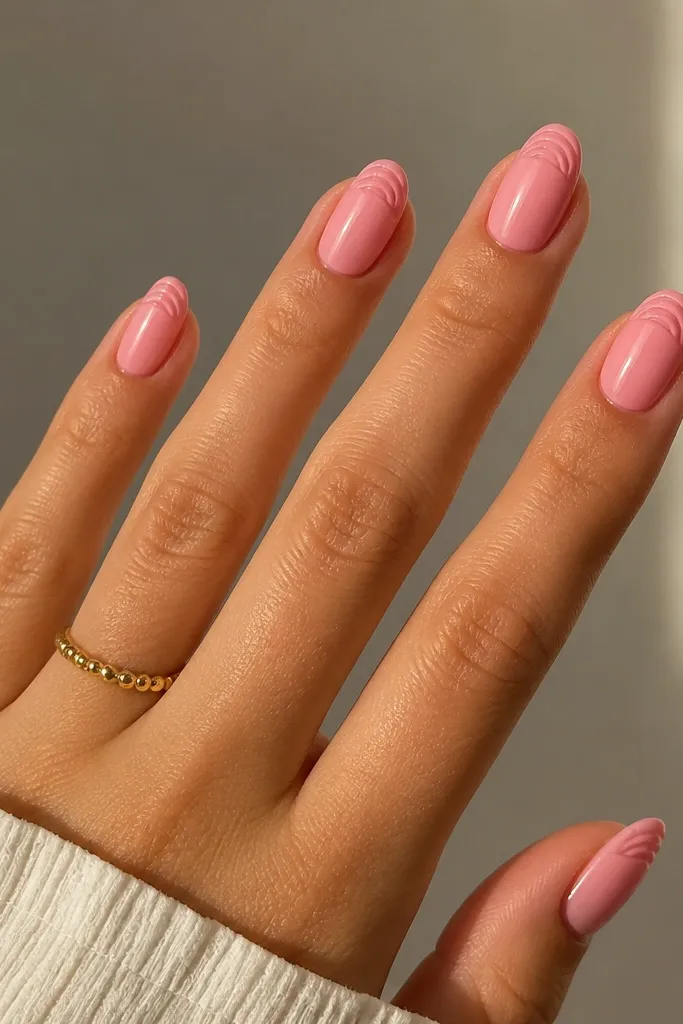
If you love bright pink but want it to look beachy instead of childish, use a bubblegum pink base and keep the shell detail small. The conch lines near the tip read like a shell imprint you’d find in sand. This works well for medium nail lengths and looks great on hands that already wear bold lip colors, because the nails match your vibe without needing extra gems. The glossy finish makes the conch lines look crisp.
First, paint bubblegum pink in two coats, letting it level between coats. Then focus on the top third: draw stacked curved lines using a thin brush, each line slightly shorter than the one below. Add tiny ridge breaks by lifting the brush so the lines look natural, not uniform. Seal with a thick glossy top coat, and cap the free edge so the shell lines stay sharp.
Use a smaller brush than you think you need — tiny shells look best when lines are narrow.
Don’t cover the whole nail with conch lines; it turns into a pattern wash.
15. Rose Pink Micro Glitter Shell Shadow (No Chunky Sparkle)
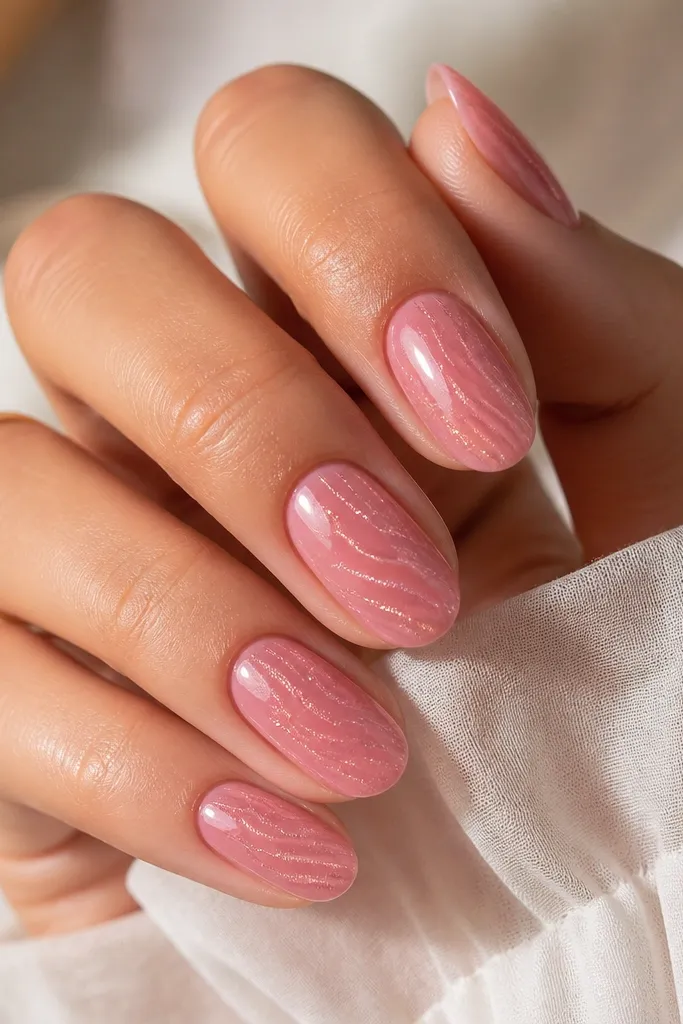
This set is for the budget shopper who wants “ocean sparkle” without paying for luxury chrome or 3D charms. Micro glitter gives that light-catching shell effect, but only when you keep it fine and control where it sits. The rose pink base keeps it wearable, and the shell shadows create depth. I like it for everyday wear because it looks subtle in daylight and prettier at night.
Start with a rose pink base and let it dry fully. Mix a tiny amount of micro glitter into clear gel/top coat and dab it only where you’ll draw ridges. Use a thin brush to paint shell ridges in a lighter pink, then lightly drag the glitter mixture along the ridge lines so it concentrates on the edges. Seal with a glossy top coat in two layers so the glitter doesn’t feel gritty.
If you don’t have micro glitter, crush fine glitter between two spoons and sift — you want dust-like sparkle.
Avoid chunky glitter; it catches fabric and makes shell ridges look messy.
16. Sheer Pink with White Shell Border and Blush Pearl Liner
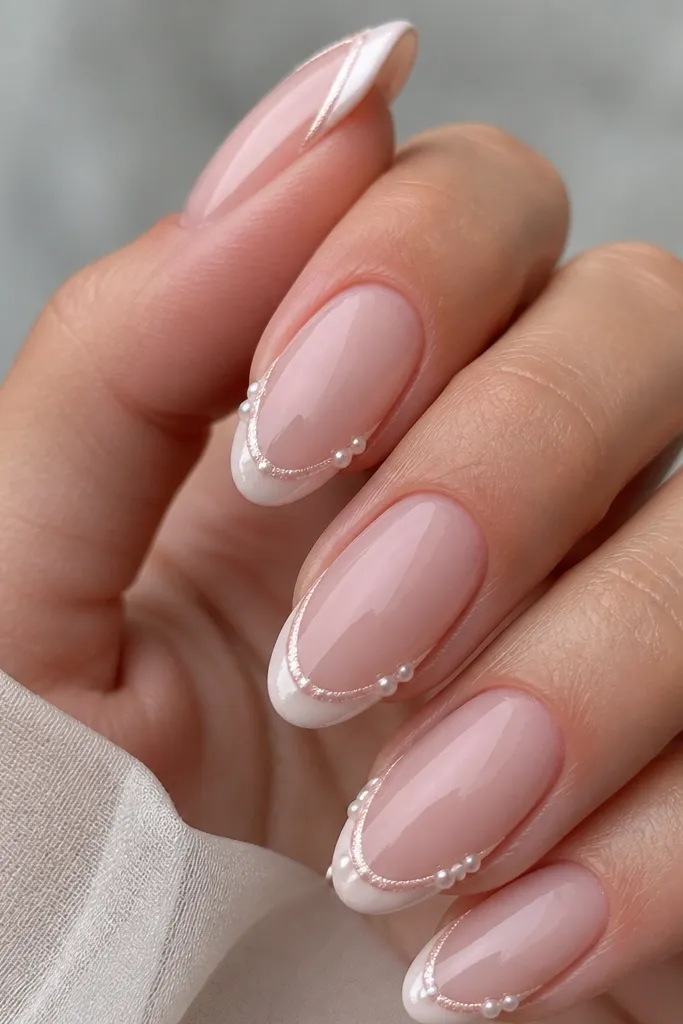
This is a “clean girl” seashell look that still reads clearly as shell texture. The thin white border gives structure, and the blush pearl liner adds that soft glow you usually only get from expensive finishes. I recommend it when you want a set that works with everything — white shirts, denim, even summer dresses. The corner pearl dots add interest without turning it into a rhinestone manicure.
First, paint sheer pink and seal. Draw a thin white border along the tip edge, leaving the center bare. Add a blush pearl liner just inside the white border, using a pearl polish or pearl gel with a fine brush. Place tiny pearl dots at the side corners and seal with a glossy top coat, then cap the tip edge with a thicker last swipe.
Use a dotting tool for the corner pearls so they’re the same size on every nail.
Don’t place pearls too close to the cuticle; it shortens the look.
17. Pastel Pink Shell Ridges with Clear Jelly Top Coat
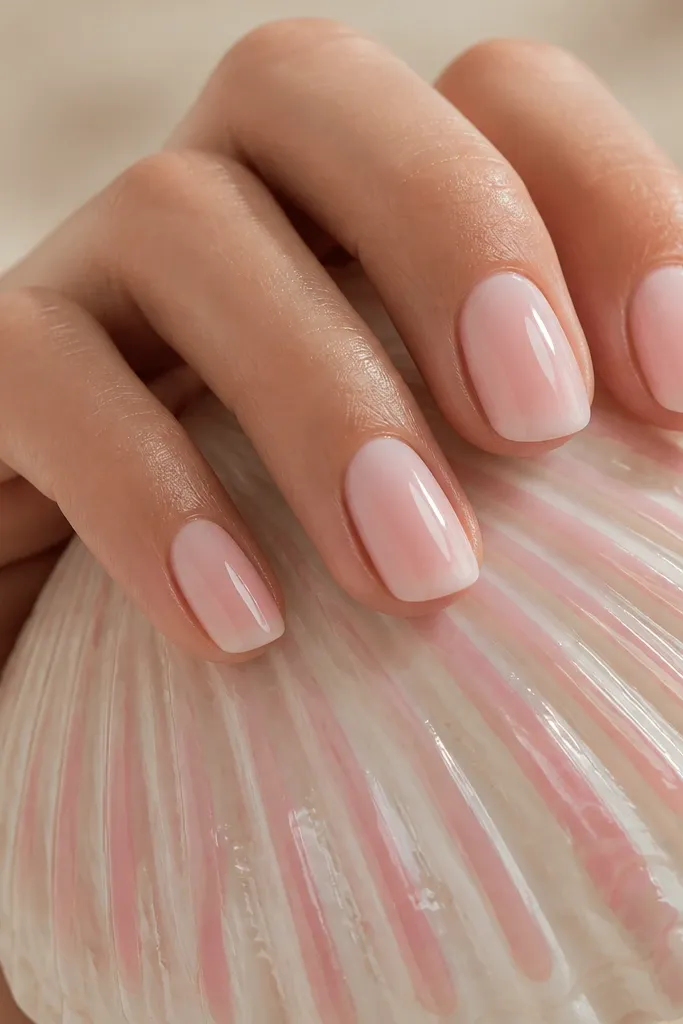
Jelly top coat is the budget shortcut to 3D depth. When you put ridges under a clear, slightly thick top coat, they look like they’re floating inside a shell. This is flattering on short-to-medium nails because the glassy finish makes them look smoother and more polished. I wear this when I want the seashell look to feel softer and more “nail candy” than graphic. The ridges still show, but they feel gentle and dimensional.
Paint a pastel pink base in two thin coats. Create shell ridges with a slightly darker pastel pink, keeping lines thin and curved. Apply a clear jelly top coat generously, then wait for it to level — you want the surface to look thick and glassy. Add a second jelly layer if the ridges feel too flat, and cure/dry fully before you touch anything.
Editor's noteIf your jelly top coat floods the cuticle, clean the edges with a small brush dipped in remover before curing.
Watch outDon’t skip the jelly layer; ridges without a glass finish look like regular nail art.
18. Pink Seashell Skirt with Negative Space Center
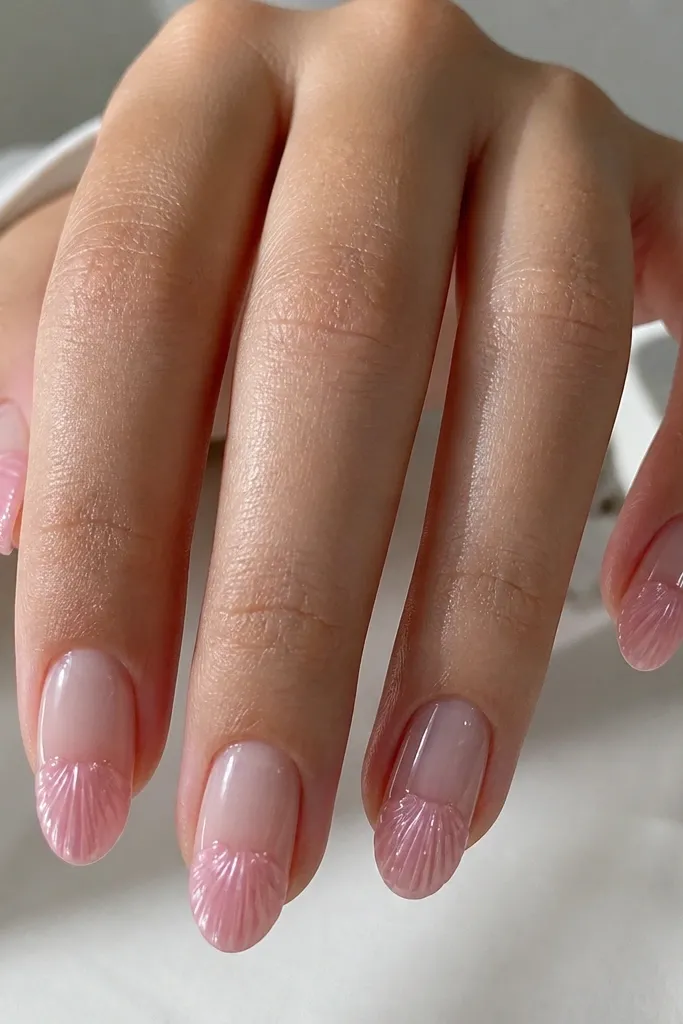
Negative space makes seashell nails look modern and gives your hands a cleaner, longer look. The “skirt” placement concentrates the shell texture on the bottom half, which is great for people who hate clutter near the cuticle. I like this on short nails because the clear center makes the nail bed look taller. It also works across skin tones because the main color is still pink and sheer, not overpowering.
First, paint only the bottom half of the nail with sheer pink, leaving a clear negative space window in the center. Then draw curved shell ridges within the pink skirt area, starting near the negative space edge and arcing toward the free edge. Add tiny pearl dots along one side of the ridges for a seashell highlight. Seal with glossy top coat, keeping the negative space clean and glossy too.
Use a thin brush to define the negative space edge — a sharp edge is what makes this look chic.
Avoid messy cuticle edges; negative space makes every boundary more obvious.
19. Pink Seashell Watercolor Wash with White Edge Ridges
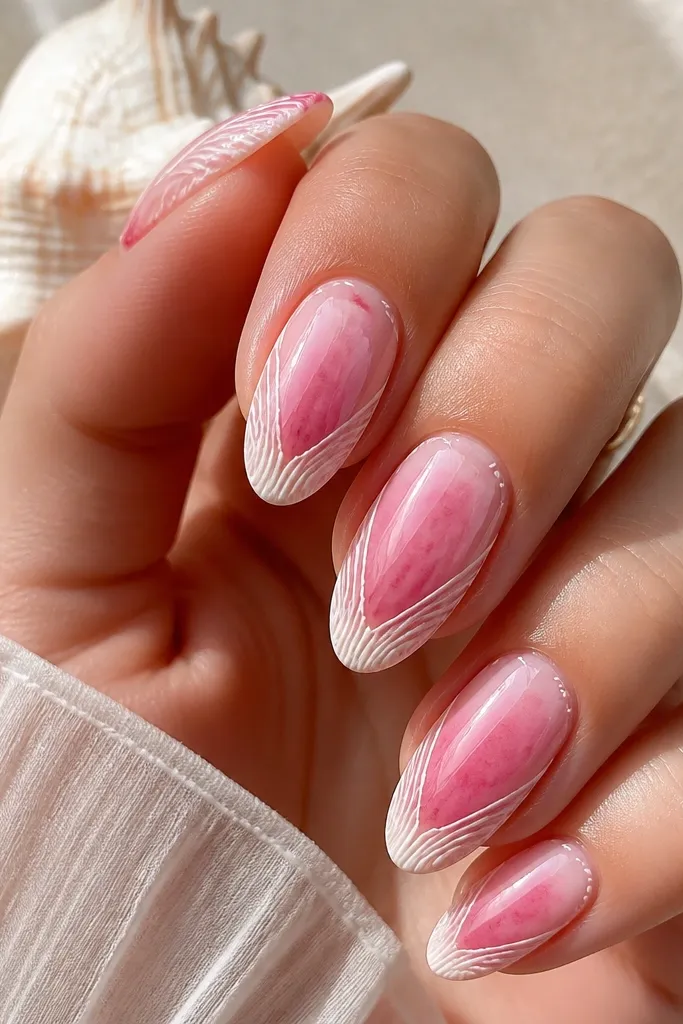
Watercolor wash gives you that beach-stone variation without needing complex tools. The soft pink blending looks natural on nails, and the white edge ridges frame it like a shell rim. This flatters hands because it keeps the center light and airy while still showing detail at the edges. I like it for spring and summer because it looks like sunlight on sand — gentle, not intense.
Start with a light milky base, then add rose watercolor streaks with a damp brush or sponge so the edges fade. Let the wash set until it’s tacky-free. Use a fine brush to draw white shell ridges along the sidewalls and a thin ridge line near the tip, keeping them narrow. Seal with a glossy top coat in two layers so the watercolor looks smooth and not chalky.
Editor's noteIf your watercolor looks streaky, use less pigment and build it in two passes.
Watch outDon’t let watercolor dry completely before sealing; it can lift under top coat.
20. Two-Tone Shell Dip with Blush Base and Light Peach Ridges
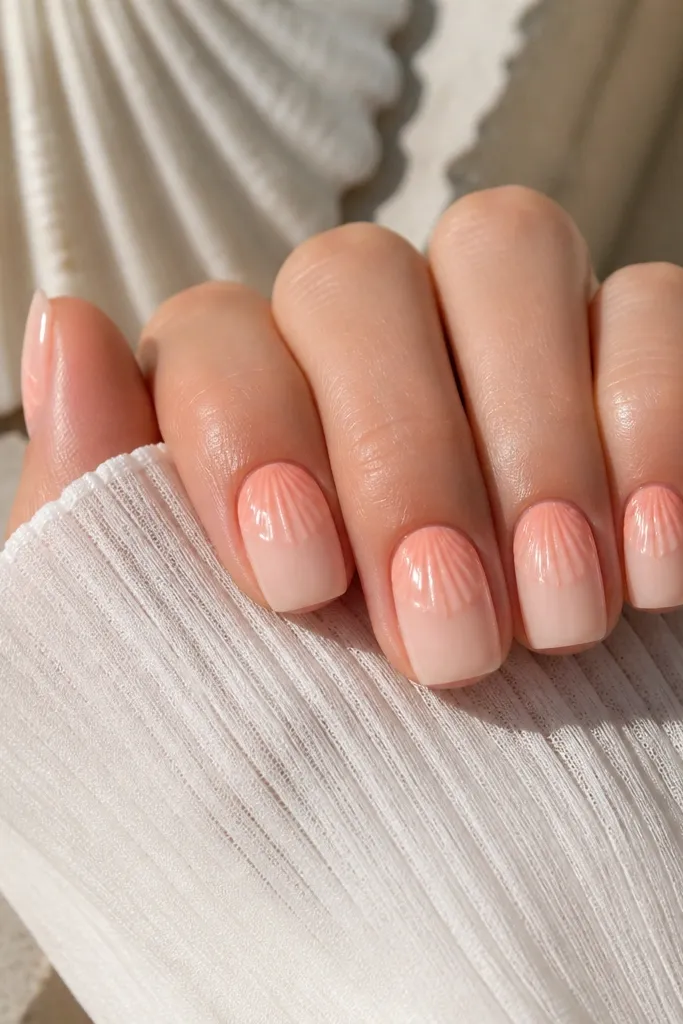
This is one of my favorite budget layouts because it looks intentional even if your shell lines aren’t perfect. The two-tone dip creates depth, and using peach ridges on a blush base keeps it beachy instead of flat. It works well on fair, medium, and deep skin tones because peach-pink sits in the flattering warm range. The result looks like a shell you’d find in shallow water.
Paint blush base across the whole nail. Then sponge a light peach dip at the tip area — keep it to the top third. Paint shell ridges in the peach shade so the pattern blends into the dip. Add a tiny pearl dot at the center of two nails and leave the rest plain for a balanced set. Seal with a glossy top coat and cap the tips.
Editor's noteWhen you sponge the peach dip, wipe the sponge on a paper towel first so it stays soft.
Watch outAvoid harsh straight lines between blush and peach; smudgy blending is the point.