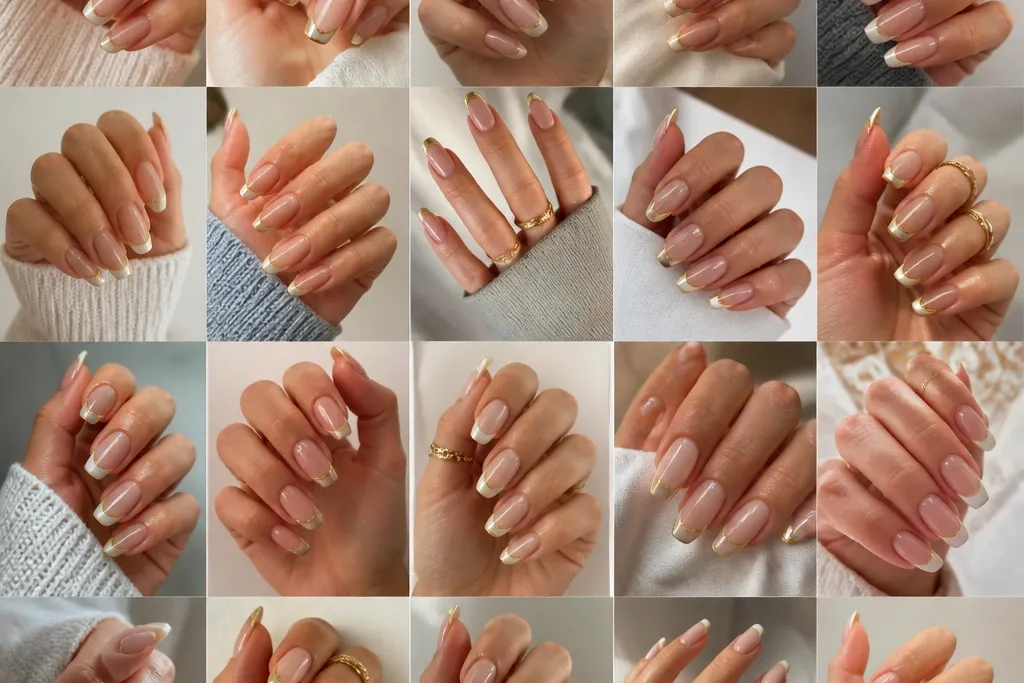
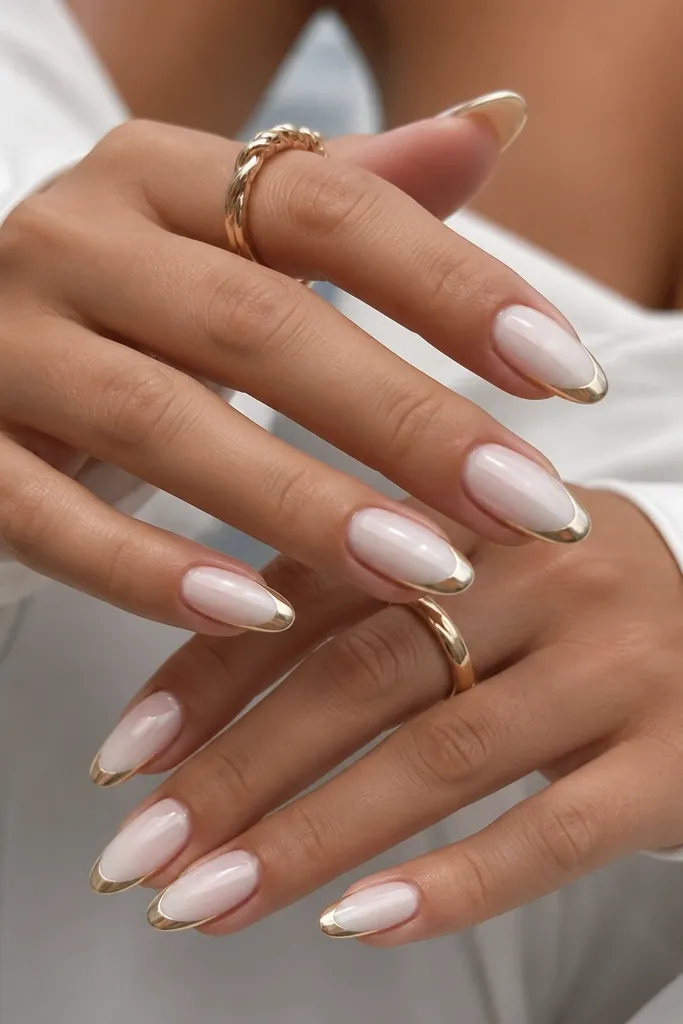
1. Classic Micro French with Foil Gold Arc
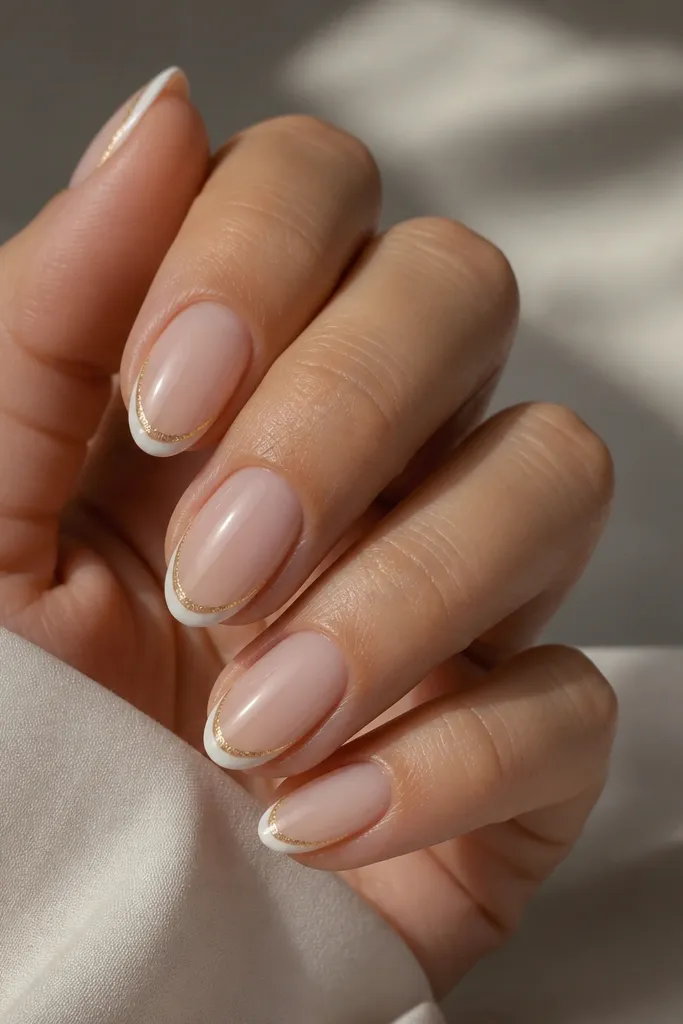
Start with a sheer nude base that matches your skin tone (I like pinky-beige, not orange). Paint a micro French tip using opaque white gel — keep the line narrow so it reads “clean” instead of “thick.” Press a small curved piece of gold foil just above the white line, then seal it with a glossy top coat. This design flatters short nails and medium nail beds because the thin white arc adds length without taking over your whole nail. It also looks great on warm or neutral skin tones since the nude base keeps everything balanced.
Editor's noteIf your foil lifts at the edge, press it with the back of a silicone pusher for 10 seconds before top coat.
First, prep and apply a sheer nude base coat, then cure fully. Next, draw the French line with a detail brush: place the brush at the tip edge and pull in one smooth stroke, keeping the white width small. Then, use gold foil with tweezers to place a curved arc above the French line — aim for a gap of about 1 mm between foil and white. Finally, top coat in two thin layers, curing each layer so the foil is locked down.
Watch outAvoid jelly white — it turns patchy over nude and makes the French line look uneven.
2. Milky White French with Gold Leaf Tips
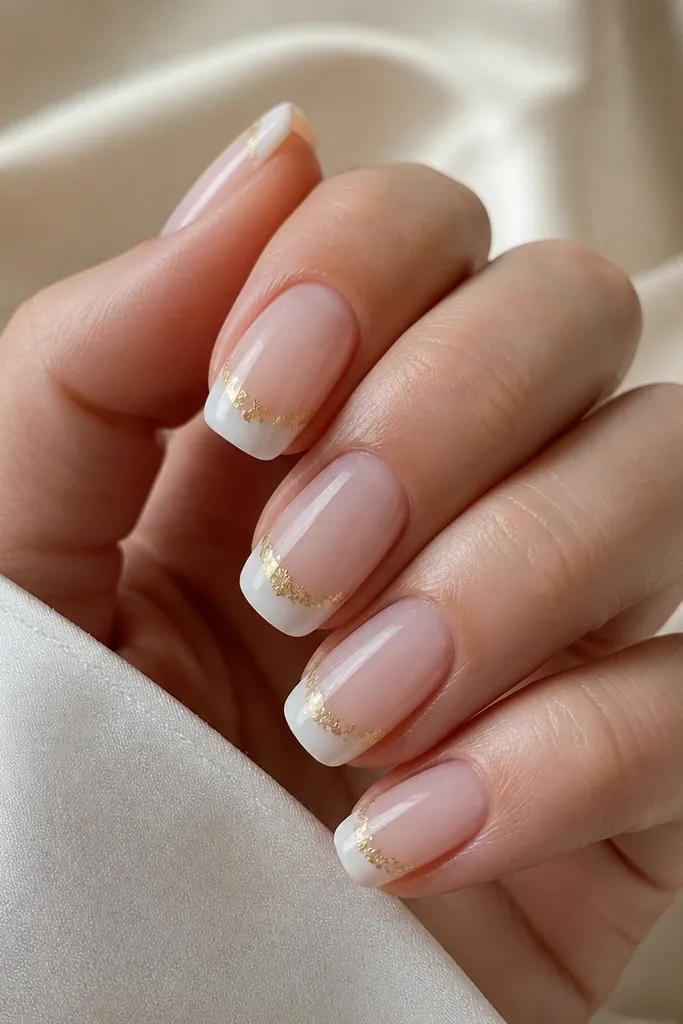
This one looks like a salon mani because the white tip is milky and opaque, not stark. Use a milky nude base so the white reads bright but still soft. For the gold, place gold leaf in a thin band right at the outer edge of the tip, letting tiny irregular pieces show — it keeps the look airy. I love this on medium-length nails and hands that want a “brighter” finish without going full glitter. It’s also forgiving for people who don’t love ultra-thin lines because the milky white hides tiny brush streaks.
Paint a milky nude base, cure, then apply a second thin layer if your nude looks streaky. Use white gel to create a French tip that covers about one-third of the nail, shaping the curve to your nail bed. While the white is tacky, press small bits of gold leaf along the outer edge, then cure. Finish with a glossy top coat; if the gold leaf has texture, do a thicker top coat and cure longer for a glassy feel.
Chop your gold leaf pieces small with nail scissors so they don’t clump at the free edge.
Skip full-coverage gold leaf — it makes the tips look heavy and can catch on fabric.
3. White French with Thin Gold Pinstripe Center
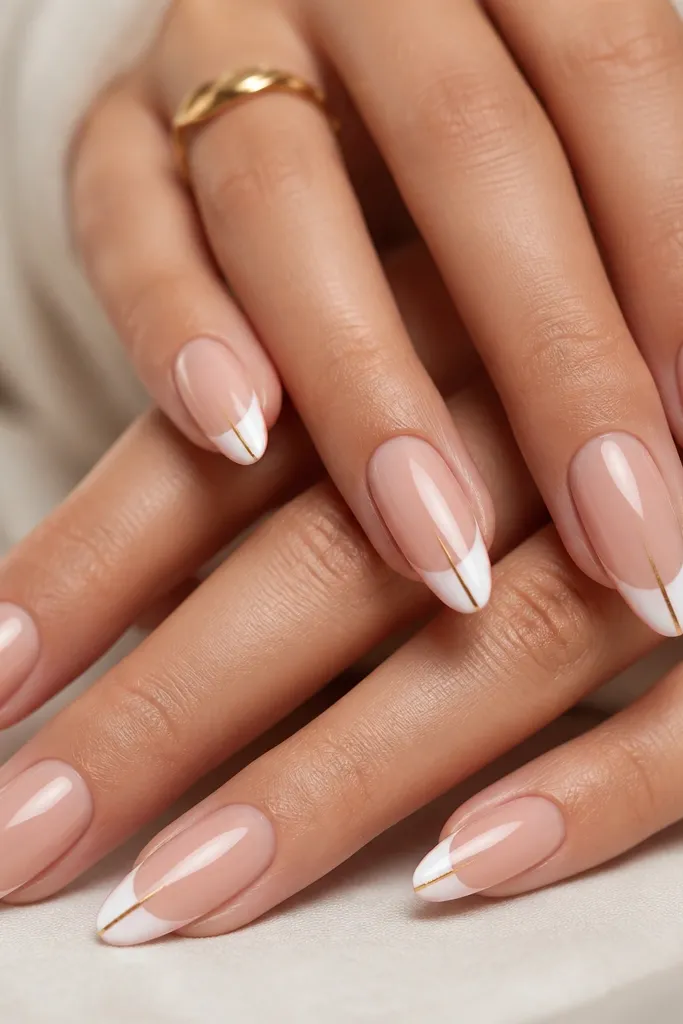
This design is my go-to when I want French tips to look intentional instead of “just painted.” The base stays glossy nude so the white tip pops, and the gold pinstripe adds a clean vertical line that makes nails look longer. Use a true white gel for the French edge, then apply gold striping tape or gold chrome paint to create the center line. It flatters almost everyone because the gold line is thin and doesn’t overwhelm the nail plate. I’ve worn it on my own hands for work days and it still looks neat even when nails grow out.
Editor's noteUse tape for the first try — it’s the fastest way to keep the gold line straight.
Apply a glossy nude base and cure. Paint the French tips with opaque white, keeping the edge symmetrical on both sides. Cut a tiny strip of gold striping tape and place it dead-center on the white area, then press firmly. Remove excess tape after curing or seal it directly with top coat if you’re using gel-safe tape. Finish with a final glossy top coat over the whole nail to lock the stripe flat.
Watch outDon’t drag gold paint across wet white — it smears and turns the pinstripe dull.
4. Gold Chrome Half-Moon at the Cuticle with White French
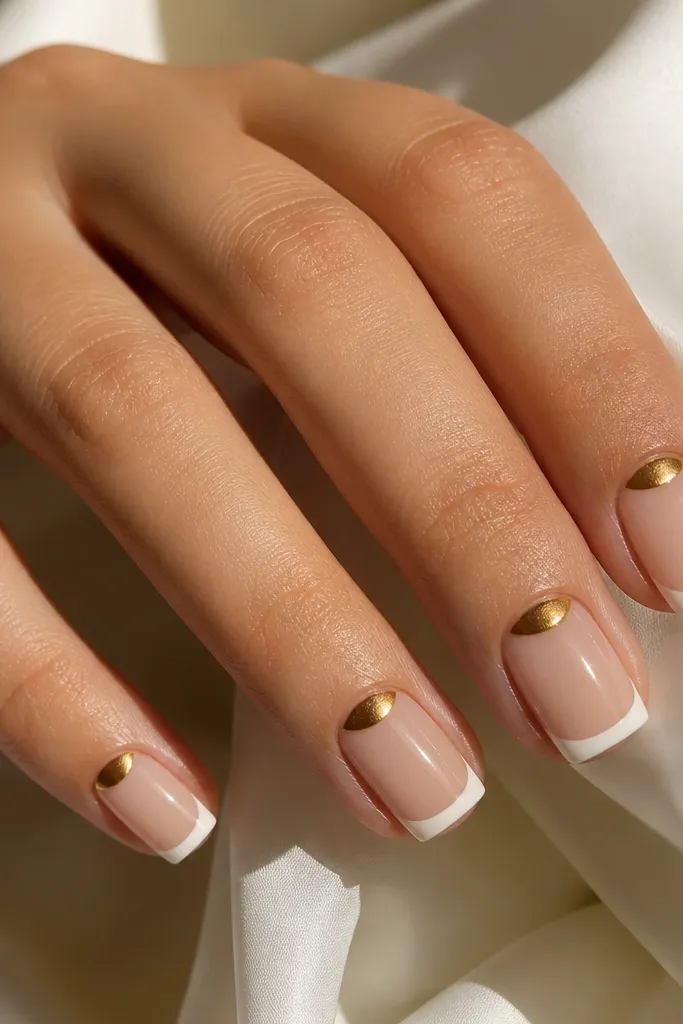
This flips the usual French focus upward, so it looks fancy without adding bulk at the tip. Keep the white French crisp and thin so the cuticle detail becomes the star. Use gold chrome powder or chrome gel to create a half-moon at the cuticle — it reflects light and makes the nail look polished. This style flatters hands with shorter nail beds because the reflective cuticle shape visually lifts the nail. It also looks stunning on cooler skin tones because the gold reflection warms the nude base.
Start with a nude base and cure. Apply chrome gel in a half-moon shape near the cuticle, leaving a tiny gap from the skin so it doesn’t flood. Dust chrome powder over the half-moon, tap off excess, then seal with a thin top coat and cure. Now paint your white French tip, keeping it narrow and smooth. Finish with a glossy top coat that covers both the chrome and the French edge.
If your half-moon looks messy, use a small piece of tape to mask the cuticle line before applying chrome gel.
Avoid thick chrome — it lifts during wear and can look grainy.
5. White French with Gold Glitter Fade Edge
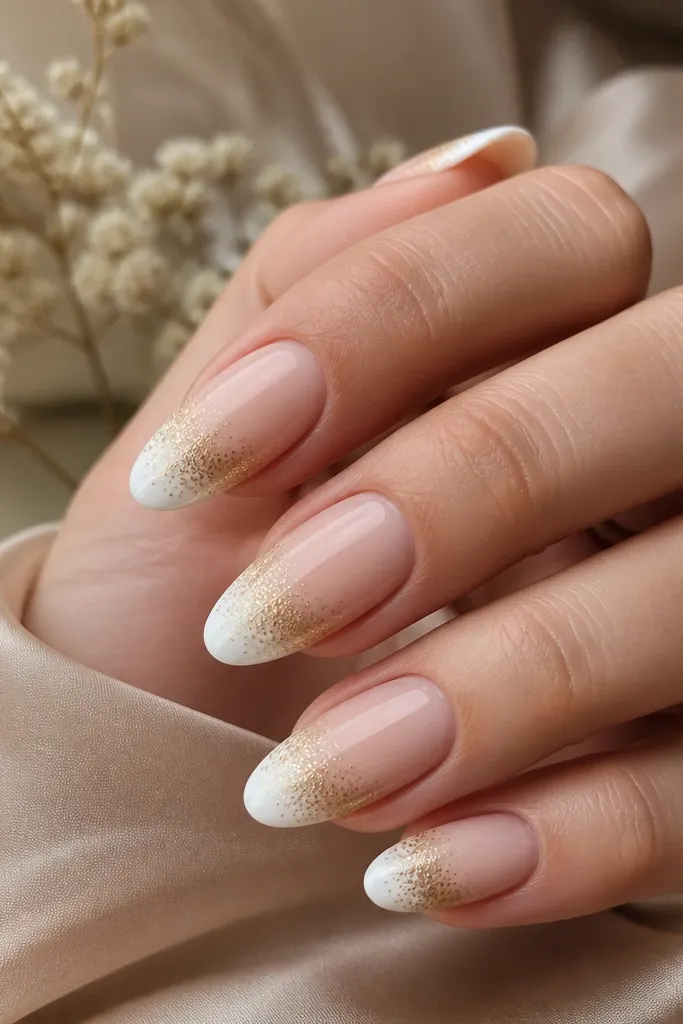
This design gives you the clean French look but adds movement at the free edge. The key is a fade, not a full glitter band. Paint a solid opaque white French tip, then sponge a tiny amount of gold glitter gel onto the outer edge so it gets denser at the border and fades inward. It flatters short to medium nails because the glitter is concentrated at the tip, not across the whole nail. It also looks great for nights out because the gold catches light as you move your hands.
Apply nude base and cure. Create your white French tip with a smooth brush, then cure. Use a small makeup sponge to dab gold glitter gel on the outer 1-2 mm of the white tip, building slowly. Clean up the sides with a brush dipped in alcohol before curing. Seal with a glossy top coat; one thick coat helps the glitter feel smooth.
Use a sponge that’s slightly dry so you get a soft fade instead of a chunky glitter line.
Don’t pack glitter all the way across the tip or it stops looking like French and starts looking like random sparkle.
6. Matte Nude Base with Glossy White French and Gold Accent
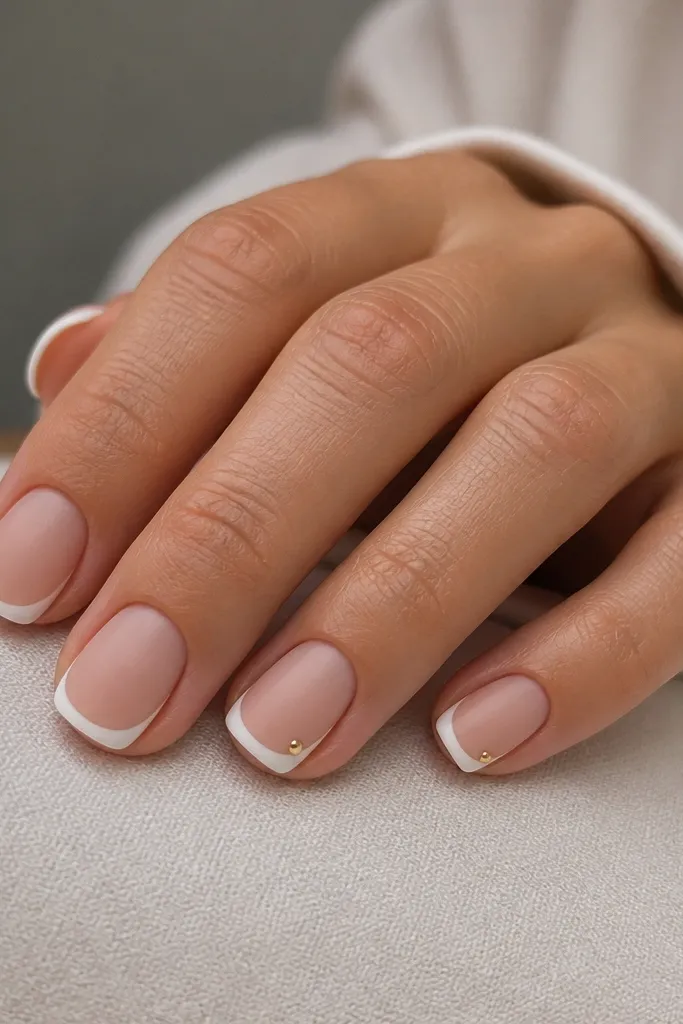
Contrast is what makes this one look high-end. The matte nude base kills shine, so the glossy white French tips look crisp and “fresh,” and the small gold stud adds a tiny flash. Keep the gold minimal: one stud or one tiny gold foil triangle per hand. This flatters hands that look better with softer finishes because matte makes skin tone look smoother on photos. It also hides small surface imperfections better than full gloss.
Editor's noteIf you hate matte on your cuticles, keep the cuticle area glossy and matte only the mid-nail.
Apply matte nude base by using a matte top coat after your nude cures. Then paint the French tips in glossy white gel and cure; don’t matte the French area. Add a tiny gold stud on accent nails by placing it at the outer tip corner, then cure again. Finish with glossy top coat only on the French tips and gold details, leaving the rest matte. If your matte gets dull around the edges, reapply matte top coat to the nude area.
Watch outAvoid using matte top coat over the French — it makes white look chalky.
7. Reverse French with White Tips and Gold Side Lines
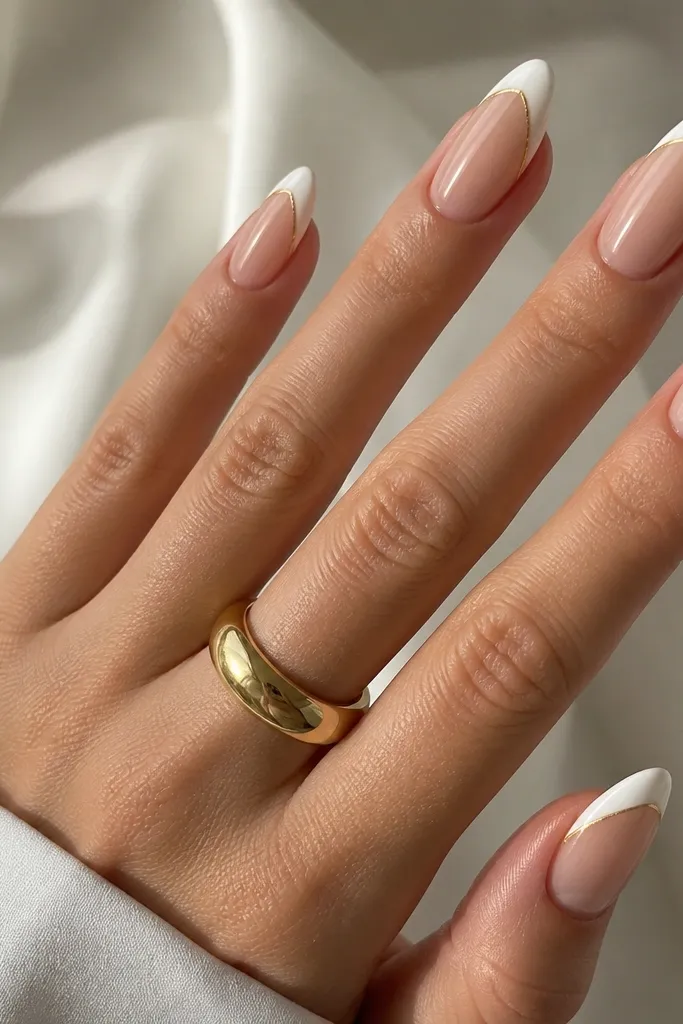
Reverse French is where white and gold feel modern instead of classic. The white wraps slightly up the sidewalls, and the gold side lines mirror that shape so your nails look extra neat. Use a nude base that’s not too warm so the gold stays clean and doesn’t look brassy. This style flatters almond nails and longer nail beds because the side lines visually extend the nail shape. It’s also great if you’ve got uneven nail edges — the white side wrap helps hide small gaps.
Editor's noteUse a steady hand marker: line up the brush with the nail’s natural side curve first, then fill once it’s centered.
Start with nude base and cure. Paint a white tip that covers the free edge and extends slightly up the sidewalls, keeping the center crisp. Add gold side lines by either using thin striping tape or gold paint along each side of the white area. Cure, then top coat with a glossy gel top coat to seal the tape and smooth the paint. Keep the gold lines thin — about the width of a striping brush bristle — so they don’t overpower the white.
Watch outAvoid thick gold side lines — they make the shape look wider than it is.
8. White French with Gold Foil Confetti Corner
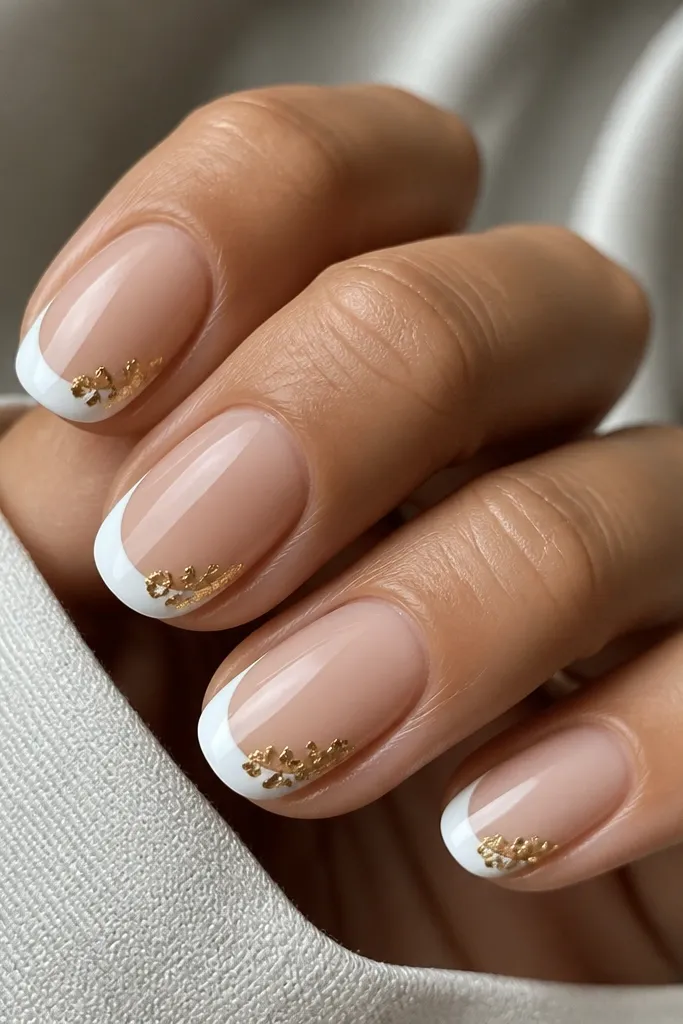
This is my favorite “just enough” gold look. The French tips are classic and clean, then you add a tiny confetti corner that makes the nails look like you spent time. Use opaque white so the corner foil stands out sharply. I like this on short almond and squoval because the corner placement keeps the nail feeling balanced. It flatters medium and deep skin tones especially well because gold foil pops against both warm and cool nudes.
Editor's noteIf foil won’t stick, apply a thin layer of tacky gel only to the corner area before pressing foil.
Apply nude base and cure. Paint your white French tips with a consistent curve across all nails. Cut small foil pieces and press them into the outer tip corner — keep the cluster within 1-2 mm so it doesn’t spread when you top coat. Cure and then apply a glossy top coat in two thin layers. Use a nail file to gently smooth the foil edge after the first top coat cures if it feels raised.
Watch outDon’t cover the whole tip with foil — confetti should stay small and intentional.
9. White French with Gold V Outline
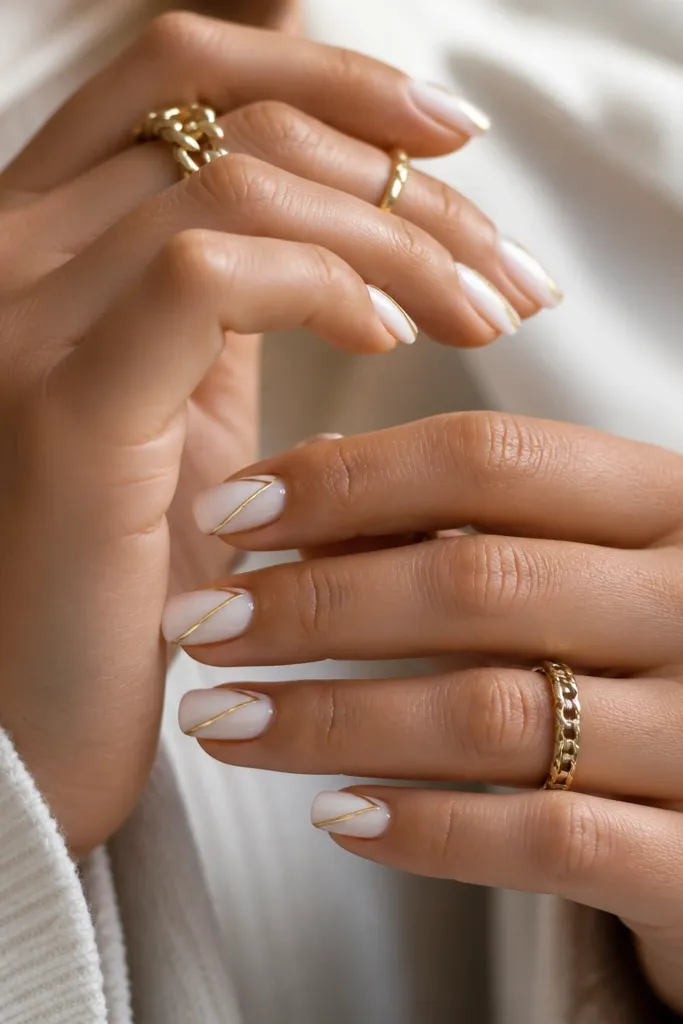
The gold V outline makes French tips look like jewelry. Keep the white tip smooth and opaque, then create a thin gold V using a liner brush and gold chrome paint. This design elongates nails because the V pulls the eye toward the center. It flatters oval and almond shapes, and it looks gorgeous on hands with slender nail beds. I’ve worn this to weddings because it photographs well under flash without needing glitter.
Editor's noteUse a liner brush meant for nail art, not a craft brush — the line thickness stays consistent.
Nude base first, cured. Paint the French tips in bright white and cure. With a fine liner brush, draw a gold V starting at the lower center of the white tip and meeting near the middle, leaving a tiny gap between the V lines and the white edge. Cure and apply a glossy top coat over everything. For extra crisp edges, outline the V once, cure, then touch up with a second thin gold pass.
Watch outAvoid drawing the V too low — if it touches the nude, it looks like a stain.
10. Gold Dotted French Border with White Tips
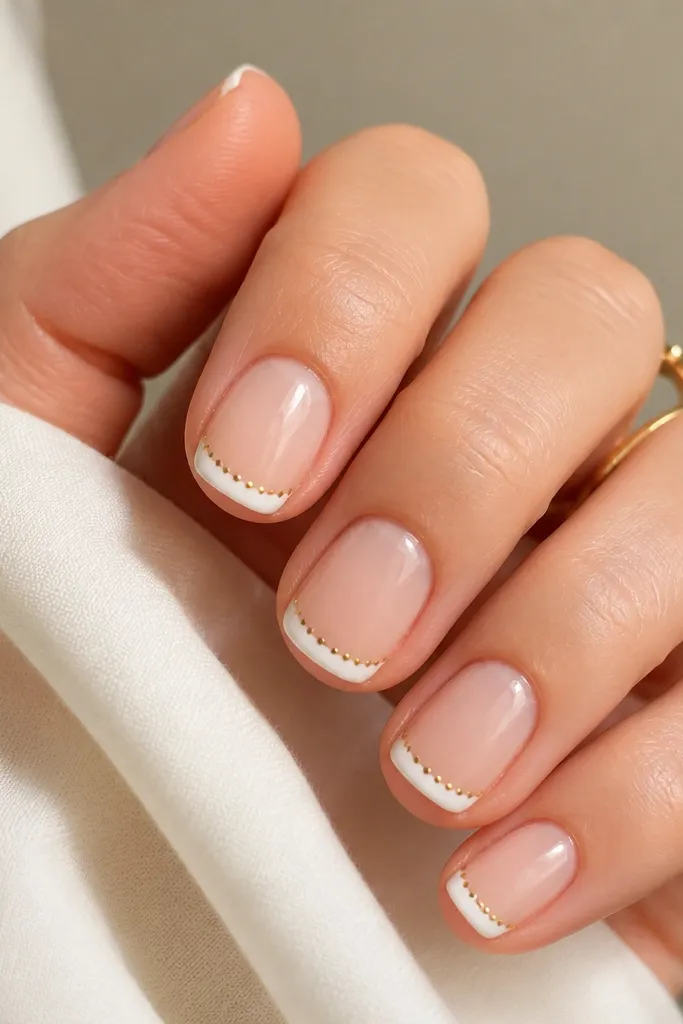
Dotted borders are clean, playful, and easier than they look. You keep the white French tip crisp, then add a series of tiny gold dots along the outer edge like a beaded frame. Use gold gel paint or gold acrylic paint and a dotting tool tip size that matches your nail width. This flatters square nails because the border frames the tip and makes the corners look intentional. It also works for everyday wear since the design is controlled and doesn’t rely on heavy glitter.
Editor's noteIf dots smear, let the gold paint sit on a palette for 30 seconds so it thickens slightly.
Start with nude base and cure. Paint your white French tip with a smooth curve, cure again. Dip a dotting tool into gold gel paint and place dots along the outer edge of the white tip, spacing each dot about 1 mm apart. Use a fine brush to adjust any wonky dots before curing. Finish with a glossy top coat that covers the dots so they stay raised-free and smooth.
Watch outAvoid big dots — they look chunky and cheap next to a thin French line.
11. White French with Gold Stripe Across the Smile Line
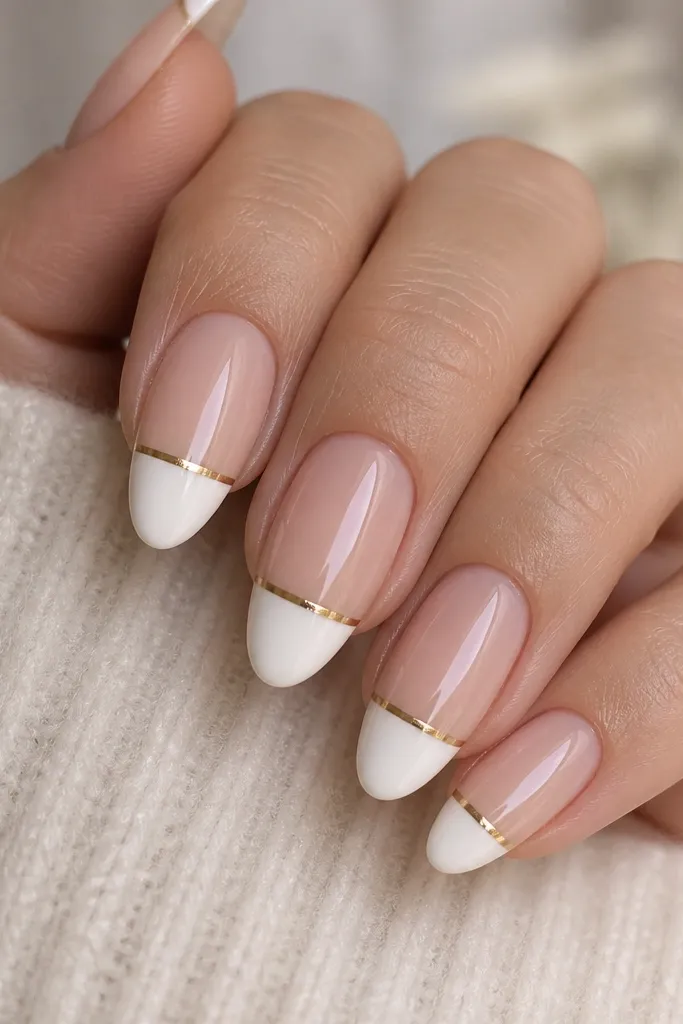
This design looks like a mini belt across your nails. The gold stripe sits across the smile line, so it frames the French tip and makes the curve look sharper. Use a thin strip of gold striping tape or a gold liner brush; the stripe should be narrow and even. I like this on medium-length almond nails because the horizontal stripe adds width to the middle and makes the nail look fuller. It also suits formal events because it looks intentional and structured.
Apply nude base and cure. Paint white French tips and cure. Place a thin gold striping tape across the smile line (the curved edge of the French), then press gently so it follows the curve. If you’re painting, use a liner brush to draw the stripe, then cure. Remove tape only if it’s non-gel-safe; otherwise, seal it under top coat. Finish with a glossy top coat for a smooth surface.
Use the same stripe height on every nail — consistency is what makes it look salon-perfect.
Skip a stripe that’s thicker than your white brush tip — thick stripes make the French look messy.
12. French Tips with Gold Half-Drape on One Side
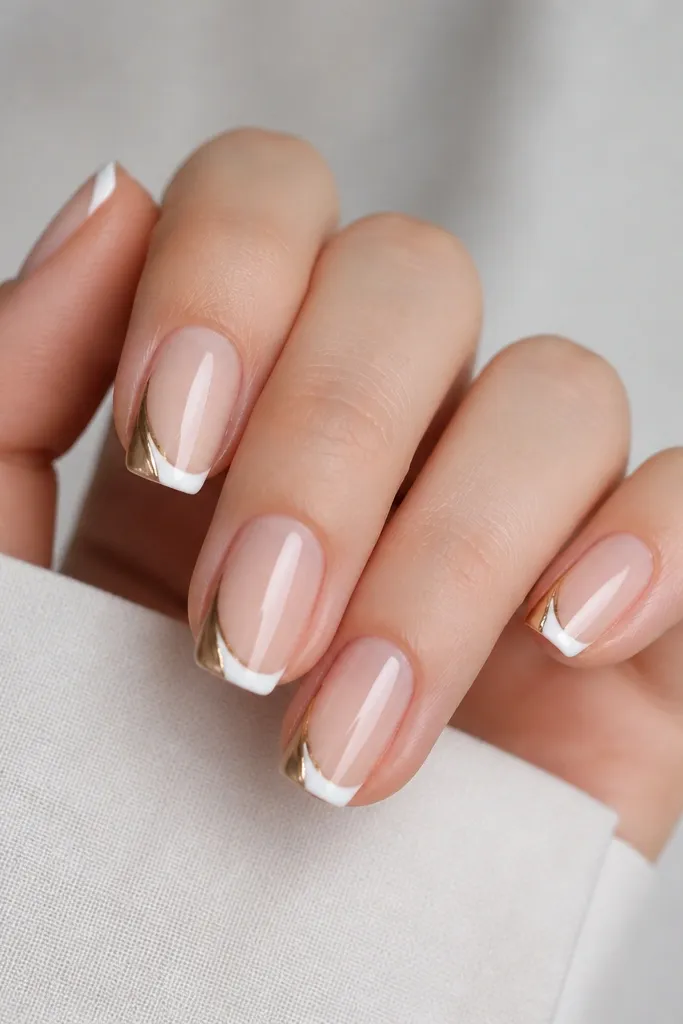
This asymmetrical gold drape looks artsy but still wearable. The white French tip stays classic, and the gold sits only on one side of the tip, which makes nails look more sculpted. Use gold chrome for a smooth reflective finish, not chunky glitter. This flatters round nail beds because the gold drape adds a diagonal line that visually narrows the nail. It also looks great on both cool and warm skin tones because the chrome reflection is neutral.
Editor's notePractice on one nail first: the drape should be about 2 mm wide at the tip edge.
Nude base, cured. Create the white French tip with a smooth smile curve, then cure. On the outer corner of the tip, apply gold chrome gel in a small diagonal shape, pulling it slightly along one sidewall — stop before it reaches the nude area. Cure and seal with top coat. Repeat the same side placement on each nail so the set looks intentional, not random.
Watch outDon’t paint gold onto the nude — it turns the look into muddy contrast.
13. White French with Gold Outline Cuticle Ring
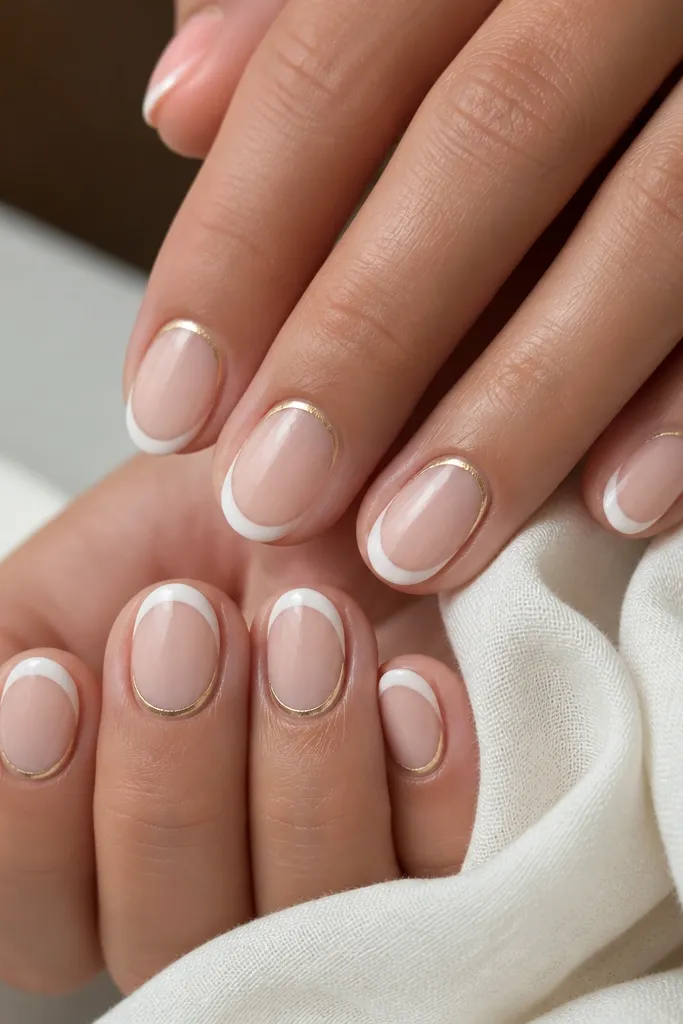
A cuticle ring makes French tips feel like a set of rings for your fingers. Keep the ring thin and gold — think outline, not filled-in. The white tip stays the main shape, and the gold ring adds a luxe frame near the base. This flatters hands that have thinner nail beds because the ring gives structure at the cuticle. It also photographs beautifully because the gold outlines catch light from different angles.
Editor's noteUse a liner brush with a sharp point; blunt brushes make cuticle rings look like smudges.
Start with nude base and cure. Paint white French tips, keeping the tip width consistent. Use a fine liner brush to draw a thin gold outline ring just inside the cuticle line — leave a tiny gap from the skin. Cure and apply a glossy top coat, making sure the gold line is fully sealed. If the gold line feels rough, do a second top coat over just the cuticle area.
Watch outAvoid thick gold rings — they look like you tried to cover a gap.
14. White French with Gold Crisscross Lines
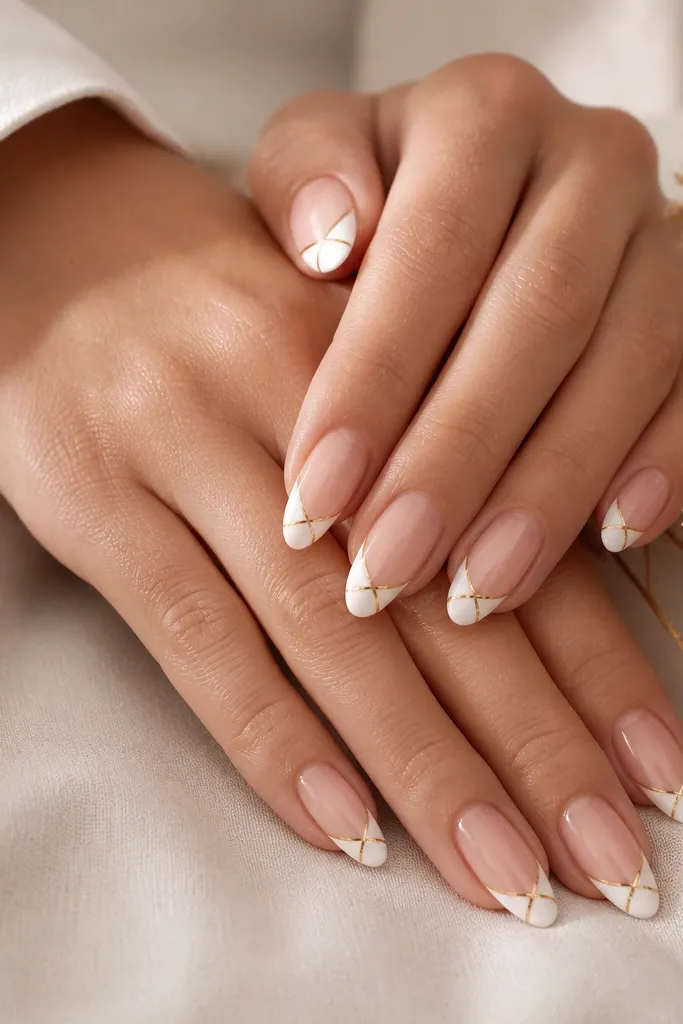
Crisscross over a French tip makes the design feel graphic without turning into full nail art. Keep the white tip smooth and opaque, then add two thin gold lines that cross near the center and stop before the edges. Use gold striping tape for the cleanest look or gold chrome paint with a steady hand. This flatters nails that look a bit flat because the cross lines add dimension. It also works for people who want something more interesting than a simple stripe but still wearable.
Editor's noteStop the lines short of the corners by 1-2 mm so the French curve stays visible.
Nude base first, cured. Paint the white French tips and cure. Place two thin gold striping tape pieces diagonally so they cross near the center of the white tip, then press and cure. If painting instead, draw one diagonal line, cure if needed, then draw the second diagonal line. Seal with glossy top coat, keeping the top coat thin so the tape edges don’t lift.
Watch outAvoid crisscrossing all the way to the edges — it makes the tip look crowded.
15. White French with Gold Micro Stars
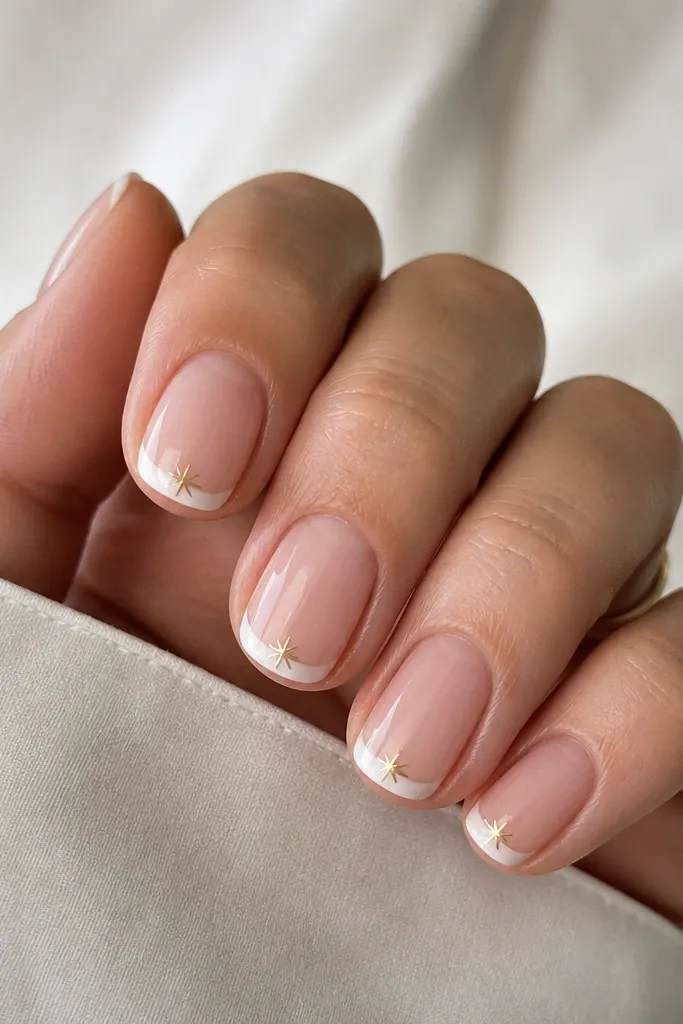
Micro stars make white and gold feel cute, not childish. The key is scale: tiny stars placed near the outer half of the white tip, not in the middle of your nail bed. Use opaque white so the star details stand out cleanly. I like this for short nails because the stars add personality without needing extra length. It also looks great on fair to deep skin tones because gold star shapes are high contrast.
Editor's noteUse one star per nail for a weeknight look; add two only on your accent nails.
Apply nude base and cure. Paint thin white French tips and cure. Place tiny gold star decals using tweezers and press them flat, or paint micro stars with gold acrylic paint using a dotting tool to make the points. Seal with a glossy top coat in two layers, curing fully so the stars don’t snag on clothing. If the decal edge feels raised, file lightly and top coat again.
Watch outAvoid large stars — they overwhelm the French and look like sticker overload.
16. White French with Gold Spider Gel Web
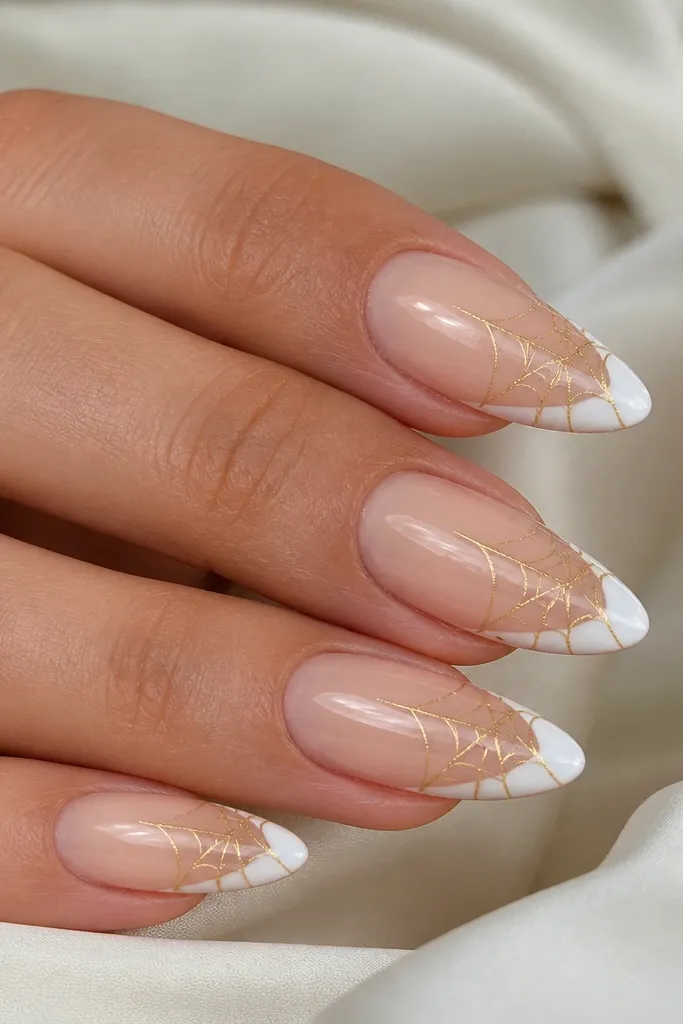
Spider gel over a white French tip looks like lace, but it’s still nail-shaped and wearable. Use a fine gold spider gel so the web lines stay hair-thin. Keep the web confined to the tip area so it doesn’t spread into the nude. This flatters longer almond nails because the web pattern has space to breathe, but it still looks good on medium nails if you keep it small. It also works on cooler skin tones since the gold web adds warmth without changing the base color.
Editor's noteIf your web turns thick, use less spider gel — the thinnest web looks the most expensive.
Nude base and cure. Paint bright white French tips, cure, and let the surface cool for a minute. Apply spider gel by dotting a small amount at the center of the white tip, then use the included tool or a toothpick to pull thin strands outward in a web pattern. Stop when you have 6-8 strands; too many strands look messy. Cure and seal with glossy top coat, keeping your brush strokes light so the web doesn’t smear.
Watch outAvoid webbing across the whole nail — it turns French into random texture.
17. Gold Foil Tips on Top of White French
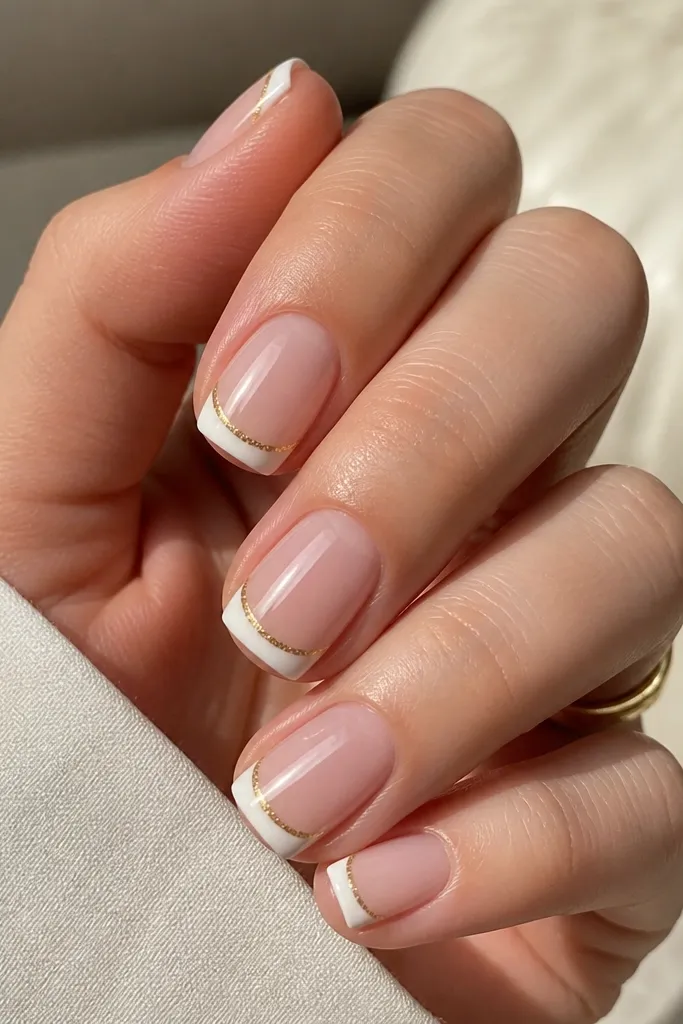
Layering foil on top of white gives you that sharp, high-contrast border effect. The white tip is still the foundation, and the gold foil only touches the outer edge so it doesn’t look like your whole tip is metal. I like this for people who want a bright, festive look but still want the French shape. It flatters nails that get lots of sun because the foil stays reflective even when white looks slightly worn. It also looks good on both fair and deep skin tones since the contrast is strong.
Editor's notePress foil with a flat tool, not a finger, so you don’t leave fingerprints in the gold.
Apply nude base and cure. Paint glossy white French tips and cure until fully hard. Apply a tiny strip of gold foil to the outer edge of the tip — just 1-2 mm — pressing only the border area. Seal with top coat; if the foil feels rough, do a slightly thicker top coat over the edge and cure longer. File the very tip lightly so it doesn’t catch.
Watch outAvoid covering the full white tip — it stops reading as French.
18. White French with Gold Outline Chevron at Tip
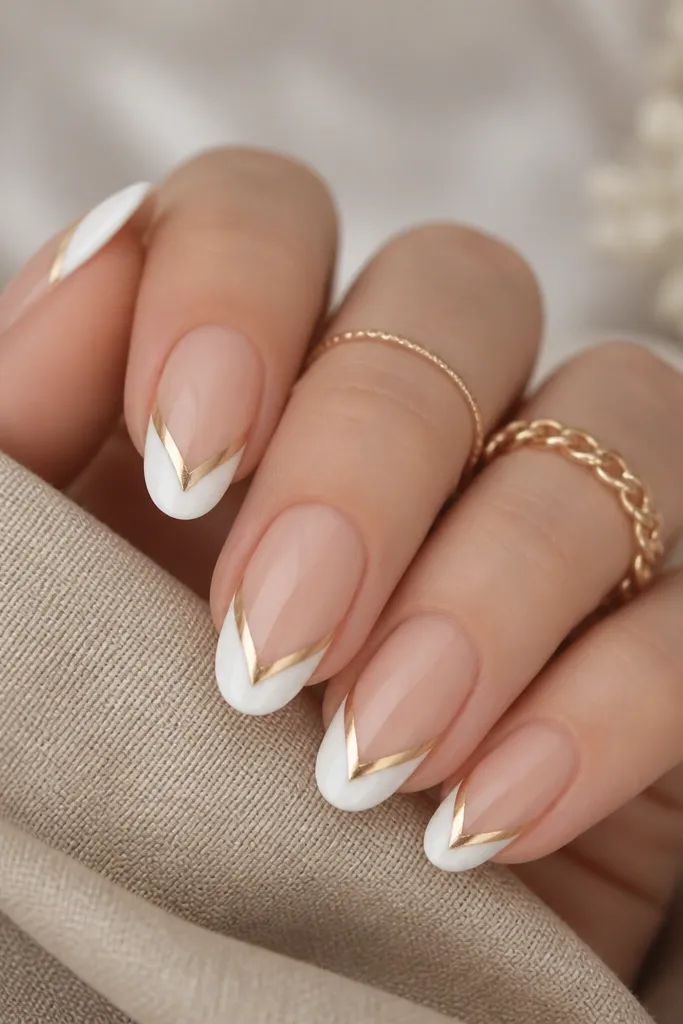
Chevron outlines add structure and make the French tip look like it has a design plan. Keep the chevron thin and only within the white area so it doesn’t look like a random doodle. Use gold outline paint or gold chrome paint with a liner brush to draw the V shape, then add a second thin line to create the outline. This flatters almond and oval nails because the chevron follows the natural nail curve. It’s also a good option if you want something more graphic for photos while still staying classy.
Nude base and cure. Paint the white French tips with a crisp curve, cure again. Draw a chevron V in gold near the outer third of the white tip, then outline it by tracing the same V line with a second pass. Keep the chevron width about 2-3 mm so it stays delicate. Cure and apply a glossy top coat, making sure the gold edges are sealed.
Mark the chevron center point first with a tiny dot so both sides match.
Avoid thick chevrons — they look like stickers when the white base is thin.
19. White French with Gold Halo on Accent Nails
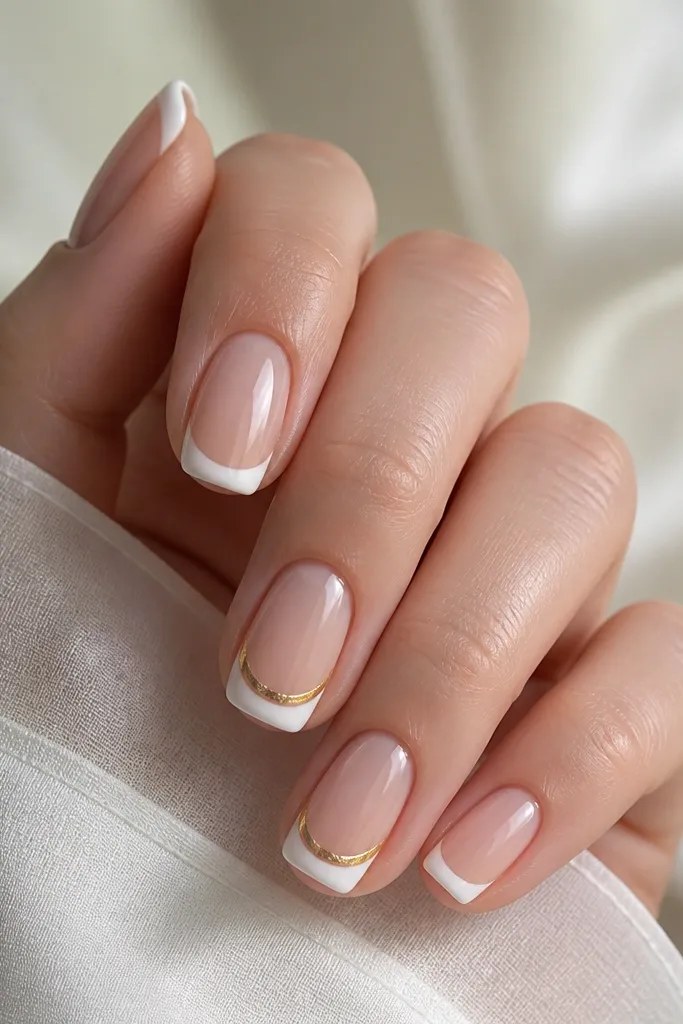
Halo accents make French tips look editorial without covering every nail. Keep your main nails classic with crisp white tips, then add a gold halo ring on just two nails per hand. The halo should sit around the smile line, leaving the center of the nail tip clean. This flatters hands with uneven nail shapes because the halo draws attention to the curve and makes it feel intentional. It also works for both casual and dressy settings since the gold reads refined, not sparkly.
Editor's noteKeep the halo slightly off-center toward the outer corner for a more natural look.
Apply nude base and cure. Paint white French tips on every nail and cure. Choose two accent nails and draw a thin gold ring around the smile line using gold chrome gel or gold outline paint; keep it partial so it looks like a halo, not a full circle. Cure and seal with glossy top coat over the ring. If the ring looks too bold, thin it with a second gold pass that fills only the outline.
Watch outAvoid doing halo rings on all nails — it gets busy fast.
20. White French with Gold Half-Glaze Stain-Effect
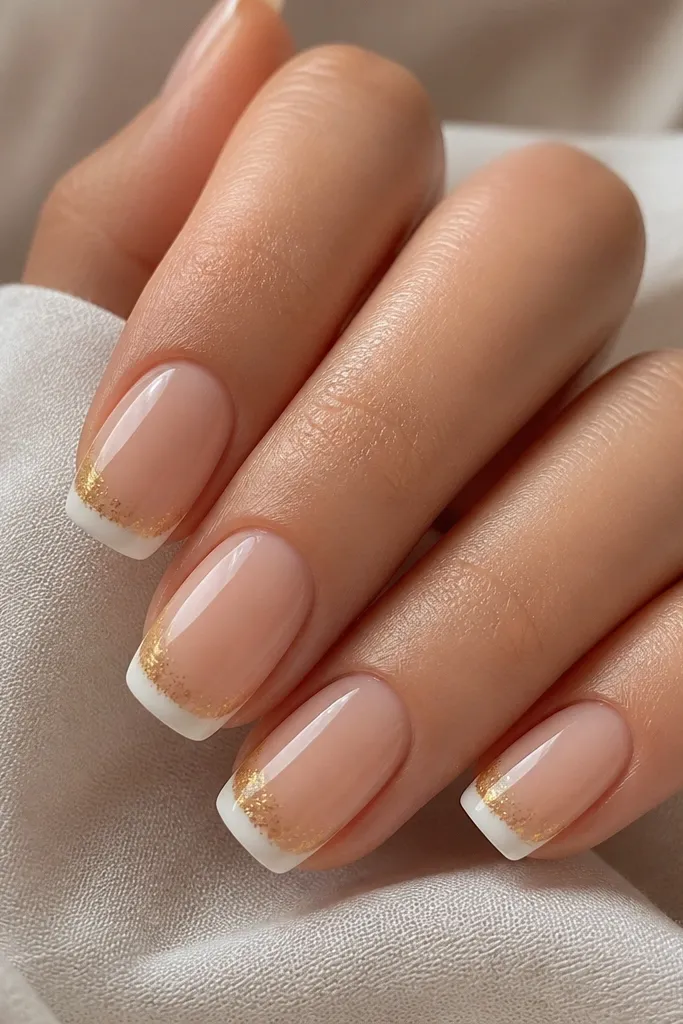
Gold glaze fading over white looks expensive because it mimics a stained-glass effect. The white stays bright and opaque, and the gold is semi-transparent so you get depth instead of a flat gold layer. I use gold gel glaze or thin gold paint mixed with clear gel for control. This design flatters medium-length nails and hands that look good with softer gradients. It also looks great on warm skin tones because the gold glaze blends naturally without turning brassy.
Editor's noteMix gold paint with a tiny amount of clear gel so it spreads smoothly without streaks.
Nude base, cured. Paint your opaque white French tips and cure. Apply gold glaze gel to the outer half of the white tip using a thin brush, then drag it slightly outward to fade; stop before it reaches the inner edge of the white. Cure and seal with a glossy top coat, using a second coat if the glaze looks dull. Clean the sides with a brush and alcohol so the gradient stays sharp at the nail edges.
Watch outAvoid full opacity gold — it kills the stained-glass look and turns it into a chunky overlay.