
1. Thin White French With Micro Gold Tips
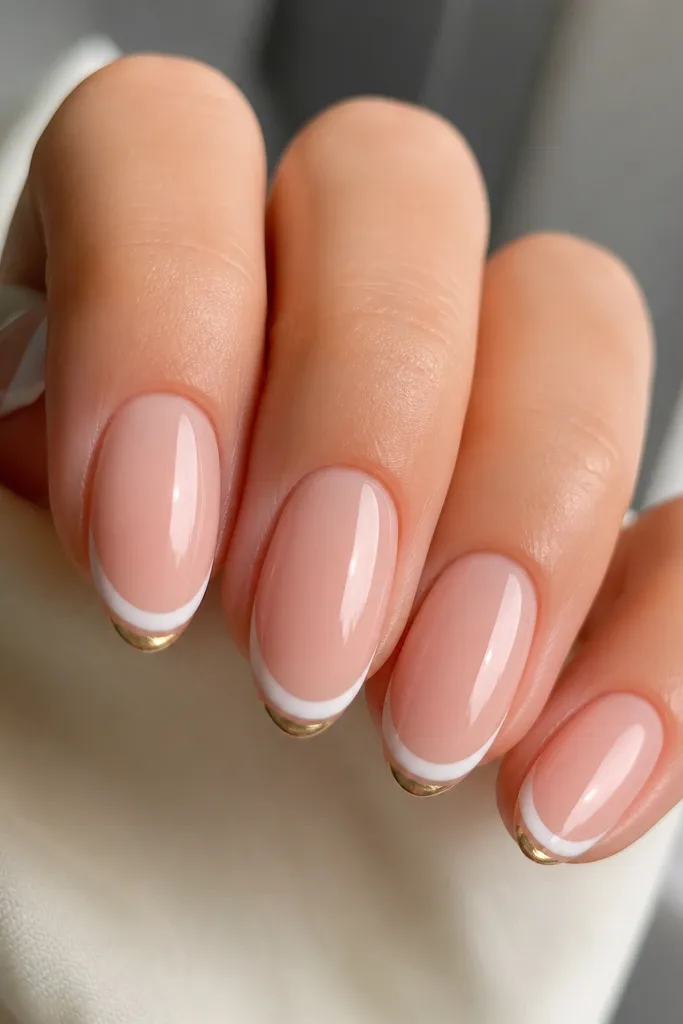
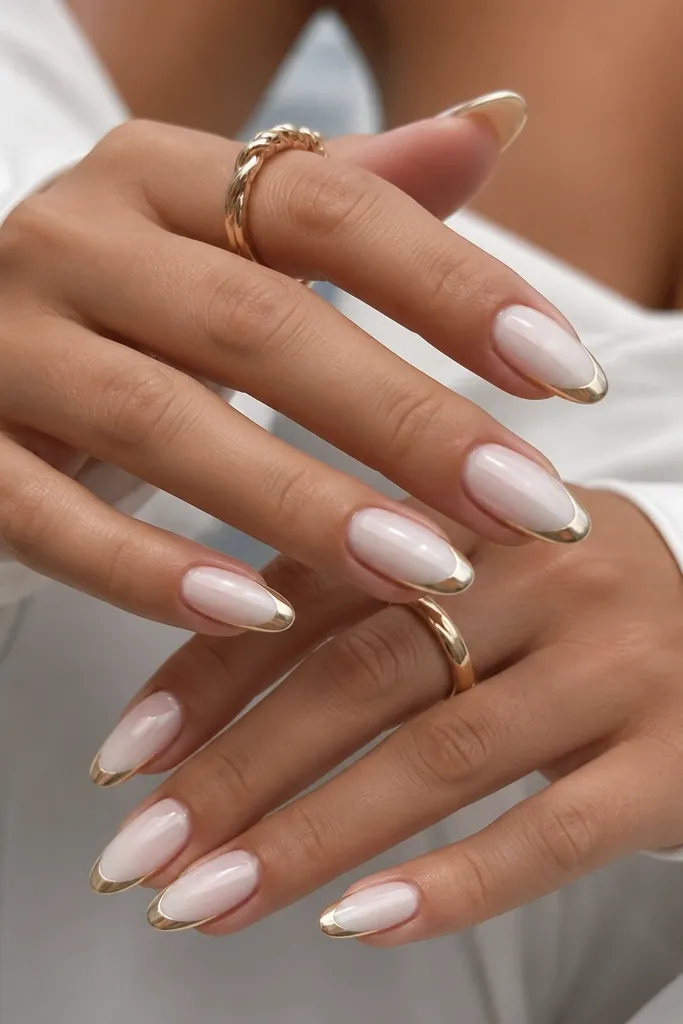
This one looks like you spent way more than you did because it keeps the white line tight and the gold super narrow. I do a sheer nude base so your nail bed still looks healthy, then I paint a thin French in opaque white - no thick smile lines. The micro gold band sits only on the far tip edge, so it stays bright even when the manicure grows. It flatters most skin tones because the nude base blends, and it's especially pretty on hands that have longer fingers since the almond shape already frames the tip.
Start by shaping your almonds and pushing back cuticles, then apply a sheer nude base coat and cure. Paint a thin French line with a striping brush, leaving a clean gap between the white and the nude; cure again. Press a tiny strip of gold foil or apply gold gel only at the very tip edge, then lightly drag the brush to keep it straight. Finally, seal with a glossy top coat in two thin layers to lock the gold down.
Editor's noteIf your French line wobbles, use a strip of painter's tape as a guide for the first nail, then repeat the angle on the rest.
Watch outDon't make the French too wide - wide white tips make the gold look like a sticker.
2. Half-Moon Cuticle White With Gold Foil Crescent
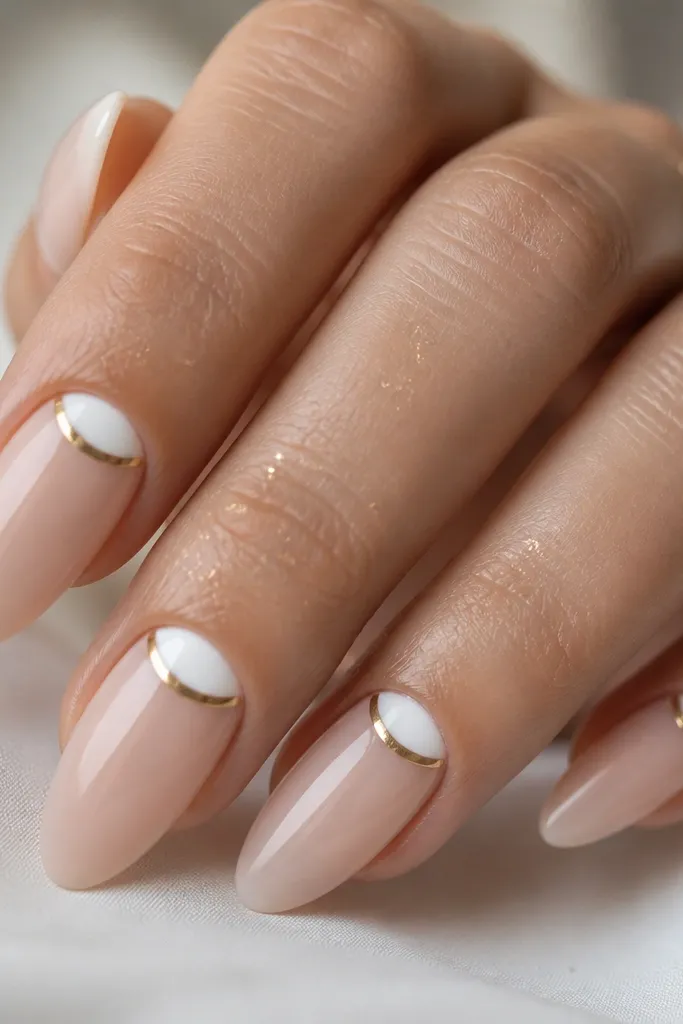
Half-moon designs look neat because they follow your nail's natural curve. I paint a compact white crescent near the cuticle, then add a gold foil crescent right along the edge of the white so it looks like jewelry. The gold placement is tight - it doesn't spread down the nail, so it still looks classy after a few weeks of growth. This works on shorter almond too, because the accent is at the base where regrowth is least noticeable.
Start with a sheer nude base and cure. Use a small detail brush to paint a half-moon white at the cuticle, leaving the center of the nail sheer. Press a small piece of gold foil into the top edge of the half-moon, using tweezers, then trim any overhang with a file. Seal with a glossy top coat, focusing on the cuticle area so the foil doesn't lift.
Editor's noteFor super clean edges, wipe the nail brush with alcohol before you touch the cuticle line.
Watch outAvoid making the half-moon too large - big cuticle shapes can look heavy and crowd the nail bed.
3. White Marble Swirl Over Nude With Gold Vein
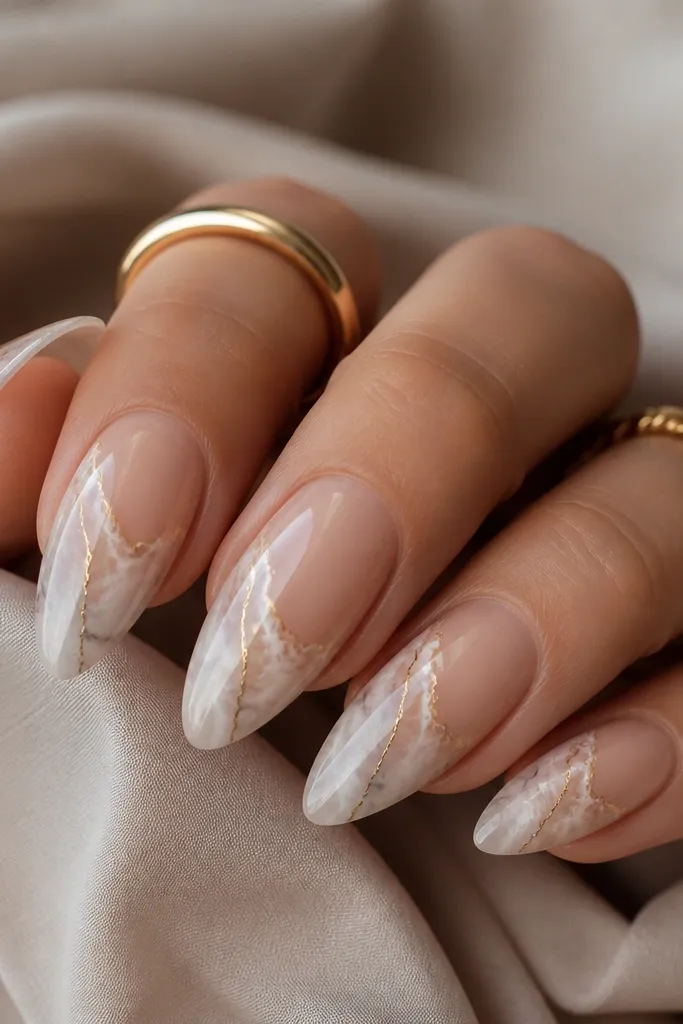
Marble looks fancy without needing a lot of drawing skill because the pattern is organic. I keep the base nude so the white marble doesn't turn chalky, then I add a single gold "vein" line instead of sprinkling gold everywhere. That one gold line makes it read as high-end, like a slab of stone with a metallic crack. It flatters warm and neutral skin tones because the nude base smooths the contrast, and it looks good on both short and medium almond.
Apply a nude base and cure. Sponge or brush a semi-opaque white for the marble, then add a second lighter white over it to create movement; cure. With a striping brush, draw one thin gold line along the strongest swirl, then add a tiny second line only if it needs balancing near the tip. Finish with a glossy top coat so the marble looks wet and dimensional.
Editor's noteUse a white that dries slightly thicker than watery nail polish - it feathers better and doesn't run.
Watch outDon't add multiple gold veins - three or more lines makes it look like broken foil instead of marble.
4. Gold Chrome Half-Glaze Over White Base
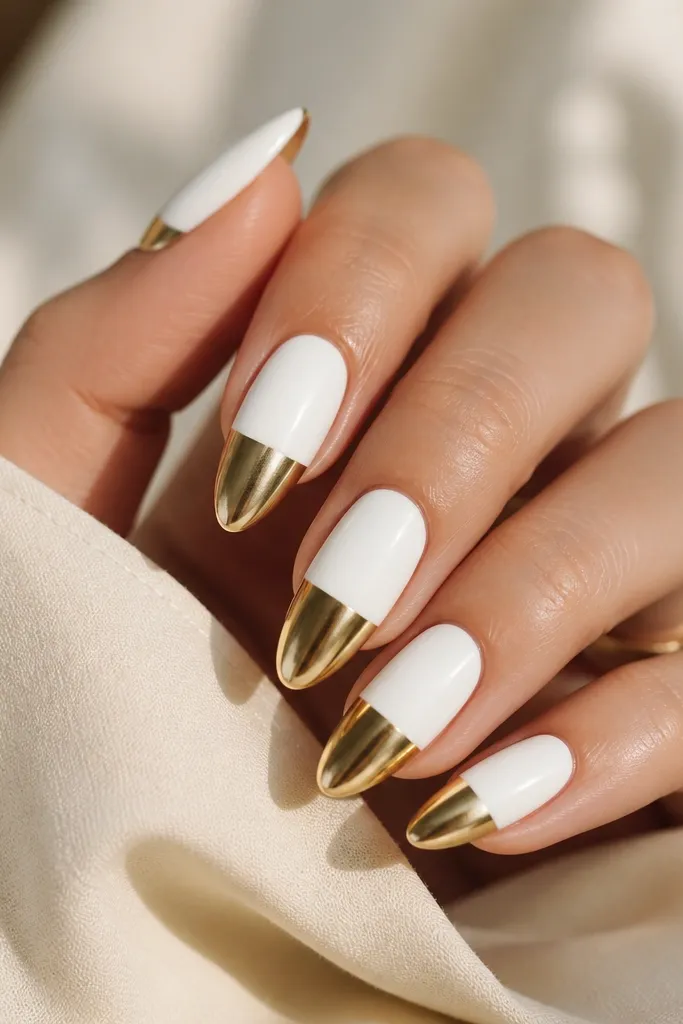
This is the "simple glam" version of a full chrome look. The white base stays opaque and crisp, and the gold chrome only covers the lower half, which makes the gold feel intentional instead of loud. I finish the white area with a satin top coat and keep the chrome glossy, so you get contrast without adding extra art. It's flattering on hands with slightly wider nail beds because the chrome band gives a long, horizontal visual line that narrows the shape.
Start by applying and curing a full opaque white gel or polish base. Seal it with a thin layer of base coat and cure if needed for your system. Apply gold chrome powder only to the lower half using a small eyeshadow applicator, then buff lightly so it stays smooth. Finish with top coat: satin on the white half, glossy on the gold half, keeping the boundary crisp.
Editor's noteIf chrome looks patchy, buff again with a gentle foam block before you seal.
Watch outAvoid putting chrome too close to the cuticle - it can look like a grown-out stain.
5. White Layered Bow Tip With Gold Accent Dot
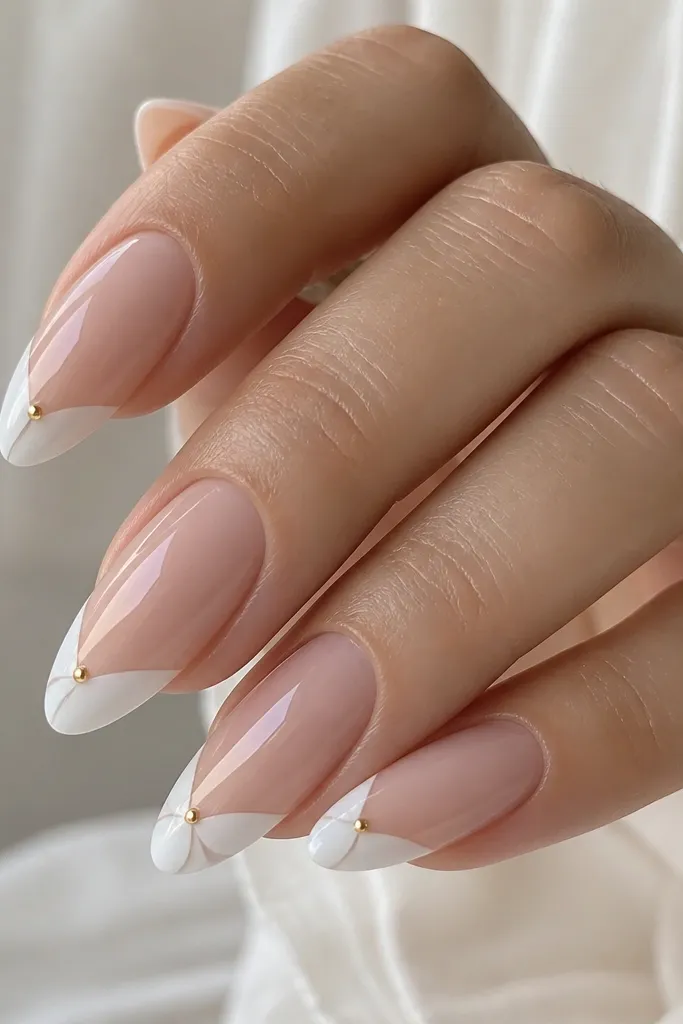
This one reads cute but still grown-up because the gold is tiny. I build a white "bow" only on the tip area, not across the whole nail, so your nail still looks long. The gold accent dot makes it sparkle without taking over the design. It flatters fair and medium skin tones because the nude base keeps everything soft, and the white bow gives a clean focal point that looks great on photos.
Apply a nude base and cure. Paint a thin white tip line first, then use a dotting tool to place two small white curved shapes like bow wings. Add a tiny second layer so the bow looks raised, curing each layer if you're using gel. Place one gold dot at the bow center with gold gel or a metallic paint pen, cure, then seal with glossy top coat.
Editor's noteUse a dotting tool with a smaller tip than you think you need - it keeps the bow from getting bulky.
Watch outSkip a thick bow outline - thick white makes it look like nail art sticker residue.
6. Diagonal White Sweep With Gold Side Rail
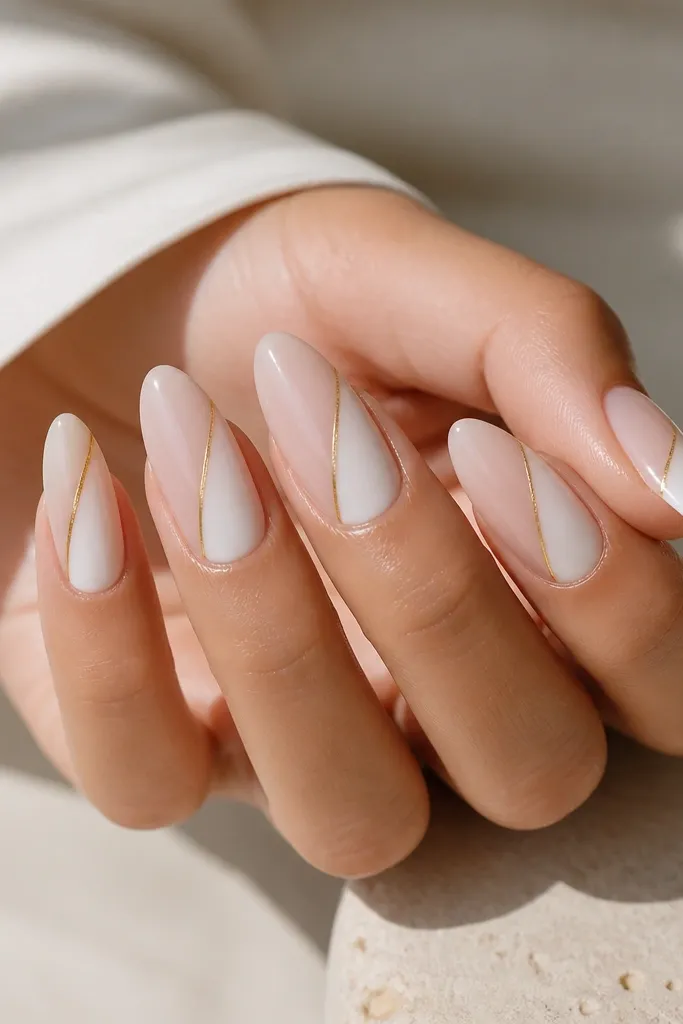
Diagonal lines make nails look longer because your eye follows the slant. I paint a bold diagonal white sweep that still leaves some nude visible, then I add a thin gold rail line right along one edge for a "tailored" look. This is a great choice for people who don't want lots of tiny details - it looks graphic and clean. It works on any skin tone because the nude base is the anchor, and it looks especially good with long almond since the diagonal has room to breathe.
Start with a nude base and cure. Use a striping brush to draw the diagonal edge first, then fill the sweep with opaque white, keeping the edges sharp. Cure, then apply gold gel on only one side of the diagonal edge with a liner brush - keep the line about the width of a hair. Seal with glossy top coat, and run the brush lightly over the gold line so it doesn't snag.
Editor's noteTape a thin strip at the diagonal angle on your first nail, then use that nail as your template for the rest.
Watch outAvoid painting freehand without a boundary - sloppy diagonals make the gold rail look crooked.
7. White Half-Tip With Gold Foil Splash
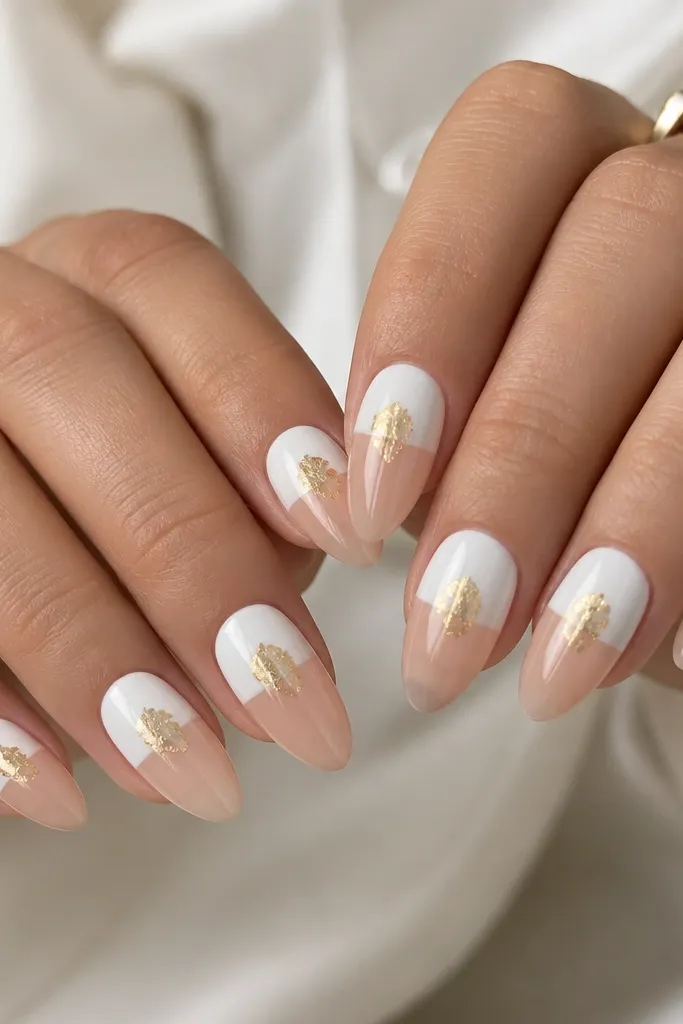
This look is simple because the base pattern is just two blocks: nude and white. The gold foil splash is the twist, and it stays elegant because it's small and irregular like real paint splatter. I place it slightly off-center so it looks natural, not like a sticker placed by measuring. It flatters nearly everyone because the nude keeps it breathable and the white tip brightens the overall look. Wear it to events when you want something noticeable but not busy.
Apply nude base and cure. Paint the top half of the nail tip area in opaque white, using a straight brush to keep the boundary clean; cure. Press a small piece of gold foil onto the white area, then tap off excess so it looks like a splash. Trim the edges with a file so it's flush, then seal with glossy top coat.
Editor's notePress foil with the flat end of tweezers - it gives better control than fingers.
Watch outDon't cover the whole white tip in foil - too much gold makes it look costume-y.
8. White Pearlized Base With Gold Outline French
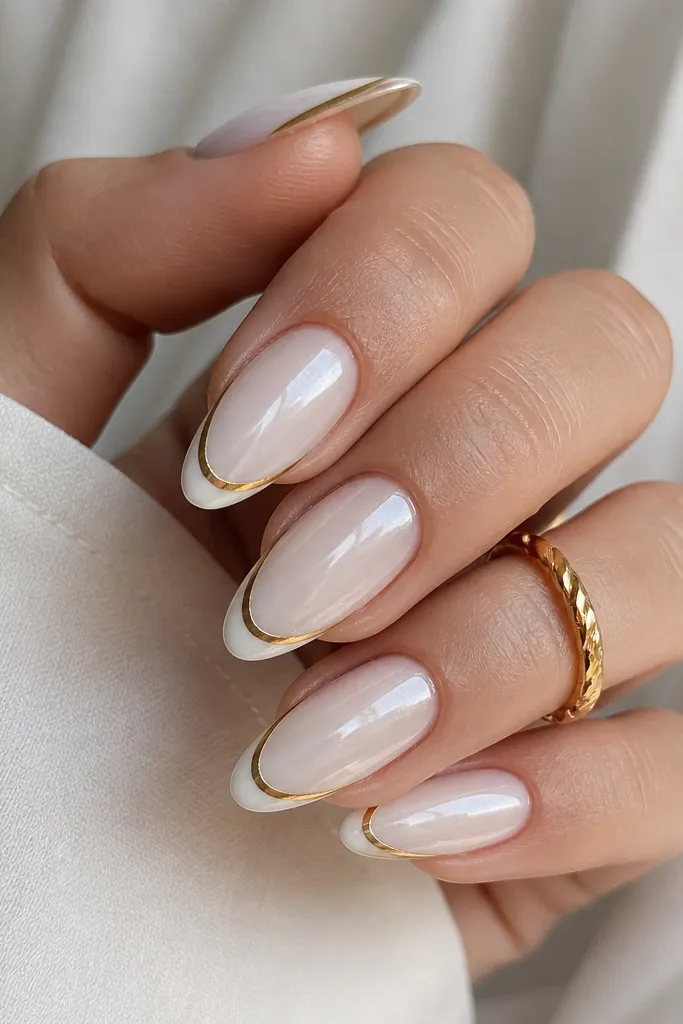
Pearlized white makes the set feel soft and expensive without needing extra art. I use a milky pearl white as the base so it reflects light like a candle - not flat like regular white. Then I add a gold outline around the French shape, keeping the gold line thin and smooth. This gives you the glamour of gold without losing the clean look of a French. It's flattering on hands that get dry because pearl finishes hide tiny texture better than full mirror chrome.
Start with a pearlized milky white base and cure fully. If your pearl polish needs two coats, do two and cure each. Outline the French tip with a liner brush and gold gel, tracing the smile line you like, then cure. Finish with a pearl-safe top coat; if your top coat turns pearl dull, use a normal glossy top coat and keep it thin.
Editor's notePractice the French smile line on one nail with a strip of tape before you commit to gold.
Watch outAvoid thick gold borders - thick lines look heavy and hide the French shape.
9. Matte White Nails With Glossy Gold Leaf Tips
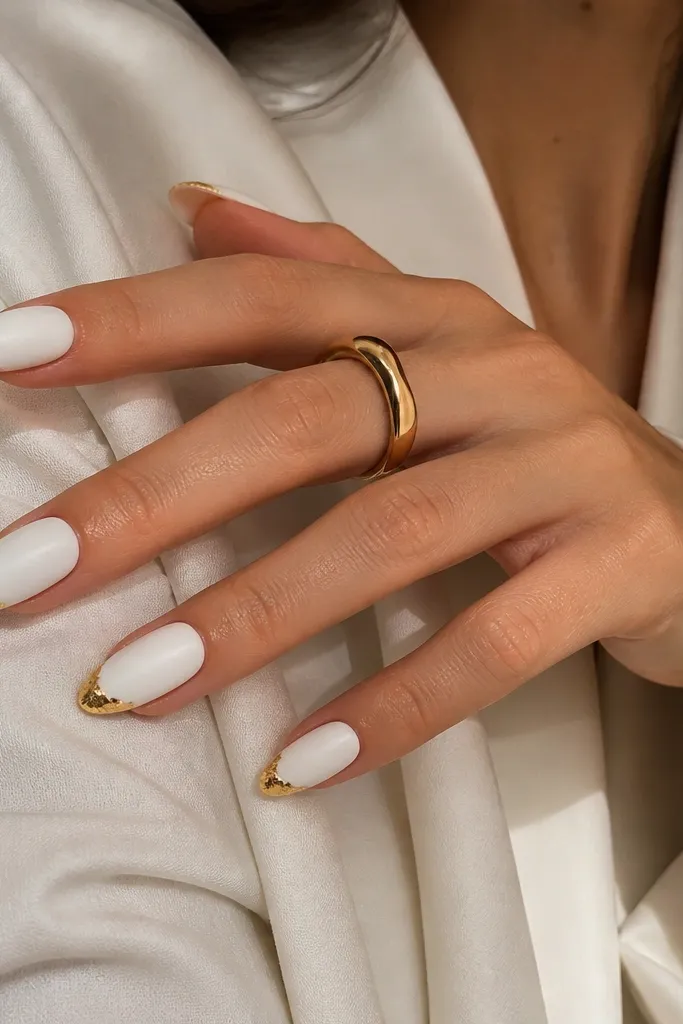
Matte white makes gold leaf look like real metal because the contrast is instant. I keep the white fully opaque and matte, then press small gold leaf flakes only at the tip, not down the sides. The leaf is irregular, so it looks organic and expensive. This set is perfect for colder months and for outfits with black, cream, or gray, because the matte texture reads luxe. It also flatters short almond since the matte base hides small imperfections.
Apply opaque white gel and cure. Seal with a matte top coat across the whole nail and cure. Add gold leaf flakes to the tip area using a leaf adhesive or tacky gel - press lightly so the flakes stick in thin patches. Seal with glossy top coat only over the gold leaf area so the gold stays reflective while the rest stays matte.
Editor's noteIf leaf won't stick, dab adhesive with a toothpick - less spread means better placement.
Watch outAvoid sealing matte top coat over gold leaf without a glossy layer - it dulls the sparkle.
10. White Swirl Outline With Gold Dot Corners
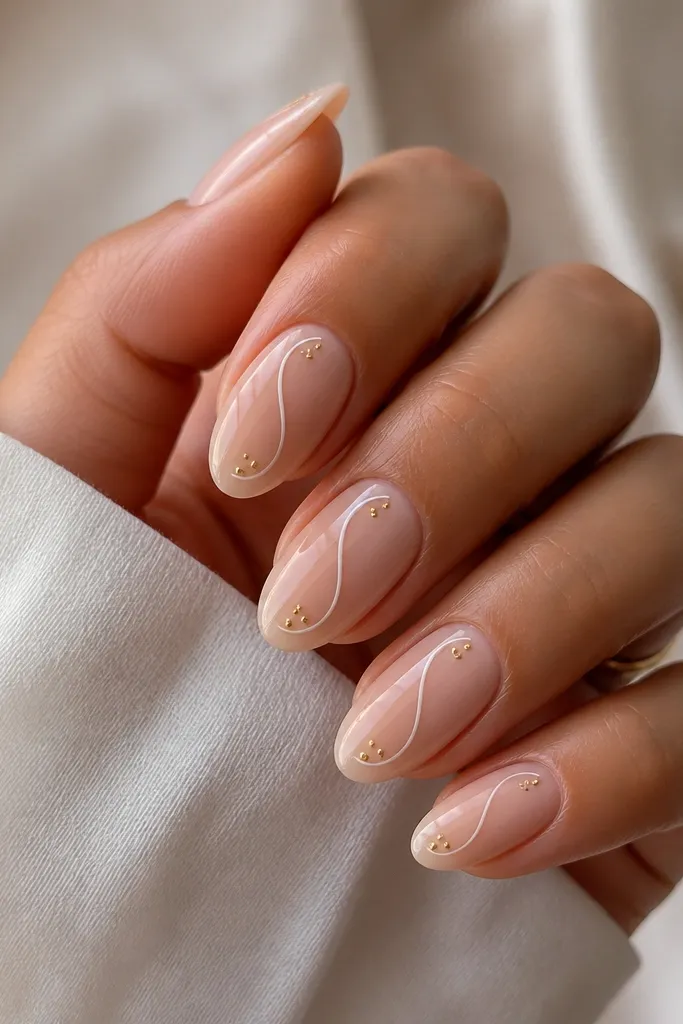
This one is for people who like art but don't want full nail coverage. The trick is using a thin white outline instead of filling large white shapes, then placing gold dots at two corners so the design feels balanced. I like it on medium almond because the swirl has enough length to look elegant. It flatters cool and neutral skin tones because the nude base keeps the palette light, and the gold dots add warmth without overpowering.
Start with a nude base and cure. Use a thin liner brush to draw a white swirl in the center of the nail, leaving space around it so the nude shows through. Place two gold dots with gold gel - one near the swirl's top curve and one near the bottom curve. Cure, then apply glossy top coat carefully over the lines to prevent smearing.
Editor's noteUse a striper that's slightly smaller than you think - thin lines are the whole point here.
Watch outDon't thicken the white swirl - thick lines look like a sticker outline.
11. White Ombre Fade Into Gold Glitter Tip
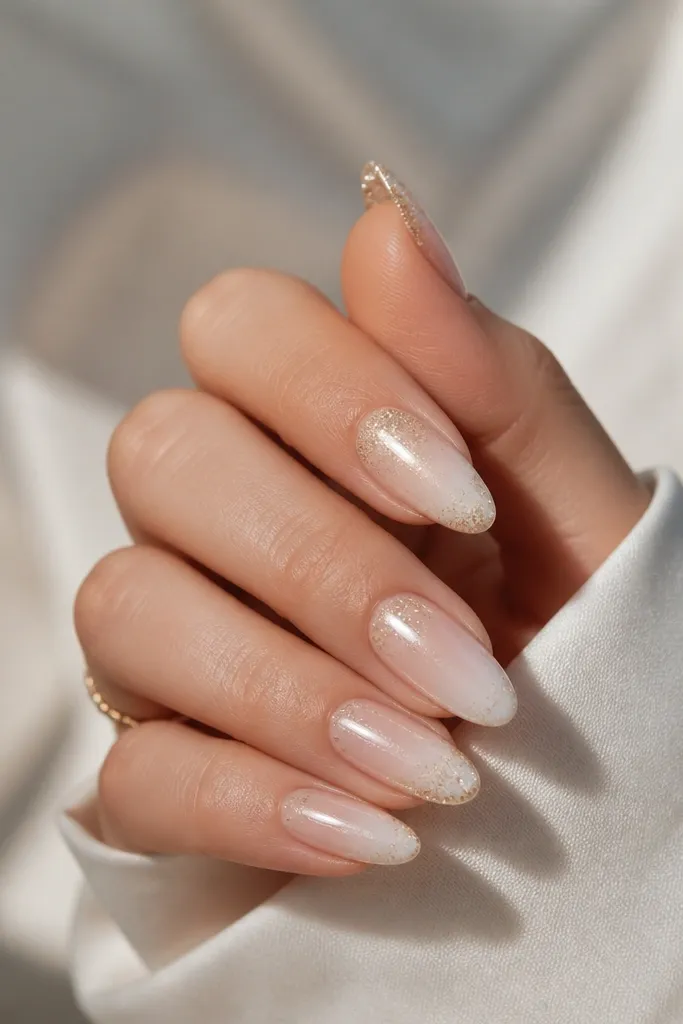
Ombre is where white and gold can look extra seamless if you blend the transition. I start with a nude base, then airbrush or sponge a soft white that fades toward the tips. The gold glitter is only at the tip, packed densely at the edge, then feathered backward so it doesn't look like one block. This set looks amazing for nights out because it catches light in motion, but it still reads clean because the glitter is controlled. It flatters hands with shorter nails too since the ombre creates a longer visual line.
Apply a nude base and cure. Sponge or airbrush a white ombre from mid-nail toward the tip, keeping the center lighter and the tip more opaque; cure. Dab gold glitter gel at the tip edge and feather it slightly into the white with a clean brush; cure. Seal with glossy top coat in two layers so the glitter doesn't feel gritty.
Editor's noteBefore curing, wipe the brush edge on a paper towel so you don't drag glitter into the white too far.
Watch outAvoid a hard glitter edge - it makes the manicure look like it's grown out unevenly.
12. White Pearl French With Gold Center Stripe
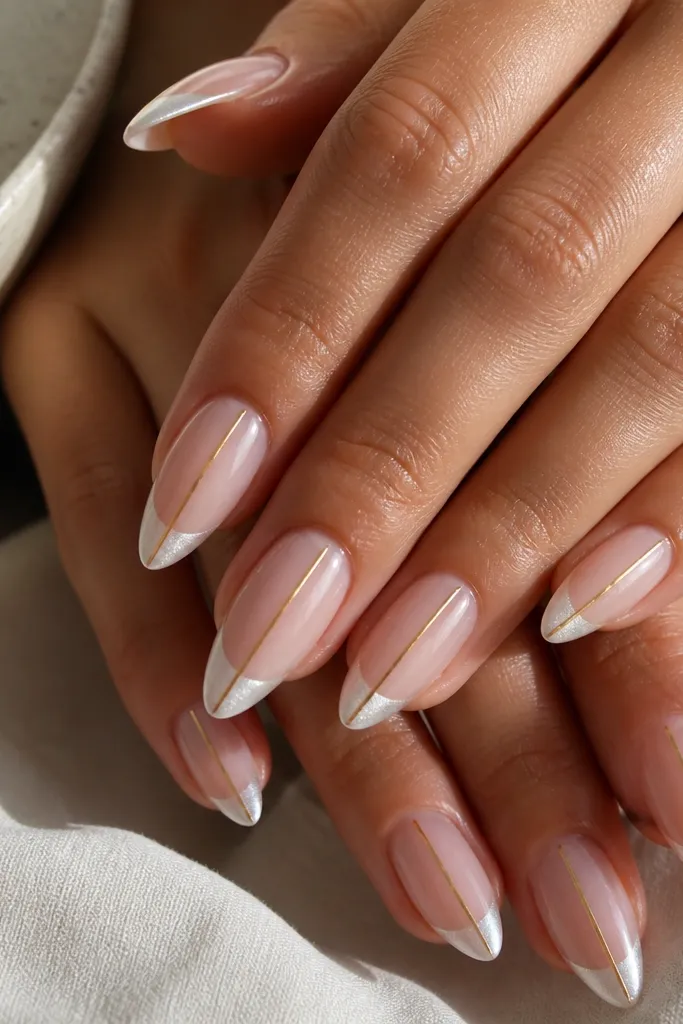
Center stripes are my go-to when I want almond nails to look extra long and tidy. This design uses pearl French tips for the white, then adds one thin gold stripe in the middle so the gold reads like a highlight rather than decoration. The result feels "simple glam" because it's controlled and graphic. It works on all skin tones because the nude base keeps the look light, and the gold stripe frames the center of the nail bed. If your nails are slightly uneven, a center stripe draws attention to shape instead of surface flaws.
Start with a sheer nude base and cure. Paint a pearlized milky white French tip, keeping the smile line narrow; cure. Draw one thin gold stripe straight down the center using a liner brush - start just above the French line so it looks seamless. Cure and apply glossy top coat, making sure the stripe is fully sealed so it doesn't snag.
Editor's noteUse a nail guide strip or the edge of a credit card to keep the stripe perfectly centered on the first nail.
Watch outAvoid starting the stripe too low near the cuticle - it can look like a crack in photos.
13. White Studded Triangle Near Tip With Gold Outline
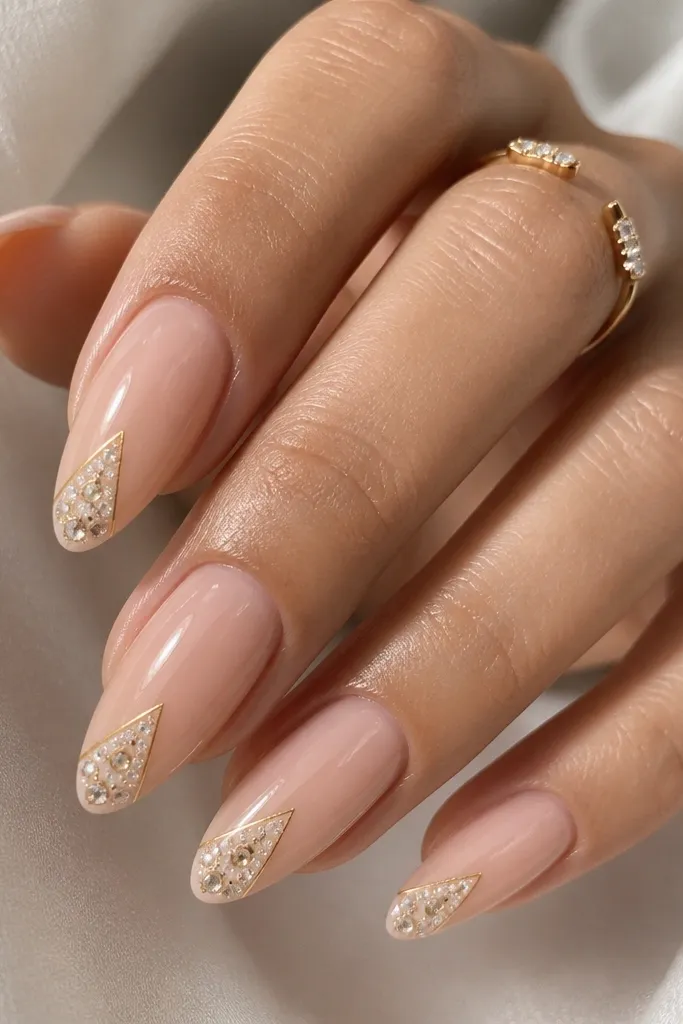
Triangles look modern, and this one stays "simple" because it's small and placed near the tip. I build a white triangle using a gel that holds studs well, then outline it with a thin gold line so it looks intentional. The studs are micro-sized, not big rhinestones, so it feels classy instead of party. This flatters medium to deep skin tones because the nude base makes the white triangle pop, and the gold outline warms everything up. It's great for weddings and holiday dinners when you want sparkle that won't scream.
Apply nude base and cure. Place a small white triangle near the tip using a striping brush, then cure. Use a dotting tool to pick up micro studs and press them into the tacky white gel; cure again. Outline the triangle with thin gold gel using a fine liner brush, then seal with glossy top coat, avoiding too much thickness over the studs.
Editor's notePick studs that are the same size as your gold line width so the triangle looks balanced.
Watch outDon't use large rhinestones - they lift and catch on sleeves fast.
14. White Lace-Look Negative Space With Gold Chain Link
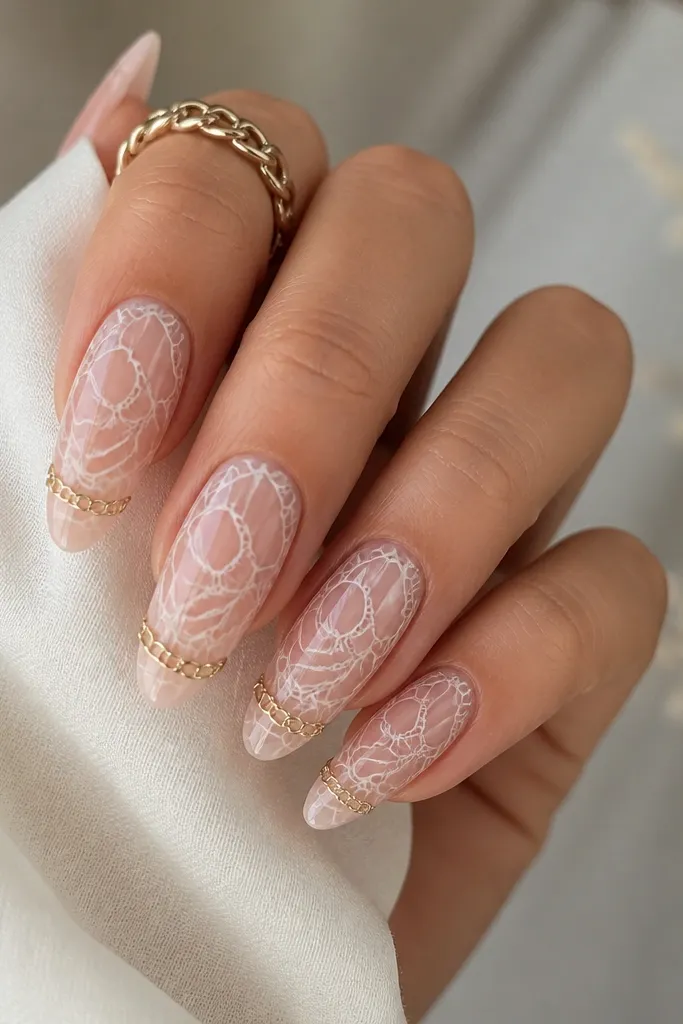
Lace-look nails work because the design uses negative space instead of filling the whole nail with white. I paint thin white "lace" lines in a web pattern, then add one gold chain link detail near the tip for that jewelry feel. The gold is limited to one motif so it stays chic. This is a flattering choice for hands that have longer fingers because the lace spreads nicely along the almond taper. It also looks good on fair skin because the nude base keeps it soft.
Start with a sheer nude base and cure. Use a stamping plate or freehand thin liner to create lace lines across the nail while leaving gaps of nude between them. Add a small gold chain link near the tip using gold nail chain or a tiny chain decal, then seal around it with gold gel. Cure and finish with glossy top coat in a thin layer to lock the lace lines without flooding the pattern.
Editor's noteIf you freehand the lace, rotate the nail under the light and keep your lines all going in one direction for a cleaner look.
Watch outAvoid thick white lace filling - it kills the airy lace effect.
15. White Glossy Base With Gold Foil Side Accent Only
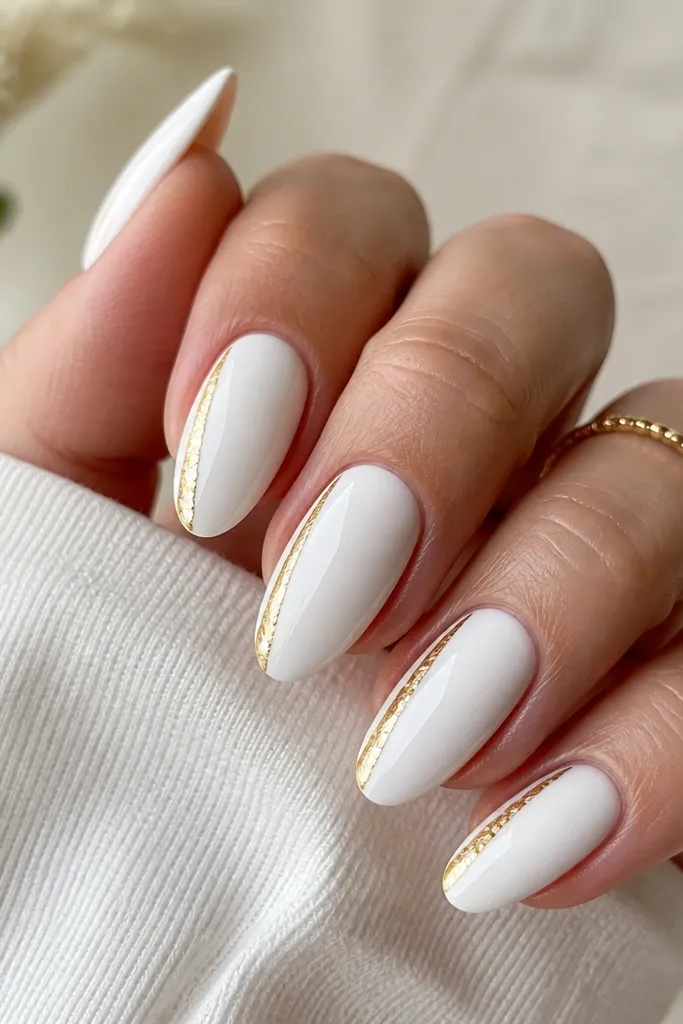
This is the most flattering "minimal glam" version because it guides the eye down one side. I paint a fully opaque glossy white, then place gold foil only on one lateral side - just a narrow strip. It makes nails look slimmer and longer, especially if your nails widen near the free edge. The gold stays bright because it's not competing with other patterns. This look is perfect for everyday and it also photographs well under office lighting.
Apply opaque white gel and cure, then wipe any tack layer if your system needs it. Cut a narrow strip of gold foil and press it vertically along one side wall, keeping it centered on that side and leaving a clean margin from the cuticle. Trim overhang and file the edge so it doesn't lift. Seal with glossy top coat, using a slightly thicker top coat over the foil strip to smooth it down.
Editor's noteUse a foil piece that's long enough to cover the tip; stopping halfway makes it look accidental.
Watch outAvoid placing gold on both sides - it widens the nail and breaks the slimming effect.