1. Classic white base with full gold mirror tips
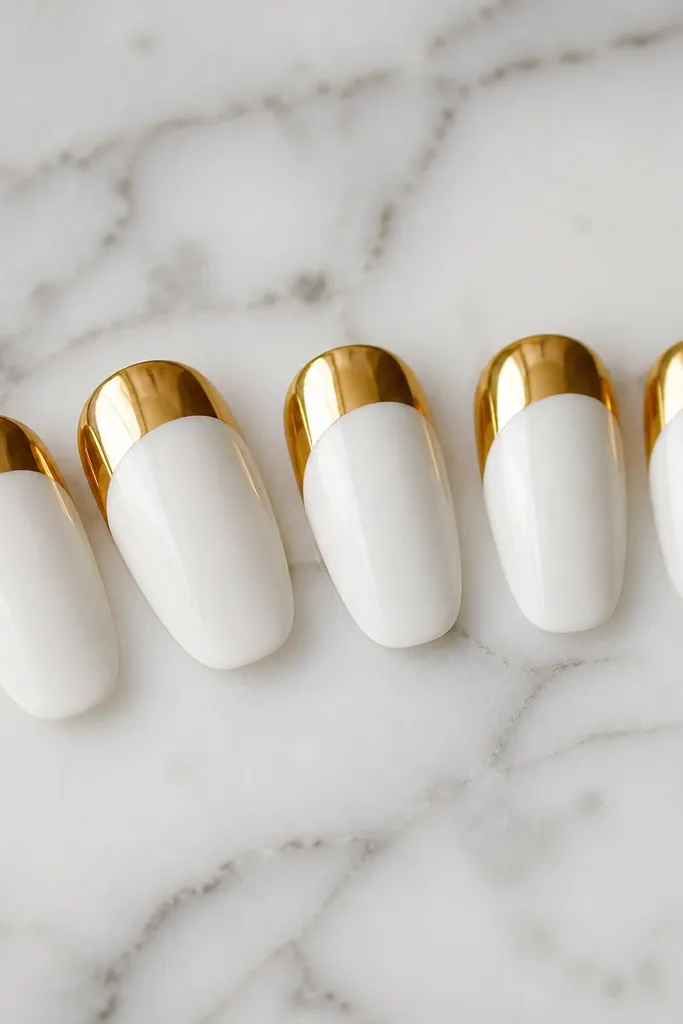
This is the look I go to when I want 'expensive but simple.' The white reads cool and clean, and the gold mirror tips throw a bright flash when you move your hand. It flatters short to medium nails because the gold starts high enough to lengthen without covering the whole nail. On warm or olive skin tones, the gold pops even more against the cool white. The styling principle is contrast control: you keep the white mostly intact and let the gold do the glow.
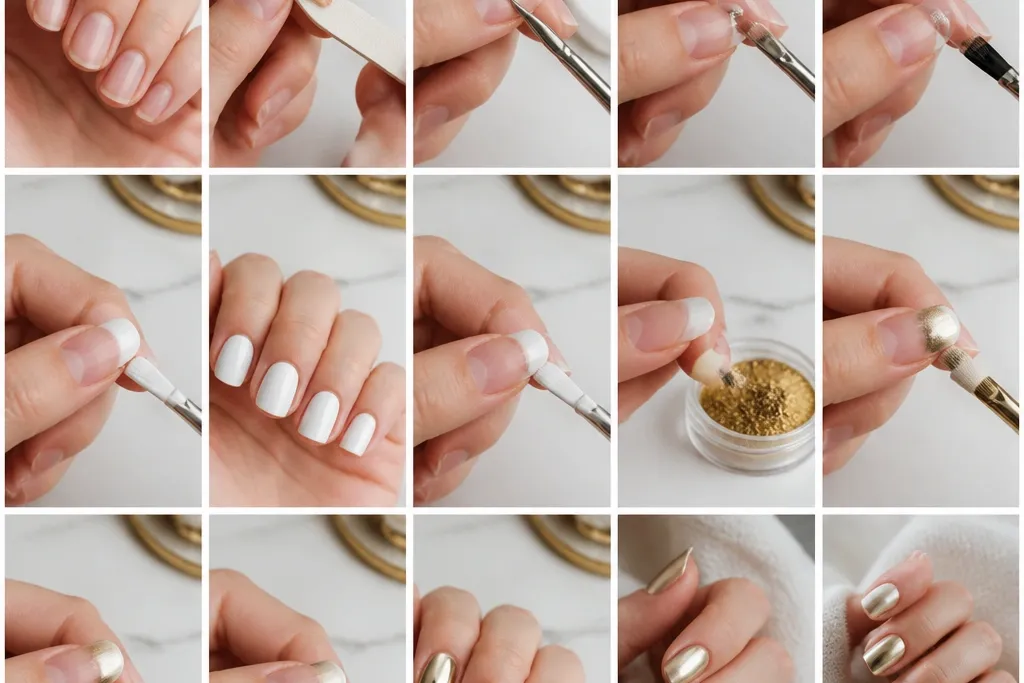
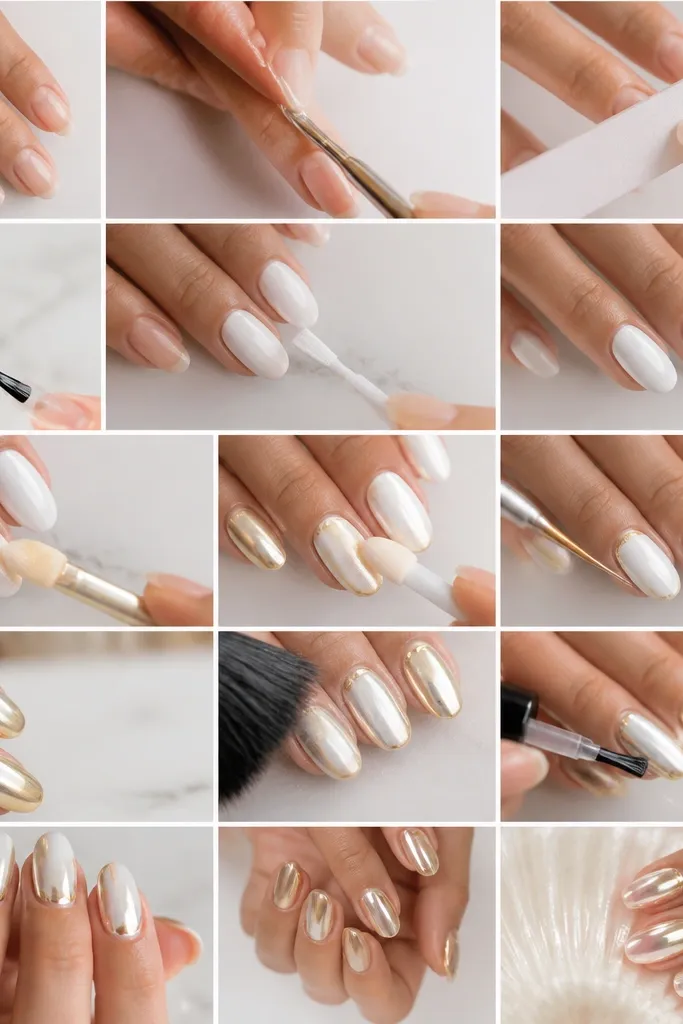
Start by filing the nail to a smooth oval and pushing back cuticles gently. Apply a thin base coat, cure, then add two thin coats of cool white gel, curing each coat fully and leveling the last coat with a careful brush pass. Create a chrome gel layer only on the tip area where you want the gold, leaving about 1 mm space from the cuticle and sidewalls. After curing the chrome gel to the tacky stage your product requires, rub loose gold chrome onto the tips, then brush off excess. Seal with a non-wipe glossy top coat over the gold only, cure fully, then wipe any remaining inhibition layer if your top coat needs it.
To keep the tip line razor-straight, mark the curve lightly with a white pencil on a piece of paper, then match the curve as you apply chrome gel.
Don’t use a thick chrome gel layer or the gold will look bumpy instead of mirror.
2. White half-moon with gold chrome cuticle ring
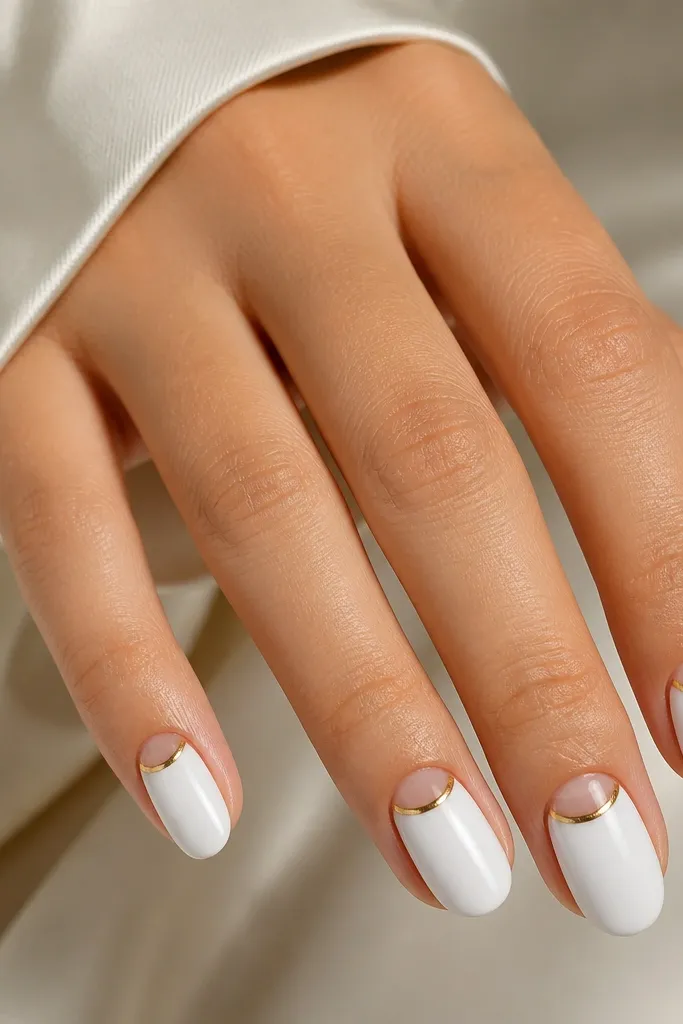
Prep and base coat first, then paint two thin coats of cool white gel. Use a half-moon guide sticker or a small curved stamper to protect the negative space at the cuticle area. Apply chrome gel in a thin band around the half-moon edge, staying off the protected negative space and leaving about 0.5 mm from the sidewalls. Cure to tacky stage, then press gold chrome powder into the band with a small foam applicator or your chrome applicator puff. Brush away excess, remove the half-moon protection, then seal with glossy top coat, feathering the top coat over the ring without flooding it.
This design looks neat even when your cuticle growth is visible because the gold ring hides the line where nails grow out. The half-moon shape balances the nail, and the gold chrome ring makes it feel jewelry-like instead of flat. It suits medium almond nails best, but I’ve done it on short squares too with a tighter ring. If your skin tone is fair, the contrast looks crisp; on deeper skin tones it still pops because the white is cool and opaque. The principle here is framing: you’re outlining a focal point rather than covering everything.
Watch outAvoid getting chrome gel onto the negative space — it will blur the half-moon edge.
Editor's noteIf your half-moon keeps getting messy, use a peel-off gel barrier around the cuticle zone and remove it after curing white.
3. White marble base with gold chrome veining
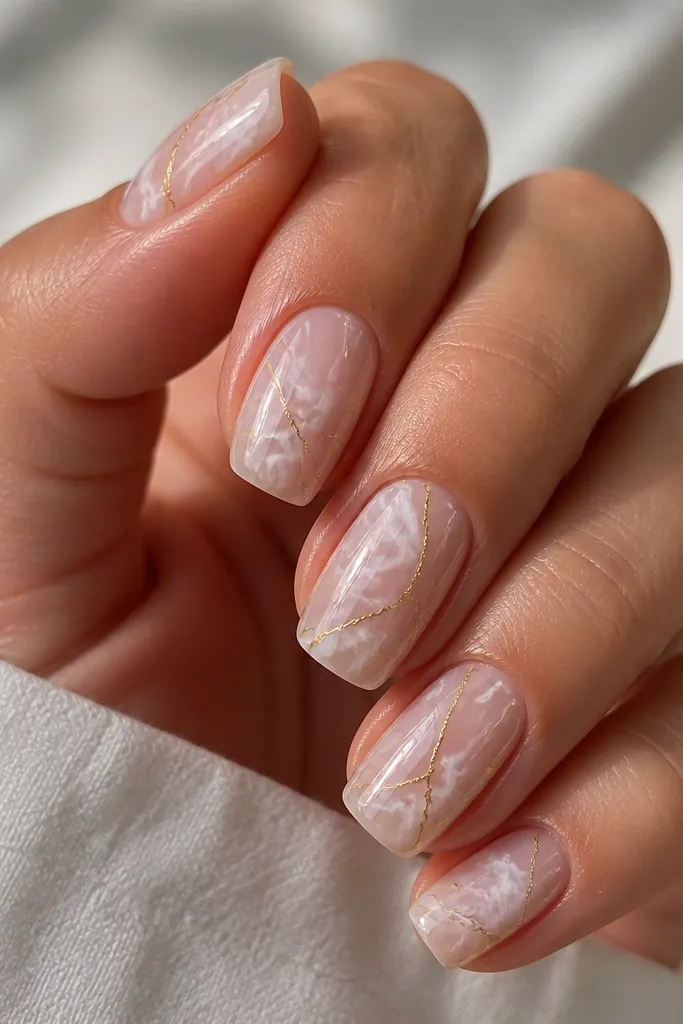
Start with two coats of cool white gel, fully cured and leveled. Create marble by dropping a thin white gel or white striping gel onto the nail and swirling with a fine liner brush; keep your lines semi-transparent in places so it looks like stone. Cure, then apply chrome gel only along the chosen vein lines (you pick 2-3 per nail) so the gold stays like accents. Cure to tacky stage, rub gold chrome into the vein gel, then gently buff off excess with a soft brush. Finish with glossy top coat over the whole nail, curing fully so the marble and gold lock together.
Marble works because each nail is slightly different, but the white-gold combo keeps it cohesive. The gold veining looks like metal inlaid into stone, and it catches light without needing heavy 3D studs. This suits long almond nails because marble looks more natural with more surface to break up the pattern. On any skin tone, the cool white keeps the marble from turning yellow or dingy. The principle is controlled chaos: you vary the marble but keep the gold lines narrow and intentional.
Watch outDon’t paint thick marble layers — the chrome will sit on top and look raised.
Editor's noteUse a liner brush with a sharp tip and wipe it on a lint-free pad between nails to keep the gold lines clean.
4. White gradient to gold chrome ombré tips
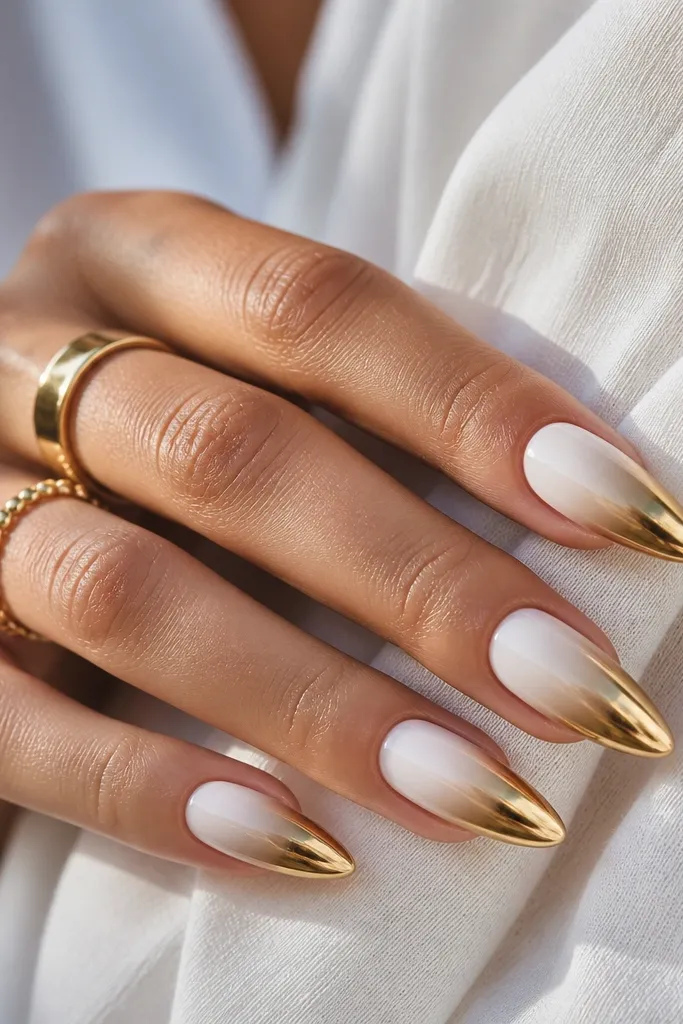
This is the most flattering version if your nails are short, because the gradient visually stretches the nail. The white starts opaque and cool, then softens into a warm gold shimmer that ends in mirror chrome. It looks good on all nail shapes, but it’s especially pretty on squoval because the fade follows the natural edge. Fair to medium skin tones read extra bright with the cool white, while deeper tones look luxe because the gold warms the contrast. The principle is blending: you’re creating a transition zone before the chrome becomes fully reflective.
Apply base coat and two thin coats of cool white gel, curing each. For the gradient, sponge a tiny amount of white gel or white glitter gel onto the lower half of the nail, then blend upward with a clean sponge so the center is softer. Next, brush chrome gel onto the tip third in a loose curve, then cure to the tacky stage. Rub gold chrome powder into the chrome gel area, focusing pressure near the tip end and using lighter pressure as you move upward to keep a fade. Seal with glossy top coat, using a thin layer so you don’t blur the gradient.
Practice the curve on a spare nail tip first — your hand learns the fade speed fast.
Avoid overloading chrome gel too high up the nail or you’ll lose the fade and it becomes a flat tip.
5. White base with gold chrome dotted confetti
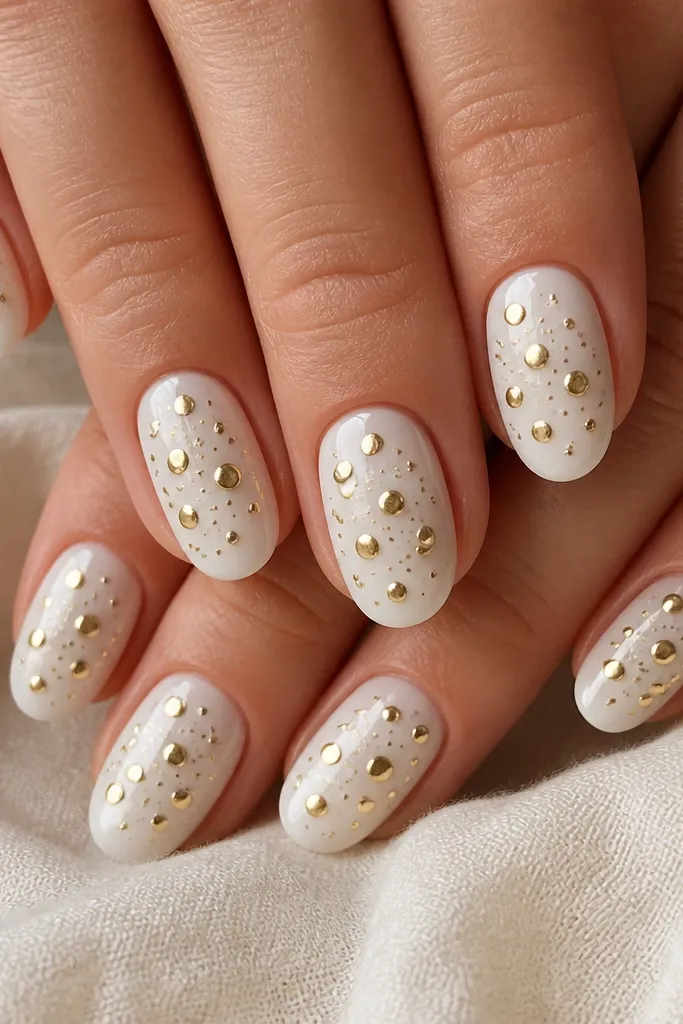
Confetti dots make the white and gold combo feel playful without turning into chunky glitter. Because the chrome dots are small, the manicure still looks clean for work or nights out. This design flatters short nails because dots give the eye movement without covering the whole surface. On all skin tones, the white keeps it bright and the gold adds warmth. The principle is spacing: you place dots where light hits the nail, not in a dense block.
Start with two cool white gel coats, level, and cure fully. Use a dotting tool dipped in chrome gel (or a thin clear gel) to place dots about 1-2 mm apart, leaving some breathing space near the cuticle. Cure to the tacky stage required by your chrome gel. Rub a small amount of gold chrome powder over the dots, then tap off excess so only the dot surfaces catch chrome. Finish with glossy top coat, but keep the brush gentle so you don’t smear the dots.
If your dots keep spreading, use a thicker chrome gel on the dot and cure longer so it grabs the powder.
Don’t cover the entire nail with chrome gel — confetti turns into a full chrome look.
6. White French tips with gold chrome outline
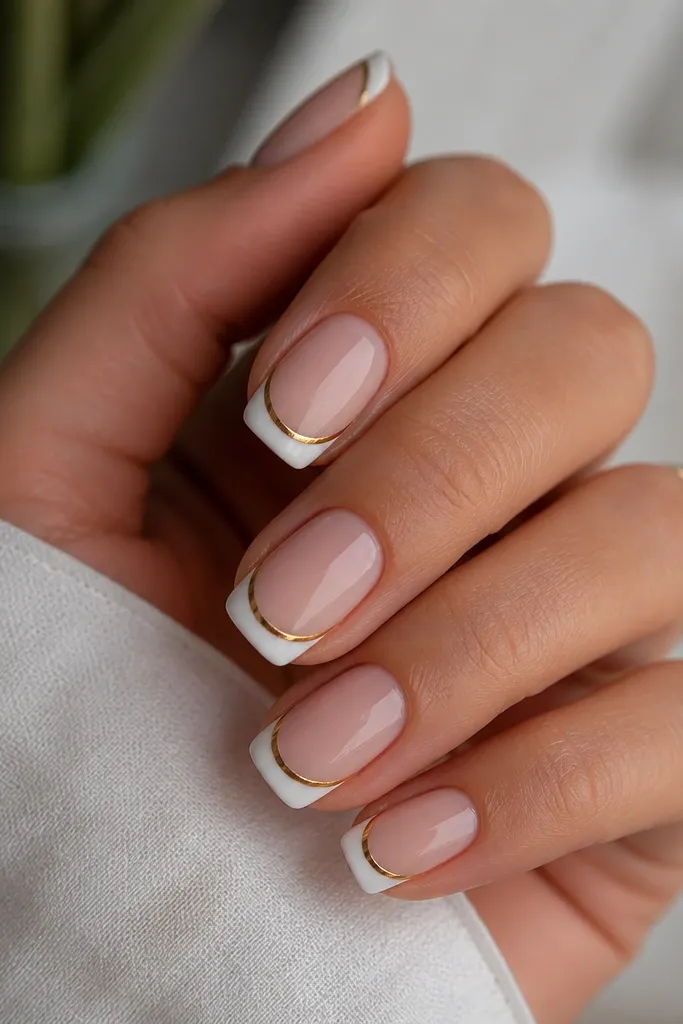
Prep and apply base coat, cure, then paint two cool white gel coats for the full nail. Create the French tip using a guide sticker or a French brush, keeping the tip thickness even and the smile line smooth. Cure the French tip. Now apply chrome gel only along the French tip edge, not across the tip surface — keep it like a border. Cure to tacky stage, rub gold chrome onto the border, then seal with glossy top coat across the whole nail.
This is the cleanest 'white nails but make them special' look. The French tip gives structure, and the gold outline adds that jewelry finish without needing heavy patterns. It works on short and medium nails because the gold line is thin and doesn’t crowd the nail. If you like understated glam, this one reads classy on any skin tone. The principle is line work: you’re emphasizing the smile curve rather than filling it.
Watch outAvoid thick gold border lines — they look like sloppy glitter instead of a crisp outline.
Editor's noteUse a striping brush to remove tiny stray chrome bits along the sidewalls before top coat.
7. Gold chrome leaf accents on white negative space
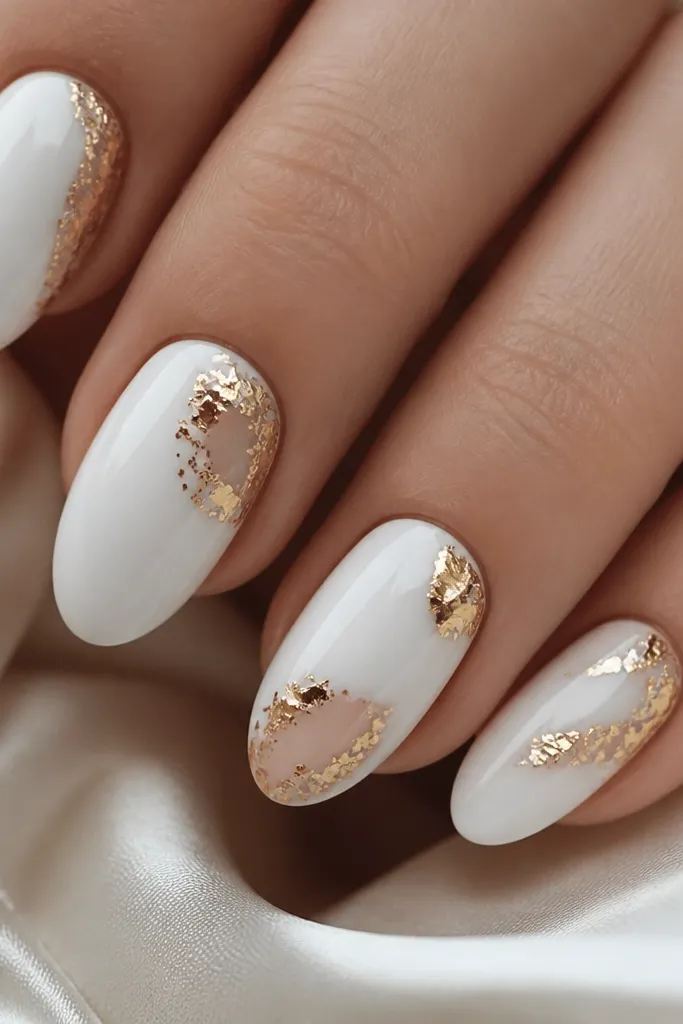
Leaf accents look expensive because you get movement — the gold isn’t a flat mirror, it breaks up light. The negative space keeps it modern, and the cool white keeps it fresh instead of dull. This suits medium almond and short oval nails because the panels balance the nail without making it look long. On fair skin, the negative space looks airy; on deeper skin, it makes the white feel intentional. The principle is contrast between solid white and crisp openings.
Apply base coat and two coats of cool white gel, curing each. Add negative space by using nail tape to mask small panels on the nail (about 2-3 mm wide) before you cure the final white coat. Apply chrome gel or leaf transfer adhesive to the masked panel edges where you want gold flake, curing to tacky stage if required. Press gold chrome leaf flakes onto the tacky areas, then rub lightly so they grab and remove excess with a soft brush. Remove tape, then seal with glossy top coat, keeping the top coat thin so the leaf texture stays defined.
If you’re using chrome leaf, press with a silicone tool, not your fingers — it keeps the pattern crisp.
Don’t stack more than one layer of leaf — it turns grainy and loses that sharp metallic look.
8. White and gold chrome diagonal stripe nail
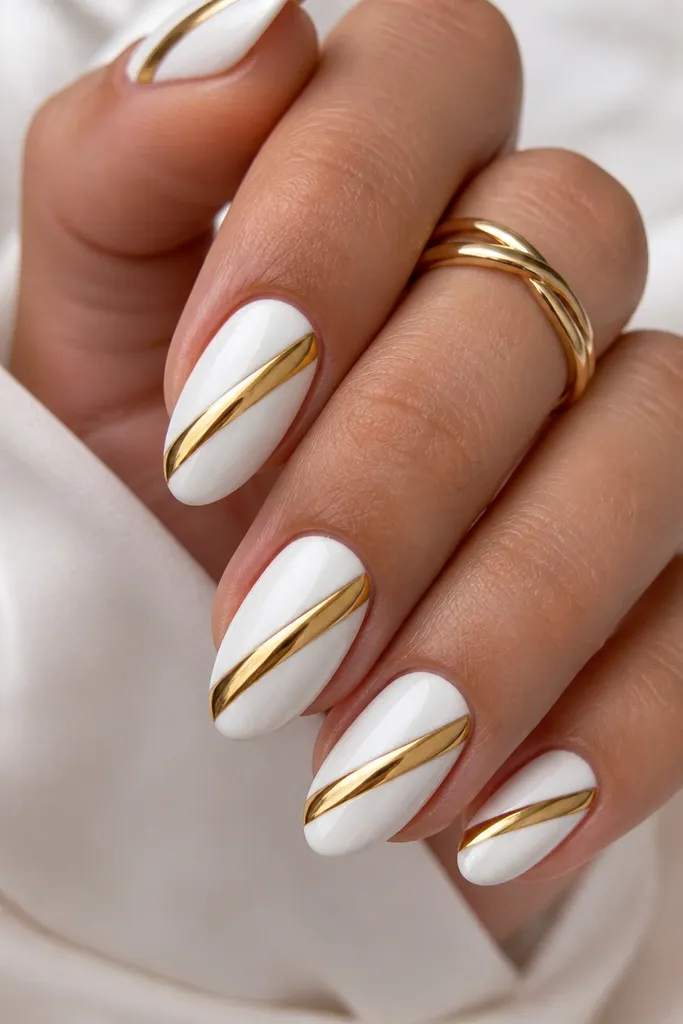
Start with base coat and two cool white gel coats, cure fully. Use nail striping tape or a thin diagonal guide sticker to map the stripe line; place it so the stripe starts about 1 mm from the sidewall and ends near the tip edge. Brush chrome gel along the taped line, remove tape carefully while gel is still wet or after it reaches the right tackiness per your product. Cure to tacky stage, rub gold chrome into the stripe, then brush off excess. Finish with glossy top coat, pulling the brush along the stripe direction to keep edges crisp.
Diagonal stripes make the nail look longer and slimmer because they cut across the surface. The gold chrome stripe gives a strong focal point without needing art on every nail. This works great for short nails because the stripe adds visual height; it also looks sharp on stiletto for a more dramatic vibe. It flatters all skin tones, especially when the white is cool and clean. The principle is one bold element: one diagonal stripe, no extra clutter.
Watch outAvoid moving the tape after you’ve applied chrome gel — it smears the edges.
Editor's noteIf your stripe looks fuzzy, shorten the stripe length slightly; sharp ends read more professional.
9. White base with gold chrome halo nails (two-tone ring)
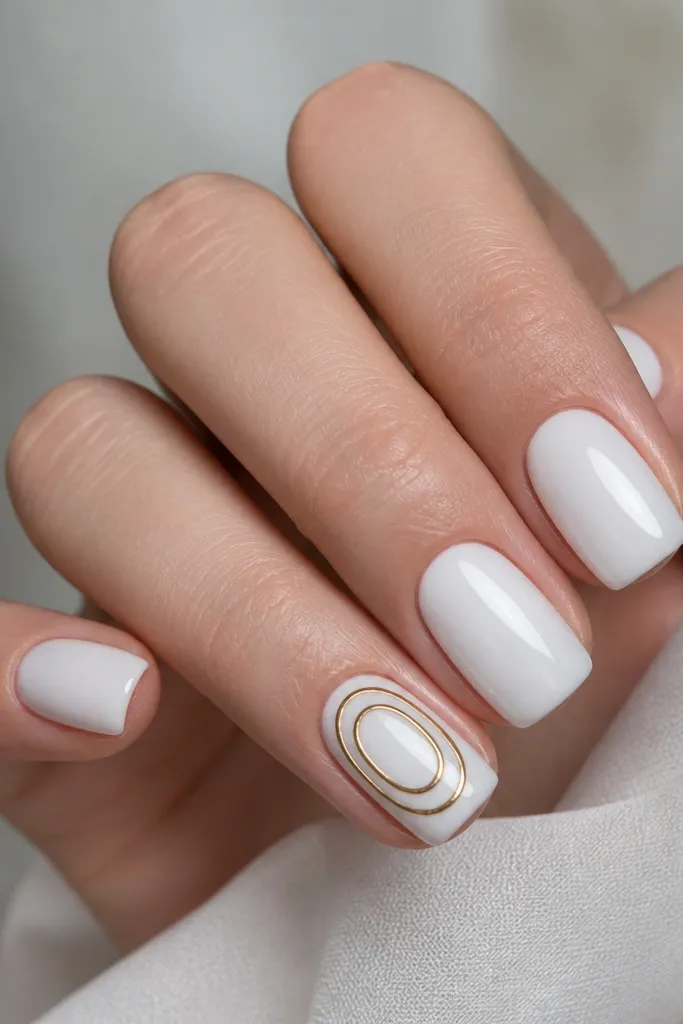
Do your standard prep and two cool white gel coats on every nail. On the accent nail, apply chrome gel in a thin circle around the cuticle area, leaving about 1 mm from the actual cuticle line. Cure to tacky stage, rub gold chrome, then brush off excess. Now apply a second, thinner chrome gel circle slightly closer to the center of the nail, cure to tacky stage, and repeat with gold chrome. Seal with glossy top coat in two thin passes so the rings stay defined.
The halo effect looks like jewelry and it’s easier than it looks. You get that 'ring light' reflection because the gold sits in a tight circle near the cuticle where light hits. This is perfect for an accent nail set because it changes the manicure without making every nail busy. It flatters medium nails because the ring has room to breathe, and it looks great for parties or bridal events. The principle is layering circles: one ring anchors the design, the second ring adds detail.
Watch outDon’t make the halo too close to the cuticle — it will flood and lift as the nail grows.
Editor's noteUse a tiny hole reinforcement sticker as a guide for the circle — it’s the same curve every time.
10. Matte white with glossy gold chrome center stripe
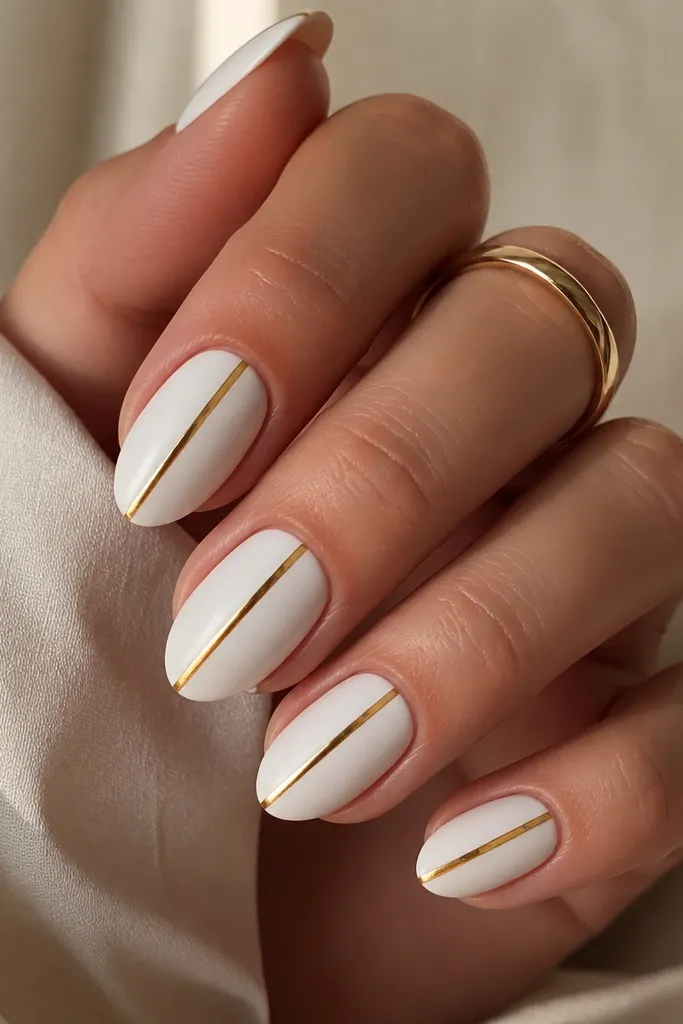
Apply base coat and two coats of cool white gel, cure fully. Top coat with a matte top coat and cure it properly so the surface stays truly matte. On each nail, apply chrome gel only in a thin vertical stripe down the center, then cure to tacky stage. Rub gold chrome onto the stripe, brush off excess, and immediately seal with a glossy top coat over the stripe only (keep it from spreading onto the matte areas). Cure, then check edges with a clean brush to remove any glossy smears.
This combo looks high-end because matte white kills glare, then the glossy gold line brings it right back. It’s a good choice if you like the chrome look but don’t want the whole nail to scream shine. I’ve worn this to work and it still looks neat because the matte base hides minor surface lines. It flatters short almond and oval nails because the center stripe draws attention straight down. The principle is texture contrast — matte base, glossy chrome stripe.
Watch outAvoid brushing glossy top coat over the matte whole-nail — it turns the look into patchy shine.
Editor's noteUse matte top coat first, then protect it with tape while you apply glossy top coat over the stripe.
11. White aura nails with gold chrome outer glow
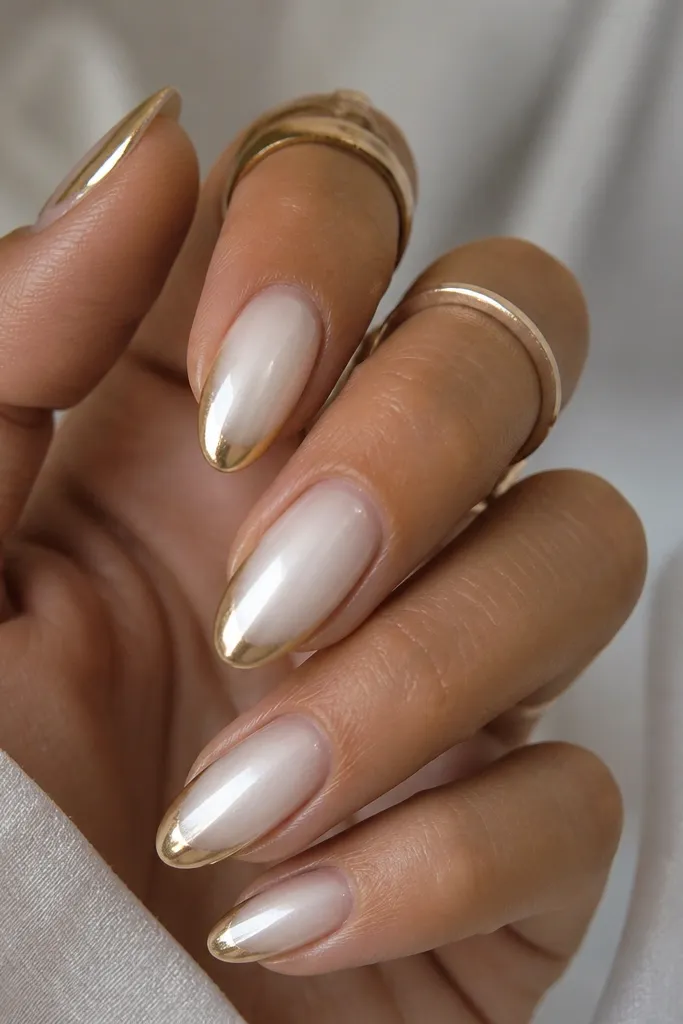
Paint two cool white gel coats, cure, and level. For the aura, take a small makeup sponge and dab a thin layer of white gel or white glitter gel in the center, then blend outward with light pressure. Cure the aura layer. Apply chrome gel around the outer edge of the nail — about 1-2 mm from the sidewalls and around the tip perimeter — and cure to tacky stage. Rub gold chrome along the perimeter, focusing on the outermost areas for the glow effect. Seal with glossy top coat, keeping the top coat thin so the aura haze stays soft.
Aura nails look dreamy, but this version stays crisp because you keep the aura in white and the glow in gold. The gold chrome sits at the outer edge, which makes the nail look wider and brighter near the center. It works on medium almond and short squoval because the glow frames the nail shape. On deeper skin tones, the white aura looks clean and luminous; on fair skin, the gold glow stands out. The principle is placement: glow at the perimeter, not the center.
Watch outDon’t rub chrome too close to the center or you’ll lose the aura softness.
Editor's noteUse a tiny sponge piece cut into a wedge so you can control the aura radius on each nail.
12. White nail with gold chrome 'crack' lines (skeleton chrome)
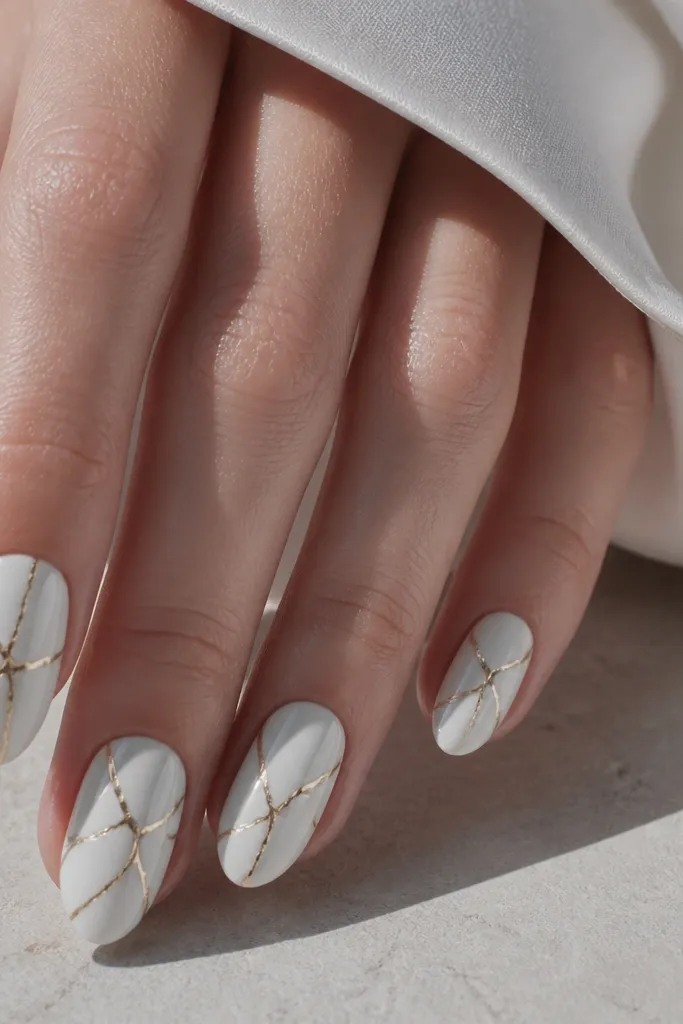
Start with two cool white gel coats, cure, and make sure the surface is smooth. Use a fine liner brush to draw crack lines with a thin clear or gold chrome gel, starting from the center and branching toward the sidewalls and tip. Cure once the lines are set enough to not smear. Apply gold chrome powder over the crack gel while it’s tacky (or rub chrome into the lines if your product requires it), then brush off excess with a soft dry brush. Seal with glossy top coat, pulling the brush gently along the lines so they stay crisp.
Crack lines look like shattered glass, but the white base keeps it wearable. Gold chrome lines make the cracks look like metallic skeletons, and they catch light even when your nails are still. This suits medium to long nails because the branching looks better with more space. It looks great on any skin tone because the contrast is clear, and it photographs well in daylight. The principle is line thinness: keep the crack lines narrow and let the branching do the work.
Watch outAvoid thick crack lines — they turn into metallic scribbles instead of glass cracks.
Editor's noteIf your lines disappear under top coat, use a slightly thicker chrome gel for the crack drawing.
13. White base with gold chrome bow on one accent nail
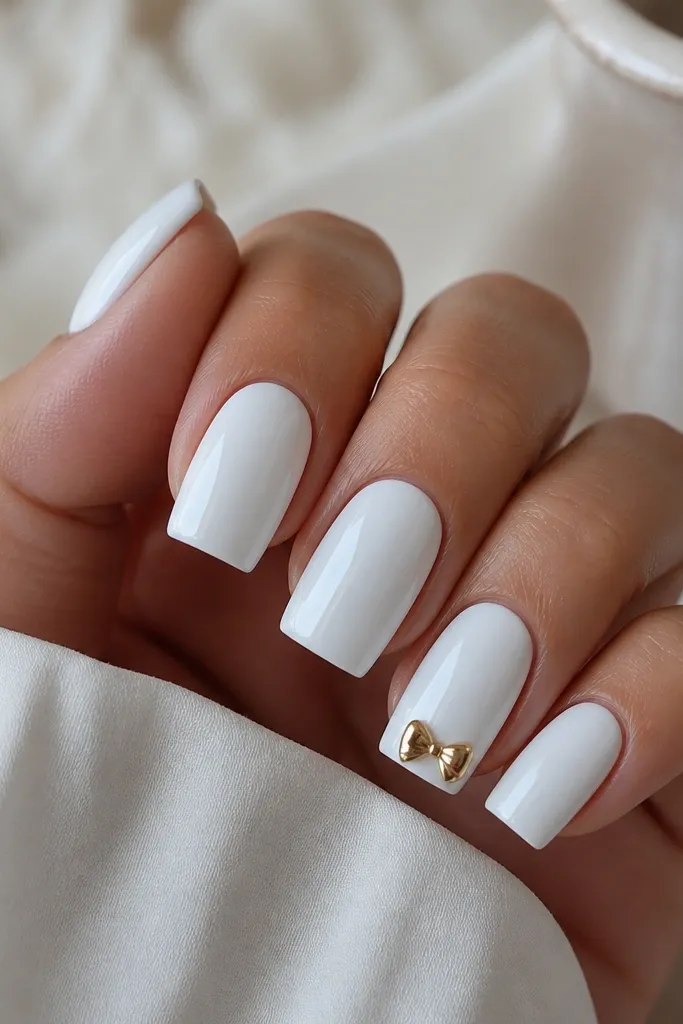
A bow is the fastest way to make white and gold feel cute instead of severe. Keeping it on one accent nail keeps the set balanced and wearable, even if you’re not a nail art person. The gold mirror bow looks like a tiny gift ribbon, and the white base makes it pop without extra colors. This flatters short almond and oval nails because the bow can be scaled down cleanly. The principle is scale: small bow, centered placement, no extra gems.
Apply base coat, then two coats of cool white gel on all nails, curing and leveling. On the accent nail, draw a bow using striping gel or a fine liner brush: two loops and a small knot in the middle, positioned about 2-3 mm below the tip edge. Cure the bow shape. Apply chrome gel over the bow lines only, cure to tacky stage, then rub gold chrome powder onto the bow. Brush off excess and seal with glossy top coat, using a thin layer so the bow stays defined.
Use a dotting tool to place the knot first, then connect the loops with short controlled strokes.
Don’t put the bow too close to the cuticle — it makes the nail look bottom-heavy.
14. White swirl gel base with gold chrome spiral tips
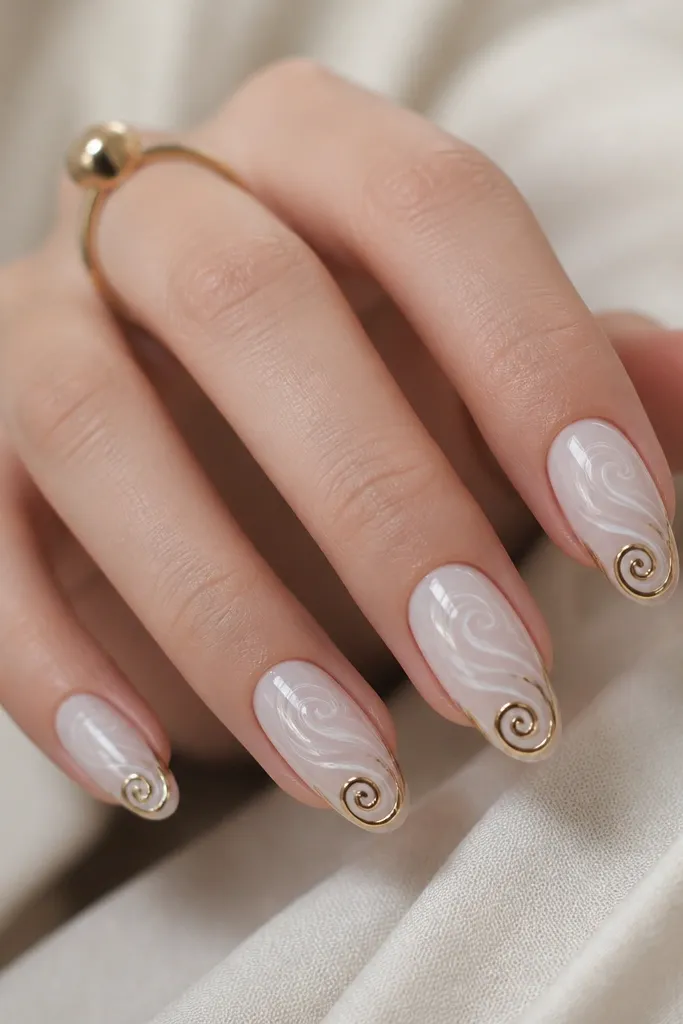
Start with base coat and two cool white gel coats, cure fully. Create swirls by painting thin white gel lines and swirling them with a clean liner brush, curing after your swirl pattern looks right. Then apply chrome gel to the tip area, but only where your spiral will land. Cure to tacky stage and rub gold chrome onto the spiral path, starting at the outer tip corner and spiraling inward with light pressure. Seal with glossy top coat, and keep the top coat brush moving in the direction of the spiral so you don’t flatten the pattern.
Swirls add motion, and gold chrome spirals turn that motion into something you can see from across the room. I like this for nights out because it looks like you did real art, but the technique stays simple. It looks best on medium almond or long square because spiral tips need space to curl. On fair skin, the white swirls look crisp; on deeper skin, the gold spiral gives a bright focal point. The principle is direction: the spiral follows the tip curve so it looks intentional.
Watch outAvoid swirling too close to the cuticle — the spiral chrome will fight the busy pattern.
Editor's noteIf your spiral looks messy, slow down and do it in two passes: outline the spiral first, then fill the line area with chrome gel.
15. Pearl White Chrome Coffin With Gold Foil Border
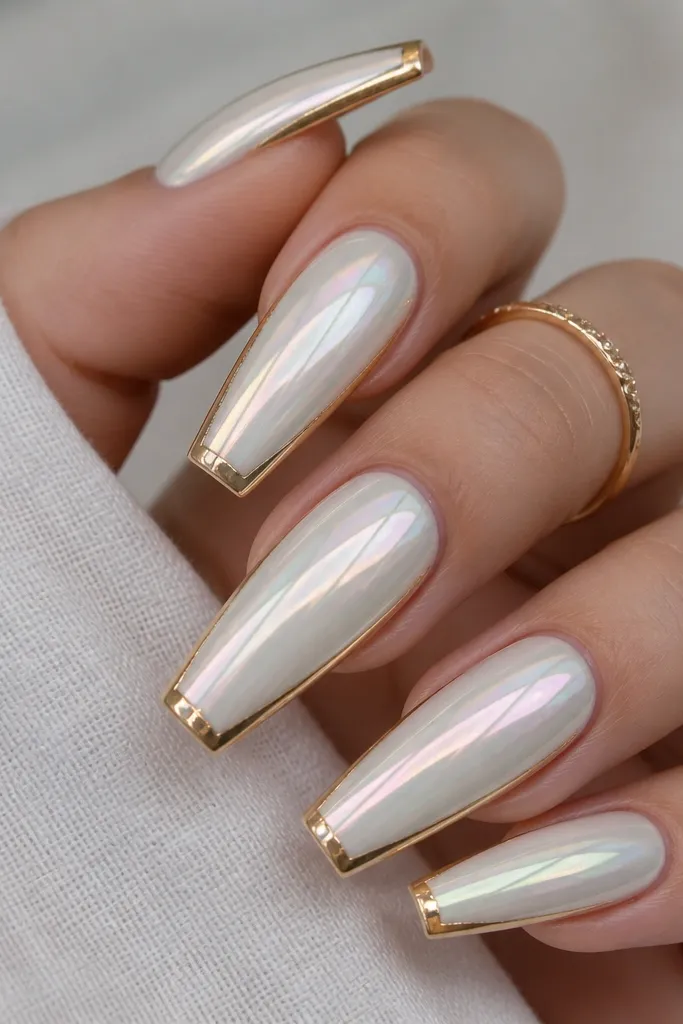
File your coffin shape and buff the nail to a satin finish, then wipe with alcohol and let it dry fully. Apply a thin layer of pearly white chrome gel or white gel, cure, and top with chrome powder for that mirror-like pearl effect. For the gold border, cut a strip of gold foil 1-2 mm wide for each nail and press it along the outer edge where the nail curves. Use a small silicone tool or a flat foil applicator to push the foil right to the sidewalls, then cure. Seal with a glossy top coat in two thin layers so the foil edges stay crisp and don’t lift.
This look is white chrome first, then gold foil treated like a picture frame. The pearly white base gives you that expensive, milky glow even before you add any design. The gold foil border stays thin and controlled, so it reads clean instead of busy. I like it because it looks “done” from across the room, but you can still build it at home with a simple foil transfer and a steady hand.
Watch outDon’t use a thick layer of foil adhesive or you’ll get gold blobs instead of a clean frame.
Editor's notePress the foil starting at the center of the sidewall and work toward the corners. If you start at the tip, the foil wrinkles and you get a fuzzy border.