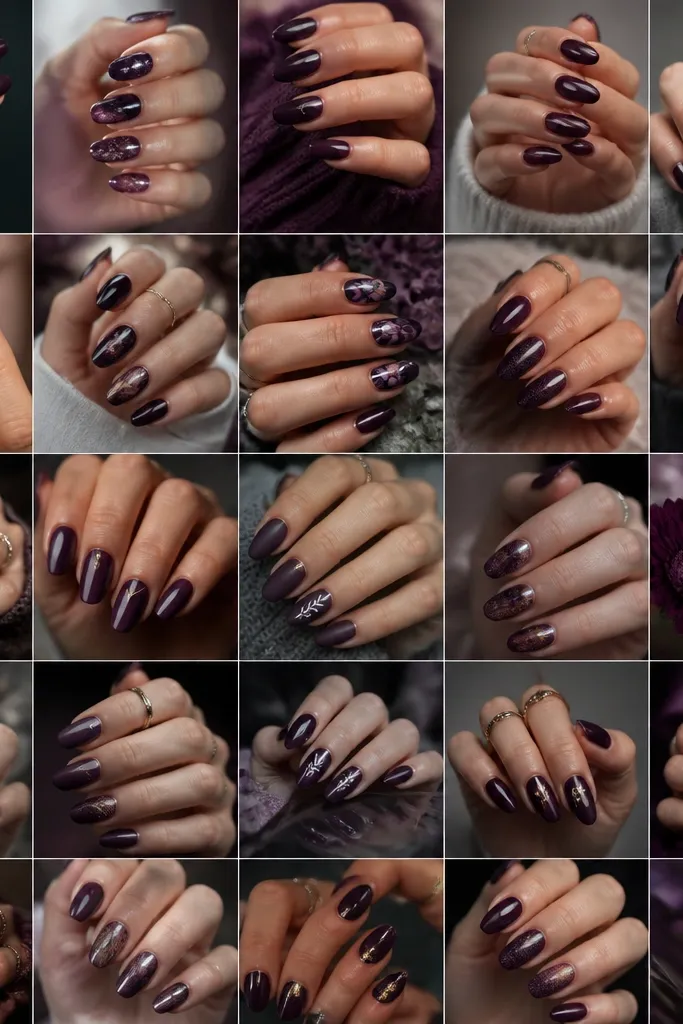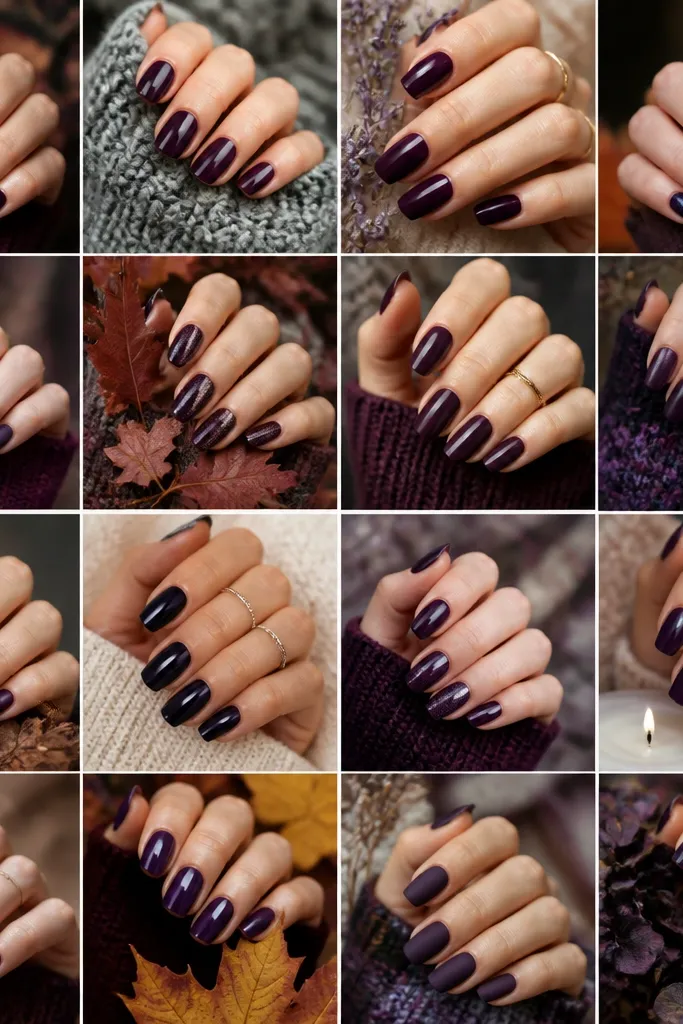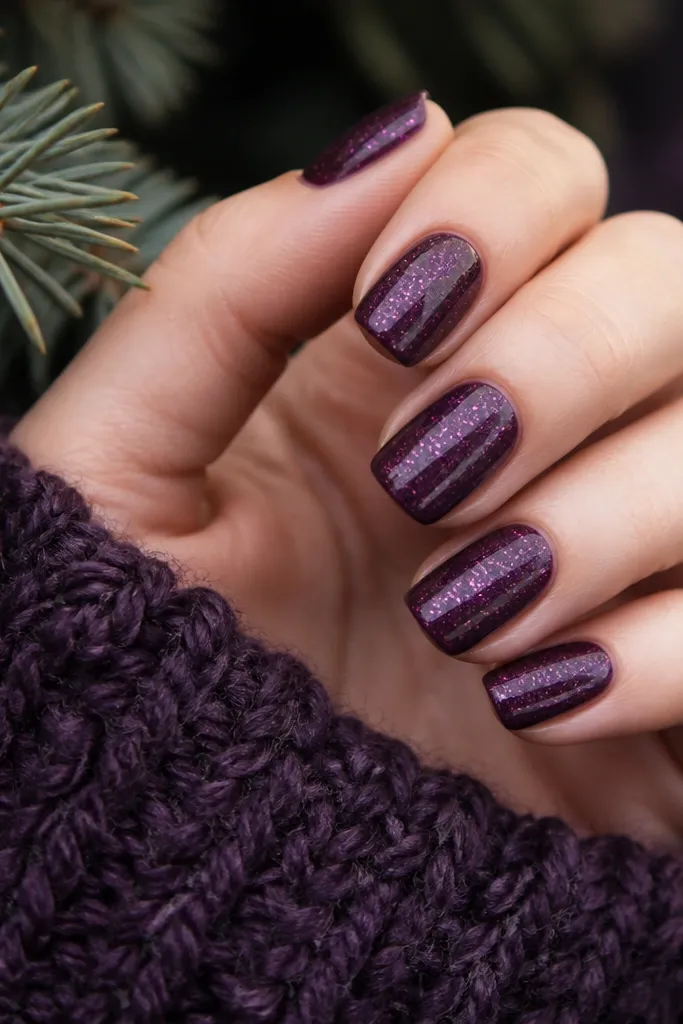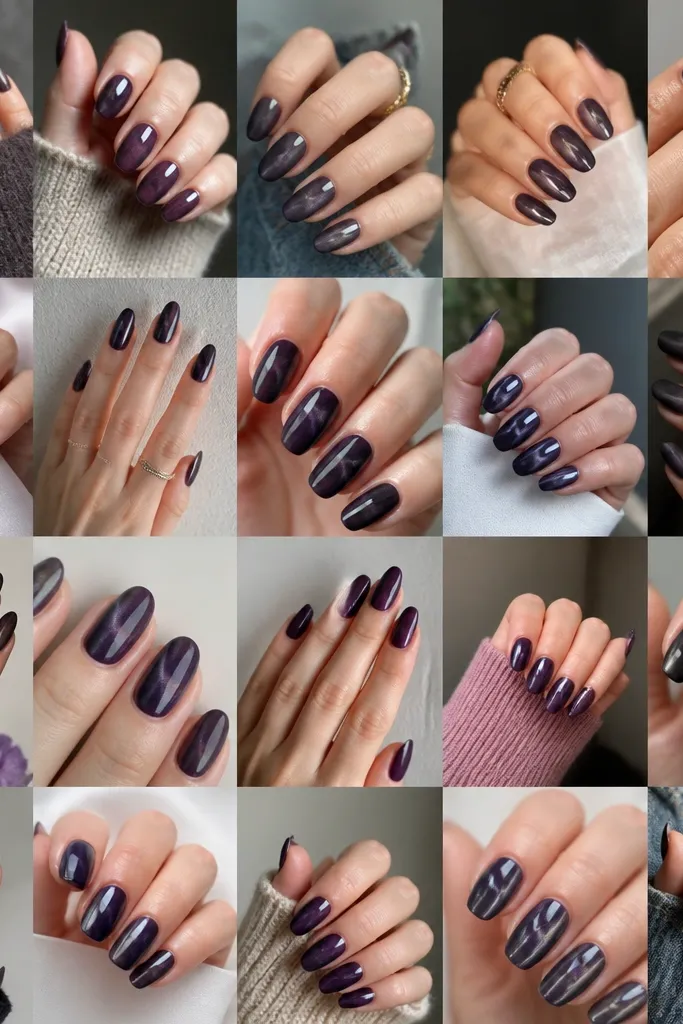
1. Velvet Purple Base With Black Micro-French Tips
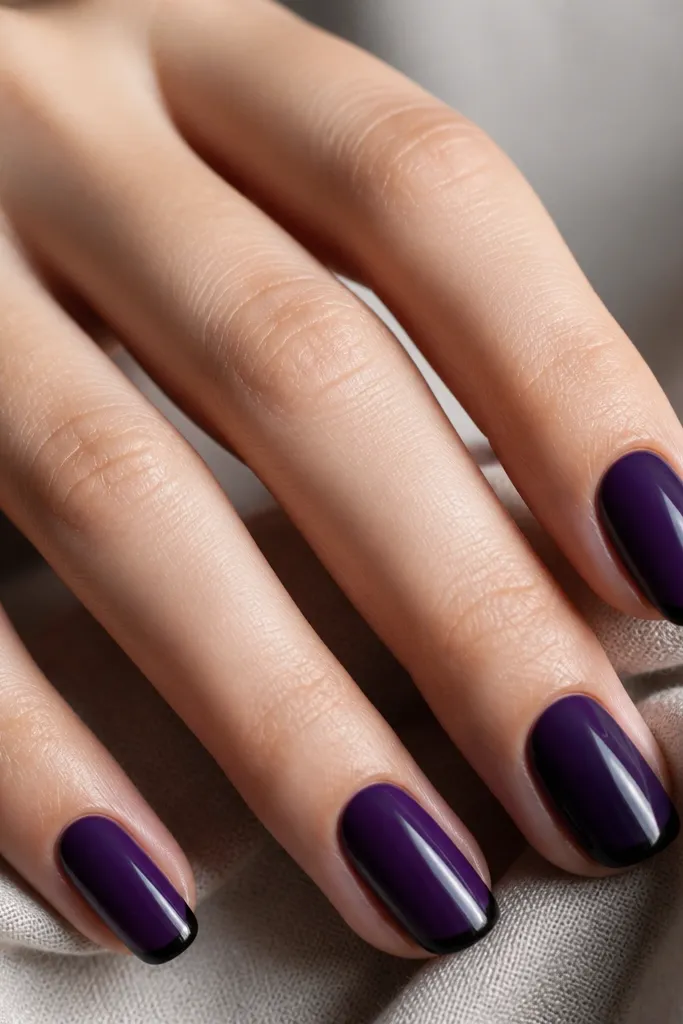
Start with a deep purple that leans slightly cool (think blackberry, not magenta). This style works because the micro-French keeps the black in a narrow band, so the purple stays the star while the black adds that sharp edge. I've worn it on short nails and it still looks clean, because the tip line is tight and doesn't take over the nail bed. It also flatters warmer skin tones because the purple brings a berry glow, while the black keeps everything grounded for work or dinner.
First, apply two coats of the deep velvet purple. Let each coat dry fully, then use a fine nail art brush or striping tape to create a super thin black line at the free edge, staying about 1-2 mm from the sidewalls. Next, place a second tiny black line parallel to the first if you want extra contrast, then remove tape while the black is slightly tacky. Finish with a thick glossy top coat, making sure you cap the free edge with the brush.
Editor's noteIf your black looks streaky, paint it on in two thin passes instead of one heavy pass.
Watch outAvoid a wide French tip - it makes budget black look blunt and can swallow the purple.
2. Black Half-Moons Over Dark Purple Jelly
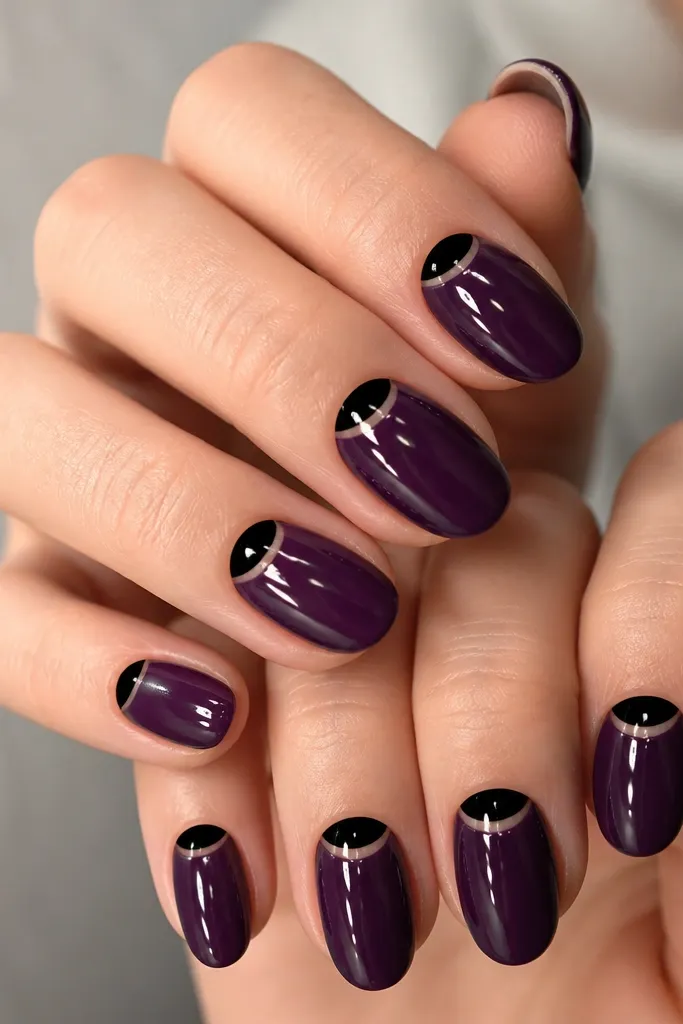
This one is all about contrast at the cuticle. A dark purple jelly base looks translucent and juicy, so the black half-moons pop without needing heavy layers. I like it on medium and short nails because the crescent shape makes fingers look longer. It also looks great on hands with visible cuticles because the half-moon sits where your nail meets skin, giving a neat frame. For evenings, the jelly sheen reads expensive even if the polish is basic.
First, paint a dark purple jelly in two thin coats, leaving the cuticle area slightly lighter so you can frame it. Then use a half-moon nail vinyl or a small sponge brush to paint black crescent shapes - keep the curve following your natural cuticle line. Let the black dry, then add one more thin coat of purple over any tiny smudges so the edges stay smooth. Finish with glossy top coat and pay attention to the cuticle seal.
Editor's noteUse vinyls if you're new - freehand crescents always look wobbly on the first try.
Watch outDon't over-paint the cuticle. Thick black near the skin makes lifting show sooner.
3. Sponge Ombré Purple To Black (No Harsh Lines)
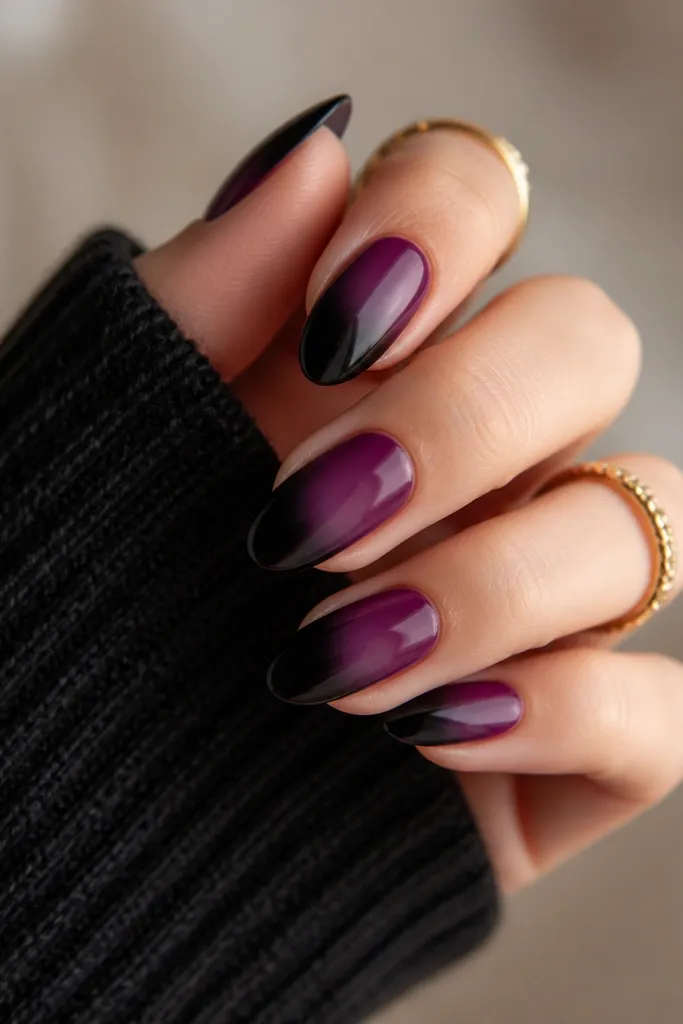
Sponge ombré works because it creates a soft blur, and dark purple naturally blends into black without turning gray. I've done this with regular nail polish and it still looks smooth when you tap lightly and stop before the sponge gets too saturated. This flatters short nails because the darker tip visually elongates the nail. It also looks great on cool-toned skin and neutral undertones because both colors are deep and not orange.
Start with a base coat, then paint two coats of dark purple across the whole nail. Take a makeup sponge and dab it with black polish - tap the sponge starting at the tip and work upward only 1/3 of the nail. Use small, quick taps, not dragging, then rinse sponge and repeat once if you want more depth. Finish with a glossy top coat to blend the edges and smooth the texture.
Editor's noteWipe excess polish off the sponge on a paper towel first, or you'll get a dark blob at the tip.
Watch outSkip the drag motion - it creates streaks that scream "DIY."
4. Black Lightning Bolt Accent On Purple Storm Nails
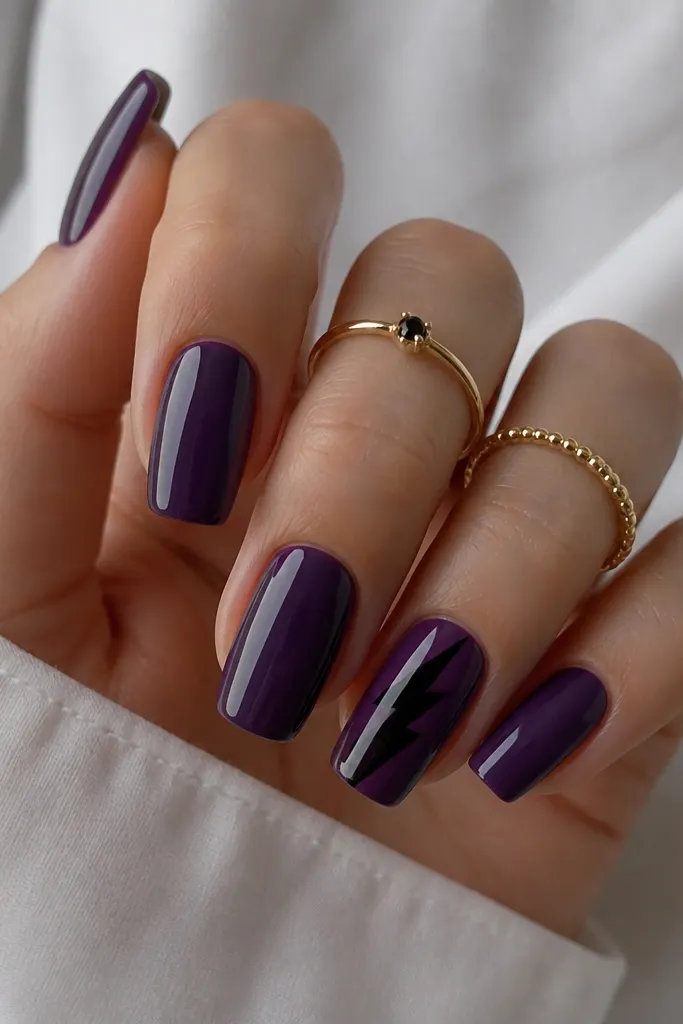
Lightning bolts look edgy without covering the whole nail in black, and that matters for budget sets. The purple gives the bolt a darker background so it reads crisp. I like this for hands that need a little attitude but still want a wearable base for school or work. The bolt shape flatters most nail shapes because it pulls the eye vertically. It also looks good with matte tops if you want a more goth vibe.
Paint all nails with two coats of deep storm purple. On one or two accent nails, place a thin striping tape guide in a zigzag, then fill the zigzag with black using a fine brush. Carefully remove tape while the polish is still slightly wet so the edges stay sharp. Seal with glossy top coat on the purple nails and, if you want contrast, use matte top coat only over the bolt.
Editor's noteIf your bolt edges get messy, paint the outline in black first, let it dry, then fill the inside.
Watch outDon't put a bolt on every nail. It turns graphic fast and can look costume-like.
5. Black Lace Stamping Over Dark Purple
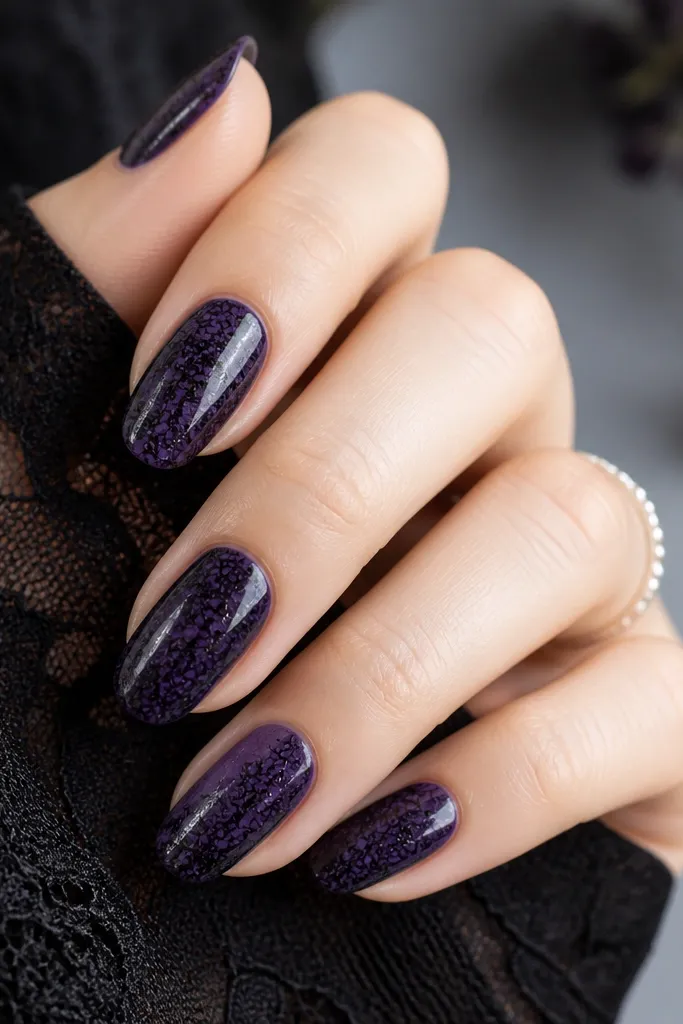
Stamping lace looks expensive because the pattern is already clean and symmetrical. Dark purple is the best base for lace because it reads like a shadowed fabric, not a flat color. I've worn this with both short squoval and longer almond nails - the lace lines make the nail look more detailed and longer. It flatters darker skin tones beautifully because the black lines have strong contrast, and the purple doesn't wash out.
Start with two coats of dark purple, fully dry. Apply a stamping plate with a black stamping polish, scrape well, then press onto the nail for a crisp transfer. Work one nail at a time so the stamp doesn't dry on the plate. Finish with a smooth glossy top coat, and if you feel raised stamp texture, add a second top coat after the first dries.
Editor's noteClean your stamper between nails with acetone on a lint-free wipe so lines stay sharp.
Watch outDon't rush the stamping press. One quick press too soon gives blurry lace.
6. Black Rosebud Accent On Deep Purple Crème
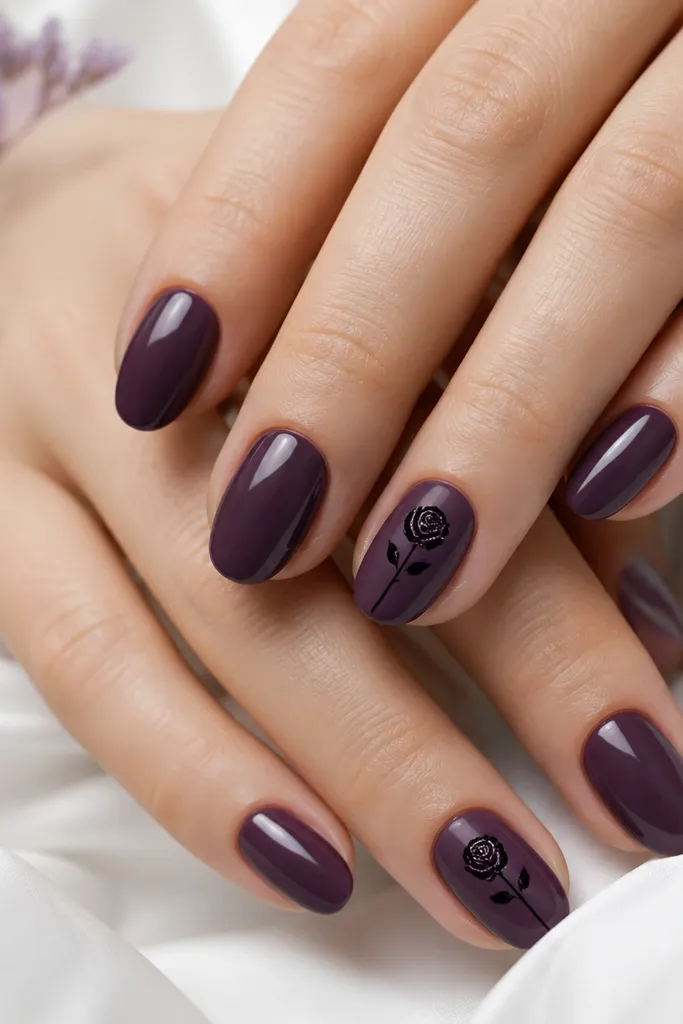
A tiny black rosebud gives you "gorgeous edge" without covering every nail in black. I like it on deep purple creme because the base looks like smooth velvet and makes the rose lines pop. This style flatters oval and squoval nails because the rose sits naturally in the center. For everyday wear, keep the rose small - about the size of a dime on a full nail. It also looks striking on light to medium skin tones because black line art brings definition.
Paint all nails with two coats of deep purple creme. On the ring fingers and maybe one middle finger, dot the center with a small black dot, then pull short petal strokes outward using a dotting tool and fine brush. Add two tiny highlight dots in the rose center using a slightly lighter purple or a white dot if you want more contrast. Seal with glossy top coat, making sure the brush goes over the rose edges.
Editor's noteUse a nail art pen for the rose outlines if your brush strokes wobble.
Watch outAvoid filling every petal solid black. Line art with negative space looks cleaner.
7. Black Crosshatch Over Purple With Clear Negative Space
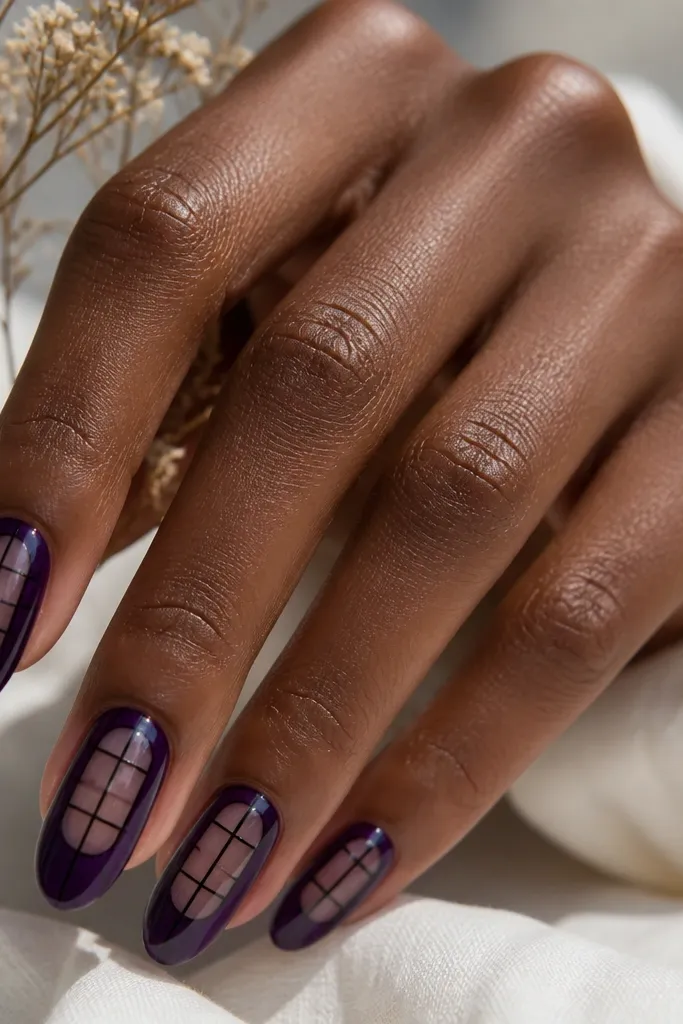
Crosshatch is graphic and modern, and the negative space makes it look intentional instead of heavy. The purple is your base, but the clear window keeps the set from feeling bulky. I like this on almond nails because the center window elongates the look. It also flatters hands with shorter nail beds since the grid draws the eye upward. For photos, the glossy top coat makes the lines look sharper.
First, paint two coats of deep purple and let them dry. Use striping tape to mask a small oval or rectangle window in the center of each nail, then press tape down firmly. Paint black crosshatch lines over the exposed area using a thin brush - make one direction first, then the other. Remove tape while still slightly tacky, then add glossy top coat to smooth and seal.
Editor's notePress tape for 10 seconds with your fingertip before painting so edges don't bleed.
Watch outDon't use thick tape windows. Big clear areas make the manicure look unfinished.
8. Purple And Black Marble Swipe (One Nail Accent)
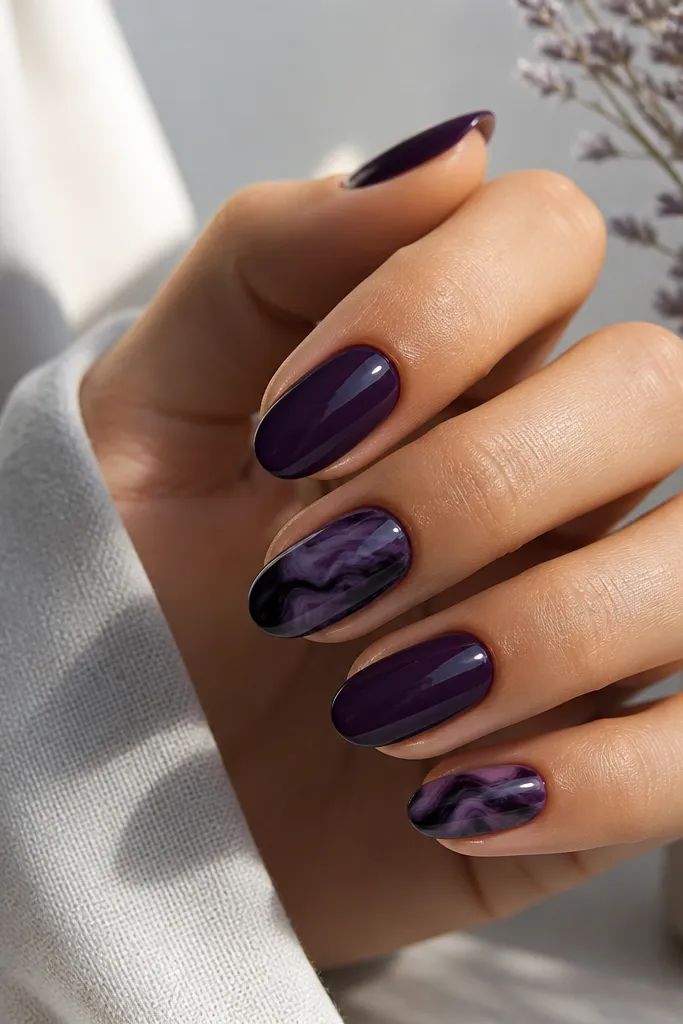
Marble looks fancy because it looks random, but budget marble is still controllable if you keep it to one or two accent nails. Dark purple marble with black ink-like swipes reads moody and designer. I've found this style looks best when your base purple is slightly opaque and your marble lines are thin. It flatters nearly every nail length because the marble texture adds movement. For cooler undertones, the purple-black combo gives a clean, night-sky look.
Paint all nails with two coats of dark purple. On accent nails, apply a thin layer of black polish on a makeup sponge edge or a flat brush and swipe downward in 3-5 streaks. Use a second purple shade (a touch lighter) to drag through the black streaks for a veined effect, then lightly dab with the sponge to soften edges. Finish with glossy top coat, and avoid getting top coat too thick on the marble so it doesn't smear.
Editor's noteKeep marble lines thin. Thick marble looks like smeared paint on a budget set.
Watch outSkip the overworking. If you keep swiping after it starts to tack, it turns into one muddy patch.
9. Matte Black Tips On Glossy Dark Purple Base
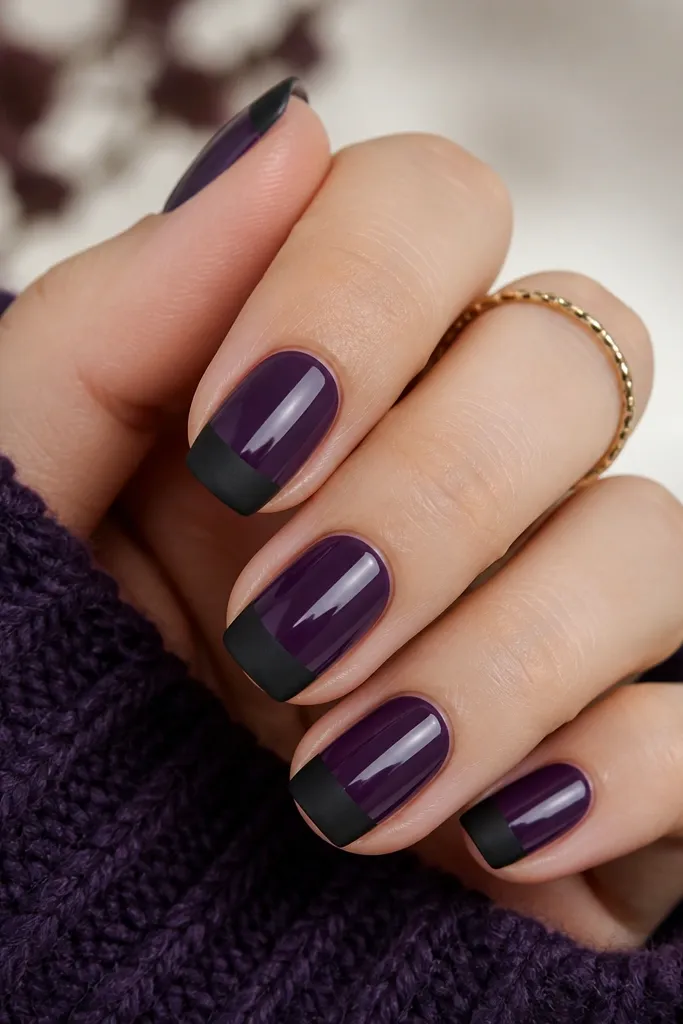
This is one of my favorite "edge" combos because it looks intentional even with simple shapes. Keeping the base glossy makes the purple look deep and smooth, while the matte black tips look velvety and sharp. I wear this most in fall and winter because it looks cold-weather clean. It's flattering on short nails since the matte tip doesn't show ridges as much as glossy black. On medium skin tones, the contrast looks bold without needing extra gems.
Start with two coats of glossy dark purple - I mean glossy right away, not a flat finish. Let it dry, then paint a black tip band using a striping tape to keep it straight. Remove tape, then skip top coat on the tips until the black is dry. Apply matte top coat only over the black tips, and apply glossy top coat over the rest of the nail.
Editor's noteUse separate brushes for matte and glossy top coat so you don't accidentally dull the purple base.
Watch outDon't matte the whole nail. The set loses the contrast that makes it look expensive.
10. Black Studs On Dark Purple Jelly With Clear Top
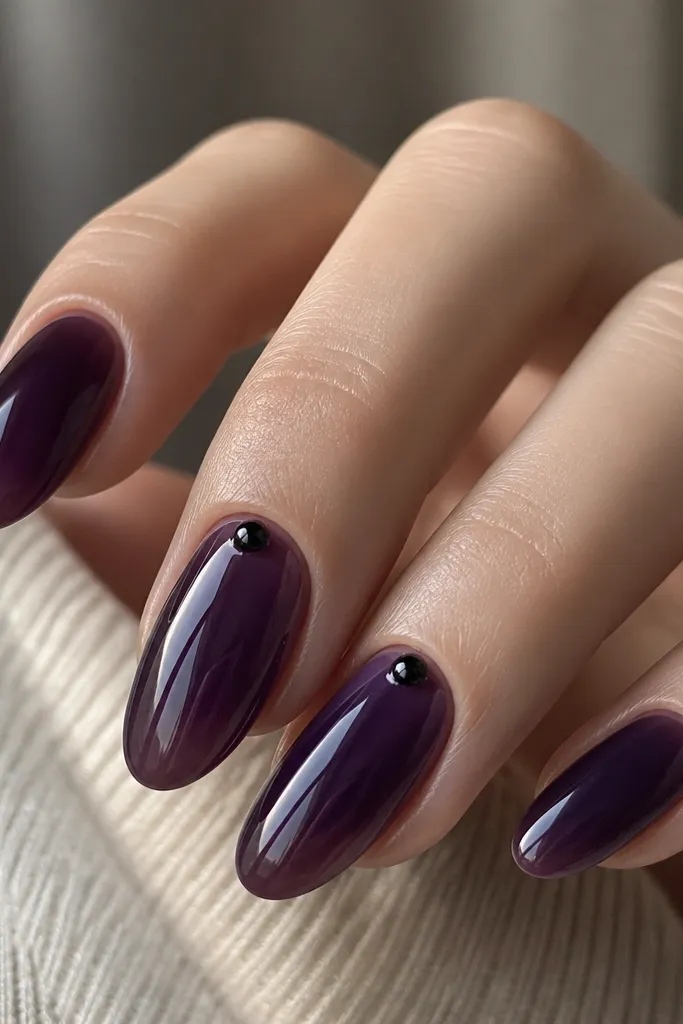
Studs make a manicure look styled fast, but you need the right placement so it doesn't feel heavy. Jelly purple has that see-through glow that makes the studs look like they're floating. I like studs near the cuticle because it draws attention to nail shape and keeps the tip area clean. This flatters hands with shorter nails since the visual weight sits at the base. For medium to deep skin tones, the black studs read super crisp against the purple.
Paint two coats of dark purple jelly and let it fully cure/dry. Use a dot of clear builder gel or thick clear top coat at the cuticle area on two accent nails. Place 2-3 small black studs with tweezers, then lightly press so they sit flat. Seal with a clear top coat that covers the studs completely, using a thicker pass over the base so water doesn't sneak under.
Editor's noteIf you don't have gel, use a stud glue and let it set before top coat.
Watch outAvoid placing studs on every nail. Two accent nails is enough for the edge.
11. Black Outline Hearts On Dark Purple Velvet
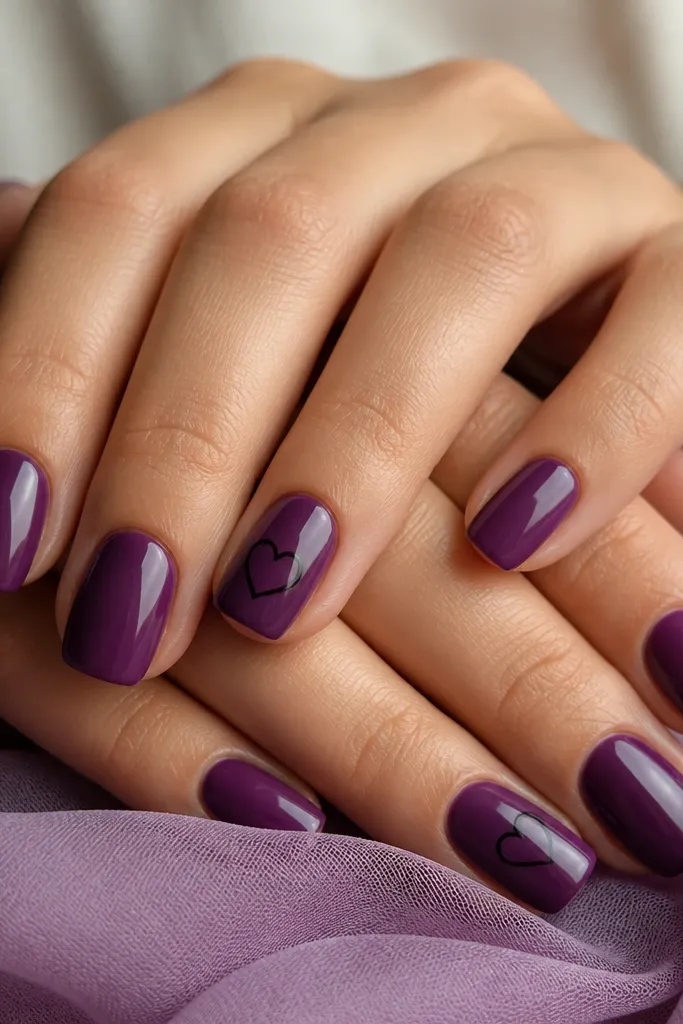
Outline hearts keep it cute but still dark, because black line art stays sharp against purple. A velvet or creme purple makes the hearts look like they're drawn on fabric. I like this for date night or birthdays because it feels playful without turning into pastel. It flatters short nails because the heart size stays small and centered. If you have uneven nail ridges, the velvet purple finish hides them better than a watery jelly.
Apply two coats of deep purple velvet creme. On ring fingers, draw one small outline heart near the center using a fine black liner brush or nail art pen. Keep the heart hollow - no filling - and make the line thickness consistent. Add one dot at the top of each heart if you want a little "spark," then seal everything with glossy top coat.
Editor's notePractice one heart on a scrap nail or a paper palette first so your curve is smooth.
Watch outSkip filled hearts. Solid black blobs look messy and thick.
12. Purple Chrome Swipe With Black Base Edges
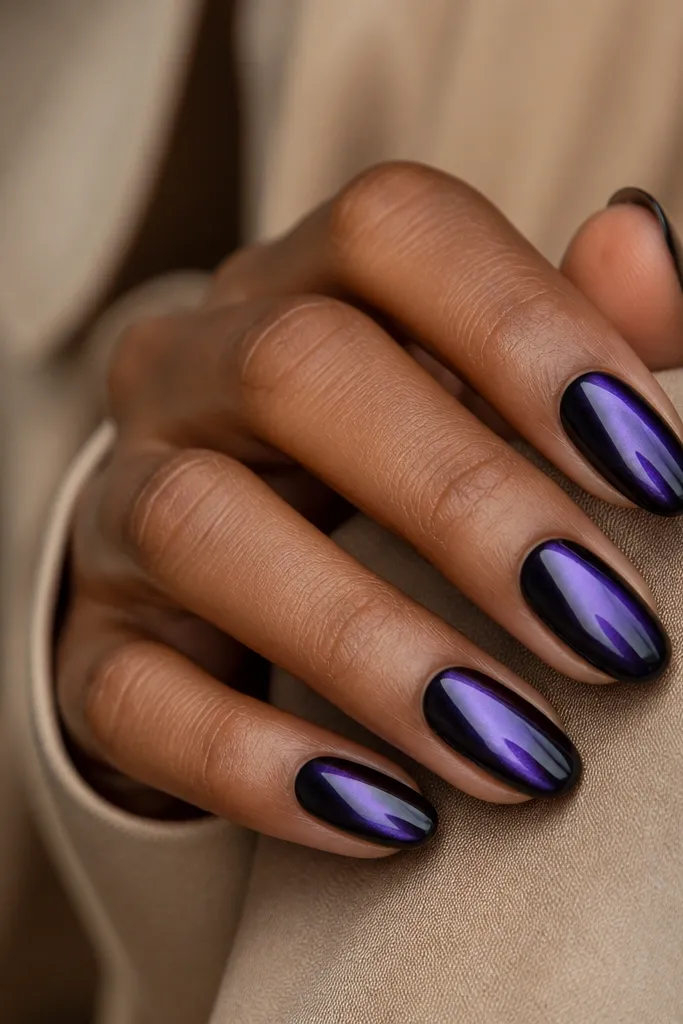
Chrome swipe looks high-end because it adds light reflection, and it's easy when you keep it to one stroke. Using black at the sides frames your nail like a border, so the chrome looks sharper. I like this on oval nails because the chrome swipe stretches the center line visually. It also works on fair skin and deeper skin tones because chrome reflects across undertones. The key is not overdoing the chrome - one clean swipe is enough.
Paint nails with two coats of dark purple, then use a thin brush to paint black along the sidewalls only - about 1 mm wide. Wipe chrome powder or chrome gel onto the center using a sponge applicator, then buff with an eyeshadow applicator for a smooth metallic stripe. If you're using chrome gel, cure and then remove any excess powder. Finish with glossy top coat, but don't bury the chrome under a super thick layer.
Editor's noteUse a small piece of sponge, not a full cotton pad, so chrome stays in one stripe.
Watch outAvoid chrome on every nail. Too much chrome turns into glittery noise.
13. Black Polka Dots Over Dark Purple (Micro-Scale)
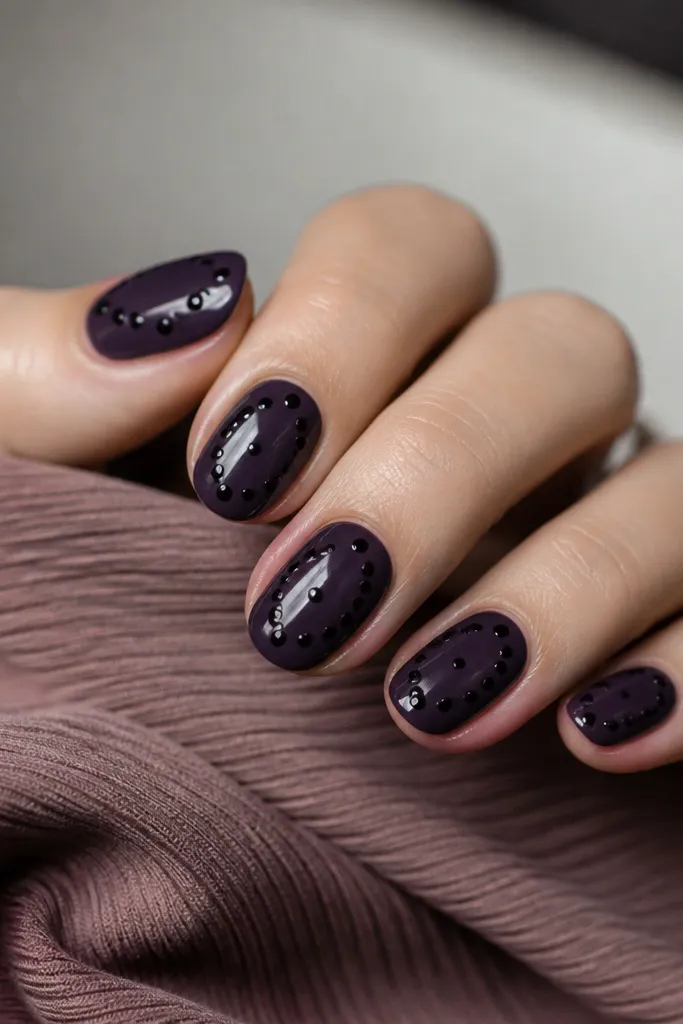
Micro polka dots look playful but still goth when they're black on dark purple. This works because the dots are small enough to feel intentional, not childish. I've done it with a dotting tool and it stays neat even if your hands shake a little, because you can place dots one at a time. It flatters short nails because the diagonal spacing adds length. On light skin, the contrast is bold; on darker skin, it looks clean and graphic rather than harsh.
Paint two coats of dark purple and let them dry. Dip a dotting tool into black polish and place dots in a diagonal line from near the cuticle to the side of the nail - keep spacing about 1-2 dot widths apart. Add a few extra dots between the main dots if you want a denser look, but don't cover the whole surface. Finish with glossy top coat and cap the dot edges.
Editor's noteIf dots smear, wait an extra 5-8 minutes before placing the next dot.
Watch outDon't make the dots too big. Large dots can look like fingerprints.
14. Black Vertical Stripes On Dark Purple Half-Negative Nails
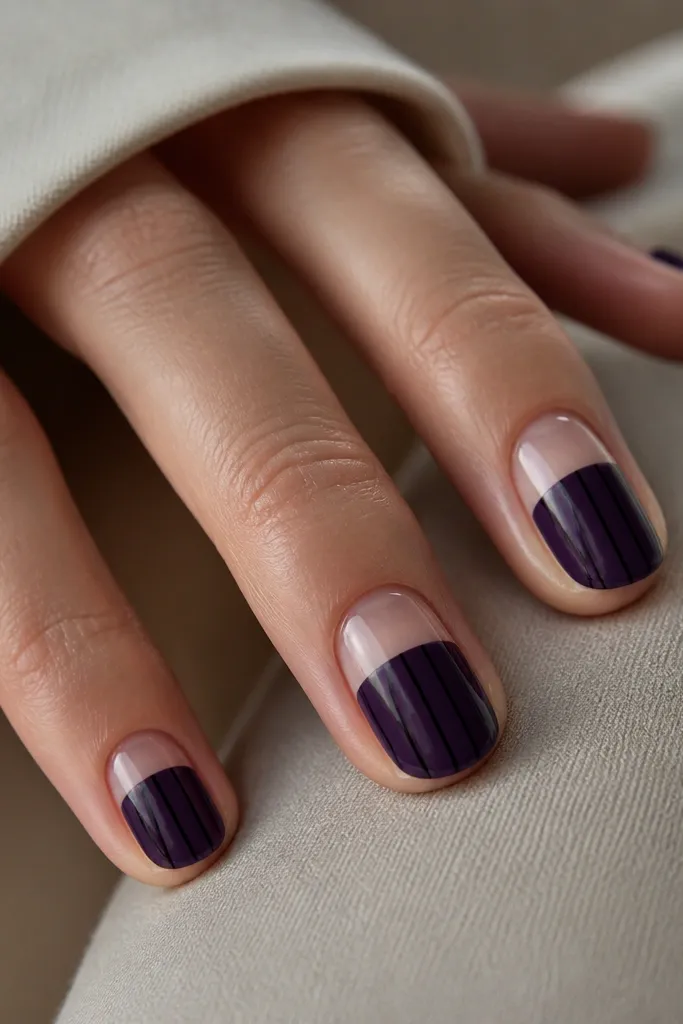
Half-negative space makes nails look longer and more modern, especially when you keep the design vertical. The dark purple bottom anchors the look, and the black stripes guide the eye upward. I like this for people who don't want full coverage polish but still want dark purple and black. It also hides minor cuticle unevenness because the clear section draws attention away from the base. This one looks sharp with almond and squoval shapes.
Start by painting a base coat, then use striping tape to mask the top third of the nail. Paint two coats of dark purple on the exposed bottom area, then remove tape carefully while the polish is still slightly wet. Use a thin liner brush to paint 2-3 vertical black stripes across the purple section, keeping them narrow and evenly spaced. Finish with glossy top coat over everything, leaving the clear area shiny.
Editor's noteUse tape to create clean edges even if you're confident - it saves time and nerves.
Watch outAvoid thick stripes. They look chunky and cheap on a budget set.
15. Black Outline Marble With Dark Purple Base (Reverse Veins)
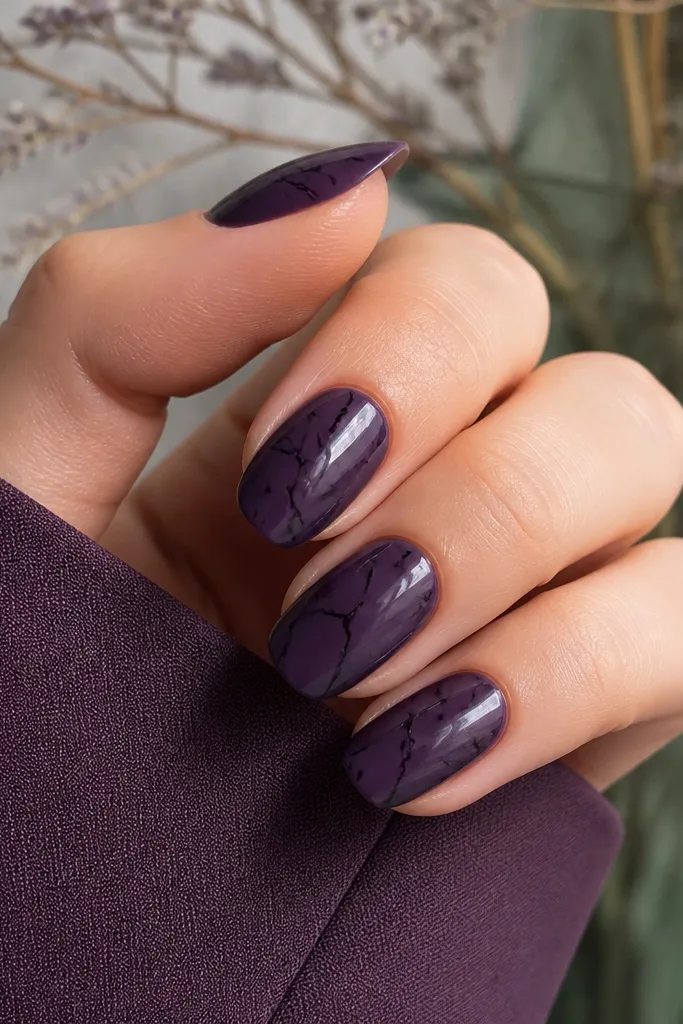
Reverse-vein marble looks cleaner than full marble because the black stays as lines instead of filling the whole nail. The dark purple base gives depth, and the black veins add that luxe "stone" vibe. I've found it's easier to make this look crisp at home because you're not trying to blend big areas. It flatters medium-length nails because the veins can run vertically. It also looks great for work since the black is controlled.
Paint two coats of dark purple and let dry. Take a fine black liner brush and draw a few thin branching lines from the center toward the sides, leaving the purple visible between lines. Add one thicker vein line to create variation, then add tiny offshoots like marble cracks. Seal with glossy top coat, brushing extra carefully along the lines so they don't lift.
Editor's noteUse a liner brush with a sharp point. A frayed brush makes veins look like smudges.
Watch outDon't draw too many veins. Five to eight lines per nail looks expensive; twenty lines looks chaotic.
16. Purple Glitter Fade Into Black Tips
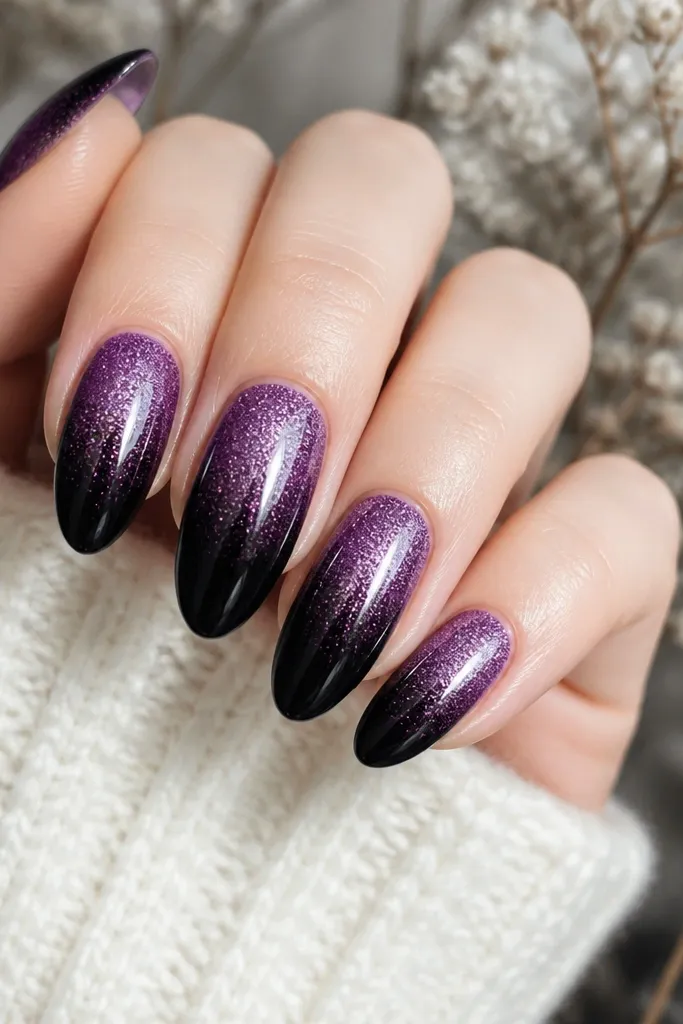
This fade gives you sparkle but keeps the black for the edge. The trick is using a purple glitter that isn't chunky so it doesn't catch on fabric and start lifting. I like it on short nails because the black tips visually elongate and make glitter feel intentional, not messy. It also looks great for parties because the glitter catches light, but the dark base keeps it moody. On cool undertones, the purple glitter looks extra icy.
Start with two coats of dark purple. Sponge on purple glitter starting around the middle and fade it upward slightly, leaving the tip mostly clear at first. Then paint black on the free edge in a clean band, blending it into the glitter with a tiny sponge tap. Finish with glossy top coat and add one extra thin top coat after it dries to smooth the texture.
Editor's noteIf glitter feels rough, use a top coat that dries thicker and cap the edges twice.
Watch outSkip chunky glitter. It chips faster and feels scratchy.
17. Black Dot Cluster Near Cuticle On Dark Purple
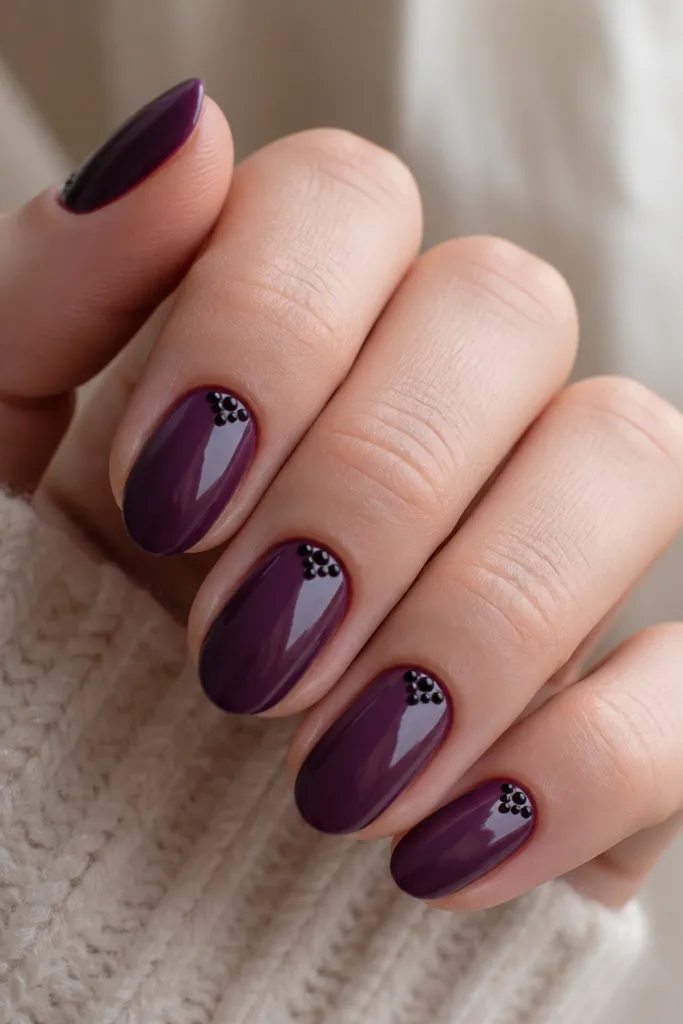
A dot cluster near the cuticle looks like a design detail, not a random pattern. Dark purple provides the backdrop, and the black dots make a focal point without taking over the whole nail. I like it on hands that need a low-effort manicure that still looks styled. This works on short nails because the cluster sits low and makes the rest of the nail look neat. It also flatters different skin tones because the contrast is clear and the design is compact.
Paint nails with two coats of deep purple and let dry. With a dotting tool, place 4-6 black dots in a tight cluster at the cuticle line, slightly off-center toward one side. Vary dot sizes - one bigger dot in the middle, smaller dots around it - to keep it from looking like a sticker. Seal with glossy top coat, making sure the brush touches the dot edges so they don't snag.
Editor's noteUse a fresh dotting tool tip for each nail if your dots start looking uneven.
Watch outDon't spread the dots across the nail. Keeping them clustered looks intentional.
18. Black Brushstroke Over Dark Purple Creme (Centre Swipe)
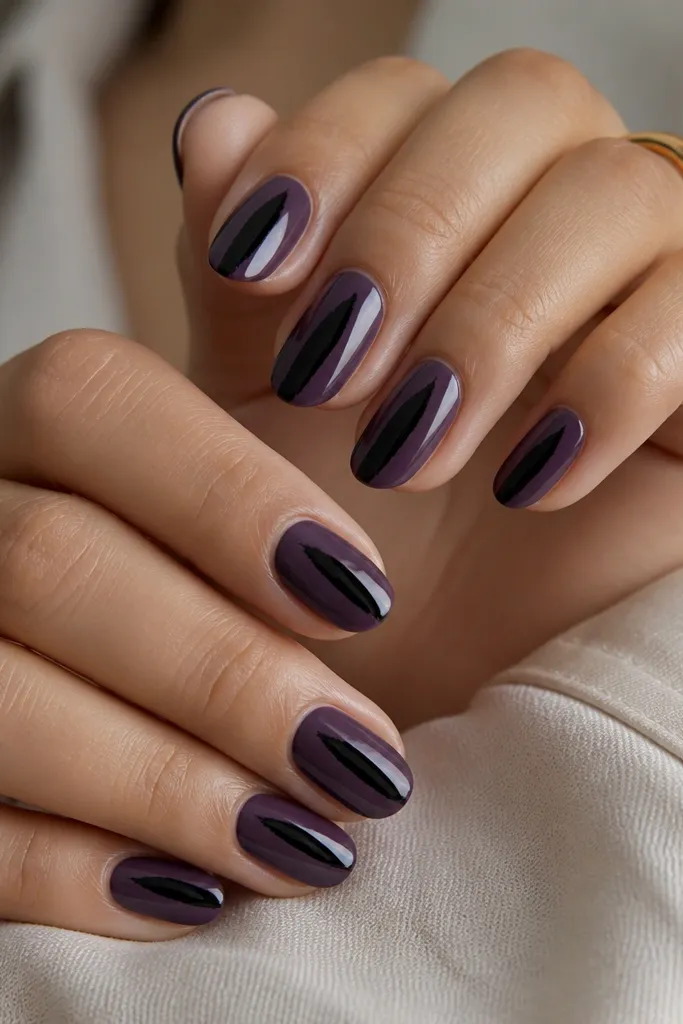
A single brushstroke is the fastest way to get an artistic edge. The key is letting the purple stay smooth and consistent, then making the black stroke thick enough to read from across the room. I like this on oval nails because the stroke follows the nail's curve and elongates. It's also forgiving on beginners because you can correct the stroke shape while it's wet. On light skin, the black reads dramatic; on deeper skin tones, the purple brings the contrast without looking harsh.
Apply two coats of deep purple creme and let fully dry. Load a flat or angled brush with black polish - don't thin it - and paint one centered swipe from just above the free edge down toward the middle. Widen the center slightly, then taper both ends for a swoosh effect. Clean the edges around the stroke with a brush dipped in acetone, then finish with glossy top coat.
Editor's noteIf your black stroke looks streaky, wipe the brush once on the bottle edge before you paint.
Watch outAvoid thin, watery black strokes. They look like streaks instead of design.
19. Black And Purple Foil Flakes On One Accent Nail
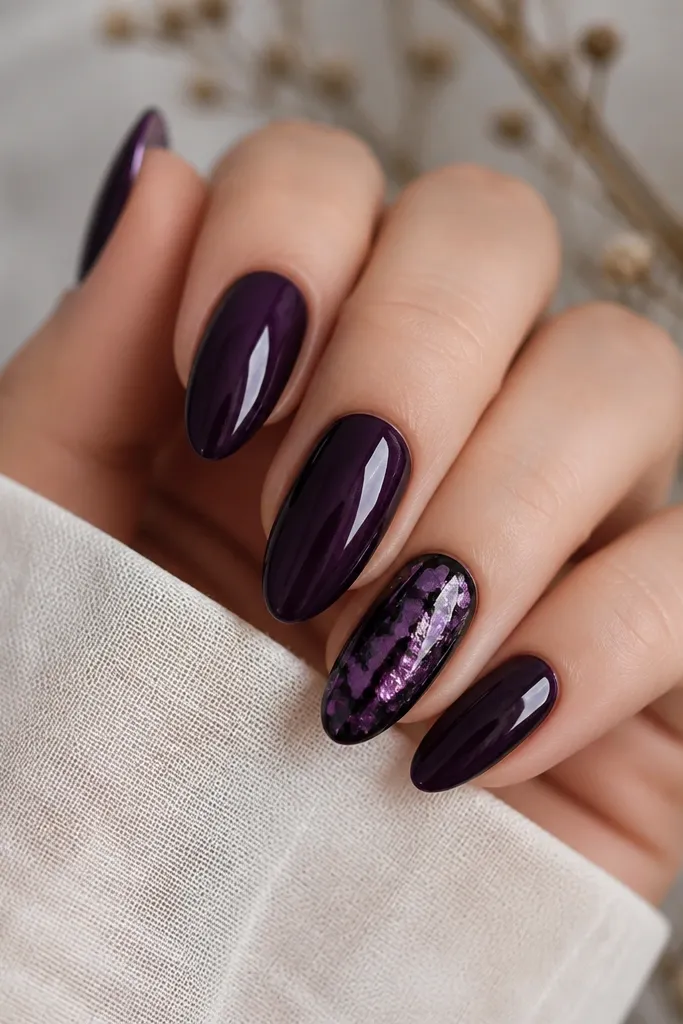
Foil flakes look expensive because they reflect light in multiple directions, but you don't need them on every nail. Keeping it to one accent nail keeps the set budget-friendly and prevents the look from going messy. Dark purple nails make black foil look extra sharp, while purple foil adds a second tone so it doesn't feel flat. This works on short nails too because the foil gives texture without requiring length. It's great for parties and photos because the foil catches flash.
Paint all nails with two coats of deep purple and let dry. On the accent nail, apply a thin layer of tacky foil glue or thick clear gel to only the center area. Press black and purple foil flakes in small pieces, then use a dry brush to nudge stray bits into place. Seal with two layers of glossy top coat, curing between coats if you're using gel.
Editor's noteUse small foil pieces - big sheets curl and lift at the edges.
Watch outSkip foil on every nail. It starts looking like you spilled craft glitter.
20. Dark Purple Marble Background With Black Side Frame
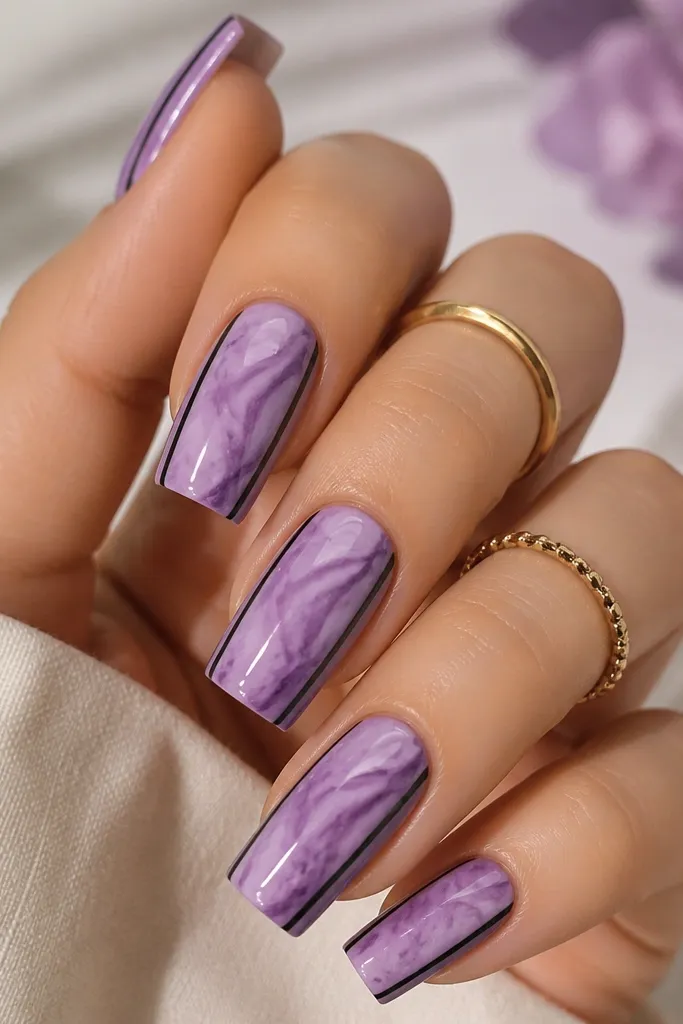
This look feels designed because it mixes texture with clean structure. The soft purple marble gives movement, and the black side frame keeps it from looking chaotic. I like it for medium and long nails because the side frame visually defines shape. It also flatters hands with uneven nail beds because the frame draws attention to the sides. On warm skin tones, the purple marble looks flattering and the black frame keeps it sharp.
Start with two coats of dark purple. For marble, dab a lighter purple and a tiny amount of black polish onto a makeup sponge and lightly tap to create cloud-like veining, then blend by tapping again. While it's still tacky, use striping tape to mask a thin line along each sidewall and paint a narrow black frame line. Remove tape and finish with glossy top coat, sealing the frame edges.
Editor's noteIf tape bleeds, wait until the marble is fully dry before framing.
Watch outDon't frame too wide. Wide frames make nails look stubby.