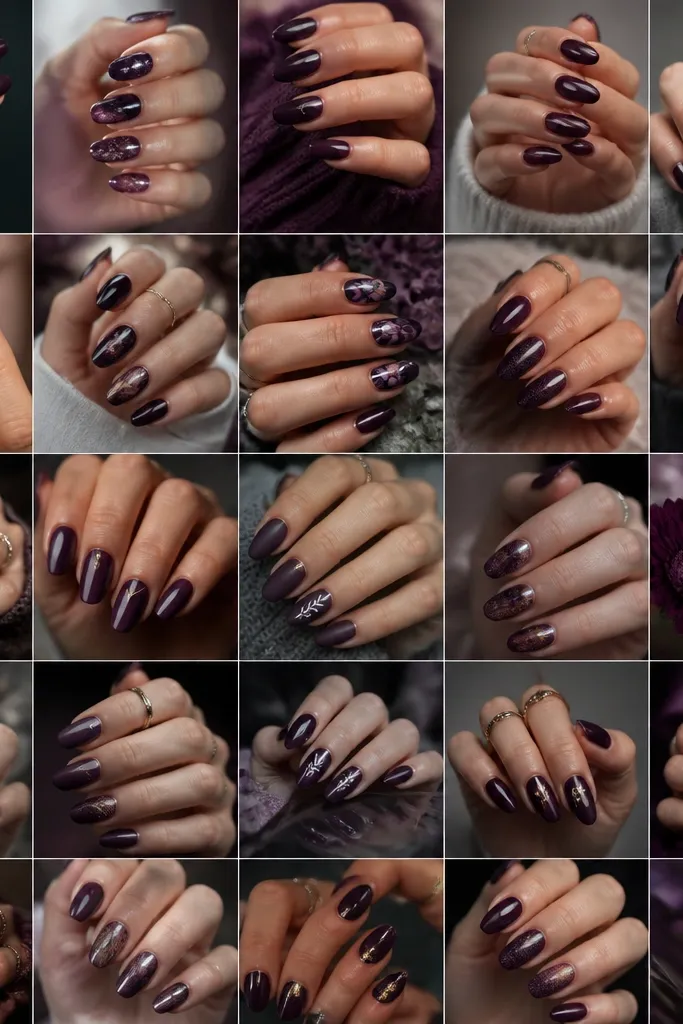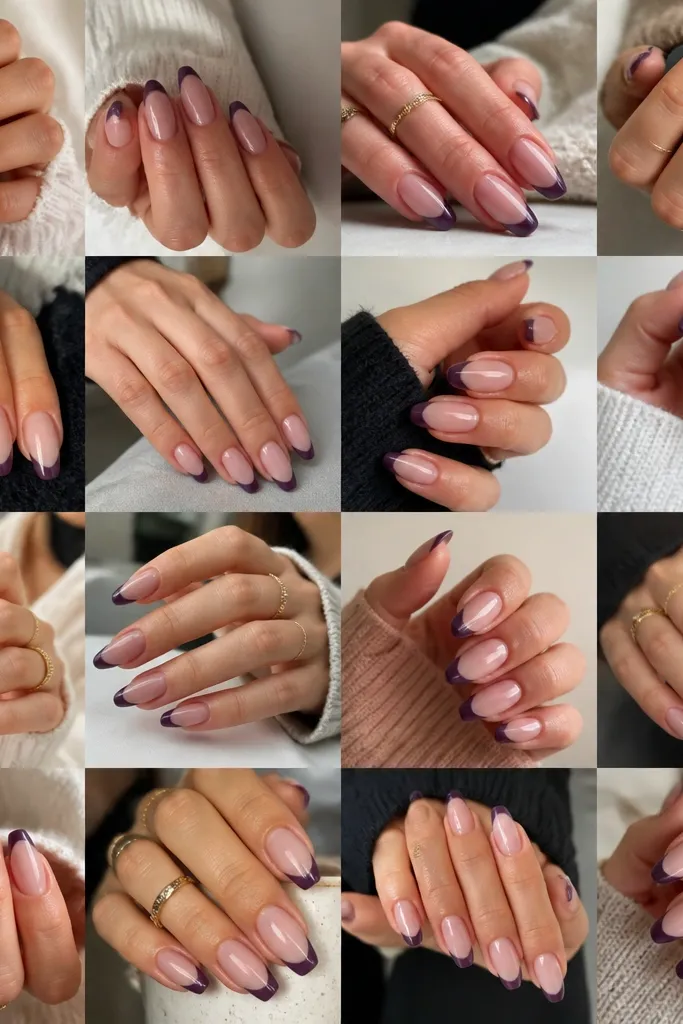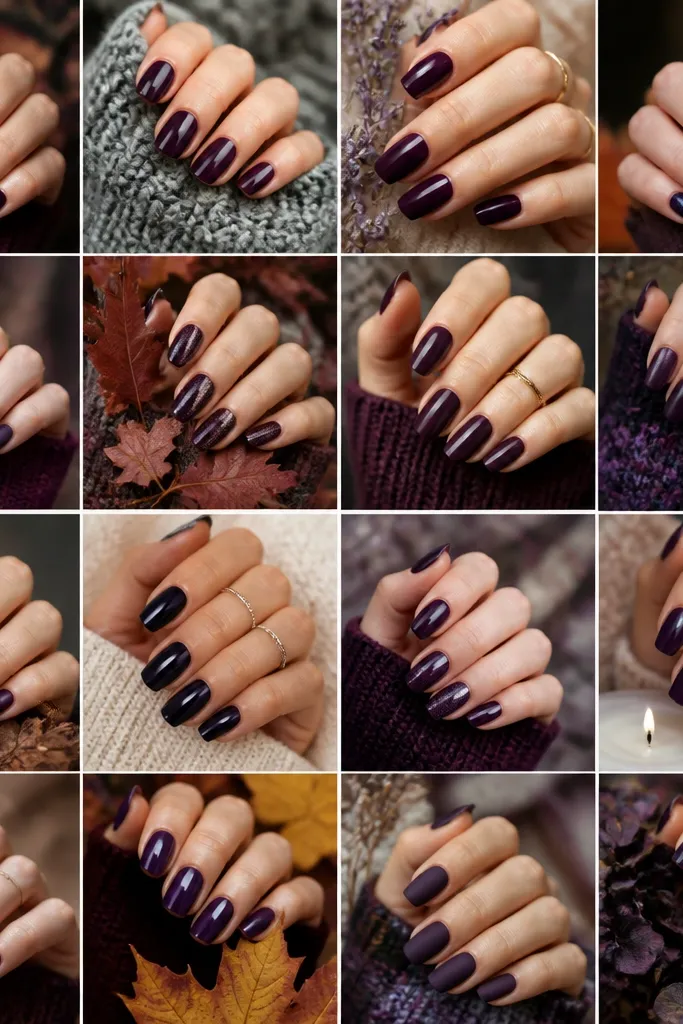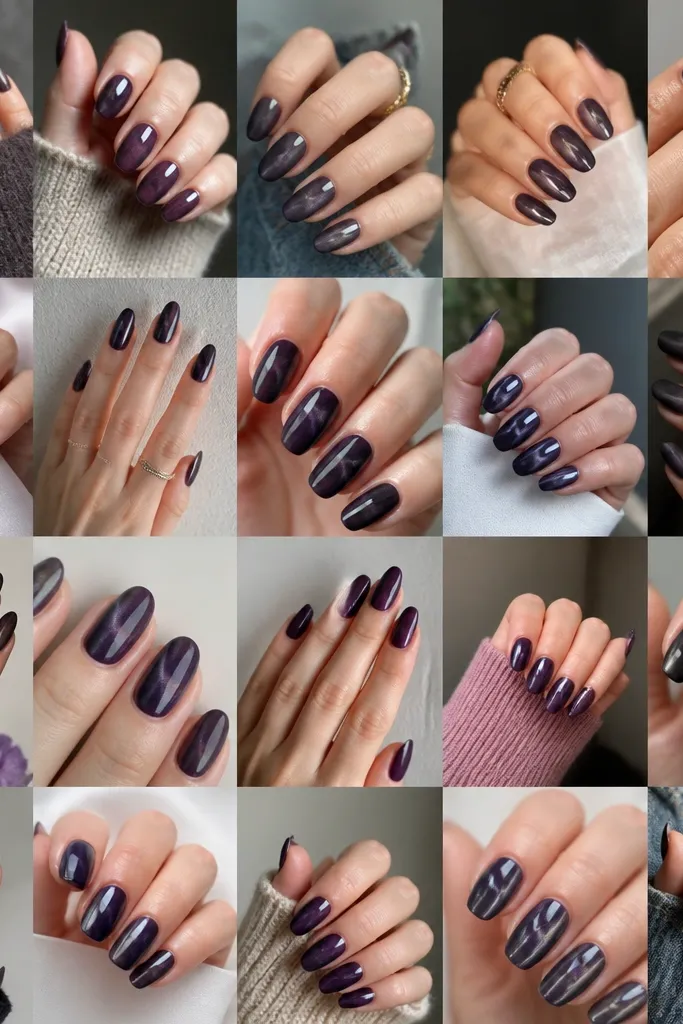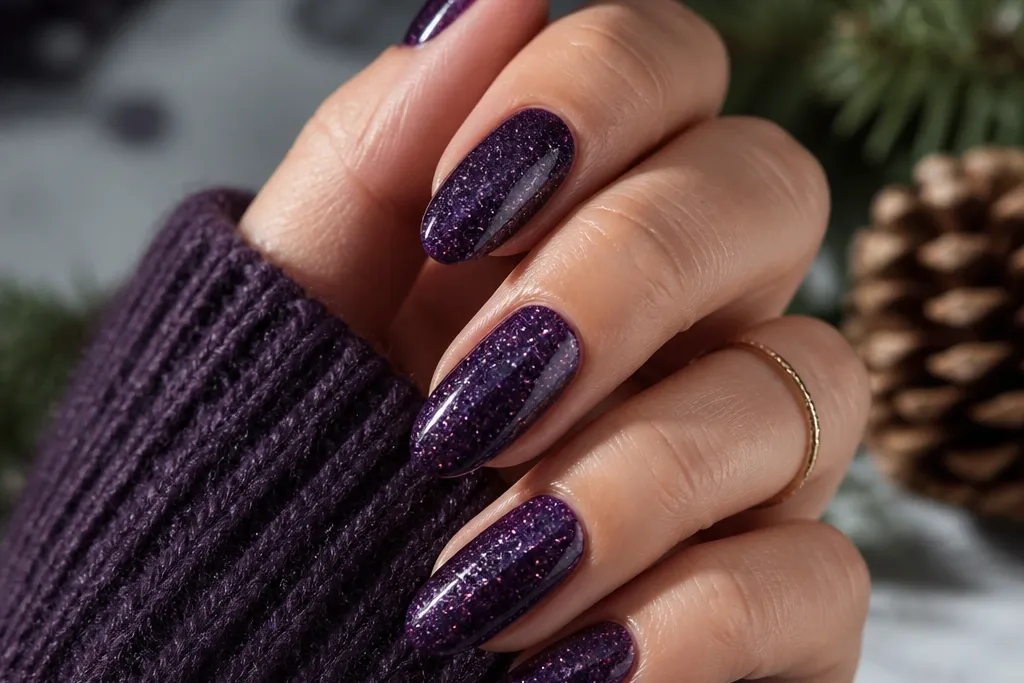
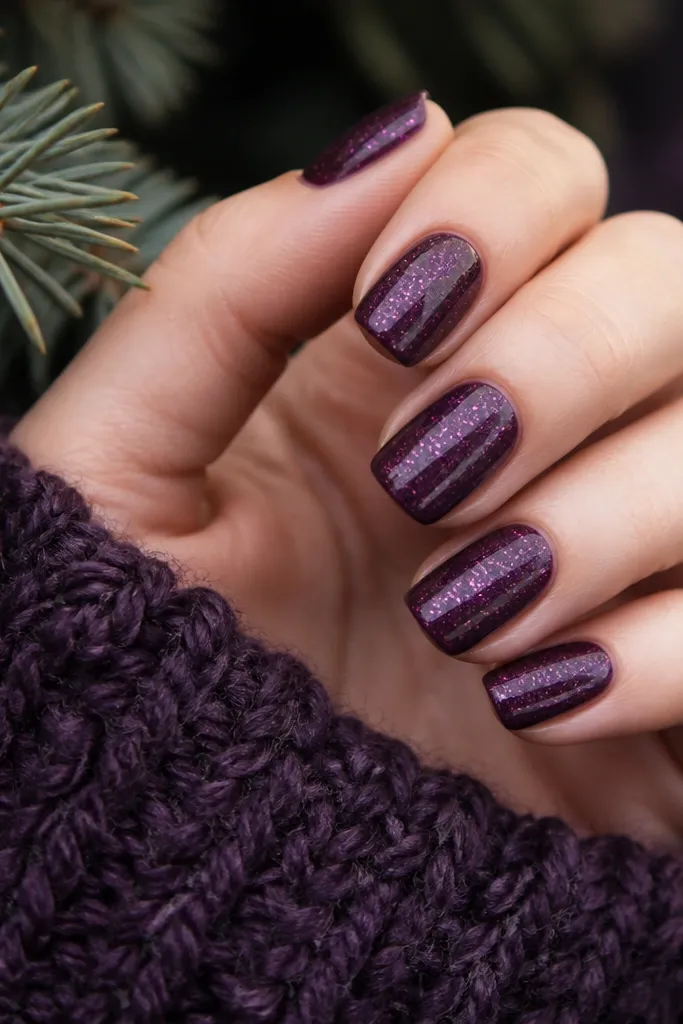
1. Grape Ink Half-Moon With Fine Holographic Dust
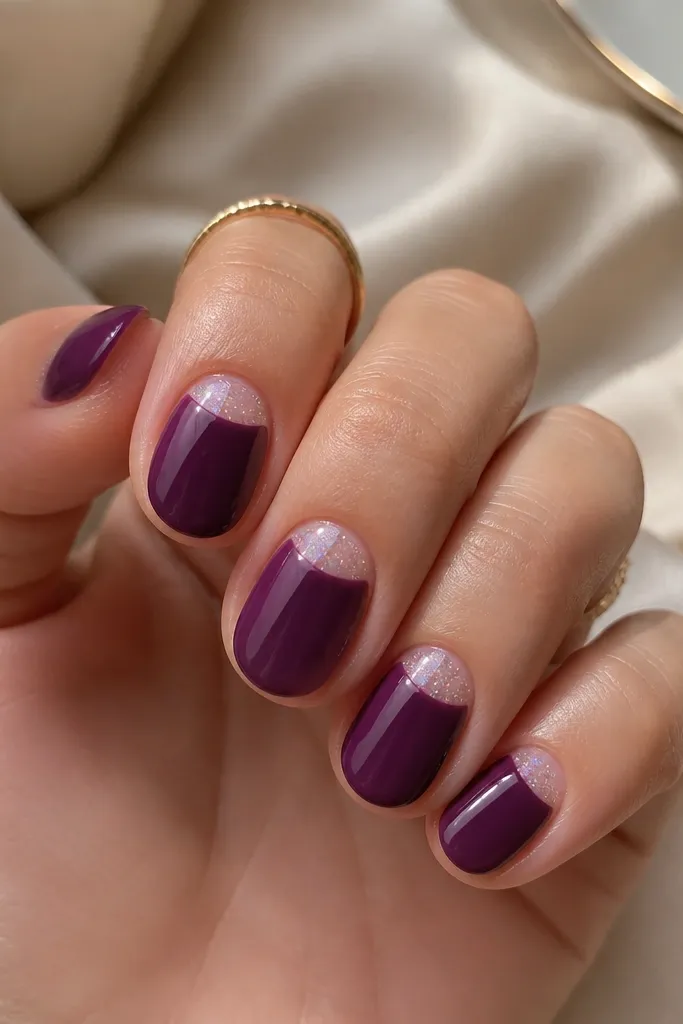
This one is my go-to when I want dark purple nails to look neat instead of loud. The base is a grape ink purple that looks almost black in shade, then the half-moon area stays sheer so your nail bed still looks airy. The fine holographic dust reflects tiny rainbow flecks without chunky texture, which makes it flattering on hands that run dry or look a little crepey. It also works on short nails because the shimmer stays close to the cuticle and doesn’t swallow the nail.
Start by applying two thin coats of the grape ink purple, letting each coat cure fully. Take a small silicone half-moon sponge or a dotting tool and add glitter only inside the cuticle curve, keeping the border crisp. Leave a little gap between the glitter edge and the purple so it looks intentionally cut-out. Finally, seal with a thick clear topcoat and cap the free edge with one extra swipe so the glitter stays smooth.
Editor's noteIf your glitter migrates, mix a tiny drop of topcoat with the dust before placing it, then cure and cap again.
Watch outDon’t let glitter reach the sidewalls — it makes the half-moon look blurry and cheap.
2. Plum Wine Ombré With Glitter Drift Upward
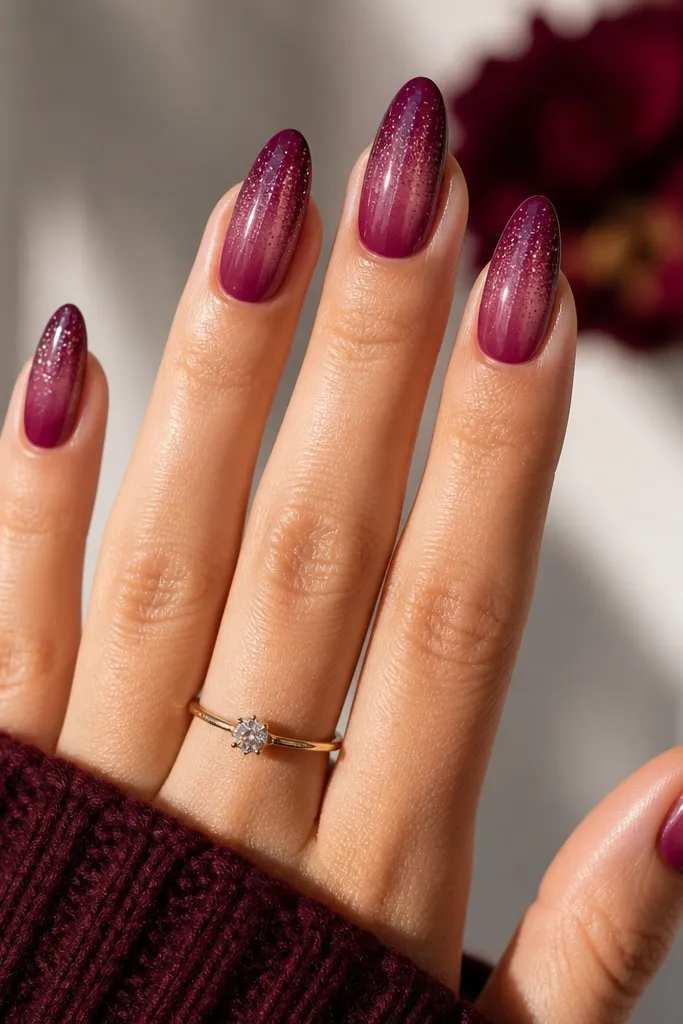
An ombré with a glitter drift is the most forgiving way to wear glitter without it looking scattered. The base starts as rich plum wine at the tip, then fades to a sheer lavender-plum in the middle so the nail still looks light. I love this on medium almond shapes because the taper gives the gradient a natural runway. If you have darker skin tones, this one looks extra dimensional since the purple reads saturated and the glitter catches contrast.
Paint two coats of the plum wine at the tip area, leaving the center lighter and slightly patchy. Use a makeup sponge to dab a sheer plum or milky lavender from mid-nail upward, blending the edge while the polish is tacky or with a gel ombré sponge method. Then tap fine glitter near the tip and drag it upward with a clean brush — stop once it reaches the midline. Finish by sealing the whole nail with topcoat, paying attention to the transition line so it doesn’t feel gritty.
Editor's noteFor a smoother gradient, use a small round sponge and rotate it each dab so you don’t leave hard dots.
Watch outDon’t overbuild glitter too close to the cuticle — it makes the ombré look like a smear.
3. Aubergine Velvet Base With Micro-Glitter Top Cap
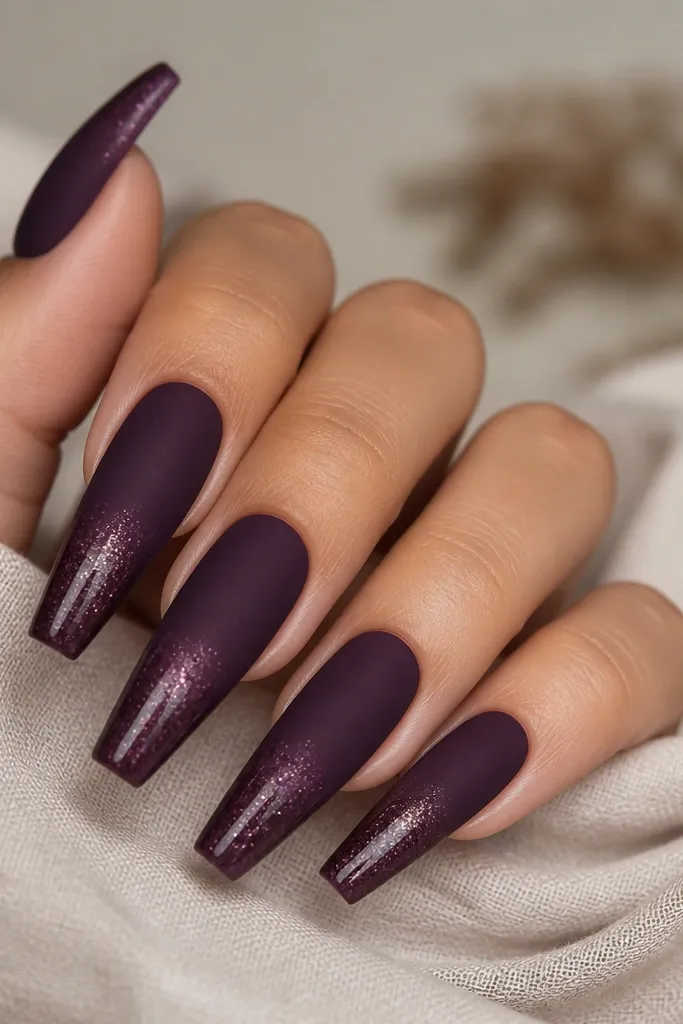
This set looks expensive because it mixes finishes instead of mixing random colors. The base is an aubergine that has a velvet-matte texture, which hides ridges and makes the purple look deep and smooth. The glitter is micro-fine and sits only on the top third, so your nails catch light at the tip when you move your hands. It flatters long nails and also looks good on shorter nails if you keep the cap thin.
Apply the aubergine base and cure, then add a velvet matte topcoat over the whole nail. For the glitter cap, layer a clear gel or topcoat only on the upper third and press micro-glitter into it with a silicone tool. Use a flat brush to tidy the glitter edge into a straight line or a slight curve. Cure again, then cap the glitter with glossy topcoat so the tip feels smooth instead of sparkly-gritty.
If you want extra shine, use matte only on four nails and keep two nails glossy with the same glitter cap.
Don’t leave the matte topcoat under chunky glitter — the glitter will catch and lift faster.
4. Dark Purple Galaxy Lines With Silver Glitter Thread
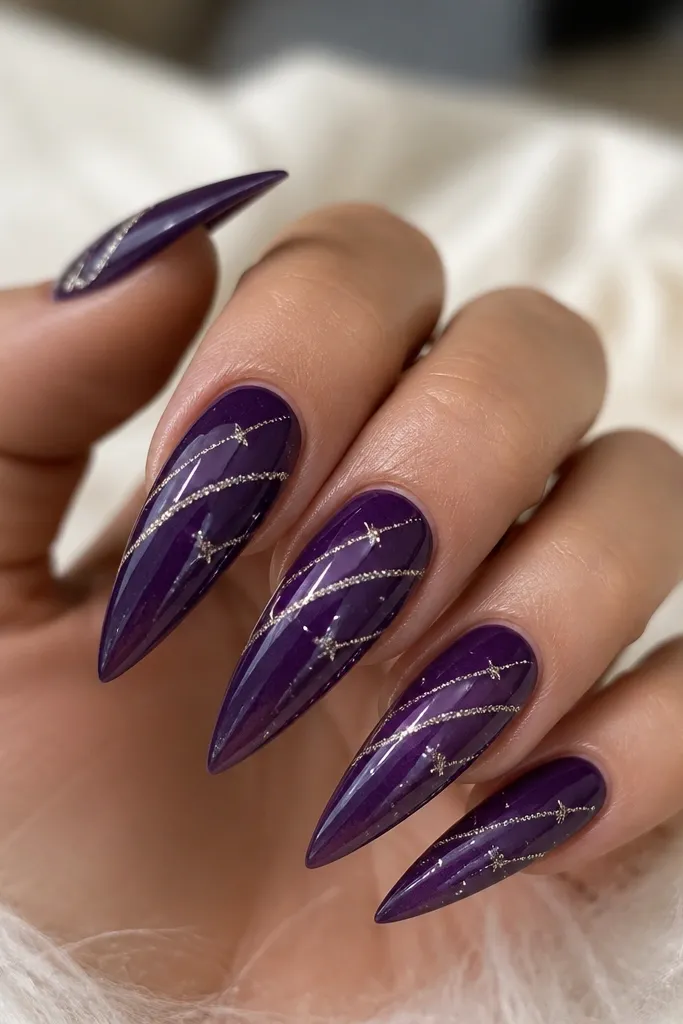
Think of this as a controlled galaxy instead of full-on speckle. The dark purple base is inky and slightly sheer at the center so the lines look like they’re floating. The silver glitter thread gives you that crisp contrast that makes purple look sharper, not muddy. I like it on stiletto or pointed shapes because the movement of the lines follows the nail’s natural angle. It also works on fair and deep skin tones because silver and dark purple both read high-contrast.
Start with two coats of the inky dark purple, then add a sheer purple wash in the center if your polish is too opaque. Use a striping brush and a gel liner to draw two curved “shooting star” lines — one thicker, one thinner. Then apply silver glitter gel along the lines and cure. Finish with a glossy topcoat over everything, and dot tiny stars with a dotting tool at the ends of the lines.
Editor's noteUse a thin liner brush you trust. If the lines wobble, clean the edge with a lint-free wipe and a bit of gel remover before curing.
Watch outDon’t cover the whole nail in glitter — the lines lose their star effect.
5. Berry Jelly Base With Floating Glitter Specks
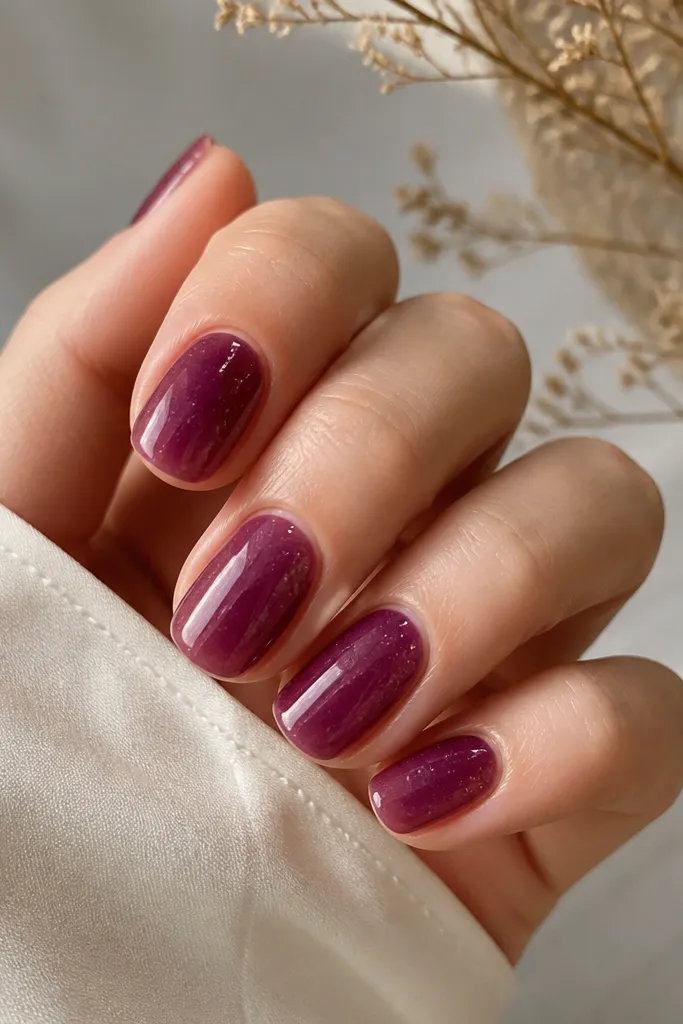
This is the “soft sparkle” version that still looks festive. A berry jelly base has that juicy, semi-translucent look, so the nail bed shows through a little and the purple stays flattering. Floating glitter specks are placed lightly, so you get twinkle when your hand moves but you don’t feel like you’re wearing glitter glue. It looks great on short squoval nails because the translucent base makes the nail look healthy and the specks don’t overpower the shape.
Apply one or two coats of berry jelly purple, keeping it slightly sheer in the center for that glassy depth. With a fine glitter mix, tap tiny specks onto the middle of each nail, then lightly drag them toward the tip edge so it fades. Cure, then add a jelly-like clear topcoat to blend the specks into the surface. Cap the free edge with the same topcoat so the glitter stays locked.
Editor's noteIf your specks look too dense, use a clean dry brush to lift a few before curing.
Watch outDon’t do a thick glitter layer — jelly bases hate bulk and can look bumpy.
6. Dark Purple French Tips With Chunky Glitter Smile
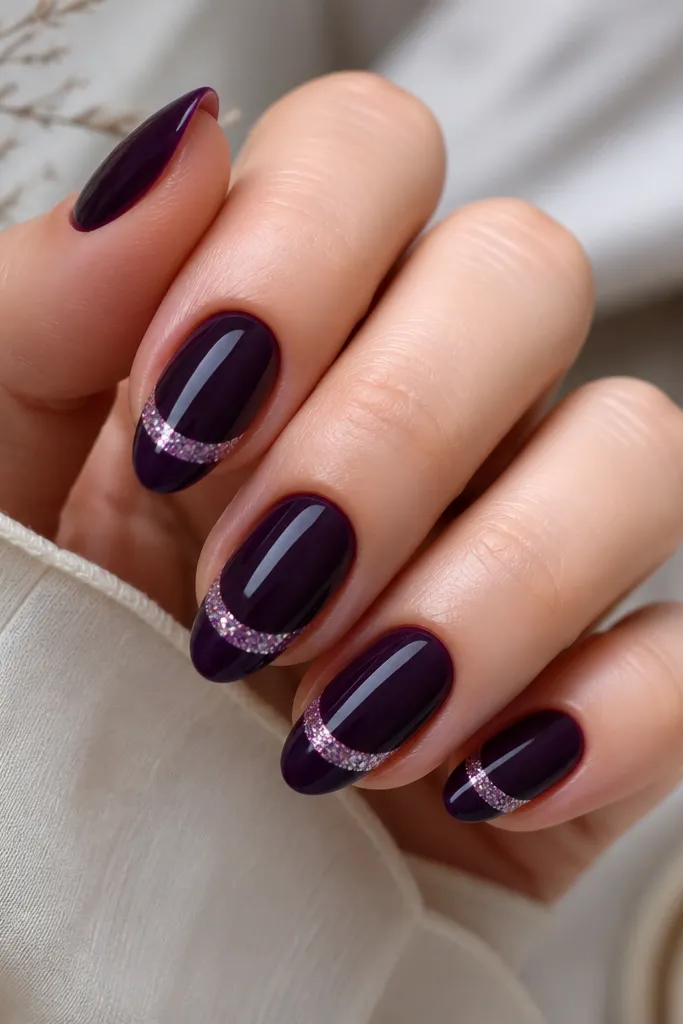
French tips usually look classy, but glitter makes them feel party-ready fast. Here the base is deep dark purple, and the tip area is also dark so everything looks cohesive. The chunky glitter smile line sits just under the very tip edge, which makes it look like a highlight rather than a full glitter tip. This flatters hands with shorter nail beds because the glitter line adds a visual “lift” at the front.
Start by painting the full nail with dark purple and cure. Add French tips using a stencil or freehand with a thin striping brush so the tip line is even across all nails. Then, while the tip is tacky (or with a small gel bead), place chunky glitter along the smile curve right at the border between the tip and base. Clean the line with a brush dipped in remover, cure, then seal with topcoat.
Editor's noteUse a stencil for the French edge, then freehand the glitter smile so it looks custom, not cookie-cutter.
Watch outDon’t let glitter spill over the French border — it ruins the crisp French line.
7. Aubergine Marble Veins With Iridescent Glitter Fragments
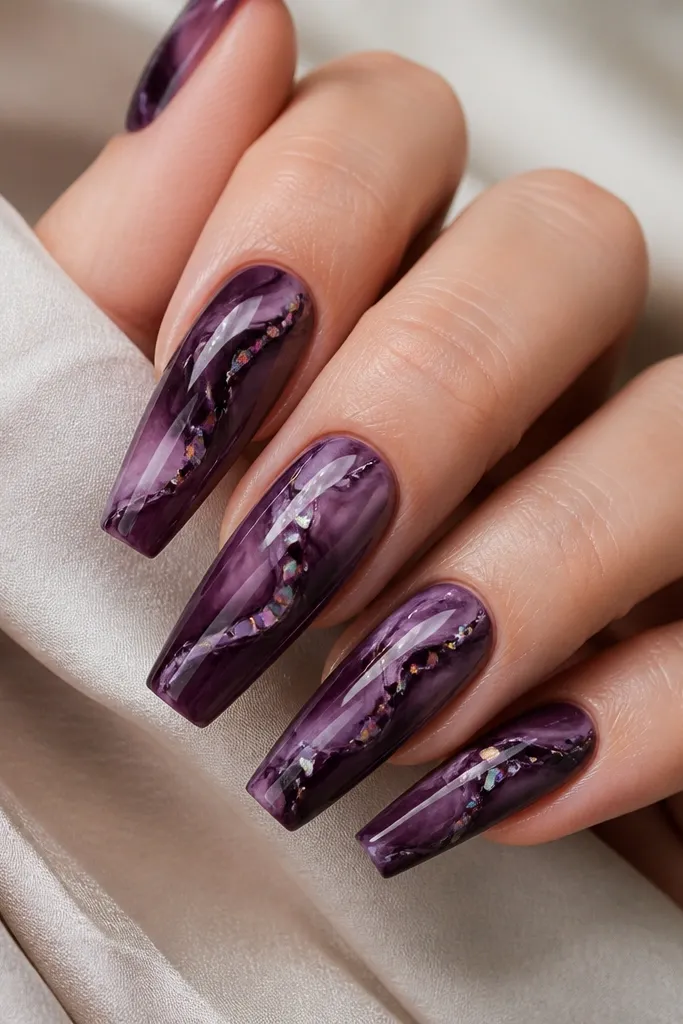
Marble nails look hard, but this version is actually controlled and wearable. The base is aubergine, then you drag lighter purple and a touch of sheer milky nude through it to create movement without turning gray. Glitter fragments go only where veins cross, so the sparkle looks embedded in the design. This one flatters medium to long nails, and it looks especially good if your hands have more movement in the veins (it matches the natural complexity).
Paint a solid aubergine base and cure. Add wispy marble veins with a thin brush using a lighter purple or milky lavender — keep the lines irregular, not too perfect. While the marble layer is still slightly tacky, press tiny iridescent glitter fragments into two or three intersection points per nail. Cure and then apply a glossy topcoat in two thin layers so the marble doesn’t look chalky.
Editor's noteUse a small amount of milky nude in your marble mix. Too much makes the purple look washed out.
Watch outDon’t add glitter to every vein — it turns marble into random sparkle.
8. Purple Noir Matte With Starry Glitter Corners
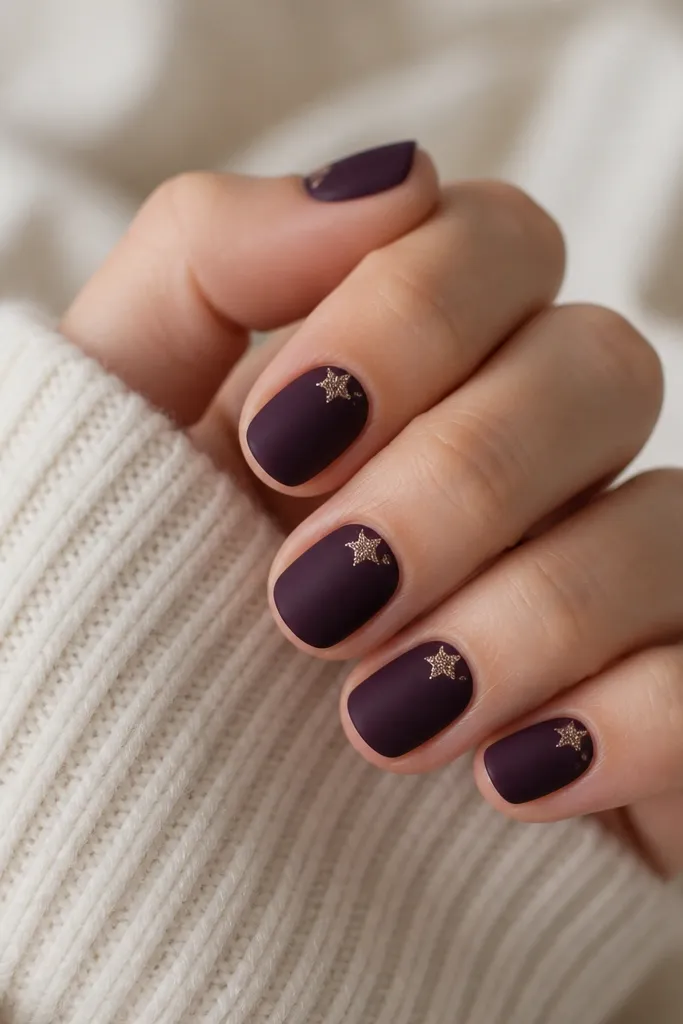
This is my winter pick because it looks cozy and not overly shiny. The base is a very dark purple that reads almost black; matte makes it look velvety and hides small dents. Glitter goes only in tiny corner clusters, so the sparkle looks like it’s peeking out from under a sleeve. It flatters short nails because the clusters are small and placed near the tip edge rather than covering the whole nail.
Apply two thin coats of dark purple, then top with a matte topcoat and cure. For the corner star clusters, use a dotting tool to add a small gel bead at the top corner and press fine glitter into it. If you want star shapes, use a small star-shaped glitter or place a few micro-dots in a star-like pattern. Cure and then spot-topcoat the glitter area with gloss so it stays smooth against your skin.
Editor's noteKeep the glitter corner the same position on every nail so your set looks intentional.
Watch outDon’t paint glitter directly over matte without sealing it — it will look rough quickly.
9. Deep Purple Ombre Jelly With Silver Leaf Dust
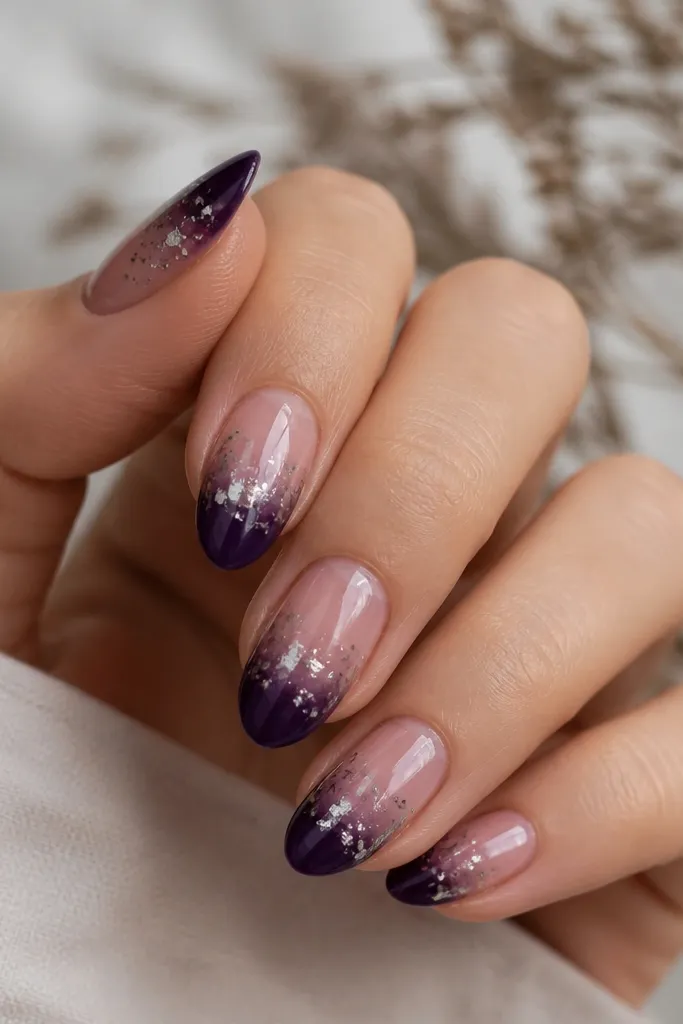
This looks like jewelry because silver leaf dust has a soft shimmer that doesn’t scream glitter. The jelly ombré keeps the purple looking dimensional and less flat, especially on nails that are more narrow or have ridges. I like this when I want something wintery but not too heavy, because the silver stays delicate. It flatters most skin tones since silver pairs cleanly with both cool and warm purples.
Apply a deep purple jelly polish at the tip and cure. Sponge a sheer plum or milky lavender from the center upward so it blends into the nail bed — stop while it still shows a clear ombré. Add silver leaf dust in a light pinch at the transition area, then press gently so it adheres. Seal with a thick glossy topcoat, and cap the free edge with an extra thin layer to stop leaf from catching.
If silver leaf looks patchy, add a tiny amount of clear gel where you want it denser, then press leaf into that spot.
Don’t rub leaf hard — it smears and looks gray instead of shiny.
10. Purple Rhinestone Drop With Glitter Halo
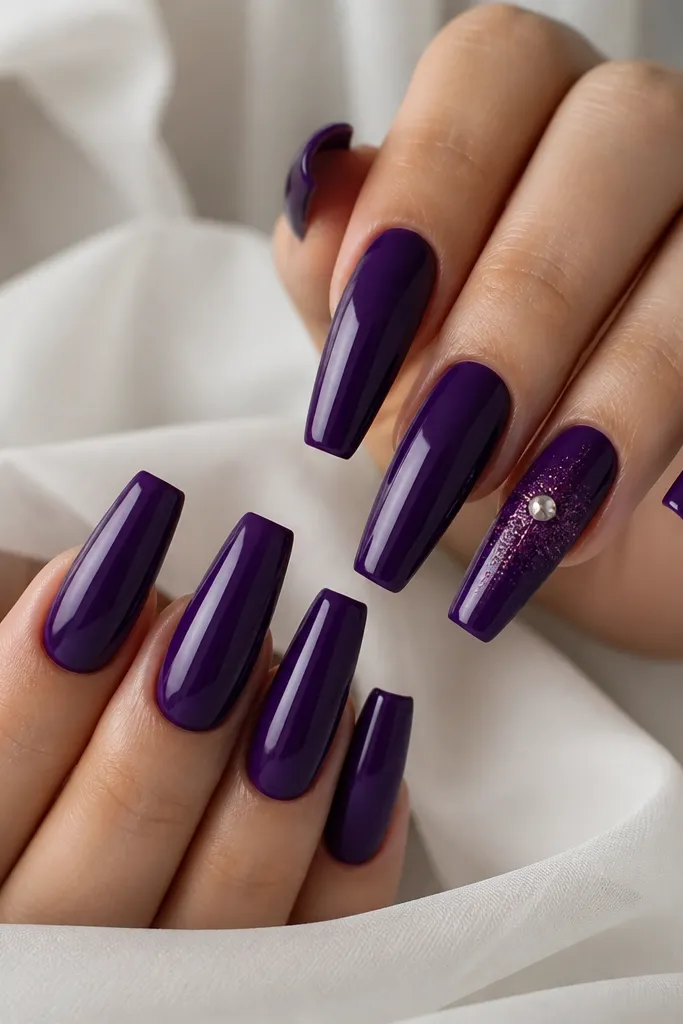
A single rhinestone plus a glitter halo looks like a manicure from a salon chair, and it’s easier than it looks. The deep purple base makes the rhinestone pop without needing extra colors. The halo of fine glitter is the secret: it softens the stone so the whole design feels cohesive, not like a random sticker. This flatters hands that want a focal point — it draws the eye to the center of the nail and makes fingers look longer.
Start with two coats of deep purple and cure. Place a small clear rhinestone using gel adhesive — I set it a little above the midline so it looks centered when you hold your hand up. Surround it with a thin ring of fine glitter gel, then sprinkle glitter lightly over the ring. Cure and topcoat, focusing on sealing the rhinestone base so it doesn’t lift.
Use matte topcoat on the stone-free nails and keep the rhinestone nail glossy for contrast.
Don’t use chunky glitter under a rhinestone — it raises the stone and can snag.
11. Dark Purple Glitter Roadstripe Accent
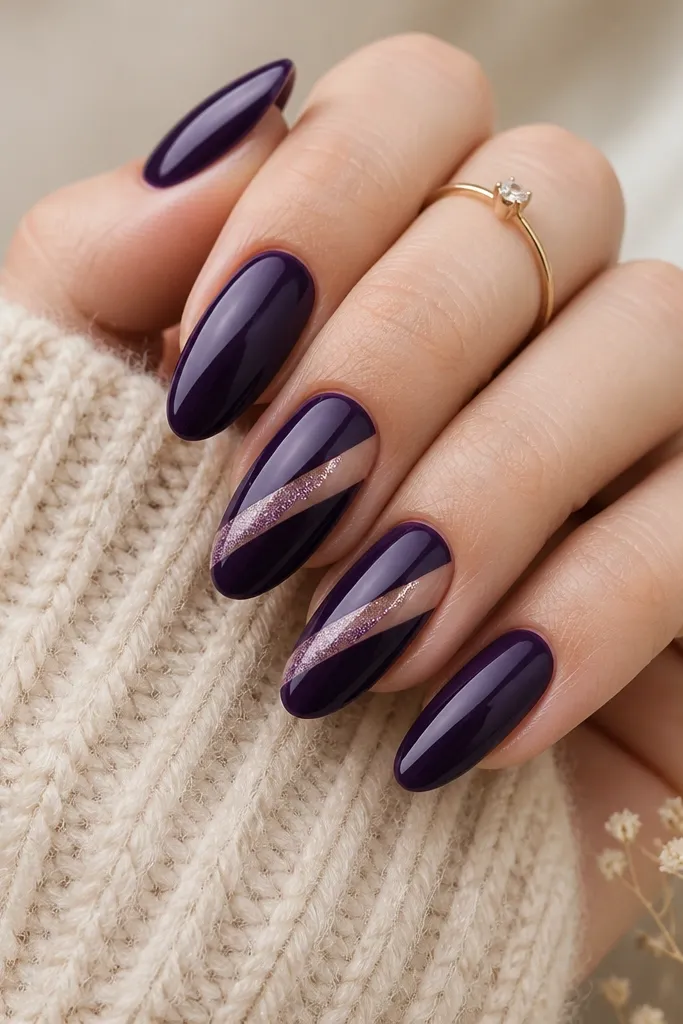
This is the set I wear when I want sparkle but I don’t want to babysit glitter placement. The diagonal stripe creates movement, and the clean edges make it look intentional. I like it on medium almond because the stripe follows the nail curve and makes the nail look sleek. It also looks great on shorter nails if you keep the stripe narrow and stop it before the tip.
Paint all nails deep purple and cure. On your accent nails, use striping tape to define a narrow diagonal channel — press it down firmly so the edge stays sharp. Fill the channel with fine glitter gel, cure, then remove the tape while the gel is fully cured. Seal with topcoat and run it along both sides of the stripe so you don’t feel any glitter ridge.
Editor's noteChoose one stripe size: thin (about 1mm) for short nails, thicker (2-3mm) for medium and long.
Watch outDon’t eyeball the angle — uneven stripes make the manicure look careless.
12. Plum Chrome Dust Over Dark Purple
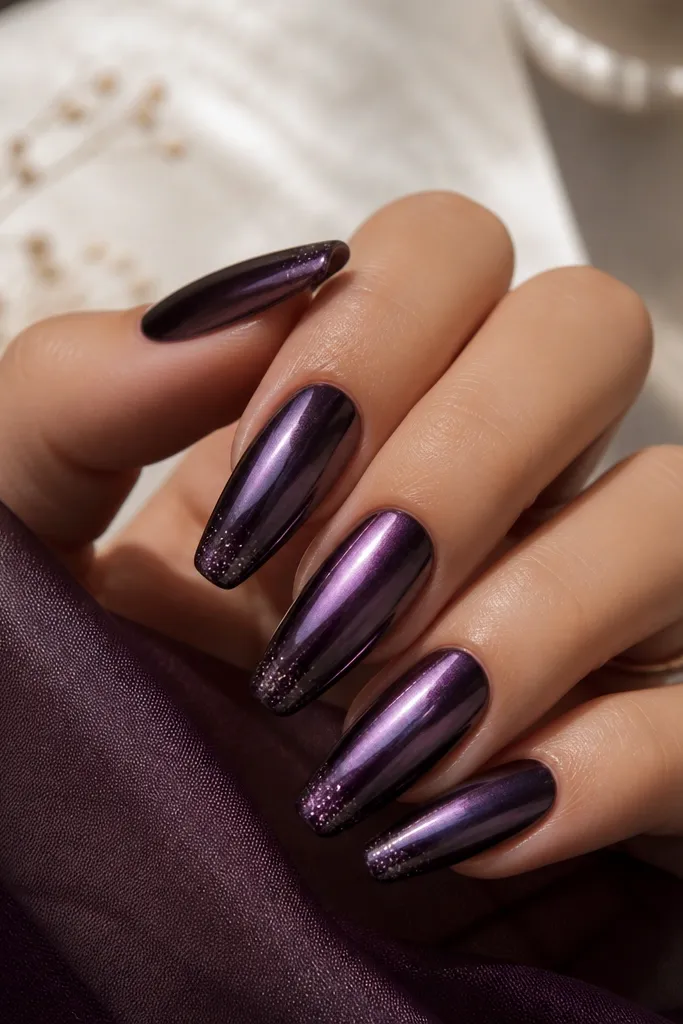
Chrome dust gives you that mirror look without needing a ton of glitter pieces. I use this when I want dark purple to look futuristic but still seasonal and wearable. The plum chrome over a dark purple base reads like deep berry metal, and it looks especially good on hands with warm undertones. The small glitter highlight near the tip keeps it from looking flat and gives that sparkle cue that AdSense-friendly photos love.
Apply dark purple base in two coats and cure. Buff plum chrome powder over the nail using an applicator sponge, then press and buff again until it looks even. For the glitter highlight, add a thin line of clear gel near the tip and sprinkle fine holographic glitter on top. Cure and seal with a glossy topcoat that’s compatible with chrome so you don’t dull it too much.
Editor's noteUse less topcoat than you think on chrome — too much can mute the shine.
Watch outDon’t use coarse glitter with chrome powder — it creates texture that looks out of place.
13. Dark Purple Scattered Confetti Glitter Tips
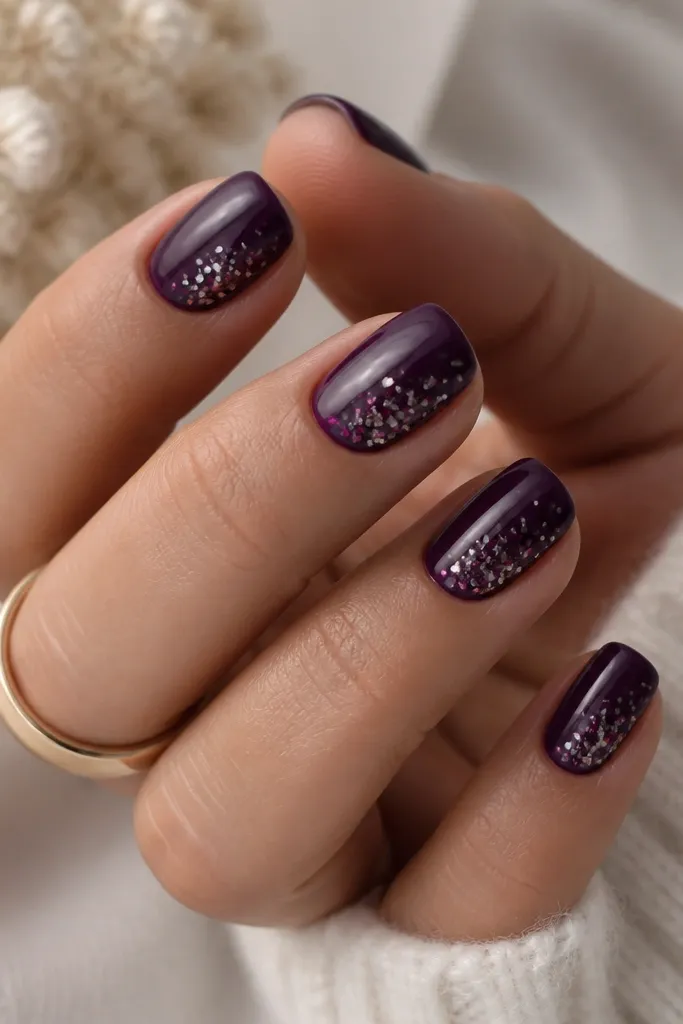
Confetti glitter tips look fun, but the key is scattering only at the edge so the rest of the nail stays smooth. Dark purple is the perfect anchor because it holds the sparkle and prevents it from looking random. This set flatters short nails because the glitter sits in a smaller zone and still makes the nails feel celebratory. I also love it for casual events where you want sparkle without a full coat of glitter.
Paint two coats of dark purple and cure. Add a clear gel “tip zone” only on the last 2-3mm of the nail, then sprinkle confetti glitter of mixed sizes into that wet gel. Tap off excess and clean the sides with a brush. Cure and apply a glossy topcoat in two thin layers so the glitter feels sealed and smooth.
Use a glitter funnel or a small paper fold to control where the confetti lands.
Don’t leave dry glitter exposed — it catches on hair and fabric.
14. Black-Purple Jelly With Aurora Glitter Swirl
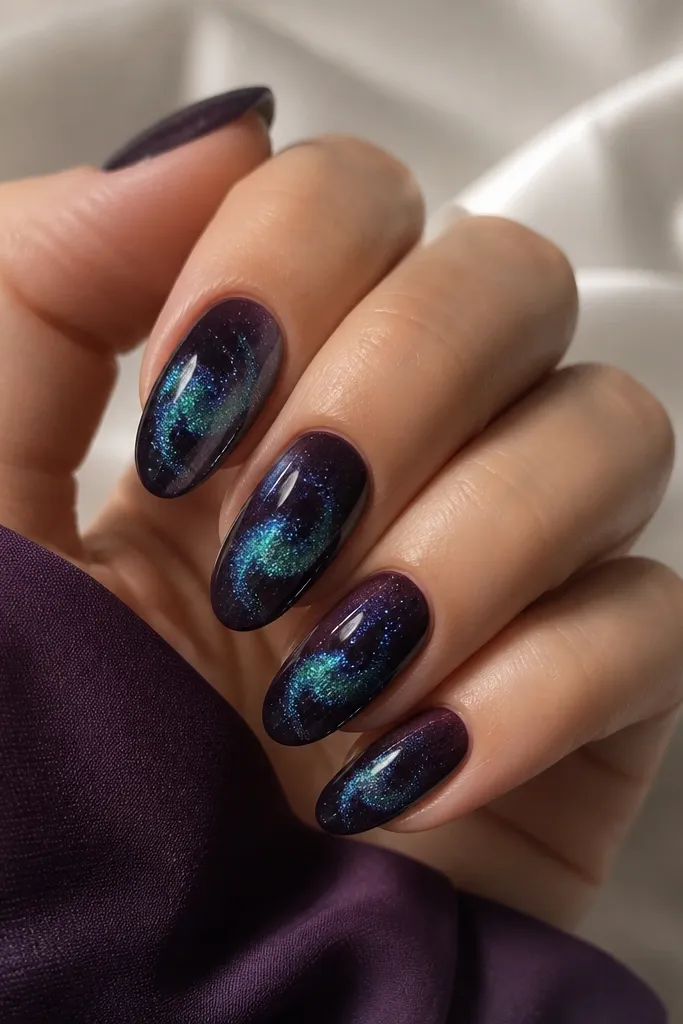
Aurora glitter over black-purple is the most eye-catching combo that still feels classy. The jelly finish makes the purple look like it has depth, and the iridescent swirl gives you that northern lights effect when you move. This one flatters slender fingers because the swirl adds a diagonal flow. If you have olive or neutral undertones, the green-blue shift in the glitter looks extra flattering.
Apply black-purple jelly polish in two coats, keeping it slightly translucent so the jelly depth shows. With a thin brush, draw a curved swirl line using clear gel from mid-nail toward the tip. Sprinkle aurora iridescent glitter along the gel line, then tap and cure. Seal with glossy topcoat, making sure the swirl ridge is fully capped.
Editor's notePractice the swirl on one nail tip first. Once the line looks right, repeat the same motion on the rest.
Watch outDon’t use only green glitter — you want mixed iridescent tones so the aurora effect shows.
15. Plum Foil Flakes With Fine Glitter Veil
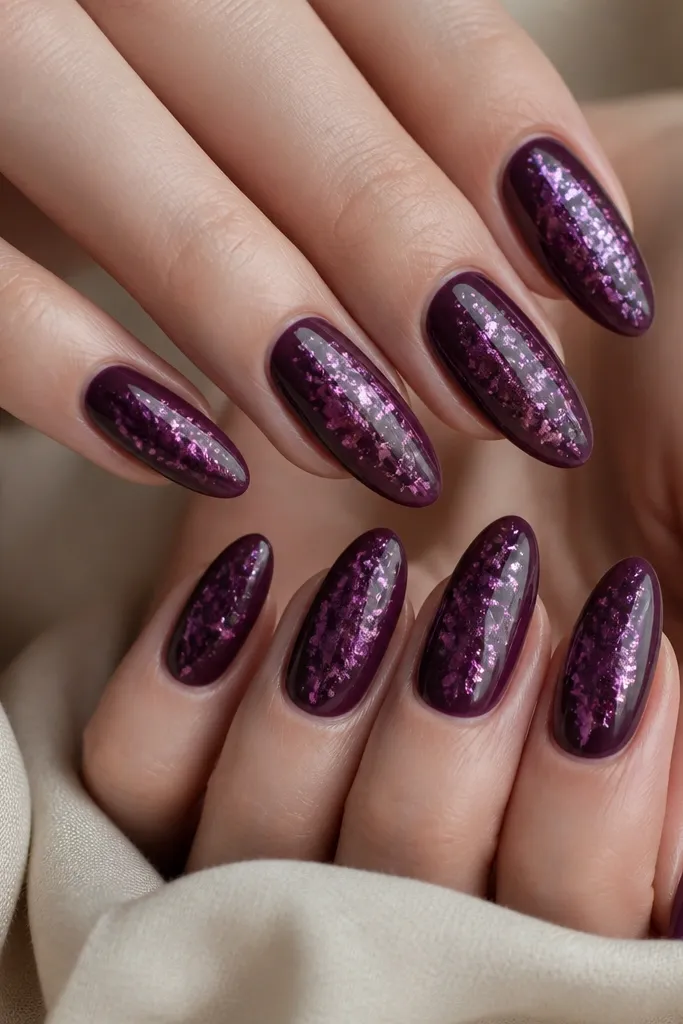
Foil flakes look high-end because they catch light in larger pieces, but they can get messy if you don’t control them. This design uses a fine glitter veil over the foil so the edges blend into the nail instead of looking stuck on. The result reads like stained glass under a glossy topcoat. It flatters medium and long nails and looks great on both cool and warm skin tones because the plum foil stays within the same color family.
Paint nails deep plum and cure. Dab foil adhesive gel onto the center area and press plum foil flakes in small patches — leave some negative space so it doesn’t cover everything. Then brush a thin sheer layer of clear gel over the flakes and sprinkle fine glitter to create a veil. Cure and topcoat twice, making sure the foil edges are sealed so they don’t snag.
Use smaller foil pieces than you think. Big flakes can lift and look uneven.
Don’t skip the veil. Without it, foil edges look like stickers.
16. Dark Purple Confetti Dot Gradient
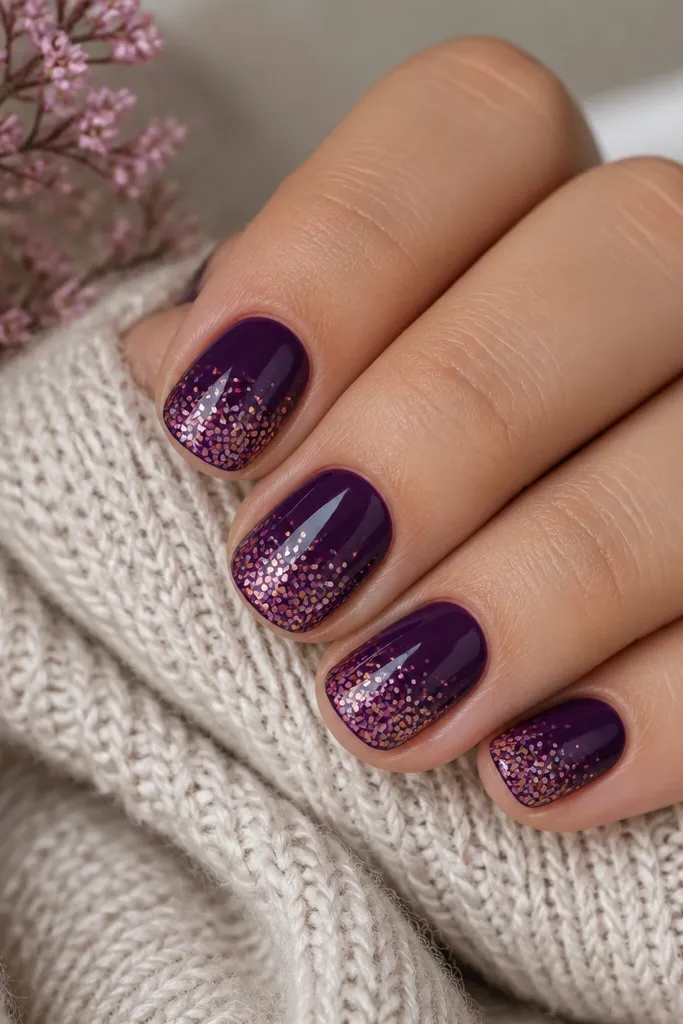
This is a dot-gradient that feels playful but still clean, because the dots are evenly controlled. The dark purple base keeps the look grounded, and the dot fade makes short nails look longer. I like it for everyday wear because the glitter is light enough that it doesn’t feel like you’re wearing a party filter. It also works if you have bitten nail edges or uneven cuticles — the dot pattern pulls attention away.
Apply two coats of dark purple and cure. Using a dotting tool and fine glitter gel or glitter polish, place a tight cluster of tiny dots at the tip edge. Then move upward with fewer dots, spacing them so the density decreases toward the center. Cure and seal with topcoat, then cap the free edge so dot glitter doesn’t lift.
Editor's noteFor cleaner dots, wipe your dotting tool between nails so the glitter doesn’t clump.
Watch outDon’t make the dot spacing random — uneven spacing reads messy in photos.
17. Purple Ink Stiletto Marble With Micro Glimmer
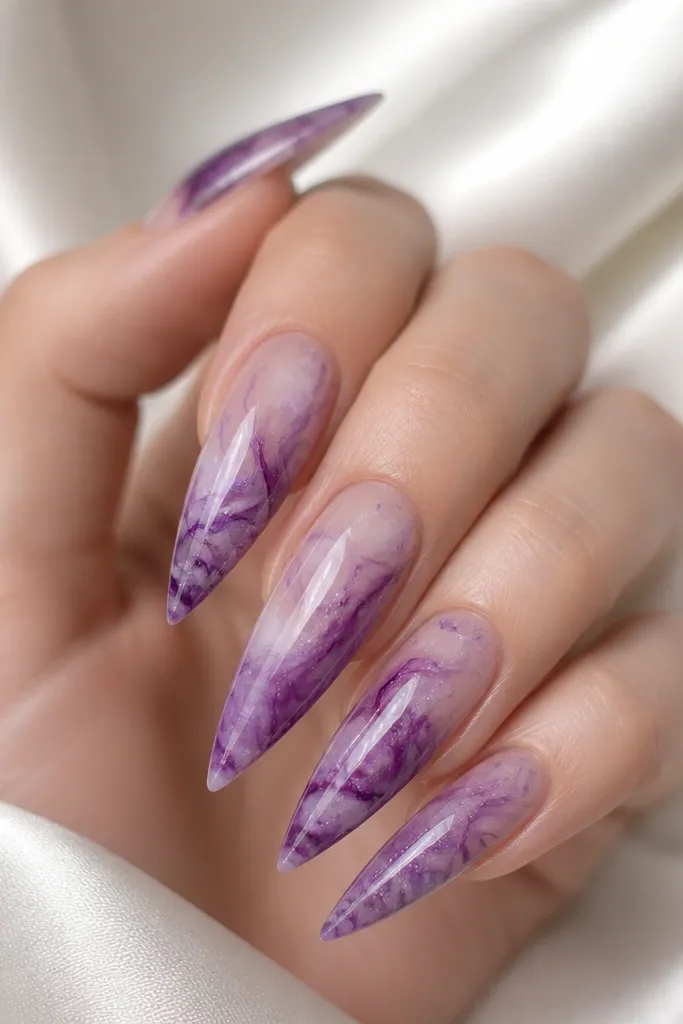
This set is for when you want marble but you don’t want chunky glitter texture. The purple ink marble uses two shades of purple so it looks dimensional without turning gray. Micro glimmer specks are scattered lightly over the whole nail, which makes the marble look alive when light hits. Stiletto shapes benefit because the long surface gives the marble room to breathe and the specks don’t crowd the nail bed.
Base with deep purple ink and cure. Add marble swirls with a lighter plum and a thin brush, then soften edges by lightly dragging with a clean brush. Sprinkle micro glimmer specks over the marble while it’s still tacky, then cure. Finish with a glossy topcoat and cap the tip carefully since stiletto tips catch on sleeves.
Use a makeup brush to dust off extra micro glimmer before curing so it stays light.
Don’t use chunky glitter over marble. It kills the smooth marble effect.
18. Dark Purple Halo Glitter Ring Around Cuticle
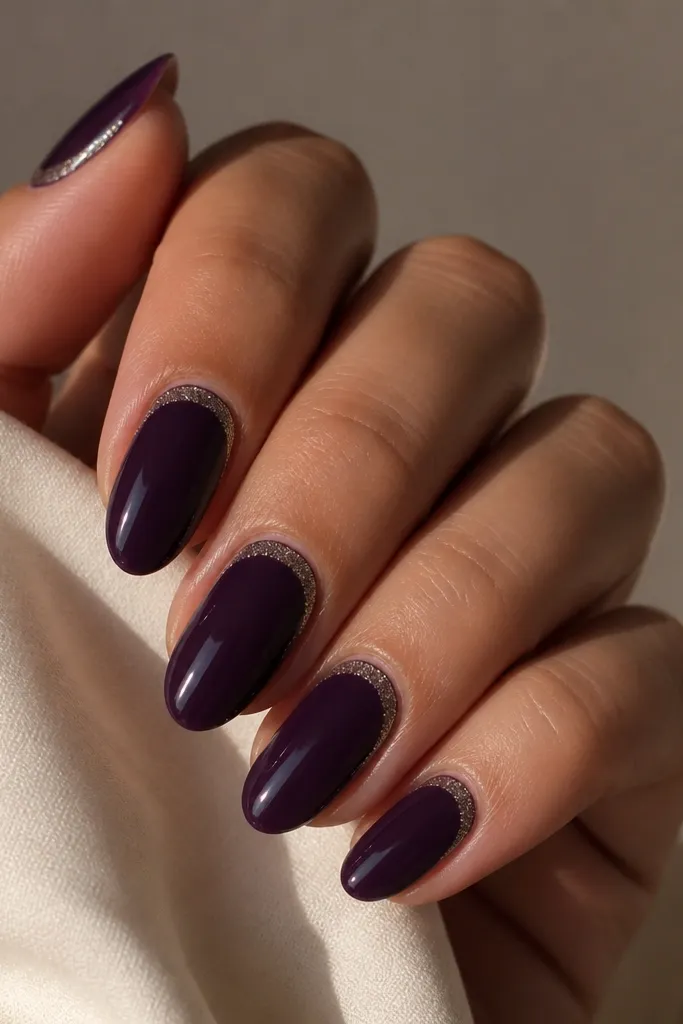
A cuticle halo ring makes your nails look polished even if you hate full glitter. The ring is thin, so it doesn’t take over the nail shape, and the center stays a smooth dark purple that looks rich. I like this for hands that have dry cuticles because the halo draws attention upward and away from imperfections. This also photographs well because the ring catches light right where your hand moves most.
Apply two coats of dark purple and cure. Add a thin bead of clear gel around the cuticle — not on the skin, just on the nail edge. Sprinkle fine glitter into the bead and tap off excess so the ring stays crisp. Cure and then apply topcoat, sealing the halo and running it along the cuticle line to prevent lifting.
Keep the ring slightly thicker at the sidewalls for a more natural halo shape.
Don’t flood gel onto the skin. It will peel and looks sloppy.
19. Plum Night Glitter Drip Tips
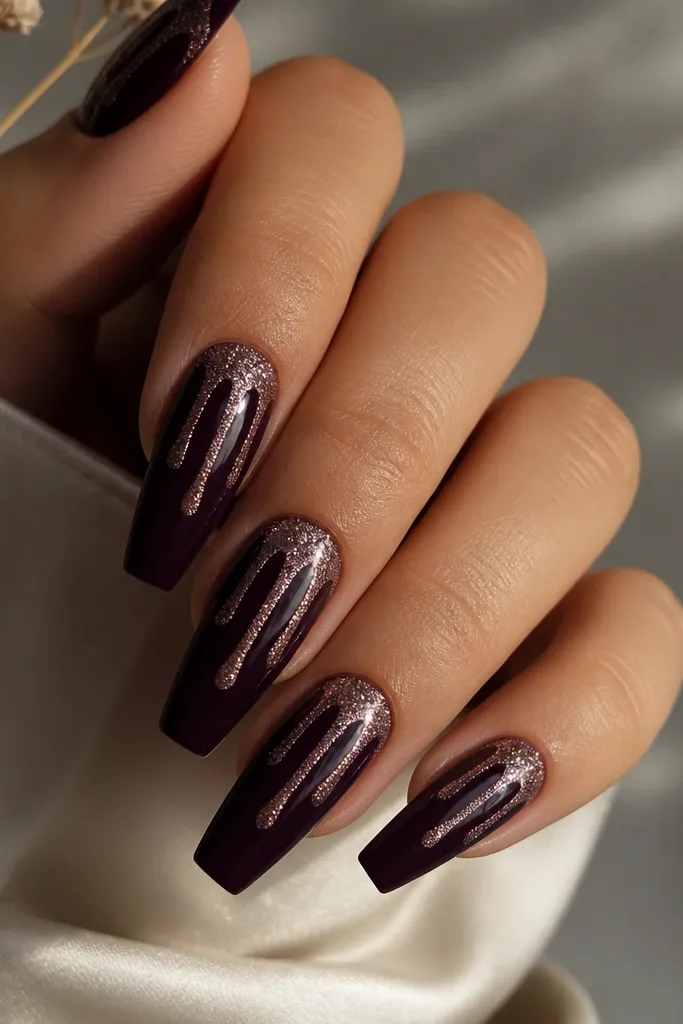
Drip glitter looks edgy, but you can make it neat with the right consistency. Plum night base keeps it dark and seasonal, and the glitter drip trails add movement. I love this on coffin nails because the flat tip gives you a stable starting point for the drip lines. It flatters hands with longer fingers by adding a vertical line effect, and the drip stays readable even if your glitter application isn’t perfect.
Paint nails plum night and cure. Load a thin brush with glitter gel and drag a small amount from the tip edge downward, creating two or three short trails per nail. Keep each trail short — about 1-2mm of drip depending on nail length — so it looks intentional. Cure and seal with glossy topcoat, making sure the drip edges are fully capped so they don’t snag.
Editor's noteIf the drip spreads, use a thicker gel and less product on the brush.
Watch outDon’t make drips too long. Long drips can look like a nail accident.
20. Dark Purple Glitter Linework Corners
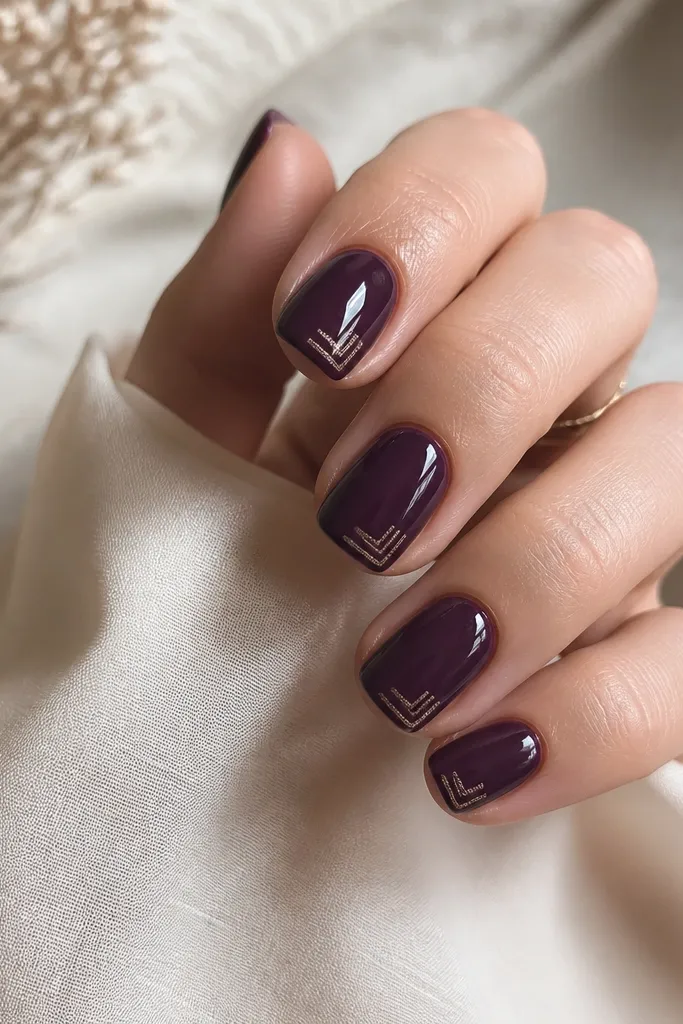
Geometric glitter corners look sharp without covering the nail in glitter. The dark purple base is your main color, so the sparkle stays like trim instead of clutter. This design is flattering on short nails because the glitter is placed near the tip corners, which gives a subtle lengthening effect. I also like it for workdays because it’s minimal but still catches light.
Apply two coats of dark purple and cure. With striping tape or a steady hand, add tiny corner guides at each free edge — top-left and bottom-right work well on short nails. Fill each corner with fine glitter gel using a thin detail brush, cure, then remove any tape carefully. Seal with topcoat and cap the corners so they feel smooth when you run your fingers over them.
Use a detail brush with a pointed tip. Round brushes make lines look chunky.
Don’t overfill the corner — flat glitter mounds look bulky on short nails.
21. Violet Satin Base With Glitter Cuticle V
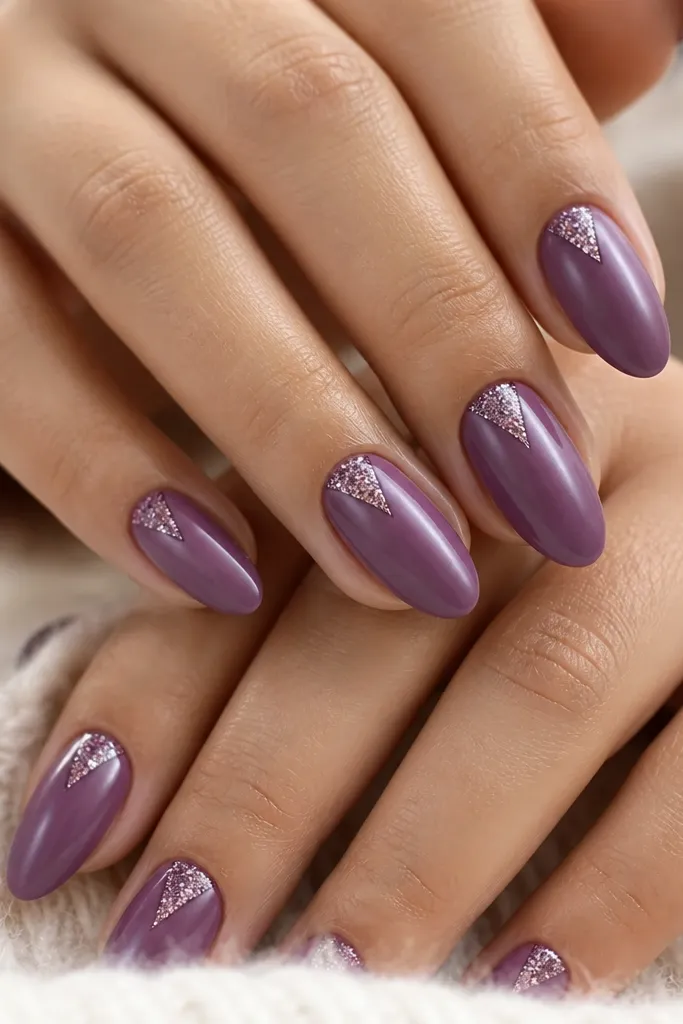
A cuticle V shape is one of the cleanest ways to add sparkle while keeping the nail looking structured. The satin violet base gives a soft sheen that makes glitter look smoother and more expensive. Because the glitter V points upward, it visually lengthens the nail bed and makes fingers look slimmer. This looks great on medium almond and oval nails, and it flatters most skin tones because satin violet bridges cool and warm undertones.
Apply two coats of satin-finish violet purple and cure. Use a fine brush to draw a V from each side of the cuticle up toward the center — keep it narrow and centered. Paint the V with clear gel, then sprinkle fine glitter and tap off excess. Cure and then topcoat over the whole nail so the V is sealed and the surface stays smooth.
Editor's noteMake the V slightly wider at the cuticle and taper it as it climbs for a more flattering shape.
Watch outDon’t let the V touch your skin. The glitter line will lift and you’ll see gaps.
22. Dark Purple Glitter Gradient Tips With Sheer Mid
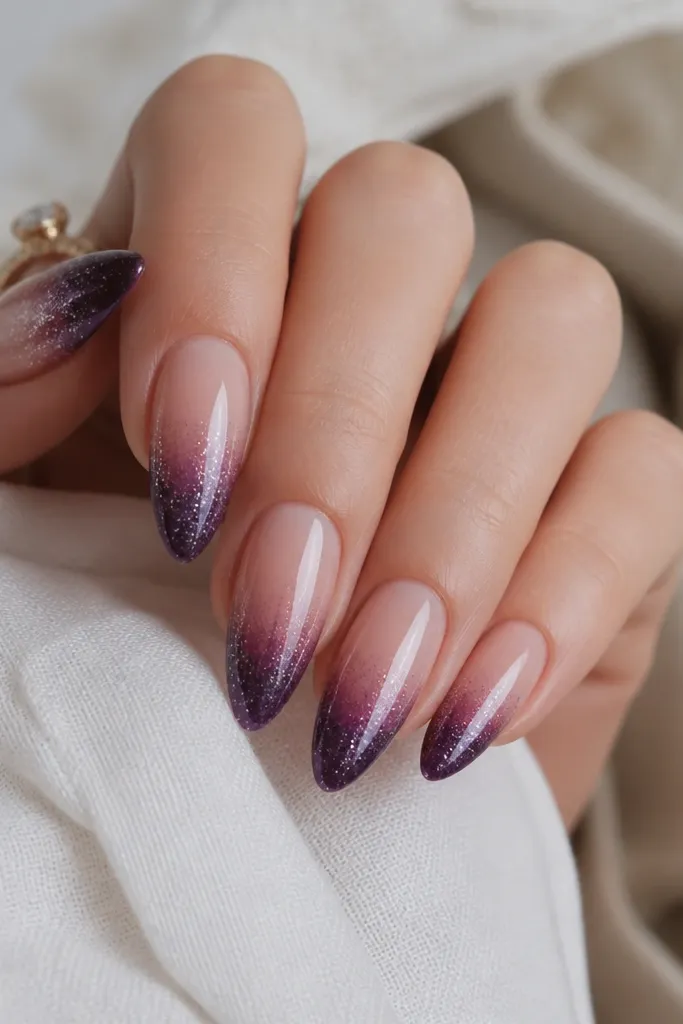
This is the “clean glitter” look I use when I want dark purple nails to look luxe, not artsy. The sheer mid-nail keeps the set breathable, and the glitter gradient at the tip looks like light refracting through glass. It flatters long almonds because the taper makes the fade look natural. If you have uneven nail texture, this set hides it because the glitter concentrates at the area that catches attention.
Start with a sheer base layer or sheer purple gel to create the mid-nail transparency. Add dark purple at the tips in two thin coats and cure. For the glitter, apply a clear gel layer only at the tip area and blend fine glitter from the very tip backward — stop the glitter fade before the mid-nail. Cure and then seal thoroughly with glossy topcoat, especially along the fade edge.
Editor's noteUse a sponge to blend the glitter fade. A brush alone leaves a hard edge.
Watch outDon’t apply glitter all the way to the center. That’s when it turns into a full glitter nail.
23. Plum Noir Sticker Look With Glitter Edge Outline
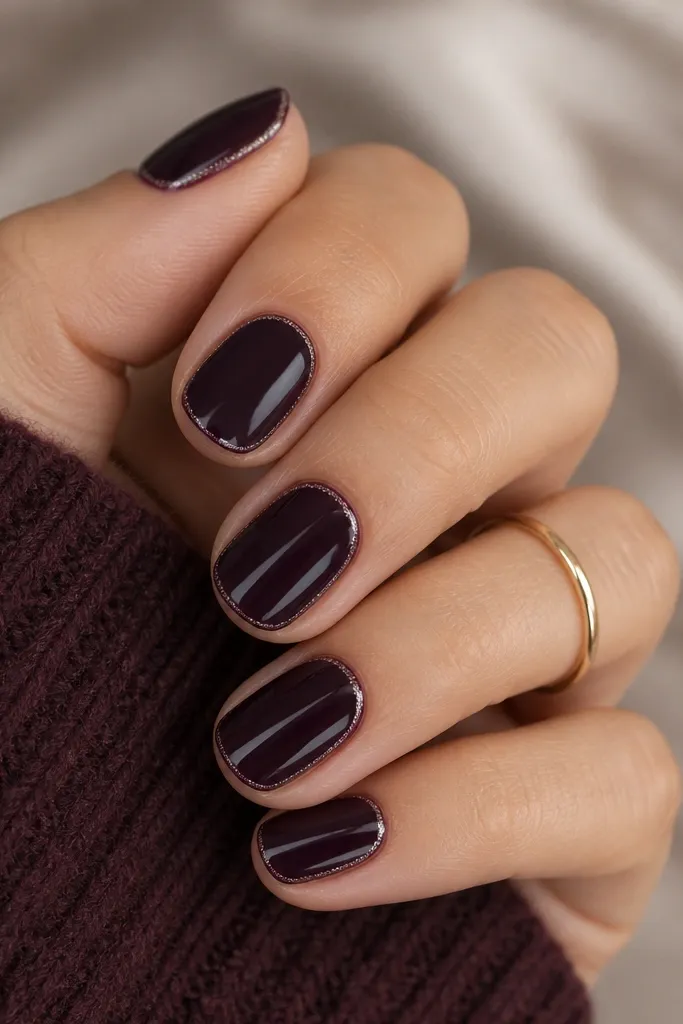
This looks like a nail sticker design, but it’s actually easy and it stays neat. The plum noir base is solid and glossy, then a thin glitter outline traces the nail perimeter so it looks framed. I like it on round nails because the outline follows the curve and makes the nail shape look intentional. It also works for everyday because the glitter is only around the edges, so it doesn’t get in the way.
Paint a smooth plum noir base and cure. Use a fine striping brush to apply clear gel along the nail perimeter — follow the natural shape from sidewall to sidewall, staying off the skin. Sprinkle fine glitter, tap off excess, and cure. Finish with topcoat in two layers so the outline feels sealed and doesn’t scratch when you type.
Keep the outline thin. A thick outline makes round nails look smaller.
Don’t outline over a streaky base coat. The glitter will reveal every uneven spot.
24. Smoked Eggplant Smoke-Glaze With Silver Glitter Fade
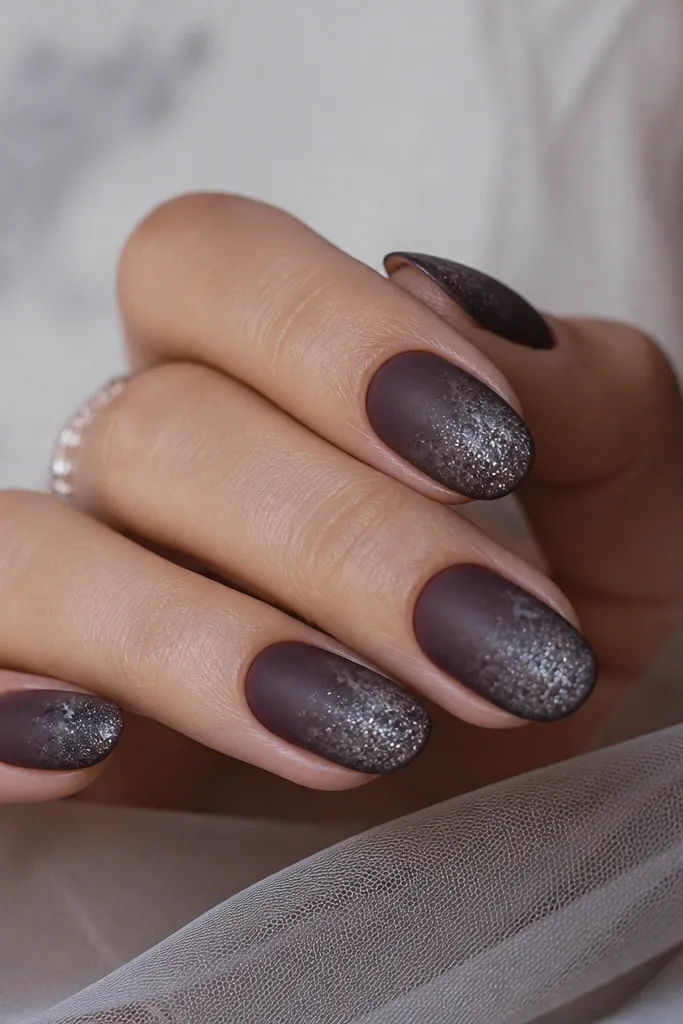
This look hits that dark-purple mood without turning into straight glitter overload. The smoke-glaze base gives you depth — you can see lighter gray-purple haze moving across the nail as it catches light. The silver glitter fade sits where your eye naturally lands when you flex your fingers, so it sparkles even when you are wearing plain clothes. I’ve worn this to winter parties and it still looks good in daylight because the glitter is concentrated at the tips, not the whole nail.
Start with a true eggplant base, then add the smoke-glaze effect using a makeup sponge lightly tapped with a mix of eggplant polish and a tiny dab of gray. Work from the center outward, and keep the cuticle area cleaner so it stays velvety. Seal that base with a glossy top coat that dries fully. Next, sponge silver fine glitter along the tip area only, then blend upward with a nearly dry sponge so the glitter looks faded, not striped. Add a second thin top coat over the glitter so the fade stays smooth and doesn’t snag on fabric. Finish by wiping the nail edges with a lint-free pad dipped in acetone to keep the smoke effect crisp.
Use a fine glitter (not chunky) for the fade. Chunky glitter makes the transition look harsh on a dark base.
Skip applying glitter directly over wet polish — it turns patchy and you lose the smooth fade.
25. Dark Purple Glitter "Velvet Web" Over Matte Ink
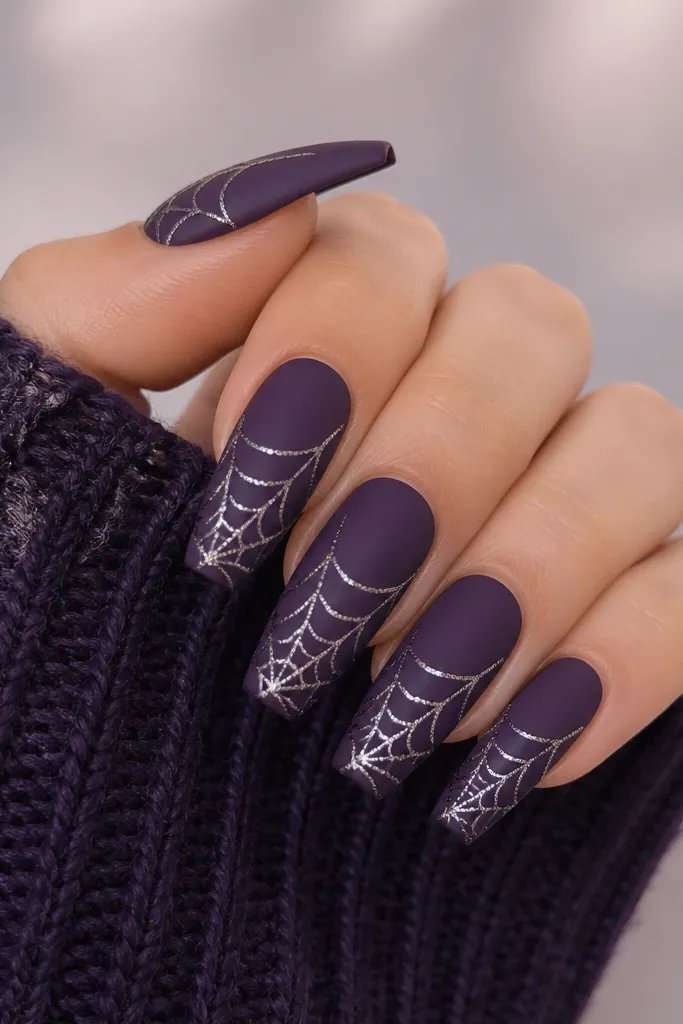
This one looks like nail art you’d get at a salon, but it’s actually very controlled once you have the web layout. The matte ink base makes the silver glitter lines pop without needing heavy coverage. I like it because it reads “sparkly” from across the room, yet it doesn’t feel like you’re wearing a disco ball on every nail. The web pattern also flatters the nail shape since the lines pull the eye toward the tip.
Paint your nails with a deep purple polish and let it dry, then top with a matte top coat so the surface feels dry and slightly velvety. Use striping tape or a nail guide to mark two diagonals across each nail, meeting at the center — this keeps the web symmetrical. Cure or dry that base layer so the lines don’t smear. Use a detail brush to draw thin “crisscross” strands with silver glitter gel, starting from the center and pulling outward in short strokes. Add a second pass only where the line looks too thin, then cure fully. Finish with a glossy top coat only over the glitter web lines, leaving the rest matte for contrast.
If your lines look thick, drag the brush lightly with less gel on it. A thin line with a second cure looks cleaner than one heavy stroke.
Avoid putting glossy top coat over the entire nail — it kills the matte contrast and the web loses its edge.