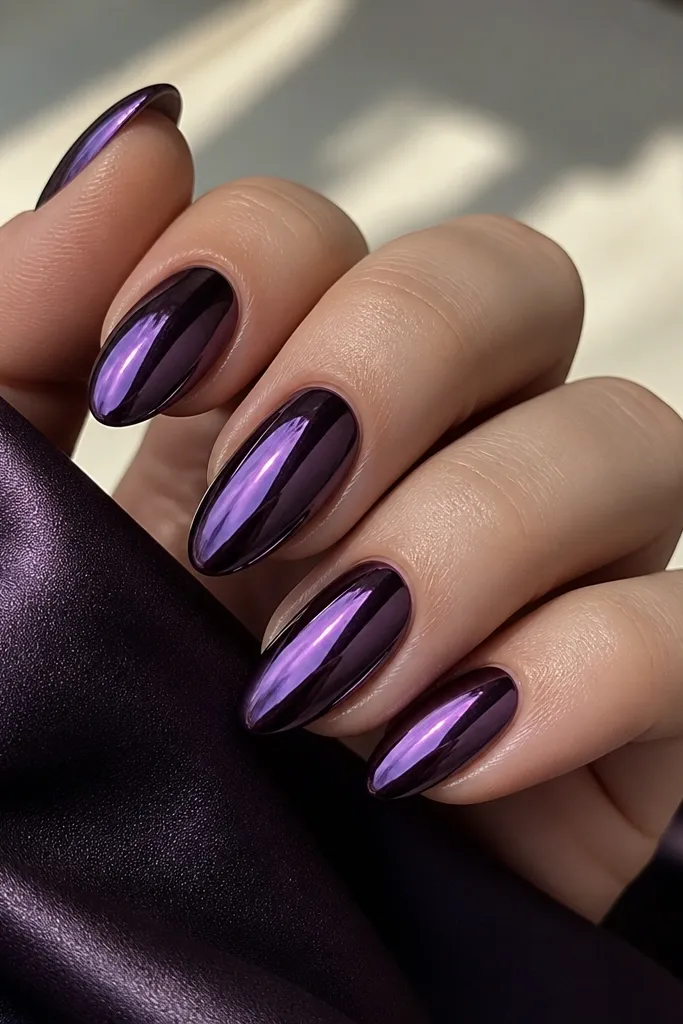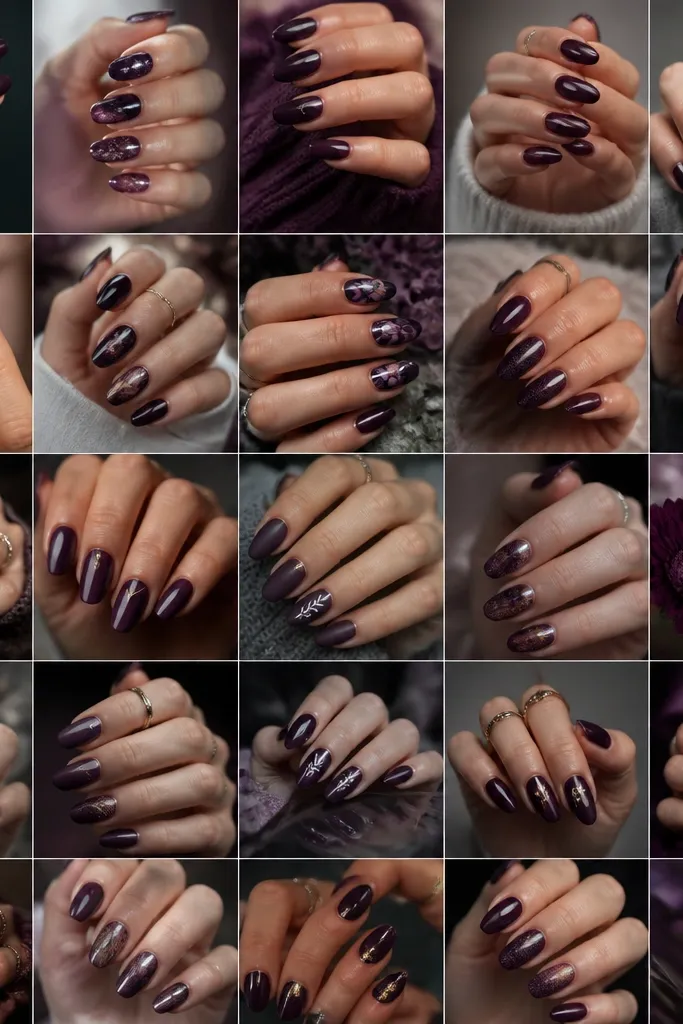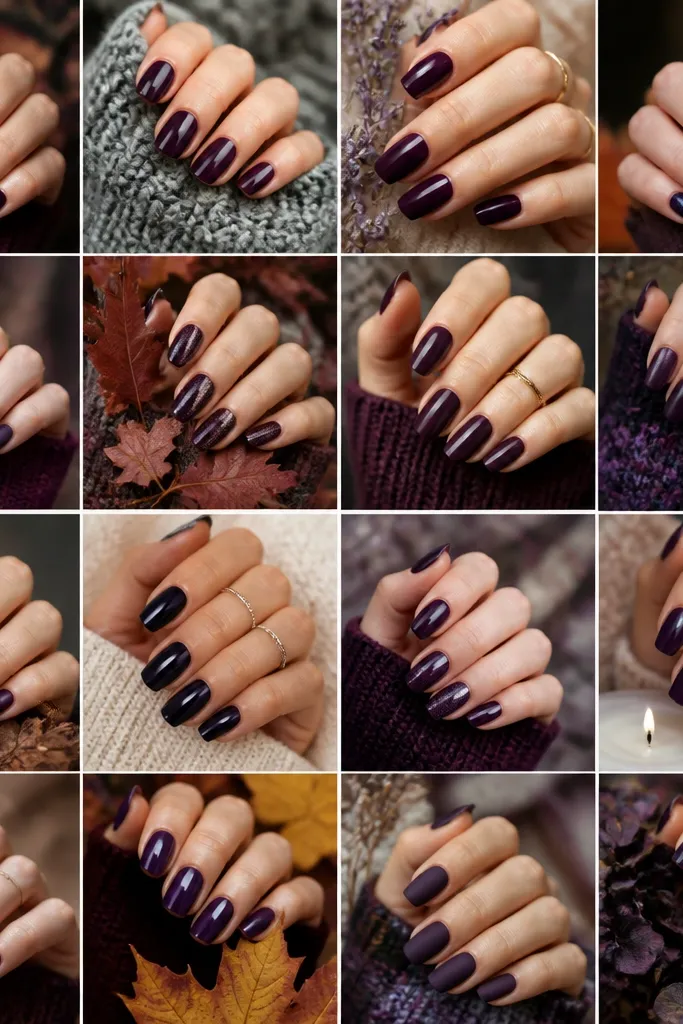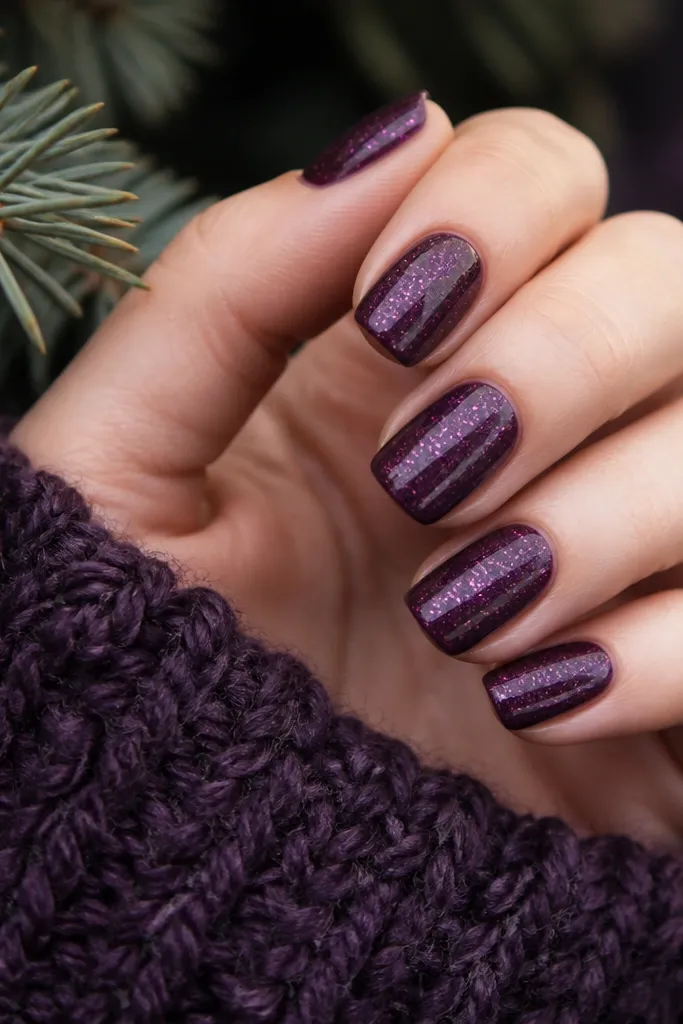
1. Velvet Plum Solid With Micro-Glow Topcoat
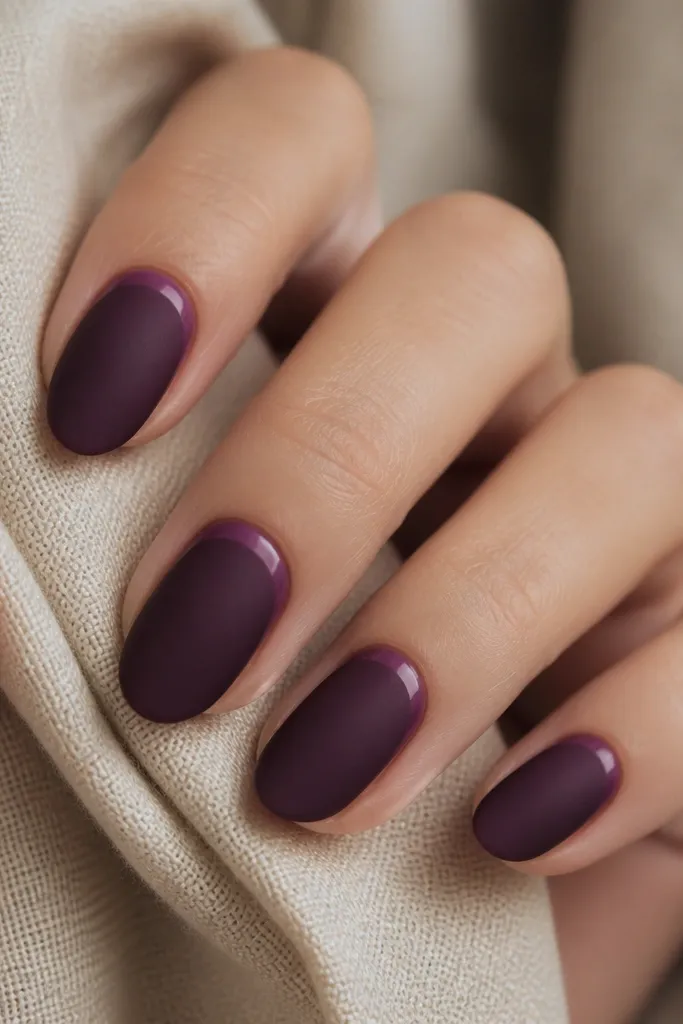
This is your "set it and forget it" dark purple look. Use a deep plum creme base (it reads near-black indoors) and finish with matte topcoat, then apply a thin swipe of satin topcoat only around the cuticle on each nail. The contrast makes your hands look smoother and more polished because the light hits the cuticle area first. It flatters all skin tones, especially if you have warm undertones - the plum stays classy instead of turning rosy.
Start by filing nails to a soft almond shape and buffing the shine off the surface lightly. Apply two thin coats of deep plum creme gel or polish, curing each coat fully if you're on gel. Let it cool, then cap the free edge and add matte topcoat over the whole nail except leave a 1-2 mm gap around the cuticle. Finally, use a small brush to paint satin topcoat right at the cuticle halo and cure again. Keep the satin strip narrow so it looks intentional, not like a messy highlight.
Editor's noteIf your matte topcoat looks streaky, stir it by rolling the bottle between your palms instead of shaking.
Watch outSkipping cuticle cleanup makes matte look dusty and uneven.
2. Grape Jelly Fade One-Hand Accent
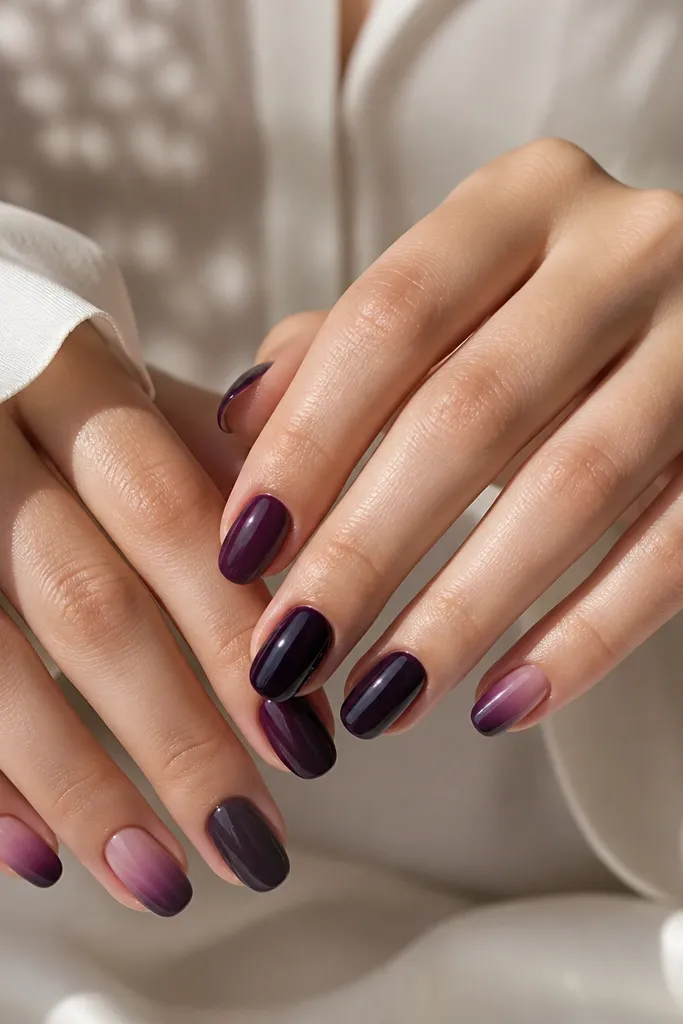
This idea keeps the dark purple moody but makes it beginner-friendly because the fade forgives tiny brush marks. Use a grape jelly polish that's translucent, then build the purple intensity from mid-nail to tip. I like doing the full ombré on one accent nail and keeping the rest solid - it looks styled without needing perfect symmetry. It looks great on short-to-medium nails and flatters cooler undertones because grape stays crisp instead of turning brown.
Paint a solid base of dark grape jelly on all nails with two coats. On the accent nail, apply a sheer coat of the same jelly (thin layer) and cure/dry. Take a makeup sponge and dab richer grape jelly starting at mid-nail, then blend upward with a few light taps. Seal with glossy topcoat for a juicy look, and keep the sponge work limited to one nail so you don't overthink it. Finish by cleaning the sides with a brush dipped in acetone-free remover.
Editor's noteUse a sponge that's firm, not fluffy, so you get a controlled gradient instead of speckling.
Watch outGoing too opaque too early makes the fade look like a block of color.
3. Eggplant French Tips With Thin Black Lining
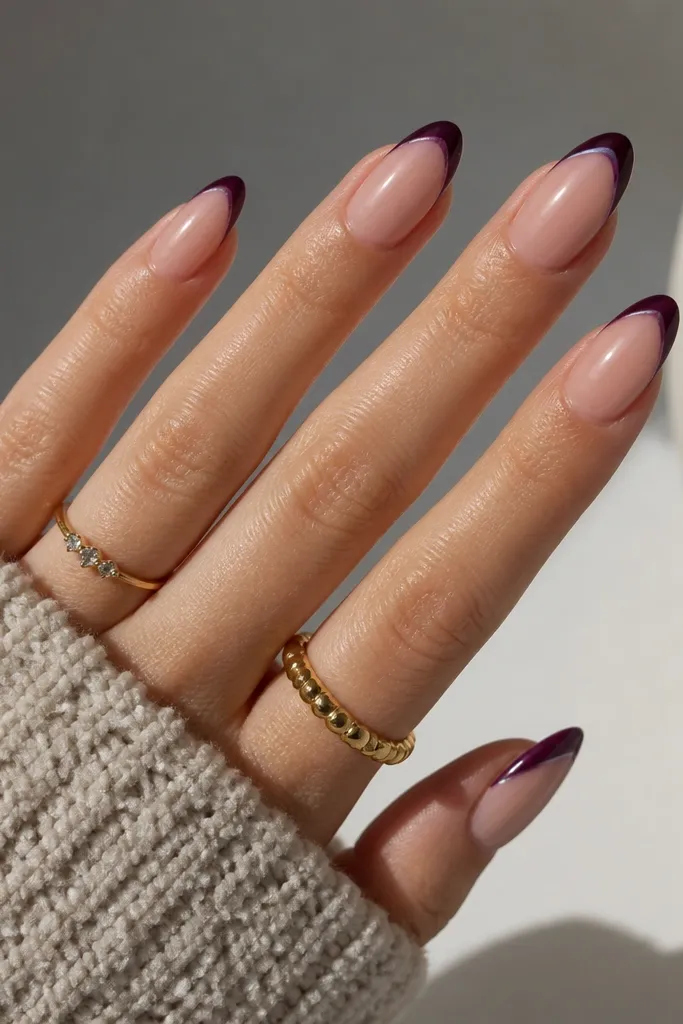
French tips are the easiest structure for beginners, and eggplant keeps them moody instead of classic. The trick is the thin black lining - it crisps the tip boundary and makes the purple look more intentional. Choose a semi-sheer nude base so the nail still looks clean and long. This set looks especially good if your nail beds are shorter because the nude base gives you visual length.
Start with a nude-pink base gel or polish (two coats) and cure/dry. Place nail guides or use tape to mark a slim French smile line - keep it thinner than you think, about 1.5-2 mm. Fill just the tip with eggplant purple, then use a striping brush to trace a hairline black line along the outer edge of the French tip. Remove any tape before topcoat so you don't get a ridge. Seal with glossy topcoat and wipe the underside if you're on gel.
Editor's noteIf your smile line is wobbly, tighten it by painting the purple first, then clean the edge with a thin brush and a tiny bit of nude polish.
Watch outThick French tips on short nails make them look like stickers.
4. Dark Purple Marble Swirls On Two Nails
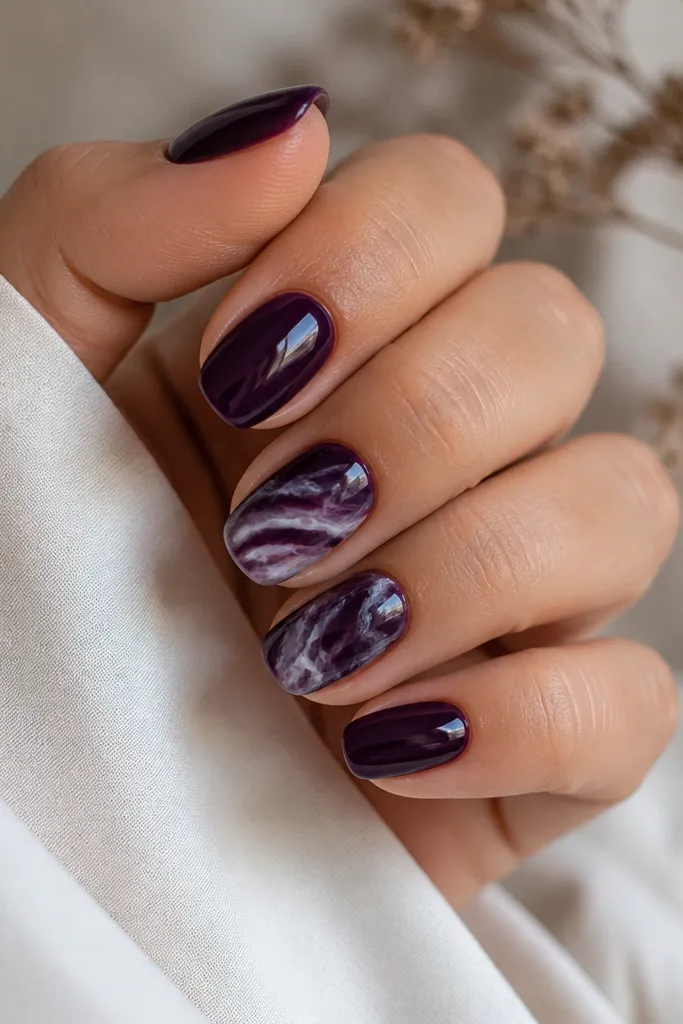
Marble looks hard, but it's mostly controlled chaos. Dark purple as the base makes the white veining pop without needing bright colors. I do it on two nails only because the pattern is detailed and beginners need a win, not a full-hand art project. It flatters hands because the veins pull the eye across the nail and make fingers look longer.
Paint all nails a dark plum or eggplant purple in two thin coats. On the two accent nails, add a thin layer of a lighter lavender/white gel (not too opaque) where you want the first veins to start. Use a dotting tool and a very fine brush to drag lines outward, then add a couple thicker swirls for depth. Wipe the brush tip often so you don't blob color. Finish with glossy topcoat on every nail to make the marble look like glass.
Editor's noteUse gel for marble if you can - you can nudge lines before curing and fix mistakes fast.
Watch outUsing thick white paint makes marble look like nail stickers.
5. Sponge Ombre Plum Tips
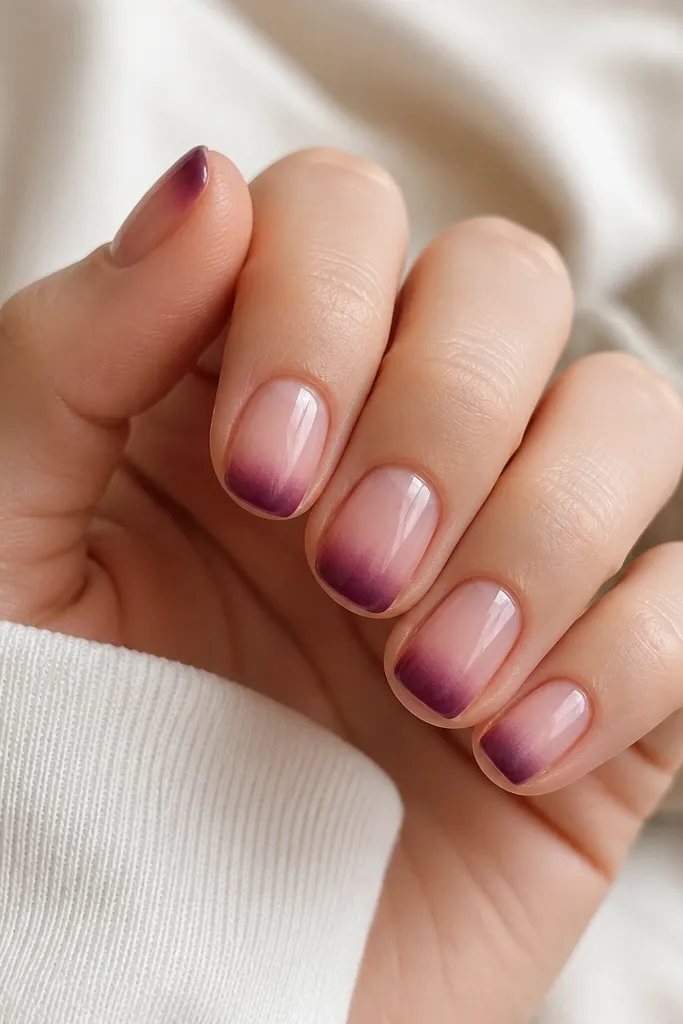
Sponge ombré is the most forgiving gradient method for beginners. The fade looks soft even if your brush control isn't perfect, and plum is dark enough to look dramatic without being neon. This one is flattering on square or short nails because the nude base keeps the shape tidy while the sponge gives a smooth transition. It also looks good on warm and neutral undertones.
Start with a nude-pink base and two coats for even coverage. Dab plum purple onto a small makeup sponge and press it onto the tips, starting near the free edge and blending upward with 3-5 light taps. Re-dab the sponge in the same direction so the gradient stays consistent. Let it dry, then add glossy topcoat to smooth out the texture. If you see a harsh edge, go back with a third light sponge tap using a tiny bit less purple.
Editor's notePractice on a nail tip or a scrap press-on first - you'll feel the right amount of polish on the sponge quickly.
Watch outPressing too hard makes the sponge ombré look patchy.
6. Dark Purple Dot Grid Accent
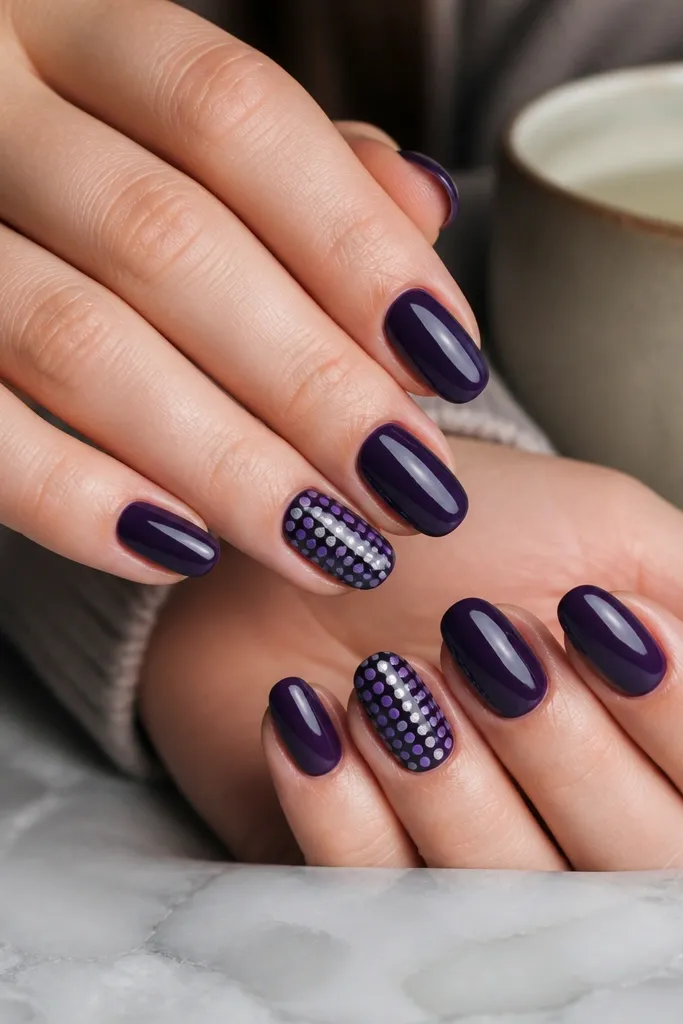
Dots make a manicure look designed without needing long lines. A dot grid on one accent nail keeps it modern and clean, and the lighter purple plus one silver dot adds shine without looking busy. This works on every nail length, but I like it most on short almond because the dot pattern fills the nail nicely. It flatters fair skin because the lighter dots brighten the dark base.
Paint all nails a solid dark purple in two thin coats. On the accent nail, cure/dry the base completely. Use a dotting tool (small ball tip) and lighter grape or lilac gel to place dots in two rows, then add a third row only if the spacing looks balanced. Finish by adding one silver dot in the center of a corner square. Topcoat everything and cap the free edge so the dots don't snag.
Editor's noteIf your dots pull into streaks, your top gel is too wet - cure the base longer before you start dotting.
Watch outOvercrowding dots makes the accent look messy instead of graphic.
7. Matte Eggplant With Glossy Cuticle Half-Moons
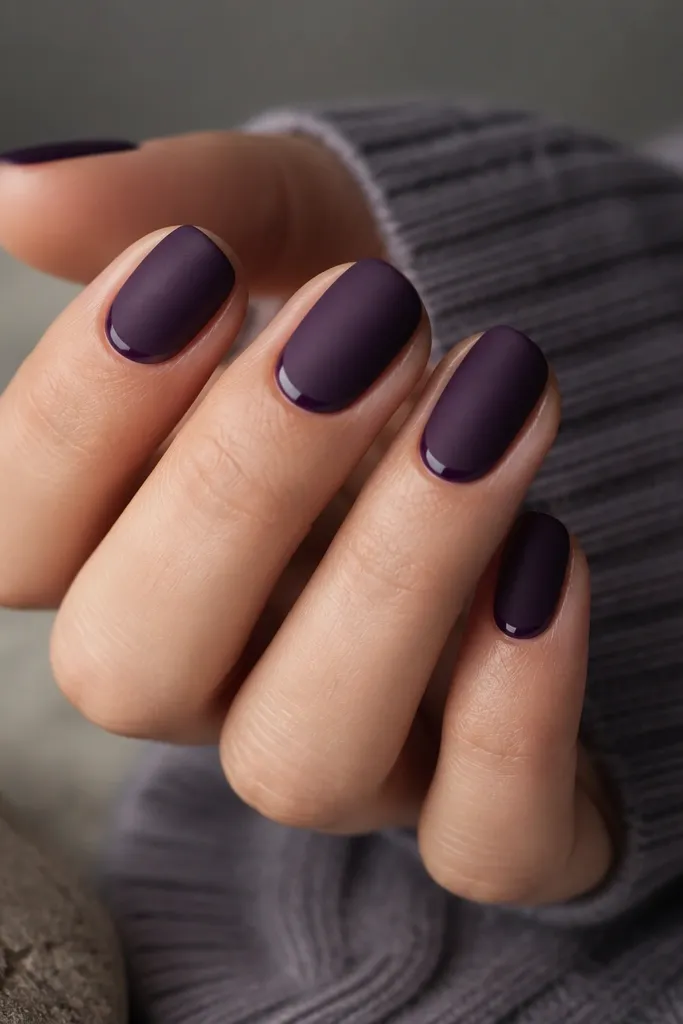
This is one of those designs that looks expensive because it plays with texture. The matte eggplant gives that velvety dark tone, and the glossy half-moon makes a "frame" that draws attention to the nail bed. It's flattering because it makes your cuticle area look intentional even when nails are a little short. This also looks great on deeper skin tones because the contrast reads crisp.
Apply two coats of eggplant purple and cure/dry fully. Buff lightly after curing if you get any roughness, then apply matte topcoat over the entire nail. After the matte dries, use a thin striping brush to paint a glossy gel half-moon right along the cuticle line, staying about 1 mm away from the skin. Cure, then finish with matte topcoat again only on the rest of the nail, leaving the half-moon glossy. Keep the half-moon shape consistent across nails by using your brush handle as a guide.
Editor's noteUse a peel-off cuticle barrier if you're prone to flooding your skin with gel.
Watch outPainting the half-moon too wide makes the nail look like it has a thick border.
8. Amethyst Crystals On Blackest Plum
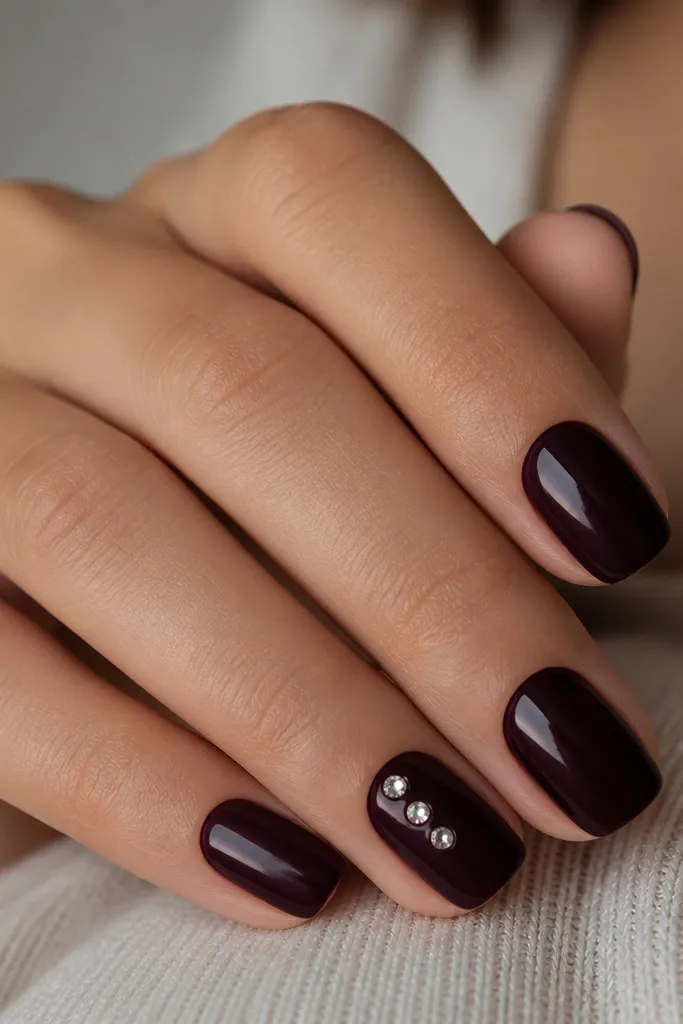
If you want "moody but fun," crystals do it without needing fancy art. Start with a black-plum base so the stones look like amethyst. I place only a few tiny crystals because beginners get overwhelmed when they try to cover the whole nail. This set looks best on medium almond or short almond because the crystal points add visual length.
Paint nails a blackest plum creme or gel in two coats. On the accent nail, add a tiny bead of clear gel where you want the crystals to sit - one at the center and two slightly offset. Use crystal tweezers or a toothpick to place the stones, then press gently for contact. Cure and then topcoat carefully with a thin layer so you don't smear the facets. Avoid thick topcoat over crystals or they look cloudy.
Editor's noteIf crystals pop off later, cure each stone with a slightly tacky base layer - the adhesion holds better.
Watch outUsing large rhinestones makes short nails look top-heavy.
9. Purple Galaxy Specks With Starburst Accent
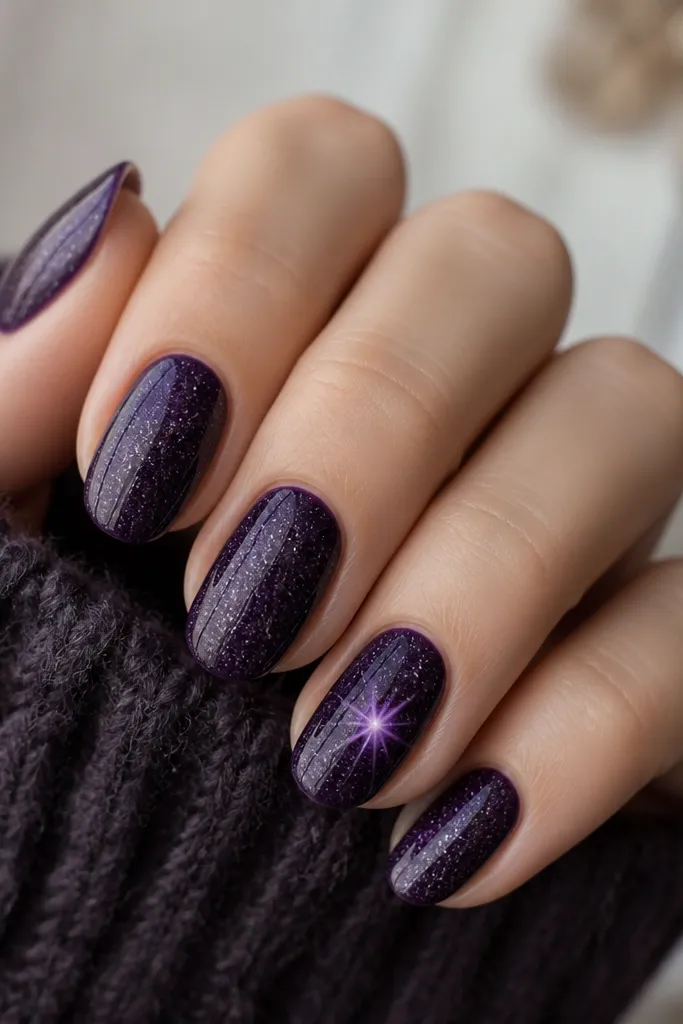
Galaxy nails look cool because they're random, but the trick is controlling the density. Use dark plum as the base and sprinkle silver-white micro glitter for the star effect. Add one starburst accent so the set has a focal point. This works on any skin tone, and on fair skin it looks extra crisp because the specks catch light.
Start with a dark plum base in two coats. For specks, thin a silver glitter gel with a drop of clear gel so it sprays or dots easily. Tap a stiff brush over the nail for tiny specks, then add a few larger dots with a toothpick. On one nail, paint a small starburst by dotting five points in a circle and connecting them with short lines. Seal with glossy topcoat to lock the glitter down.
Editor's noteHold a piece of paper under your hand when tapping specks so you don't get glitter all over your cuticles.
Watch outAdding too much glitter makes it look gritty, not galactic.
10. Dark Purple Half-Slider Lines Using Nail Tape
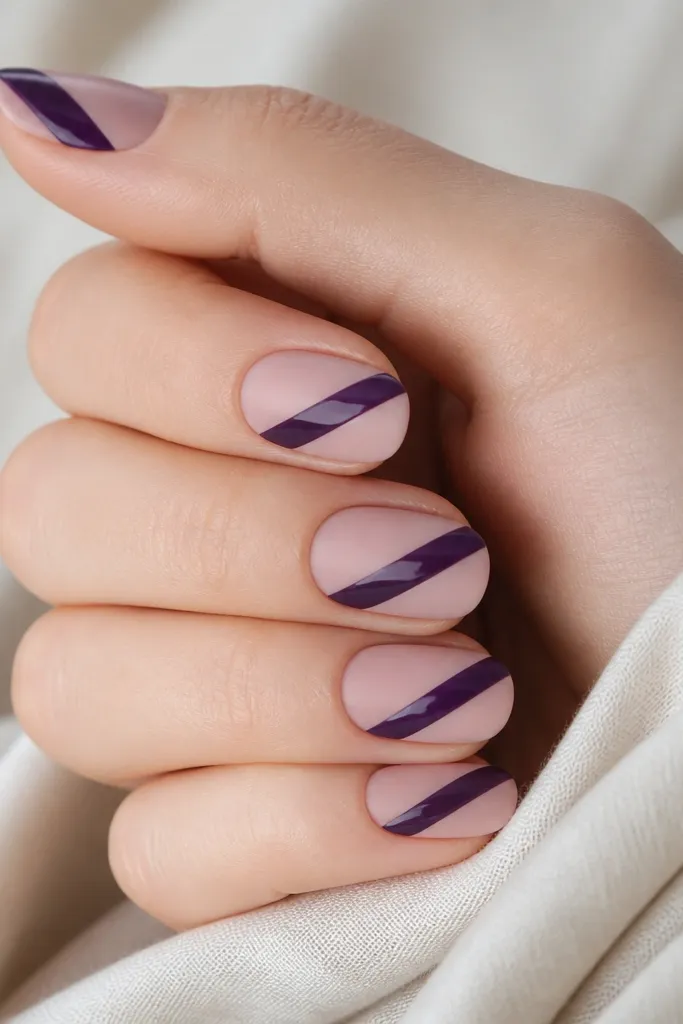
This design is clean and architectural, which is why it looks good even when you're a beginner. Nail tape gives you a sharp line without shaky brushwork. I like doing nude plus one diagonal dark purple stripe with a matte topcoat on the nude and glossy on the stripe. It flatters shorter nails because the diagonal line visually lengthens.
Base coat with a nude-pink polish and cure/dry. Apply matte topcoat over the nude area only if you want that contrast. Place nail tape diagonally starting near the sidewall and stopping short of the tip so it doesn't look like a sticker edge. Paint dark purple over the exposed stripe area, then remove tape immediately before it fully sets. Finish with glossy topcoat over the stripe and a light matte topcoat over the rest.
Editor's noteUse thin tape meant for nails, not craft tape, because craft tape can pull off polish.
Watch outLeaving tape on too long can cause bleeding under the edge.
11. Plum Chrome Undercoat With Black Topcoat
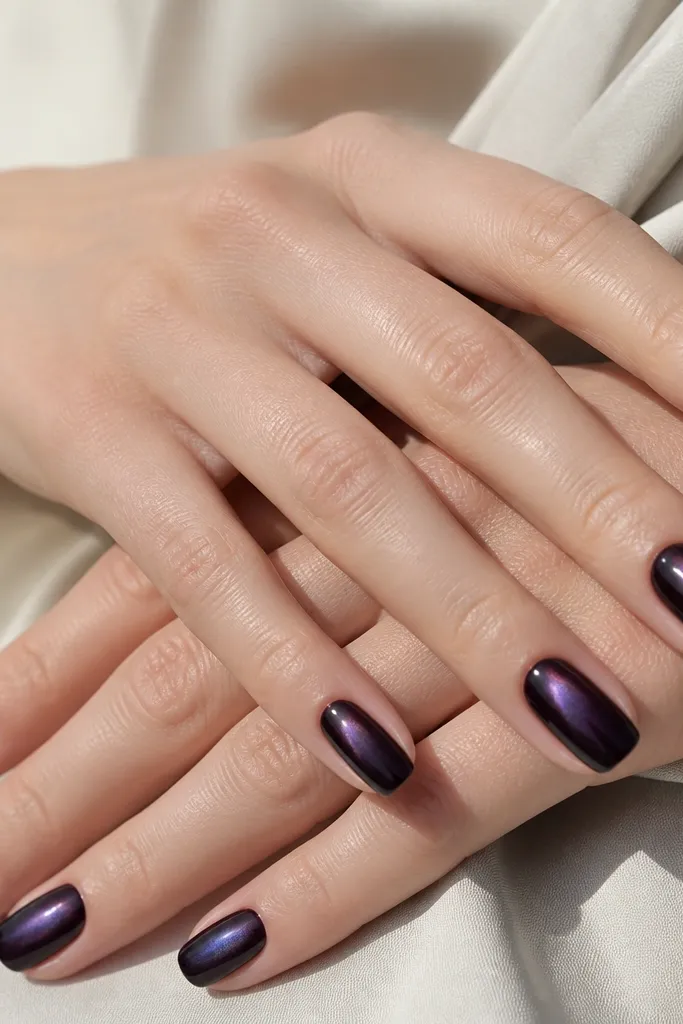
This one looks like you paid for a salon chrome, but it's just layering. The purple chrome powder under a dark topcoat makes your nails look like they shift color when you move your hands. It's flattering because it adds dimension without needing art lines. I especially like it on medium oval - the shimmer travels across the nail curve.
Apply a blackest plum or near-black gel base and cure. Add a thin layer of purple chrome-friendly gel (or use a chrome base) and cure to tacky stage. Rub purple chrome powder into the surface and buff gently with an applicator sponge until you get even shimmer. Seal with a dark topcoat over it, leaving a very thin area unsealed if you want extra pop - I usually keep it fully sealed and still get the shift. Clean the surface with a soft brush and finish with one final topcoat layer.
Editor's noteIf chrome looks patchy, press powder in with firm short strokes, then buff lightly.
Watch outOver-buffing before sealing can remove the shimmer.
12. Dark Purple Halo Gradient At The Cuticle
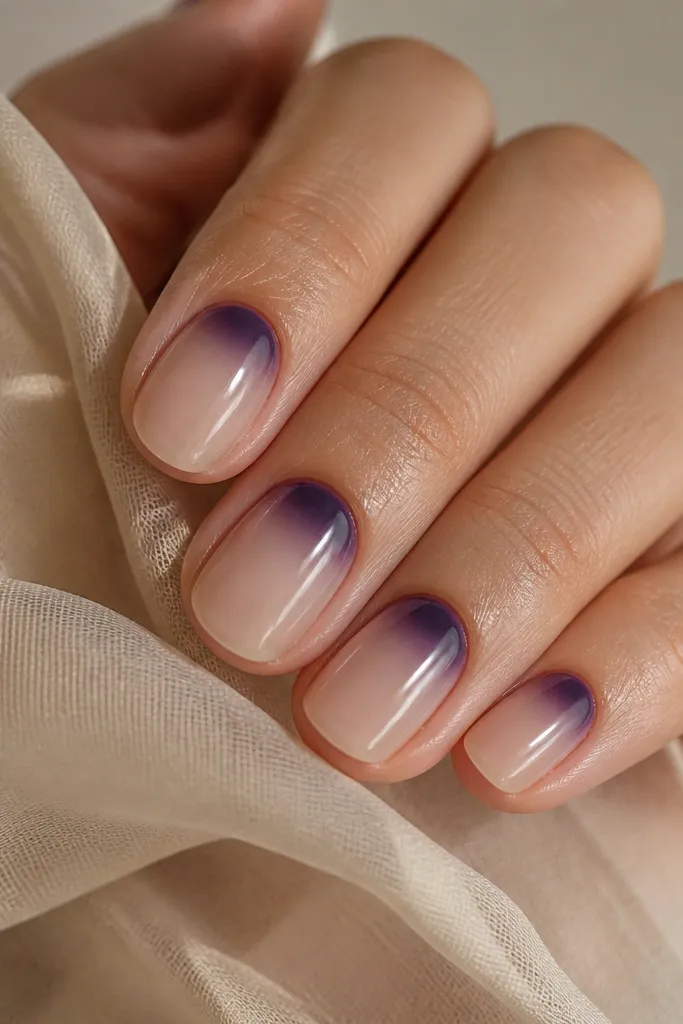
A cuticle halo makes dark purple feel airy and modern. The gradient starts at the cuticle and fades outward, so your nail bed still looks natural and your nails don't look heavy. This flatters hands with shorter nail beds because the halo frames the area without shrinking your nail length visually. It also works beautifully for everyday wear because it's subtle until you move.
Start with a sheer nude base and cure/dry. Use a small sponge or a makeup wedge to dab dark purple gel at the cuticle area only, then blend outward with light taps. Keep the halo about 2-3 mm wide so it stays delicate. Add a second halo layer if the purple fades too much, then seal with glossy topcoat. Clean around the cuticle with a thin brush dipped in remover for sharpness.
Editor's noteUse a sponge that's been cut down smaller - you'll control the halo width much better.
Watch outDragging the sponge across the cuticle can lift the base and create bald spots.
13. Twilight Tips With Silver Foil Edge
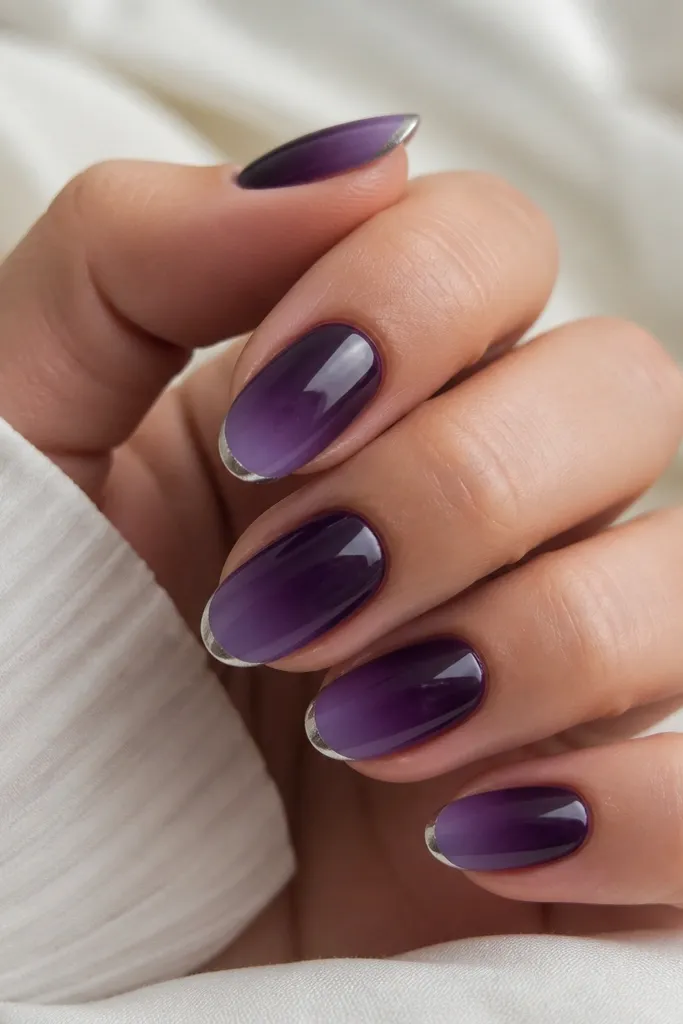
Foil edges look luxe because they catch light at the nail tip, where your fingers naturally move. This works with a twilight fade because the lighter purple gives the foil something to contrast against. I like it for nights out because it reads moody in low light but still sparkly in photos. It flatters most skin tones, and it looks especially good if your nails are short-to-medium because the edge detail makes them look sharper.
Paint nails with a dark purple base in two coats. For the twilight fade, sponge a lighter grape or lilac starting at mid-nail and blending into the tip. Seal the gradient with a thin glossy topcoat. Apply silver foil along the very tip edge using a foil adhesive or tacky gel - press gently and peel to pick up the foil. Finish with one more glossy topcoat, keeping it thin so the foil stays crisp.
Editor's noteTrim foil with nail scissors before applying so you don't fight awkward shapes.
Watch outThick topcoat over foil makes it look dull and textured.
14. Dark Purple Micro Glitter Fade
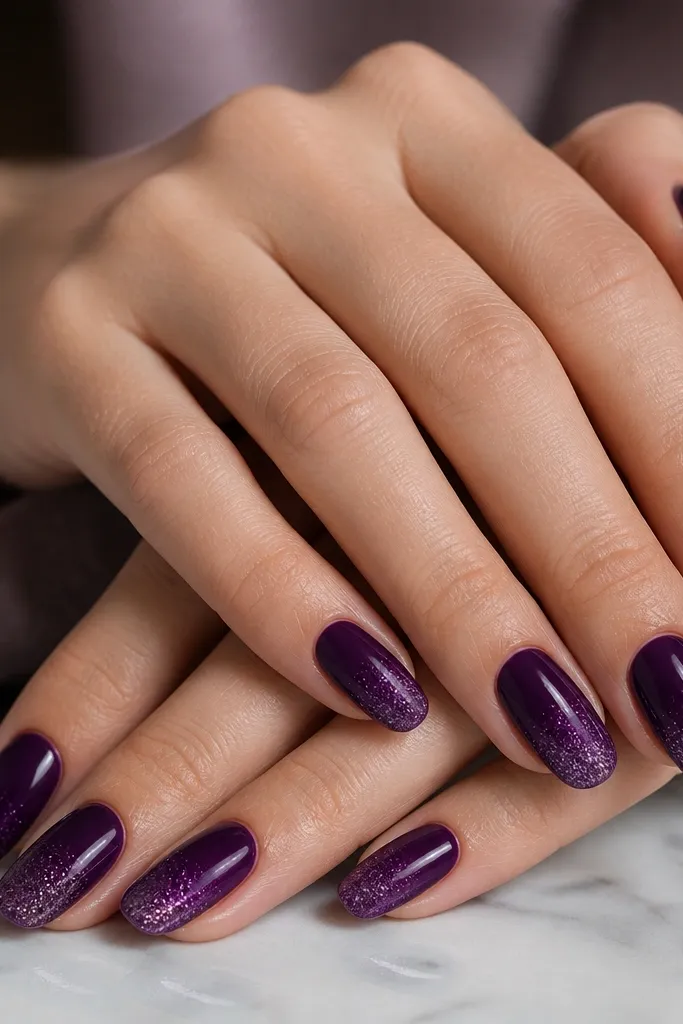
This is a beginner-friendly sparkle that doesn't scream "too much." Fine micro glitter fades look smoother than chunky glitter because they blend into the base instead of sitting on top. Use deep plum as the base, then add glitter only at the tips so the nails still look sleek. This one flatters hands with dry cuticles too, because the sparkle draws attention away from the skin.
Apply two coats of deep plum and cure/dry. Dab micro glitter gel or loose micro glitter mixed with clear gel onto the tip area only. Use a sponge or a flat brush to blend the glitter upward slightly, stopping around one-third of the nail length. Add glossy topcoat in two thin layers so the glitter doesn't feel rough. Clean the sides with a brush dipped in acetone-free remover.
Editor's noteIf loose glitter catches on fabric, seal with a thicker second topcoat layer just on the tip.
Watch outUsing chunky glitter makes the fade look uneven and bumpy.
15. Purple Stripe Down the Center
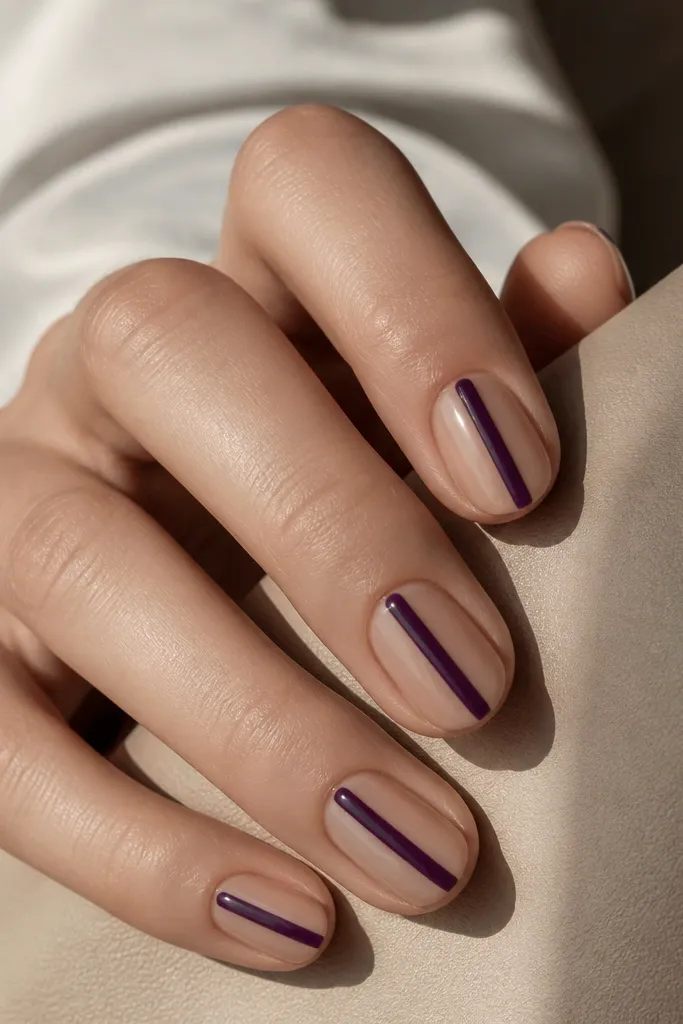
A center stripe is the easiest way to make dark purple look intentional and slimming. The nude base keeps it clean, and the stripe draws the eye from cuticle to tip. This flatters shorter nails and also looks great on wider nail beds because the line gives structure. Choose a deep plum for a soft, classy look or eggplant if you want it cooler and sharper.
Start with a nude-pink base and cure/dry. Use a striping brush to paint a thin line of dark purple down the center, starting at the cuticle line and stopping just before the tip. If your line looks uneven, do a second pass rather than dragging to correct - gel levels out but it won't fix a wobbly stroke. Cure, then add glossy topcoat over everything to blend the stripe edges. For extra precision, wipe the brush on a lint-free pad before each stroke.
Editor's noteMeasure the stripe width by looking at it from above - keep it around the width of your pinky nail hole.
Watch outPainting the stripe too thick makes nails look shorter.
16. Dark Purple Checkered Accent Nail
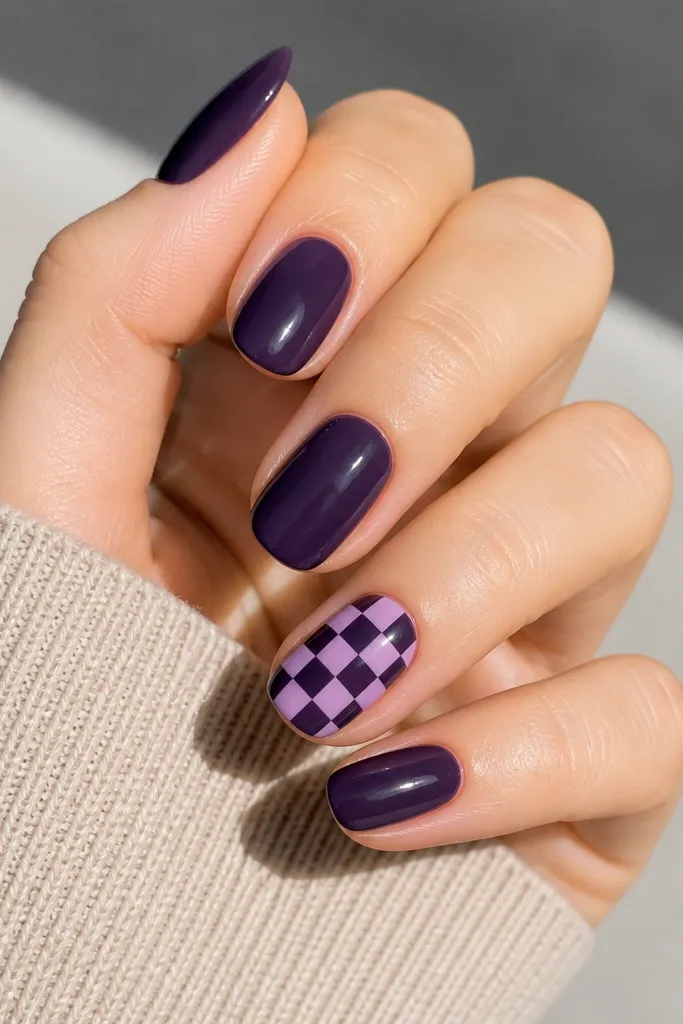
Checkers look harder than they are, and they're perfect for beginners because the pattern repeats. Keep the checkered design on just one nail per hand so you don't spend your whole evening perfecting squares. The lighter lavender squares make the dark purple feel lighter and less heavy. This looks great on medium almond and also works on short nails because the pattern fills the nail without needing long lines.
Paint all nails solid dark purple in two coats. On the accent nail, paint a base coat of dark purple and cure fully. Use a fine liner brush to paint small lavender squares - start with a 2x2 grid, then add more only if the nail size allows. Let the squares dry and add a second thin coat to deepen the lavender. Finish with glossy topcoat and cap the edges so the corners don't catch.
Editor's noteUse a nail dotting tool to place square corners before you connect them with the liner brush.
Watch outFreehanding checkers without a guide makes the pattern look crooked.
17. Plum Aura Nails With Soft Airbrush Look
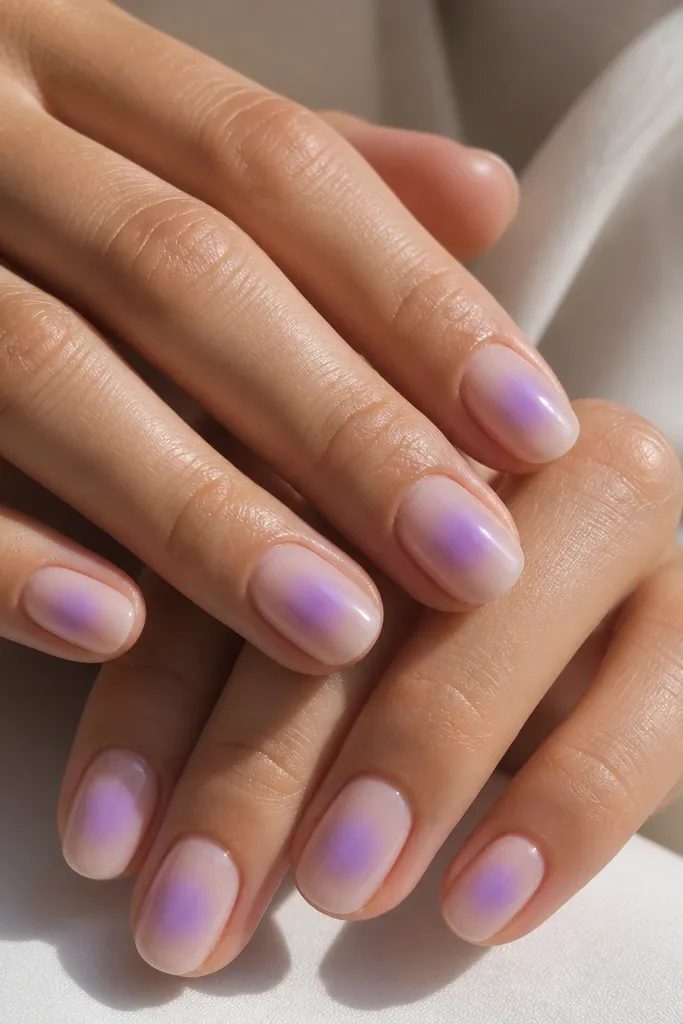
Aura nails make dark purple look dreamy instead of harsh. The brightest point in the center gives a "glow" effect that looks flattering on any nail shape. I like plum aura because it stays moody but still wearable for daytime. It also hides small imperfections because the gradient is soft and forgiving.
Apply a sheer nude base and cure/dry. Take a small sponge and dab dark plum gel in the center of the nail, then blend outward by tapping lightly until the edges fade. Keep the aura about one-third of the nail width so it doesn't swallow the nail. Add a second layer only at the center to intensify the glow. Seal with glossy topcoat and clean the sides carefully for a crisp fade.
Editor's noteBlend edges with a nearly dry sponge - you want smoke-like fading, not a second color block.
Watch outOverloading the sponge makes the aura look like a stain.
18. Dark Purple Leafy Accent With One-Line Vein
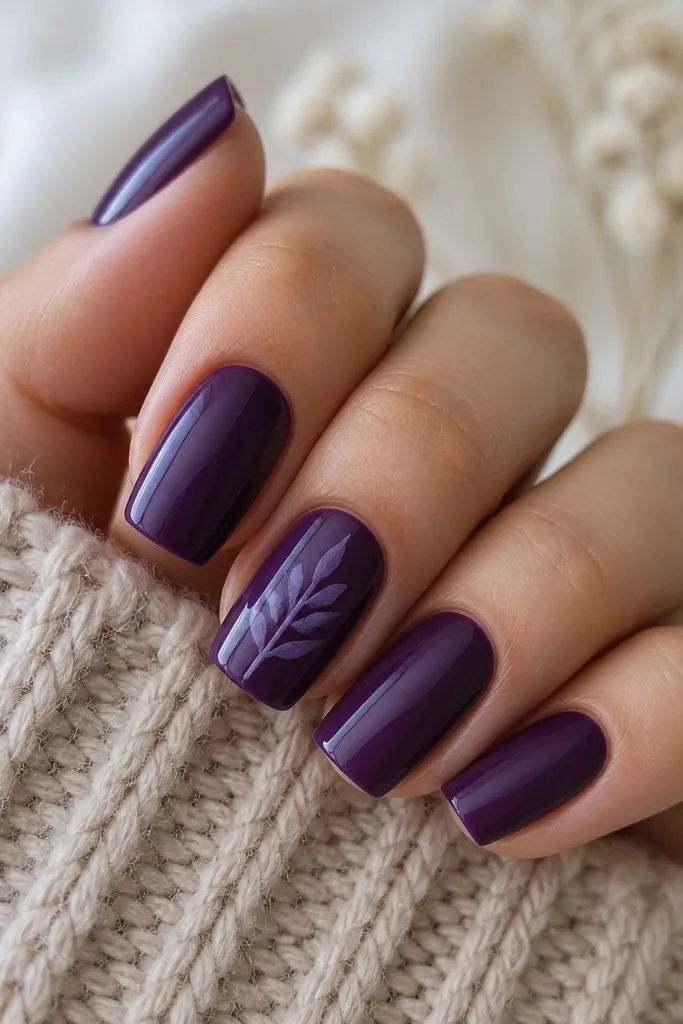
Leafy accents look artsy but you can keep them beginner-simple by using one leaf shape and one vein line. The darker base makes the lighter leaf pop without needing detailed petals. I like this for fall vibes because eggplant and plum read like evening light on leaves. It flatters medium-length nails and makes hands look dressed up without looking flashy.
Paint all nails a deep purple creme and cure/dry. On the accent nail, draw a leaf outline using a thin liner brush in lilac or lighter grape gel. Add one central vein line and two short side lines branching out. Keep the leaf about half the nail width so it doesn't crowd the cuticle. Cure, then apply glossy topcoat over everything. If the leaf edges look uneven, go back with a tiny brush and a bit of base purple to clean the outline.
Editor's noteSketch the leaf lightly in nail polish remover on a paper towel first, then copy the shape.
Watch outAdding multiple leaves makes it look like a transfer sticker.
19. Plum Marble Tips Only
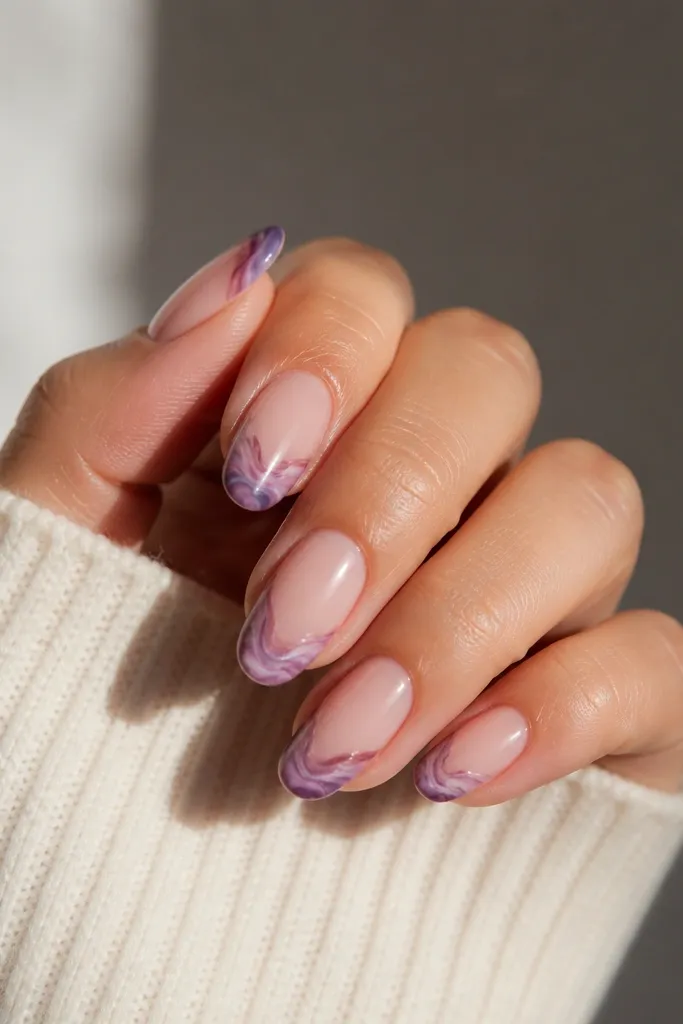
Marble tips are easier than full marble because you only work in the area that already has a natural curve. The nude base keeps the look clean and makes the marble feel like a highlight rather than a full commitment. I like plum + soft lavender because it gives depth without turning the pattern muddy. This set flatters short nails because the nude base still shows length.
Start with a nude base and cure/dry. Create a tip zone by painting the tips in a dark plum jelly - leave a small gap around the sides so it looks like a tip, not a blob. While it's slightly tacky (or with a thin layer of clear gel), drag soft lavender and white veining through the plum using a fine brush. Add a couple short curved lines, then stop - less looks better here. Seal with glossy topcoat and clean the sides for sharp edges.
Editor's noteUse a gel that stays workable for at least 30-60 seconds so you can drag lines without rushing.
Watch outGoing too opaque with marble colors makes it look like a thick layer.
20. Dark Purple Tie-Dye Swirls
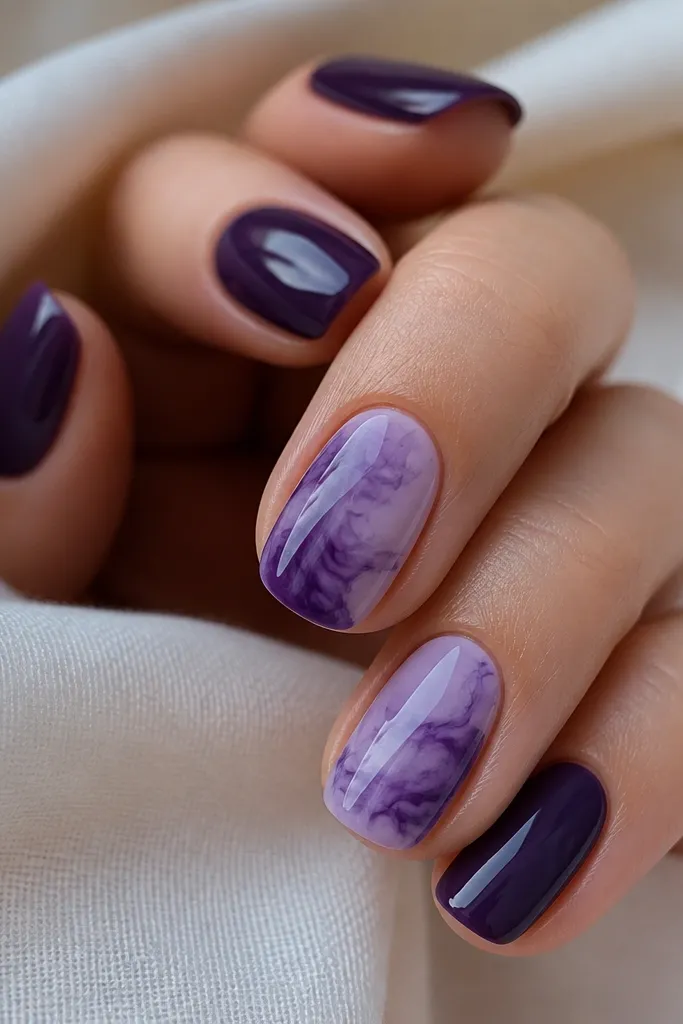
Tie-dye swirls look artsy but you can control them by keeping the colors limited and placing them on just two nails. Use a lighter lavender gel and a darker plum gel so everything stays in the same family. This is flattering because the swirls move diagonally across the nail, which visually lengthens. It also looks good on both short and medium nails because the pattern is compact.
Paint a dark purple base on all nails. On two accent nails, add a thin layer of lighter lavender gel in random curved patches across the nail. While the gel is tacky, drag the patches outward with a dotting tool to create feathered edges. Add one tiny deeper plum swirl inside a lighter patch for contrast. Cure and finish with glossy topcoat over the entire nail for a smooth, ink-like effect.
Editor's noteIf the swirls disappear after curing, you're using too opaque a lavender - switch to a semi-sheer gel.
Watch outUsing three or more unrelated colors makes tie-dye look chaotic.
21. Purple Lace Look With Stamping Plate
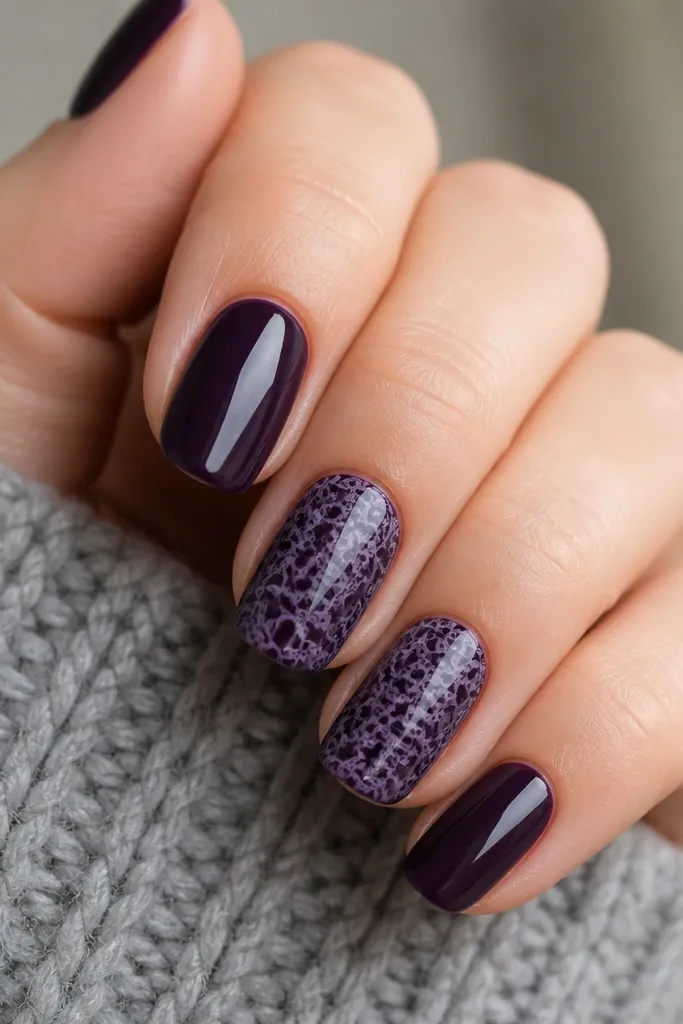
Stamping lace is the fastest way to get detailed nail art when you're a beginner. The lace motif looks delicate against dark purple, and stamping keeps the pattern crisp so it doesn't look hand-drawn. I use lighter purple or a mauve shade so the lace still reads purple, not gray. This looks best for date nights and it flatters most skin tones because the contrast is controlled.
Paint all nails a dark purple base and cure/dry. Choose a lace stamping plate with thin line details and clean it with stamping alcohol or remover. Apply stamping polish in a lighter purple, scrape the plate clean, then press the stamper firmly onto the nail. Roll once and lift straight up. Add a topcoat to seal the stamp, pressing gently around the edges to avoid lifting. If the stamp is incomplete, re-stamp on top - don't scrape off the base.
Editor's noteWarm your stamping polish slightly by rolling it in your hands; it transfers more evenly.
Watch outSkipping a clean scrape makes the pattern look smeared.
22. Dark Purple Cat-Eye Magnet On Short Nails
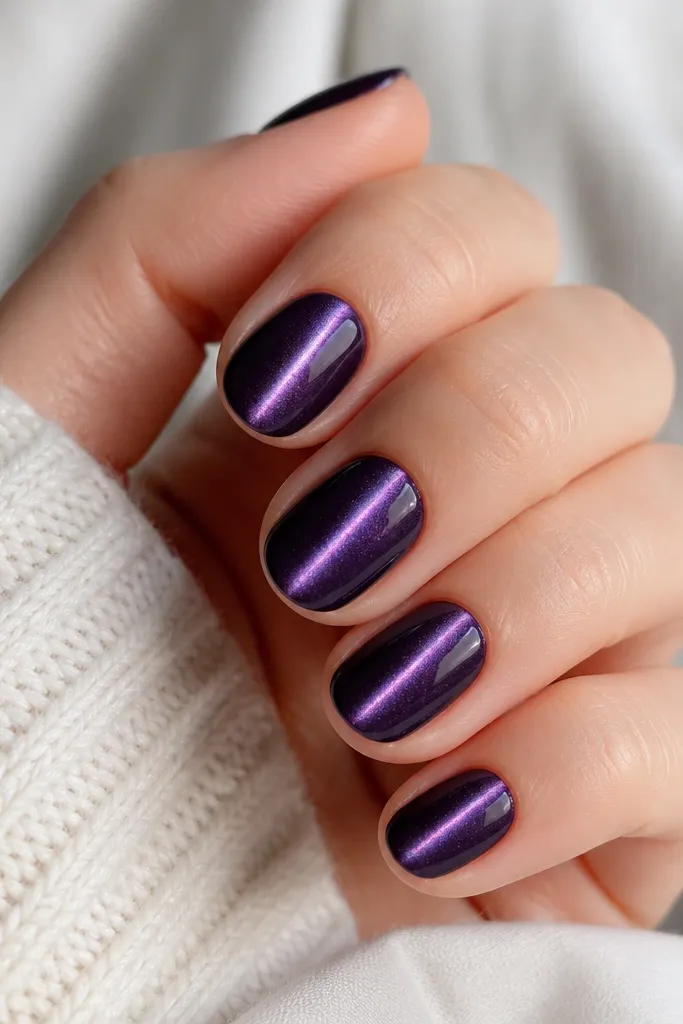
Cat-eye is one of the few effects that looks fancy while being very forgiving. Dark purple cat-eye powder creates a glowing line that makes nails look smoother and longer. It flatters every nail shape because the magnet line centers the eye. If you have uneven nail beds, cat-eye still looks polished because the glow draws attention to the middle.
Apply a base coat and cure/dry. Paint a thin layer of dark purple cat-eye gel, then hold the magnet over the nail at a 90-degree angle to your nail surface. Move the magnet slightly closer for a stronger line, then cure while the magnet is held in place. Add a second thin cat-eye layer for intensity and cure again. Seal with a glossy topcoat - matte cat-eye looks cool but glossy is easier for beginners.
Editor's notePractice magnet distance on one nail first - the line strength changes a lot.
Watch outMoving your hand while curing smears the magnetic line.
23. Gothic Plum Micro French With Negative Space
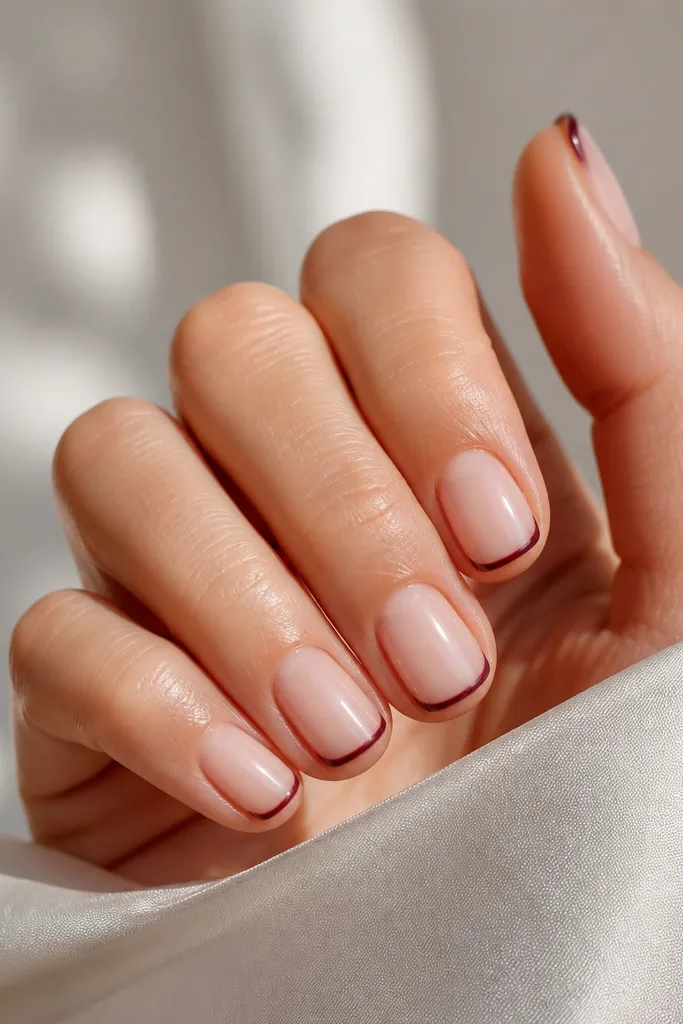
Negative space makes dark purple feel lighter and more modern. Micro French tips keep the look neat and beginner-proof because the art area is tiny. The negative gap gives you that clean "gothic" boundary without needing a perfect smile line. This is flattering on short nails because it keeps the nail bed visible and prevents the tips from taking over.
Start with a nude base and cure/dry. Use a thin nail guide or freehand with a striping brush to paint a micro French tip - keep it 1-2 mm wide. Leave a hairline gap of nude between the tip and the rest of the nail so the negative space reads clearly. Clean the edges with a tiny brush and remover before topcoat. Finish with glossy topcoat to sharpen the boundary and make the plum look deeper.
Editor's noteIf your gap disappears, use a second pass only on the plum and don't touch the nude area.
Watch outFilling the whole tip area removes the negative-space contrast.
24. Dark Purple Watercolor Wash On Nude
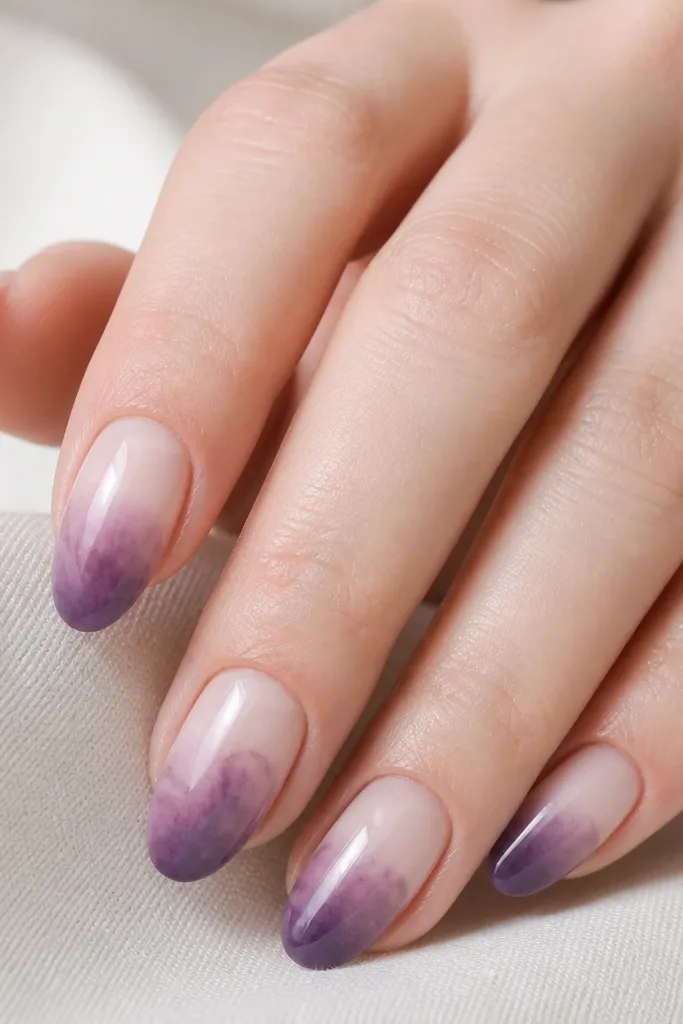
Watercolor wash looks artistic but it's really just controlled dilution. Keep the base nude and let the purple sit on the lower half so your hands look clean, not heavy. I use a darker plum diluted with clear gel so the edges feather naturally. This flatters fair to medium skin tones because it adds depth without harsh blocks.
Apply a sheer nude base and cure/dry. Mix dark purple gel with clear gel to thin it - you want it translucent. Brush the diluted purple onto the lower half of the nail and stop before the sides to avoid streaks. Use a clean brush dampened with a little gel cleaner to feather the top edge. Cure and seal with glossy topcoat; gloss makes watercolor look like it's under glass.
Editor's noteThin your purple more than you think - watercolor looks right when it stays see-through.
Watch outUsing full-strength purple makes the wash look like a stain.
25. Plum And Lilac Diagonal Half-Moons
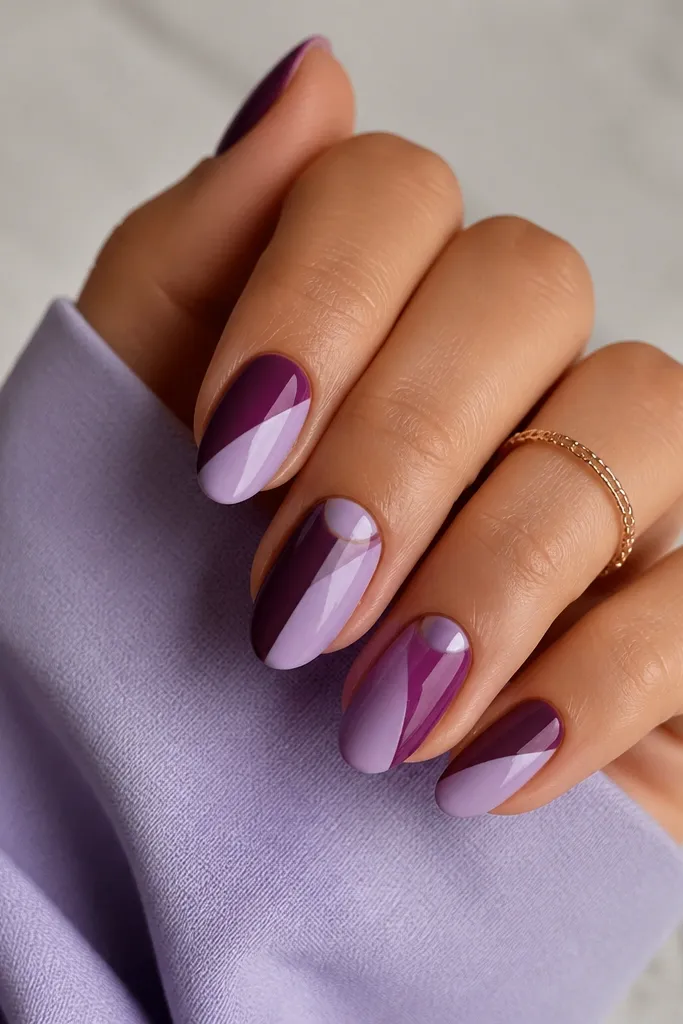
Diagonal half-moons are bold but still doable because you're working with two solid colors and clean edges. Use plum as the darker half and lilac as the lighter half so the contrast stays purple-forward. I like it on almond nails because the diagonal line follows the nail curve and looks sleek. It's flattering on hands that look better with contrast, like if your nails are naturally pale or your nail beds are short.
Base coat with a thin layer of clear or nude if you want opacity control, then cure. Use nail tape to mark a diagonal split from lower left to upper right. Paint one side with plum and the other with lilac, keeping coats thin so tape edges don't lift. Remove tape while the polish is still slightly tacky. Add glossy topcoat to blend the border and cure/dry fully. For extra neatness, cap the free edge so the two colors don't peel.
Editor's notePress tape down with a silicone tool or your fingertip to prevent bleed under the edge.
Watch outThick coats under tape cause ridges and messy separation.