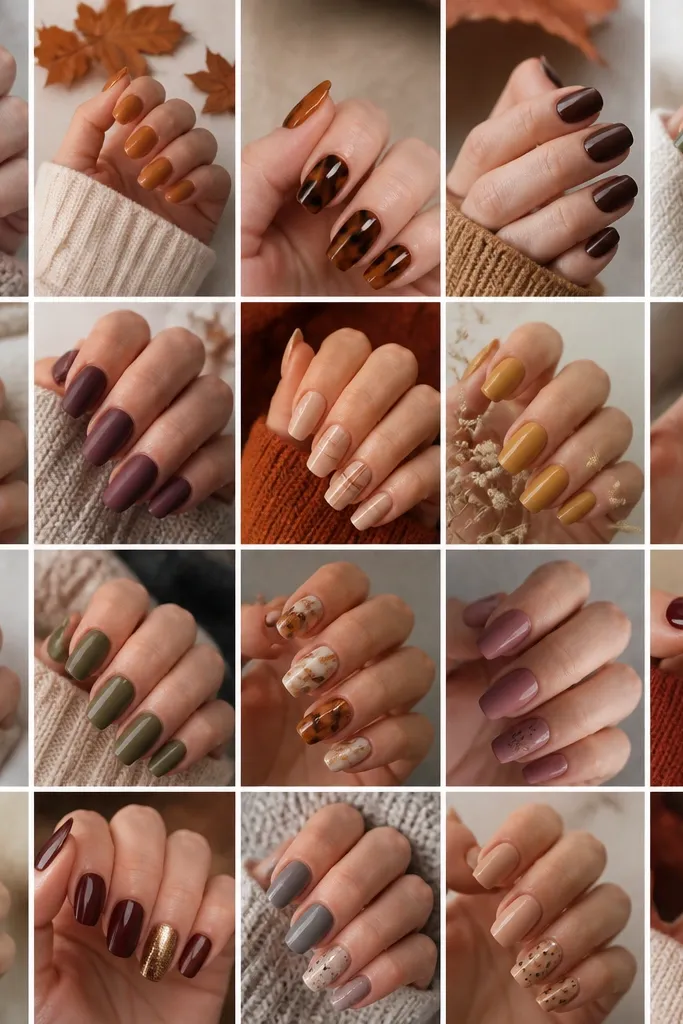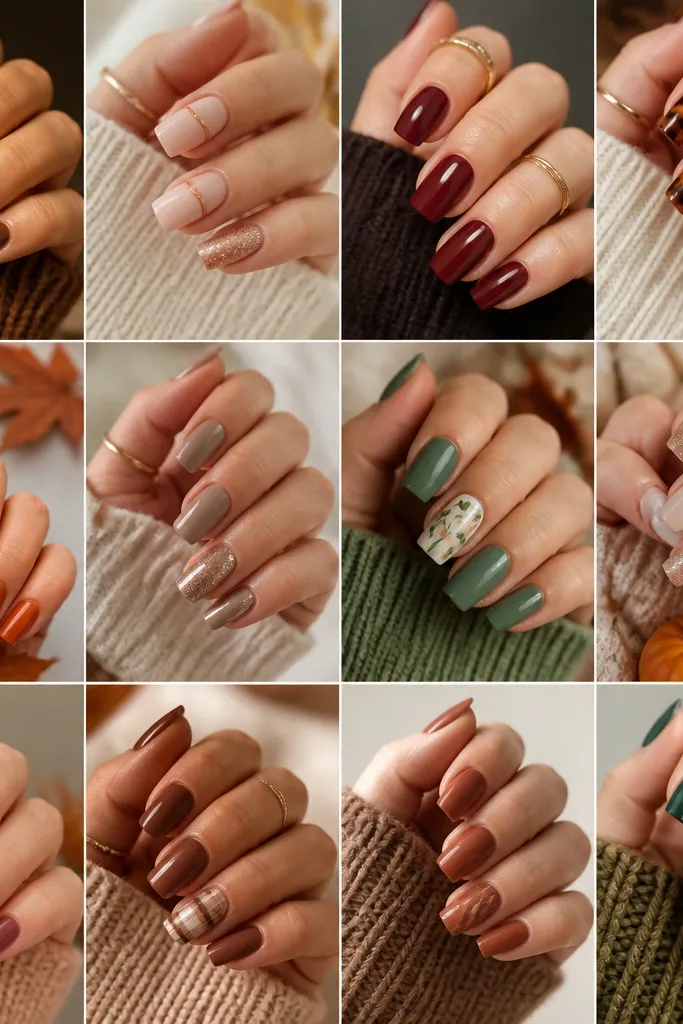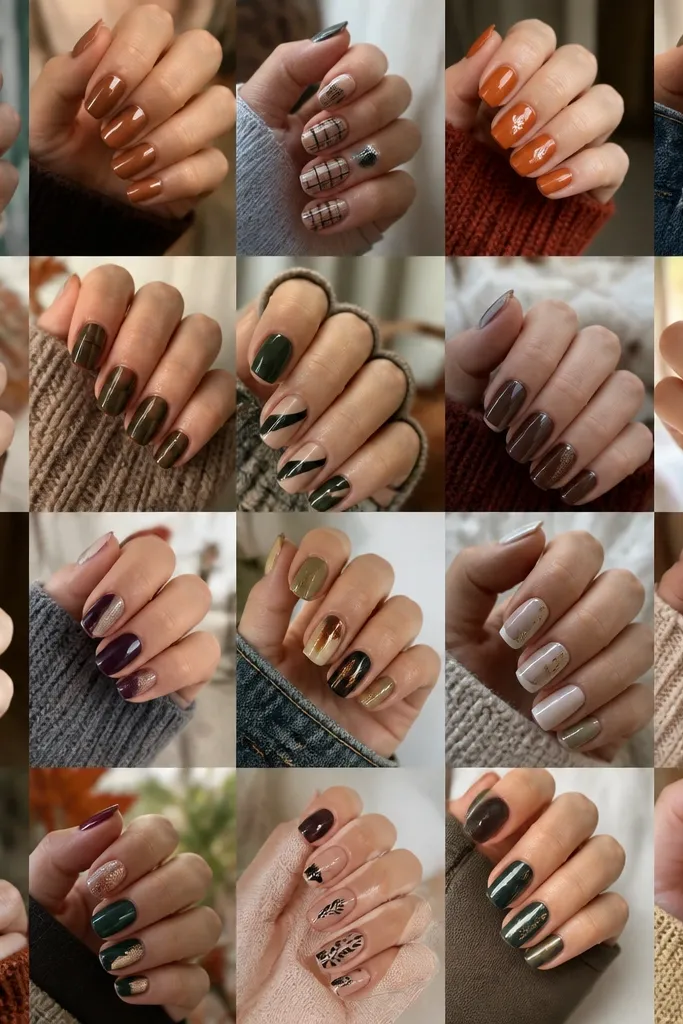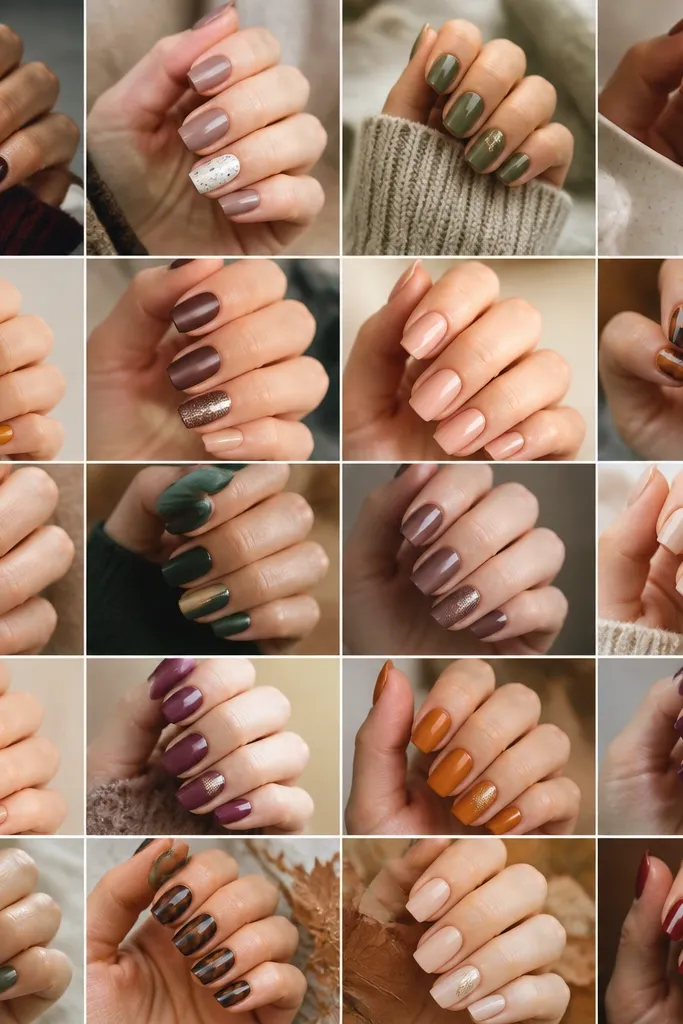
1. Caramel Nude French With Burnt Orange Tips
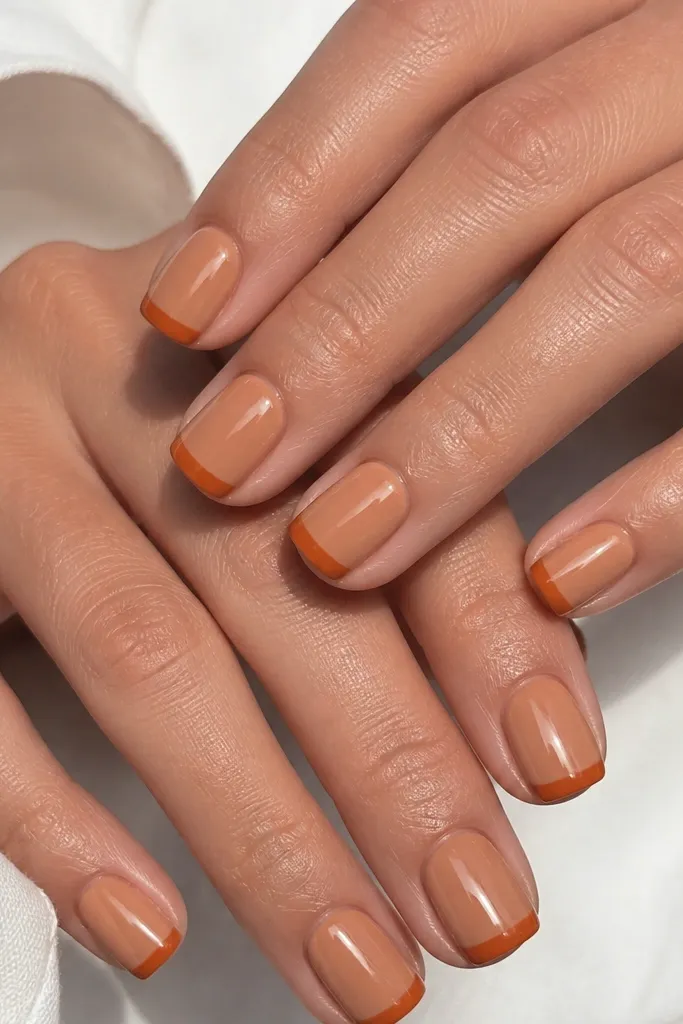
This set flatters almost everyone because caramel nude sits close to skin tone without turning gray. On fair skin, it reads cozy and creamy; on deeper skin, it warms the hand instead of looking ashy. The burnt orange tips add that fall punch while keeping the shape classic. I like French tips on short square because the line stays sharp and you don’t need a long nail to make it look intentional. The styling principle is contrast in one place — keep the base smooth and let the tips do the talking.
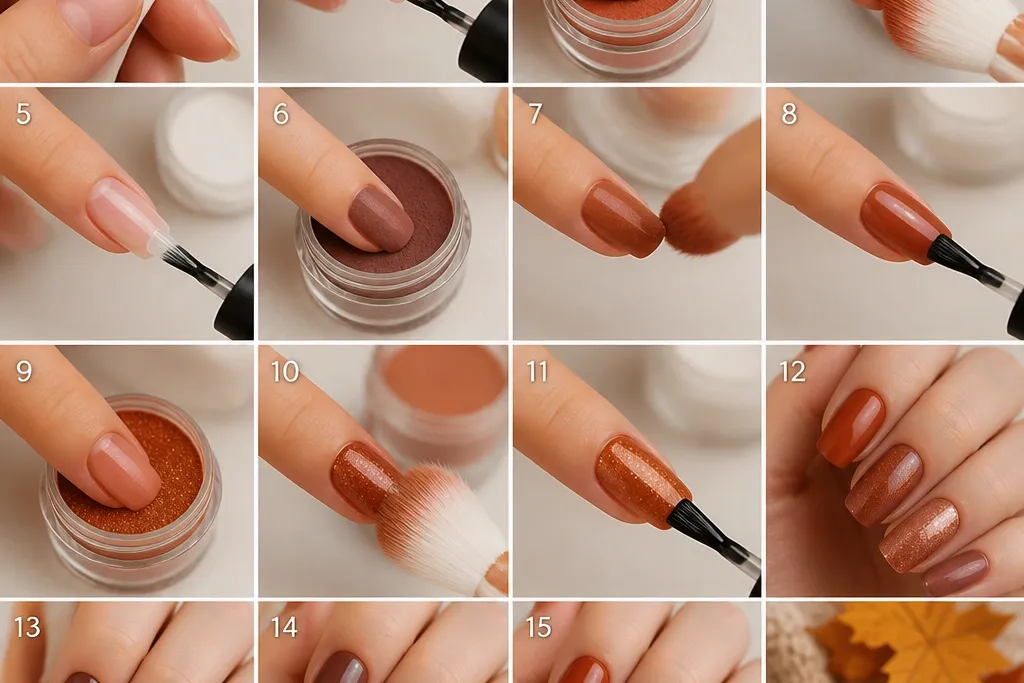
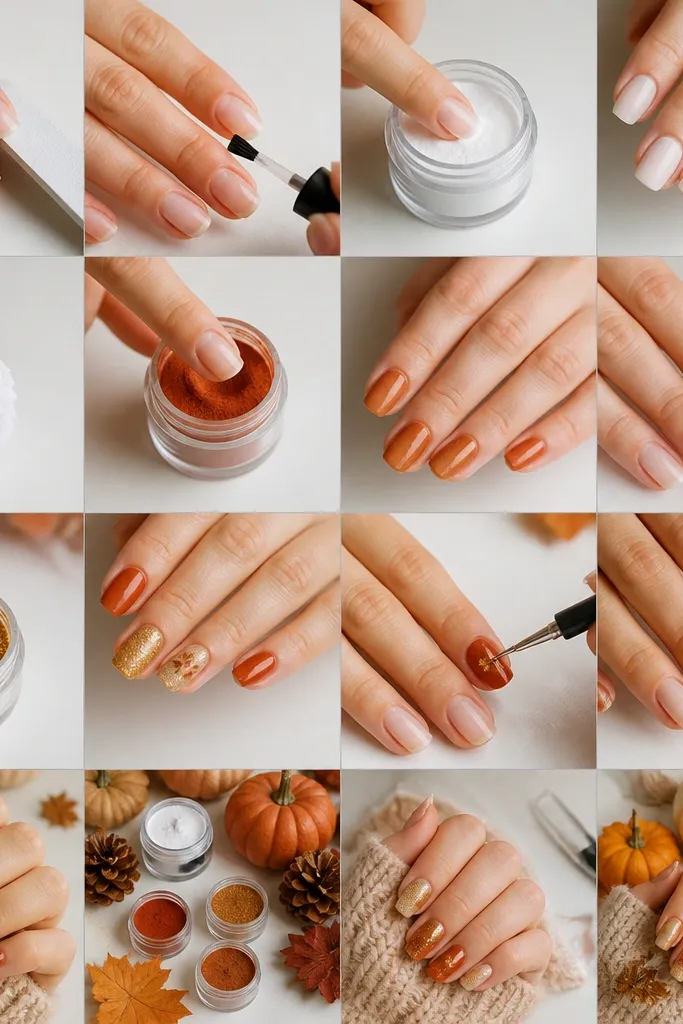
Start by filing your dip surface to a flat dome, then remove dust with a lint-free wipe. Apply a nude dip color as your base on all nails, curing each layer according to your kit. For the French, use French guides or a steady hand with a thin striping brush to place burnt orange at the free edge, keeping the line even across all nails. Add a second thin layer of burnt orange if you see any see-through spots, then seal with a high-gloss dip sealer or topcoat. Finish by running the brush along the sidewalls to lock the edges.
For extra crisp lines, wipe the brush on a paper towel so the paint or gel doesn’t flood under the guide.
Don’t make the French tip too thick — heavy tips look bulky on short nails.
2. Mocha Swirl With Soft Nude Base
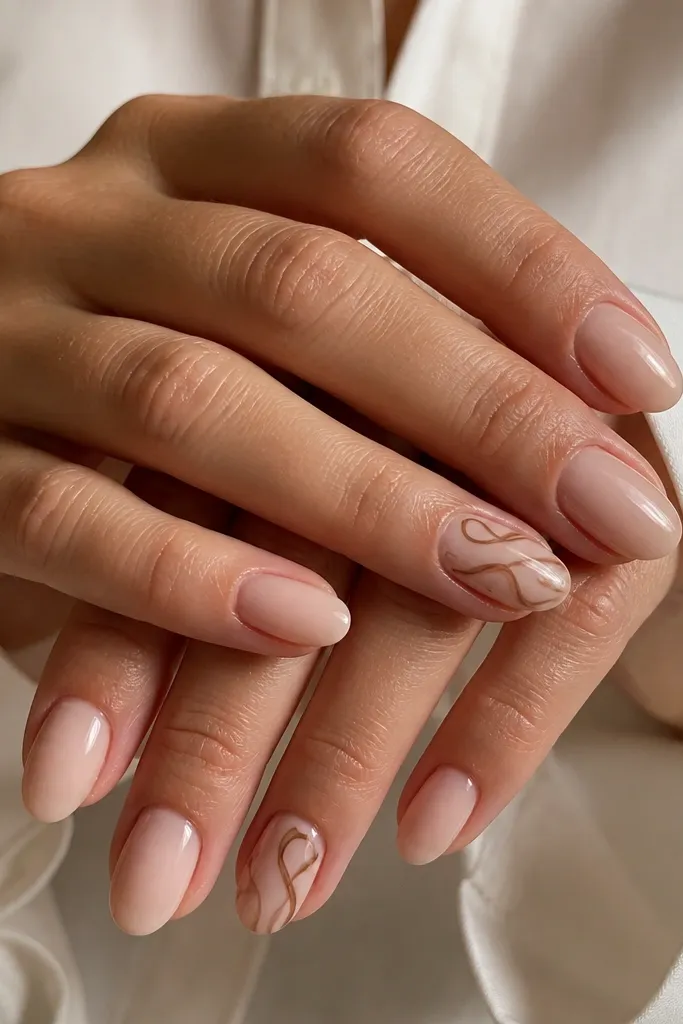
A nude base plus mocha swirls looks expensive because the lines are thin and the negative space keeps it airy. This design works especially well if you have shorter nails — the swirl gives movement without adding bulk. On warm undertones, the mocha looks chocolatey; on cooler undertones, it still stays flattering because the base is creamy nude. I’ve worn this to work and got compliments because it looks like nail art, not just color. The principle is “line art” — let the base be calm and use thin strokes for detail.
Start with your nude dip base on all nails and cure until smooth. File lightly to remove shine, then wipe clean. Choose one or two accent nails and paint thin mocha swirl lines using a striping brush (or a nail art pen) — pull the line in one continuous motion, then loop back to form the swirl. Let the lines dry or cure, then add a clear topcoat layer to bury the art smoothly. Seal the edges with the brush tip so the swirl doesn’t catch on fabric.
Practice the swirl on a scrap nail tip or paper first so your curve matches the nail’s width.
Skip thick paint lines — they look raised and cheap after topcoat.
3. Olive Leaf Accent Over Nude Gloss
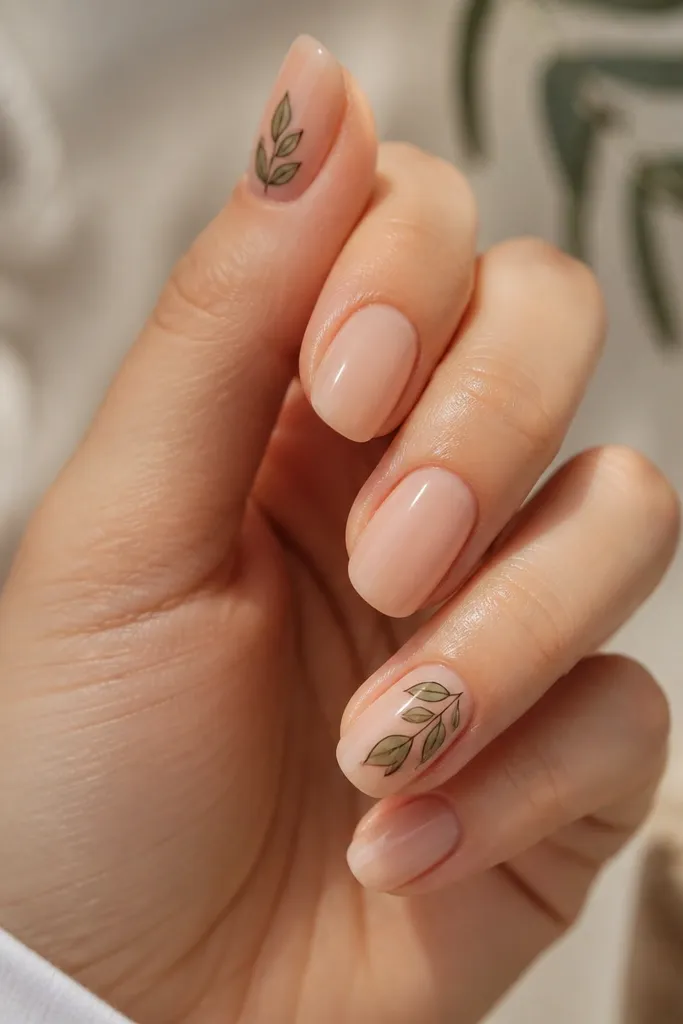
Olive leaf nails feel very fall because the color reads earthy, not neon. The nude gloss keeps your hand looking polished even with the leaf detail. This one flatters hands with longer fingers because the leaf shape can stretch upward, but it also works on short nails if you keep the leaf small and centered. I like using a darker outline so the leaf looks crisp instead of muddy. The styling principle is earthy accent placement — one or two nails only, so the set stays wearable.
Apply a nude dip base to all nails and cure. After filing and dusting, choose two accent nails and add an olive green leaf using thin nail art strokes. Outline the leaf with a darker green to create depth, then add 2-3 short vein lines in the same direction as the leaf’s center. Keep the leaf under the top third of the nail so it doesn’t crowd the cuticle. Topcoat everything with a glossy sealer, and wipe the brush along the free edge for a smooth finish.
If your leaf looks flat, add a tiny highlight vein in lighter olive near the center.
Don’t cover the whole nail in leaf pattern — it turns into “holiday sweater nails” fast.
4. Burnt Orange Marble Lines On Clear Nude
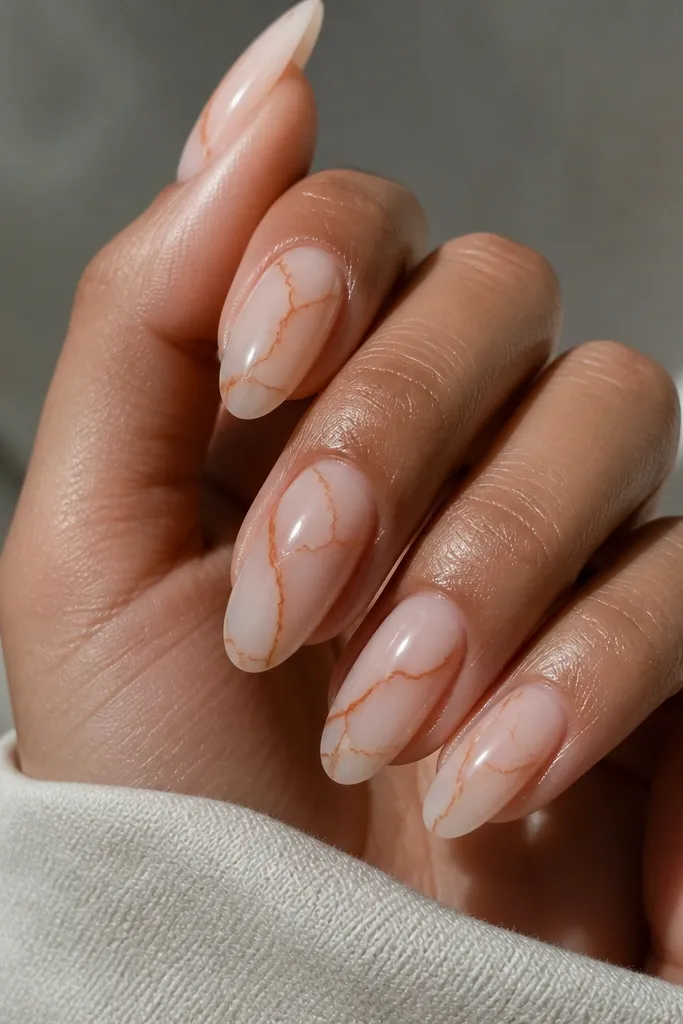
Clear nude with burnt orange marble reads modern and fall without looking heavy. If you like dip because it’s low-maintenance, this design is perfect because it hides small imperfections under the glossy stone effect. It flatters every skin tone because the base is translucent and warm. I’ve found marble lines look best when they’re inconsistent — some lines thick, some barely there. The principle here is controlled chaos — vary the line thickness so it looks like real stone.
Start with a milky clear nude dip base on all nails. Cure and file so the surface is smooth, then wipe dust. Use a thin brush to draw marble “crack” lines in burnt orange gel or paint. Add a few extra lines on the accent nails only, then soften any harsh edges with a clear coat before you seal. Finish with a high-gloss topcoat and make sure the sides are sealed by dragging the brush from base to tip.
Use a gel liner brush — it puts down thinner lines than a regular nail art brush.
Don’t draw perfectly even lines — marble should look accidental.
5. Deep Plum Cracked Glass Over Nude
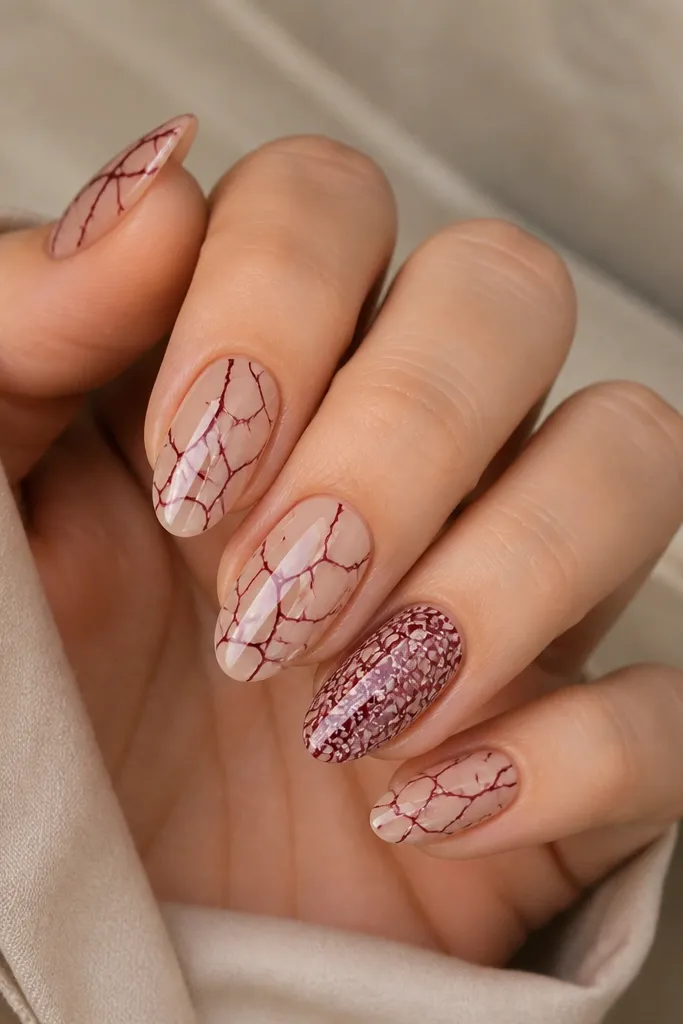
Cracked glass looks like fall jewelry on your nails because deep plum catches light and the nude base keeps it wearable. This is one of my favorite “date night” dip looks because it looks detailed even when you do simple steps. It flatters medium to deep skin tones especially well, but fair skin still looks gorgeous because the nude base brightens the hand. The principle is contrast and pattern density — keep the cracks lighter on most nails and heavier on one or two.
Apply a nude dip base and cure. File to remove shine, then wipe clean. On accent nails, paint a network of plum crack lines using a thin liner brush. Add a few thicker segments where you want the light to catch, then connect the lines so they form small irregular cells. Seal with a clear topcoat, then do a second thin topcoat if you want extra glassy shine. After curing, run the brush along each sidewall to prevent snagging.
If you mess up a crack line, cover it with a tiny dab of nude topcoat before you seal.
6. Terracotta Speckle On Matte Nude
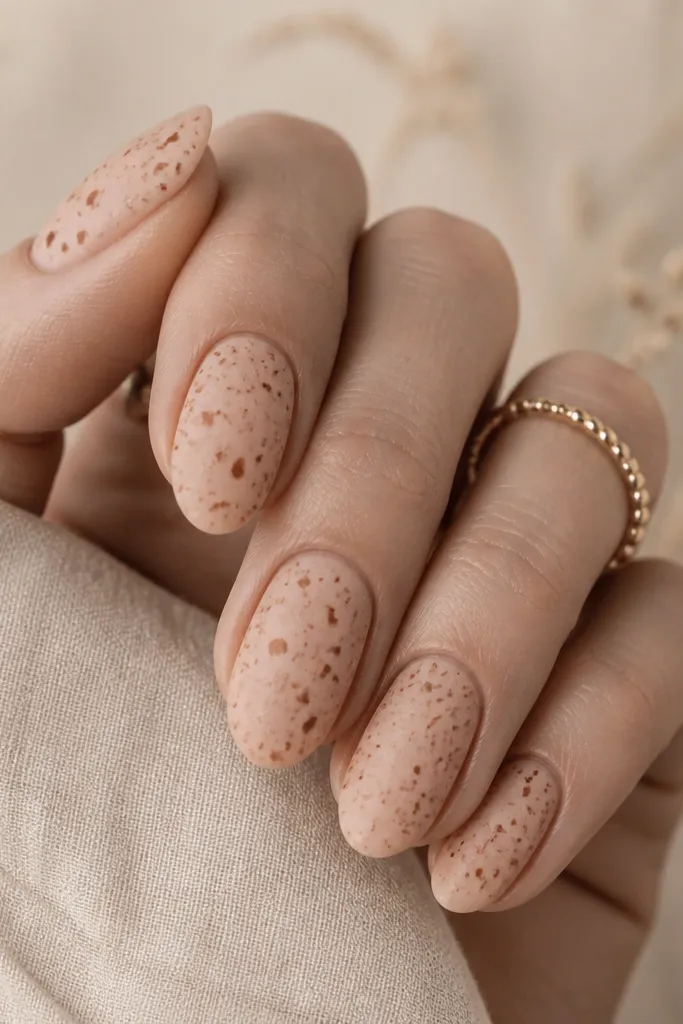
Matte nude with terracotta speckles looks like fall clay and it hides micro scratches better than glossy. This design is great if you hate strong glitter but still want texture. It flatters hands with dry cuticles because matte makes the overall look even and calm. I also like it on short round or squoval nails because the speckles spread naturally across the nail. The principle is texture contrast — matte base, tiny speckle detail.
Start with a nude dip base and cure. File smooth, then apply matte topcoat on all nails (not glossy). While the matte is still ready for art (follow your product timing), tap terracotta paint or pigment speckles using a small stippling brush or toothbrush with controlled pressure. Work from cuticle area toward the tip, leaving some negative space so it doesn’t look like dirt. Let it dry or cure, then skip adding glossy topcoat so you keep the matte effect intact. Seal the edges with a thin matte topcoat pass.
Editor's noteLoad less paint on the brush for smaller speckles — one heavy dip creates blobs.
Watch outDon’t overdo speckles on every nail — keep it to one or two nails if you want a cleaner look.
7. Gold Foil Half-Moon On Caramel
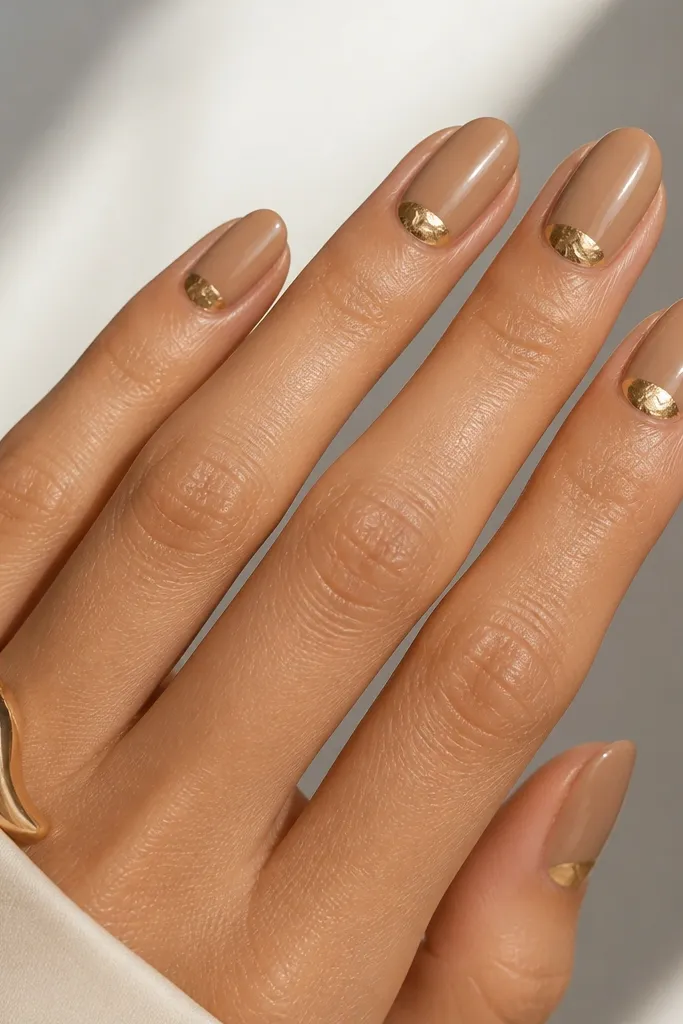
Gold foil half-moons look like a warm manicure that still feels fancy. Caramel nude gives the foil something to glow against, so it doesn’t look harsh. This set flatters all nail lengths, but it looks best on squoval and almond because the half-moon matches the nail curve. I’ve noticed the foil looks cleaner when it’s only at the cuticle, where the eye expects detail. The principle is “one focal point” — keep everything else solid so the foil reads intentional.
Apply caramel nude dip to all nails and cure. File smooth and wipe dust. For the half-moon, use cuticle area as your guide — leave about 1-2 millimeters of space above the cuticle line so it doesn’t flood skin. Press small pieces of gold foil onto a tacky gel spot near the cuticle, then seal with a clear topcoat. If you’re using dip seal instead of gel, apply the sealer carefully with a flat brush so you don’t lift foil edges. Finish by checking the sidewalls under bright light and adding a tiny extra coat where foil meets the edge.
Cut foil pieces small with nail scissors — tiny pieces stick better and look sharper.
8. Chocolate Brown Gradient Tips
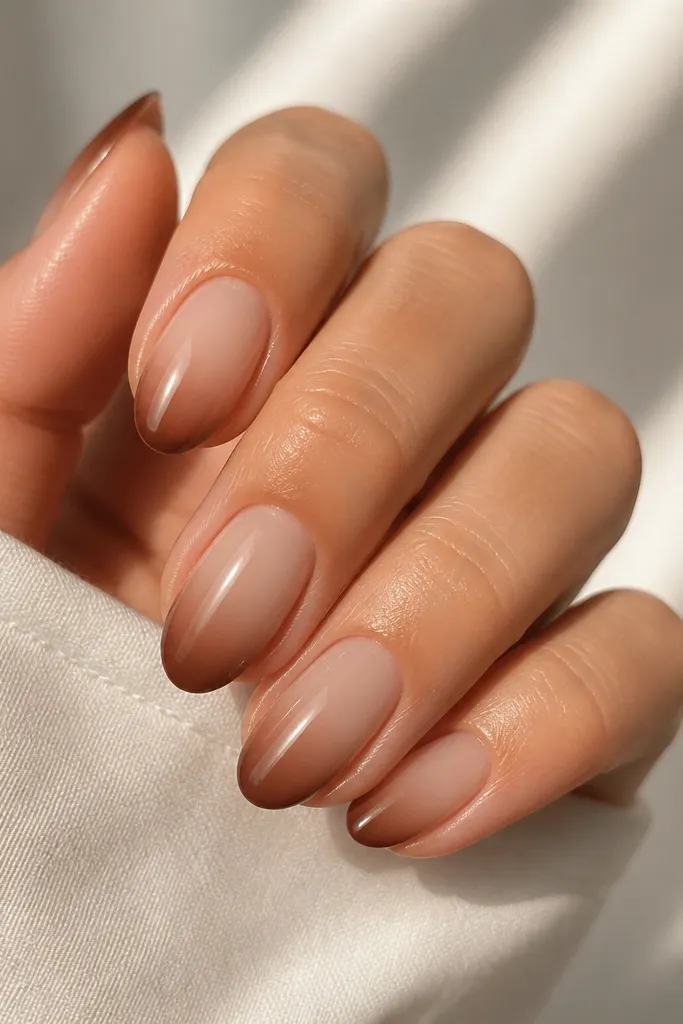
A chocolate gradient screams fall comfort without being loud. The milky nude base makes your nails look clean, and the brown tips add warmth. This is flattering if your nails are short because the gradient visually lengthens the nail bed. I’ve done this on both fair and deep skin — the key is choosing a milky base that matches your undertone. The principle is smooth blending — avoid hard lines so it looks like ombre, not stripes.
Start with a milky nude dip base on all nails and cure fully. File the surface smooth, then wipe dust. For the gradient, sponge a lighter brown at the mid-tip area first, curing if you’re using gel/pigment, then sponge a darker chocolate only at the very edge. Build in thin layers so the transition stays soft. Seal with topcoat, then do a final edge sweep to keep the tip from catching. If you want extra depth, add one more thin layer of dark brown only at the free edge before sealing.
Use a makeup sponge with a small corner — it gives you a better fade than a big round sponge.
9. Cinnamon Swirls Over Clear Pink
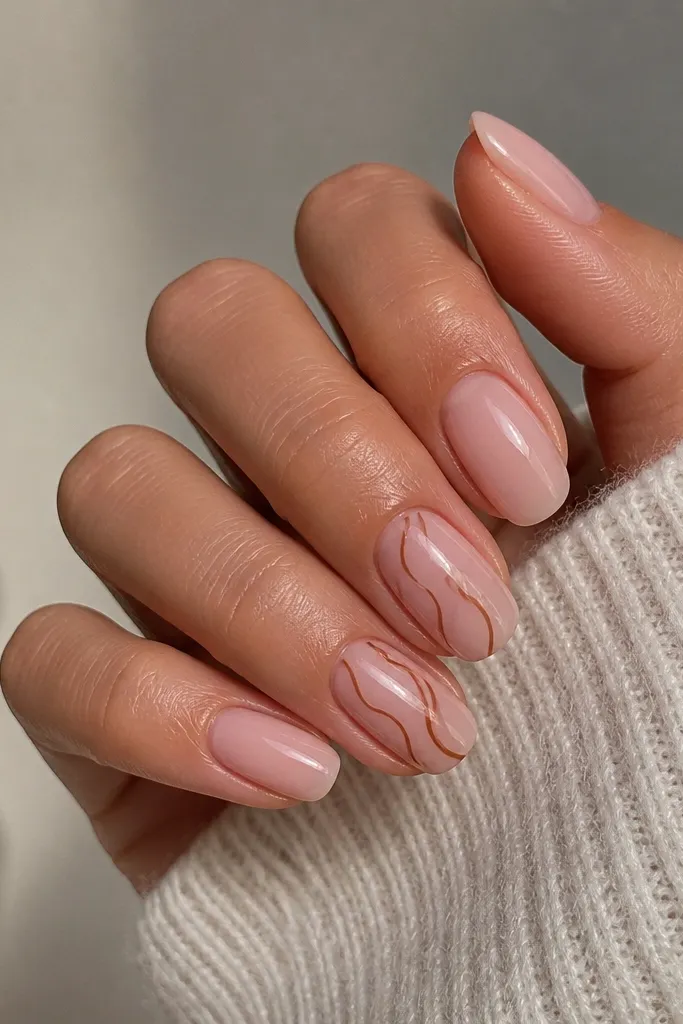
Clear pink makes your nails look fresh, and cinnamon swirls add that fall warmth without going dark. This is a good pick if you want nail art that still looks natural in daylight. It flatters hands with pink undertones because the base blends and the cinnamon stays warm. I also like it for people who get bored with plain solid colors — the swirl is subtle but visible. The principle is minimal art placement — keep swirls on two nails and leave the rest glossy and solid.
Apply a clear pink dip base on all nails and cure. File to remove shine, then wipe clean. On two accent nails, draw one or two cinnamon swirls using a thin liner brush, starting near the sidewall and curving toward the center. Keep the swirl line about the thickness of a hair — you should still see the clear base through it. Seal with gloss topcoat in two thin layers for smoothness. After curing, check under side light to make sure the swirl edges are flat.
Editor's noteIf your line looks wobbly, drag the brush again lightly over it while the paint is still wet.
10. Olive And Black Micro Dots
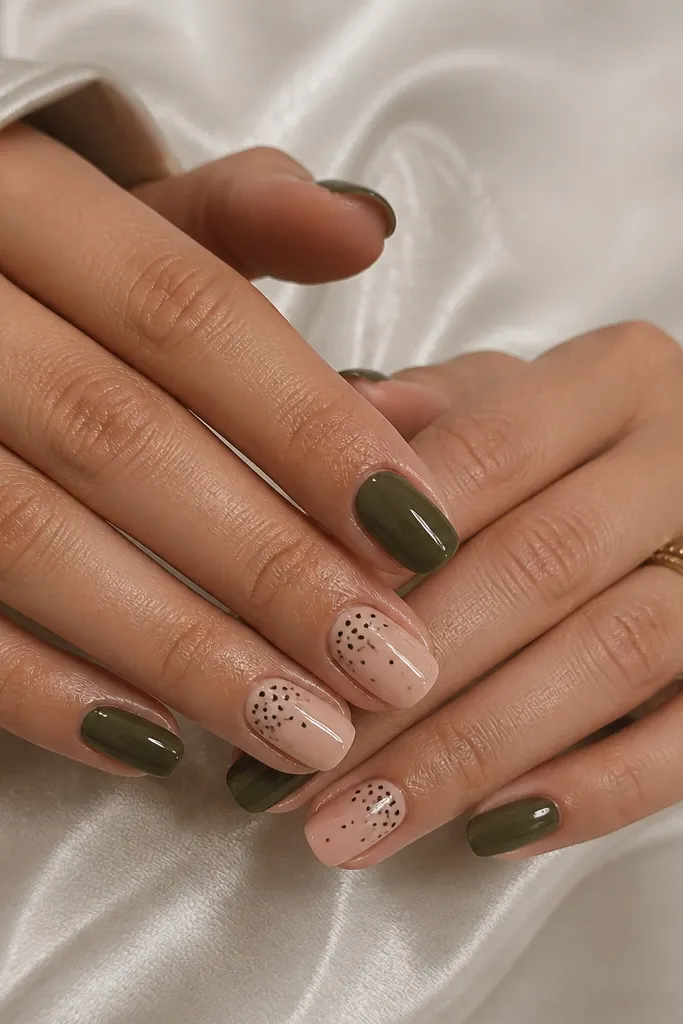
Micro dots make nails look graphic, not messy, and olive + black is a fall combo that reads modern. This is flattering on short nails because the dot clusters create a focal point near the cuticle. I’ve worn this to casual events and it still looks neat because the pattern is small and controlled. The principle is dot scale — keep dots tiny and grouped, not scattered everywhere.
Start by painting or dipping olive on two nails and a nude dip on the rest. Cure and file smooth. Use a dotting tool to place tiny black dots on the nude nails, clustering them in a small arc near the cuticle and leaving more space as you go down the nail. Add only a few dots per nail so it doesn’t look like a speckle storm. Seal with topcoat, and be gentle when brushing over dots so you don’t smear them. If you want extra crispness, do a second thin clear coat only after the first is fully dry.
Editor's noteDip the dotting tool lightly so each dot forms a sharp circle instead of a blob.
11. Burnt Orange Glitter Fade
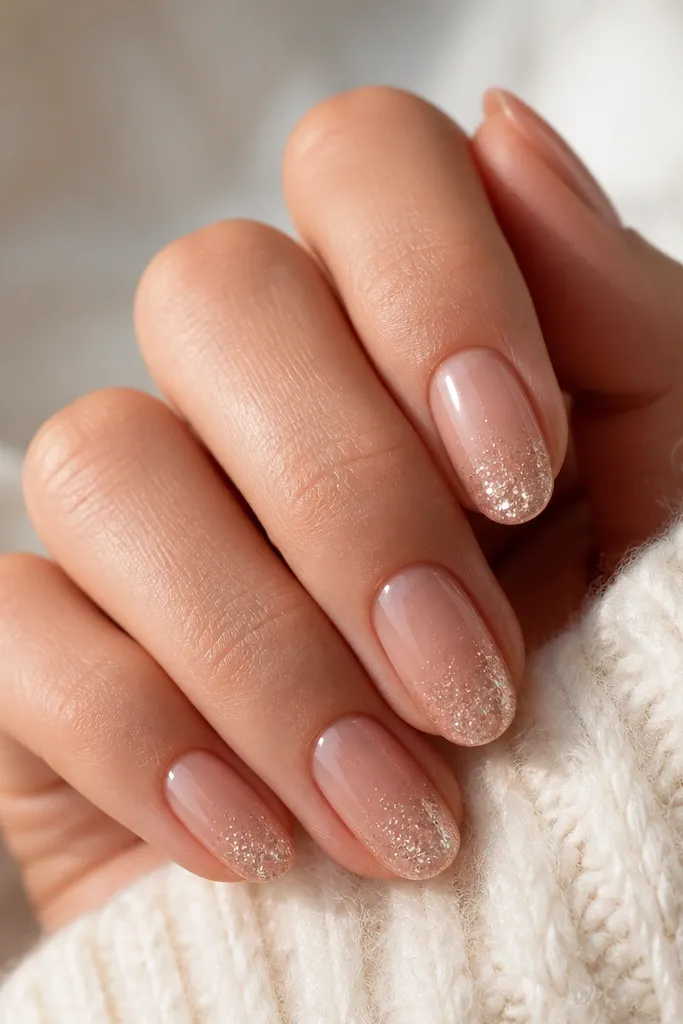
A glitter fade is the easiest way to get a fall sparkle that doesn’t look like you glued craft glitter on. Burnt orange glitter over nude gives warm light that looks good in indoor lighting. This design flatters every nail shape because the fade follows the natural curve of the tip. I like it for events because it reads festive without needing heavy patterns. The principle is gradient sparkle — densify at the tip, thin upward.
Apply nude dip base to all nails and cure. File smooth, then wipe dust. For the fade, apply a thin tacky layer or gel at the free edge, then dip or brush burnt orange fine glitter starting at the tip. Use a clean brush to pull the glitter upward lightly so it fades rather than ends in a hard line. Cure, then seal with a clear topcoat in two thin coats. Finish by capping the edge so the glitter doesn’t snag when you wash your hands.
Use fine glitter, not chunky — chunky glitter catches on everything and looks uneven after filing.
12. Deep Plum Velvet Matte With Gloss Edge
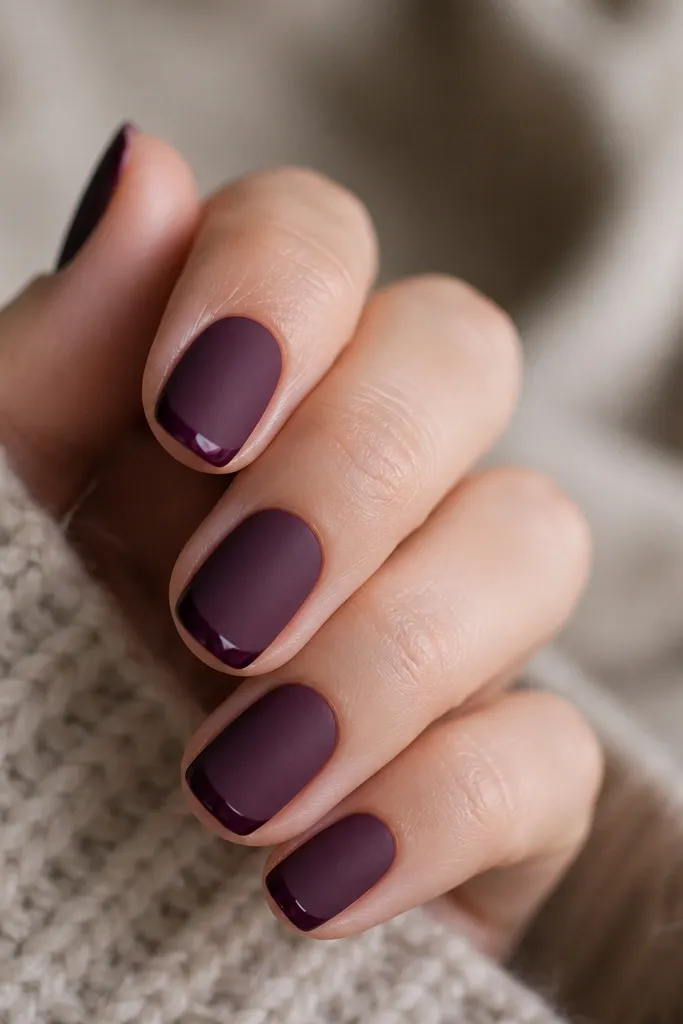
This one looks like velvet because the matte topcoat kills shine, and the glossy edge brings it back at the tip. Deep plum is the fall color that looks rich without needing extra art. It flatters hands with cooler undertones because plum doesn’t turn muddy. On short nails, the glossy edge gives the illusion of length. The principle is finish contrast — matte body, glossy detail line.
Dip all nails in deep plum and cure. File smooth and wipe dust. Apply matte topcoat to the entire nail surface, avoiding cuticles and sidewalls. After it dries or cures, use a guide strip at the tip and paint a narrow glossy plum or clear gel line on just the free edge. Cure and then remove any guide residue carefully. Seal the glossy line with a thin extra topcoat so it stays smooth.
Mask the cuticle area with a small piece of tape so matte topcoat doesn’t creep onto your skin.
Don’t go full glossy — the velvet effect disappears.
13. Autumn Leaf Ombre Green To Nude
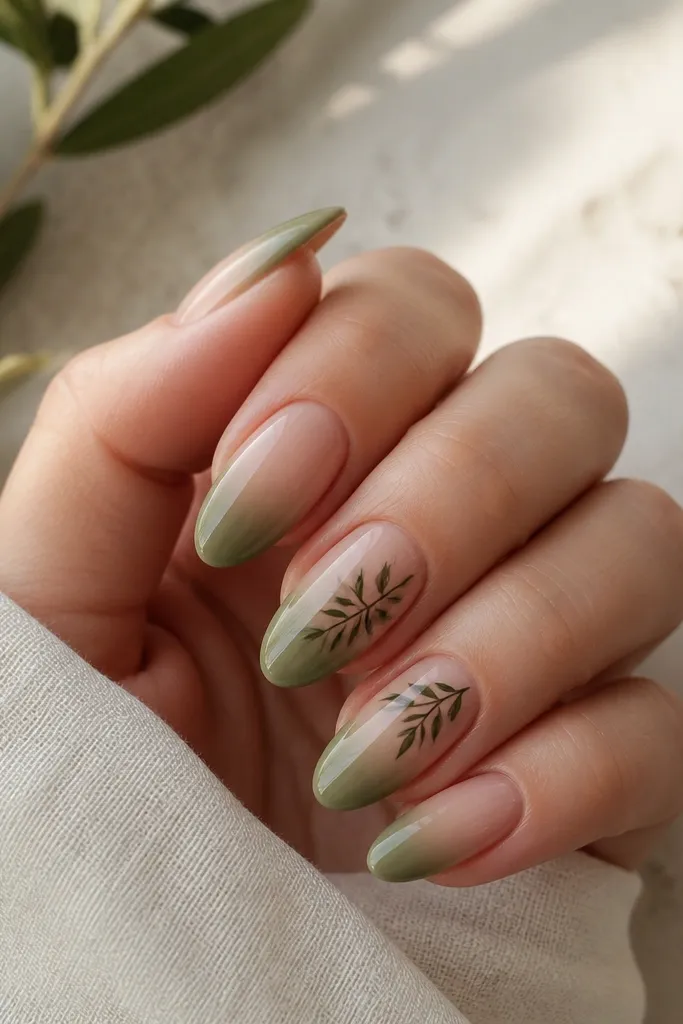
Green ombre feels like fall outdoors — olive and moss tones look calm, not neon. The nude-to-green fade flatters most skin tones because it keeps the base light. If your nails are slightly short, this works because the fade draws attention toward the tip without looking bulky. The leaf outlines add just enough seasonal detail. The principle is gradient direction — keep the fade smooth from cuticle down so it looks like weathered leaves.
Start with a nude dip base and cure. File smooth and wipe dust. For the ombre, apply olive green near the tip and sponge or brush it upward gradually until it fades. Cure and repeat for a stronger gradient only if you need it. On accent nails, draw tiny leaf outlines with dark green liner — one leaf per nail, centered. Topcoat everything glossy, then cap the free edge with a careful edge sweep.
Use a lighter olive if you want a softer ombre; use a darker moss if you want it to pop more.
14. Spiced Nude With Copper Foil Flecks
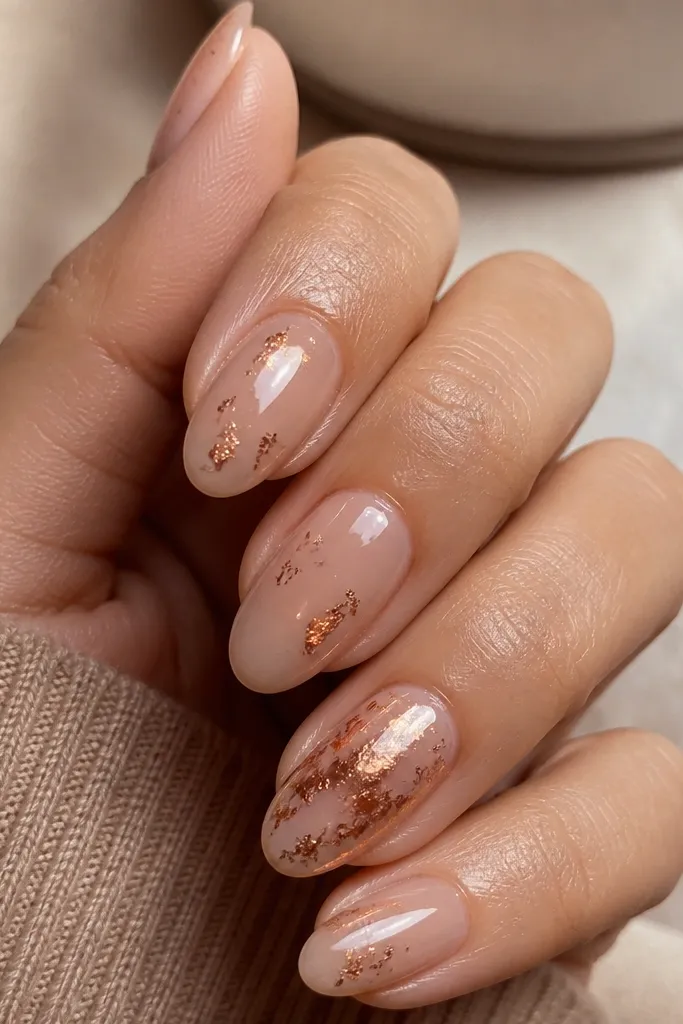
Spiced nude is my go-to fall base because it looks like a warm sweater and it photographs well. Copper foil flecks add that “autumn light” effect without full glitter coverage. This flatters hands with yellow or neutral undertones, and it still looks good on cool undertones because the base is warm. I like flecks on two nails only since copper can look busy if it’s everywhere. The principle is metallic restraint — small flecks, big payoff.
Dip all nails in spiced nude and cure. File smooth and wipe dust. On two accent nails, apply a thin tacky gel spot near the middle and tap copper foil flecks onto it. Press gently so the foil sticks, then seal with clear topcoat. Do a second thin topcoat if you feel any raised foil edges — you want it glass-smooth. Cap the sides by brushing topcoat along the nail edge so the flecks don’t lift.
If foil won’t stick, wipe the nail with alcohol prep wipe first, then try again.
15. Rust Orange Checker Accent On Nude Dip
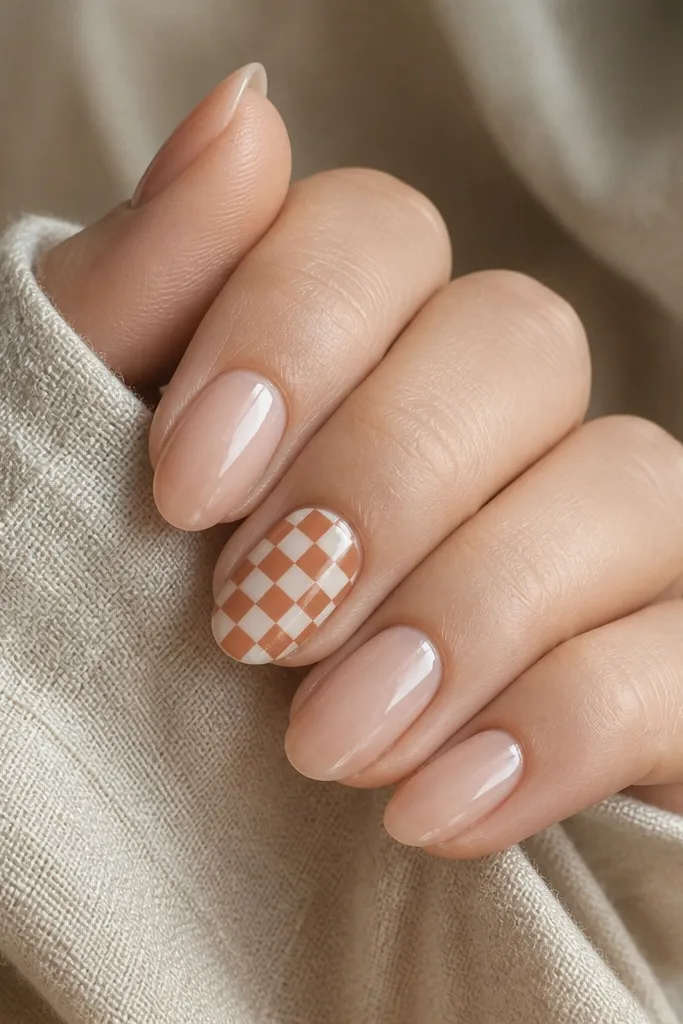
A tiny checker pattern feels like fall without turning into a Halloween costume. Nude keeps it modern, and rust orange is warm enough to match scarves and boots. I like this for short squoval nails because the squares can be small and centered. It flatters a wide range of skin tones because the base is light and the pattern is warm. The principle is scale and spacing — small checks, tight grid, clean negative space.
Start with a nude dip on all nails and cure. File smooth and wipe dust. On one or two accent nails, draw a grid lightly with a thin striping brush using rust orange gel or paint. Fill alternate squares, then let it dry or cure. Add a clear topcoat layer, then check for any uneven edges and do a second thin seal coat. Keep the pattern in the center of the nail so it doesn’t crowd the cuticle or free edge.
Use a nail art tape strip to create perfectly straight grid lines if your hand shakes.
Don’t make the squares too big — large checks look childish and bulky.