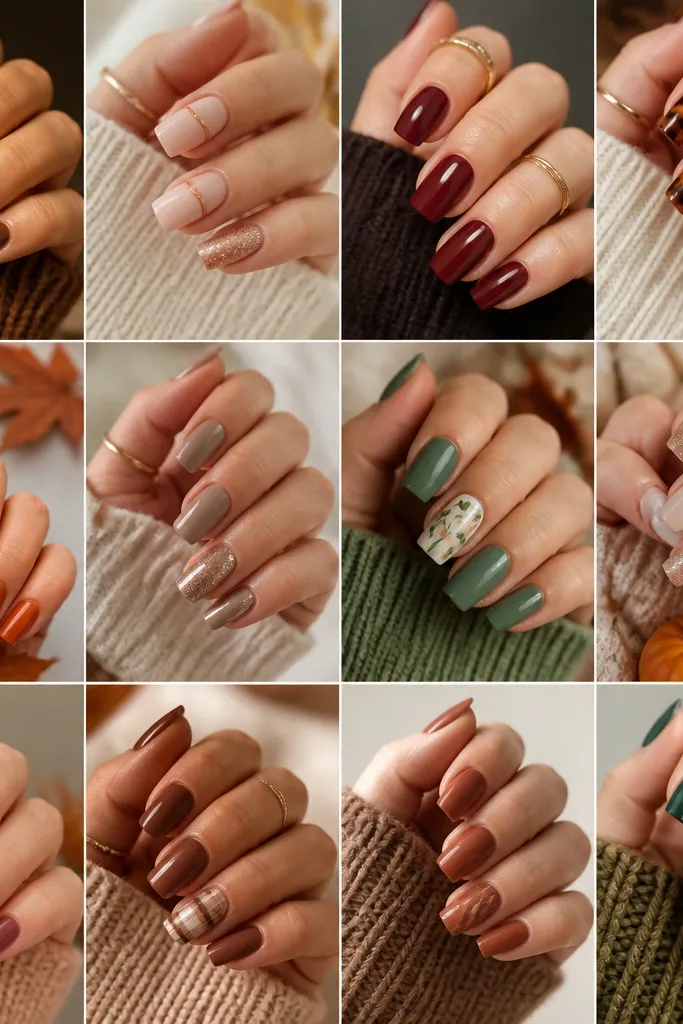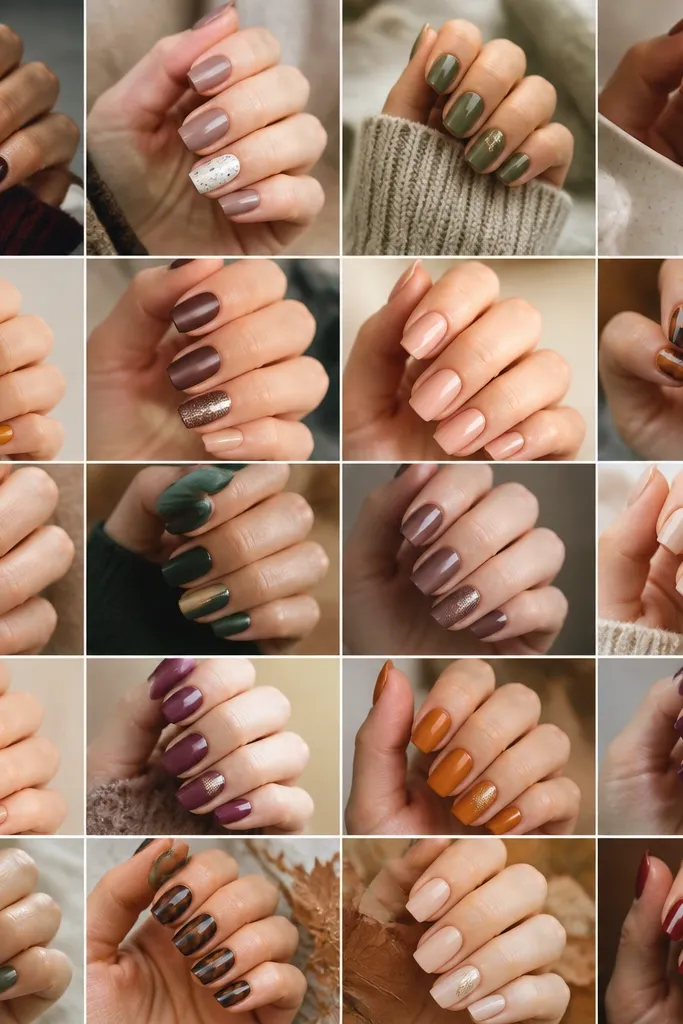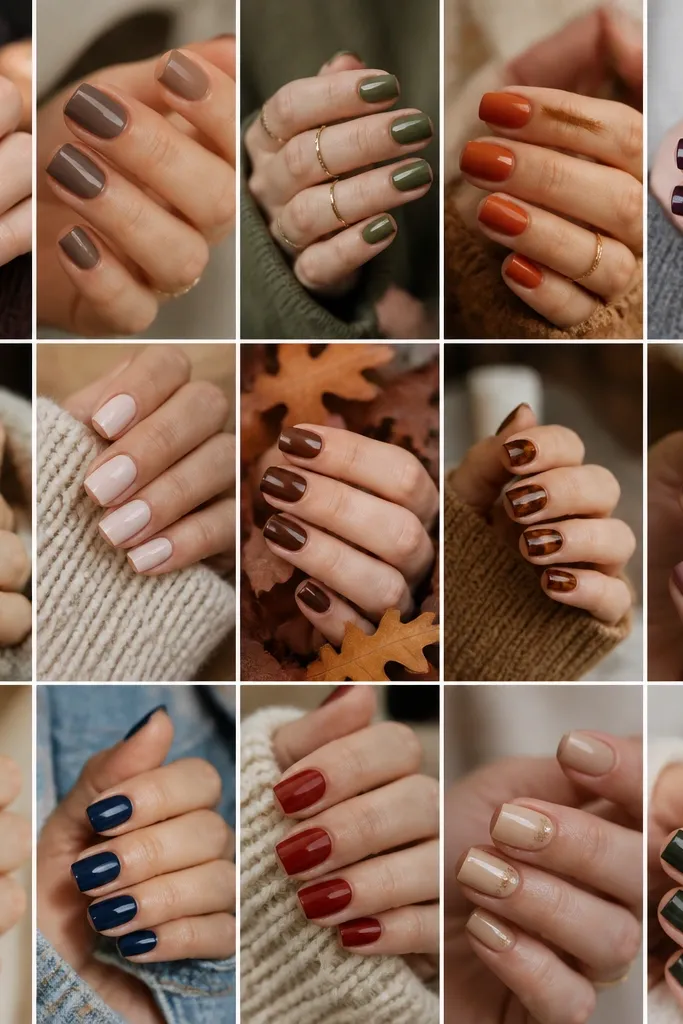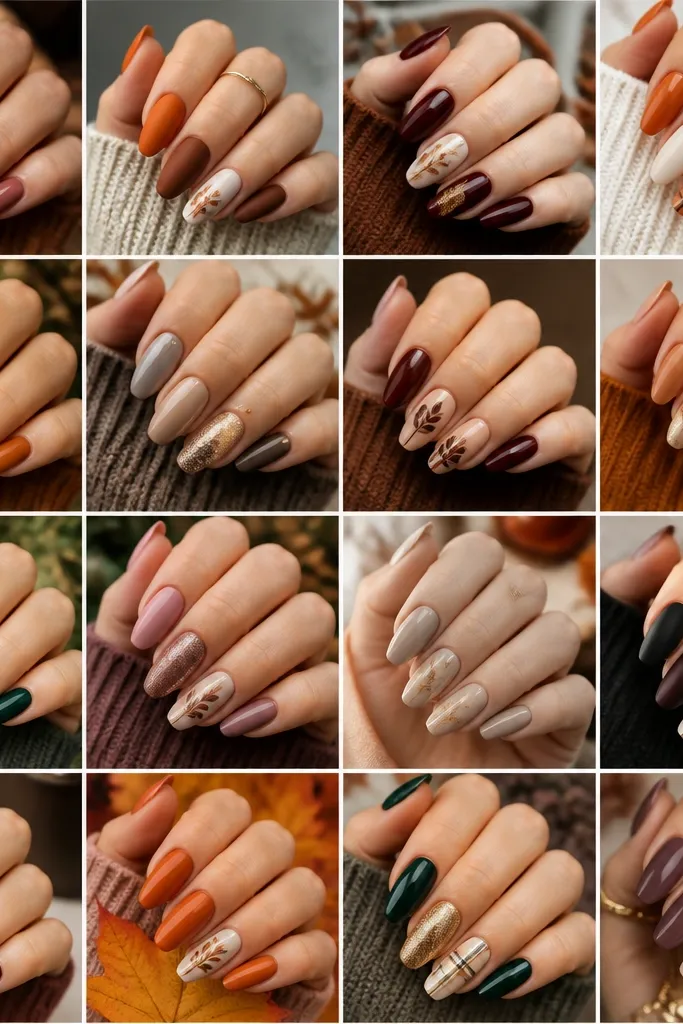
1. Burnt Orange Half-Moons with Clear Gloss
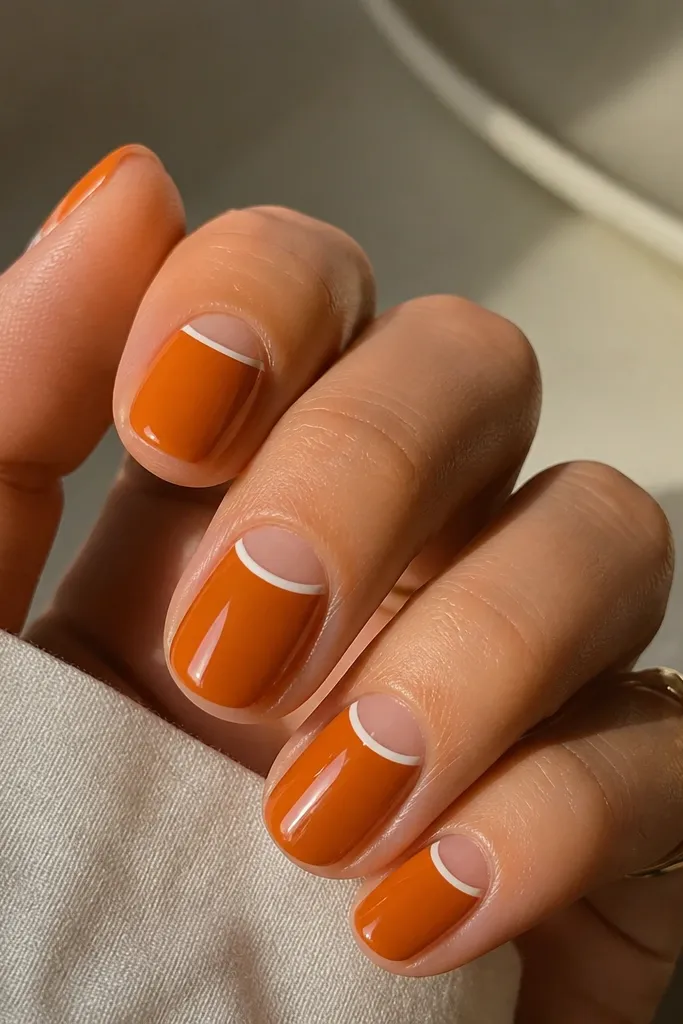
This look works because the clear negative space creates a real break in color, and the half-moon shape visually lifts the nail up. I use a creamy burnt orange so the color looks warm against autumn skin tones, especially if you have golden undertones. The cuticle area stays bright and fresh because the design starts right where growth shows. It also looks good on squoval and short rounded nails since the half-moon follows the natural curve. If you want fall without “too much art,” this is the one I reach for first.
Start by pushing back cuticles and applying a gel base coat, then cure. Paint two thin coats of burnt orange on the whole nail except the half-moon area — I use striping tape to mask a curved band near the cuticle. Cure each coat fully so the edges stay crisp. Remove the tape, then paint a clear gel layer over the half-moon and seal the boundary lightly with top coat. Finish with a glossy top coat and cap the free edge with a slightly thicker swipe.
Editor's noteFor extra clean edges, press the tape down with a silicone tool or the back of a tweezer for five seconds before curing.
Watch outAvoid thick orange near the cuticle — it makes the half-moon edge look fuzzy and cheap.
2. Mocha Micro-Glitter Fade (No Full Sparkle)
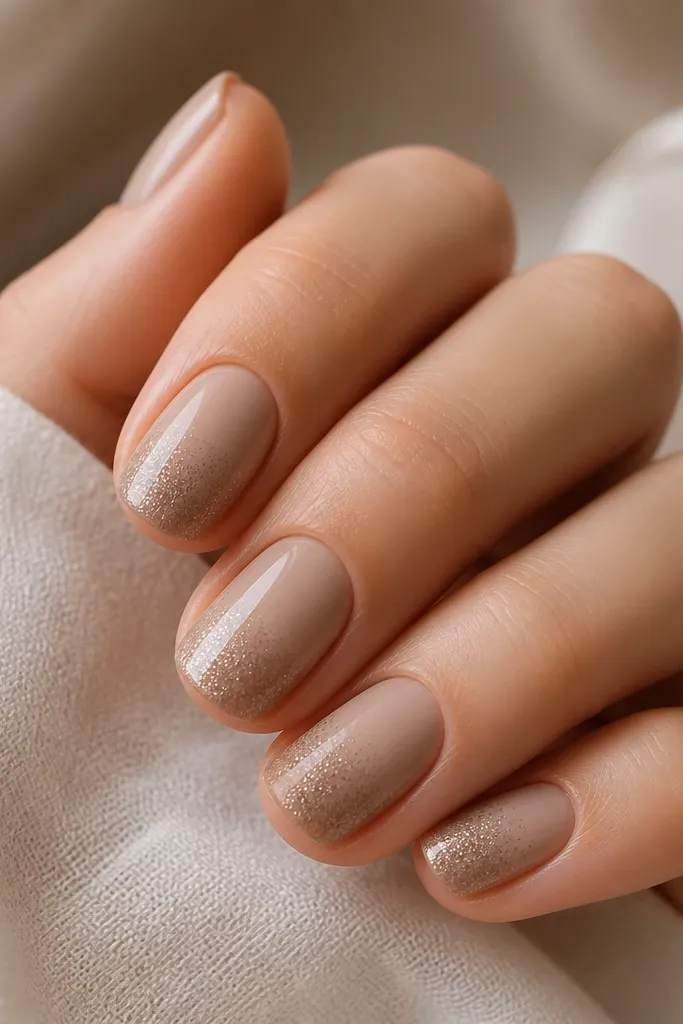
Micro-glitter fades look expensive because they mimic light reflection, not random sparkle. I like mocha bases (taupe-brown) because they flatter both warm and cool undertones — they sit in the middle of the spectrum. On short nails, concentrating glitter at the tips adds length without filling the nail bed. The smooth fade also hides small imperfections, so your nails look polished even if your lines aren’t perfect. This is my go-to when I want fall sparkle for cheap gel glitter.
Start with a creamy mocha/taupe base in two thin coats, then cure. Dab a small amount of micro-glitter gel at the very tips using a sponge cut into a tiny triangle, then tap upward just a little to create the fade. Cure and repeat only if you want stronger glitter at the tip. Clean up the sides with a lint-free wipe and a tiny brush dipped in isopropyl alcohol. Seal with glossy top coat, and cap the free edge so the glitter doesn’t snag.
Use a sponge for blending instead of a brush — the fade looks smoother in photos.
Skip chunky glitter — it makes short nails look bulky and uneven.
3. Olive Satin Nails with Copper Cuticle Line
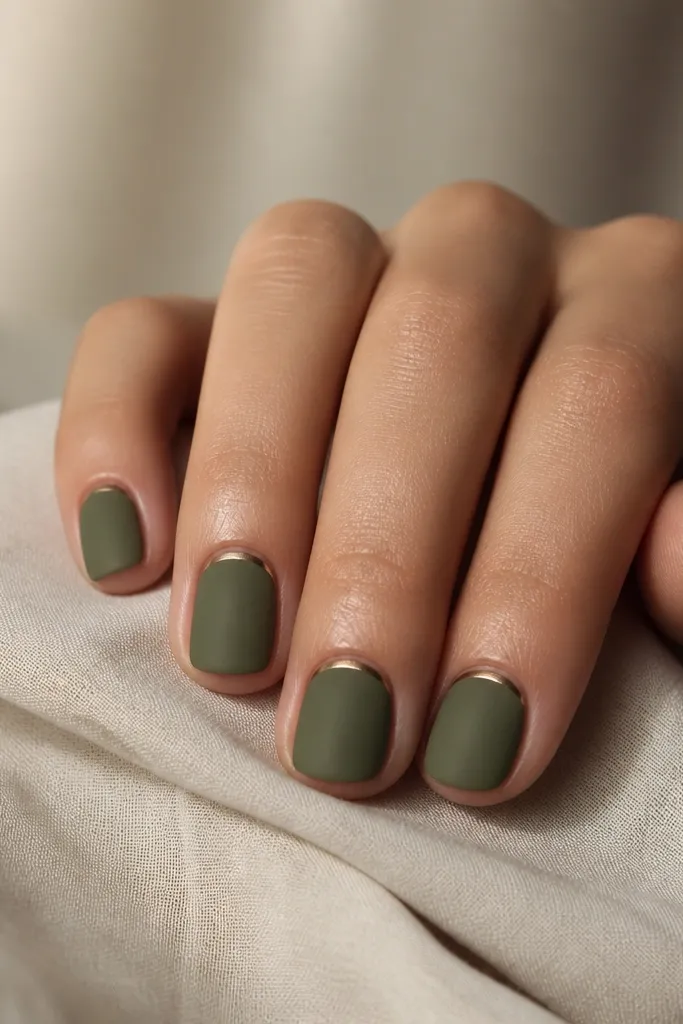
Satin olive looks like fall without being loud, and the copper line gives you that “jewelry” effect. I like it for medium to deep skin tones because the olive doesn’t wash out and the copper pops at the cuticle. The satin finish also hides minor texture, which matters when your nails are short and you want a smooth surface. This style feels clean and intentional, not artsy. It’s also great for work because it looks refined even with minimal design.
Start with an olive gel color in two thin coats and cure thoroughly. Apply a satin top coat (or mix glossy top with a matte top, if that’s what you have) and cure. Use striping tape or a fine detail brush to draw a thin copper line right along the cuticle curve — keep it narrow, about the width of a matchstick. Cure the copper line, then add a final satin top coat over everything except the line if you want it to stay slightly glossier. Cap the free edge with a thin top coat so the finish stays smooth.
If your copper line floods, use a smaller brush and wipe the bristles on a paper towel before you draw.
Don’t place the line too low — a cuticle line sitting in the middle of the nail makes short nails look chopped.
4. Oxblood Gloss with One Matte Accent Stripe
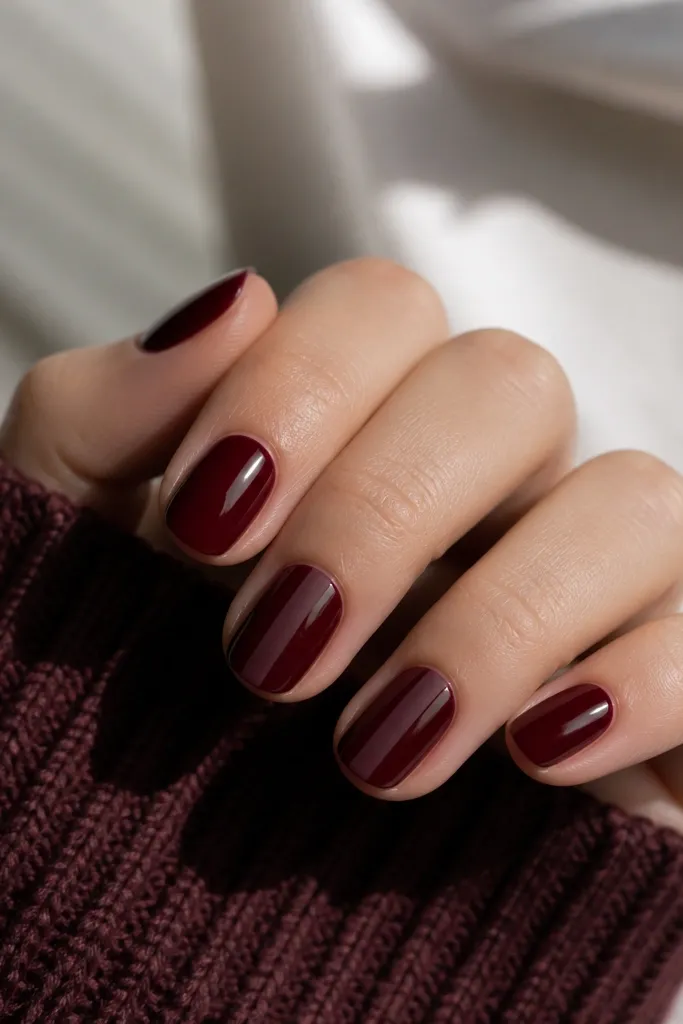
This is the easiest way I know to get contrast without extra tools. Oxblood is flattering on almost every undertone because it has both brown and red inside it. The matte stripe breaks up the shine and adds a “fashion” look even though the design is basically one line. On short nails, the vertical placement makes the nail look longer and keeps attention on the center. It also grows out nicely because the main color is uniform.
Paint oxblood gel in two thin coats and cure. Leave one or two accent nails fully glossy for contrast. For the matte stripe, apply a thin strip of matte gel polish in the center using a detail brush or tape — keep it about 1/8 of the nail width. Cure, then finish the whole nail with glossy top coat except over the matte stripe, or use a matte top only on the stripe. Seal the edges with top coat so the stripe doesn’t peel.
Editor's noteUse tape to place the stripe, cure, then remove the tape before you top coat.
Watch outAvoid multiple stripes — on short nails it looks like a barcode and reads messy.
5. Chocolate Brown French Tips with Thin Copper Outline
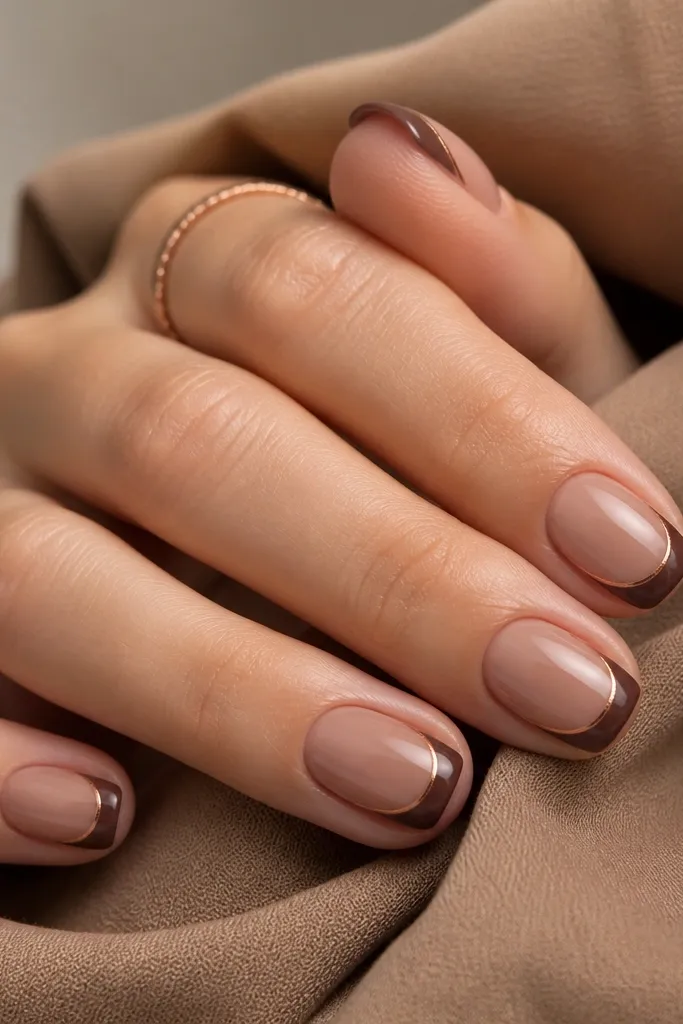
French tips usually look best on short nails when the tip is narrow and the outline is crisp. Chocolate brown feels very autumn, and the copper outline makes it look intentional instead of like you just used two colors. I love this on light to medium skin tones because the nude base keeps your hand looking clean. The thin outline also hides small unevenness in the tip curve. It’s a “going out” look that still reads affordable.
Start with a nude-beige base in two coats and cure. Apply French tip guides or use striping tape to mask a narrow tip — keep it less than 1/3 of the nail length. Paint the masked tip chocolate brown, cure, then remove the tape carefully. With a fine detail brush, draw a copper outline along the French edge only, not across the tip. Finish with a glossy top coat and cap the free edge.
Editor's noteIf your copper outline is shaky, practice on a paper swatch before you touch your nail.
Watch outSkip wide French tips — they make short nails look stubby.
6. Terracotta Speckle Dots over Nude Base
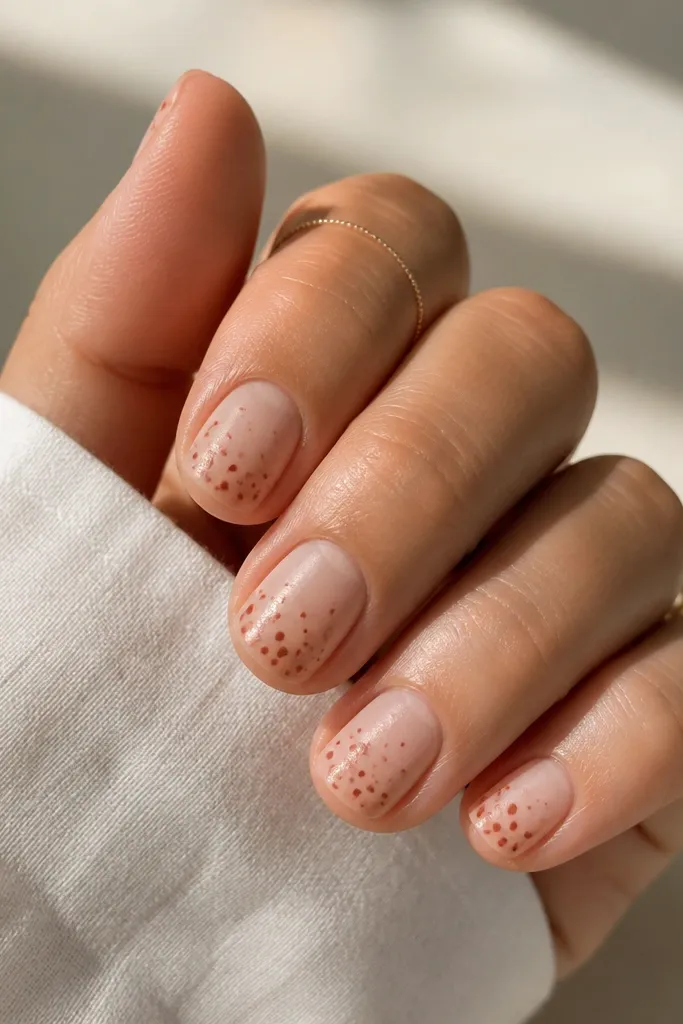
Speckle dots look handmade and don’t require perfect symmetry, which is exactly why they work on short nails. Terracotta has that warm autumn tone that looks amazing with cozy sweaters and looks great against most skin shades. I keep the base nude so the dots don’t overwhelm the nail bed. If you like a casual fall vibe, this is it. The speckle placement on the lower half also makes the nail look longer because there’s less visual weight at the tip.
Start with a sheer nude base gel in two thin coats, then cure. Dip a dotting tool into terracotta gel polish and tap off excess on a paper towel. Create dots starting near the lower third of the nail, then move toward the center — leave the upper half mostly clean. Cure, then apply a matte top coat if you want a clay-like finish, or glossy if you want it brighter. Clean around the cuticle with a small brush and alcohol before top coat.
Editor's noteUse a toothpick for one of the dot sizes to get natural variation without buying more tools.
Watch outAvoid filling the entire nail with dots — it turns into a solid block and looks cheap.
7. Deep Plum Reverse Half-Moons
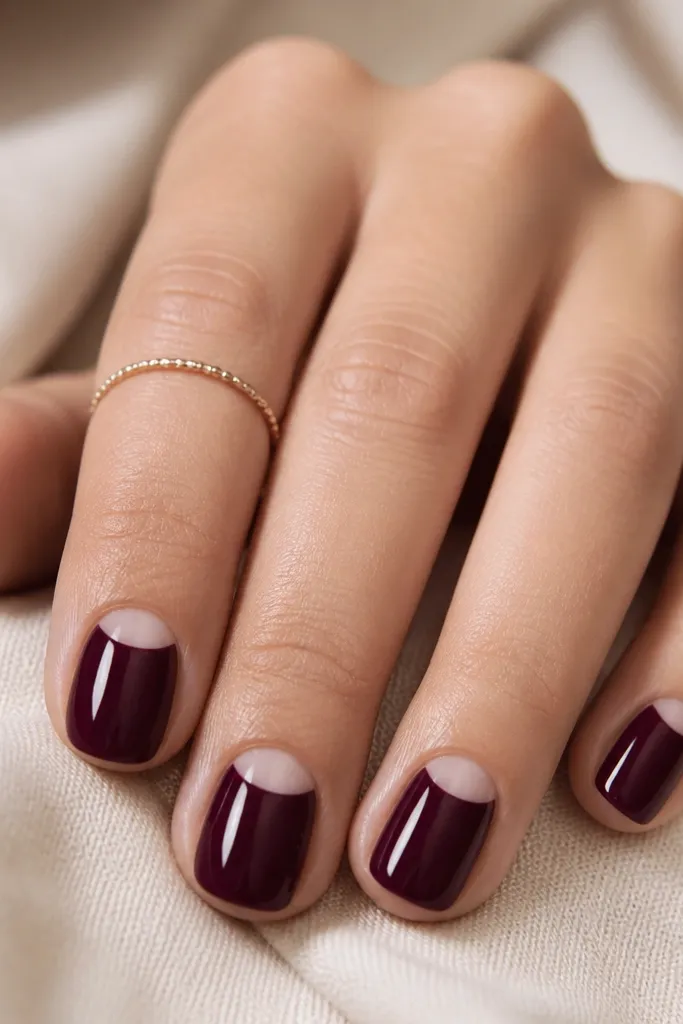
Reverse half-moons make short nails look cleaner because the clear window draws the eye upward. Deep plum is a fall staple that flatters cool undertones and also looks dramatic on warm skin. The crisp curve is what makes it look salon-done, not like a random mask. This design also hides small growth lines because the plum is darker and the window stays consistent. If you want a darker fall set that still looks neat, this is the one.
Apply a sheer nude base and cure, then paint deep plum over most of the nail, leaving the cuticle window unpainted. Use striping tape to mask a curved band at the cuticle — press it down and keep the curve smooth. After curing the plum, remove the tape to reveal the nude window. Add a thin coat of clear gel over the window to even out the surface. Finish with a glossy top coat and cap the free edge.
Make the window slightly wider on the center of the nail — it looks more natural than matching the exact curve every time.
Don’t rush tape removal — peel slowly to keep the edge sharp.
8. Sage Green Diagonal Tape Lines
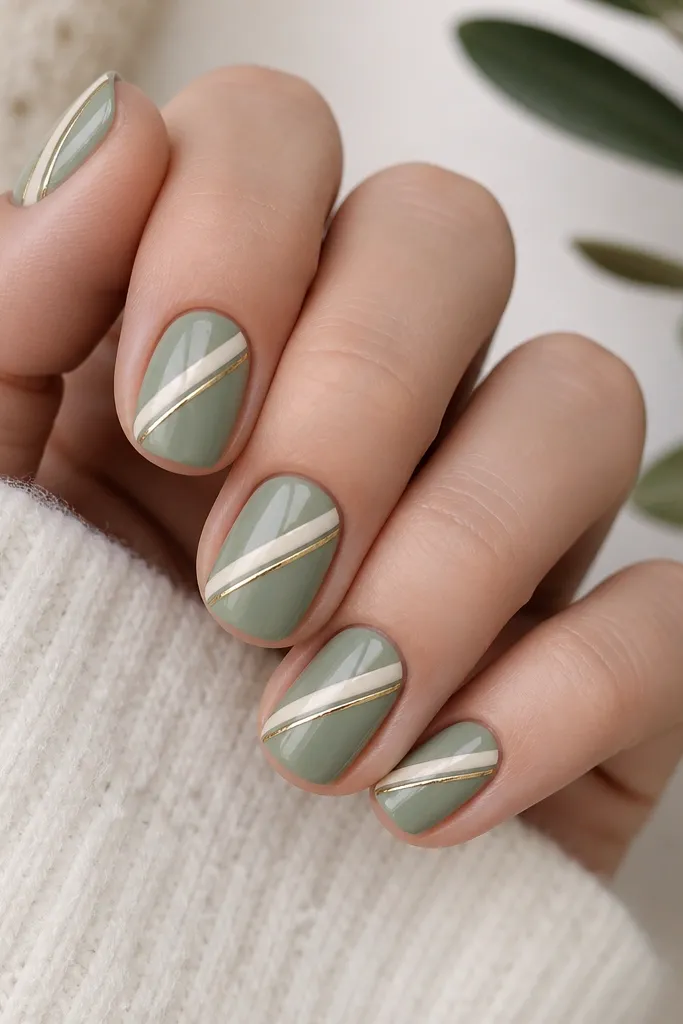
Diagonal lines look modern and make short nails feel longer because the eye travels across the nail. Sage green is my favorite fall “neutral” because it’s calm but still autumn-coded. The off-white and thin gold lines add contrast without needing nail art pens or stamping. This design looks good on hands with shorter fingers because the diagonal placement creates a sense of movement. It’s also easy to redo if you mess up one line.
Paint sage green in two coats and cure. Place striping tape diagonally from the lower left toward the upper right, then paint off-white in a thin layer over the exposed area. Cure, remove tape, then add a thinner gold line by placing tape again or using a striping brush. Keep the gold line narrower than the off-white stripe so it doesn’t dominate. Top coat glossy and cap the free edge.
Use tacky gel or sticky lint-free wipes to clean the nail surface before tape — it prevents lifting.
Avoid thick stripes — on short nails they swallow the nail shape.
9. Burnished Gold Chrome Tips on Nude
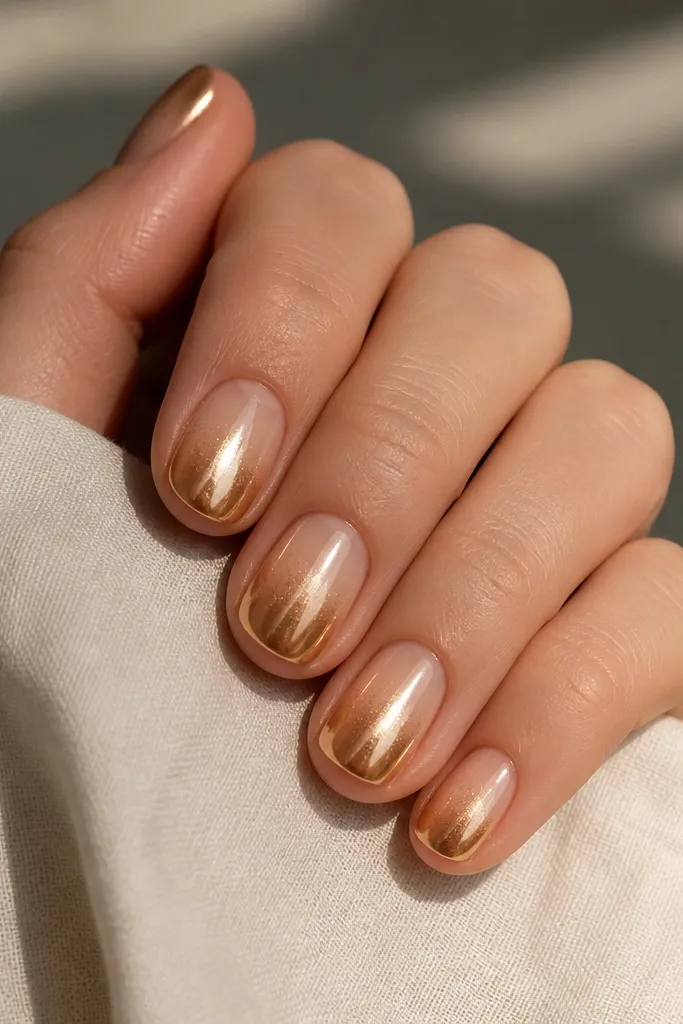
Chrome tips are one of the fastest ways I get “expensive” fall nails without painting tiny details. Nude bases make the gold look warm and not too harsh, and burnished gold flatters most undertones. On short nails, chrome only at the tip adds length and keeps the look sleek. The fade effect also hides any unevenness at the boundary. This is great for dinners, weddings, and nights out when you want shine but still want short nails.
Start with a nude gel base in two coats and cure. Apply a thin layer of chrome gel or a tacky base on just the tips, about 1-2 mm down from the free edge on short nails. Press burnished gold chrome powder into the tacky area with a sponge applicator, then buff lightly for a smooth finish. Use a clean sponge to blend the chrome upward slightly for a soft fade. Seal with a chrome-friendly top coat or a protective gel top that doesn’t dull the shine.
Do chrome after your color is fully cured and cool — warm nails cause smearing.
Skip full chrome coverage — it makes short nails look heavy.
10. Creamy Nude with Brown Leaf Vein Accent
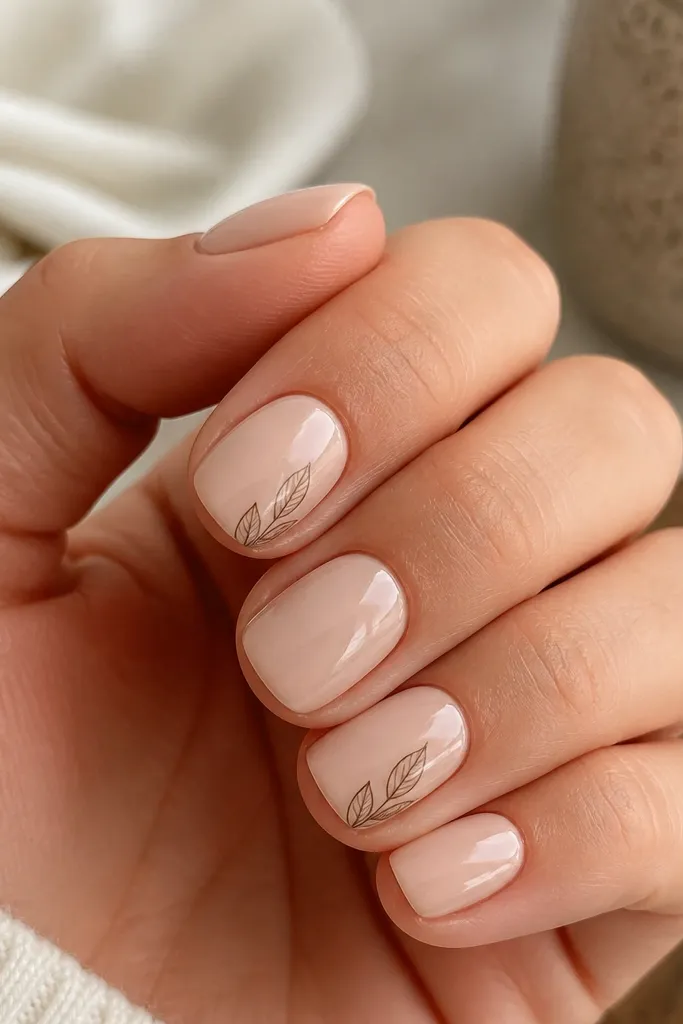
A tiny leaf accent gives you fall energy without turning your nails into a craft project. I keep the leaf small and placed on the side because it frames the nail bed and doesn’t crowd the center. Creamy nude bases look clean on every skin tone, and brown leaf lines make the set feel autumn without using black or heavy reds. The vein detail adds realism, but you only need one line to make it look intentional. This works for office days and casual weekends because it’s subtle.
Paint all nails with a creamy nude gel base in two coats and cure. Choose one accent nail and place a small leaf outline near the side of the nail, starting near the mid-point and angling upward. Use a thin brush to draw the leaf shape in light brown, then add one darker brown vein line from base to tip. Cure each nail after the art is done. Finish with a glossy top coat, and cap the free edge with a careful, thin layer.
Editor's noteIf your leaf looks uneven, make it asymmetrical on purpose — it looks more natural.
Watch outAvoid filling the leaf completely — outlines look cleaner on short nails.
11. Rust Orange Gradient with Sponge Edge
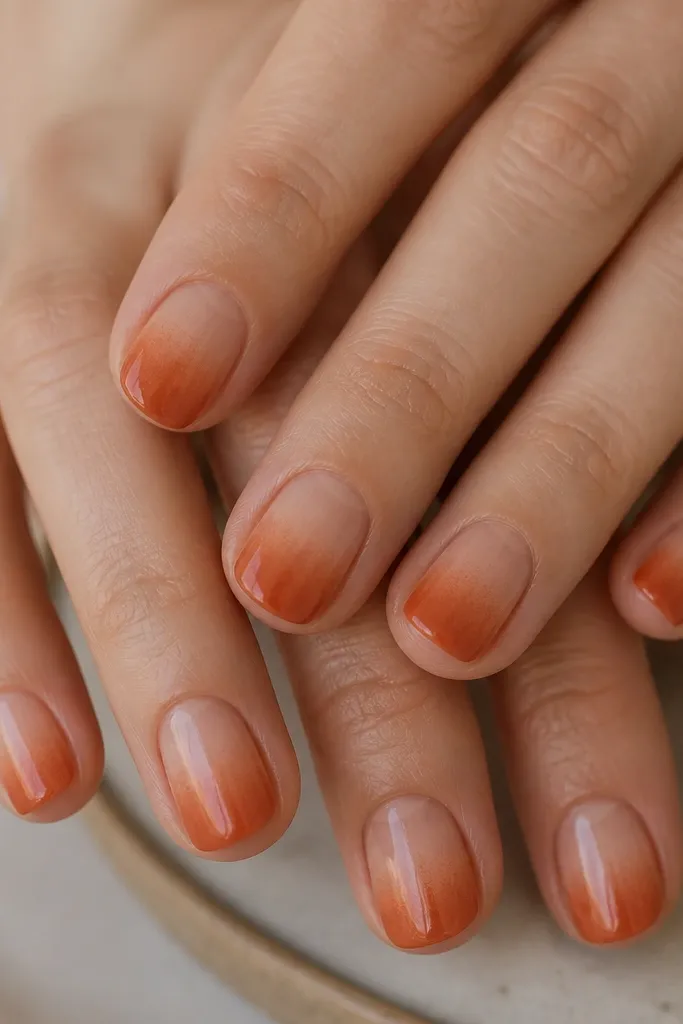
Sponge gradients are the quickest way to get that fall color shift without hand-painting. Rust orange is flattering and feels seasonal, especially with warm-toned clothing. The gradient starting at the tips visually lengthens short nails and keeps the cuticle area neat. I like this look when my nails are slightly uneven because the fade hides small bumps. It also photographs well because the color transition creates depth.
Apply a sheer nude base gel in two thin coats and cure. Load a small makeup sponge with rust orange gel polish, then dab at the very tips first. Tap upward in short, light motions until you get the fade height you want, then cure. Add one more rust layer only if you need more intensity at the tip. Seal with a glossy top coat and cap the edges so the gradient doesn’t lift.
Wipe the sponge on a paper towel before you touch the nail to prevent hard blotches.
Don’t pull the sponge straight — it makes streak lines.
12. Blackened Brown Micro French with Nude Gap
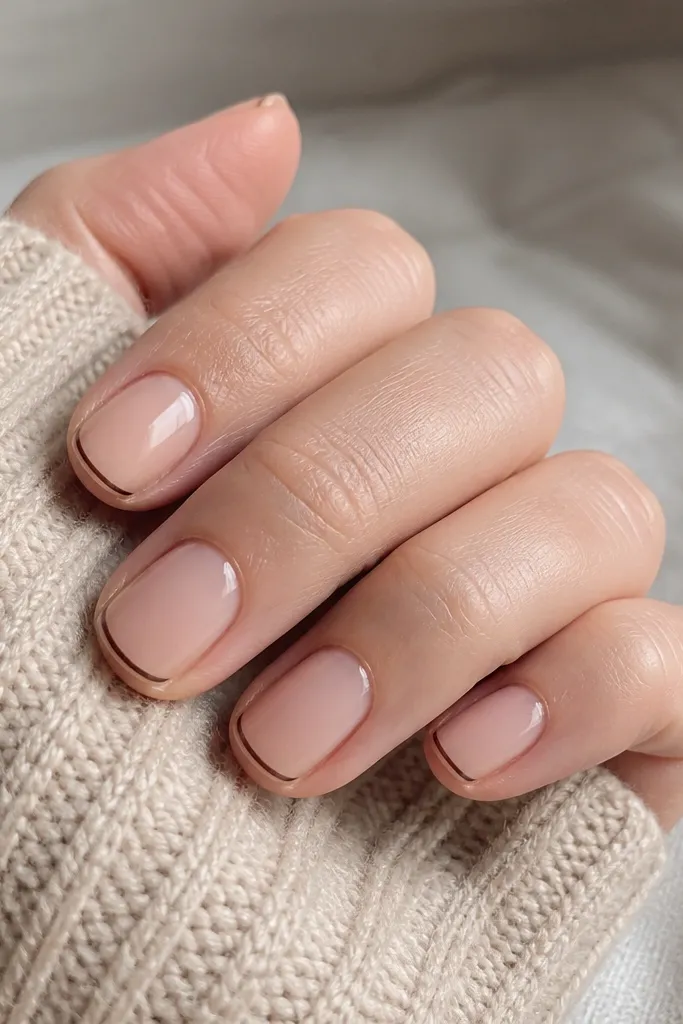
Micro French is the cleanest way to do fall dark color on short nails. The key is the nude gap — it keeps the design light and prevents the tip from looking like a thick stripe. Blackened brown feels softer than pure black and pairs with gold jewelry. This design is also low maintenance because small chips at the tip are less noticeable. It’s my pick when I want dark nails that still look classy in daylight.
Start with a nude base gel in two coats and cure. Place striping tape just a hair away from the free edge to create a narrow tip mask, leaving a tiny gap of nude between base and tip. Paint blackened brown over the masked area, cure, then remove tape. Use a thin detail brush to smooth the edge if needed. Top coat glossy and cap the free edge.
Use a striping brush instead of a wide brush for the tip — micro lines look sharper.
Avoid thick dark tips — they swallow short nail length.
13. Maple Leaf Stamping on One Accent Nail
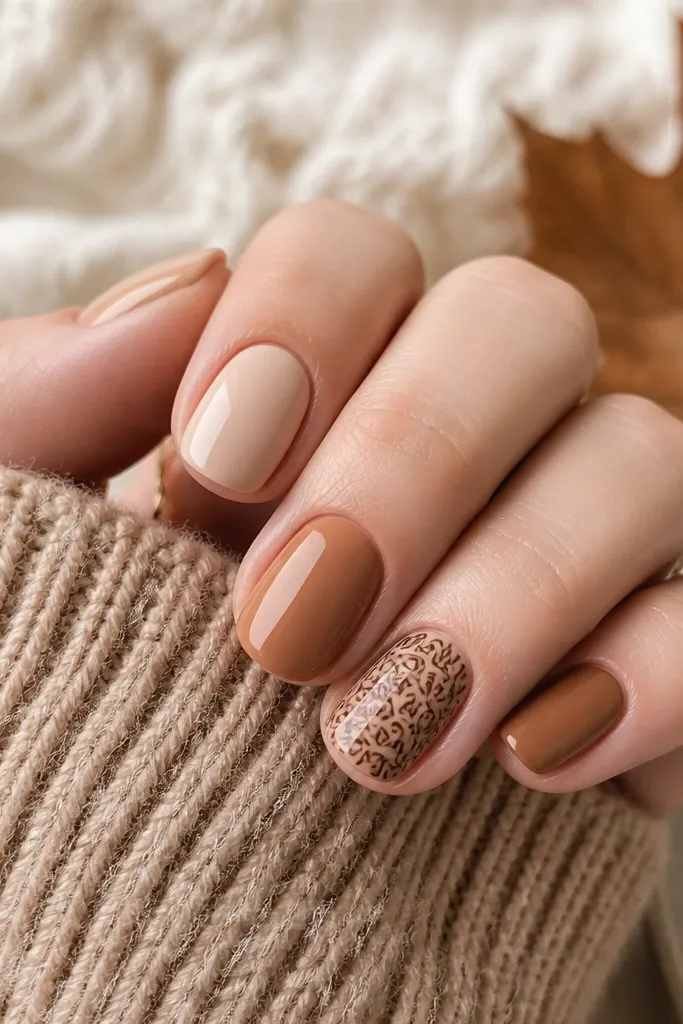
Stamping gives you a detailed leaf pattern without freehand stress, and doing it on one accent keeps the look affordable and wearable. Warm beige bases make the leaf pattern pop, especially in fall lighting. I like dark brown stamping ink because it looks natural and not neon. Short nails can handle a small pattern, but if you stamp every nail, it starts to look busy. This is a “weekend cute” set that still looks intentional.
Paint all nails with a warm beige caramel nude in two coats and cure. Choose one accent nail and apply a stamping base (or a thin layer of gel that works with your stamping product). Press a maple leaf plate with dark brown stamping polish, scrape, then stamp onto the accent nail. Cure after stamping. Seal with glossy top coat and cap the edges carefully so the stamped lines don’t snag.
Editor's noteIf the stamp looks cloudy, wipe the plate with a lint-free pad lightly — clean plates stamp sharper.
Watch outAvoid stamping too large on short nails — keep the leaf inside the nail width.
14. Sienna Marble Swirls with Clear Negative Space
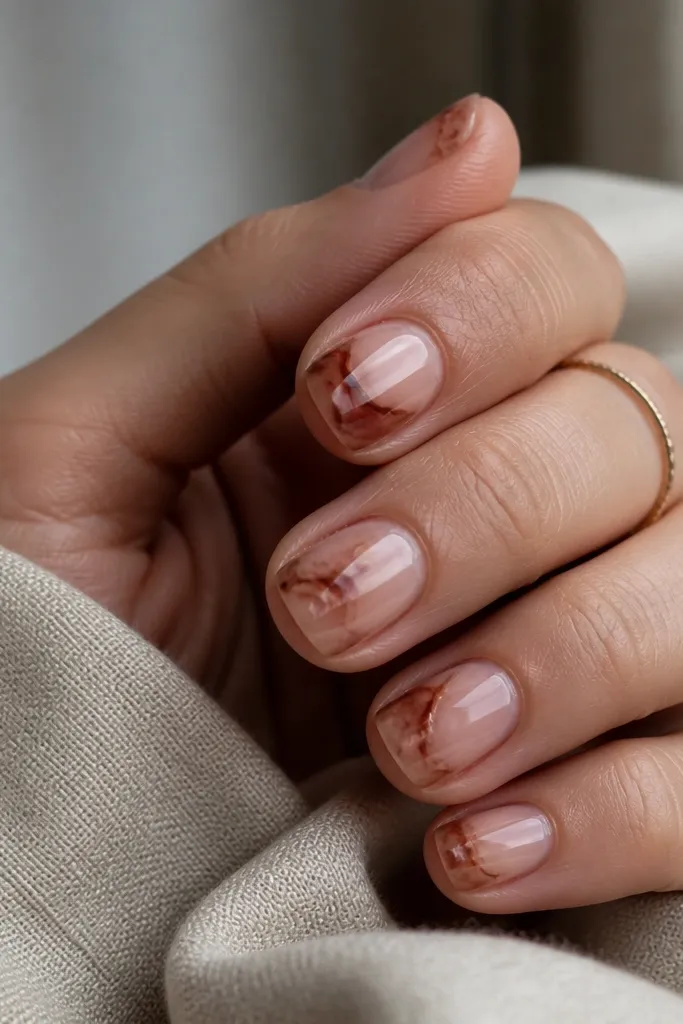
Marble works because it has movement — your eye follows the swirls instead of seeing a flat color block. Clear negative space keeps short nails from feeling heavy, and sienna-brown looks autumn without turning too dark. I like this for days when you want a statement but you don’t want glitter or thick 3D stuff. It also looks great on hands with short nail beds because the clear center draws length. The glossy finish makes the marbling look like glass.
Start with a clear or sheer nude base and cure. Drop sienna-brown gel in small amounts near the sides, then use a thin brush or silicone tool to drag lines through it, creating marble cracks that circle the center. Leave a clear center strip so the negative space stays visible. Cure and add a second marble pass only where the swirls look too faint. Finish with glossy top coat to smooth everything.
Editor's noteUse a toothpick to pull the thinnest “cracks” — it gives better control than a wider brush.
Watch outDon’t fully cover the nail — full coverage marble on short nails looks like mud.
15. Chocolate Checkers on Two Nails Only
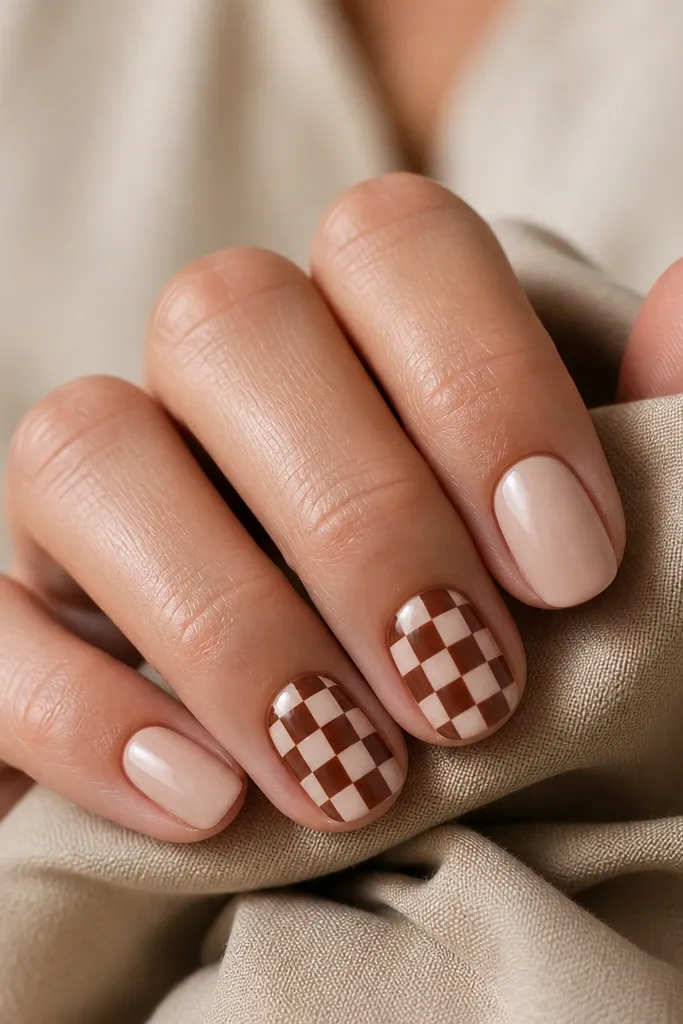
Checker patterns look retro and fall-friendly when the colors are close to nude and chocolate. Keeping it to two nails makes it look curated instead of chaotic. The grid also makes your nails look sharper and more intentional, which matters when you’re working with short length. I like this on medium and deep skin tones because the nude base doesn’t disappear and the chocolate squares still show clearly. It’s also a fun choice for fall events because it reads “cute” rather than “serious.”
Paint all nails with a creamy nude base in two coats and cure. On two accent nails, use striping tape to create a small grid: place vertical lines first, cure the tape-free area by painting checkers, then remove tape carefully. Paint alternating squares chocolate brown and nude (or use the base color for nude squares). Cure, then add a glossy top coat over everything to flatten the pattern and seal it.
Editor's noteIf tape edges lift, skip tape and use a dotting tool to place square corners, then connect lines with a fine brush.
Watch outAvoid big squares — they overpower short nail beds.
16. Cinnamon Spear Tip Line (One Line Art)
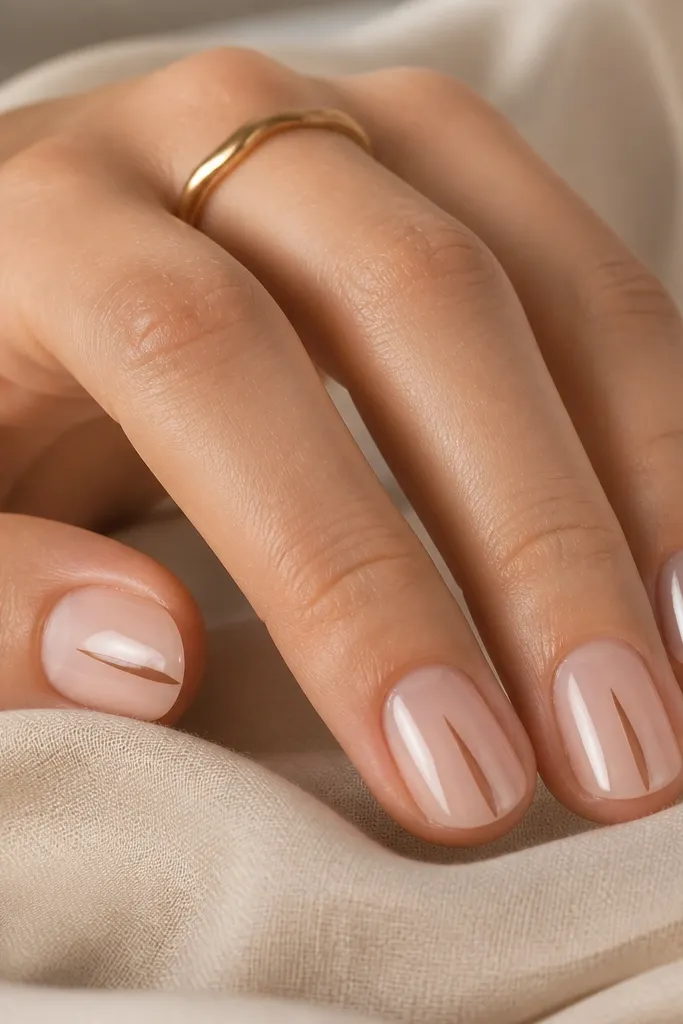
One-line art looks clean because it doesn’t fight for space on short nails. A spear tip line adds a sharp diagonal that makes the nail look longer and slimmer. Cinnamon brown is warm and forgiving, and the sheer nude base keeps your hands looking fresh. This is also one of the easiest ways to make fall nails look custom — you can tilt the line slightly to match your nail shape. It’s flattering across skin tones because the colors stay grounded.
Apply a sheer nude gel base in two thin coats and cure. Use a fine detail brush to draw a diagonal line from the center near the cuticle toward the tip, stopping just before the free edge. Thicken the line slightly at the tip to create a small spearhead point, then cure. Clean the sides with a brush and alcohol. Seal with glossy top coat and cap the free edge.
Let the first line dry/cure fully before you add thickness — it prevents wobble.
Avoid drawing multiple lines — two lines on short nails looks messy fast.
17. Olive and Oxblood Two-Tone V-Cut
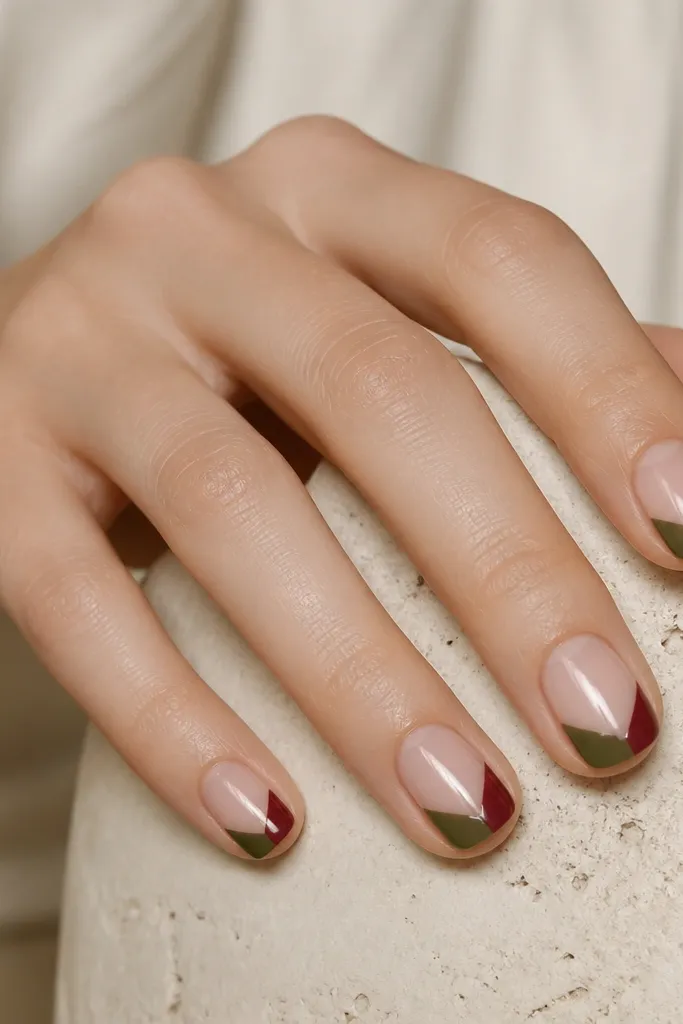
A V-cut design makes short nails look longer because the point pulls the eye toward the center and upward. Using olive plus oxblood feels very fall because it mixes earthy and deep tones. The nude base keeps the design light, so it doesn’t feel heavy even with dark oxblood. I love this on short rounded nails because the V shape follows the natural nail curve. It also looks great with gold rings because the colors warm up metal tones.
Start with a nude base in two coats and cure. Mask a V shape at the tip using striping tape — the point of the V should land in the nail center. Paint one side of the V olive green and the other side oxblood red, cure each side if needed or cure after both coats. Remove tape slowly and clean edges with a small brush. Finish with glossy top coat and cap the free edge.
Editor's noteKeep the V angle narrow — a wide V makes short nails look broader.
Watch outDon’t overlap colors at the meeting point — it should look crisp, not muddy.
18. Terracotta French with Scattered Gold Specks
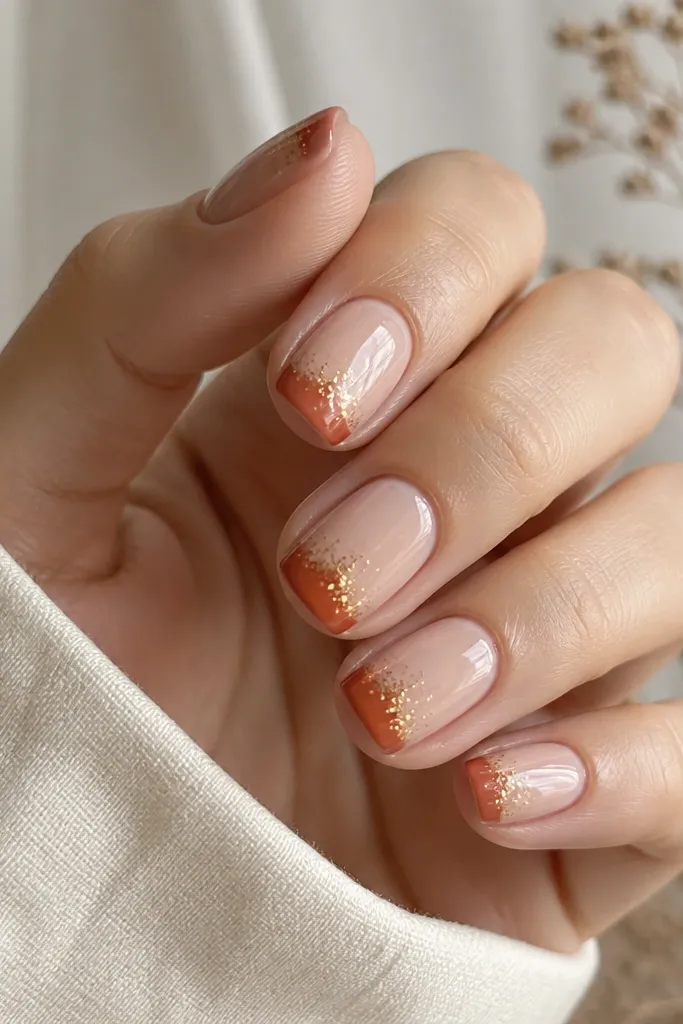
This is a fall French that doesn’t look plain. Terracotta gives the seasonal color, and the scattered gold specks add sparkle without covering the whole nail. Gold specks also make the French tip look more expensive because they catch light at different angles. It flatters warm undertones and looks great with simple jewelry — you don’t need rings that match exactly. On short nails, the gold stays inside the tip so it doesn’t overwhelm the nail bed.
Paint nude base in two coats and cure. Mask a narrow French tip with tape and paint terracotta, cure. Using a dotting tool, flick tiny gold specks onto the terracotta tip — start small and build only if you want more. Cure again so the specks set cleanly. Seal with glossy top coat, making sure to cap the free edge so the specks don’t chip.
Editor's noteFor the best speck size, load the dotting tool lightly and tap once per speck.
Watch outAvoid large glitter chunks — they ruin the delicate confetti look.
19. Matte Clay Nude with Dark Brown Half-Stripe
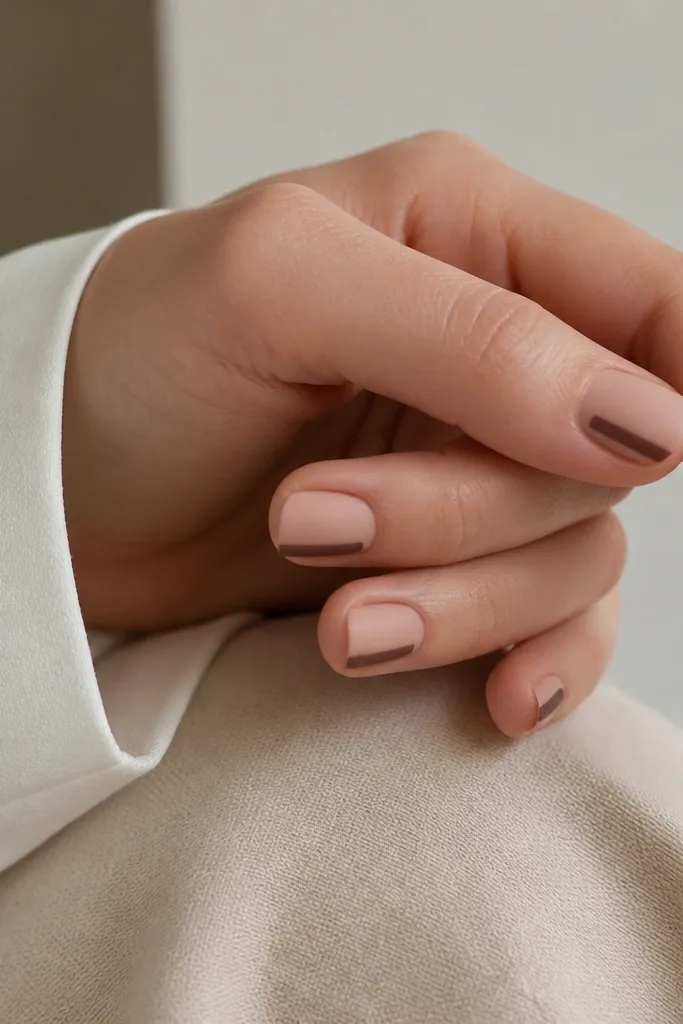
Matte clay nude looks like fall pottery, and the side half-stripe adds structure without needing a full design. The dark brown stripe gives contrast that makes short nails look more defined. I like this for everyday because matte hides micro dents and small texture issues. It also looks great on hands with slightly wider nail beds since the stripe can visually narrow one side. If you want a low-cost set that looks styled, matte is your friend.
Paint clay nude gel in two coats and cure. Apply matte top coat over the whole nail and cure. Use striping tape to cover one side of the nail for a half-stripe — position it from about the midline to the tip. Paint the exposed area dark brown, cure, then remove tape. Finish with matte top coat again, but keep the stripe edges crisp by sealing carefully at the boundary.
If your stripe looks thick, clean the edge with a thin brush dipped in alcohol before curing.
Avoid glossy on matte — it makes the stripe look like it’s floating.
20. Satin Taupe Nails with Micro Gem at Cuticle
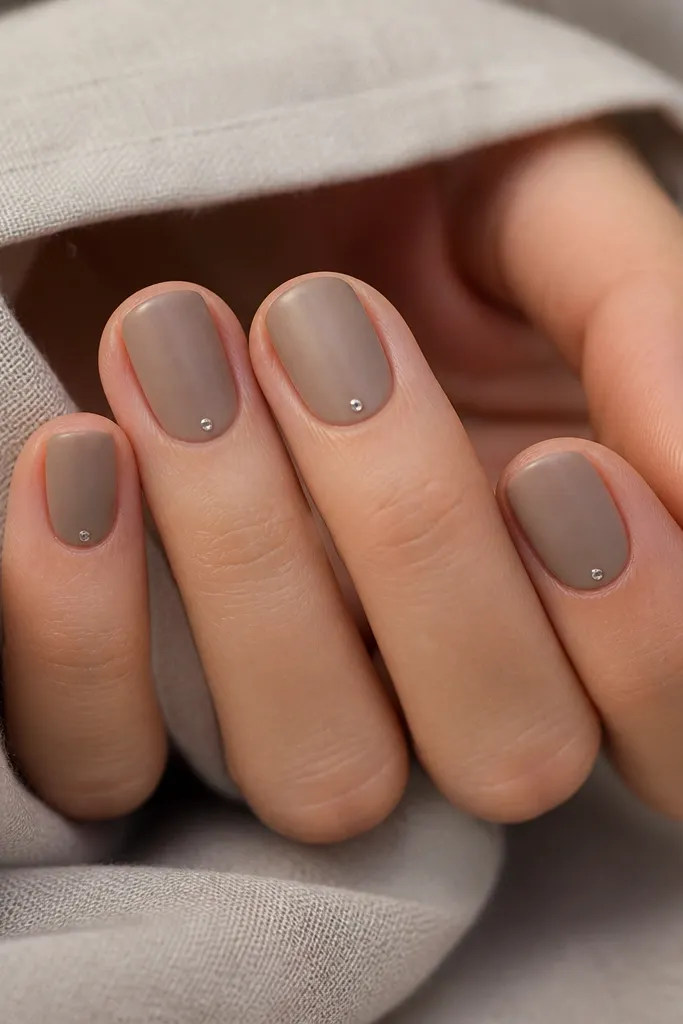
One micro gem makes short nails feel dressed up without adding length. Satin taupe is a perfect fall neutral because it looks warm but not orange, and it flatters every undertone. The gem at the cuticle draws attention upward and keeps the nail looking neat as it grows. I do this when I want something “special” for a wedding guest or date night but I don’t want to commit to long nails. The satin finish also makes the gem look more like jewelry than a sticker.
Paint taupe gel in two thin coats and cure. Apply a satin top coat and cure. Place a tiny rhinestone or micro gem at the cuticle center using gel glue or a small dot of thick builder gel — don’t drown it. Press gently with tweezers and cure. Apply a thin top coat around the gem, not over it too thick, then cap the free edge. Make sure the gem sits flat so it doesn’t catch on fabric.
Editor's noteUse tweezers with a rubber tip or a damp lint-free wipe on your finger to pick up the gem without dropping it.
Watch outAvoid large gems — they look heavy on short nails and lift faster.
21. Chocolate Ombre Tip with Soft Blur Edge
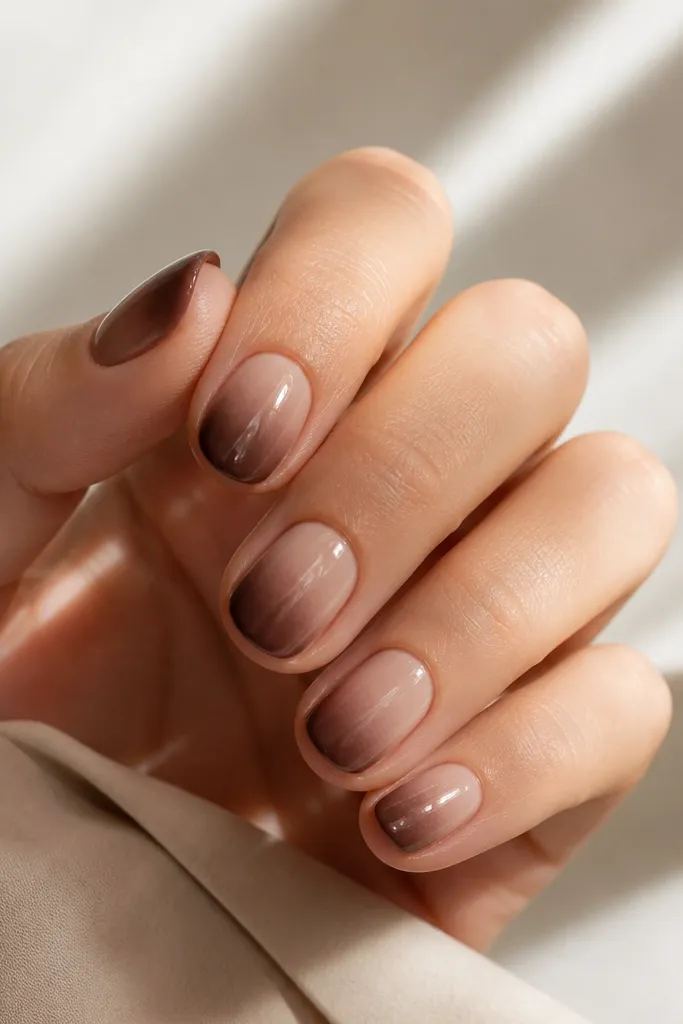
An ombre tip looks smooth and salon-like because the transition is gradual. Chocolate brown is a fall color that looks classy, and it doesn’t clash with warm knits or cool denim. This design works for short nails because the color starts higher than a French tip but still stays concentrated, so your nails don’t look blocky. The blurred edge hides small application mistakes and makes the set forgiving. I use this when I want dark fall nails that don’t feel too heavy.
Start with a nude base gel in two coats and cure. Sponge or brush a small amount of chocolate gel onto the tips and mid-tip area, then blend upward using a clean sponge edge. Cure, then repeat with a lighter hand for a smoother gradient. If you see hard lines, lightly buff the surface after curing and reapply a thin top coat for smoothing. Finish with glossy top coat and cap the free edge.
Editor's noteBlend with a clean sponge edge — not the same sponge loaded with pigment.
Watch outAvoid sharp ombre lines — they read like a stencil and look cheap.
22. Rust Orange and Cream Chevron Accent
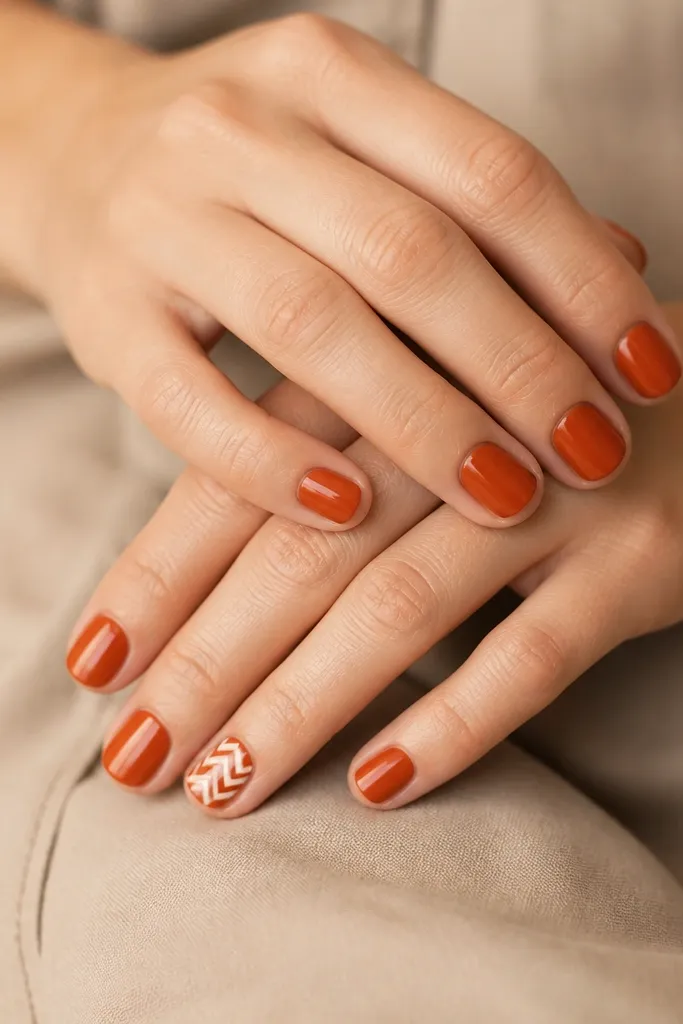
Chevron on one accent nail gives you that fall pattern energy without turning every nail into a project. Rust orange is bold but still autumn, and the cream chevron keeps it from feeling too dark. I place the chevron centered because it makes short nails look balanced. This design also looks good when your nails are slightly different lengths since the chevron stays in the center. It’s a fun option for fall festivals and casual weekends.
Paint all nails with rust orange in two coats and cure. Choose one accent nail and apply a thin striping tape guide for a centered V shape near the middle of the nail. Paint cream gel within the V areas, cure, then remove tape. Add a second chevron V slightly above or below for a stacked look, cure again. Top coat glossy and cap the free edge gently so the chevron edges stay smooth.
Use tape for the first chevron line — freehand chevrons on short nails wobble easily.
Avoid chevrons that hit the cuticle — they make short nails look cramped.
23. Deep Green Gloss with Copper Speckled Accent
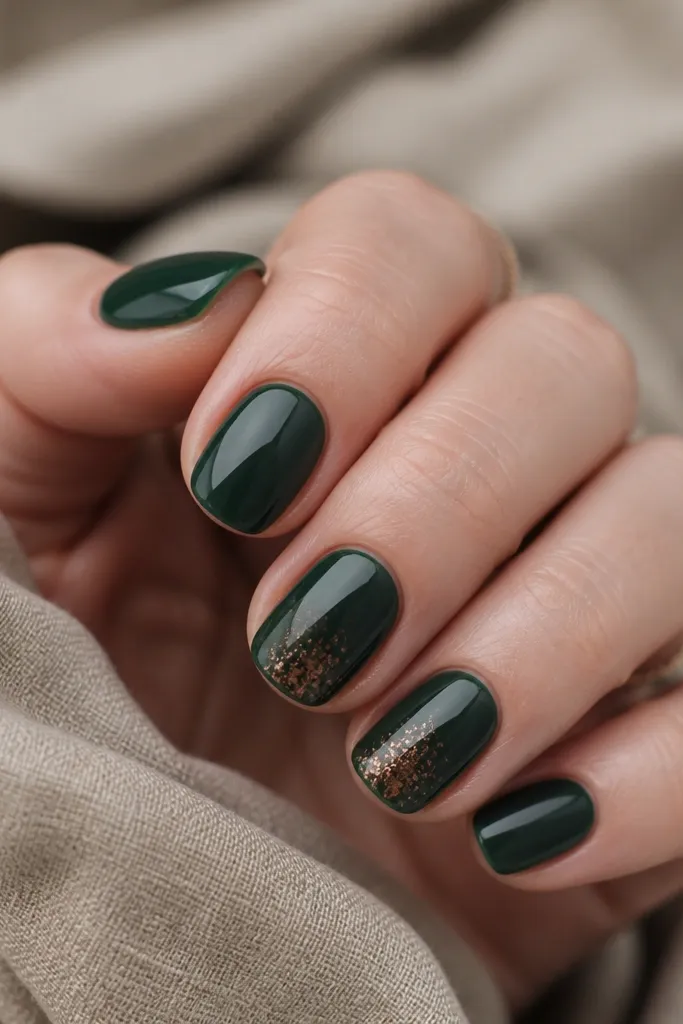
Deep green is the fall shade that looks the most “cozy” to me, especially in daylight. Copper speckles add warmth and make the green look dimensional without needing glitter gradients. I keep the speckles on one or two nails because it makes the set look intentional and keeps it affordable. The glossy finish makes the copper catch light, and short nails hold the pattern without getting crowded. This is a great choice if you wear a lot of black, cream, or camel.
Paint all nails deep forest green in two thin coats and cure. Leave one nail for the accent. Add copper speckles using a dotting tool: tap small dots into a gel layer near the center, then lightly scatter toward the tip. Cure and check the sparkle under a lamp — add one more tiny layer if it looks too sparse. Seal with glossy top coat on all nails, and cap the free edge.
Tap the dotting tool on a paper towel first so you get tiny specks instead of blobs.
Avoid copper flakes — they look chunky and can catch on sweaters.
24. Clear Jelly Base with Burnt Orange Jelly Tips
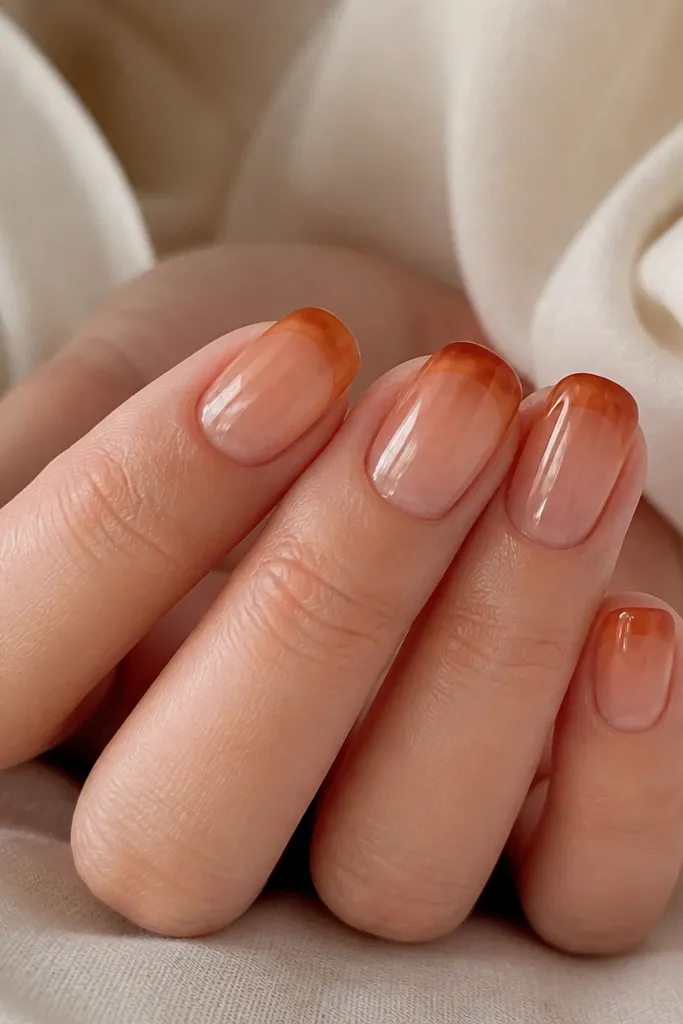
Jelly tips are the fall look that always gets compliments because they look “fresh” and not heavy. The clear base makes short nails feel airy, and the translucent burnt orange reads warm without turning opaque. This style is also forgiving because the jelly finish hides tiny brush marks. It flatters all undertones since the color is semi-sheer and blends with your natural nail tone. I love it for week-to-week wear because it looks good even as it grows.
Start with a clear jelly base gel and cure. Apply burnt orange jelly gel only at the tips, keeping it translucent — use thin layers and cure between each coat. Blend the edge slightly with the brush so the tip fades into the clear base. Cure fully and add a glossy top coat, but keep it thin so you don’t destroy the jelly look. Cap the free edge lightly so it stays smooth.
Editor's noteDo two thin jelly tip coats instead of one thick one for a smoother, more glassy fade.
Watch outAvoid opaque orange on a jelly design — it kills the stained-glass effect.
25. Matte Blackened Brown with Copper Dot Cluster
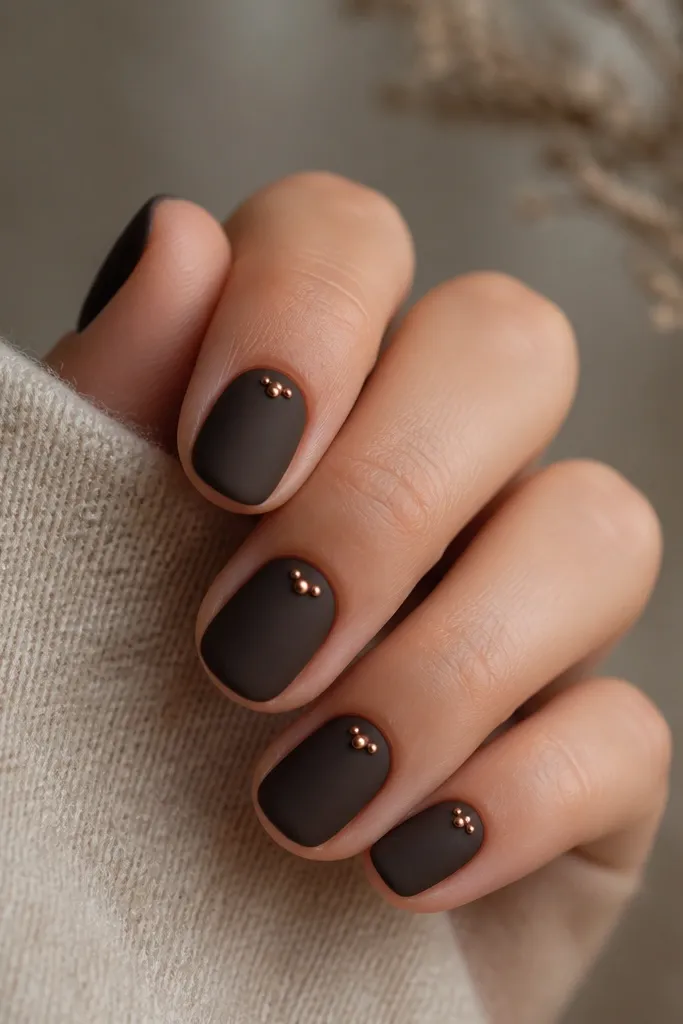
This is fall mood in a clean, wearable way. Matte blackened brown hides imperfections, and the copper dot cluster adds just enough shine to look like jewelry. I put the cluster near the cuticle because it frames the nail bed and makes your hands look neat even when nails are short. Copper is warm and flattering, and the contrast reads well in both daylight and evening light. It’s also fast because you only need a few dots, not full nail art.
Paint blackened brown gel in two thin coats and cure. Apply matte top coat and cure. Use a dotting tool to place three to five tiny copper dots in a small cluster near the cuticle center — keep them close together. Cure again if your copper gel needs it. Seal with a thin glossy top coat only around the dots or a spot-gloss product so the dots stay shiny while the rest stays matte.
Make the cluster slightly higher on the center of the nail — it looks more balanced than a perfectly flat row.
Avoid spreading dots across the whole nail — it turns into random glitter.