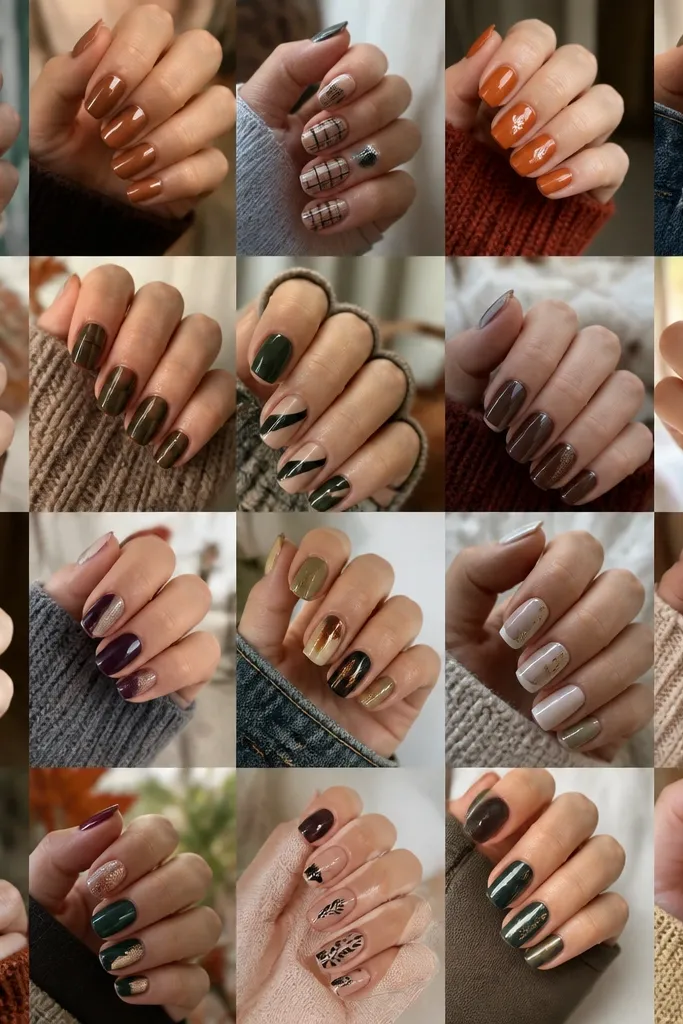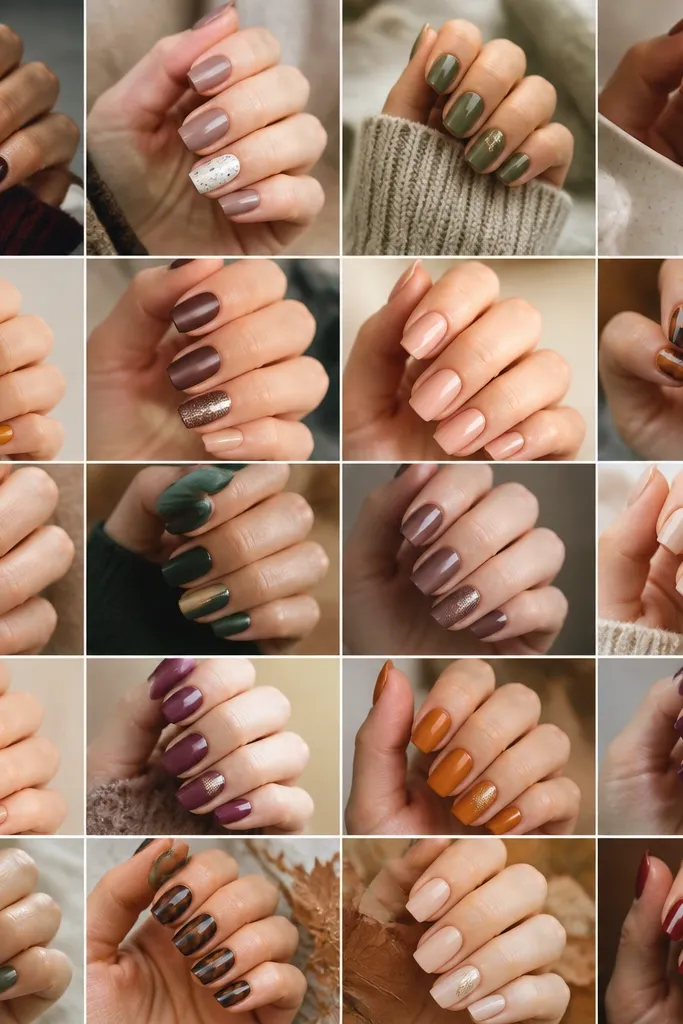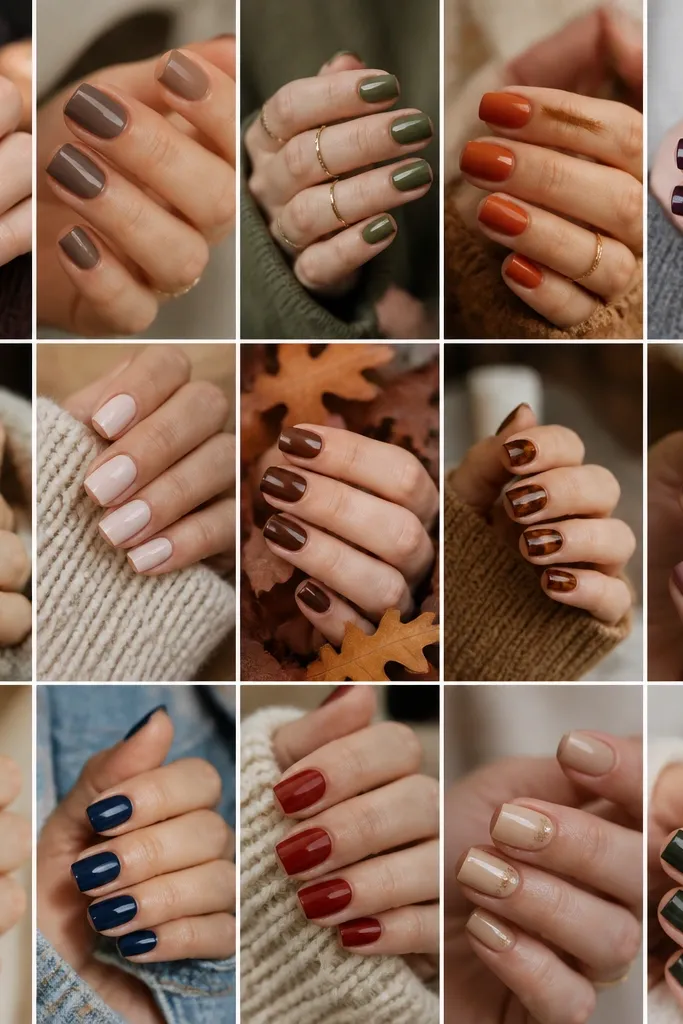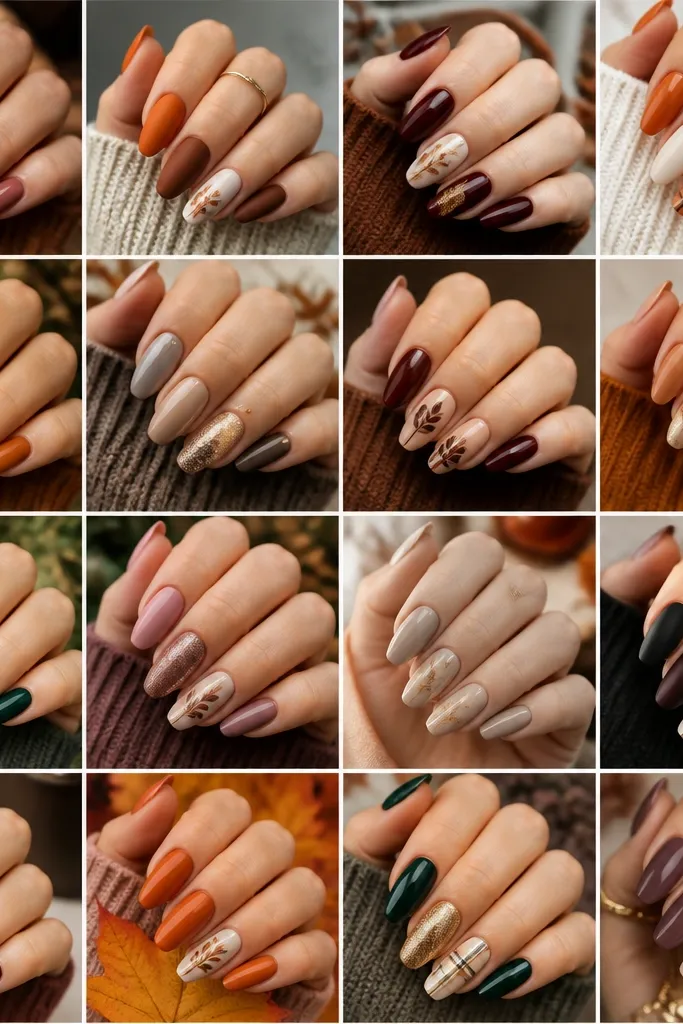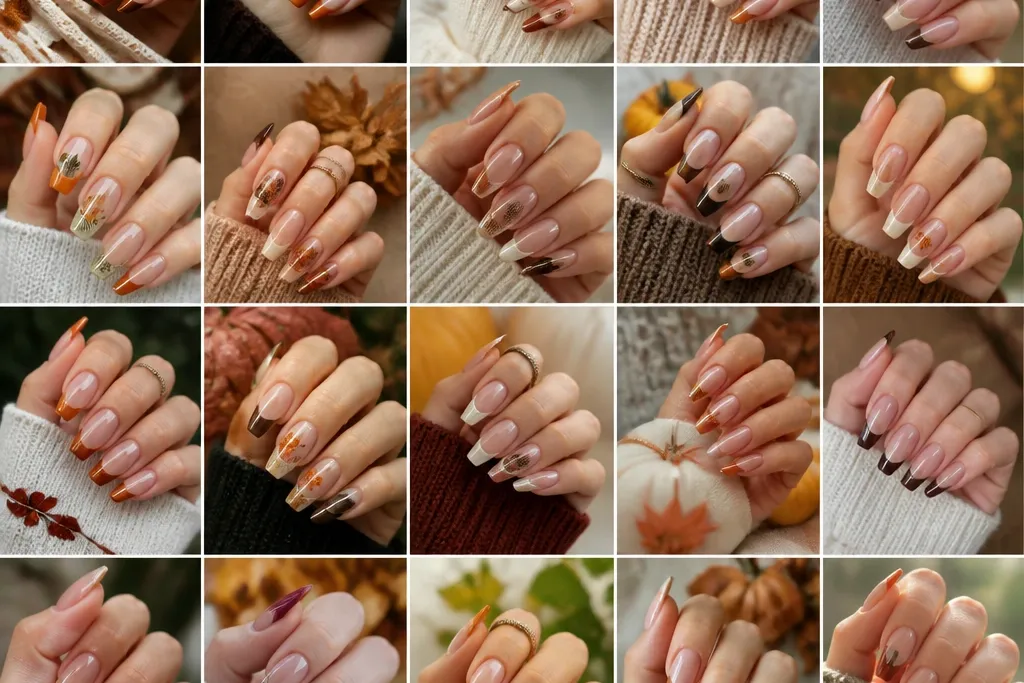
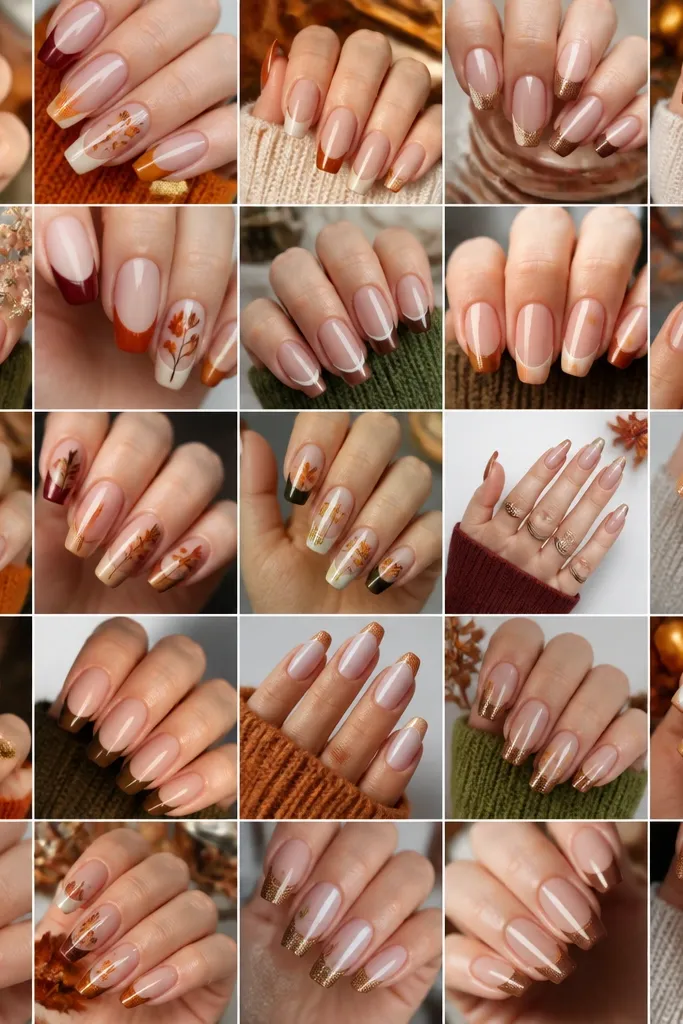
1. Latte Base with Rusty Terracotta French Tips
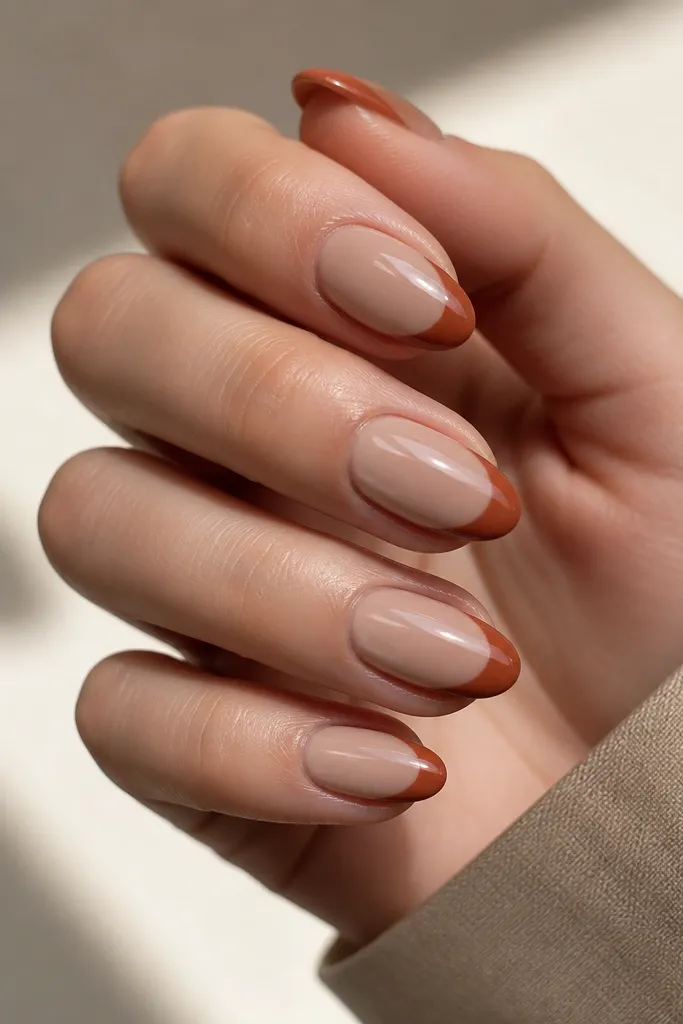
I love this one because it looks warm even if you keep your makeup simple. Use a milky latte base so your skin still looks even-toned, then paint the tips in terracotta rust — not bright orange, more like baked clay. The contrast is soft enough for everyday, but the tip color makes it feel like fall. This flatters fair to medium skin tones the most, especially with gold jewelry and camel coats. It also works on shorter nails because the creamy base keeps your nail bed looking longer.
Editor's noteIf your terracotta looks streaky, thin it with a gel reducer or use a second thin layer instead of pressing harder with the brush.
Start by applying two thin coats of latte nude gel or polish, curing each coat if you’re using gel. Place French tip guides or freehand a smile line, setting the tip start about 1.5-2 mm from the cuticle. Paint the terracotta rust tips in two thin layers so the line stays opaque without flooding the edges. Clean up the sides with a brush dipped in acetone, then seal with a glossy top coat. Cure again or let it fully dry before touching anything.
Watch outAvoid painting the tip too close to the cuticle — it makes the nail look shorter and the line looks messy.
2. Deep Oxblood Tips on Milky Nude
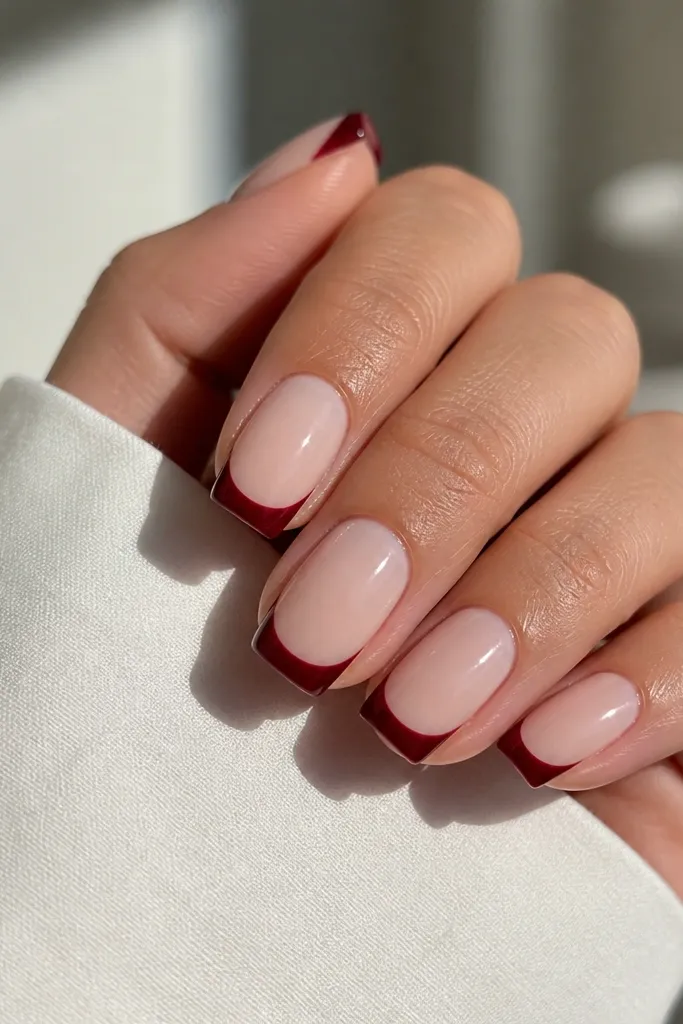
Oxblood looks expensive because it’s dark but still warm. I pair it with a milky nude base because it brightens your nail bed and keeps the red from looking heavy. This combo looks amazing with burgundy sweaters, dark denim, and gold or rose-gold rings. It flatters medium to deep skin tones especially well, but fair skin also looks clean if the base stays milky. The French line makes the dark shade look intentional instead of like a solid manicure.
Editor's noteUse a slightly smaller brush than you think you need for the curve; oxblood shows every wobble.
Apply a milky nude base in two coats, then cure and let it level. Use a liner brush to draw a thin French outline first — just the curve — then fill it in with oxblood. Keep the tip width around one-third of the nail to avoid a “painted on” look. Clean the outer corners with a small brush and acetone, then top coat glossy and cure fully. If you want extra crispness, add a second top coat after the first has set.
Watch outDon’t use a gray nude base — it makes oxblood look muddy in daylight.
3. Olive Green French Tips with Nude Jelly Base
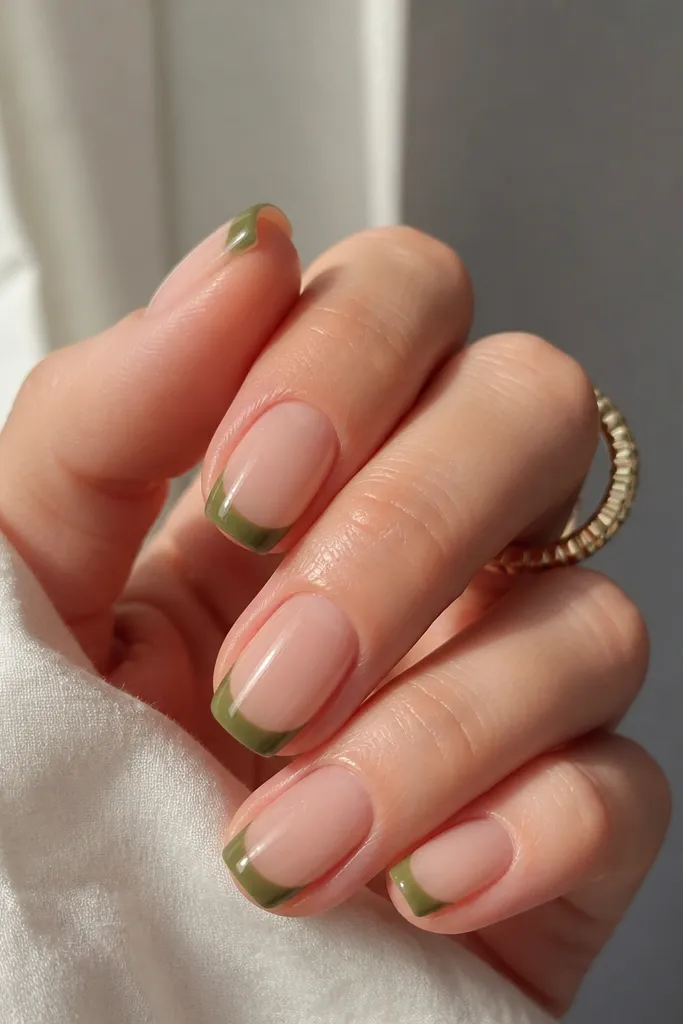
Olive French tips are a fall cheat code because they match boots, army jackets, and even olive-toned eyeshadow. The nude jelly base gives a “fresh” look while the olive tip adds the seasonal hit. This looks best on medium nail lengths and flatters most skin tones because the jelly base is light and clean. I especially like it with silver jewelry because olive + silver looks crisp. It also hides minor nail staining better than a full solid color.
Start with a nude jelly base — one thin coat, then a second coat for even opacity. Cure each coat if using gel. Paint the olive French tips with a striping brush, keeping the curve smooth and consistent across nails. Aim for a mid-width tip so the olive reads clearly but doesn’t dominate the nail bed. Seal with glossy top coat, and cap the free edge lightly so it lasts.
For a cleaner tip line, hold the brush at a 45-degree angle and pull the color from the center outward.
Avoid a matte top coat on jelly bases — it can make the olive look chalky.
4. Chocolate Brown French Tips with Microglitter Edge
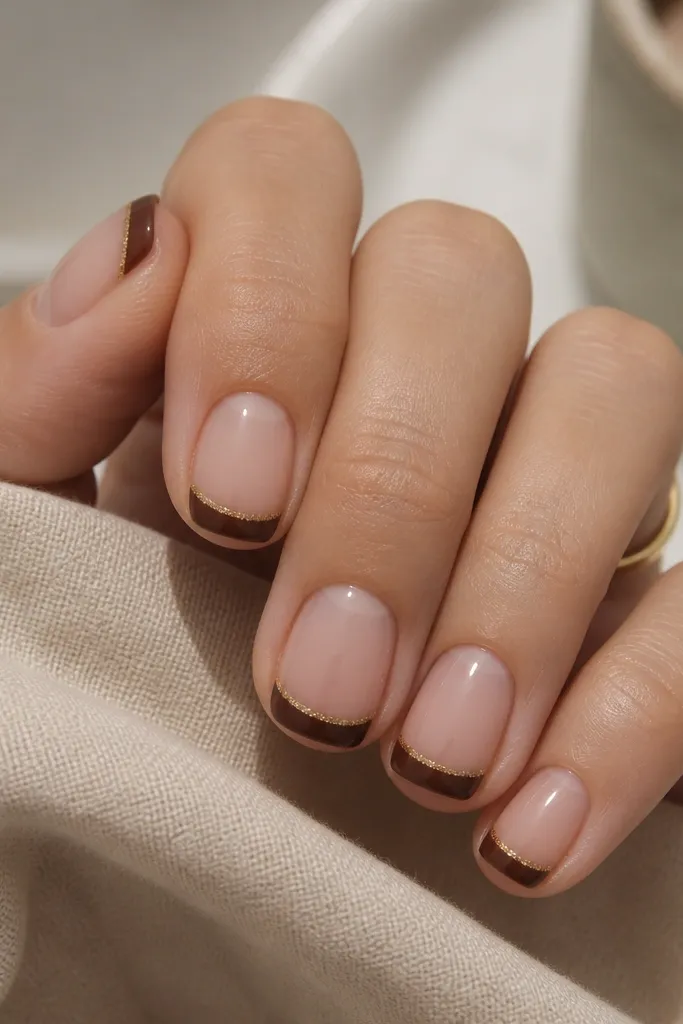
This design is for when you want fall warmth plus a little sparkle that doesn’t scream “party.” The chocolate tips look rich and grounded, and the microglitter edge adds movement in low indoor light. I use a nude or soft tan base so the glitter stays the star. This suits fair through deep skin, especially with warm-toned clothing. It also works on short nails because the sparkle line is narrow and draws the eye to the tip.
Editor's noteIf the glitter keeps migrating, tap it on with a sponge-tip applicator instead of dragging it.
Paint a nude base in two coats and cure or dry completely. Apply chocolate brown French tips using guides for a straight smile line. While the chocolate is still slightly tacky (gel) or right after polish sets, add a thin microglitter strip right at the outer edge of the tip. Use a small detail brush to keep the glitter only on the border, not the whole tip. Finish with glossy top coat, and cure longer if your gel requires it.
Watch outDon’t add glitter across the entire tip — it can look chunky and uneven.
5. Creamy White French Tips with Pumpkin Orange Accent Nail
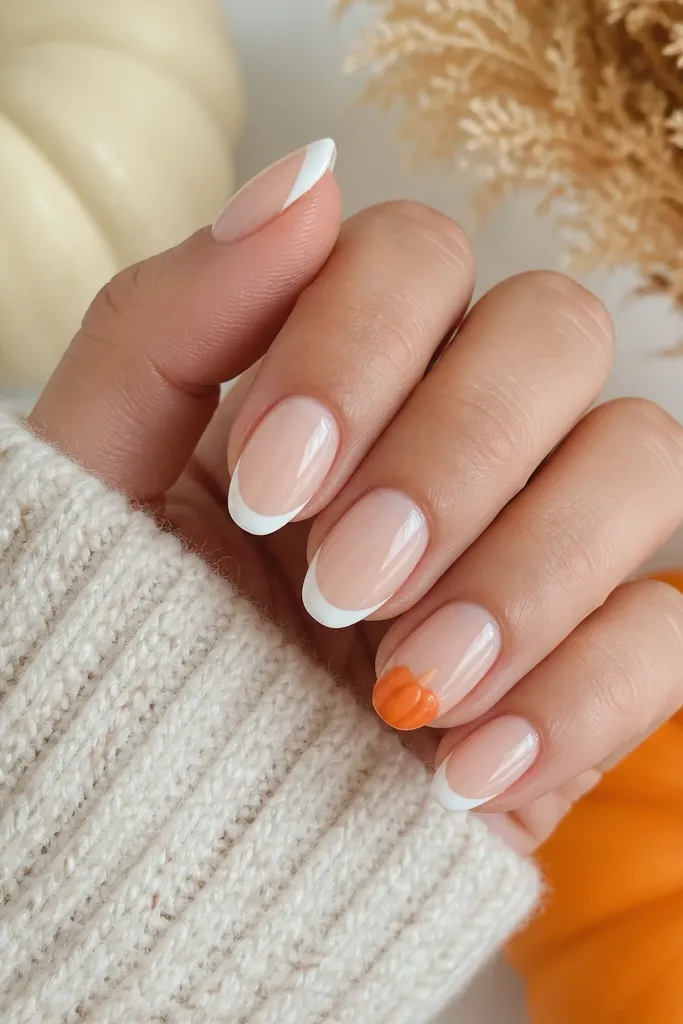
Classic creamy white French tips look fresh in fall when your accent nail adds the seasonal color. I keep the majority of nails in a creamy nude + creamy white combo because it makes your hands look neat and bright. Then I choose one nail to carry pumpkin orange — like a thin tip or a small angled stripe — so you get the autumn cue without overdoing it. This flatters anyone who loves clean nails but still wants a fall moment. It also works great for short nails because the creamy tip stays soft.
Do two coats of creamy nude base and cure/dry fully. Paint creamy white French tips on four nails with guides or freehand. On the ring finger (or middle), add a pumpkin orange French tip in the same width, or paint a thin orange diagonal slash that starts near the cuticle and ends at the tip curve. Clean the edges with acetone on a cotton swab. Seal everything with glossy top coat.
Pick a pumpkin orange that leans slightly red-brown; it looks more autumn than neon.
Avoid pure bright white on a warm skin tone base — it can look stark.
6. Matte Nude Base with Glossy Burnt Orange Tips
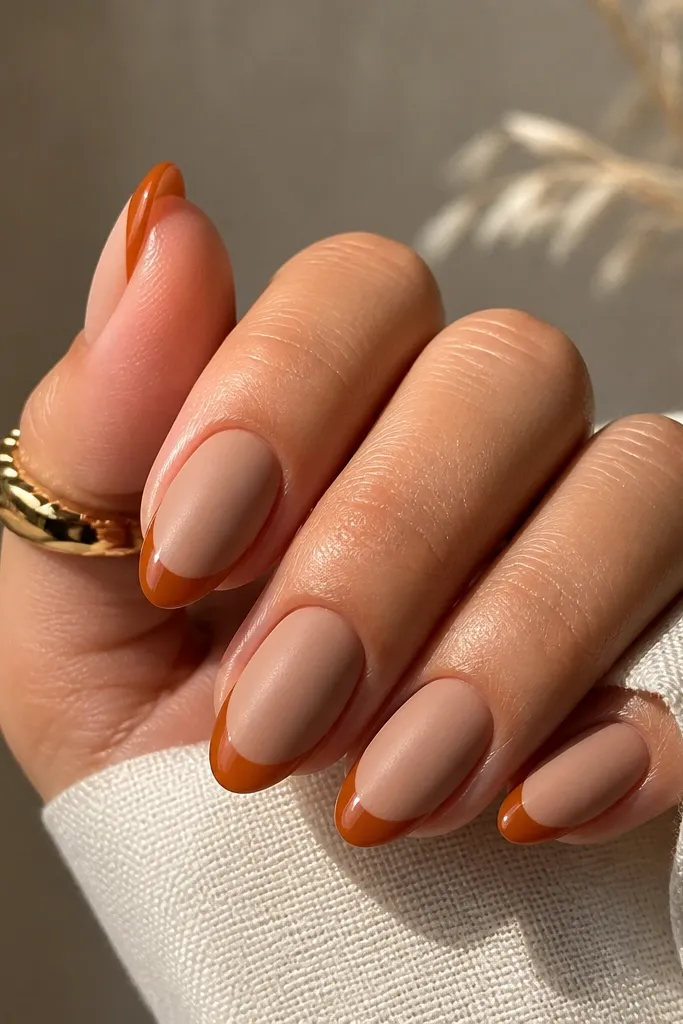
Finish contrast is what makes this look designer. The matte nude base makes your nails feel cozy and fall-like, while the glossy burnt orange tips pop when you move your hands. I use a nude that is slightly pink-brown so the matte doesn’t look dusty. This is flattering for fair to medium skin, and it looks amazing with knitwear and scarves. It also photographs well because matte absorbs light and glossy tips catch it.
Apply nude base in two thin coats. Top coat with matte top coat and cure fully, then leave it alone for a few minutes so the matte sets. Paint burnt orange French tips on top of the matte using a steady guide, keeping the tip width consistent. After the orange cures or dries, top coat only the tips with glossy top coat so the finish contrast stays sharp. Avoid brushing glossy over the matte area or it will create shiny patches.
Use matte top coat first, then tape the nail line with a small strip of tape so you don’t accidentally gloss the base.
Don’t rush the matte cure — if it’s not fully set, the glossy top coat can smear.
7. Sage Green French Tips with Tiny Gold Leaf Dots
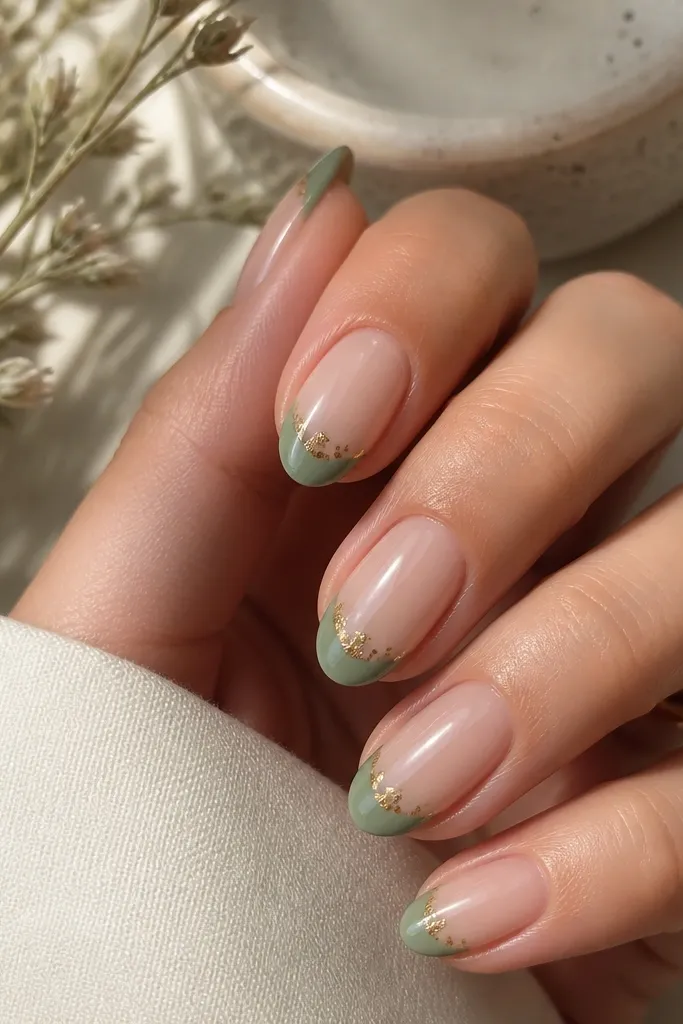
Sage green feels like fall mornings to me — soft, calm, and not too loud. Pair it with a nude glossy base so the sage stays fresh instead of looking dull. The tiny gold leaf dots make it look like real autumn leaves without drawing full leaf decals on every nail. This flatters most skin tones because sage sits in a gentle green family, and gold warms everything up. It’s also a great pick if you want fall nails that still look clean for work.
Editor's noteUse fewer dots than you think — one or two per nail looks intentional, five looks busy.
Start with a nude glossy base in two coats. Paint sage green French tips with guides, keeping a narrow tip width so the green looks refined. Add gold leaf dots on the outer third of each tip using a dotting tool or tweezers for tiny leaf pieces. If you’re using gel, place a tiny dab of clear gel where the leaf will land, then cure and seal. Finish with a glossy top coat that covers the leaf edges for a smooth feel.
Watch outAvoid large leaf decals — they look thick and snag on sweaters.
8. Blackened Brown French Tips with Clear Negative Space
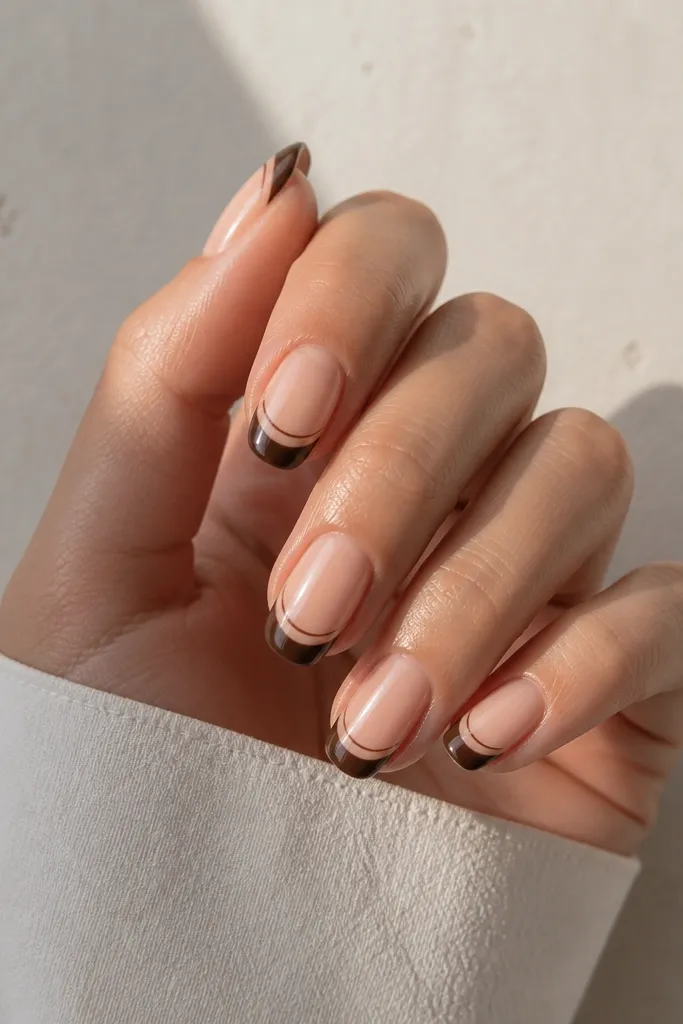
This is for the person who likes fall but hates cutesy designs. The blackened brown tip reads sleek, and the clear negative space keeps it from looking heavy. I like this on short squoval nails because the negative gap makes the nail look longer and sharper. It flatters deeper skin tones beautifully, and fair skin looks edgy without turning gray. Pair it with matte black accessories or dark green coats and it looks pulled together.
Use a sheer nude or clear gel base so you have real negative space. Draw the French tip outline in blackened brown, then leave a narrow clear channel in the center by masking it with a tiny strip of tape or using the brush edge to keep it clean. Fill only the side sections of the tip with blackened brown. Cure, remove any tape, then seal with glossy top coat. If the negative gap gets filled by accident, clean it with a tiny brush and acetone before curing.
Masking works — use small tape strips cut with a craft knife for a precise clear gap.
Don’t make the clear gap too wide or the tips look unfinished.
9. Gold French Tip on Nude with Burnt Orange Outline
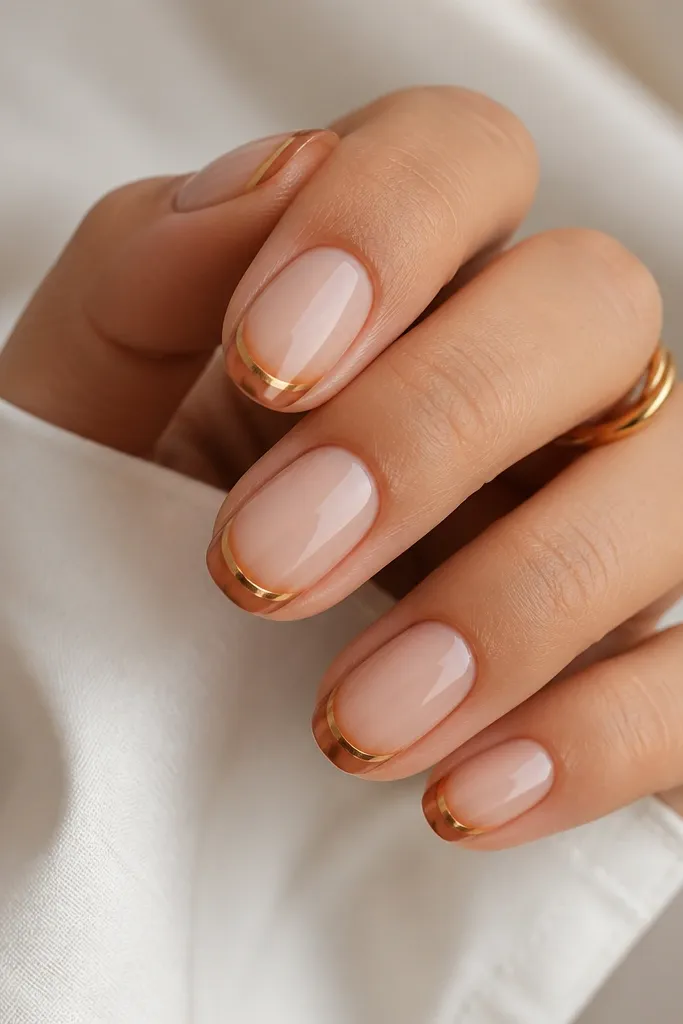
Metallic gold makes fall nails feel like jewelry, and the burnt orange outline keeps it autumn instead of holiday. I use a nude base that’s close to your skin tone but slightly warm, so the gold doesn’t look too bright. The double-line effect gives depth and makes the French edge look custom. This is gorgeous for medium to deep skin tones and also looks flattering on fair skin if the nude base is creamy, not gray. It’s a great option for dinners, weddings, and photos.
Editor's noteMetallics look best when you apply them in thin layers; thick gold can crack at the smile line.
Paint a nude base in two coats and cure/dry fully. Apply a metallic gold French tip using a liner brush, keeping the tip width moderate. Then, with burnt orange polish or gel, draw a thin outline just inside or just outside the gold edge — choose one direction and keep it consistent. Clean the outline with a small brush if it bleeds. Finish with glossy top coat, and cap the gold edges so they don’t dull too fast.
Watch outAvoid thick outlines — double lines look messy if they’re too wide.
10. Rosewood French Tips with One Side Pearl Charm
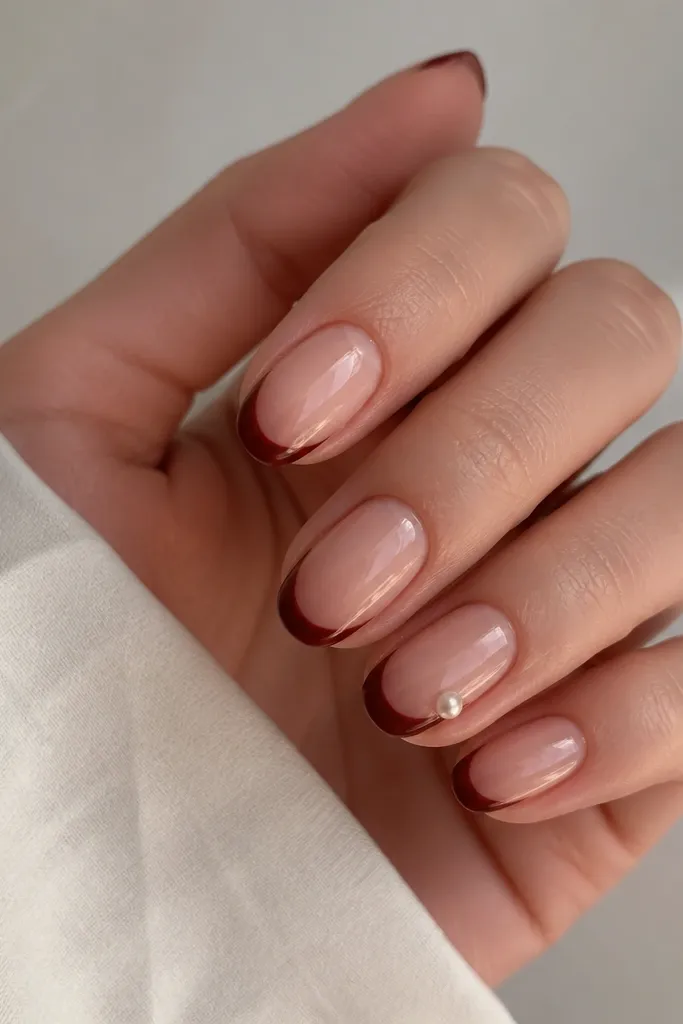
This is a sweet fall twist on French tips: rosewood gives you that cozy red-brown, and the single pearl adds a jewelry feel without clutter. I like a nude base that’s slightly rosy so the rosewood looks blended, not separated. The pearl charm is best placed near the outer corner of the tip, so it looks like it’s sitting on top of the curve. This flatters everyone because it’s small and placed strategically. It’s also perfect if you wear rings a lot and want your nails to match the sparkle.
Editor's noteIf the pearl feels wobbly, add a second thin layer of top coat over it after the first cure.
Start with a nude base in two coats and cure/dry. Paint rosewood French tips with a steady smile curve and keep the tip thickness around a third of the nail width. On one accent nail, place a tiny pearl using gel adhesive or a dot of thick clear gel near the outer edge of the tip curve. Press gently for 10 seconds and cure. Seal with glossy top coat, then cap over the pearl so it doesn’t catch on fabric.
Watch outDon’t place pearls in the center of the tip — it looks heavy and can pop off sooner.
11. Caramel Ombré French Tip (Top Half Only)
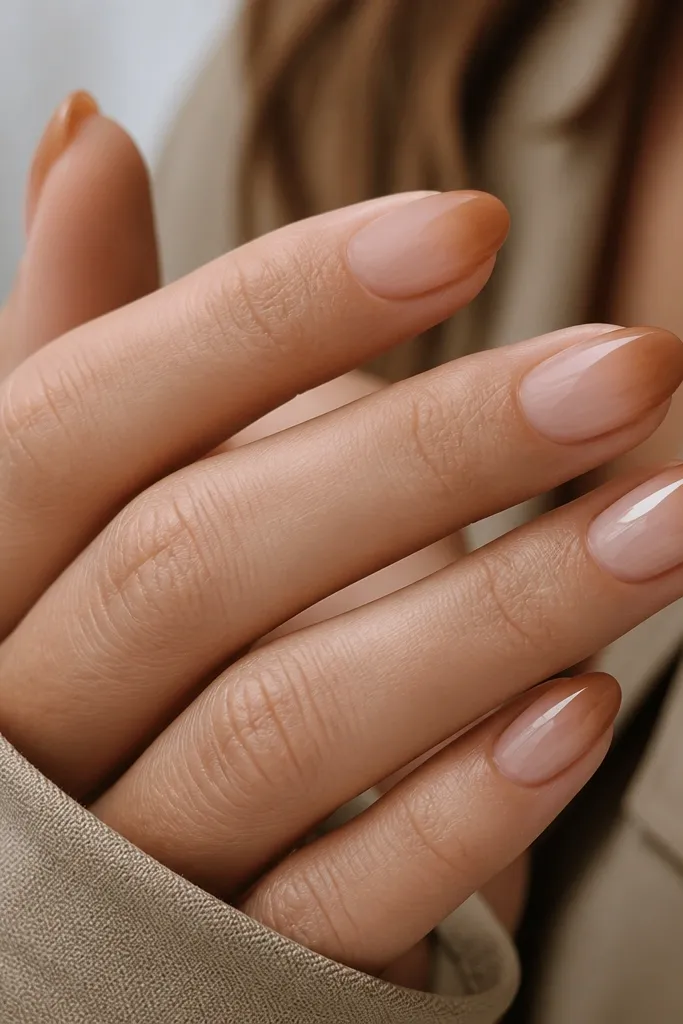
Ombré French tips look soft and expensive, and this version keeps it grounded by limiting the gradient to the top half. Use a caramel shade that’s slightly golden, then blend it down into a nude base so it looks like your nail is naturally warm. This flatters short to medium nails because it creates a gentle lengthening effect. It also looks great on medium skin with gold undertones and on fair skin with warm blush makeup. The key is keeping the fade smooth, not patchy.
Editor's notePractice on one nail first — the sponge dabbing technique is fast once your pressure is right.
Apply a nude base in two coats and cure/dry. Create the French curve with a light caramel line using a brush, then use a makeup sponge to dab caramel from the tip curve downward about halfway. Blend in small dabs until the transition looks even. Add a second caramel pass only at the very edge if you want more contrast. Finish with glossy top coat to smooth the texture and make the gradient look seamless.
Watch outAvoid blending all the way to the cuticle — it turns into a full ombré instead of a French look.
12. Terracotta Speckle French Tips Over Nude
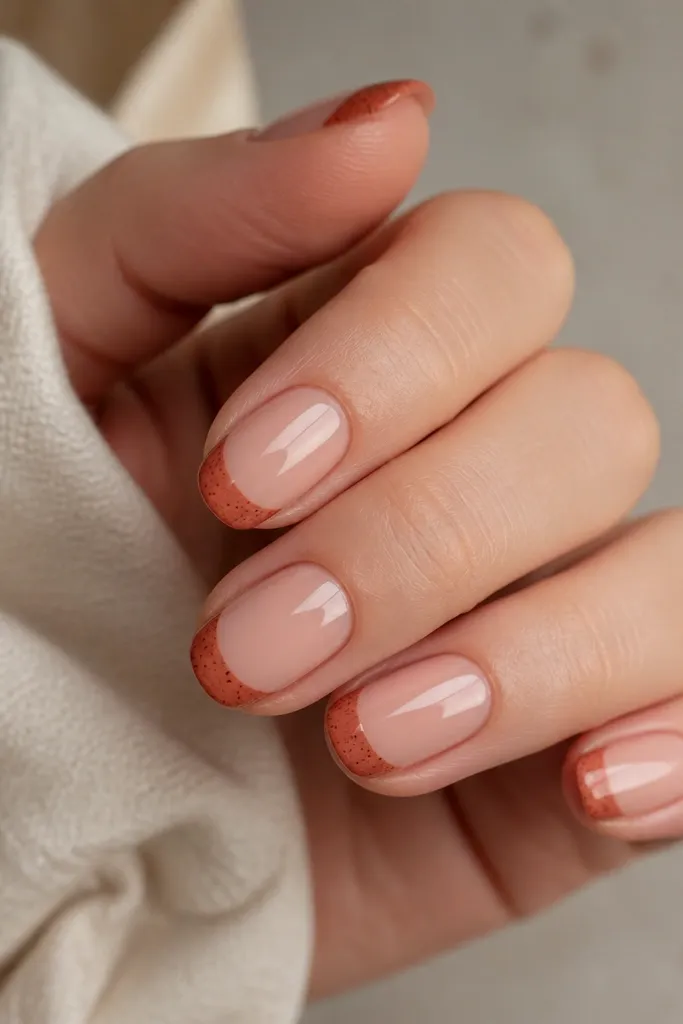
Speckled French tips give fall texture without needing complicated decals. I use a nude base so your nails look clean, then paint a terracotta tip and add fine speckles in a slightly darker rust. It looks like autumn clay and makes your nails feel handmade. This is flattering on short square and squoval nails because the speckles add dimension without adding bulk. It also hides tiny chips better than a solid tip because speckles don’t show lines.
Editor's noteDip your dotting tool in paint, then wipe most off on a paper towel so the speckles are tiny.
Start with a nude base in two coats and cure/dry completely. Paint terracotta French tips using guides and a thin brush. While the tip is still slightly tacky (gel) or right after polish is set, add darker rust speckles with a dotting tool or a thin brush loaded with minimal paint. Keep the speckles concentrated toward the center of the tip and lighter near the curve. Seal with glossy top coat in two thin layers if needed.
Watch outDon’t flood the speckles — thick dots look like paint splatter.
13. Plum Tips with Silver Foil Flake Corner
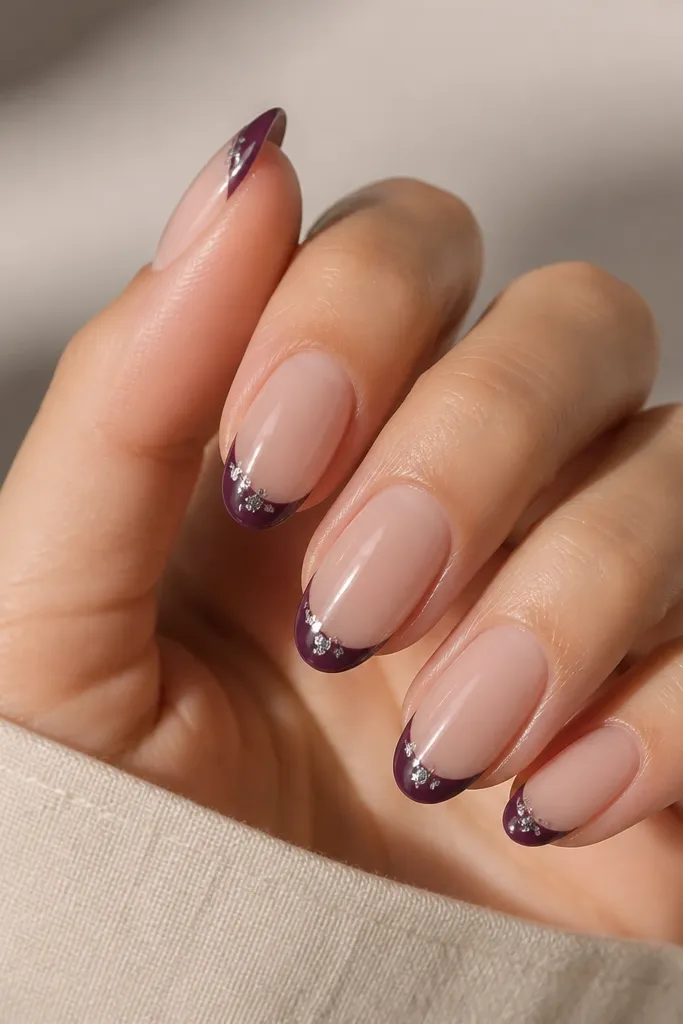
Plum French tips look gorgeous when you want fall nails that still feel a little glam. I pair them with a nude base so the plum stays rich rather than overpowering. The silver foil flake corner adds a flash when your hand moves, like cold air catching light. This flatters fair to deep skin tones because plum works across undertones, and silver makes it feel crisp. It’s especially pretty with gray knits and silver rings.
Apply nude base in two coats and cure/dry. Paint plum French tips with a clean smile line, keeping the tip width consistent across nails. On the outer corner of each tip, add a tiny amount of clear gel. Press small silver foil flakes into that gel spot, then cure. Finish with glossy top coat, making sure the foil edges get sealed so they don’t lift.
Use small foil pieces — larger flakes cover too much and can make the tip look bulky.
Avoid skipping the clear gel under foil — flakes won’t stay put under top coat pressure.
14. Burnt Orange French Tips with Matte Leaf Silhouette
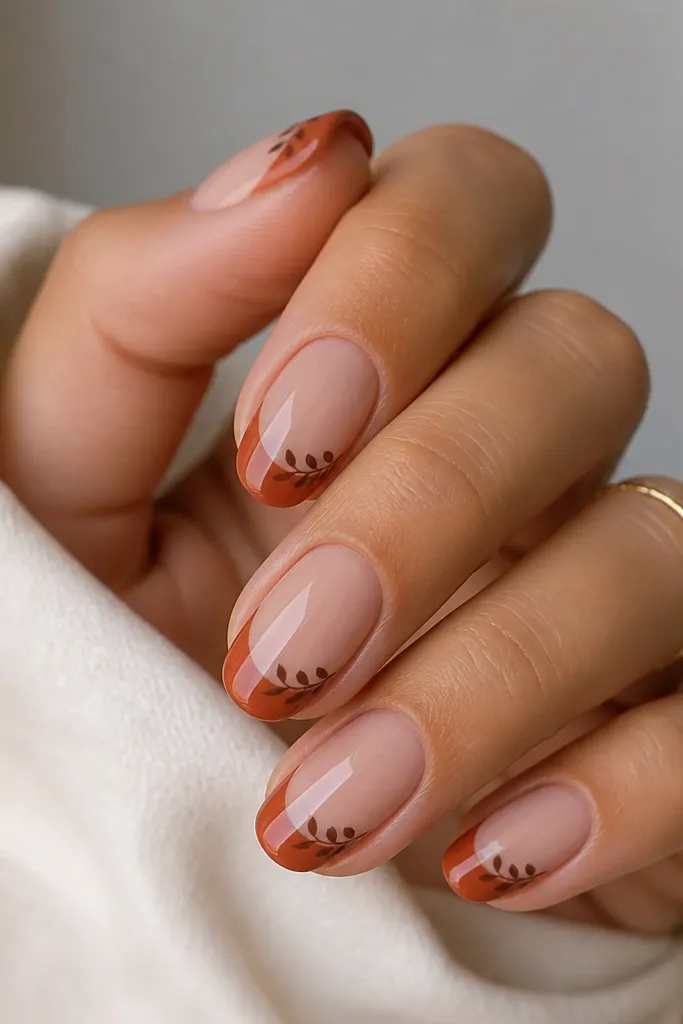
This one looks like a fall leaf press, but it stays wearable. The burnt orange tips give you the season color, and the matte leaf silhouette keeps it from looking flat. I like placing the leaf near the outer edge of the tip so it looks like it’s sitting on the curve, not covering the whole nail. This flatters fair and medium skin tones, especially if you wear warm browns or caramel boots. It also looks great on slightly longer nails because the leaf detail has room to breathe.
Start with a nude glossy base in two coats. Paint burnt orange French tips with guides and cure/dry. Use a thin striping brush to draw a small leaf shape near the outer edge of the tip, then fill it with a darker brown matte gel or matte-finish polish. Cure again if gel, then top coat glossy over the rest of the nail but keep the leaf silhouette matte by using a matte top coat only on the leaf area. Clean the edges with a fine brush and acetone.
If leaf shapes are hard, draw a simple teardrop with a tiny notch at the top and a single vein line.
Don’t put matte leaf on every nail at full size — it looks costume-y.
15. Camel Nude Base with Oat Milk French Tips
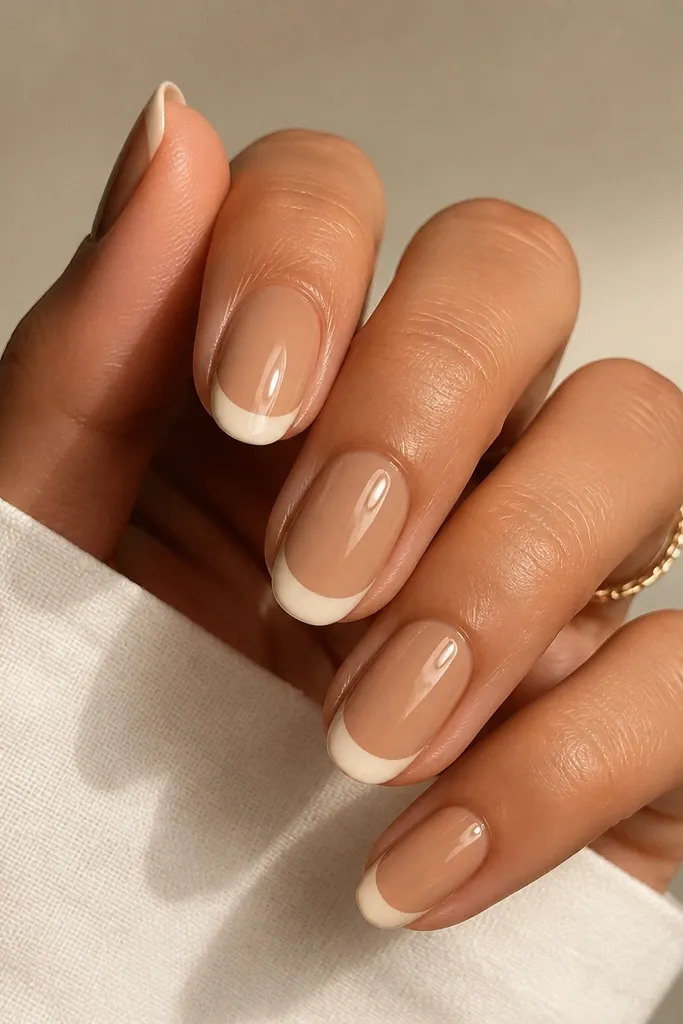
This is the “my nails look healthy and expensive” fall option. The camel nude base warms up your hands, and the oat-milk French tips add a subtle contrast that still reads like a manicure. It’s perfect if you hate bold colors but still want fall vibes. This flatters every skin tone because the shades sit in the beige family — just keep the oat-milk tip slightly lighter than the base. It also looks amazing with neutral outfits, tan bags, and cream sweaters.
Editor's noteIf your oat milk looks too gray, pick one that leans more creamy yellow — it reads warmer in fall light.
Apply camel nude base in two thin coats and cure/dry fully. Paint oat-milk beige French tips using guides for a clean smile curve. Keep the tip width slightly narrower than you would for a bold color so it looks refined. Clean up the sides with acetone on a small brush. Seal with glossy top coat and cap the free edge.
Watch outAvoid a high-contrast white tip — it makes beige bases look washed out.
16. Spiced Cognac Tips with Clear Outline
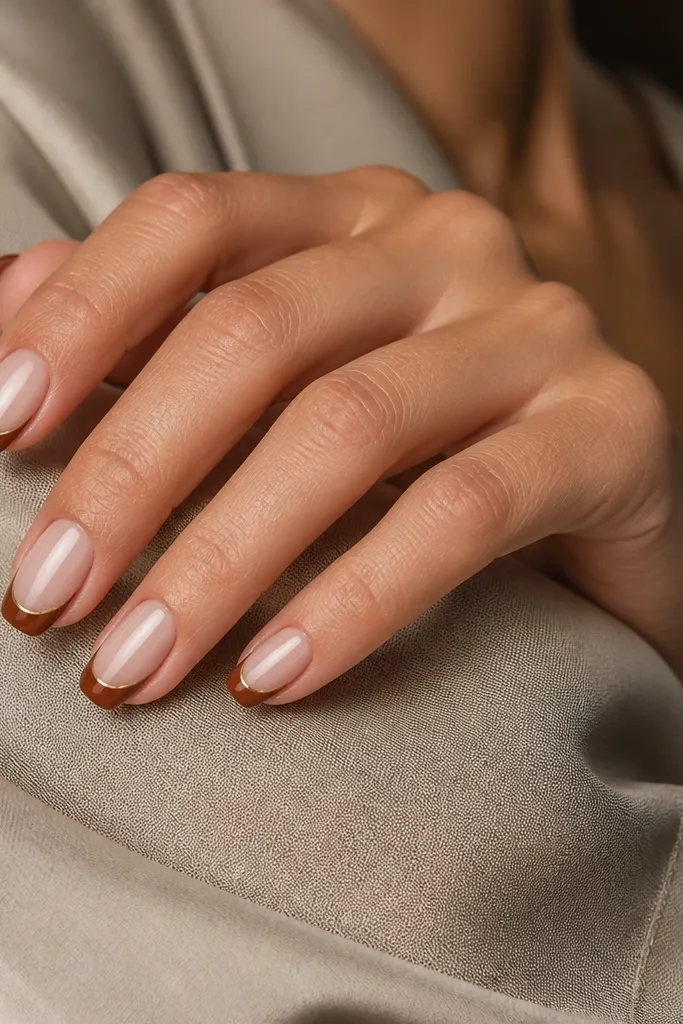
This gives you a graphic French tip without painting tiny lines on every nail. The spiced cognac brown is warm and flattering, and the clear outline makes the tip look like it’s outlined in glass. I use this when I want a manicure that feels modern with fall outfits. It works best on medium and short nails because the outline is delicate. This flatters fair through deep skin tones — the key is keeping the base nude sheer enough to show your nail bed.
Editor's noteUse thin tape for the outline — thick tape leaves a step line under top coat.
Apply a sheer nude base in two coats for an even tone. Paint the cognac French tips with a guide and cure/dry. To create the clear outline, place a very thin strip of tape along the outer tip edge, paint cognac up to it, then remove the tape so a clean clear border remains. If you freehand, use a thin liner brush with gel and pull the outline only once. Finish with glossy top coat, being careful not to flood into the clear border.
Watch outDon’t overwork the outline after it gets tacky; it turns cloudy.
17. Mocha French Tips with Glossy Top Coat Only on Tips
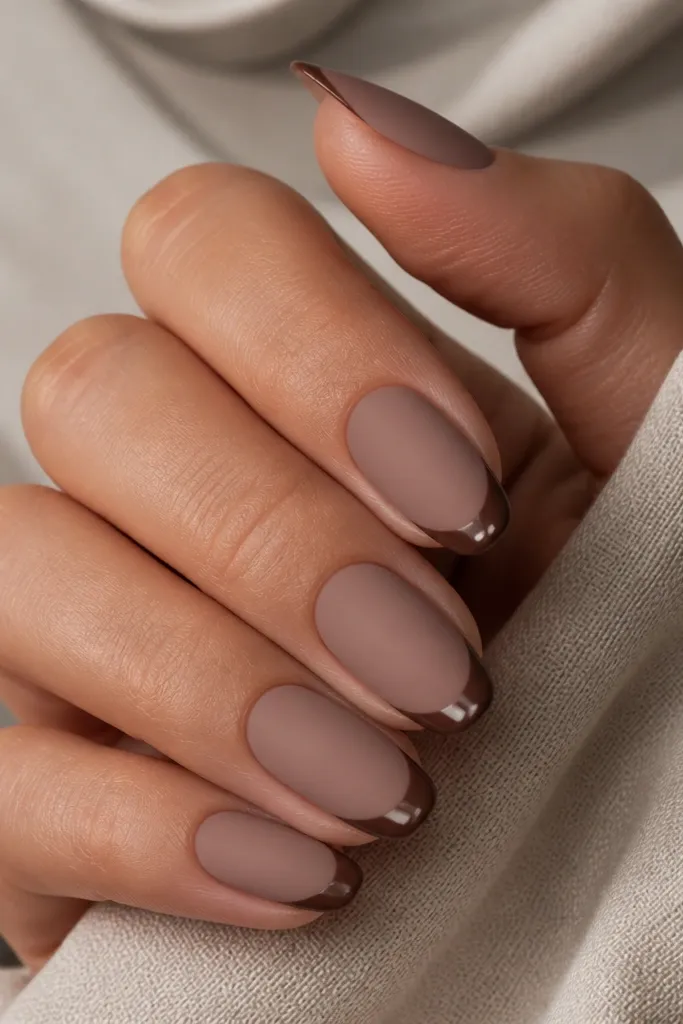
Finish contrast is the trick again, but this time it’s mocha instead of burnt orange. A matte mocha nude base looks cozy, and glossy mocha tips look like your nails have a glaze. I like this for fall because it hides minor texture and still looks neat when your hands are busy. It flatters medium and deep skin tones especially, and fair skin looks great if the matte base is warm, not gray. This is also a good choice if you want something that looks “done” even when you wear no nail jewelry.
Paint a warm mocha nude base in two coats and cure/dry. Apply matte top coat over the entire nail and cure fully. Paint French tips in a slightly darker mocha brown, keeping the smile line crisp with guides. After the tip color sets, apply glossy top coat only to the tips — avoid brushing glossy onto the matte base. Let it cure and check the edges for any overlap.
If matte top coat peels at the tips, lightly rough the surface with a buffer before applying color.
Avoid doing glossy over matte across the whole nail — you lose the contrast that makes it look intentional.
18. Rust French Tips with Skinny Gold Stripe Along the Smile
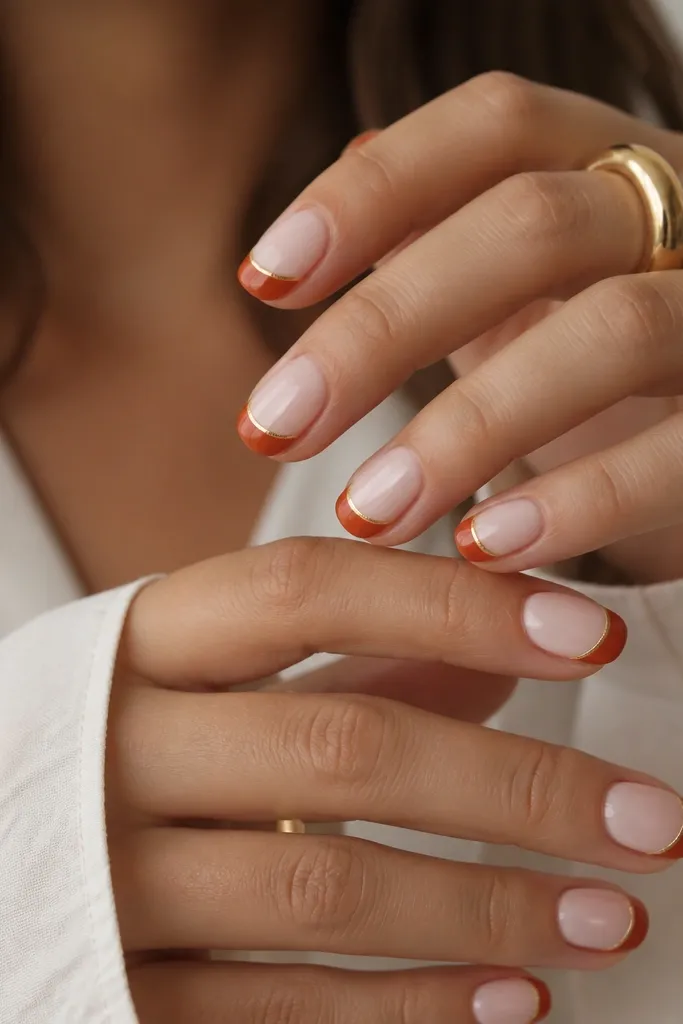
This is the simplest way I know to make rust tips look like a salon manicure. The gold stripe turns the French line into jewelry. I pair rust orange with a nude base that’s slightly peachy so the whole set looks warm and flattering. This works on short almond and squoval nails because the stripe stays thin and doesn’t crowd the tip. It’s especially pretty with gold hoop earrings and brown leather bags.
Editor's noteIf the gold stripe looks thick, use less gel — thin lines read cleaner in fall photos.
Apply nude base in two coats and cure/dry. Paint rust orange French tips with guides, keeping the tip thickness around a third of the nail width. Place a thin gold stripe along the inside edge of the smile line using striping tape or gel line art. If you use striping tape, press it down gently and remove after curing, then top coat over it. Seal with glossy top coat and cure fully so the stripe doesn’t lift.
Watch outAvoid placing the stripe too far from the smile line or it looks like a random line.
19. Tortoiseshell French Tips in Warm Umber
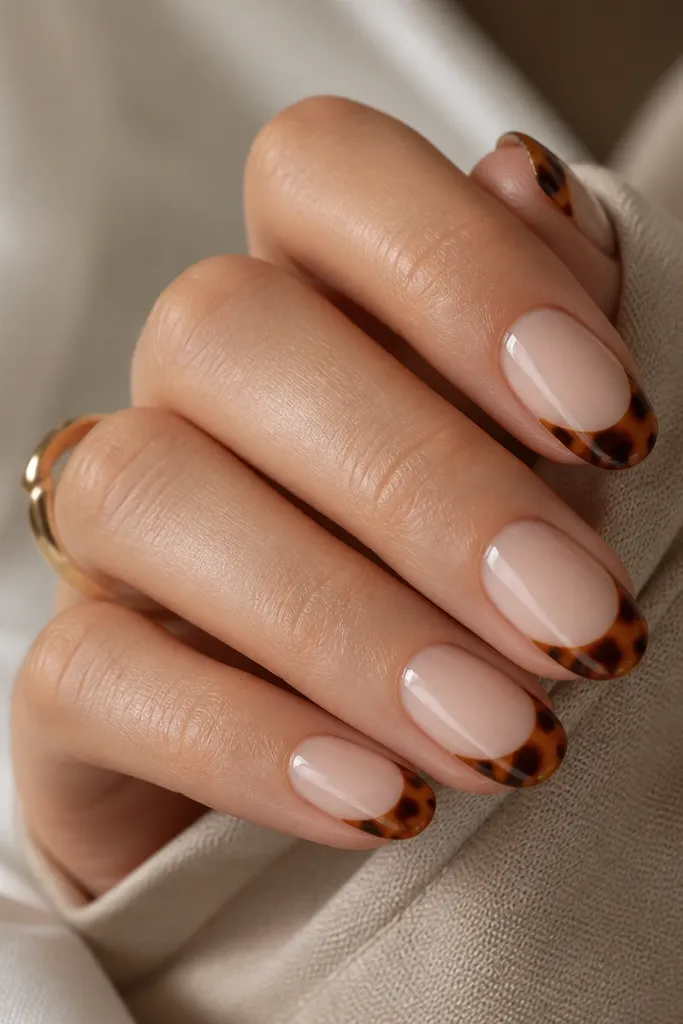
Tortoiseshell is one of those fall looks that feels natural because it’s warm and earthy. I keep the base nude so the pattern stays focused on the tips. Use amber, umber, and caramel-brown shades to build the shell effect — it should look like irregular pieces, not dots. This flatters nearly everyone because the palette sits in warm neutrals. It’s also a great pick if you want something autumn that still looks classy with office outfits.
Editor's noteLet each color layer set for a minute before adding the next so the pattern stays crisp.
Start with a nude base in two coats and cure/dry. Paint the French tips with a caramel-brown base layer, then layer darker umber patches using a detail brush. Add amber swirls and small irregular shapes, leaving some base showing so it looks like shell segments. Use a thin toothpick or nail art dotting tool to drag lines slightly for the tortoiseshell effect. Seal with glossy top coat in two thin layers for a smooth, glassy finish.
Watch outAvoid making the pattern too uniform across nails — real tortoiseshell never looks identical.
20. Satin Beige Base with Copper Foil French Tips
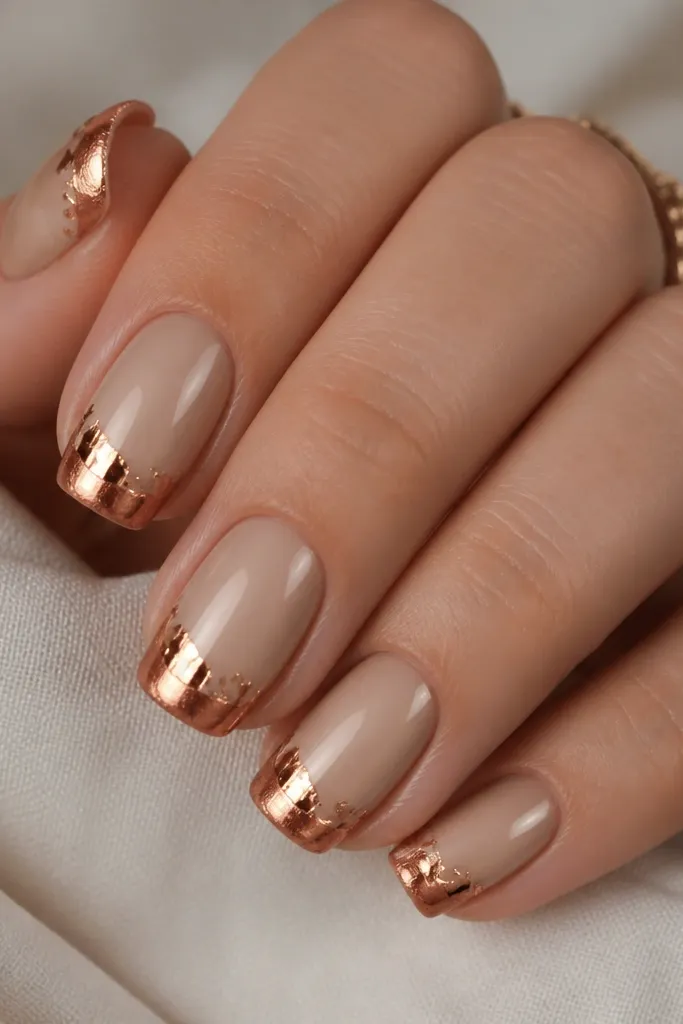
Copper foil French tips look like fall sunsets on your hands. The satin beige base gives a soft, smooth look, while the copper tip adds that reflective warmth. I like this for medium to long nails because the foil texture has space to show. This flatters fair, medium, and deep skin tones because copper sits in a warm spectrum. It also looks incredible with plaid, rust scarves, and copper-toned bangles.
Editor's notePress foil with a silicone tool or your fingertip — dragging can smear the edges.
Apply a satin beige base using a satin-finish top coat or a beige polish that dries with a soft sheen. Paint French tips in a copper metallic gel or polish, then press small copper foil pieces onto the wet/tacky copper in the tip area. Cure to lock it in. Use a thin brush to tidy the smile line edges if foil spreads. Finish with glossy top coat over the entire tip area so the foil feels smooth and doesn’t snag.
Watch outDon’t leave foil unsealed at the smile line — it catches and lifts first.
21. Powder Blue Base with Autumn Spice Tips
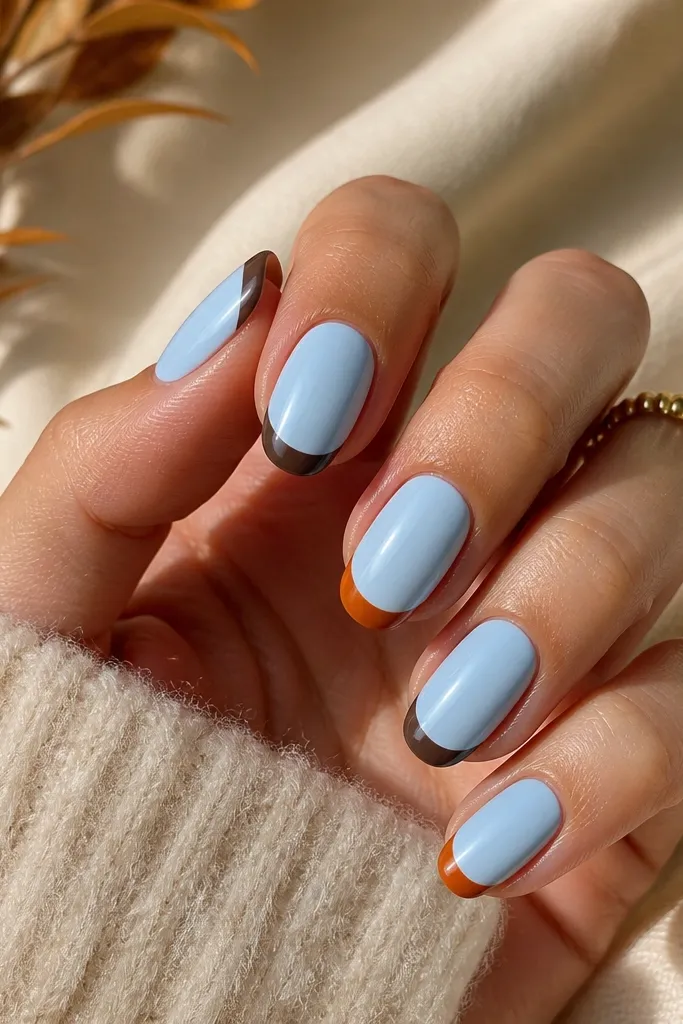
This one is bold, but it looks surprisingly right in fall because powder blue makes the warm tips pop. I use a soft powder blue base so your hands don’t look harsh, then I alternate the tip colors between burnt orange and chocolate brown. The result looks playful yet still seasonal. This flatters fair skin a lot because powder blue brightens, but medium and deep skin can wear it too if the blue stays milky. It’s a great choice for people who want fall nails that don’t look like every other set.
Start with a powder blue base in two coats and cure/dry fully. Paint French tips with guides — on alternating nails use burnt orange on one and chocolate brown on the next. Keep each tip width consistent so the set looks intentional, not random. Clean the edges with acetone and a small brush. Seal with glossy top coat and cap the free edge.
If the powder blue looks streaky, do three thin coats instead of one thick coat for an even finish.
Avoid mixing too many tip colors on one nail — it turns into clutter fast.
22. Moody Gray-Nude Base with Sage and Rust Split Tips
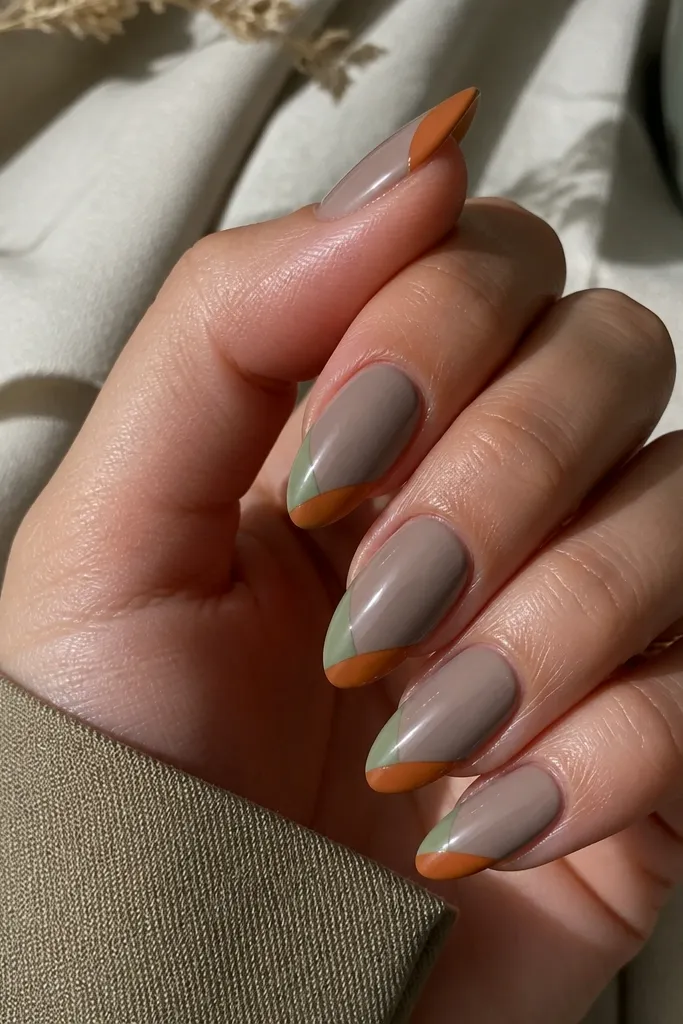
Split-color French tips make fall nails look modern, not just “another tip.” I start with a moody gray-nude base because it makes both sage and rust look richer. The diagonal split gives movement and makes the tip look like a design element instead of two random colors. This flatters medium to deep skin tones really well, and fair skin looks great if the gray-nude is warm, not icy. It’s a great pick for denim days because it matches the coolness of the fabric.
Editor's noteUse tape as a divider even if you’re confident — one straight diagonal line makes the whole set look clean.
Apply moody gray-nude base in two thin coats and cure/dry. Use French tip guides for the overall tip shape. Paint the left side of the tip sage green and the right side rust orange, then keep the diagonal line crisp by using a strip of tape as a divider. After both colors set, remove tape carefully. Seal with glossy top coat and cure fully so the diagonal line stays sharp.
Watch outDon’t blend the diagonal line — the sharpness is the point.
23. Clear Jelly Base with Brown Sugar French Tips
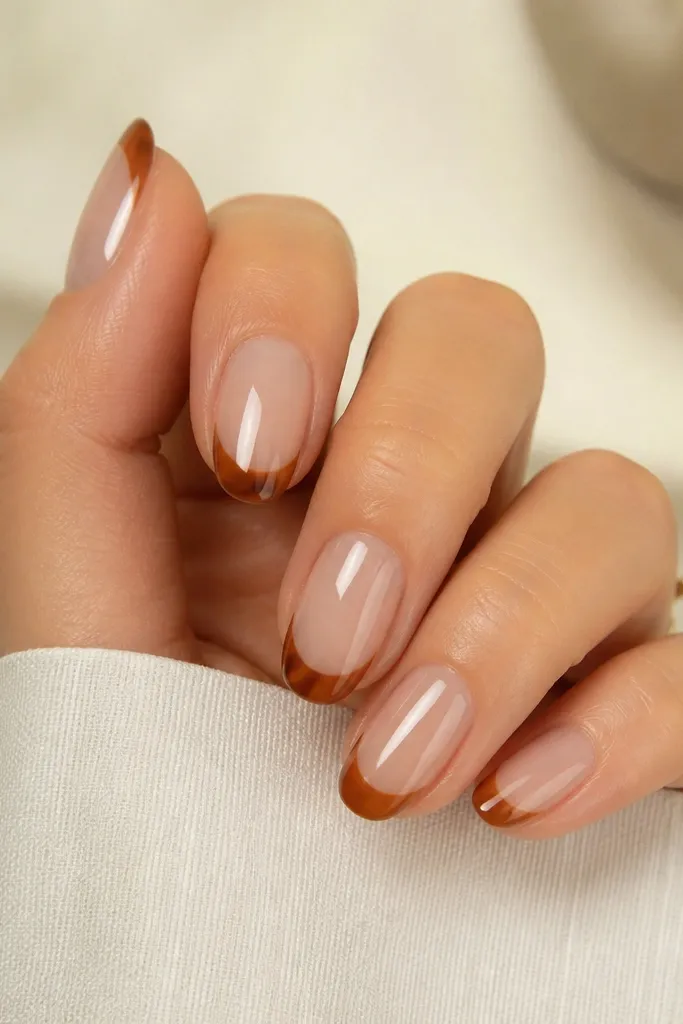
This is the “short nails, but make it fall” design. The clear jelly base makes your nails look hydrated and healthy, and the brown sugar tip adds warmth without turning opaque-heavy. I love this when my nails are short because the jelly base makes them look longer. This works across skin tones because the base is neutral and the tip stays warm and semi-sheer. It’s also a great option if you want something that grows out gracefully.
Start with a clear jelly base in two coats, curing between coats if gel. Paint brown sugar French tips with a warm brown that has slight translucency, keeping the smile line crisp. Apply a second layer only at the tip edge to build opacity without losing the jelly feel. Clean the sides with a small brush and acetone. Top coat glossy and cap the free edge.
If the brown sugar color goes too opaque, thin it with a clear gel so the tip stays syrupy.
Avoid a fully opaque tip on a clear jelly base — it looks like two different manicures.
24. Gingerbread Spice Tips with Tiny Candy-Cane Stripe
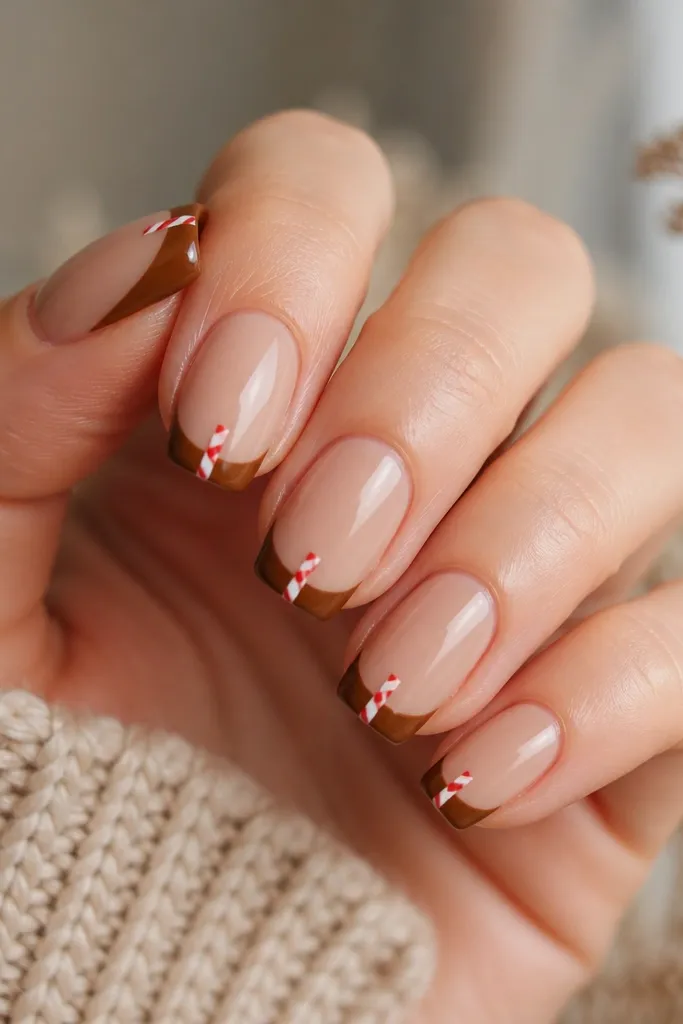
This feels like fall baking without going full holiday. Gingerbread brown gives you the cozy base color, and the tiny candy-cane stripe is small enough to look cute instead of childish. I place the stripe near the center of the tip so it reads like a detail, not a full pattern. This flatters fair and medium skin tones, and deep skin looks great if the gingerbread brown is warm and not too dark. It’s a fun set for October birthdays and pumpkin patch days.
Editor's noteUse a striping brush with a fine point; thicker brushes make the stripe look like a line smear.
Apply warm nude base in two coats and cure/dry. Paint gingerbread brown French tips with guides. On one or two nails, add a tiny vertical stripe in white gel and then a thinner red stripe beside it using a striping brush. Keep the stripe height small — just the top third of the tip. Seal with glossy top coat, and cure long enough to lock in the stripe.
Watch outDon’t add candy stripes on every nail — it stops reading as an accent.
25. Vintage Rose Tips with Thin Chocolate Outline
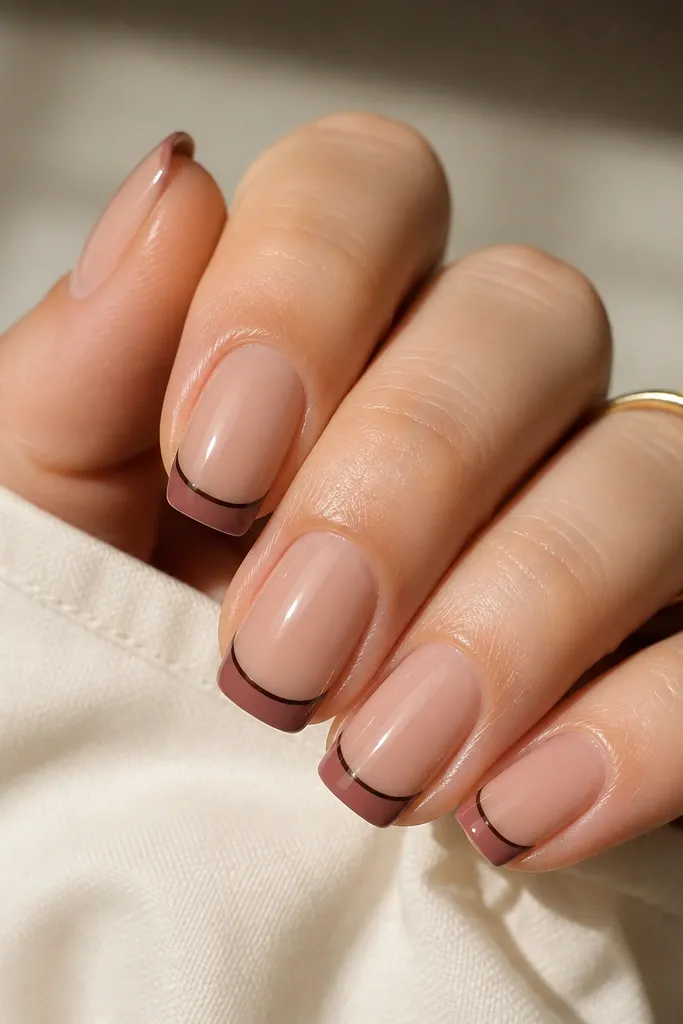
Vintage rose tips look like fall flowers pressed in a book. The rose-pink-brown color is softer than oxblood, and the thin chocolate outline makes the tip look crisp and framed. I love this for people who want fall nails that still feel romantic. It flatters fair to medium skin tones the most, and it also looks good on deeper skin if the rose shade isn’t too light. The outline is what makes it look “designed,” even though the steps are simple.
Start with a nude base in two coats and cure/dry. Paint vintage rose French tips with guides, keeping the smile line smooth. Then use chocolate brown gel or polish to draw a thin outline right along the outer edge of the tip. Cure/dry, then clean any smudges with a fine brush. Finish with glossy top coat and cap the tip edges.
Outline with a gel liner brush — it gives you a line that stays even across the curve.
Avoid thick outlines — they turn the French tip into a chunky border.