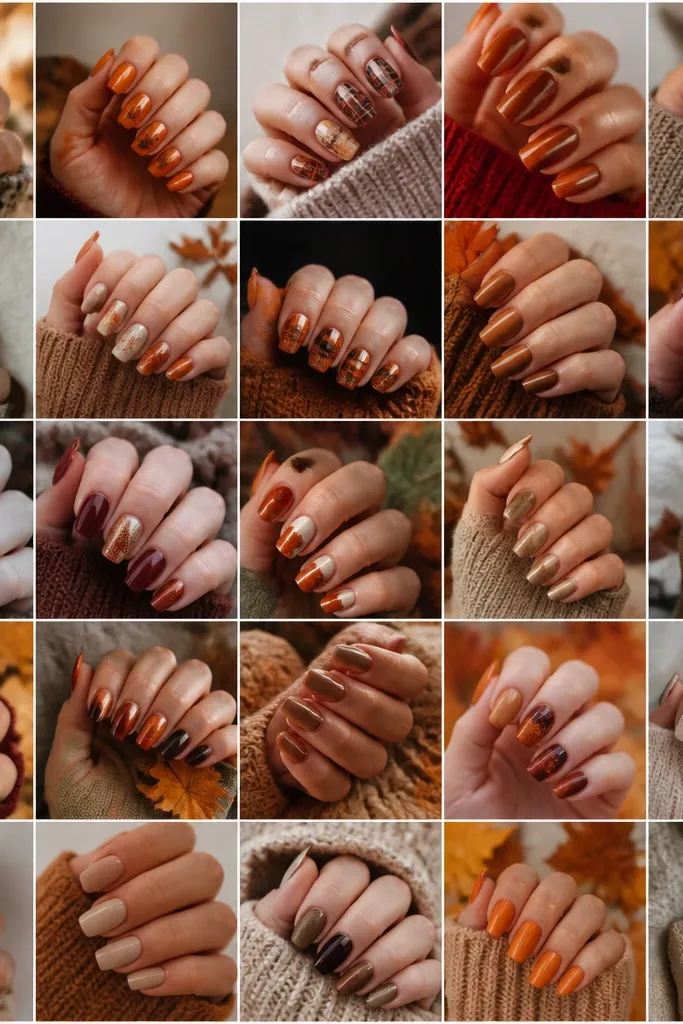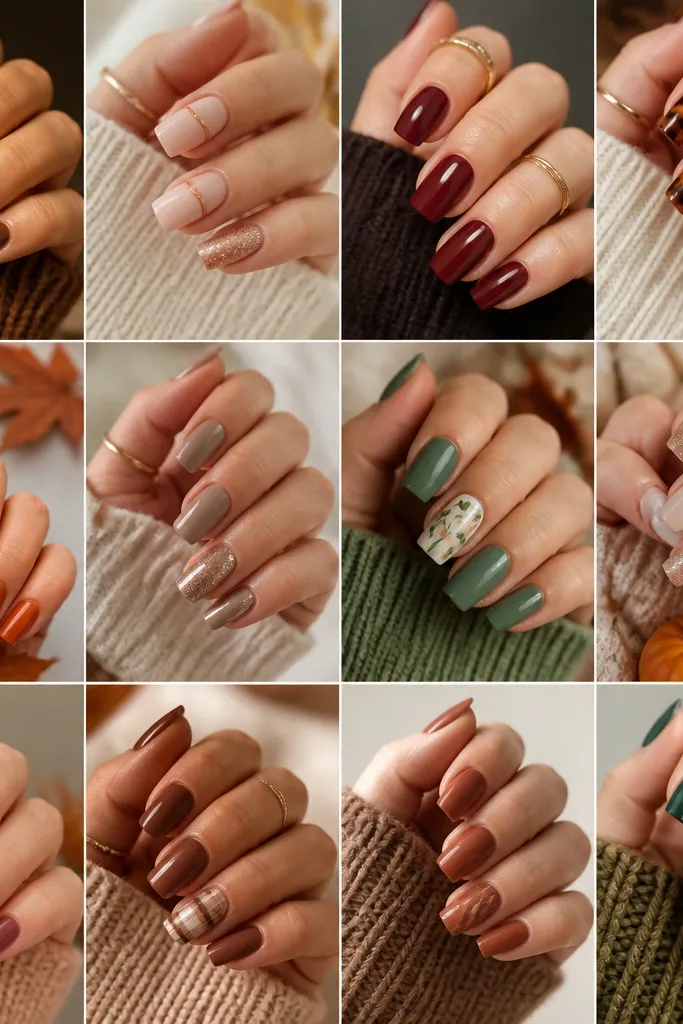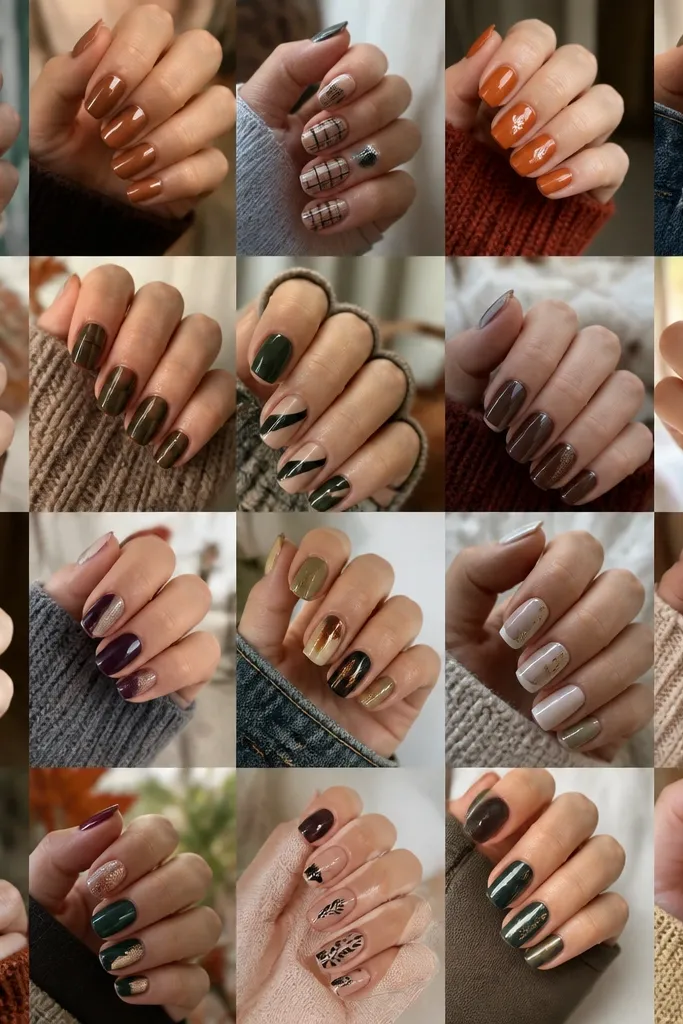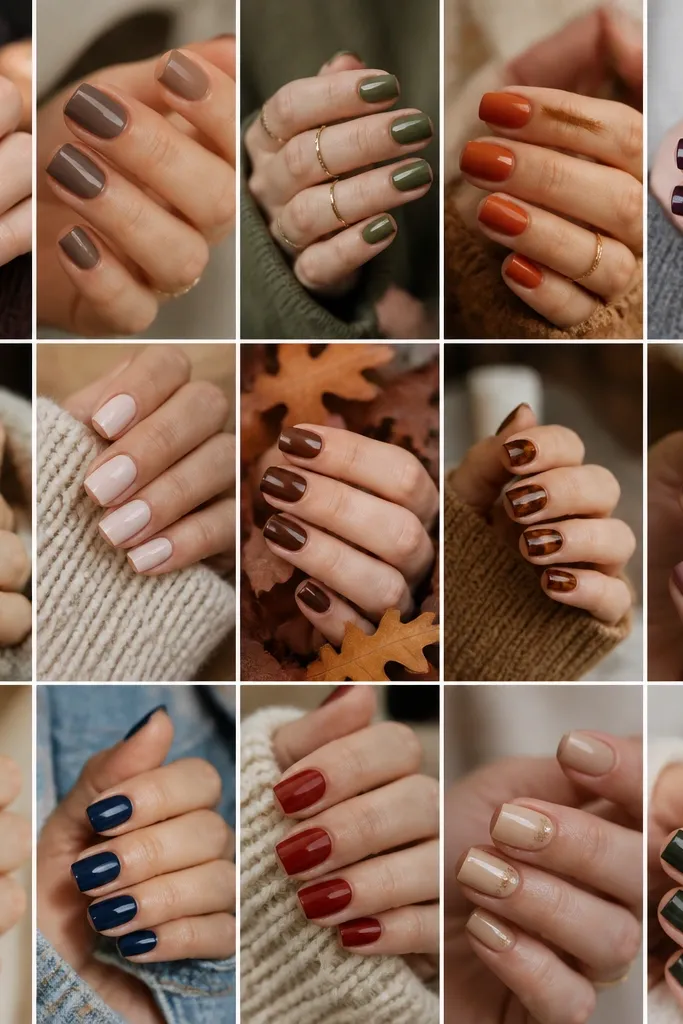
1. Oxblood Micro-French with Bare Half-Moon
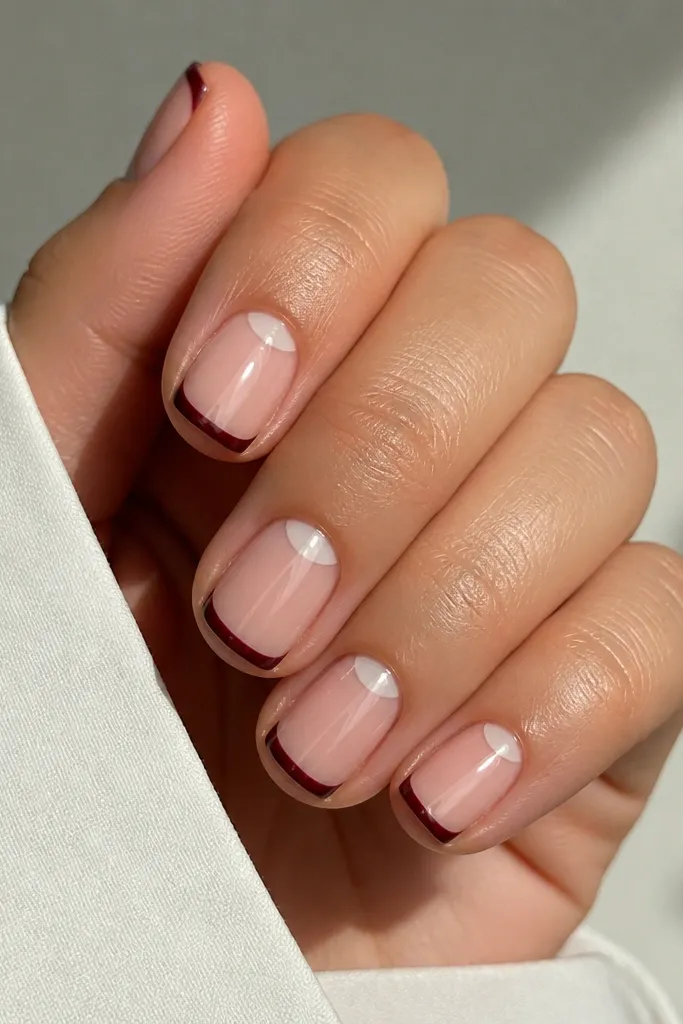
This one is my go-to when I want fall without heavy coverage. The oxblood tip reads deep and polished, and the bare nude half-moon keeps the look light on short nails. I’ve worn it on fair and medium skin tones and it always pops — the contrast makes nails look longer even when the free edge is short. It also looks clean for work because the design is minimal and the line stays where your nail shape naturally curves. The best part is that the negative space makes your cuticles look intentional instead of bare.
Paint a sheer nude gel base across the whole nail, then cure. With a striping brush, draw a micro-French line using oxblood gel only along the tip edge, keeping it about 1 mm wide. Leave the cuticle half-moon bare by masking with a small piece of tape or by carefully not touching the gel to the cuticle line. Cure again, then apply a glossy top coat and cap the free edge with a thin swipe.
Use the same brush for the French line and clean it between nails with gel cleanser so the stripe stays razor-thin.
Don’t make the French too thick on short nails — it turns into a blocky band.
2. Cinnamon Latte Jelly Base with One Gold Dot
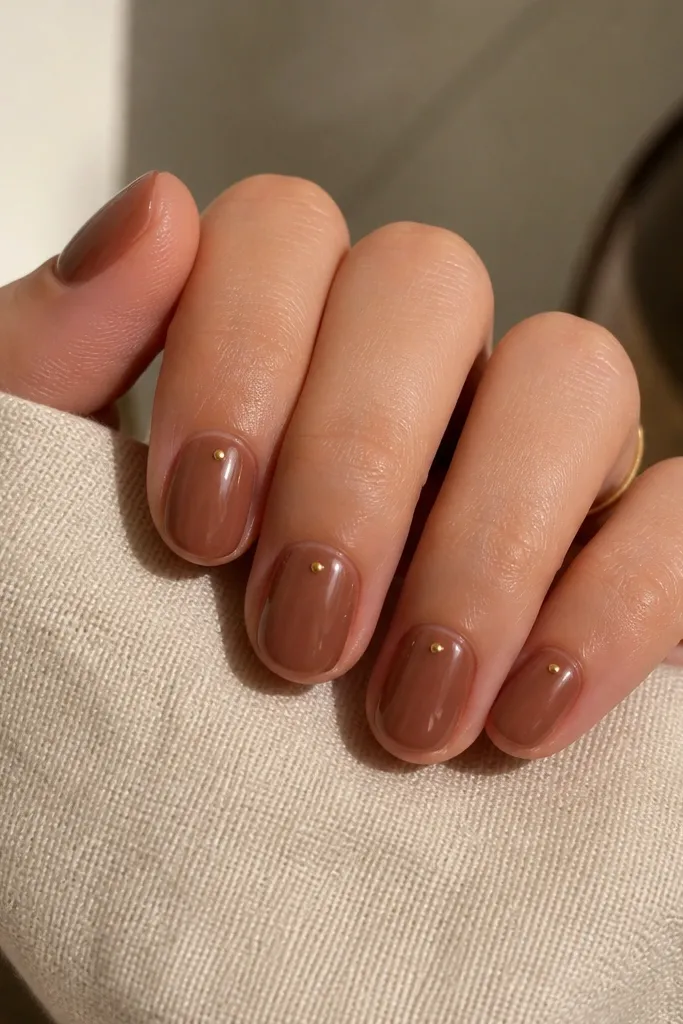
A jelly latte base is the easiest way to get that cozy fall warmth without looking flat. The cinnamon tone looks good on cool and warm undertones because it’s not too red and not too gray. The single gold dot is small enough for short nails, but it still catches light when you move your hands. I like it for everyday because it reads intentional even with minimal art. It also photographs well because the dot adds a focal point without clutter.
Apply two thin coats of cinnamon latte jelly gel, curing after each coat until it looks evenly milky. Use a dotting tool to place one gold dot on each nail, centered and placed about 2-3 mm below the cuticle. If your nails are very short, place the dot slightly higher so it doesn’t feel too low. Cure the gold dot (or cure the gel paint if it’s not foil), then seal with one glossy top coat.
If your gold dot looks streaky, use gel gold paint instead of loose pigment and cure it longer than you think.
Don’t add multiple dots — it stops being simple and starts looking like random specks.
3. Terracotta Burnt Orange Half-Swipe
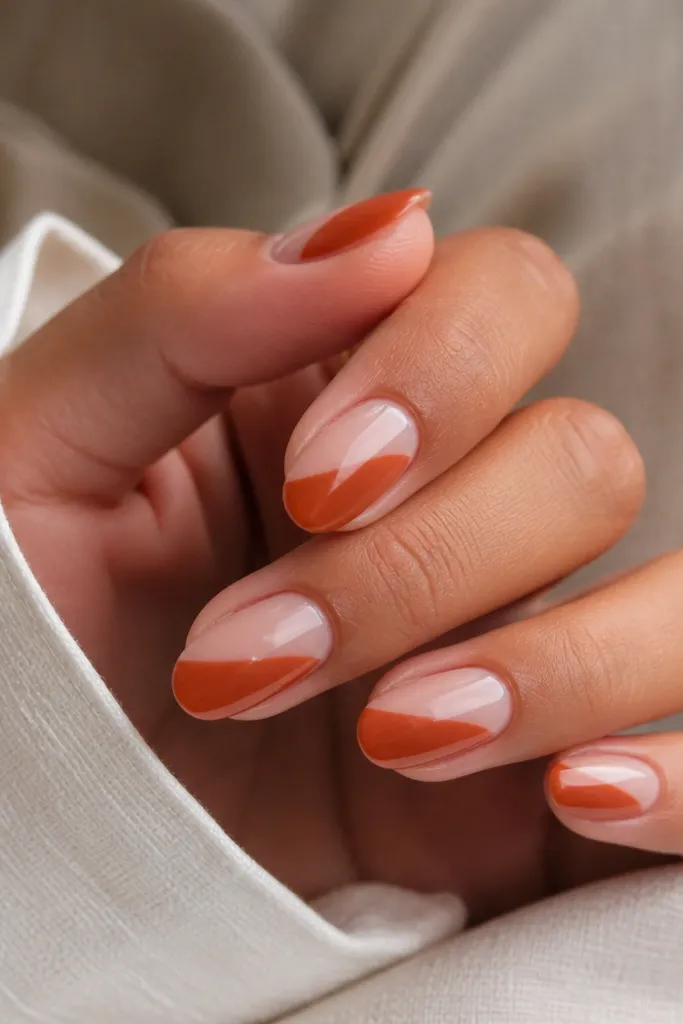
This is the fastest “autumn color story” look because the terracotta hits that clay-and-leaves vibe instantly. The nude base keeps it wearable, and the diagonal half-swipe makes short nails look more elongated. On medium skin, it gives a warm contrast; on fair skin, it looks like a soft sunset. The diagonal placement is flattering because it pulls the eye across the nail instead of making it look wide. It also works when you’re tired of tiny art — the color shape does the work.
Editor's noteFor sharper edges, wipe your brush on a lint-free wipe so the gel doesn’t flood.
Start with a nude sheer base gel, two thin coats if needed. Use a flat brush to paint a terracotta swipe that covers about half the nail width, starting near one sidewall and ending toward the center tip area. Keep the swipe edge clean — I do it by placing the brush at the start point and dragging in one steady motion, then touching up with a smaller brush. Cure, then apply glossy top coat. Clean up around the cuticle with a cotton swab dipped in cleanser before curing.
Watch outAvoid painting the swipe all the way to the cuticle — it makes short nails look grown-out.
4. Smoky Olive Tips with Clear Negative Stripe
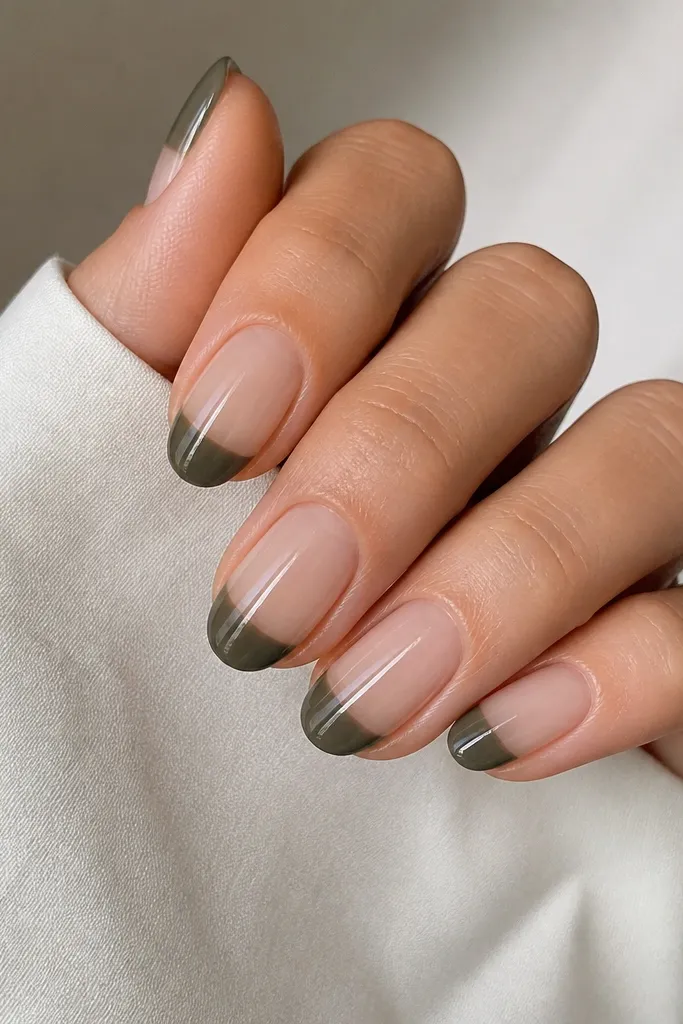
Smoky olive feels very fall to me because it looks like dried leaves and worn leather, not bright green. The clear center stripe keeps it modern and prevents it from looking like a full dark manicure. This design looks especially good on hands with longer nail beds because the stripe draws the eye downward. It also looks great if your skin tone is darker, since olive can sometimes blend — the nude base and stripe handle that. The clear stripe makes it feel “designed,” but you still get that simple vibe.
Editor's noteUse nail tape that’s made for gel (low tack). Regular masking tape can pull gel off when you remove it.
Apply a sheer nude base and cure. Paint the tip area with smoky olive, leaving the center strip clear — you can use a small strip of nail tape down the middle during cure to keep it exact. Remove tape carefully before top coat so you don’t smear the gel. Then apply glossy top coat and cap the tip edges with a thin pass. If the stripe looks cloudy, add one more thin top coat and cure.
Watch outDon’t skip curing the olive fully — soft olive gel can smear when you remove tape.
5. Chestnut Chrome Streak on Nude
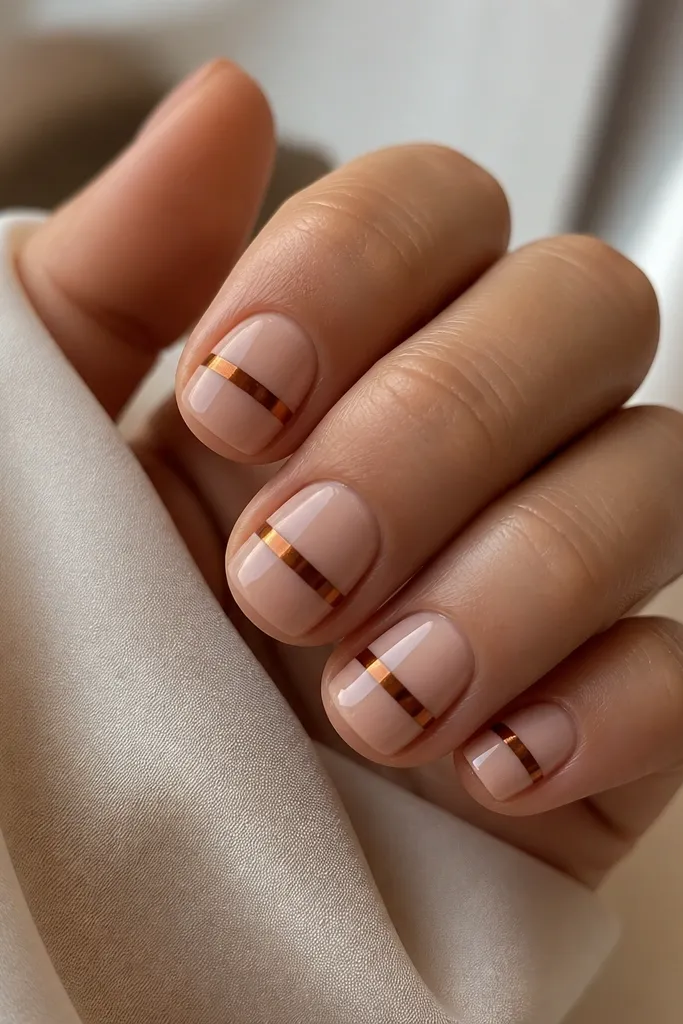
A chestnut chrome streak gives you instant “fall special” without adding much time. The nude blush base makes the chrome look smoother and more expensive, and the thin band stays flattering on short nails. I’ve worn this on both pale and deeper skin tones; the key is choosing a chrome that leans brown rather than red so it doesn’t turn harsh. The stripe placement across the middle looks balanced, and it doesn’t crowd the cuticle area. It’s also easy to repeat — once you get the placement, every nail matches.
Editor's noteIf your chrome looks patchy, press the powder in with a dry applicator before sealing.
Apply a nude blush gel base and cure, then add one more thin coat for an even tone. Use a striping brush to paint a thin line of chestnut-brown chrome gel in the center of the nail. Tap chrome powder lightly onto the line using a firm eyeshadow applicator, then gently brush away excess. Seal with glossy top coat, and cap the edges of the stripe so it doesn’t snag.
Watch outDon’t apply chrome over a thick gel line — it can look raised on short nails.
6. Classic Fall French in Cocoa Brown
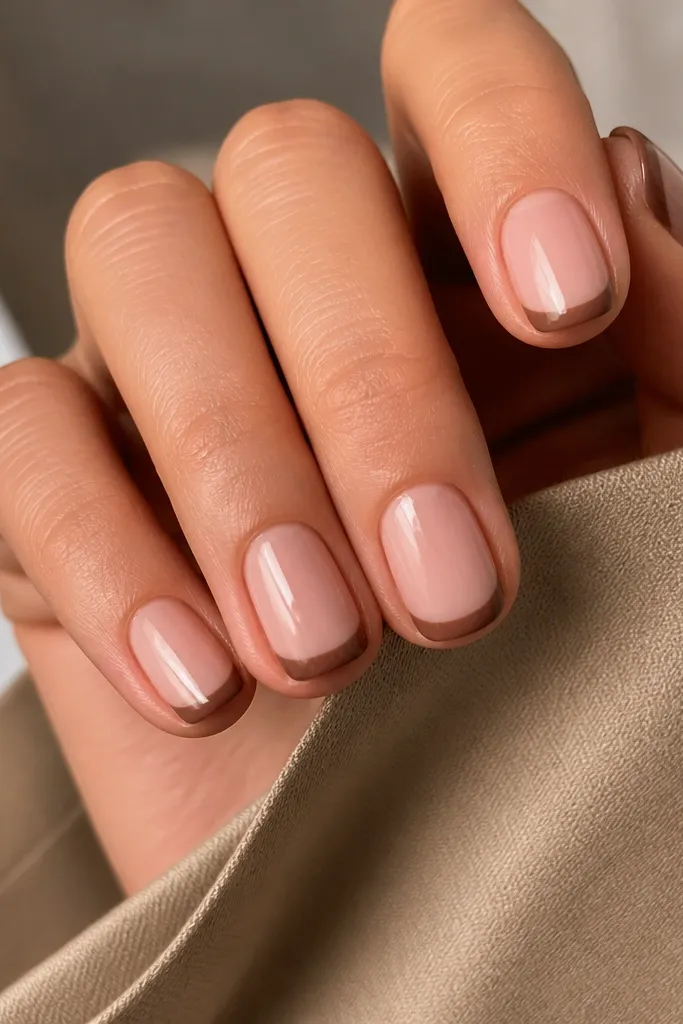
This is the one I recommend when you want your manicure to look “done” without tiny details. Cocoa brown French tips look autumn because the shade is warm and slightly deep, not blackened. On short nails, medium-width French makes the nail look intentional and neat rather than undersized. I’ve seen it work across skin tones because the nude base can be adjusted: go warmer nude for cool undertones and slightly pinker nude for warm undertones. It also hides minor growth because the tip area is where the eye expects color.
Editor's noteUse a slightly smaller guide size than you think for short nails so the tip doesn’t swallow the nail.
Start with a nude base that matches your skin — I like a sheer pink-beige for most people. Cure, then place French tip guides if you need help keeping the curve. Paint cocoa brown gel on the tip, covering about 1/3 of the nail length. Cure and remove guides carefully, then apply glossy top coat. Finish by wiping the sides with a gel brush to keep the edges crisp.
Watch outDon’t bring the French line too far onto the nail — it shortens the look.
7. Maple Leaf Cuticle Dot Cluster
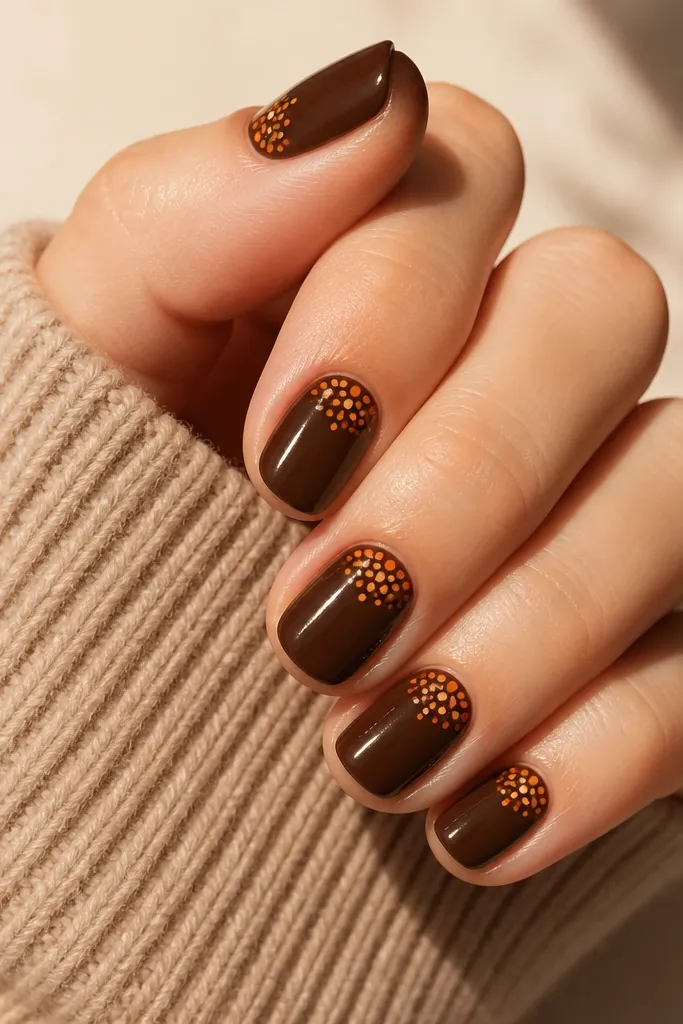
Dot clusters at the cuticle make short nails feel “seasonal” without drawing whole leaves. The caramel brown base anchors the look, and the amber and light orange dots create the maple-leaf impression through color, not lines. This flatters hands because the action is near the cuticle where your eye already rests. If you have shorter nail beds, this placement helps because it doesn’t shrink the nail visually. I like it for fall events because it looks thoughtful up close.
Editor's noteIf the dots look too round and cartoony, gently drag each dot 1 mm with a toothpick tip to suggest leaf shape.
Paint a caramel brown gel base and cure. With a dotting tool, add 5-7 dots near the cuticle in a loose leaf pattern: one bigger amber dot at the center, then smaller orange dots radiating around it. Add a tiny highlight dot in pale gold to mimic leaf shine. Cure fully, then seal with glossy top coat. Keep the dots small enough that they don’t touch the sidewalls.
Watch outAvoid big leaf outlines — on short nails they look messy fast.
8. Mocha Marble Accent on Two Nails
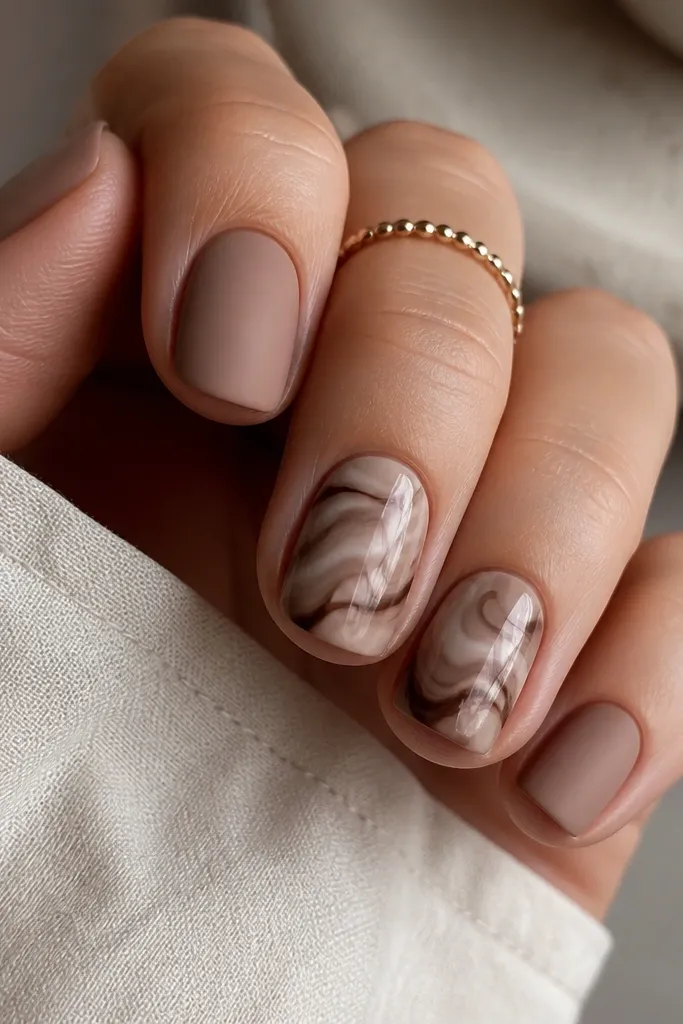
Marble can get busy, so I only do it on two nails when they’re short. The matte mocha nude on the rest makes the marble look intentional and expensive. The swirls are taupe and dark brown, which read autumn instead of gray. This design looks great on hands that need length — the marble lines stay soft and don’t break the nail silhouette. It’s also perfect for fall parties because it looks like you tried harder than you did.
Editor's noteDo marble on one nail twice? Skip it. One clean marble pass looks better than repeated swirls.
Paint all nails with a matte mocha nude base and cure, then top coat with matte. Pick two nails and add a glossy nude base first. For marble, use a thin brush to drag taupe gel and dark brown gel through the wet layer — do it with light pressure so the lines stay wispy. Cure, then top coat those two nails with glossy only. Clean the cuticle line with a small brush dipped in cleanser.
Watch outDon’t marble every nail — it turns short nails into a full pattern instead of a focal point.
9. Leopard Spot French Tips in Tan and Espresso
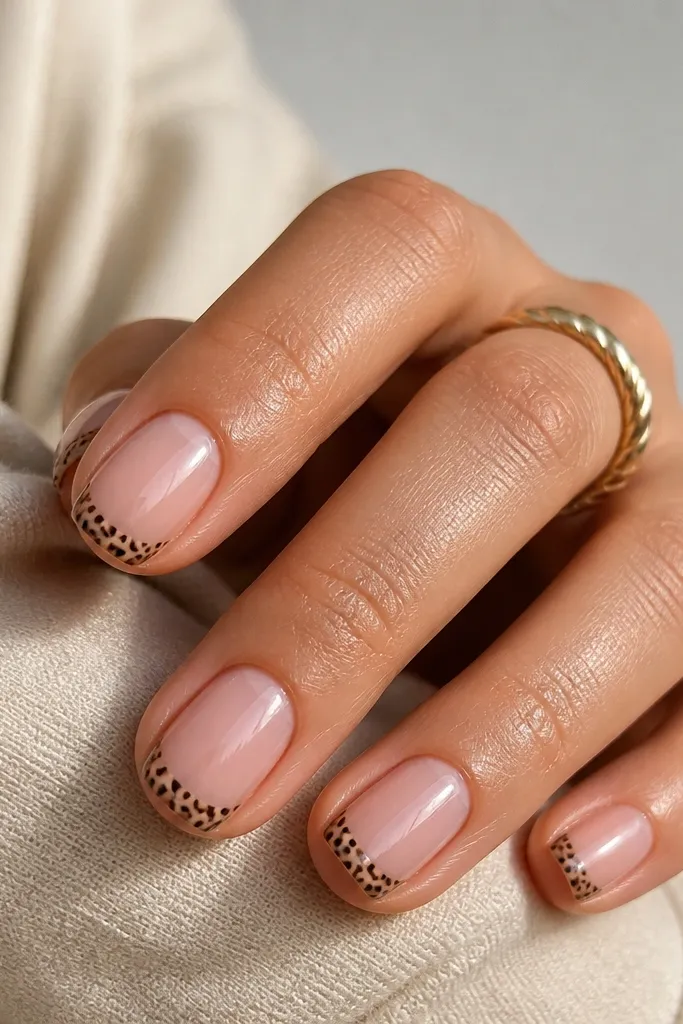
Leopard tips feel so fall to me when the colors are tan and espresso, not neon or bright orange. This keeps the vibe animal and warm without looking like a Halloween costume. The spots are clustered near the tip line, so short nails still look clean and wearable. I’ve done this on nails with slightly uneven shape and it still looks good because the pattern sits at the tip where small asymmetry hides. It’s also a solid “autumn weekend” option when you want attention without long length.
Use a nude base and cure. Paint a thin French tip area in tan gel, covering about 1/4 of the nail length. With a dotting tool, add small espresso spots inside the tan tip, leaving some tan showing between spots. Lightly outline a few spots with the same espresso color using a liner brush so it looks like leopard fur, not blobs. Cure and finish with glossy top coat.
Keep spots irregular — perfect circles look fake on leopard patterns.
Don’t fill the tip completely with spots. Leave tan gaps for the leopard look.
10. Burnt Sienna Side Stripe on Clear Pink
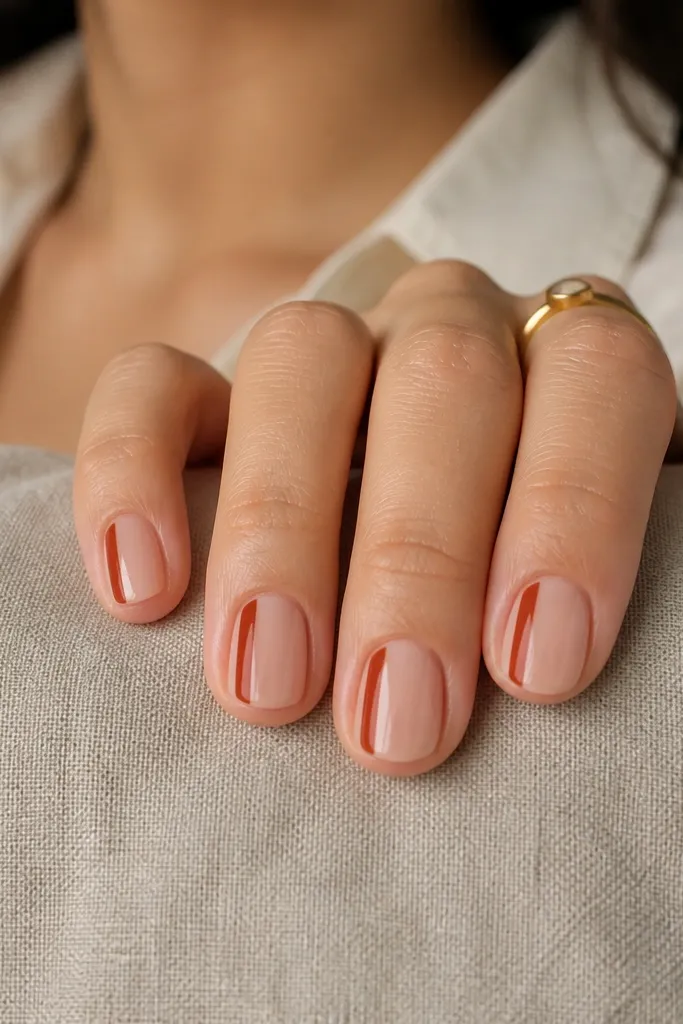
A side stripe is a sneaky lengthener for short nails, and burnt sienna is the perfect fall orange-brown. The clear pink base keeps it airy, so the stripe looks like a design line rather than a heavy color block. On fair skin it looks warm and soft; on deeper skin it creates contrast without going too dark. This also works when your cuticles are a bit uneven because the stripe draws attention away from the base line. It’s simple enough for beginners but still looks like you planned it.
Apply a clear pink jelly base and cure. Use a striping brush to paint a vertical burnt sienna line on one side of the nail — keep it about 1 mm wide. Start the stripe 1-2 mm below the cuticle so it doesn’t flood the cuticle edge. Cure, then apply glossy top coat, making sure the stripe feels smooth by capping over it lightly.
If your stripe wobbles, don’t try to fix it mid-nail. Cure, then redraw over the stripe with a thin pass.
Avoid thick stripes — they make short nails look stubby.
11. Forest Green Matte with Tiny Gold Leaf Corners
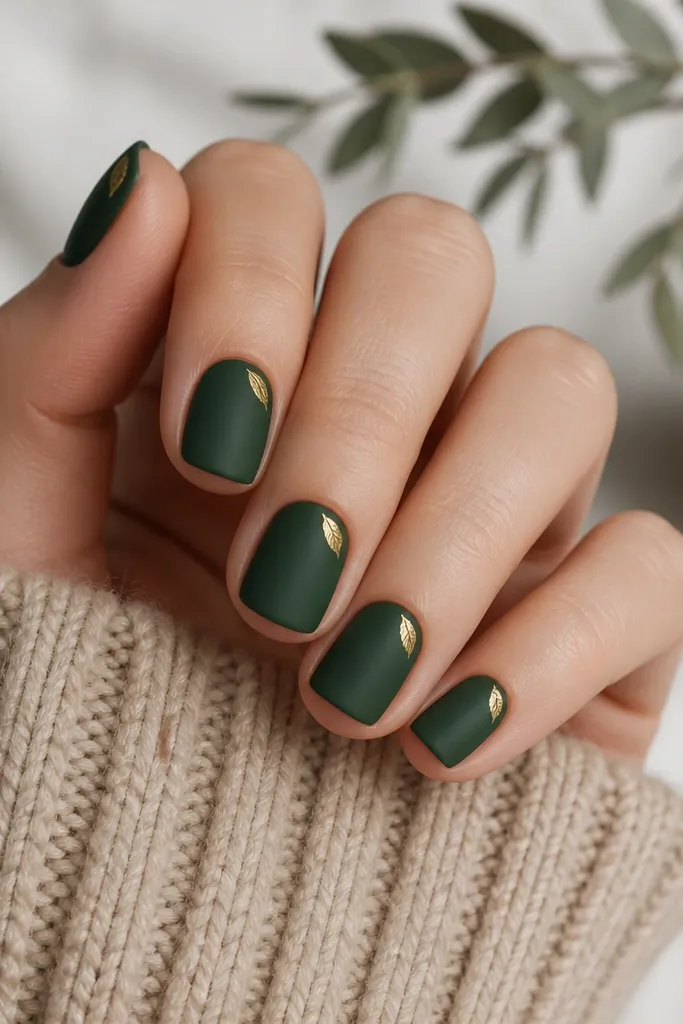
Matte forest green reads like a sweater or a pine branch, and the tiny gold leaf corner adds that fall “glint” without taking over. I love gold foil pieces here because they look organic and imperfect, which suits fall. This design flatters hands because it stays at the corner and doesn’t spread across the center of the nail. If you have shorter nails, the corner placement makes them look more structured. It also looks great for holiday dinners because matte green feels festive without being red.
Editor's noteCut gold leaf into smaller scraps with clean scissors so the corners stay delicate.
Apply forest green gel and cure. Top coat with matte top coat and cure fully. Use gold foil adhesive or a small amount of gel glue at the outer top corner of each nail, then press tiny gold leaf pieces into the adhesive. Cure again, then add one thin glossy top coat only over the gold leaf so it won’t look dull against the matte background. Keep the gold pieces small — about the size of a grain of rice.
Watch outDon’t cover the whole nail in foil. Corner placement is the trick.
12. Chocolate Brown Glaze with Micro Glitter Fade
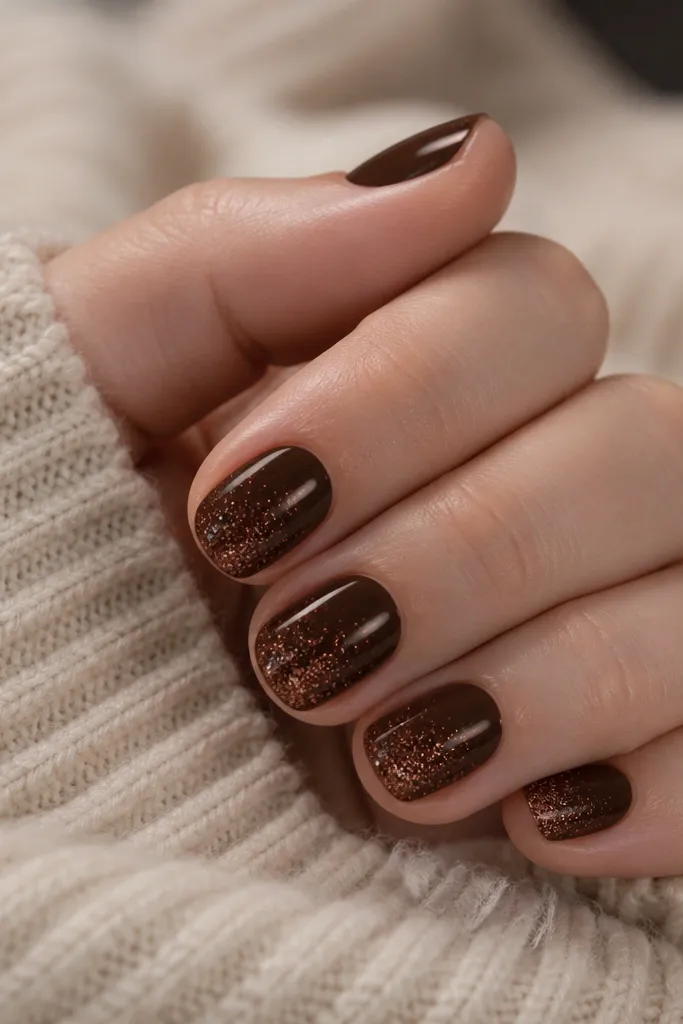
A chocolate glaze is the fall neutral that looks expensive in real life. The micro glitter fade adds sparkle right where light hits your fingertips — especially when you type or hold a coffee. Keeping glitter only on the tip prevents the nail from looking like it’s wearing away. On all skin tones, chocolate brown creates a flattering contrast, and the fade gives dimension without extra art. It also pairs well with gold rings and a warm-toned outfit.
Editor's noteFeather with a dry brush after the glitter goes on. It removes harsh lines fast.
Apply two coats of chocolate brown gel, curing each. For the glitter fade, load a small amount of fine micro glitter gel onto a fluffy brush and tap it at the tip, then softly feather upward toward mid-nail. Don’t bring glitter past mid — short nails look best when the cuticle stays clean. Cure and seal with glossy top coat, then cap the tip edge so glitter doesn’t lift.
Watch outAvoid chunky glitter. It catches and makes short nails feel rough.
13. Caramel French with Clear Outline
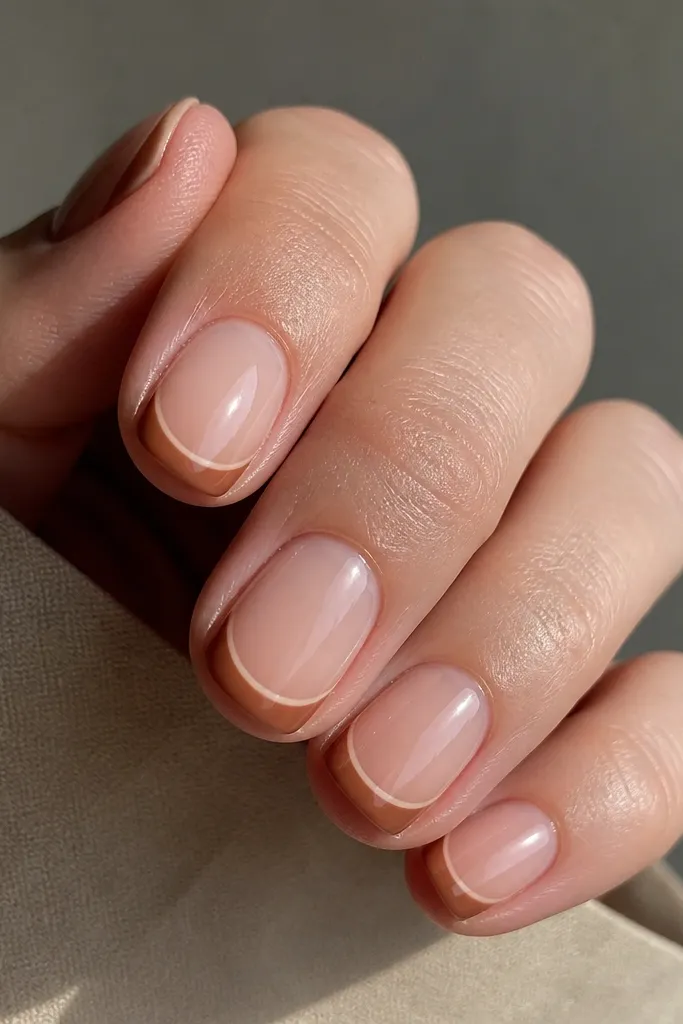
This look makes caramel feel graphic instead of plain. The clear outline acts like a border, so the French curve stays crisp even on short length. I like it on people who want color but don’t want heavy coverage over the nail bed. It also looks great with warm skin tones because the caramel matches your undertone — and the clear outline keeps it from turning too flat. If your nails are slightly stained or uneven, the negative outline visually cleans the shape.
Editor's noteUse striping tape to create the outline instead of trying to paint the clear space by hand.
Start with a nude sheer base and cure. Paint a caramel French tip, covering about 1/4 of the nail. While the caramel is still slightly tacky, place thin nail striping tape along the inner edge of the French curve to create the clear outline, then cure. Remove tape after curing so the outline stays negative space. Top coat gloss and clean up the sides with a detail brush.
Watch outDon’t let caramel bleed into the outline. Clean tape removal matters.
14. Spiced Teal with Copper Dot Trail
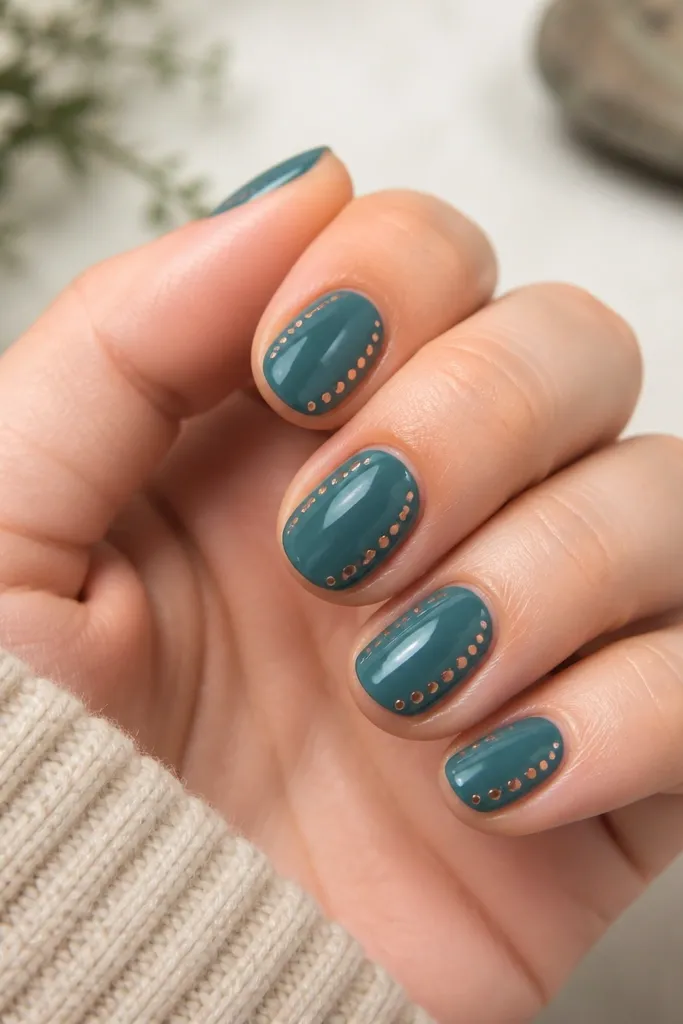
Spiced teal is one of my favorite fall colors because it reads autumn and still feels different from the usual reds and browns. The copper dots add a warm metal contrast that looks like autumn hardware. This design is flattering because the dot trail is vertical and slightly diagonal, which guides the eye toward the tip. It also looks good on both short square and short oval shapes because the trail can follow the nail’s natural curve. Wear it with denim, camel coats, and gold jewelry — it matches everything.
Editor's noteCopper gel paint darkens after curing. Do a quick test on a spare nail tip first if you’re unsure.
Apply spiced teal gel as a full base and cure. Use a dotting tool to place 4-5 copper dots starting near the cuticle side and curving gently toward the tip. Keep the dots small and spaced so there’s negative space between them. Cure again, then apply glossy top coat over everything. If the dots feel raised, add a thin top coat layer and cure to smooth them.
Watch outDon’t crowd the dots near the cuticle — it looks heavy on short nails.
15. Nude Nude Base with Espresso Micro-Grid
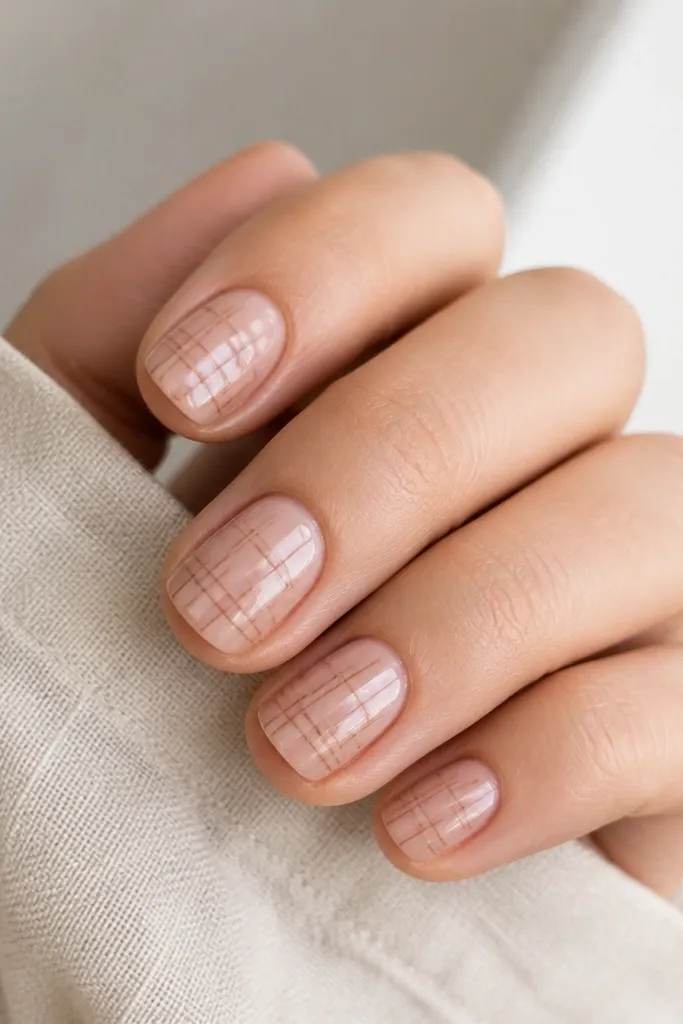
A micro-grid is one of those designs that looks simple from far away and detailed up close. On short nails, you want the grid scale small — think “tiny window screen,” not big checkerboard squares. Espresso brown keeps it fall, and the sheer nude base makes it wearable for work. This is flattering on hands with shorter nail beds because the grid pattern stays centered and doesn’t widen the nail. I also like it for people who want something more modern than florals.
Editor's noteIf your lines look too dark, thin the espresso gel with a gel medium so it stays see-through.
Apply a sheer nude gel base and cure. With a liner brush, draw a grid by making 3-4 horizontal thin lines across the center area only. Then add 3-4 vertical thin lines that intersect, staying within the central third of the nail. Cure, then top coat gloss. Clean up any thick line edges with a small brush dipped in cleanser before curing.
Watch outAvoid full-nail grids. They look busy on short nails.
16. Sienna Swirl Corner on Clear Pink
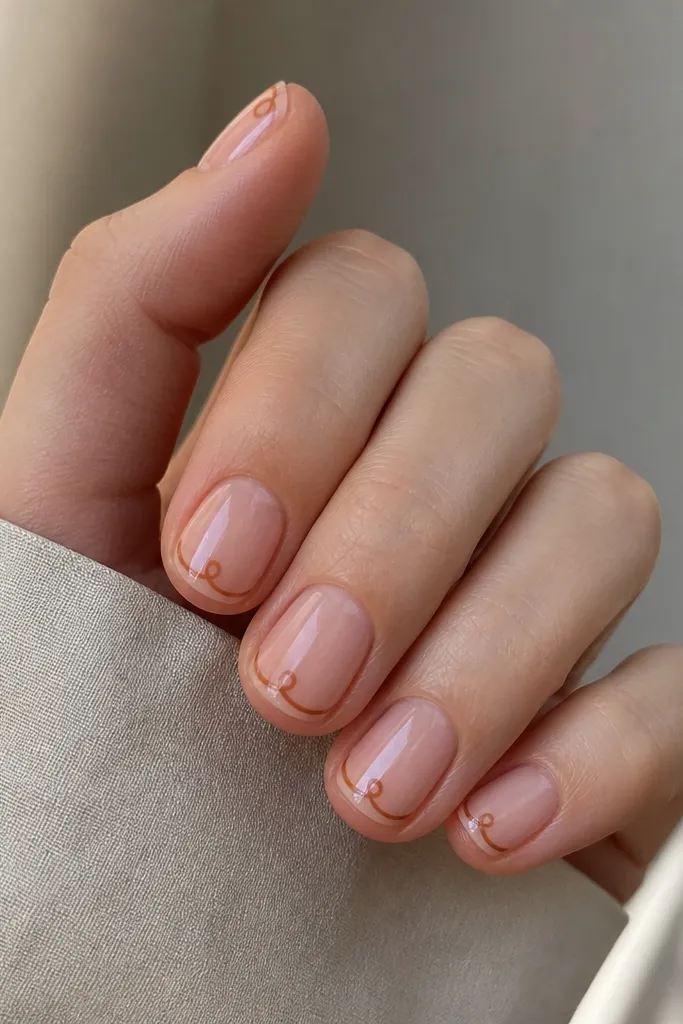
Corner swirls are my go-to when I want art that doesn’t take over the nail shape. The clear pink base makes the sienna swirl look delicate, and the swirl loop is small enough to stay classy on short nails. This design works well on almond short and short oval because the corner naturally frames the swirl. I’ve worn it on both light and deep skin tones; it always looks “intentional” because the color is warm and placed where your eye expects detail. It also feels more modern than a full accent nail.
Editor's notePractice the swirl shape on one nail first. Once you nail the curve, repeat it exactly across the rest.
Apply clear pink gel base and cure. Use a fine liner brush to draw a single sienna swirl in the outer top corner near the free edge, about 2-3 mm long. Keep the swirl to one loop so it doesn’t turn into a scribble. Cure, then add glossy top coat and cap the free edge carefully so the swirl stays smooth.
Watch outAvoid double swirls. Two loops look cluttered on short nails.
17. Velvet Taupe with Rose Brown Cuticle Arc
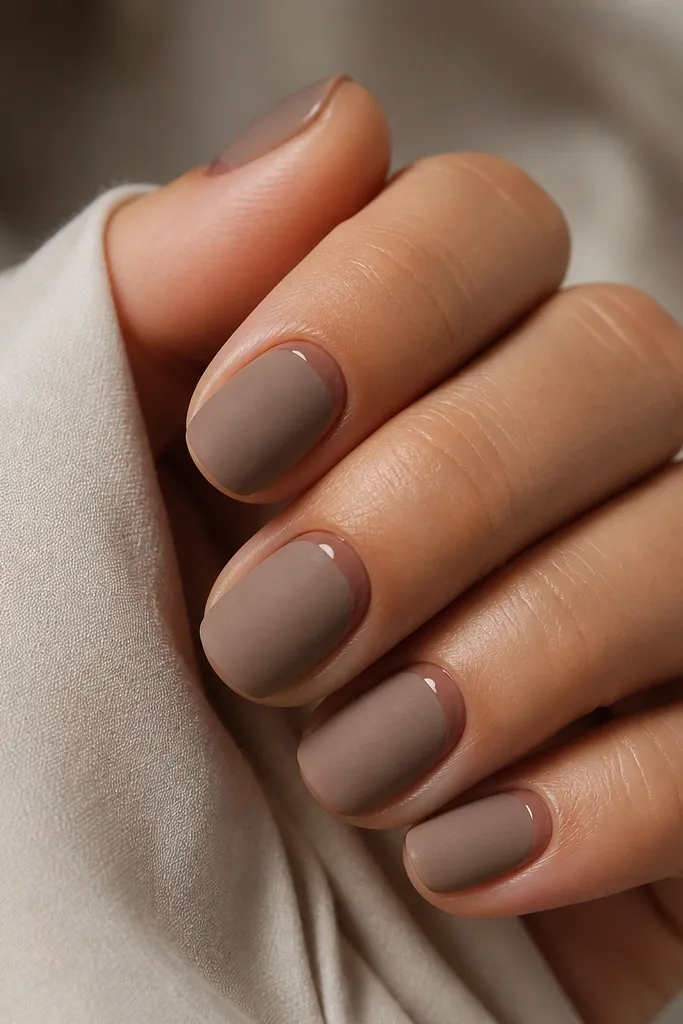
Velvet taupe feels like fall without screaming fall colors. The rose-brown cuticle arc adds a soft frame, and it makes the manicure look neat even if your cuticles need a little grace. This works especially well on medium to deep skin tones because taupe can look flat — the rose arc gives it warmth and shape. On fair skin, it looks cozy and understated. The matte velvet texture also hides tiny surface imperfections, which is a lifesaver when you do gel at home.
Apply velvet taupe gel and cure, then top with matte or use a velvet effect top coat if you have it. With a liner brush, paint a thin rose-brown arc right along the cuticle curve, leaving a tiny gap at each side so it doesn’t flood. Cure and keep the arc super thin so it doesn’t thicken the nail. Finish with one more matte top coat to blend the arc into the velvet texture. Clean the edges on the sides before curing.
Use a thin liner brush and wipe off excess gel before touching the cuticle line.
Avoid thick cuticle arcs. They look like a band on short nails.
18. Blackened Brown Micro Studs on One Accent Nail
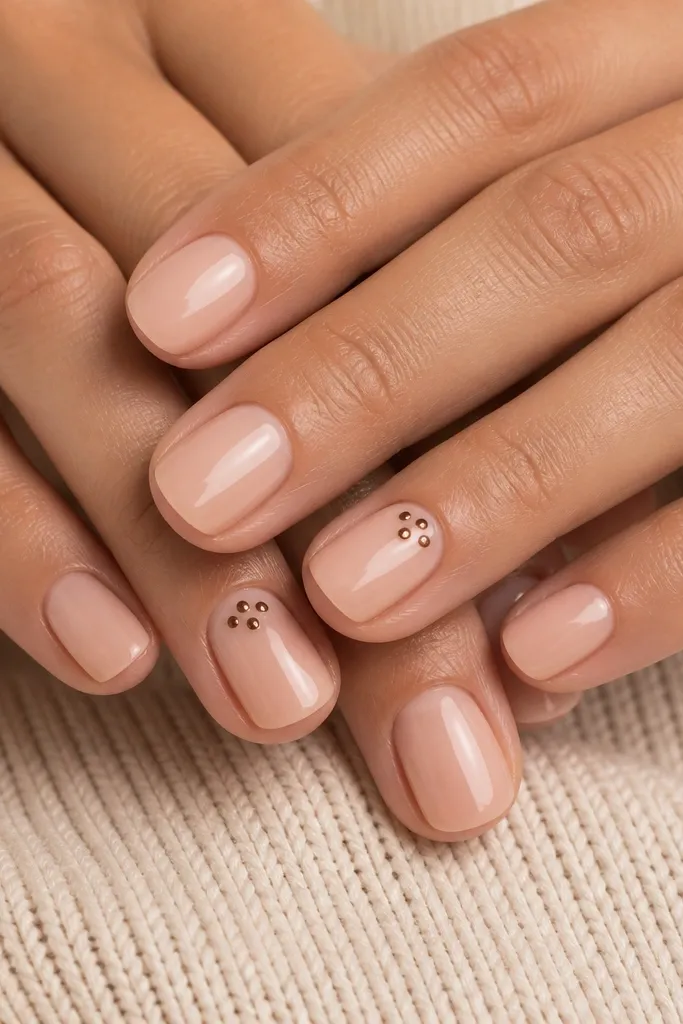
If you want fall with a little edge, micro studs do it without forcing length. The blackened brown tone reads smoky and autumn when paired with a nude base. Keeping studs on one accent nail keeps it classy and wearable — especially when you’re dealing with short nails that can catch. I’ve done this for office days and it still looks polished because the studs are tiny and positioned near the cuticle. This design also flatters shorter nail beds since the studs don’t cover the full nail width.
Editor's noteLet the studs set for a full minute before curing so they don’t shift.
Paint all nails with a glossy nude base and cure. Choose one accent nail per hand and apply a thin layer of gel where you want studs, then cure just enough to make it tacky if your studs need a grip. Place three micro studs using tweezers in a small triangle near the cuticle, spacing them about 1 mm apart. Press lightly so they sit flush. Cure fully and seal with a thick-but-smooth top coat layer, then cap the edges.
Watch outAvoid putting studs on every nail. Short nails need breathing room.
19. Golden Olive Leaf Tips with Negative Space
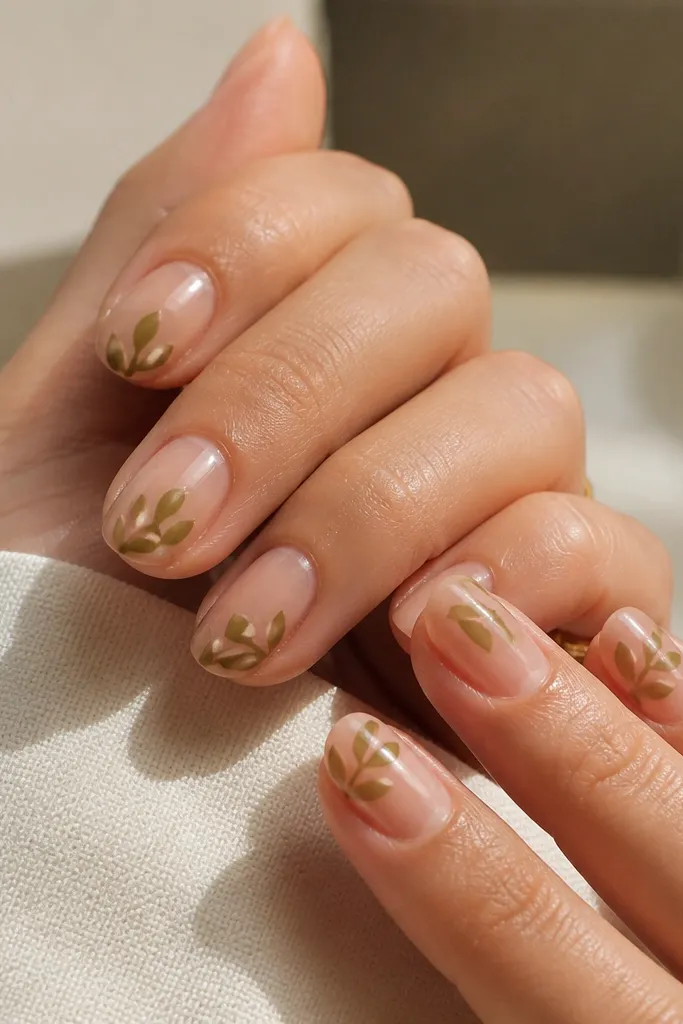
These leaf tips feel like fall foliage without drawing a full leaf on every nail. Golden olive is warm and muted, so it reads autumn instead of neon. The negative space between the leaf shapes keeps the design airy and makes short nails look lighter. This is one of the few “pattern” styles that still stays simple because the pattern lives only on the tip area. It also looks great on hands that prefer subtle texture over heavy glitter.
Editor's noteKeep the leaf shapes small enough that the tallest point stays within the top 1/4 of the nail.
Start with a nude base and cure. Paint small leaf tips using a thin brush: create teardrop leaf shapes along the outer edges of the tip, leaving gaps in the center. Use golden olive gel for the leaves, then add a tiny touch of pale gold to one side of each leaf for dimension. Cure, then apply glossy top coat and cap the tip edges. If the leaf edges feel sharp, add a slightly thicker top coat layer and cure to smooth them.
Watch outAvoid covering the whole tip with solid leaves — negative space is what makes it wearable.
20. Walnut Swirl Aura with Milky Nude and Espresso Center
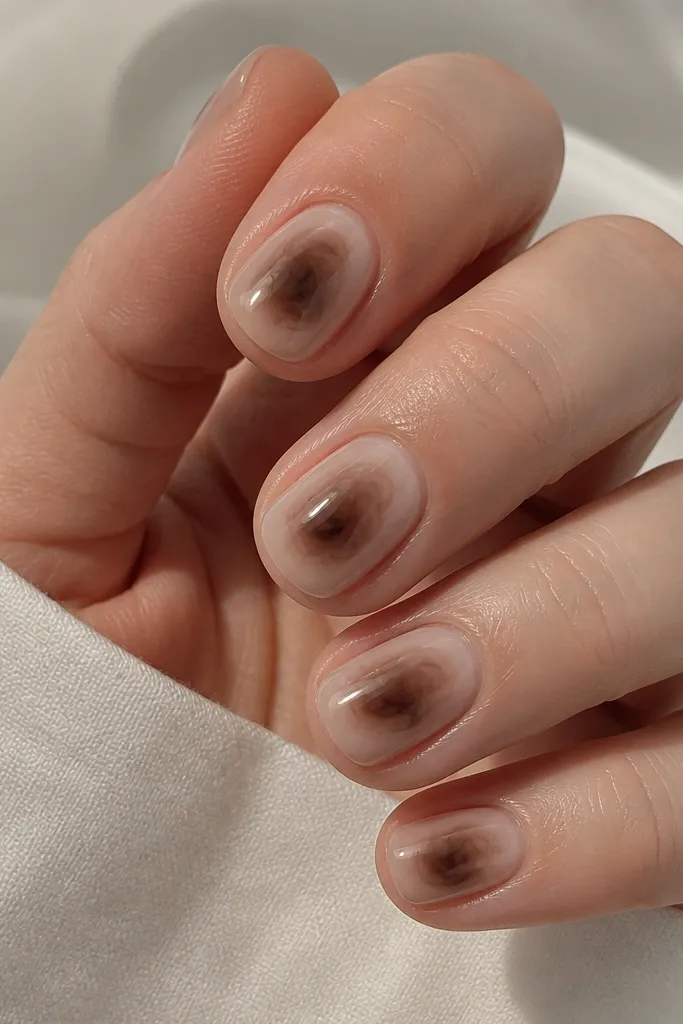
This look is fall without looking heavy because the base stays milky and light. The espresso swirl gives you that cozy walnut vibe, and the aura fade keeps it from feeling like a solid dark nail. I like it on short nails because the swirl can be scaled to fit the nail bed instead of overpowering it. It also photographs really well because the translucent edges catch light as you move your hand.
1) Push back cuticles, then buff the shine off the nail plate lightly. Cure a thin milky nude gel base (not opaque white) for 30-60 seconds depending on your lamp. 2) With a thin striping brush, place a small dot of espresso gel right near the center of the nail. Drag the gel in a loose spiral toward the sides, then use a clean dry brush to feather the edges so the swirl fades. 3) Cure, then repeat one more time only if the center needs to be darker. Finish with a glossy topcoat and cap the free edge so the swirl stays crisp.
Use espresso gel that’s slightly thick — it spreads less, so the swirl keeps a clean center instead of turning into a blob.
Don’t overwork the swirl after it starts to spread; once the edges go cloudy, stop and cure.