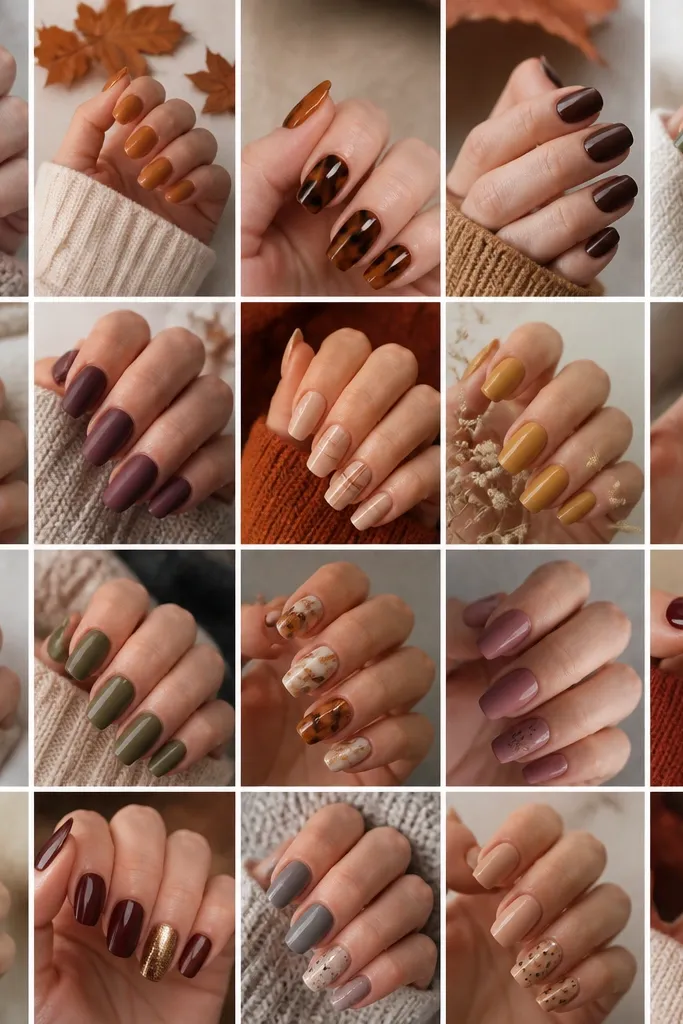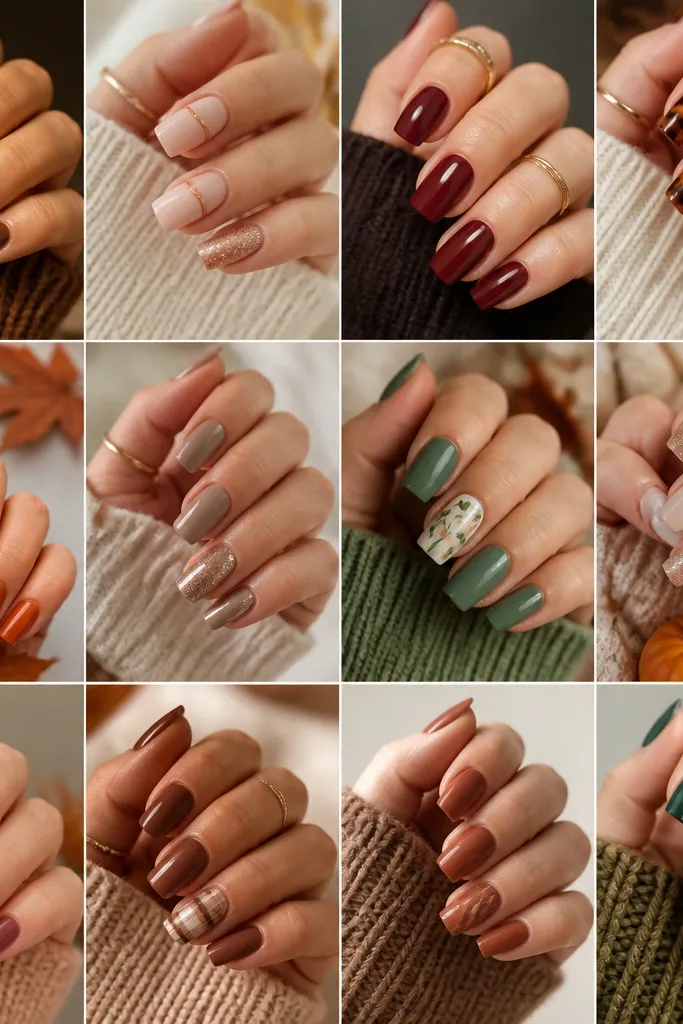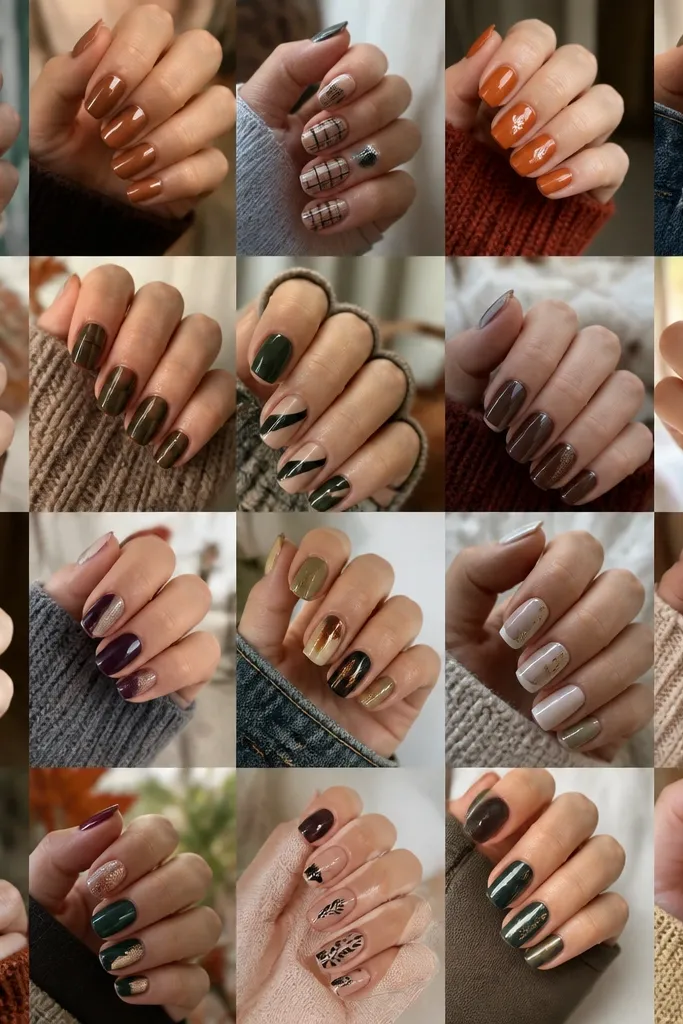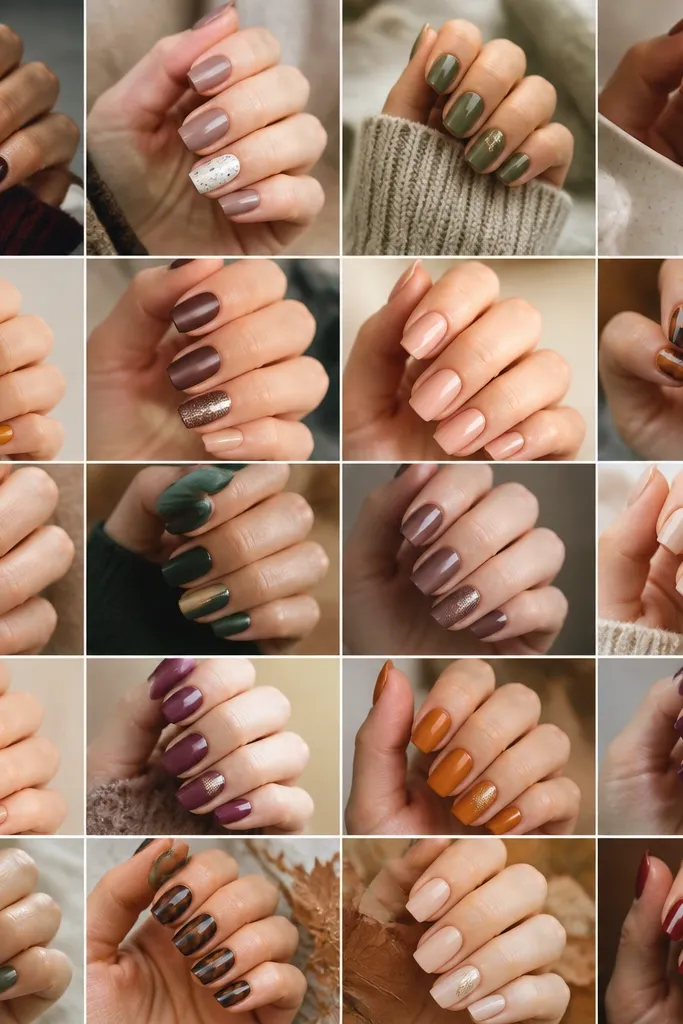
1. Caramel Swirl Accent on Nude
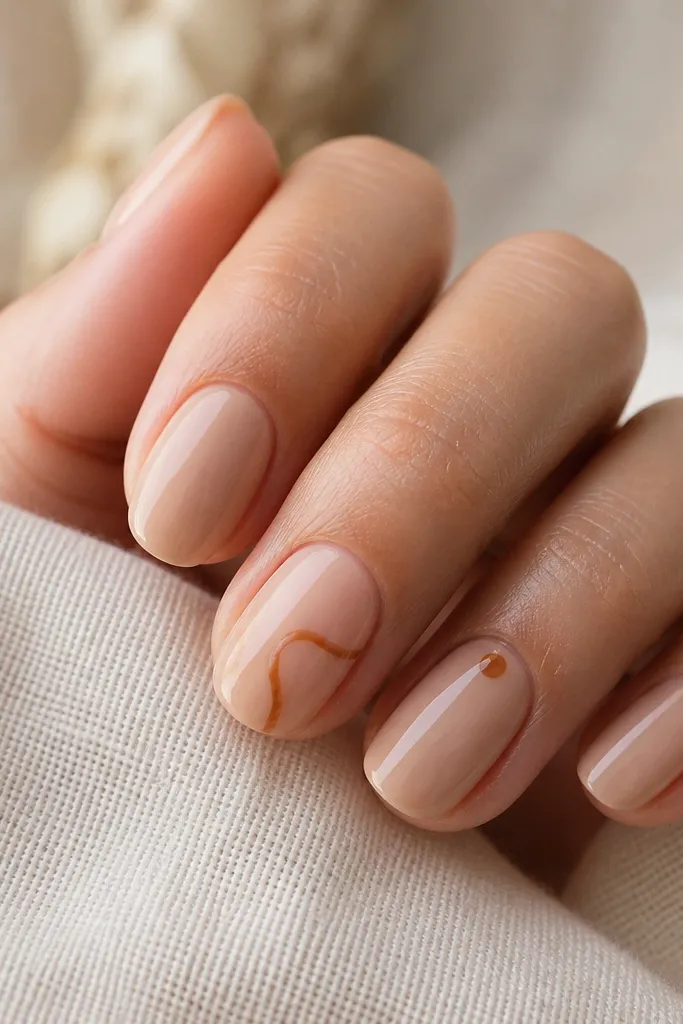
This set flatters almost everyone because the base is a warm nude that blends with natural nail color instead of fighting it. I like it on short to medium nails since the swirl stays airy and doesn’t crowd the nail bed. The caramel line looks cozy against beige and reads like fall without turning orange. Keep the swirl thin and slightly off-center — that asymmetry makes it look hand-done, not like a sticker.
Start by applying two thin coats of warm nude polish, then let it fully dry. Using a striping brush, paint a caramel-brown swirl on one accent nail, starting small near the cuticle and dragging the line thinner as it curves. Add one tiny dot in the same caramel shade near the base on a second nail if you want a little extra balance. Finish with a glossy top coat and cap the free edge so the swirl stays smooth.
Editor's noteIf your lines wobble, draw the swirl lightly first, then go back for one clean pass after it dries for 30-60 seconds.
Watch outDon’t thicken the swirl — chunky lines look like a stamp and lose the cozy, sweater-like vibe.
2. Rust Pumpkin Gradient with Sponge
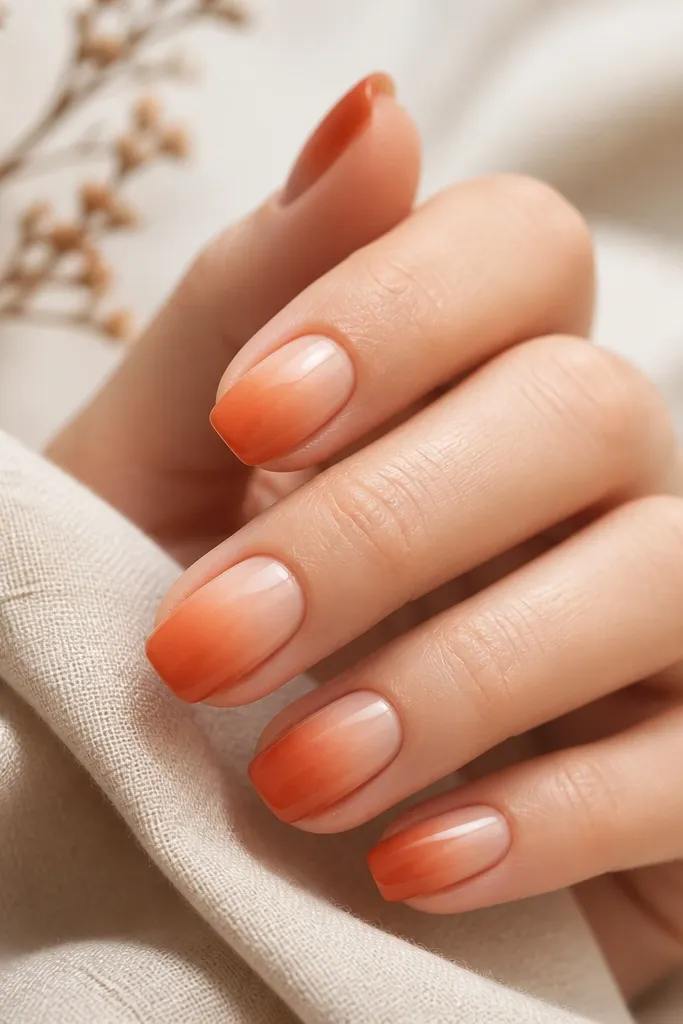
A sponge gradient is the easiest way to get that pumpkin patch feeling because it hides minor unevenness. This color combo flatters medium and deeper skin tones especially well — the peach starts bright and the rust adds warmth. On fair skin, it still looks natural because you start light, not neon. The key is keeping the darkest rust only at the very tips so the nails don’t look heavy.
Paint two coats of a pale peach base across all nails. Dab a small makeup sponge with burnt orange polish and press it lightly from mid-nail toward the tip, then blend once more with a lighter orange if the fade looks harsh. Finally, add a tiny amount of rust only at the extreme tips, using the edge of the sponge for control. Seal with glossy top coat, and make sure you cap the sides of the tips.
Editor's notePractice the sponge pressure on a paper towel first — light taps give the smooth fade you want.
Watch outDon’t overload the sponge; too much pigment makes the gradient look like a smear.
3. Chocolate Brown Half-Moon Tips
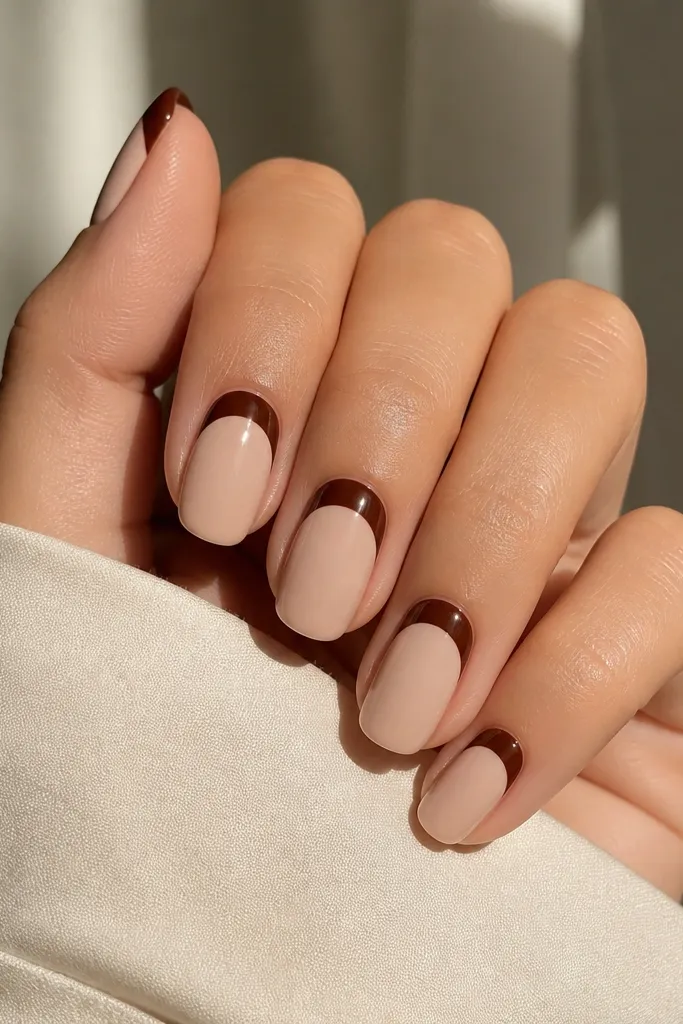
Half-moons look sharp and neat even when you’re working fast. The chocolate tip gives a cozy fall depth without turning the set into a full dark manicure. I’ve worn this on my own nails for work days, and it looks polished with both sweaters and office outfits. It also flatters shorter nails because the negative space makes your nail bed look longer.
Start with two coats of creamy nude. Cut small crescent pieces of tape and place them so they cover the tip area in a clean arc, leaving a curved nude line in the middle. Paint chocolate brown over the exposed tip, then remove tape while the polish is still slightly tacky so you get a crisp edge. Add one glossy top coat and run the brush along the free edge to lock it in.
Editor's noteUse thin striping tape, not thick masking tape, for the cleanest crescent curve.
Watch outDon’t wait for the polish to fully cure before removing tape — you’ll chip the edge.
4. Sage + Terracotta French Tips
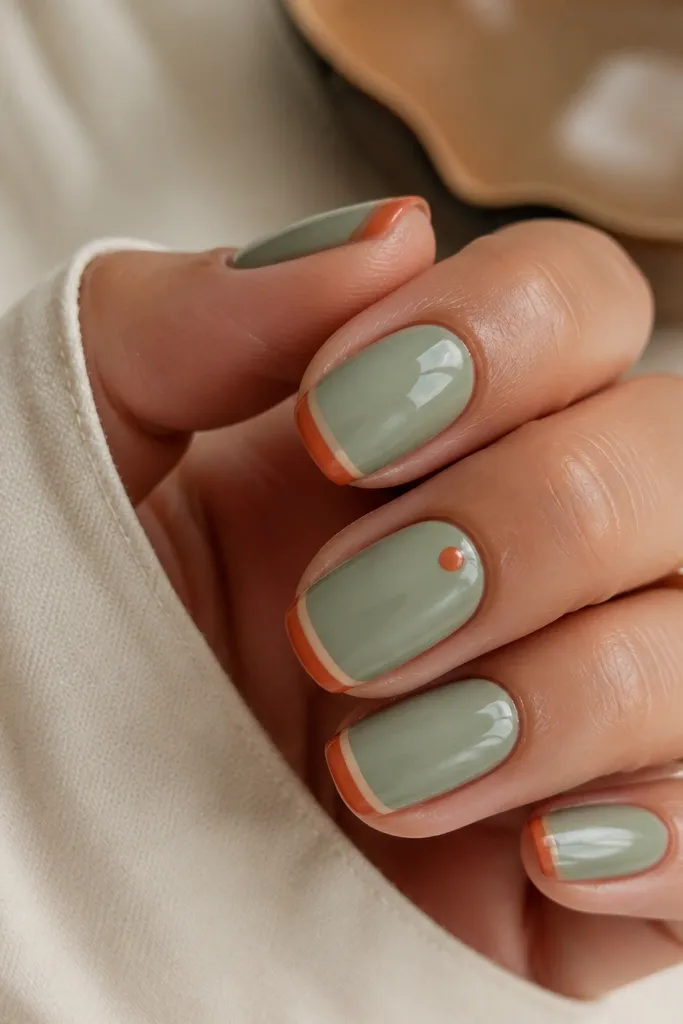
This combo looks like fall plants and clay pots, and it works on every skin undertone because sage is neutral-cool and terracotta is warm. I like it for beginners because French tips are simple shapes - you just need steady tape or a guide line. The split-tip detail adds interest without requiring tiny art. It’s also flattering on short nails since the tips keep the design high and clean.
Apply two coats of sage green and let it dry completely. Place a thin strip of tape just at the edge where you want the French tip — paint terracotta orange inside the tape area. For the split look, add a second micro-line of nude or pale cream on one side of the tip using a striping brush. Remove tape carefully, then finish with glossy top coat and cap the tip edge.
If tape makes you nervous, use a nail art guide sticker sheet and press it down firmly before painting.
Don’t make the French tip too thick; chunky tips can overpower the sage base.
5. Moody Plum Matte with One Glossy Stripe
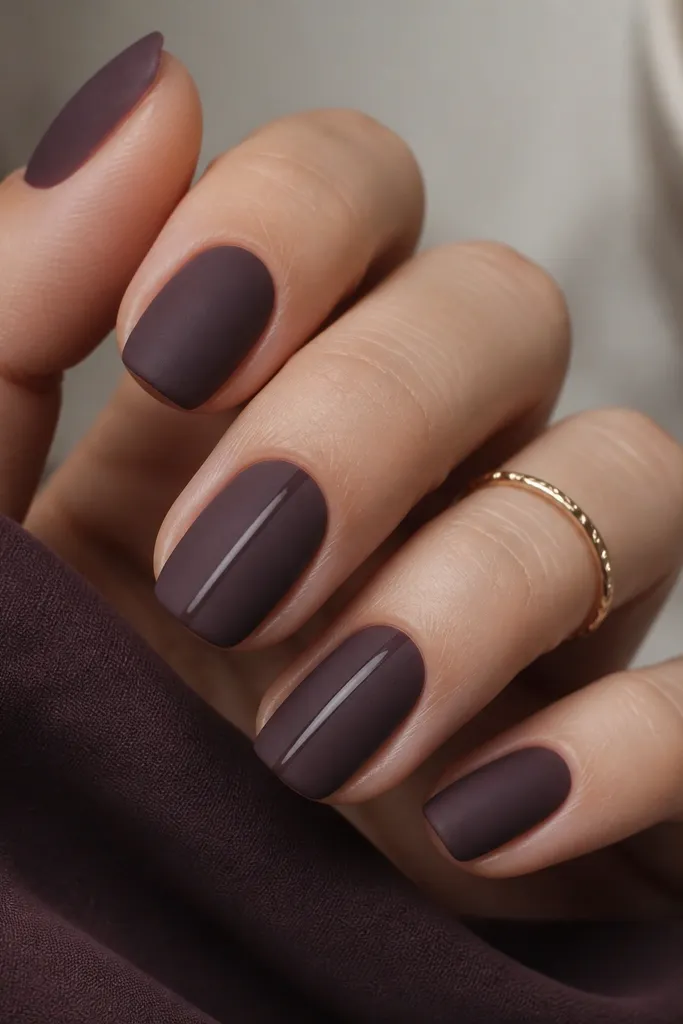
A matte plum set looks like a cozy cardigan because it absorbs light instead of reflecting it. The glossy stripe gives you contrast and makes the manicure look intentional, not flat. This is great for medium-length nails and also looks good on oval shapes because the stripe follows the natural curve. If you wear a lot of black or navy, this will blend and still look warm.
Paint two coats of plum polish on all nails. Let it dry, then apply matte top coat over every nail except the ones you want striped. On the striped nails, paint a thin vertical line with plum-shade glossy polish or a darker plum and keep it centered. Finish by sealing the stripe nail with glossy top coat only on the stripe and a matte top coat elsewhere.
Editor's noteUse a striping brush that’s longer than your nail — it helps you keep the line straight in one pull.
Watch outDon’t mix matte and glossy unevenly; if it smudges, the contrast looks sloppy.
6. Copper Foil Speckle Over Nude
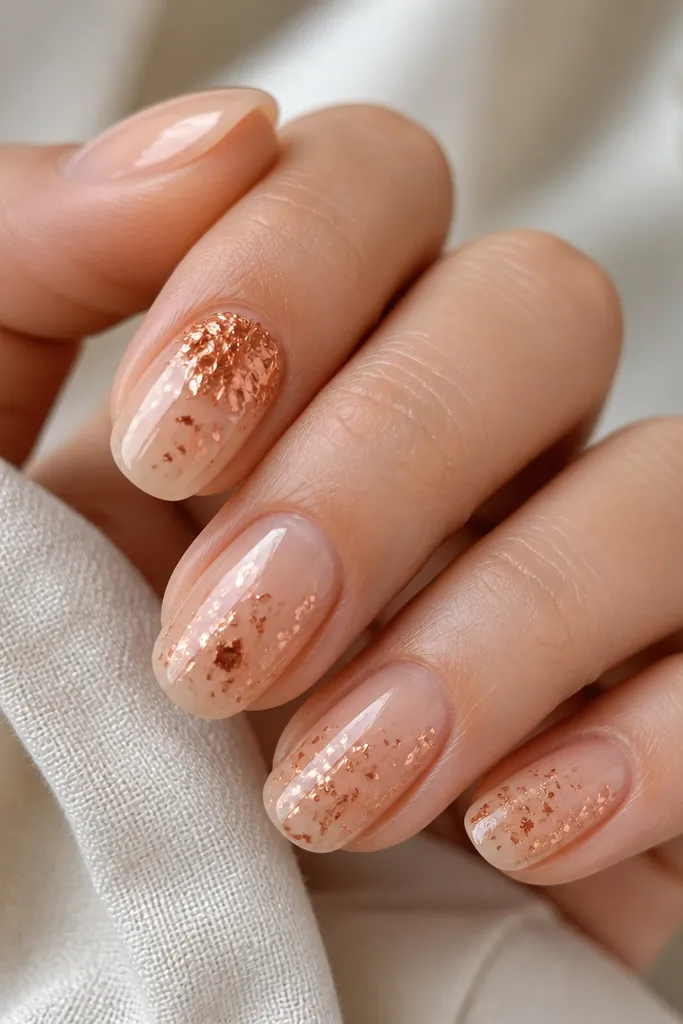
Copper speckles catch light like fall leaves in the sun. I like it on fair to deep skin tones because copper sits warm against nude without needing a lot of pigment. This works best on medium-short nails because the foil can look busy if you go too dense. The foil also makes your nails look more expensive without complicated art.
Start with two coats of nude polish, then add glossy top coat. Tear tiny pieces of copper foil and press them onto the nail with a fingertip or foil tool, focusing on the center and letting some pieces drift toward the edges. Seal with a layer of foil glue top coat or a thick top coat so the foil doesn’t lift. Finish with a final thin glossy coat for smoothness across the speckles.
Press foil in small clusters, not an even layer — clusters look like leaf fragments.
Don’t skip sealing — unsealed foil catches on fabric and lifts fast.
7. Blackened Olive Dots on Cream
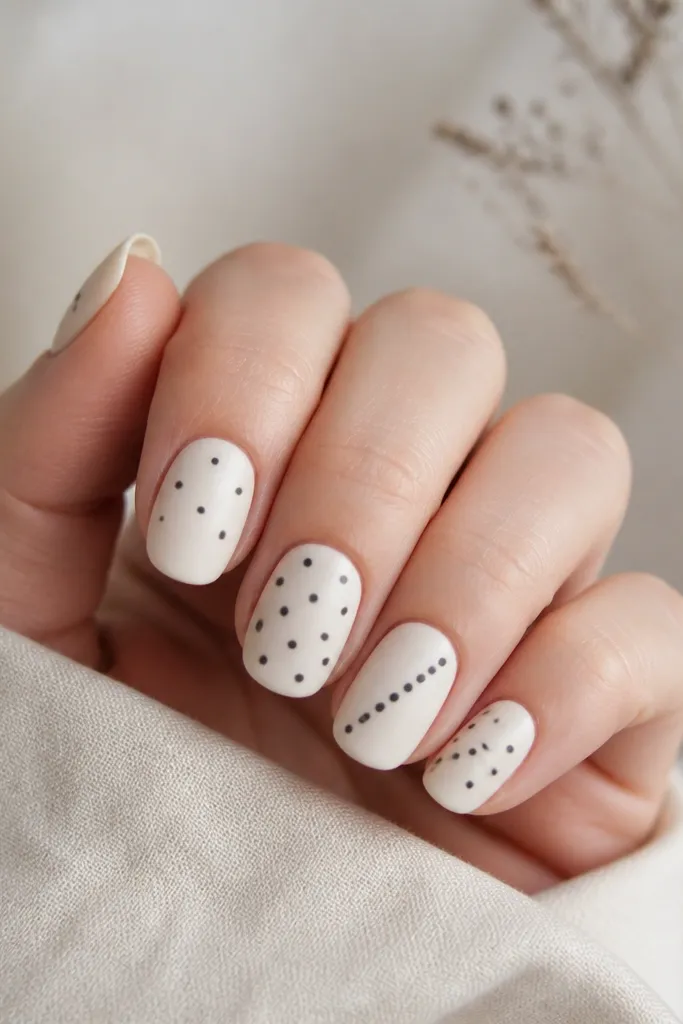
This set is understated fall. The cream base keeps it soft, and the blackened olive dots add that outdoorsy, forest vibe. It flatters hands that look dry because the cream hides texture better than bright nudes. On short nails, dot patterns make your nails look longer because the eye travels across small points.
Apply two coats of cream polish and let it dry. Add matte top coat to lock in the cozy look. Using a dotting tool, place tiny dots of blackened olive on two or three nails, leaving space between each dot. For the accent nail, create a diagonal line of dots from lower left to upper right, then seal with a matte top coat.
If you want cleaner dots, dip your dotting tool lightly — too much polish makes blobs.
Don’t put dots too close to the cuticle; it can make the nail look crowded.
8. Chocolate Lines with Nude Negative Space
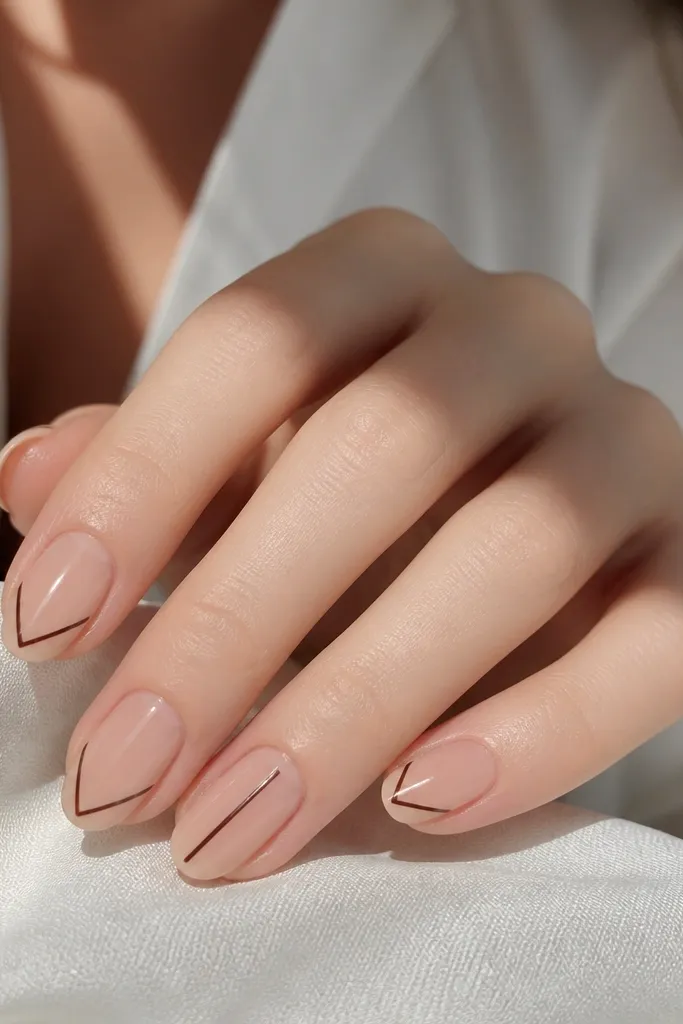
Thin lines look crisp and make your nails look designed even when you’re doing it with tape. Chocolate-brown lines are forgiving because they don’t show streaks like black can. I like this for beginners because you only need to place a few straight strokes. It also works for any nail shape, but oval and almond look especially clean.
Paint a nude base with two coats and glossy top coat. Cut narrow tape strips and place them diagonally to form a V or a single center line near the tip. Paint chocolate brown over the exposed areas, then remove tape immediately after painting. Add one more glossy top coat to smooth the edges and make the lines look like they’re under glass.
If your tape edge smears, clean it with a tiny brush dipped in acetone before you paint over it.
Don’t overlap lines too much; thick intersections look messy.
9. Burnt Orange Skittle with One Neutral Base
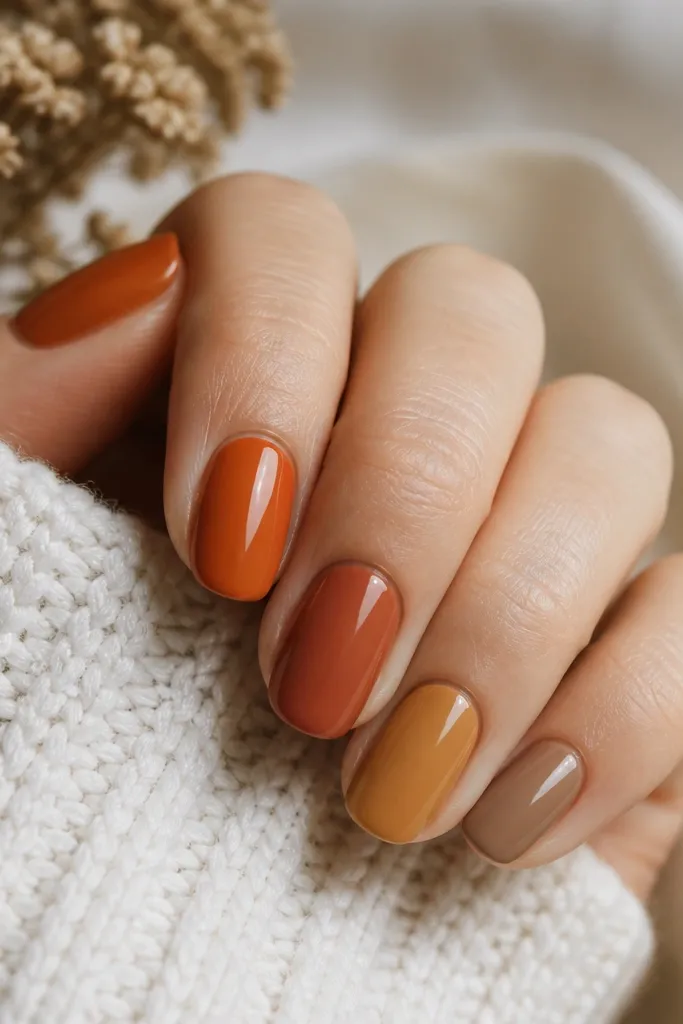
A skittle manicure feels fun without needing nail art skill. The trick is keeping the palette tight: use one family of warm fall colors so they look intentional together. This flatters most skin tones because the shades are warm and harmonize. I like it for people who get bored with one-color nails but don’t want detailed designs.
Choose four shades: burnt orange, terracotta, caramel brown, and a muted taupe. Paint each nail with a different shade in a planned order so the darkest isn’t always on the same finger. Use two thin coats per nail for even coverage, then glossy top coat across all nails. If you want it to look more polished, keep the ring finger as caramel and make the others skip around lighter to darker.
Editor's noteLet each coat dry longer than you think — it prevents color mixing on the nail edges.
Watch outDon’t pick random browns; gray-brown and warm-brown together can look muddy.
10. Gingerbread Nude with Tiny Gold Studs
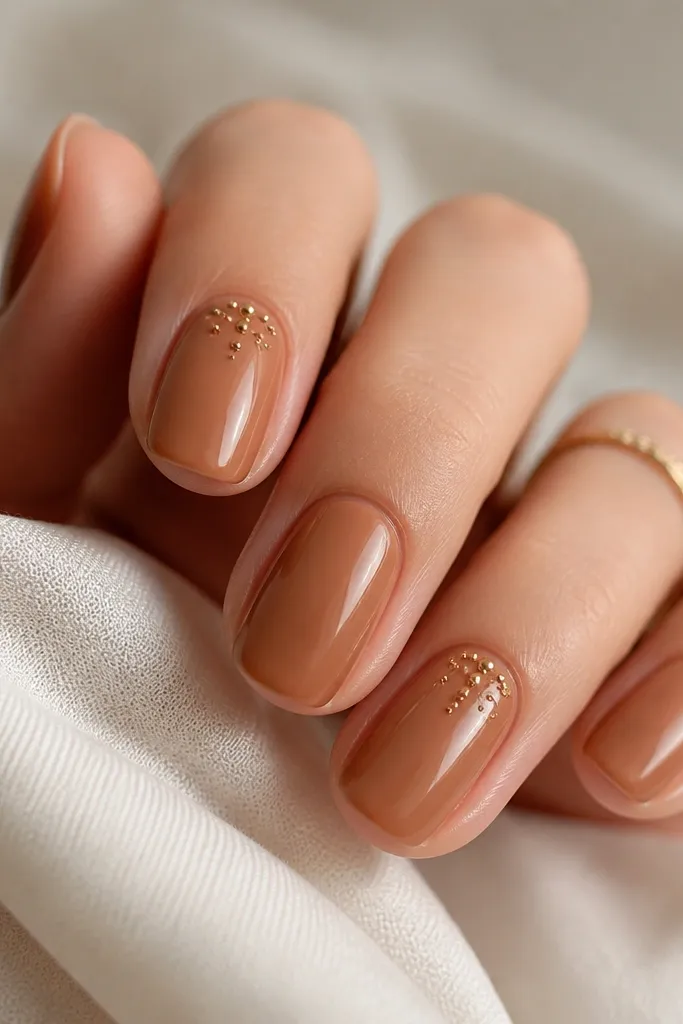
Gold studs make any nude feel festive without turning it into full-on glitter. The gingerbread nude shade looks like a warm cookie, and it suits fair to deep skin tones because it’s a balanced warm neutral. Studs also look great on short nails because they’re concentrated near the cuticle, which visually lengthens the rest of the nail. This is a good pick for beginners because you only place a few pieces.
Start with two coats of gingerbread nude and let it cure enough that it doesn’t dent. Dab a small amount of nail glue or sticky gel just near the cuticle on two accent nails. Place micro gold studs using tweezers and press gently so they sit flat. Seal with a thicker top coat layer over the studs, then finish with a thin glossy coat.
Editor's noteUse the smallest studs you can find — big studs look heavy on short nails.
Watch outDon’t drag top coat over studs too soon; it can smear them out of place.
11. Deep Teal with Pumpkin Orange Dot Corner
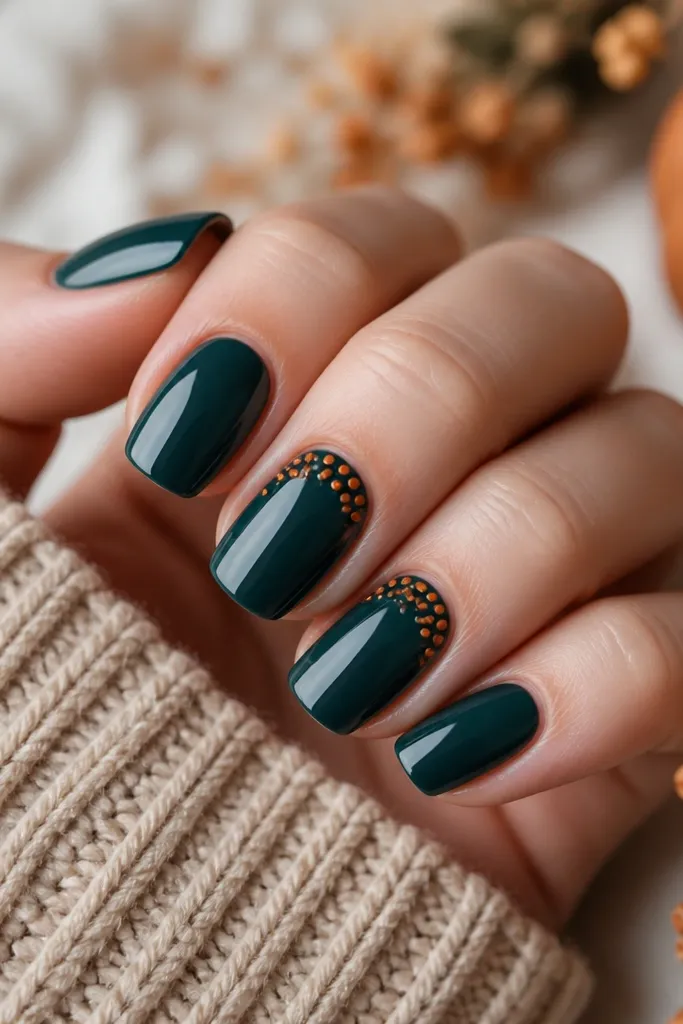
Teal plus pumpkin orange is a fall color combo that looks fresh instead of predictable. The deep base makes the orange pop, and the dot cluster keeps it simple for beginners. This set looks great on short almond or square nails because the dot corner adds a diagonal visual. It also works well with denim and olive jackets.
Apply two coats of deep teal to all nails. After it dries, pick one accent nail and place a small cluster of pumpkin orange dots near the cuticle corner — think 6-10 dots, not a full line. Use a dotting tool to vary dot size slightly for a natural look. Finish with glossy top coat and cap the free edge to prevent chipping.
Keep the dot cluster tight — a small cluster looks intentional and classy.
Don’t spread dots across the nail; scattered dots can look like a mistake.
12. Plum French with Thin Nude Inner Line
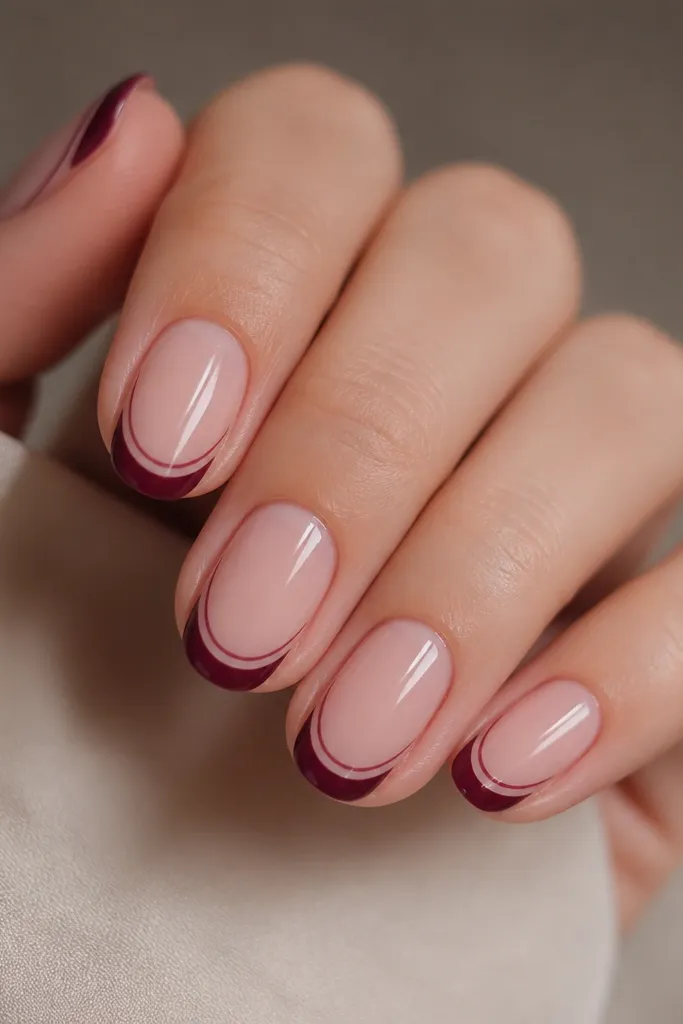
This is a French tip upgrade without adding complexity. The thin inner nude line makes the tips look sharper and more expensive, and it’s easier than trying to freehand tiny art. I recommend it for beginners because the shape is simple, and tape does most of the work. It flatters medium and long nails, but it also looks good on short nails if the tip is thin.
Paint a nude base with two coats and glossy top coat. Use tape to mark the French tip line and paint plum over the exposed tip area. For the inner line, apply a second thin tape strip slightly inside the first edge and paint over it with nude or leave it unpainted depending on your setup. Remove tapes carefully and seal with one more glossy top coat.
Do your tape placement first, then paint — rushing the tape step is where crooked lines happen.
Don’t make the tip too wide; wide French tips can look like you covered the whole nail.
13. Taupe Marble with Tape Breaks
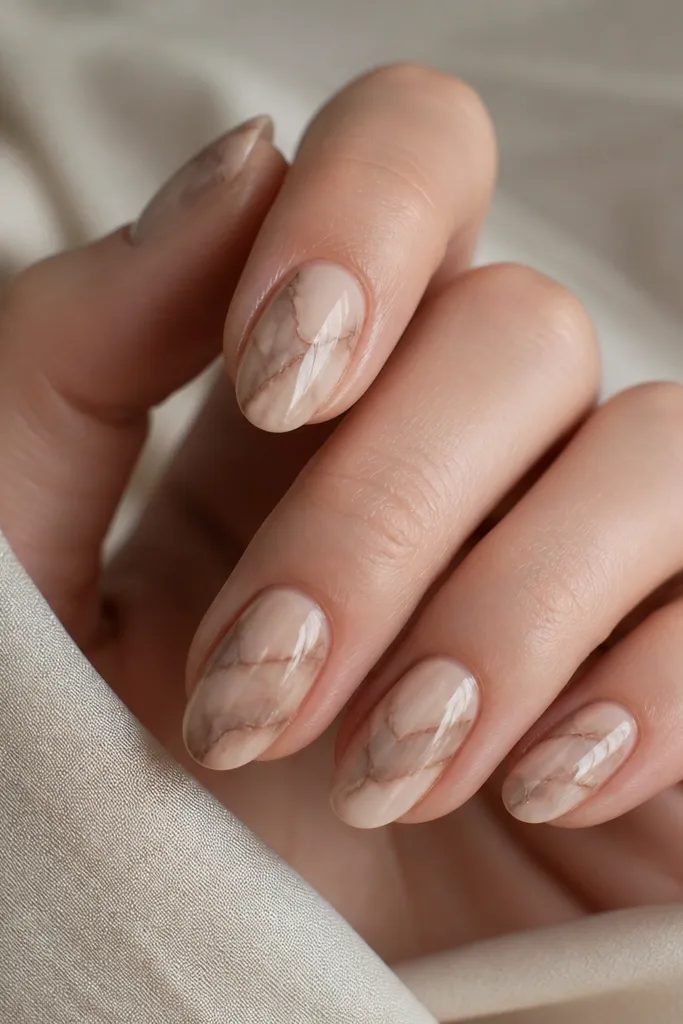
Marble nails look hard, but this version is beginner-friendly because tape helps you control the veining. Taupe marble looks cozy for fall and doesn’t clash with gold jewelry or leather bags. It flatters hands because the stone pattern adds dimension without loud color. I love this when you want something neutral that still looks styled.
Start with a nude base and glossy top coat. Apply tiny tape strips in random vein-like paths, then paint a light taupe over the nail. Remove tape to reveal nude lines, then use a thin brush to add darker taupe veins in a couple spots. Finish with glossy top coat and keep the veins thin so they look like stone, not scribbles.
Use tape only for the first pass — the final veins should be painted freehand for the natural look.
Don’t overdo the veining; too many thick lines make it look like dirt on the nail.
14. Leafy Outline on Olive (One Accent Nail)
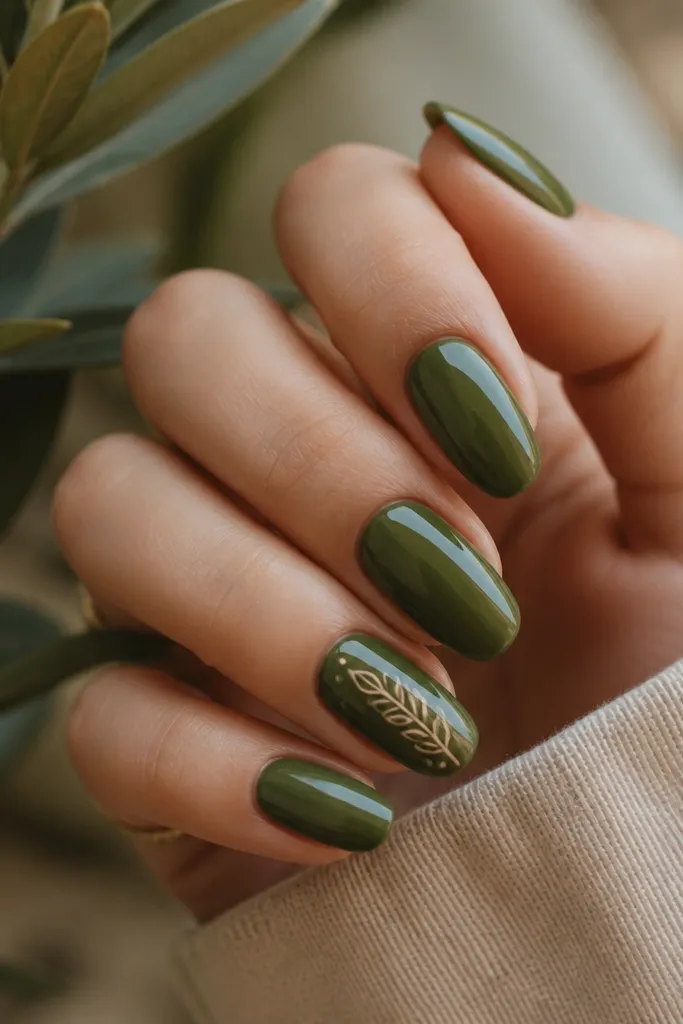
A single leaf outline keeps the set autumn without turning it into a full nail scene. Olive is flattering because it’s deep and warm, and the beige outline makes the leaf look like it’s etched. This style works best when you’re not chasing perfect leaf shapes; simple outlines read as intentional. It’s also a good option if you want something that looks cute in photos but still feels wearable for daily life.
Paint all nails olive green with two coats. Choose one accent nail and use a thin striping brush to draw a simple leaf outline — one leaf shape or two small leaves — using light beige polish. Add a couple tiny beige dots near the outline for balance. Seal with glossy top coat, and make sure the accent nail gets an extra careful top coat over the lines.
Editor's noteIf your leaf lines wobble, keep the outline slightly thicker at the base and taper it — that hides small shakes.
Watch outDon’t draw tiny veins inside the leaf; the detail is where beginners get frustrated.
15. Cream Base with Cinnamon Stick Stripe
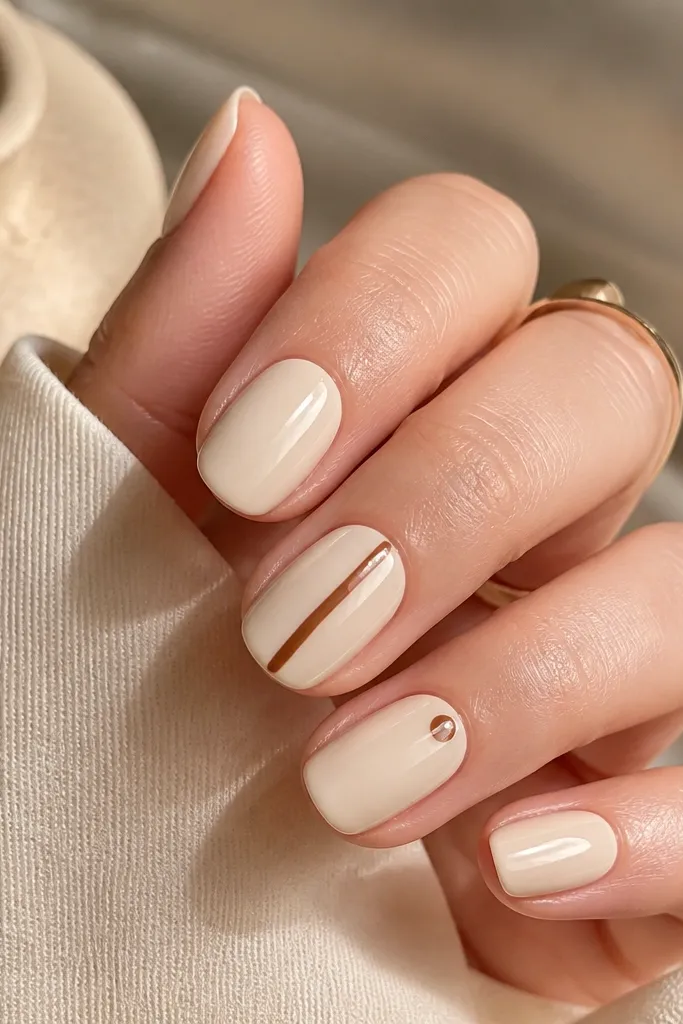
This is the fall version of a minimal manicure, and it looks cozy because cinnamon brown is warm and soft. The cream base makes your nails look clean and fresh, and the vertical stripe lengthens the nail bed visually. I like it on square and short oval shapes because the stripe sits nicely without needing elaborate art. It also matches everything — boots, knit sets, even gym clothes.
Apply two coats of cream polish to all nails. On one accent nail, paint a vertical cinnamon stripe starting from a millimeter away from the cuticle and stopping just before the tip. Add a thin second line of lighter brown or a tiny highlight curve beside it, then leave the rest of the nail plain. Finish with glossy top coat and cap the stripe nail’s free edge.
Editor's noteUse nail tape to place the stripe guide, then remove the tape before adding the highlight line.
Watch outDon’t put the stripe too far to the side; it should stay centered for the lengthening effect.
16. Black Cherry with Micro Glitter Tips
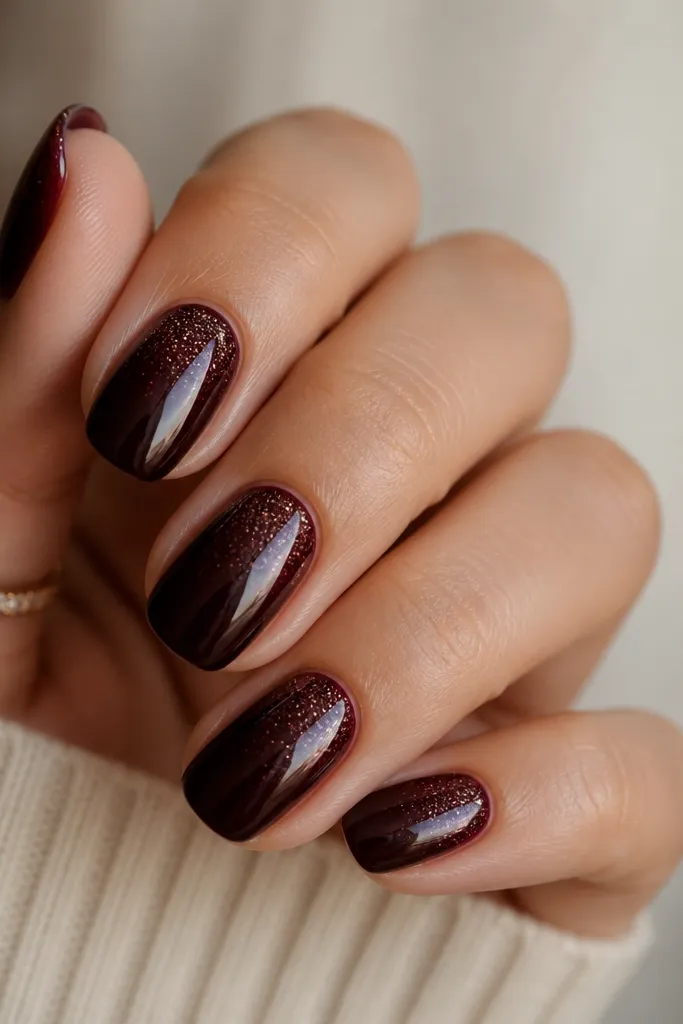
Black cherry is one of the most flattering fall reds because it reads deep and warm, not neon. Micro glitter tips add that cozy night-out sparkle without looking like holiday overload. This set is beginner-friendly because you’re only blending glitter at the tips, not creating art. It looks especially good on medium-length almond nails where the tip area has room.
Paint two coats of black cherry polish. For the glitter, dab micro fine glitter polish with a sponge or brush starting at the upper third of the nail and blend downward slightly. Keep the glitter concentrated at the tip so it looks like a fade, not a full glitter nail. Seal with a glossy top coat — you’ll want a slightly thicker layer to smooth glitter texture.
If the glitter grabs, do a second top coat after the first dries — it levels the surface.
Don’t cover the whole nail with glitter; it turns into a rough texture and hides the color.
17. Matte Chocolate with Nude Dot Trail
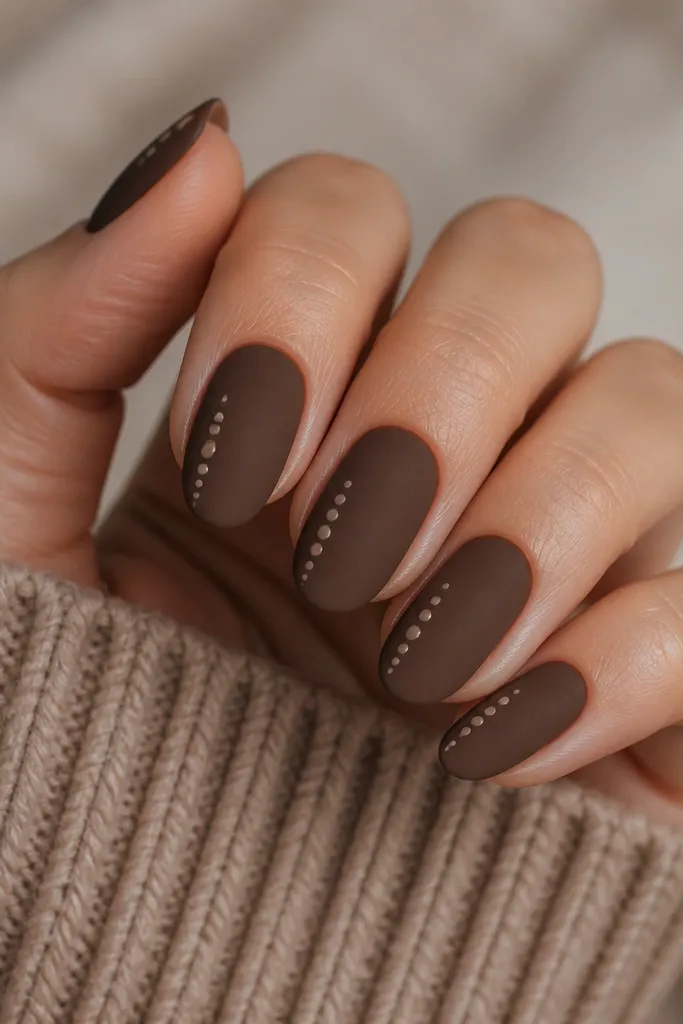
Matte chocolate looks like cocoa powder, and the nude dot trail makes it playful without being loud. The nude dots give contrast that’s flattering for all skin tones because they’re light and warm. I like this on short round nails because the dot trail adds a gentle diagonal shape. The glossy dots against matte make it look intentional even if your dots aren’t perfectly sized.
Paint two coats of chocolate brown and let it dry fully. Apply matte top coat. For the dot trail, use a dotting tool with a nude shade and place 4-6 dots along one side, starting near the mid-nail and tapering toward the tip. Finish by applying glossy top coat only over the dots, not the rest of the nail.
Editor's noteDip the dotting tool once, then wipe the tip on a tissue to control dot size.
Watch outDon’t put dots in a straight line too evenly — uneven spacing looks more natural.
18. Pumpkin Orange with Tiny Black Cat-Eye Accent
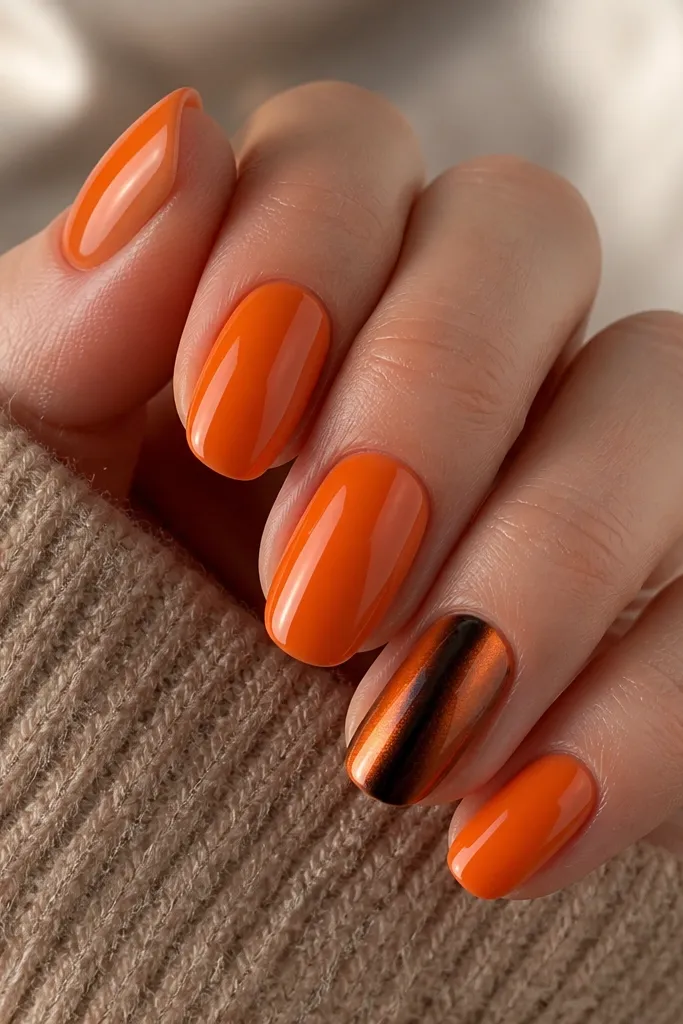
Cat-eye polish gives you that mysterious fall-night vibe without needing to paint a full design. The pumpkin orange base keeps it cheerful, while the black cat-eye strip adds drama and still stays beginner-friendly. This looks great on medium-length nails because the cat-eye stripe shows its glow when it catches light. It also works well if you want something festive but not too Halloween-costume.
Apply two coats of pumpkin orange to all nails. On one accent nail, paint a thin vertical strip of black cat-eye polish using a brush, then use the magnet tool right after application to pull the shimmer toward the center. Keep the strip narrow and centered. Top coat everything with glossy top coat, and avoid dragging the magnet too long — you want the stripe to stay sharp.
If your magnet smear happens, pause — apply the polish, magnetize, then stop touching the nail until it sets.
Don’t put the cat-eye strip too close to the cuticle — it can look like a stain.
19. Cinnamon Nude with Half-Glitter Tip
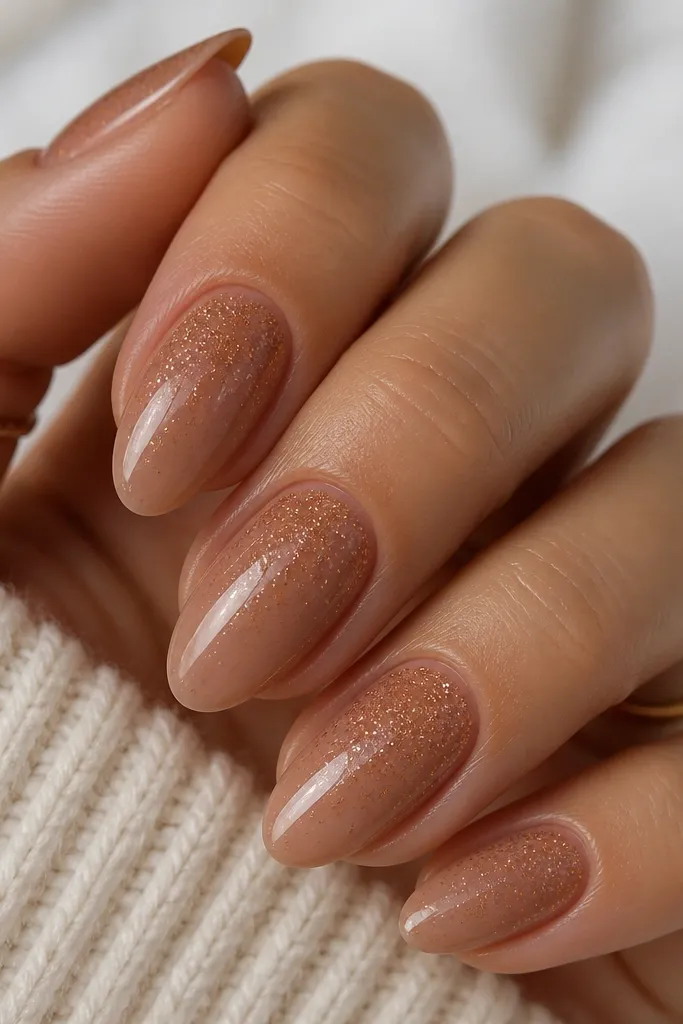
Half-glitter tips feel like fall parties but still look wearable for everyday. Cinnamon nude is warm and flattering, and the glitter only at the top keeps the nail from looking heavy. This works on short nails because the glitter begins high and doesn’t crowd the cuticle. The fade effect also hides application lines, which matters when you’re learning.
Start with two coats of cinnamon nude. Sponge a small amount of fine gold glitter polish onto the upper half of the nail, then tap a clean sponge lightly to blend the start of the glitter. Keep the glitter densest at the tip and lighter toward the middle. Seal with a glossy top coat, focusing on the glitter edge so it doesn’t peel.
Editor's noteUse a glitter polish that’s fine, not chunky — chunky glitter makes the surface rough fast.
Watch outDon’t apply glitter over wet polish; it clumps and looks uneven.
20. Burgundy Base with Gold Micro Dot Border
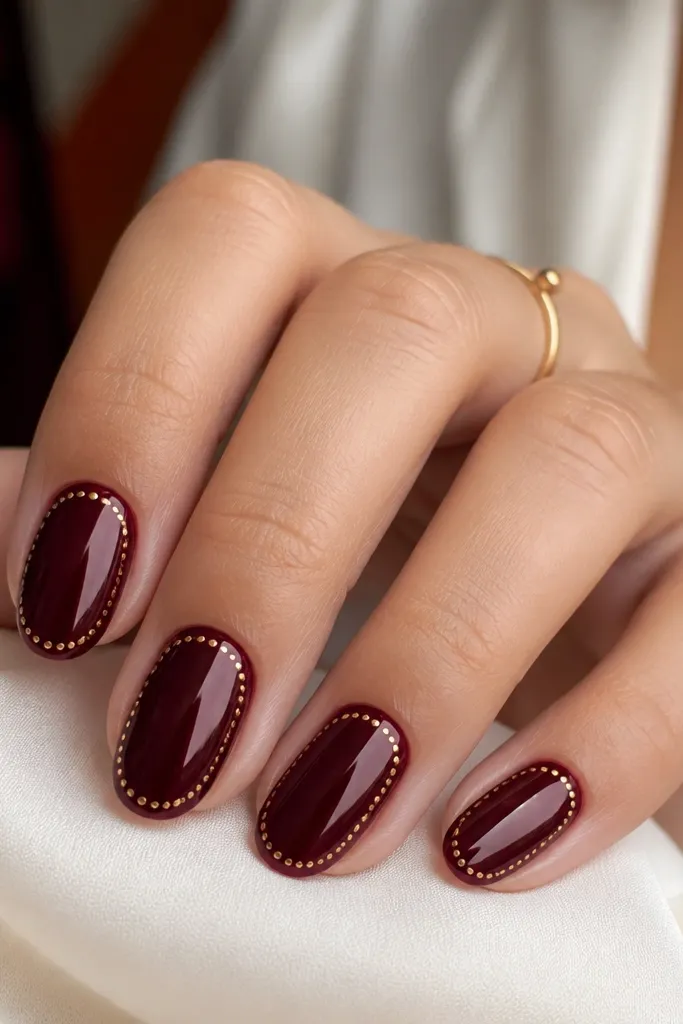
A dotted border looks fancy because it creates a frame, but it’s still simple. The burgundy base is classic fall and flatters warm and cool undertones because gold bridges the gap. I like this on almond nails since the border follows the shape cleanly. It also looks great with rings because the gold dots mimic jewelry detail.
Paint two coats of burgundy polish on all nails. For the border, use a dotting tool with gold polish and place micro dots in a line near the tip edge, leaving a little gap from the very edge. Do it on all nails for a full border look, or keep it to two nails for a more relaxed version. Finish with glossy top coat and make sure the dots are sealed so they don’t catch on hair.
If your dots merge, let the gold layer dry longer before top coat.
Don’t make the border too thick; a heavy dot line looks like a sticker.
21. Oat Milk Nude with Brown Check Accent
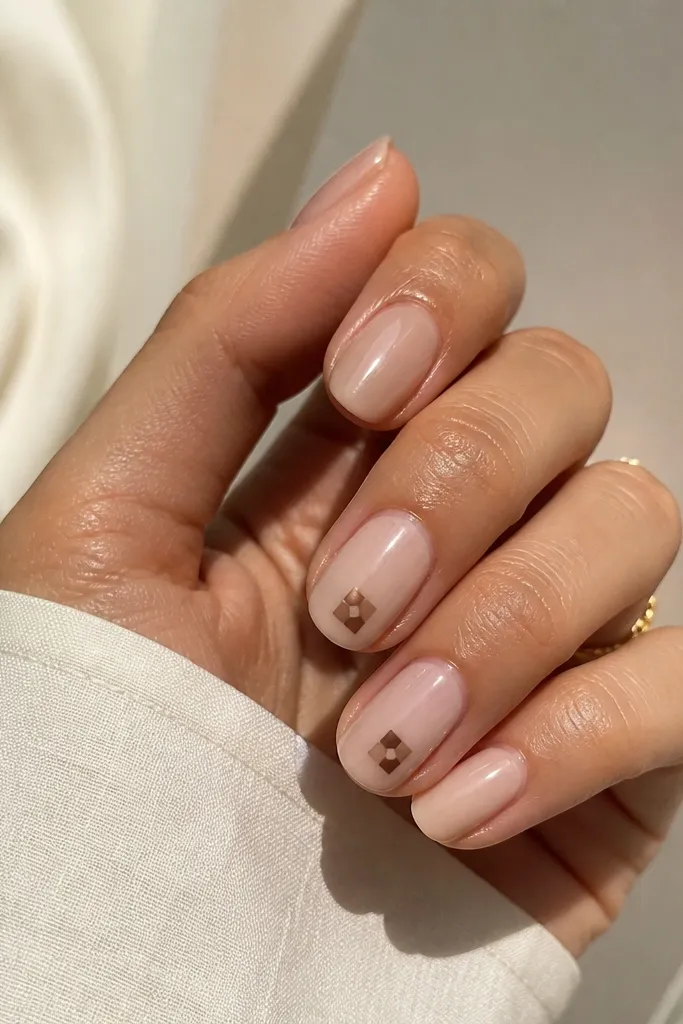
Check patterns feel autumn because they remind me of scarves and flannel. The oat milk nude base keeps it soft and wearable, and the small check accent keeps the design from getting busy. This flatters hands with short nails because the check square is contained and doesn’t stretch across the whole nail. It also looks great if you wear plaid — the nails match your outfit without copying it exactly.
Apply two coats of oat milk nude to all nails. Choose one accent nail and use a fine striping brush to draw a small grid with brown polish, like a 4x4 mini check. Let the lines dry between passes so the pattern stays crisp. Add two coats of glossy top coat over the accent nail, and cap the free edge carefully.
Editor's noteUse a nail art guide sticker to keep the grid square — it makes the check pattern look intentional.
Watch outDon’t draw the check too large; big checks look childish on nails.
22. Smoky Gray-Lavender with Copper Crescent
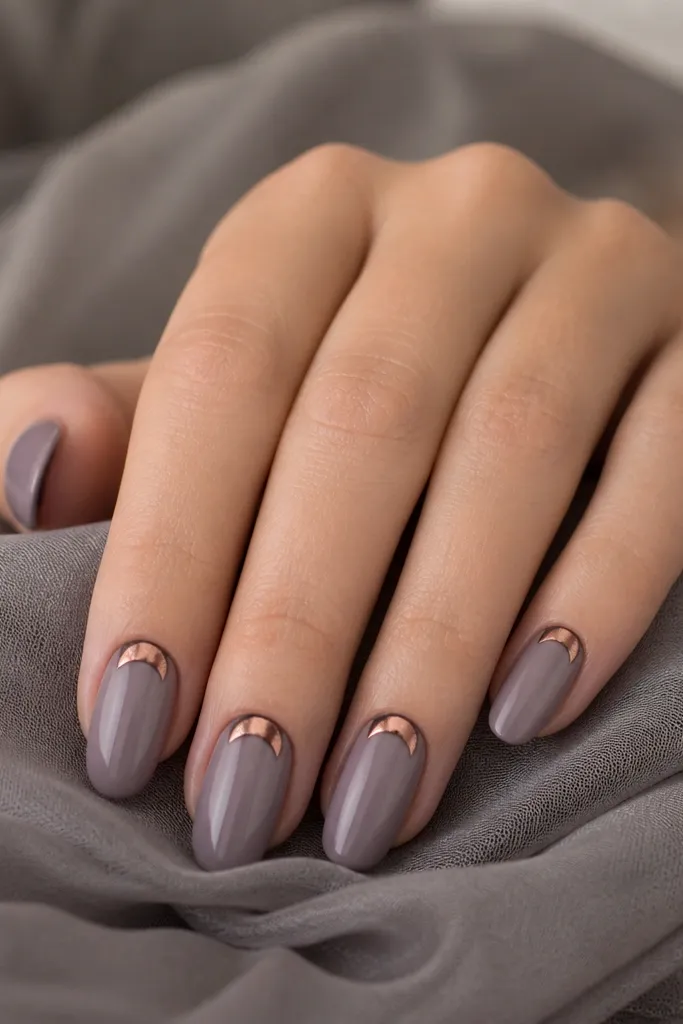
Smoky gray-lavender is a fall twist that looks modern with denim and leather. The copper crescent near the cuticle is a clean, flattering shape because it frames the nail bed. I like this on medium-short nails since the crescent draws attention to the center and makes nails look tidy. Copper also adds warmth so the gray doesn’t feel cold.
Paint two coats of smoky gray-lavender and let them dry. Use a small piece of curved tape or a half-moon stencil to mask the cuticle crescent area. Paint copper polish inside the mask, then remove the stencil carefully. Seal with glossy top coat and cap the edges so the crescent stays crisp.
If you don’t have stencils, use a flexible tape strip and press it into a gentle arc — it works surprisingly well.
Don’t let copper polish flood under the stencil; it blurs the crescent line.
23. Terracotta Dot Cluster with Sheer Nude Base
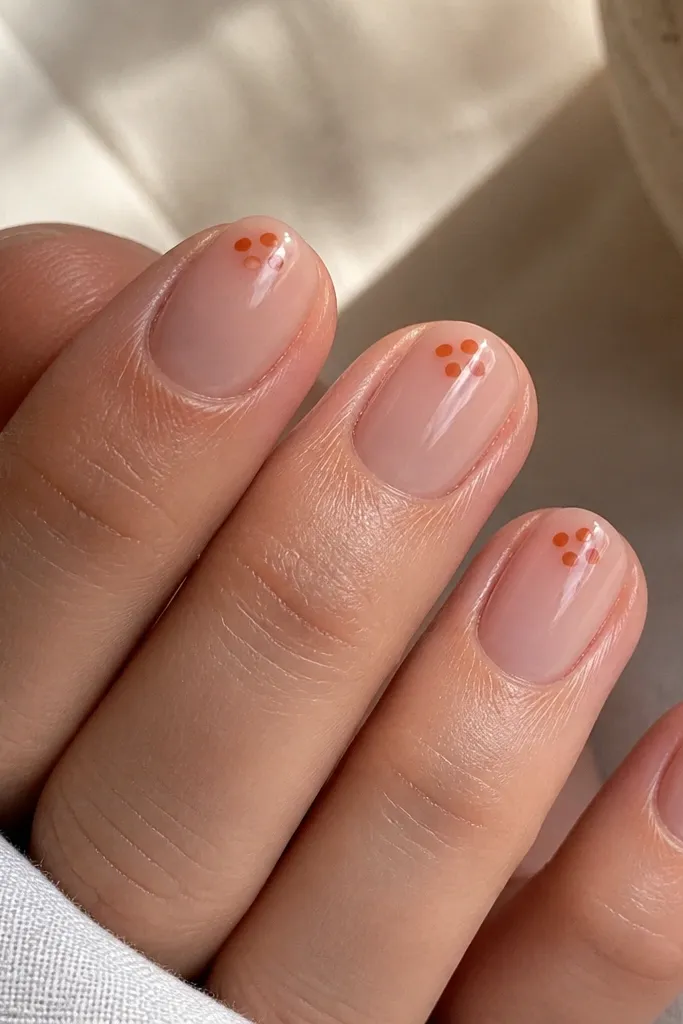
This design is cute, quick, and forgiving. The sheer nude base makes it look natural, and the terracotta dots add that autumn warmth without darkening the whole nail. It’s flattering on all nail lengths because the dots sit near the cuticle — your nails still look clean and airy. I also like it for beginners because dot placement is easy and you don’t need perfect symmetry.
Apply a sheer nude polish with two coats, keeping it translucent and even. Add glossy top coat if your nude is not glossy already. Using a dotting tool, place 5-8 terracotta dots clustered near the cuticle on each nail, leaving a tiny gap around your cuticle line. Finish with glossy top coat and run the brush over the dot area to smooth texture.
Editor's noteUse the smallest dotting tip you have for that 'berry bunch' look.
Watch outDon’t cover the entire cuticle with dots; it should feel like a small cluster, not a full cap.
24. Cinnamon Latte Chrome Fade with Toasted Almond Tips
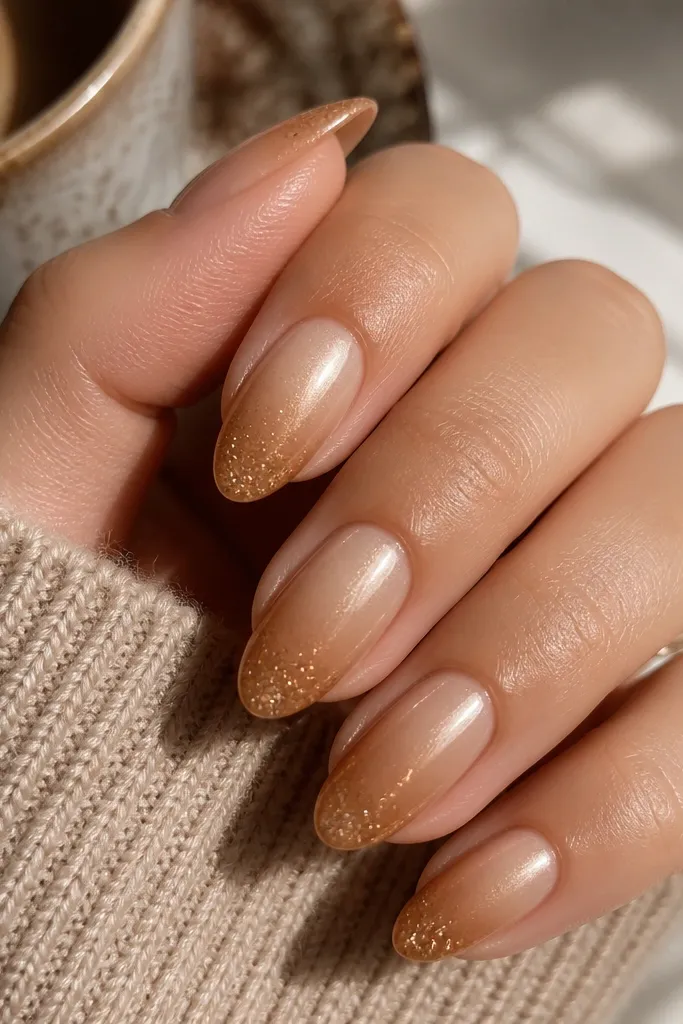
This one looks like fall in a cup — beige steam at the top, cinnamon warmth at the tips. The chrome fade makes the nails look smooth and expensive even if your base color is simple. I like almond shapes here because the fade has room to stretch without looking harsh. The toasted-almond micro-glitter at the tip adds a little texture when you move your hands, like the sparkly edge of a cinnamon sugar rim.
Start with a sheer milky nude base and cure it fully. Use a thin sponge or small makeup brush to dab caramel-brown polish only on the last third of the nail, then blend upward with a clean brush so there’s no hard line. When the color is set, apply a chrome powder in the caramel zone — press it on, then buff lightly with a soft dry brush for a foggy fade. Finally, add micro-glitter only at the very tip (about 2-3 mm), seal with two coats of glossy top coat, and cure each coat long enough so the chrome doesn’t dull.
Editor's noteIf the chrome looks too mirror-like, buff it for 5-10 seconds more before sealing. It turns that “chrome disco” look into a cozy, latte-sheen finish.
Watch outSkip applying chrome over wet polish or after a top coat — it will turn patchy and you’ll fight bald spots.
25. Evergreen Pine Needle Green with Clear Jelly Snowflakes
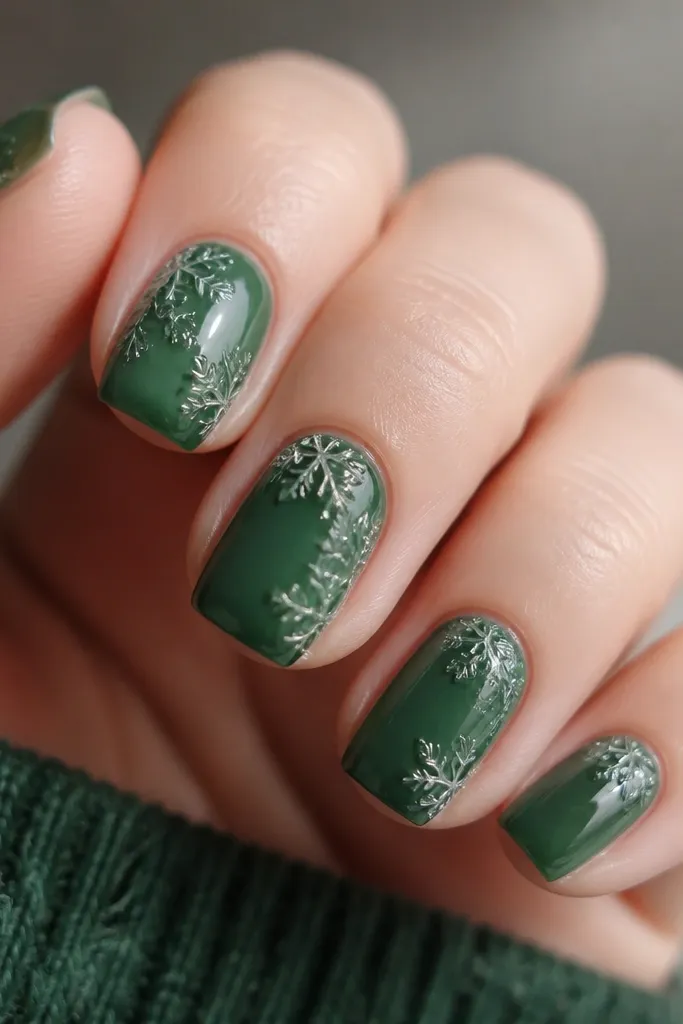
This design reads cozy because it uses deep evergreen, not bright holiday green. The clear jelly snowflakes keep it light and airy instead of turning into a flat sticker look. I’ve worn this in early fall when the weather still feels warm, and the contrast between dark green and clear “ice” looks fresh on day one. It also photographs well because the snowflakes catch direct light but don’t cover the whole nail.
Paint two thin coats of evergreen green, leaving the center slightly more sheer if you want that natural jelly depth. Cure fully, then add a layer of clear jelly gel over the snowflake placement areas only — about a dime-sized spot near the cuticle. Use a dotting tool to dab snowflake shapes with clear gel or clear builder gel, building thin lines from the center outward, then cure each nail. Finish with glossy top coat, but keep it lighter over the raised snowflakes so they stay dimensional instead of flattening.
Editor's noteUse a toothpick to pull tiny gel “arms” for the snowflakes — it gives you thinner lines than a brush and keeps the pattern crisp.
Watch outDon’t spread top coat deep into the snowflake lines — it melts the raised edges and turns the snowflakes into blurry blobs.