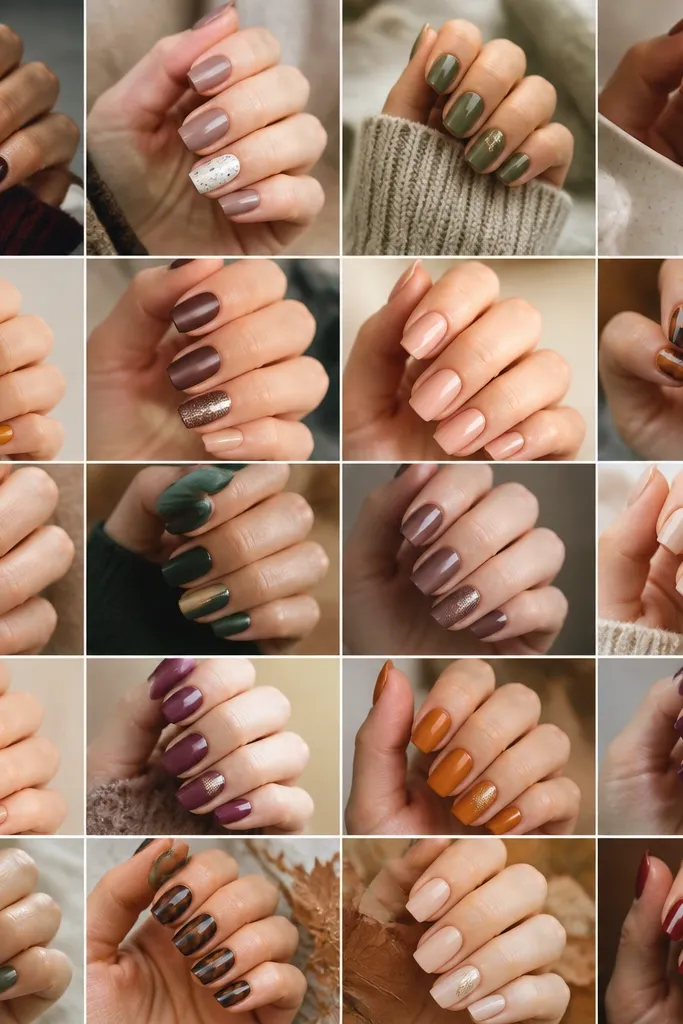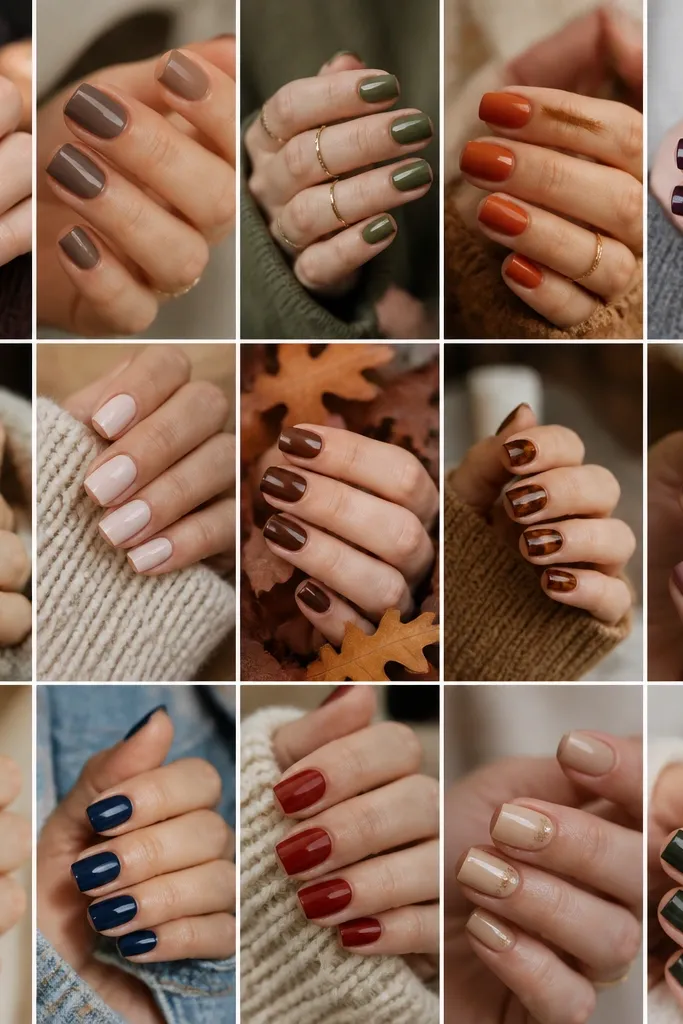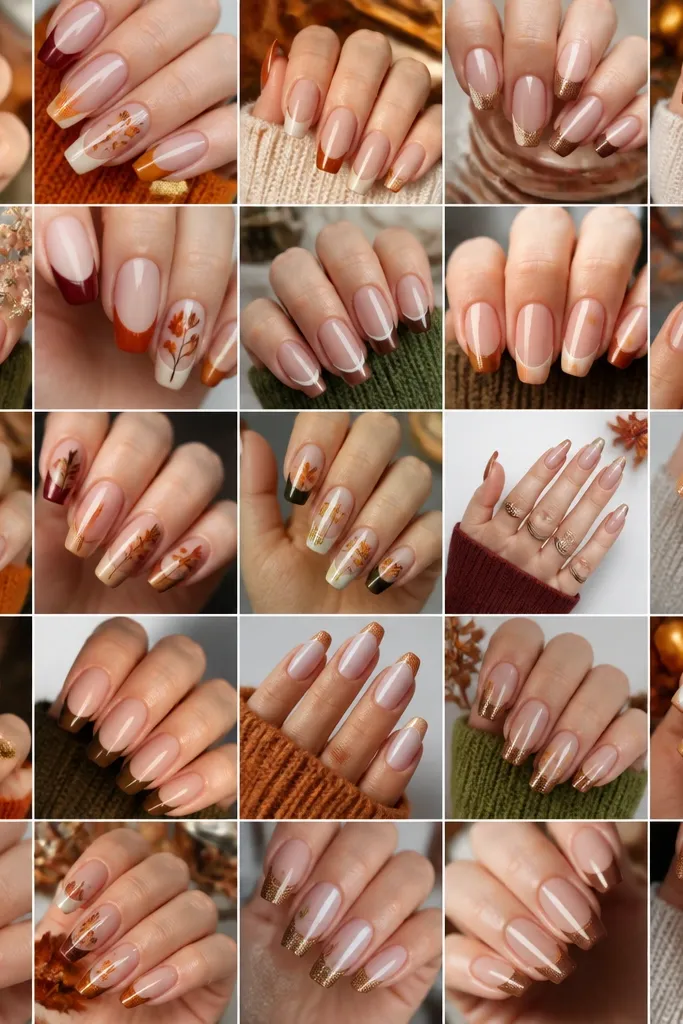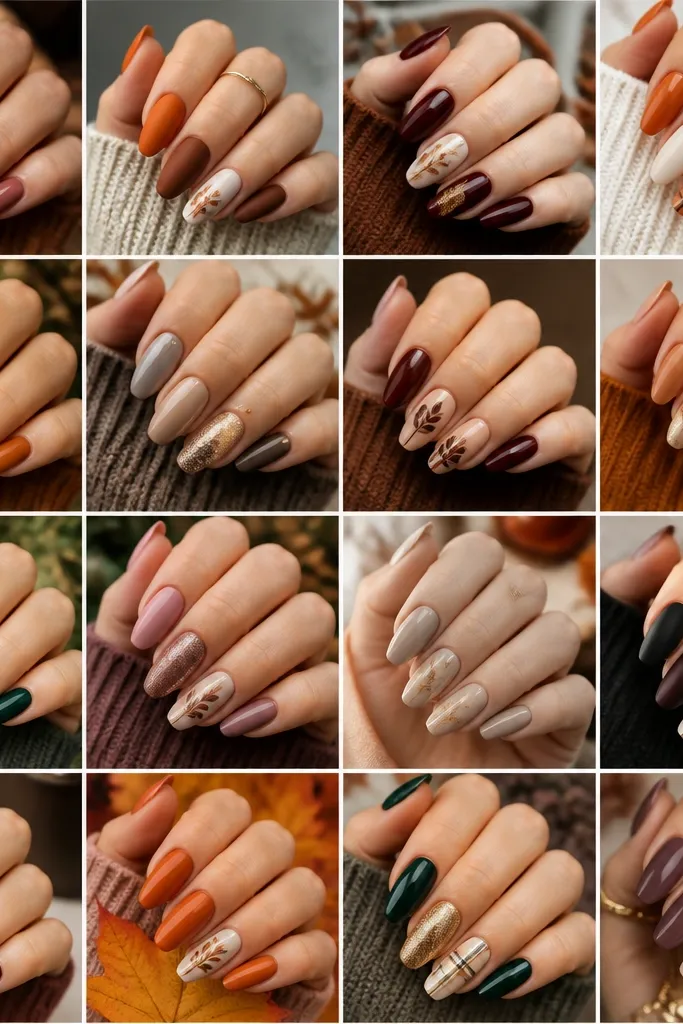
1. Terracotta Micro-French with Clear Nude Base
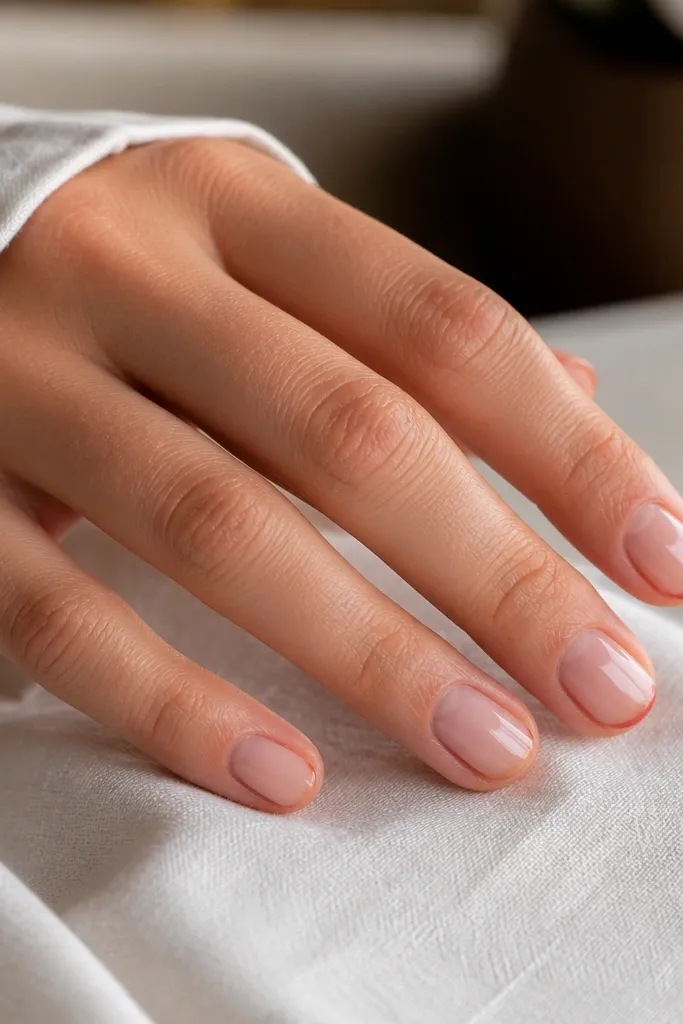
Start by cleaning the nail surface and applying a thin base coat, then let it dry fully. Paint your clear nude base in two thin coats, keeping the polish close to the cuticle without flooding it. Use a striping brush to draw a micro line at the tip in terracotta, then add a second pass to make the line even. Finally, cap the free edge with top coat so the tip doesn’t catch and chip.
I love a micro-French in fall because it gives the season vibe without covering your whole nail. Start with a clear nude base that matches your skin tone, then paint a thin terracotta strip right at the tip — think clay-orange, not neon. This flatters hands because it visually elongates the nail bed, especially if you keep the line narrow (about the width of a grain of rice). It looks best on short to medium nails and on warm or neutral undertones. If you’re fair, the nude base should be milky; if you’re deeper, use a nude that’s slightly caramel so the terracotta pops.
Watch outDon’t make the French line too wide or it turns into a blocky color that looks heavy on short nails.
Editor's noteLet the nude coat dry 5-8 minutes before you touch the tip line — it makes the terracotta stay sharp.
2. Cocoa Half-Moon with Sheer Rose Nude
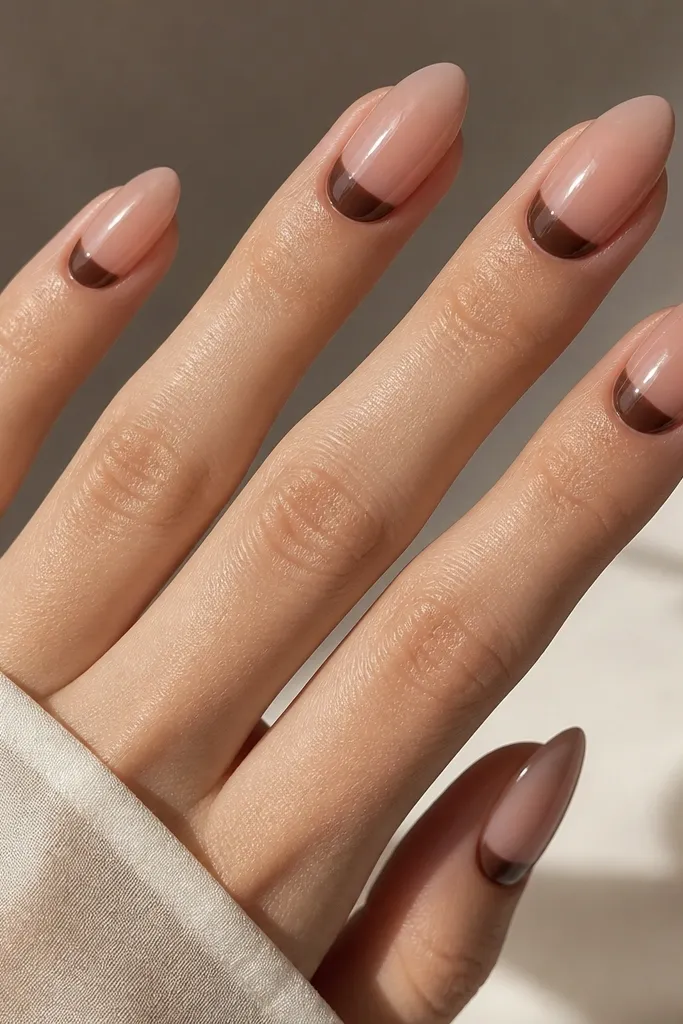
Start with a sheer rose nude base in two thin coats; stop slightly above the cuticle line so the crescent has a clean boundary. Paint the cocoa half-moon with a small angled brush: place the crescent first, then adjust the curve so it’s symmetrical on each nail. If your half-moon looks too dark at the edges, lightly drag a clean brush edge through it to soften the outer border. Finish with a glossy top coat and cap the free edge.
This set looks classy and autumn without needing leaves or glitter. The cocoa half-moon at the cuticle gives a warm shadow effect, while the sheer rose nude keeps it light. It flatters most skin tones because the half-moon sits in the narrowest part of the nail, which makes fingers look tidy. I’ve worn it on hands that look dry around the cuticle, and the shape actually disguises roughness because the crescent sits right where your natural cuticle line is. For deeper skin tones, cocoa reads rich; for fair skin, it looks soft and creamy when you choose a rose nude base.
Watch outDon’t fill the entire cuticle area — a full moon looks bulky and grows out awkwardly.
Editor's noteUse a small piece of tape to create a guide for the crescent curve if you struggle with symmetry.
3. Olive Sage Dots on Milky Nude
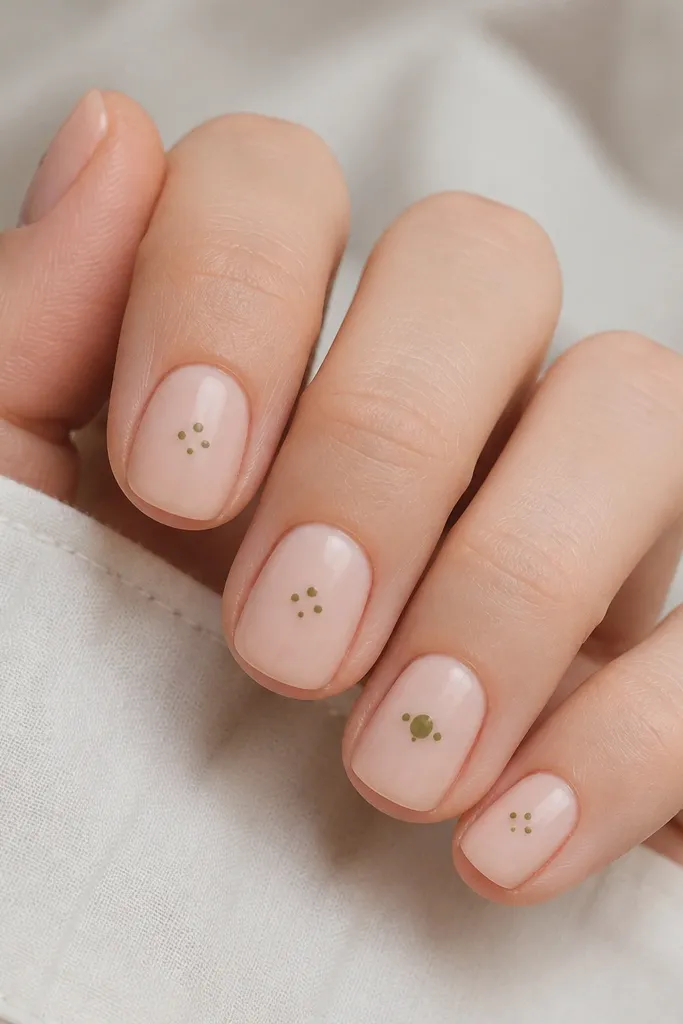
Dots are the fastest way to make fall nails feel intentional. Milky nude gives you that cozy, creamy base, and olive sage dots add an earthy tone that reads autumn without looking like Halloween. This design is forgiving on beginners because you can place dots first and refine spacing after. It looks great on short nails because the dot cluster sits in the center and doesn’t widen the tips. On cool undertones, olive sage can look almost green-gray, which pairs beautifully with milky pink nudes.
Apply milky nude in two thin coats and let it dry fully. Use a dotting tool to place three dots in a vertical line down the middle of each nail, then add one smaller dot near the base or side. For the ring finger, make the top dot slightly larger for a focal point. Seal with a glossy top coat, and press the brush gently over the dot area so it doesn’t lift.
If you use gel, cure each dot set for a short time, then do one final full cure after top coat.
Don’t make dots too big — large dots look like bubbles unless your polish is super thick.
4. Rust Stripes with Clear Gloss Overcoat
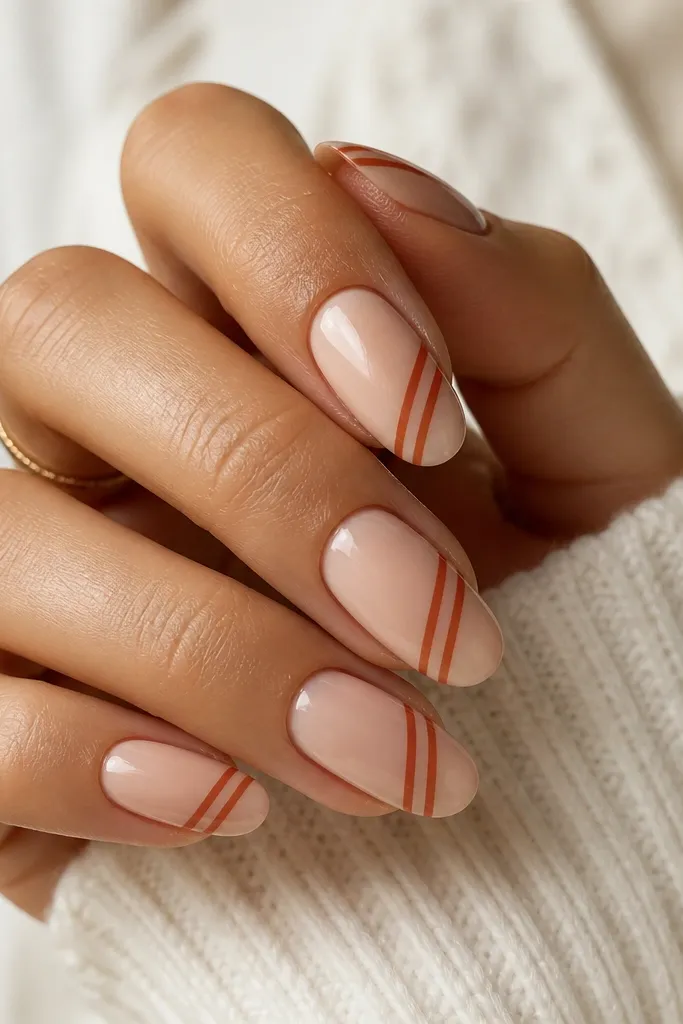
Diagonal stripes add movement and make your nails look sharper, even when you keep the design minimal. I use a nude base so the rust-orange stripes look like warm highlights rather than heavy blocks. This style flatters hands with shorter nail beds because diagonal lines guide the eye upward. It also looks good on both fair and deep skin because rust is warm and forgiving. For a clean fall vibe, choose a rust that leans terracotta instead of bright orange.
Paint a nude base in two coats and let it dry completely. Use striping tape or a thin liner brush to place two diagonal lines on each nail, keeping equal spacing between the stripes. Let the rust stripes set for a few minutes, then add one more thin pass if you need opacity. Finish with a clear gloss top coat and cap the tip so the stripes don’t catch.
Use tape for the first stripe, then freehand the second so both lines look slightly hand-done but still straight.
Don’t flood the stripe edges into the nude — it blurs and looks sloppy.
5. Chocolate Matte Nails with One Glossy Accent
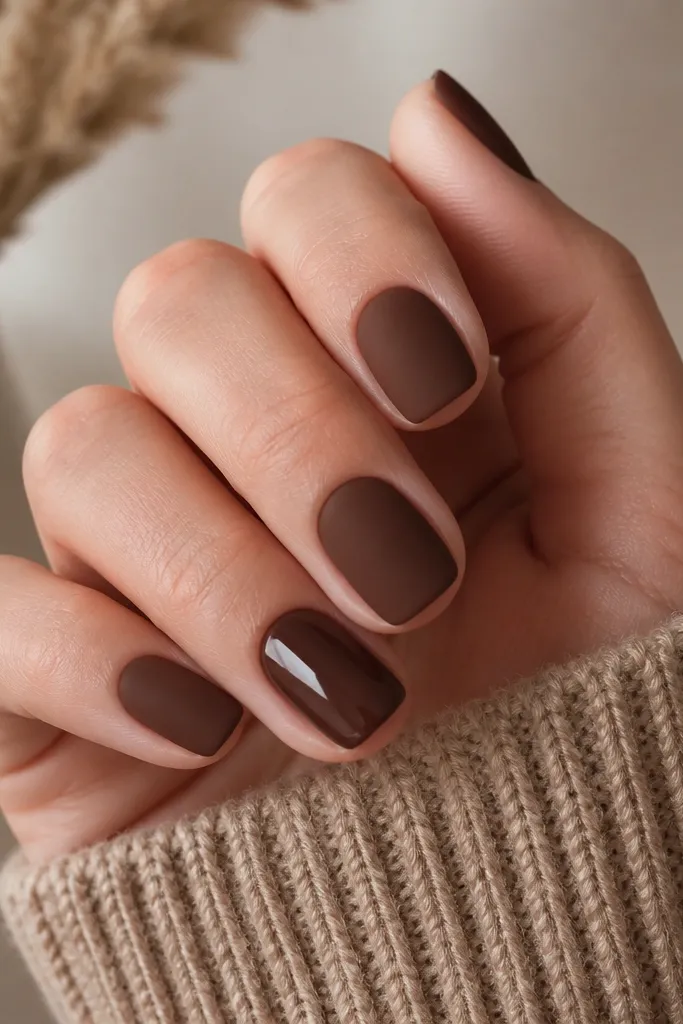
Matte in fall is the easiest way to look “seasonal” without adding art. Chocolate brown reads grounded and cozy, and the contrast between matte and glossy makes it feel designed. I do this when I want a set that still looks expensive on busy weeks. Matte hides tiny surface imperfections, and the single glossy accent gives you a focal point without extra colors. It flatters every skin tone because brown looks natural against nails and doesn’t fight your undertone.
Start with a smooth base coat, then paint chocolate brown in two thin coats for even coverage. Let it dry fully, then apply matte top coat on all nails except one. On the accent nail, skip matte top coat and apply glossy top coat only to that nail. After curing/drying, lightly buff the matte nails with a soft lint-free pad to remove any dull streaks.
If your matte top coat turns patchy, add a second thin layer instead of one heavy layer.
Don’t put matte top coat over nail art that isn’t fully dry — it can smear.
6. Creamy Taupe Ombré Top Third
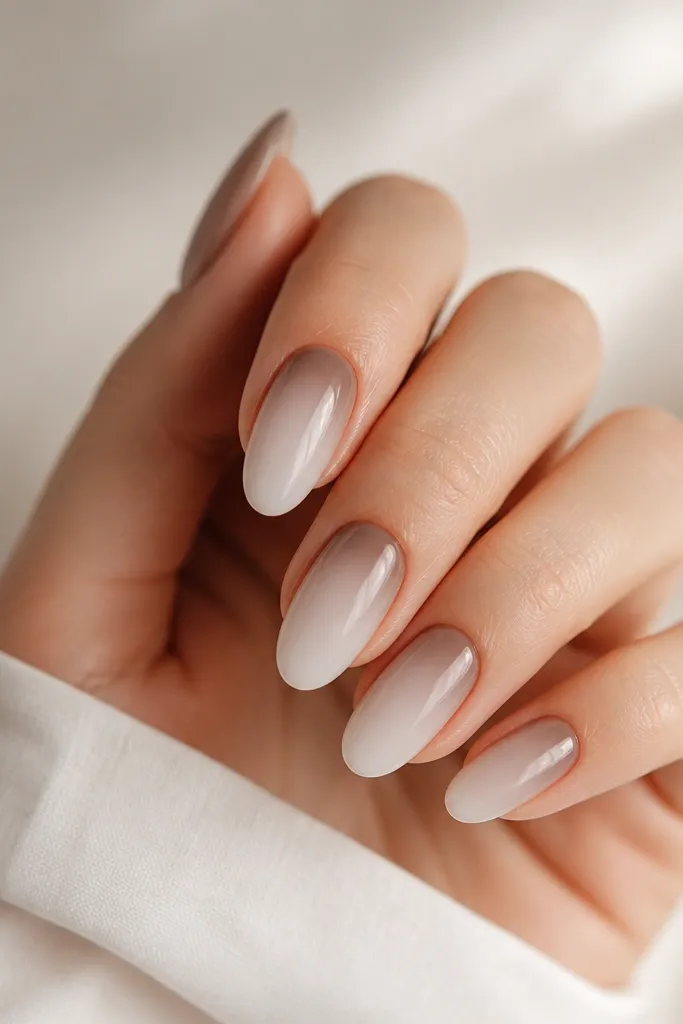
Paint milky nude in two thin coats and let it dry completely. Dab creamy taupe onto a makeup sponge, then tap only the top third of the nail — stop before the midline. Build the fade with 2-3 light passes, wiping excess taupe off the sponge between coats. Seal with glossy top coat, and cap the free edge for extra wear.
Ombré can look hard, but if you keep it to the top third it becomes easy and clean. The milky nude base keeps it wearable, while taupe adds that autumn “smoke” color. This set flatters nails of almost any length because the fade starts near the free edge, so the nail bed still looks neat. On warm undertones it looks slightly cooler and modern; on cool undertones it stays balanced and elegant. I use a sponge blend because brush ombré often leaves lines.
Watch outDon’t blend all the way down to the cuticle — that’s where ombré gets streaky.
Editor's notePractice on one nail first — sponge ombré takes two tries to get the exact softness you like.
7. Blackened Olive Vertical Half-Lines
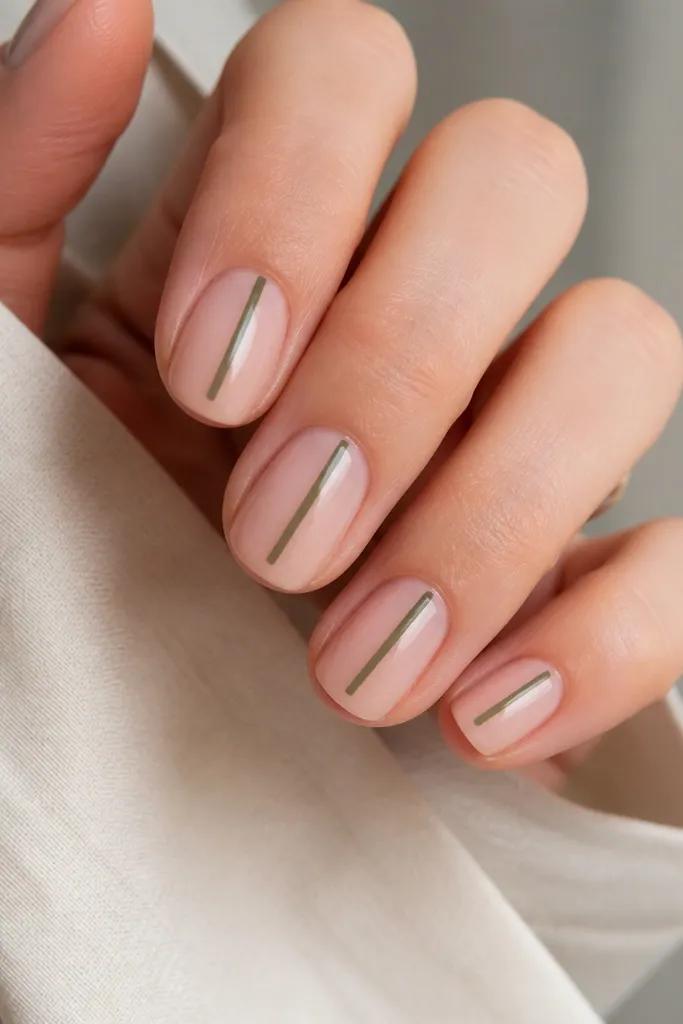
Vertical lines are a cheat code for making nails look longer and cleaner. Blackened olive is deep enough for fall, but it still feels muted and wearable. This design looks great on small nail beds because the line is narrow and centered, so it doesn’t expand the nail width. It also works if your hands are on the drier side since the sheer nude base looks smooth. For fair skin, blackened olive adds contrast; for deeper skin, it looks like an intentional “shadow” stripe.
Start with a sheer nude base in two thin coats. Use a liner brush to paint a vertical olive line centered on each nail, leaving a tiny gap from the cuticle so it doesn’t pool. Stop the line about 1 mm before the tip edge so your free edge stays clean. Finish with glossy top coat, and run the brush lightly along the sides to lock everything down.
If your line looks shaky, use a second brush loaded with nude to clean the edges before top coat.
Don’t paint the line too close to the sidewalls — it makes the nail look narrower than you want.
8. Burnt Orange Dot Fade on Nude
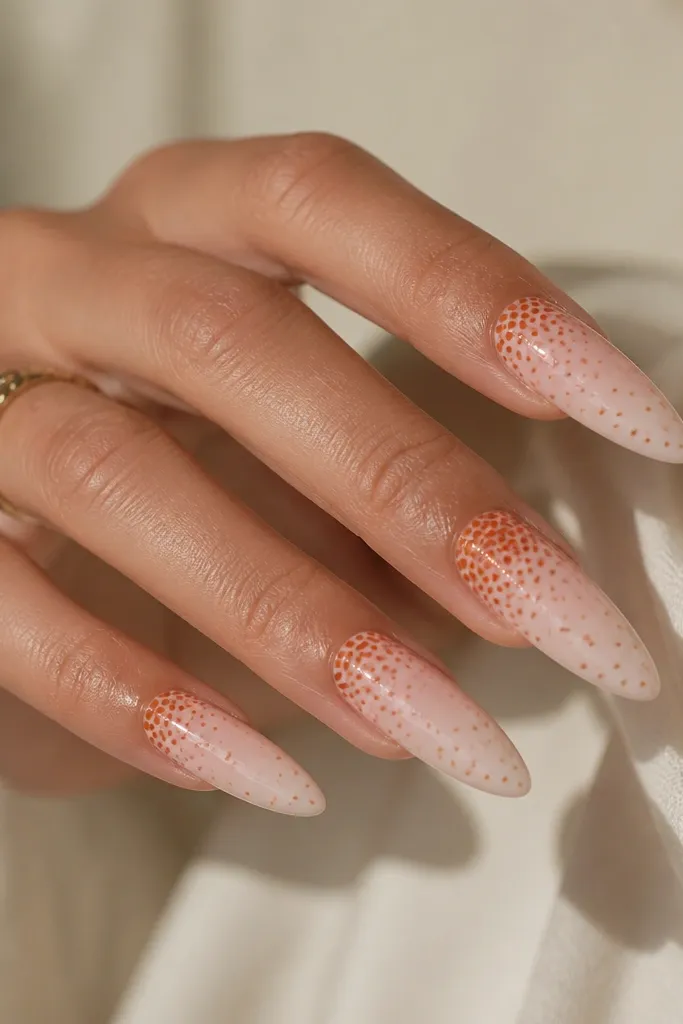
This dot fade looks like warm autumn confetti, and it’s surprisingly easy once you plan the density. Keep the base nude pink so the orange stays bright but not loud. The fade effect flatters because it adds interest near the cuticle and keeps the tip lighter. It’s especially pretty on longer nails where you have space for the dot pattern to “flow.” If you’re fair, choose burnt orange that’s more rust than tangerine; if you’re deeper, go a slightly brighter burnt orange for contrast.
Paint nude pink in two coats and let it dry fully. Use a dotting tool to place a cluster of orange dots starting near the cuticle on one side of the nail, then gradually space them farther apart as you move toward the free edge. For the ring finger, add one extra dot at the center to make it the focal nail. Seal with glossy top coat; drag the brush gently over the dots so they don’t catch.
Work from cuticle to tip in one direction so your spacing stays consistent.
Don’t overlap dots into a solid blob — keep them separated so it reads as a fade.
9. Taupe Cable-Knit Accent on One Nail
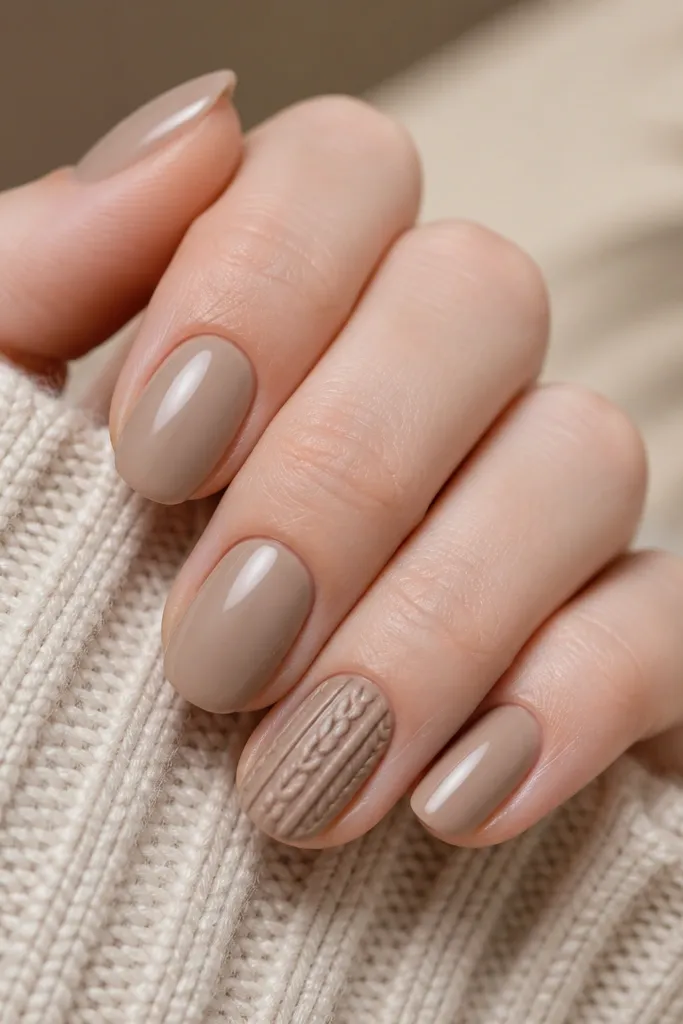
Paint all nails nude in two thin coats. On the accent nail, outline two vertical columns in darker taupe, then add diagonal lines that cross between them to form the “twist” sections. Use a striping brush to keep the lines thin; fill the centers lightly so the pattern stays crisp. Finish with glossy top coat on all nails, and add a second thin top coat over the cable nail so it looks smooth.
Cable-knit nail art sounds complicated, but you can fake it with clean striping lines. I do this as a one-accent nail because it reads cozy fall without turning your whole set into a craft project. The base is nude for softness, and the cable pattern is taupe-on-taupe for a knit effect that looks dimensional even with flat polish. This style is flattering for short nails because the pattern stays on one nail and doesn’t crowd the rest. It also looks great on any undertone since taupe is neutral and doesn’t fight your skin.
Watch outDon’t make the lines thick — thick knit lines look like stripes, not cable.
Editor's noteIf you want it to look more raised, use gel and add a tiny layer over the pattern only before final cure.
10. Sienna Marble Swirl Tips
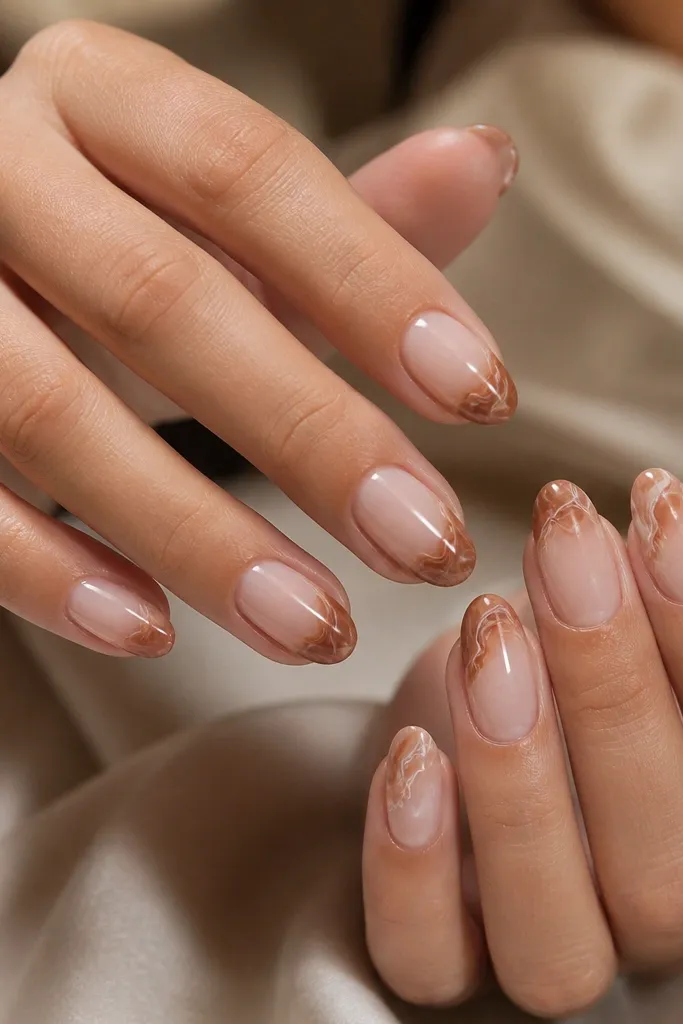
Apply milky nude in two coats. For the marble tips, paint a sienna layer along the top edge of the nail tip, then drag a thin brush through it to create swirls before it fully dries. Add micro white lines using a liner brush — keep them thin and varied, like broken veins. Seal with glossy top coat and cap the tip so the marble doesn’t chip at the edges.
Marble tips make fall nails feel elevated without needing full coverage art. The milky nude base keeps your hands looking fresh, and sienna brown adds that warm earth tone. Thin white veining makes the marble read clearly instead of looking like smudged brown. This is best on medium to long nails because you need a little space for the swirl to show its shape. It flatters everyone because the base is light and the accent sits at the tip.
Watch outDon’t blend the brown too much — if it becomes one flat patch, it stops reading as marble.
Editor's noteMarble looks better when each nail is slightly different — copy your first nail only for the overall placement.
11. Deep Burgundy Micro-Glitter at the Tip
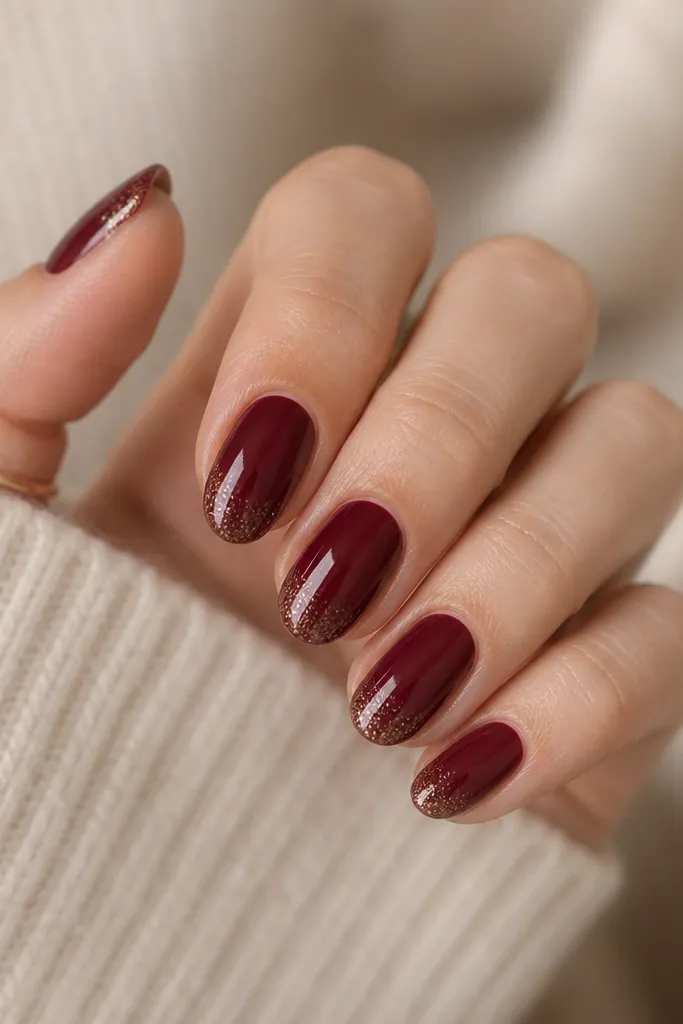
Glitter gets a fall upgrade when it stays tiny. A deep burgundy base already feels seasonal, and the micro-glitter band at the tip catches light like a warm evening. This set flatters short nails because the glitter band stays narrow and doesn’t widen the tip too much. It also hides small wear since glitter masks micro chips. For fair skin, burgundy is dramatic; for deep skin, it looks rich and almost wine-like.
Paint deep burgundy in two thin coats and let it dry. Use a sponge or a glitter applicator to press fine glitter only into the last 1-2 mm of the nail tip. Tap off excess so you don’t get glitter on the nail bed. Add glossy top coat over everything, focusing on the tip edge, then cap the free edge.
If glitter looks gritty, use a thicker top coat and let it self-level before curing/drying.
Don’t put glitter across the whole nail — it turns into a holiday look that grows out fast.
12. Terracotta and Cream Side Accent Line
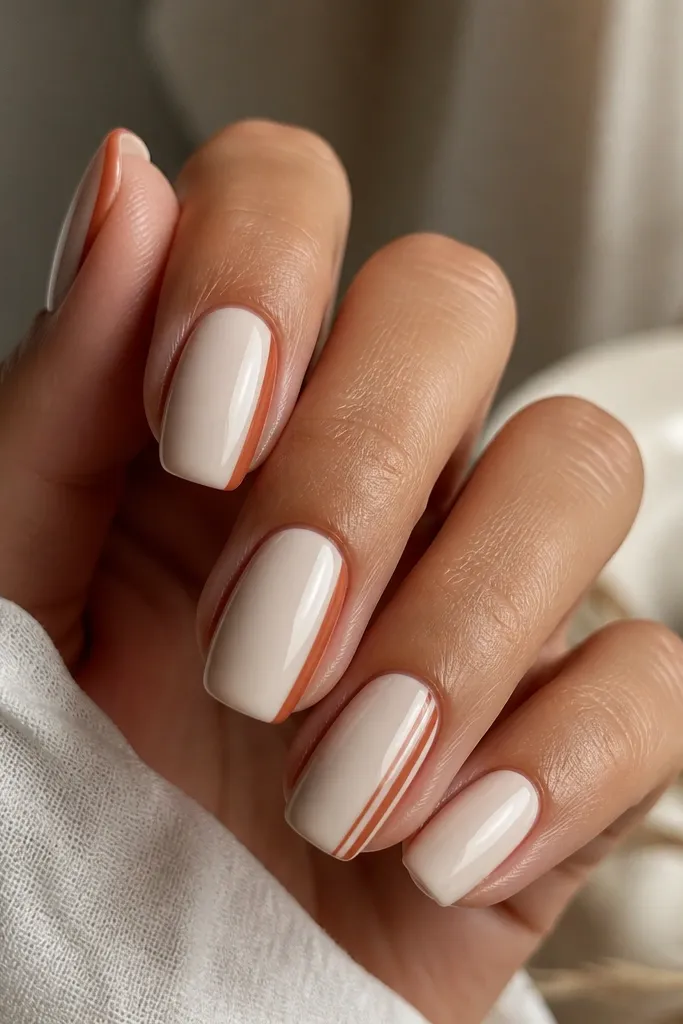
Apply cream nude in two coats and let it dry. Use a liner brush to paint a terracotta line along the outer side of each nail, starting near the cuticle and stopping 1 mm before the tip. Leave the inner side plain so the design stays minimal. On the ring finger, add a thinner cream line next to the terracotta line for a two-tone effect, then seal with glossy top coat.
Side accents look modern and make your nails look styled even when you keep everything simple. Terracotta on a cream nude base gives a warm fall contrast that doesn’t feel heavy. This flatters because it creates a vertical “frame” along the outside of the nail, which visually narrows and lengthens. I’ve used it on hands with wider nail beds and it makes the shape look more balanced. Choose a cream nude that matches your undertone — peachy for warm, pink-beige for cool.
Watch outDon’t run the line too close to the cuticle — it will flood and blur.
Editor's noteKeep the terracotta line the width of a thin eyebrow pencil — anything wider looks blocky.
13. Olive Nude with One Copper Foil Fleck
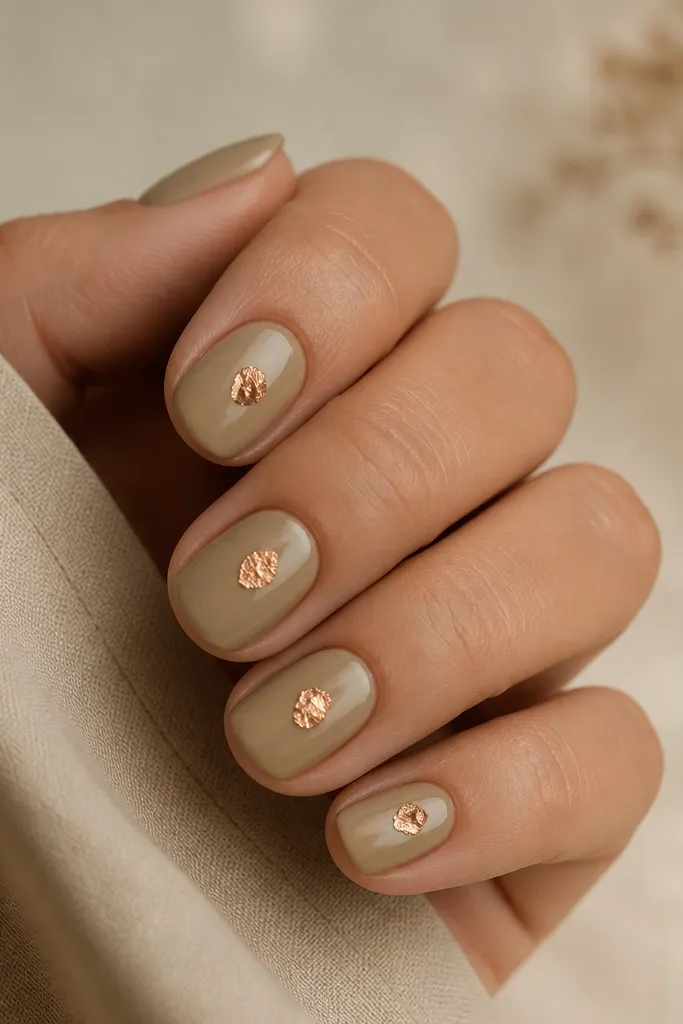
This is my “fall but still clean” set. Olive nude is a soft earthy base, and one copper foil fleck gives that autumn-metal shine without needing a whole pattern. Foil flecks are flattering because they sit where your nail catches light naturally, so the look feels intentional. It also works if you’re rough on your nails — the foil doesn’t show chips the way fine lines do. On fair skin, olive nude reads fresh; on deeper skin, it looks grounded and luxe.
Paint olive nude in two thin coats and let it dry fully. Use nail glue or a foil transfer adhesive on a tiny spot near the center of the nail, then press a small piece of copper foil onto it. Lightly pat and lift so you get an irregular edge, then repeat placement on each nail with the foil piece sized slightly differently. Seal with a glossy top coat, focusing on the foil edge so it stays smooth.
Warm copper foil looks best with olive nude — avoid yellow-gold foil unless you want a more beachy vibe.
Don’t use too much glue — excess glue makes foil edges lift.
14. Mocha Brown Gradient with Nude Fade
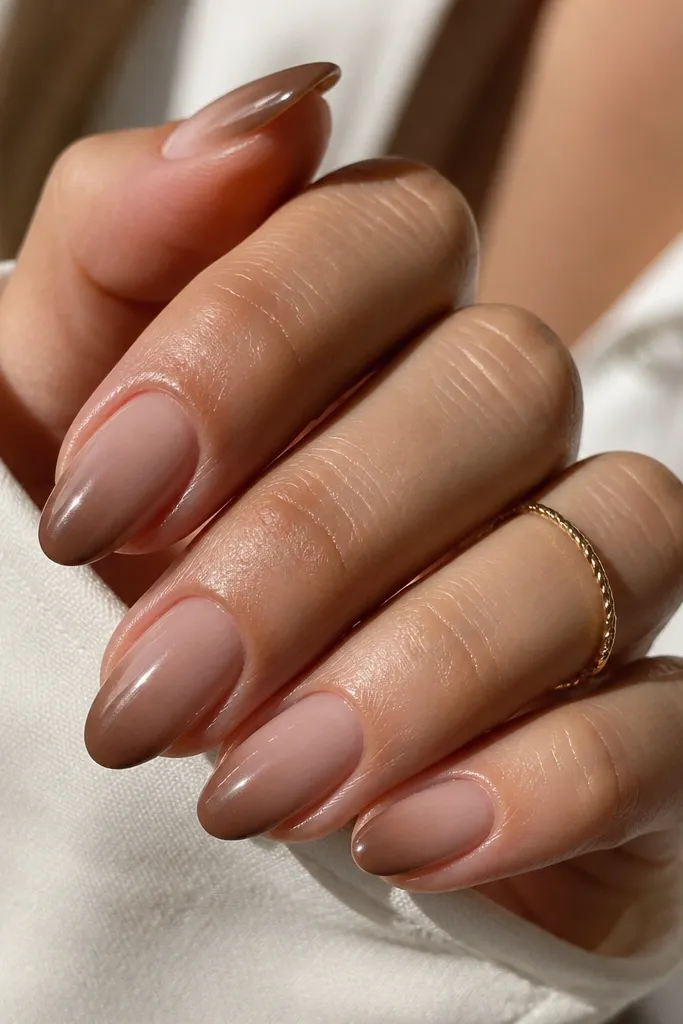
A nude-to-mocha gradient looks like your nails got “sun-kissed” in fall. It’s simple because it uses one color family, and it’s easy because you blend only the top area. Mocha brown is flattering on everyone because it’s warm and neutral at the same time. On short nails, the gradient makes the nail look longer; on longer nails, it adds softness instead of sharp contrast. This is also a great option if you hate nail art but want something that looks done.
Start with a nude base in two coats. Dab mocha brown onto a makeup sponge and tap from the middle toward the tips, stopping before the midline so you keep a nude fade. Add 1-2 more light taps to deepen the tips without making streaks. Finish with a glossy top coat so the gradient looks smooth and not speckled.
If you see banding, paint a thin nude layer over the mid area and blend lightly again with a clean sponge.
Don’t blend too aggressively with the sponge — rubbing creates patchy texture.
15. Burnt Sienna Leaf Outline on One Accent
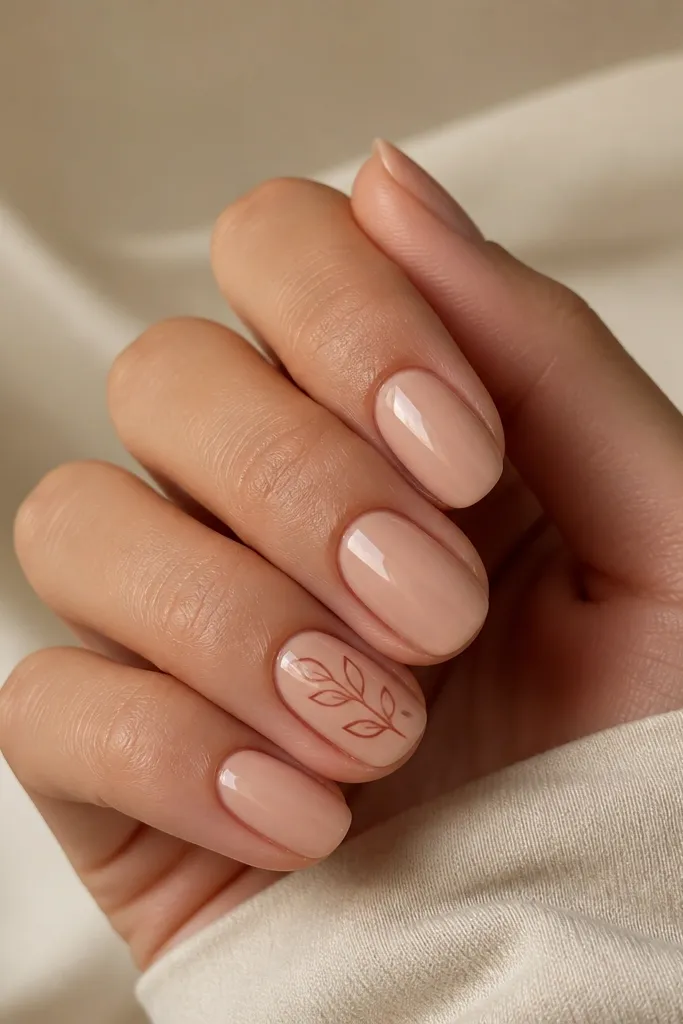
Paint all nails with nude in two thin coats and let them dry. On the accent nail, use a fine liner brush to draw a simple leaf shape — one pointed end, one rounded end. Add one center vein line and a few short side lines with the same brush. Let it dry and then apply glossy top coat across all nails, sealing the leaf outline.
One leaf outline is the quickest way to make your fall set look like it has a theme. The nude base keeps it wearable for work, and the burnt sienna outline reads warm and autumn without turning into chunky 3D art. Outline nail art flatters short nails because the lines stay thin and don’t fill up your nail. It also looks good on hands with bitten edges or uneven nail shape since the leaf sits on top and draws attention away from the sides. Choose a burnt sienna that’s slightly darker than your base for a clean outline.
Watch outDon’t use a thick brush for the outline — thick lines look like a toddler drawing.
Editor's noteIf you don’t trust your leaf shape, draw a tiny teardrop first, then taper one side into a point.
16. Smoked Taupe with Tiny Black Dot Ladder
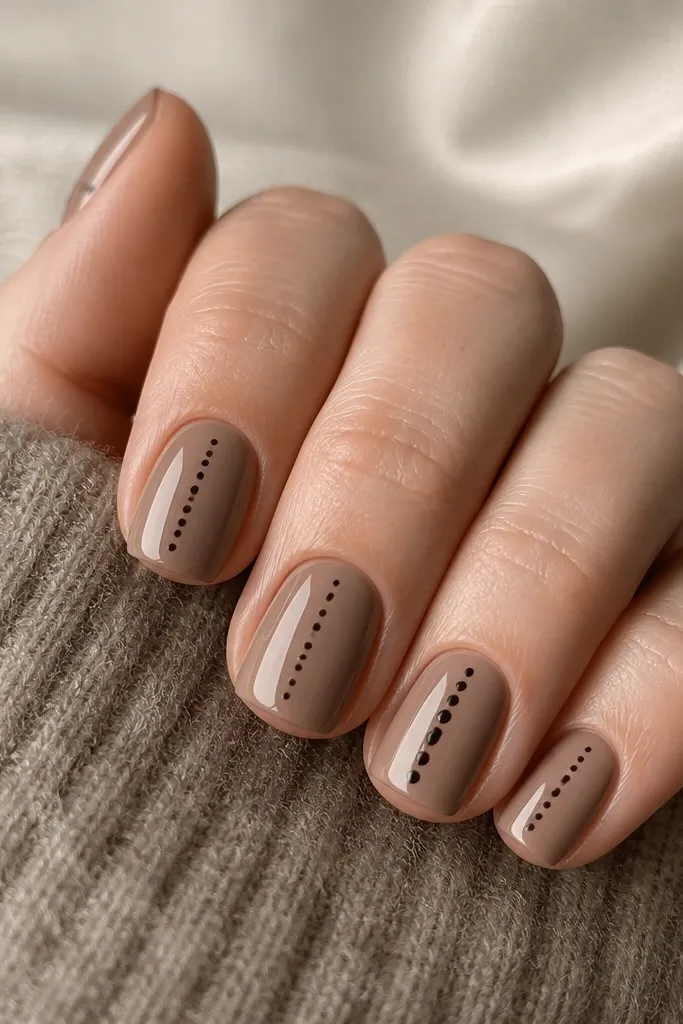
This is fall nail art for people who like clean geometry. Smoked taupe is the cozy base, and tiny black dots create a ladder effect that looks crisp in daylight. It flatters because the pattern stays centered and vertical, which gives the nail a longer look. If you’ve got short nails and want something different from plain polish, this hits the sweet spot. Black dots also hide minor chips because the dots blend with small wear.
Paint smoked taupe in two thin coats. Use a dotting tool to place 4-5 tiny black dots in a vertical line down the center of each nail, leaving equal gaps between dots. For the ring finger, make the second dot slightly larger and add one extra dot near the base. Finish with glossy top coat so the dots look smooth, not raised.
Use the smallest dotting tip you have — tiny dots look intentional, big dots look cartoonish.
Don’t place the ladder too close to the sidewalls or it will look like a mistake.
17. Cinnamon Swirl Accent over Nude Gloss
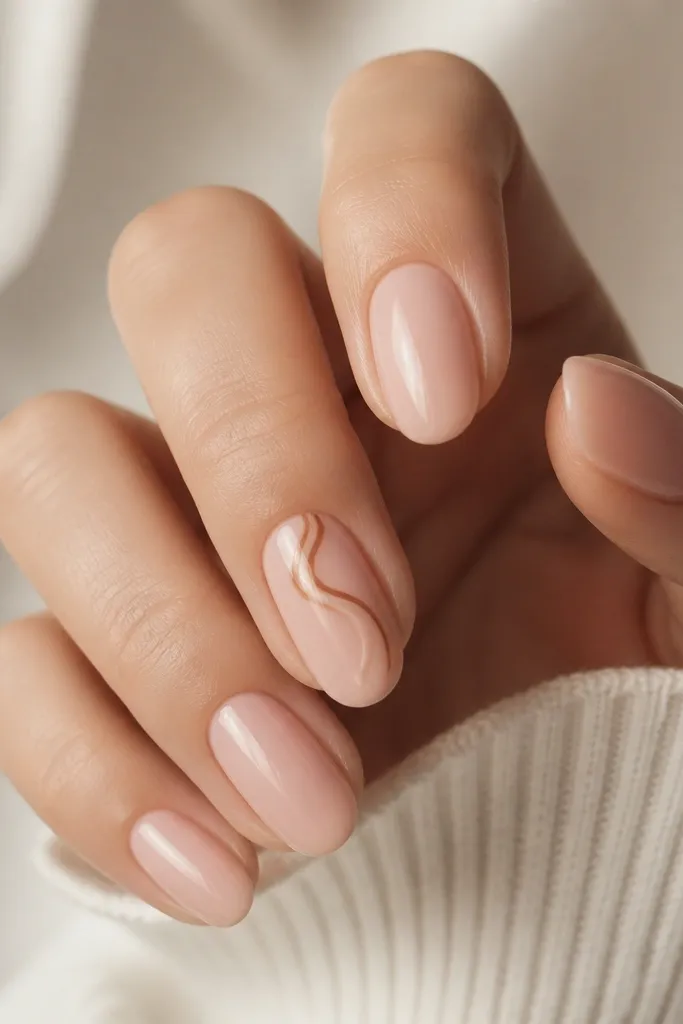
Swirls feel fancy, but you can keep them simple by drawing just one line. A cinnamon-brown swirl over a glossy nude base looks like a warm spice stain — modern and autumn. This flatters because the swirl draws the eye upward and keeps the rest of the nail clean. I like it for everyday because it still looks polished at a distance, not just up close. It’s also forgiving on uneven nails since the swirl is thin and adds structure.
Paint nude glossy base in two coats and let it dry. On one accent nail, use a liner brush to draw a single cinnamon swirl: start near the cuticle, curve toward the center, then taper off. Add a second thinner line inside the swirl for depth, keeping it close to the first line. Seal with top coat carefully, dragging the brush over the swirl so it doesn’t catch.
Practice the swirl on a paper strip first — it trains your wrist for the taper at the end.
Don’t make the swirl too wide — thick swirls look like smears.
18. Teal-Green and Copper Half-Tip
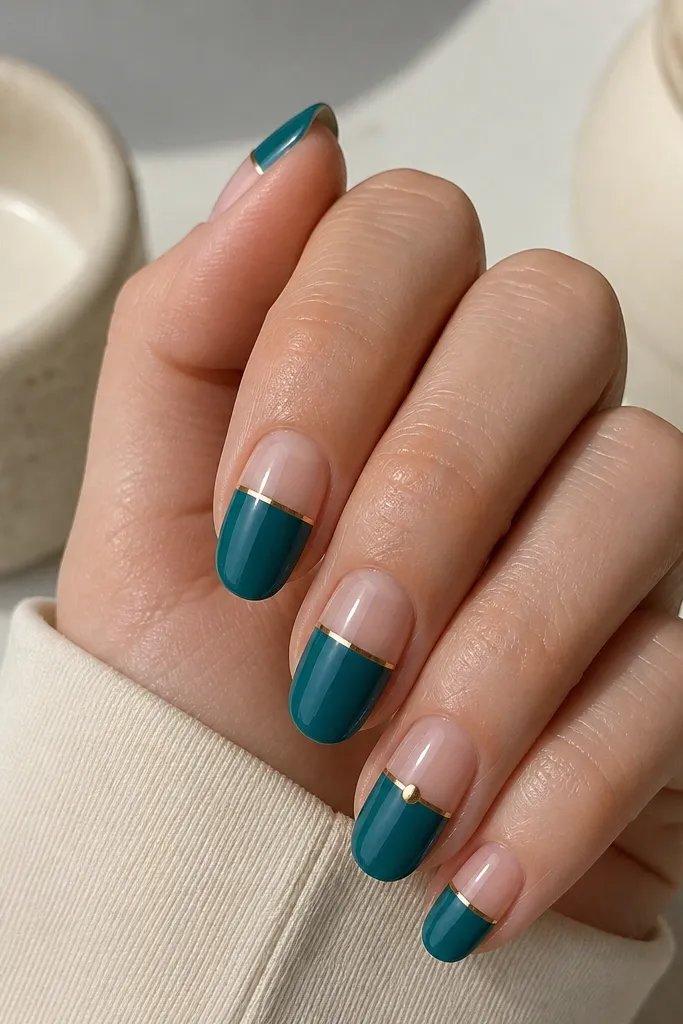
Paint the nude base first and cure/dry fully. Apply teal-green to the bottom half of the nail, then use a thin liner brush to clean up the edge so it looks straight. Add a copper line right where the split meets — keep it thin and crisp. On the accent nail, place one copper dot centered on the line for a focal point, then top coat everything.
This half-tip split is my go-to when fall colors feel too predictable. Teal-green still reads autumn when you pair it with copper, because copper looks like warm metal against a muted base. The split line creates a graphic look that doesn’t need extra art. It flatters most nail shapes because the horizon line sits at a consistent spot and makes nails look balanced. If your skin tone is warm, teal can look extra flattering; if it’s cool, go for a deeper teal that leans green instead of blue.
Watch outDon’t freestyle the split line — uneven edges make it look messy.
Editor's noteUse a steady hand and a striping brush for the copper line; thin lining makes the whole set look expensive.
19. Pumpkin Nude with Chocolate Speckle
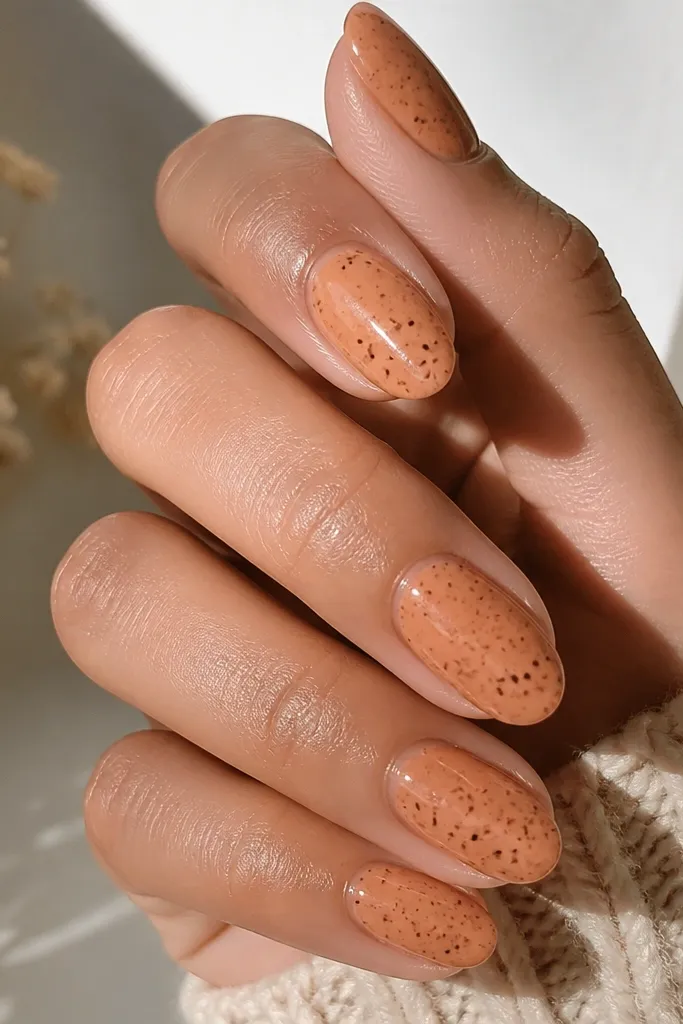
Paint pumpkin nude in two thin coats and let it dry fully. Load a small brush or toothpick with chocolate polish, then tap lightly to create tiny speckles across the nail, focusing on the center and upper half. Keep the speckles lighter near the cuticle so the nail doesn’t look too busy. Finish with glossy top coat and cap the tip so the speckles stay smooth.
Speckles look like fall spice without taking time. Pumpkin nude is warm and flattering, and chocolate speckle makes the set feel like autumn leaves without painting leaves. This works especially well on short nails because speckles don’t need a lot of space to look intentional. It’s also a smart choice if you hate clean lines — speckles hide tiny imperfections. On fair skin, pumpkin nude brings warmth; on deeper skin, it gives a soft glow and keeps the look from being too dark.
Watch outDon’t add speckles all the way to the cuticle — it makes the nail look dirty.
Editor's noteTap over a scrap paper first to control speckle size and avoid big blobs.
20. Burgundy Velvet Look with One Gold Dot
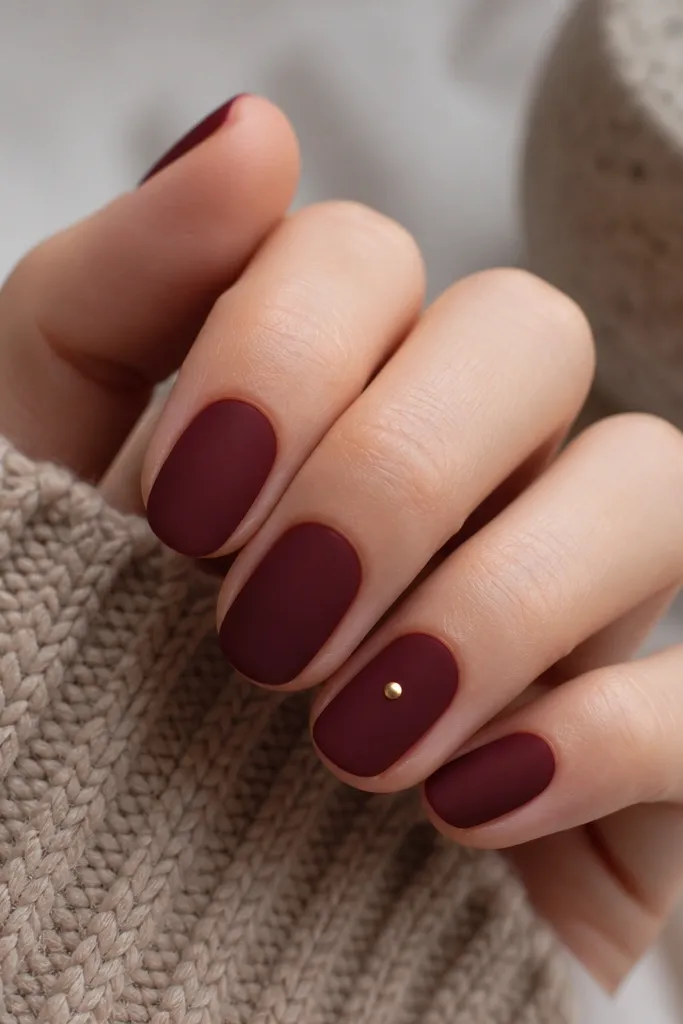
Apply burgundy polish in two thin coats, then seal with a matte top coat on all nails. On the ring finger, add one gold dot using a dotting tool and let it dry fully. If the gold dot feels dull, add a small drop of glossy top coat only over the dot. Finish by checking the edges and cleaning any top coat smudges around the cuticle with a cotton swab dipped in polish remover.
Velvety burgundy is a fall mood in nail form. The matte finish makes the color look plush, and the single gold dot gives you a tiny warm highlight. I like this when I want something that feels dressed up but takes me less than an hour. It flatters because burgundy is dark and the matte hides minor texture around the nail surface. Gold against burgundy looks great on any undertone and pops in indoor lighting.
Watch outDon’t skip cleaning around the cuticle — matte shows smudges faster than glossy.
Editor's noteUse a toothpick to place the gold dot — the tip gives you a perfect tiny circle.