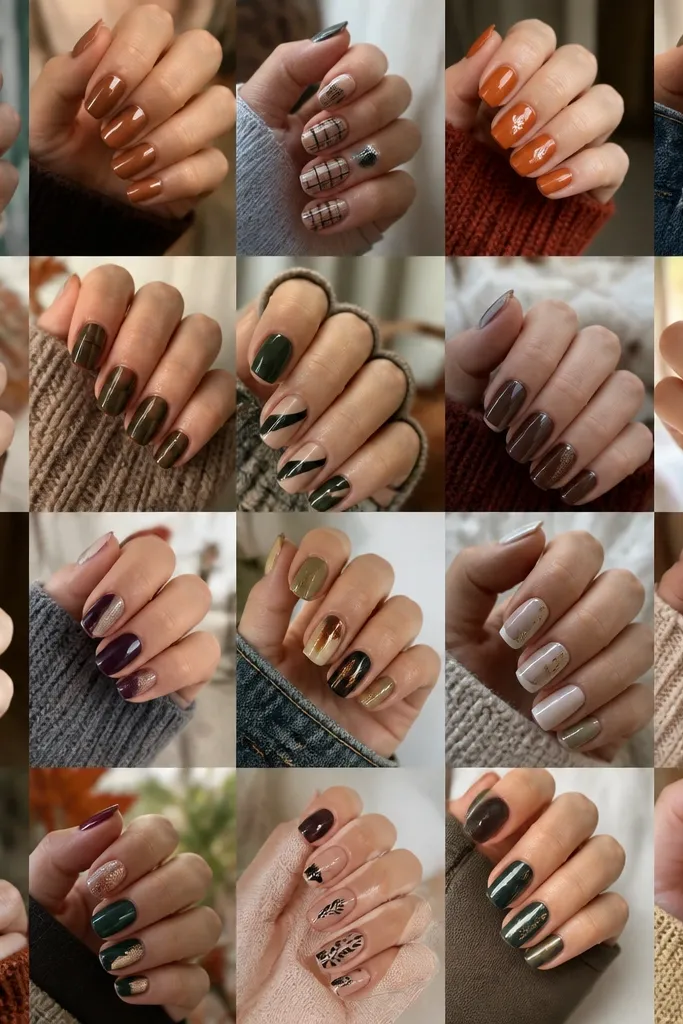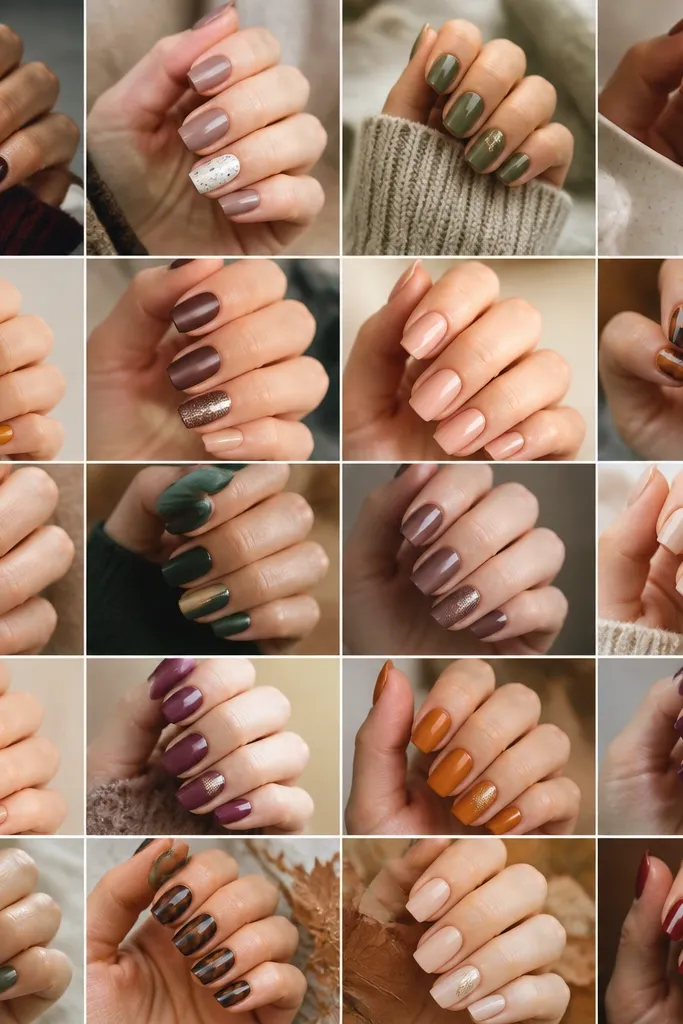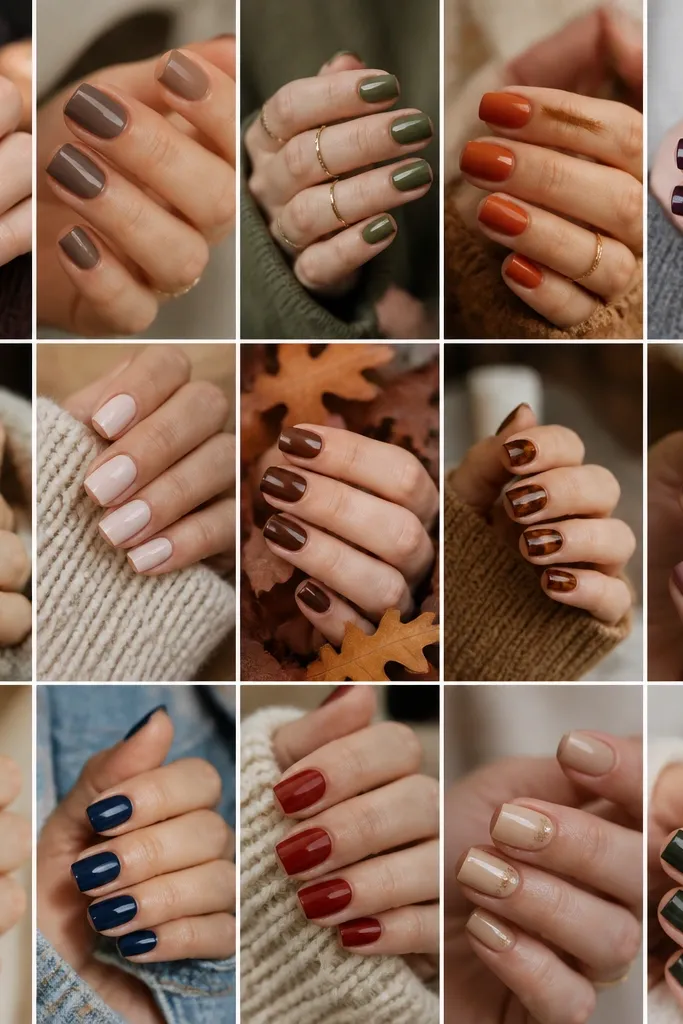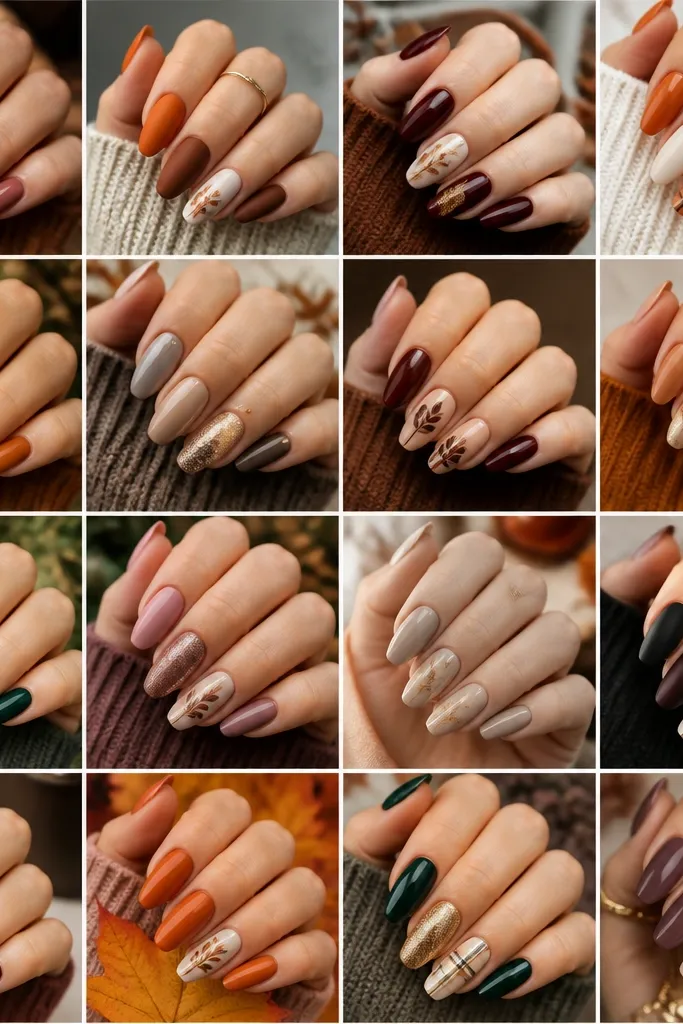
1. Caramel French Square with Burnt Orange Edge
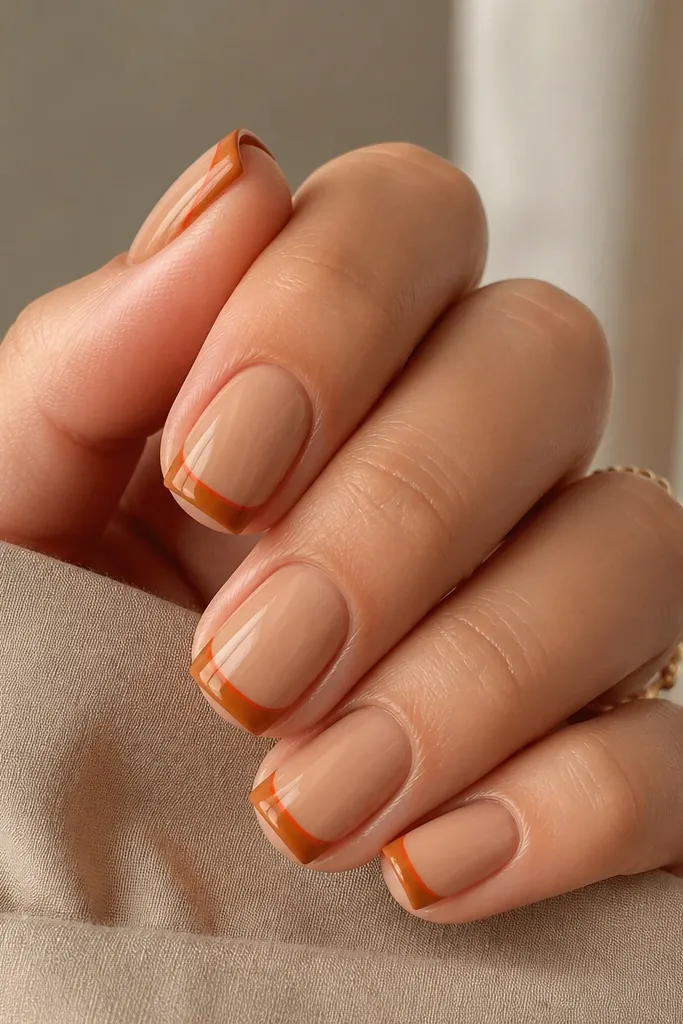
This design makes square nails look polished without needing a lot of tiny art. The caramel nude base flatters most skin tones because it sits in the warm beige family, so it doesn’t turn your nails gray. The wide French tip creates that “intentional manicure” look, and the burnt orange edge adds a fall pop right where your nail catches light. I like it on short-to-medium square nails because the crisp tip line makes fingers look tidy, not stubby. It also works for both everyday wear and work meetings since it reads like a neat French, not a costume.
Start by applying a warm caramel nude base (two thin coats). Then paint a wide French tip in the same caramel family but slightly deeper, keeping the tip corners perfectly square. While the French layer is still tacky (or once dry if you’re using regular polish), add a super thin burnt orange line along the very outer edge of the square tip. Finish with a glossy topcoat and cap the free edge so the orange line doesn’t chip at the corners.
Editor's noteUse a striping brush and steady your hand on a table. If the orange line looks wobbly, fix it by wiping the brush tip with acetone and re-tracing only the edge.
Watch outAvoid thick French tips on short squares — they make the nail look shorter and the corners chip faster.
2. Olive Velvet Matte with Gold Cuticle Halo
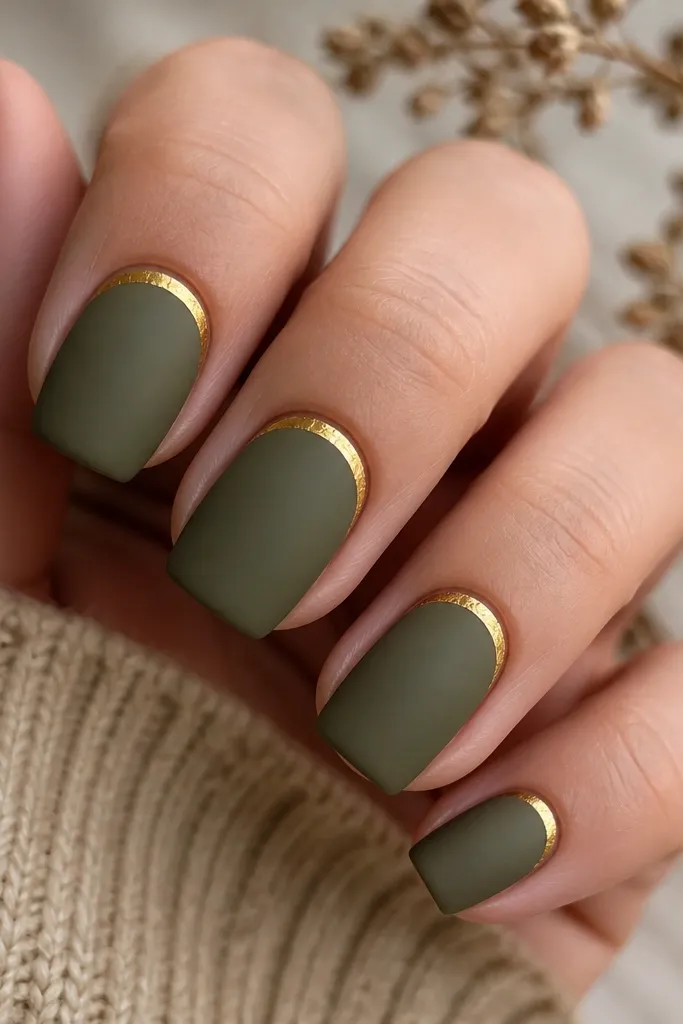
Matte olive looks like fall in a bottle — grounded, not loud. The matte finish softens the color and makes it feel expensive, especially with gold near the cuticle where the light hits as you move. This set is best if your skin has warm or neutral undertones, because olive won’t clash and the gold brings warmth back to your hands. On square nails, the matte surface hides minor ridges and makes the edges look clean. It’s also great if you want fall nails that aren’t covered in tiny designs.
Paint two thin coats of olive gel and cure fully. Apply a matte topcoat to the entire nail so it looks like soft fabric, not satin. Then use striping tape or a fine liner brush to draw a thin gold arc around the cuticle on each nail, leaving a small gap between the arc and the cuticle line. Seal with a glossy topcoat only over the gold halo if you want it to look more reflective, or keep it matte if you prefer a muted gold.
If your cuticle lines are hard to control, use a tiny piece of striping tape as a guide for the first pass, then remove it before curing.
Don’t matte the gold — it dulls the contrast and makes the halo look flat.
3. Plum Tuxedo Square with Micro Studs
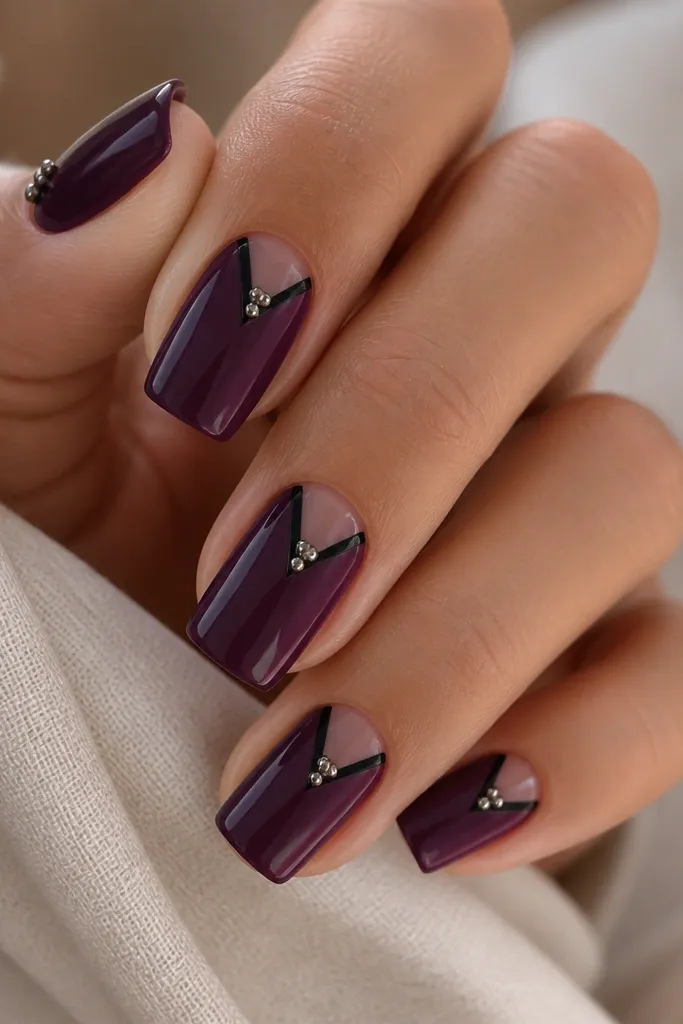
This is my go-to when I want fall nails to look “styled” but still wearable. The plum base reads rich without being too dark, and the black V gives that structured tuxedo effect that flatters the nail shape. Micro studs at the center point create a focal point that draws the eye upward, which makes short squares look longer. I’ve worn this on both fair and medium skin tones and it always looks sharp because the contrast is controlled: plum + black + tiny silver. It’s perfect for dinners, date nights, and anything where you want your hands to look put-together.
Start with two coats of deep plum gel, then cure. Use a thin liner brush to paint a black V that starts about 1/3 down from the cuticle and meets at the center of the nail, keeping the arms symmetrical. Place one or two micro studs at the inner point — press them into tacky gel and cure. Finish with a glossy topcoat, but keep it thin over the studs so they don’t get rounded off.
If your V line looks uneven, wipe the brush with acetone and re-paint only the top half — that’s where symmetry matters most.
Skip big rhinestones — on square tips they look heavy and cheap fast.
4. Burnt Orange Gradient Square with Caramel Glow
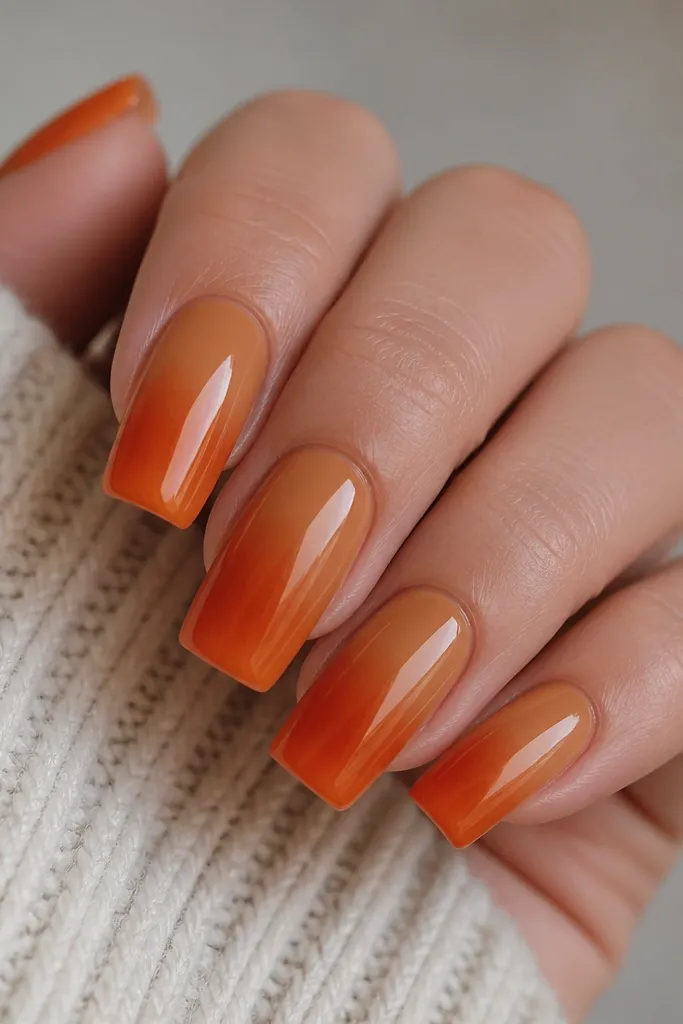
A gradient is the easiest way to make fall colors look custom. Caramel at the cuticle flatters because it brightens your nail bed area, and burnt orange at the tip adds that autumn warmth without turning the whole nail too dark. The square shape helps the gradient look intentional because the tip edge gives a clear boundary for the darker shade. This is especially flattering if you have short nail beds — the lighter base makes the nail look taller. It also looks great in photos because the glossy finish catches light across the blended area.
Use a caramel nude as your base and cure. Sponge on burnt orange gel using a makeup sponge, starting near the cuticle and blending outward — do light passes until the transition looks smooth. Clean up the sides with a small brush dipped in cleanser so the gradient stays centered. Apply topcoat and cap the free edge to keep the burnt orange from chipping at the corners.
Use a thin sponge layer first, cure, then build color. Too much pigment on the first coat makes the blend patchy.
Don’t blend with thick gel — it drags and creates stripes on square corners.
5. Taupe Marble Square with Copper Veins
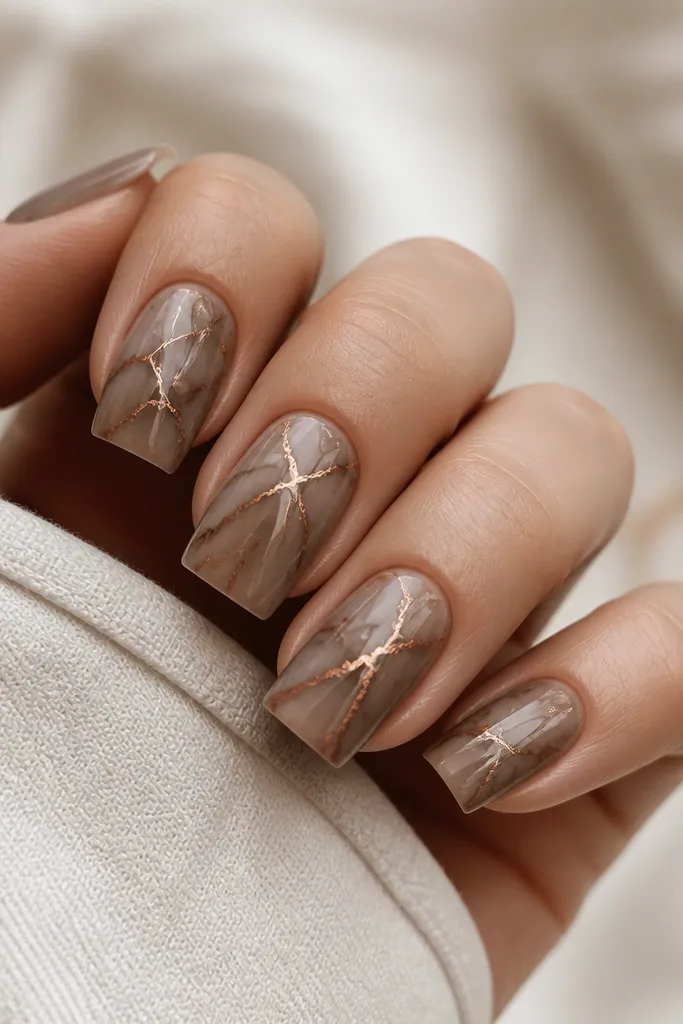
Marble nails look fancy because they mimic stone, and fall marble is all about muted warmth. Taupe works on a wide range of skin tones because it’s neutral, and copper veins add that autumn metallic warmth without going full gold. On square nails, the marble movement looks cleaner if you keep the veins mostly vertical or diagonal, not swirling. This set flatters hands that look better with softer contrast — it looks grown-up, not flashy. It’s also a great choice for office days where you still want your nails to feel like a style choice.
Paint a taupe base with two thin coats and cure. Add copper lines with a fine liner brush or a nail art pen — start with a few thicker veins, then add hairline offshoots. Use a tiny dotting tool to drag the taupe a little around the copper lines so the marble looks layered, then cure. Seal with a glossy topcoat that smooths everything and makes the copper look like it’s under glass.
Editor's noteIf you’re using regular polish, practice the copper lines on a paper strip first. Marble needs steady pressure to avoid blobs.
Watch outAvoid random copper scribbles — they look like mistakes instead of marble.
6. Chocolate Brown Square with Nude Half-Moon
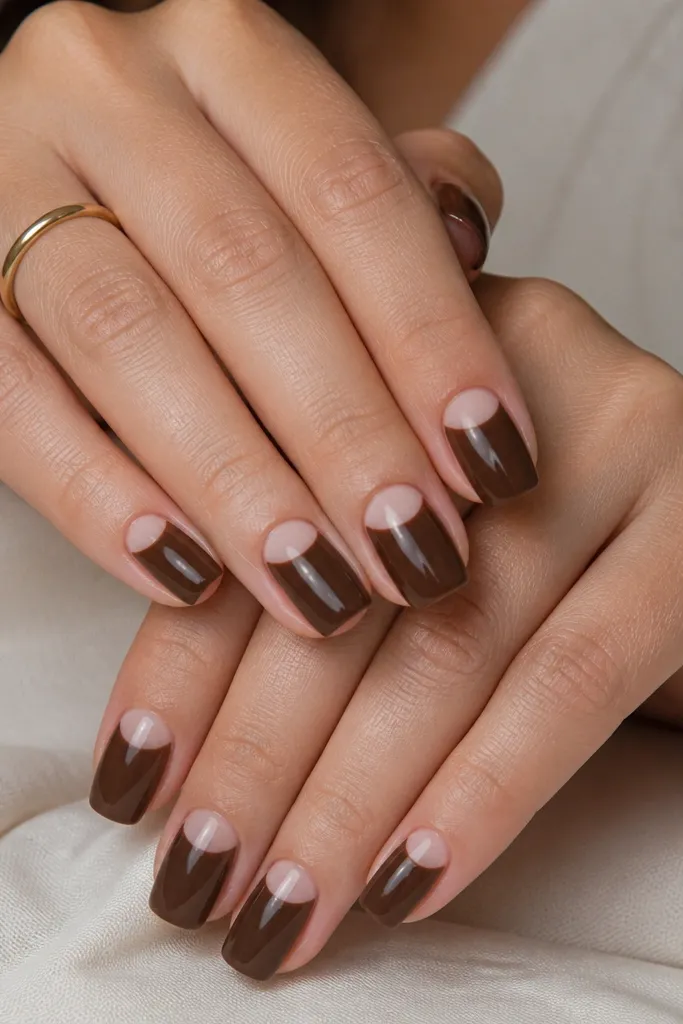
This half-moon design is a throwback that still looks modern because the square shape makes the negative space look intentional. Chocolate brown is a fall staple that flatters deeper skin tones and also looks rich on fair skin. The nude half-moon brightens the cuticle area and makes the nail bed look longer. I like it when your nails are slightly uneven — the nude shape draws attention to the center and away from tiny imperfections. It’s also a safe pick for formal events because it looks clean and graphic, not busy.
Start with a nude base if you want the half-moon to blend smoothly, then apply chocolate brown polish over the rest of the nail. Use a small stencil or a cuticle half-moon guide so the nude area stays crisp — place it at the cuticle and press gently. Paint chocolate brown, cure or dry, then remove the stencil while the polish is fully set. Finish with a glossy topcoat and cap the free edge so the chocolate stays intact on the corners.
Choose a nude half-moon shade that matches your cuticle area, not a pinky nude. A warm beige looks more natural with chocolate.
Don’t make the half-moon too big — it can overpower short square nails.
7. Forest Green Tips with Nude Jelly Base
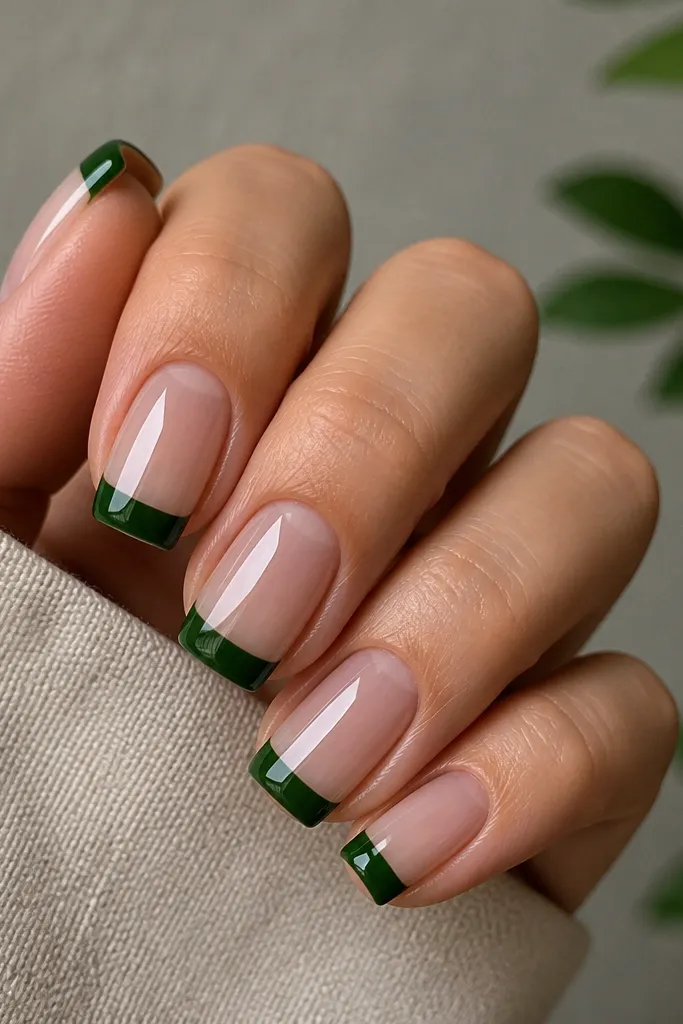
Jelly bases make fall nails look softer and more expensive because they let your natural nail show through. The forest green tips add that crisp autumn contrast without turning the whole nail heavy. This set flatters hands with shorter nails because the translucent base makes the nail look longer. I’ve worn it during fall weekends and it still looks fresh because the jelly finish doesn’t show wear as quickly as opaque colors. On square nails, the banded tip design keeps everything graphic and tidy.
Apply a nude jelly gel or regular polish in thin layers until you get a translucent, even coat. Then paint a forest green tip band — keep it about 2-3 mm thick if your nails are short, and keep the edges straight. Clean up the sides with a flat brush so the green doesn’t creep down the sides. Seal with two coats of glossy topcoat, and be extra careful to cap the tip corners to prevent chips.
If your jelly base looks streaky, do three thinner coats instead of one thick one.
Don’t put the green band too close to the cuticle — it shortens the look of the nail.
8. Rust Checkerboard Accent on Square Nails
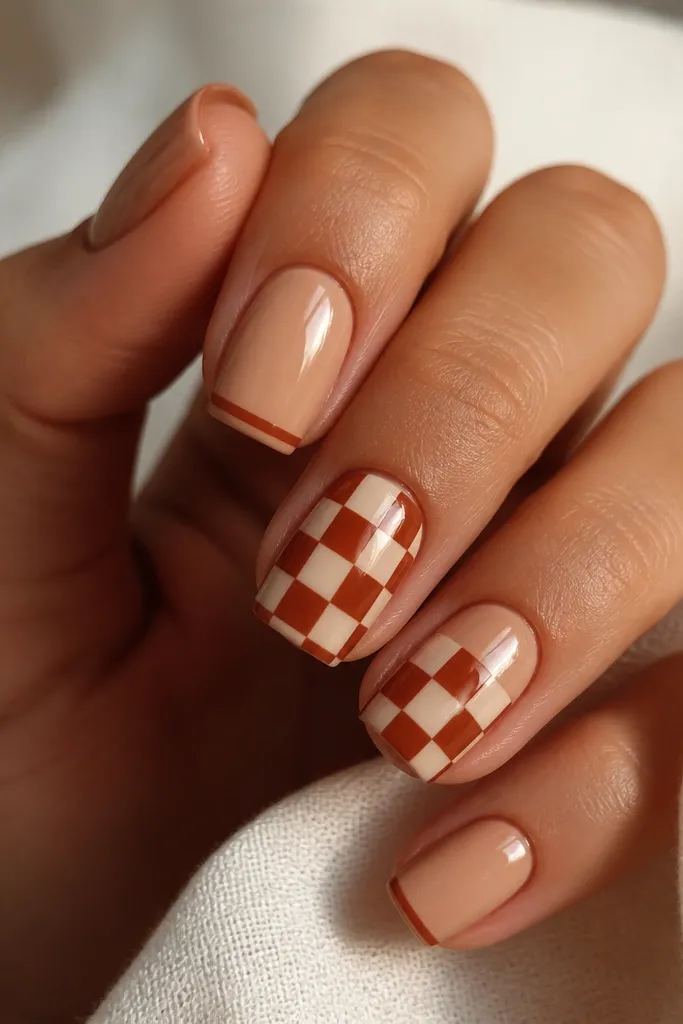
Checkerboard is the quickest way to add personality to fall without covering every nail. The rust + cream combo reads autumn and still looks clean because the pattern is small and controlled. On square nails, the grid lines look sharper and more modern than on rounded shapes. I like this for people who want nail art but don’t want every nail to be complicated. It also looks great on medium skin tones because rust pops against warm nudes.
Start with a warm nude base on all nails and cure. Pick two accent nails and map out a checkerboard using a thin striping brush — aim for small squares, about 1 mm each, and keep the grid centered. Use rust orange and a creamy off-white, alternating squares, then cure. Add a glossy topcoat over everything, and on non-accent nails you can add a thin rust stripe near the tip for a matching set.
Use a nail art dotting tool to place each square corner first. Then fill in — it keeps the grid straight.
Don’t freehand big squares — they look sloppy on square tips.
9. Creamy Nude with Burnt Orange Leaf Lines
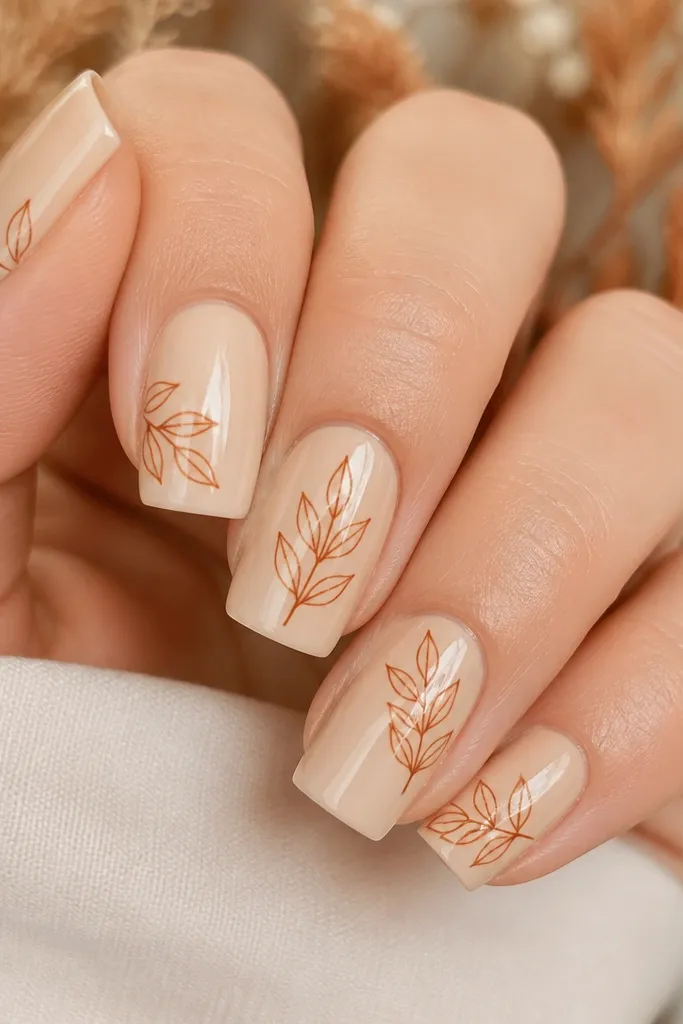
Line art is the secret weapon when you want fall vibes but you hate thick designs that feel bulky. A creamy nude base keeps your hands looking clean and makes the burnt orange leaf lines feel light instead of heavy. Leaf lines also flatter square nails because the leaf shape naturally follows the nail length — it draws the eye upward. This is a great option for short square nails because the art stays delicate and doesn’t crowd the tip. It’s also beginner-friendly if you use a liner brush and keep your lines thin.
Paint a creamy nude base with two thin coats and cure. With a fine liner brush, draw one leaf shape on each nail — keep it near the center and point it slightly toward the tip. Add vein lines inside the leaf using lighter pressure, then add a small stem line if you want extra detail. Finish with glossy topcoat, and cap the edges so the thin lines don’t catch and lift.
If your lines wobble, set your brush down for a second at the start point, then pull — the pause makes the line steadier.
Don’t fill the leaf shapes solid — it turns line art into a blob.
10. Midnight Plum with Copper Foil Flakes
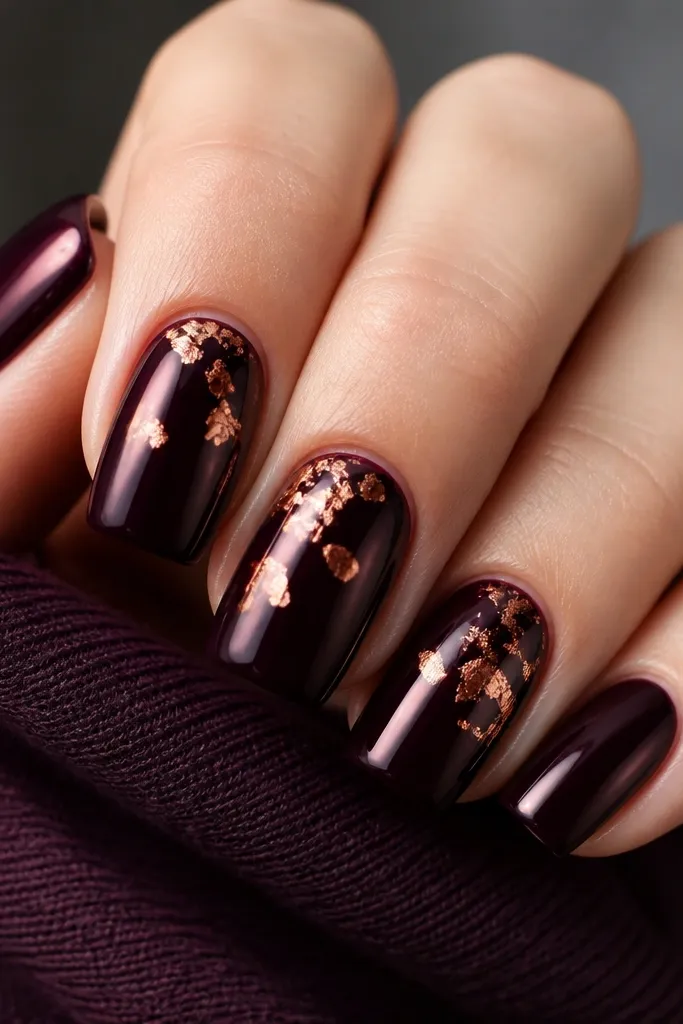
This one looks like you spent way more time than you did. Midnight plum is dramatic but still wearable, and copper foil adds that fall metallic sparkle without needing rhinestones. I love it on square nails because the foil catches light on the flat planes, so it looks dimensional. It flatters most skin tones because plum has both warm and cool undertones — it doesn’t wash anyone out. If you want a manicure that feels “going out” but still classy, this is the set.
Start with two coats of midnight plum gel and cure. Add a thin layer of tacky gel or foil glue on one or two accent nails near the cuticle and mid-nail, then press copper foil flakes into place. Press lightly and repeat until you like the density, then cure. Seal with a glossy topcoat, using a slightly thicker topcoat over the foil so it feels smooth when you run your thumb across.
Use a makeup sponge to press foil into tiny gaps. Your fingers can be too heavy and smear the flake placement.
Don’t skip the smoothing topcoat over foil — rough edges catch on sleeves and lift.
11. Sienna Brown Micro-Glitter Ombré
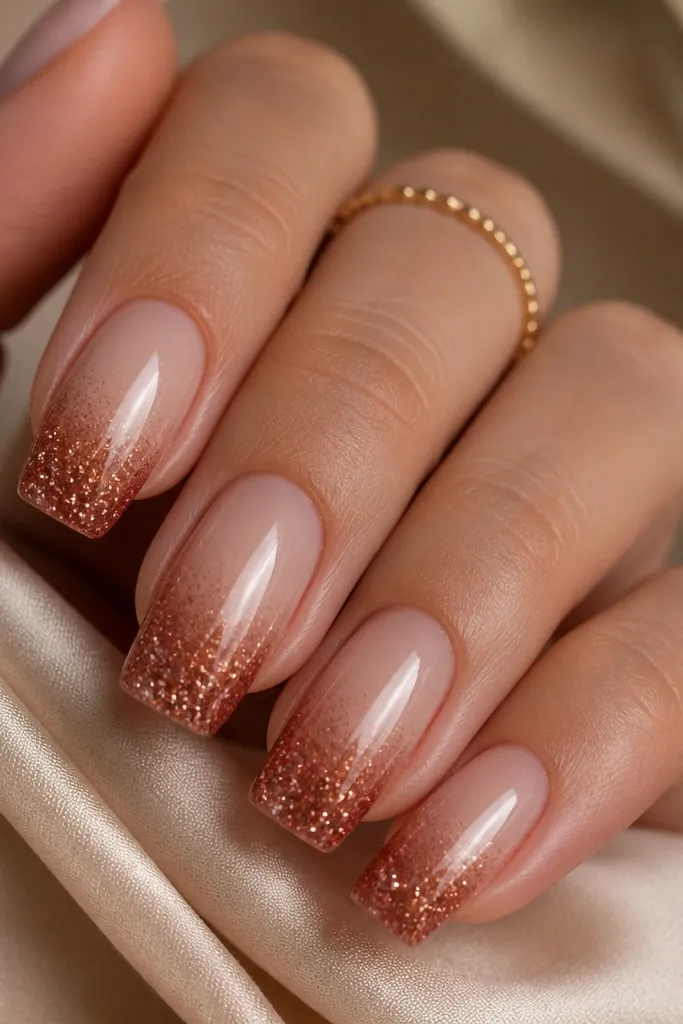
Micro-glitter ombré is the cleanest way to do sparkle in fall. Sienna brown keeps it warm, and the nude base prevents the glitter from looking harsh. On square nails, the ombré looks especially good because the tip area is flat and reflects light evenly. This design flatters hands that look better with subtle shine — it doesn’t scream, it glints. It also hides small chips better than solid glitter because the fade disguises wear.
Apply a nude base and cure. Sponge or brush on sienna micro-glitter gel starting at about 1/3 down from the tip, then blend upward with a lighter touch. Add a second glitter layer only on the top half of the glitter zone to deepen the tips, then cure. Finish with a glossy topcoat and cap the free edge so the glitter doesn’t separate at the corners.
Choose micro-glitter labeled “fine” or “ultra-fine.” Chunky glitter makes square tips feel rough and looks uneven.
Don’t make the glitter start too low — it can cut off the nail length visually.
12. Cream Stripe Over Chocolate Base
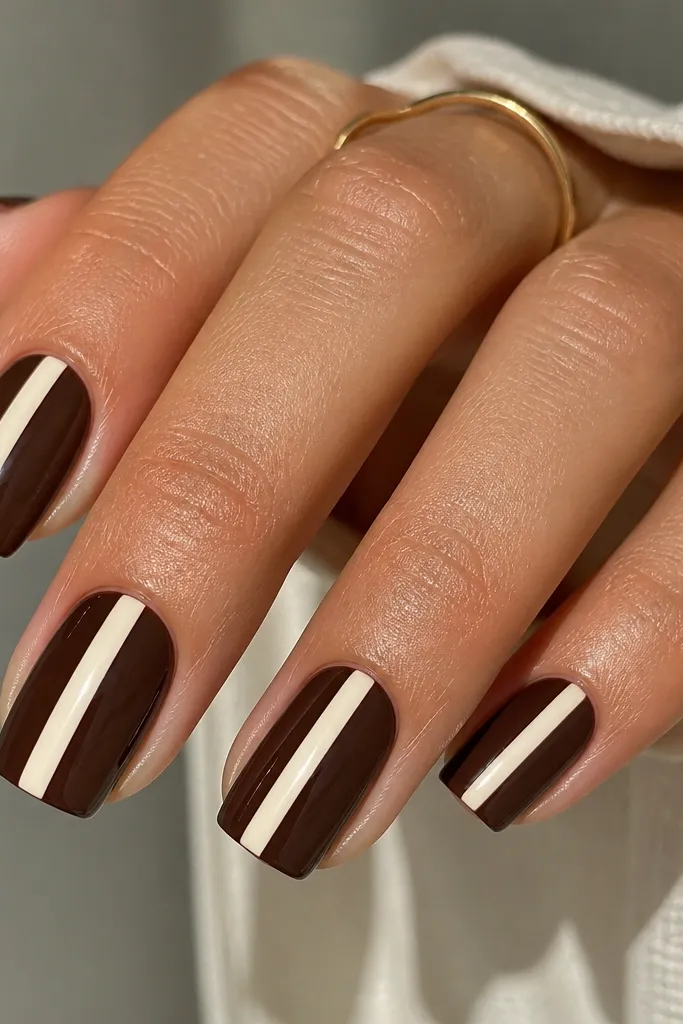
A single center stripe makes square nails look longer and slimmer, and it’s the easiest graphic design to keep neat. Chocolate brown gives you that fall depth, while cream creates contrast that doesn’t look neon. This works well if your nail beds are wide, because the stripe pulls attention to the middle and visually narrows the nail. It’s also a good choice if you want something different from French tips but still clean enough for work. The glossy finish makes the stripe look smooth and intentional.
Paint two coats of glossy chocolate brown and cure. Mark the center of the nail with a tiny dot of topcoat so you don’t lose alignment, then apply a strip of cream polish down the middle using a striping brush. Keep the stripe thickness around 1/3 of the nail width, and leave a small gap from the cuticle line and tip edge. Cure fully and topcoat over everything, cap the sides so the stripe doesn’t lift at the edges.
If you use regular polish, let the chocolate dry completely before you stripe. Moving too soon makes the cream bleed.
Avoid stripes that touch the cuticle or tip — they look harsh and make chips more obvious.
13. Burnt Orange and Olive Split Half
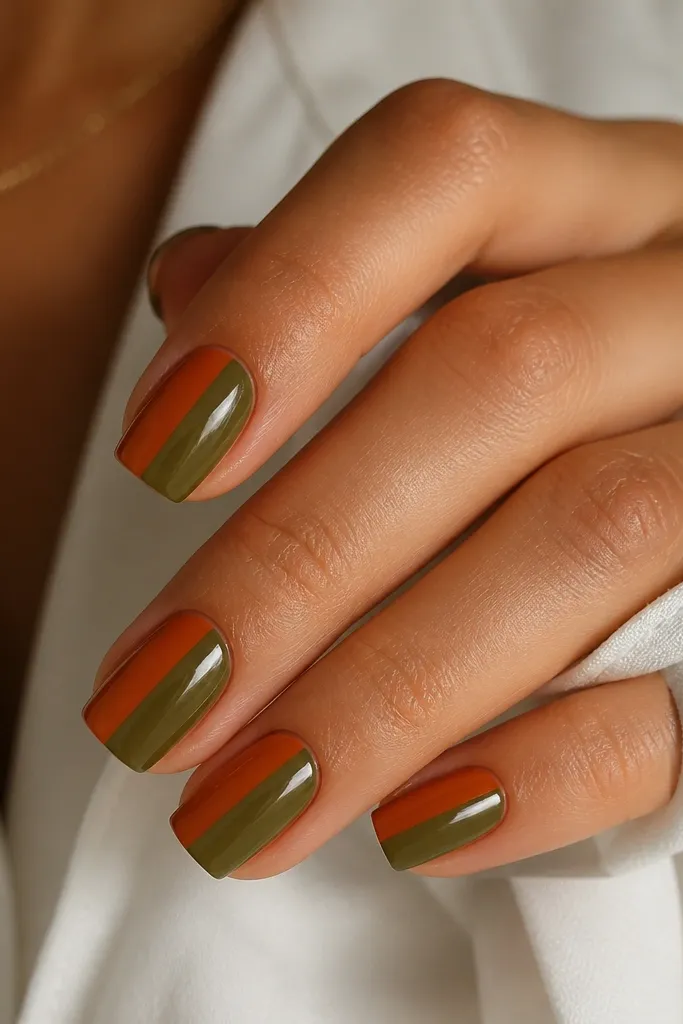
This split-color manicure looks bold without needing art tools. Burnt orange and olive are both fall-forward but they’re different enough to create contrast — orange gives warmth, olive adds depth. The vertical split makes square nails look sleek and slightly longer, which is great if your nails are on the shorter side. It also flatters medium and deep skin tones because the colors sit clearly against your hand. If you want a fall look that still feels modern and graphic, this is it.
Start with a clear base coat. Paint the left half burnt orange and cure, then paint the right half olive and cure, keeping the split line straight. If you have trouble with straight lines, use thin striping tape down the center as a guide, then remove after both colors are applied. Seal with a glossy topcoat and cap both free edges — split designs chip faster if the corners aren’t sealed.
Use tape sparingly and press it flat so you don’t get a raised ridge at the split.
Don’t blend the two sides — a blurry split looks messy on square nails.
14. Taupe Base with Dark Plum Dots at the Tip
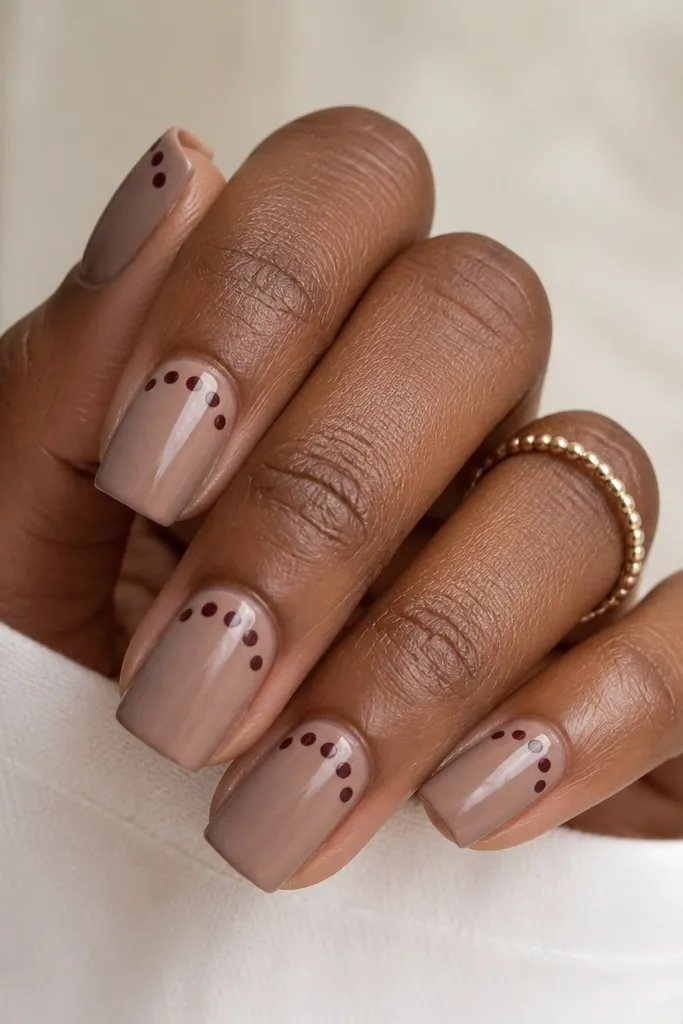
Dot accents are my favorite when you want fall nails that look playful but still tidy. Taupe gives a soft neutral base that works for basically every skin tone, and dark plum dots bring that autumn depth. The dots placed near the tip create a “lightweight French” effect without a full painted band. On square nails, the dot arc looks clean because the nail edge is flat and gives the dots a stable placement. This set is also forgiving — if your dot spacing is slightly off, it still reads as intentional.
Paint two coats of taupe and cure. Use a dotting tool and dark plum polish to place 3-5 dots across the tip area — start with the center dot, then place two dots on each side to form a gentle arc. Keep the dots about 1 mm apart so they don’t merge into a blob. Topcoat with glossy finish and cap the tip corners so the dots don’t catch during wear.
Wipe the dotting tool between nails. Old polish buildup makes dots larger and uneven.
Don’t put dots too far down the nail — it shortens the look of the square tip.
15. Smoked Mocha Square Nails with Dried-Leaf Outline
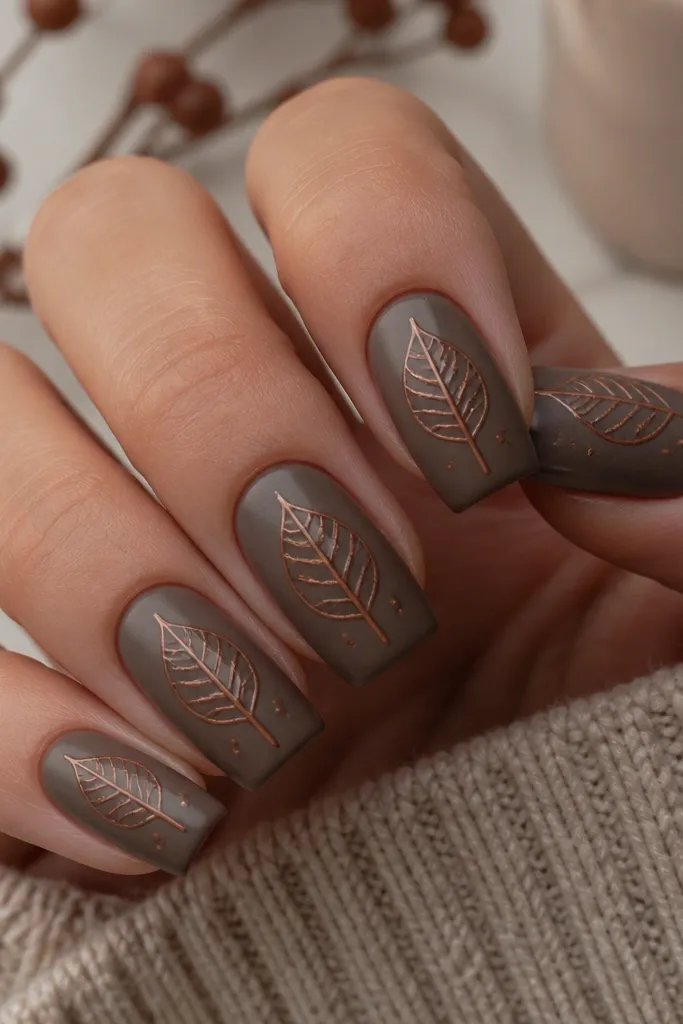
This design looks like you pressed a real leaf into your nails, then sealed it under glass. The smoked mocha base is the part that makes it feel fall — it reads warm and grounded, not flat brown. The dried-leaf outline keeps the look classy because it stays thin and airy instead of covering the whole nail. I’ve worn this with chunky sweaters and it still looks clean because the pattern stays in the center, not all over the nail. The contrast between semi-matte mocha and glossy leaf lines makes the design pop without needing glitter.
Start with two thin coats of smoked mocha polish, then finish with a semi-matte top coat. Let it cure fully so the outlines don’t bleed. Use a striping brush and warm caramel paint to draw a simple leaf shape down the middle of each nail — start with the center vein line, then add short angled branches on both sides. Add a couple of tiny dot “spores” near the leaf tip if you want it to look more natural. Seal everything with a glossy top coat, and cap the free edge so the line stays crisp.
If your leaf lines look too perfect, break them once or twice with a tiny gap — that’s what makes it look like a real dried leaf. Use a striping brush dampened with cleaner to clean the edges instead of wiping the whole nail.
Don’t draw the leaf outline on a glossy base — the caramel line will spread and you’ll lose the crisp vein detail.