1. Matte Black Half-Moon With Glossy Cherry Tips
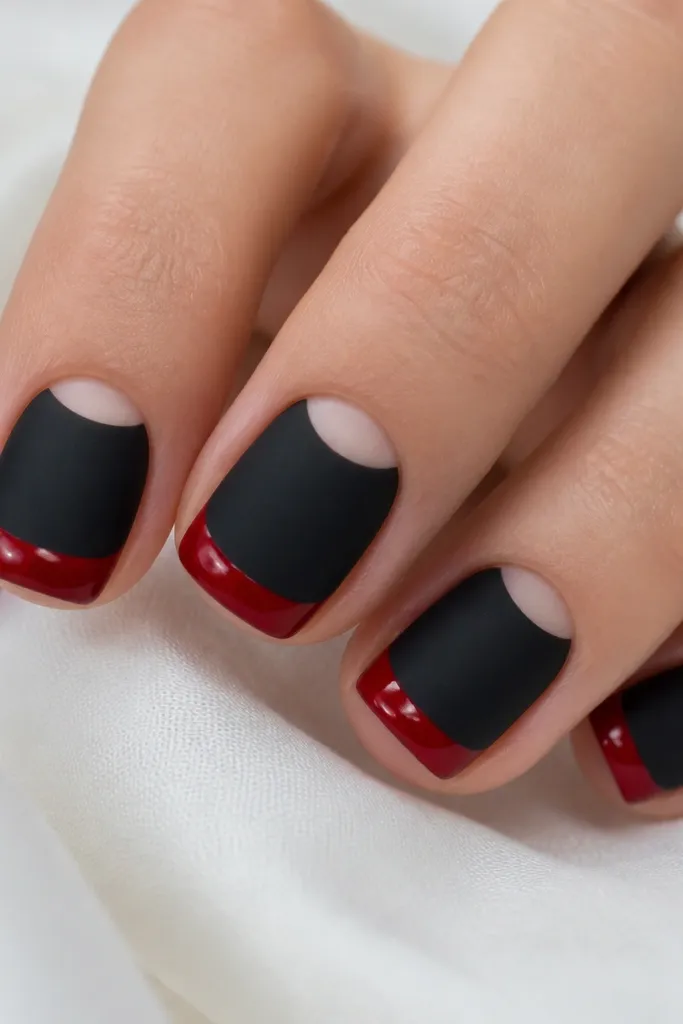
This one looks cozy because matte black gives that soft, winter sweater vibe while glossy cherry red brings the glow. The negative-space half-moon keeps fingers looking longer, especially on medium tan or fair skin tones where solid black can feel heavy. I've worn this to work and then to dinner - it reads dressed up without needing extra gems. The classy trick is the border between matte and gloss: keep it sharp so the contrast looks intentional, not accidental.
Start by painting a matte black base on the nail, covering evenly but leaving the half-moon area bare near the cuticle. Then use a striping brush to trace a thin curve where the half-moon ends. Cure or fully dry the matte layer. Next, apply glossy cherry red to the free edge only, staying about 1mm away from the half-moon cutline so the border stays crisp. Finish with a glossy top coat only on the cherry red section, and skip top coat on the matte area so the contrast stays cozy.
Editor's noteUse a tiny piece of tape to mask the half-moon curve if you struggle with freehand - press it lightly so it doesn't pull polish.
Watch outDon't flood the red into the cuticle zone; it makes the half-moon disappear and the nail looks shorter.
2. Micro-French With Black Outline On Red Base
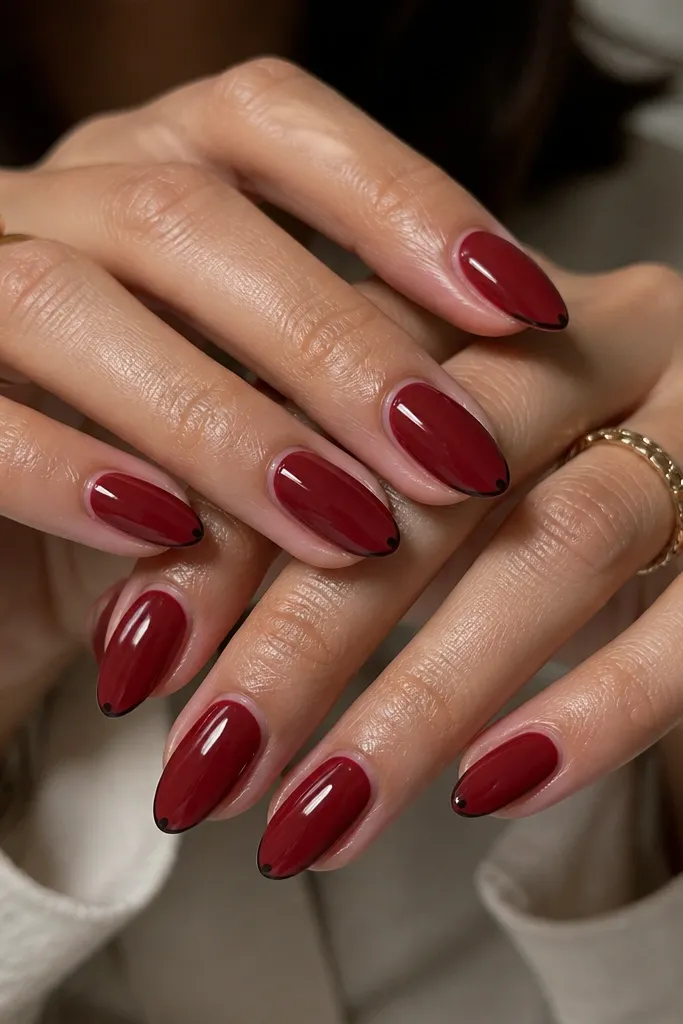
Micro-French is classy because it frames the nail instead of covering it. A deep red base looks flattering on most skin tones because it sits close to your natural warmth, while the black outline gives structure. I love this when my nails are slightly uneven - the outline makes everything look intentional. It's also beginner-friendly if you can steady your hand, because you're drawing one thin line, not a full pattern.
Paint your entire nail with a deep red creme or jelly-red in two thin coats. Let it dry completely so the surface isn't tacky. Use a fine liner brush dipped in black polish to draw a thin smile line about 0.5mm above the tip edge. Then add a small black dot near the center of the tip on top of the smile line, keeping it under the size of a pinhead. Seal with a smooth top coat over the whole nail so the red stays glossy and the black line doesn't dull.
Editor's noteIf your smile line looks wobbly, clean the edge with a small brush dipped in acetone right after painting.
Watch outAvoid thick red coats; heavy base polish makes the micro line look buried.
3. Glossy Black Cat-Eye With Red Star Center
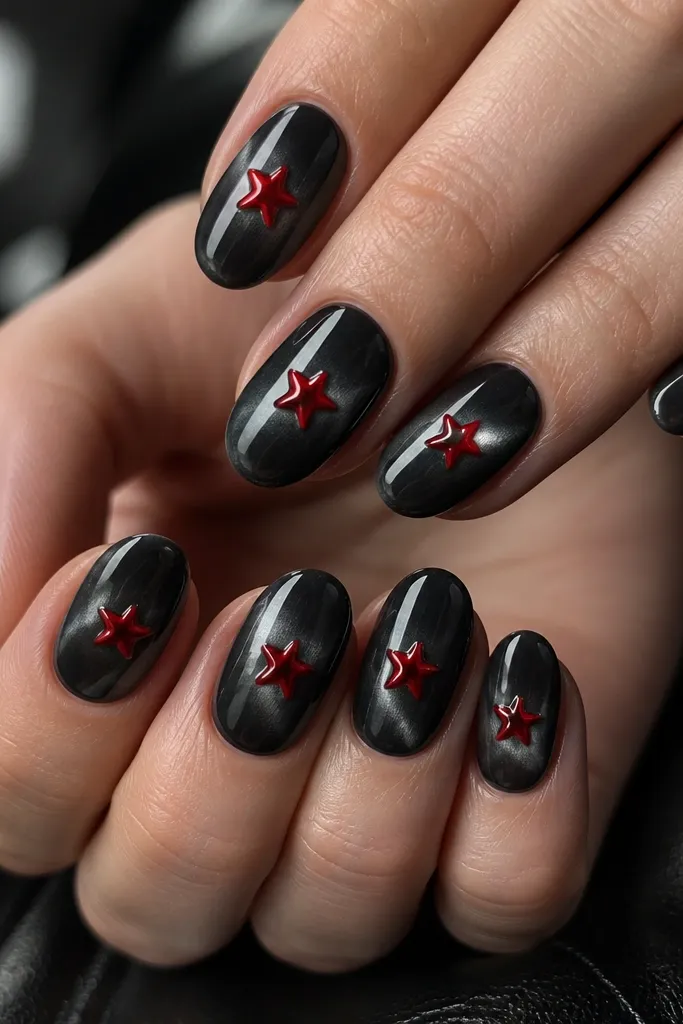
Cat-eye polish gives that cozy, night-sky effect, and black makes the shimmer look expensive. The red star adds a focal point without turning the nails into busy art. I wear this on my light skin when I want something darker but still playful. The star is small enough to look neat even as your nails grow out, and it stays classy because the rest of the nail is clean.
Apply glossy black cat-eye polish in two thin layers, keeping the magnet direction consistent across fingers. Move the magnet to create the brightest line down the center, then cure or dry. With a dotting tool or toothpick, place a tiny red dot at the center of the nail. Use a star stencil if you have one; otherwise, drag four short lines outward from the dot to form points, then refine the angles with a liner brush. Finish with a high-gloss top coat to lock the star edges and make the cat-eye band look smooth.
Editor's noteMagnetize for the full time your product recommends - rushing makes the shimmer look patchy.
Watch outDon't add stars to every nail if your hands already feel busy; do it on two accent fingers for a calmer look.
4. Velvet Matte Red With Black Lace Bow Accent
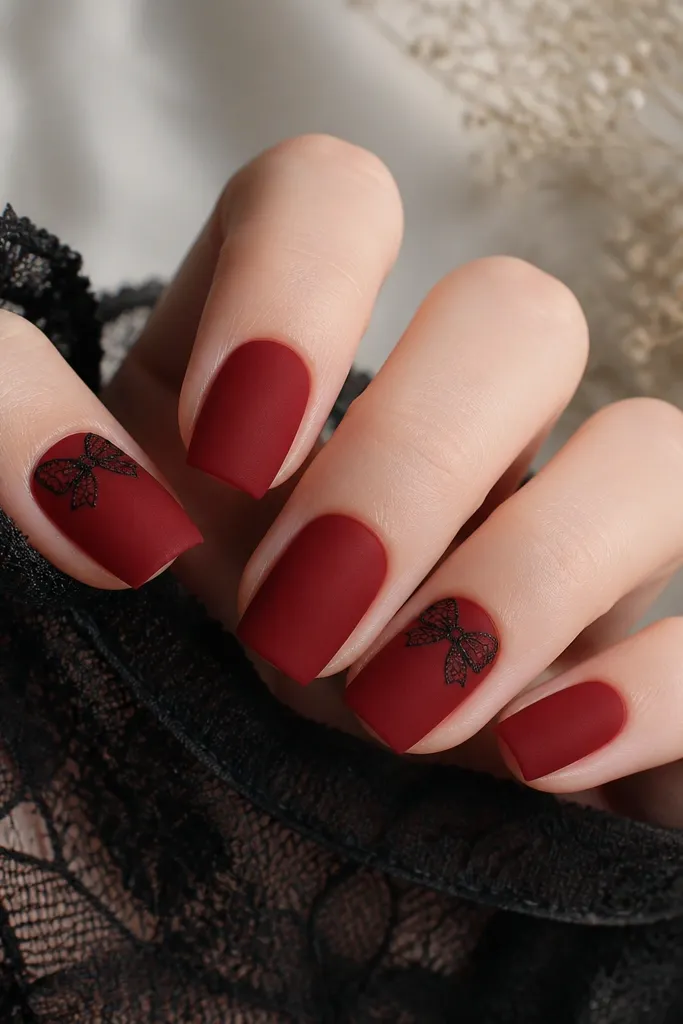
Velvet matte red looks cozy because it's soft-looking, not mirror shiny, and it hides small nail texture. The black lace bow at the cuticle adds romance without covering the whole nail. This flatters hands with slim nail beds because the bow sits high and draws the eye upward. I like it for holiday parties or anytime you want "cute but not loud."
Start with a velvet matte red base: either a velvet-matte polish or a regular red with a matte top coat, applied in two thin coats. Let it fully set so it doesn't grab the lace. For the accent nails, dab a tiny amount of clear gel or nail glue near the cuticle line. Place a pre-made black lace bow charm or lace strip and press gently with tweezers. Seal over the top with a thin layer of gel top coat, focusing on the edges so it doesn't lift.
Editor's noteKeep the bow small - around 2-3mm wide - so it looks like jewelry, not a sticker.
Watch outSkip heavy clear gel over lace; it makes the bow look bulky and cloudy.
5. Black Glossy Grid Over Red Jelly Base
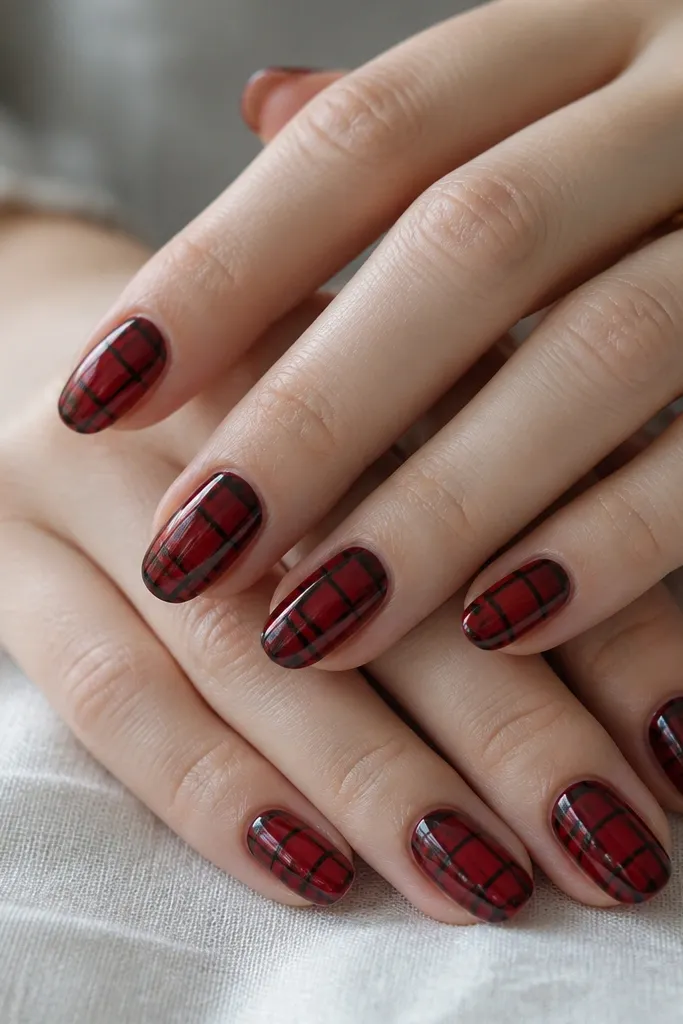
This design reads classy because the grid is controlled and the red jelly underneath stays visible. The shine on the black lines makes it look crisp, like printed nail art rather than hand-drawn. I like it on olive and medium-deep skin tones because the red jelly warms the base while black keeps it grounded. It also works great for people who hate heavy decals - the grid is thin and light.
Apply a red jelly base in two to three thin coats so it stays translucent, not opaque. Cure fully, then wipe with cleanser if you're using gel. Use a striping brush to paint vertical black lines first, spaced evenly about 2-3mm apart. Then add horizontal lines to cross them, keeping the intersections aligned. Finish with a glossy top coat that smooths the lines and makes the jelly look juicy.
Editor's noteIf you're using regular polish, use nail art tape to mark spacing before painting the first line.
Watch outDon't let the grid lines touch the sidewalls; leave a tiny margin so the nail looks clean.
6. Red And Black Diagonal Split With Thin White Edge
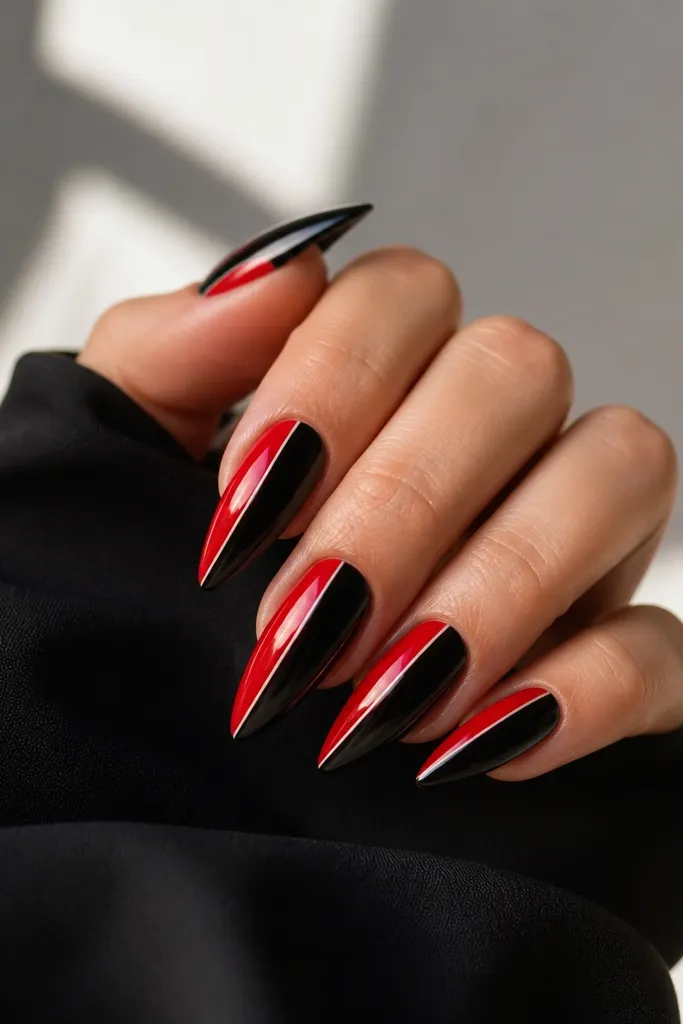
Diagonal splits look classy because they elongate the nail and create movement. The thin white edge makes the red and black look separated and intentional, like graphic design. This flatters hands with broader nail beds because the diagonal line visually narrows the nail. I wear it when I want something bold but still tidy for work.
Paint a base coat, then apply black on one side of the diagonal using a striping brush, leaving the other side bare. Cure or dry. Clean up the edge with a brush dipped in acetone. Next, paint the red side in two thin coats, stopping right at the diagonal edge. Use a fine brush to draw a hairline white line down the center where the colors meet. Seal with a glossy top coat for a crisp, glassy finish.
Editor's noteMark the diagonal with a pencil dot on each side of the nail before you paint so your line stays straight.
Watch outDon't skip the white separator - without it, the colors blend into a muddy line.
7. Black Marble Swirl On Red Creme
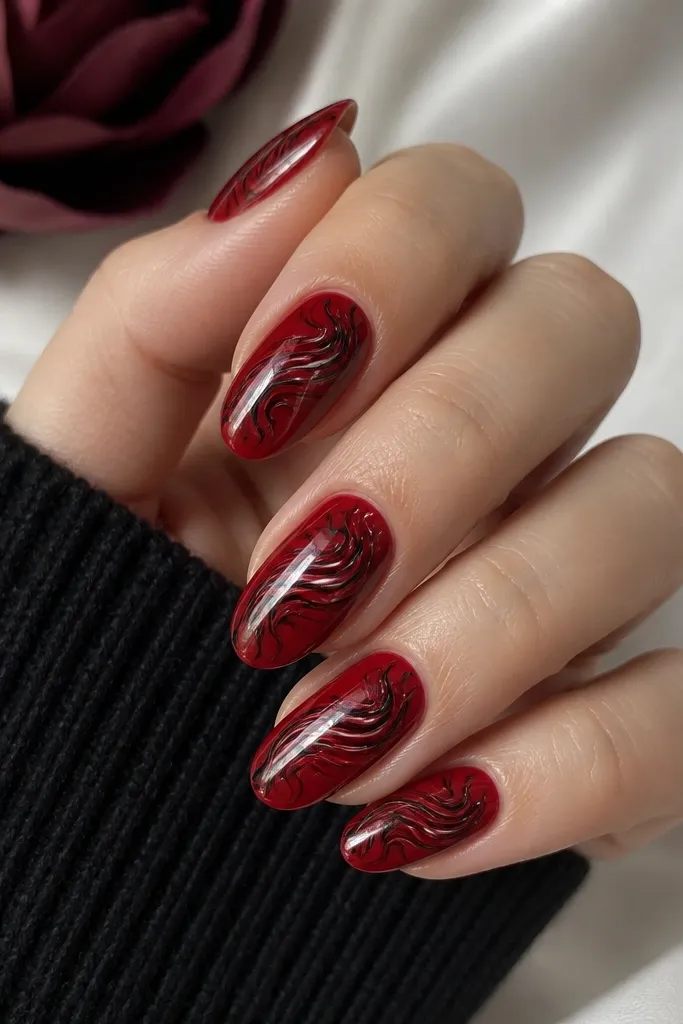
Marble looks cozy because it has motion and it hides tiny application imperfections. The red creme base keeps the look warm, while black swirls add drama without needing gems. I like this for evenings because the marble catches light differently on each nail. It also looks good on short-to-medium nails since the swirls can stay fine and centered.
Start with a solid deep red creme base in two coats. When it's tack-free but not fully hardened (for gel, cure the base; for regular polish, wait until it's mostly dry), add black polish in small drops. Use a thin toothpick or marbling tool to drag the black into swirls, pulling lines outward and then lifting to stop the streak. For extra polish, add a couple micro white streaks by dragging a tiny amount of white over the black. Seal with a glossy top coat so the marble looks like it's under glass.
Editor's noteDo the marble on one nail at a time so it doesn't dry out before you blend the swirls.
Watch outDon't overmix; too many passes turn marble into thick blobs.
8. Red Chrome Half-Moon With Matte Black Tips
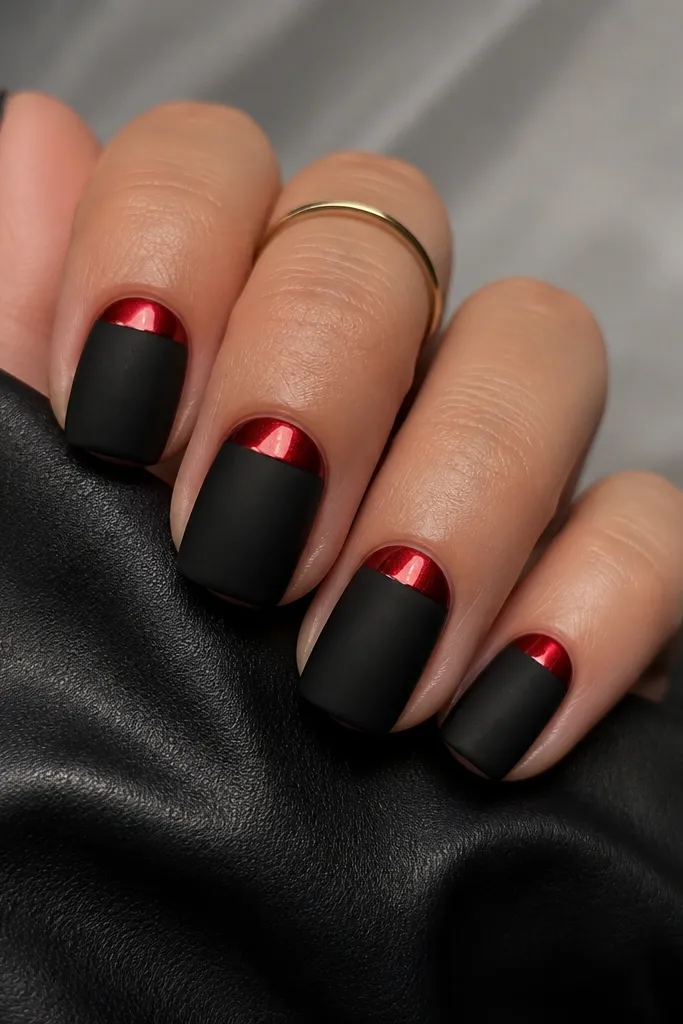
Chrome at the cuticle looks cozy and classy because it grabs light right where your hand moves. Matte black tips keep it grounded and stop the chrome from feeling too loud. This design flatters medium and deeper skin tones especially well because the red chrome pops without washing out. The key is the border: crisp curves make it look like a planned manicure, not a random effect.
Paint the nail with a black base that you finish with a matte top coat. Leave the half-moon area near the cuticle uncoated - mask it with a small curved sticker or freehand with a clean brush. Apply red chrome powder to the exposed half-moon area over a tacky gel or sticky base, then gently buff off excess. Keep the chrome strictly in the half-moon so you don't get speckling. Finish by sealing the matte portion with matte top coat again and applying glossy top coat only over the chrome half-moon.
Editor's noteWipe the nail with cleanser right before chrome so the powder adheres evenly.
Watch outDon't press too hard on chrome powder; it can smear and create dull patches.
9. Black And Red Reverse French With Rounded Corners
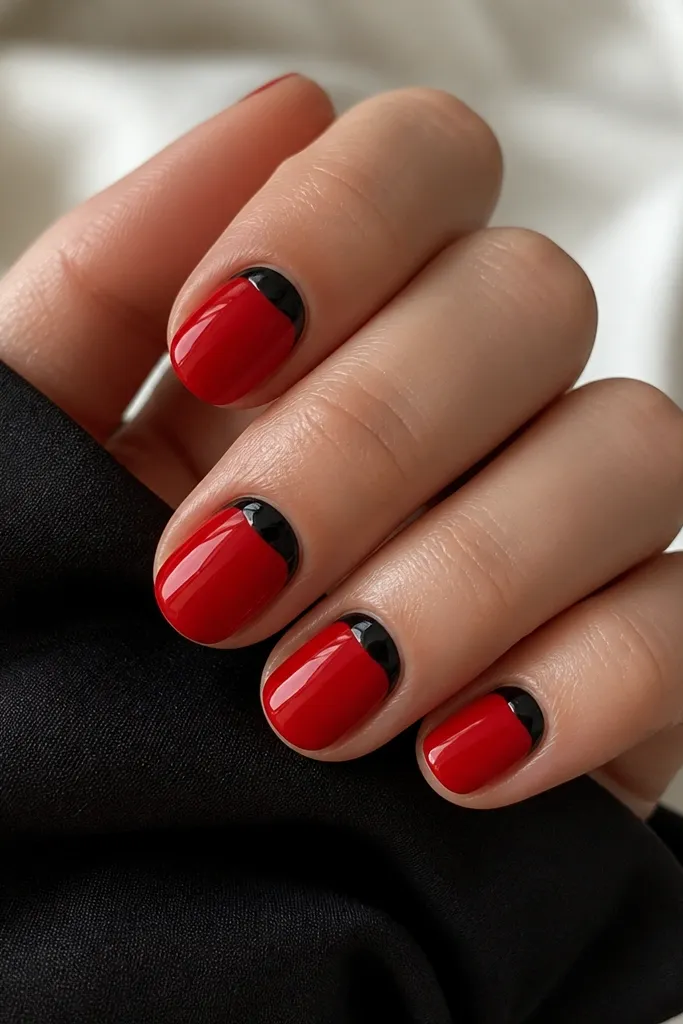
Reverse French looks classy because it frames the cuticle like a neat halo. Rounded corners keep it cozy and friendly, not sharp-edged. On fair to light skin, the glossy black arc makes the cuticle area look tidy and gives a clean contrast to red. On deeper skin tones, the glossy red base stays warm and the black arc adds structure.
Start with a glossy red base in two coats. Cure fully. Use a small nail art brush to paint the reverse French arc at the cuticle - keep it rounded and stop about 0.5mm away from the sidewalls. Paint the arc black and clean the edges with a thin brush dipped in remover. If you want extra neatness, add a second thin black pass once the first layer is dry. Finish with a full glossy top coat to make the arc look smooth and even.
Editor's noteIf your cuticle line grows uneven, keep the arc slightly thicker in the center - it balances on most hands.
Watch outDon't make the arc too wide; wide reverse French can make nails look shorter.
10. Red Foil Flakes On Black Base
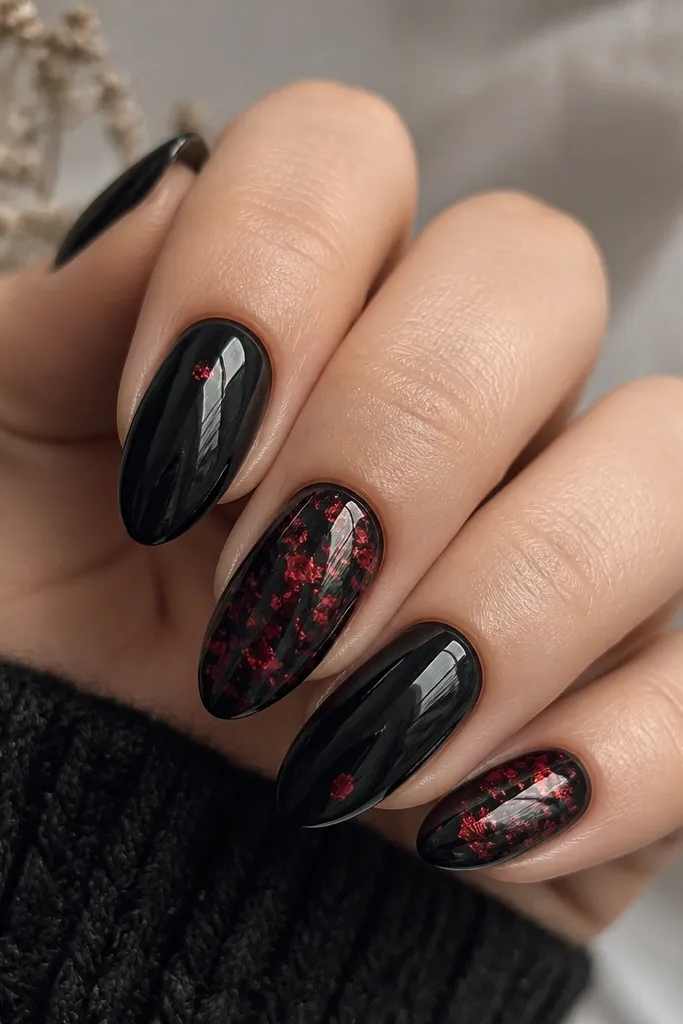
Foil on black looks cozy because it feels like candlelight - warm red sparks against a dark background. The classy part is controlling where the flakes land so it looks like art, not fallout. I like this for nights out because the foil reflects light with every hand gesture. On hands with short nails, foil can look too scattered, so I keep it to two accent nails and leave the rest mostly black.
Apply a deep glossy black base in two coats. Cure or fully dry. For accent nails, dab small patches of clear sticky gel or foil glue where you want flakes, then press red foil pieces in and around those spots. Tap off extra foil gently so it doesn't smear. If you want it cleaner, add a single larger foil shard near the center, then fill around it with smaller bits. Seal with a thin layer of glossy top coat, using a gentle hand on the foil texture.
Editor's noteUse matte top coat over only the black nails if you want a more cozy, less shiny look.
Watch outDon't cover foil with thick gel; it can dull the shine and trap texture.
11. Black Outline Hearts On Red Matte
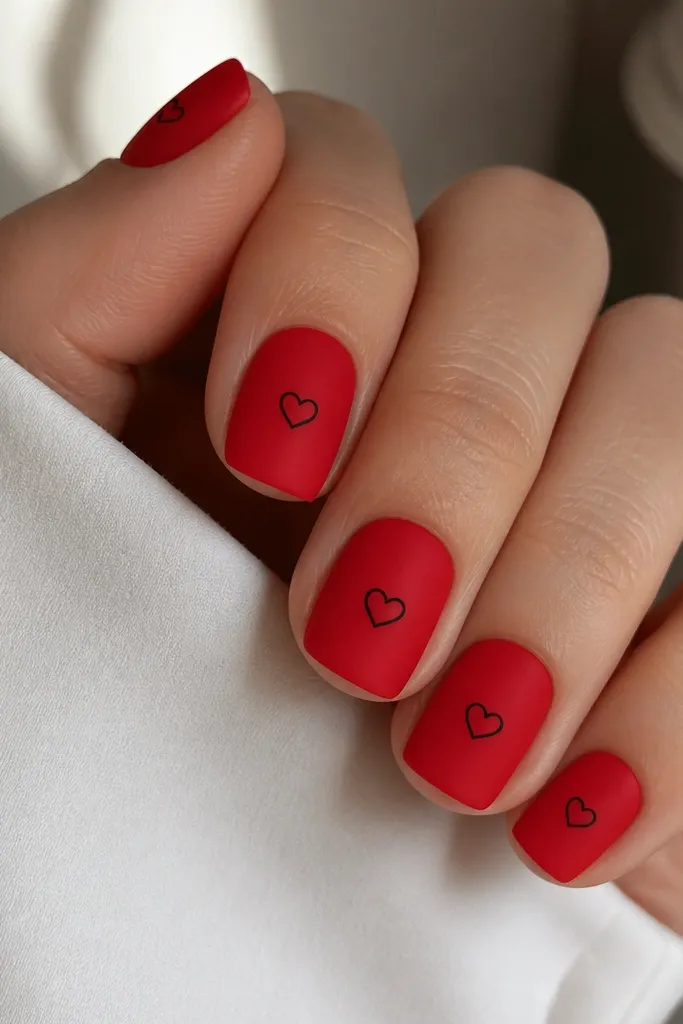
Hearts look cute, but the outline style keeps them classy. Matte red makes the hearts feel cozy and cozy-cute without turning glossy and childish. I like this on everyday hands because the hearts are small and consistent, so they don't look messy as nails grow out. Black hearts also sharpen the shape of the nail and look great on all skin tones - it's the clean contrast that matters.
Paint nails matte red with a creme red base plus matte top coat, or use a matte-finish polish. Let it fully dry so the line work doesn't bleed. Use a fine liner brush to draw a small heart outline in black near the center of the nail, leaving the inside open so the red shows. Add the second half of the heart by mirroring the first side, then connect the bottom point. Finish with a thin matte top coat over everything, or glossy top coat only on the hearts if you want a slight shine.
Editor's notePractice one heart on a spare nail tip or paper first - you want the bottom point to look sharp.
Watch outDon't fill the heart solid black; it makes the design heavy and eats up the nail space.
12. Black And Red Plaid With Negative Space
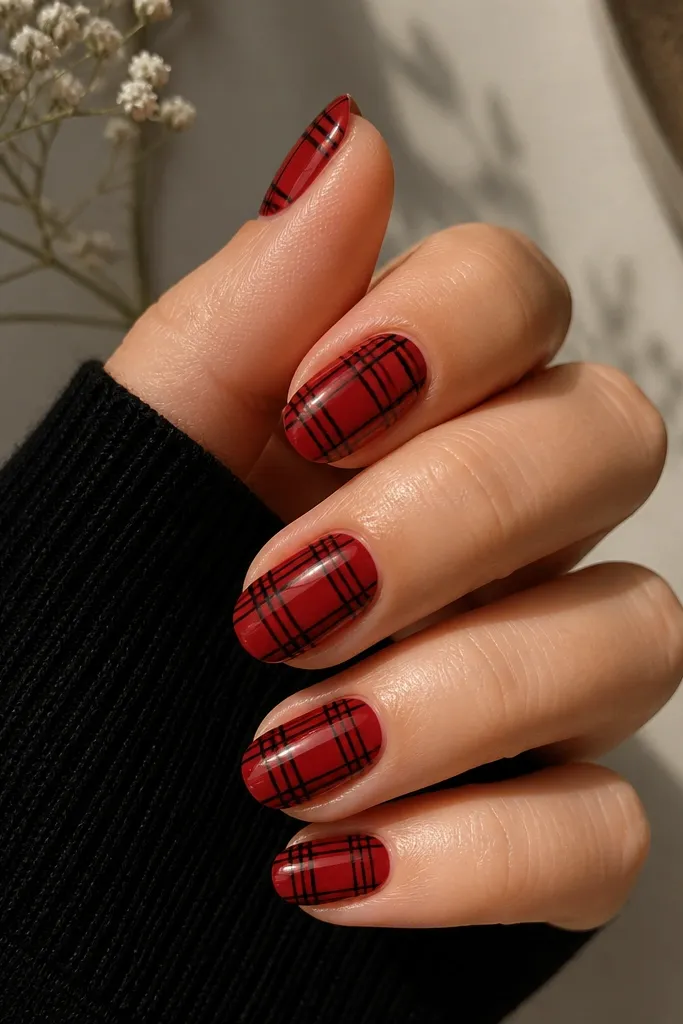
Plaid can look cozy because it feels like flannel, but only if the lines stay thin. This design is classy because the negative space keeps the nail from looking crowded. On slender nail beds, plaid can make nails look wider - the answer is spacing and leaving gaps. I use this when I want a winter vibe that still looks clean and intentional.
Start with a sheer red base or a very light red polish so the plaid has warmth underneath. After it's dry, draw thin black vertical lines across the nail. Then add red lines that cross those black lines, keeping the red lines slightly thinner than the black. Finally, draw black horizontal lines to complete the grid, leaving small square gaps. Seal with glossy top coat so the lines look smooth and the pattern doesn't catch on clothes.
Editor's noteKeep your plaid lines all the same thickness - that uniformity is what makes it look designed.
Watch outAvoid thick stripes; wide plaid lines make the nail look bulky.
13. Cherry Red Accent Nail With Black Marble French
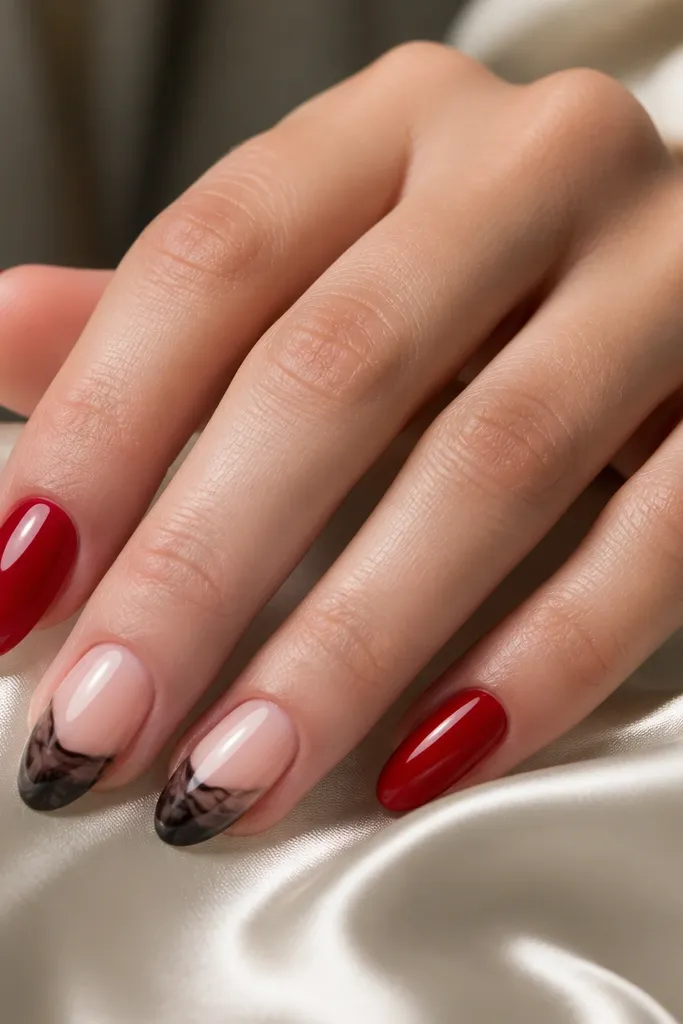
This is the classy way to do marble without covering every nail. Glossy cherry red is simple and flattering, and the black marble French tip adds sophistication where your eye lands first. I like it for people who want something cozy but don't want to commit to full nail art on all fingers. The marble tip also looks good even when you lose some length, because the tip area stays the focus.
Paint all nails glossy cherry red in two coats. Choose one or two accent nails. For the accent nails, wipe the tip area clean and create a sheer or nude base only at the tip region, leaving a crisp smile line. Add black marble swirls on top of that tip area using a small amount of black polish and a toothpick to drag it into wisps. Add tiny white flecks if you want depth, then seal with a glossy top coat over the accent tips and regular top coat over the rest.
Editor's noteUse a French guide sticker for the smile line - it takes the guesswork out of marble placement.
Watch outDon't marble all the way to the cuticle; it looks messy on grown-out nails.
14. Black Matte With Red Glossy Ribbon Stripe Down the Center
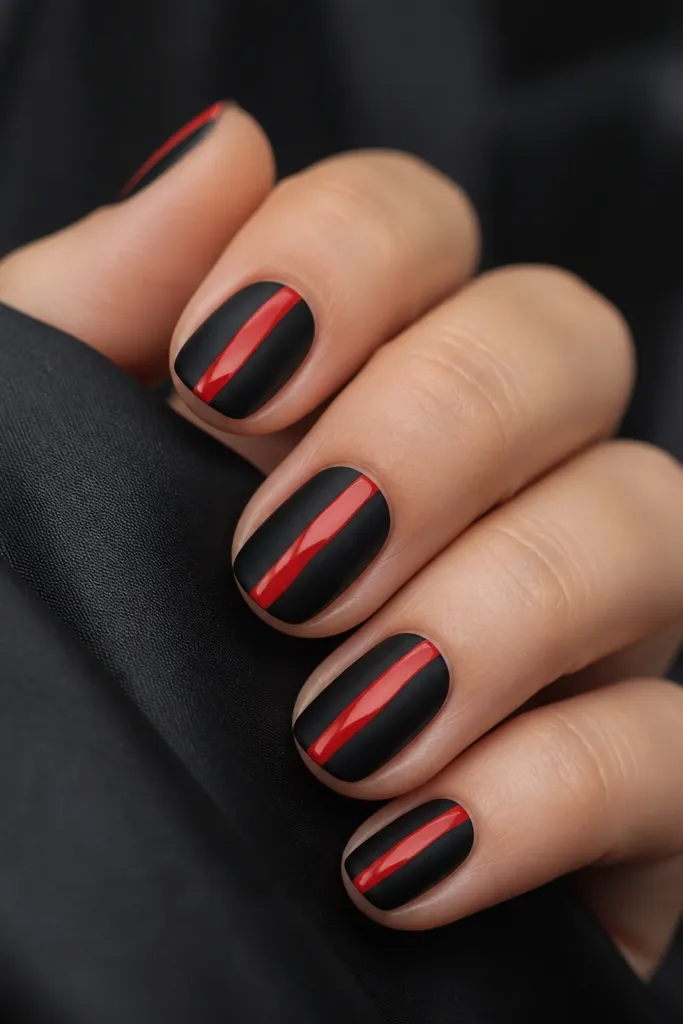
This design is classy because it's graphic and clean, and it makes nails look longer. Matte black creates a cozy base, and the glossy red ribbon gives a "satin" feel without adding bulk. It flatters hands with uneven nail surfaces because matte hides texture and the stripe draws attention to the center line. I also like it because it looks good on both square and almond shapes when the stripe stays narrow and centered.
Apply matte black to all nails in two thin coats, then matte top coat if you need extra fuzziness. Let it set completely. Use a striping brush to paint a glossy red stripe down the exact center, keeping it about 1mm wide on short nails and 1.5mm on medium nails. For the ribbon effect, slightly curve one edge of the stripe by pulling the brush with light pressure, then refine the opposite edge so it looks paired. Cure or dry, then add glossy top coat only on the red stripe so the rest stays matte.
Editor's noteIf your stripe drifts, fix it early. Clean the edges with a small brush dipped in remover before the polish fully dries.
Watch outDon't make the ribbon too thick; thick stripes turn classy into cartoonish.
15. Red And Black Polka Dot Accent With Black Base
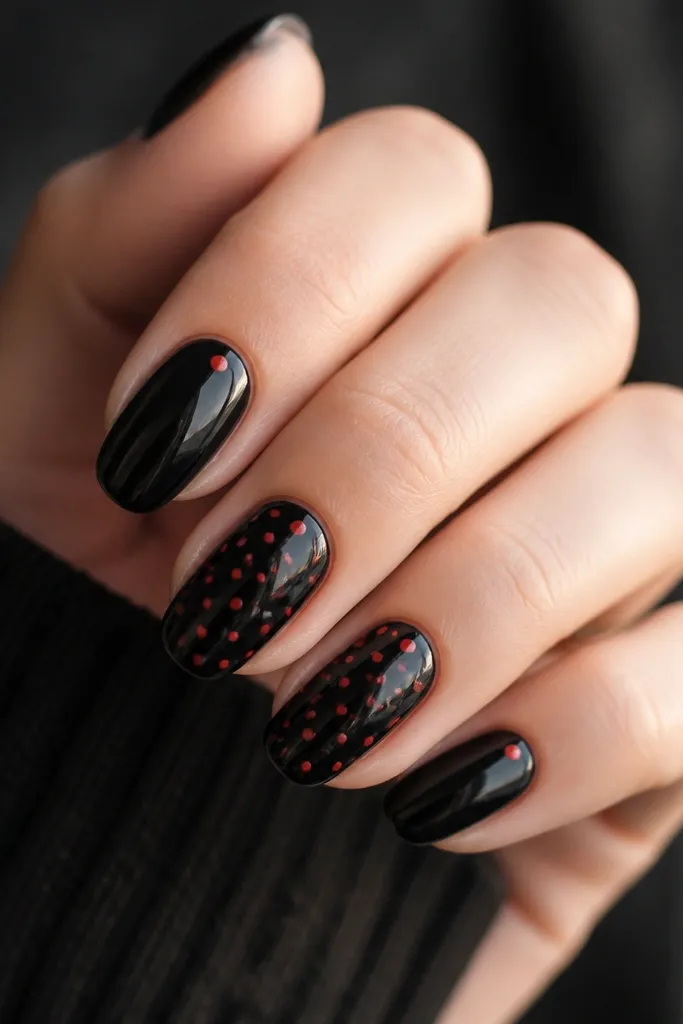
Polka dots look cozy when they're small and spaced, not oversized and clumpy. A glossy black base makes the red dots pop like candy, and it stays classy because the dots are controlled. This works especially well when you have short nails - dots add interest without needing length. I've used this for quick manicures when I'm busy, and it still looks intentional because the dots are the only decoration.
Paint all nails glossy black in two coats. For the accent nails, add small red dots using a dotting tool or the tip of a bobby pin. Start with two dots near the center line, then add dots around them to keep the distribution even. If you want the look extra neat, keep the dots the same size across each nail. For the non-accent nails, add one tiny red dot near the cuticle or skip them entirely. Finish with a glossy top coat over every nail so the dots look smooth, not raised.
Editor's noteUse a paper towel to wipe your dotting tool tip between nails so the dot size stays consistent.
Watch outDon't drag the dotting tool across polish; that creates smudges and uneven circles.