
1. Classic Black French Base With Red Tip
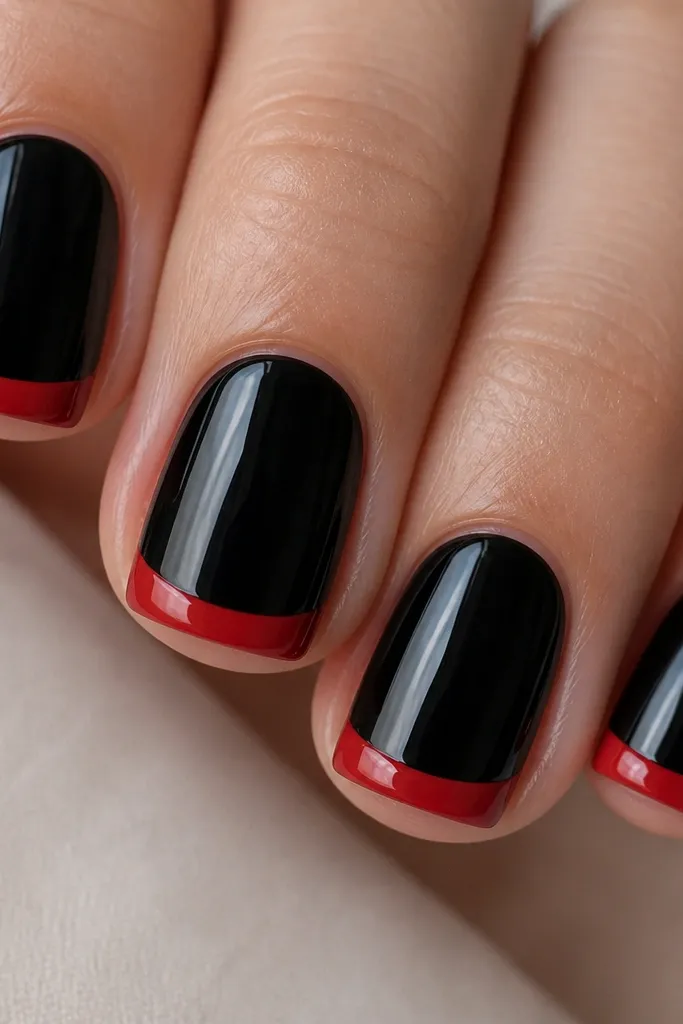
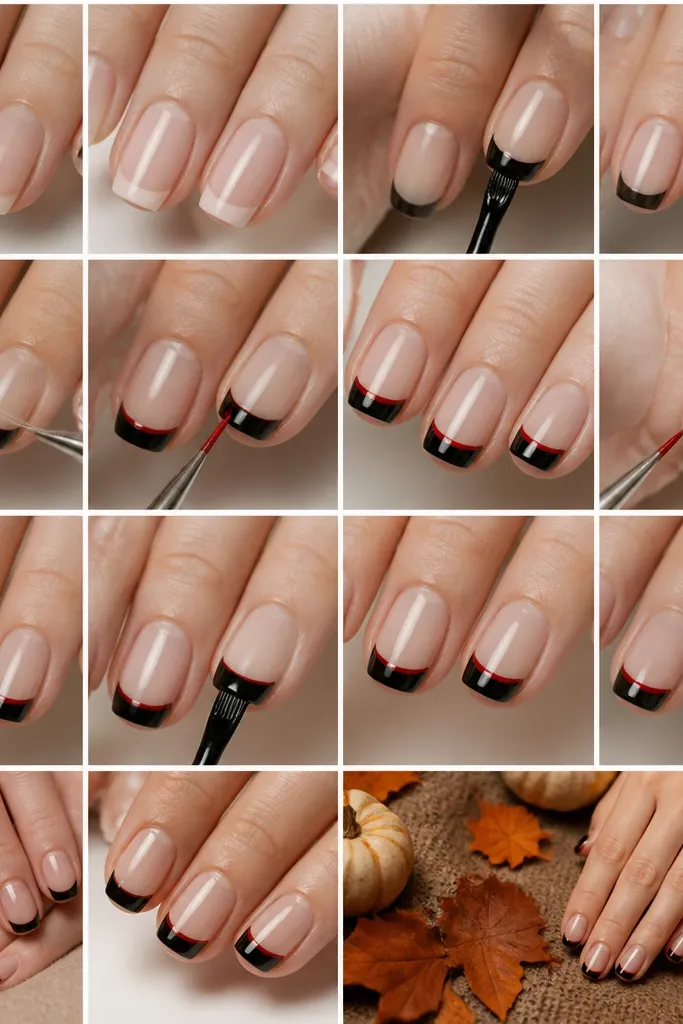
This version is the one I reach for when I want the cleanest “French” look without complicated art. The black coverage is opaque and smooth, then you paint a narrow red tip that sits right at the free edge — it looks intentional on short and medium nails. I like it most on medium skin tones and warm undertones because the cherry red pops without turning orange. The styling principle is keeping the red strip narrow enough that the black still frames the nail.
Start with a rubber base coat, cure it, then paint two thin coats of opaque black. Use strip guides or a French stencil to map the smile line — place them so the curve matches your natural nail edge. Paint the red tip in two thin coats, keeping the red edge slightly thicker at the center and feathering out toward the sides. Finish with a glossy top coat and cap the free edge by dragging the top over the very end.
Editor's noteIf your smile line looks wobbly, clean the first edge with a small brush dipped in acetone before you cure or top coat.
Watch outDon’t paint red in one thick coat — it floods the guide and blurs the French edge.
2. Reverse French Red Base With Black Outline
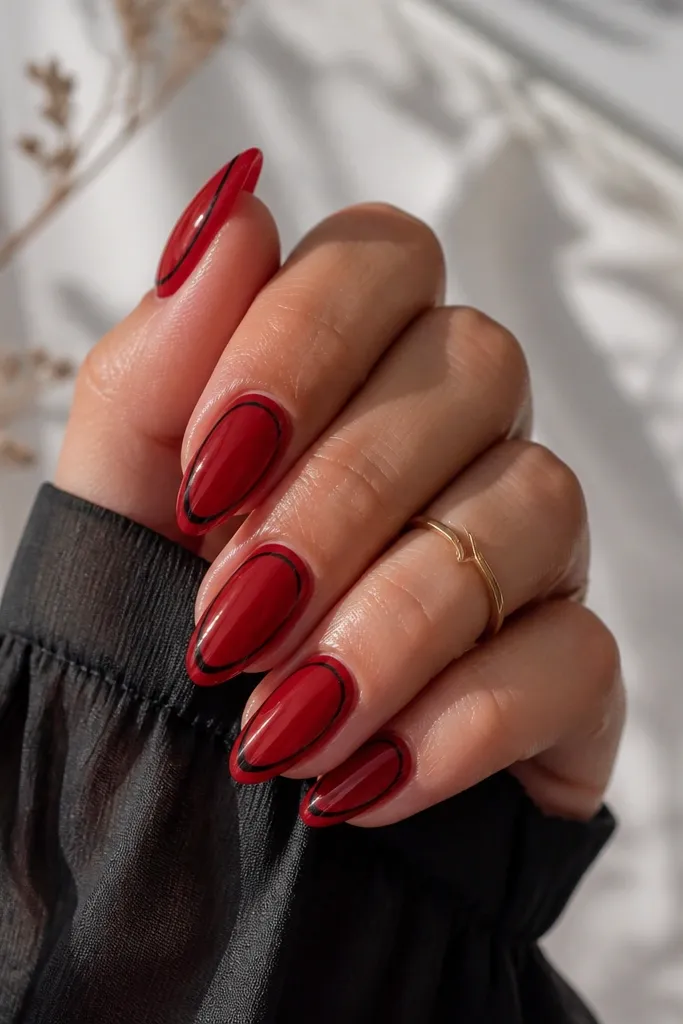
This is the “edgy but wearable” option because the red sits near the cuticle and black acts like a frame. It looks best on almond or medium squoval nails because there’s enough space to keep the black outline thin and even. I’ve had it look flattering on fair to medium skin tones because the red brightens the nail bed and the black line adds structure. The principle here is negative space control: you leave a clean red band so the outline reads sharp.
Begin with a tinted red base (two thin coats) on a fully prepped nail. Use a fine striping tape to mask a thin band where the black outline will sit, then remove the tape carefully while the polish is still slightly workable (for regular polish) or after curing (for gel). Paint black along the masked line with a liner brush, staying inside the tape edge for a straight frame. Add top coat and seal the outline by lightly dragging top over the black line so it doesn’t lift at the edges.
Editor's noteFor a cleaner outline, drag the liner brush from outside-in rather than starting in the middle — it keeps the line consistent.
Watch outDon’t make the black outline wide; wide frames look heavy and cover the nail bed.
3. Diagonal Black French With Red Corner Tip
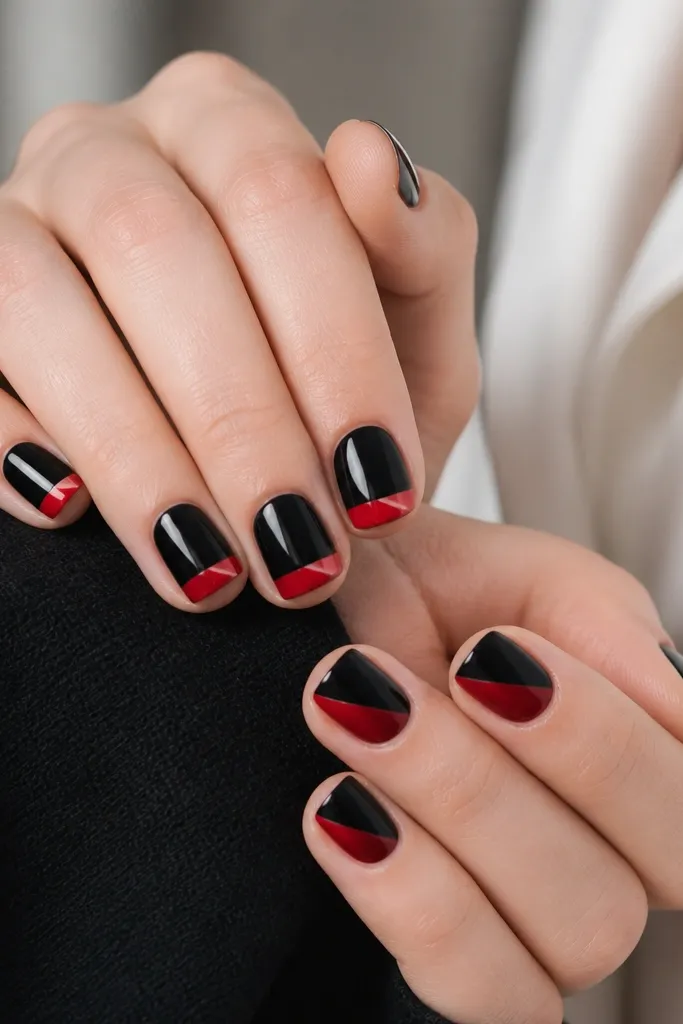
Diagonal French is my go-to when I want something seasonal that still looks neat. The black stays dominant, and the red only shows in the corner, which makes the set feel graphic instead of busy. This style is flattering on shorter nails because diagonals visually lengthen without you painting a wide tip. The styling principle is one directional line: keep the diagonal angle the same on every nail so the set looks designed, not accidental.
Start with a black base in two thin coats, then let it dry fully or cure it completely. Place a small piece of striping tape diagonally to create your French boundary; press it down firmly at the sides and leave the center smooth. Paint the uncovered section with red for a corner tip — keep red only at the outer free edge, not across the whole tip. Remove the tape, then clean any ridge with a tiny brush and finish with a high-gloss top coat.
Editor's noteUse tape as a guide, not as a crutch — press the tape edge flat so polish doesn’t creep under it.
Watch outAvoid freehand diagonals without tape; the angle will drift and the set will look messy.
4. Thin Micro-French Black Tips With Red Center Stripe
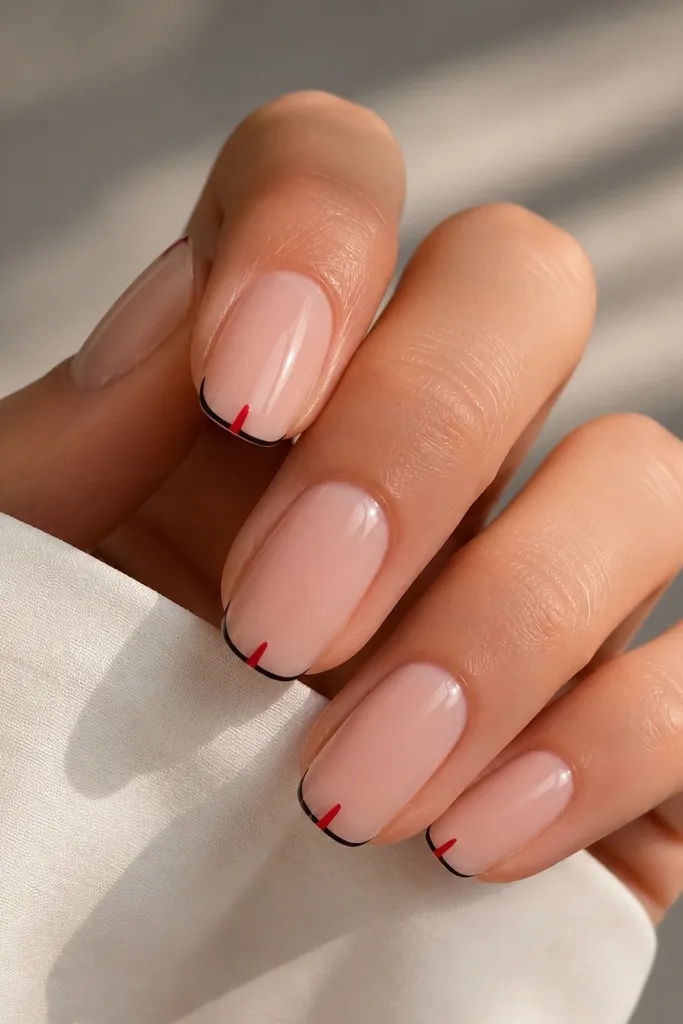
This one is subtle from far away and punchy up close. The micro-French keeps things clean and modern, and the red center stripe adds that black-and-red hit without covering the whole tip. I like it on fair and light-medium skin because the nude base makes the black look crisp and the red stripe looks like a highlight. The principle is narrow geometry: micro lines look sharp when you keep them thin and symmetrical.
Apply a nude or pink-beige base (two thin coats) and cure or dry fully. Use French guide strips for micro-French so the black line stays the same width across nails. Paint black only on the free edge, then remove the guide. With a liner brush, paint a single red stripe down the center of the black tip, keeping it narrower than the black line, then seal with top coat.
Let the black micro-French set before you stripe red — it prevents bleeding into the black edge.
Don’t choose a too-transparent nude base; patchy nude makes the French line look uneven.
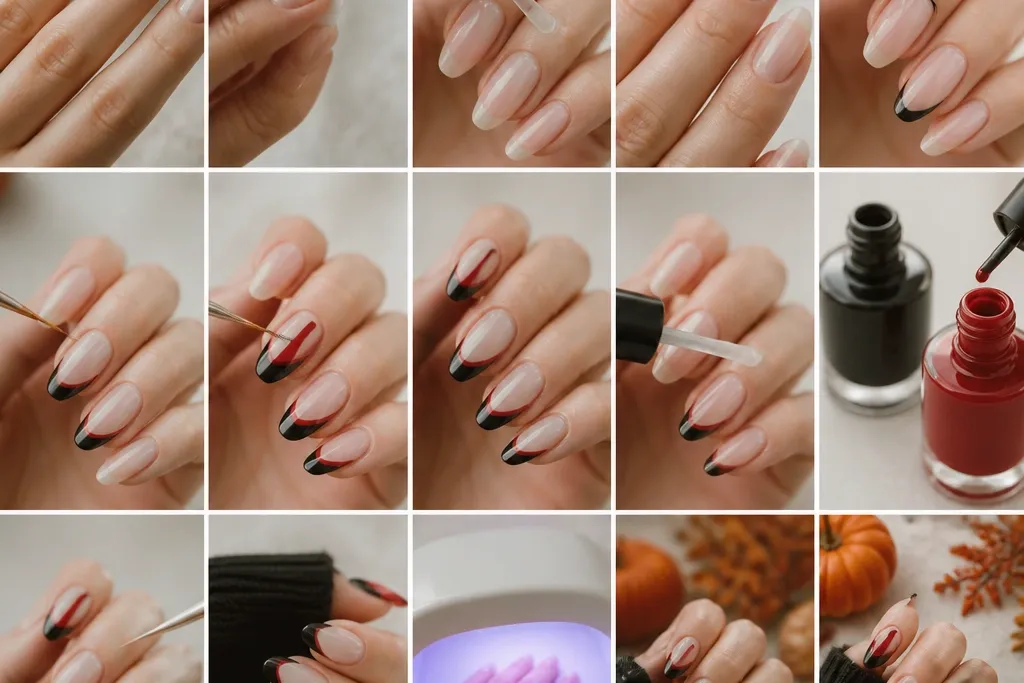
5. Black Tips Split Half-Red Half-Black
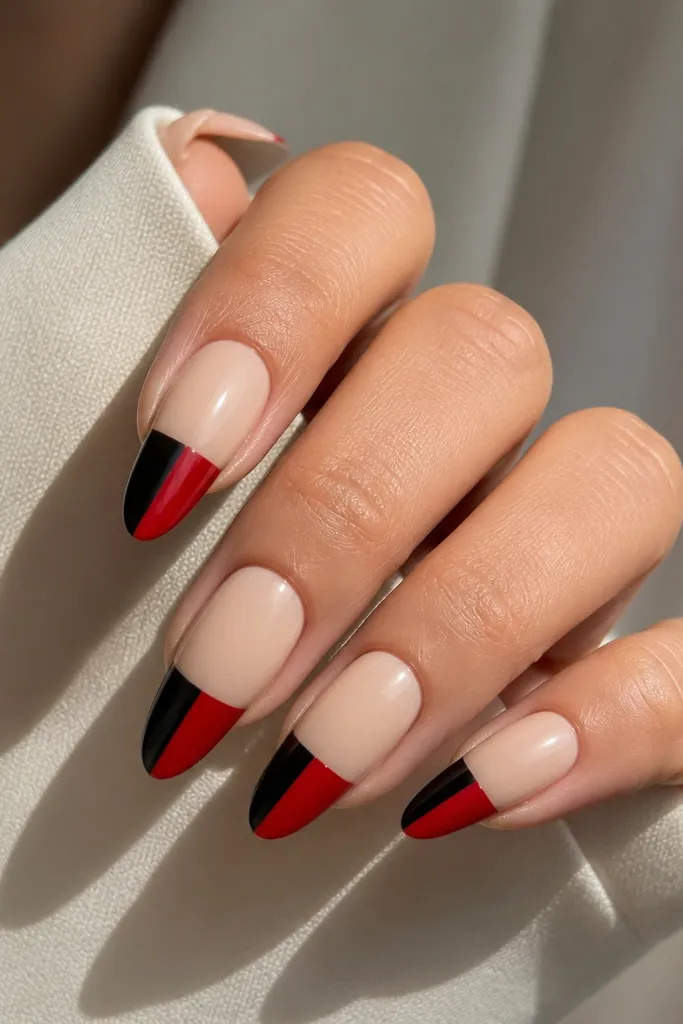
This is the bold “two-tone” version that still reads clean. The vertical split makes the nail look like it’s been designed with a logo — it’s striking and looks sharp in photos. It flatters longer shapes because you have room for the split line to sit straight without crowding the nail bed. The styling principle is straight separation: one center line, no wobble.
Start with a nude base, then paint the entire tip area with black first (two coats if needed) to create an opaque foundation. Use striping tape vertically down the center to split the tip — press it flat along the smile line and the free edge. Paint the exposed side with red in two thin coats. Remove the tape while the polish is slightly tacky (regular) or after curing (gel), then top coat and cap the tip.
If the center line looks fuzzy, run a thin brush with black or red along the seam to sharpen it after the first top coat layer dries.
Don’t rush tape placement; moving tape after you’ve painted starts a ragged seam.
6. French Tips With Black Overlay And Red Edge
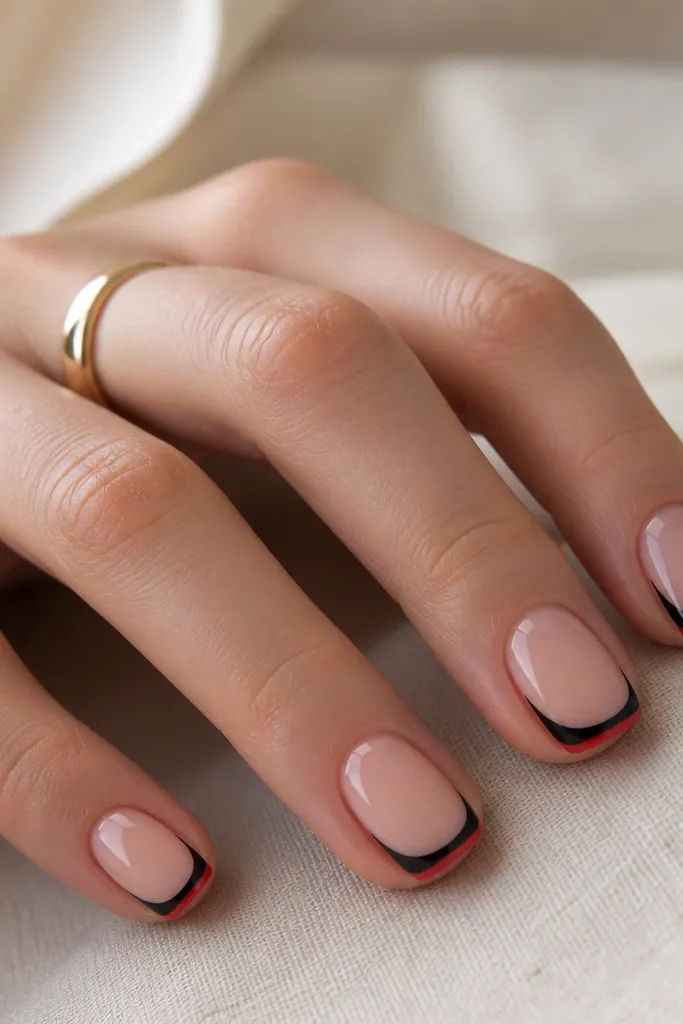
This is a dimensional look without complicated 3D. The black overlay gives you depth, and the thin red rim at the edge makes it feel seasonal and sharp. It looks great on short nails because the rim keeps attention at the free edge where it belongs. The principle is layering color at the edge only, so you don’t blur the French curve.
Apply a sheer pink base, then place French guide strips for a smile line. Paint black over the guided tip shape in two thin coats, letting the second coat fill the curve evenly. After the black cures or dries, remove the guides and paint a super-thin red rim only along the outer free edge. Finish with top coat, and cap the rim by dragging top over the very end so it doesn’t chip first.
Use a smaller brush than you think you need for the red rim — thin control beats speed here.
Avoid painting red across the whole tip; it turns into a chunky French instead of a rim.
7. Matte Black Tips With Glossy Red French
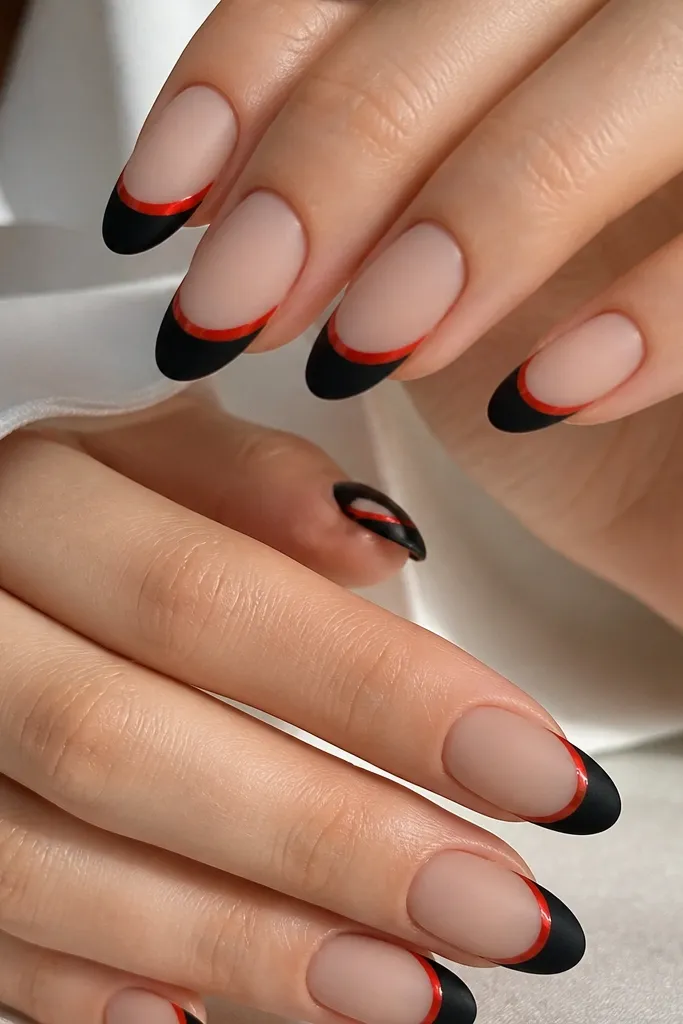
Matte-and-gloss contrast makes this set feel dressed up fast. The matte black keeps the look grounded, and the glossy red line makes it look like fresh paint even days later. I’ve worn this to weddings and winter events because the black reads sleek and the red still shows emotion. The principle is finish contrast: only the red line gets gloss so the design stays intentional.
Start with a nude base and apply a matte top on the base first. Paint your French tips in black and cure/dry, then seal with matte top again so the entire tip area is velvety. Use French guide strips and paint a thin red French line on top, keeping it narrow and centered at the tip edge. Finally, apply glossy top only over the red line, not over the matte black.
Brush the glossy top only on the red stripe and let it self-level; don’t wipe back and forth or you’ll smear the matte edge.
Don’t matte the whole nail after you’ve painted red — it kills the contrast.
8. Black Marble Base With Red French Vein
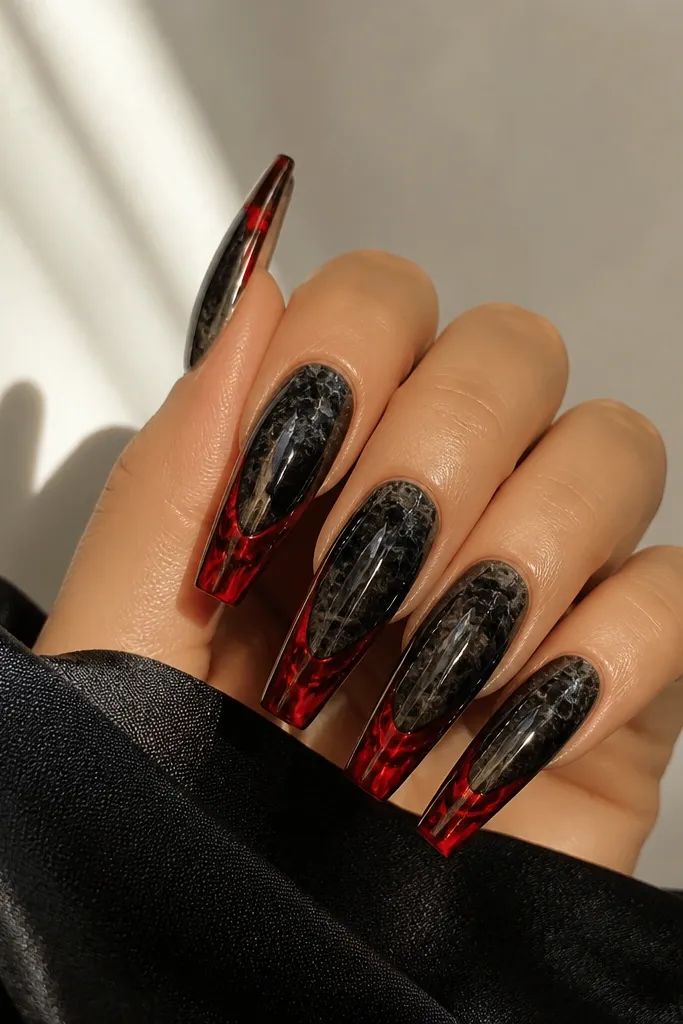
If you want something that still fits the black-and-red theme but doesn’t look like standard French, this does it. The black marble background adds movement, and the red vein French line pulls your eye to the tips. It flatters medium to deeper skin tones because the black has depth and the red looks saturated. The principle is using texture in the base, then keeping the French line clean so the design doesn’t become chaotic.
Apply a black marble base using a black base coat plus thin streaks of gray-black and then swirl them with a damp brush (gel: cure between layers). Leave the tip area clean for your French line. Place French guide strips for a classic smile, then paint the red tip area in two thin coats. Use a liner brush to add one red “vein” stroke down the center of the red tip, then seal with glossy top coat.
Use a damp brush lightly for marble — too wet turns it into blobs you can’t rescue.
Don’t add red vein strokes across the entire nail; keep it on the tip so it reads as French.
9. Black Glitter French With Solid Red Tip
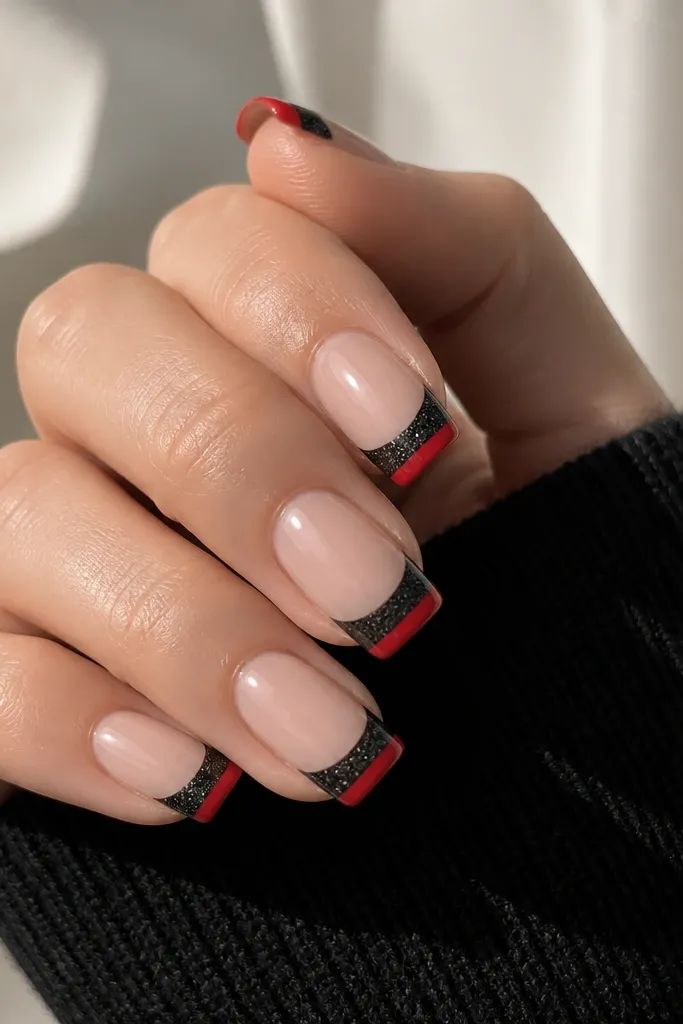
This is for when you want black-and-red for holiday or night plans but still want the French shape. The black glitter adds texture without changing your color palette, and the solid red strip keeps the look from turning into all sparkle. I like it on medium nails because you can control the glitter boundary with guides. The principle is glitter restraint: glitter stays inside the French boundary, and red stays on the outer edge.
Start with a nude base and cure/dry. Apply French guide strips for the smile line, then paint the guided tip area with a black glitter gel or polish in two coats. Remove the guides and wipe any glitter creep from the skin with a cotton bud. Paint a thin solid red strip along the outer free edge, slightly narrower than the glitter area, then finish with a thick top coat to smooth the glitter texture.
Seal glitter with a thicker top coat — thin top can leave a gritty edge that catches on fabric.
Don’t put glitter under the red strip; it makes red look tinted and less clean.
10. Red Micro-Flowers on Black Tips
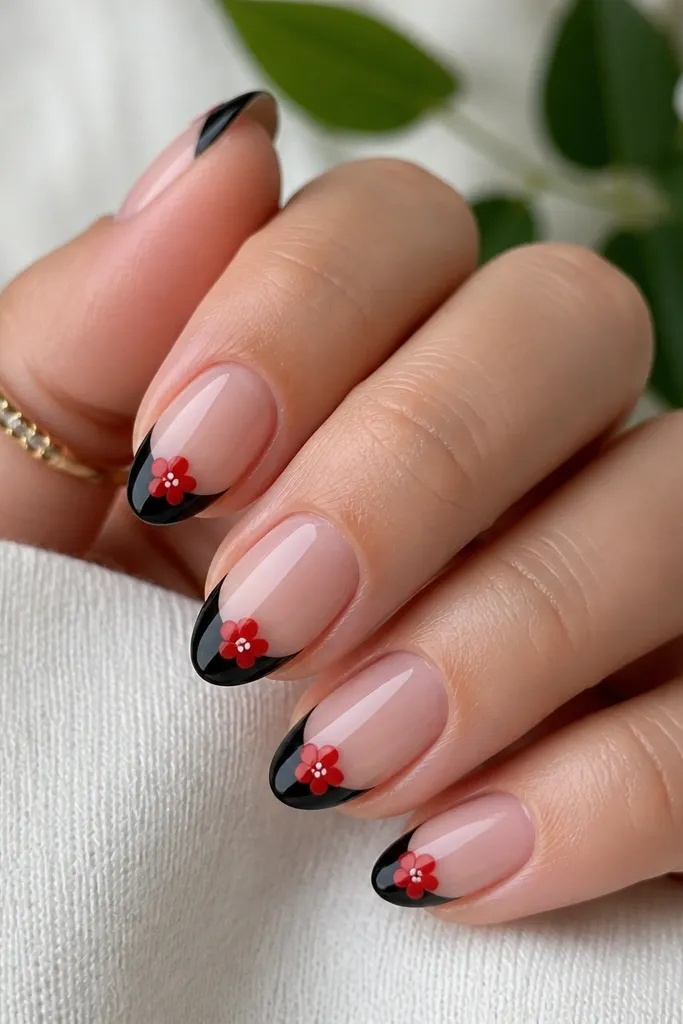
This is the cutest seasonal spin when you want something more than a straight French line. The black tip makes the red flowers pop, and the tiny white dot center keeps it from looking flat. It flatters hands with shorter nail beds because the flowers sit in the tip area, not near the cuticle. The principle is placement: one small accent per nail, positioned the same way each time.
Paint a nude base and cure/dry, then create black French tips using guides. After the black sets, dot a tiny red blob where the flower will sit using a dotting tool. Use a fine brush or toothpick to pull five small petals outward from the center dot. Add a micro white dot in the middle, then top coat carefully, staying gentle around the petals so they don’t smear.
If your flower petals look uneven, use the side of a toothpick to drag the petal shape instead of a full brush stroke.
Avoid more than one flower per nail; extra details make the tips feel crowded.
11. Black French With Red Outline on Nude
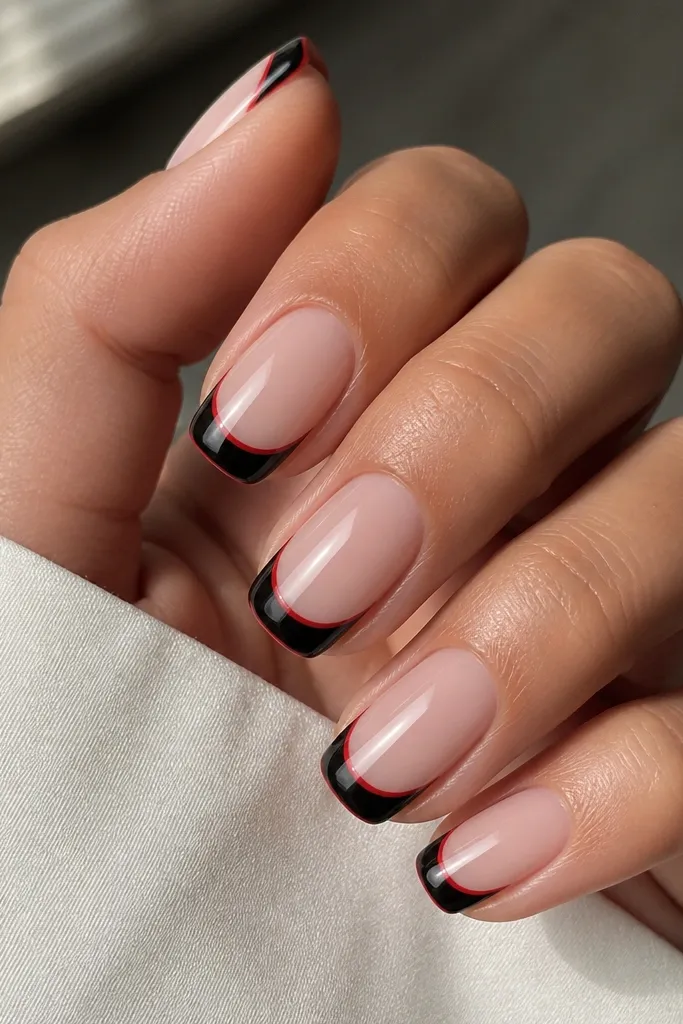
This is the cleanest way to add red without covering the nail. The nude base keeps it light, black gives structure, and the red outline looks like a border on a graphic design. I’ve worn it for everyday work because it looks intentional even with minimal jewelry. The principle is double-line control: black fills the tip area, red only outlines the perimeter.
Apply a sheer nude base in two thin coats and cure/dry fully. Use French guide strips to paint the black tip area, keeping the smile curve smooth. Remove the guides, then let the black set completely. With a liner brush, paint a thin red line along the outer edge of the black tip, staying just inside the free edge, then top coat and cap the corners.
Editor's noteFor the red outline, load the brush lightly — too much paint makes the line look like a stripe instead of a border.
Watch outDon’t outline while black is still wet; the red will bleed and widen.
12. Seasonal Fall Tip With Black Leaves and Red Tips
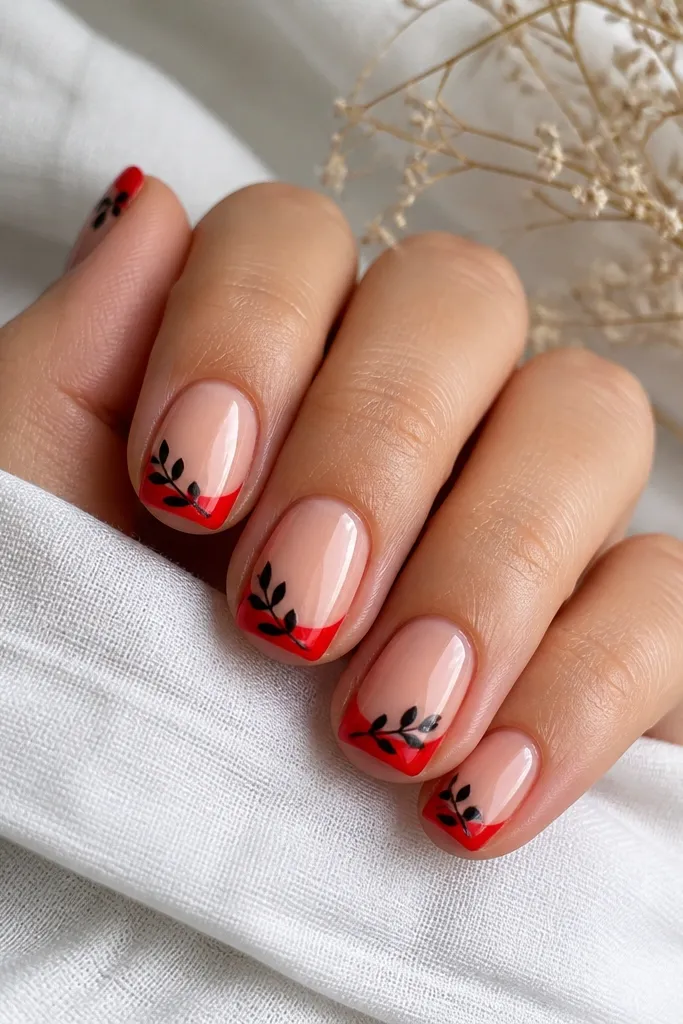
This is the seasonal version that still follows the black-and-red French idea. Red tips keep the color theme, and the black leaf silhouettes add a fall mood without turning it into full nail art. It’s flattering on short nails because the leaves sit near the edge and don’t crowd the nail bed. The principle is “small art on big color”: keep the base solid and let the leaf shapes be the only extra detail.
Start with a nude base and cure/dry, then guide your French tips with strips. Paint red tips in two thin coats, keeping them opaque and smooth. After the red is fully set, use a dotting tool or a small leaf stencil to place 1-2 black leaf shapes on each tip, angled toward the outer corner. Add a glossy top coat and cap the leaf edges by lightly brushing top over the highest points.
Editor's noteIf your leaf shapes look blob-like, use a stamping plate or a tiny stencil and press once — don’t keep re-stamping.
Watch outAvoid putting leaves near the center of the nail; keep them to the outer edge for a balanced look.
13. Holiday Black French With Red Bow Accent
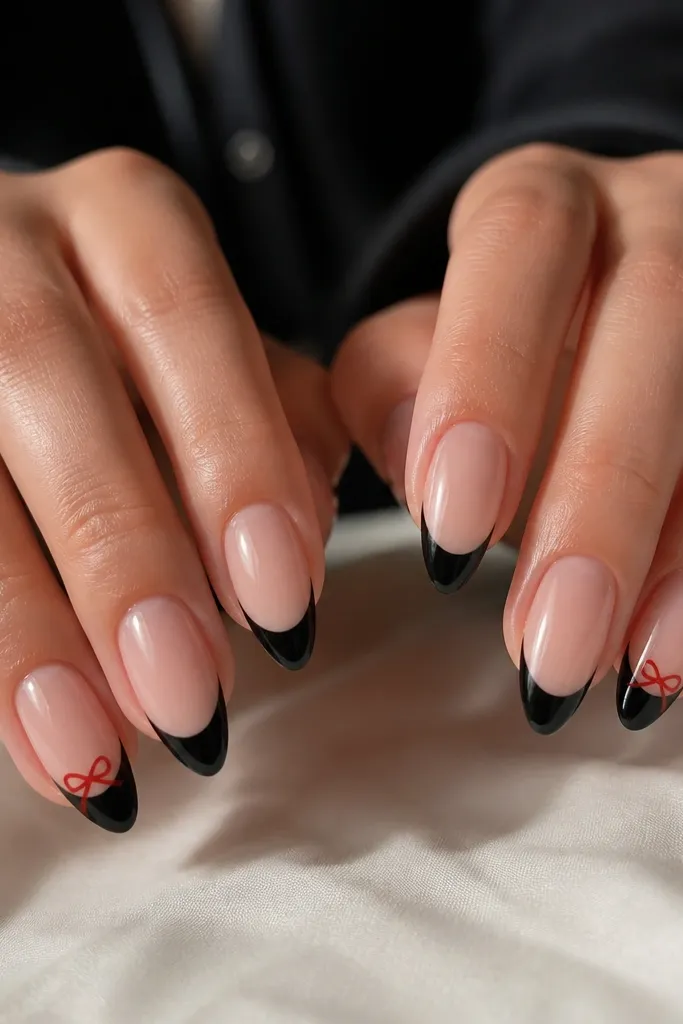
This is my pick for holiday parties when you want black-and-red but also want something that reads “event.” The black French tips keep it classic, and the red bow gives a focal point without turning every nail into a craft project. I like it on medium almond because the bow has a natural place to sit and the curve of the bow matches the nail shape. The principle is accent control: only one or two nails get the bow so the set stays elegant.
Do a nude base, then paint black French tips with guides and cure/dry. Choose one accent nail per hand (two total) and leave the others as plain black French. For the bow, dot two small red circles for the loops, then pull each into a teardrop with a fine brush. Add a tiny red knot in the middle, then outline the bow edges with a darker red or a thin black line if you want extra definition. Finish with top coat, and be careful not to flood the loops.
Let the bow dry or cure fully before top coat — rushing makes the bow flatten.
Don’t put bows on every nail; the set stops reading as French and starts reading as stickers.
14. Red Ombre Into Black French Edge
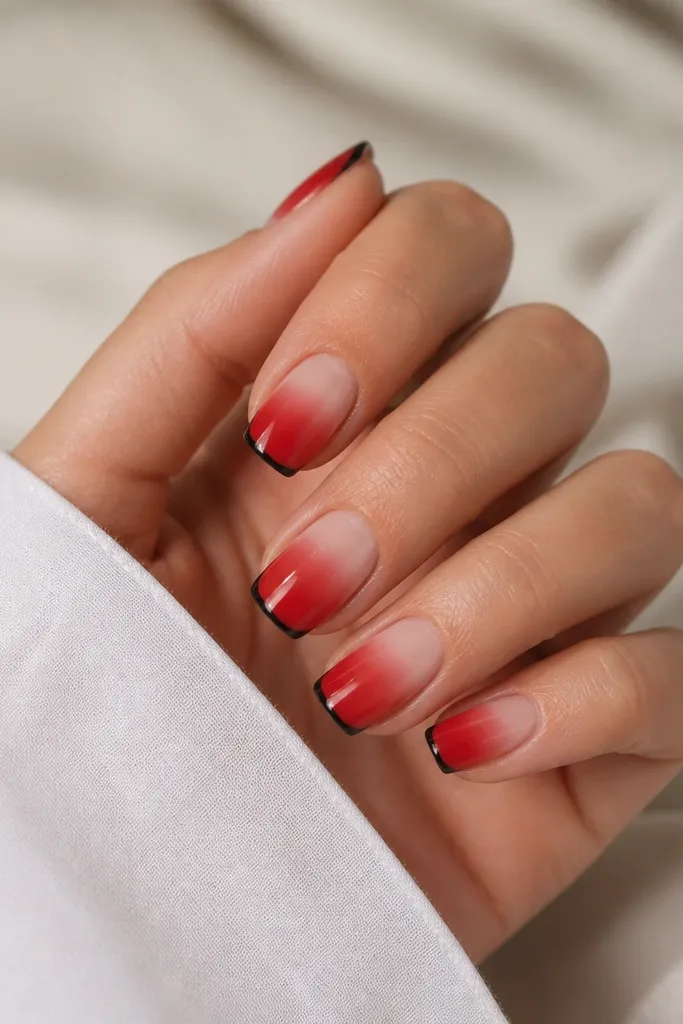
This one looks polished because the red fades smoothly into the tip instead of sitting as a hard block. The black outline gives you that French structure so it still matches the black-and-red theme. It flatters hands that look better with softer gradients, especially if you hate harsh lines. The principle is gradient softness with one crisp boundary — the black outline keeps it from looking like a random ombre.
Apply a nude base and cure/dry. Use a makeup sponge to dab red near the tip area, building from the outer edge toward the center until you get a soft fade. Keep the gradient inside the tip zone so you don’t blur into the nail bed. Once the ombre is dry or cured, use French guide strips for a thin black outline at the free edge and paint the black line over the top of the fade. Remove guides and top coat for a glossy finish.
Use a fresh sponge segment for each nail; reusing the same area makes the ombre muddy.
Don’t press the sponge hard — hard pressure creates streaks instead of a fade.
15. Smoked Black Smoke Fade French With Blood-Red Chrome Tip
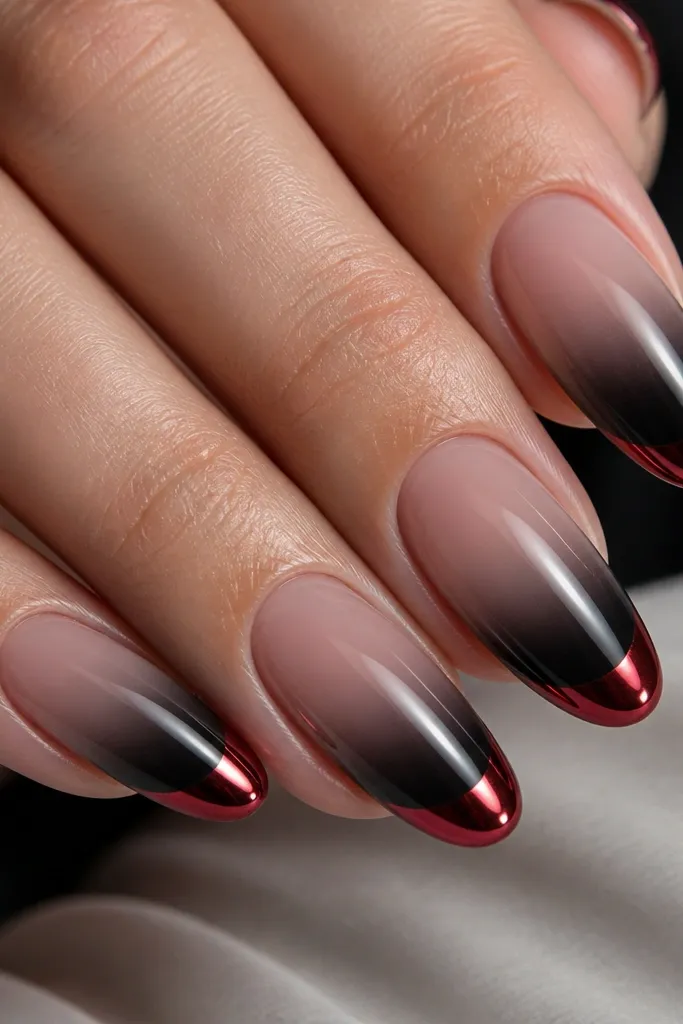
This look mixes two textures that look expensive fast — a soft smoked black fade and a mirror-like blood-red chrome tip. The key is keeping the black gradient airy so it reads like smoke, not a streak. The chrome tip stays clean and geometric, which makes the fade feel intentional instead of messy. I did this on myself with a cheap makeup sponge at first, and the effect looked like a salon airbrush within 10 minutes once I learned the placement and pressure. It also looks great for seasonal "fall night out" vibes because the red reads deeper than regular red polish.
Step 1 — Prep and base: push back cuticles, buff the nail lightly, then wipe with acetone-free nail prep. Paint a sheer nude base (thin coats) and cure each coat until it looks glassy. Step 2 — Build the smoked French fade: use a makeup sponge to dab black gel near the tip area, keeping the center slightly stronger than the sides, then fade it upward by tapping less pressure. Cure, then go back with a small flat brush dipped in black gel to smooth any harsh spots without dragging the smoke. Step 3 — Create the crisp chrome tip: paint a straight blood-red French line at the very end using a striping brush, cure, then apply chrome powder over only the red area. Seal with a high-gloss top coat, and wipe off excess chrome with a dry lint-free pad before top coat.
Editor's noteFor the smoke edge, dab with the sponge in tiny taps — dragging makes it look like smudged eyeliner. Press the chrome powder only onto the red tip line so the black stays soft and matte-looking underneath.
Watch outSkip using regular red polish for the chrome step — it dulls the reflection and you get a flat red band instead of that mirror edge.



