1. Cherry Half-Moon With Glossy Black Base
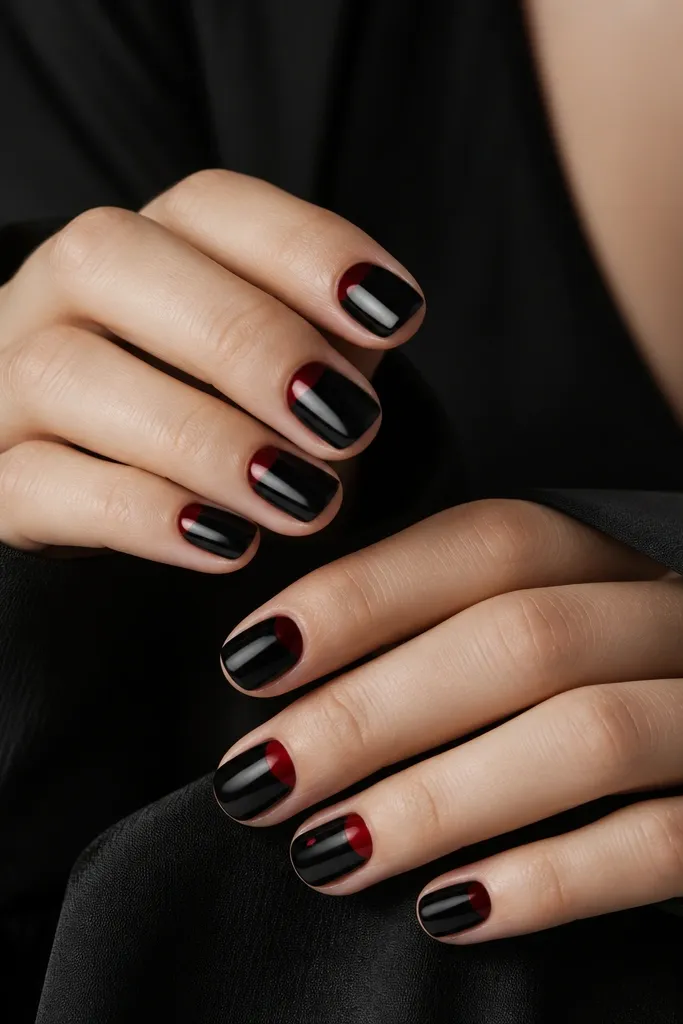
This design works because the half-moon frames the nail shape instead of covering it. Glossy black makes the red look brighter, especially if your red is a little on the sheer side - the black underneath keeps it bold. It flatters almost every hand because the red sits near the cuticle and visually lifts the nail bed. I wear it for work and dinners because it reads neat in daylight and still pops at night.
Start with a sticky base coat, then paint 2 coats of glossy black. Let the final black coat set for a minute, then place a small half-moon stencil or use a cuticle sponge to block the shape. Paint cherry red in the open half-moon area and clean the edges with a thin brush dipped in acetone. Finish with glossy top coat and cap the free edge on every nail. If you want the extra detail, add a single tiny red dot on the ring finger after the half-moon dries.
Editor's noteIf your half-moon looks uneven, use a firm angled brush to redraw the black border instead of repainting the whole nail.
Watch outDon't skip capping the free edge or the red edge will lift first and make the half-moon look ragged.
2. Red Micro-French Over Matte Black
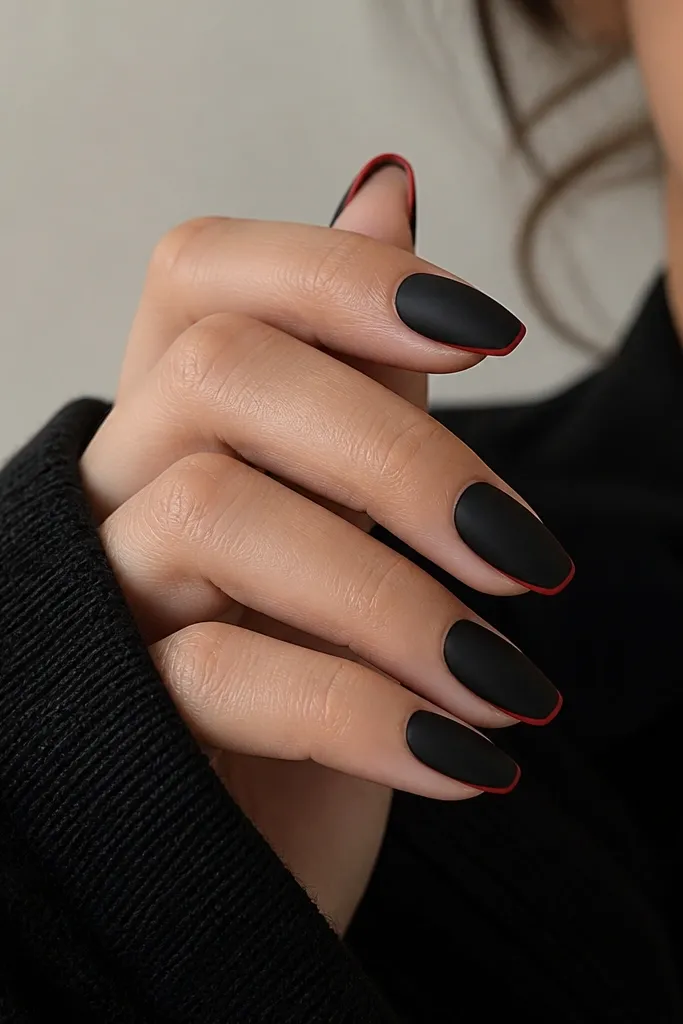
Micro French always looks sharper than a wide tip because it keeps the design minimal. Matte black gives the nail a velvety look, so the red line reads like a graphic detail, not paint. This is great for hands with shorter nails because the thin tip makes them look longer. On deeper skin tones, red against black looks especially crisp, like a clean graphic poster.
Paint 2 coats of matte black and let it fully dry so the tape and brush don't pull it up. Use striping tape or a guide strip to mark a thin line at the tip, then remove the tape carefully to keep the edge crisp. Paint a creamy cherry red over the guide, then add 1 more thin coat for coverage. Seal with a matte top coat on the black areas and a glossy top coat only over the red line if you want that contrast.
Editor's noteUse tape for the line - even cheap striping tape gives you cleaner edges than freehand.
Watch outAvoid thick red lines; they look clunky and cheap fast on matte bases.
3. Black Marble Accent With One Red Vein
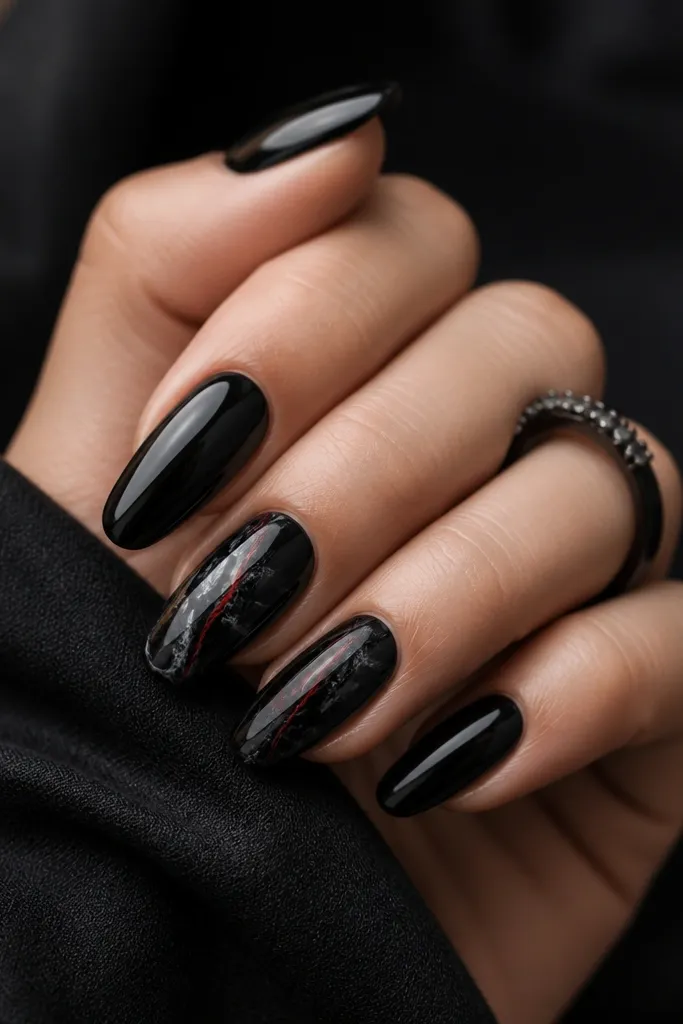
Marble looks complicated, but you can fake it with a sponge and a couple of colors. The trick is to keep the red as a single vein, not a whole chunk - it makes the set feel intentional. This works on any nail length, but it looks best on medium almond because the swirls have room to curve. The red vein gives movement without turning the set into a busy mess.
Start with a glossy black base on all nails. On two accent nails, dab a tiny amount of dark gray polish with a makeup sponge to create faint marble texture over the black. While it's still tacky, drag a toothpick through the polish to form thin swirls. Add one thin line of deep red (wine or blood red) as a single "crack" using a striping brush. Finish with glossy top coat to lock in the marble and smooth out the texture.
Editor's noteIf the marble gets too dark, wipe the sponge lightly on a paper towel before dabbing again.
Watch outDon't paint red all over the marble - it kills the effect and makes it look like random red streaks.
4. Red Stamped Roses On Black One-Accent Set
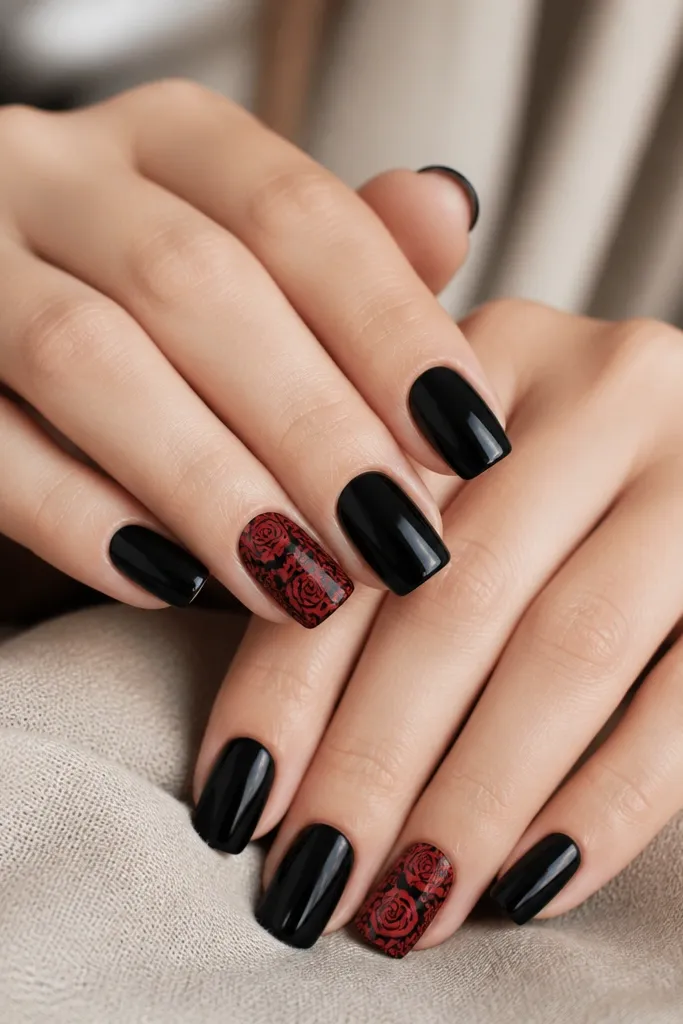
Stamping is my favorite budget trick because it looks like nail art even when you're not painting freehand. Black makes the stamped red pop, and rose patterns look romantic without turning into "Valentine's only." This flatters short nails because the stamp design fits small spaces. It also looks clean on hands with any skin tone because the contrast is strong and controlled.
Paint 2 coats of glossy black on all nails and let them dry fully. Choose a stamping plate rose design, then scrape the excess polish hard so the pattern is crisp. Use a red stamping polish or a thick red regular polish mixed with a drop of stamping medium if it's too thin. Press the stamper onto the nail in one firm motion, then remove and check for gaps. Seal with 1-2 layers of glossy top coat, focusing on the stamp edges so it doesn't lift.
Editor's noteWarm your stamping polish between your fingers for 10 seconds if it feels thick - it stamps cleaner.
Watch outAvoid re-stamping over the same nail; it smudges and creates gray residue around the edges.
5. Black Over Red Negative Space Swirls
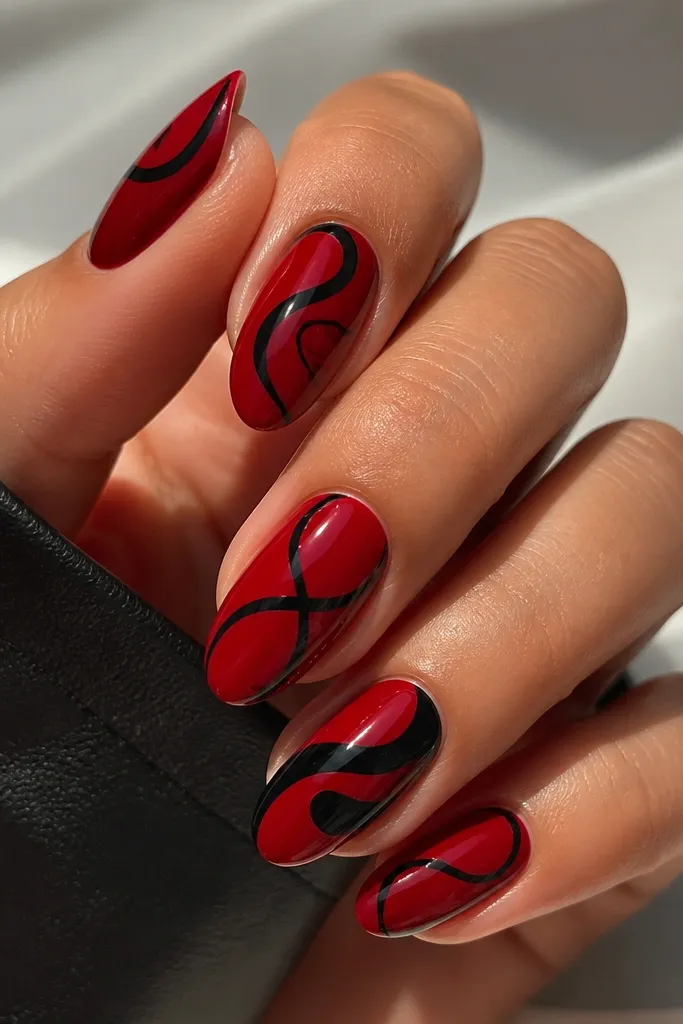
This one flips the usual order: red first, then black swirls that leave red showing through. The look is cleaner because the red is the "underpainting," so your black lines don't need to be perfect coverage. It's bold and flattering for long almond and square nails because the swoops have space to curve. If you want a set that looks like nail art without feeling heavy, negative space does that.
Start with 2 coats of glossy cherry red on every nail. Use a thin striping brush to paint black swirls - keep them ribbon-like and leave smooth curves of red in between. For a budget-friendly guide, lightly tap the brush where you want the swirl to start, then drag outward. Let the black dry for 2-3 minutes, then add a second black pass only where lines look thin. Finish with glossy top coat to fuse the layers and smooth the swirl edges.
Editor's noteUse a nail art brush with a fine tip, not a regular liner brush - it keeps the swirl lines even.
Watch outDon't rush the black layer while the red is still soft or the swirls will bleed and blur.
6. Classic Red Crisscross Over Black Tips
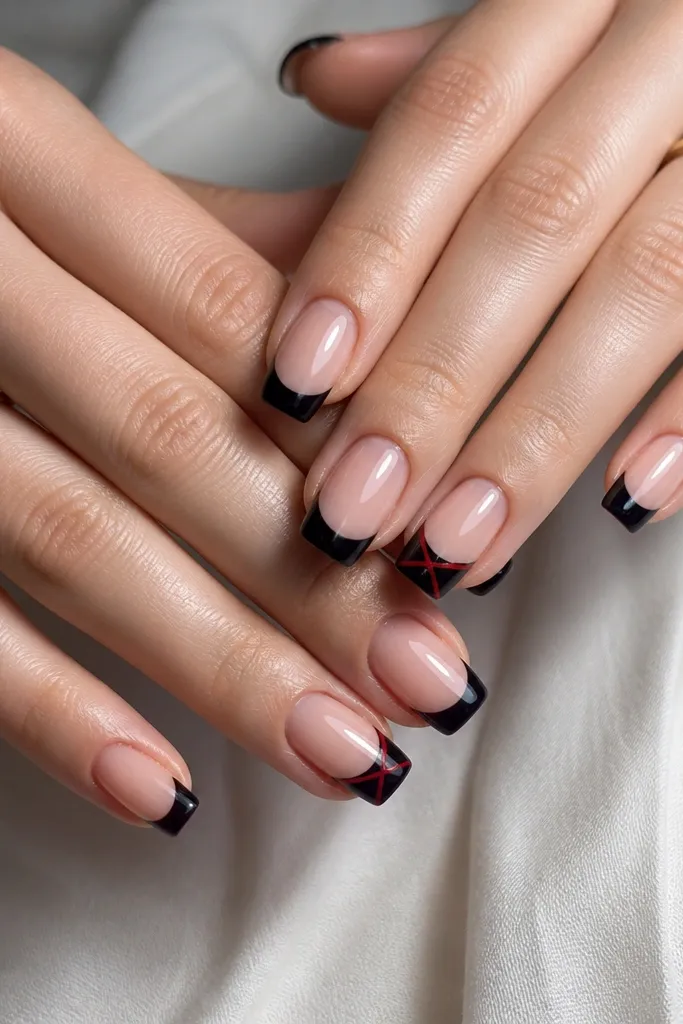
Crisscross lines look sporty and clean when the base stays simple. The nude base keeps it wearable, and the black tips make the red crisscross look graphic. I like this for short to medium nails because the design sits in the tip area and doesn't overwhelm the nail bed. It also photographs well because the lines catch light sharply on the glossy black.
Paint a sheer nude base (or your natural nail with a nude polish) and let it dry. Create glossy black French tips by using a guide strip or a steady freehand line, then fill in the tip area with 2 coats if needed. On two nails (or all if you want bold), draw red diagonal lines across the black tip area in an X pattern using striping tape or a fine brush. Add a second coat of red only on the lines so they stay opaque. Seal with glossy top coat and cap the free edge.
Editor's noteIf your red is streaky, apply it in two thin passes instead of one thick coat.
Watch outAvoid putting the crisscross too low; it should sit on the tip so it reads like a pattern, not smudges.
7. Matte Black With One Glossy Red Accent Nail
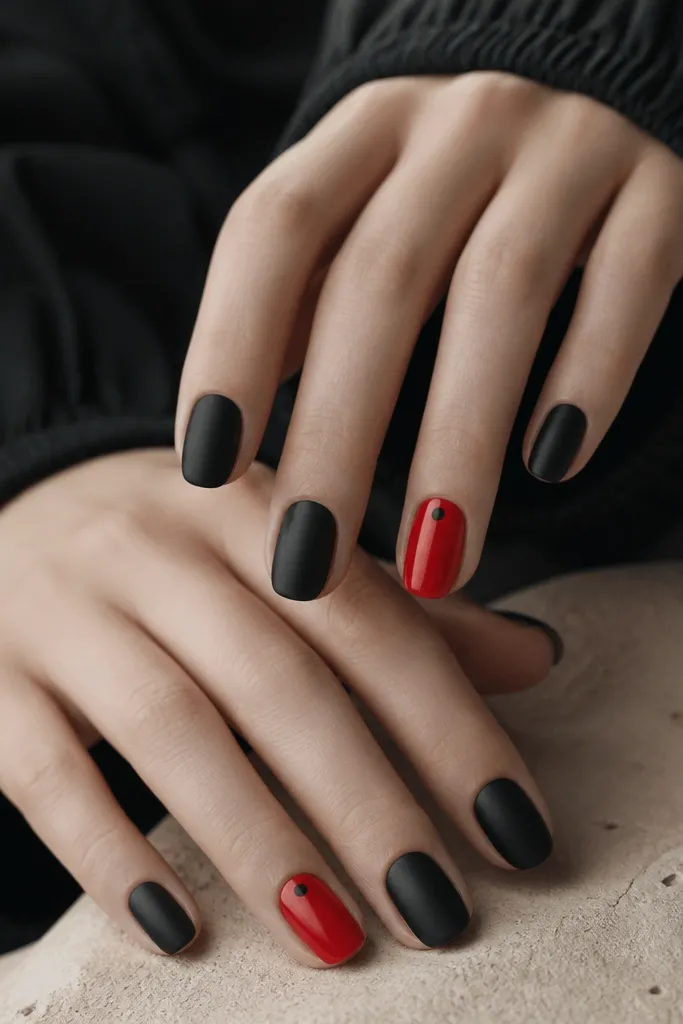
This is the quickest way to look intentional when you don't want to paint details on every nail. Matte black hides minor brush strokes and looks smooth, while the glossy red accent makes your hands look dressed up. It flatters any nail shape because the matte finish evens out the surface. I wear this when my schedule is chaotic and I still want the nails to look "done."
Start with base coat, then paint 2 coats of matte black on all nails. Let it dry longer than you think because matte polish sets as it cures. On your chosen accent nail, paint 2 coats of glossy cherry red instead of matte and keep it glossy with a glossy top coat. Add one tiny black dot near the cuticle with a dotting tool if you want a little detail. Finish by sealing matte nails with a matte top coat and the accent nail with glossy top coat.
Editor's noteUse matte top coat even on the first matte layer if your black polish dries satin - it locks the look in.
Watch outAvoid mixing matte and glossy on the same nail unless you separate them with a clear line.
8. Red Outline Hearts On Glossy Black
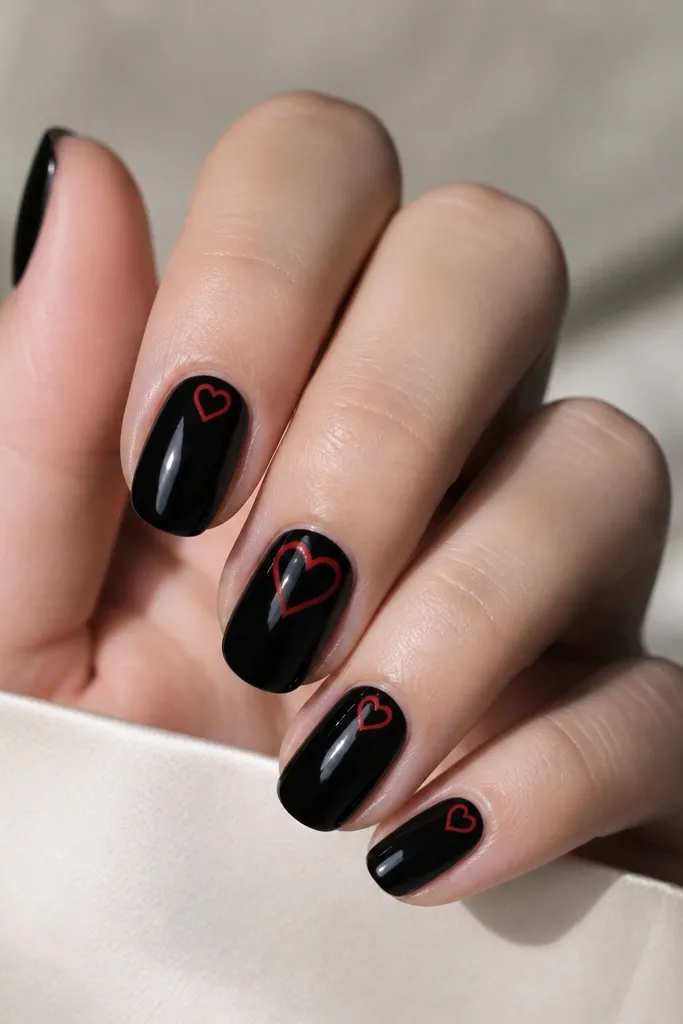
Outline hearts look cleaner than filled hearts because they don't look chunky. Glossy black makes the red lines look crisp, like a fine marker drawing. This flatters shorter nails because the heart sits near the cuticle instead of taking over the whole nail. It also gives a "soft edge" to black - it reads cute without turning into a full theme.
Paint 2 coats of glossy black on all nails. Use a striping brush or a red nail art pen to draw a tiny heart outline near the cuticle, leaving the inside black. Start with two small curves, then connect at the bottom point. Add a second pass for line thickness only where it looks faint. Seal with glossy top coat, and gently cap over the heart edges so the lines don't catch.
Editor's notePractice the heart on a paper scrap first - the curve control matters more than the size.
Watch outDon't fill the heart in solid red; thin outline looks sharper and more expensive.
9. Black And Red Split Nails With Tape Lines
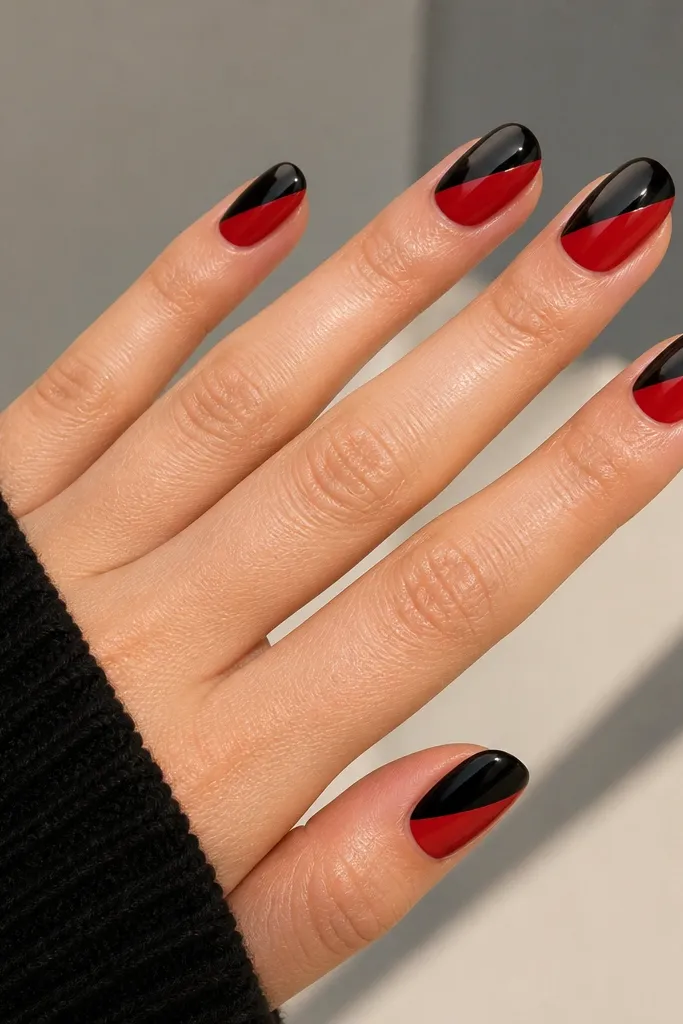
Split nails look like salon work when the line is straight. Tape lines are the secret because they remove the shaky-hand problem. This design works best on medium square or almond because the diagonal division elongates the nail. The contrast is bold, so it looks best with simple outfits or a black/red accessory to tie it together.
Paint 2 coats of glossy black on nails, then let dry. Place striping tape diagonally at the angle you want, burnish the edges lightly, then paint glossy red over the exposed section. Remove tape while the red is still slightly tacky for the cleanest edge. If the red looks thin, add a second coat after drying. Finish with glossy top coat and cap the side edges where the line meets the nail tip.
Editor's noteAngle the diagonal line so it follows your natural nail curve - it looks more flattering than a random slope.
Watch outAvoid lifting tape too slowly or your line will get jagged and show a ridge.
10. Red Glitter Fade Tips Over Black Base
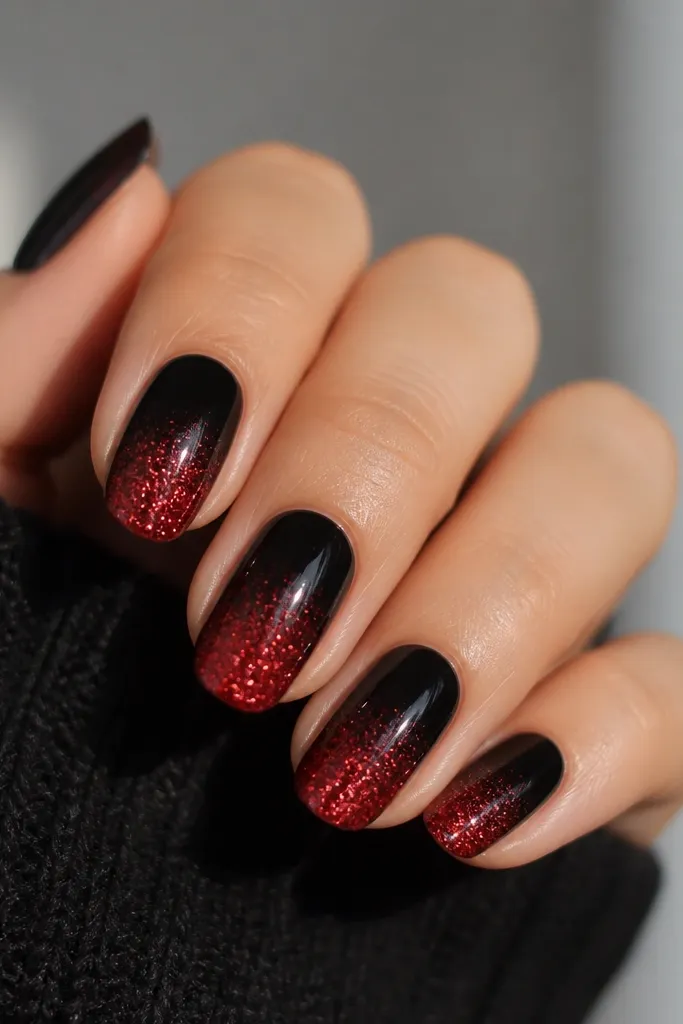
A fade is easier than it looks and it reads like a professional ombre because the glitter density changes gradually. Black makes the red glitter look deeper and more dimensional, not dusty. This style flatters hands with short nails because the glitter starts higher only if you want length, then stays concentrated at the tip. It's also great for events because it catches light without needing a full design.
Start with 2 coats of glossy black. Apply a thin layer of clear gel-like polish or thick base coat near the tip area (about the outer third). Tap red glitter onto the wet layer, then use a makeup sponge to blend the glitter upward so it fades. Keep the top layer densest right at the tip so it looks intentional. Seal with glossy top coat in 2 thin layers to prevent grit from feeling rough.
Editor's noteUse a sticky top coat for sealing glitter - it smooths texture better than a watery one.
Watch outAvoid overloading glitter - thick clumps make a budget set look bulky.
11. Wine Red Micro Dots On Matte Black
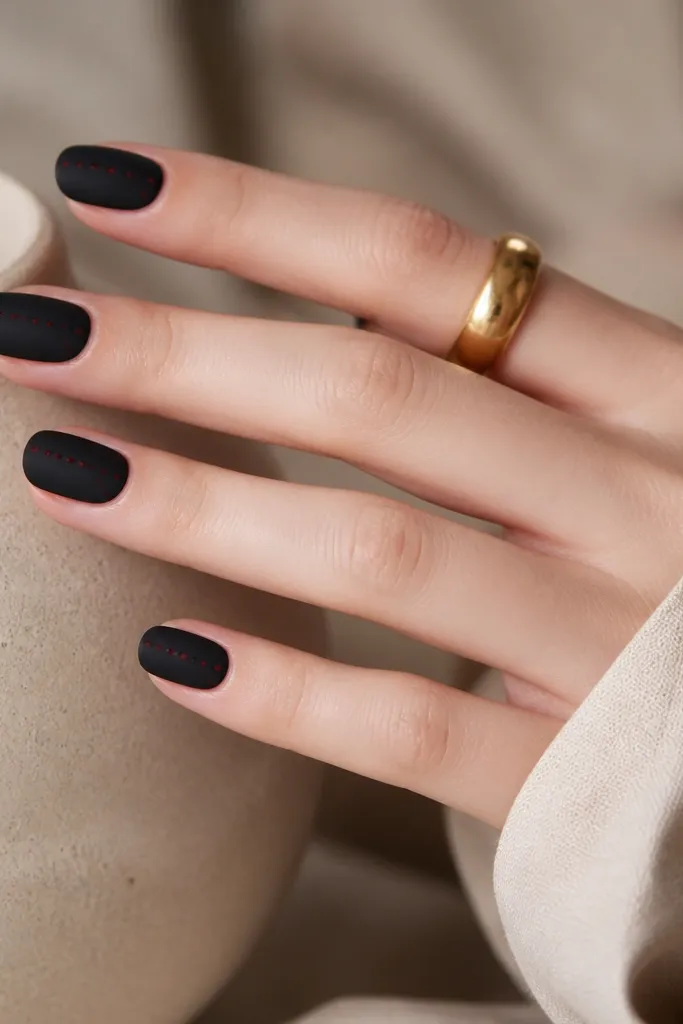
Micro dots make black and red feel playful without looking childish. Matte black gives the dots a soft background, and the wine red reads richer than cherry in matte. This works on short nails because the dot pattern sits above the nail base and doesn't crowd the tip. It's also easy to repeat across all nails so the set looks cohesive.
Paint 2 coats of matte black and let it cure fully. Dip a dotting tool into wine red polish (not too much) and place 4-6 tiny dots in a diagonal line starting near the mid-nail. Keep dot spacing consistent by reloading the tool the same amount each time. Add one or two extra dots on the ring finger for a focal nail. Finish with a matte top coat if you want all matte, or use glossy top coat only over the dots if you want them to pop.
Editor's noteWipe the dotting tool lightly on a paper towel before each nail so dots stay micro.
Watch outDon't place dots too close to the cuticle; they can drag when you wash your hands and look smeared.
12. Red Foil Flakes On Glossy Black Accent
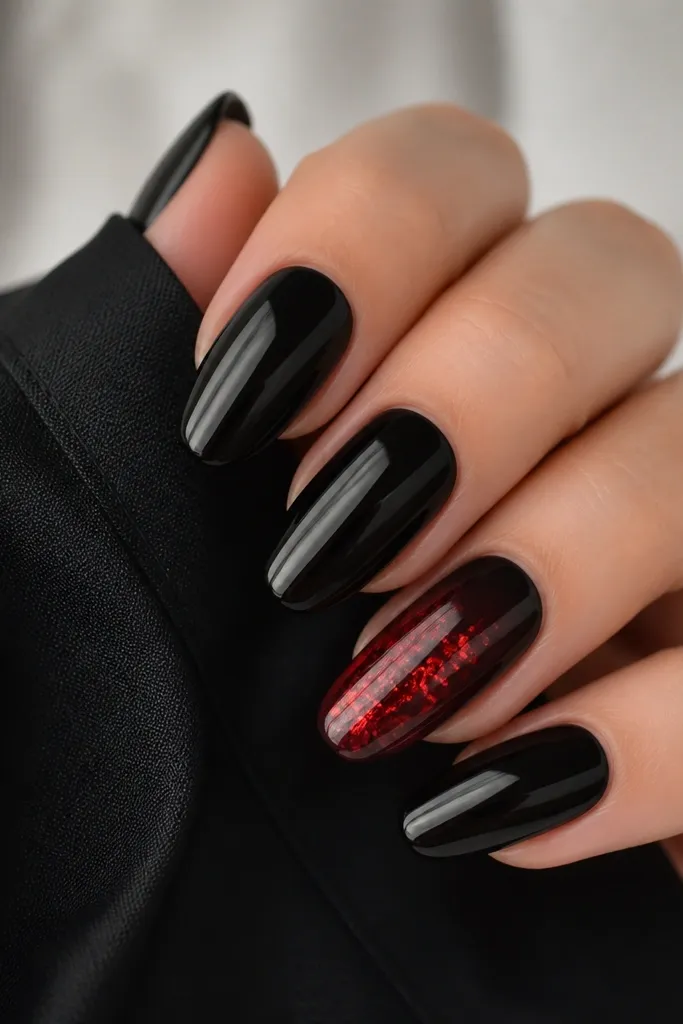
Foil flakes look expensive because they reflect light in random shapes, so you don't need precision. Keeping it on one or two nails keeps it budget-friendly and avoids a heavy look. Glossy black makes the red foil look like it has depth, almost like stained glass. This flatters any nail length, but it looks best on almond because the flakes can sit in a smooth arc.
Paint all nails with 2 coats of glossy black. On the accent nail, dab a small amount of foil glue (or a tacky base coat) where you want flakes, usually the center and outer third. Press red foil flakes in sections - don't try to cover every inch. Leave some black showing so the foil looks layered. Seal with 1-2 coats of top coat, pressing gently to avoid lifting edges.
Editor's noteUse tweezers for flaky edges so you place pieces exactly where you want the sparkle.
Watch outAvoid rubbing the foil after placement; it smears and you lose the shard look.
13. Reverse French With Thin Red Cuticle Line
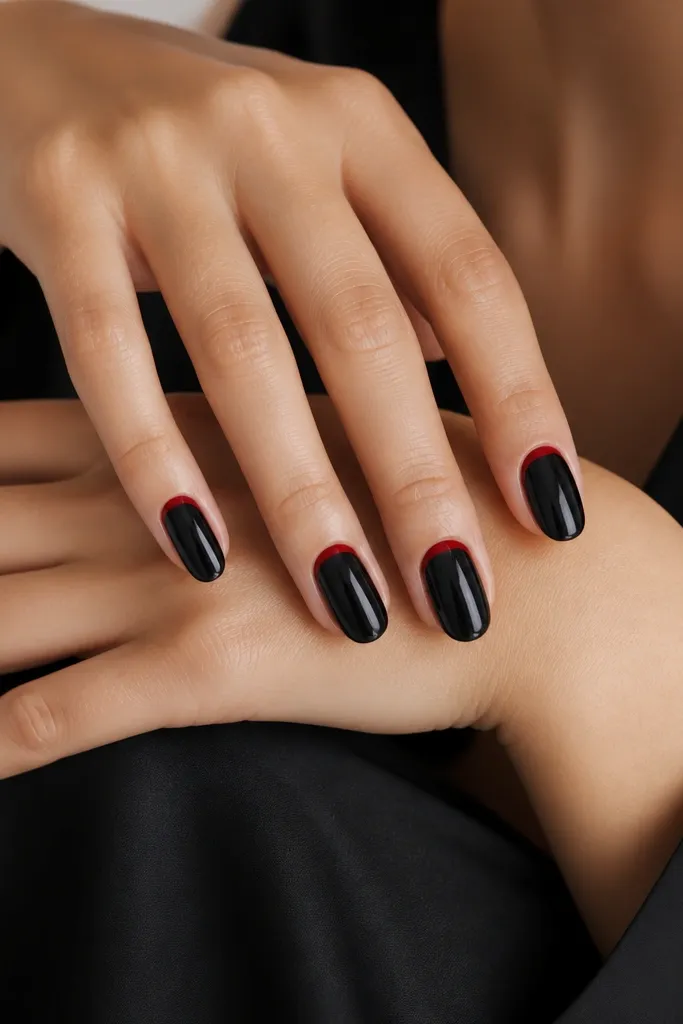
Reverse French looks clean because it uses the natural nail curve and keeps the design close to the cuticle. The thin red line makes your nails look more structured without adding bulk. I like it for hands that have short nail beds because the red line gives a focal point higher up. It also works for everyday wear since it doesn't rely on big art details.
Start with a glossy black base and let it fully dry. Use a small strip of striping tape or a cuticle-hugging guide to mark a thin arc around the cuticle, leaving a tiny gap from the skin. Paint red over the exposed line area in 1-2 thin coats. Remove the tape while the red is still tacky for a crisp edge. Finish with glossy top coat and cap the top edge of the cuticle line so it doesn't lift.
Editor's noteIf your cuticle line gets too wide, clean it with a thin brush dipped in acetone instead of repainting black.
Watch outAvoid dragging red polish onto your skin - it makes the line look messy by day two.
14. Black Base With Red Broken Chevron Tips
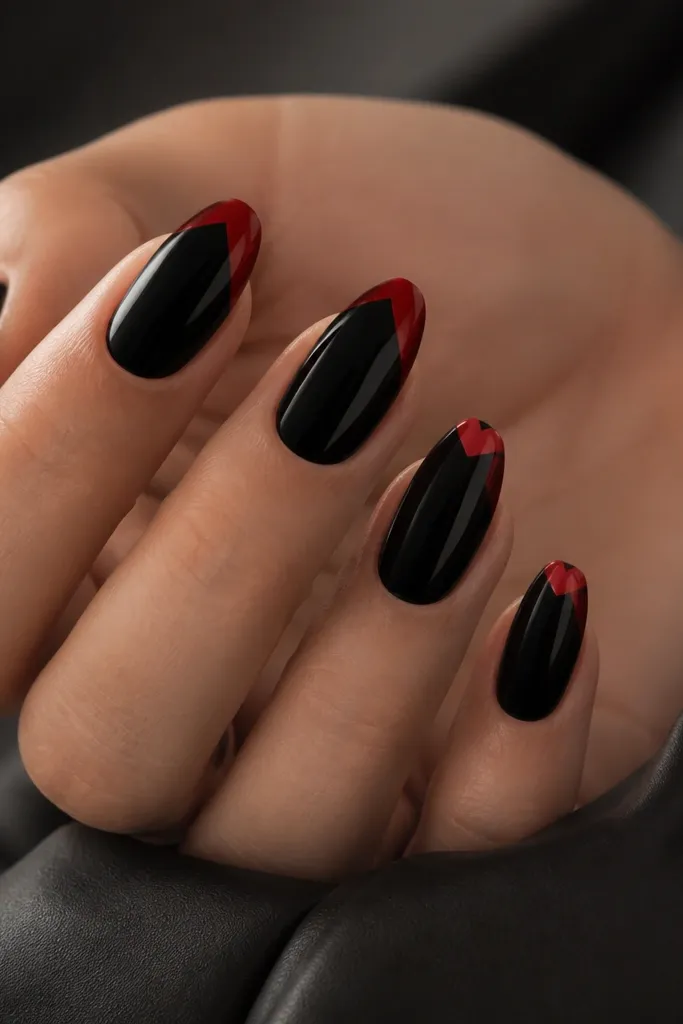
Chevron tips look bold, but broken chevrons keep them modern and not too "perfect." Black base makes the red V stand out, and the jagged edge gives texture even if your red polish is basic. This style flatters medium square nails because the chevron sits nicely in the tip area. I wear it when I want something edgy that still looks neat in photos.
Paint 2 coats of glossy black and let dry fully. Place two small pieces of striping tape to form a V at the tip, leaving a gap between them. Paint red over the taped V area, then remove tape carefully. For the broken look, add a second tiny V segment on one side slightly shifted before sealing. Finish with glossy top coat, then lightly cap the chevron edges.
Editor's noteUse thin tape and keep the V narrow - narrow chevrons look crisp even on a cheap polish budget.
Watch outAvoid filling the chevron too thick; thick V shapes look messy and widen the nail.
15. Red And Black Diagonal Checker Accent
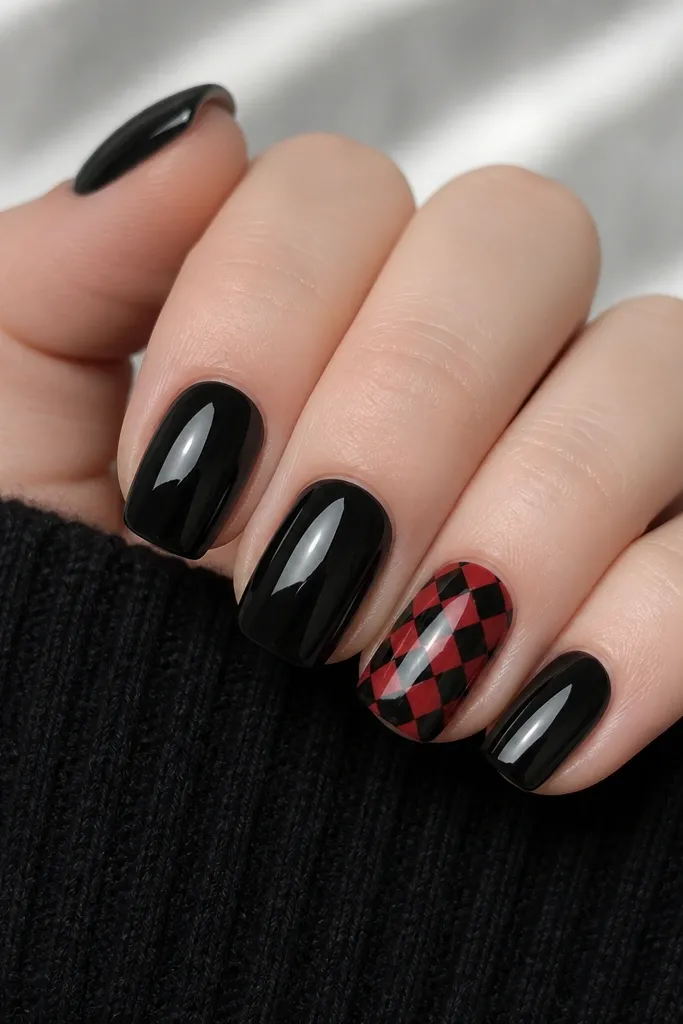
Checker patterns look hardest, but one accent nail makes it doable. Rotating the checker diagonally makes the nail look longer and keeps it from looking like a simple grid. Black and red together feel graphic and clean, especially when the squares are small. This is flattering for all nail shapes because the pattern sits in one focal area.
Paint all nails glossy black with 2 coats. On the accent nail, use a fine brush or nail striping tape to create tiny squares along a diagonal line. Paint alternating squares red and black, keeping the red consistent in shade. Let each color set for a minute before adding the next square to avoid bleeding. Seal everything with glossy top coat, focusing on the edges of the squares.
Editor's noteMake the squares small - bigger squares look beginner and can look like "patches."
Watch outAvoid uneven square sizes; one or two off squares ruin the whole checker effect.
16. Red Jelly Overlay Over Black Tips
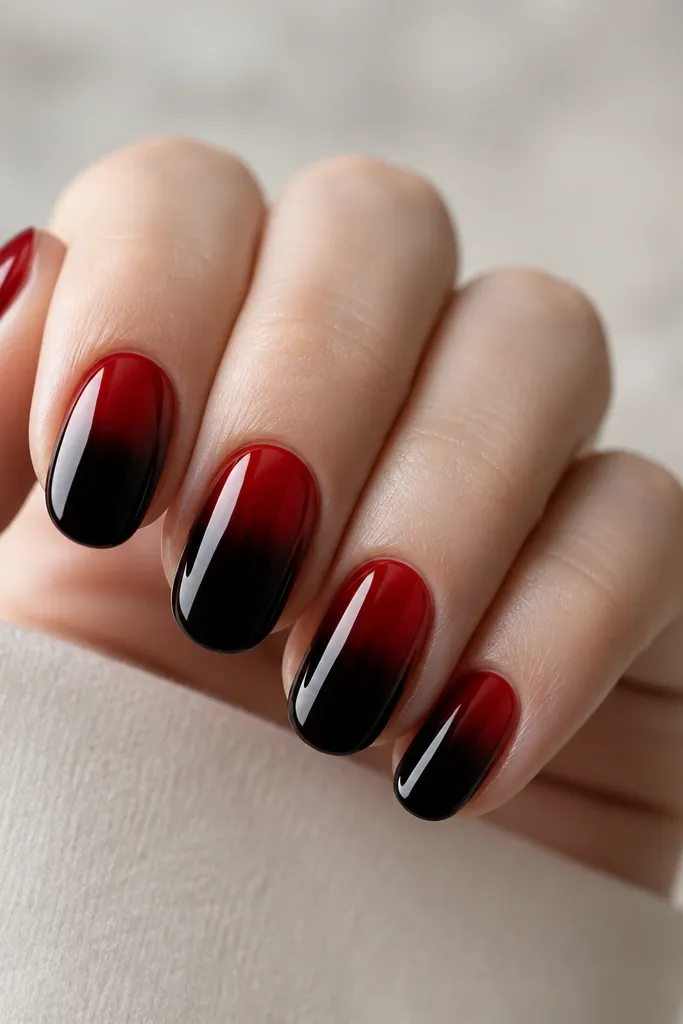
Jelly overlays are my favorite budget hack because they make cheap polish look richer. The translucency creates depth over black, so the red looks like it has a glow rather than looking flat. This flatters short nails because the smooth transition makes the nail bed look longer. It also looks good on any occasion because it's bold but not heavy.
Paint 2 coats of glossy black and let dry. Sponge or brush a red jelly polish starting from the middle upward, leaving the black visible at the lower half. Blend the transition by lightly dabbing a damp sponge at the boundary so it fades instead of lines. Add a second jelly layer only on the top half for opacity. Finish with glossy top coat to lock the jelly look and smooth the surface.
Editor's noteIf your red jelly is too opaque, thin it with a couple drops of clear polish so it stays translucent.
Watch outAvoid a hard straight line at the middle; it looks like a cheap two-tone sticker.
17. Red Lace Trim On Black Base
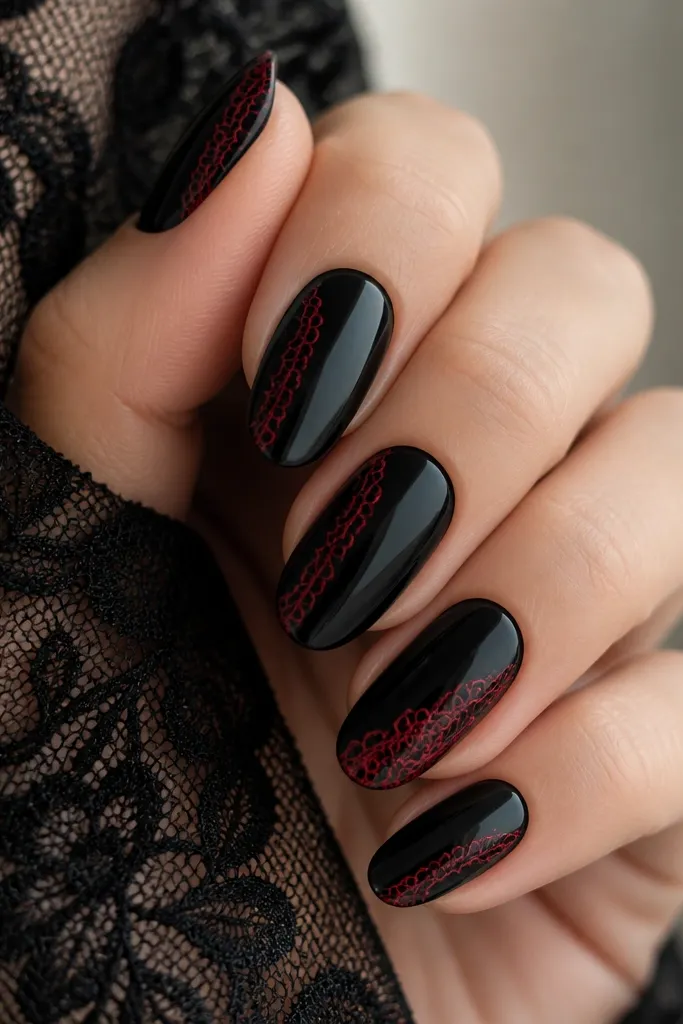
Lace trim looks expensive because it's detailed, but you can do it with a stamping plate or a thin nail art brush. Keeping the lace as a border instead of a full coverage pattern makes it wearable. Black base makes the red lace look like it's printed, not painted. This flatters smaller nail beds because the lace sits along the side and creates a slimming vertical effect.
Paint all nails glossy black with 2 coats. Choose a lace trim stamping plate or freehand using a fine brush; place the pattern along the left side of the nail from near the cuticle to about 2/3 down. If stamping, press firmly and move quickly to avoid smearing. If freehand, start with a thin straight line, then add loop curls on top of it. Seal with glossy top coat and cap the lace edges so it doesn't lift.
Editor's noteIf your lace looks too thick, use less polish on the brush and build in two light passes.
Watch outDon't spread lace across the whole nail - it turns into a busy red-black blob fast.
18. Black Glossy Nails With Red Index Finger Stripe
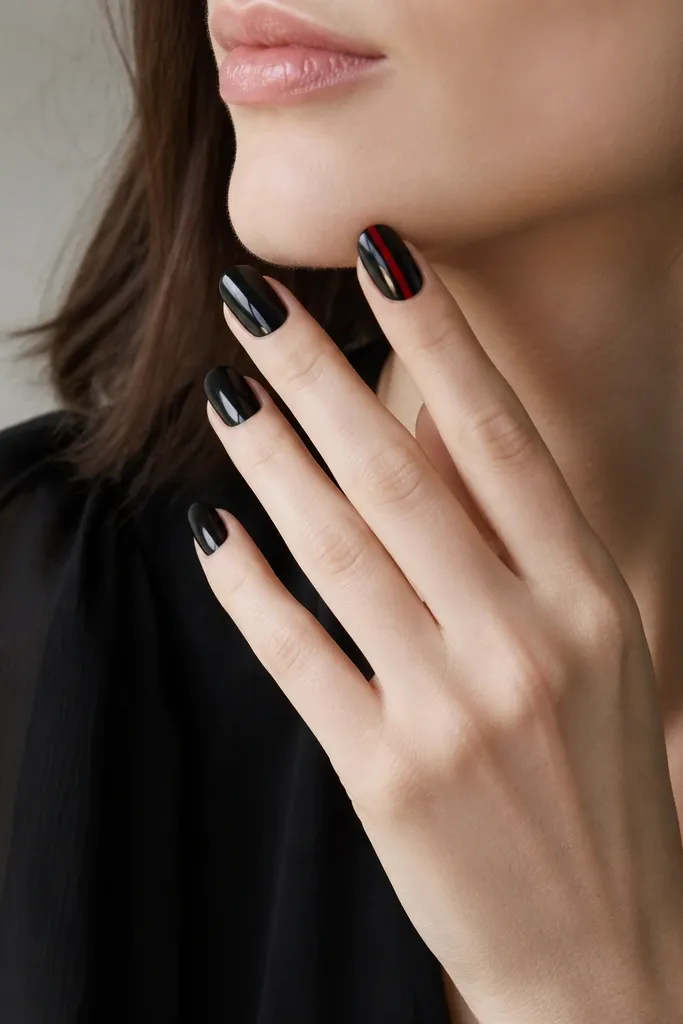
This is the "grown-up" version of nail art. One vertical stripe lengthens the nail visually, and keeping the rest solid black makes it look clean. It flatters hands with shorter nails because the stripe gives a vertical focal point without adding extra color blocks. I wear this when I want black and red but not full-on patterns.
Paint 2 coats of glossy black on all nails. On the index finger nail, place striping tape down the center line (or slightly off-center if you want a softer look). Paint glossy red over the exposed stripe area in 2 thin coats. Remove tape while the polish is still tacky for a sharp edge. Finish with glossy top coat on all nails, and cap the sides of the stripe so it stays smooth.
Editor's noteIf your stripe looks uneven, fix it with a tiny amount of black polish on a thin brush - it's easier than repainting the red.
Watch outAvoid painting a wide stripe; thick lines look like a smudge on a budget set.
19. Red Bow Accent On Black With Micro Dots
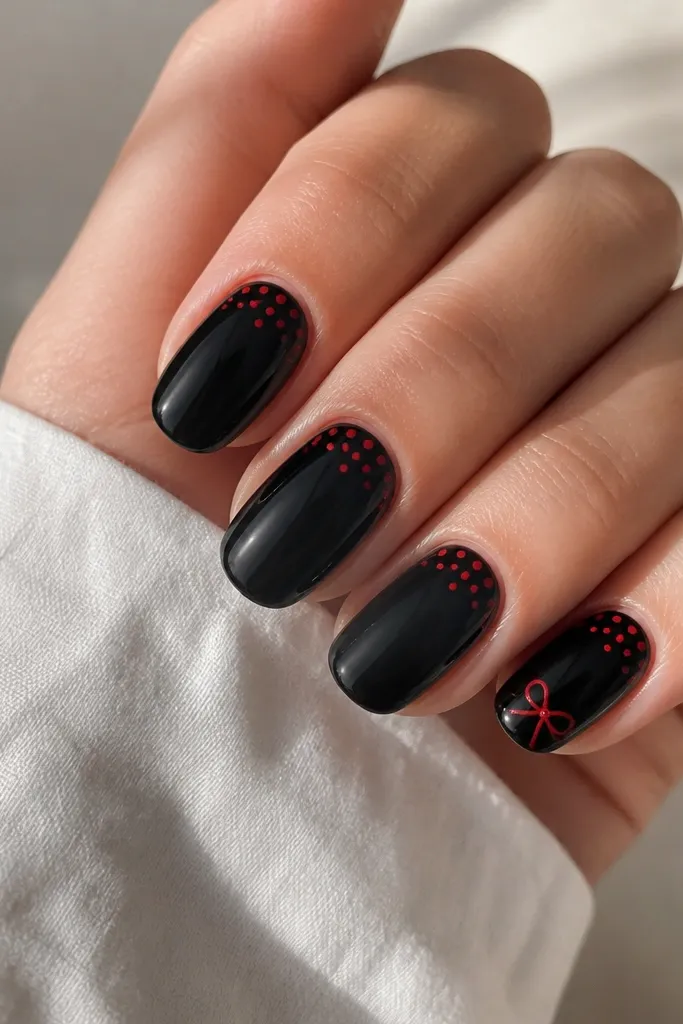
Bows add cute detail without needing a full theme if you keep them small. The micro dots around the nail make the bow feel connected instead of random. Glossy black makes the red bow look like it's outlined and intentional. This works best on short to medium nails because a big bow takes over the whole nail and starts to look costume-y.
Paint 2 coats of glossy black on all nails. Use a dotting tool to place 2-3 tiny red dots near the cuticle on each nail. On your chosen accent nail, draw the bow: paint two small curved loops, then add a small center knot with red. Outline the bow loops lightly with black polish if you want extra crispness. Seal with glossy top coat, and press the top coat over the bow so it doesn't snag.
Editor's noteUse a toothpick for the center knot; it makes a perfect tiny dot shape.
Watch outAvoid big bows on short nails; keep it small and near the tip.
20. Black Base With Red Outline Cat-Eye Accent
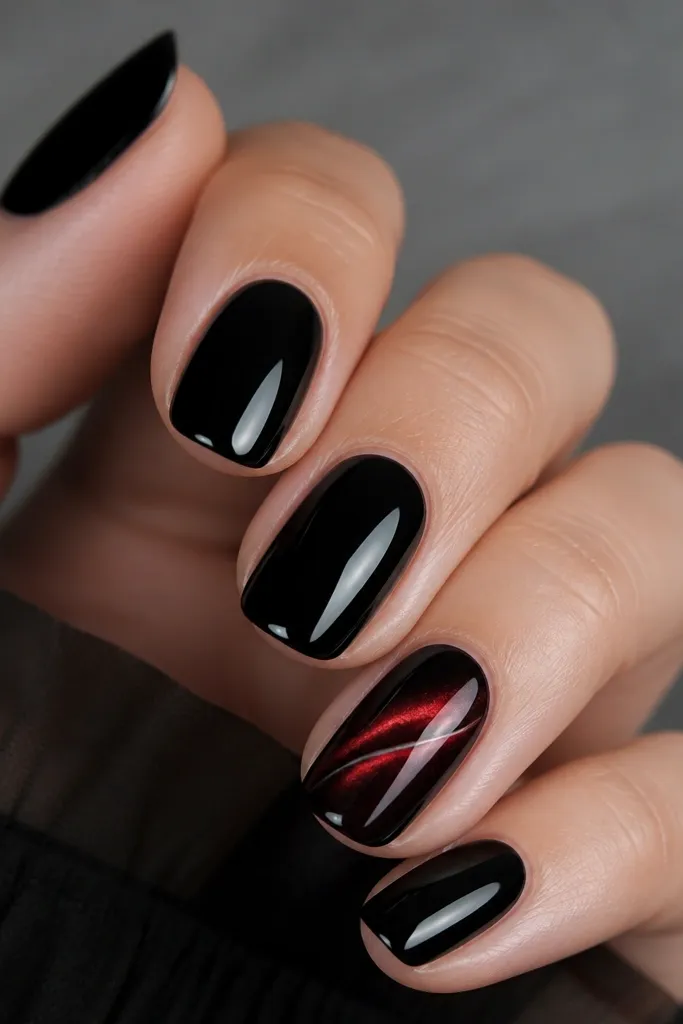
Cat-eye polish is a budget-friendly way to look high-end because the magnetic shimmer does the work. A red cat-eye over black gives a glowing streak that looks like it has depth, especially under indoor lighting. This flatters almond and oval nails because the magnetic line curves nicely along the nail. I like it for nights out when you want something dramatic but still clean.
Paint all nails glossy black with 2 coats. On the accent nail, apply a base coat, then paint a thick coat of red cat-eye polish. Hold a magnet close to the nail at the angle you want the streak (for me it's diagonal from lower left to upper right) for 10-15 seconds. Add one more thin cat-eye coat only if the streak needs more opacity. Finish with glossy top coat, and use a fine brush to add a thin black outline curve near the streak if you want it extra defined.
Editor's noteDon't move the magnet while it's forming the streak - small shifts ruin the line.
Watch outAvoid thin cat-eye coats; the shimmer streak gets weak and looks like regular red.