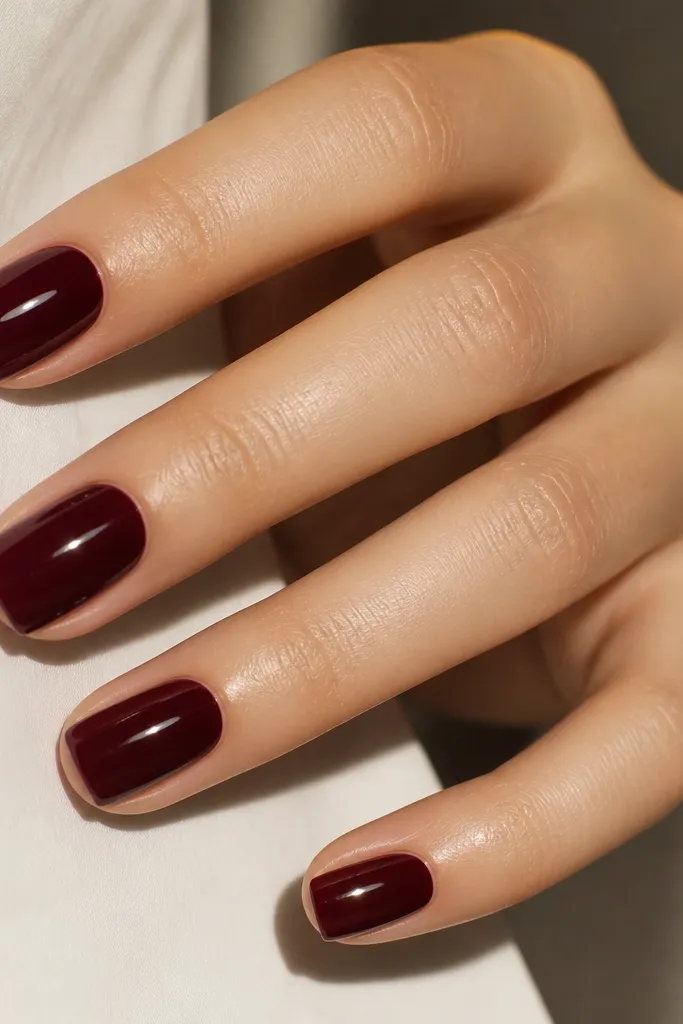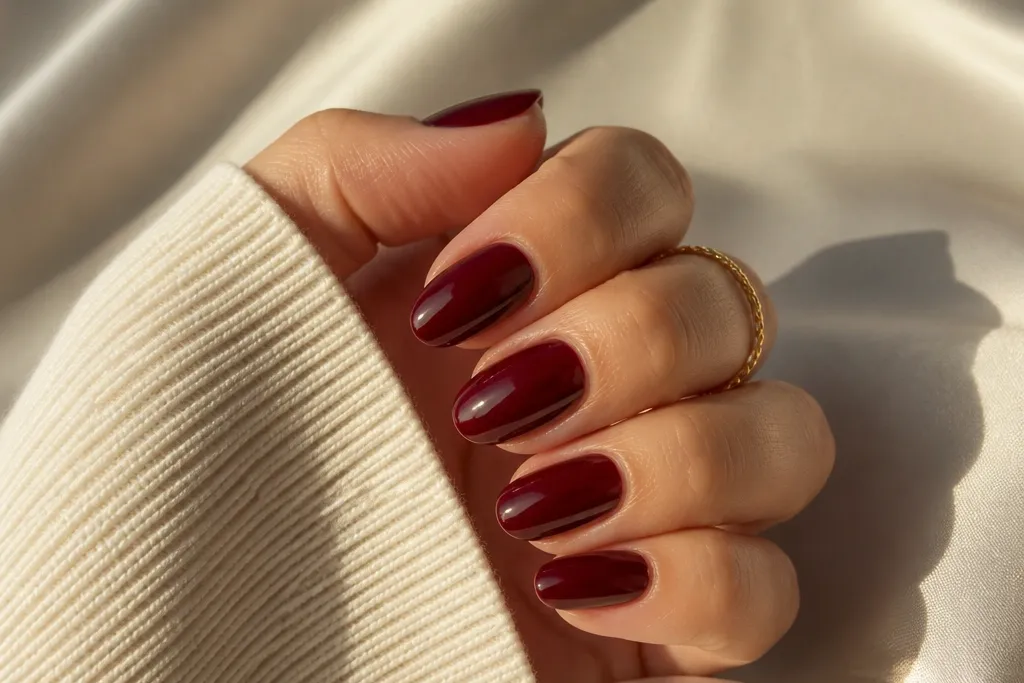

1. Jelly Cherry Gloss With Barely-There Micro Shimmer
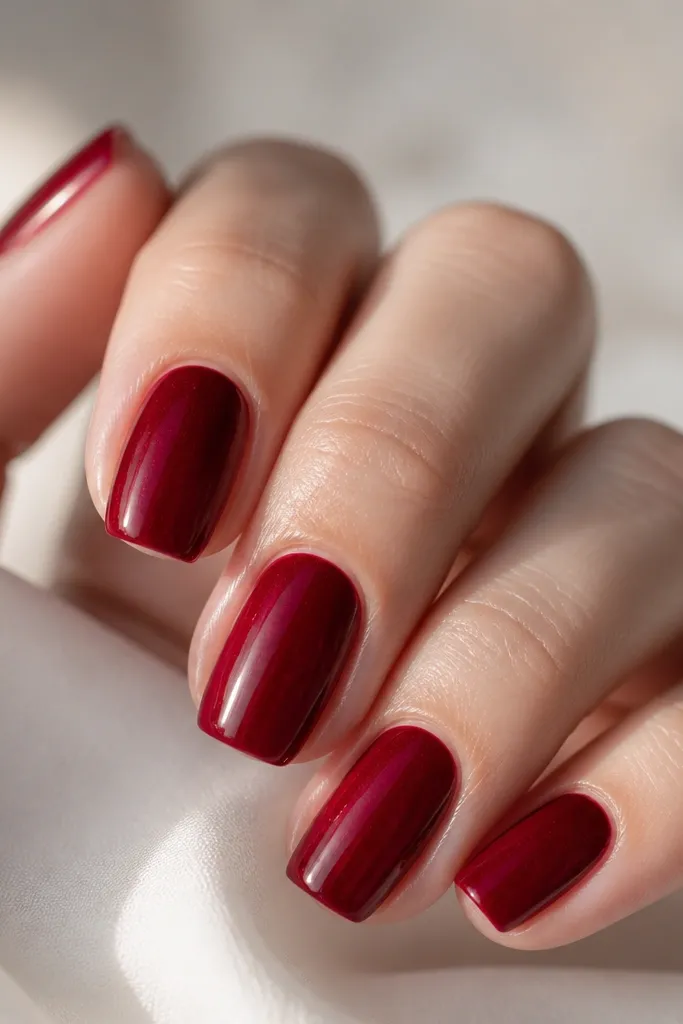
This is the “expensive red” version of Dark Red Cherry Nails That Look Stunning because the jelly base lets light sink into the color instead of sitting on top. I use it when I want the shade to look rich without adding patterns. It flatters most skin tones — fair skin looks like a glossy berry, while deeper skin looks like ruby fruit. On short squoval nails, the shimmer stays subtle so your hands don’t look overdone. The styling principle is simple: depth first, decoration second.
Start by prepping your nails and pushing back the cuticle gently, then buff only the shine off the surface. Apply two thin coats of a jelly dark cherry red, curing fully between coats. If your polish is sheer, add a third ultra-thin coat only on the center of each nail to keep the edges clean. Finish with a thick, glossy top coat and cap the free edge so the shine doesn’t dull at the tips. Keep the shimmer even — don’t concentrate it at the cuticle or it will look streaky.
Use a top coat that levels well; watery top coats make jelly reds look patchy at the edges. If you see streaks, cure longer and add a second top coat instead of adding more color.
Avoid matte top coat on this one — it kills the jelly glow.
2. Cherry Red French Tips On Squoval
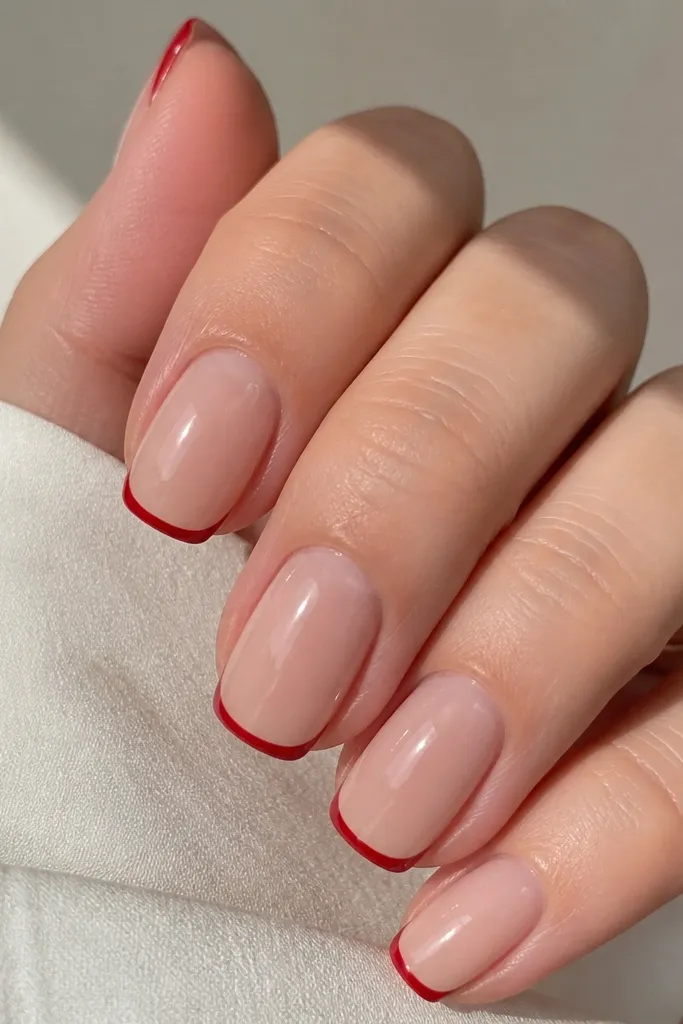
French tips in dark cherry make your nails look freshly manicured without needing art. The sheer nude base gives contrast, so the cherry tip reads sharp and bright instead of turning muddy. This works especially well on medium-to-deep skin tones because the nude base warms the whole look. On shorter nails, thin tips elongate the nail bed and keep the set from feeling heavy. The principle is contrast control: let the tip do the work.
Editor's noteChase a “thin but opaque” tip: you want coverage in one or two coats, not a streaky third coat.
Start with a sheer nude base that matches your skin tone — I like pink-beige, not gray-beige. After curing, use a striping brush to paint a thin cherry-red smile line, keeping it centered and slightly curved. Fill the tip area with one smooth layer, then clean the edges with a small brush dipped in acetone. Cure, then seal with a glossy top coat that covers the tip edge. If your French line looks too thick, redo the tip before top coat — it’s easier than fixing under shine.
Watch outAvoid a thick French tip on short nails — it shortens the look.
3. Velvet Cherry Matte With Glossy Cuticle Halo
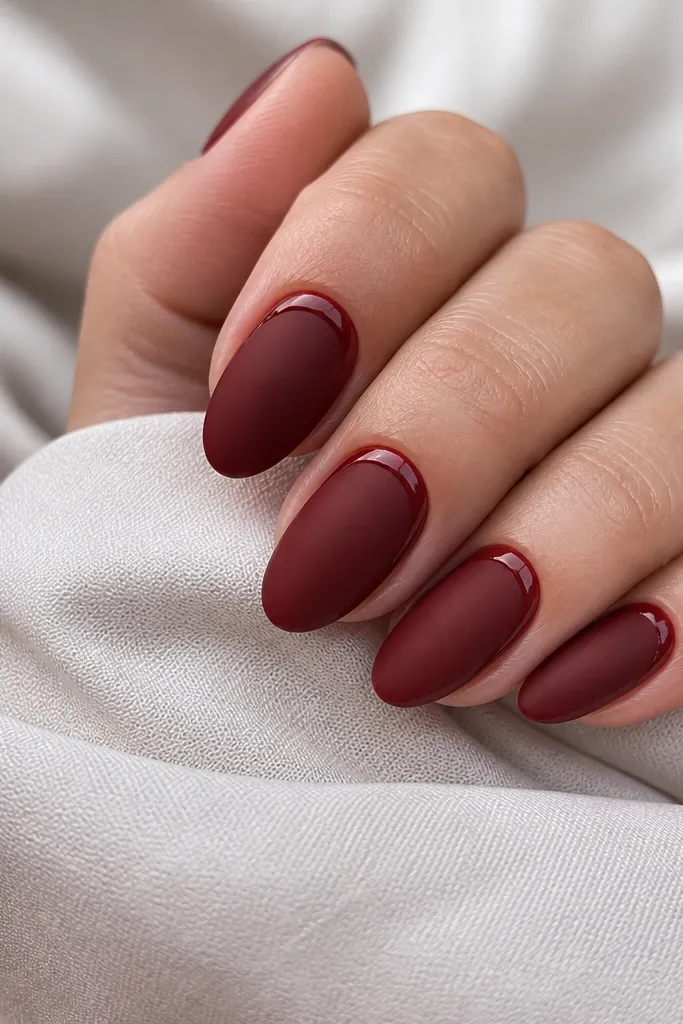
Matte velvet cherry nails look stunning because the color turns softer, like fruit leather, while the glossy halo gives you a clean focal point. I do this when I want Dark Red Cherry Nails That Look Stunning but still wearable for everyday. It flatters hands with longer nail beds because the almond shape makes the matte look smooth. On fair skin, the matte reduces harshness; on warm undertones, it looks like a deep berry stain. The principle is finish contrast: matte background, glossy detail.
Editor's noteIf your matte top coat looks grainy, wipe the tacky layer off with the right product and reapply matte in a thinner layer.
First paint two coats of dark cherry red gel and cure fully. Apply matte top coat over the entire nail surface, avoiding the cuticle area at first. With a fine brush, paint a thin glossy halo by applying glossy top coat (or a clear gel) just around the cuticle line, then cure again. Add a final glossy coat only over the halo area if it looks uneven. Keep the halo narrow — about 1 millimeter — so it reads like a highlight, not a stripe.
Watch outAvoid getting matte top coat onto the cuticle halo — it will turn the highlight dull.
4. Dark Cherry Glass Nails With Chrome Edge
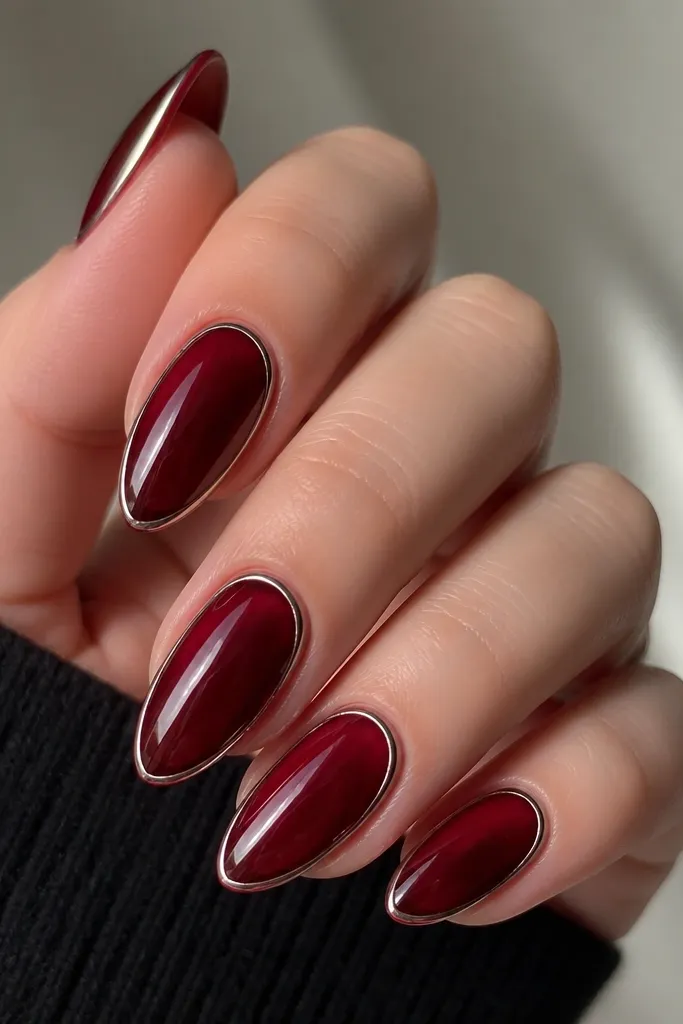
This look is all about “glass” shine. The translucent dark cherry base makes the nails look like colored gel candy, and the chrome edge gives a sharp outline that makes your hands look sharper. I like it for nights out because chrome catches light even when you’re not moving much. It flatters cooler undertones and anyone who likes clean, modern lines. The principle is framing: the chrome edge defines the shape.
Editor's noteUse a thin striping brush and do the chrome in one confident pass per side — multiple passes smear the line.
Start with a translucent dark cherry gel base in two coats, keeping it slightly thicker in the center for a domed glass effect. Cure well and wipe if your system requires it. Apply chrome pigment or a chrome gel only to the outer edge line, using a striping guide or tape to keep it straight. Seal everything with a high-gloss top coat that can handle chrome (some top coats dull chrome). Finally, cap the free edge so the chrome doesn’t chip at the side.
Watch outAvoid thick chrome coverage — it makes the edge look bulky.
5. Cherry Drip Accent Over Nude Base
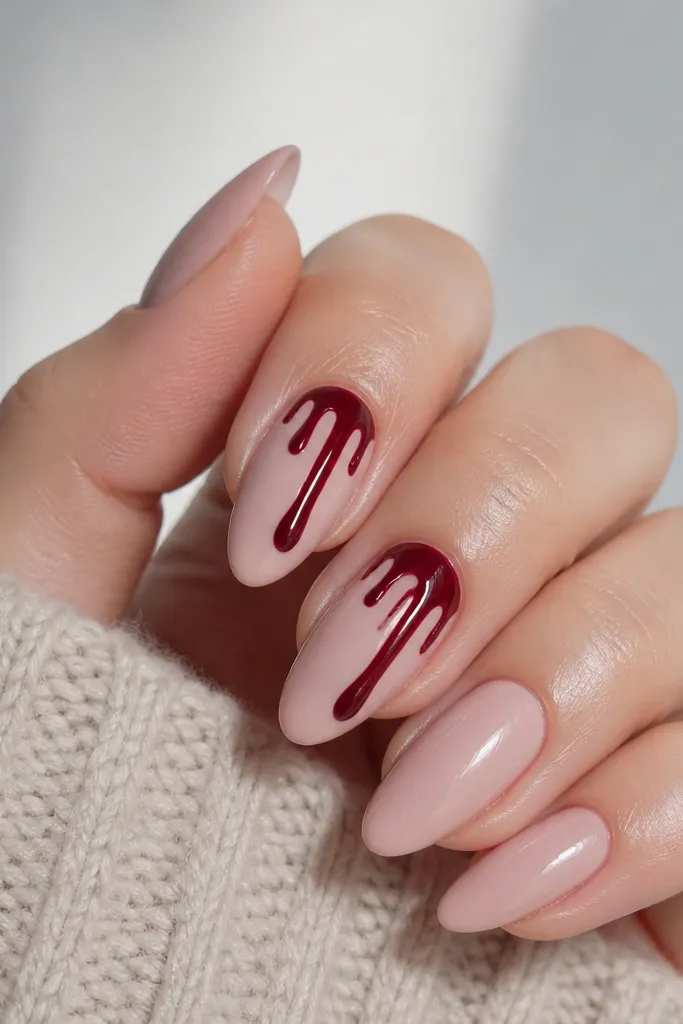
Drips look messy on the wrong red, but with a dark cherry they look like glossy candy art. The nude base keeps it wearable, and the drip placement makes your nail bed look longer. I do this for birthdays and date nights because it reads playful without being childish. It works on short to medium lengths; on short nails, keep the drip short so it doesn’t cover the whole nail. The principle is negative space: let the nude do the calm work.
Paint all nails with a nude-pink base and cure. On two accent nails, place three small dots of dark cherry gel near the upper third and drag them downward with a dotting tool tip, leaving gaps between drips. Keep the longest drip about halfway down the nail so it stays proportionate. Cure, then add a thick glossy top coat over the entire set, paying extra attention to smoothing the drip ridges. Clean any overflow around the cuticle with a small brush and acetone.
If your drips look like blobs, thin the gel slightly and practice on a silicone mat first.
Avoid drips that start too close to the cuticle line — they can look like a stain.
6. Dark Cherry Crisscross Lines On Glossy Base
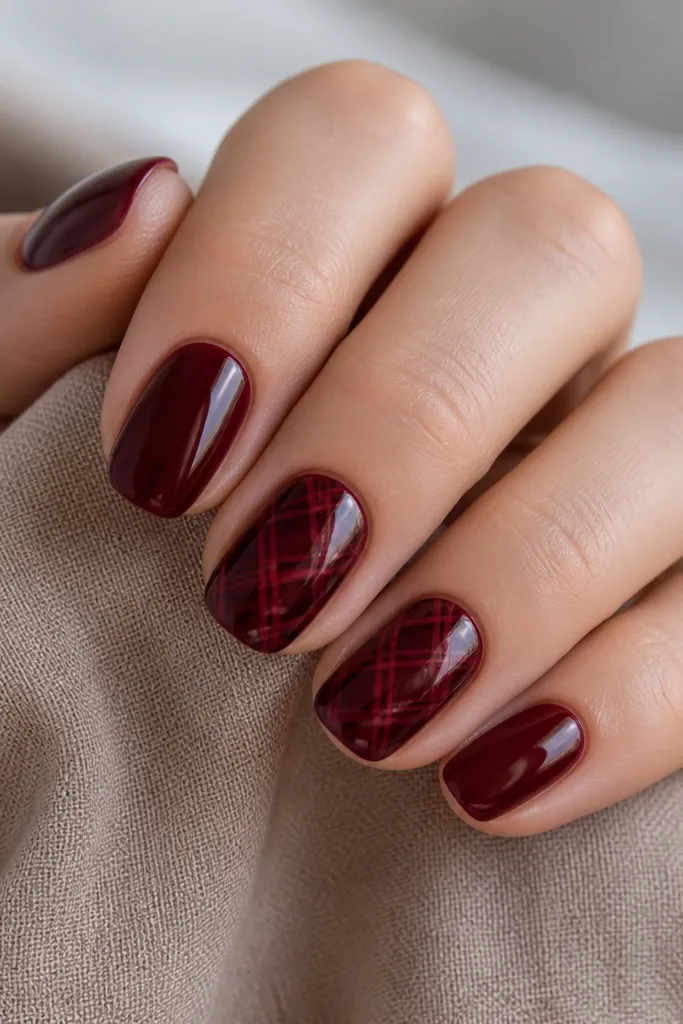
Crisscross line art gives you a lot of visual interest while still staying within the cherry-red family. I like this when I want something different from plain solid color but I don’t want tiny flowers or rhinestones. The lighter cherry lines catch the light and create dimension, so the nails look more layered. This is flattering on medium almond nails because the lines follow the nail curve. The principle is controlled contrast: use one shade lighter for the lines, not a bright new color.
Editor's noteUse long, light strokes with the striping brush; pressing too hard widens the line.
Start with two coats of your darkest cherry red gel and cure. Using a striping brush, paint thin crisscross lines on the center of each accent nail, forming an X pattern. Keep the lines spaced so you still see the base between them. Cure again, then seal with a glossy top coat that fills in tiny gaps. If the lines look uneven, add a second thin line pass before top coat.
Watch outAvoid thick marker-like lines — they turn the design flat.
7. Cherry Ombré Fade Into Clear Pink
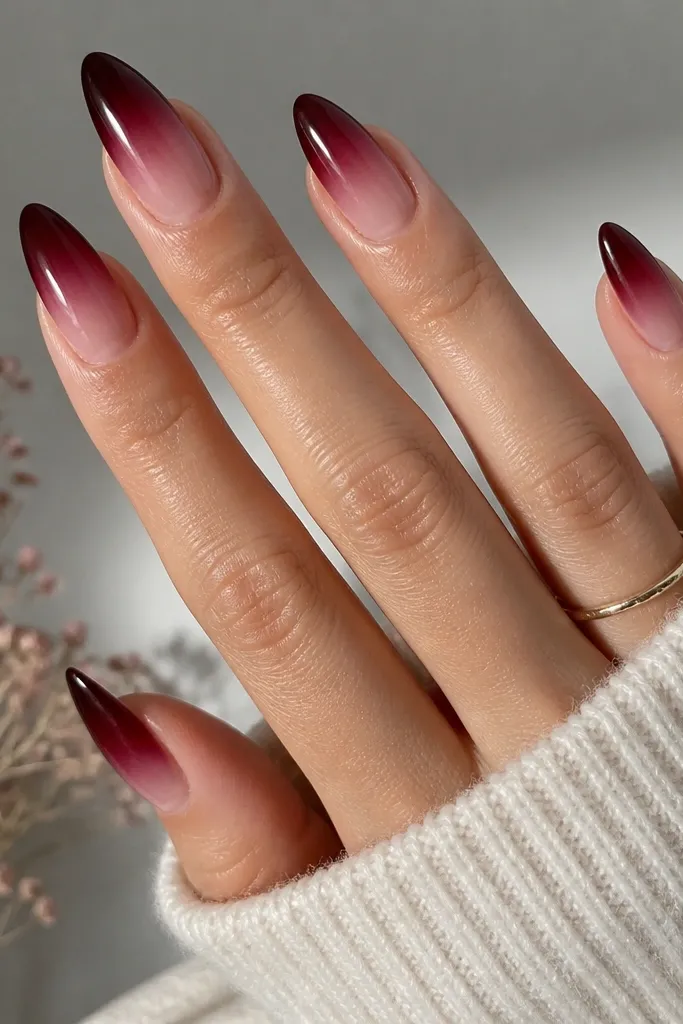
Ombré makes Dark Red Cherry Nails That Look Stunning because it stretches the color from tip to bed instead of stopping abruptly. The clear pink near the cuticle keeps it airy and makes the nails look longer. I’ve worn this on both pale and deeper skin tones and it always looks clean, like a salon fade. It also hides small imperfections because the blend softens edges. The principle is gradient placement: heavy at the tip, light near the cuticle.
Editor's noteIf the ombré looks patchy, let it cure fully, then add one more feathered sponge layer instead of repainting.
Apply a clear pink base (or sheer nude) and cure. Sponge on dark cherry gel at the free edge using a makeup sponge, then blend upward with lighter pressure. Work in thin layers until the fade looks smooth — don’t try to build full opacity in one swipe. Cure, then wipe off any residue around the cuticle if your gel system needs it. Finish with a glossy top coat; for extra dimension, add a gel top coat that creates a slight dome.
Watch outAvoid starting the dark color too high on the nail — it can shrink the finger.
8. Cherry Marble Swirl Over Transparent Base
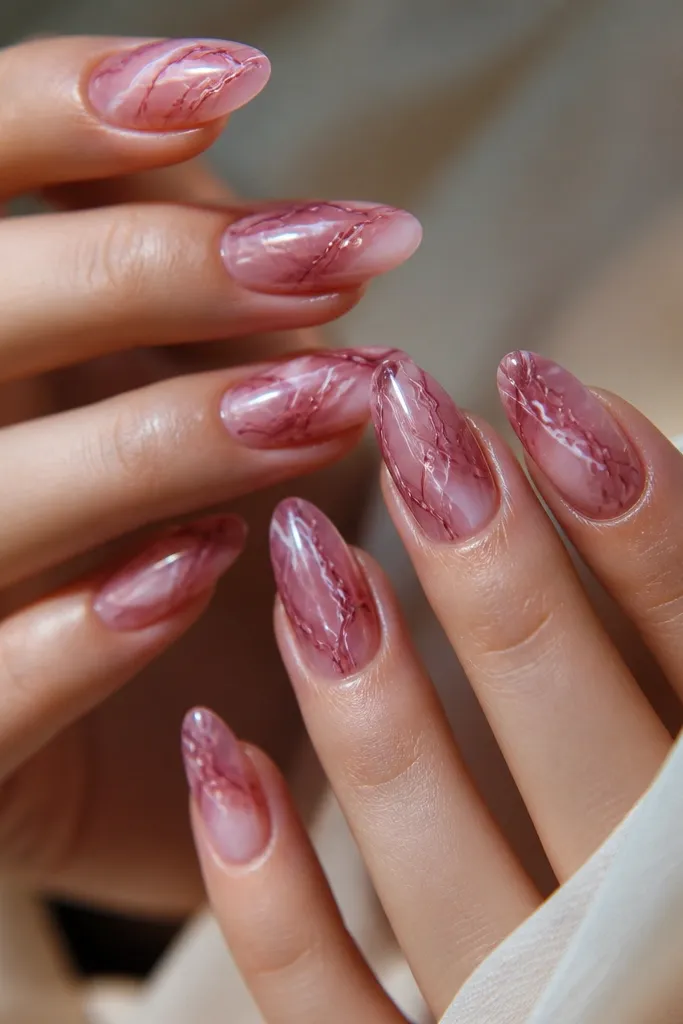
Marble looks hardest when the colors are wrong. In cherry marble, the dark cherry stays the star, and the thin light lines keep it from looking like a stain. I use a transparent base so the marbling floats — it looks like the nail is filled with cherry glass. This works great for medium-long nails, because marble needs space to breathe. The principle is spacing: keep swirls separated so each one reads.
Editor's noteUse a toothpick for the first dot placement — it keeps dots small and controlled.
Start with a transparent pink base and cure. Drop small dots of dark cherry gel on the nail, then swirl them with a thin nail art brush using a light touch. Add tiny touches of off-white gel and drag them through once or twice for that marble veining look. Cure each nail, then seal with a thick glossy top coat to smooth the surface. If the marbling looks too dark, add one more sheer layer after curing to lighten the background.
Watch outAvoid big, heavy swirls — they look like you dragged paint too far.
9. Cherry Micro French With Negative Space Half-Moon
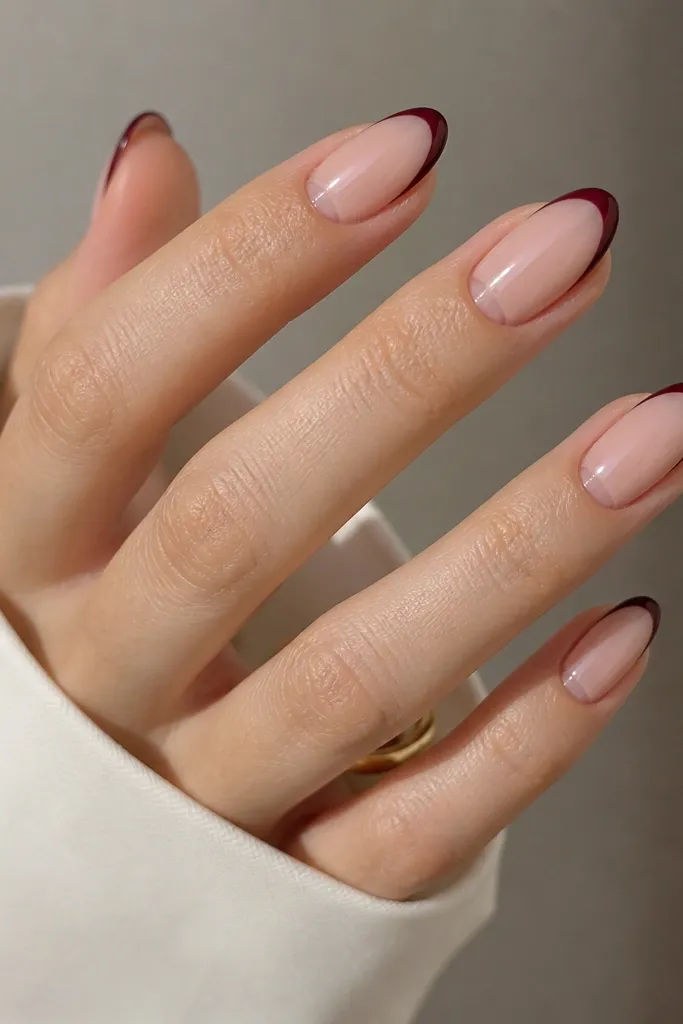
This design makes your nails look crisp because the half-moon negative space breaks up the solid cherry. It’s a smart choice when you want Dark Red Cherry Nails That Look Stunning but you don’t want full coverage on every nail. I like it most on almond and squoval because the half-moon sits neatly at the cuticle curve. On warm undertones, the nude base makes the cherry look brighter, not dull. The principle is geometry: small shapes, clean edges.
Paint a sheer nude base and cure. For the half-moon, leave the cuticle area bare — you can mask it with a tiny piece of tape if you’re careful. Apply dark cherry gel to the very tip in a thin micro French line, then clean the sides with a brush dipped in acetone. Cure and remove any masking. Finish with a glossy top coat but keep it off the negative space; you can cap the rest of the nail for shine.
If tape pulls at your base, use a peel-off cuticle barrier instead.
Avoid top coat flooding into the half-moon — it erases the negative space.
10. Dark Cherry Leopard Spots On Sheer Pink
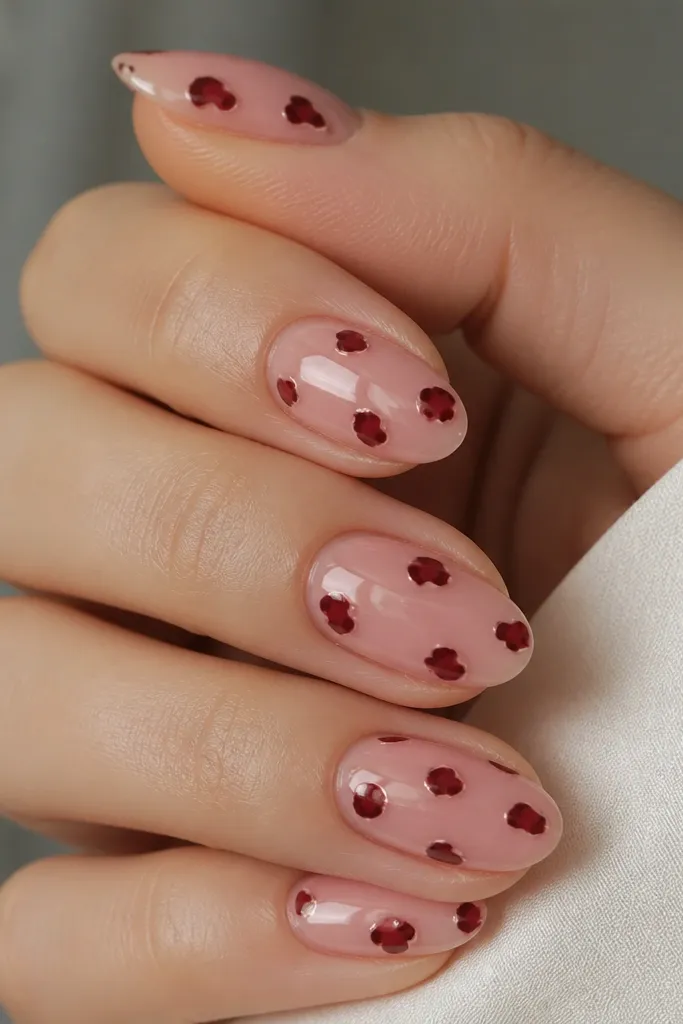
Leopard spots in cherry red look hotter than classic black because the color stays feminine and deep. The sheer pink base keeps it from looking heavy, and the small lighter edges make the pattern pop without turning into a loud print. I like this on medium almond nails because the spots can sit along the nail curve. It flatters fair and medium skin tones by adding warmth, and it flatters deeper skin tones because the sheer base lets the cherry read true. The principle is controlled density: don’t cover the whole nail.
Start with a sheer pink base and cure. For each nail, place 2-4 leopard spots near the center and slightly toward the sides, keeping them separated. Use a dotting tool to create the dark cherry spots, then add a smaller, lighter cherry or deep burgundy outline around each spot. Cure and seal with glossy top coat in two thin layers so the pattern stays smooth. If your spots look too dark, fade the edges with a tiny brush and sheer top gel.
Use a light hand with the outline; thick outlines look like stickers.
Avoid full leopard coverage — it looks busy and can hide the nail shape.
11. Cherry Red Half-Glaze Over Clear Nude
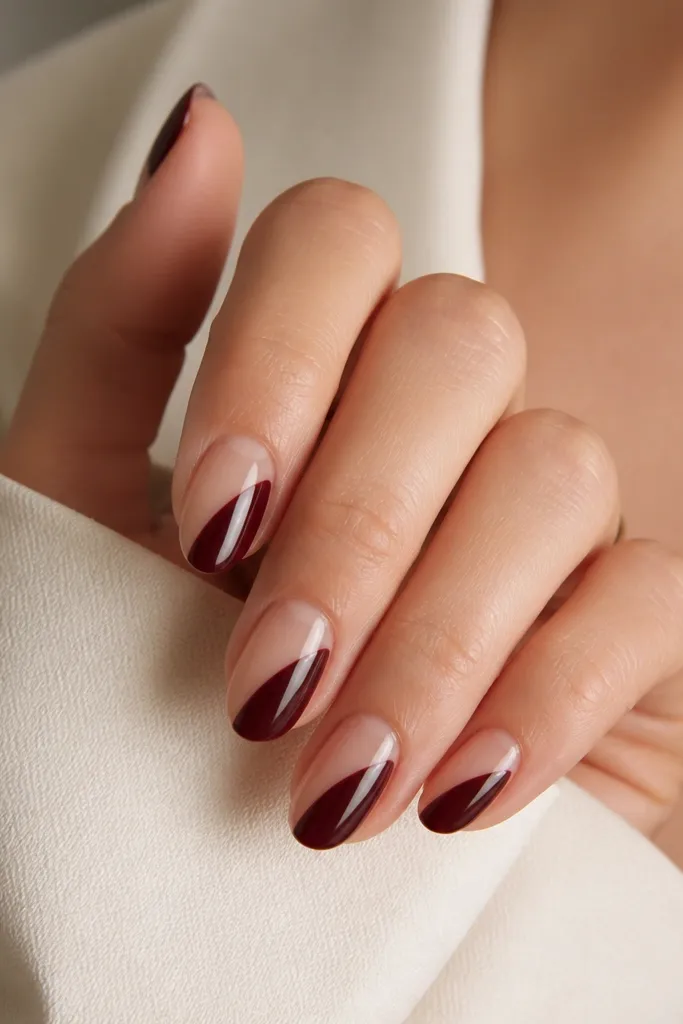
Half-glaze looks modern because it gives you contrast and a clean edge without needing tiny details. The clear nude side makes your nails look longer, and the dark cherry side gives that stunning depth. I’ve worn this to weddings and it still looks polished because the boundary is sharp and the finish is glassy. It flatters most nail shapes; almond makes the diagonal line look extra elegant. The principle is one diagonal, one shade, one crisp line.
Apply a clear nude base and cure. Use tape or a nail art guide to mask the diagonal boundary, then paint dark cherry gel on one side only. Cure, remove the mask carefully, and clean the boundary with a fine brush and acetone. Seal with a high-gloss top coat that levels across both sides. If the boundary looks jagged, add a thin clear gel layer over it and cure again.
Press the tape down lightly with a lint-free pad so paint doesn’t bleed under.
Avoid rounded boundaries — the look depends on a crisp edge.
12. Cherry Velvet With Gold Micro Dots At One Side
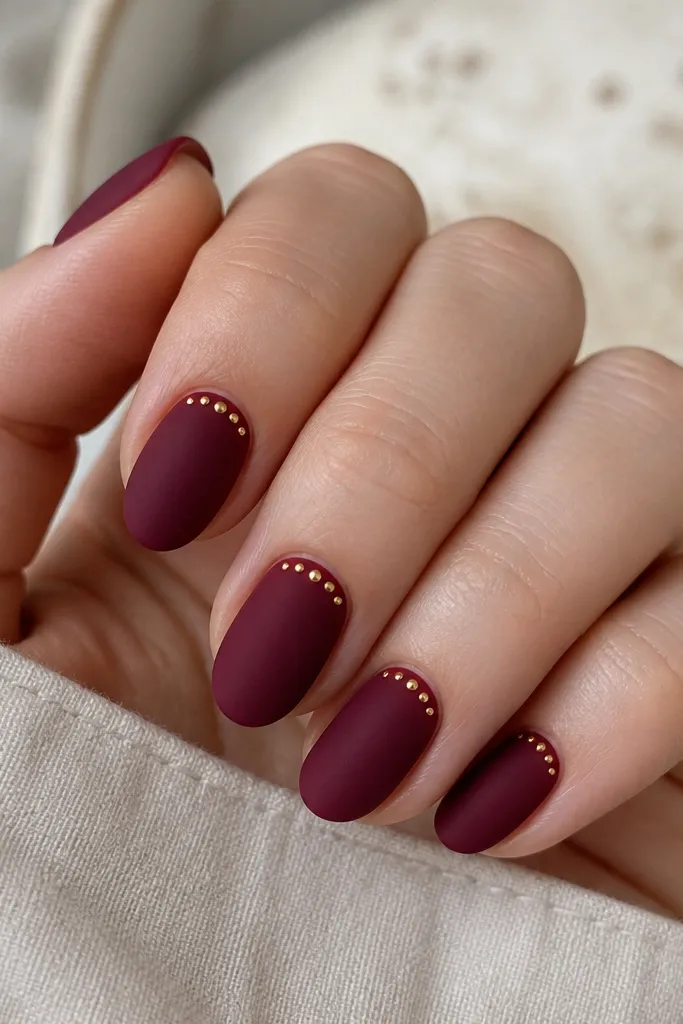
This is a “quiet luxury” cherry set without going too fancy. Matte velvet makes the cherry look soft, and the gold micro dots add a little sparkle that still reads subtle. I like it for work days because it doesn’t scream, but it still looks intentional. It flatters shorter nails because the dots near the cuticle visually lift the nail. The principle is placement: keep the gold close to the cuticle and sparse.
Paint dark cherry velvet gel in two coats and cure. Apply matte top coat over the full nails. Using a dotting tool, place 3-5 tiny gold dots on one side of each nail, starting about 1 millimeter away from the cuticle and angling them toward the center. Cure if your system needs it, then add glossy top coat only on the dot area so the gold looks like it’s sitting on top. Finish the rest of the nail with matte top coat so you don’t get a shiny patch.
If your gold dots look too big, reload the dotting tool with less pigment and touch lightly once.
Avoid gold dots across the whole nail — it turns into heavy confetti.
13. Cherry Ombre With Red-Gold Shift Chrome Tips
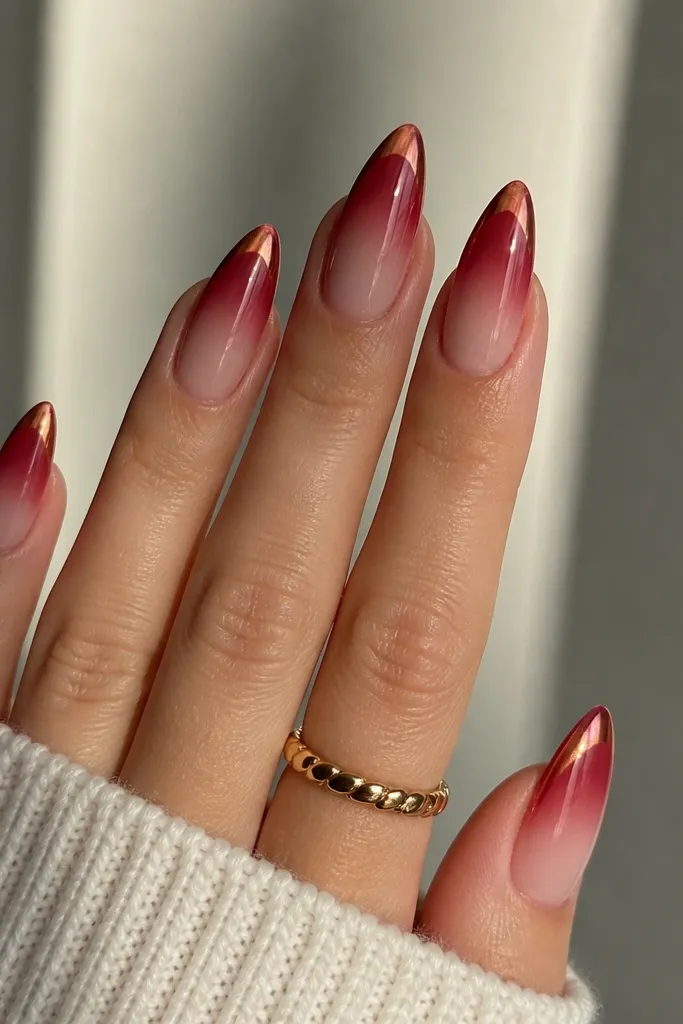
Shift chrome over a cherry ombré looks stunning because you get color depth plus that “moving” highlight. When the chrome is red-gold, it stays in family with the cherry — it doesn’t turn into a random metallic. This is great for photos because the tips catch light and your nails look like they’re glowing from within. It flatters medium-to-long almond nails and makes hands look extra polished. The principle is layering: gradient first, chrome second, gloss last.
Start with a sheer nude base and cure. Sponge dark cherry gel onto the tips and blend upward for a smooth ombré, then cure. Apply a thin layer of chrome gel only at the tip area, then rub red-gold shift chrome powder into it. Press gently so it sticks evenly, then wipe off excess. Seal with a glossy top coat that clears well over chrome, and cap the free edge to prevent tip wear.
Use a cotton-free wipe and don’t overwork the chrome layer — it can dull if you buff too much.
Avoid chrome over the entire nail — it will overpower the cherry fade.
14. Dark Cherry Rhinestone Line Down the Center
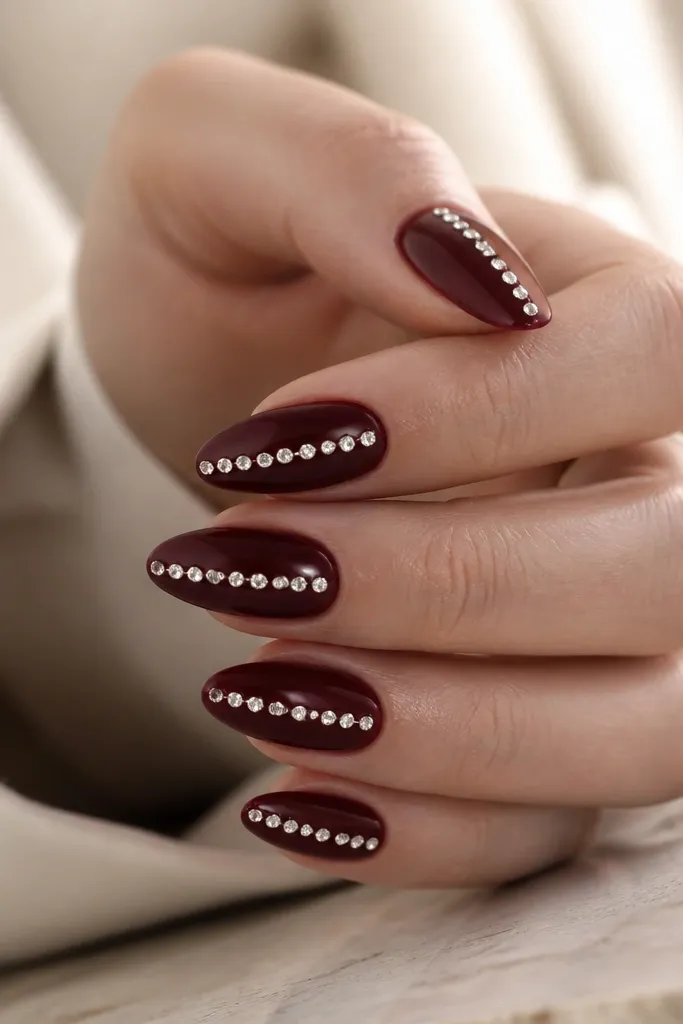
A center rhinestone line makes Dark Red Cherry Nails That Look Stunning because it draws a straight line that elongates the nail bed. The key is size and spacing — small stones look clean, while big stones look like costume jewelry. I wear this for events because it photographs well and still feels elegant when the base is glossy and smooth. It flatters anyone who wants their hands to look longer. The principle is minimal sparkle: one line, one placement.
Start with two coats of glossy dark cherry gel and cure. Plan the center line by marking the center point lightly on the nail with a dot of clear gel. Place small rhinestones using rhinestone gel or thick top gel, starting near the middle and working toward the tip, then repeat on each nail. Keep consistent gaps so the line looks straight. Cure and then add a thin glossy top coat over the stones without flooding the sides.
Do stones in batches: place 3, cure, then place the next 3. It keeps alignment easier than doing all at once.
Avoid big stones — they lift more easily and snag on hair and fabric.
15. Cherry Rose Accent Nail With Tiny Petals
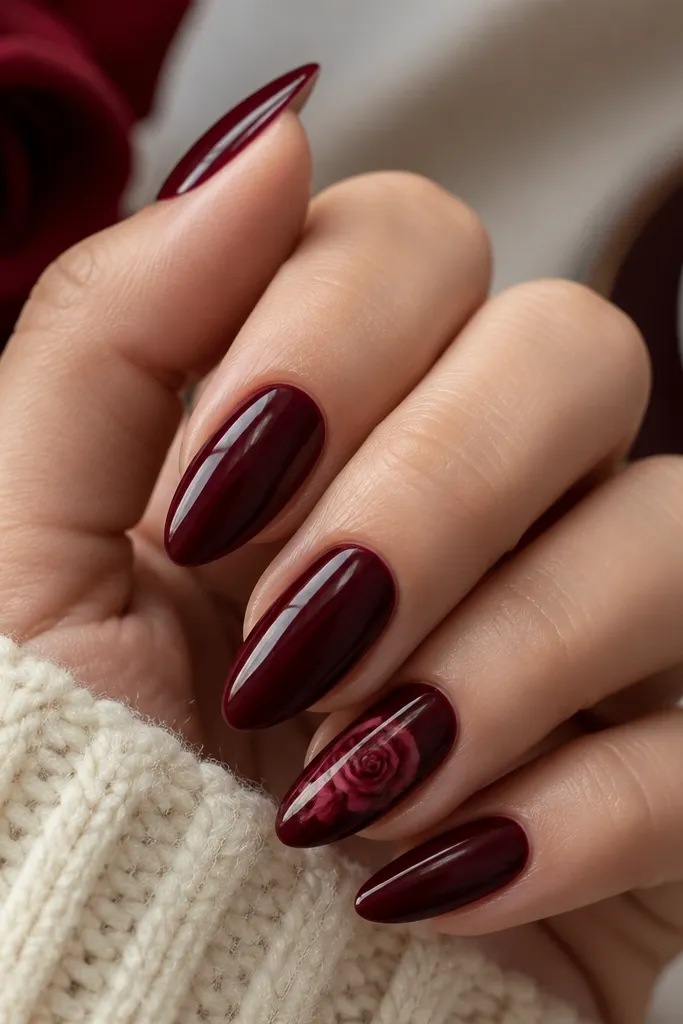
A tiny rose over dark cherry looks romantic without turning the set into a full floral. I like painting it in two cherry tones — one slightly lighter for petals and one deeper for shadow — so it stays cohesive. This works best when the rose is small and placed near the center, not covering the whole nail. It flatters short almond and medium lengths because the rose stays crisp. The principle is single-focus art: keep it to one accent nail and let the rest be solid.
Paint all nails with two coats of glossy dark cherry gel and cure. On one accent nail, add a thin layer of clear gel where the rose will sit. Paint the rose with a small detail brush: start with a tight spiral center, then add 5-7 tiny petal strokes around it using lighter cherry. Add a few thin darker cherry lines for shadow between petals. Cure and seal with glossy top coat, then cap the edges around the rose so it doesn’t catch.
If your rose looks flat, add one tiny highlight stroke on the petal edge with a lighter cherry or a touch of white gel.
Avoid large roses on short nails — the details get crowded.
16. Cherry Cat-Eye Gel With Dark Plum Glow
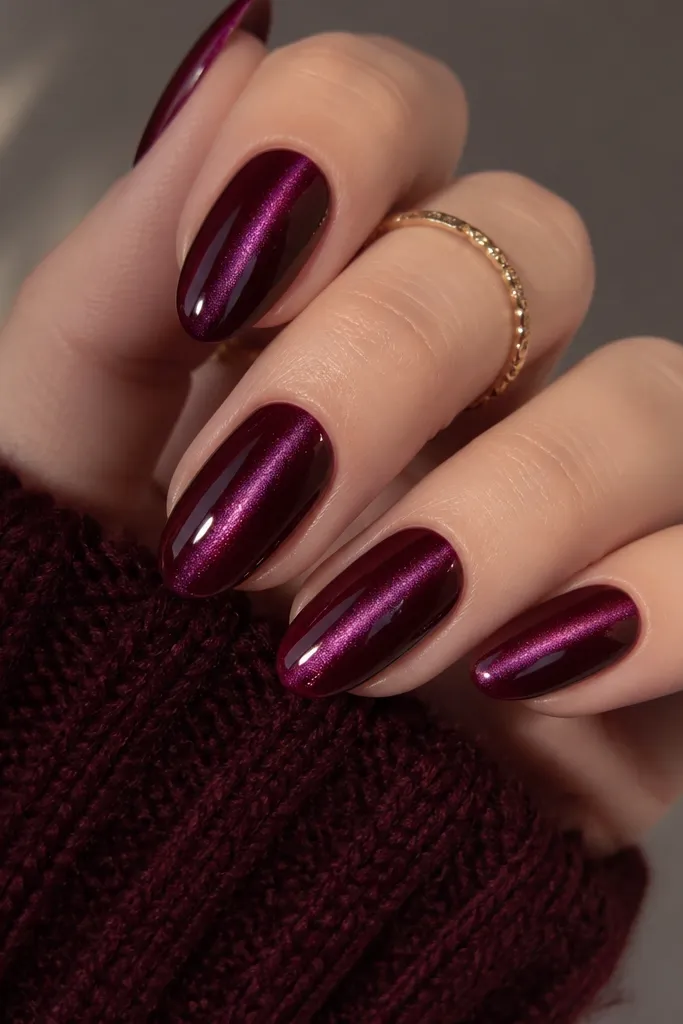
Cat-eye cherry is one of the easiest ways to get stunning depth without hand-painting. The magnetic plum streak gives you movement and dimension, and the cherry base keeps it feminine. I like it for fall and winter because it reads warm and dramatic under indoor lights. It flatters hands with longer nail beds because the streak visually stretches the nail. The principle is magnet placement: center the streak.
Editor's noteMove the magnet slowly and pause — fast movement makes the streak fuzzy.
Apply a base coat and cure if needed. Apply a cat-eye gel in dark cherry red — two coats if your brand needs it — and cure according to the gel’s instructions. Hold the magnet directly above the nail at the distance your brand recommends, then pull the magnetic streak into a centered vertical line. Cure while the magnet is still in place. Finish with a glossy top coat to lock in shine and smooth the surface.
Watch outAvoid magneting too close — it can distort the streak.
17. Dark Cherry Watercolor Fade With Clear Spots
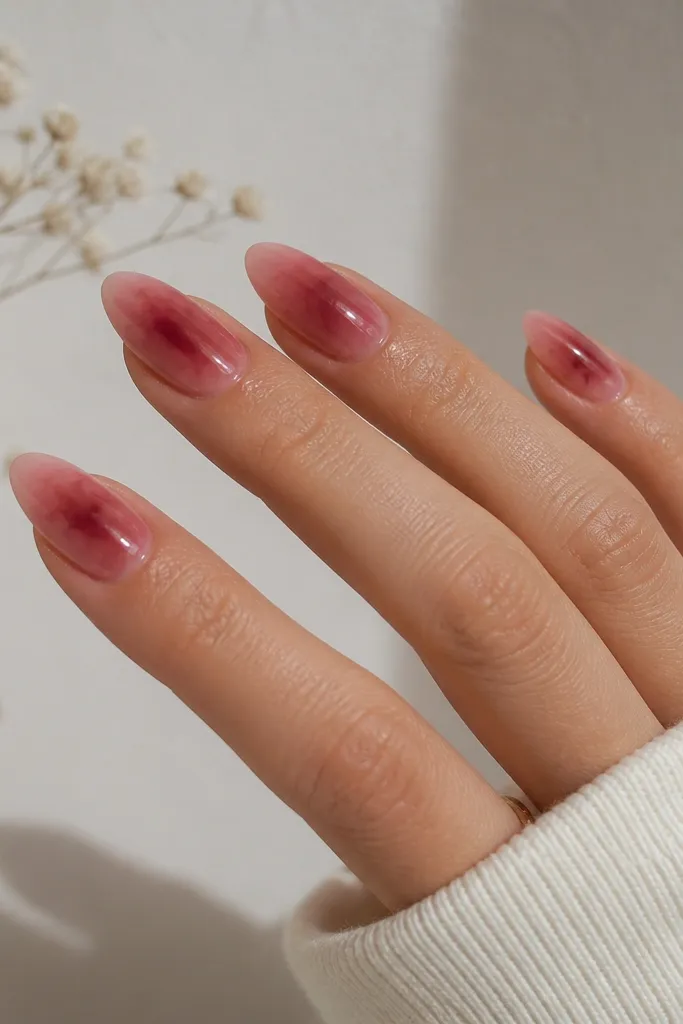
Watercolor fades in cherry red look stunning because they feel fluid and modern instead of painted-on. The clear spots keep the design airy and prevent it from looking like a solid block of color. I love this look when my nails are slightly uneven because the watercolor edges hide small filing marks. It flatters most skin tones because the cherry stays saturated while the clear areas brighten the nail bed. The principle is controlled softness: let edges blur, keep placement intentional.
Editor's noteUse a separate brush for thinning and keep it clean — dirty thinning makes mud.
Start with a sheer clear base or a very light pink nude. On each nail, add dark cherry gel in the center and use a clean brush with gel thinner or top gel to drag outward in soft motions. Leave two or three small areas untouched so you get the clear spot effect. Cure, then add a glossy top coat that levels. If the watercolor looks too dark, layer one more sheer clear coat over it after curing.
Watch outAvoid over-blending until everything turns uniform — you need variation in intensity.
18. Cherry Chrome Half-Moon Cuticle Accent
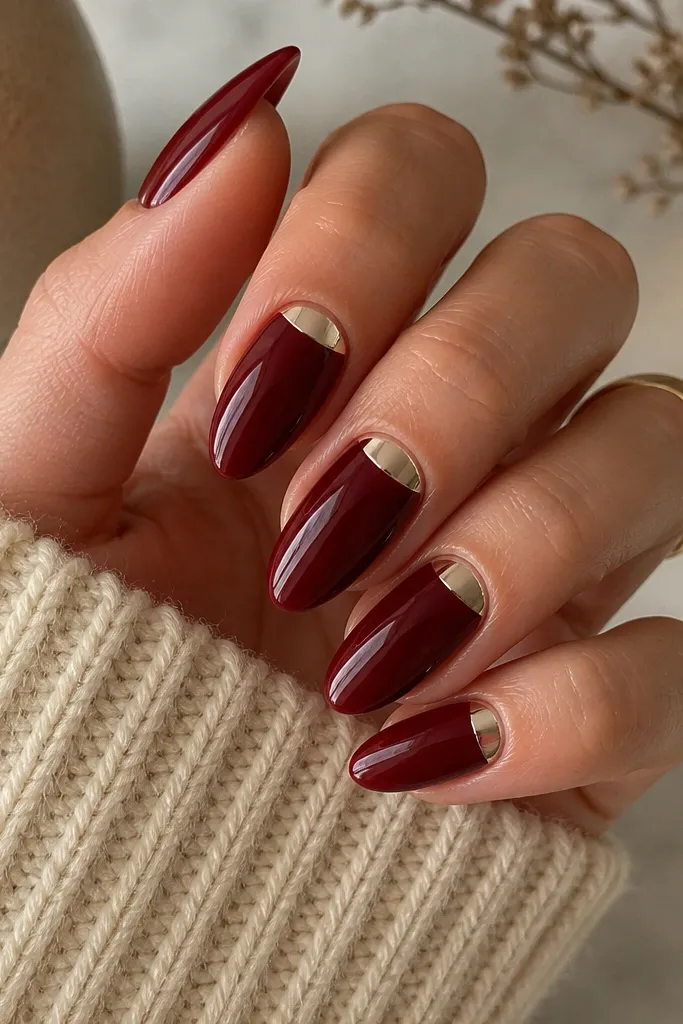
This is a clean, high-impact cherry set because the chrome half-moon makes the cuticle area look finished. The dark cherry base gives the richness, and the champagne chrome adds light without changing the color story. I do this when I want my nails to look expensive but still simple enough for busy mornings. It flatters small nail beds because the half-moon lifts the visual focus upward. The principle is one highlight area: chrome only at the cuticle curve.
Editor's noteUse a cuticle stencil or a steady hand with tape to keep the half-moon curve even.
Paint dark cherry gel in two coats and cure to full opacity. Apply a thin layer of chrome gel just along the cuticle curve and slightly outward on each side, leaving the center cuticle line untouched. Place champagne chrome powder over the gel and rub lightly, then wipe excess. Seal with a glossy top coat, but keep the top coat off the center cuticle edge if you want the crisp half-moon. Cure and check both sides for symmetry.
Watch outAvoid thick chrome gel — it can lift and smear after a few days.
19. Dark Cherry Stained Glass With Black Outline Lines
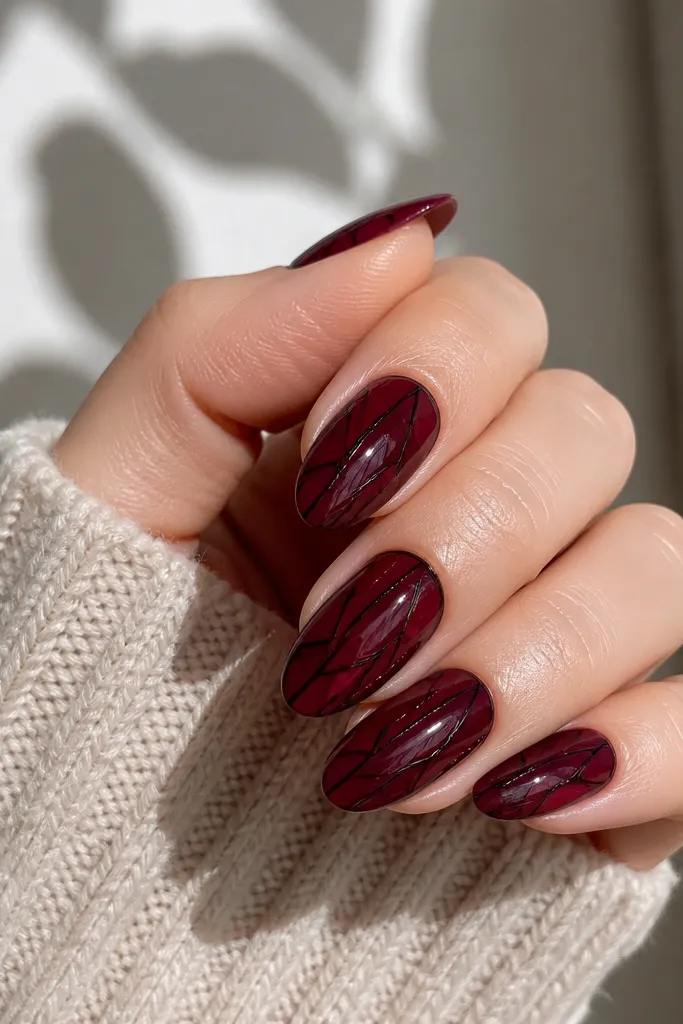
Stained glass panels make cherry nails look graphic and sharp. The black outline keeps the cherry from turning into a single flat color, and it gives you that stained-glass separation. I like this for nights out because the geometry looks crisp even when you’re moving. It flatters medium almond and longer shapes where panels can extend. The principle is separation lines: keep outlines thin and the cherry areas translucent enough to glow.
Editor's noteUse a gel liner brush — a regular nail art brush makes black lines too wide for stained glass.
Start with a glossy clear base or sheer pink and cure. Draw thin black gel lines to form geometric panels — triangles and rectangles look best. Fill each panel with translucent dark cherry gel, leaving the black lines visible. Cure each nail, then add a glossy top coat in two thin layers so the panels look smooth and glassy. If you see bubbles, pop them with a pin before curing.
Watch outAvoid thick black lines — they turn the look into heavy stripes.
20. Cherry Red Satin Finish With One Glossy Accent Nail
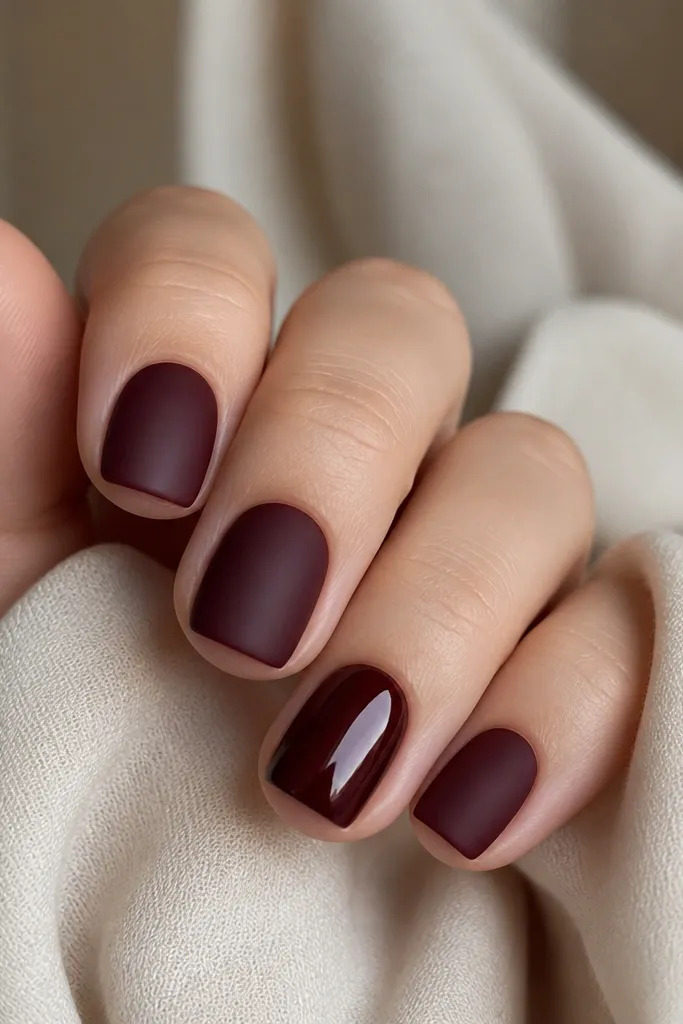
Satin finish cherry nails look smooth and modern, like a soft fabric. When you add one glossy accent nail, you get instant contrast that makes the set look intentional even with one detail. This is a great choice for everyday and for first-time nail art because it’s simple. It flatters short nails by making the surface look even and clean. The principle is controlled contrast: satin on the majority, gloss on one nail.
Editor's noteIf satin looks too flat, apply a second satin top coat thinly instead of switching colors.
Paint all nails with two coats of dark cherry gel and cure. Apply satin top coat to every nail except the chosen accent. On the accent nail, leave it glossy by using a high-gloss top coat. Cure and then check the shine difference under light — you want the accent to pop without looking like a different color. Finish by cleaning around the cuticle so the satin doesn’t look dusty.
Watch outAvoid making multiple glossy nails — the contrast loses its punch.
21. Dark Cherry Ombre Tips With Tiny White Stars
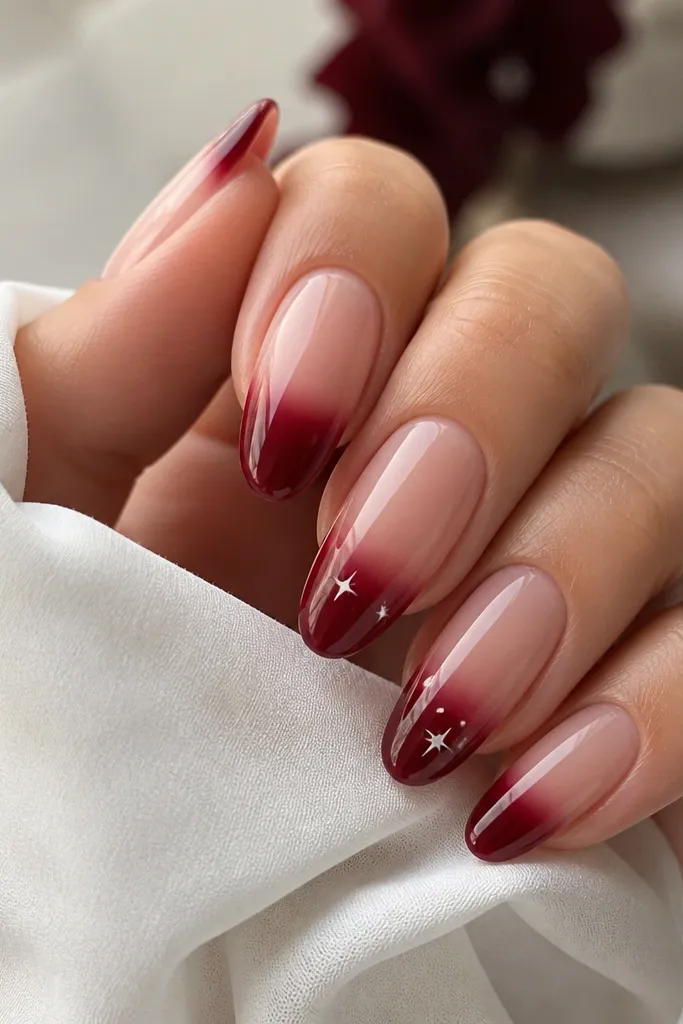
White stars on cherry ombré look cute without turning childish because the base is still deep and grown-up. The ombré keeps the color from feeling heavy, and the stars add a little sparkle that reads like night sky. I like this for holidays and parties, but it also works for everyday if you keep the stars minimal. It flatters short-to-medium nails because the ombré creates length. The principle is tiny accents: a few stars, not a full pattern.
Editor's noteIf stars look crooked, place them with a dotting tool first, then connect lines lightly.
Apply a clear pink base and cure. Sponge dark cherry gel onto the tips and blend upward into a soft ombré. Cure and then add a glossy top coat lightly over the ombré area. On two accent nails, place 3-5 tiny white star dots using a star-shaped stamping tool or a detail brush. Cure again and seal with glossy top coat, making sure the stars are fully embedded and smooth.
Watch outAvoid large stars — they overpower the cherry ombré.
22. Cherry Red Gloss With Diagonal Gold Foil Strip
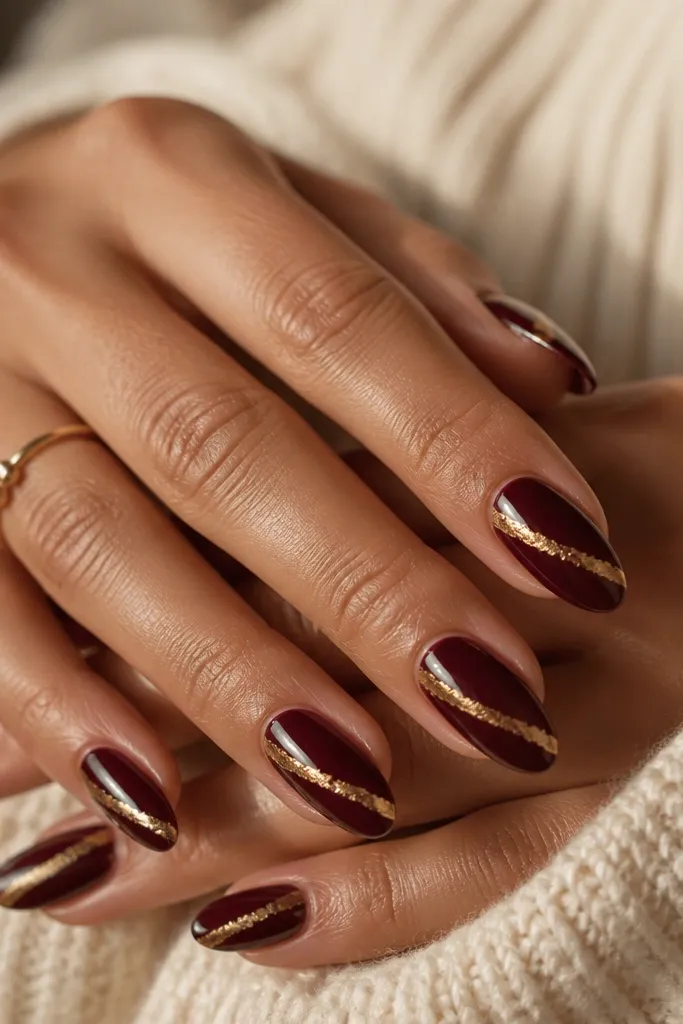
A diagonal gold foil strip makes dark cherry look like jewelry. It’s one of the fastest ways to get that “stunning” look without painting complicated art. I do this when I want the set to feel special for dinners, but I still want it to stay mostly cherry-red. It flatters long almond nails because the diagonal line follows the nail’s natural curve. The principle is one directional accent: diagonal foil only.
Editor's noteUse thin foil strips; thick foil makes the nail feel heavy and clunky.
Paint two coats of glossy dark cherry gel and cure. Cut small pieces of gold foil — thin strips work best — and place them diagonally from the outer mid-side toward the center or tip. Use foil transfer gel or tacky clear gel so the foil grabs, then press gently with a makeup sponge. Cure, then add one or two glossy top coats to smooth the foil edges. If foil lifts at the corners, add a tiny dab of clear gel under the edge and cure again.
Watch outAvoid placing foil too close to the cuticle — it can catch on hair.
23. Cherry Red Galaxy Swirl With Purple Undertone
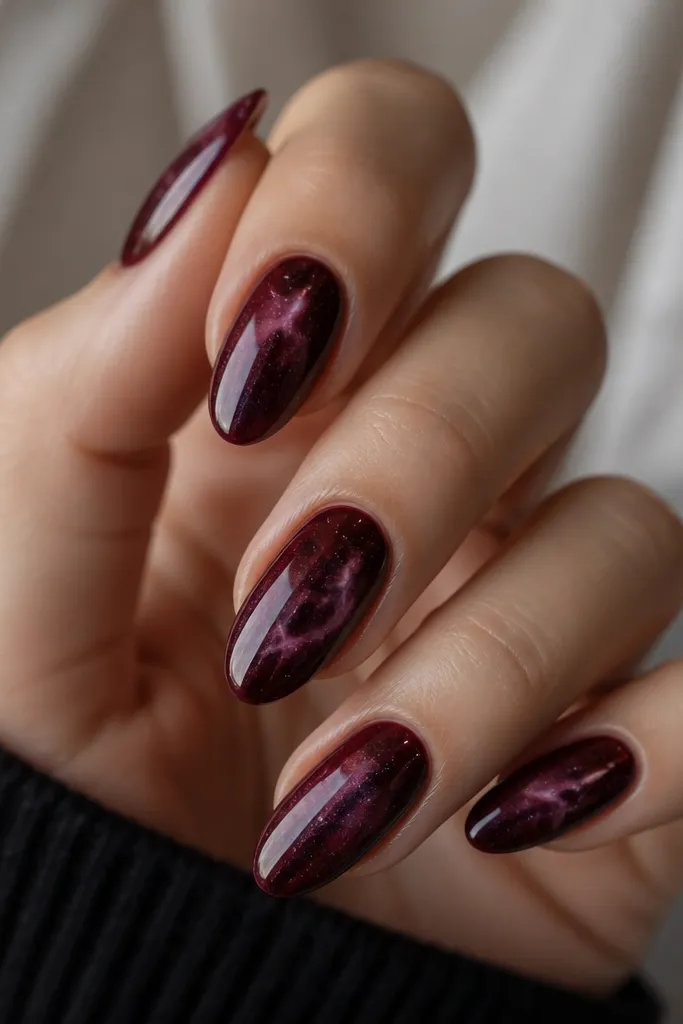
Galaxy nails in cherry red look stunning because the base is deep and the purple undertone adds glow. It’s not a random glitter mess when you keep the dots tiny and the swirls controlled. I like it for weekends because it feels fun but still matches everything you wear — black, denim, and cream look great with it. It flatters medium almond and oval shapes because the swirl can follow the nail curve. The principle is density control: few dots, soft swirls, high shine.
Editor's noteIf your galaxy looks muddy, reduce the purple amount and add more dark cherry back over any too-light areas.
Start with two coats of dark cherry gel and cure. Add a small amount of deep purple gel in the center and swirl outward using a thin brush — keep it wispy. Dot tiny specks of lighter cherry or silver glitter gel across the nail, then add a few micro dots of clear glitter for depth. Cure and seal with glossy top coat that fills in the swirls so it looks smooth. Don’t pile glitter — the galaxy effect comes from contrast, not bulk.
Watch outAvoid big chunky glitter — it kills the galaxy look.
24. Cherry Red Bloom Accent With 3D Center Dot
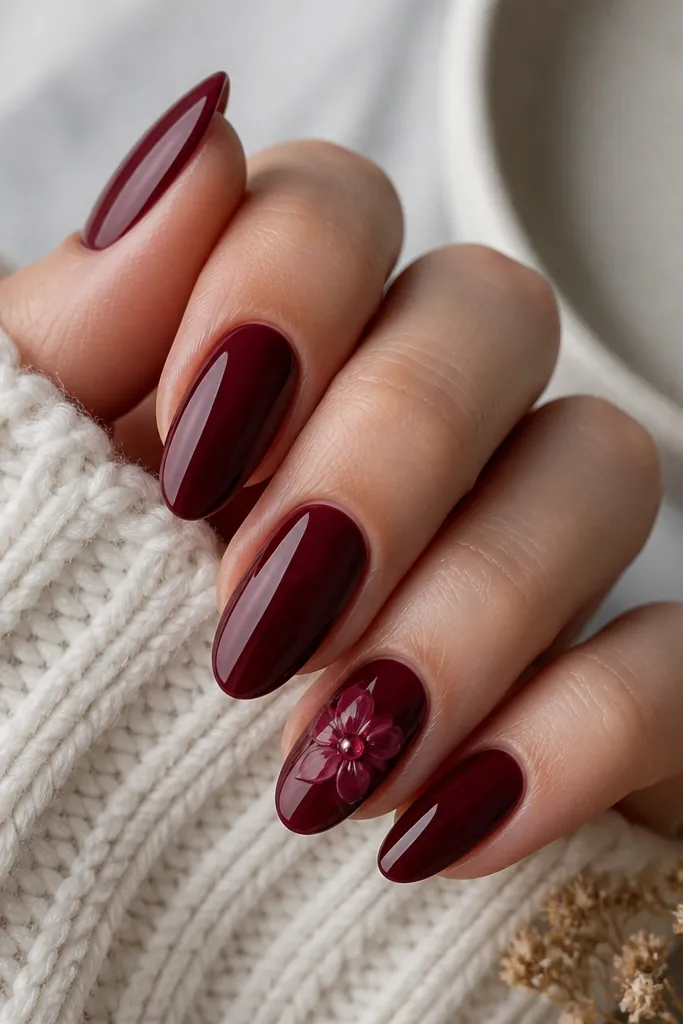
This set looks stunning because the flower is simple, and the 3D center gives it a “jewel” effect. The clear gel center catches light like a tiny cherry pit. I like it for dates and events because it feels sweet but still anchored by the dark cherry base. It flatters short almond nails because the bloom stays compact and doesn’t overwhelm the nail bed. The principle is texture: one raised detail, everything else stays smooth and glossy.
Editor's noteLet the 3D center cure fully before top coat — rushing can smear the dome.
Paint all nails with two coats of glossy dark cherry gel and cure. On one accent nail, paint 5-6 tiny petals using a lighter cherry shade around a center point. Cure, then add a small bead of clear builder gel or thick clear gel right in the center and shape it into a smooth dome. Cure again and make sure the dome is centered. Finish with a glossy top coat over the whole nail, but keep the dome glossy and smooth without flattening it.
Watch outAvoid oversized domes — they snag and can look heavy.
25. Dark Cherry Chrome Aura Over Clear Pink
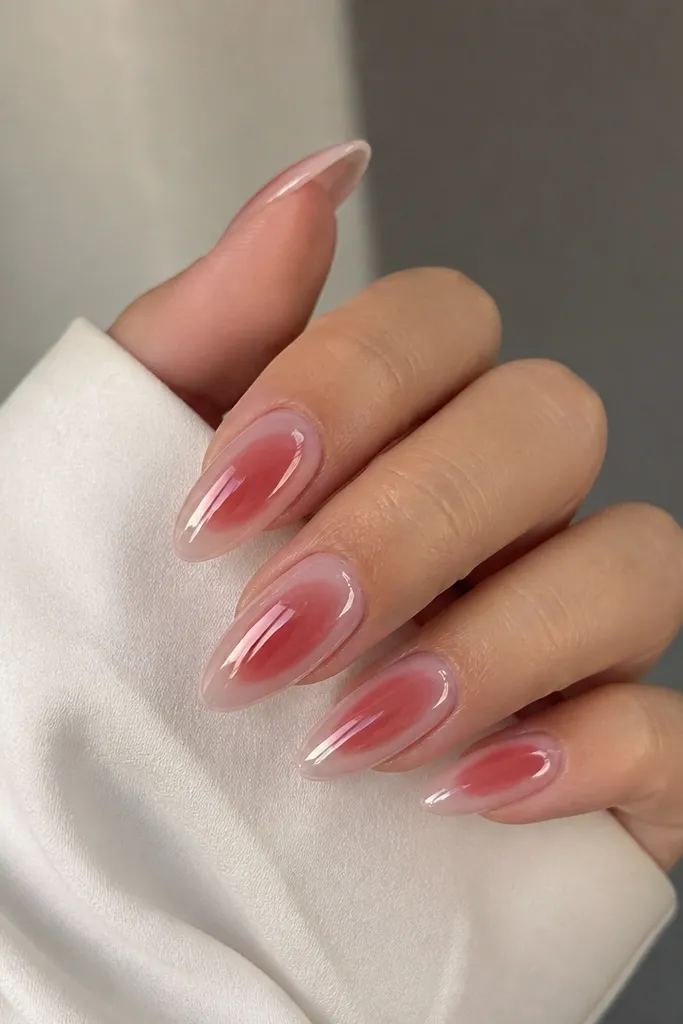
Aura nails work because they create a glow effect that’s flattering and modern, and cherry red makes that glow look like warm fruit light. The clear pink base keeps it airy, while the chrome aura adds a subtle metallic shimmer without changing the color family. I like this when I want a “wow” look that still feels clean and wearable. It flatters shorter nails too because the center glow draws attention to the middle and visually lengthens. The principle is central focus: glow in the center, soft fade outward.
Editor's noteUse a small sponge and build in layers — one heavy sponge pass makes aura look like a blob.
Start with a clear pink base and cure. Sponge dark cherry gel in a soft circle around the center of each nail, then blend outward with lighter pressure so it fades. Add chrome powder or chrome pigment over the aura area using chrome gel — keep it only in the glow zone. Cure and seal with a glossy top coat, then check that the edges of the aura aren’t harsh. If the aura looks too dark, add a thin clear pink layer and cure to soften it.
Watch outAvoid chrome all over — the glow needs that soft edge.