
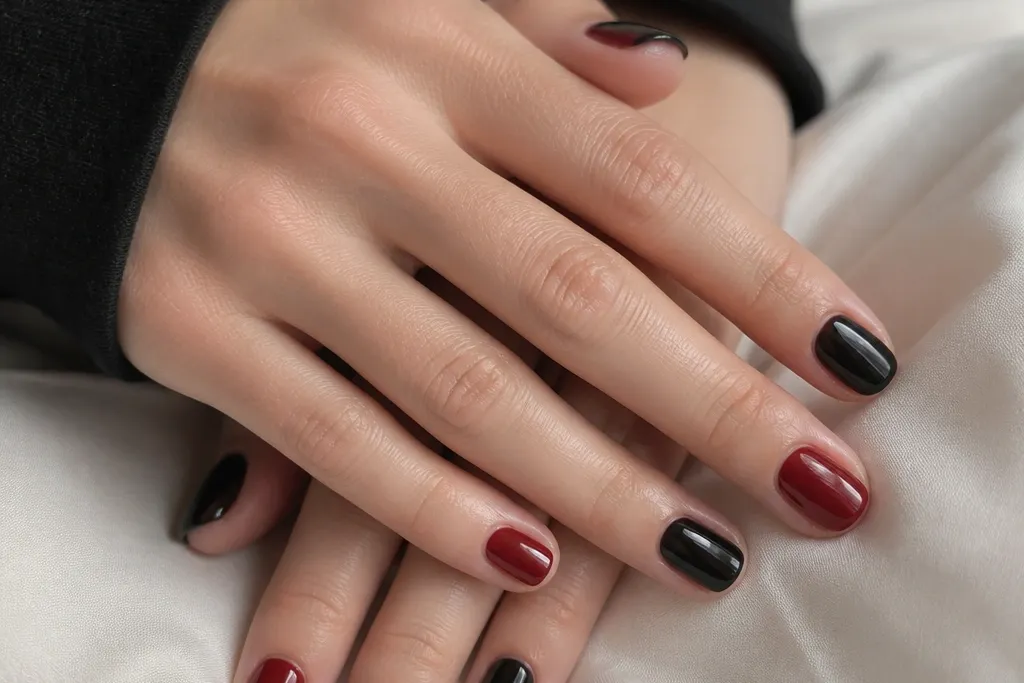
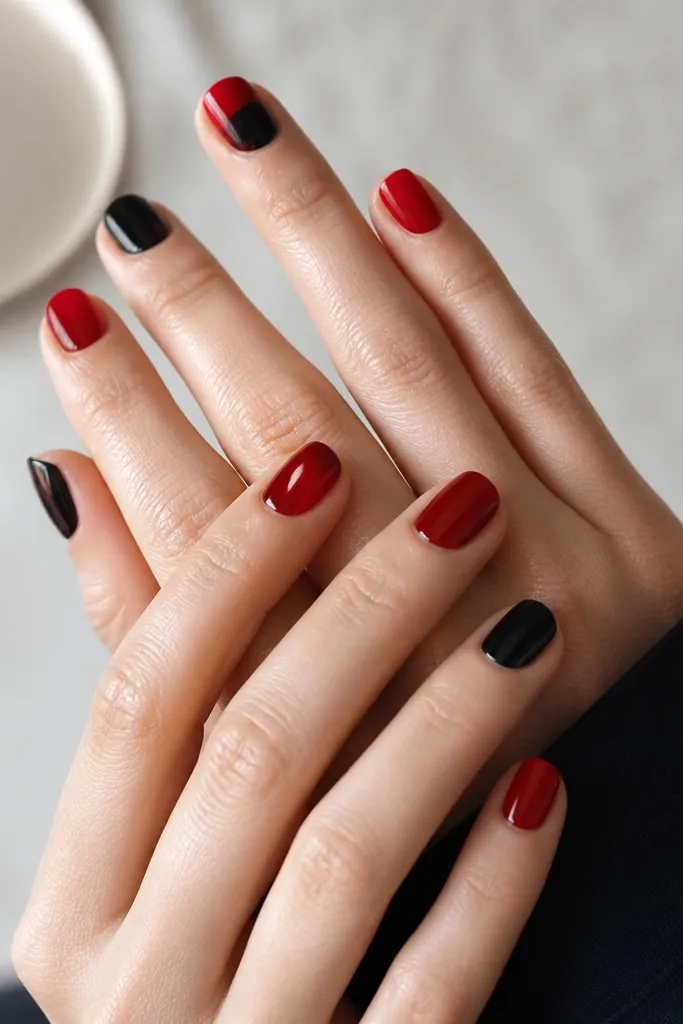
1. Cherry Red Half-Moon with Black Base
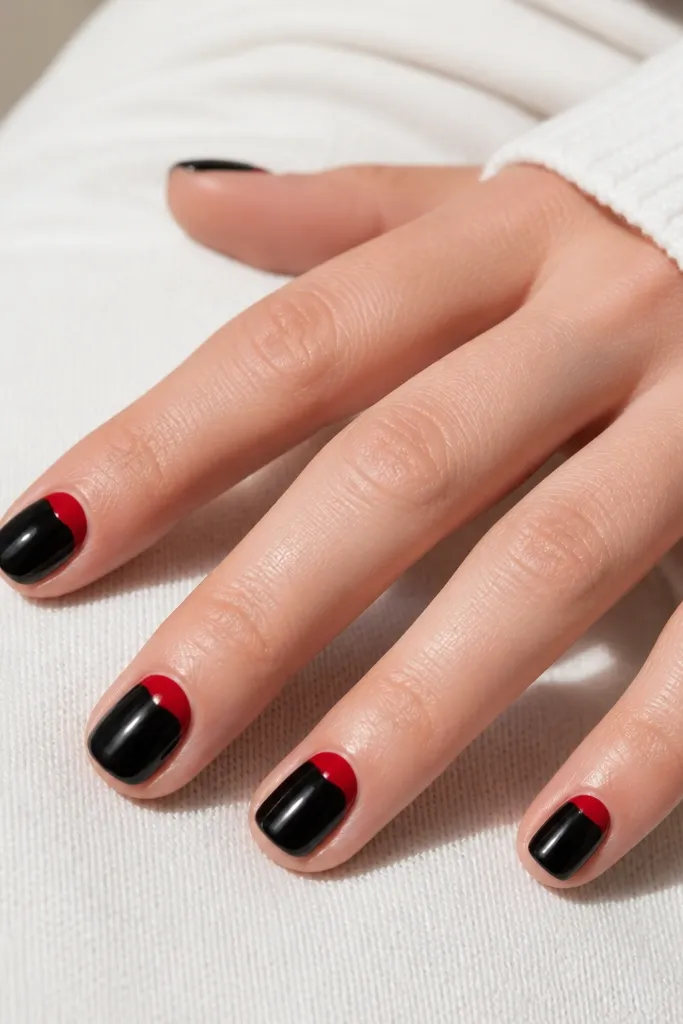
First, paint two thin coats of black polish or gel, curing between coats if you’re using gel. Next, use a half-moon guide sticker or a small striping brush to paint a cherry-red arc at the cuticle — aim for about 2-3 mm tall. Fill the arc solid, then clean the edges with a flat brush dipped in acetone or gel cleanser. Finally, seal with a glossy top coat and cure fully so the red doesn’t dull. Keep the red away from the sidewalls by a hair so it doesn’t smear when your hands move.
Start with a deep, opaque black base because it gives you instant contrast on short nails. Then place a cherry-red half-moon right at the cuticle, keeping the curve tight so it reads clean instead of chunky. This design flatters hands with longer nail beds because the half-moon draws the eye upward, but it still works on shorter beds if you keep the red area small. It also looks great on medium to deeper skin because the cherry red stays bright against the black. I like glossy top coat here because the cuticle area catches light and makes the manicure look freshly done.
Watch outDon’t make the red half-moon too wide — if it hits the sides, it turns into a blob on short nails.
Editor's noteIf you hate lining work, use half-moon stickers once, then remove them before top coat so the edge stays crisp.
2. Thin Black French with Micro Red Tips
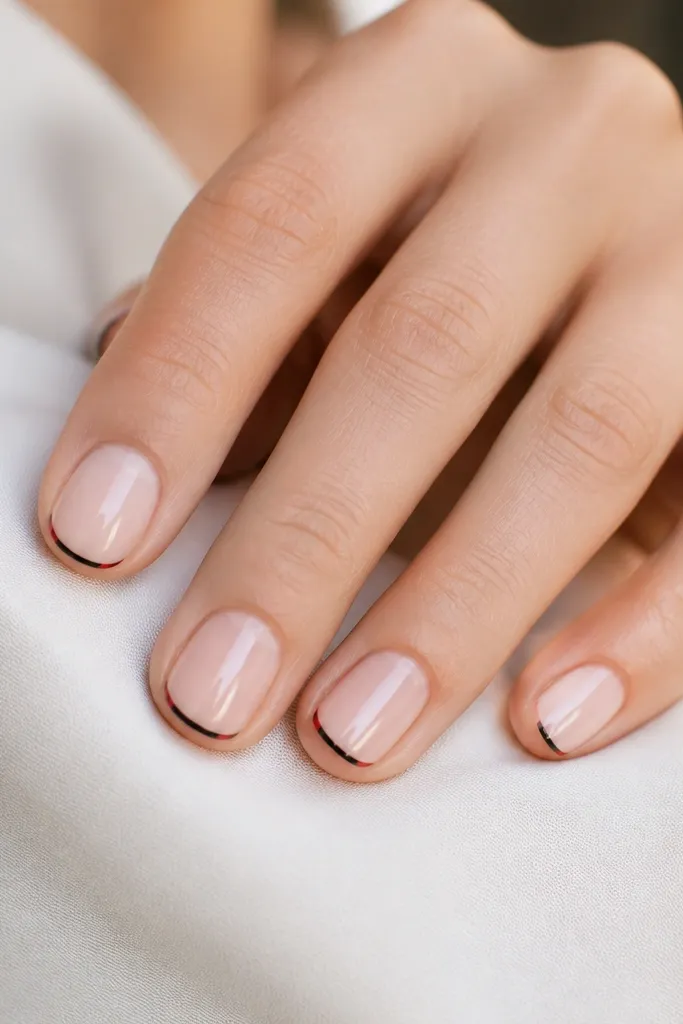
Start with a nude base polish or gel in a pink-beige shade, then cure. Use a French guide strip or freehand with a steady hand to draw a thin black line along the tip — keep it about 1 mm thick. Without waiting too long, add a micro red sliver right in the center of the tip area under or just inside the black line. Clean up the sides with a small brush and acetone on cotton. Seal with glossy top coat and cap the free edge so the micro red doesn’t lift.
This is the version of French that feels neat even when your nails are short. The nude base keeps it wearable, and the thin black line frames the tip so your hands look polished. Micro red at the tip adds the red-and-black punch without taking up space that makes short nails look crowded. It flatters fair to deeper skin because nude can be adjusted — I use a pink-beige close to your skin tone so the nail looks longer. Glossy top coat makes the micro red look like candy, not flat paint.
Watch outSkip a thick French line — it swallows the short nail and makes the red look accidental.
Editor's noteUse a liner brush with a tight tip — the thick ones make the French line look like stripes instead of a frame.
3. Black Matte Base with Red Glossy Accent Stripe
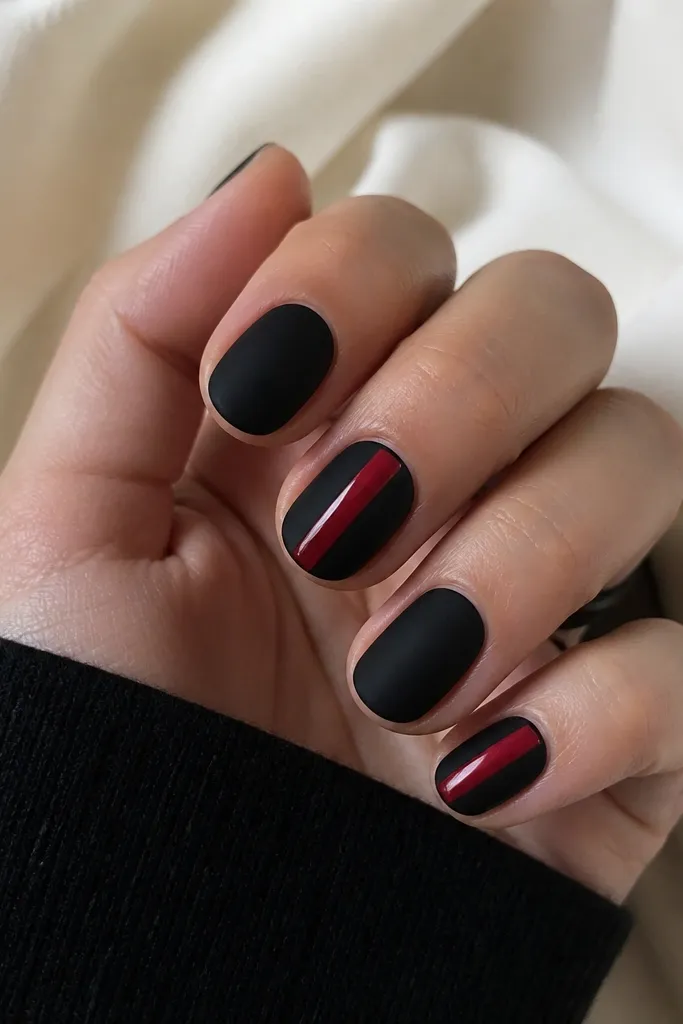
Paint two coats of black and cure fully, then apply a matte top coat over all nails. Choose one or two accent nails and use a striping brush to paint a straight vertical cherry-red line down the center — about 1 mm wide. Let it dry or cure, then add glossy top coat only over that red stripe so it stays shiny. If you’re using gel, cure the glossy top separately to prevent the stripe from going dull. Finish by checking the stripe edges — clean them with a thin brush if any red creeps.
Matte black hides small imperfections in the nail surface and makes the manicure feel intentional. Then you add one glossy red stripe to create contrast — the shine catches light and makes your nails look longer. This works especially well if you have dry cuticles because the matte finish doesn’t show tiny texture the way glossy does. I like it on medium to deep skin because the glossy cherry red looks bright and clean. Keep the stripe narrow so it doesn’t widen your nail visually.
Watch outDon’t matte the entire red stripe — it kills the contrast that makes this look stand out.
Editor's noteFor a perfectly straight stripe, rest your hand on a table and move your brush, not your wrist.
4. Red-and-Black Diagonal Check on One Accent Nail
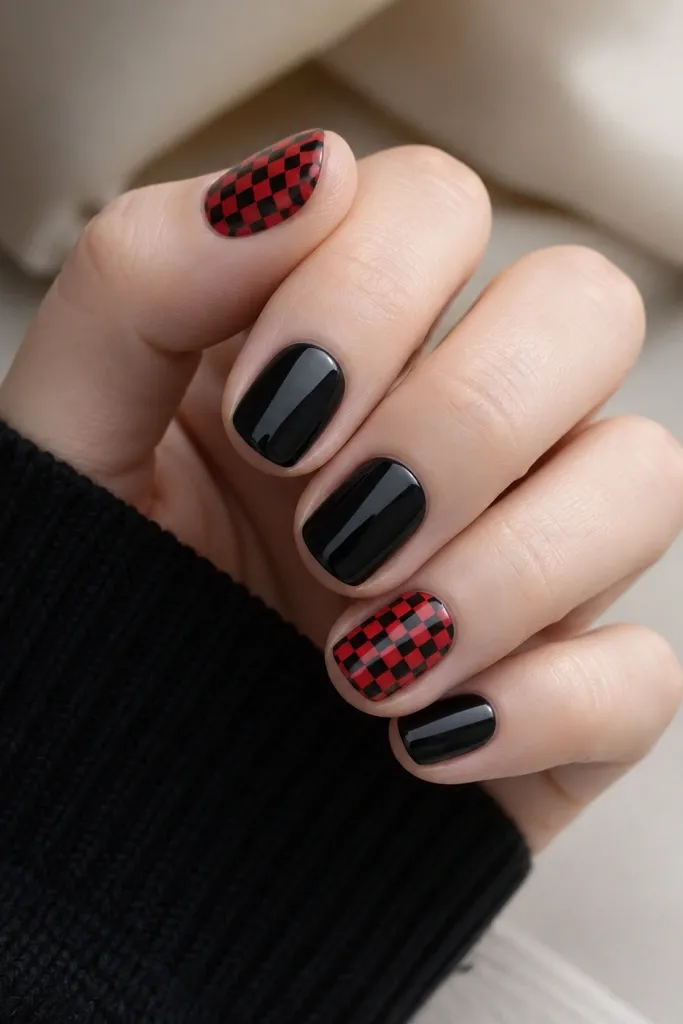
First, paint all nails either solid black or solid red — I usually do black on four fingers and red on two thumbs or ring fingers for contrast. Pick one accent nail and draw a diagonal line from lower left to upper right as your guide. Then use a striping tool or dotting tool to place tiny squares in a grid-like rhythm, alternating black and red. Keep each square small — about the width of a pinhead — so it fits on short nails. Seal with glossy top coat and cap the edges so the squares don’t catch on fabric.
The trick with check patterns on short nails is to limit them to one or two accent nails. When you spread checks across every finger, it gets visually busy and hard to keep crisp. The diagonal layout makes the pattern feel modern and adds motion, and the alternating squares hold up even when the nail grows out a little. I’ve worn this with a simple black sweater and a red lip and it looks styled without extra jewelry. It flatters hands with shorter nail beds because the diagonal direction pulls the eye across the nail.
Watch outDon’t make the squares too big — on short nails it turns into a messy patch.
Editor's noteIf your squares blur, use a dotting tool and let each color set before adding the next one.
5. Black Base with Red Outline Hearts at the Cuticle
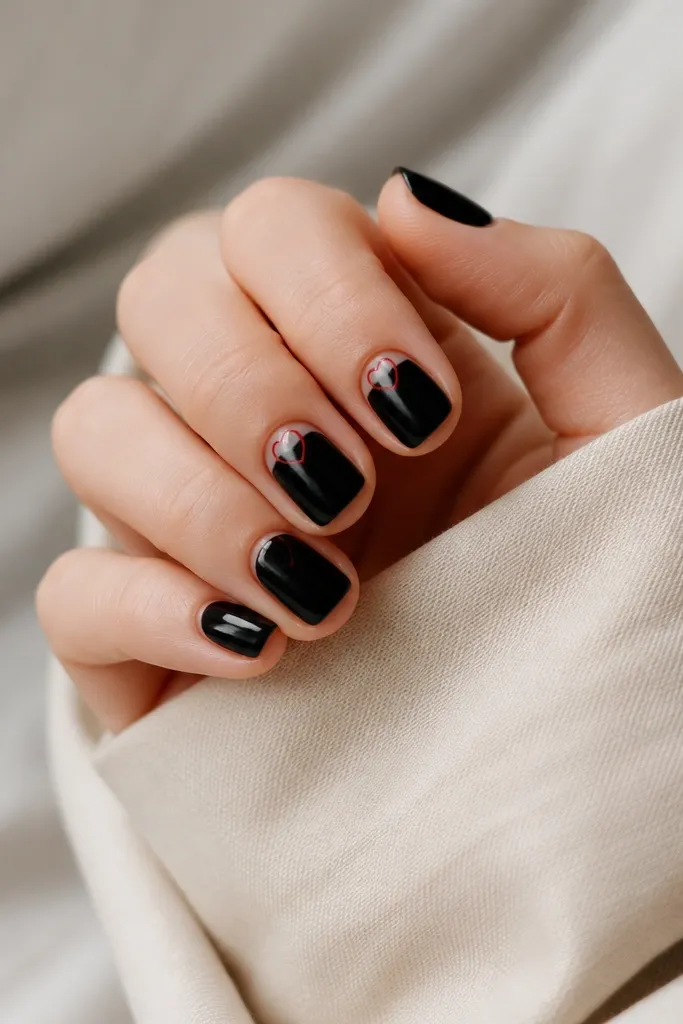
Start by painting all nails glossy black in two thin coats. On the accent nails, place a tiny red heart outline at the cuticle — about 3 mm wide — using a fine liner brush. Draw one side of the heart, then the other, then connect the bottom point. Leave the heart unfilled so it stays light and fast. Cure, then apply glossy top coat over everything, but be gentle around the linework so you don’t flood the design.
Outline hearts look clean on short nails because you’re not filling a large shape that takes time to cure and can smear at the edges. The red lines against black feel cute without going full cartoon. This design is great for date nights, but it’s still low maintenance because only two nails have the detail. I’ve worn it for office days too — the hearts are small and sit near the cuticle, so they don’t look loud when your nails grow out. It flatters most skin tones because the black is the backdrop and the red linework stays sharp.
Watch outDon’t fill the hearts in — filled hearts take longer, and the edges lift faster on short nails.
Editor's notePractice on a paper nail tip first — outline hearts get easier once your hand knows the curve.
6. Red Skittle Accent with Black Half-Moons
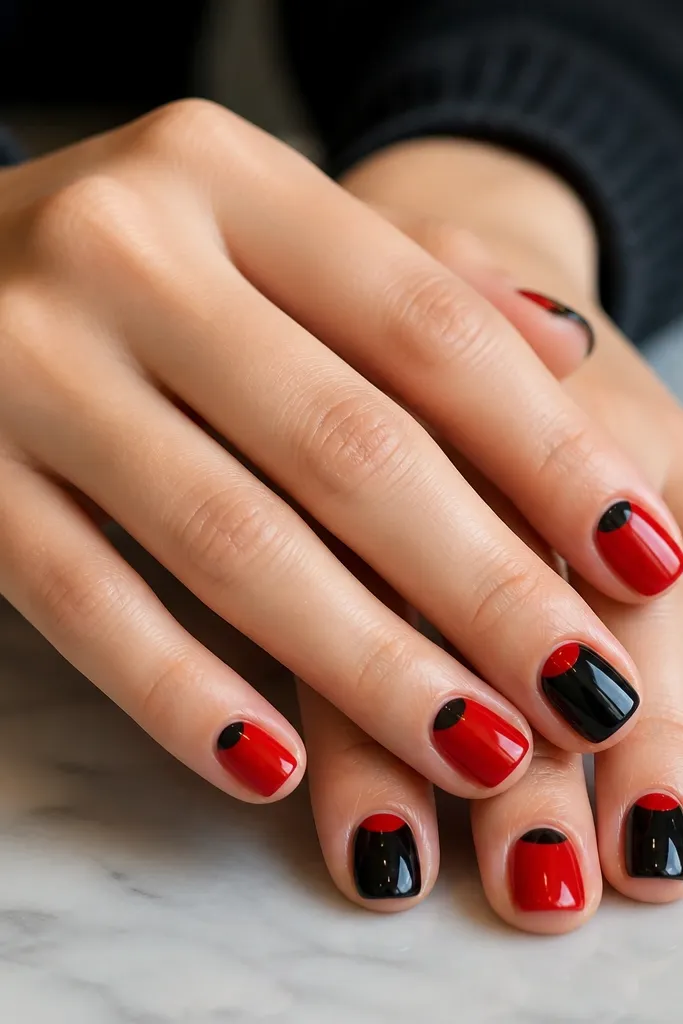
This is the easiest “varied” manicure that still looks put-together. The half-moon placement is repeatable, so it stays neat even if you’re not a nail artist. Using skittle colors (alternating red and black across fingers) keeps the look interesting without adding extra art. It flatters shorter nails because the half-moon sits high and makes the nail bed look longer. I like it on fair to deep skin because the colors are bold and don’t depend on subtle undertones.
Paint alternating nails solid red and solid black — for example, index and ring red, middle and pinky black, then thumbs alternate too. On every red nail, paint a black half-moon at the cuticle about 2-3 mm tall. On every black nail, repeat with a red half-moon. Use half-moon stickers if you want perfect arcs, then remove after you’ve filled the color. Finish with glossy top coat and cap the free edge on all nails.
Keep the half-moon sizes the same across fingers. Consistency makes it look expensive.
Don’t try to freehand every arc if you’re rushing — uneven half-moons make it look like it was done in a hurry.
7. Black Swirl Lines on Red Base
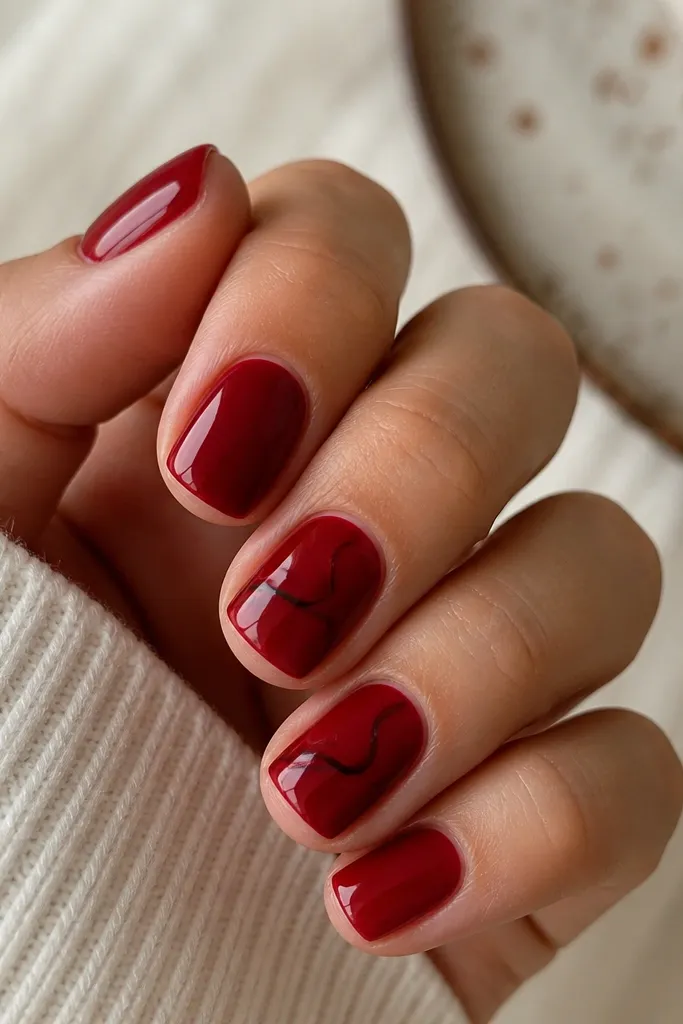
Start with two coats of glossy deep red and cure fully. Choose two accent nails and, with a thin liner brush, draw a loose swirl that starts near the sidewall and loops toward the center, then tapers off. Keep the lines about 0.5-1 mm thick so they don’t look like scribbles. Add a second smaller loop if you want, but don’t cover the whole nail. Seal with glossy top coat and clean up any over-paint around the cuticle before curing.
Swirl lines look like nail art but they’re actually low effort when you keep them thin and placed in one area. A glossy deep red base gives you a strong color field, then black linework adds structure. This flatters hands with smaller nail plates because thin lines don’t crowd the surface — they guide the eye. It also looks good on warm and cool skin tones because the red is the star. For day-to-day wear, I keep swirls to two accent nails so your manicure grows out without becoming chaotic.
Watch outSkip thick black lines — they make short nails look smaller.
Editor's noteWork one line at a time. If you try to “fill” the swirl in one pass, you’ll get uneven thickness.
8. Red Underlayer with Black Overcoat Crackle
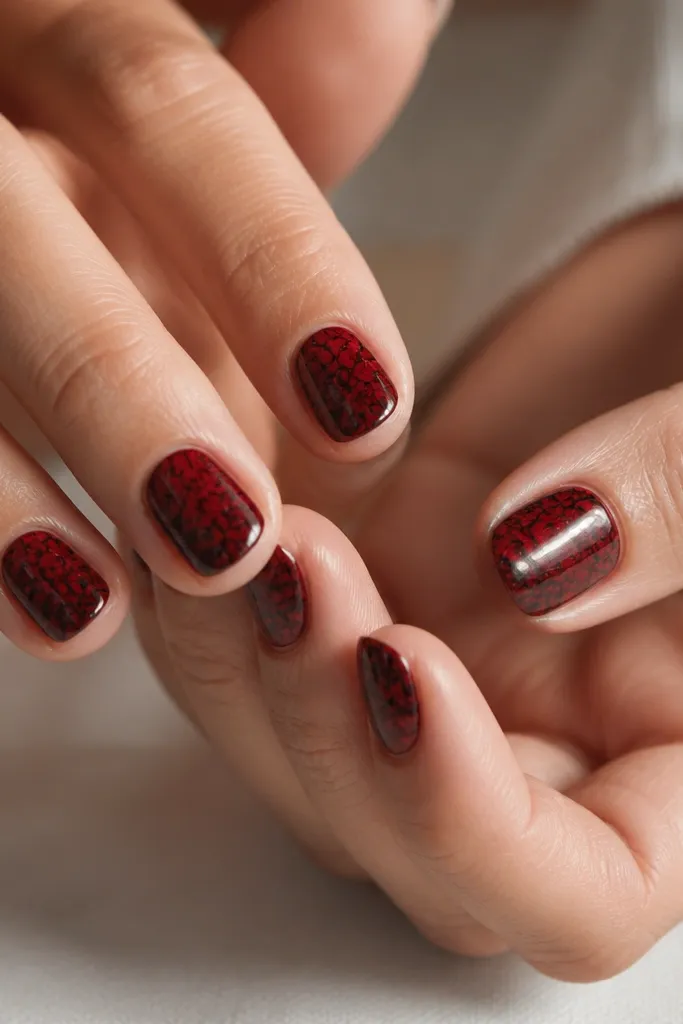
Paint a solid red base in two thin coats and cure or let it fully dry. Apply a crackle top coat or crackle gel in black over the red — one controlled layer is enough. Watch it crack as it sets; don’t go back in with a second layer or it can get muddy. Once it’s dry or cured, seal with a glossy top coat to smooth the surface and prevent snagging. Keep the base coat thick enough to stay opaque under the crackle.
Crackle finishes are the secret weapon for low maintenance because you don’t have to paint details — chemistry does it. With a red underlayer, black crackle makes that “broken glass” look that reads edgy even on tiny nails. I like this when you want something different from standard solid polish but still fast. It flatters almost everyone because the pattern is distributed across the nail, not concentrated in one spot. If your nails are prone to chipping, crackle can hide small wear for longer because the pattern already looks textured.
Watch outDon’t skip the glossy seal — crackle without top coat feels rough and catches on fabric.
Editor's noteUse thin base coats. Thick red underneath makes the crackle less defined.
9. Black Stripes on Red Marble Spots
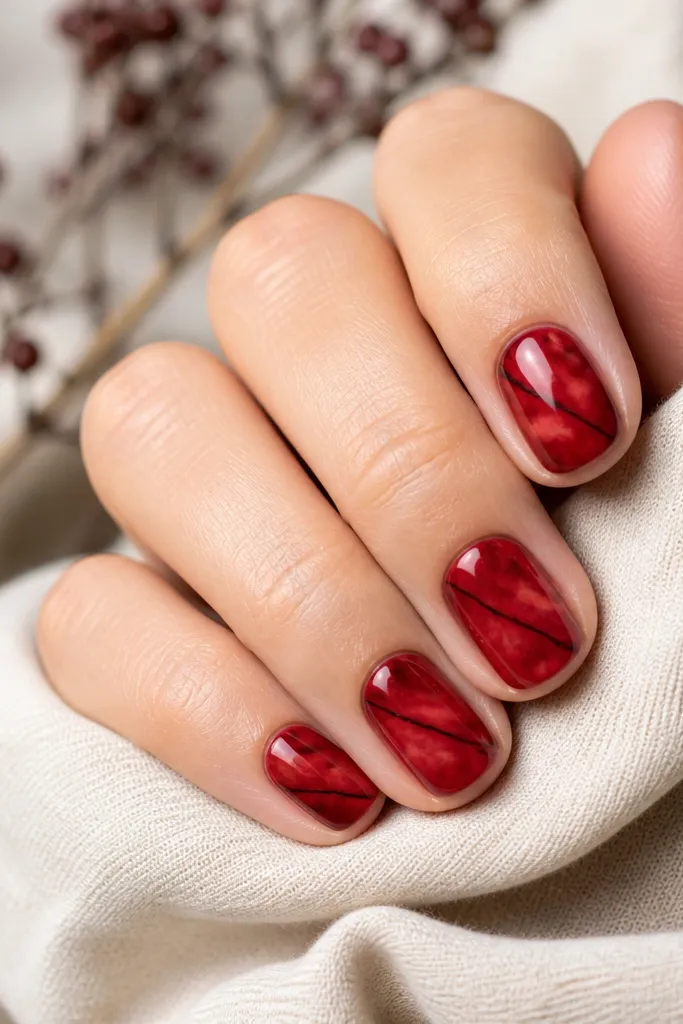
Start with a deep red base and cure. Add a second red shade (a brighter cherry or berry) in small blobs near the center and blend lightly with a sponge so it looks like marble spots. While still tacky (or right after paint), draw 2-3 thin black diagonal stripes using a liner brush across each nail. Leave gaps so the red marble shows through between lines. Seal with glossy top coat and clean up the edges to keep the stripes crisp.
Marble looks fancy, but on short nails you can keep it simple by doing “spot marble” instead of full swirls. The red base gives warmth, and thin black stripes act like veins, making the pattern read clearly. This flatters hands with slightly wider nail beds because the stripes create vertical movement. I’ve worn this to events where I needed something more interesting than plain red, and it still looked neat in photos. The key is to keep the black lines thin — thick stripes turn marble into stripes.
Watch outDon’t draw black lines over wet paint. You’ll get bleeding and blurry edges.
Editor's noteUse a sponge for the marble — brush-only blending makes red look streaky on short nails.
10. Red and Black Dot Grid on One Nail
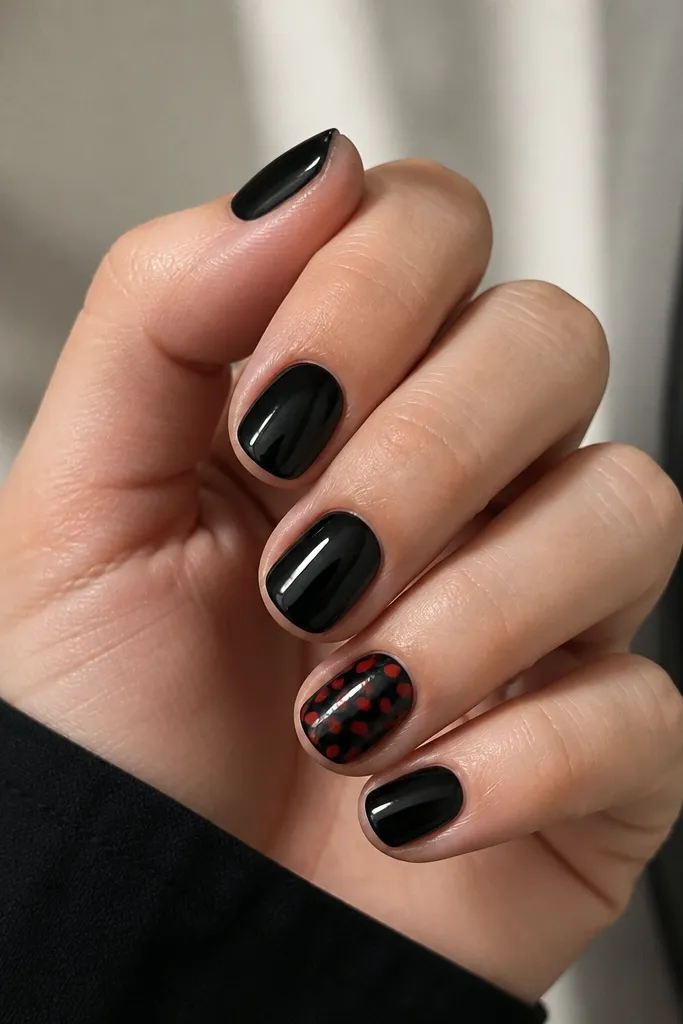
Paint all nails solid black in two thin coats and cure. On the accent nail, place a starting dot near the cuticle and another near the sidewall to set your grid spacing. Use a dotting tool to add alternating red and black dots in rows — aim for 3-4 rows total depending on nail length. Keep the grid centered so it doesn’t drift toward the sidewalls. Finish with glossy top coat, and cap the edges lightly so the dots don’t lift.
A dot grid looks graphic and clean, and it’s surprisingly easy because you’re repeating the same action. The reason it works on short nails is that dot spacing can stay tight without taking up the whole nail. Black base makes the dots pop, and alternating red keeps it from looking like plain polka dots. This manicure flatters hands that need a little visual structure — the grid pattern makes the nail shape look more defined. It’s also low maintenance because only one nail has the detail.
Watch outDon’t crowd the dots too close to the tip — they’ll chip first on short nails.
Editor's noteIf your dots look uneven, wipe your dotting tool between colors so the red doesn’t tint the black.
11. Classic Red Base with Black Side V Stripes
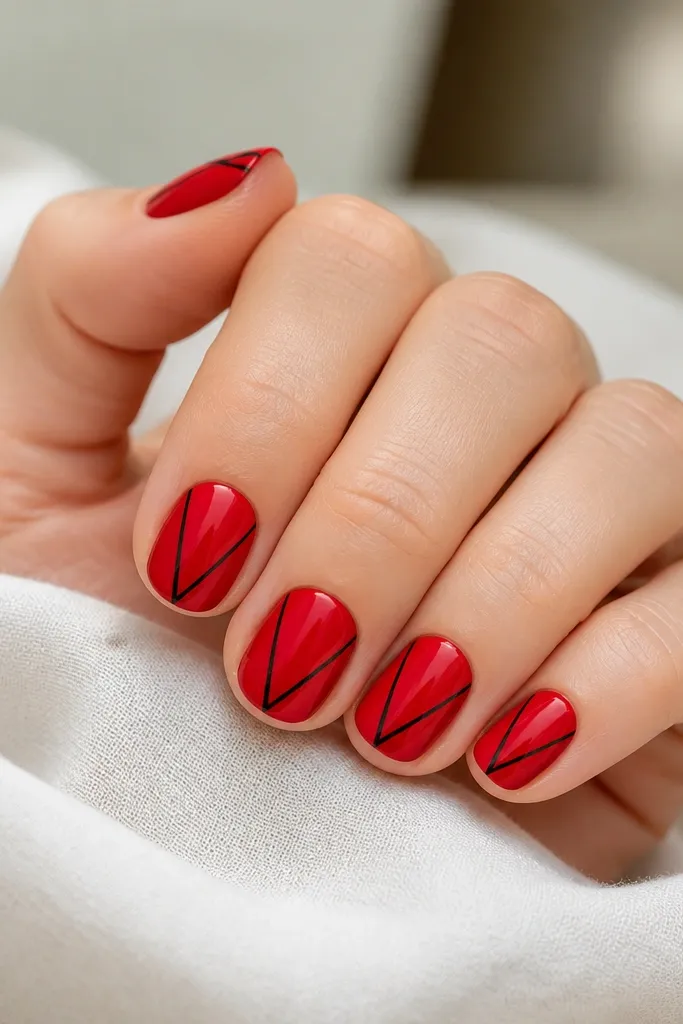
This design makes short nails look longer because the V shape pulls the eye toward the center. A glossy classic red base is simple, and the black side stripes create a slimming frame. It flatters most nail shapes, especially if your nail beds are shorter — the negative space in the center keeps the nail from looking blocky. I like it for everyday because it looks intentional even when you don’t have time for full art. The symmetry is what makes it look “salon,” not DIY.
Start with two thin coats of glossy classic red and cure. Using a liner brush, paint a thin black stripe from the left side near the middle of the nail down toward the center, then mirror it on the right to form a V. Keep the stripes about 1 mm wide and leave the center red untouched. Let it dry fully, then check that the V meets at a similar point on each nail. Seal with glossy top coat and cap the free edge.
Use a guide dot at the center point so both sides meet the same height.
Skip uneven stripes — one side thicker makes the whole manicure look off.
12. Black Base with Red Tiny Stars (Negative Space)
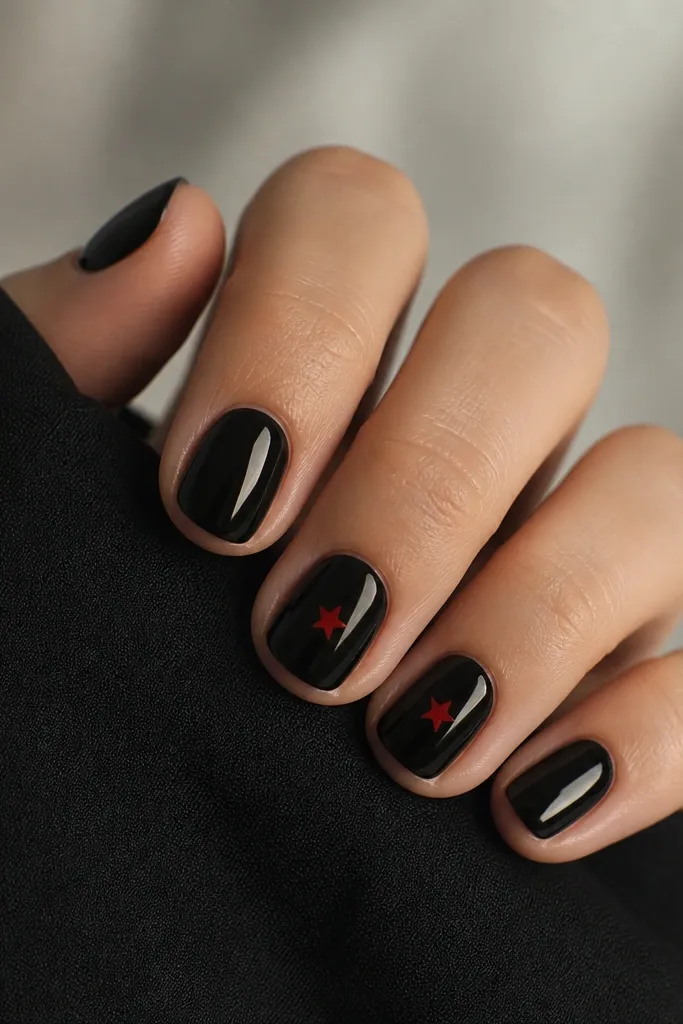
Tiny stars read cute and edgy at the same time, and the negative space keeps them from looking heavy. Black base makes the stars crisp and gives you an even backdrop for the red. This works on short nails because star shapes can be small and still readable, especially with glossy top coat. It flatters fair to deep skin tones because red stays the focus and doesn’t blend into the black. I’ve worn this for nights out where I wanted something fun but didn’t want to commit to full nail art on every finger.
Paint two coats of glossy black on all nails. On two chosen nails, use a fine liner brush or a star stamp to place small five-point red stars — about 1-2 mm wide — spaced with one star per nail or two per nail. Leave the surrounding area black so it stays clean. Cure/dry, then apply glossy top coat carefully over the stars without flooding them. Clean the edges around the cuticle so the stars stay centered.
If freehand stars wobble, use a small star stencil — it saves time and keeps the shape consistent.
Don’t add big stars. They take over a short nail and chip at the points.
13. Red Ombré Fade into Black Tip
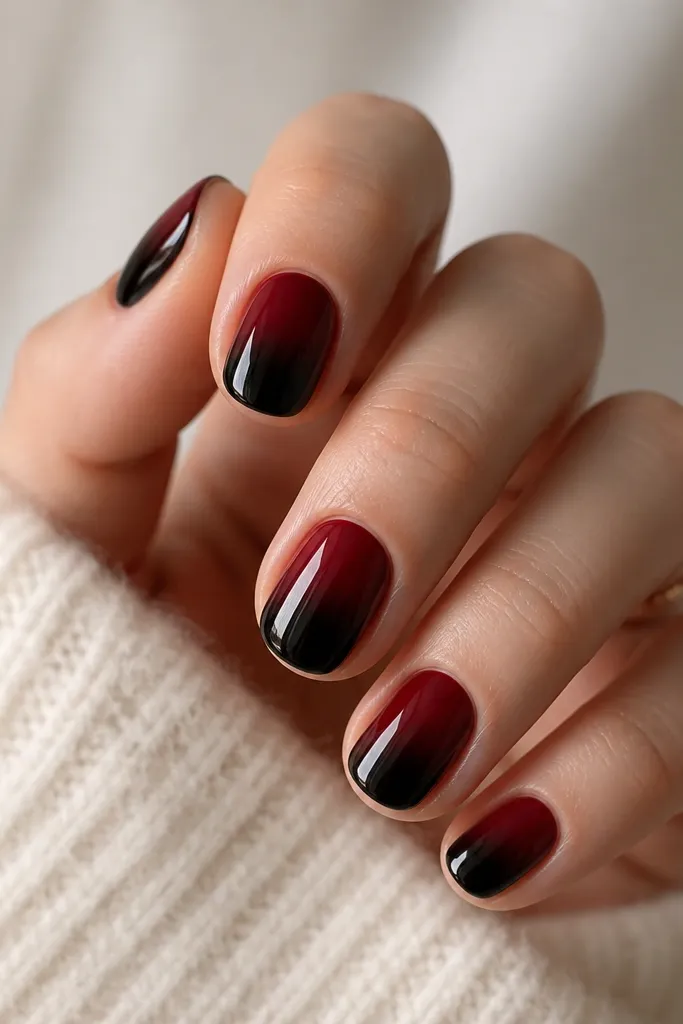
Ombré looks hard, but the short-nail version is fast because you only blend across the top third. Red-to-black gradients create a “lit from within” effect that looks good in daylight and in photos. It flatters hands with shorter nail beds because the fade starts high and makes the tip look intentional. I’ve worn this on weeks when I didn’t want to redo my nails, and it still looked neat as they grew out since the gradient doesn’t have a sharp line. Glossy top coat makes the blend look smooth instead of patchy.
Start by painting a red base near the cuticle in two thin coats and cure. For the ombré, sponge black polish or gel onto the outer tip area and blend upward about 2-3 mm using a makeup sponge — dab, don’t swipe. Add a second pass if you need more black at the tip, then stop while the blend still looks soft. Clean up the sides with a brush dipped in acetone and seal with glossy top coat. Cap the free edge so the black tip stays smooth and doesn’t peel.
Use a small sponge piece and test the gradient on a paper towel first so you don’t over-darken the blend.
Skip dragging the sponge across the nail. That creates streaks on short nails.
14. Black and Red Tape-Look Diagonal Panels
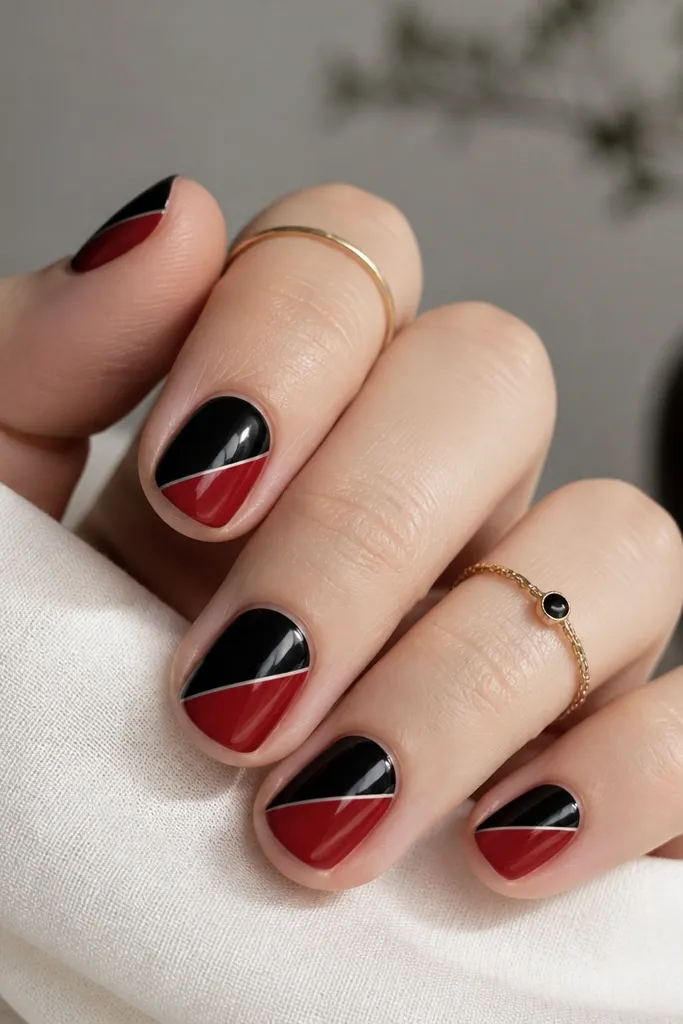
Start with a base coat, then paint a solid red layer on the nail and cure. Place striping tape or thin nail tape across the nail diagonally so the line is straight from sidewall to sidewall. Paint black over the exposed area, cure, then remove the tape while the polish is still workable if it’s gel-cured — remove after curing so edges stay sharp. If you want extra definition, repeat with a second tape placement to create two diagonal panels. Seal with glossy top coat and cap the edges.
Tape-look nails are my go-to when I want geometry without freehanding. The diagonal panels make short nails look modern and longer because the lines cut across the nail. Using red and black in separate panels keeps the contrast strong, and the crisp edges make it look salon even when you’re doing it at home. This flatters hands with slightly uneven nail plates because the panel boundaries distract from tiny bumps. Glossy finish keeps the panels looking smooth and “sealed,” like you actually used striping tape.
Watch outDon’t remove tape late. If the adhesive is gone or the polish is fully set and the tape is stuck, edges can tear.
Editor's notePress the tape down firmly along the sidewalls so paint doesn’t creep under it.
15. Red Glitter Edge with Black Base
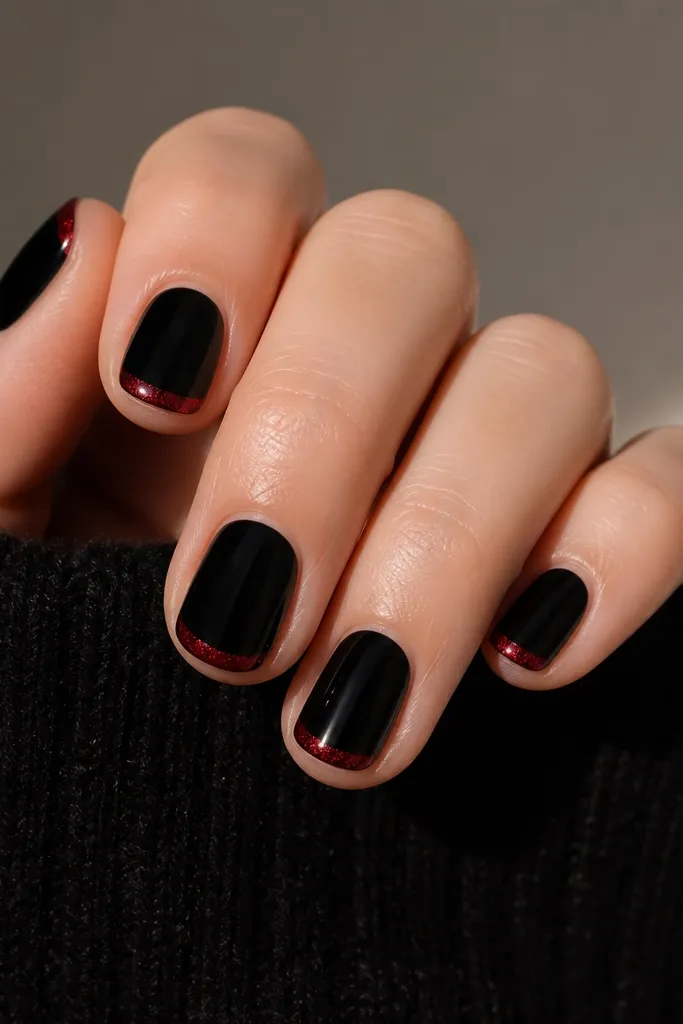
Glitter edges look festive without needing big artwork. The black base makes the glitter line look intentional, and the thin edge placement is perfect for short nails because you’re not covering the whole surface. This is a great choice if you want red-and-black for holidays, but you still want it to look clean and not overdone. It flatters fair to deep skin tones because red glitter reflects warm light and pops against black. I like a glossy top coat over the glitter so it stays smooth and doesn’t snag.
Paint two coats of solid black and cure, then decide if you want glossy or matte black under it. For the glitter edge, use a fine red glitter polish or glitter gel and apply it only along the free edge — about 1-2 mm wide. Use a thin liner brush to keep the glitter line straight and centered. Add one more clear top coat layer over the glitter to smooth texture so it doesn’t catch on sweaters. Cure fully and check the edge — any thick glitter clumps will snag.
If the glitter is chunky, mix a tiny drop of clear gel with glitter and apply thinly for a smoother line.
Skip a wide glitter edge. On short nails it looks bulky and chips faster.



