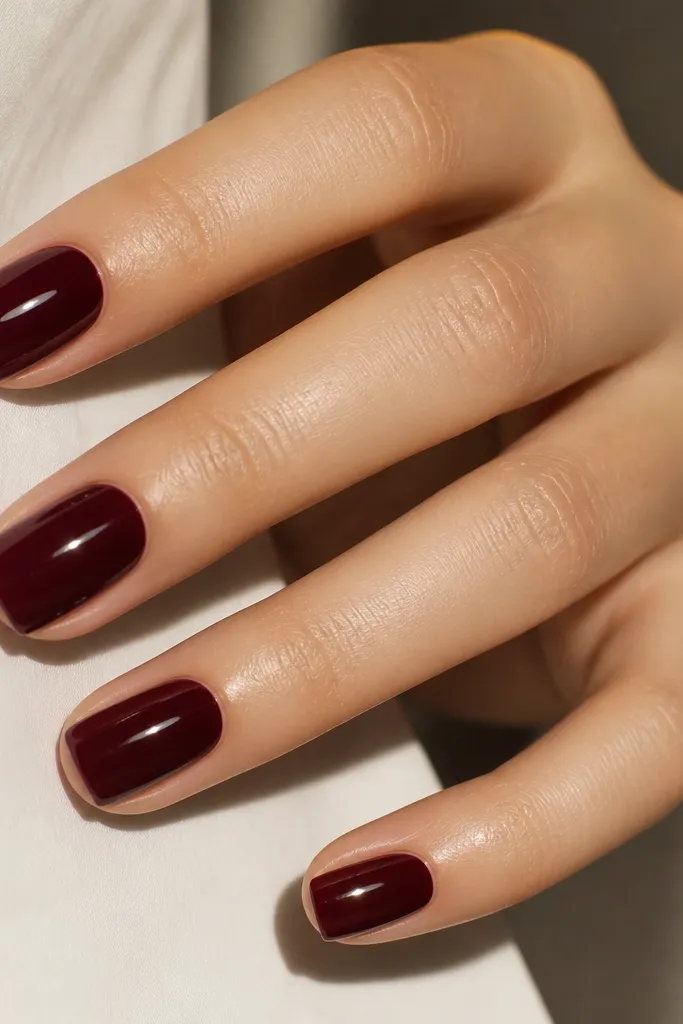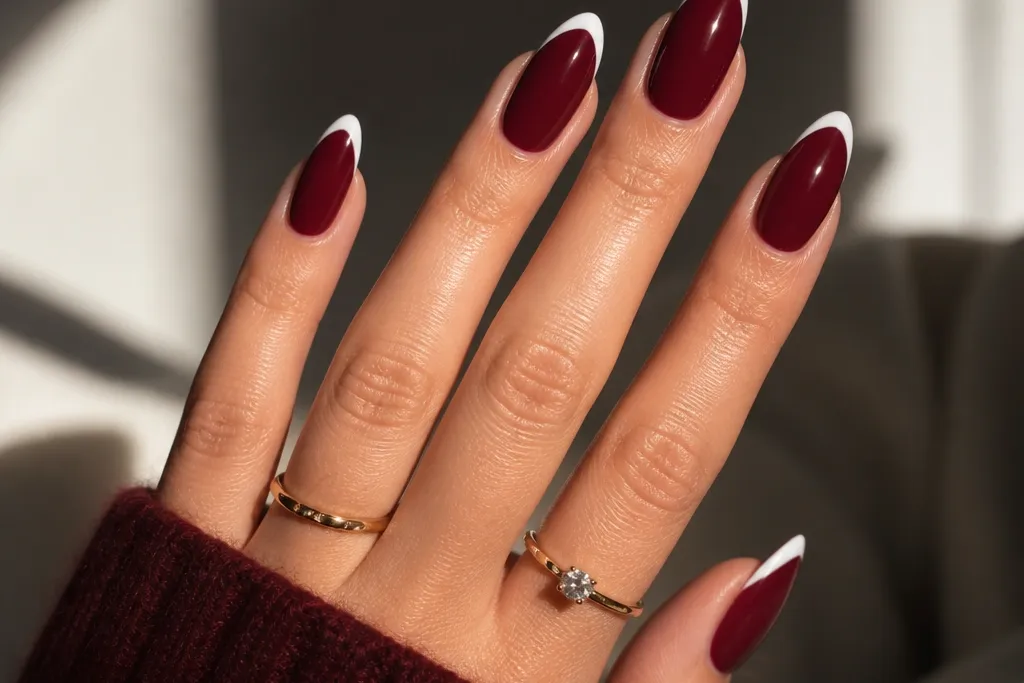
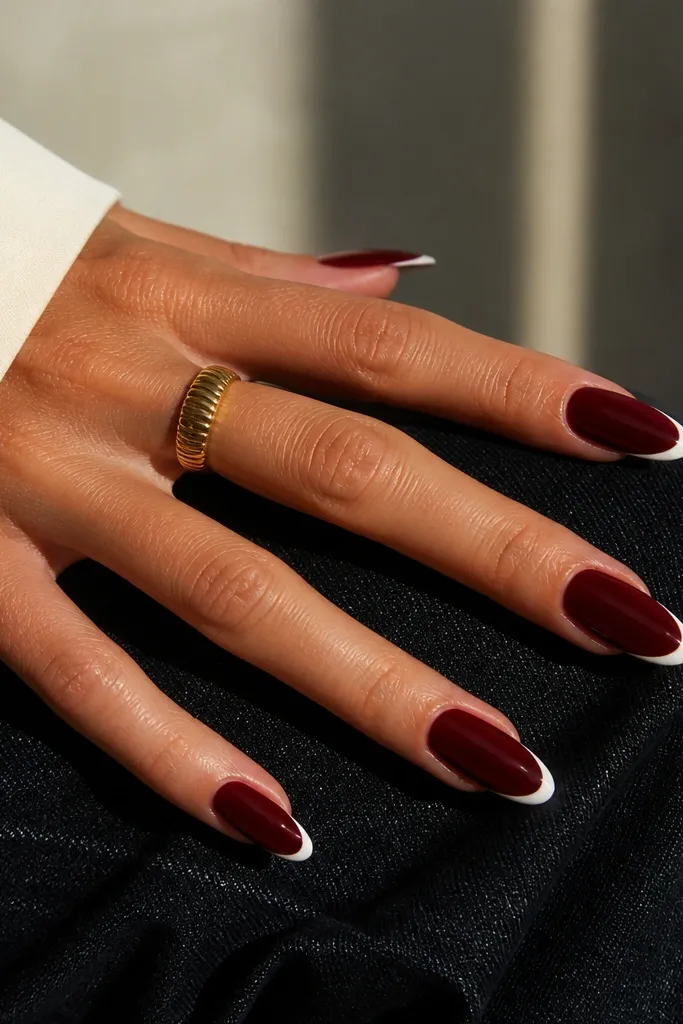
1. Classic Dark Cherry French Tip with Creamy Nude Smile Line
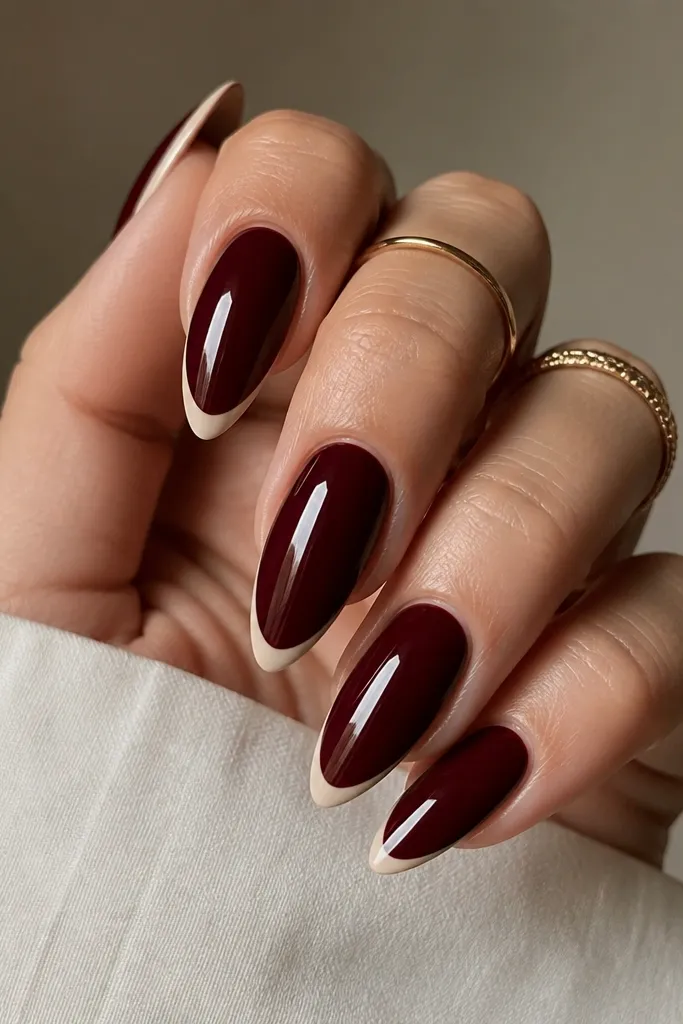
This is the cleanest version of Dark Cherry Red Nails French Tip Almond because the tip color sits close to your natural nail tone. I use a creamy nude that’s not too beige — it has a tiny pink cast so it flatters fair to medium skin without washing out. On deeper skin tones, the nude tip makes the cherry look even darker and more polished. The finish matters too: keep the base glossy so the cream tip looks sharp, not dusty.
Start by painting two thin coats of dark cherry red on the full almond nail, then cure if you’re using gel. Next, place the guide line for the French tip — I aim for about 1.5 to 2 mm of tip thickness on the free edge. Fill the tip with the creamy nude, then cap the free edge with a thin layer of nude so it doesn’t chip. Finally, top coat everything with a glossy top coat and wipe the tacky layer if your gel system needs it.
Use a fine striping brush and pull the tip line from the center outward — it gives you a smoother smile line than painting start-to-finish.
Avoid a wide nude tip — on almond nails it makes dark cherry look bulky and cheap.
2. Dark Cherry French Tip with Milky White Tip and Glossy Depth
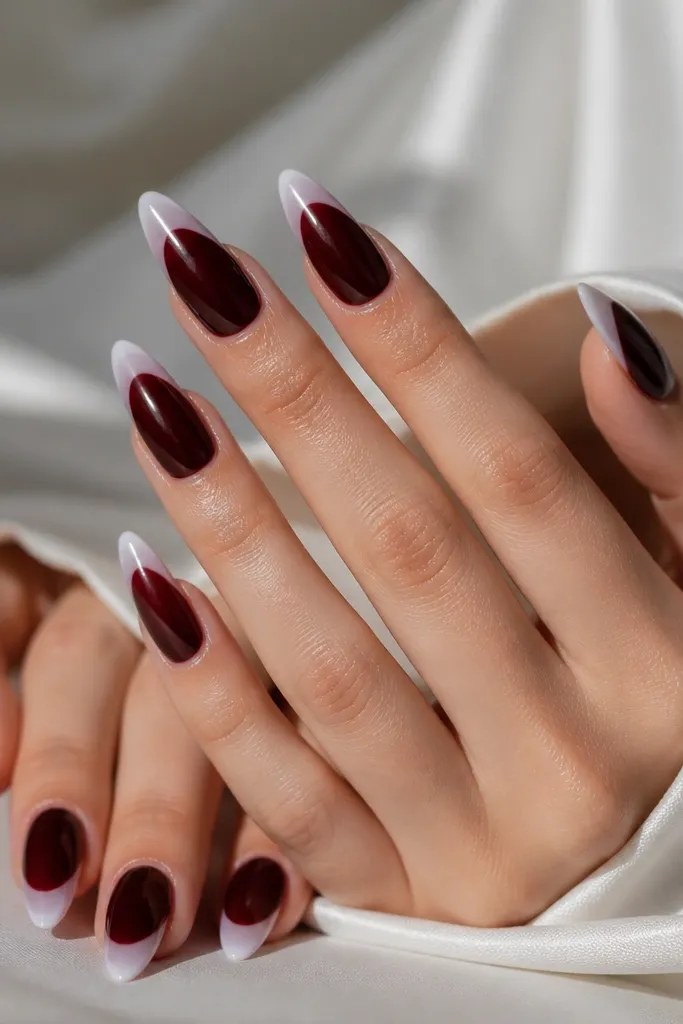
Milky white is softer than pure white, and that’s why it looks good with dark cherry. I’ve worn this on my hands during winter and it looks crisp without feeling harsh. On light skin, the milky white brightens the look; on medium to deep skin, it adds contrast that still reads elegant. The glossy top coat keeps the cherry looking deep instead of flat.
Paint two coats of dark cherry red and cure fully so the base is even. For the tip, use milky white and keep the first layer thin, then add a second layer only where you need opacity. Keep the smile line slightly higher at the sides on almond nails so it matches the taper. Seal with a glossy top coat and cure, then lightly buff the top if you see any texture on the tip.
Editor's noteIf your white gets streaky, do thin coats instead of thick — milky white levels best that way.
Watch outSkip pure bright white — it can look like sticker nails against dark cherry.
3. Cherry Base with Sheer Rosy Nude French Tip (Almost Invisible)
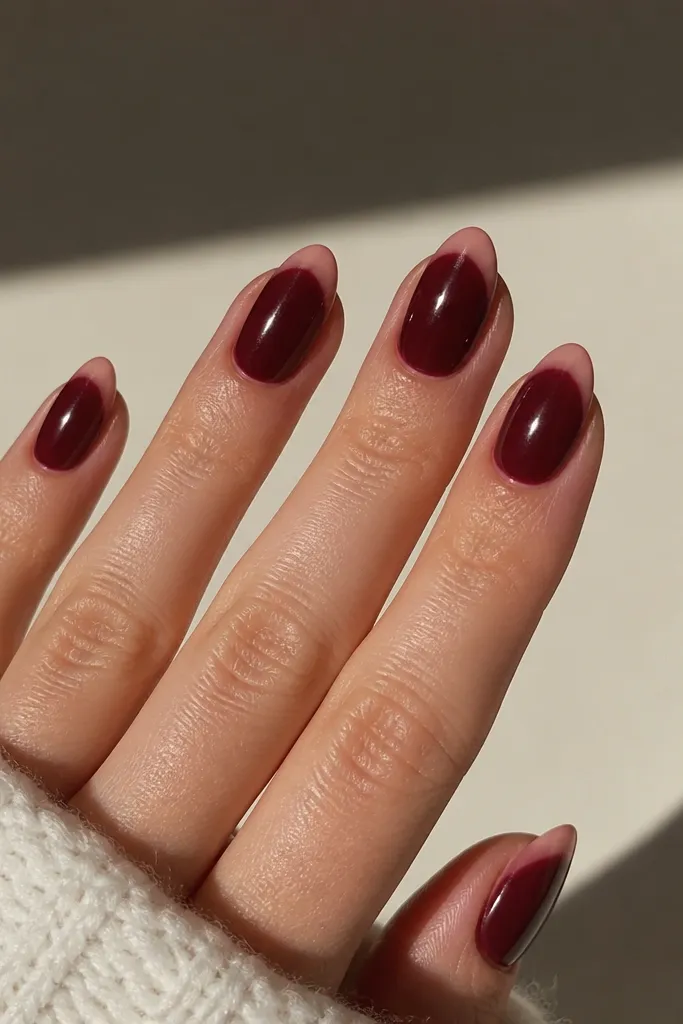
This one is for when you want French tips but not the hard outline. The rosy nude tip looks like a natural tint at the free edge, which flatters short almond nails and hands with shorter nail beds. It’s also great if your skin tone is very warm — the rosy nude doesn’t fight the cherry undertone. Because the tip is sheer, the overall look stays airy even though the base is dark.
Start with two coats of dark cherry red, then clean up the cuticle line with a small brush dipped in acetone. Choose a rosy nude that’s sheer enough to show the cherry faintly through it. Paint the tip using a very thin layer, then add a second layer only at the center of the tip for gentle opacity. Finish with a glossy top coat so the translucent edge looks smooth and glassy.
Editor's notePlace the tip line higher than you think — sheer tips show mistakes less, but placement still matters.
Watch outDon’t make the sheer tip too thick — it turns into a patch instead of a rim.
4. Dark Cherry French Tip with Thin Gold Outline (One-Line Luxury)
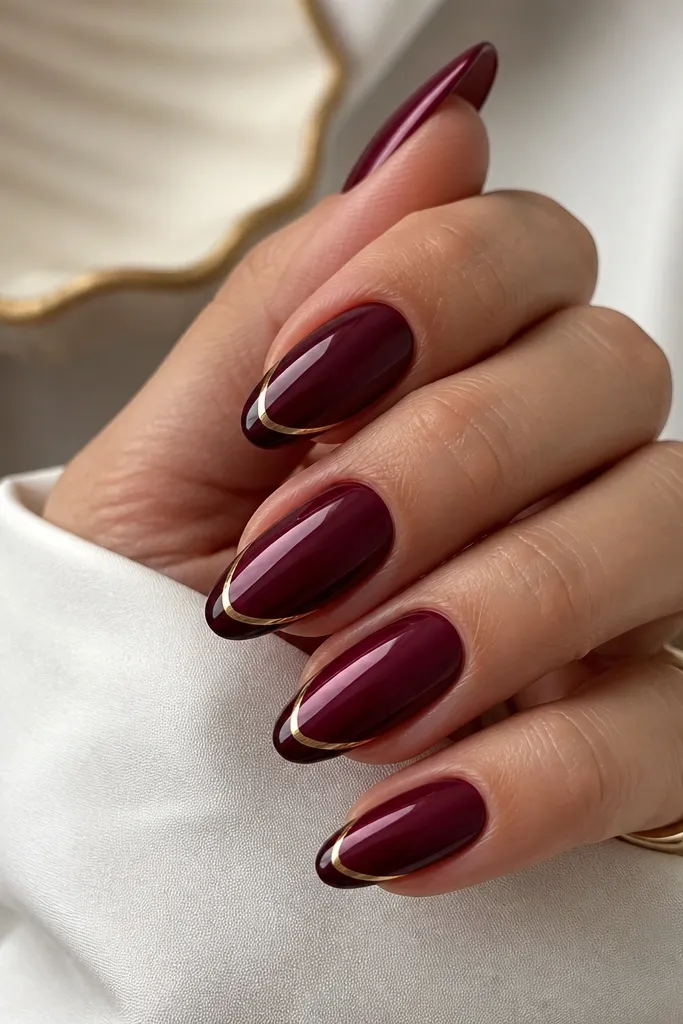
Instead of changing the tip color, you define the French tip with gold. That’s why it looks expensive without feeling busy — the gold line is delicate and it makes the almond shape look sharper. I’ve worn this to events where I wanted nails to match gold jewelry and it always looks intentional. It also flatters hands with smaller nail beds because the line visually lengthens the free edge.
Paint the full nail in dark cherry red and cure. Create a French tip guide by lightly marking the smile line with a dot of gel — don’t smear it. Then paint the tip area with dark cherry again so the base stays consistent, and draw one thin gold line along the smile line using striping gel or gold chrome liner. Cure and top coat carefully so the gold line stays crisp.
Use gold liner gel and a brush meant for fine lines — a regular nail brush makes the gold line too wide.
Skip thick gold — it looks like costume jewelry instead of a clean outline.
5. Dark Cherry Velvet French Tips with Matte Top Coat
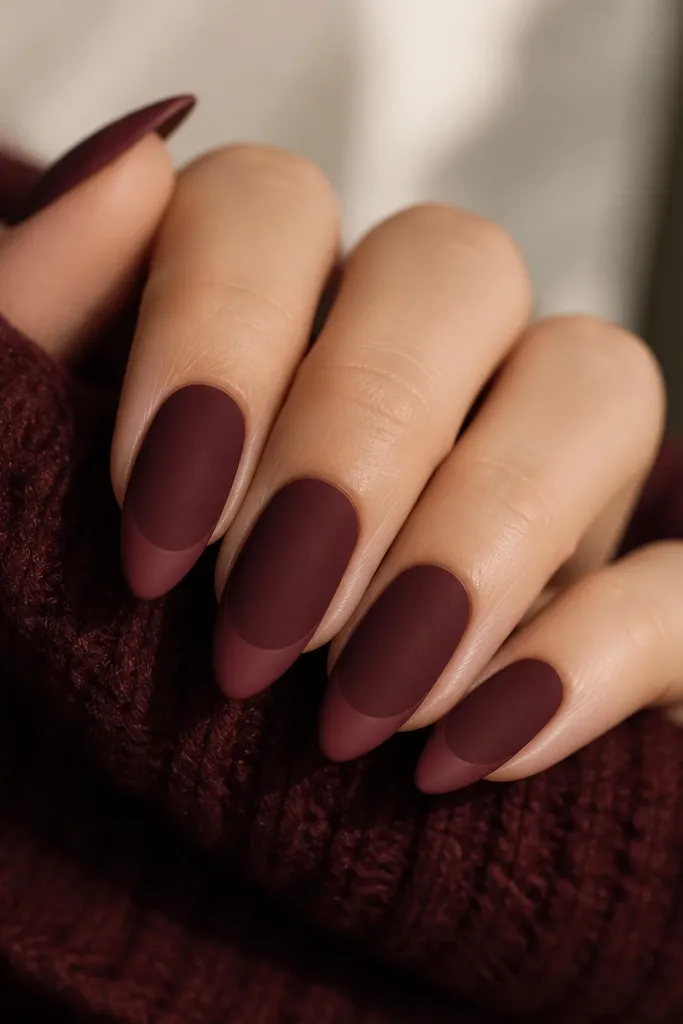
Velvet-matte makes dark cherry feel richer and hides tiny filing lines. For French tips, I like a slightly lighter cherry tip so it reads like a tone-on-tone gradient without needing white. This looks amazing on medium to deep skin because the matte texture catches light differently than gloss. It’s also forgiving if your application isn’t perfectly smooth — matte hides micro streaks.
Apply dark cherry gel base and cure. For the tip, use a lighter cherry shade and apply it only to the free edge region, keeping the smile line narrow. Add a velvet powder product on top of both base and tip while gel is tacky, then cure as instructed. Finish with a matte top coat that’s compatible with the velvet effect so the texture stays uniform.
Do the velvet step in thin layers — thick velvet powder can clump near the tip edge.
Avoid glossy top coat over velvet — it wipes out the velour look.
6. Dark Cherry French Tip with Burgundy Micro-Glitter Fade
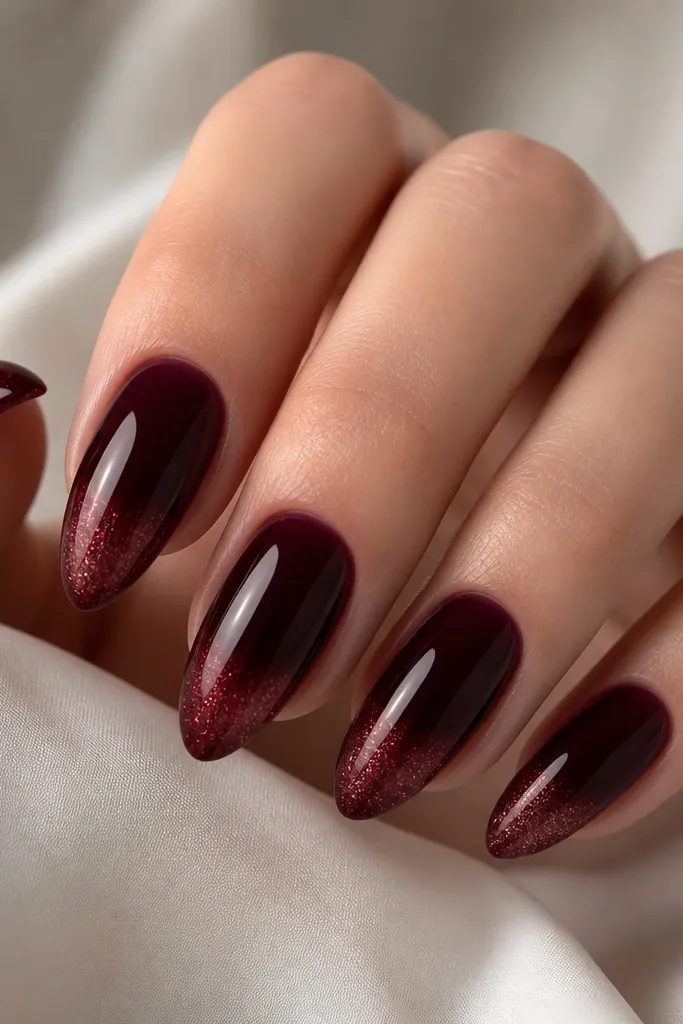
Micro-glitter looks best when it fades, not when it’s a full glitter block. The burgundy glitter keeps everything in the same family, so your hands still look classy even under harsh lighting. I’ve done this for holiday dinners and it photographs well because the glitter catches light in small flashes instead of big sparkles. Almond nails make the glitter fade look like a soft ombre at the free edge.
Paint a glossy dark cherry base with two coats. For the tip, start with dark cherry at the smile line and tap burgundy micro-glitter gel from the free edge inward using a makeup sponge or small stippling brush. Build density at the very tip and keep it lighter as you approach the smile line. Cure, then seal with a thin glossy top coat so the glitter doesn’t feel gritty.
Use a sponge for the fade — brush strokes leave glitter ridges on almond tips.
Skip chunky glitter — it makes the tip look uneven and rough.
7. Dark Cherry French Tip Almond with Icy Nude Chrome Tip
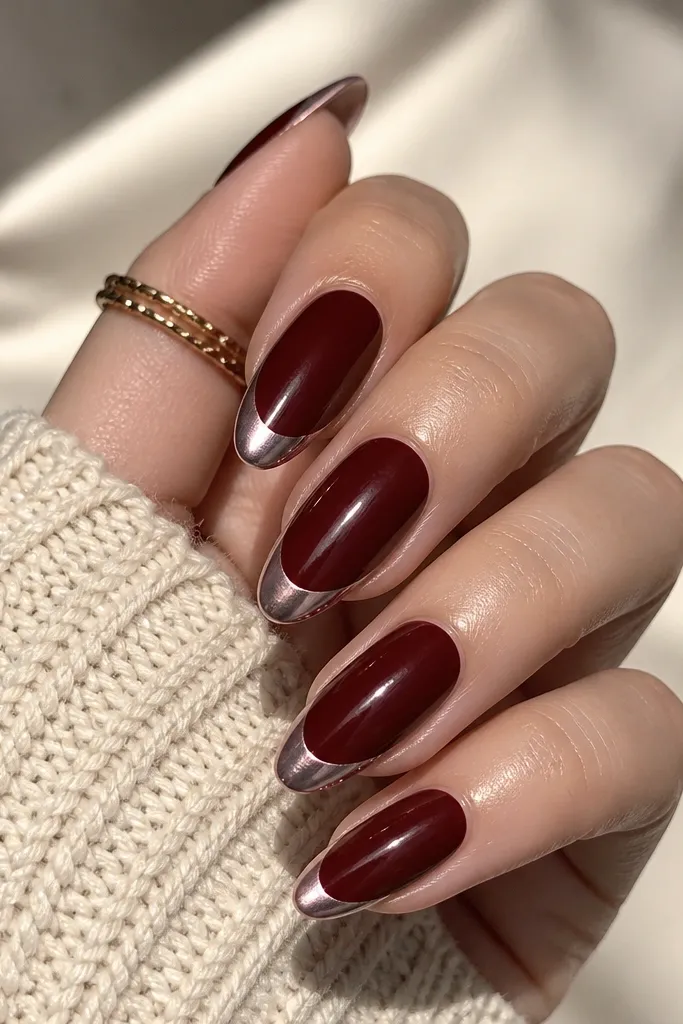
Chrome turns Dark Cherry into something runway without adding gems. The icy nude chrome is flattering because it’s neutral enough to work with warm and cool undertones, but it still looks bright next to cherry. This is the version I reach for when I want that “clean but wow” look for nights out. It also makes the almond shape pop because chrome reflects along the curve.
Apply two coats of dark cherry red and cure. Paint the French tip area with a light nude gel base that matches the chrome undertone, then cure. Apply chrome powder or chrome gel on the tip only, burnish gently so it’s smooth, and wipe off excess per your system. Seal with a non-wipe top coat if your chrome needs protection, then cure and check the tip edge for any smearing.
Editor's noteDo chrome over a fully cured base — if the base is tacky, you get patchy reflectivity.
Watch outDon’t touch the chrome with bare fingers — oils leave dull spots fast.
8. Dark Cherry French Tip Almond with Sparkling Rose Gold Foil
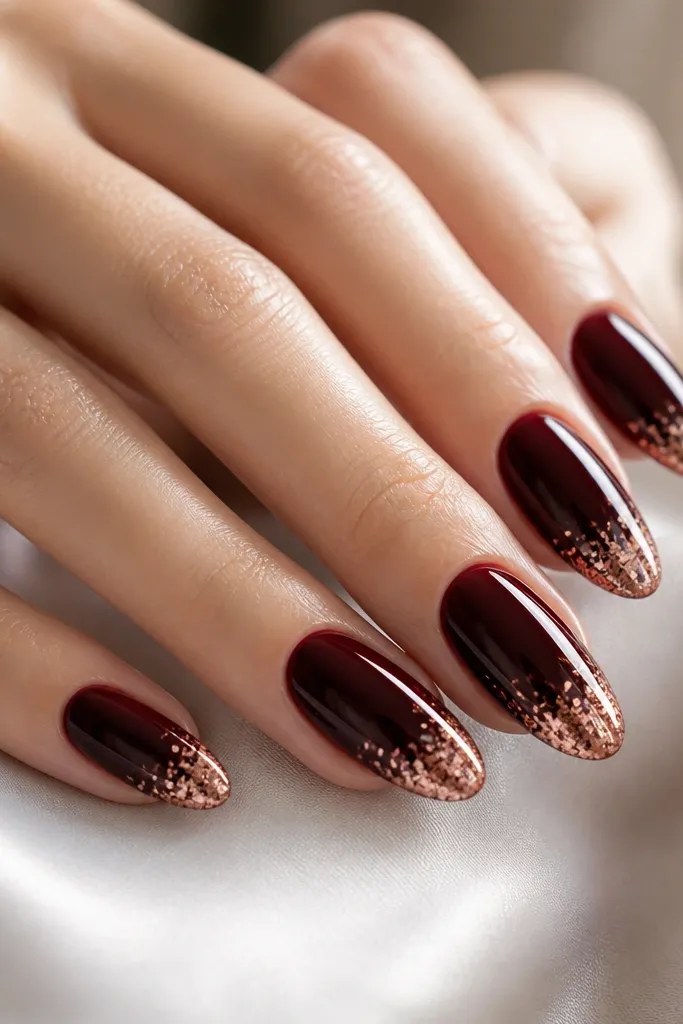
Foil flakes look best when they’re placed like a gradient, not dumped everywhere. Rose gold foil works with dark cherry because it echoes the warm undertone you often find in cherry reds. This looks great on hands with warmer skin tones and on people who wear rose gold jewelry. The foil also adds dimension without the heaviness of rhinestones.
Start with a glossy dark cherry base. On the tip area, apply a thin layer of rose gold foil adhesive or a foil gel only where you want foil. Press foil flakes onto the tip and tap off excess so the smile line stays crisp. Seal with a glossy top coat that can handle foil so the texture looks smooth instead of snaggy.
Use small pieces of foil at the center of the tip and bigger flakes at the very edge for a natural fade.
Avoid covering the entire nail with foil — it steals attention from the French tip shape.
9. Dark Cherry French Tip with White Marble Veins
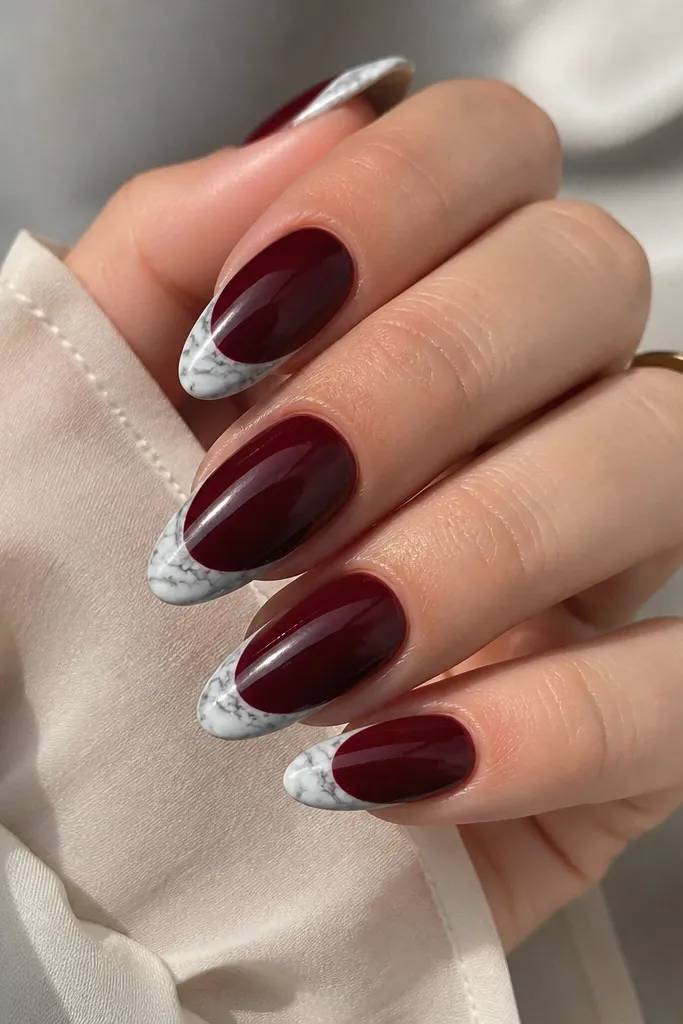
Marble tips look like you paid for nail art even when you keep the design inside the tip. The trick is using thin veining — too much white makes it look like candy. This style flatters nearly everyone because the marble is neutral, and the cherry base keeps it grounded. I like it for office-friendly events because it looks detailed but still clean.
Paint the dark cherry base and cure. Apply a milky white layer to the French tip area, then using a dotting tool or liner brush, drag thin gray-white lines through the white layer. Pull a few lines from the smile line toward the free edge, leaving gaps so it looks like natural marble. Finish with a glossy top coat and cap the tip edge so the veining doesn’t lift.
Use a gray-white line, not pure white — it reads more like real stone on camera.
Don’t blob marble at the center — marble looks best when it stays mostly within the tip.
10. Dark Cherry French Tip with Tiny Black Cat-Eye Chrome
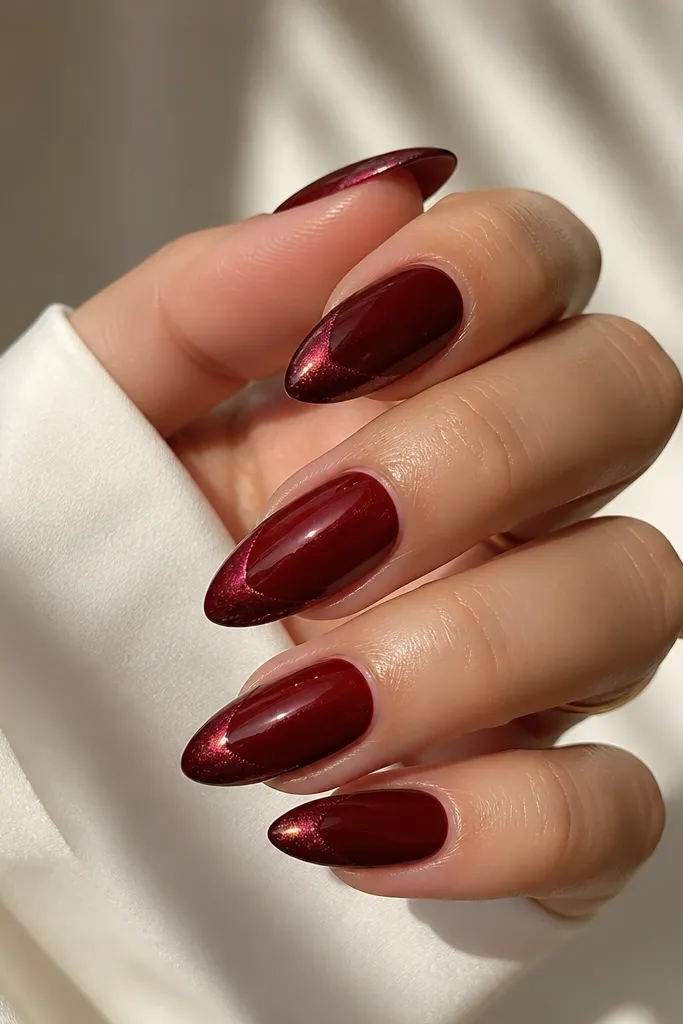
Cat-eye chrome adds movement, and black makes it feel edgy without losing the cherry elegance. For French tips, I keep it thin — a single streak — so it doesn’t turn into a full black nail. This looks amazing on fair to deep skin because the cherry base gives warmth and the chrome gives edge. It’s also a good choice if you want something different from the usual white tips.
Do your dark cherry base in two coats and cure. Apply a thin black gel or dark base only inside the French tip area, then cure. Apply cat-eye chrome powder or cat-eye gel and use a magnet close to the tip to pull the line — I hold the magnet for 8-12 seconds and keep the line centered. Cure and seal with a top coat that doesn’t kill the cat-eye effect, then check under light from the side.
Magnet angle decides everything — tilt the magnet slightly so the streak follows the almond curve.
Avoid wide cat-eye — thick streaks look messy on almond tips.
11. Dark Cherry French Tip with Burgundy Lined Studs (3-Stud Tip)
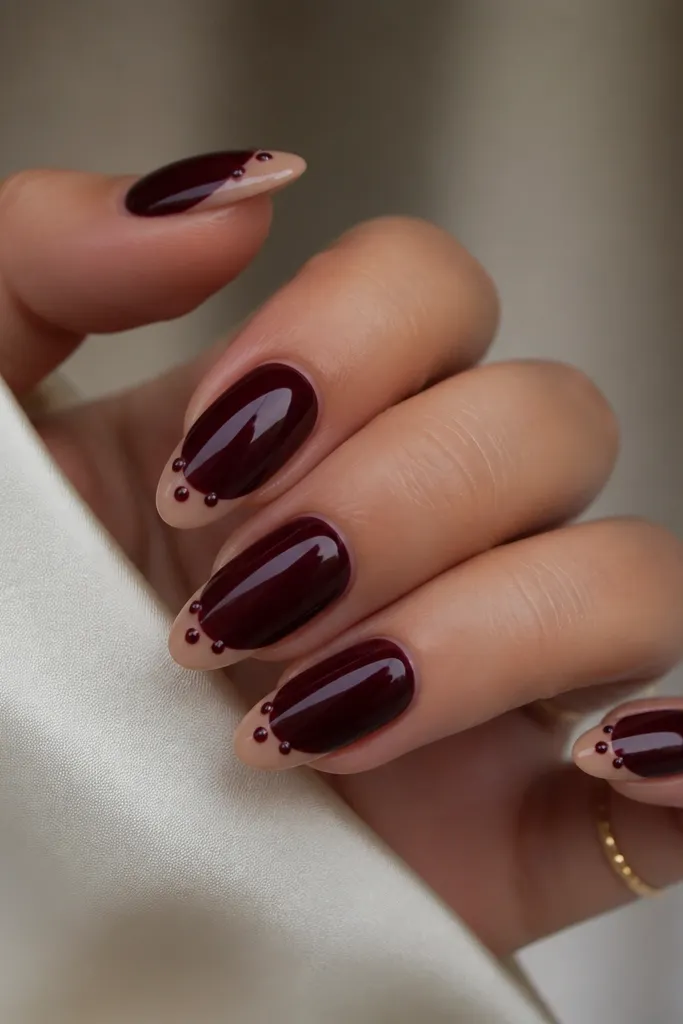
If you like sparkle but hate heavy rhinestones, this is the compromise. The nude tip keeps it classy, and the three small burgundy studs add just enough focus at the smile line. I’ve worn this to weddings and it looks intentional with both silver and gold jewelry because the studs are burgundy, not bright red. On shorter almond nails, the clustered studs make the free edge look longer.
Paint dark cherry base and cure. Apply a nude French tip and keep it narrow, about 1.5 mm. Place three micro studs along the smile line: one in the center and two slightly staggered toward the sides. Press them into a small amount of clear gel, cure, then top coat carefully around the studs so they stay glossy and secure.
Use micro studs, not bigger stones — you want the smile line to look clean, not crowded.
Skip random stud placement — if the row isn’t centered, the nails look lopsided.
12. Dark Cherry French Tip Almond with Red Wine Gradient Tip
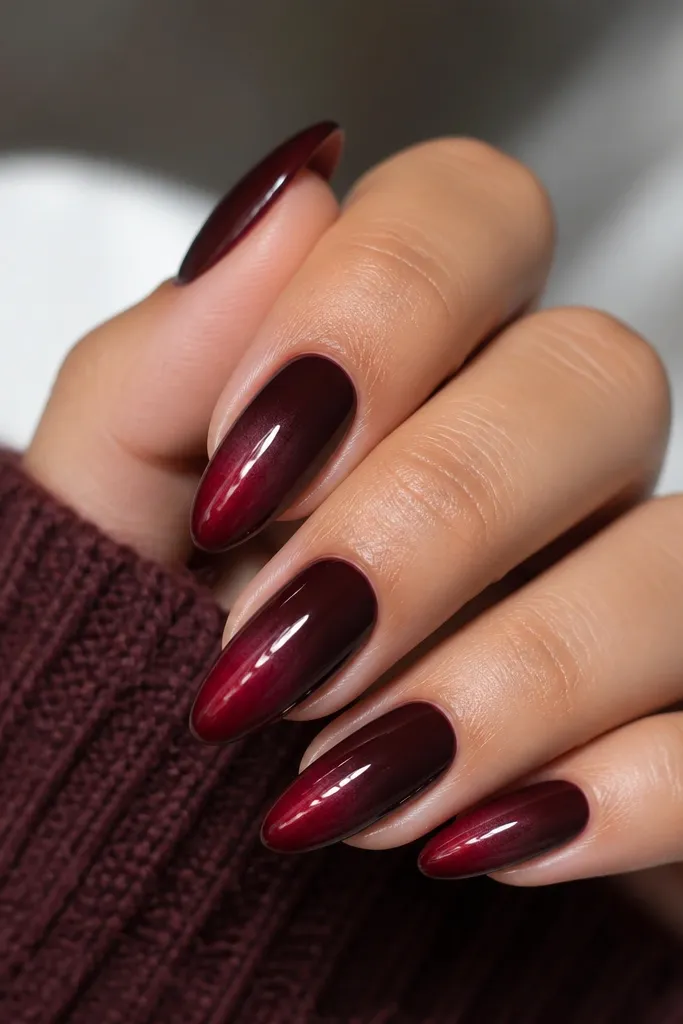
Gradient French tips look smooth and expensive because there’s no hard edge to fight with almond shaping. Use a red wine shade at the tip and blend toward a lighter cherry near the smile line. This style flatters hands with ridges because the gradient visually smooths the transition. It also looks great for daytime because it doesn’t rely on white contrast.
Apply dark cherry base in two coats and cure. For the tip, sponge on a red wine shade at the free edge, then dab more lightly as you move inward. Blend using a flat brush lightly over the gradient so it stays smooth and doesn’t streak. Cure, then finish with a glossy top coat and cap the tip edge.
Use a makeup wedge sponge and clean it between nails — you keep the gradient even.
Don’t paint the gradient with a thick brush — it leaves hard bands.
13. Dark Cherry French Tip with Silver Shimmer Dust at the Edge
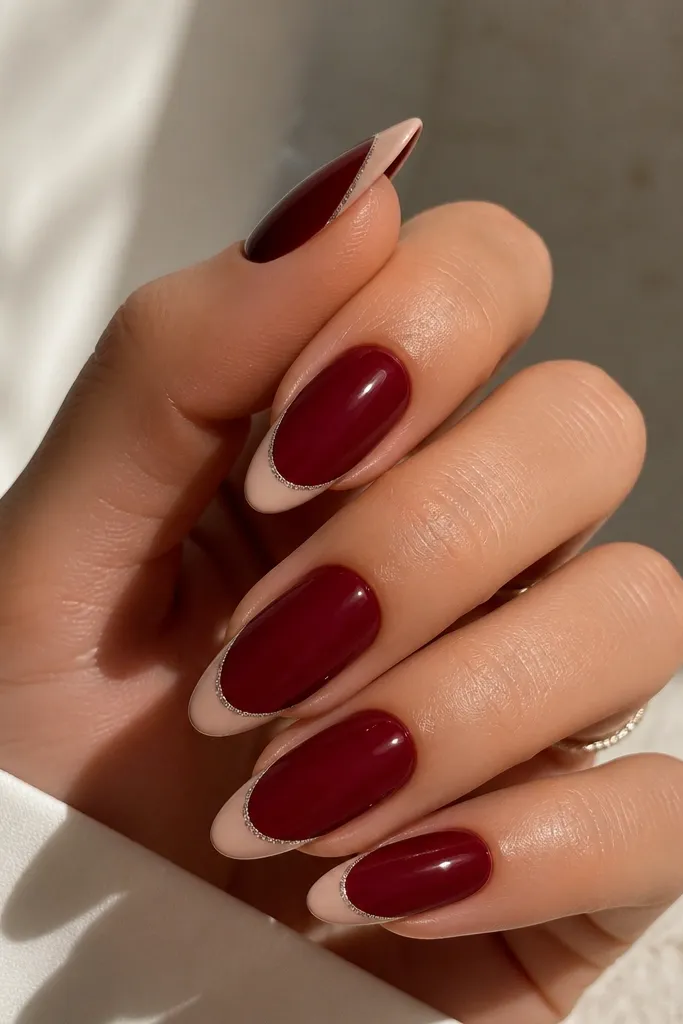
This is my go-to for people who want sparkle but hate glitter everywhere. The shimmer dust at the edge looks like the light hitting the nail naturally. Silver shimmer makes dark cherry look cooler and more modern, especially if you wear silver rings or watch bands. It’s also flattering because the clean nude tip keeps the shape crisp while shimmer adds dimension only where it should.
Start with a glossy dark cherry base. Apply a creamy nude French tip and cure. Add a tiny amount of fine silver shimmer gel or loose pigment mixed with clear gel only at the outermost 1/3 of the tip edge. Use a small liner brush to keep shimmer from crossing the smile line, then seal with a glossy top coat.
Press shimmer in with the brush tip instead of dragging — it prevents stray sparkle lines.
Avoid thick shimmer layers — they feel gritty and chip faster.
14. Dark Cherry French Tip Almond with Navy Ink Tip Liner
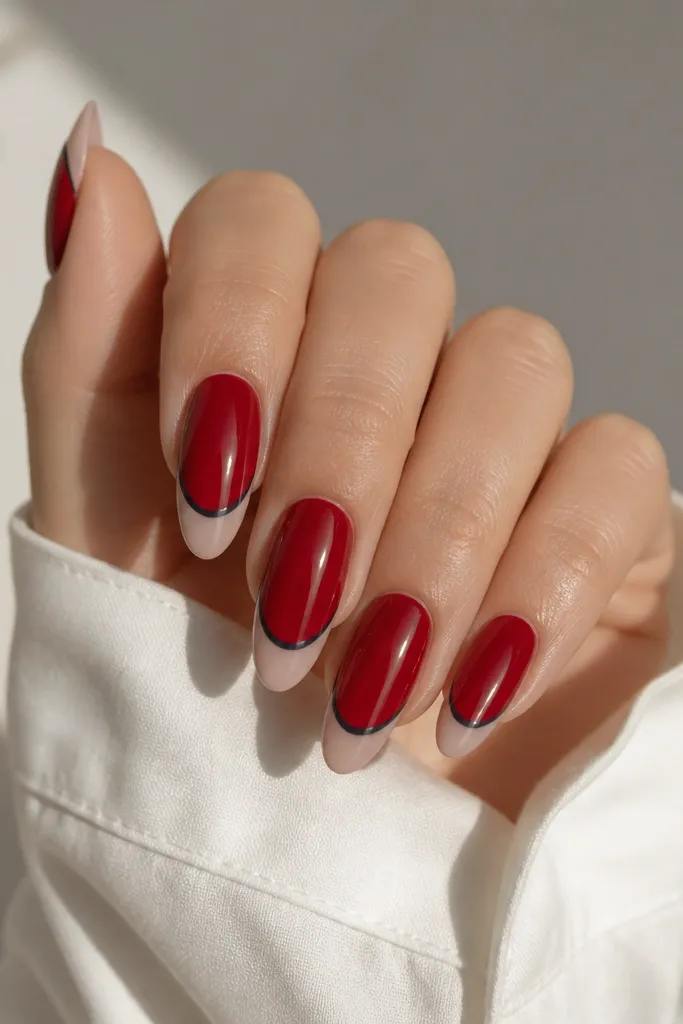
Navy ink lines make the tip look graphic and sharp without using white. The contrast is cooler than gold and more wearable than black for most people. I like this on medium and deep skin because the navy pops without looking harsh. It also makes the almond tip look extra defined even when your nails are short.
Paint dark cherry base and cure. Apply a sheer nude French tip so the nail still looks natural. With a striping brush, draw a thin navy line along the smile curve — keep it even and don’t flood the line. Add a glossy top coat over everything and ensure the line is sealed so it doesn’t lift at the edges.
Editor's noteLet the nude tip fully cure before lining — wet gel smears the navy.
Watch outSkip a thick navy outline — it turns into a cartoon border fast.
15. Dark Cherry French Tip with White Lace Appliqué on the Smile Line
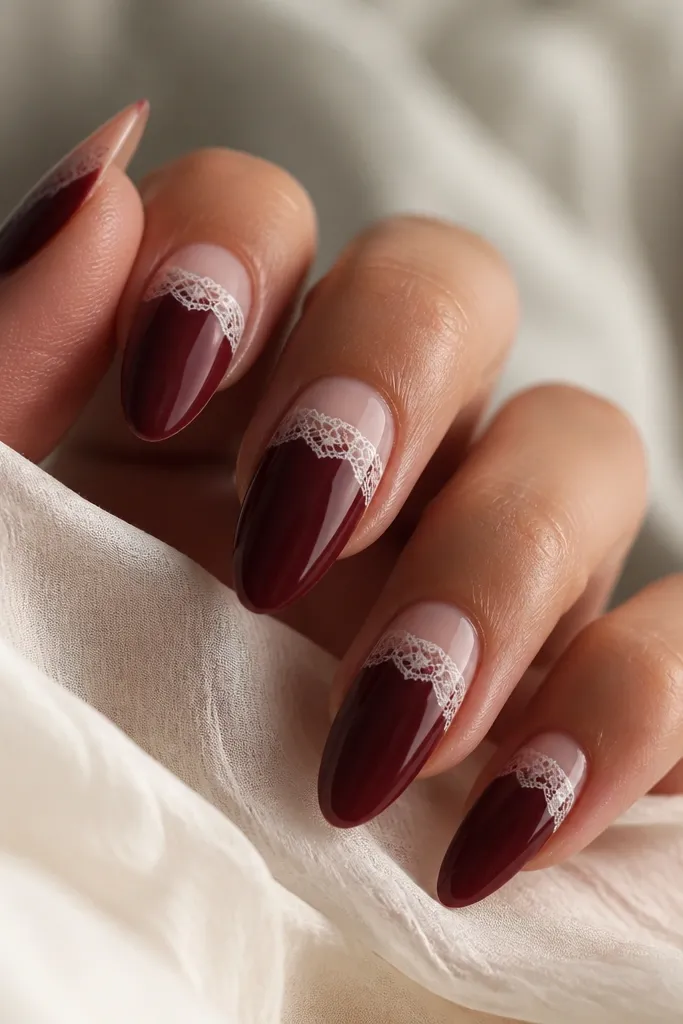
Lace looks delicate here because it’s placed only at the smile line, not across the whole nail. The white lace against dark cherry feels romantic, but the nude tip keeps it from looking costume-y. This is stunning for bridal events, birthdays, or any time you want your nails to look like they belong with a dress. It also flatters different nail lengths because the lace sits where the eye naturally lands.
Do your dark cherry base and cure. Apply a nude French tip and cure, then place lace pieces cut to fit the smile width of each almond nail. Use clear gel to tack the lace down, then cap with clear gel so the lace is fully sealed and smooth. Cure, then top coat glossy and check for any raised edges near the sides.
Editor's noteCut lace with sharp scissors and round the edges — sharp corners snag on coats and hair.
Watch outAvoid thick lace layers — they make the tip feel bumpy and catch on fabric.
16. Dark Cherry French Tip with Tiny Crystal Dots (No Big Stones)
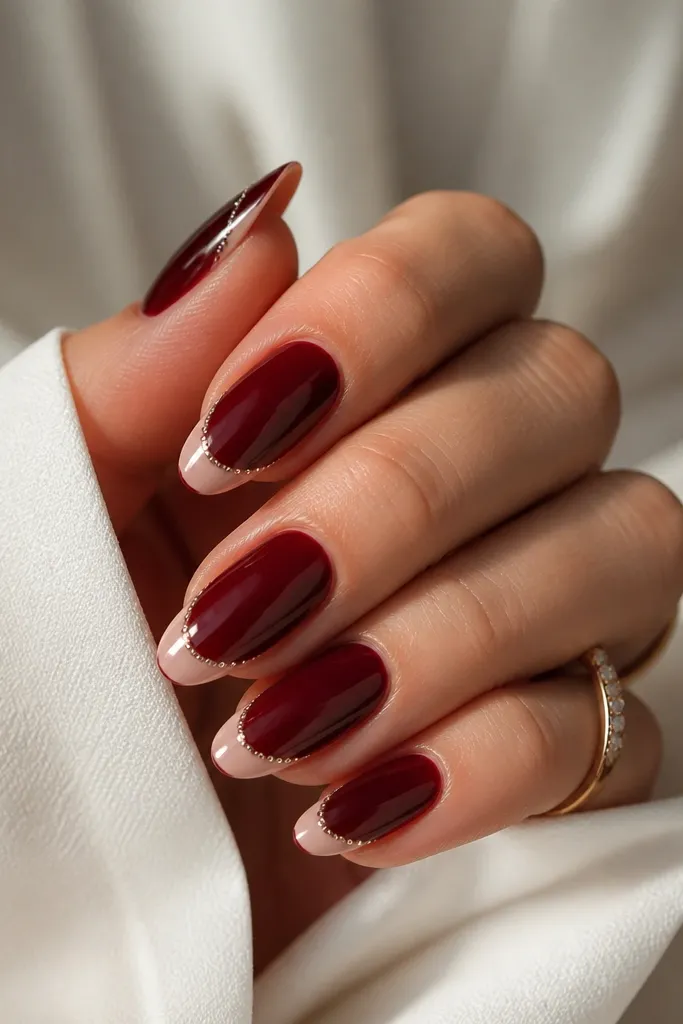
Tiny crystal dots give you sparkle that looks like jewelry, not craft store glitter. I like this version when I want “done” nails without heavy gems that pop off. The nude tip keeps the crystals from looking too loud, and the dark cherry base makes the crystals read clean and bright. This flatters hands of all sizes because the border stays narrow.
Paint dark cherry base and cure. Apply a nude French tip, keeping the tip width around 1.5 mm. Place tiny clear crystals along the smile line using a dotting tool — one at the center and then evenly spaced toward the sides. Cure, then seal with a thin clear gel layer and glossy top coat so crystals are locked down.
Use a toothpick to adjust spacing — your eyes catch uneven gaps immediately.
Skip large crystals — they make the almond tip look bulky.
17. Dark Cherry French Tip with Black Micro-Lettering Accent
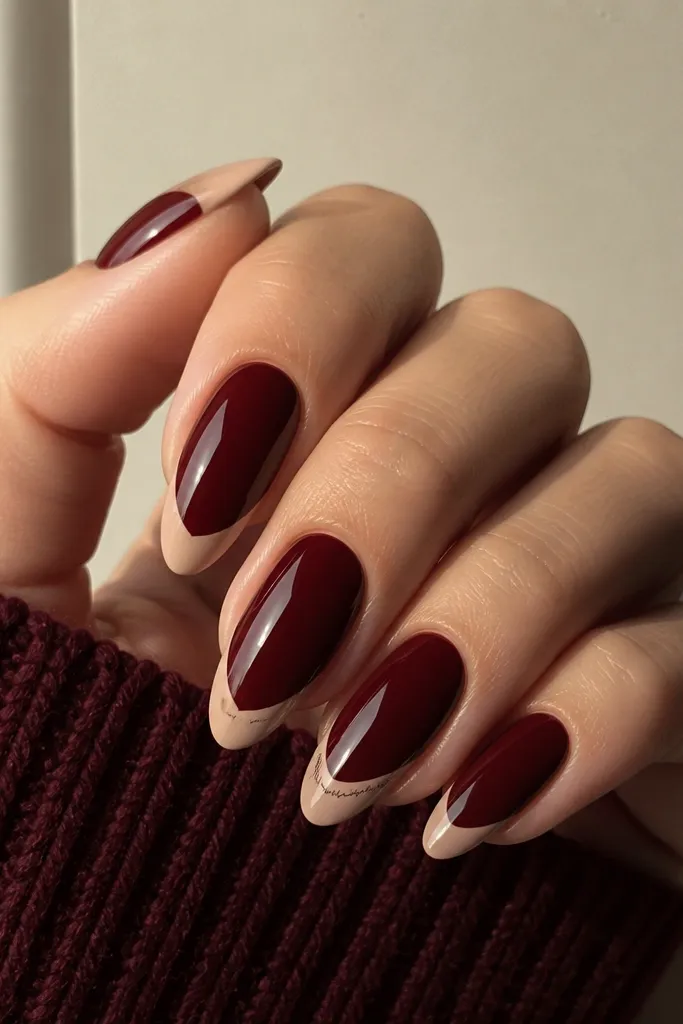
Micro-lettering is a fun way to make Dark Cherry Red Nails French Tip Almond feel personal without turning it into loud nail art. Black ink over nude tip looks crisp and modern, especially if your handwriting style is clean. This looks best on hands that already wear statement rings, because the lettering competes less than big graphics. It also flatters because the design is small and placed where the eye already follows.
Paint dark cherry base and cure. Apply a nude French tip and cure. On your accent nail, add tiny black lettering with a fine liner brush or nail art pen, keeping the text within the tip zone and centered. Seal with glossy top coat, and if you want extra durability, cap the lettering with a thin layer of clear gel before the final top coat.
Practice the letters on a spare nail first — the brush control is the real learning curve.
Avoid big text — it makes the tip look cluttered.
18. Dark Cherry French Tip Almond with Champagne Glitter Confetti
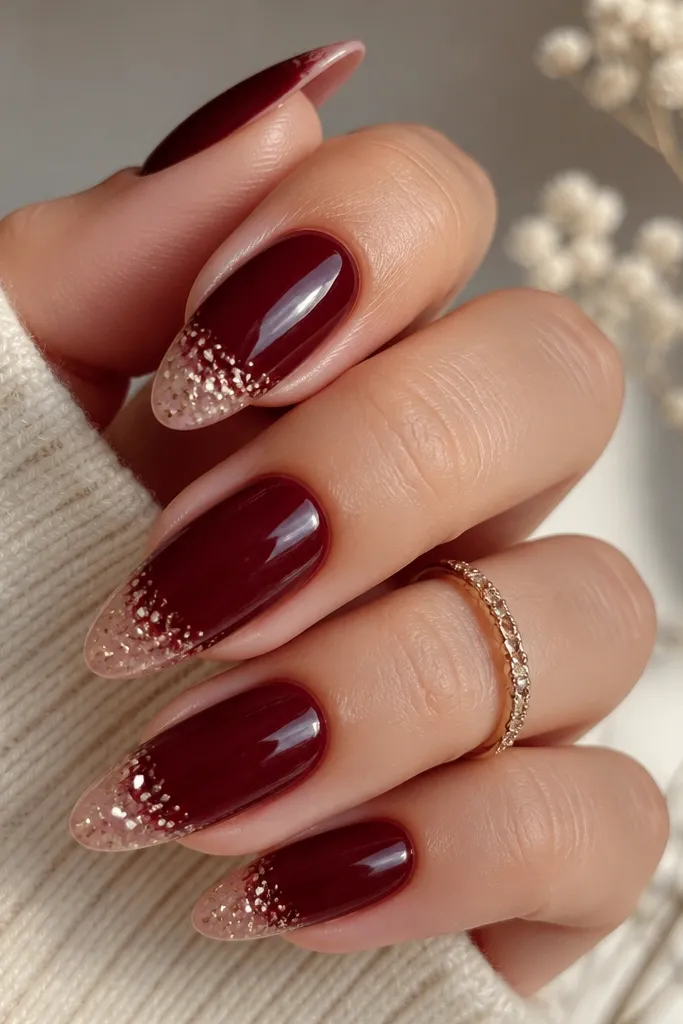
Champagne glitter confetti is softer than silver and warmer than gold, which is why it pairs so well with dark cherry. The nude tip keeps it light, and the confetti placement makes it look like a celebration instead of a heavy glitter bomb. I’ve done this for holiday parties and it looks good in both warm and cool lighting. It’s especially flattering if you like glam but still want your nails to look wearable.
Start with a glossy dark cherry base in two coats. Apply nude French tips and cure. Tap champagne glitter confetti onto the tip edge only, then use a small brush to guide the lighter scatter inward. Seal with a glossy top coat and cap the free edge so the confetti doesn’t snag.
Editor's noteUse a sticky base layer only at the edge — full-tip tack makes glitter migrate upward.
Watch outAvoid large glitters — they catch and chip sooner on almond tips.
19. Dark Cherry French Tip with Deep Plum Half-Moon Negative Space
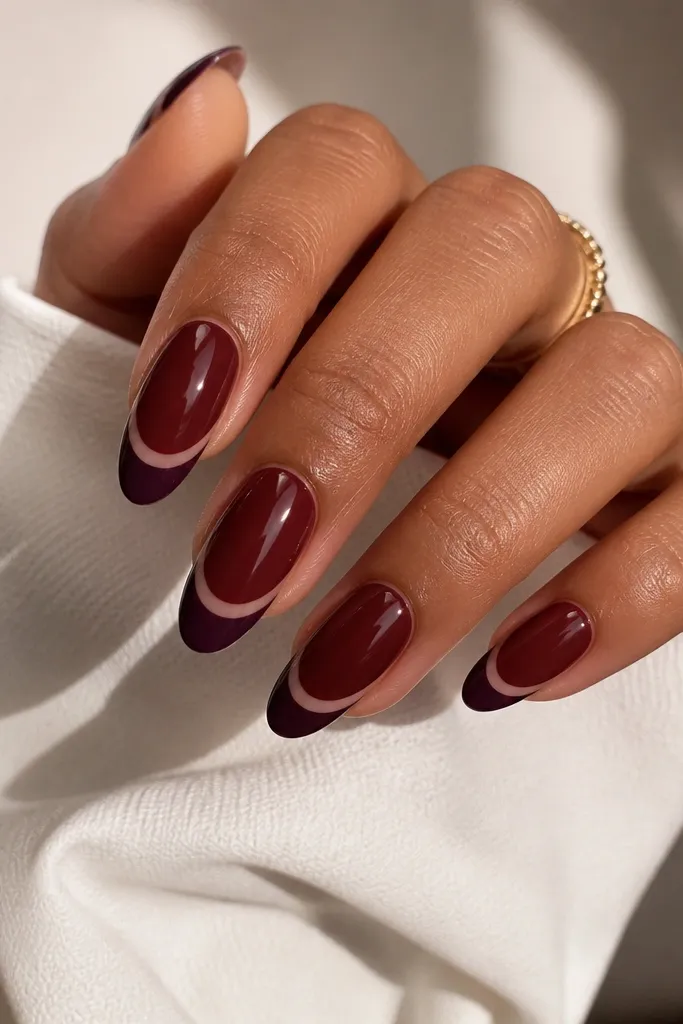
Negative space makes French tips look modern, and the half-moon spot gives your nail a custom, sculpted feel. The deep plum tip stays in the same family as cherry, so it looks intentional rather than mismatched. This is flattering for hands with slightly wider nail plates because the negative space visually narrows the tip area. It also photographs well because the contrast creates a clear shape.
Paint the full nail dark cherry and cure. Apply a thin layer of nude or clear where you want the negative space to show through at the smile line. Use a stencil or carefully place tape to create a half-moon cutout, then paint the plum tip around it. Remove the stencil while gel is still workable if your system allows, or after cure if using liquid latex, then top coat glossy and smooth the edges.
Editor's noteKeep the half-moon small — about the width of a pencil eraser on the nail — so it looks chic, not like a mistake.
Watch outDon’t make the negative space too wide — it breaks the French tip illusion.
20. Dark Cherry French Tip with Clear Jelly Base and Dark Cherry Tip Edge
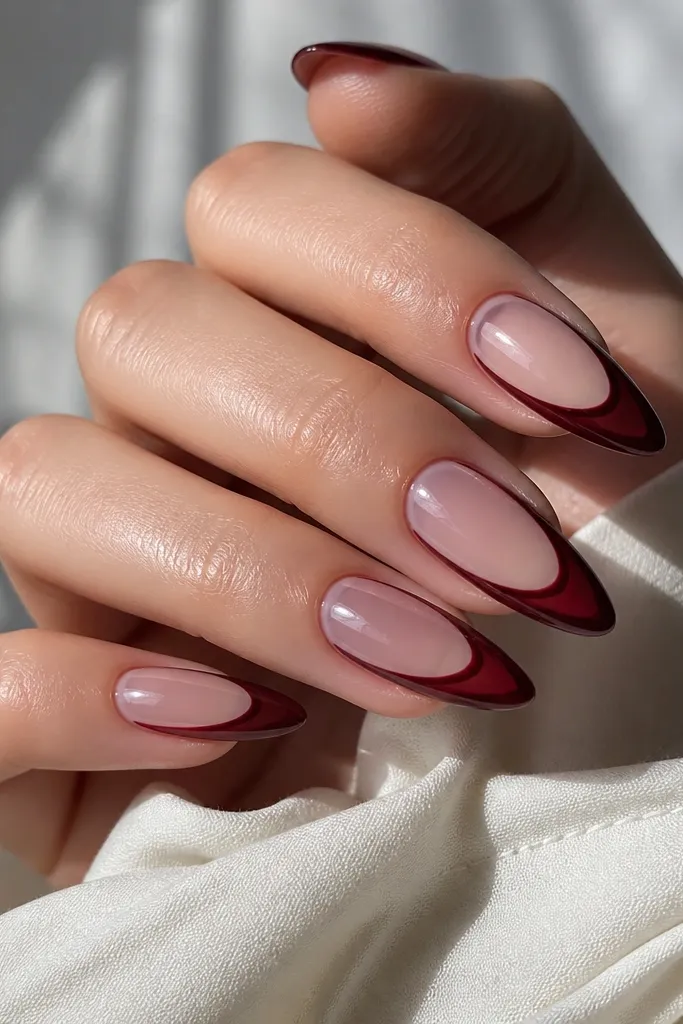
Clear jelly bases make dark cherry tips look like they’re floating, which feels fresh and a little daring. This style flatters hands with uneven nail beds because the jelly look blends imperfections and still reads clean. I like it for people who like a lighter, airy manicure but still want the drama of cherry. The key is keeping the cherry only on the tip edge so the jelly center stays transparent and glossy.
Use a clear jelly builder or clear gel as your base and cure. Then paint dark cherry only on the free edge, shaping it into a French tip that’s about 1.5 to 2 mm thick. Blend the cherry edge into the clear jelly with a thin brush so the transition stays smooth. Finally, cap the free edge with clear gel and add glossy top coat for a glassy finish.
Editor's noteIf your jelly looks cloudy, your base layer is too thick — apply thinner layers and cure longer.
Watch outAvoid painting the jelly base opaque — it kills the floating effect.