
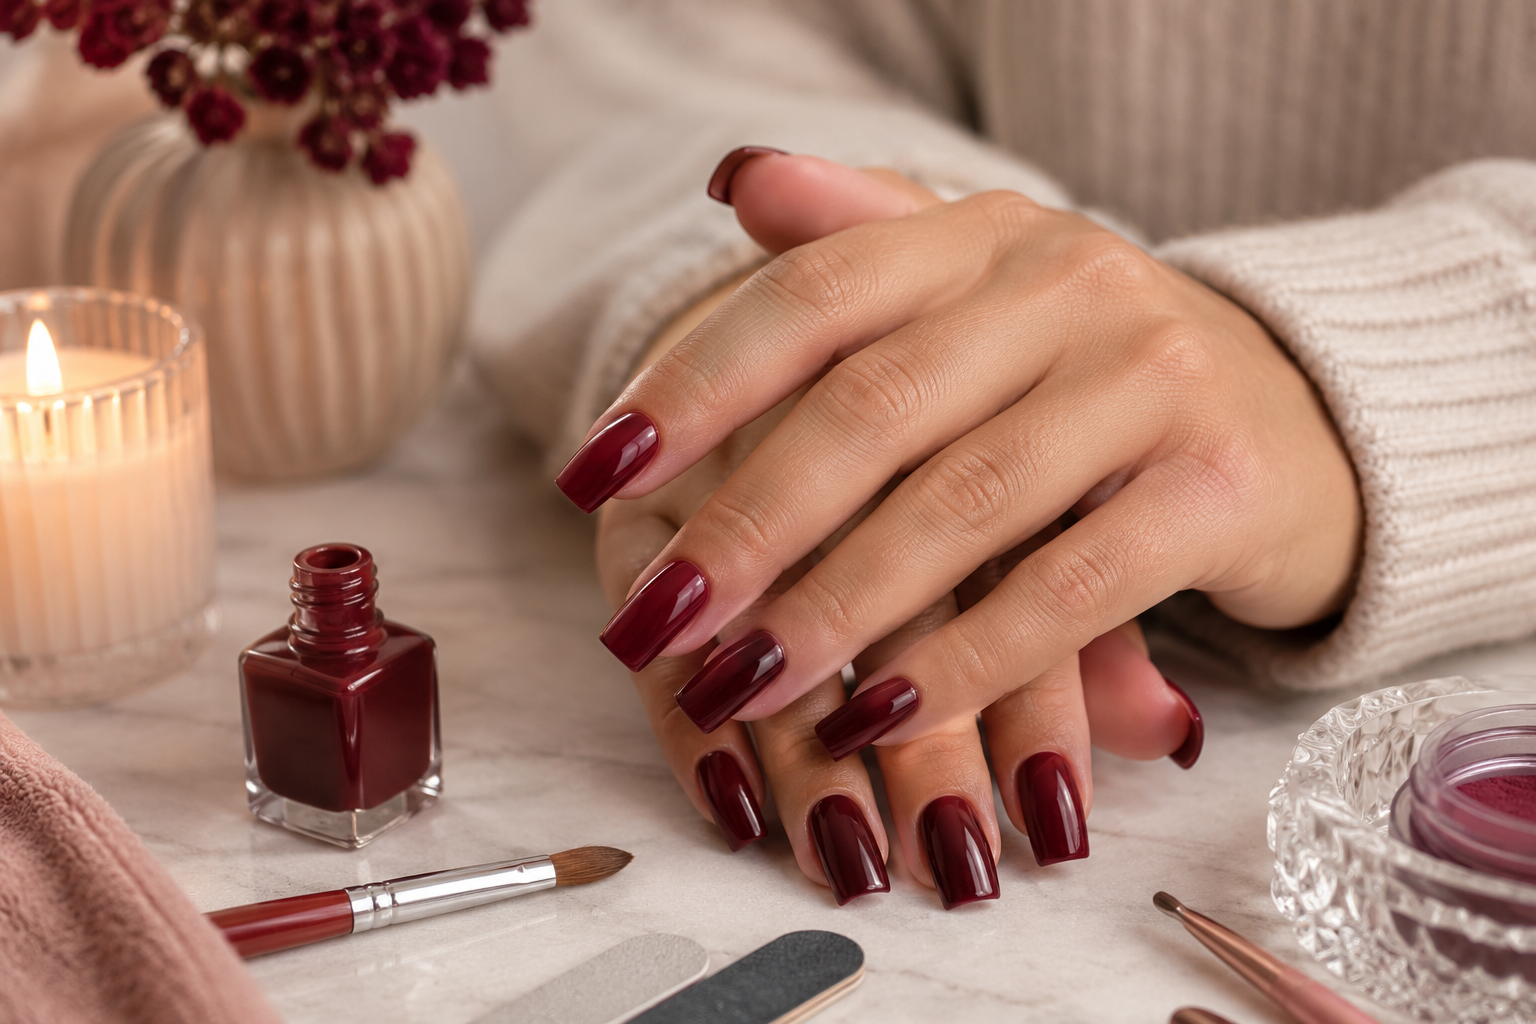
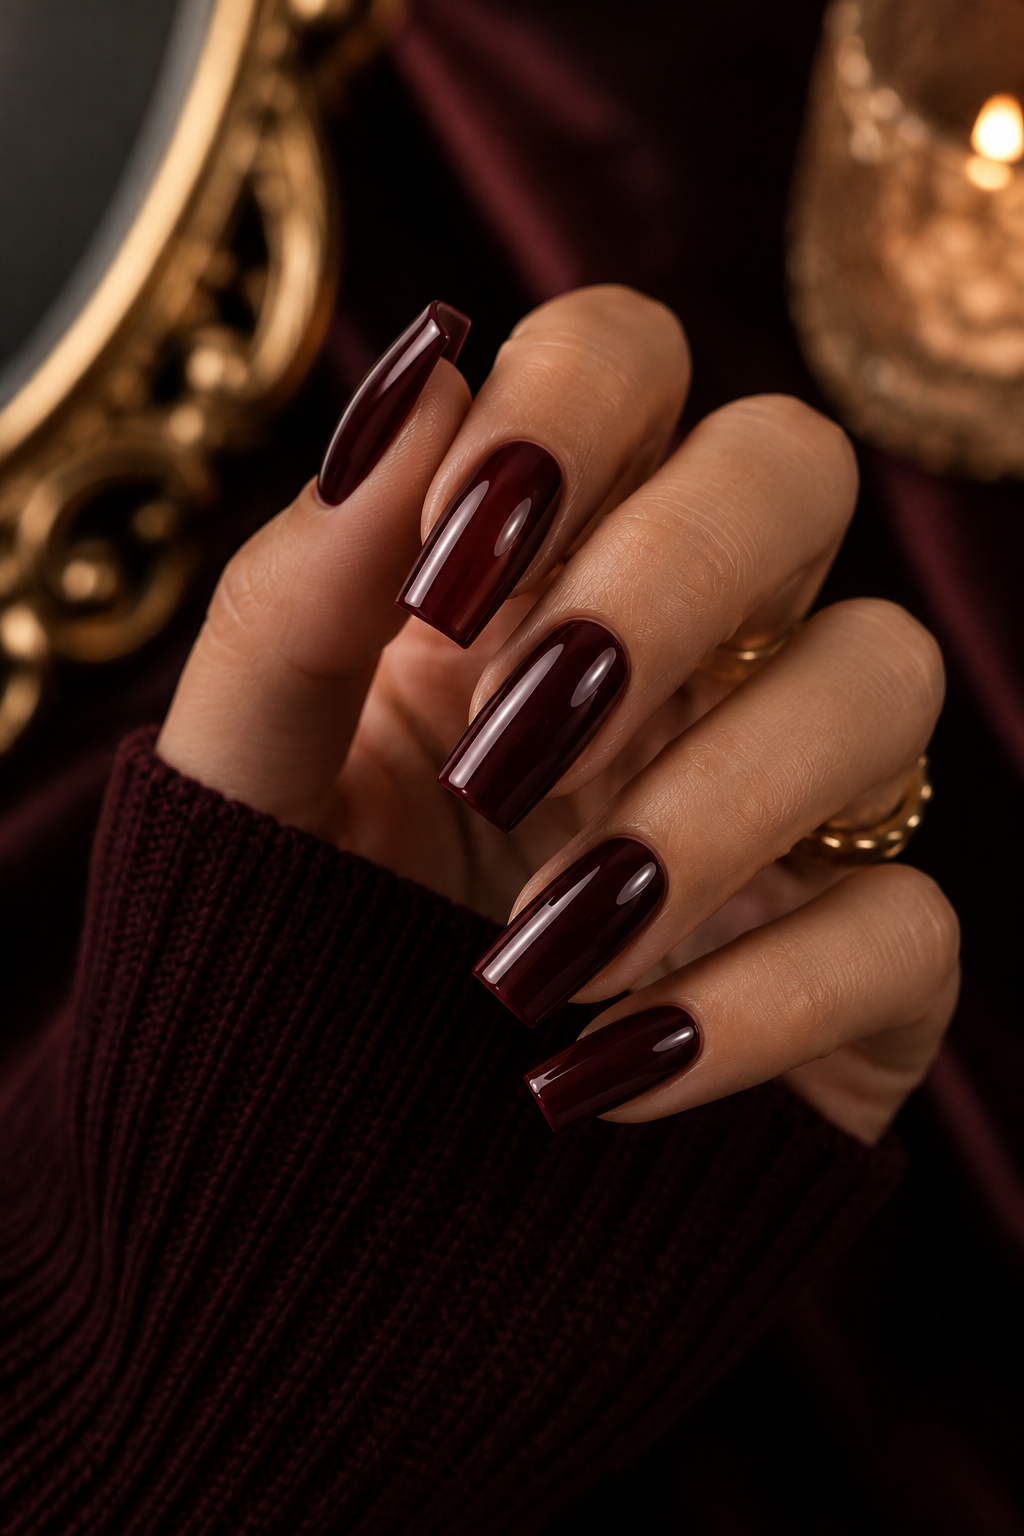
1. Classic Cherry Coffin With Micro-Gloss Seal
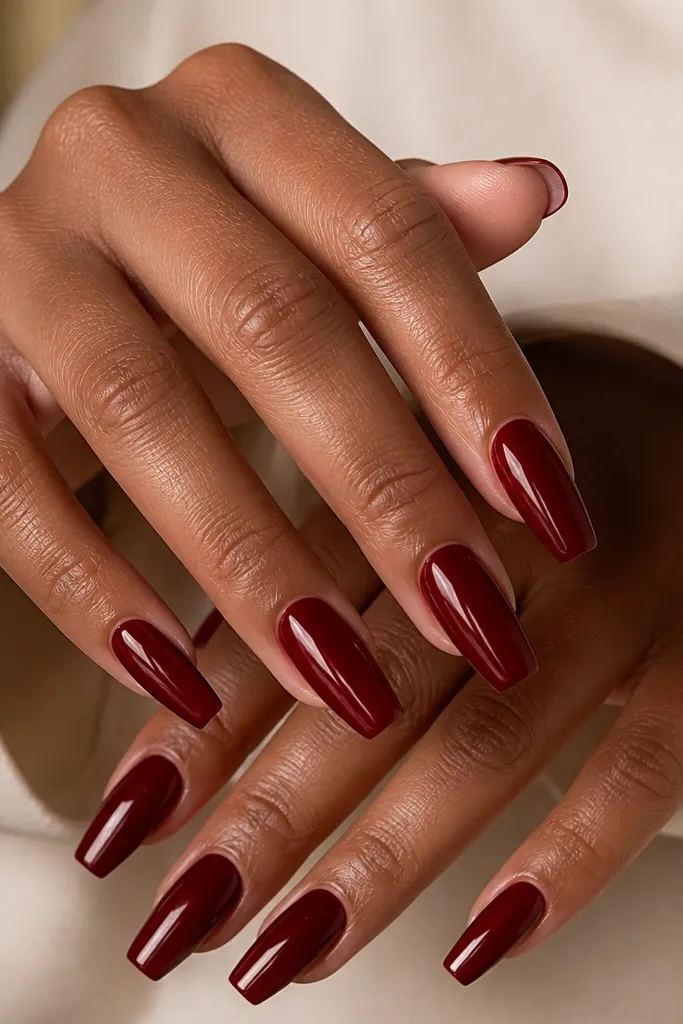
This is the version of dark cherry red that looks expensive because the shape stays crisp and the color stays uniform. I do this on medium-length nails because coffin tips hold the taper well — the red looks smooth instead of pooling at the center. It flatters hands with longer fingers since the tapered tip makes them look even sleeker. If your skin tone runs warm, the cool cherry base still reads rich without turning orange. For everyday wear, the glossy finish makes the red look like lacquer even though it’s acrylic.
Start by filing your acrylic form or natural nail into a coffin shape with a gentle taper from sidewall to tip. Keep the free edge about 2-3 mm longer than you think you want, then refine the taper so the tip is squared but not sharp. After sculpting, buff only the surface texture lightly so the top coat can grip without dulling the color. Clean the dust, then apply a medium-thick top coat in one direction per nail to prevent bubbles. Cure fully and wipe with your recommended cleanser if your top coat leaves residue.
Use a slightly thicker top coat than you think for cherry red — it levels the surface and makes the color look like it’s under glass.
Don’t over-file near the cuticle — that’s where dark red turns patchy and thin.
2. Short Squoval Dark Cherry With Center Apex
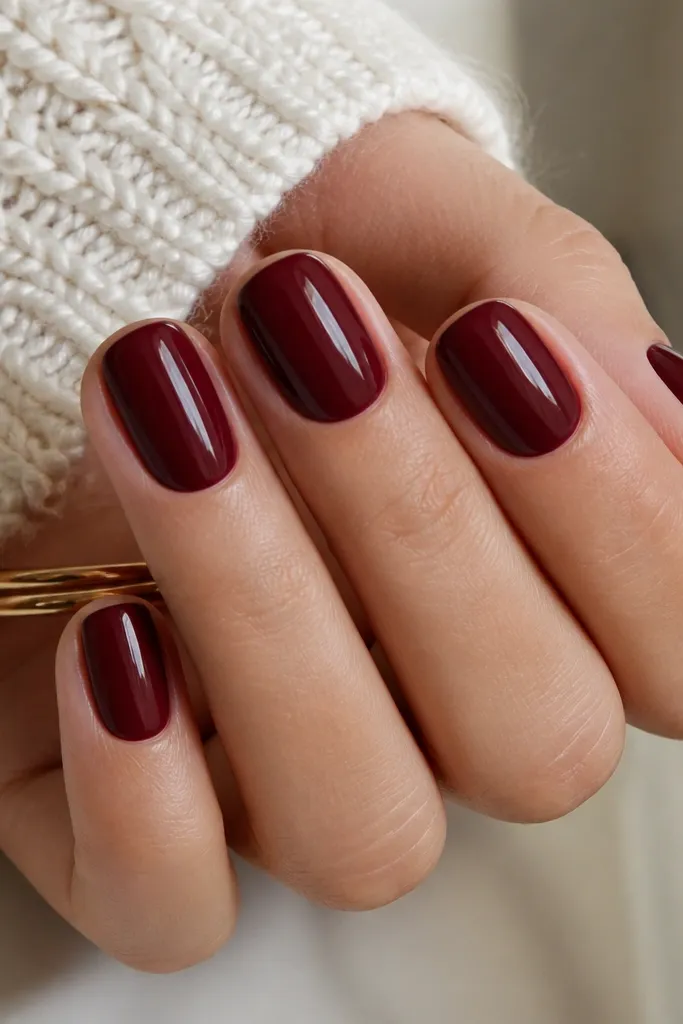
Short squoval is the easiest way to wear dark cherry red without it looking heavy. The rounded corners keep the shade from looking harsh, especially if your hands are a bit fuller or your cuticles grow quickly. I like this on fair to medium skin because the contrast stays flattering and clean. Dark cherry also hides minor nail ridges better on short lengths since there’s less area to show unevenness. The centered apex is what keeps it looking professional instead of flat.
Start by trimming your nails to an even short length and lightly matte the surface. Place a single acrylic bead centered, then press it down toward the middle so it builds an apex without spreading to the sidewalls. Use a damp brush tip to smooth the bead edges, keeping the cuticle gap tight but not touching skin. File the shape into squoval: rounded corners first, then a gentle flat tip. Finish with a fine buff, dust off thoroughly, then seal with two thin top coat layers for a super smooth look.
Aim for a cuticle clearance you can see with your eyes — about a hairline gap — so it grows out clean.
Avoid making the nail too pointy — dark cherry gets “sharp” fast and looks less polished on short lengths.
3. Dark Cherry Red With Velvet Matte Cuticle Fade
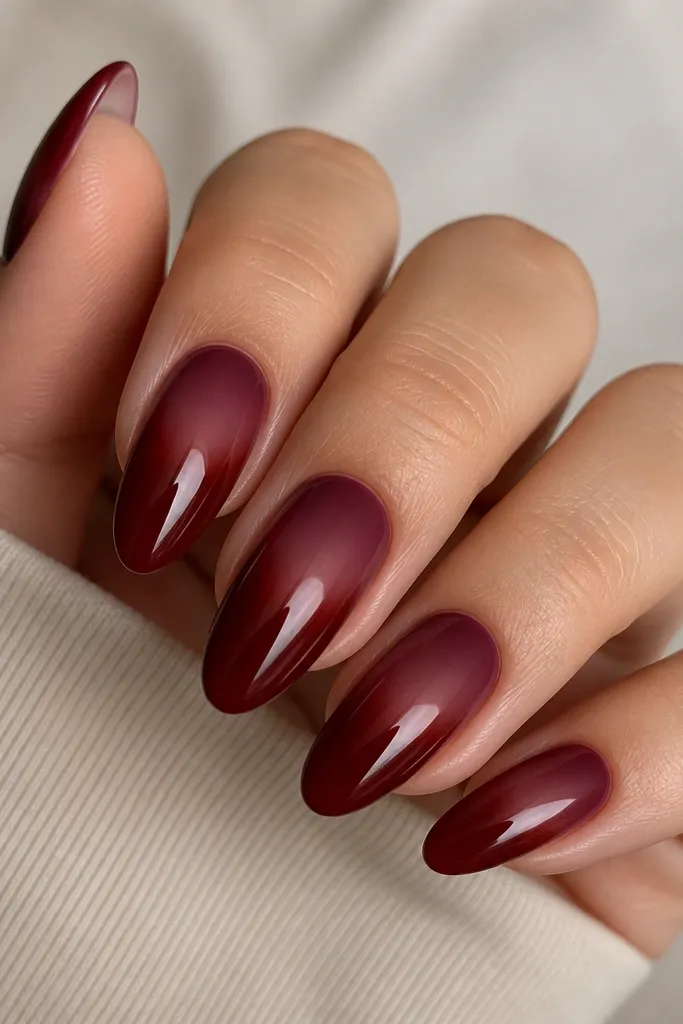
This look gives you that salon contrast where the red feels deeper near the cuticle. The matte fade makes the nail bed area look fuller and smoother, which is great if your cuticles are dry or your nail plate shows texture. Almond shape keeps the fade elegant instead of patchy. I wear this on days I want drama without a mirror shine, and it photographs beautifully because the matte catches light differently. The cherry stays rich because the matte is only applied in a controlled band.
Editor's noteDo a test nail first if you’re new to matte fades — the cuticle band is where most people go too wide.
Build your acrylic in full gloss red first, then shape into a medium almond. After sculpting and filing, wipe with cleanser and apply a normal top coat only on the lower half of the nail so the upper band stays matte-ready. Buff the top band lightly to roughen it, then apply a matte top coat starting at the cuticle and stopping around the middle. Use a small brush for the fade line so it stays soft, not striped. Cure and avoid touching the matte area until it fully cools.
Watch outDon’t matte the entire nail — full matte cherry red can look flat and almost brown under indoor lighting.
4. Cherry Red Marble Vein Over Clear Base
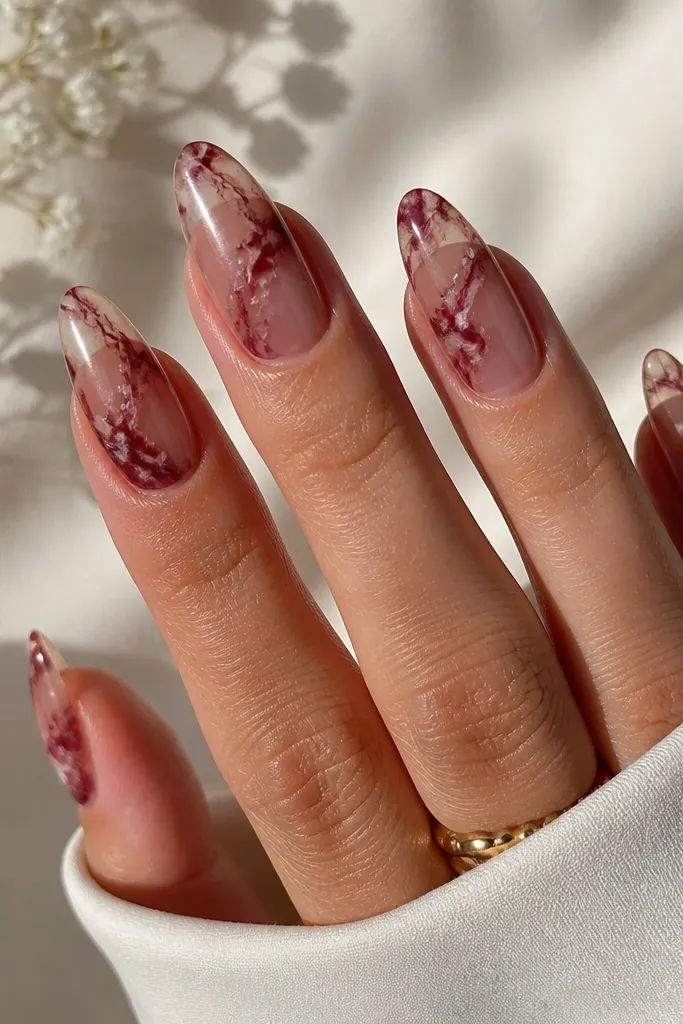
Marble veining makes dark cherry red look custom instead of one-note. I like using a clearer base under the red because it gives the veins depth — the color looks like it’s suspended, not painted on top. This works especially well on medium almond nails where there’s enough surface for the movement of the marble. If you have medium to deep skin tones, this stays striking without washing out. The key is keeping the veins thin and uneven, like stone, not like marker lines.
Start with a clear acrylic base or a very sheer pink-clear overlay, then build a thin layer of dark cherry red only in the areas you want veins. Use the acrylic brush to drag the red into wispy lines while it’s still workable. Add a tiny touch of white or pale pink acrylic powder to one or two veins to create the stone highlight. Seal with a thin clear layer if the veins feel too raised, then buff smooth. Finish with glossy top coat in two passes, one from cuticle to tip and one from sidewall to sidewall.
Keep your veins off the centerline — placing them slightly off-center makes the marble look more natural.
Don’t make thick marble patches — thick chunks of dark red turn into blobs that look heavy.
5. Dark Cherry Red French Tip With Thin Black Outline
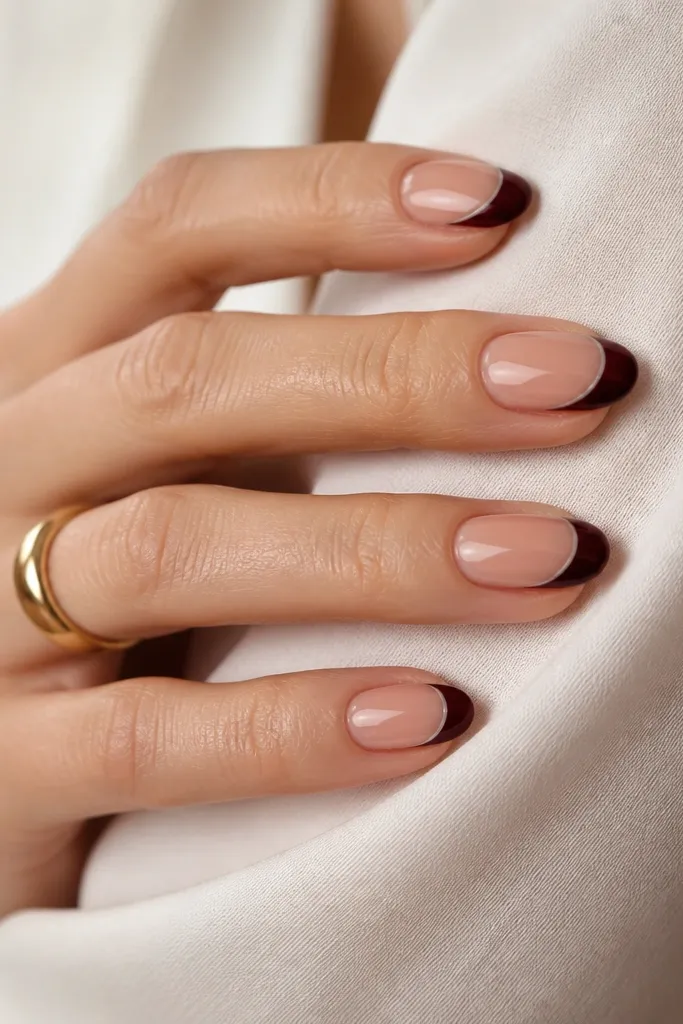
A French tip with a thin black outline makes dark cherry red look sharp instead of flat. The black line creates separation, so the red reads cleaner even if your base is a sheer nude. I do this when I want the nails to look styled but still wearable for work. It flatters hands with shorter nail beds because the outline makes the tip look longer. If you like bold colors but hate messy edges, this is one of the most forgiving designs because the line hides tiny irregularities.
Start by applying a sheer nude base acrylic or overlay and shape into short almond. Use a striping brush to paint or place dark cherry red only on the tips, keeping the smile line slightly higher at the corners. Cure fully if you’re using gel; if you’re using acrylic, sculpt the tips and let them set before filing. With a liner brush, draw a thin black outline along the border between nude and cherry. Top coat everything, then cap the free edge with a slightly thicker bead of top coat so the outline stays crisp.
Use a liner brush that’s already slightly worn — it deposits less paint and gives a more even black line.
Don’t skip the line if your French smile is uneven — cherry red alone will show every wobble.
6. Cherry Red Ombre That Stays Dark at the Tips
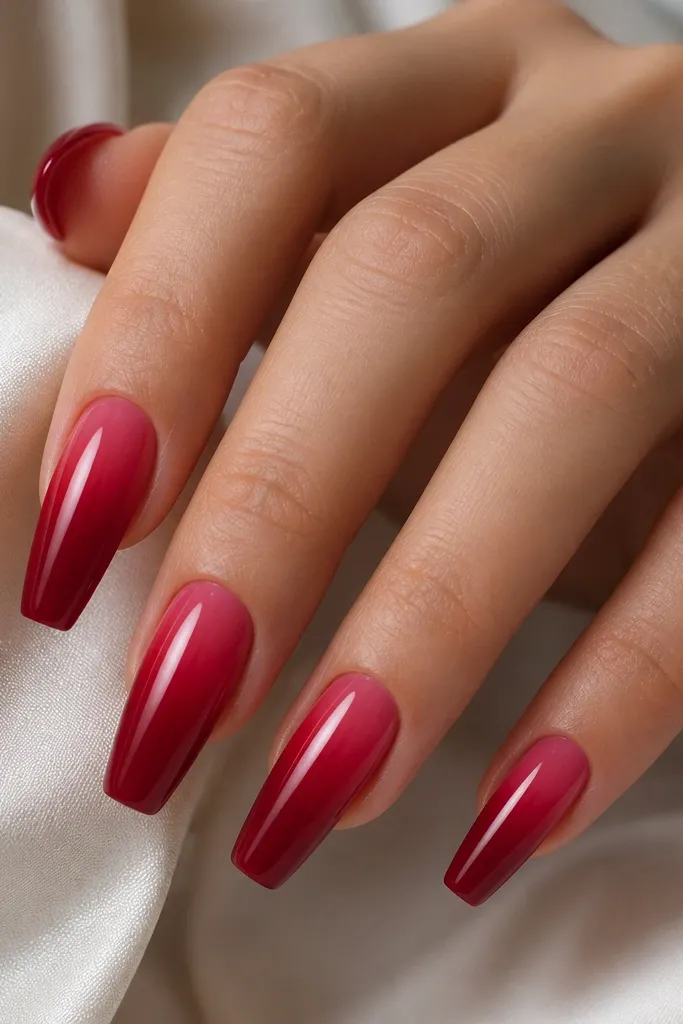
Ombre looks hardest in photos, but it’s actually one of the prettiest ways to wear dark cherry red at home. Keeping the tips darkest is what makes it flattering — it visually lengthens and avoids a “muddy” center. I like this on medium coffin or medium almond because the surface gives room for the blend to look smooth. This shade works on fair, olive, and deep skin tones because the gradient stays in the same family. The trick is to blend acrylic edges while the powder is workable, not after everything is fully hardened.
Start with a sheer nude base or very light pink overlay, then shape your nails first. For the ombre, place a light bead near the cuticle and a heavier bead at the tip, then pull the lighter product upward with the brush. Feather the blend edges slowly so you don’t create a ridge. Add a second thin layer at the tip if you need more depth, then blend again with a damp brush edge. File lightly to remove any texture, wipe dust, and seal with a glossy top coat that self-levels.
If you see a line after curing, buff it out early with a fine buffer before adding your final top coat.
Don’t overbuild the cuticle — too much dark product near the base makes the ombre look like a stain.
7. Dark Cherry Red Chrome Half-Moon Glow
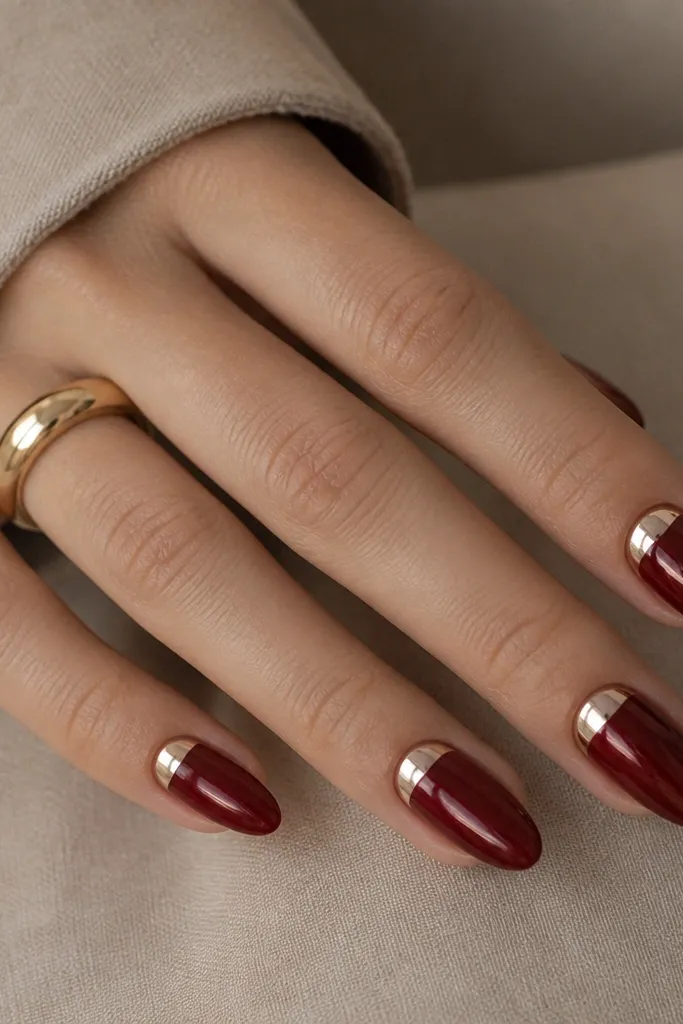
A chrome half-moon makes dark cherry red look like jewelry. The contrast between deep matte-ish cherry and reflective chrome draws attention to the nail bed and makes your fingers look longer. I do this on almond or squoval because the crescent shape looks clean on curved edges. It’s flattering for hands that need a little brightness near the cuticle, especially if your natural nail has a pale or uneven base tone. The chrome is the “wow,” while the cherry keeps it grounded and not too flashy.
Start with a full coverage dark cherry red acrylic layer and cure/set it fully. Shape into almond, then lightly buff the cuticle band where the chrome will go. Apply a thin layer of tacky gel or chrome base product in a half-moon at the cuticle — keep it symmetrical and leave a hairline gap from skin. Press chrome powder or chrome flakes onto the tacky area and brush off excess. Seal with top coat carefully — use thin coats so you don’t dull the chrome.
Cap the edges of the half-moon with top coat only along the border, not over the center, so the chrome stays reflective.
Don’t rub the chrome hard — it smears and turns patchy fast on dark bases.
8. Cherry Red Sparkle Dust Gradient
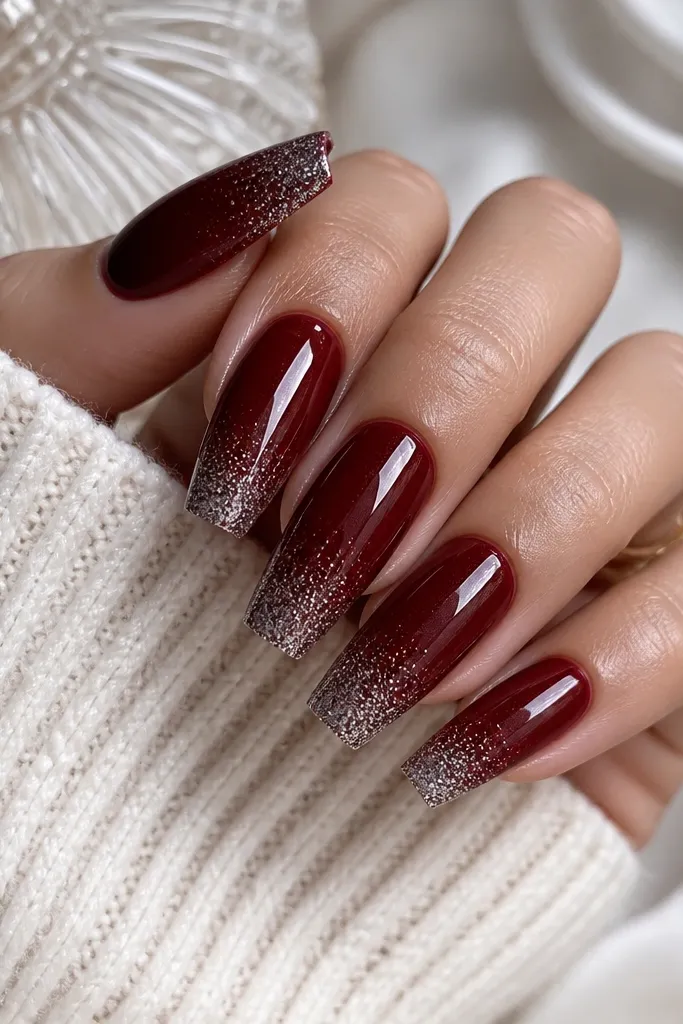
This is the “night out” version that still feels classy. The key is concentration: keep the most sparkle near the tip so the nail looks longer and the center stays smooth. I like silver micro-glitter on dark cherry because it doesn’t compete with the red; it just adds light. This looks great on medium to long coffin nails, especially if you want a party look that isn’t full rhinestones. It also hides tiny surface imperfections because glitter breaks up the light.
Editor's noteUse a small fan brush to sweep extra glitter off the cuticle and sidewalls before sealing.
Build your acrylic in dark cherry red first, then shape into coffin. Before top coat, apply a thin clear or very sheer layer at the lower half of the nail. Sprinkle fine silver glitter dust into that area and press it gently so it bonds without clumps. Blend upward by using less glitter as you move toward the middle, then cap with a clear acrylic layer or gel to smooth. File only the surface lightly, then top coat for a glass finish.
Watch outDon’t pack glitter all the way to the cuticle — it makes the nail look overgrown.
9. Dark Cherry Red All-Over Gloss With Clear Cuticle Cap
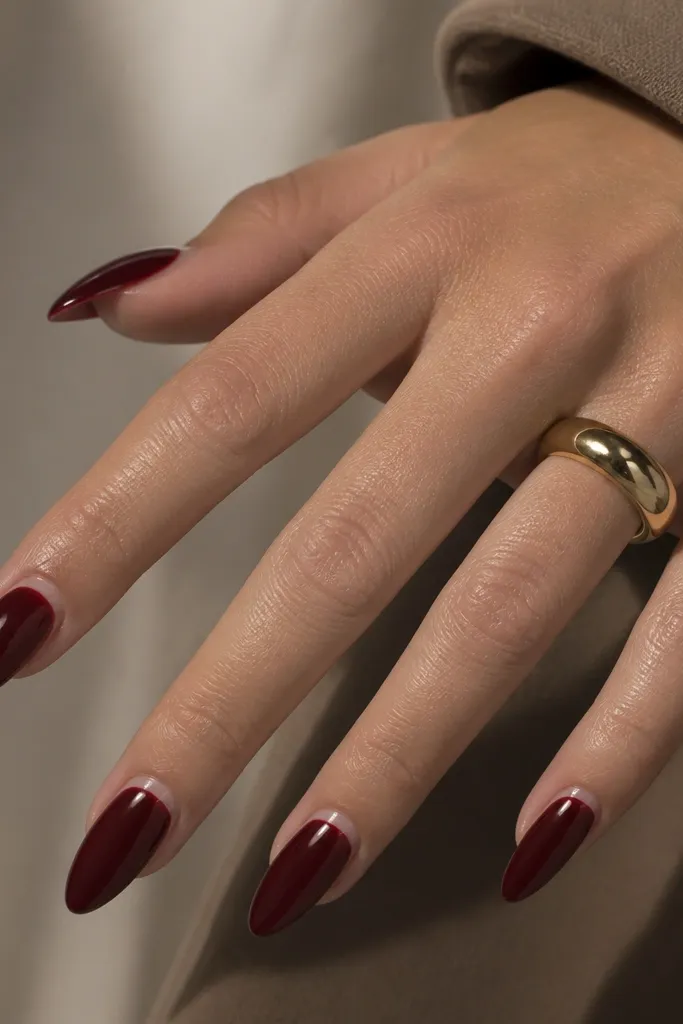
This look is for when you want dark cherry red to look extra smooth and expensive. The clear cuticle cap creates a clean boundary line so the red doesn’t flood toward skin — it also makes your cuticle area look neater as the nails grow. I like it on long almond nails because the clear halo draws the eye upward. On fair skin, it looks bright and polished; on deeper skin, it looks crisp and high contrast. The effect is basically a professional “inside-out polish” look without complicated art.
Editor's noteIf the clear cap looks too thick, file from the sidewalls inward — it keeps the center smooth.
Start with a clear acrylic base or clear overlay on the natural nail to protect and level the surface. Sculpt dark cherry red over the middle and lower nail, keeping it slightly away from the cuticle. After curing, apply a thin clear acrylic bead or clear gel right at the cuticle halo, then cap over the boundary so it’s smooth. File to even out the transition and remove any texture from the clear cap. Finish with two thin top coat layers, first to seal, second to increase gloss depth.
Watch outDon’t let the cherry red touch skin — even a tiny smear looks messy with this shade.
10. Black Cherry Red Duo Chrome Accent Nail
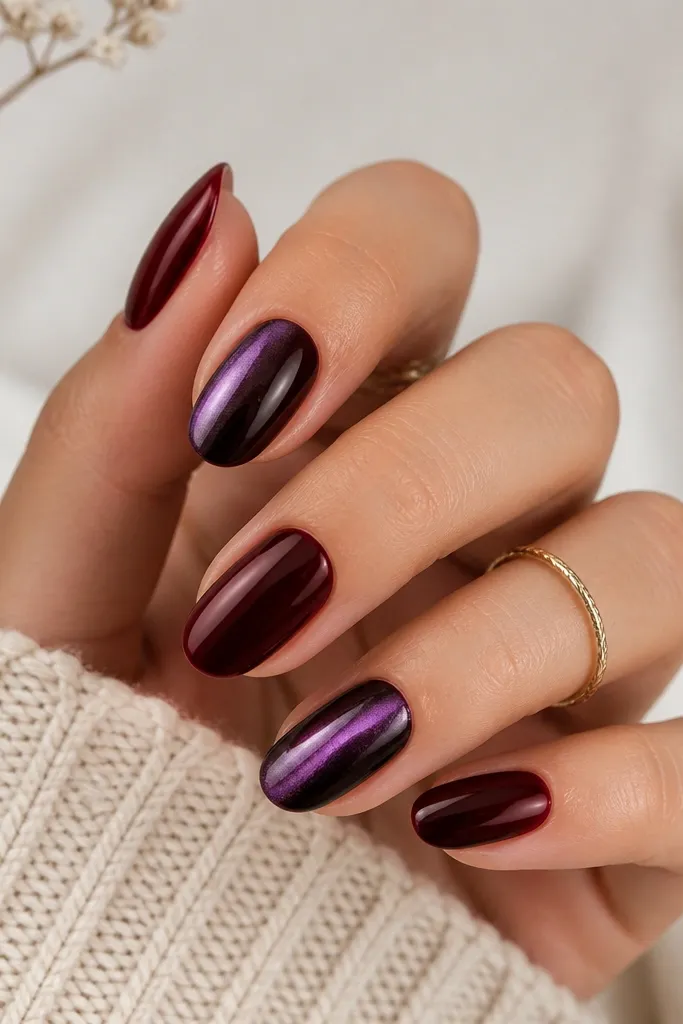
Using a duo chrome accent with dark cherry red keeps the set from looking like plain solid color. I do this when I want the red to look dimensional in photos without committing to full glitter on every nail. The purple-to-black shift plays nicely with cherry because it deepens the red under shadow and turns it more dramatic under direct light. This is flattering for any skin tone because the accent adds depth rather than lightness. Place the accent on the ring finger or index finger for the most balanced look.
Editor's notePick the duo chrome shade that looks purple indoors — it will read more “cherry” instead of “black” outdoors.
Paint or sculpt dark cherry red on all nails first and file into your preferred shape. On the accent nail, apply a thin base layer and then use duo chrome powder or gel that shifts from purple to black. Build the duo chrome in thin layers so you avoid patchy shimmer — press and buff lightly between layers if your product needs it. Seal everything with a glossy top coat, but keep the accent slightly thicker so the shift is visible. Clean up sidewalls after curing so the shimmer stays sharp.
Watch outDon’t mix duo chrome into the cherry base — it muddies the red and kills the shift.
11. Dark Cherry Red With 3D Bow Charm On One Nail
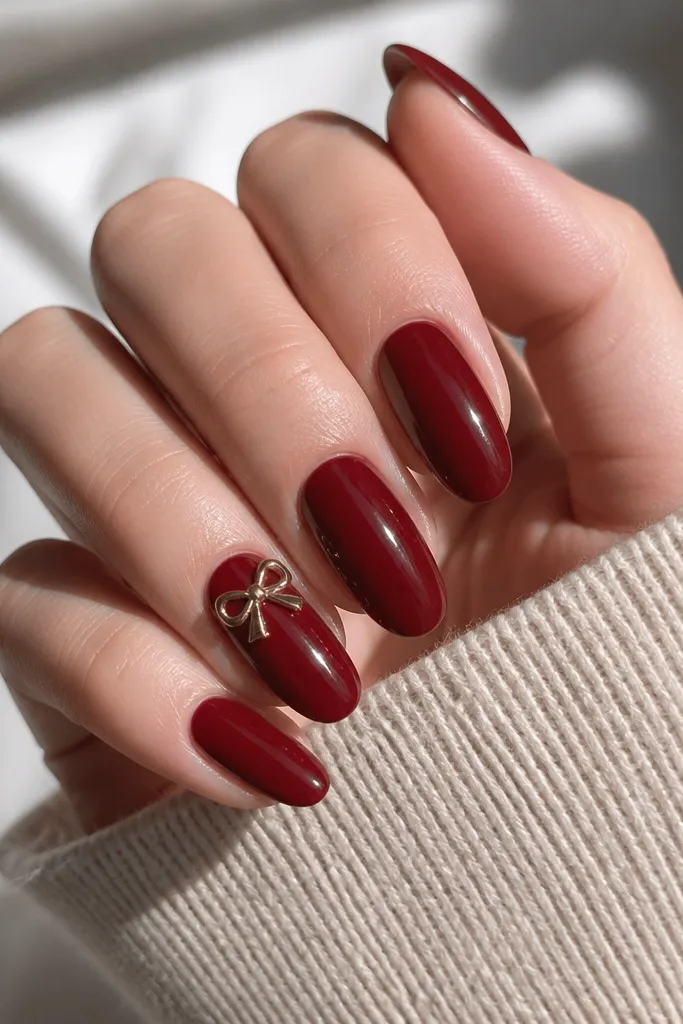
One tiny 3D bow charm makes dark cherry red feel sweet instead of goth. I like it when I want a cute contrast to deep color, especially for birthdays, date night, or holiday dinners. The charm placement matters: near the cuticle looks intentional and elongating, while on the tip can look like it’s floating. This works on almond and squoval shapes because they frame the charm nicely. The glossy cherry base makes the charm pop without needing rhinestones everywhere.
Start with solid dark cherry red acrylic on all nails and cure/set fully. Shape into almond or squoval and buff the surface lightly where the charm will sit. Apply a small dot of gel or acrylic glue where the charm base will land, then press the bow charm into place. Add a thin layer of top coat or clear gel over the charm base only, leaving the bow’s details visible. Cure and then file gently around the charm edges so it doesn’t snag on hair or clothing.
Seal the charm with a clear cap that’s thicker on the sides than the center — it grips without flattening the bow.
Don’t put the charm on a bumpy nail surface — it lifts and looks crooked fast.
12. Cherry Red Micro Rhinestone Line At Sidewall
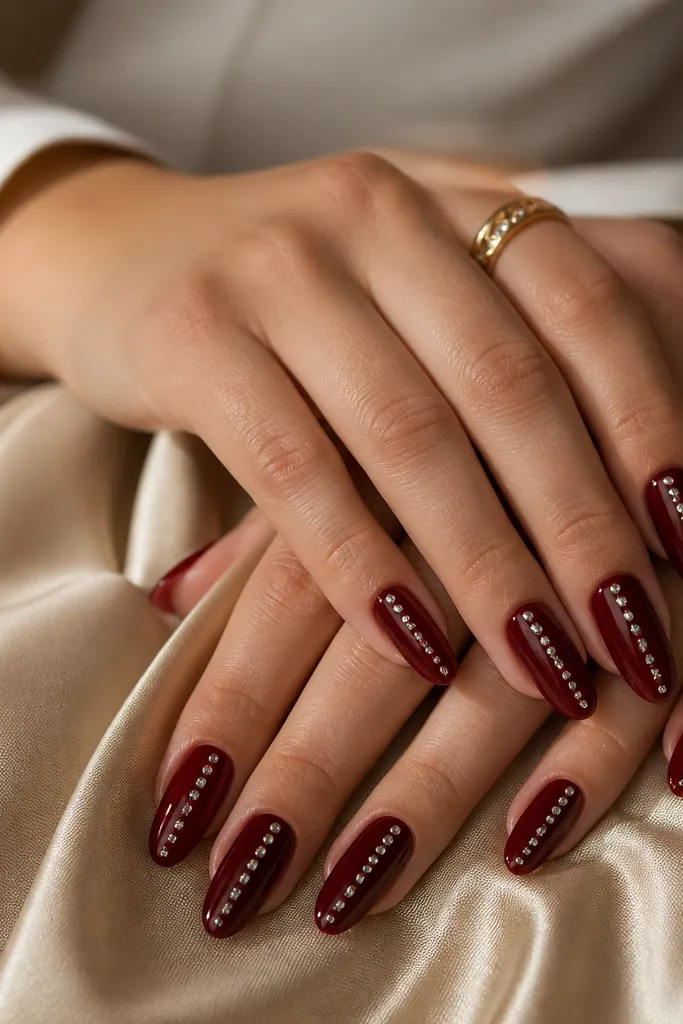
A micro rhinestone side line makes dark cherry red look like a manicure with a plan. It’s subtle from a distance, then sparkly up close when you move your hands. I like it on medium almond or medium coffin because the sidewall line follows the natural curve and looks clean. This is flattering on shorter nails too — the stones create a vertical illusion without adding length. The key is spacing: even gaps make it look like jewelry, tight clumps look messy.
Sculpt and cure your dark cherry red nails first, then file into a smooth almond curve. Apply a thin strip of tacky gel or nail glue along one sidewall where the rhinestones will go, leaving a gap from the side edge so it doesn’t flood. Place micro rhinestones one by one with tweezers, spacing them evenly from near the cuticle to near the middle. Cure, then cap over the stones with a clear gel layer so they don’t snag. Finish with glossy top coat and wipe clean so the sparkle stays crisp.
Use a toothpick to nudge stones into alignment before curing — it’s easier than tweezers for tiny corrections.
Don’t drag glue into the cuticle area — it creates a cloudy line under dark red.
13. Dark Cherry Red Negative Space Half Moon
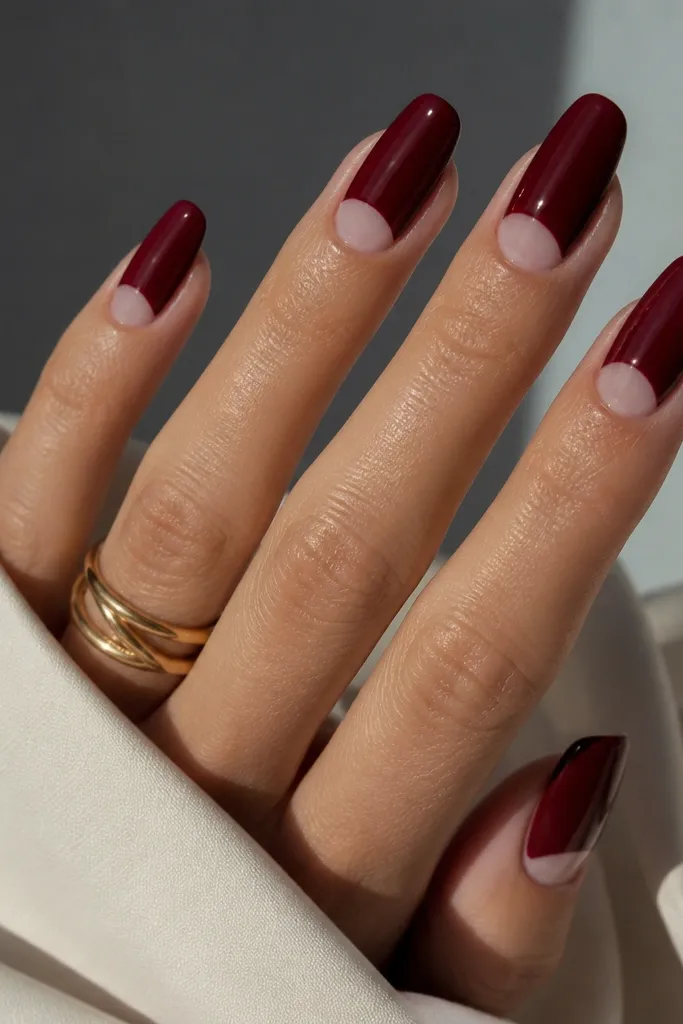
Negative space half moons make dark cherry red feel lighter and more modern. The bare crescent near the cuticle draws attention to your nail shape and keeps the color from looking too heavy. I do this on almond and squoval because the crescent line looks tidy on curved nails. This is flattering if you have short nail beds — it visually extends the nail by leaving space at the top. The effect is also forgiving on grow-out because the crescent still looks intentional.
Editor's noteIf you use petroleum jelly, apply a super thin layer — thick jelly causes messy edges and smears.
Start with a base and shape your nails first. Place a thin strip of petroleum jelly or a half-moon stencil barrier at the cuticle so acrylic doesn’t cover that crescent area. Sculpt dark cherry red over the nail body while avoiding the barrier edge — keep the top edge clean. After curing, remove the barrier and clean up the crescent edge with a fine buffer. Seal with glossy top coat, but avoid flooding into the negative space so the crescent stays crisp.
Watch outDon’t leave the negative space too wide — dark cherry red needs a tight crescent to look intentional.
14. Dark Cherry Red With Matte Top Over Gloss Accent Stripe
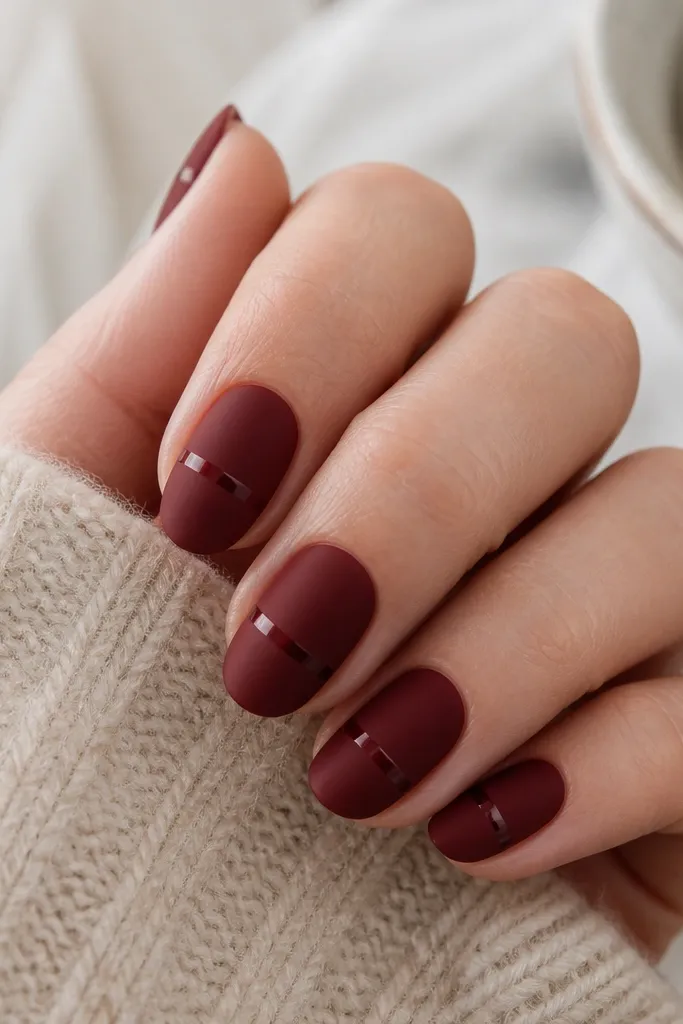
This design is a simple way to make dark cherry red look styled without hand-painting lots of details. The matte top coat makes the cherry read deeper and more velvety, while the glossy stripe gives you a clean highlight that feels graphic. I like this on short almond because the stripe makes the nail look longer and more structured. It’s flattering on hands that show dryness since matte hides tiny surface texture better than full gloss. The stripe also helps if your application is slightly uneven — the gloss band draws attention away from micro-bumps.
Apply dark cherry red acrylic and shape into short almond. After filing, apply a matte top coat to the entire nail surface and cure. Once cured, use a thin striping brush to paint a narrow glossy gel line across the middle, keeping the stripe straight and consistent on each nail. Cure again, then wipe any tackiness. Finish with a second glossy top coat pass only over the stripe edges if needed for a smooth look.
Mark the stripe location with a tiny dot of gel first, then connect it with the brush for straight placement.
Don’t use a thick stripe — it turns into a ridge and catches on hair.
15. Dark Cherry Red Aura Glow Around Cuticle
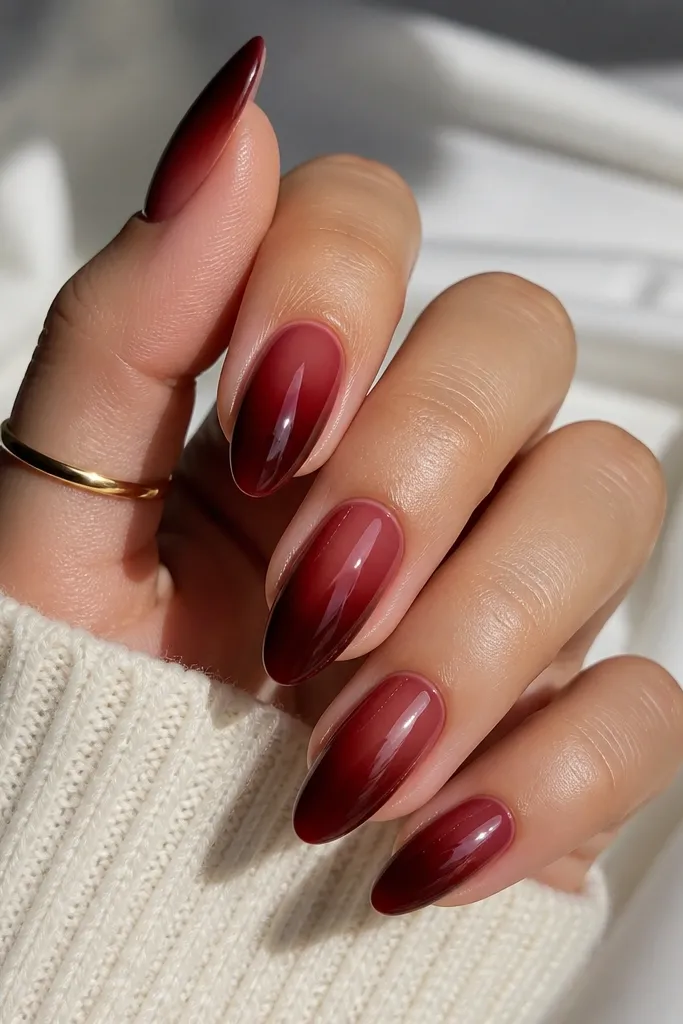
Aura nails make dark cherry red look softer and more airbrushed. The lighter center near the cuticle gives a glow effect that makes the nail bed look smoother and more lifted. I do this when I want a red manicure that’s still romantic instead of heavy. Almond shape looks best because the aura naturally follows the nail curve. This works well for fair, medium, and deep skin tones because the aura uses the same color family, just lighter at the center, so it never clashes.
Editor's noteIf you want a stronger glow, keep the aura circle smaller than you think — a tight center looks more “lit” than a wide one.
Start with a dark cherry red acrylic base, then add a lighter cherry or berry acrylic powder right around the cuticle center area. Use a damp brush to blend the lighter product outward in a soft circle — keep it airy so it doesn’t form a hard ring. Build the deepest red toward the tip by placing a slightly heavier bead there and smoothing it down. After curing, file lightly to keep the aura edge smooth and remove any texture. Seal with glossy top coat, focusing on two thin coats so the blend stays visible under shine.
Watch outDon’t blend too far down the sides — that turns the aura into an uneven blotch.



