
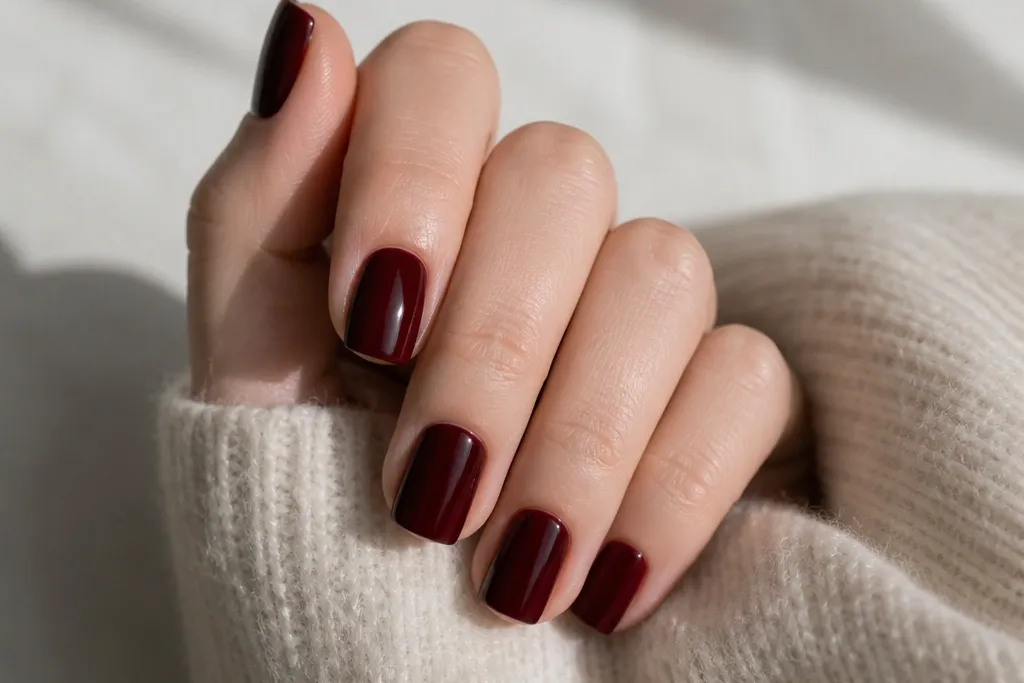
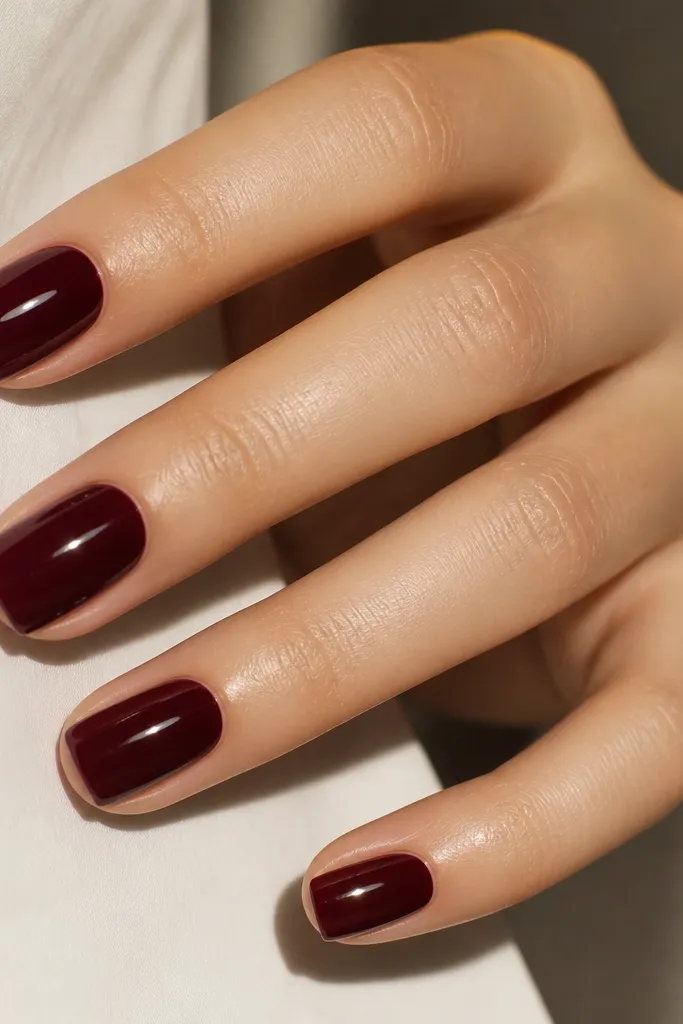
1. Classic Glossy Dark Cherry Square
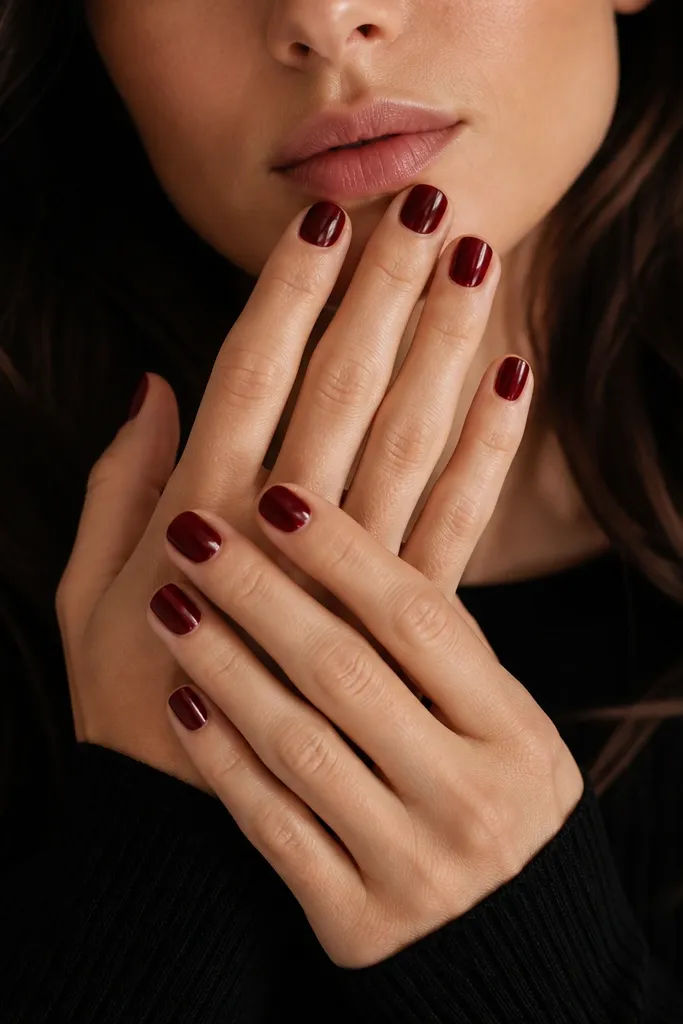
This is the one I reach for when I want the color to look expensive with zero art time. The shade reads like a deep wine — not bright red, not burgundy — and the glossy crème finish makes it look smooth and even. Square nails show off the straight edge, so the color appears more intentional than on rounded shapes. It flatters fair to deep skin tones because the red has a cool-to-neutral undertone that doesn’t go orange. For everyday wear, it also hides minor nail texture better than matte.
Editor's noteCap the free edge on every nail - run the top coat across the tip once, not just over the top surface.
Start by filing your nails into a square shape and lightly rounding the corners so they don’t catch. Apply a thin base coat, then two thin coats of dark cherry red, letting each coat dry fully so you don’t get ridges. Clean up the edges with a brush dipped in remover for crisp sides. Finish with two coats of gel-style top coat or a high-shine lacquer top coat, focusing on the free edge and corners so the square tips stay neat.
Watch outSkipping thin coats is the fastest way to get streaks and a bumpy cherry-red layer.
2. Micro French in Dark Cherry Square
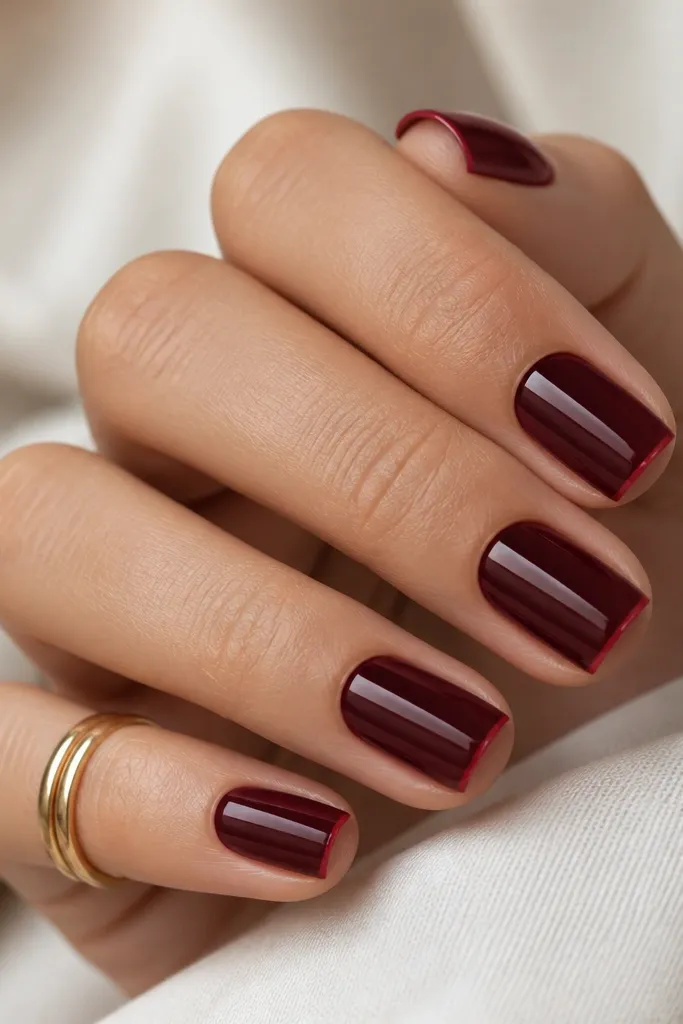
A micro French keeps the look modern because the accent is tiny and the red still does the heavy lifting. I use a slightly brighter cherry or a berry-red tone for the tip line so it reads as a highlight, not a second color fighting the base. Square nails make the French line look sharp, especially if the line is straight across. This suits short square nails because the design doesn’t overpower the nail bed. It’s also great for people who want nail art that looks “clean enough” for work.
Editor's noteUse striping tape for the first try. Freehand micro French looks great, but tape gets you straight lines fast.
Paint the nails with two coats of dark cherry red and let it cure/dry completely. Use striping tape or a thin French guide strip to mark a line about 1-2 mm from the tip — keep it consistent across all nails. Paint the tip line with a thinner brush and the lighter cherry color, then remove tape while the polish is still slightly tacky. Seal with a glossy top coat, and drag the top coat over the line so it feels smooth.
Watch outDon’t make the tip band too wide — thick French on short square nails can look like a harsh border.
3. Negative Space Half-Moon at Cuticle
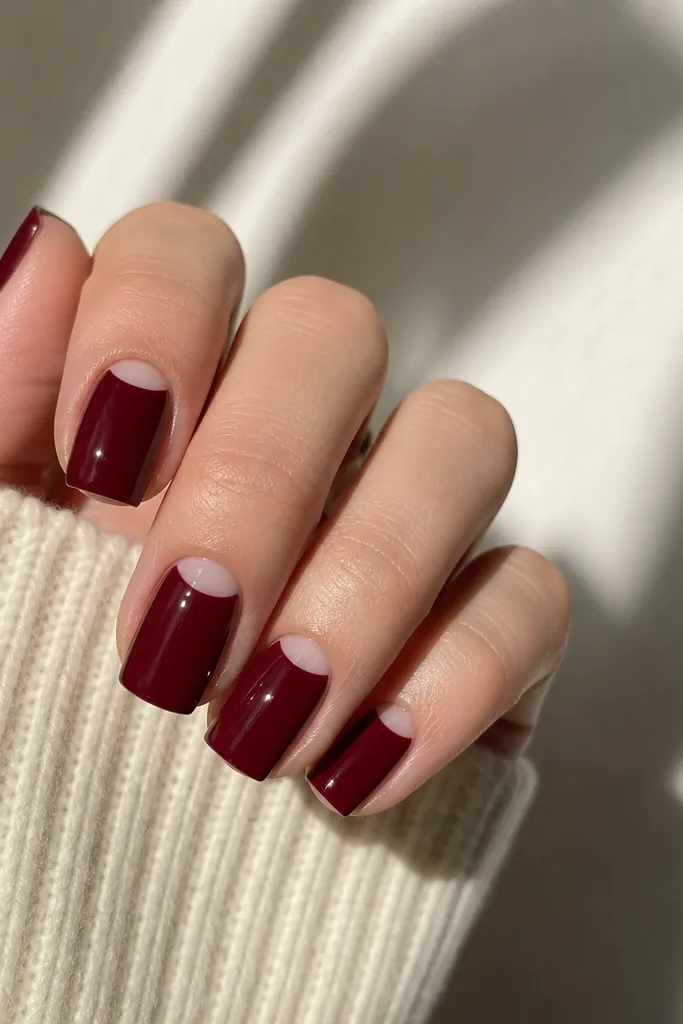
The half-moon negative space makes dark cherry red feel lighter and more graphic. It’s a simple placement trick: the red starts farther down, so your nail bed area looks longer. Square nails work well because the cuticle area is a strong shape and the half-moon aligns with it. This flatters hands with shorter nail beds because the gap draws the eye upward. It also looks sharp on both warm and cool skin tones since the negative space balances the deep color.
Editor's noteIf you don’t have stencils, use a bobby pin tip to mark the curve lightly before painting.
Start with a base coat and then apply dark cherry red in two coats, but leave the cuticle center unpainted using a small silicone half-moon stencil or a tiny piece of tape. Keep the unpainted area about 2-3 mm wide at the widest point. After the red is dry, fill the sides carefully with a thin brush so the red edges look crisp. Finish with top coat on the full nail, but avoid flooding into the half-moon gap.
Watch outDon’t wipe the gap with acetone. It can smear the red edge and leave a foggy border.
4. Cherry Red One-Stripe on Ring Finger
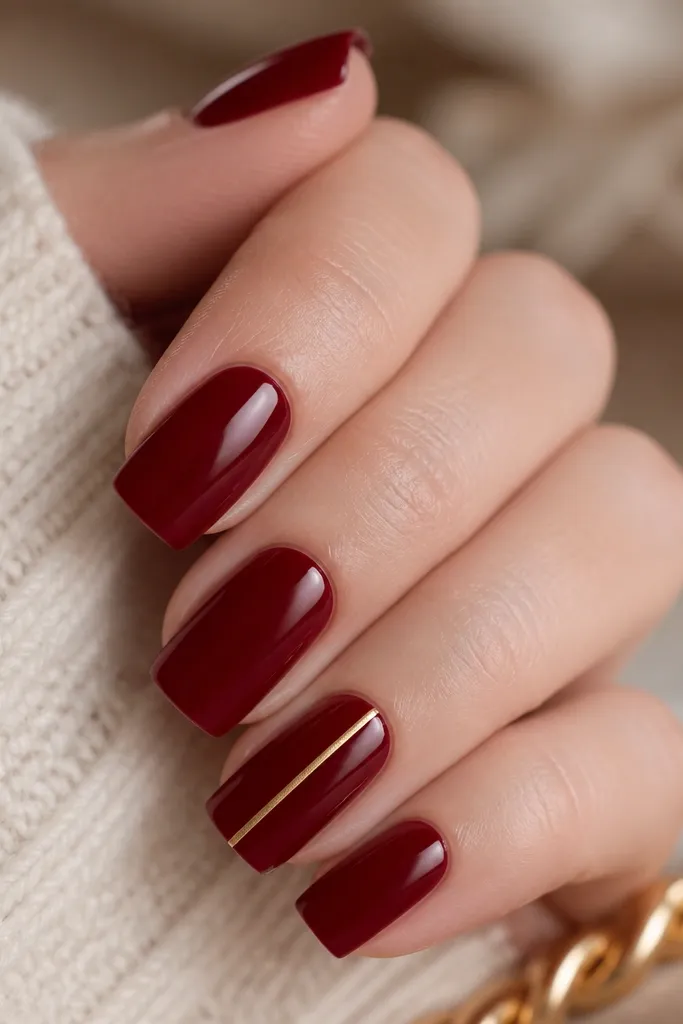
This design is my go-to when I want a little “wow” without adding a whole scene. One vertical stripe creates a lengthening effect on square nails because it pulls the eye from cuticle to tip. I use gold because it turns dark cherry red into something that looks like jewelry, not just polish. It flatters medium and deep skin tones especially well, but it also looks clean on fair skin. For events, you can dress it up with rings; for daily wear, it stays subtle.
Editor's noteUse a nail art brush with a short, flat tip. It makes the gold line straight instead of tapered.
Paint all nails with two coats of dark cherry red and seal with a quick top coat once dry. On the ring finger, place a thin striping brush or a striping tape line centered on the nail, leaving about 1 mm space from the cuticle and sides. Paint the stripe with gold polish or metallic gel, then remove tape immediately if you used it. Add top coat over the stripe and cap the tip.
Watch outDon’t place the stripe too close to the sidewalls. It can look crooked and make the nail look narrower.
5. Tiny White Dot Trail
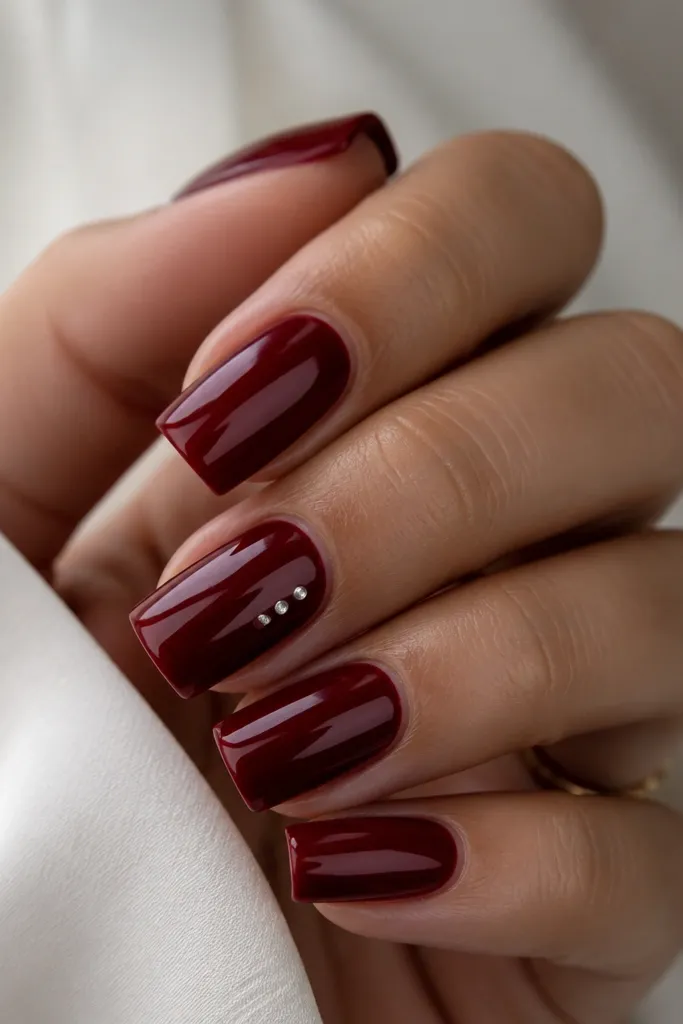
Tiny white dots make dark cherry red look playful while still classy. The key is scale: the dots should be pinhead-sized, not big circles. On square nails, the straight edges make the diagonal dot trail look intentional instead of random. This flatters hands because the dots add contrast without covering much surface. It works for casual days, but it also looks cute for birthdays and summer dinners.
Editor's noteWipe the dotting tool on a lint-free wipe between nails so the dots stay sharp.
After two coats of dark cherry red, let the base dry fully. Dip a dotting tool into white polish and test one dot on a paper first to confirm the size. Place three dots from about 3 mm above the free edge, moving diagonally toward the center — keep the spacing equal. Add a small dot at the base of the trail if you want extra balance, then seal with a glossy top coat.
Watch outDon’t drag the white polish. Touch and lift for clean circles.
6. Dark Cherry Red Velvet Matte with Glossy Accent
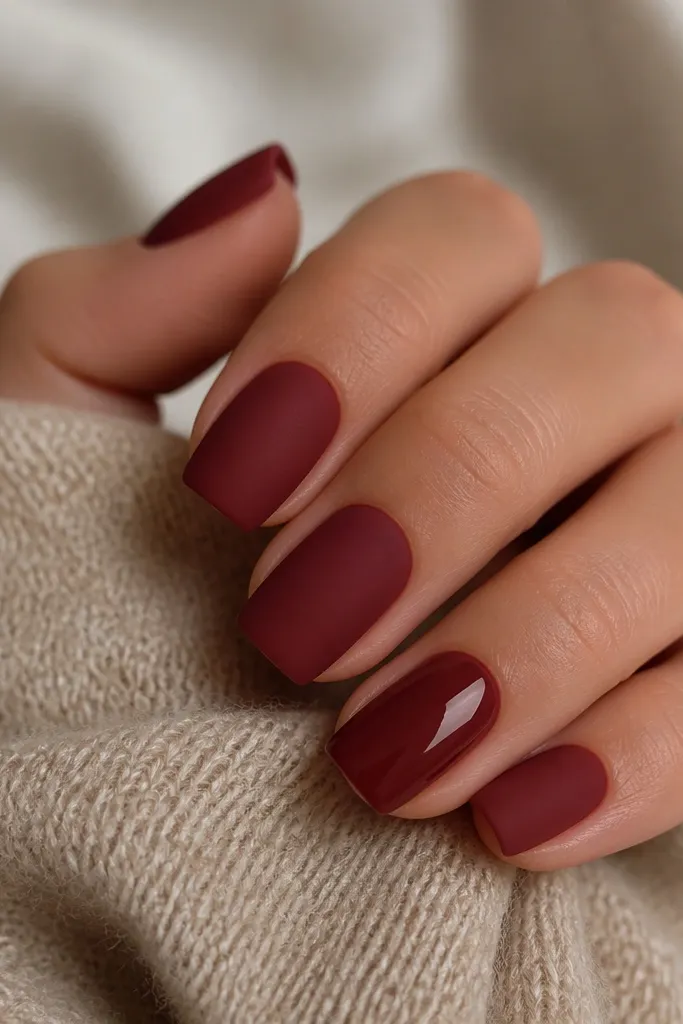
Mixing matte and glossy textures makes the color look thicker and richer. Matte dark cherry red turns wine-like and hides tiny ridges, which is great if your nails have slight texture. The glossy accent nail catches light and gives you that “salon” feel without complex art. This looks good on hands with dry skin too, because matte reduces shine on the nail surface. The contrast is flattering on all skin tones since it’s the same color with two finishes.
Editor's noteIf your matte top coat dries patchy, apply a slightly thicker matte layer on the center and feather it outward.
Apply dark cherry red in two coats and cure/dry. Let the nails set for a few minutes so the polish isn’t tacky. Coat four nails with a matte top coat, avoiding the sidewalls flooding. Leave one nail glossy by applying regular high-shine top coat to that nail only. Finish by checking the corners — matte top coat can dull the edge, so keep the coating even.
Watch outDon’t mix matte and glossy on the same nail unless you’re very neat — the border can look messy.
7. Gold Foil Corners on Dark Cherry Square
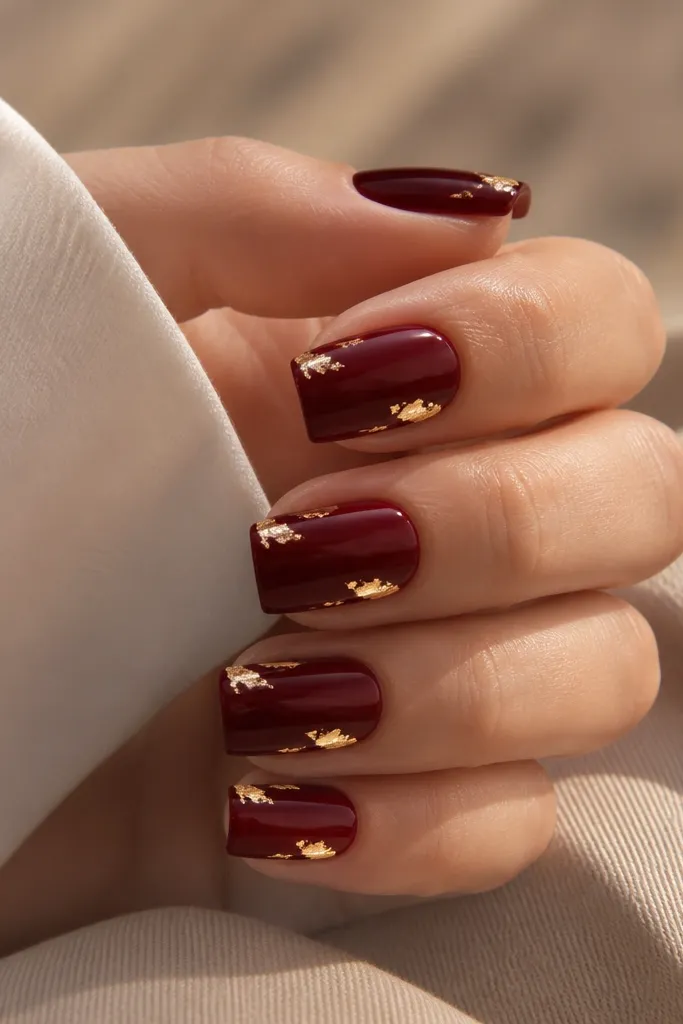
Foil corners look sharp because they follow the square geometry. I love gold foil on dark cherry red because the contrast feels like candlelight against wine. The placement is everything: tiny bits at opposite corners make the nails look styled, not chaotic. This works especially well if you want something that photographs well under indoor lighting. It’s also forgiving — foil texture hides small application imperfections.
Editor's noteCut foil into smaller fragments first. Big sheets make the corners too bold on short square nails.
Paint nails with two coats of dark cherry red and let them dry. Apply a thin foil glue or a sticky layer top coat to the corners only, using a small brush. Place gold foil pieces at the upper-left and lower-right corners, pressing gently with a silicone tool. Seal with one or two coats of top coat, and cap the free edge so the foil doesn’t lift.
Watch outDon’t cover the whole nail with foil. It turns into a chunky look that chips faster.
8. Ombre Tip Fade with Cherry Red
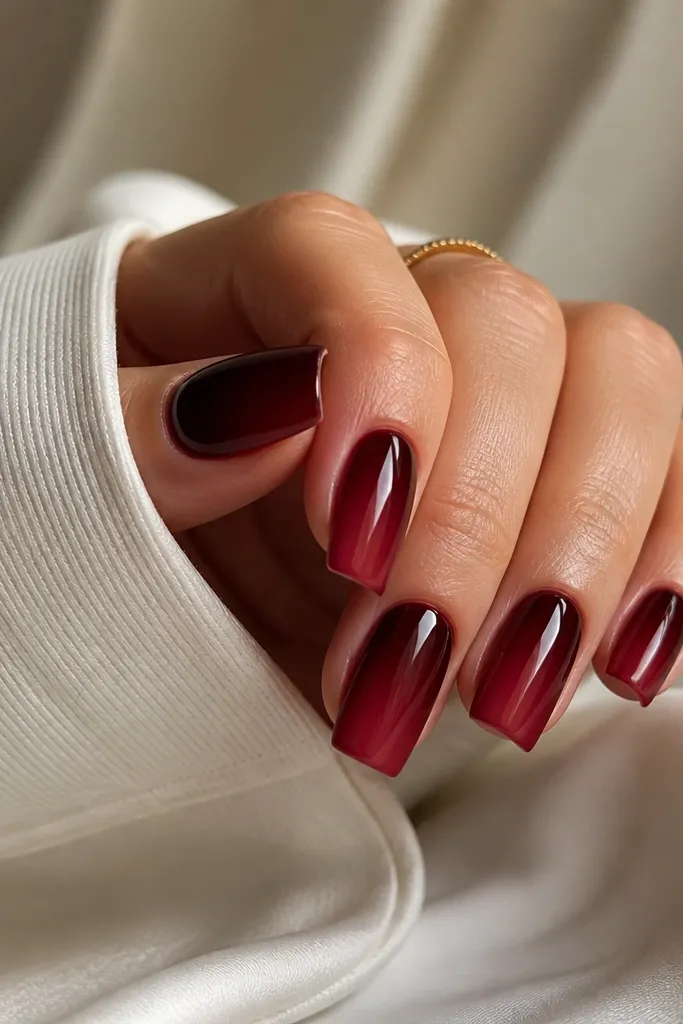
An ombre tip keeps things simple but still looks like you spent money. The fade makes square tips look softer and more elongated, which is flattering if your nail bed is short. I use a lighter berry-red or a deep rose at the tip so it blends without turning orange. This design looks great for fall and winter because the gradient stays warm and cozy. It also works well with gel because the blend looks smooth under glossy top coat.
Editor's notePractice the blend on one nail first. The right pressure is the difference between smooth and streaky.
Start with two coats of dark cherry red as your base. For the fade, sponge a lighter cherry color at the very tip, then blend upward with a clean makeup sponge lightly — use a tap motion to avoid harsh lines. Keep the fade height around 2-3 mm so the nail still reads dark cherry overall. Once dry, apply a glossy top coat to even everything out and smooth the sponge texture.
Watch outDon’t sponge too much product. Too-thick ombre turns chalky on square edges.
9. Checkerboard Accent Two Nails
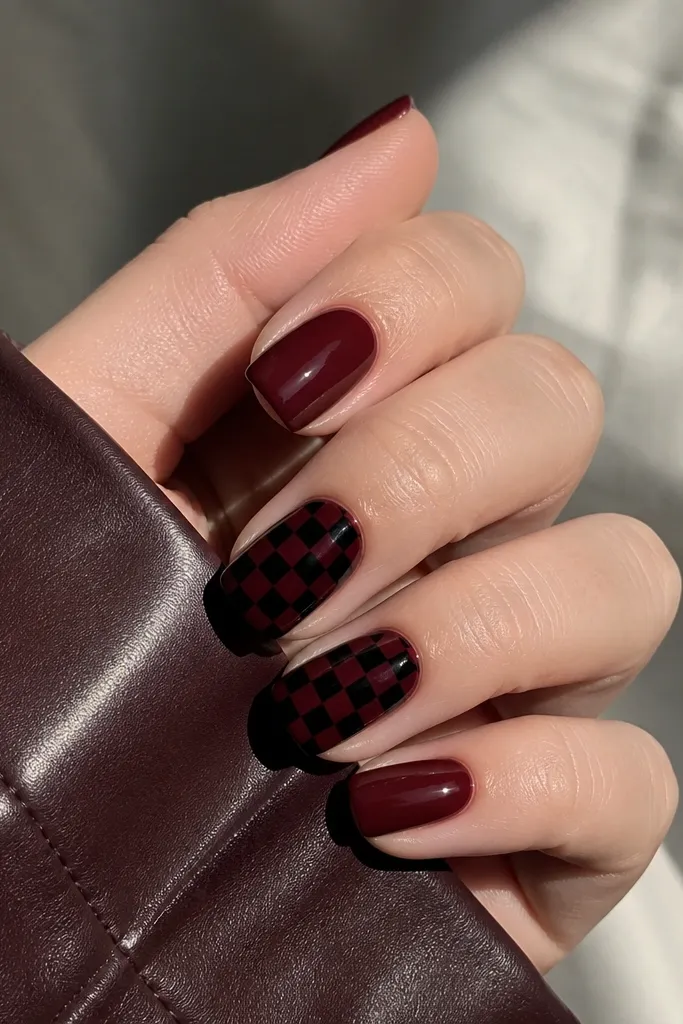
A micro checkerboard is fun without looking like full-on nail art. I keep it to two nails so the rest of the set stays wearable. Black squares against dark cherry red make the pattern feel graphic and modern, and they don’t clash like bright white can. Square nails help because the grid lines look crisp on straight edges. This works well for people who like statement nails but hate anything that feels too busy.
Editor's noteUse a nail art tape strip to guide each grid line so the squares stay even.
Paint all nails with two coats of dark cherry red and top coat once dry. On two accent nails, use a thin liner brush to draw a grid with black polish — keep squares about 1-1.5 mm. Fill alternating squares, letting each line dry so the pattern stays clean. Finish with top coat, and run the brush gently over the pattern so it doesn’t snag.
Watch outDon’t flood the squares with thick polish. Checker edges lift and chip first on square tips.
10. Cherry Red with Clear Negative Center
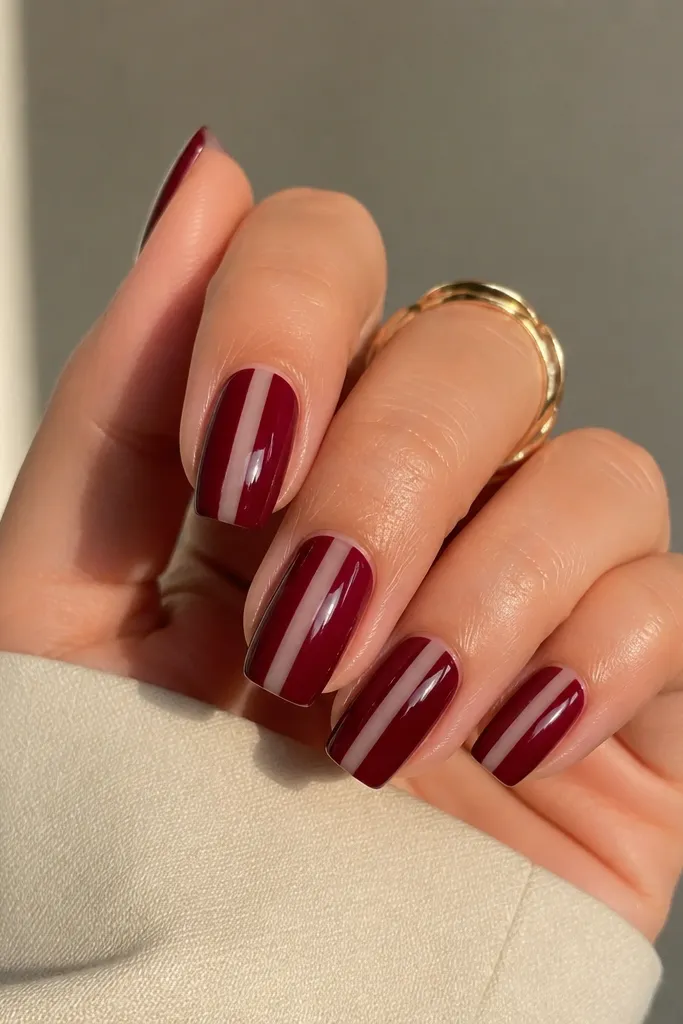
This design is sleek because it uses negative space as the “stripe.” The clear center makes the nail look longer and gives your nails a modern, editorial vibe without heavy effort. I like a clear strip width of about 2 mm on square nails so it stays elegant. Dark cherry red provides the depth, while the clear center keeps it light. It’s flattering on most nail beds because it visually stretches the nail shape. Under sunlight, the clear strip makes the red look glossy and dimensional.
Base coat first. Paint two coats of dark cherry red around a centered strip by using striping tape to protect the center line. Remove the tape after the second coat is dry-tacky, then fill any tiny gaps with a fine brush. Apply top coat over everything, including the clear strip, so it looks glassy and sealed.
Press tape down firmly at the edges so the red line stays razor-straight.
Don’t use wide tape. A thick center strip can make square nails look stubby.
11. Dark Cherry Red Sparkle Dust on Tip
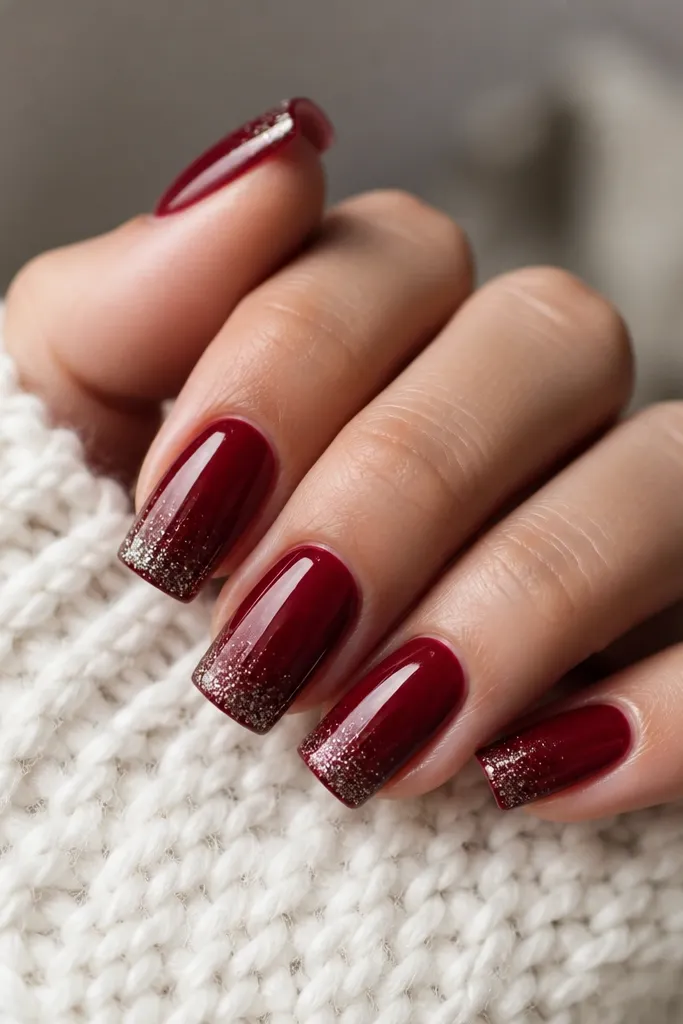
Sparkle dust at the tip makes your nails look like they’re catching light even when you’re just typing. I use fine silver or champagne micro-glitter because it looks like shimmer, not chunky glitter. Concentrating it on the last 2-3 mm keeps it simple and avoids that “glitter blanket” look. Square nails are perfect here because the straight edge lets the glitter line look intentional. This is great for parties, but it also works for everyday if you keep the glitter light.
Editor's noteUse a glitter that dissolves under top coat. It stays smoother and less textured.
Apply two coats of dark cherry red and let it fully dry. With a small makeup sponge or a glitter brush, tap micro-glitter onto just the tip area, starting at the center and working outward. Blend the glitter slightly upward with one light tap so the edge isn’t harsh. Seal with a thick top coat to smooth the glitter and prevent snagging at the corners.
Watch outDon’t leave glitter unsealed. It catches fabric and chips faster.
12. Matte Cherry Base with Glossy Line Art
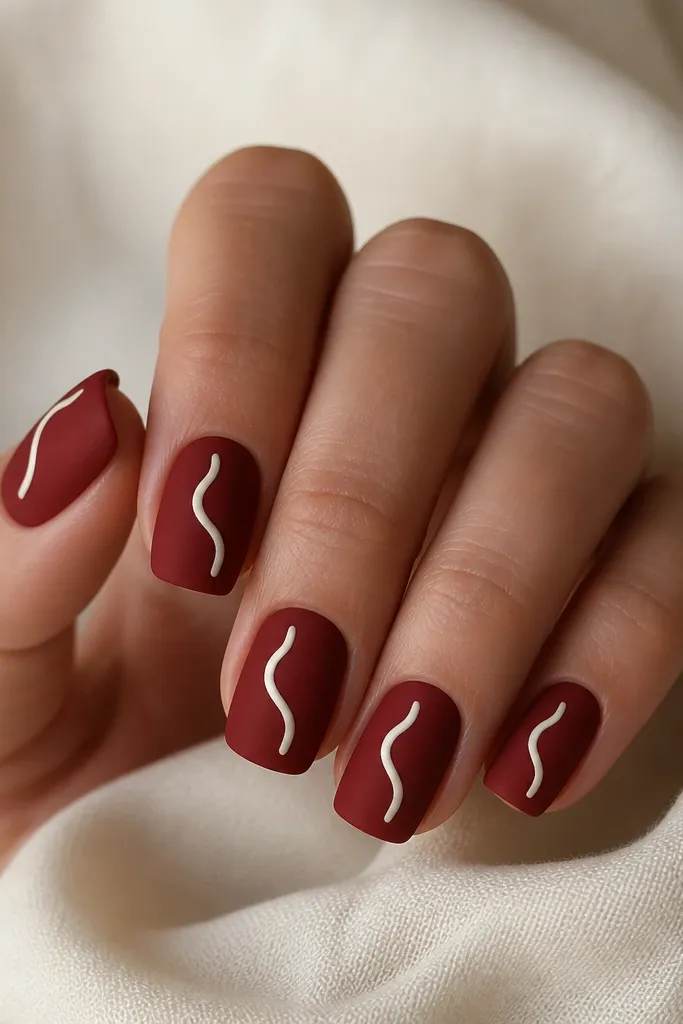
Matte base plus glossy line art makes dark cherry red look like it’s been styled with a designer finish. The glossy line catches light and creates a clean focal point without adding heavy color. I use a thin white squiggle or slash because it looks playful but still crisp on straight square nails. This is flattering because the matte finish reduces shine on the nail plate, so your hands look more polished even if your cuticles are a little dry. It’s also beginner-friendly if you use tape guides for the first pass.
Editor's noteIf your line gets thick, wipe the brush on a lint-free wipe and try again on the same wet spot before it fully cures.
Paint nails with two coats of dark cherry red. Top with matte top coat on all nails and let it cure fully. Use a thin nail art brush dipped in white gel polish to draw one squiggle near the center or slightly toward the cuticle. Add a glossy top coat only over the line art so it stands out from the matte surface.
Watch outDon’t do wide lines. Thick white shapes on dark cherry can look like accidental smudges.
13. Dark Cherry Red with Tiny Crystal on Accent Nail
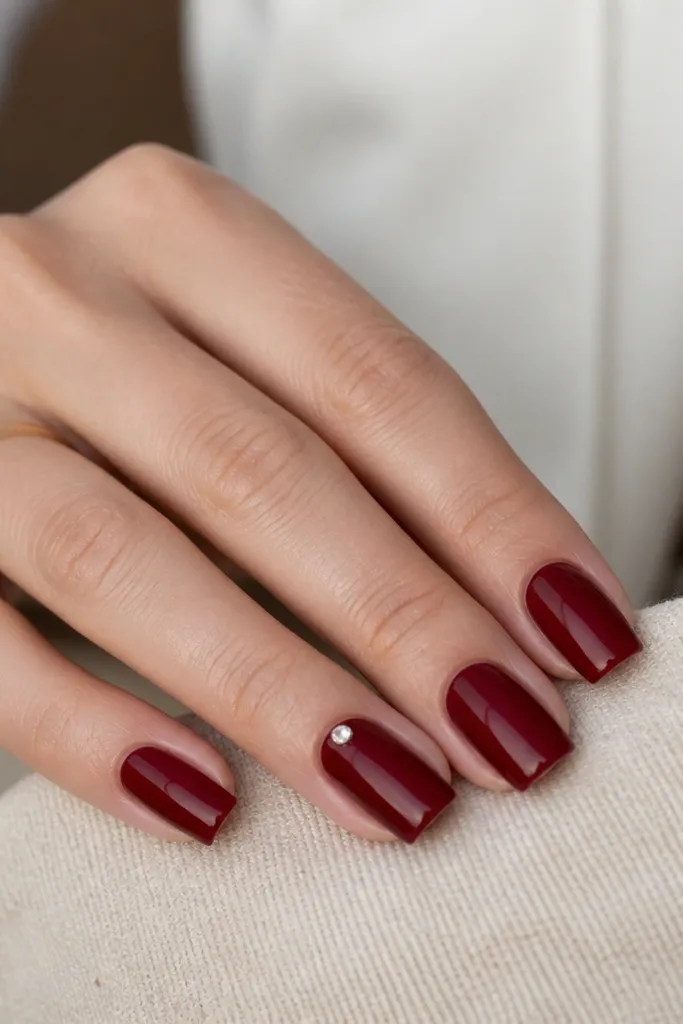
One tiny crystal turns a simple cherry-red set into something that looks intentional. Placement near the cuticle makes the nail look longer and draws attention to the center of your hand. I like clear crystals because they don’t compete with the cherry shade; they just add sparkle. This design looks best when your nails are neat and your corners are smooth, because crystals show every bump. It’s flattering on all skin tones and looks great with gold or silver rings.
Start with two coats of dark cherry red and a glossy top coat. On the accent nail, dab a small amount of crystal glue or a tiny dot of thick gel near the cuticle center. Place one small crystal and press lightly for a few seconds. Cure/dry as directed, then apply a final top coat around the crystal, not over it in a thick layer so it stays sharp.
Choose crystals with flat backs. They sit cleaner on square nails than pointed ones.
Don’t put crystals on every nail. The set looks bulky and grows out faster visually.
14. Cherry Red Square with Black Outline Tips
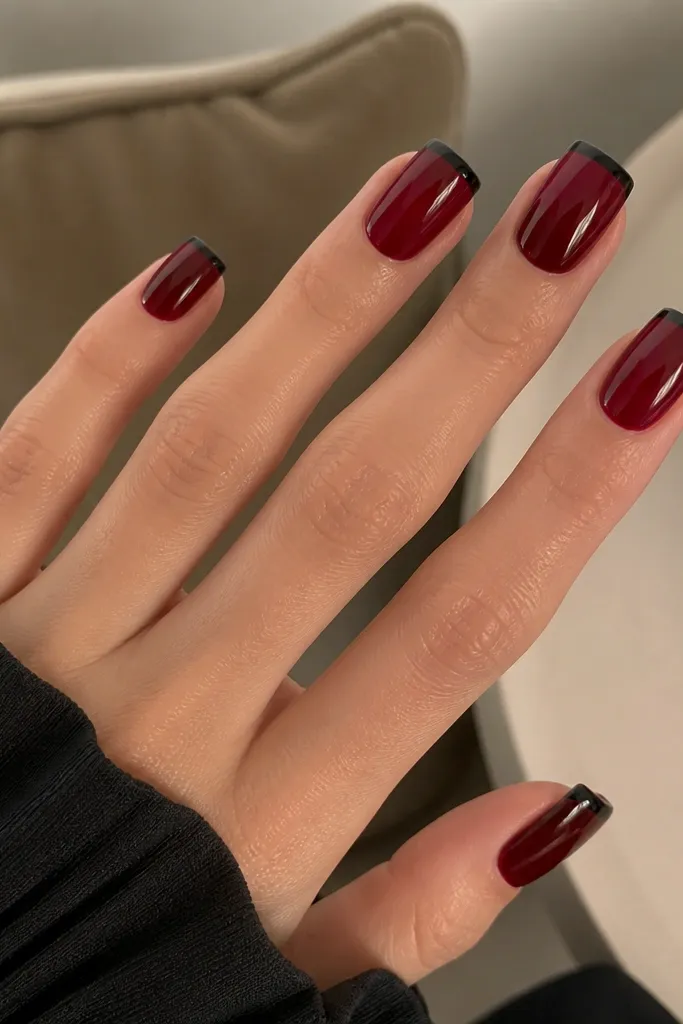
A thin black outline makes dark cherry red look like it has a frame. It’s simple because the color stays the same — you’re only adding a line. Square nails are perfect for this because the outline follows the straight tip and looks crisp. It flatters hands with shorter nails by defining the tip without adding extra width. For evening wear, it reads edgy and clean, not goth.
Editor's noteUse a liner brush that’s slightly angled. It makes the black border follow the square tip better.
Paint nails with two coats of dark cherry red and let them dry. Use a striping tape strip to create a guide line along the tip edge, then paint a thin black line just inside the tape edge. Remove tape while the black is still workable so the border stays sharp. Seal with a glossy top coat and cap the tip so the outline doesn’t chip.
Watch outDon’t thicken the black line. Heavy outlines look like sloppy nail polish edges.
15. Dark Cherry Red with Rose Gold Micro Studs
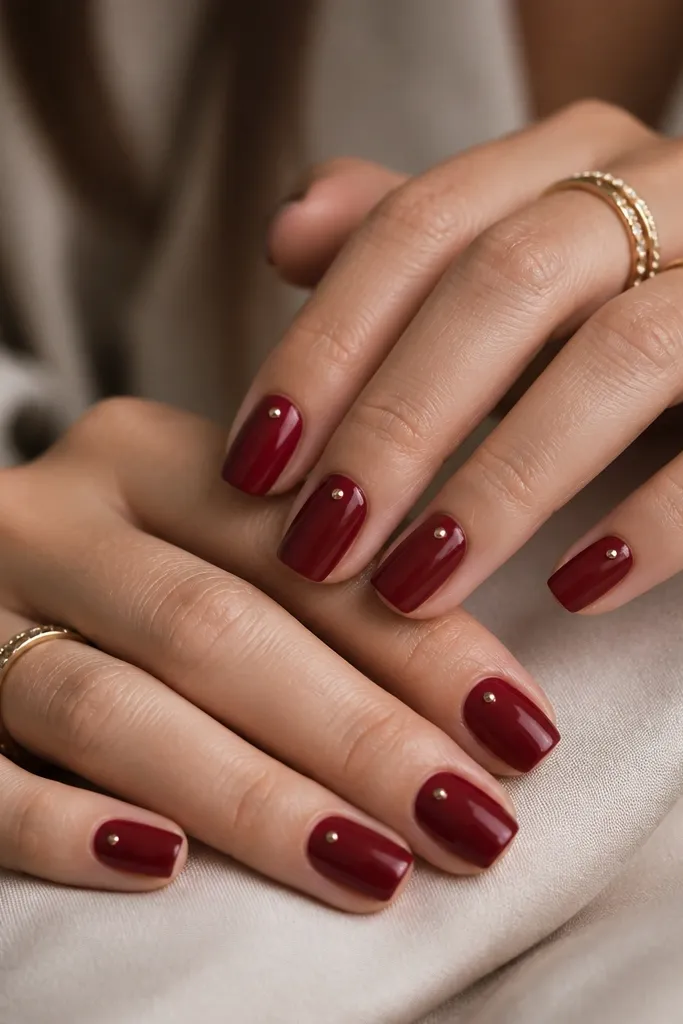
Micro studs add a jewelry feel without covering the whole nail. Rose gold looks warm against dark cherry red, so the combo feels softer than silver. I place two small studs near the sidewalls, about 1/3 of the way down from the cuticle, so the nail looks balanced. Square nails make the side placement look intentional rather than random. This is flattering if you wear rings and want your nails to match that shine.
Do two coats of dark cherry red and apply a glossy top coat once dry. Mark the stud placement lightly with a dot of gel on each nail: one near the left sidewall and one near the right, both at the same height. Press micro studs into the gel and cure/dry. Finish with top coat around the studs, then cap the free edge to keep the studs from lifting.
If studs catch on fabric, add a thin layer of top coat over the stud edges after curing.
Don’t place studs too close to the tip. They snag and pop off first.
16. Cherry Red with Thin Silver Side Lines
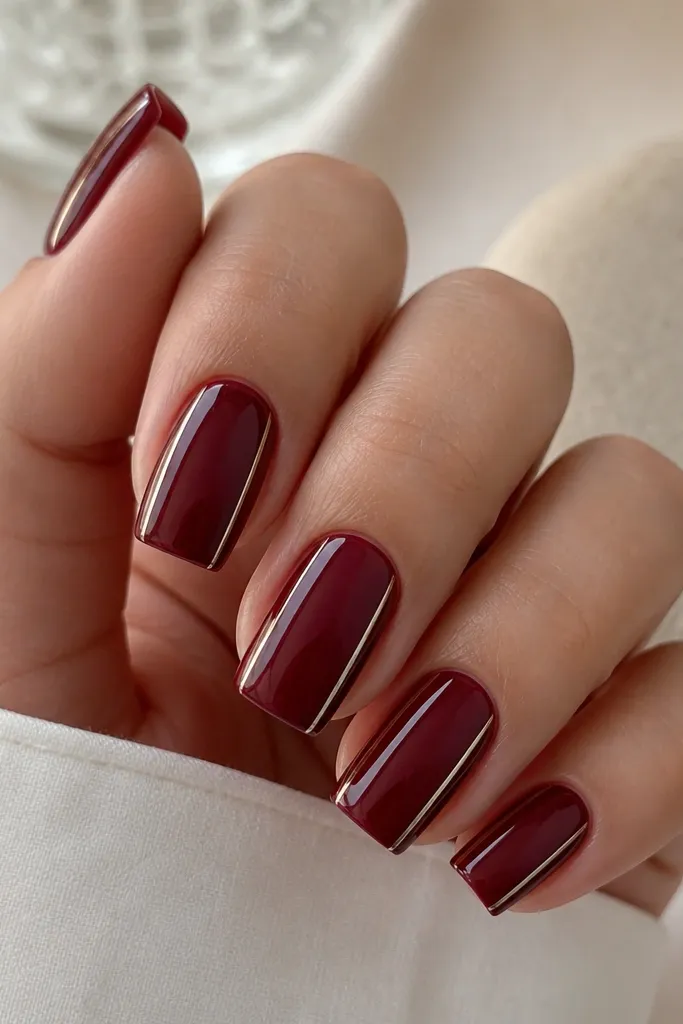
Side lines make square nails look structured, like you gave them a clean manicure outline. Thin silver lines add contrast and make the cherry red appear more saturated. I keep the lines close to the sidewalls so the nail still looks sleek. This flatters hands because it draws attention to nail shape, not nail length, which is helpful if your nails vary slightly in length. It’s a great option when you want something geometric but still simple.
Apply two coats of dark cherry red and let dry fully. Use striping tape to mark a line along each sidewall, about 0.5 mm in from the edge. Paint silver polish or metallic gel on the taped lines, then remove tape for sharp edges. Seal with a glossy top coat, paying attention to the perimeter so the side lines don’t lift.
Do one side first, cure/dry, then do the other. It keeps the lines from smearing.
Don’t paint silver too thick. Thick metallic lines look heavy on square nails.
17. Dark Cherry Red Marble with One Accent Nail
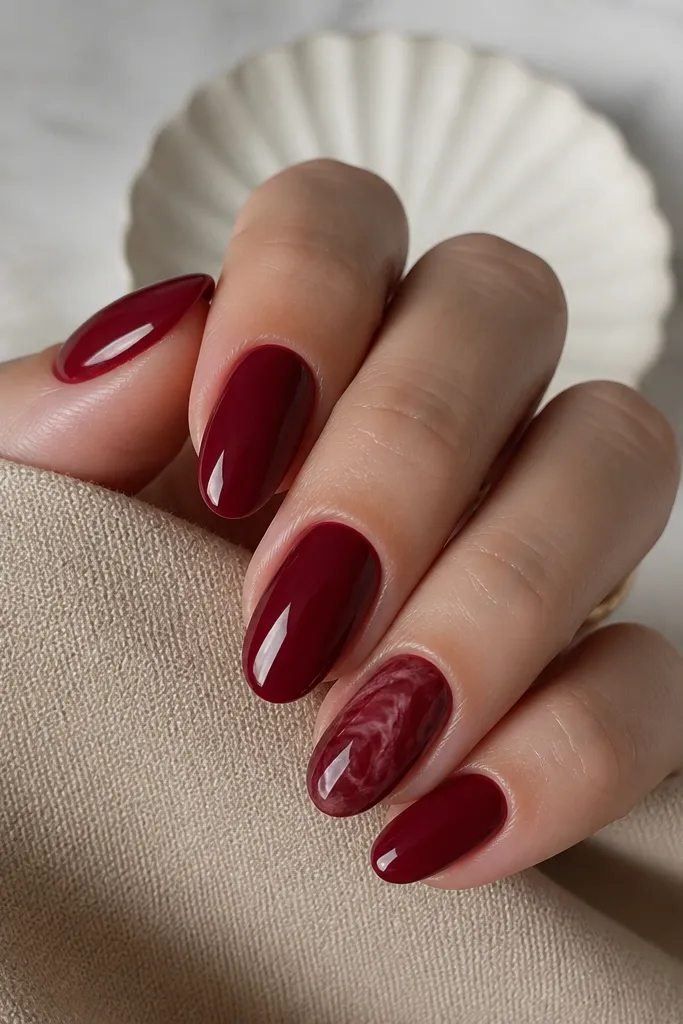
Marble looks hard, but keeping it to one accent nail makes it manageable and wearable. I use lighter maroon or deep berry to create movement inside the dark cherry base so it still reads “cherry” from a distance. Square nails make marble look modern because the straight edges hold the pattern in place. This flatters most skin tones because the palette stays in one family. It also looks great in photos since the marble has natural-looking variation.
Paint all nails with two coats of dark cherry red. On the accent nail, apply a thin layer of top coat or a gel mixing base while the nail is slightly tacky. Drop a few tiny swirls of lighter maroon gel polish using a toothpick or thin brush, then drag gently to create movement — don’t overwork it. Finish by curing and then applying a full glossy top coat for depth.
Less marble looks more expensive. Use fewer swirls than you think you need.
Don’t mix too many colors. Multi-color marble turns muddy on dark cherry.
18. Cherry Red with Black and White Diagonal Slash
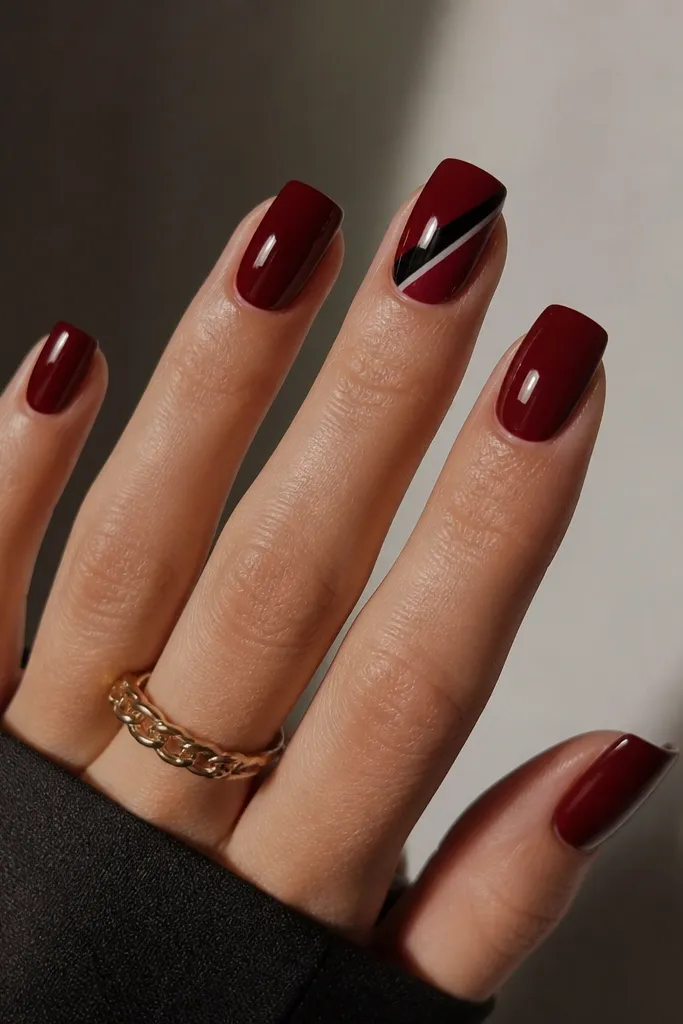
A diagonal slash is bold but still simple because it’s one shape. The trick is to keep the slash narrow so it doesn’t cover the nail. Black and white on dark cherry red makes the color look even deeper, like it’s part of a graphic design. Square nails handle diagonal shapes well because the straight tip makes the slash feel clean. It’s flattering for all nail lengths, but it’s especially nice if your nails have slight thickness differences since the slash draws focus to the center.
Editor's noteUse striping tape for the angle. If the tape angle is right, the whole design looks right.
Paint two coats of dark cherry red and cure/dry. Place a small strip of striping tape at a diagonal across the nail, centered and angled from lower-left to upper-right. Paint the area behind the tape with black polish, remove tape, then use a fine liner brush to add a thin white line just beside the black while it’s still slightly wet. Seal with glossy top coat and cap the tip.
Watch outDon’t use a runny black polish. It bleeds under tape and makes the edges look fuzzy.
19. Dark Cherry Red with Tiny Heart Outline
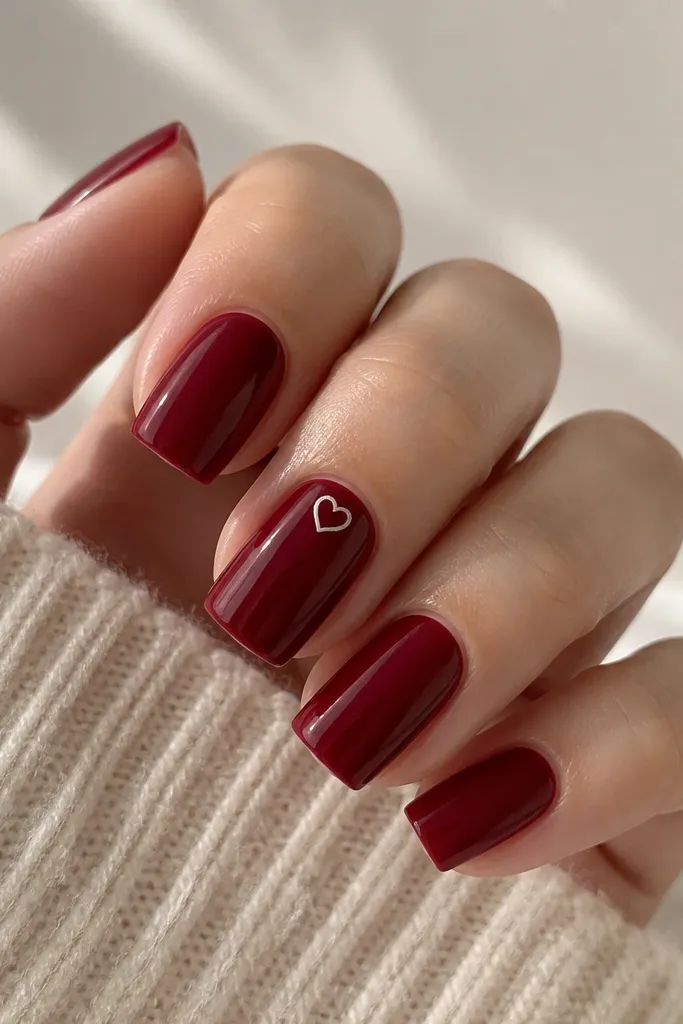
A tiny heart outline keeps the romantic vibe without turning the nails into cartoon stickers. The outline style is key because it leaves dark cherry red showing through, so the nail stays sleek. I place it near the cuticle on square nails, which makes the heart look balanced and keeps it from feeling too high or too low. This is flattering on shorter nails because the design is small and concentrated. It also works for Valentine’s Day, but I’ve worn it in late winter and it still feels fresh.
Editor's noteIf your heart looks lopsided, fix it with the same red polish using a fine brush — outline mistakes are easy to correct before curing.
Start with two coats of dark cherry red and a glossy base. On the accent nail, draw a small heart outline using a thin liner brush and white gel polish. Keep the heart about 3-4 mm wide and center it under the cuticle. If you want it cleaner, draw one half of the heart, let it set for a minute, then finish the other half. Top coat over everything, and add a thin layer around the heart so it doesn’t catch.
Watch outDon’t fill the heart solid. Filled hearts look chunky on square nails and can chip faster.
20. One-Nail Velvet Cherry Rose Detail
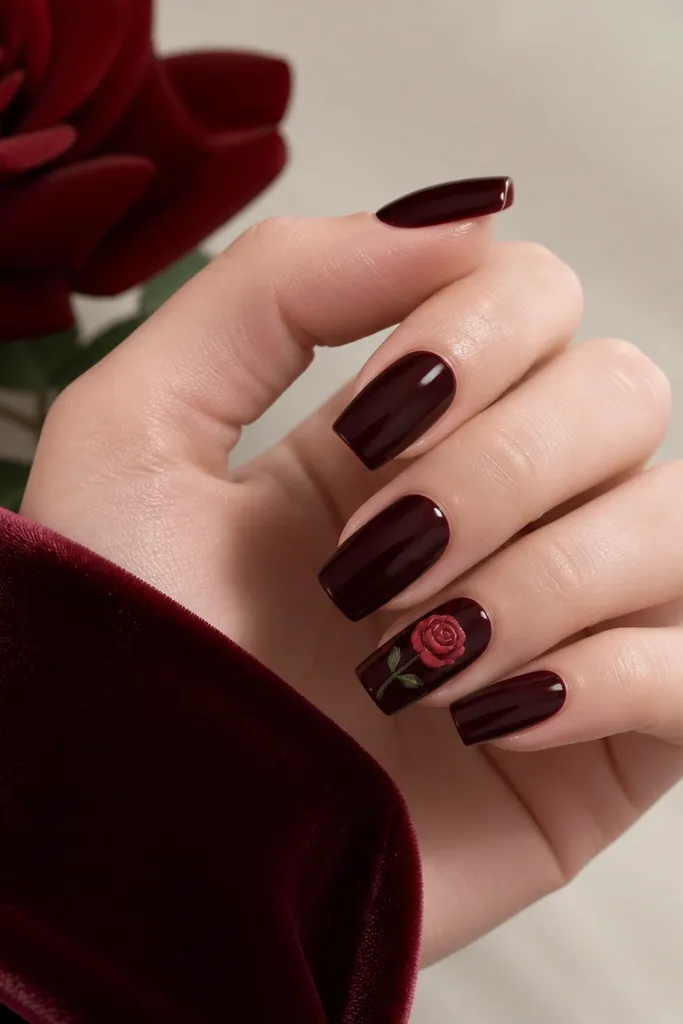
This one is dramatic in a controlled way. The matte base on the accent nail makes the light rose swirl look like it’s sitting on top, not blended into the polish. I keep the swirl small so it reads as a rose detail, not a full mural. Square nails help because the matte surface looks smooth and the square corners frame the accent. This flatters hands that need a little visual interest because the accent adds dimension without extra length. It also looks great for holiday dinners and winter events.
Editor's noteKeep the rose swirl slightly off-center toward the cuticle. It looks more natural on square nails.
Paint all nails with two coats of glossy dark cherry red and cure/dry. Choose one accent nail and apply matte top coat over the cherry base only on that nail. With a dotting tool or thin brush, create a tiny rose swirl using light rose polish or gel — start with a small dot, then add 4-5 petal strokes around it. Seal the whole set with glossy top coat on the non-matte nails and matte top coat on the rest, then add glossy top coat only over the rose swirl area.
Watch outDon’t put matte top coat over the glossy rose swirl. You’ll lose the raised, jewelry look.



