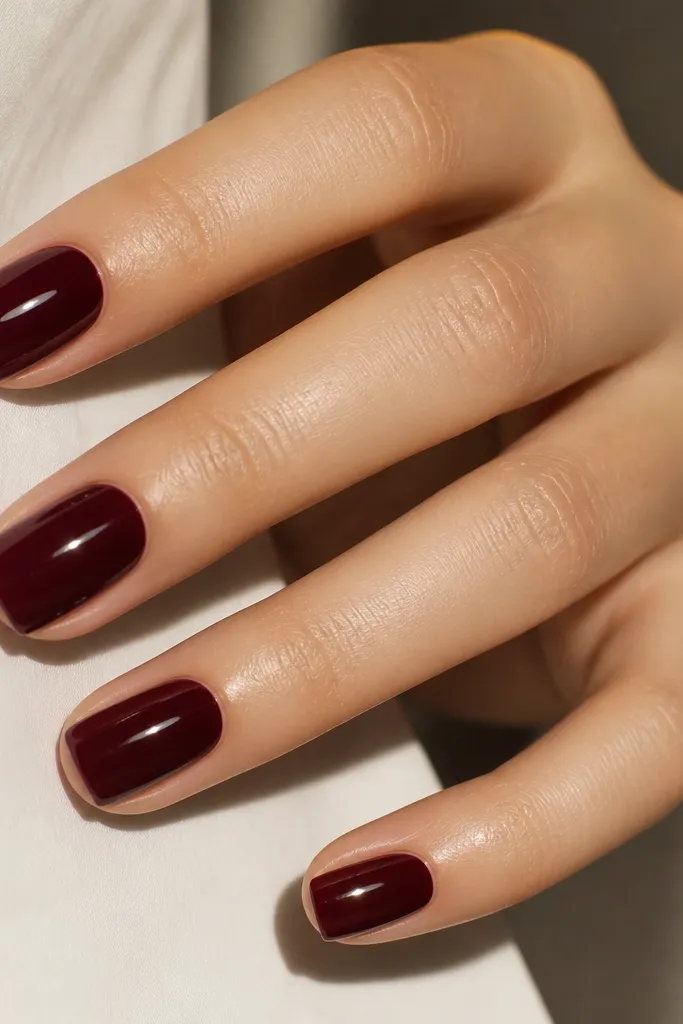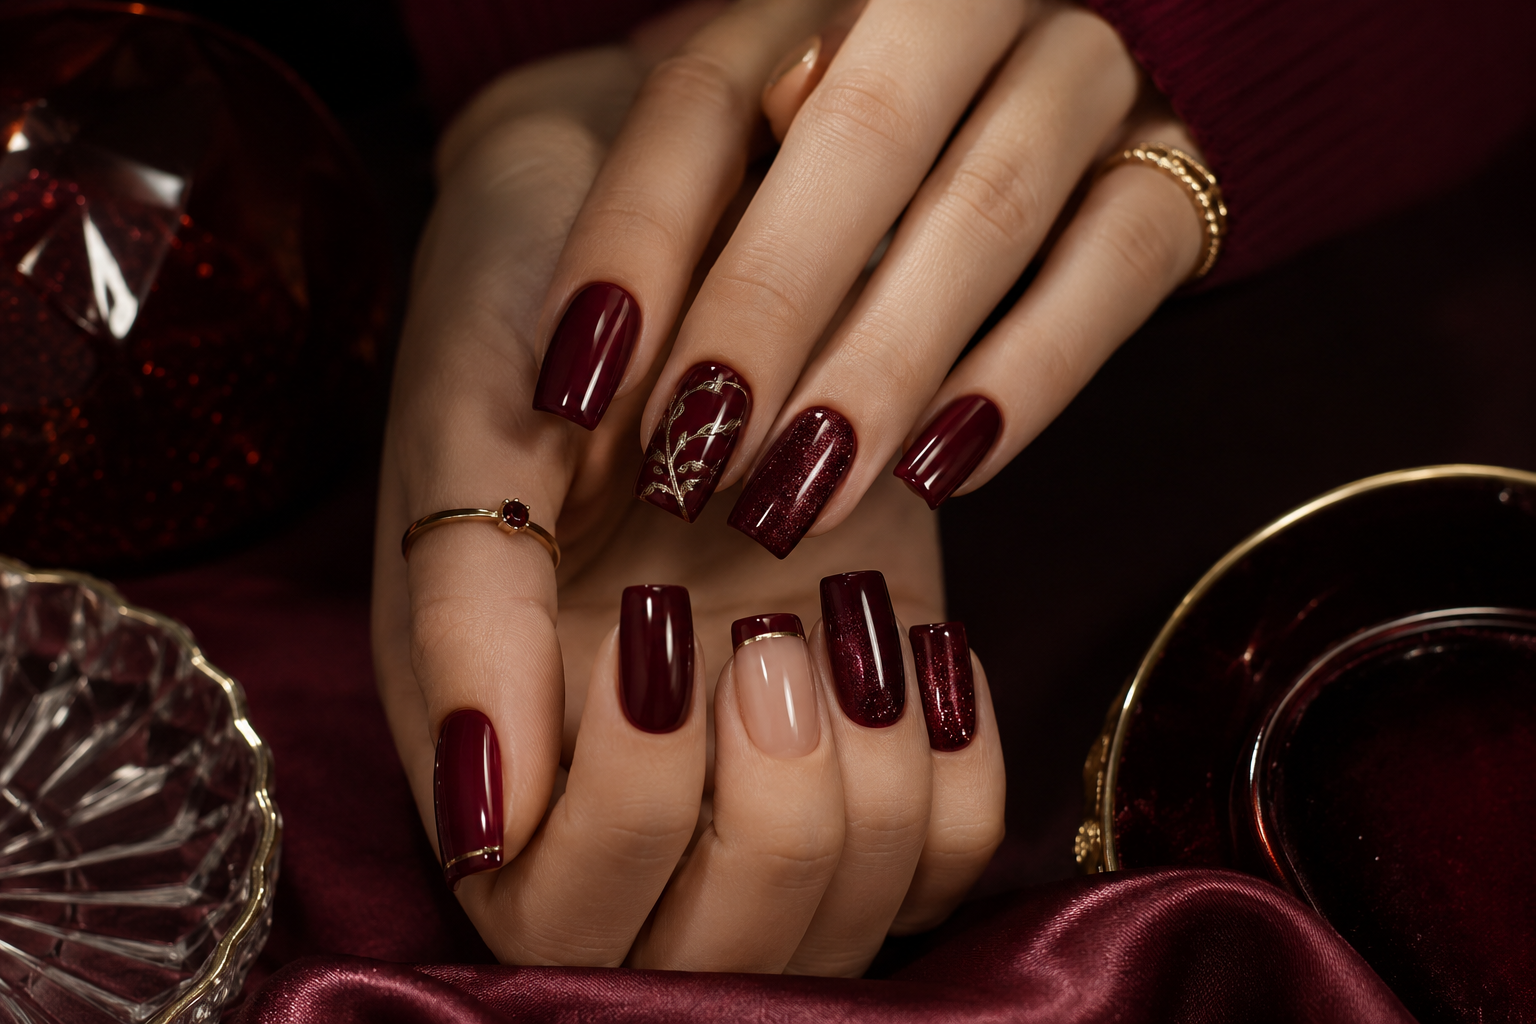

1. Slim Gold Micro-French Over Cherry
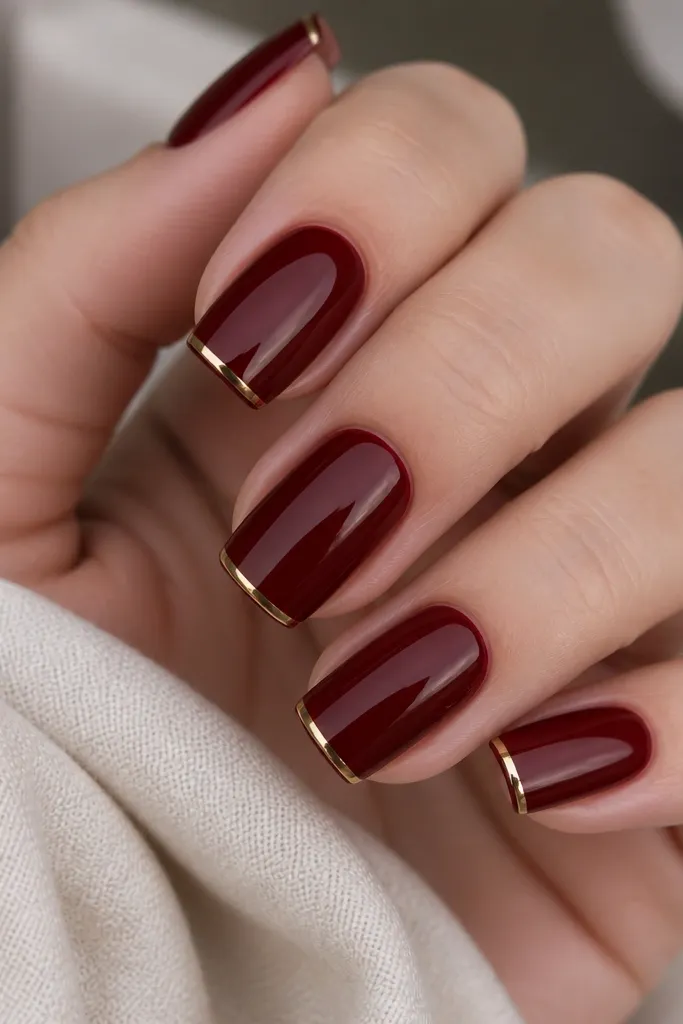
This design works because the gold line is narrow enough to feel tailored against the deep cherry. I do it on medium-short square nails where the tip area is small — the thin line makes the nail look sharper without adding bulk. The cherry red reads warm and flattering on light to medium skin tones, especially when your gold accents lean yellow instead of rose. It’s also easy to wear with office outfits because there’s no glitter chaos. The styling principle is restraint: one crisp detail at the free edge.
File your square nails so the corners are slightly softened, then buff lightly for a smooth top coat. Paint two thin coats of dark cherry red, curing fully between coats. Use striping tape or a steady hand to place a line about 1 millimeter from the tip edge, then paint the gold and cure. Remove tape while the polish is fully cured, then seal with a glossy top coat over the entire nail and around the tip edge.
Editor's noteIf your gold line looks wobbly, place a strip of tape, paint the gold, and remove only after curing — it keeps the edge razor-straight.
Watch outDon’t make the French line thick — chunky tips on square nails read heavy fast.
2. Cherry Base With Half-Moon Cuticle Gold Foil
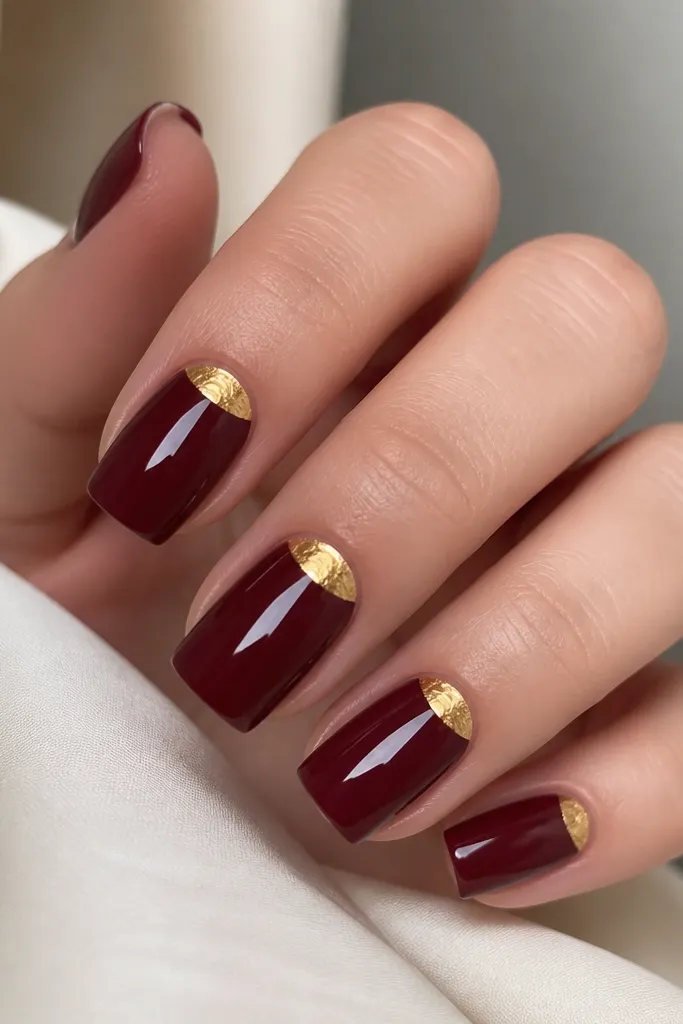
Half-moons look classy because they frame the cuticle — that’s the smallest area, so the accent stays controlled. I use gold foil or foil flakes because the texture catches light like jewelry, not like a sticker. This flatters hands with a visible cuticle line because the gold “fills” the transition between skin and nail. On deeper skin tones, the gold and cherry contrast looks expensive and clean. The styling principle is placement: concentrate the sparkle at the base, then keep the rest glossy and plain.
Start by pushing back cuticles and cleaning the nail plate, then apply a base coat. Paint two thin coats of dark cherry red and cure each coat. At the cuticle, use a small dot of gel adhesive (or a foil transfer gel) and place gold foil so it forms a neat half-moon shape. Seal with a thin top coat, making sure the top coat covers the foil edges so it doesn’t lift.
Press the foil with a silicone tool for 10 seconds — it improves transfer and keeps the half-moon shape crisp.
Skip putting foil all over the nail — it stops reading classy and starts reading costume.
3. Matte Cherry With Glossy Cherry-Tip Seal
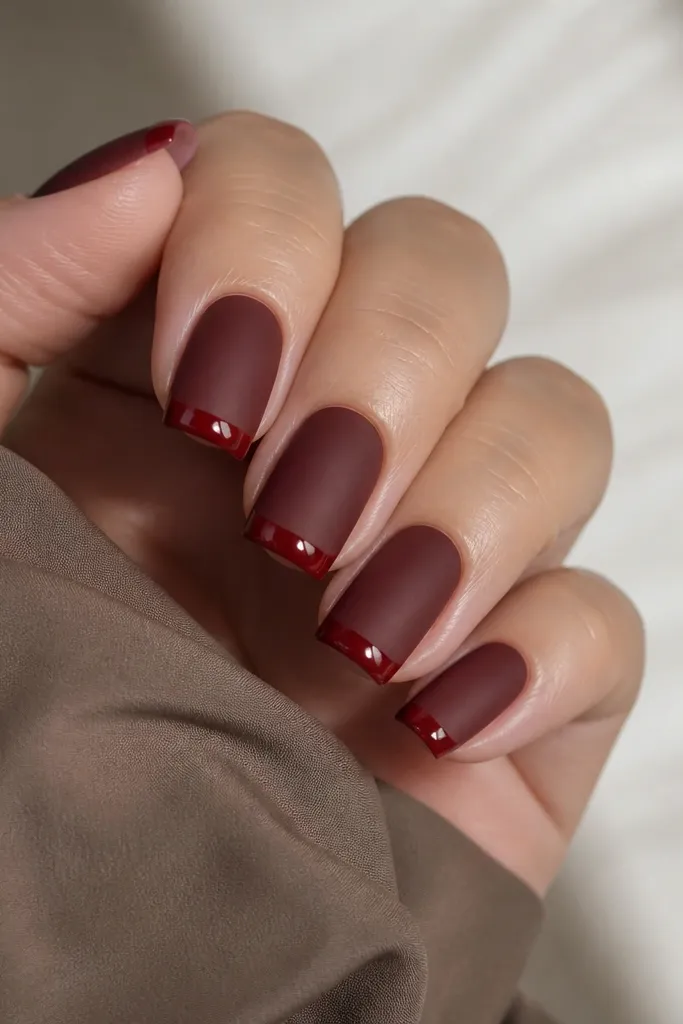
Two finishes on the same color look high-end because your eye reads texture, not extra decoration. I love this for day events and dinners because matte feels softer, while the glossy tip still gives that polished “done” look. It flatters most skin tones because it doesn’t rely on heavy contrast colors. On square nails, the glossy band at the tip visually cleans up the shape — it makes corners look intentional. The styling principle is finish contrast, not extra patterns.
Apply base coat, then paint two coats of dark cherry red and cure completely. Let it cool down, then apply matte top coat over the whole nail. Use striping tape to mask a 1-2 millimeter band at the tip, then apply glossy top coat only on that band and cure. Remove tape carefully and check for any matte-to-glossy edges lifting; add a final thin layer over the tip edge only.
Editor's noteIf your matte top coat turns streaky, shake it gently and apply in thin layers, not one thick coat.
Watch outDon’t put matte top coat over uncured color — it can make the surface look grainy.
4. Diagonal Wine Check Accent
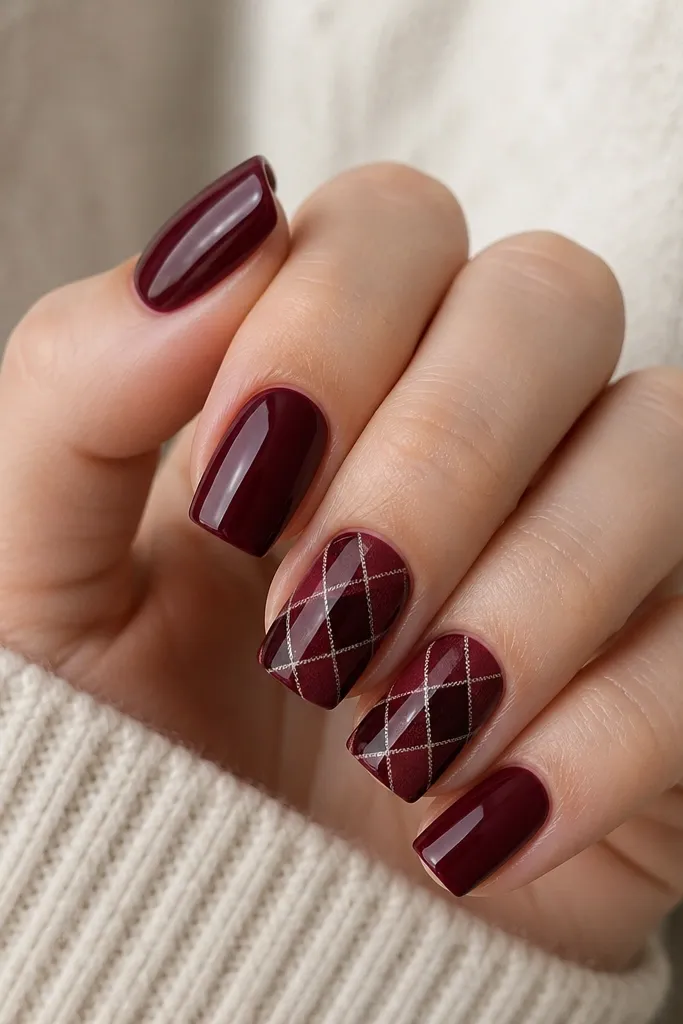
A diagonal check is classy when the squares are tiny and the contrast is close. I use two wine shades: your main dark cherry plus a slightly deeper burgundy, and I add a thin pale line (like sheer nude-gold) to define the grid. This works especially well on medium length square nails where there’s enough space for the diagonal to breathe. It flatters hands that look better with cool-toned details, because the deeper burgundy reads richer than bright colors. The styling principle is small geometry, one controlled accent at a time.
Paint all nails with two thin coats of dark cherry red and cure. On the accent nails, draw a diagonal guideline from lower-left to upper-right using a fine liner brush. Paint small check cells along that diagonal with the deeper burgundy, keeping each cell about 1 millimeter wide. Add the thin pale line between cells, cure, then apply glossy top coat to smooth everything.
Use striping tape to create straight diagonal lanes — it saves you from shaky lines on square edges.
Don’t use large check squares — big patterns look like costume nail art.
5. Cherry Ombré With Micro-Glitter Fade
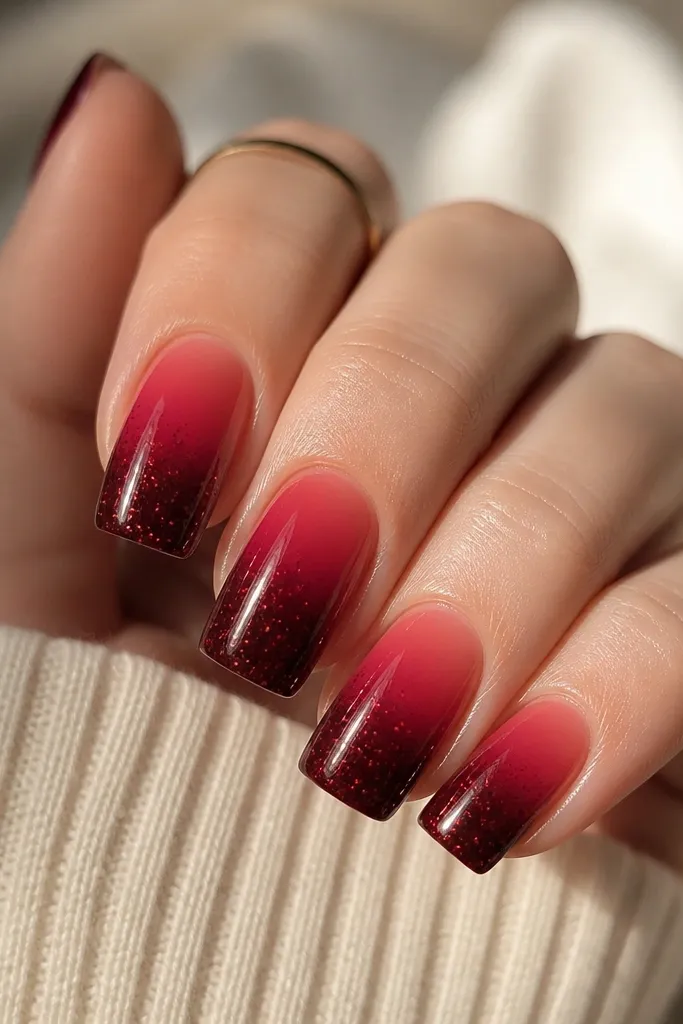
Ombré makes dark cherry look softer without losing the drama. I do a cuticle-to-tip fade where the base is slightly deeper and the tip is intensified, then I add micro-glitter only at the very edge so it looks like light catching, not like chunks. This is flattering on short square nails because the fade creates a vertical flow. On fair skin, it keeps the color from looking too heavy; on medium skin, it looks lush and dimensional. The styling principle is gradient plus tiny sparkle placement.
Paint a base coat, then sponge a slightly lighter cherry-red (or sheer cherry) starting near the cuticle and blending upward toward the center. Cure, then add a second layer of dark cherry near the tip and feather it down with a makeup sponge. For glitter, dab micro-fine cherry-red glitter gel only on the outermost tip area and cure. Finish with glossy top coat to unify the gradient and smooth the glitter edge.
Editor's noteSponge in two thin passes instead of one — you get a smoother fade and less gritty texture.
Watch outDon’t overload glitter — thick sparkle at the tip makes square corners look bulky.
6. One Nail Velvet Marble in Dark Cherry
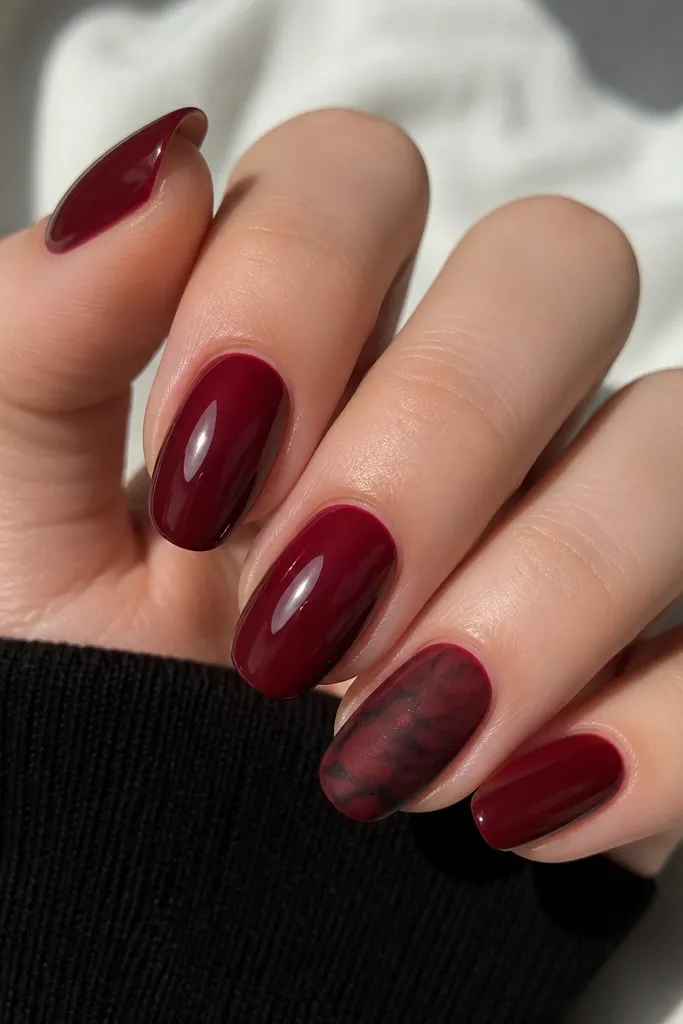
Marble looks classy when it’s subtle and limited to one nail. I use dark cherry as the base, then drag in thin lines of near-black and a lighter cherry to mimic stone veining. The velvet-matte top coat makes it look like fabric or artisan stone, not like regular nail art. This flatters hands because it adds depth without bright color blocks. The styling principle is one statement texture and the rest staying solid.
Paint all nails with two coats of dark cherry red and cure. On the accent nail, add a thin layer of a gel base, then use a thin brush to pull lines through it with near-black and lighter cherry — don’t fully fill the nail, leave some base showing. Add a second marbling pass lightly so the veins look layered. Cure, then apply a velvet-matte top coat to the accent nail only; keep the other nails glossy.
Marble looks best when the veins are uneven — straight repeated lines look printed.
Skip full-marble on every nail; it gets busy fast on square shapes.
7. Cherry Backwards French With Nude Half-Stripe
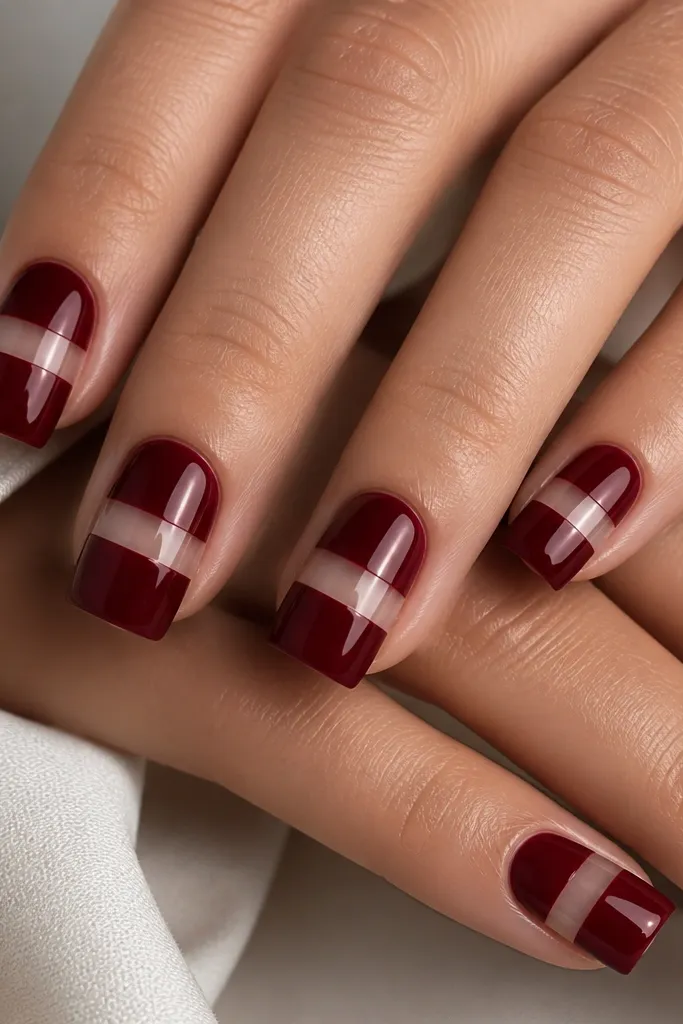
Backwards French is a classy trick because it flips the usual tip focus to the center. The nude sheer stripe softens the dark cherry so your nails don’t look too heavy, especially on shorter nails. I like a nude that matches your skin tone but slightly warmer — it makes the stripe look like it belongs to you. This design looks polished for date nights and work because it’s graphic without being loud. The styling principle is negative space at the center with a crisp line.
Apply base coat and paint two coats of dark cherry red, curing each. Use striping tape to place a horizontal band about halfway down the nail, leaving a clean margin above and below. Paint the nude sheer over the tape, cure, and remove tape while fully cured. Seal everything with glossy top coat and cap the stripe edges so it doesn’t chip.
Editor's noteWipe your brush with gel cleanser before painting the nude stripe — it keeps the line pure and prevents cherry bleed.
Watch outDon’t make the nude stripe too thick; chunky center stripes shorten square nails visually.
8. Crisscross Gold Lines on a Cherry Base
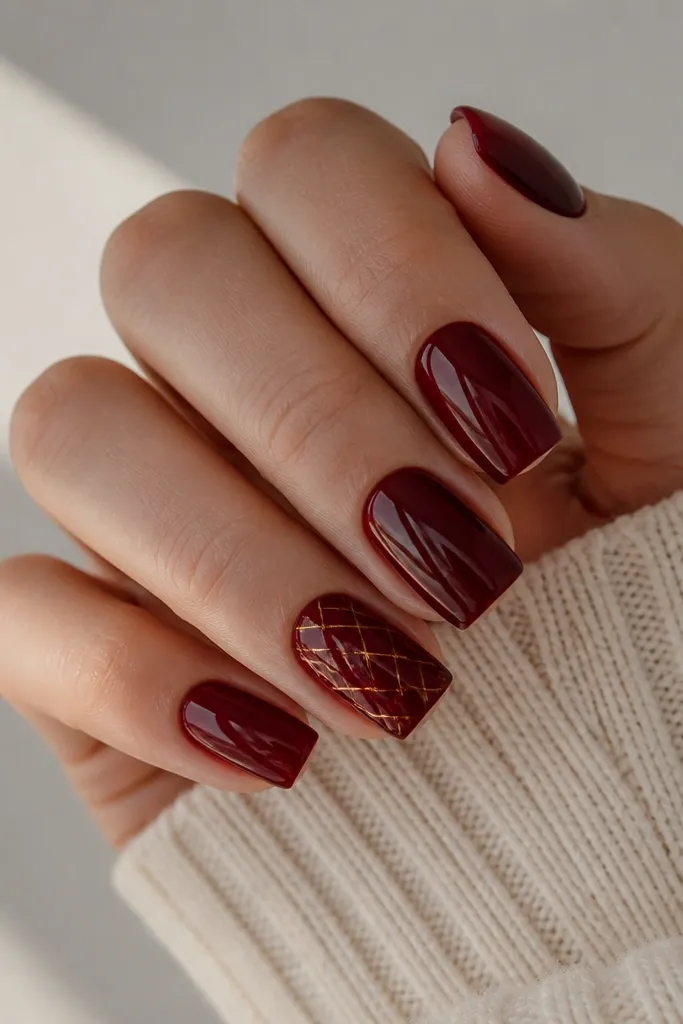
A gold lattice looks classy because it’s structured, not sparkly. I keep the lines thin and let the dark cherry do the heavy lifting, so the nail stays elegant even though the pattern is geometric. This flatters hands with shorter nail beds because the lattice adds visual interest without widening the nail. On warm undertones, the yellow gold makes the cherry look more red than brown. The styling principle is fine linework with negative space.
Paint all nails with two coats of dark cherry red and cure. On accent nails, draw one diagonal line from upper-left to lower-right, then add the opposite diagonal line to form an X shape. Add two more thin lines that connect toward the sides, keeping gaps of about 1-2 millimeters where the cherry shows. Cure the gold lines, then apply a glossy top coat over the whole nail.
Use gel striping lines or a liner brush with a tiny dot of gold gel — too much product makes the lines look like ribbons.
Don’t fill the lattice completely; solid gold coverage on cherry reads heavy.
9. Cherry Chrome Half-Tip Fade
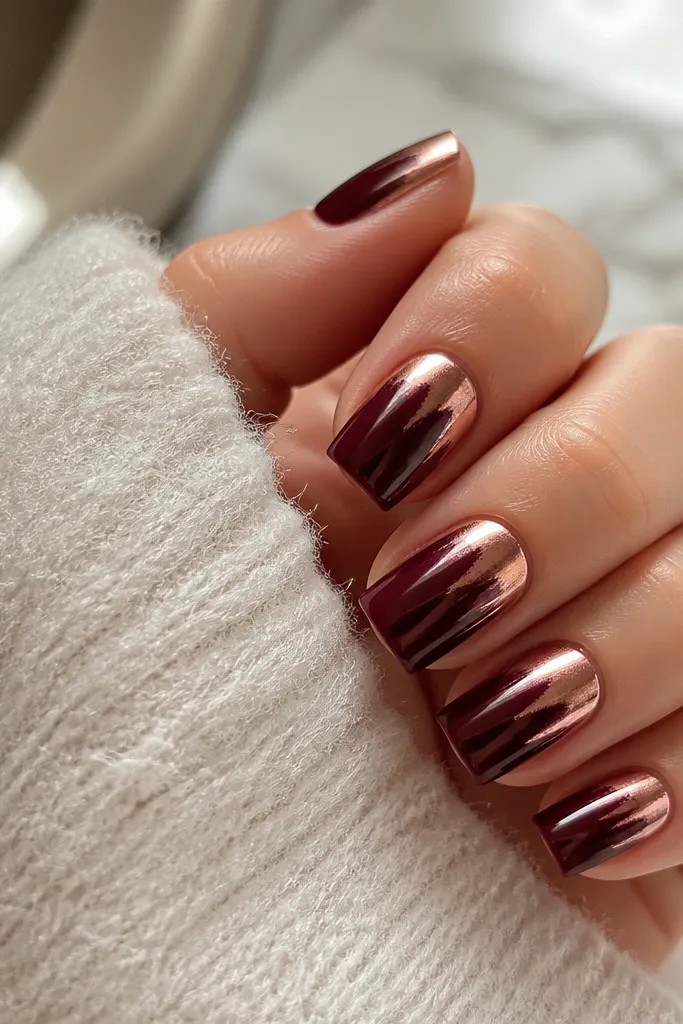
Chrome half-tips look expensive because they catch light in a clean band. I use a rosy-gold chrome so it doesn’t fight the cherry — it makes the red look deeper and more dimensional. This design looks best on medium square nails where the tip has enough real estate for the chrome to land. It flatters most skin tones because the chrome reflects warm highlights. The styling principle is a single metallic zone, not scattered chrome everywhere.
Start with two coats of dark cherry red and cure thoroughly. Apply a thin layer of chrome gel at the tip only, roughly covering the outermost third of the nail. Use a chrome powder sponge to press chrome onto the gel, blending slightly upward with gentle taps. Cure, then seal with a top coat that’s safe for chrome (thin and carefully applied) so you keep the mirror effect.
Practice on a spare nail tip first — chrome placement looks best when the band is straight from left corner to right corner.
Don’t over-topcoat chrome; heavy top coat dulls the mirror finish.
10. Cherry Cuticle Rhinestone Line
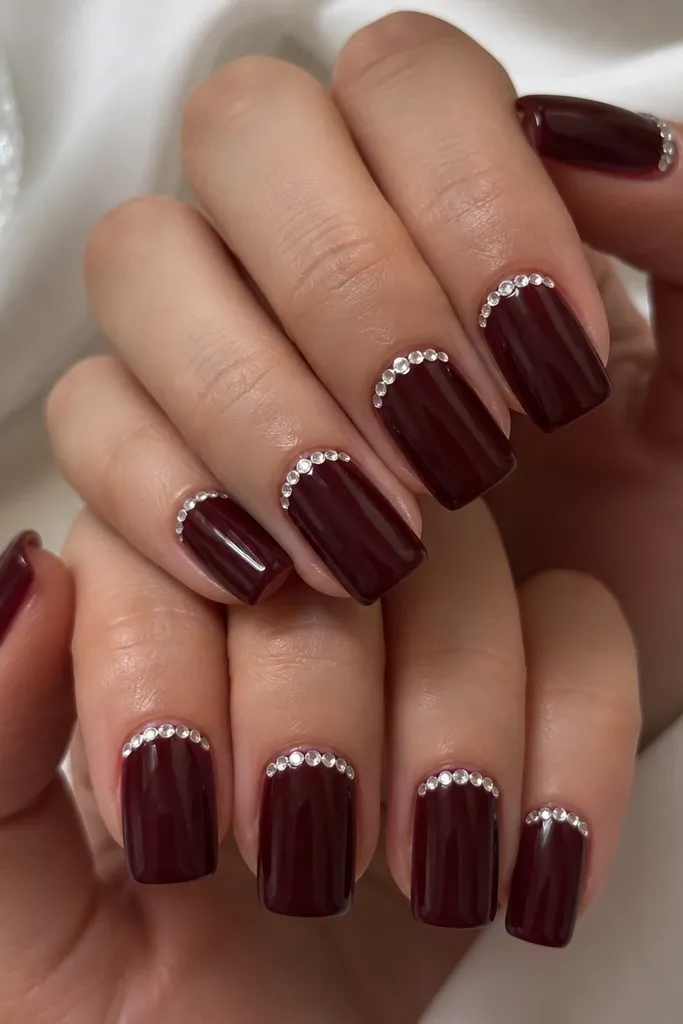
A rhinestone line at the cuticle reads classy because it looks like jewelry around the nail bed. I keep stones small (SS3 to SS5 size) and spaced evenly so it looks intentional, not like a cluster. This flatters hands with neat cuticles because the line highlights the shape of your nail bed. On deeper skin tones, the dark cherry makes the stones pop without needing extra colors. The styling principle is one row, one location.
Paint two coats of dark cherry red and cure. Apply a thin layer of tacky gel right at the cuticle line on one side, then place rhinestones across the nail with tweezers. Press each stone down for a couple seconds so it grips, then cure. Add a thin gel cap over the stones so they don’t snag, and finish with a glossy top coat.
If stones lift within a day, your gel is too dry — use a tacky gel and cure fully before top coat.
Skip big stones; large gems on square nails look bulky and can snag.
11. Matte Cherry With Glossy Center Stripe
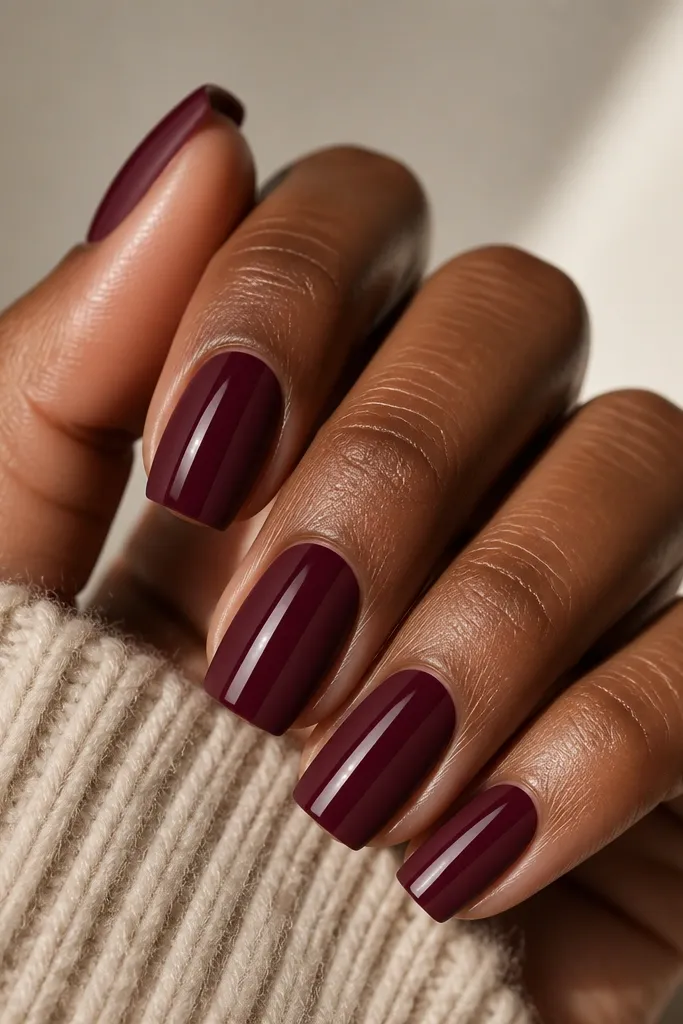
This design looks classy because it creates a clean optical line. The matte base hides tiny texture, while the glossy stripe adds shine exactly where the eye lands. I do this on short to medium square nails because the vertical stripe makes them look longer and more narrow. It flatters hands across skin tones since the color stays consistent and the contrast is only finish. The styling principle is one directional detail.
Paint two coats of dark cherry red and cure fully. Apply matte top coat to the entire nail and cure. Tape or use a striping brush to create a vertical center stripe that’s about 1 millimeter wide, then paint glossy top coat over that stripe and cure. Remove tape and add a final thin glossy layer only over the stripe edges if needed.
Editor's noteKeep the stripe perfectly centered — even a 1 millimeter shift can make square nails look crooked.
Watch outDon’t use a thick stripe; wide glossy centers can make nails look wider instead of longer.
12. Cherry Dot Fade With Nude Micro-Polka
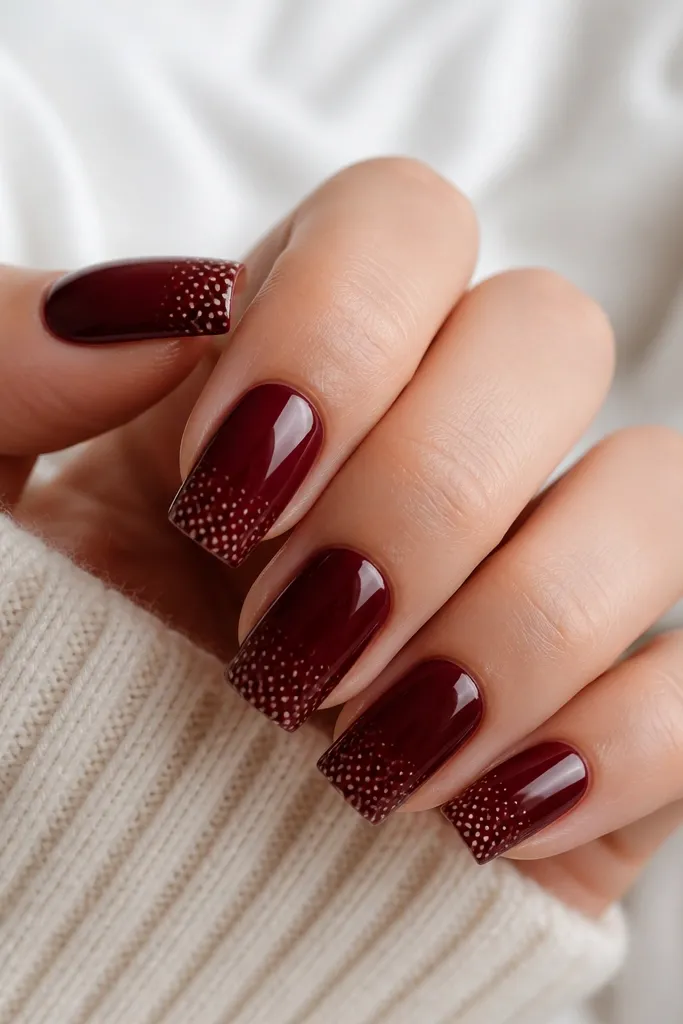
Micro dots look classy when they’re tiny and spaced like a pattern from a distance. I use nude micro dots over a subtle fade so it looks like a soft sprinkle, not a full-on glitter manicure. This is flattering for everyday wear because the dots are neutral and don’t scream for attention. On fair skin, nude dots prevent the cherry from looking too dark. The styling principle is gradual density — more dots near the tip, fewer near the base.
Paint two coats of dark cherry red and cure. Sponge a lighter cherry or sheer nude-tinted layer near the tip and feather it down slightly, then cure. Using a dotting tool, place tiny nude dots starting at the tip edge and work upward, spacing each dot about a dot-width apart. Cure everything and seal with glossy top coat to lock the dots flat.
Dip your dotting tool lightly and wipe excess on a lint-free pad — it keeps dot size consistent.
Don’t make the dots large; big polka dots on square nails look childish.
13. Cherry Velvet Glaze With Black Vein Accent
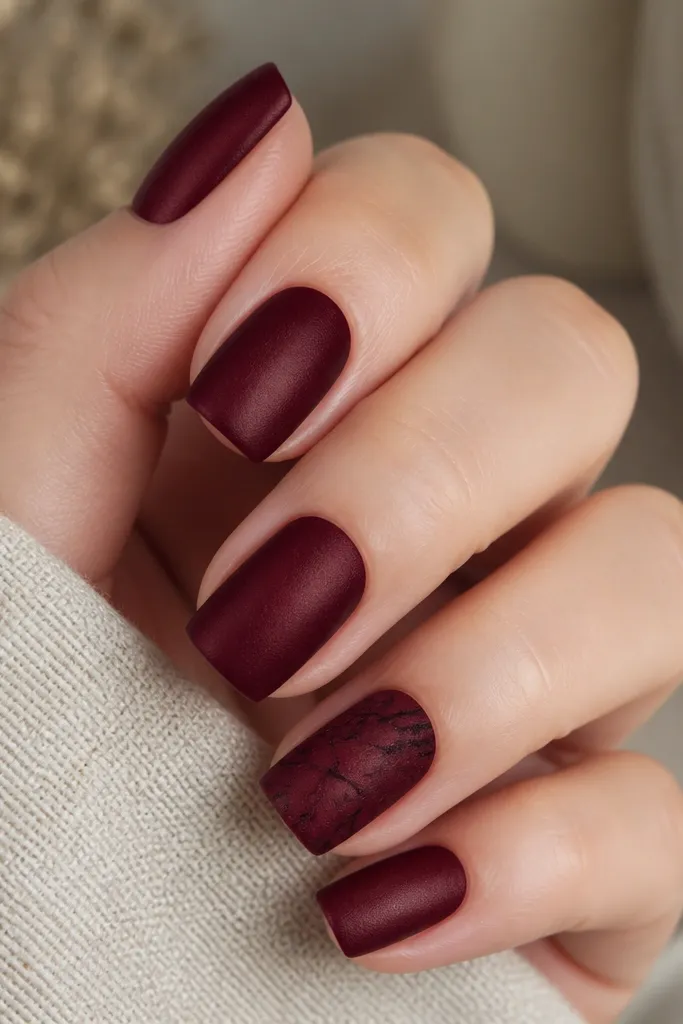
Velvet glaze keeps dark cherry looking smooth and expensive because it removes harsh shine. I pair it with thin black veins because the contrast is smoky, not bright. This looks great on hands that have slight dryness around the cuticle since velvet finishes visually soften the area. It flatters cool undertones and also makes warm undertones look deeper and more toned. The styling principle is muted texture plus one thin line accent.
Apply two coats of dark cherry red and cure. Apply velvet glaze top coat over all nails and cure until you get that soft, non-gloss look. On an accent nail, drag a fine brush through a small amount of black gel to create two or three thin veins, then cure. Seal the accent with a second light layer of velvet glaze, keeping the veins visible but not thick.
Use a very small amount of black gel — less product gives you hairline veins instead of blobs.
Skip glossy top coat over velvet designs; it erases the velvet effect and makes it look uneven.
14. Cherry Side-Slit Accent With Thin Silver Line
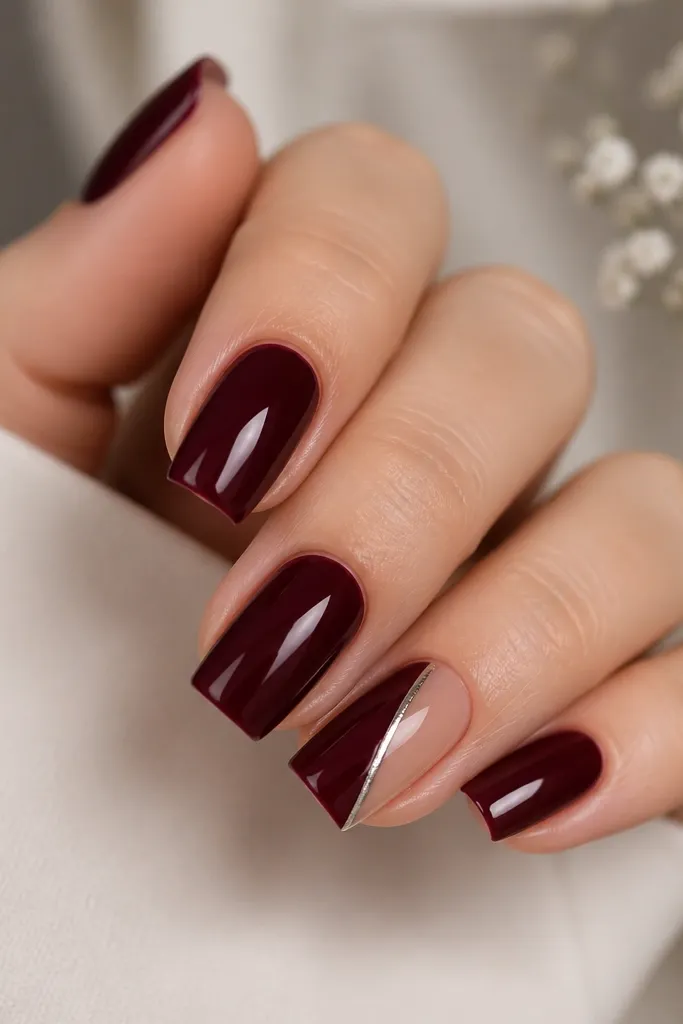
Side-slit designs feel classy because they use negative space like tailoring. I outline the slit with a thin silver line to keep it crisp, and I keep the rest of the nail glossy cherry so the contrast stays controlled. This flatters hands with longer nail beds because the diagonal slit visually stretches the nail. It also looks good with silver jewelry, which is why I like it for weddings and formal events. The styling principle is sharp negative space plus one metallic outline.
Paint two coats of dark cherry red on all nails and cure. For the accent nail, place striping tape to mask a diagonal slit shape near one side of the nail, leaving a 1-2 millimeter negative space. Paint the silver line along the tape edge and cure, then remove tape to reveal the slit. Apply a glossy top coat over the whole nail, and gently cap the slit edges with top coat using a brush so it doesn’t catch.
Press tape down firmly along the square corner — if the tape lifts, your silver line will look fuzzy.
Don’t make the negative space too wide; wide cutouts look unfinished.
15. Dark Cherry Red Nails With Smoked Glass Center Burst
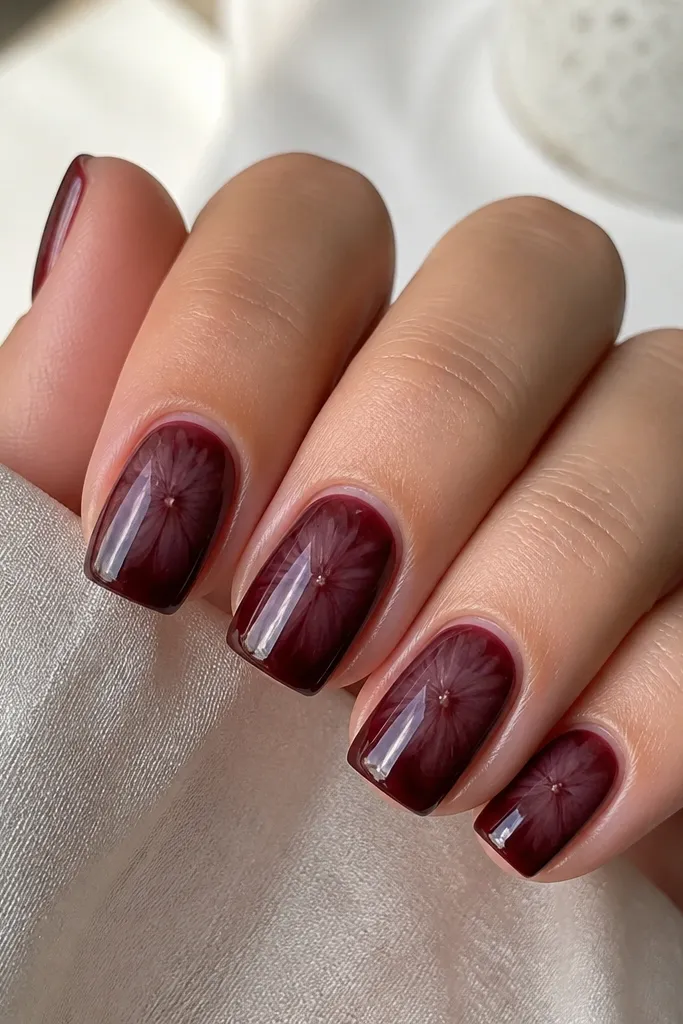
This design looks like a dark cherry gemstone seen through smoked glass. The center burst gives you a focal point that still feels classy because it stays inside the nail, not all over the surface. On square tips, the burst reads clean and structured, especially when the outer edges are feathered instead of hard-edged. I love it for nights out because the glossy top coat makes the smoky center look deeper as the light hits. It also photographs well since the burst sits right where cameras focus on nails.
Start with two thin coats of dark cherry red, then cure fully. Mix a tiny amount of matte black gel with a dab of clear builder gel and a drop of alcohol-based slip solution to keep it workable; use a dotting tool to place the burst in the middle and lightly drag outward in short arcs to create a soft, stained-glass edge. Clean up the sides with a lint-free wipe and a brush dipped in gel cleanser so the smoke doesn’t creep onto the nail walls. If you want it extra crisp, outline the burst with a thin line of clear gel and cure, then add a glossy top coat and cap the square tip.
Editor's noteUse less gel than you think for the smoky burst. If it’s too thick, it turns into a blob instead of a glassy center.
Watch outDon’t paint the smoke all the way to the cuticle — leave a clean gap so the center burst looks intentional.