
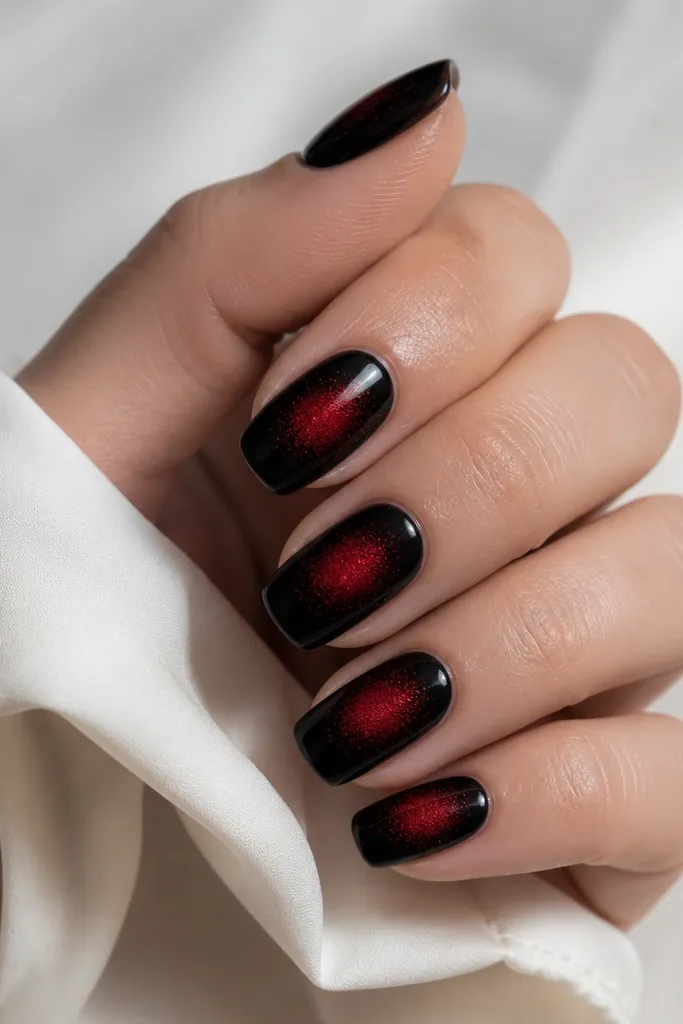
1. Smoky Center Halo With Cherry Core
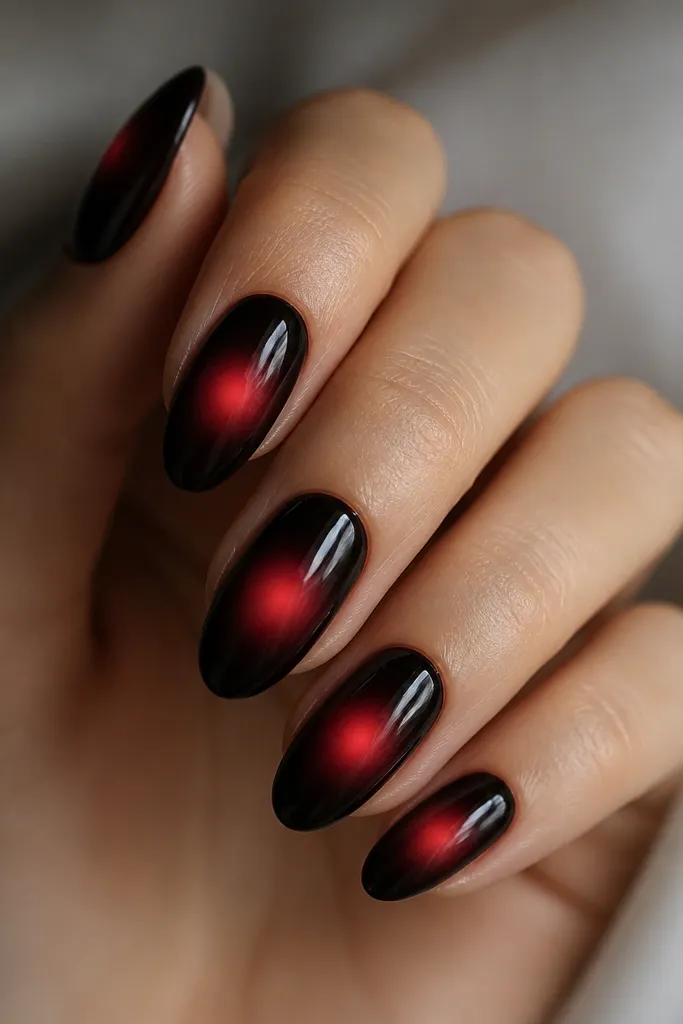
Start with two thin coats of black gel, curing each coat fully. Dab a tiny amount of cherry red gel onto a makeup sponge, then tap lightly in the center of the nail — one to three taps only — and cure 15 seconds. With a toothpick or dotting tool, place a small cherry-red dot exactly in the middle, then drag it 1-2 mm outward to create a soft center flare. Finish with a glossy top coat, cure all the way, then clean the edges with a lint-free wipe and a little isopropyl alcohol.
I did this on square-short nails and it looked instantly clean because the halo stays centered and doesn’t spill into the sidewalls. The base is a true black gel (almost ink-like), then the red aura is built with a sponge using a deep cherry red. The cherry core stays small so it reads as a lit hotspot, not a blob. This version flatters light to medium skin tones because the red pops against the dark without turning gray. It also looks great for nights out because the glossy top coat makes the glow catch light every time you move your hands.
Watch outDon’t press the sponge hard; it turns the fade into a streaky smear.
Editor's noteIf the aura looks too faint, add a second sponge pass after the first cure — don’t overload in one go.
2. Reverse Aura French Black Ring
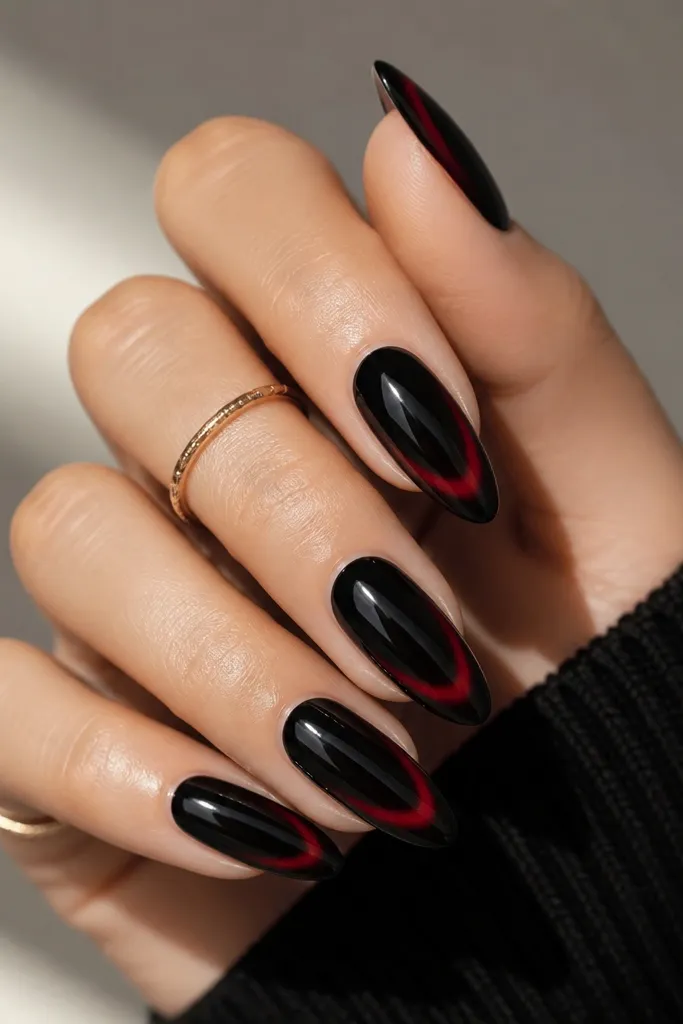
This one gives a "reverse French" vibe because the red halo sits near the free edge, not the cuticle. I like it on almond because the tip shape makes the ring look intentional and sharp. The red is a darker blood-red so it doesn’t go neon under the top coat. On deeper skin tones, this version looks extra luxe since the red ring frames the nail and highlights your hand shape. It fits events, photos, and even everyday wear if you keep the ring narrow.
Paint a solid black base and cure. Using a small sponge, tap blood-red gel along the tip area leaving the very edge slightly darker, then cure 15-30 seconds. With a fine liner brush, draw a thin black line just inside the red halo to keep the ring crisp, then cure again. Add a glossy top coat in two thin layers so the aura stays smooth and the ring doesn’t sink.
Use a liner brush to pull one tiny red stroke upward from the ring; it makes the glow look like it’s spreading.
Skip thick layers of top coat on the tip — they make the halo look cloudy.
3. Black Velvet Aura With Oxblood Smoke
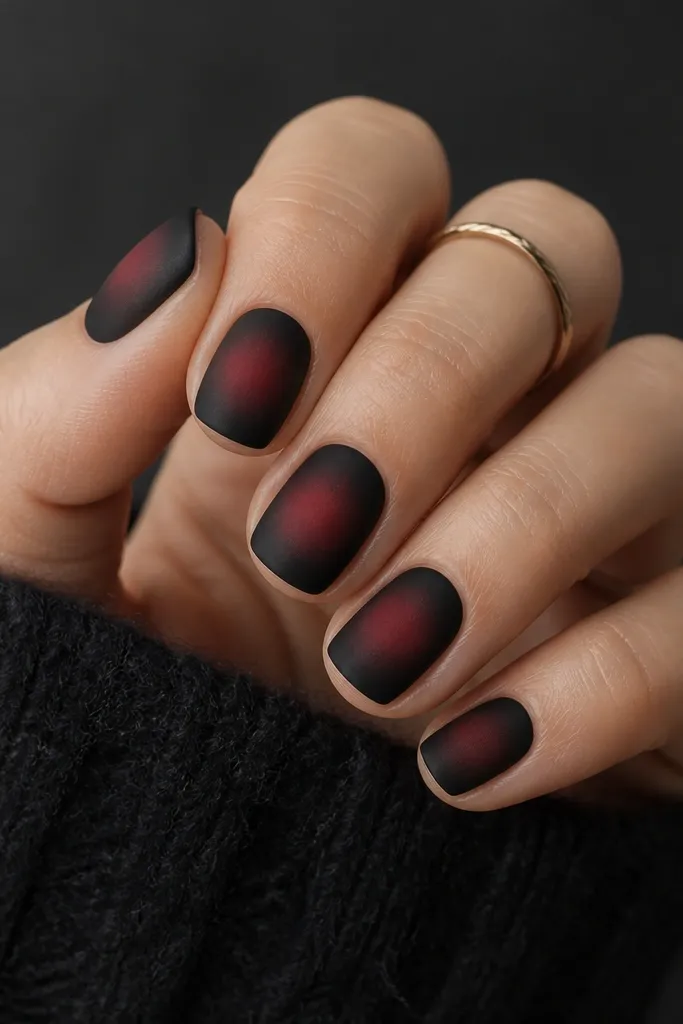
I did this with a matte top coat because black aura nails look different when they don’t shine. The oxblood red aura sits like smoke instead of a bright glow, which makes it more wearable in daylight. The matte finish also hides tiny brush strokes, so it’s forgiving if your gradient isn’t perfect. It’s flattering on hands with shorter nail beds because the center placement gives an illusion of depth. This set works for workdays, dinners, and anyone who hates super glossy nails.
Apply a smooth black gel base and cure. Sponge oxblood-red gel onto the center with very light taps, then cure 15 seconds. If you want more depth, add a second sponge tap but keep it tighter than the first. Top coat with matte sealer, cure fully, then add one glossy micro-layer only on the cherry dot (if you add one) so it looks like the smoke has a hot spot.
If your matte top coat blurs the aura, add a glossy top coat on top of the aura only, then matte the rest of the nail.
Don’t use a super bright neon red with matte — it looks out of place against black velvet tones.
4. Liner-Brush Aura With Red Vein Glow
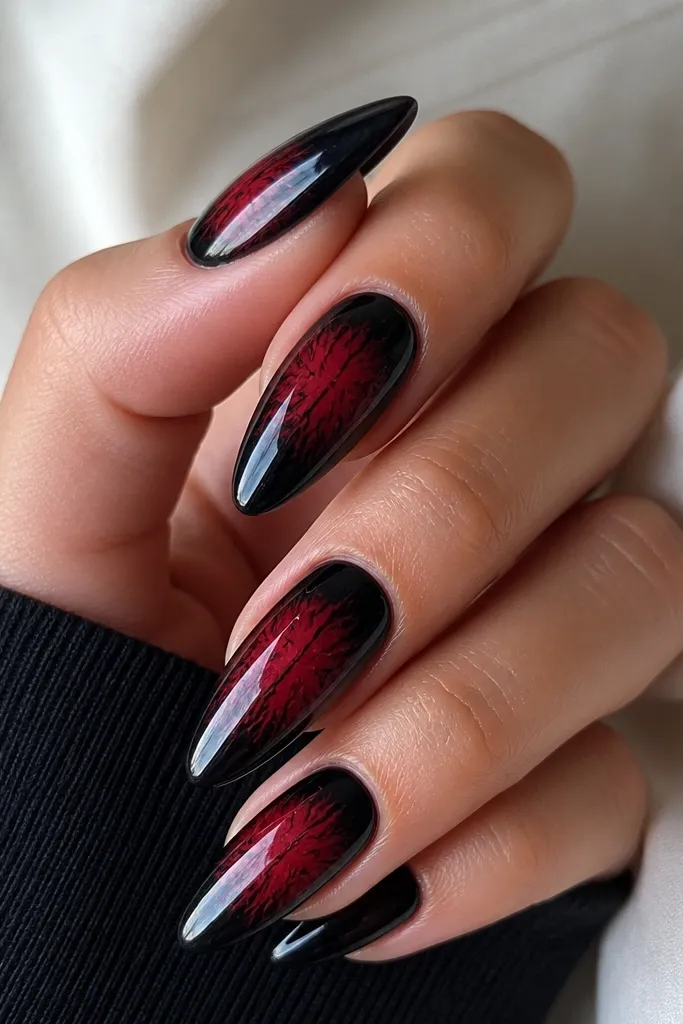
Start with two coats of black gel, fully cured. Load a thin liner brush with diluted blood-red gel (you can mix a tiny drop of gel medium into it), then paint a soft oval aura around the center — keep the edges feathered. Cure 30 seconds. Add a second pass for a slightly darker center glow, then use a fine detail brush to draw a branching vein line from the center outward. Finish with glossy top coat and cure until fully hard.
This is the aura set I reach for when I want something more “designed” without extra tools. Instead of relying only on sponge blending, you paint a narrow red aura using a liner brush with soft strokes. Then you add a red vein line that starts near the aura center and splits like a tiny lightning fracture. The contrast between soft aura and crisp vein makes it look expensive. It flatters medium to deep skin tones because the red lines frame your nail and pull attention toward your hands. It’s also great for longer nails since the veins have room to travel.
Watch outDon’t over-thicken the aura outline; it kills the glow effect.
Editor's noteKeep your vein line under 1 mm wide so it reads as detail, not a stripe.
5. Stamping Aura Black-Red Fade
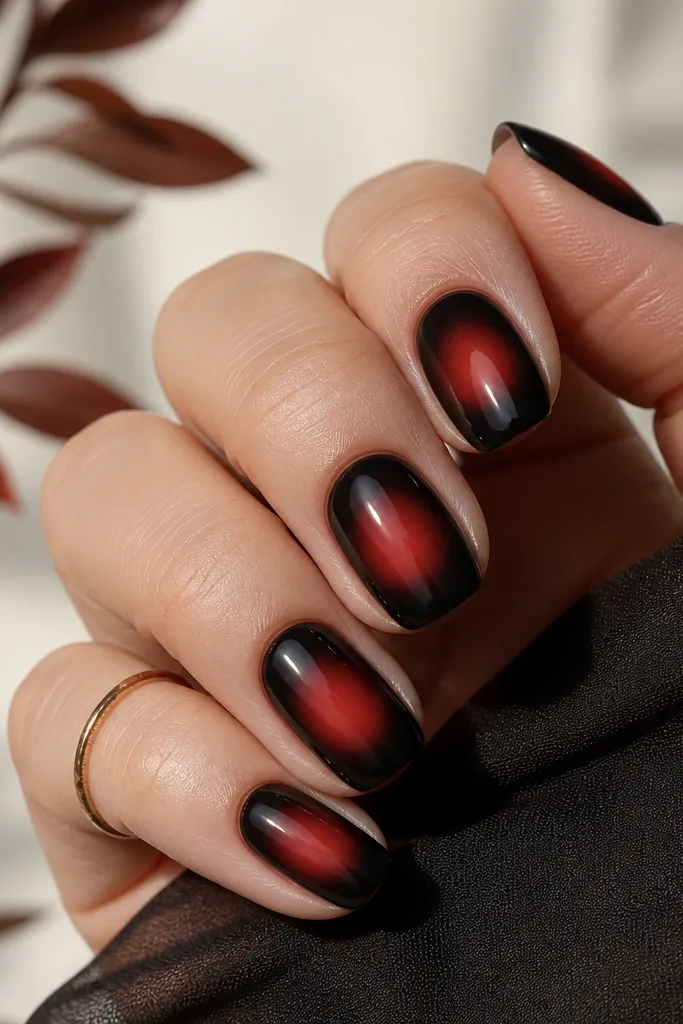
If you hate sponge mess, stamping gives you a repeatable aura shape fast. I used a stamping plate with a gradient or swirl aura pattern, then layered black over it so the red looks like it’s glowing through the dark. This set is cleaner on fingers because the fade is consistent from nail to nail. The red is a deep lacquer-like shade that stays true under top coat. It looks great for people with uneven nail beds because stamping covers minor shape differences with consistent pattern placement. It also photographs well because the aura is centered and symmetrical.
Paint a full black base and cure. Choose a stamping plate that has aura rings or swirl fades; apply red stamping polish to the plate, scrape well, then pick up with the stamper. Stamp onto the nail center once, then cure 60 seconds. If the stamp looks too light, add a second stamp with only the red portion and cure again. Seal with a glossy top coat, making sure you cap the free edge.
Wipe the stamping plate clean between nails so the gradient stays sharp, not smeared.
Don’t press the stamper too long — it drags the gradient and blurs the aura.
6. Black Aura With Micro Glitter Edge
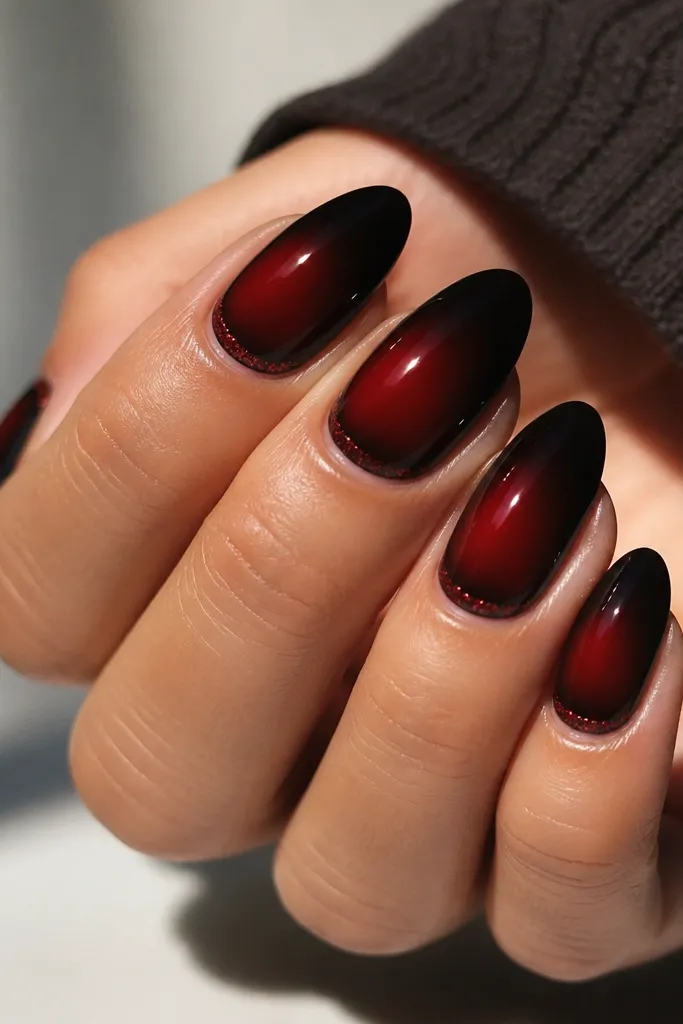
This is the aura set I wear when I want “extra” without going full sparkle party. The red aura stays smooth and smoky, then a micro glitter edge sits only near the sidewalls like a whisper of embers. I used fine red micro-glitter, not chunky, so it doesn’t snag on sweaters. This flatters hands with narrow nail beds because the side shimmer makes nails look wider and more balanced. It’s also very wearable for dates because the glitter catches light in a controlled way.
Start with a black base and cure thoroughly. Sponge a smoky red aura in the center, keeping the halo tight. Cure 15-30 seconds, then add a thin stripe of red micro-glitter gel along the left and right sidewalls using a striping brush. Cure again and wipe any tackiness. Top coat with glossy gel in a thin layer and cap the tip.
Use a striping brush with a clean, dry bristle — glitter gel spreads less when the brush isn’t wet.
Skip chunky glitter; it makes the aura look uneven and feels rough.
7. Hot Red Center Dot Aura
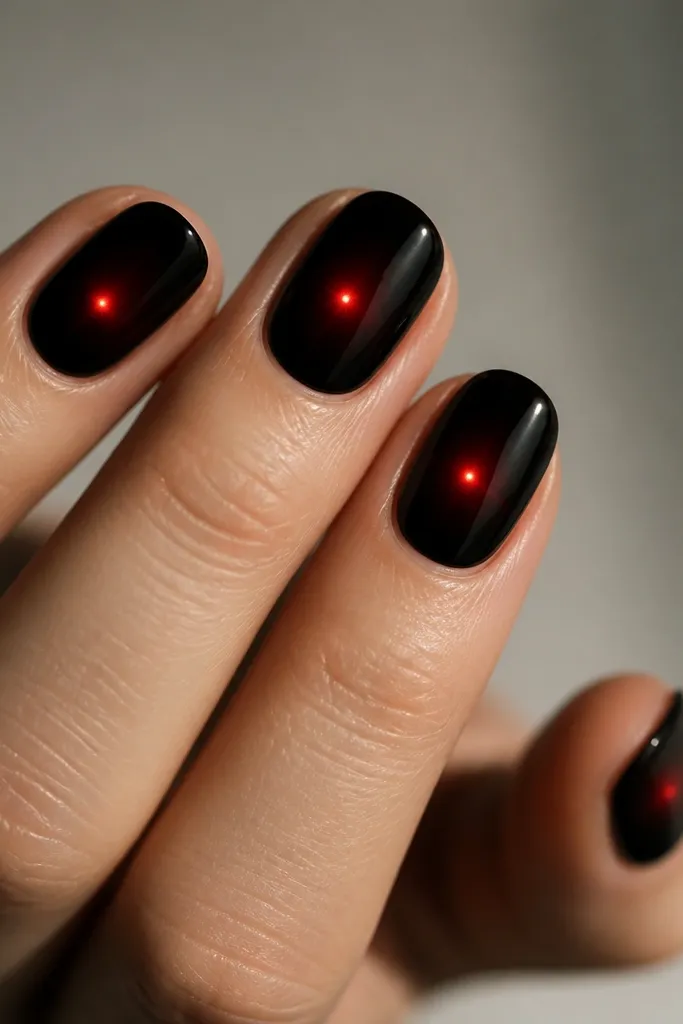
Apply two thin coats of black gel and cure. Tap a tiny amount of bright red gel with a dotting tool in the exact center. Before curing fully, lightly tap around the dot with a barely loaded sponge to soften the edges, then cure 30 seconds. Add one more top layer of red dot if you want it brighter, cure again. Seal with glossy top coat and cure until hard.
This one is quick and it looks intentional because the design has one focal point. I place a bright red dot (almost like a drop of molten paint) at the nail center, then I feather the edges with a tiny sponge so it becomes an aura. The result is more graphic than smoky. It looks great on short nails because the dot gives the eye a focus point, and the faint halo keeps it from looking flat. On cooler skin tones, the red reads crisp and doesn’t turn orange. It’s also a good choice if you’re new to aura nails.
Watch outDon’t feather the dot too far — if the halo expands past the center, it looks messy.
Editor's noteUse the smallest dotting tool you have; too-big dots make the aura look like a sticker.
8. Red Drip Aura Over Black Smoke
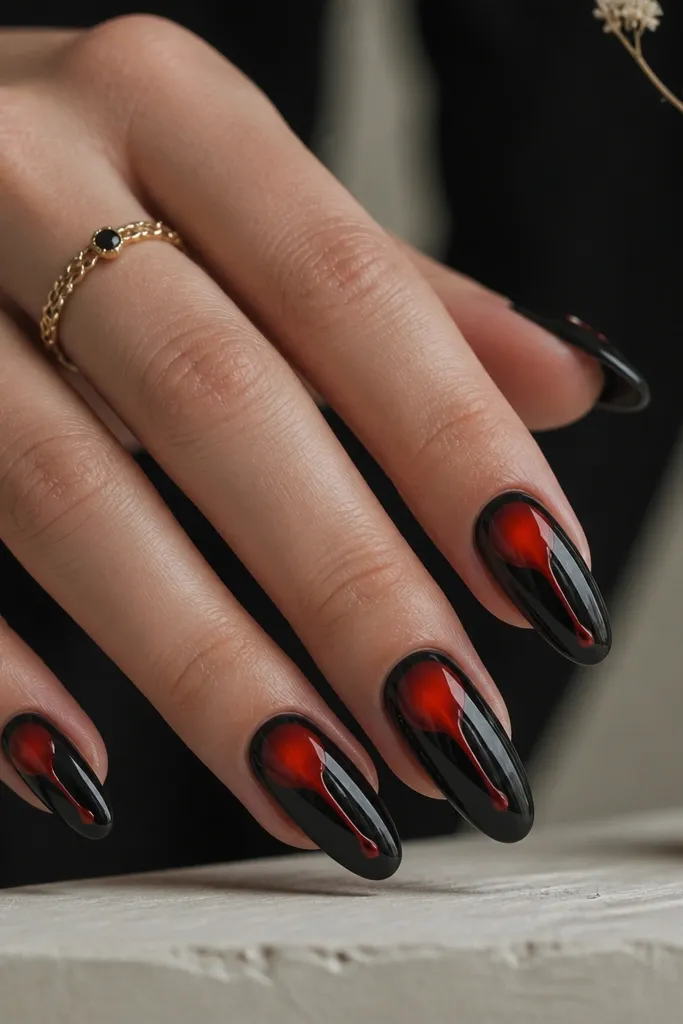
Paint black base and cure. Sponge smoky red gel in the center, then cure 15-30 seconds. Add a thicker red gel bead at the center and use a toothpick to pull it downward about 2-3 mm. Cure carefully so the drip doesn’t flood; do 30 seconds, then check, then cure again. Finish with glossy top coat, and cap the drip edges so it stays smooth.
I love this design because it mixes aura softness with a little drama. The aura is a smoky red fade in the center, and then a thicker red gel drip hangs from the center hotspot. The drip makes it look like the glow is melting. This flatters medium nail lengths because the drip needs a little vertical space to look natural. It also looks good on fingers that are a bit wider since the drip creates a vertical line. For nights out, it’s a guaranteed compliment set.
Watch outDon’t use runny polish for the drip; it spreads and ruins the aura.
Editor's noteTo control the drip length, wipe your toothpick tip on a paper towel before pulling the gel.
9. Black Aura With Red Foil Flares
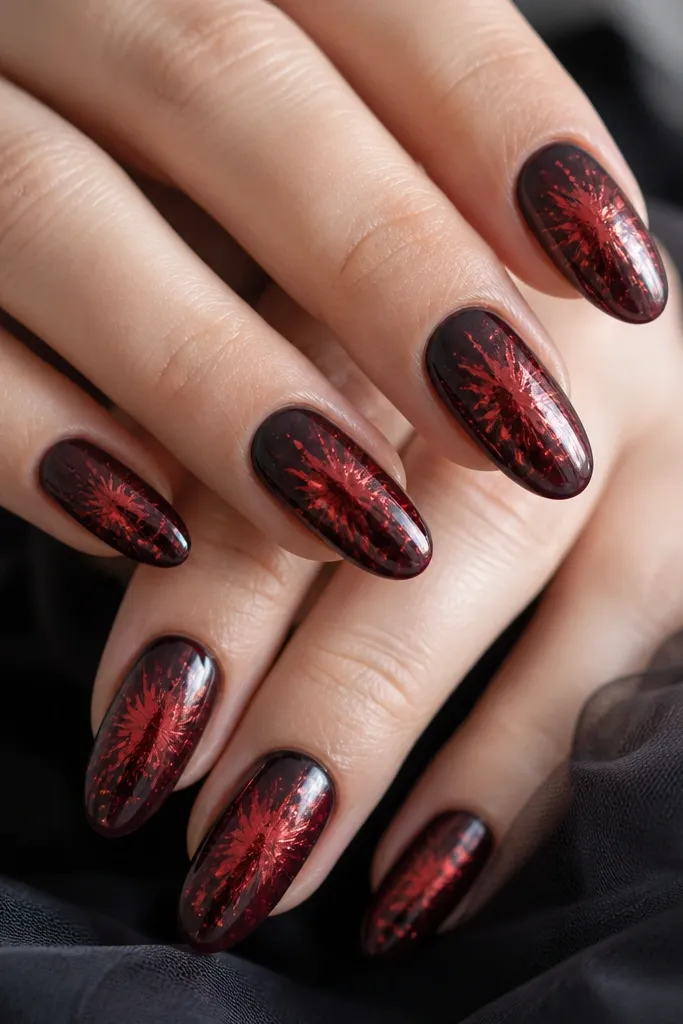
Apply black base and cure. Sponge a tight red aura in the center using a deep red gel, then cure 15-30 seconds. Add a thin layer of tacky gel around the aura edges (not the center), then press red foil fragments in small clusters. Cure and then seal with a glossy top coat, using two thin layers to fully smooth the foil texture.
Foil makes aura nails feel more “editorial.” I place a tight red aura center first, then press red foil fragments onto the sides of the aura so they look like glowing embers catching air. Use thin foil, not chunky sheets, because thick pieces look heavy against black. This set looks amazing on almond nails and on hands with warm undertones because red foil looks brighter and richer. It also hides tiny sponge imperfections since foil breaks up the gradient.
Watch outDon’t cover foil with matte top coat; it kills the glow effect.
Editor's noteCut foil into smaller bits with scissors so you can place it like a flare, not a patch.
10. Aura Ombré Tips With Black Fade Back
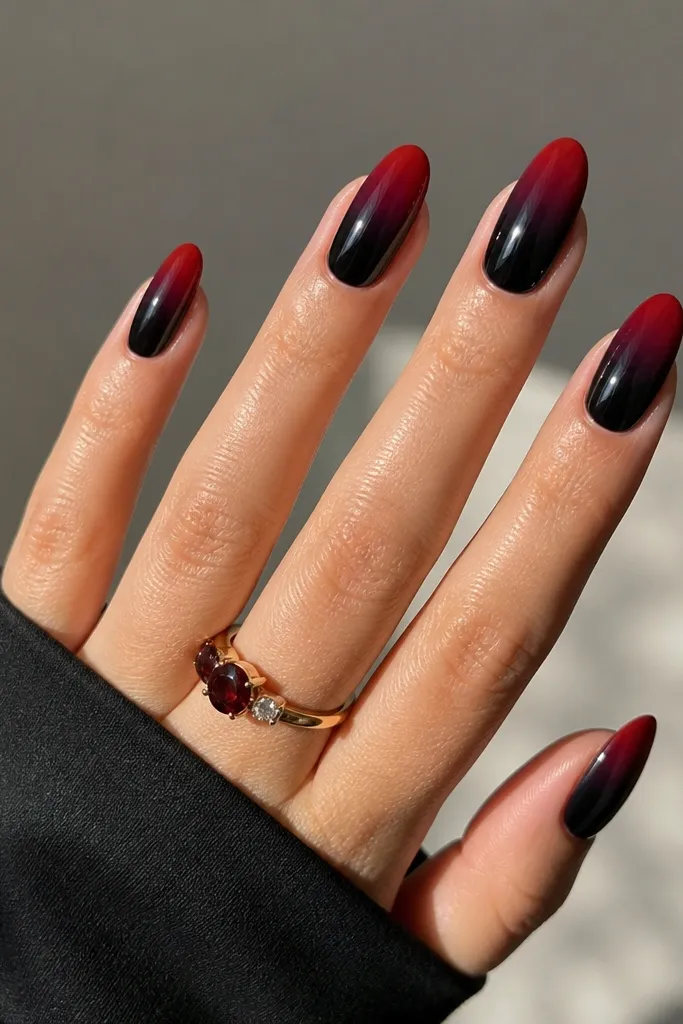
Start with a black base and cure. Sponge red gel at the tip area, but blend upward only about a third of the nail length. Cure 15-30 seconds, then add a second lighter sponge pass to soften the transition. With a clean sponge, tap once over the blend to remove harsh edges, then cure again. Top coat glossy and cap the free edge so the fade stays smooth.
This version flips the usual aura placement. The strongest glow is at the tip, then it fades into black as it moves toward the center. I like it on medium almond because it gives a built-in “length” effect. The red looks like it’s rising from the edge, which feels different than the cuticle glow sets. It’s flattering across skin tones because the black fade keeps the design grounded. Wear it for formal events — it looks crisp even when you keep the lines soft.
Watch outDon’t bring the red too high — if it covers half the nail, it stops looking like aura.
Editor's noteUse a fresh makeup sponge corner for the second pass so the fade stays soft.
11. Black Aura With Thin Red Crescent Cuticle
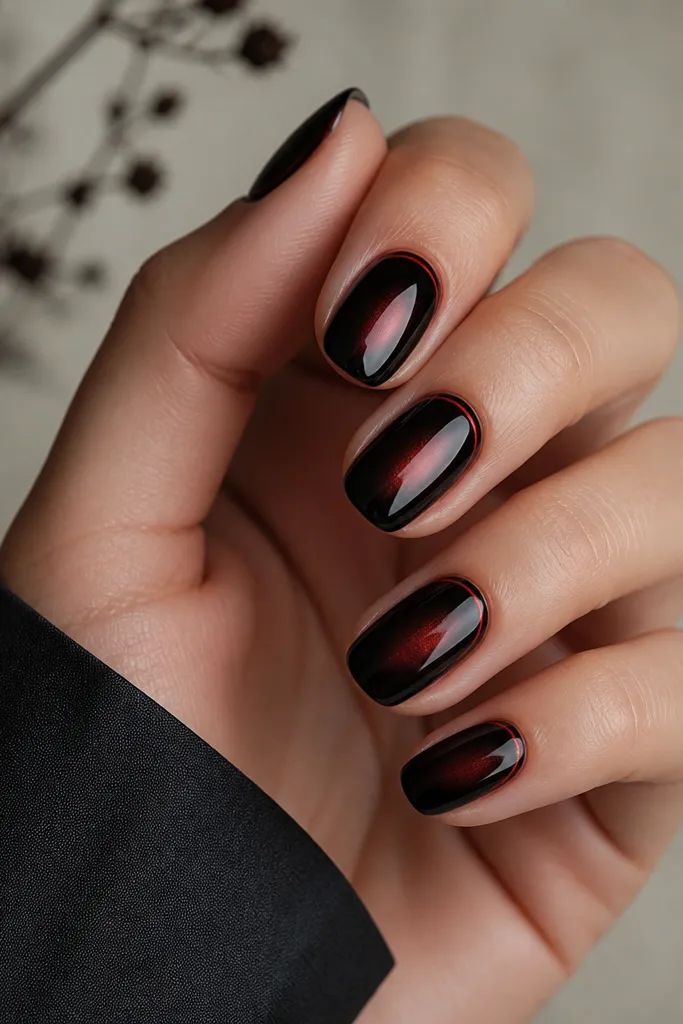
Apply black base and cure. Sponge a faint red aura in the center — keep it subtle — and cure 15 seconds. With a striping brush, paint a thin red crescent just above the cuticle, leaving a tiny gap so it doesn’t flood the skin line. Cure fully. Finish with glossy top coat and clean up the cuticle edge with a small brush dipped in remover.
This set has a clean, graphic cuticle detail that makes aura nails look more deliberate. The red crescent sits just above the cuticle line, and the aura glow stays centered so you get two levels of interest. I used a deep red gel liner so the crescent looks sharp, not fuzzy. This flatters short nails because the crescent visually lifts the nail and makes it look longer. For everyday wear, it’s my go-to because it feels polished without heavy art.
Watch outDon’t let the crescent touch the cuticle line — it drags and looks messy.
Editor's noteIf your crescent is shaky, rest your hand on a table and use the brush tip like a pen, not a paint brush.
12. Red Crackle Aura Over Black
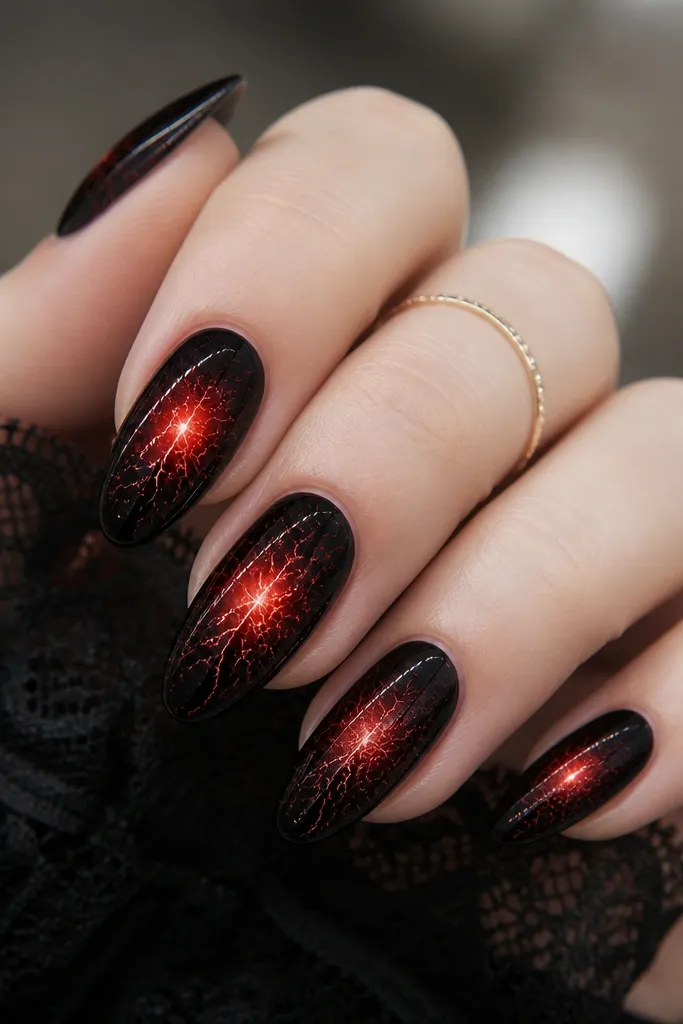
Paint black base and cure. Sponge red gel into a centered aura, then cure 15-30 seconds. Apply red crackle gel over the aura area only, using a thin layer so cracks form instead of flooding. Cure according to the gel brand timing. Seal with glossy top coat in one careful layer so the crackle texture stays visible.
Crackle plus aura looks like energy. The aura gives you the glow, and the crackle gives you texture without needing glitter. I like using a red crackle gel on top of a black base with a soft red halo under it, so the cracks show through like heated lines. This set looks best on longer shapes because the crackle lines need space to fan out. It flatters hands with a slightly longer nail bed and makes fingers look sharp. It also photographs well because the crackle creates tiny highlights under the gloss.
Watch outDon’t put crackle over a wet aura; it smears the glow.
Editor's noteIf cracks don’t show, your layer is too thick — scrape excess off with the brush and try again on the next nail.
13. Black Aura With Ombre Micro Hearts
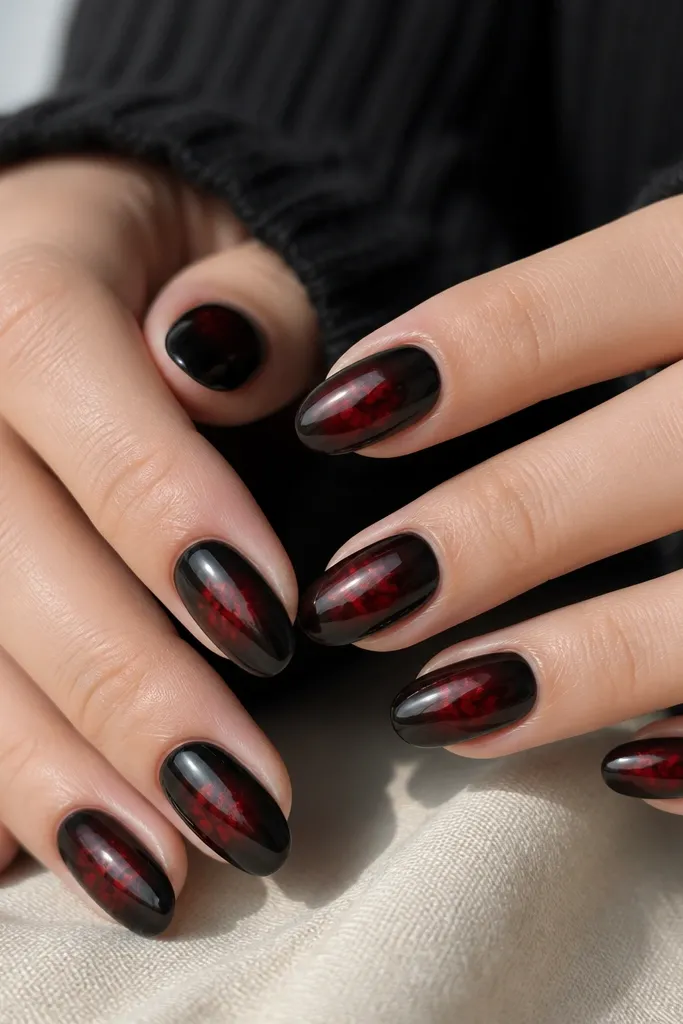
Start with black base and cure. Sponge a centered red aura, then cure 15 seconds. Use a dotting tool to make three tiny hearts: place two small dots, then drag a line between them to form the heart point. Add one heart in bright cherry and two in oxblood. Cure and finish with glossy top coat, keeping the hearts slightly raised but sealed.
This is the cute version that still feels edgy. The aura stays smoky and dark, and then I add micro hearts that sit right inside the glow ring. I used two shades of red so the hearts look layered: one bright cherry and one deeper oxblood. This flatters medium skin tones because the hearts read crisp and don’t get swallowed by the black. It’s a fun choice for date nights, birthdays, and any time you want something sweet without going full pink.
Watch outDon’t outline hearts with white; it turns it into a cartoon look fast.
Editor's noteMake hearts smaller than you think — micro hearts look better and don’t snag.
14. Aura Marble With Black Red Swirls
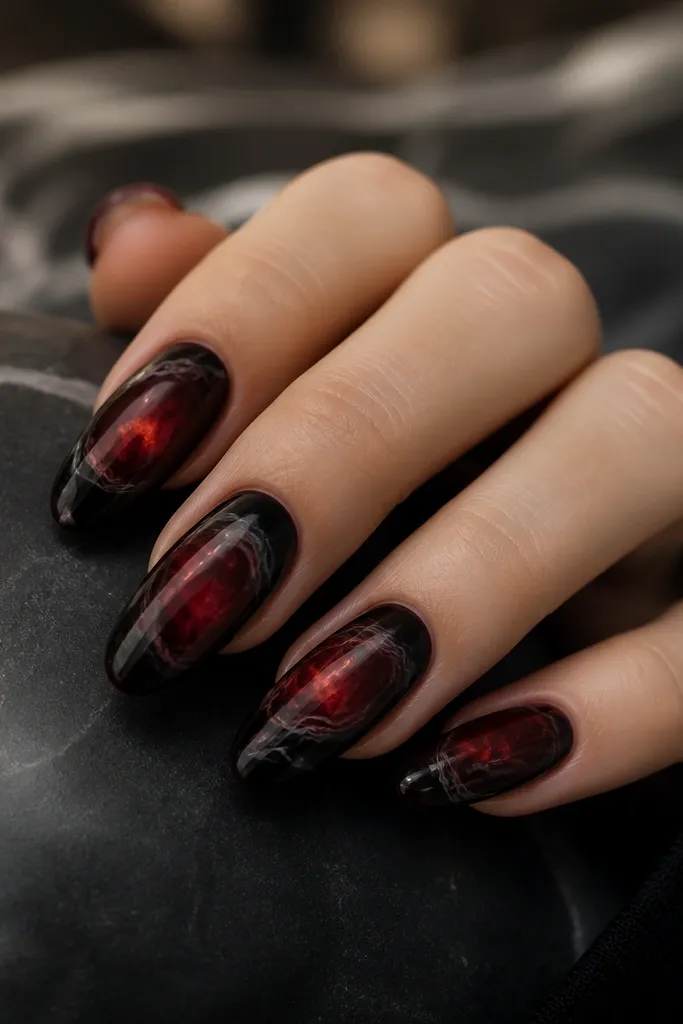
Apply black base and cure. Sponge red gel into a tight aura center, then cure 15-30 seconds. Use a thin detail brush with a mix of red gel and a little black gel to paint 2-3 thin swirls around the aura, leaving gaps. Drag the brush lightly so the lines look like they’re flowing, not painted solid. Cure, then seal with glossy top coat in two thin layers.
Marble aura nails look like you spent way more time than you did. I paint a black base, then do a tight red aura center and drag thin red-black marbling lines around it so the glow feels trapped in movement. The effect looks expensive because marble has natural irregularity. This flatters most nail lengths, but it looks especially good on oval or almond because swirls curve nicely. It also works for fair to deep skin tones because the red stays consistent and the black anchors it. If you love “art nails” but want quick steps, this is it.
Watch outDon’t fill the marble gaps — solid filling makes it look like smeared paint.
Editor's noteKeep swirl lines under 0.5 mm so the aura stays the main focal point.
15. Black Aura With Red Stipple Ombre
Stippling gives the smoothest aura when you can’t blend with a sponge. I use a stippling tool or the end of a brush handle to make tiny dots, then cure and repeat. The center has the most red, and the outer edge has fewer dots so it fades naturally. This looks great on any shape, but it’s especially flattering on short nails because the dot fade stays contained. The texture also makes the red look more dimensional under light. If you’re picky about clean gradients, this is the method.
Paint black base and cure. Load a red gel on a stippling tool (or bobby pin tip) and tap the center area with small, spaced dots. Cure 15-30 seconds. Add a second layer of dots around the first cluster, reducing dot density as you move outward to create the fade. Seal with glossy top coat and cure fully.
Use a darker red for the center dot cluster and a slightly lighter red for the outer dots.
Don’t make giant dots; they create circles you can see instead of an aura fade.
16. Red Aura Under Clear Negative Space
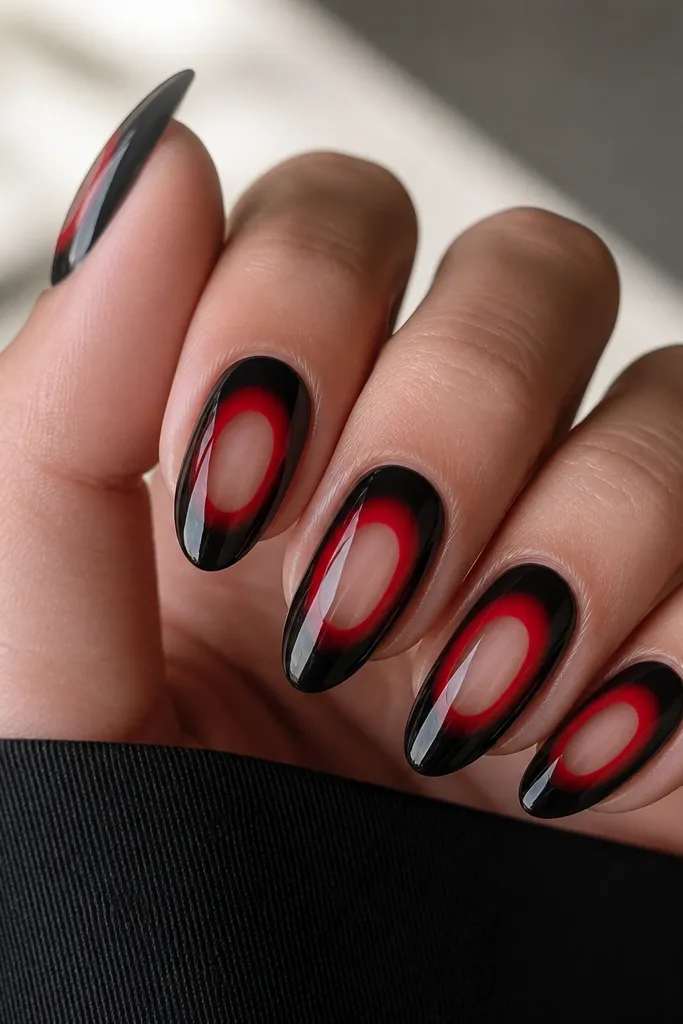
Start with black base on the whole nail except the clear window area. Cure. Sponge red gel into the window area only, building a tight aura around the center, then cure 15-30 seconds. Add a second red pass for a stronger glow and cure again. Apply a thin clear gel layer to seal the window edges, then glossy top coat over everything and cure fully.
This is my favorite “clean girl” aura look because it uses negative space like a design element. You get the red glow inside a clear oval or round window, while the rest of the nail is deep black. I usually do this on almond because the window shape looks intentional and elongating. It’s flattering because the clear area draws attention to the nail bed. The red aura behind the window looks brighter since there’s no black covering the glow directly. For formal events, it looks sharp and modern.
Watch outDon’t rush the window edges — messy edges ruin the clean look fast.
Editor's noteTrace the window with a striping brush lightly first, then sponge inside the outline so you don’t spill.
17. Black Aura With Red Micro Lattice
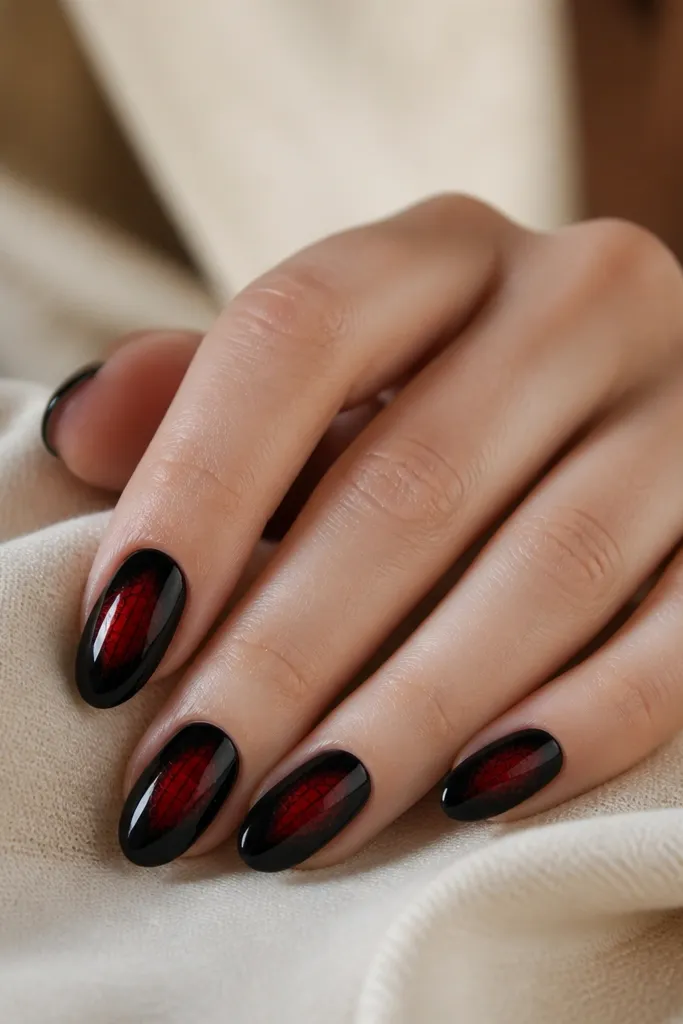
Paint black base and cure. Sponge a red aura in the center and cure 15-30 seconds. With a thin liner brush, draw two vertical lines and two horizontal lines across the aura to form a tiny grid, then add one diagonal line segment for extra detail. Cure. Seal with glossy top coat, focusing on smoothing the grid lines so they don’t snag.
This set is for when you want aura nails that feel structured. The aura is soft in the center, then you add a micro lattice using thin red lines so it looks like heat is trapped under glass. I used a fine liner brush and kept the grid small, only covering the center glow area. It flatters medium nail beds because it pulls the eye inward. Also, the lattice makes the red look more detailed without adding glitter or extra color. Great for parties, but it still looks neat on a workday if you keep the lattice tight.
Watch outDon’t extend the lattice to the sides — that’s where it starts looking cluttered.
Editor's noteUse a gel liner that levels well; watery liners make wavy lines in the grid.
18. Aura Gradient Sides With Red Inner Glow
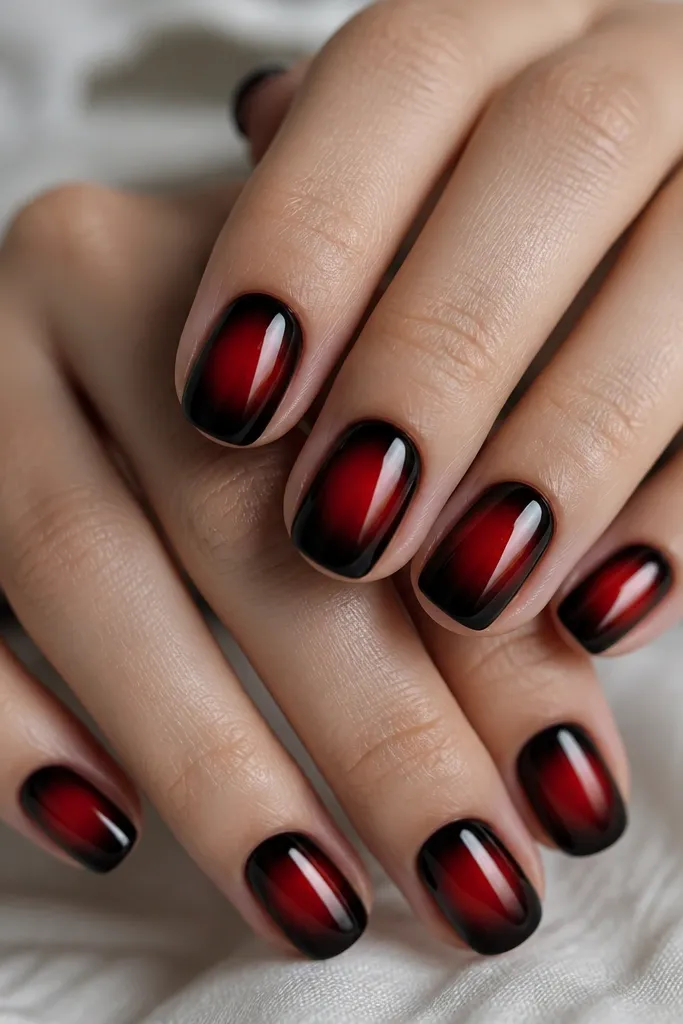
This design has more coverage than the classic aura, but it still stays clean because the fade is controlled. I built the center aura first, then added a lighter red gradient on both sides so the nail looks surrounded by heat. The effect makes your nails look fuller and more dimensional. It flatters hands with slender nail beds because the side glow adds width and balance. If you’re going for a bold look without full art, this is the one. It also looks great with short almond or squoval since the gradients have room to fade.
Apply black base and cure. Sponge deep red in the center and cure 15 seconds. Use a cleaner sponge corner to tap lighter red on both side areas, stopping before the sidewalls touch the skin. Cure again. Add a tiny bright red dot in the center hotspot, then seal with glossy top coat and cap the edges.
Keep the side glow lighter than the center; that contrast is what sells the aura.
Don’t make the side glow the same darkness as the center or it looks flat.
19. Red Flame Aura Behind Black Smoke
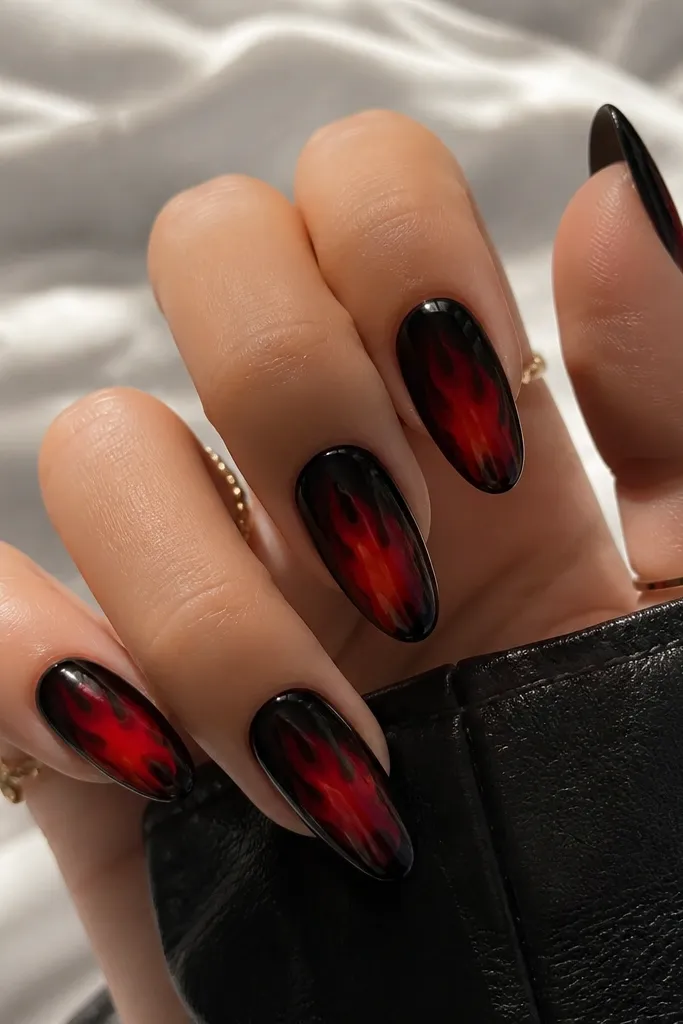
Flame aura is more aggressive and it looks so good under bright lighting. I place the aura center low, then paint flame-shaped red tips that rise toward the cuticle while staying soft at the edges. The black smoke base keeps it from looking like a Halloween flame sticker. This flatters longer almond nails the best because the flame tips have vertical space. On warm undertones, the red looks richer and more coppery. If you want aura nails that look like motion, this is the set.
Start with black base and cure. Sponge a tight red aura center in the middle and cure 15-30 seconds. Use a medium liner brush to paint two flame tips on each nail: one toward the left side of the center and one toward the right, keeping the tips 3-5 mm long. Feather the flame edges with a clean sponge tap so they blend into the aura. Finish with glossy top coat and cure fully.
Keep flame tips symmetrical across the nail; asymmetry reads intentional, not sloppy, when the tips match length.
Don’t use a thick red stripe for flames — it looks like a sticker line.
20. Black Aura With Red Glossy "Liquid" Center
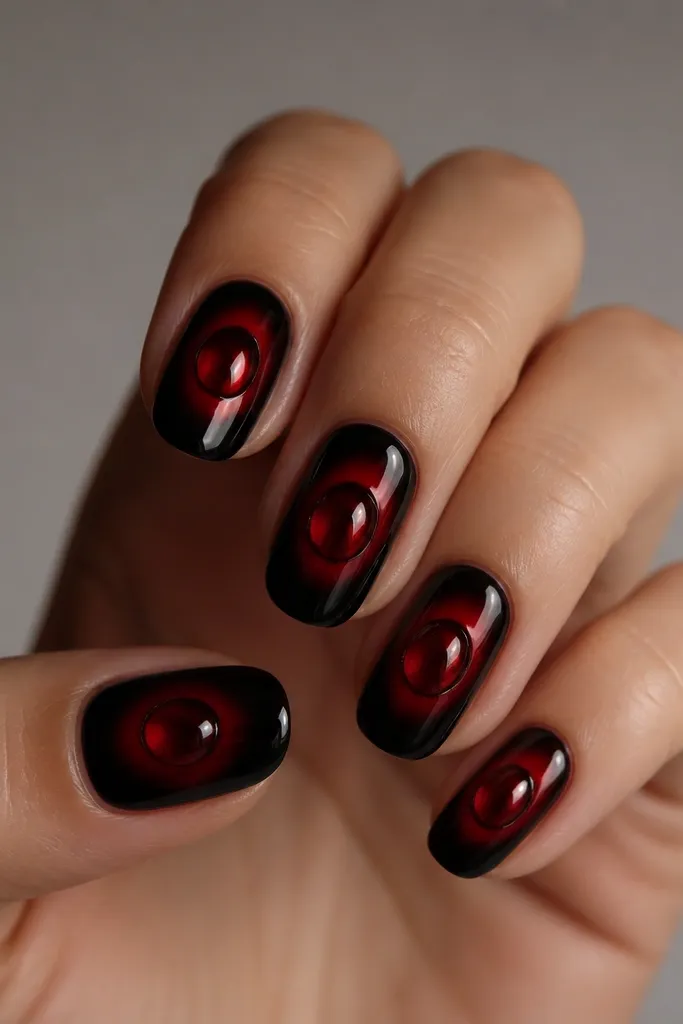
This is the aura set that looks like it’s moving. The center has a slightly raised, thick glossy red gel dome, while the aura around it stays smooth and smoky. I do this when I want the nails to look like there’s depth — like the glow is trapped in resin. It flatters all nail lengths, but it’s especially good on almond because the dome catches light nicely. On fair skin, the red reads bright; on deep skin, it reads richer and almost wine-like. It’s a great pick for photos because the center reflection is obvious.
Apply black base and cure. Sponge a tight red aura around the center and cure 15 seconds. Add thick red gel on top of the aura center in a small circle — about 1-2 mm wider than the dot you want to see — then cure in two shorter bursts so it doesn’t flood. Use a glossy top coat around the dome, then cure fully. If needed, lightly buff the dome top for a smooth surface and re-seal with one thin top coat.
Cure the dome in shorter bursts and avoid pressing — you want a rounded top, not a flat puddle.
Don’t make the dome too big; it overwhelms the aura and looks heavy.



