
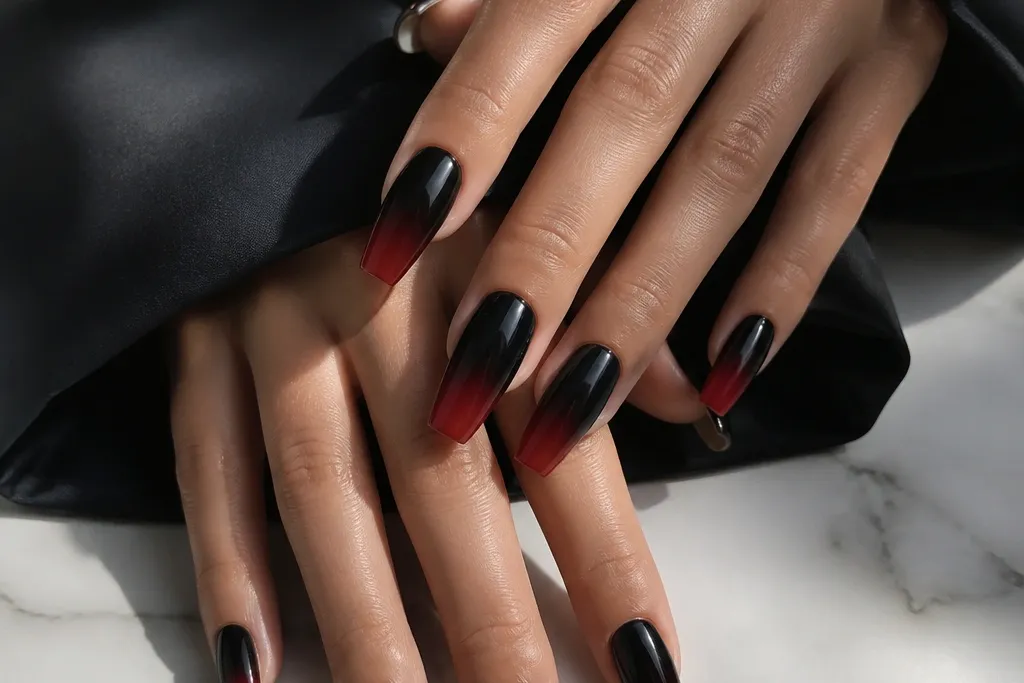
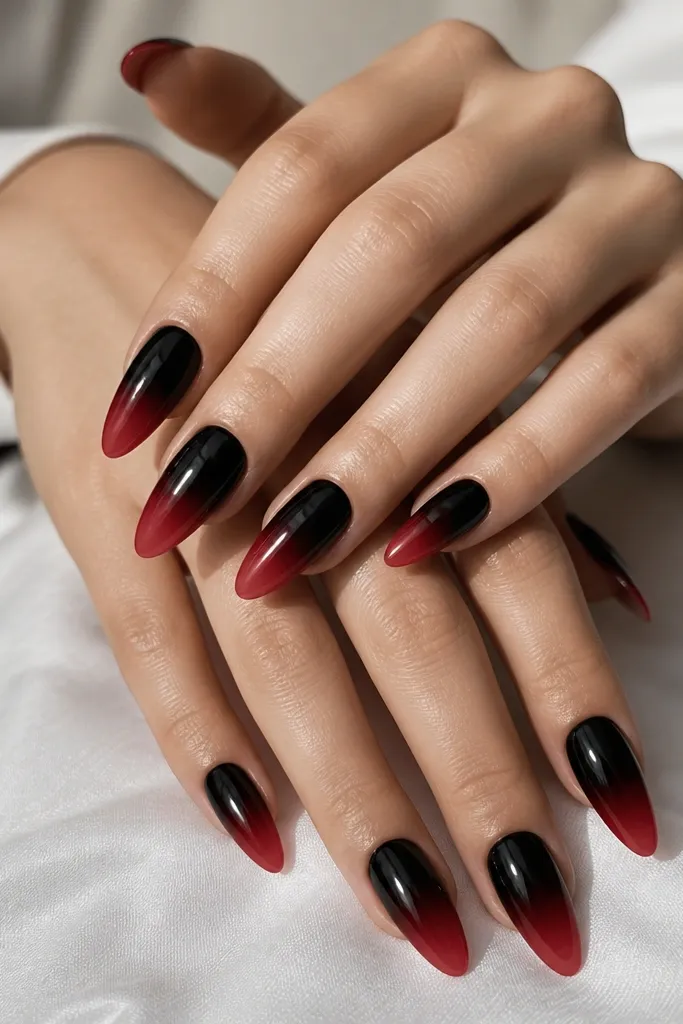
1. Glossy Tip-Heavy Black to Cherry Red
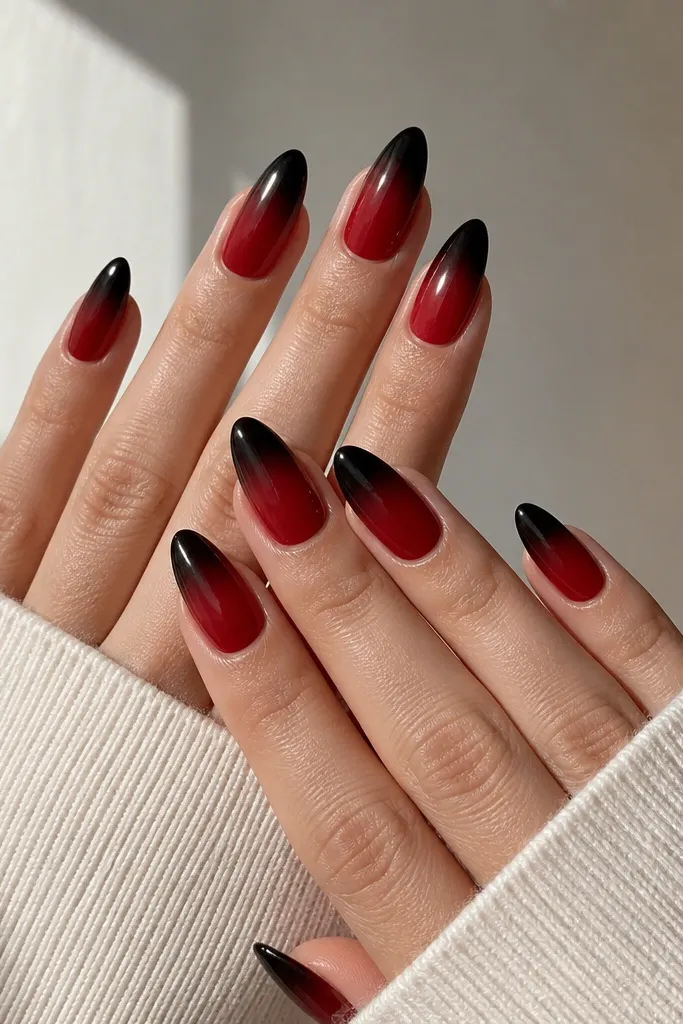
This is the ombre I reach for when I want modern drama without clutter. The black sits at the tip and fades into a cherry red that looks warm against most skin tones, especially fair to medium. On short-to-medium almond nails, the gradient makes the nail look longer because your eye reads the dark end as the “tip.” It also photographs well because the glossy finish reflects light across the fade instead of showing brush strokes.
Start with a black gel polish base only on the last third of the nail. Use a makeup sponge dabbed with cherry red to press color lightly into the black, working from the center toward the tip until the edge disappears. Add a second thin layer of cherry red in the fade area so the red looks saturated, not dusty. Cure between steps, then cap the free edge with the final top coat so the gradient stays sharp.
Editor's noteAfter curing, wipe with gel cleanser and run a dotting tool along the fade line to check for any hard banding.
Watch outSkipping thin layers — you’ll get a dark stripe instead of a fade.
2. Matte Black to Red Velvet Fade
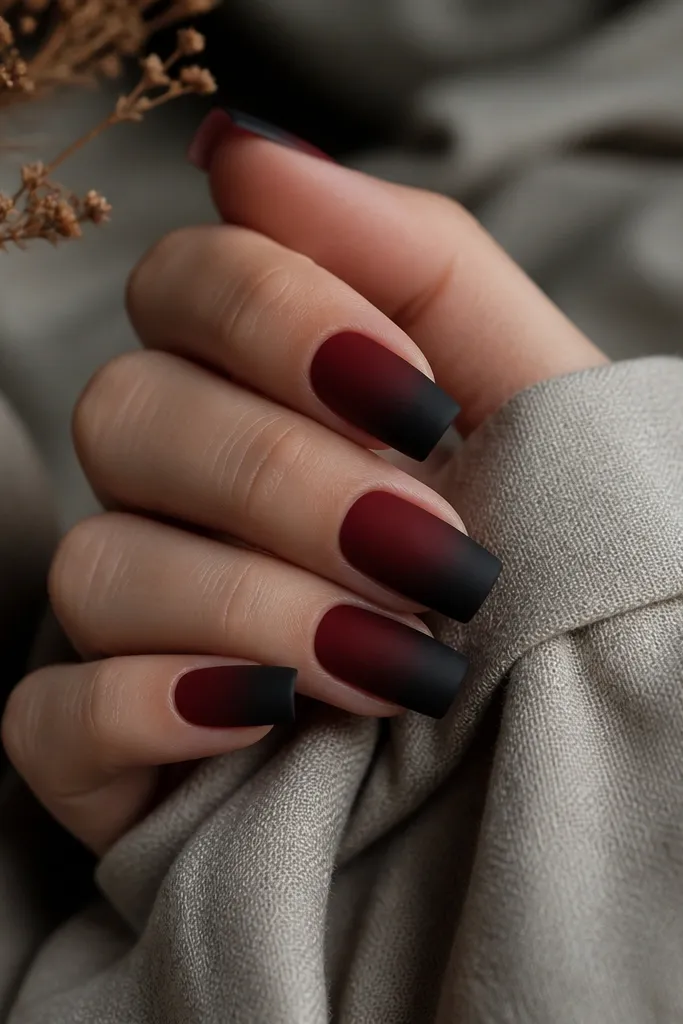
Matte changes the whole mood — this one looks like velvet, not candy. The black-to-red fade reads bold on deeper skin tones and still flatters fair skin because the red has enough pigment to show through. Matte also hides tiny imperfections in the gradient, which makes it forgiving if you’re learning ombre. I wear this for nights out because it looks expensive under low light.
Paint a sheer black base on the tip area, then sponge in a deep red (think wine-red, not orange-red). Blend until the center looks smoky, not striped. Cure and then apply a matte top coat over the entire nail. If the matte makes the red look flat, add a thin glossy top coat only on the red half for a two-texture look.
Editor's noteUse a matte top coat that cures fully — under-cured matte can turn patchy.
Watch outPutting matte over uneven cuticle work — you’ll see the edges more clearly.
3. Chrome Line Through Ombre
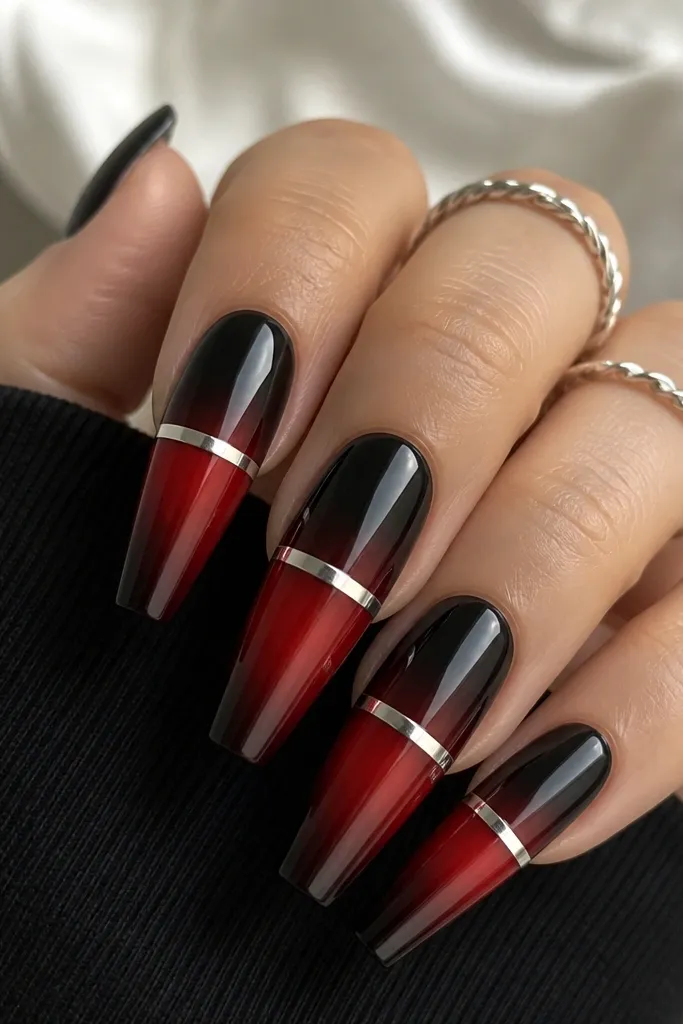
This design looks modern because the chrome gives you a clean “graphic” element. The chrome line breaks up the gradient so the set doesn’t feel like plain ombre. Silver chrome against black and red makes the red pop, especially if your red is a true cherry. It flatters hands with longer nail beds because the line visually centers the nail and makes the shape look intentional.
Create your black-to-cherry ombre first: sponge black at the tip and blend cherry red upward to about halfway. After curing, place a strip of chrome foil or paint a thin chrome gel line across the nail at the center, leaving equal space above and below. Cure again, then seal with a glossy top coat. Keep the chrome stripe narrow, about the width of a strip of foil — too thick makes it look heavy.
Editor's noteIf your chrome gel smears, apply it in one smooth pass and don’t go back over the same line.
Watch outThick chrome — it rounds off the gradient and looks bulky.
4. Red Micro-Glitter Fade Over Black
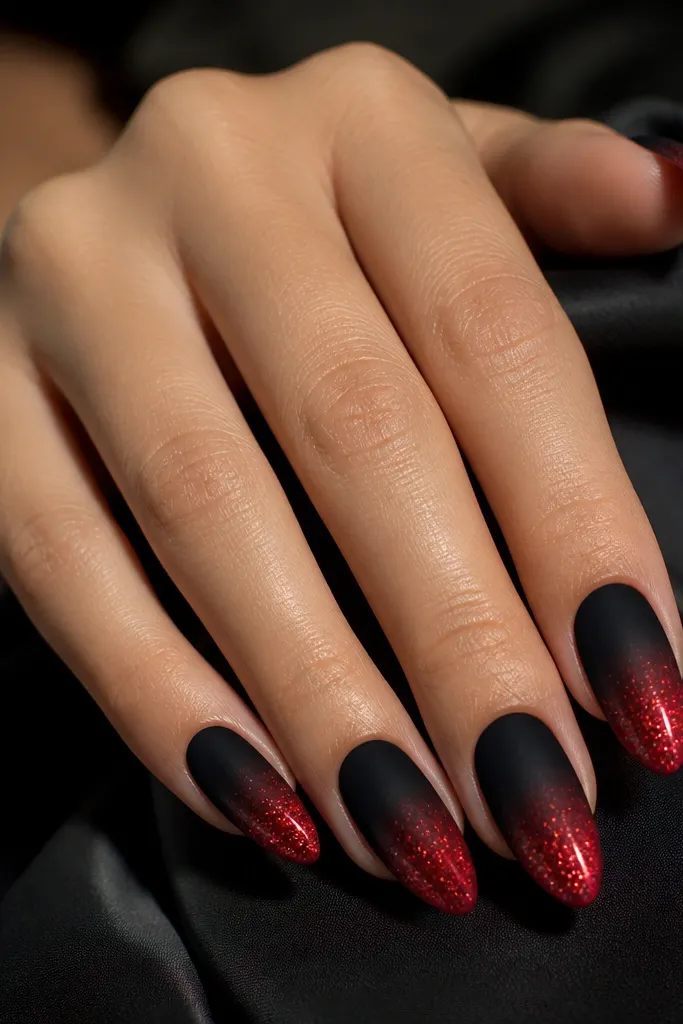
Fine glitter gives the red a “lit from within” look without turning the nail gritty. I like this when I want drama that still feels wearable because the glitter stays concentrated in the fading red zone. It works on almost every skin tone because the sparkle reflects neutral light and doesn’t fight your undertone. If your hands look dry, glitter can distract in a good way because it pulls attention to the nail surface.
Do a smooth black-to-sheer-red ombre first using a sponge and a translucent red. While the red is still tacky (or after a thin red base layer), dust fine red micro-glitter mainly on the red half and blend it slightly into the transition zone. Cure, then add a glossy top coat to smooth the texture. Cap the free edge so glitter doesn’t catch on hair or fabric.
Editor's noteUse a dense glitter top coat if you want full opacity; otherwise, keep it sheer so the ombre still shows.
Watch outBig chunky glitter — it ruins the modern fade and looks uneven.
5. Black Crackle Over Ombre Red
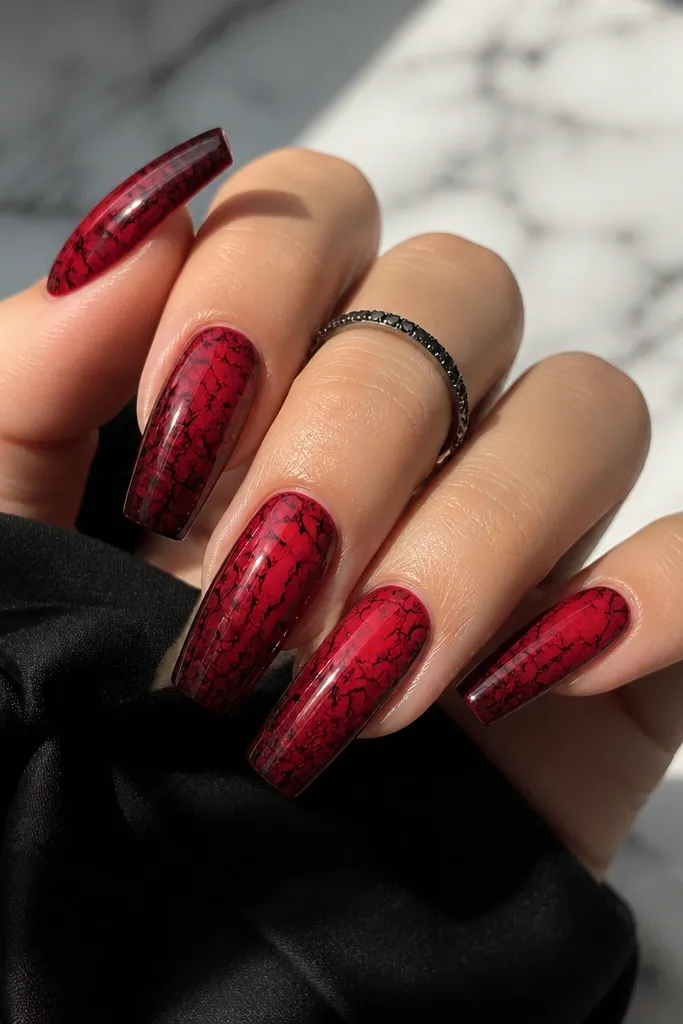
This is the “stormy” version of ombre. The red base keeps it sexy and bold, while the black crackle adds texture that looks like broken glass. It’s great for parties because the crackle catches light differently than polish. I’ve worn it on medium and long nails and it always looks intentional because the crackle stays mostly on the red area, so you don’t lose the gradient.
Start with a red ombre: sponge dark red at the tip and blend into a lighter red toward the middle. Cure. Then apply a black crackle polish or crackle gel in thin strokes over the red area only, avoiding the very base so it doesn’t look muddy. Cure and finish with a glossy top coat to make the crackle lines pop.
Editor's noteLet the crackle gel sit for a minute before curing so it spreads into thin lines instead of blobs.
Watch outCrackle over the cuticle — it can look like dirt instead of design.
6. Negative Space Half-Moon Ombre
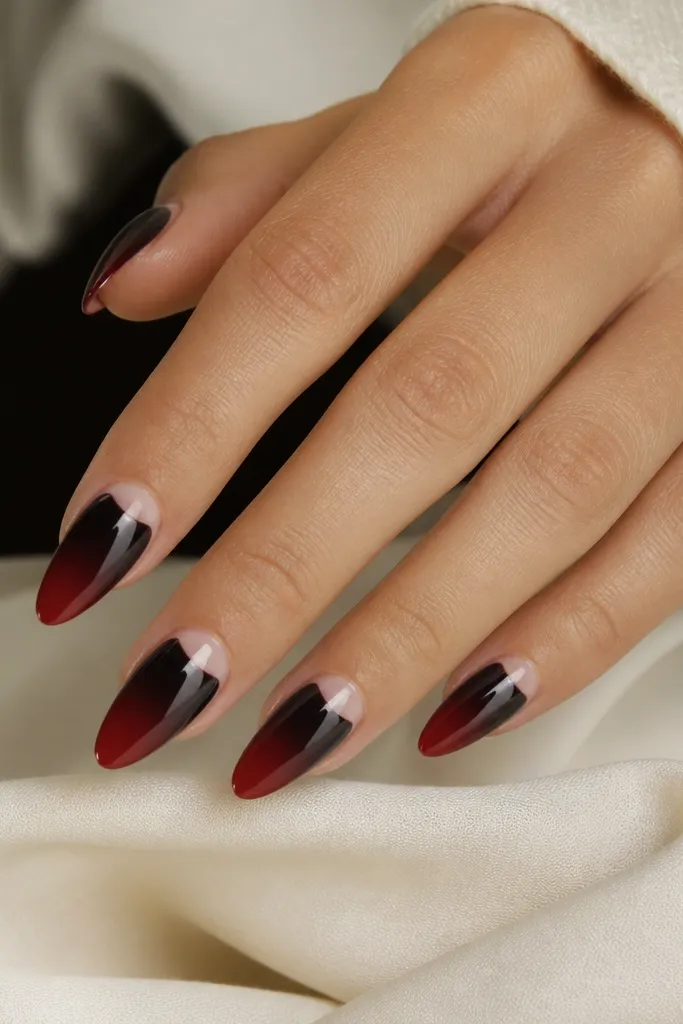
Negative space makes black and red feel modern and less heavy. The half-moon cutout keeps the set airy and draws attention to your natural nail shape. It flatters hands with shorter nails because the empty space at the base makes the nail look longer. If you have a strong cuticle line, this design hides any unevenness at the base because the half-moon area stays bare.
Apply a nude or base layer only where you want coverage, then use a small strip of barrier tape or a half-moon stencil to protect the cutout area. Sponge black at the tip and blend cherry red upward to about two-thirds of the nail, keeping the fade away from the protected half-moon. Remove the stencil carefully after curing and seal with a glossy top coat around the cutout edges.
Editor's notePress the stencil down firmly for a crisp half-moon — soft edges look messy.
Watch outLetting ombre touch the cutout — it turns the half-moon into a smear.
7. Black-to-Red Reverse Ombre (Tip-to-Base Fade)
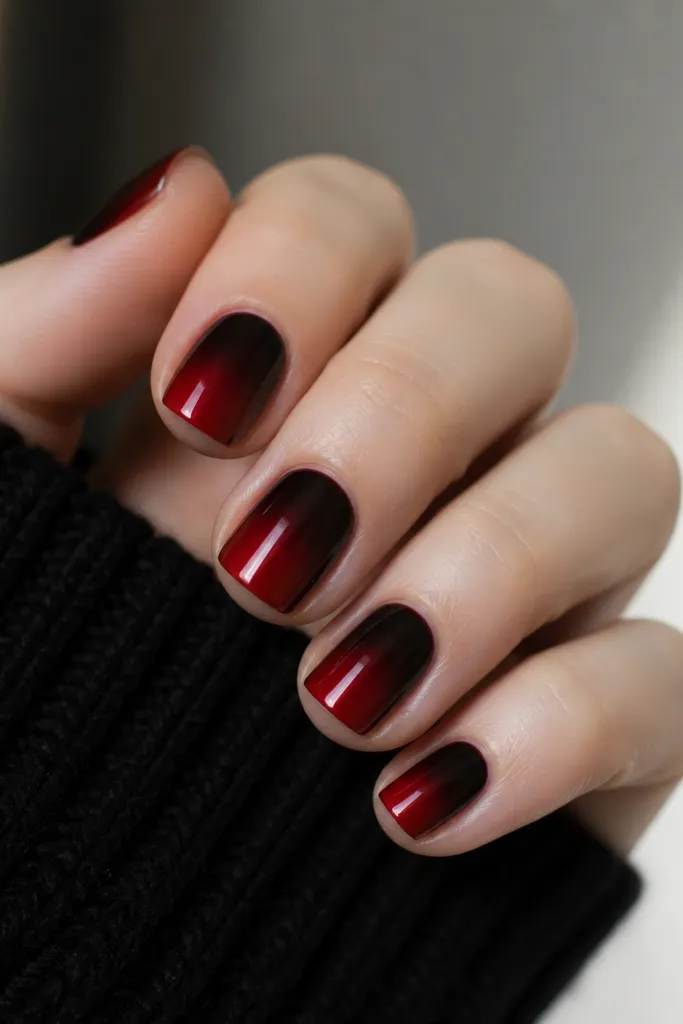
Reverse ombre flips the drama direction. Red at the tip looks playful, and black near the base makes your nails look sturdy and grounded. I like it on shorter nails because it doesn’t exaggerate length — it adds contrast instead. On medium skin tones, the black near the base looks clean and intentional, especially with a glossy top coat.
Start with a sheer red base across the whole nail. Sponge black lightly near the cuticle area and blend it downward toward the mid-nail so the fade is strongest at the base. Add another thin layer of red at the tip to keep it rich and not gray. Cure and finish with gloss, then cap the edges.
Editor's noteUse a smaller sponge piece for reverse ombre — the cuticle area needs tighter control.
Watch outOverloading black at the base — it can look like a stain.
8. Satin Finish Red Fade With Black Shadow Tip
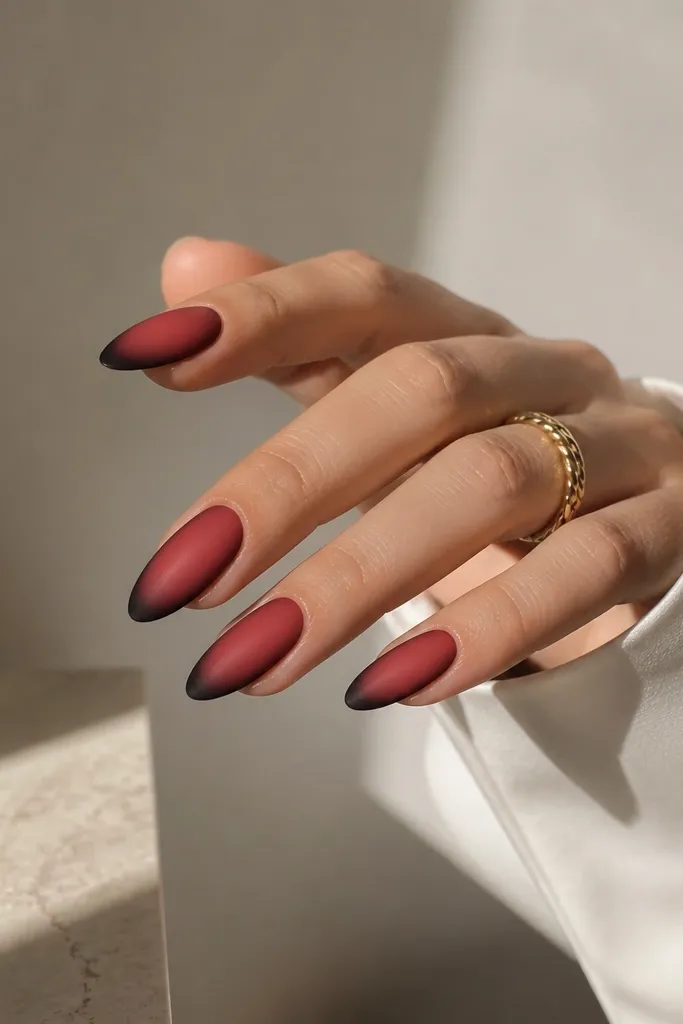
This is for when you want black and red but not a full-on ombre stripe. The satin red gives a softer, modern look, while the black shadow tip reads like depth. It flatters people who hate thick-looking nail art because the design stays thin and airy. It also looks good if your nail beds are slightly uneven because the shadow effect distracts from small shape differences.
Paint a satin red base (or a matte top coat over red) across most of the nail. Sponge black very lightly at the tip edge, pressing and lifting without filling the entire tip — you’re making a shadow, not a block. Use a small brush to blend the shadow into the red so the transition looks smoky. Seal with a satin-friendly top coat so the finish stays consistent.
Editor's noteKeep the black shadow thin — if it becomes a solid tip, you lose the modern softness.
Watch outTrying to blend with thick polish — satin shows texture and streaks.
9. Black Ombre With Thin Red Skittle Tips
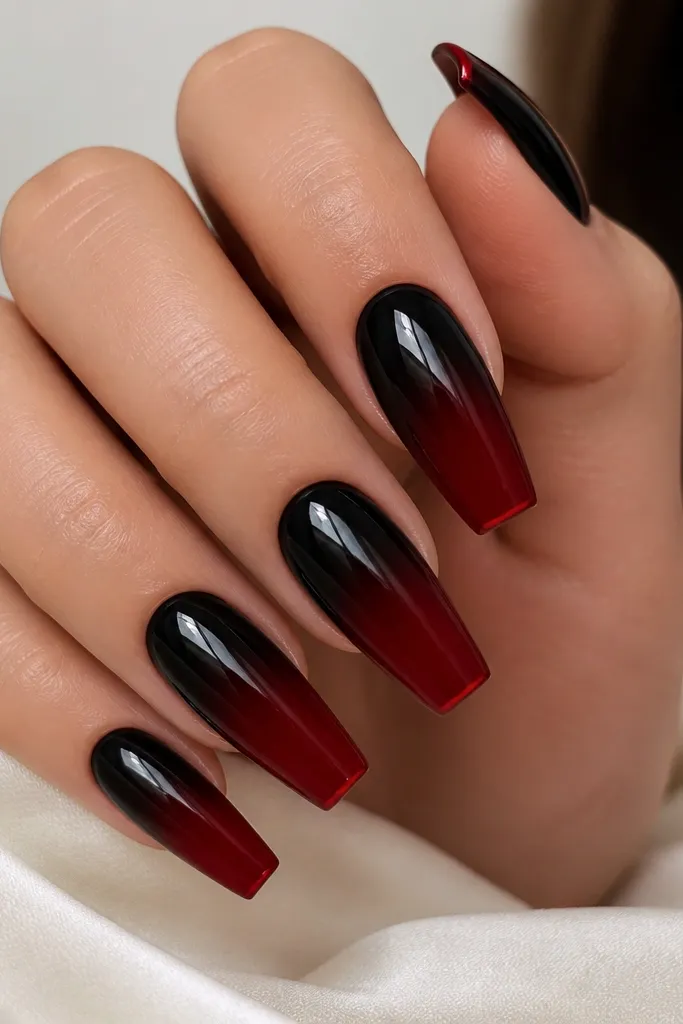
This set uses ombre as the base and then adds one crisp red detail. The thin skittle-like line at the tip makes the gradient look intentional and sharp, not faded. I like it for office days because it’s still dramatic but controlled. It flatters most nail shapes because the line follows the nail’s natural curve.
Create your black-to-red ombre with black at the tip and red fading upward halfway. After curing, take a fine detail brush and paint a thin red line right along the very edge of the tip, leaving a tiny black rim under it. Cure and top coat glossy for a clean finish. Keep the line about 1/10 of the nail width so it stays delicate.
Use a nail liner brush with a pointed tip — it helps you keep the line straight.
Thick tip lines — they turn into chunky stripes.
10. Red Jelly Ombre Over Black Base
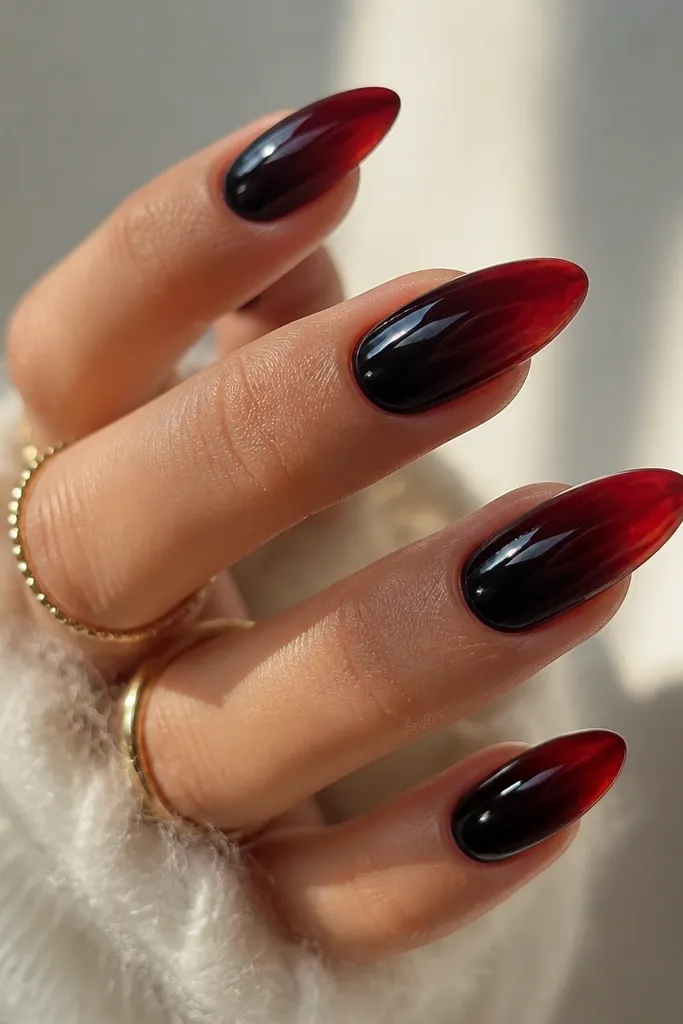
Jelly ombre looks expensive because it has depth, not just color. The black base makes the red look richer and more dimensional, like a stained-glass effect. This flatters fair and medium skin tones because the red glow reads clean instead of overpowering. If your nails are slightly short, jelly helps because the translucence makes the nail look smoother and longer.
Paint a full black base coat and cure. Then sponge or brush a translucent jelly red from the tip upward, building intensity as you move toward the center. Don’t make the red opaque everywhere; keep it see-through so the black underneath shows. Cure, then apply a thick glossy top coat to lock in the jelly look.
Choose a jelly red that’s slightly runny — it blends more smoothly on the nail.
Using a fully opaque red — you lose the glass depth.
11. Black Ombre With Red Flame Edge
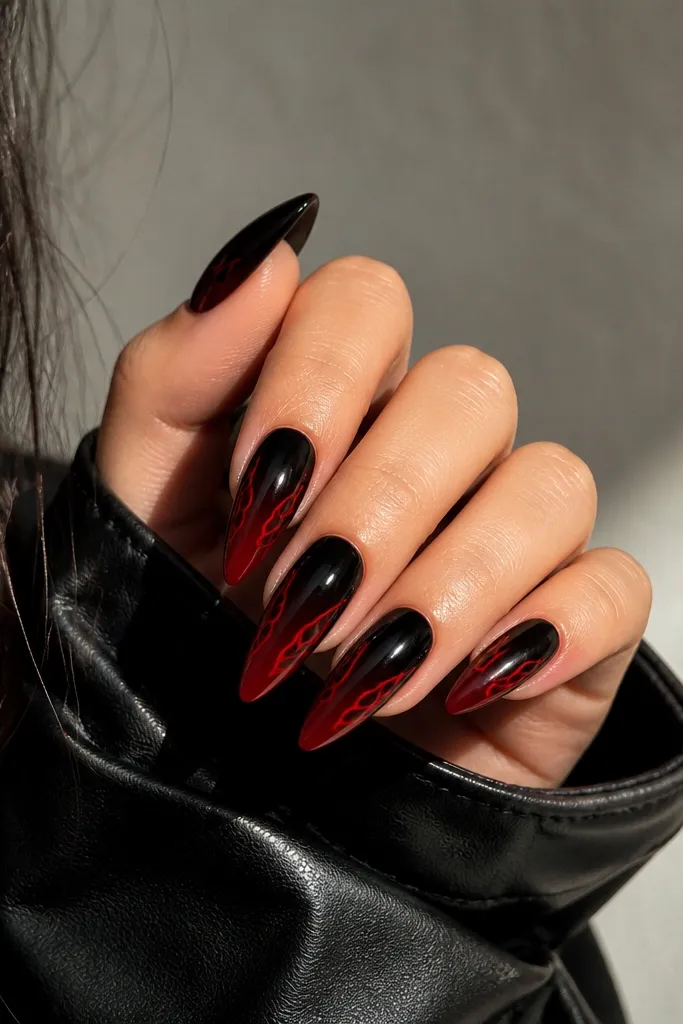
Flame edges add movement to the nail, and the ombre keeps it from looking like a sticker. The red flame border looks fiery against black, especially if your red is a true hot red rather than maroon. This style flatters long nails and hands with narrower nail beds because the side flames visually widen the nail just enough. It also looks amazing for Halloween parties or concerts.
Make a classic black-to-red ombre with black at the tip and red fading upward. After curing, use a thin liner brush to draw flame shapes along the side edges starting near the middle and tapering toward the tip. Fill the flames with hot red gel, keeping the center of the nail as ombre only. Cure and finish with glossy top coat, then clean up edges with a small brush dipped in remover.
Editor's noteKeep the flames uneven — symmetrical flames look like a stencil and feel less modern.
Watch outOverfilling the flame shapes — thick gel can smear and look messy.
12. Black Red Ombre With Tiny Crystal Cuticle Dots
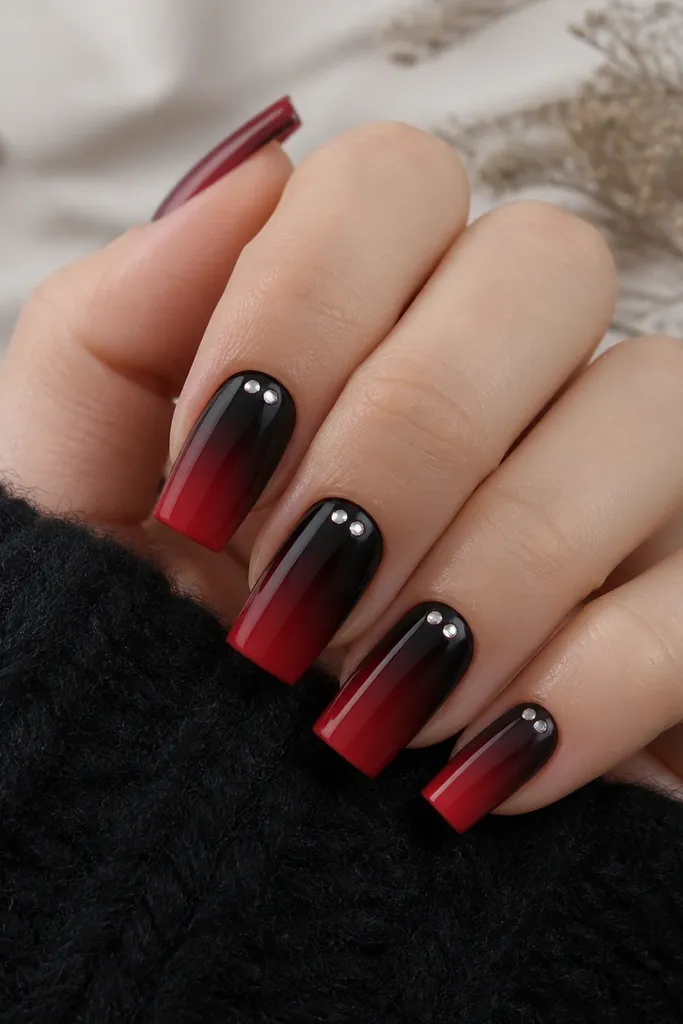
This adds sparkle exactly where light hits first when your hands move. Tiny cuticle dots keep the set modern because they’re minimal and clean, not a full rhinestone cluster. It works great for weddings or date nights because the crystals catch highlights without overpowering the ombre. On hands with slightly dry cuticles, the crystals also pull focus away from texture.
Do the ombre first: sponge black at the tip and blend into deep red toward the center, keeping the cuticle area clean. Cure and apply a glossy top coat. While tacky, place two tiny clear crystals near the cuticle line on each nail using gel adhesive or a top coat. Cure again, then add one more thin top coat to seal the crystals.
Editor's notePlace the crystals slightly off-center so they look natural — perfectly centered dots can look too stiff.
Watch outSkipping sealing — crystals pop off if you don’t cap them with top coat.
13. V-Shape Ombre Split With Black Sides
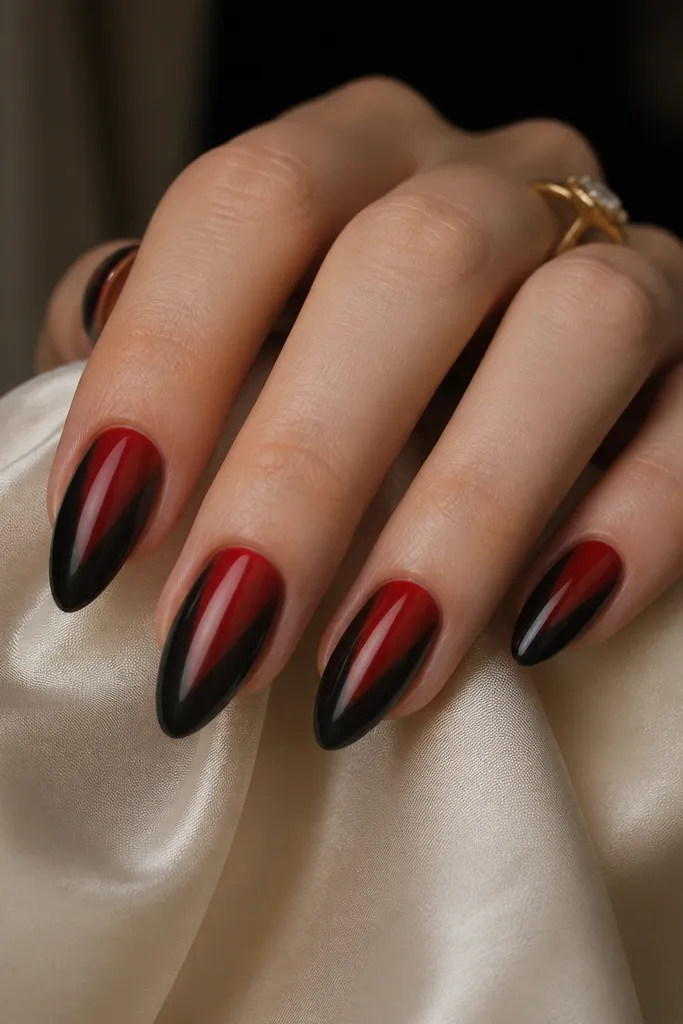
A V split makes the ombre look designed, not accidental. The black on the sides narrows the nail visually, while the red center brightens your hand. I love this on medium almond and tapered nails because the V shape follows the natural curve. It also works on short nails because the V guides the eye vertically, giving you a longer look without needing extra length.
Start with a base layer, then sponge black along both sidewalls from mid-nail to the tip. Build red in the center channel from the tip upward, blending where the colors meet so the center red stays brightest. Use a small brush to soften the edges of the V so there’s no harsh line. Cure and finish glossy, then cap free edges.
Blend the V edges with a clean, slightly damp brush — it softens the transition fast.
Leaving the V line sharp — it looks like tape marks instead of ombre.
14. Half-Red, Half-Black Ombre Blend (Straight Center Fade)
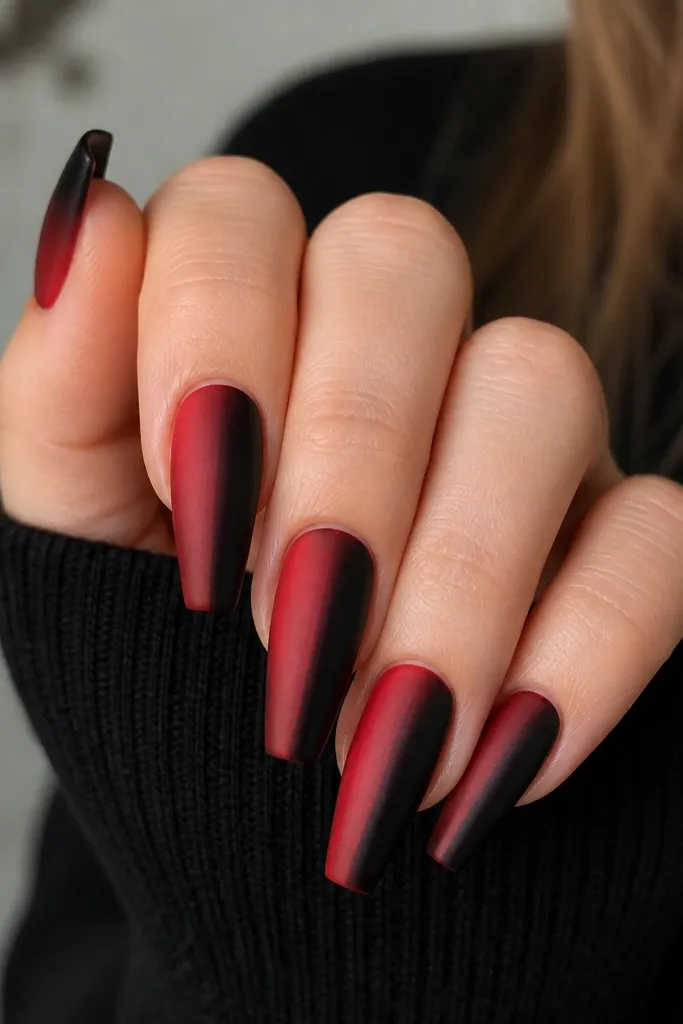
This is a bold modern look because the fade happens vertically, not just tip-to-base. It’s flattering because it creates a clean optical line down the nail. The black-to-red contrast is strong, so it looks best on medium-long nails where you have space to blend. I wear this when I want black and red to feel fashion-forward instead of classic.
Paint a base that’s either sheer nude or a thin black layer so the colors have something to sit on. Use two sponges: one loaded with black on one side and one loaded with red on the other side, then press lightly to create the blend at the center. Go back with a fine brush to soften the central edge and even out the gradient. Cure and seal with a glossy top coat for a smooth, glassy finish.
Keep the blend zone narrow — about the width of a pencil eraser — for a crisp modern look.
Overblending until the center turns muddy gray.
15. Black Ombre With Red Glossy Tear Drop Highlight
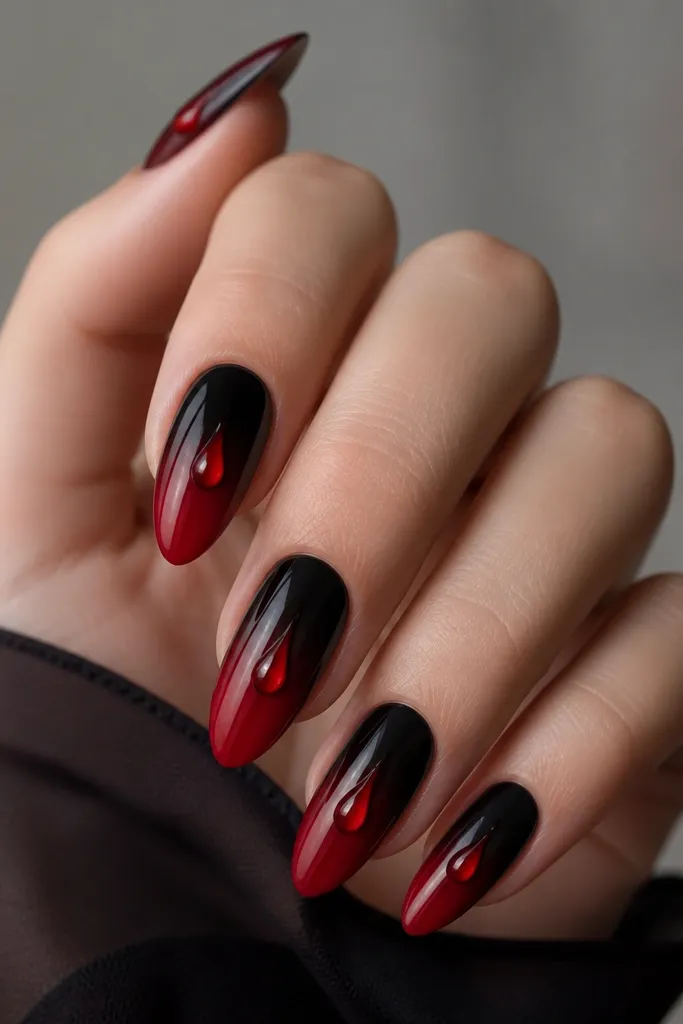
A tear-drop highlight makes the ombre feel like it has dimension, not just color. The red highlight over the gradient gives your nails a focal point that looks good even from across the room. This flatters hands with shorter fingers because the droplet sits vertically and draws the eye upward. It also looks great on both fair and deep skin tones because the highlight is bright and clean.
Create your black-to-red ombre with a smooth sponge fade. After curing, use a small dotting tool to place a tiny red gel droplet at the center of the nail around the middle. Drag it slightly downward with the dotting tool to shape a tear drop, then cure. Finish with glossy top coat, but keep the droplet slightly domed so it stays dimensional.
Editor's noteDo the droplet in one controlled shape, then cure — repeated dragging makes it smear.
Watch outMaking the droplet too big — it turns into a blob and kills the modern vibe.
16. Black Ombre With Micro Studded Red Tip
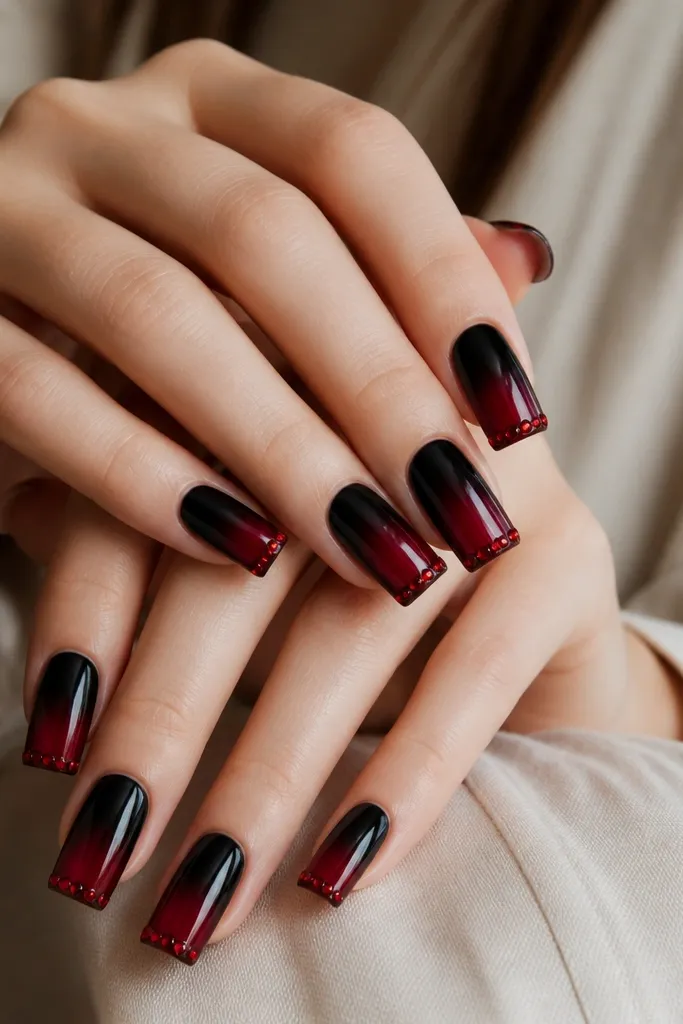
Micro studs at the tip look clean and modern because they stay in one narrow zone. The ombre gives you the color drama, and the studs add texture without covering the whole nail. This is great for events because the studs sparkle when you move your hands, but they don’t feel costume-like. It flatters medium nail beds and looks best with a short square or squoval shape.
Do the black-to-red ombre first, keeping the red strongest at the tip and fading up about half the nail. Cure and then apply gel adhesive along the very tip edge. Place tiny red studs in a straight line following the nail curve, leaving a small gap between studs. Cure and top coat carefully so the studs stay secure but don’t get flooded.
Editor's noteUse tweezers with a fine tip and place studs one at a time — rushing makes them drift.
Watch outFlooding gel over studs — it dulls the sparkle and can cause sliding.
17. Red Ombre Fade With Black Outline Border
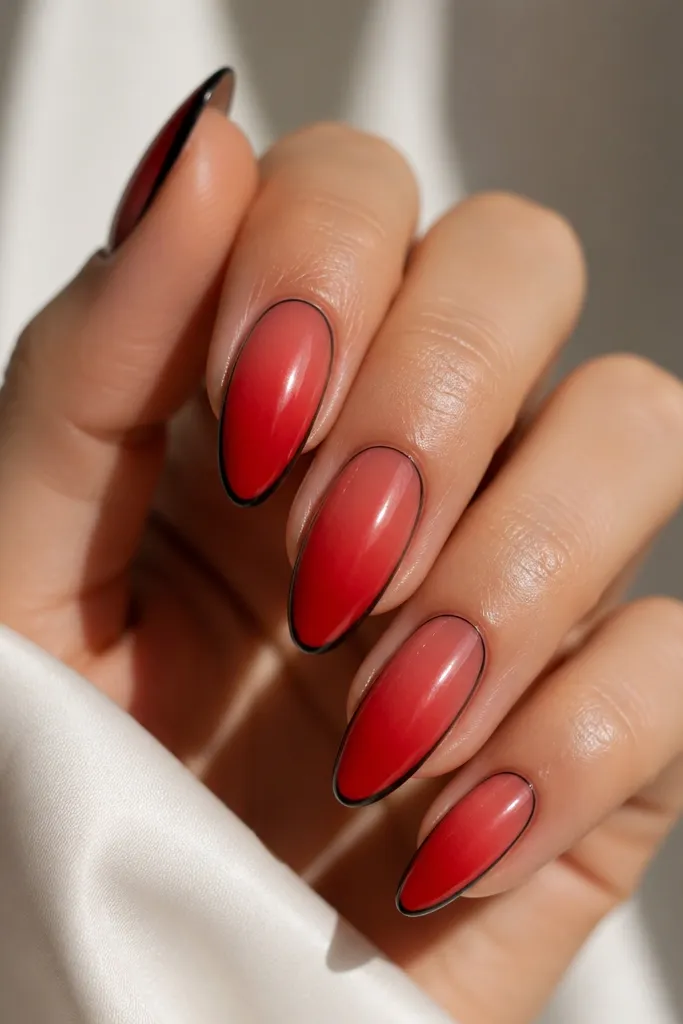
A black outline makes the red ombre look graphic and intentional. It’s the kind of look that makes people ask where you got your nails done, even though it’s just color placement plus a line. The outline works well on almond and oval because it follows the nail shape and makes the ombre look centered. It flatters most skin tones because the black frame gives contrast and keeps the red from blending into your skin.
Start with a red ombre: sponge deep red at the tip and blend into a softer red toward the center. Cure and let it fully set so the outline line stays crisp. Use a thin striping brush to draw a border along the side edges and across the tip outline in black. Cure again and finish with glossy top coat, then clean up any border smudges with a flat brush and remover.
Outline after curing — trying to outline on tacky gel often smears.
Using a thick outline — it makes the nail look heavy and less modern.
18. Black-to-Red Ombre With Matte Black Half + Glossy Red Half
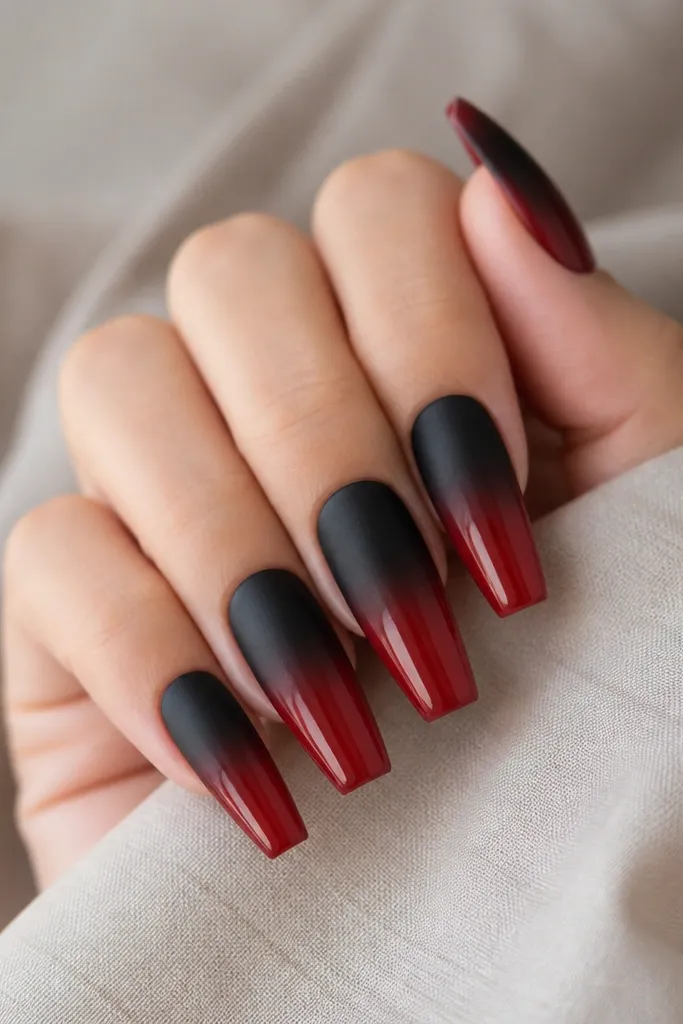
Two finishes create drama without adding more colors. Matte black feels clean and modern, while glossy red looks juicy and bright. This set flatters hands with longer nail beds because the horizontal split emphasizes width in a good way. On fair skin, the glossy red looks like a highlight; on deeper skin, the matte black keeps the look grounded and not too flashy.
Build a standard black-to-red ombre with black at the tip blending into red toward the middle. Cure. Then paint matte top coat only on the black portion and keep the red portion glossy by sealing it with glossy top coat. If your fade line looks too obvious, apply a very thin glossy layer over the transition zone only, then cure.
Mask the red half with a thin strip of tape when you apply matte top coat.
Matte top coat on the whole nail — it makes red lose its shine and impact.
19. Red Ombre With Black Smoke Veil
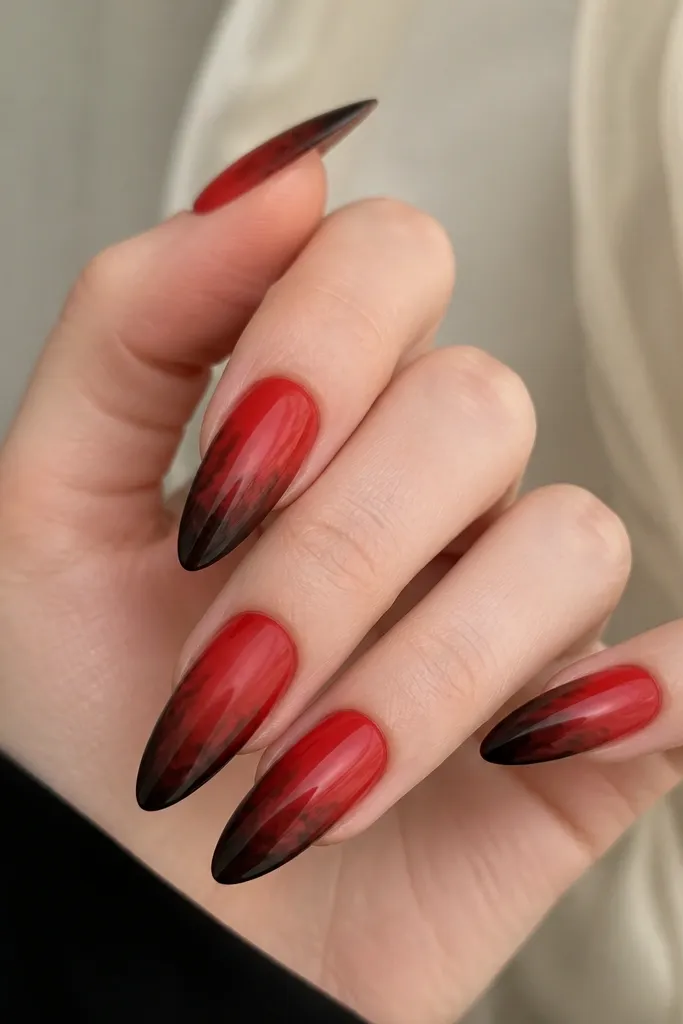
Smoke veils look artsy but still clean when you keep them light. The black drifting into the red gives you that moody modern look that doesn’t rely on glitter. It flatters hands because the veil frames the nail and makes the center look brighter. I like this for winter outfits because the red stays warm while the smoke keeps it from looking too bright.
Make a red ombre first, with the darkest red at the tip and lighter red near mid-nail. Cure. Then take a makeup sponge loaded with black and tap it lightly on the side edges at mid-nail, dragging just a little toward the center so it looks like smoke. Use a small brush to soften any harsh spots, cure, then seal glossy.
Practice the smoke on a paper towel first. If you see harsh dots, press lighter on the nail.
Overdoing the smoke — too much black makes the red look brown.
20. Black Ombre With Red Micro Hearts on the Fade
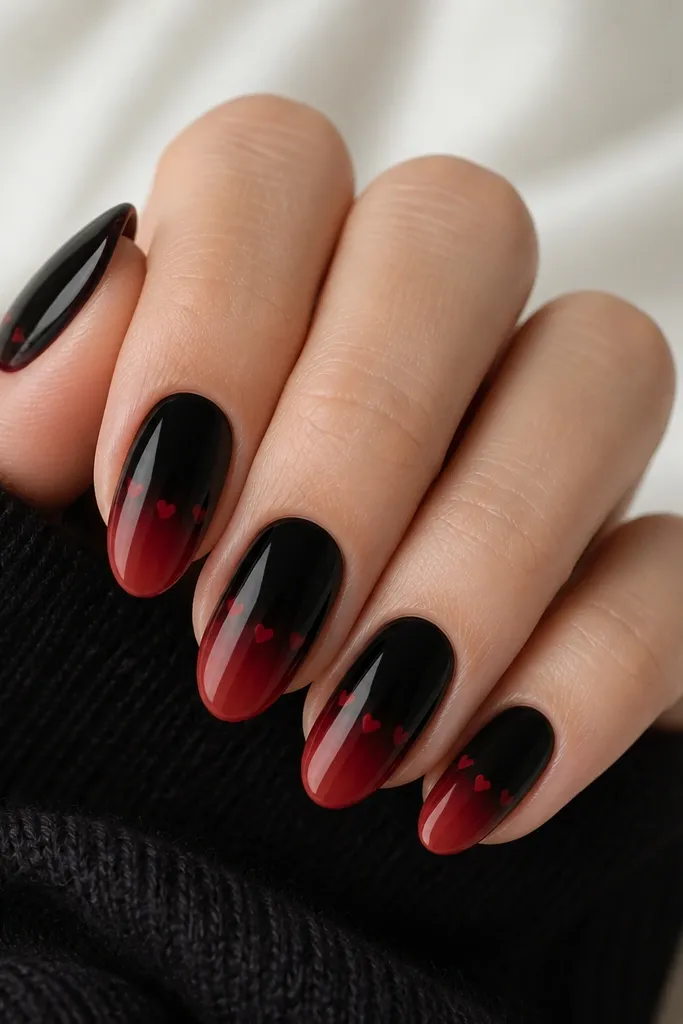
Micro hearts keep the set sweet without turning it into a Valentine-only nail. The hearts are placed where the gradient is medium, so they look like they’re floating on the fade. This works for fair through deep skin tones because the hearts are small and the red matches the ombre. I like it on oval because the curve makes the hearts look balanced.
Do your black-to-red ombre with black at the tip and red fading upward to the center. Cure and apply a glossy top coat layer if your surface looks too textured. Use a dotting tool and thin liner brush to place 1-2 micro hearts per nail right on the transition zone, keeping them tiny (about 1 millimeter each). Cure and then seal with another glossy top coat to lock them flat.
Editor's noteKeep the hearts uneven in size by a hair. Perfect hearts look sticker-like.
Watch outPutting hearts on the black tip — the hearts disappear and look messy.



