
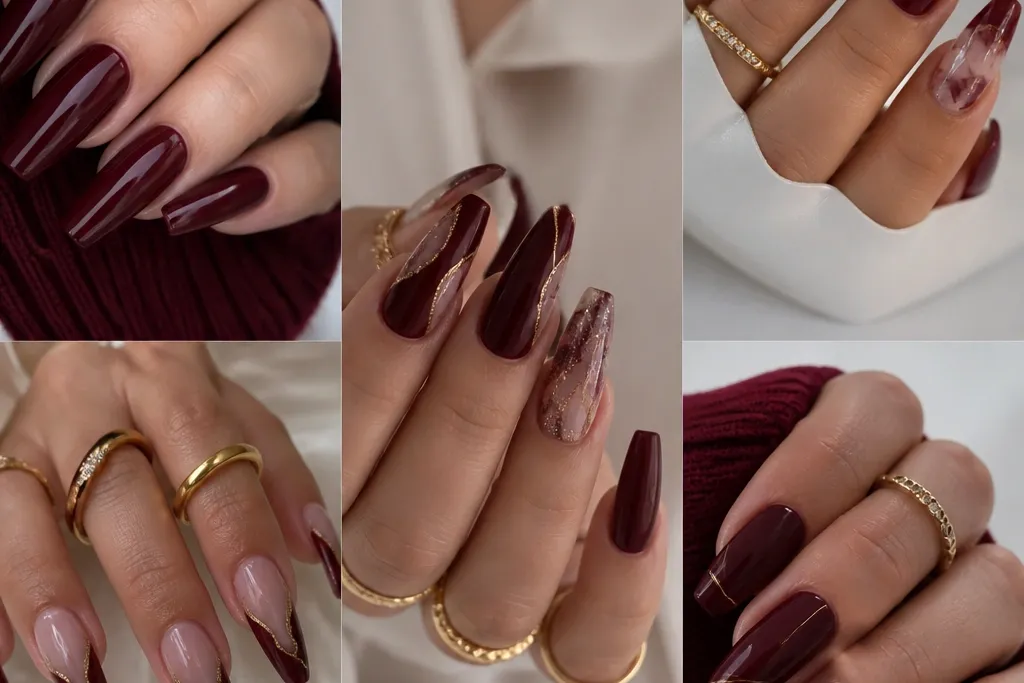
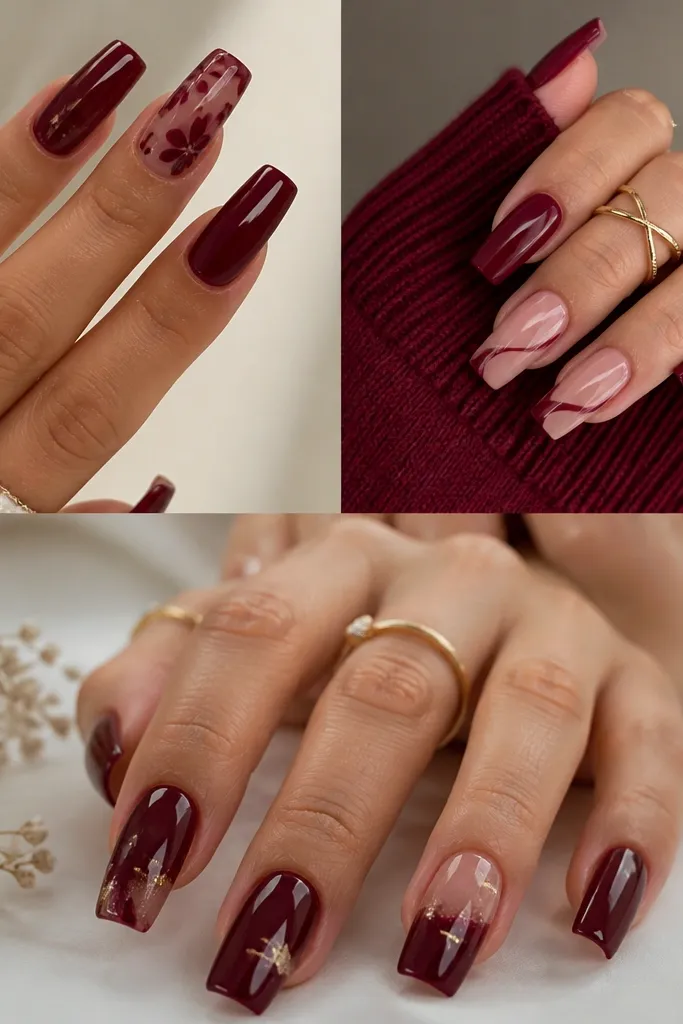
1. Gold Foil Crescent at the Cuticle
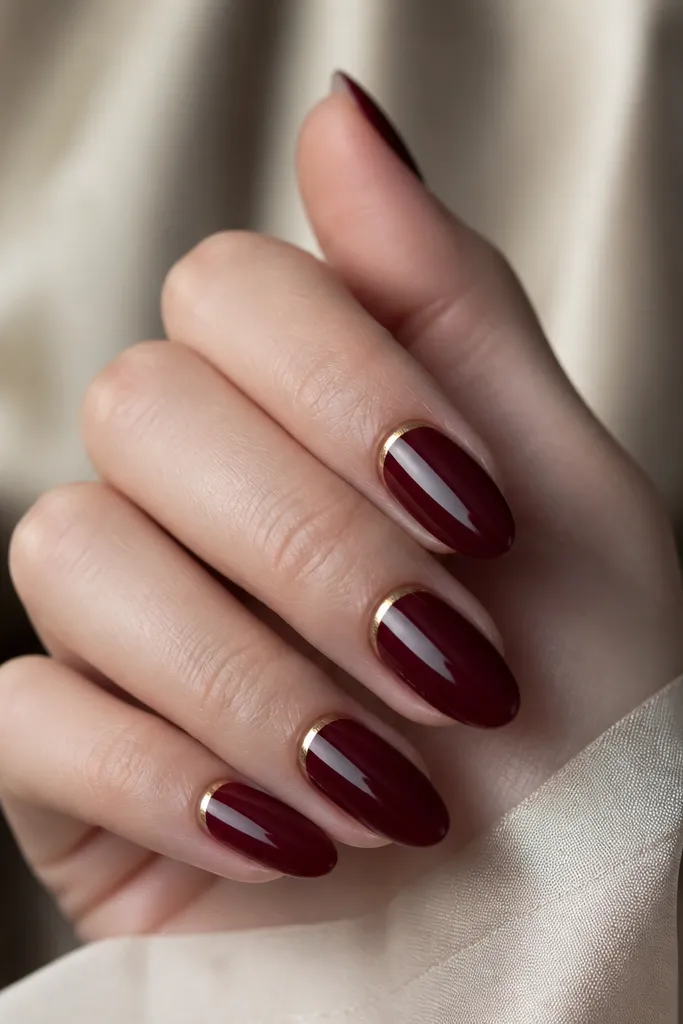
This design makes cherry red look instantly expensive because the gold sits where your eye naturally lands — the cuticle area. I’ve worn it with both warm and cool skin tones, and it still feels balanced because the foil is irregular, not perfectly flat. It works best on almond or squoval nails, where the curve lets the foil follow the nail shape. The key is contrast: dark cherry red is deep and the foil is bright, so even a small amount reads clearly.
File your cherry red acrylic into a smooth dome and wipe off any dust. Place a small dab of clear gel near the cuticle, leaving a 1 mm gap from the skin line, then press gold foil pieces so they form a crescent. Cure, then lightly brush a thin layer of clear gel over the foil to lock it in. Finish by sealing with glossy top coat, one thin pass from cuticle to tip on each nail.
Use tiny foil chunks, not big sheets — small pieces look more like real jewelry than craft foil.
Don’t drag foil across the cuticle line; it creates a messy edge that looks like lifting.
2. Cherry Red Micro-French with Black V Tip
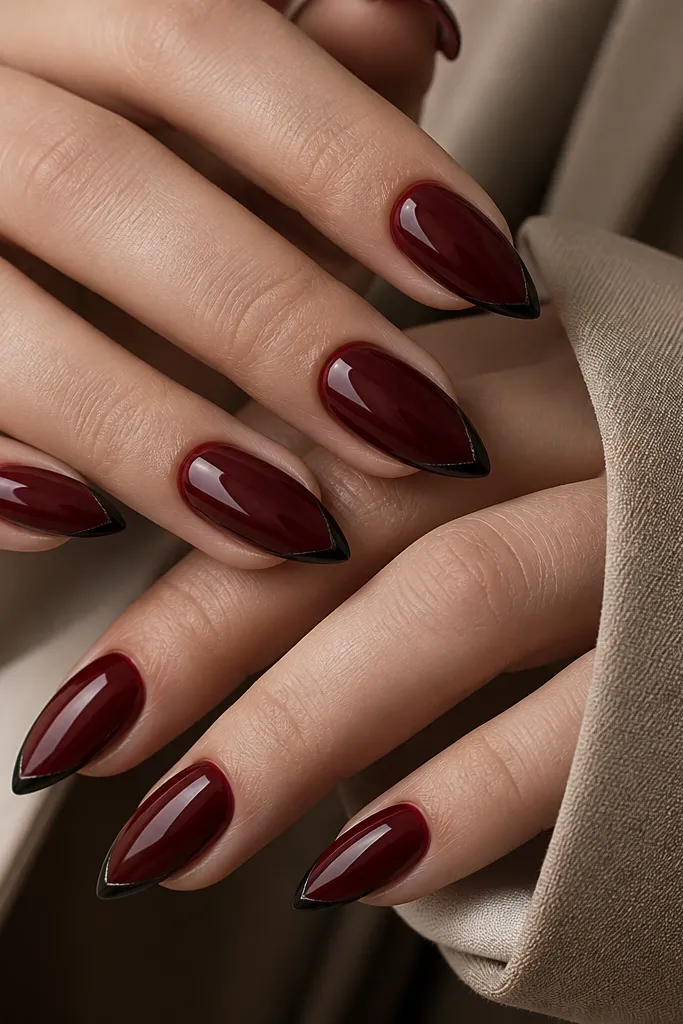
Micro-French keeps cherry red looking clean instead of busy. Adding a black V at the tip creates a sharp “cut” that makes fingers look longer, especially if you have shorter nail beds. I like this on medium almond because the V shape has enough space to look crisp. It also photographs well because the black gives a dark anchor against the glossy red.
Start with an even cherry red base, then cure and file smooth. Paint a micro-French line using a striping gel or gel polish in black, keeping it about 1 to 1.5 mm wide at the free edge. Add the V by placing two diagonal strokes that meet at the center point. Cure and top coat, making sure the V edges are fully sealed so they don’t snag.
If your line wobbles, use a cleanup brush dipped in acetone to pull the edges back while the gel is still workable.
Don’t make the French too thick; thick lines turn into a blob and lose the “slim” effect.
3. Rhinestone Teardrop Column on One Accent Nail
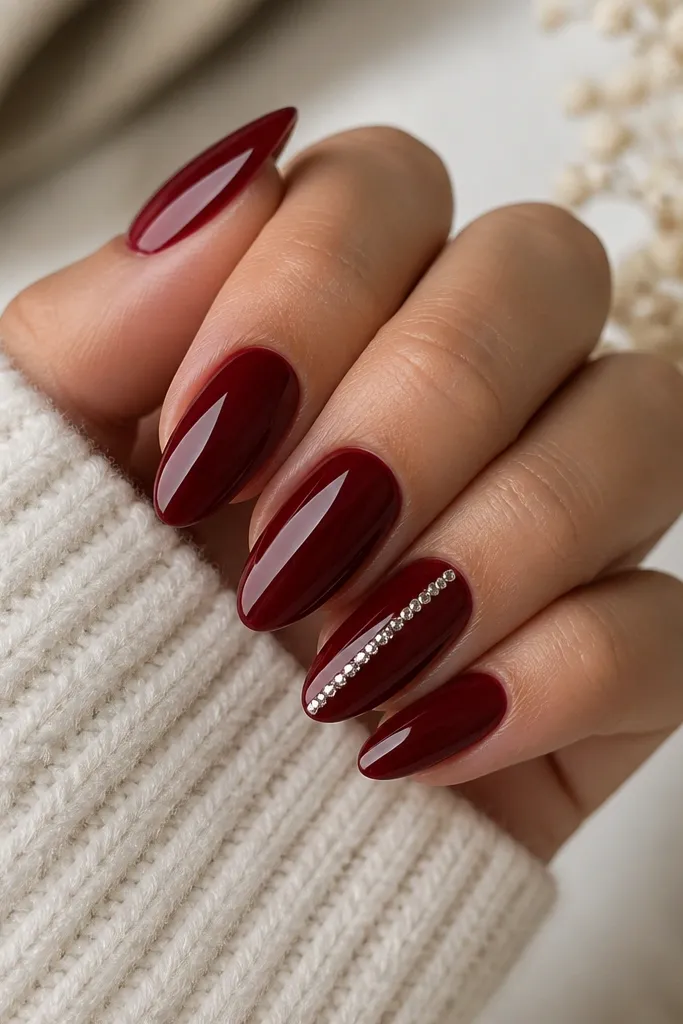
A vertical rhinestone column gives you that runway sparkle without covering every nail. I keep it to one accent nail because cherry red is already dramatic, and too many stones can look heavy. This layout flatters hands with slightly wider nail beds because the line pulls the eye down the center. Use it for nights out, weddings, or any time you want your nails to look intentional in low light.
Apply cherry red acrylic or gel to all nails and cure fully. On your accent nail only, place clear gel in a thin vertical line from about 3 mm above the cuticle to 2 mm from the tip. Press tiny teardrop rhinestones one by one, narrow end pointing upward, leaving small gaps so the stone edges show. Cure, then apply a thin top coat around the stones and over them, avoiding bubbles.
Editor's noteChoose stones that are the same size across the column; mixed sizes make the line look uneven.
Watch outDon’t flood clear gel under the stones; excess gel can create a raised dome that catches on hair.
4. Maroon Velvet Matte with Glossy Cherry Stripe
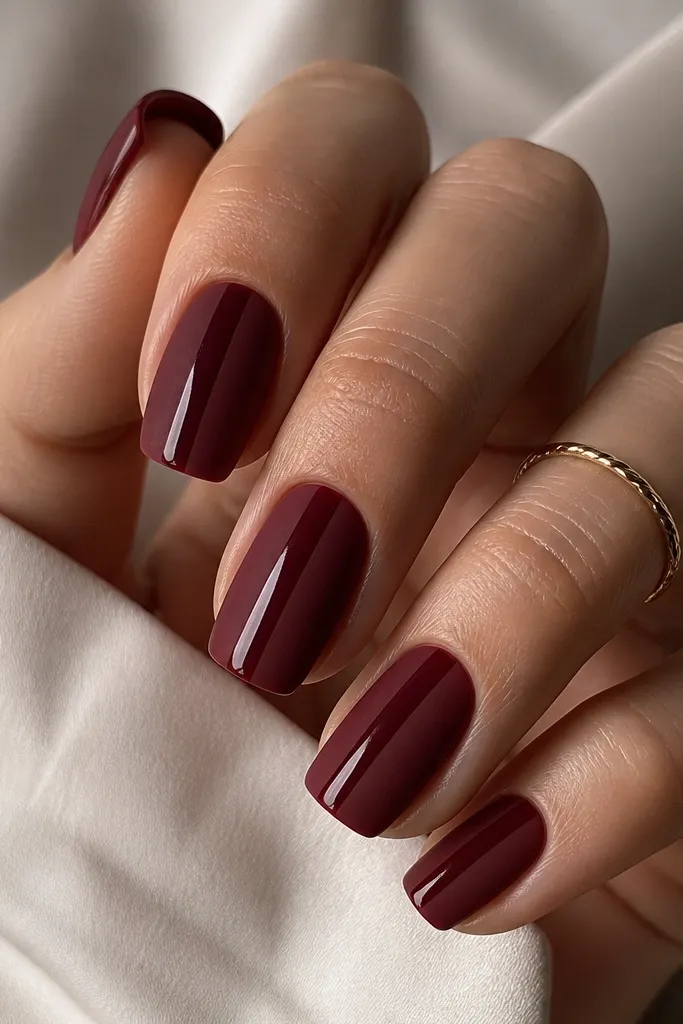
This set plays with texture, and texture reads “designer” even when the design is simple. The matte velvet finish hides minor surface lines, while the glossy stripe draws attention to the center. I’ve worn it on both short and medium nails, and it looks especially good on squoval because the stripe gives a clean vertical guide. The contrast between matte and gloss makes the cherry red feel richer.
Build your base in dark cherry red and file smooth. Apply a velvet matte top coat to the whole nail and cure. Now paint a thin vertical stripe in a deeper cherry red gel (slightly darker than the base) on top of the matte, keeping it about 1.5 to 2 mm wide. Cure and finish with a glossy top coat only over the stripe area.
Editor's noteUse a striping brush for the stripe so the edges stay razor straight against the matte.
Watch outDon’t put matte top coat over the stripe; it kills the shine contrast fast.
5. Red Chrome Ombré Fade at the Tips
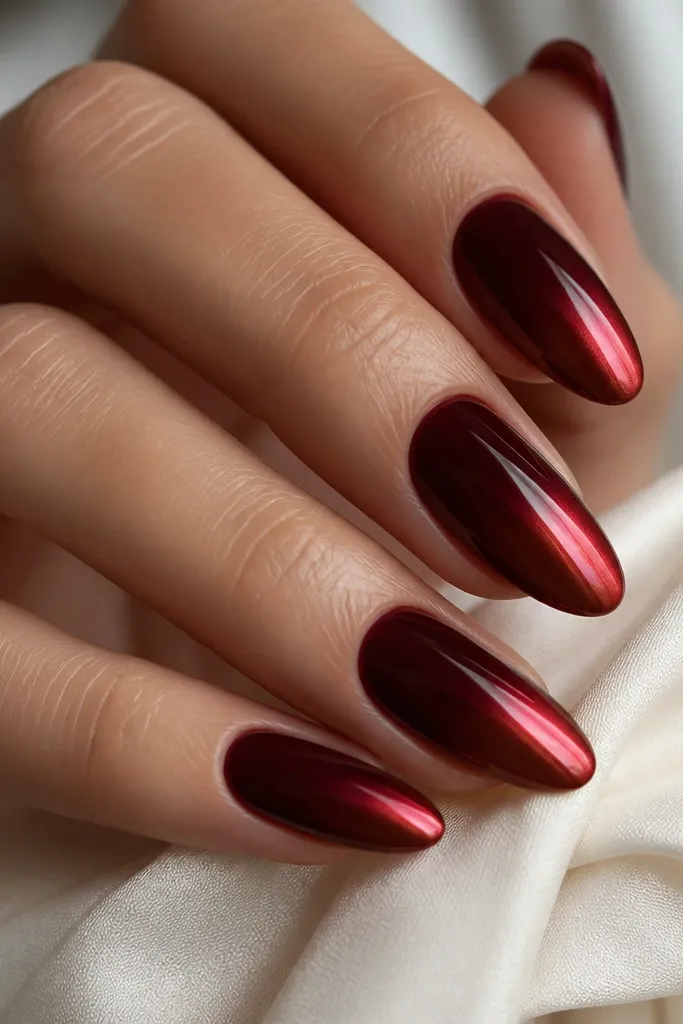
Chrome ombré makes cherry red look like liquid metal when the light hits it. I like the fade starting around the mid-nail because it keeps the center looking deep and the tips doing the sparkle. This works on most skin tones because the chrome is red-based, not silver-based. On medium almond, the gradient makes fingers look sleek and polished.
Apply and cure your dark cherry red base. At the free edge area, sponge or stipple red chrome powder or chrome gel starting at about 60% down the nail, then blend upward with a light hand. Use a fine brush to remove dust and keep the gradient smooth. Seal with a no-wipe top coat or gel top coat, then cure and buff lightly if needed.
Editor's noteBlend with a makeup sponge using tiny taps — it creates a softer fade than dragging the sponge.
Watch outDon’t over-sponge chrome into the cuticle area; it makes the nails look dirty or cloudy.
6. White Cherry Blossom Dots on a Dark Base
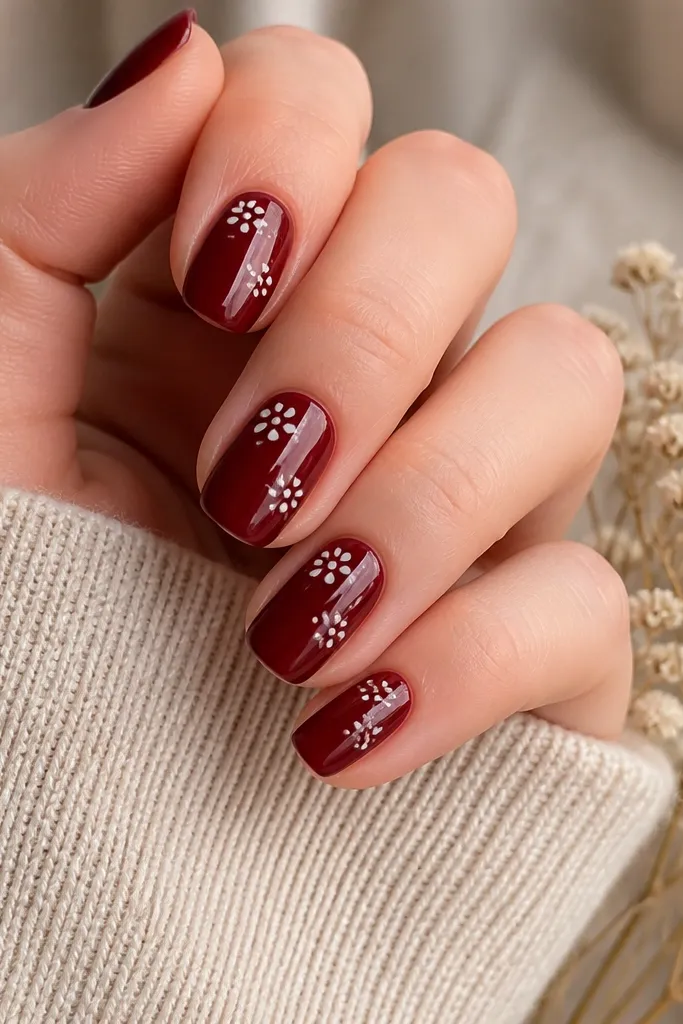
White dot clusters make cherry red feel romantic without turning it into a plain Valentine set. I’ve used this when I want something cute but still dark and grown-up. The dots look best in the upper half because they frame the nail and don’t crowd the tip. If your hands look best with lighter contrast around the cuticle, this one works fast.
Start with a full cherry red base, glossy. Use a dotting tool and white gel polish to place small “flower” clusters — usually 4 to 5 dots around a center dot. Keep each cluster about 3 to 4 mm wide, and space them so they don’t touch. Cure, then top coat over the whole nail, using gentle strokes to keep the dots raised and crisp.
Editor's noteMake the center dot slightly bigger than the surrounding petals for a more natural blossom look.
Watch outDon’t smear the dots with your brush; it makes them look like smudges instead of flowers.
7. Half-Moon Negative Space with Red Outline
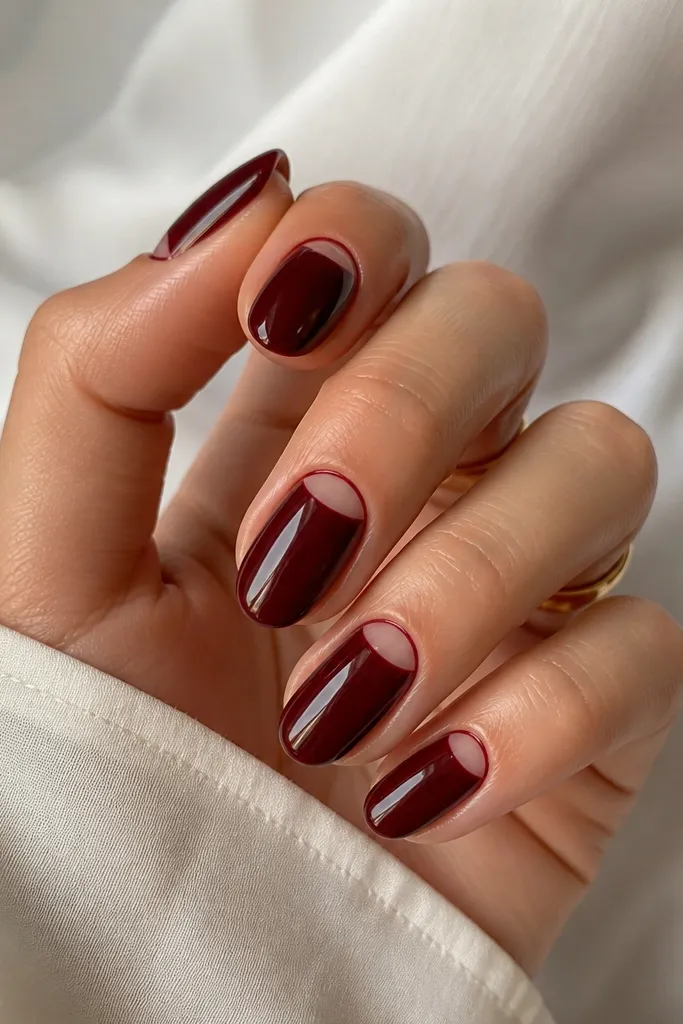
Negative space at the cuticle makes your nails look lighter and more modern, even in a dark color. The thin red outline keeps the half-moon from looking unfinished. I like it on short almond or squoval because the cuticle curve is easy to frame. It also looks great on hands with thicker cuticles because the design draws the eye away from the skin line.
Apply a clear base or nude acrylic where you want the negative space to show, then place cherry red around it. Use a thin liner brush to paint a red outline around the half-moon shape, about 0.5 mm thick. Cure and file carefully so the outline stays sharp. Seal with glossy top coat, but avoid getting top coat into the negative space so it stays clear.
Editor's noteMark the half-moon curve with a dot at each side first, then connect lightly with the brush.
Watch outDon’t flood the cuticle area with red; it defeats the negative-space effect.
8. Black Lace Overlay with Cherry Base
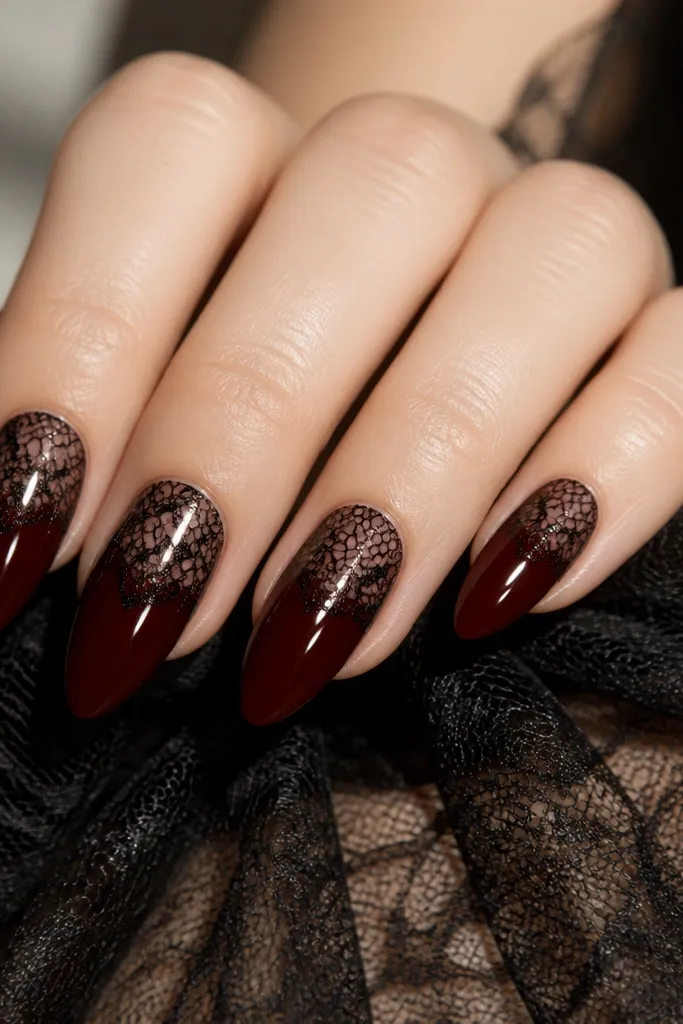
Lace on cherry red looks dramatic but still wearable because the lace lines stay fine. I’ve done this for holiday parties and it always gets compliments because it looks hand-drawn, not sticker-like. It flatters medium to long nails since the lace needs a little room to breathe. The black lace also makes the red appear deeper and less pink.
Use a smooth cherry red base and cure. On each nail, paint a lace pattern in black gel on the upper half only — start near the cuticle and stop before the mid-nail. Add small curved line loops and tiny bridge dots so it reads like lace netting. Cure and top coat carefully, pulling top coat over the edges so the lace stays sealed but doesn’t smear.
Use a gel liner brush with a fine tip, not a regular nail polish brush.
Don’t cover the whole nail with lace; it turns into a heavy black mask.
9. Cherry Red Marble Swirl with Nude Veins
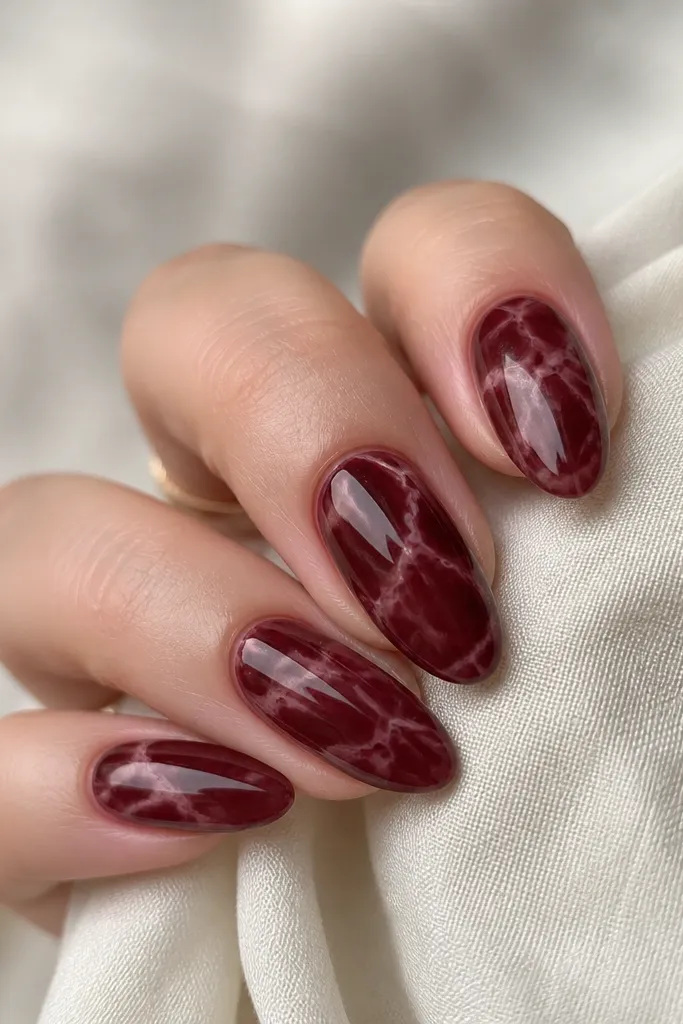
Marble looks amazing on cherry red because you get depth without adding extra colors. The nude veins keep it classy and make the set look expensive in daylight. This design flatters fair to medium skin tones because the nude pops softly, and it still works on deeper skin tones because the marble lines create contrast. I’ve found it looks best on medium almond or long coffin where the swirls can stretch.
Build your base with dark cherry red acrylic and cure. Add a thin layer of clear gel so the marble lines spread slightly. With a thin brush, drag nude gel polish in fine veins across each nail, then add a second lighter pink vein for variation. Use a toothpick to gently swirl one or two intersections so it looks like natural stone, then cure and seal with glossy top coat.
Editor's noteKeep the veins thin — marble looks premium when you can still see the base through the lines.
Watch outDon’t use chunky glitter or thick paint for marble; it ruins the stone effect.
10. Gold Leaf Shatter Accent with Solid Red Base
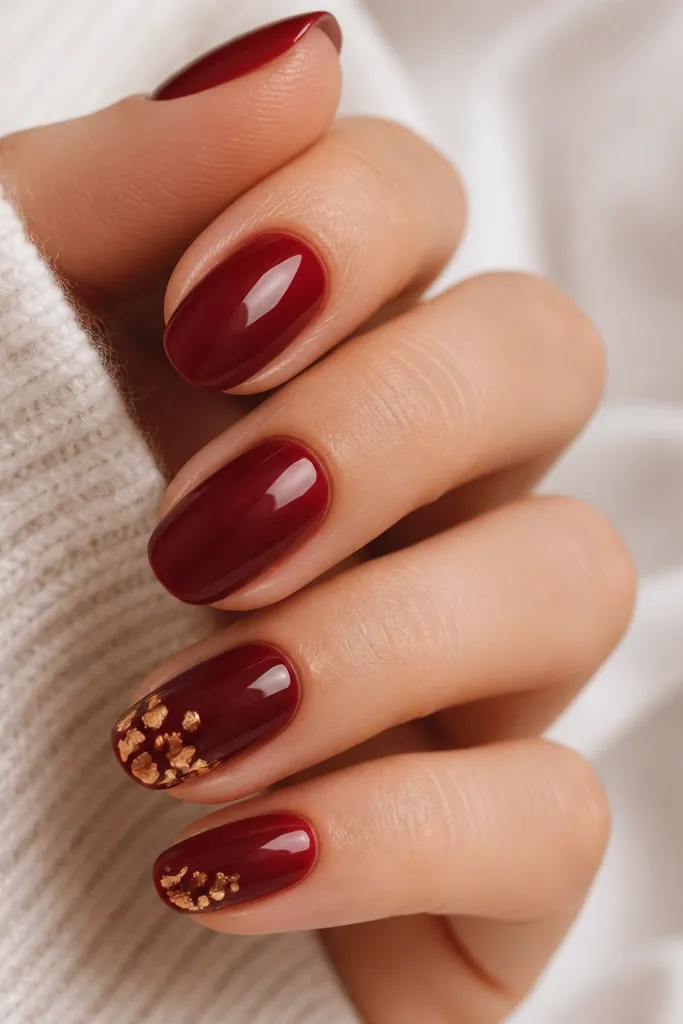
Gold leaf shatter makes cherry red feel like a night-out manicure without needing a full set of stones. I like placing it on the tip or outer edge because it gives a focal point and keeps the rest of the nail sleek. This works on short to medium nails since the accent is small and high-impact. The irregular gold edges reflect light in a way that polish can’t.
Do a full cherry red base on all nails and cure. On the accent nail, brush a thin layer of clear gel on the outer half of the nail tip area, then press gold leaf pieces so they crack across the surface. Tap off excess and cure. Seal with a thin clear gel layer to smooth the surface, then apply glossy top coat.
Editor's noteUse a makeup sponge to press leaf into gel — it grabs the edges better than fingers.
Watch outDon’t leave gold leaf unsealed; it catches on fabric and can lift.
11. Oxblood Red Skittle Nails with Tiny Gold Dots
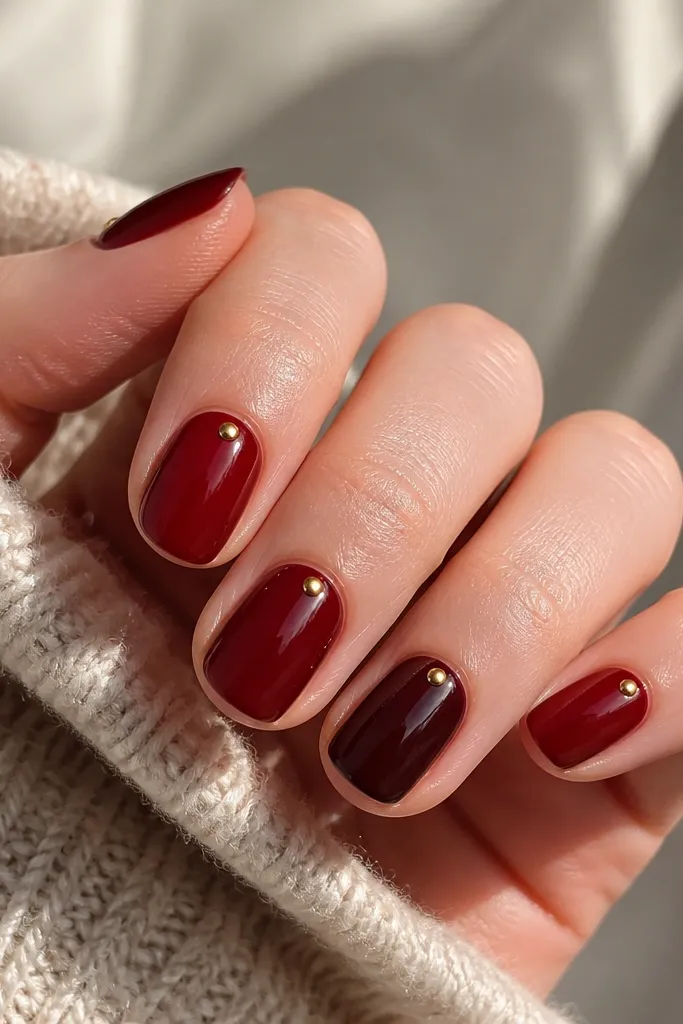
Skittle nails keep things interesting without adding complicated art. I use a slightly different shade — oxblood maroon — next to the dark cherry so your manicure looks intentional when you move your hands. Tiny gold dots add sparkle but stay subtle since they’re small and clustered near the cuticle. This layout looks good on short nails because the dots keep the eye near the top.
Paint all nails dark cherry red and cure. Choose one accent nail and swap it to oxblood maroon. On two nails, place 3 to 5 micro gold dots in a small arc near the cuticle, leaving 1 mm space from the skin. Cure and top coat, applying a thin brush stroke to cover the dots so they don’t snag.
Keep dot spacing consistent — a ruler-straight arc looks cleaner than random dots.
Don’t add gold dots on every nail; it turns into clutter fast.
12. Red Velvet French Tips with Nude Base
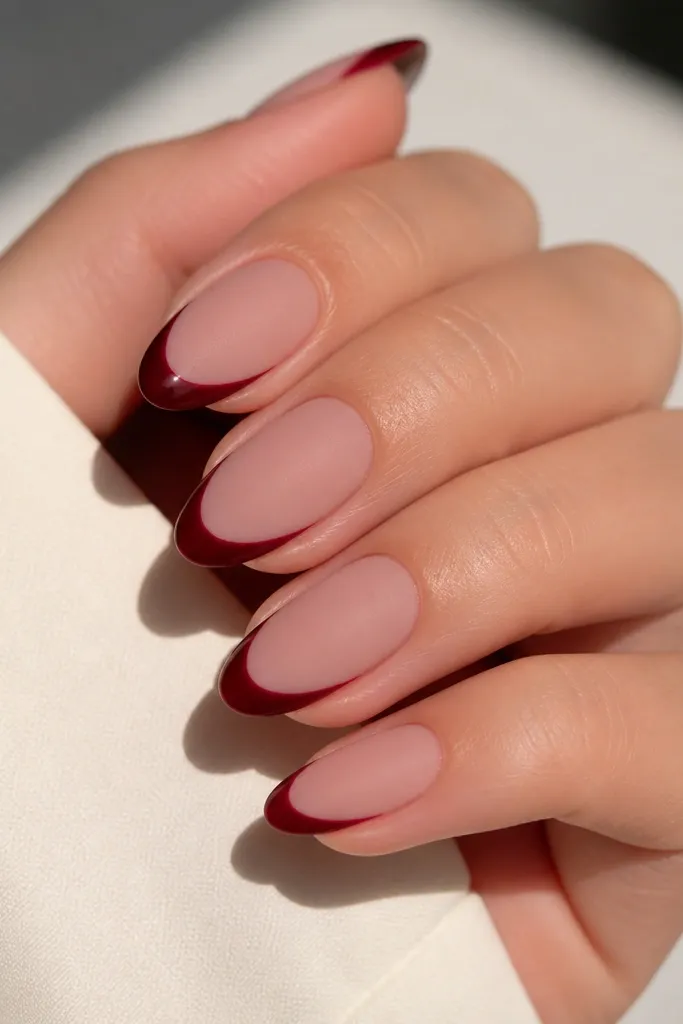
This is one of my favorites because it makes cherry red look neat instead of loud. The nude base gives your nail bed a clean canvas, and the matte velvet texture hides any small unevenness in the base. I also like that the French tips feel like a frame. It’s flattering on both short and medium nails because the nude extends visually.
Apply a nude acrylic or nude gel base and cure, then file smooth. Apply matte velvet top coat to the nude area only. Paint the French tips in dark cherry red and keep the French line thin, about 2 mm from the tip edge. Cure, then apply glossy top coat only on the French tips so they pop against the matte nude.
Use nail tape for the French edge if your freehand line struggles — peel after curing.
Don’t matte the entire nail; the glossy cherry tips are the contrast that makes it work.
13. Cherry Red Chrome Linework on Clear Negative Tips
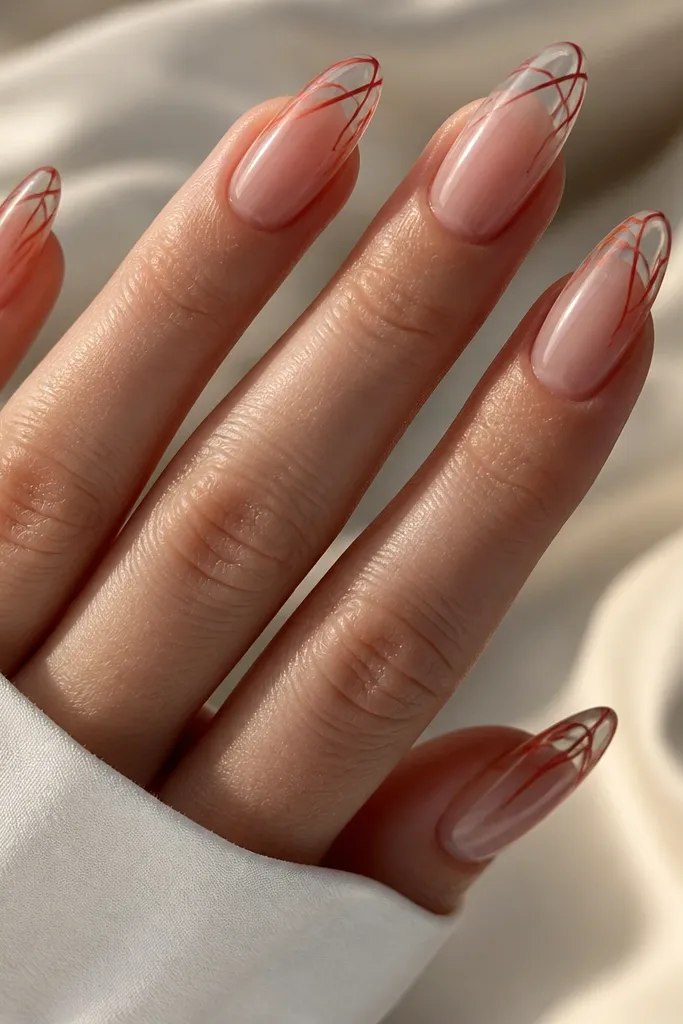
Clear tips with chrome linework look modern and sharp, and they keep the deep cherry from feeling too heavy. The linework draws attention to the nail shape, which is why this looks good even if your nails are on the shorter side. I’ve done it for work events where you want something different but still clean. The chrome lines catch light at the tip, which makes your hands look polished.
Build a nude or clear base and leave the free edge area clear. Apply a thin outline of dark cherry red gel across the clear tip — start with a curved line near the center, then add two diagonal lines that angle inward. Add red chrome powder over the lines or use chrome gel on top of the cherry gel before curing. Cure and seal with glossy top coat, keeping the clear tip truly clear by not overloading gel.
Editor's noteDo linework first, then add chrome — chrome over top coat can get dull and patchy.
Watch outDon’t cover the clear tip with solid red; the negative space is the whole point.
14. Satin Sheen Cherry Red with Tiny White Side Dots
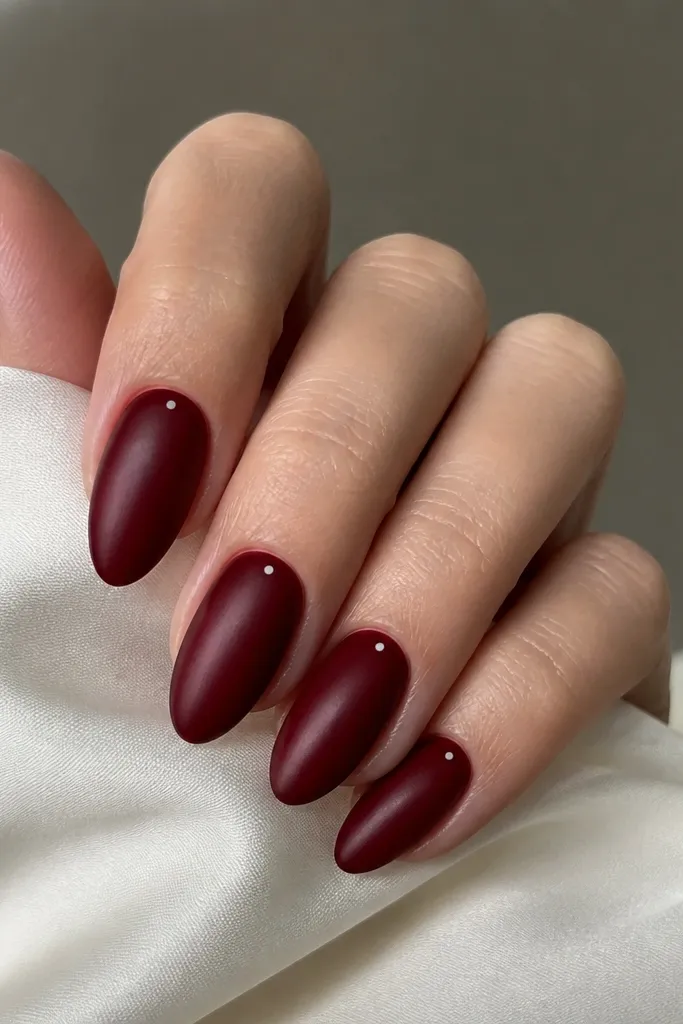
Satin sheen makes cherry red look softer, like it’s been buffed with velvet — not mirror glossy. The tiny white side dots add a playful detail without taking over the nail. This is a good choice if you like dark nails but hate heavy art. It flatters hands with slender nail beds because the side dots add width only where you want it.
Apply dark cherry red acrylic or gel and cure. Use a satin top coat (or matte top coat lightly buffed) to get that soft sheen. Place one tiny white dot on each nail near the sidewall — keep it about 2 to 3 mm from the cuticle and 3 to 4 mm above the tip. Cure and seal with a thin satin-safe top coat so the dot edges stay crisp.
Use a small dotting tool tip, not a large one, so the dots look like beads, not blobs.
Don’t put dots too close to the center; they shift the focus away from the nail length.
15. Dark Cherry Red Butterfly Accent with Micro Rhinestones
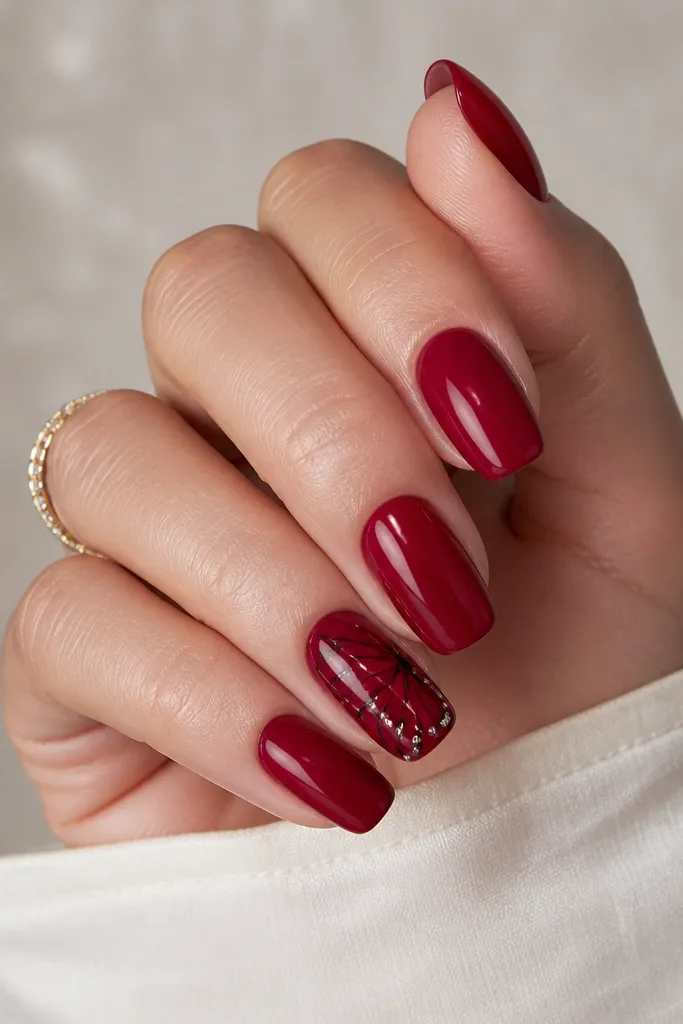
A butterfly accent makes cherry red feel artsy and sweet without going full cartoon. I keep the butterfly on one or two nails because it’s detailed and can look busy if repeated. The black linework makes the butterfly crisp, and the micro rhinestones add sparkle only at the wing edges. This works great for date nights, festivals, and birthdays where you want something that looks custom.
Paint all nails dark cherry red and cure. On your accent nail, draw butterfly wings using thin black gel lines, keeping the wings mostly in the upper half. Add a few micro rhinestones at the outer wing tips, then cure. Seal with top coat, using a careful brush to cover the lines without flooding the rhinestones.
Practice the wing curve on a nail tip first — butterfly symmetry matters for it to look clean.
Don’t use chunky rhinestones; big stones make the butterfly look like a costume.
16. Cherry Red Aura Glow Around a Nude Center
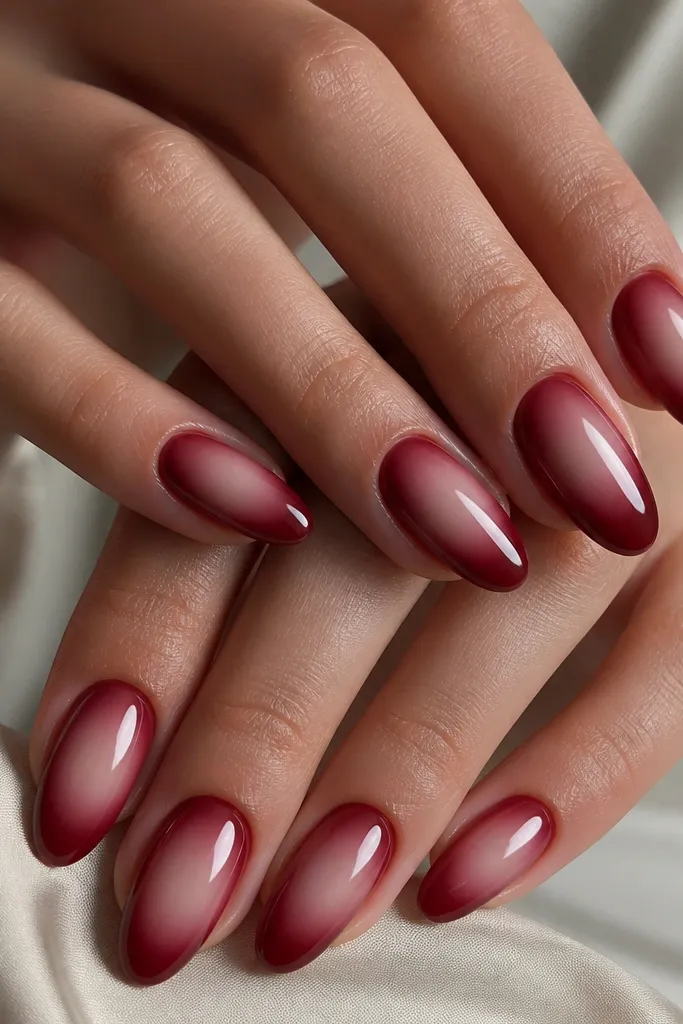
Aura nails make dark cherry red feel ethereal instead of heavy. The nude center gives a breathing space, and the glow effect looks like light radiating from the middle. I love this for spring photos and nights out because it catches flash in a flattering way. It’s also forgiving if your nail shape isn’t perfectly symmetrical — the aura blur hides small differences.
Start with a nude acrylic or nude gel center patch, leaving about 2 mm of nude showing in the middle. Blend dark cherry red outward using airbrush or a sponge with gel paint, building the color at the edges. Add a second layer for a smoother aura ring, then cure. Finish with glossy top coat across the whole nail for a glassy look.
Editor's noteUse a sponge with gel, not regular polish — regular polish can cause grainy edges under top coat.
Watch outDon’t make the aura ring too thick; it turns into a solid block and loses the glow.
17. Cherry Red Grid Check with Thin Nude Lines
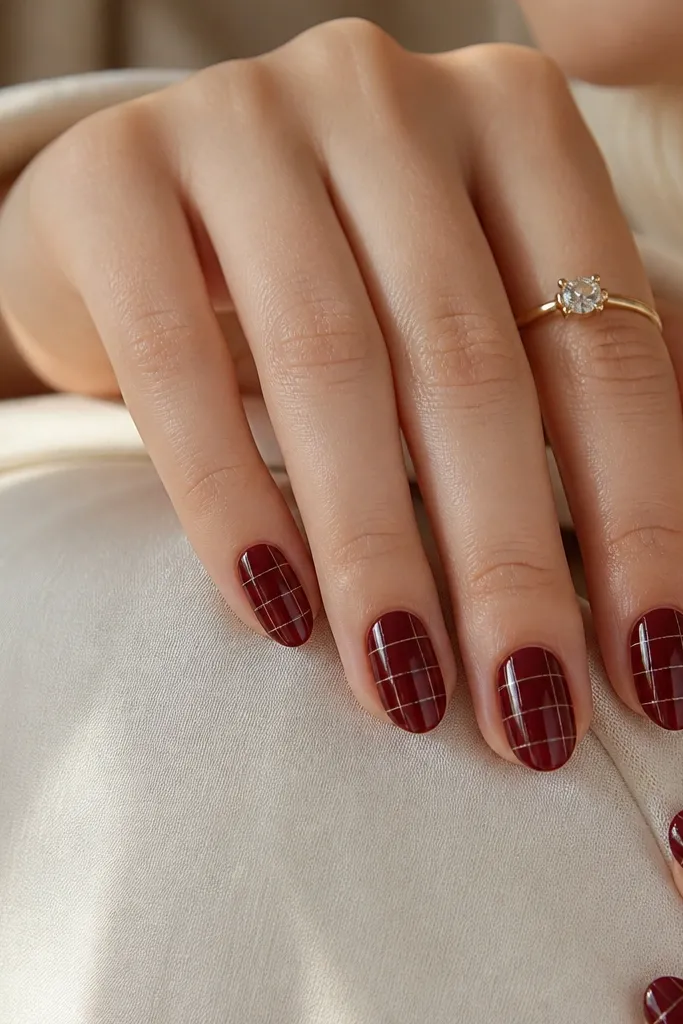
A grid check looks clean and modern, and it’s a great way to add structure to a dark color. Nude lines keep the pattern chic instead of harsh. This works really well on shorter nails because the squares create a neat visual texture without needing length. If you like geometric designs but hate thick outlines, this one is controlled and crisp.
Apply dark cherry red base and cure. Paint thin nude gel lines across the nail in one direction, then cure lightly. Add the perpendicular lines to form squares, aiming for consistent spacing about 2 to 3 mm wide. Cure fully and top coat with glossy gel, brushing from side to side to seal the edges.
Let each line set slightly before adding the next direction so you don’t drag wet gel into a smear.
Don’t use thick striping tape lines; thick lines look bulky on short nails.
18. Cherry Red and Nude Half-Tile Mosaic
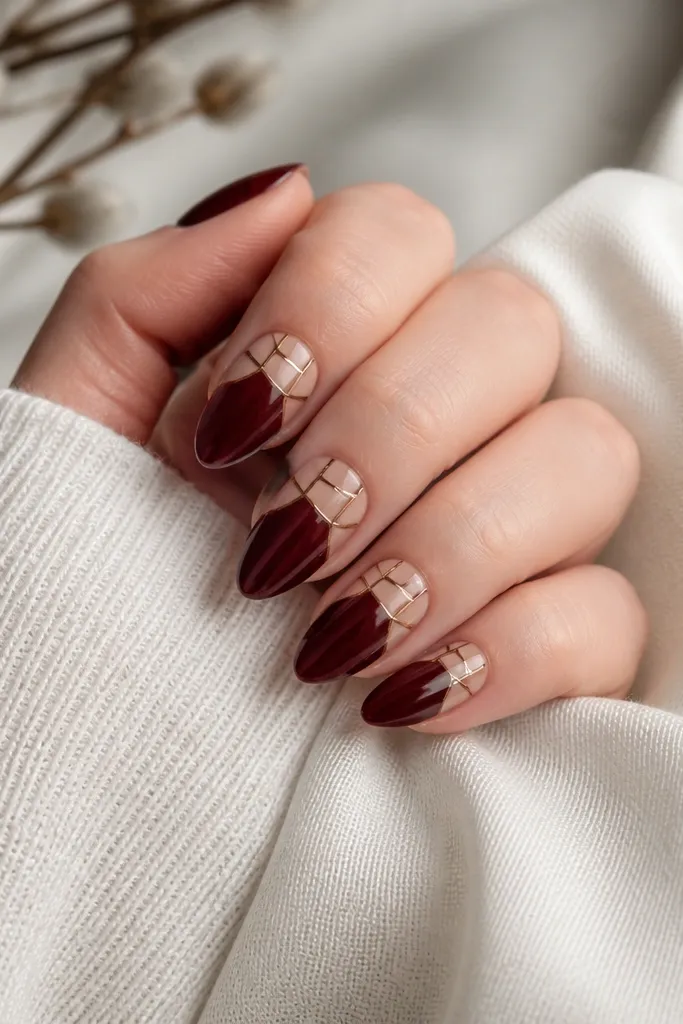
This mosaic pattern looks like a tile wall, but on nails it reads as design detail, not clutter. The nude blocks soften the dark cherry so your manicure still looks wearable in daytime. I’ve done this for people who love nail art but want it to feel “clean” and not too sparkly. It’s flattering on medium almond because the tile blocks can curve with the nail surface.
Start with a dark cherry red base and cure. On the upper half, paint nude gel blocks in uneven tile shapes, keeping edges separated by thin lines of red or clear gel. Use a fine brush to outline the tiles so they look separated, not merged. Cure and seal with glossy top coat, focusing extra attention on the tile edges so they stay smooth.
Keep tile shapes larger near the center and smaller near the sides for a natural flow.
Don’t make all tiles the same size; repetition makes it look like a sticker.
19. Cherry Red Pearls at the Side Cuticle
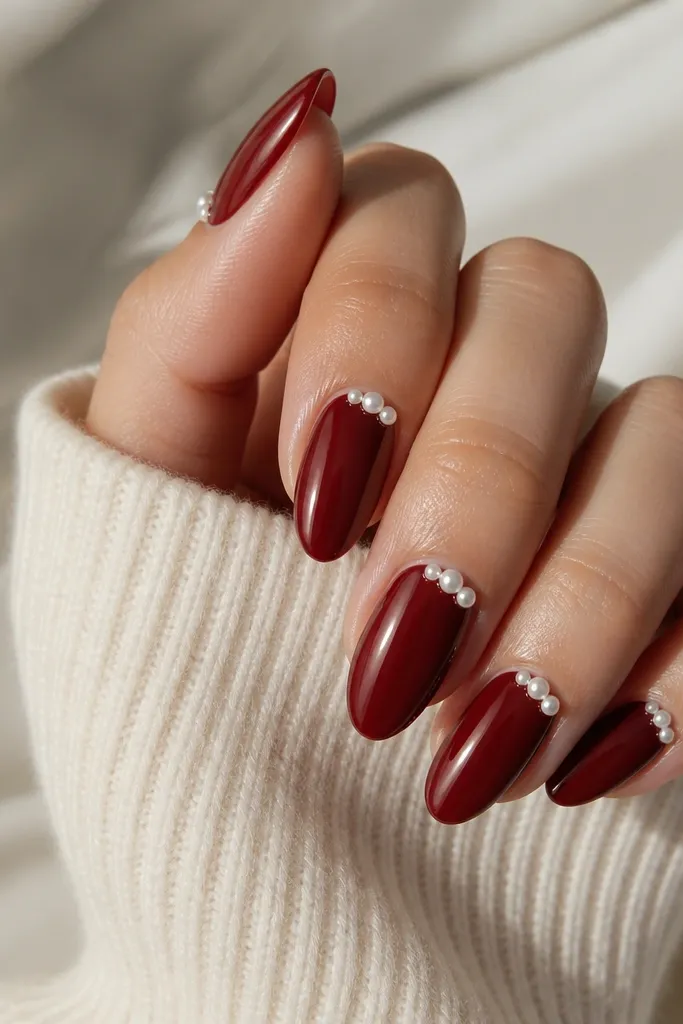
Pearls on the side cuticle look elegant because they frame the nail without taking over the entire surface. I like this when I want something bridal-adjacent but still modern, since the pearls don’t cover the tip. It flatters hands with longer nail beds because the side placement elongates visually. The pearl color also balances cherry red — it adds softness against the deep tone.
Apply a smooth cherry red base and cure. Place a thin line of clear gel along one side of the cuticle, leaving a small gap from the skin. Press 2 to 3 tiny pearls in a slight diagonal arc, then cure. Seal with a thin layer of clear gel over the pearls, then top coat the whole nail for a glassy finish.
Editor's noteUse pearls that are the same size and keep the highest pearl about 1 mm closer to the cuticle than the rest.
Watch outDon’t put pearls too close to the center ridge; they can make the nail look lumpy.
20. Black Cherry Cat-Eye with Red Shift at the Tip
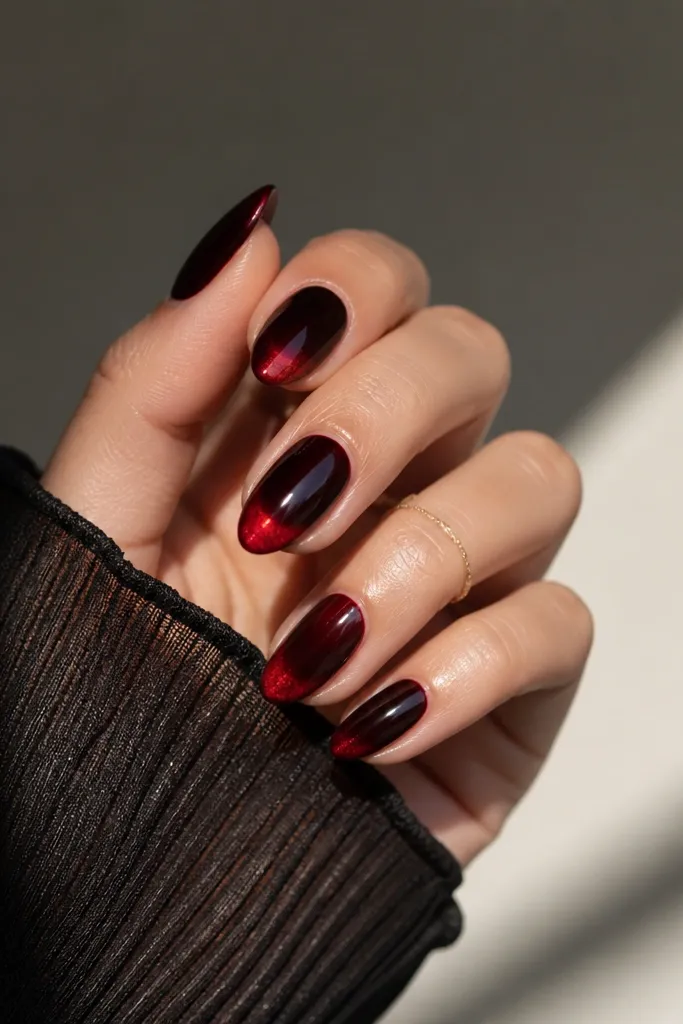
Cat-eye with a red shift looks like a dark gem. The magnetic line gives you a built-in focal point, so you don’t need extra art. I’ve worn this for winter and it always looks richer than regular polish because the light moves across the nail. This works best on medium to long almond because the magnetic effect has space to show a clean streak.
Apply a black-cherry cat-eye gel to the nail and cure. Use a magnet to pull the magnetic line — hold the magnet so the line sits slightly off-center and points toward the tip. After curing, add a thin layer of red-shift gel only on the tip third, then cure again. Finish with glossy top coat and wipe if the top coat requires it.
Editor's noteMove the magnet slowly into position before curing; it helps the streak land where you want.
Watch outDon’t rush the magnet placement; if it’s off, the streak looks random and cheap.
21. Cherry Red Floral French with Tiny White Petals
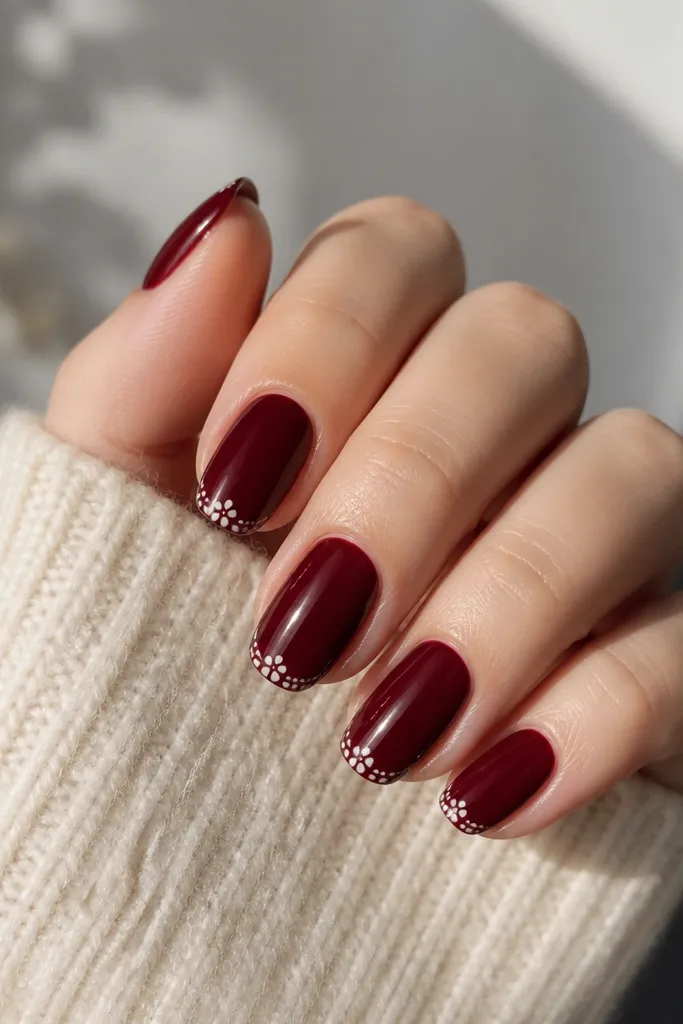
This version of French feels fresh because the tip detail is small and flower-like rather than a plain line. The cherry red base keeps it deep, and the white petals make it look crisp. It flatters short-to-medium nails because the flower clusters fit in the free edge area without swallowing the nail bed. It also looks great on hands that need a little bright contrast near the tips.
Start with a cherry red base and cure. Paint a thin French line at the tip using a nude or soft pink, keeping it about 1.5 mm. On top of the French area, place tiny white petals using a dotting tool — 5 dots per mini flower with a small center dot. Space flowers across each nail so they don’t overlap, then cure and seal with glossy top coat.
Editor's noteMake the petals slightly uneven in size — perfect circles look artificial.
Watch outDon’t add too many petals per flower; it turns into a blob at the tip.
22. Oxblood Cherry Ombre to Clear Tip
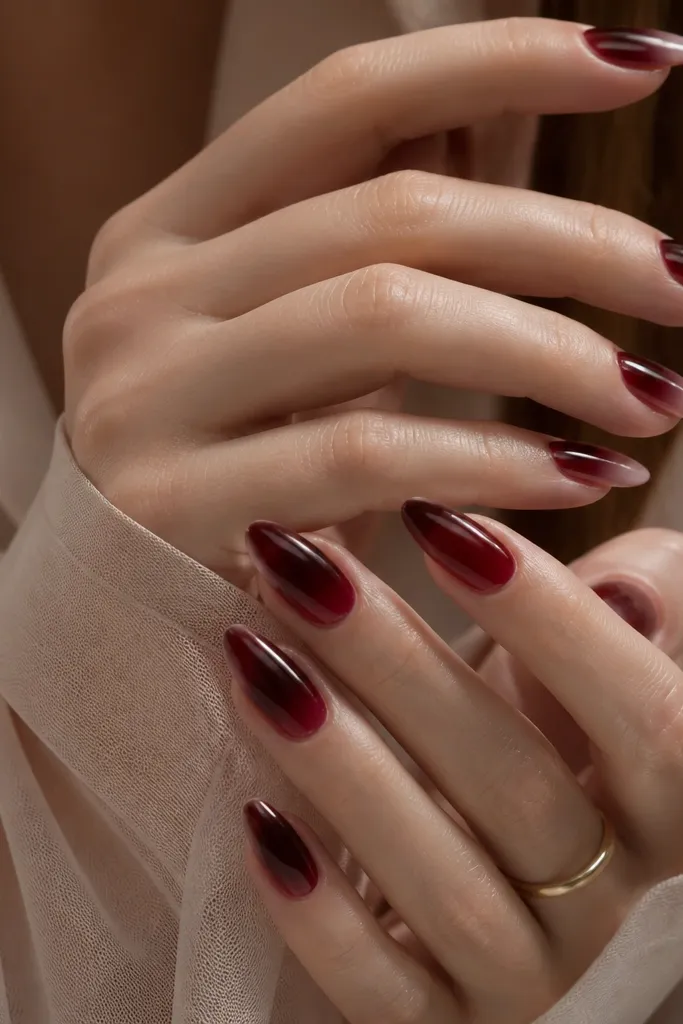
An ombre fade to a clear tip makes your nail look longer and keeps the design light at the end. I like it when my hands feel dry because the clear tip hides minor cuticle dryness visually. The fade also makes cherry red look more dimensional than solid color. This design is flattering on almost everyone because it creates a natural gradient from the nail bed to the free edge.
Apply a nude base close to your skin tone and cure. Sponge dark oxblood and dark cherry gel near the center and blend toward the tip, leaving the very end clear or lightly nude. Keep the darkest area around the mid-nail so the fade looks intentional, not patchy. Cure and seal with glossy top coat, then lightly buff any rough sponge texture.
Editor's noteUse a makeup sponge that you can dedicate to nails; clean sponge edges make smoother ombre.
Watch outDon’t blend all the way from cuticle to tip; that removes the length effect.
23. Dark Cherry Red Stained Glass Panels
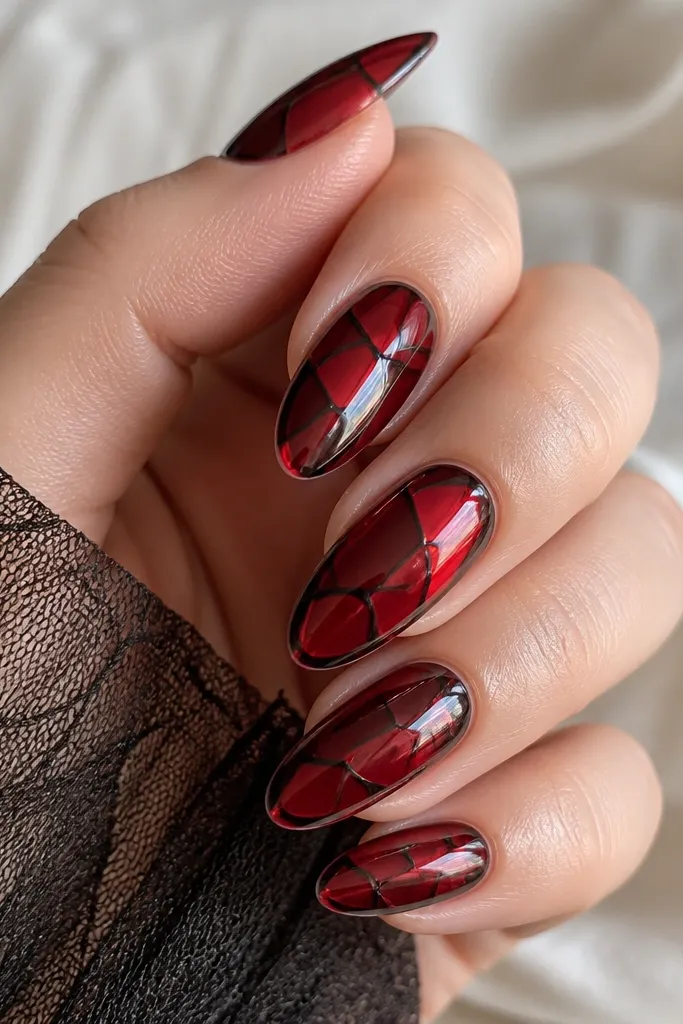
Stained glass looks like stained acrylic - glossy, dimensional, and a little edgy. The black outlines make each panel crisp, and the translucent look keeps it from being heavy. I like this for evenings because it throws light across the glossy domes. It flatters medium to long nails since the panels need space to look like separate pieces.
Build a dark cherry red base and cure. Paint black gel lines to create panel shapes across the nail, then fill each panel with a translucent cherry gel or a clear gel tinted with red. Leave some panel sections more transparent so the stained effect shows. Cure, then apply a thin clear gel layer over the whole nail to smooth and dome the panels before top coat.
Editor's noteUse black gel liner for the outlines — it stays opaque and doesn’t bleed like thinner polish.
Watch outDon’t make panel shapes too tiny; small panels look like cracked paint instead of glass.
24. Cherry Red Gradient Dots to Tip
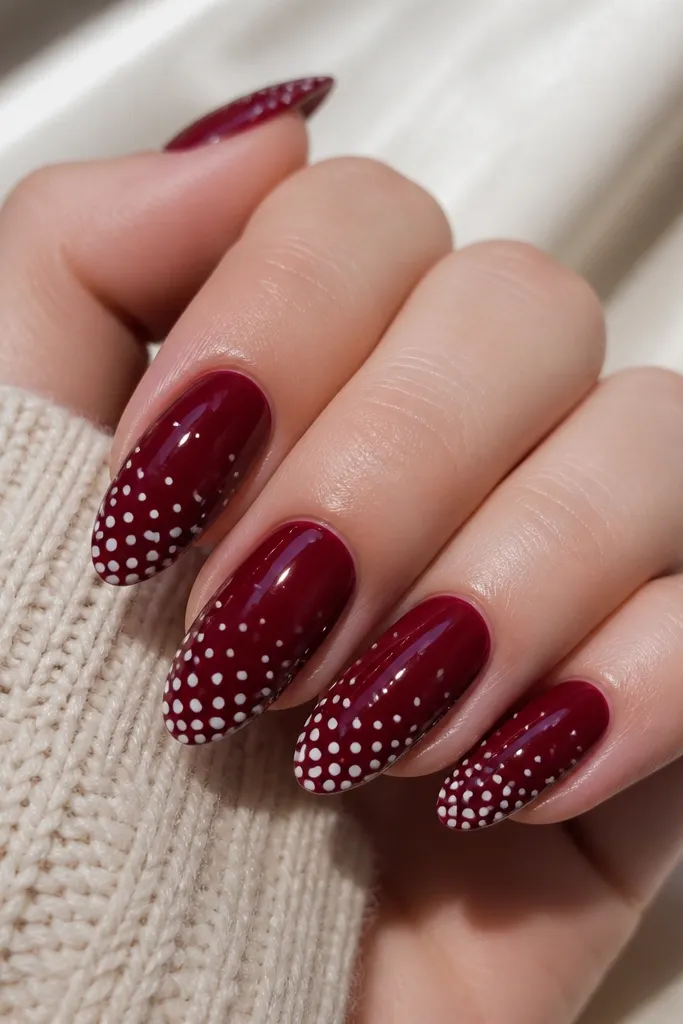
This dot gradient is a simple trick that looks like you spent hours. The dots getting larger toward the tip create a subtle “lengthening” illusion, and the white pops against the dark cherry. I use it when I want cute but not childish, because the spacing stays controlled. It works well on short nails because the tip area needs visual interest, not more coverage.
Start with an even dark cherry red base and cure. Use a dotting tool to place small white dots in a vertical line down the center, starting near the upper half. Increase dot size every few dots as you move toward the tip, and keep the dots about 1 mm apart. Cure and seal with glossy top coat, pulling the brush over the dots lightly so they stay defined.
Plan your dot sizes by counting: 3 small, 3 medium, 2 large usually looks balanced.
Don’t crowd the dots at the top; tight clusters make the nail look messy.
25. Gold Chain Link Accent on Cherry Red Tips
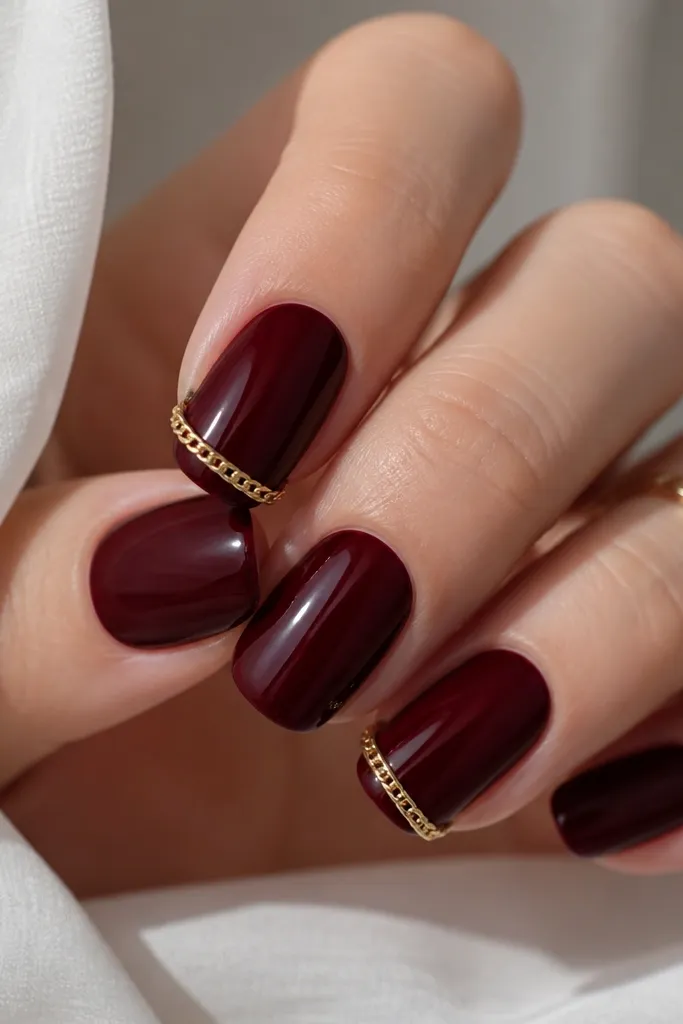
A gold chain link accent makes cherry red feel like jewelry. I put it on the ring finger and sometimes the thumb because chain details need a focal nail to look intentional. The chain sits along the tip, which makes nails look longer and adds movement when you walk or type. This works on both short and long nails, but short nails look best with just 3 to 5 links.
Apply dark cherry red base and cure. On the accent nail, measure the free edge and cut a small strip of gold chain links so it fits the width of the nail tip. Brush clear gel where you want the chain, place it so the links sit flat, then cure. Add a thin layer of clear gel over the chain to lock it down, then top coat everywhere else.
Editor's noteUse tweezers and push links into gel gently; if you press too hard, the chain lifts later.
Watch outDon’t skip the sealing gel layer over the chain; the edges will catch on fabric.



