
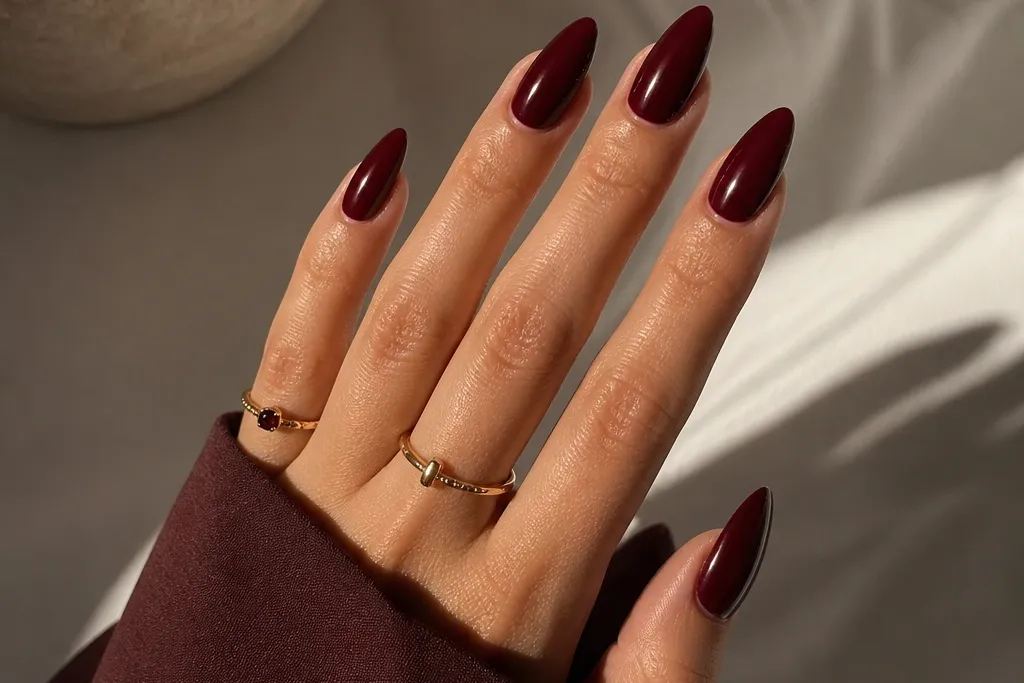
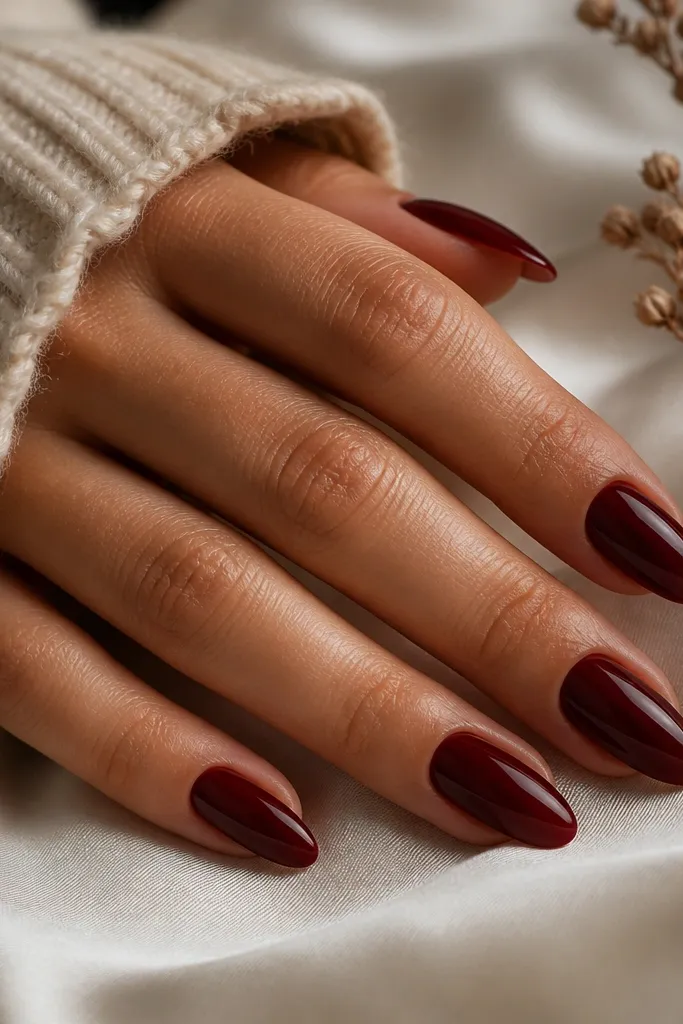
1. Classic Glossy Dark Cherry Almond
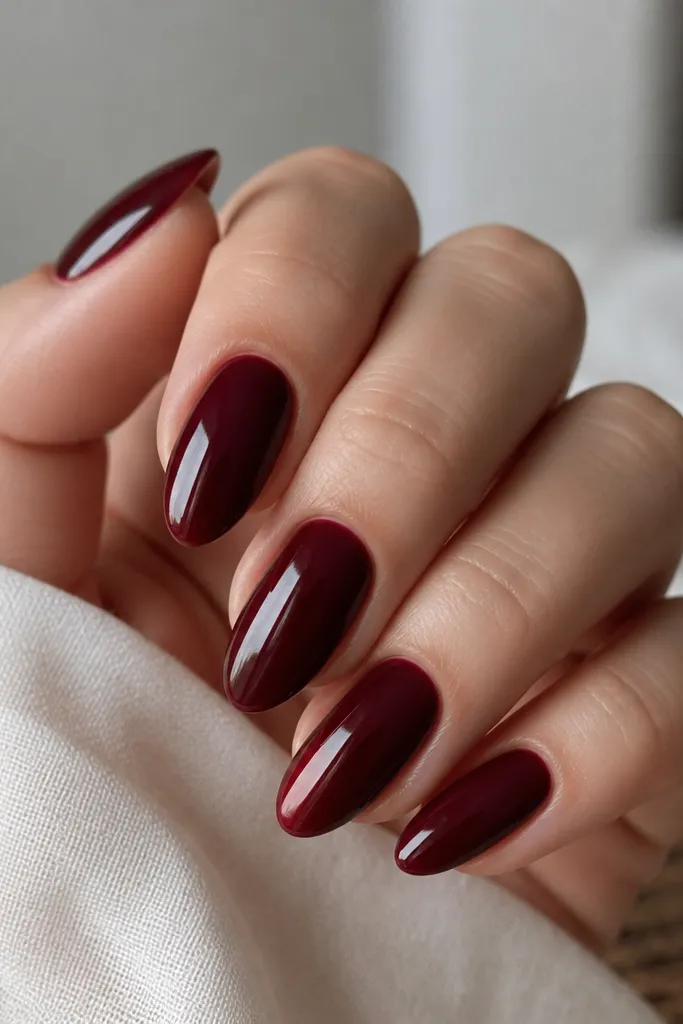
This is the “go-to when you want it to look expensive” version. The key is an even, opaque cherry layer that still lets the red look dimensional, not muddy. I like it on medium to long almonds because the taper makes the deep color feel sleek instead of bulky. It flatters hands with shorter nail beds too — the almond shape stretches the look. For skin tone, it works on both fair and deeper complexions because cherry red has a berry undertone that doesn’t pull orange.
Start by pushing back cuticles and lightly buffing the nail surface with a 220-grit. Apply a thin base coat, then two coats of dark cherry red gel or lacquer, letting each coat level for 60 seconds under a lamp if you’re using gel. On the second coat, keep the brush centered and let the pigment self-level toward the sides. Finish with a mirror-gloss top coat and cap the free edge firmly — I do two passes along the tip.
If your red looks streaky, thin the polish on the palette by a drop of gel-grade thinner or use a fresh bottle — thick product causes bubbles and uneven shine.
Avoid painting right up to the cuticle — dark cherry shows every flood line.
2. Dark Cherry French Tips on Almond
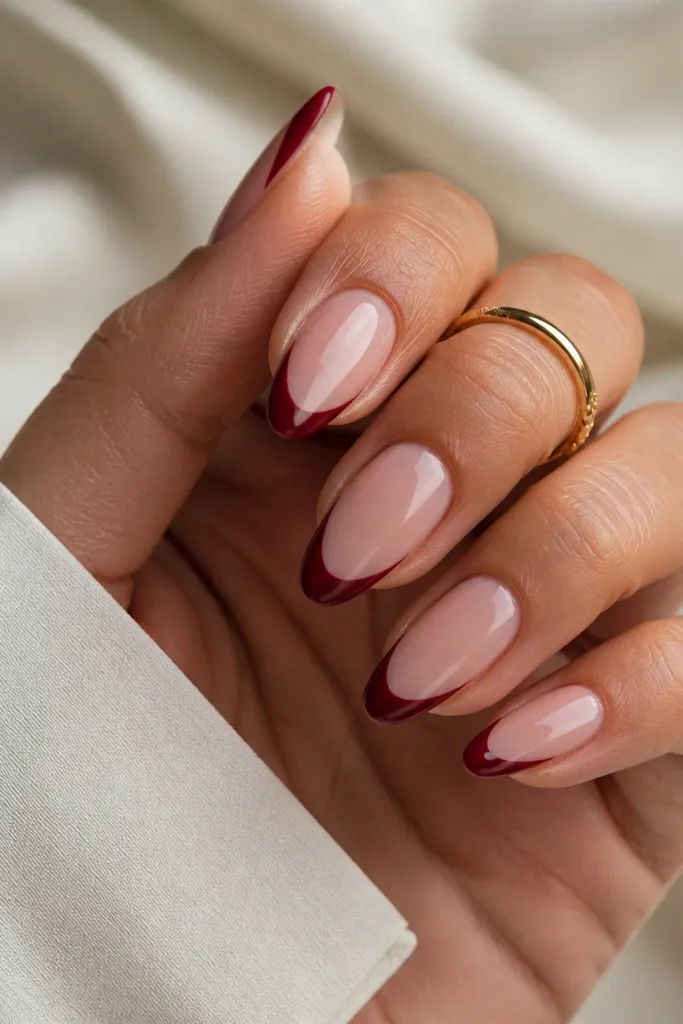
French tips make dark cherry red feel polished and wearable, especially if you want something that still looks “put together” for work. The nude base keeps the look light, while the cherry tips give that rich contrast. I like this on almond nails because the tip arc follows the natural taper and looks longer. It flatters hands that need visual balance — the negative space at the cuticle helps reduce the look of width. This works for all skin tones; choose a nude base that matches your undertone.
Start with a sheer nude base coat (pink-beige for warm undertones, sheer rose-beige for cool). After curing, paint the French tips with dark cherry red using a striping brush — I place the first side guide line, then connect across the tip. Keep the French width about 2-3 mm on medium almonds so it stays sharp, not chunky. Clean up edges with a flat brush dipped in acetone, then seal with glossy top coat.
Use a nail guide sticker for the first attempt — peel it off while the polish is still slightly wet so the edge stays crisp.
Skip thick tip lines; heavy French tips make dark cherry look like a solid block.
3. Cherry Ombré Fade From Cuticle
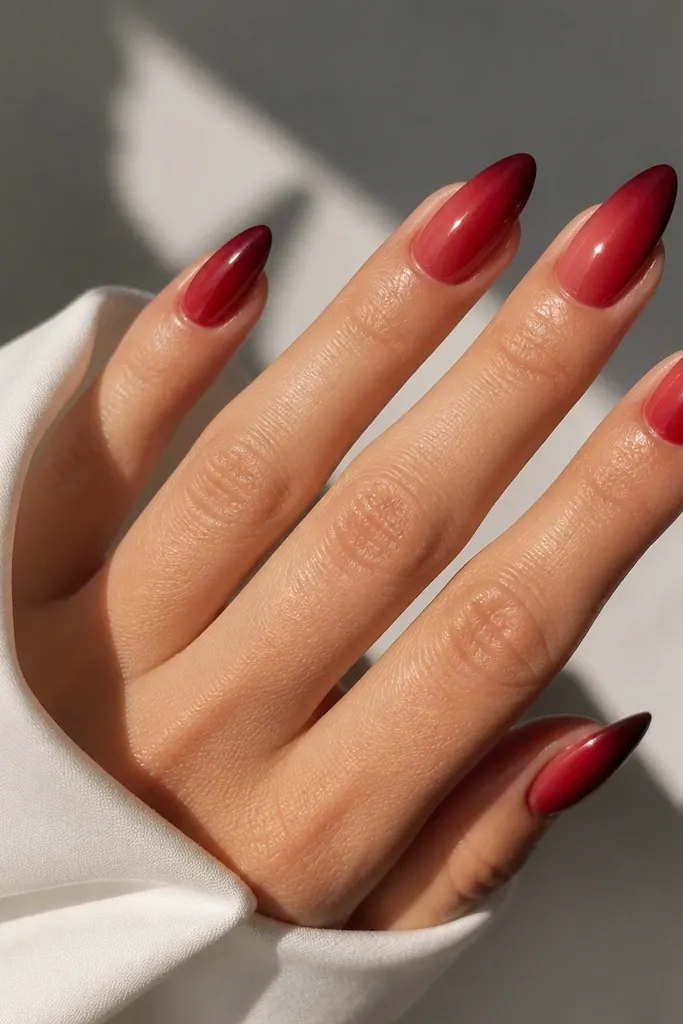
A cherry ombré keeps dark cherry red from looking heavy, because the lighter top color near the cuticle visually lifts the hand. I use a jelly-cherry or diluted cherry near the cuticle, then build depth toward the tip. This looks best on almonds because the taper gives the gradient a natural “funnel” effect. It flatters shorter nail beds since the lighter cuticle area makes the nail look longer. If you hate full coverage red, this is the version that still gives you drama.
Editor's noteWipe excess polish off the sponge on paper towel before pressing on the nail, or you’ll get a speckled look.
Start with a sheer base coat, then apply a jelly pink-cherry layer close to the cuticle. Take a makeup sponge (cut into a small wedge), dab dark cherry red on the sponge tip, and press at the mid-nail, dragging slightly upward. Repeat in thin layers until the fade looks smooth, then cure between layers. Finally, cap with glossy top coat — the gloss blends the last micro-edges.
Watch outDon’t try to blend in one thick swipe; banding happens when you flood the gradient.
4. Dark Cherry Jelly Base + Glossy Depth
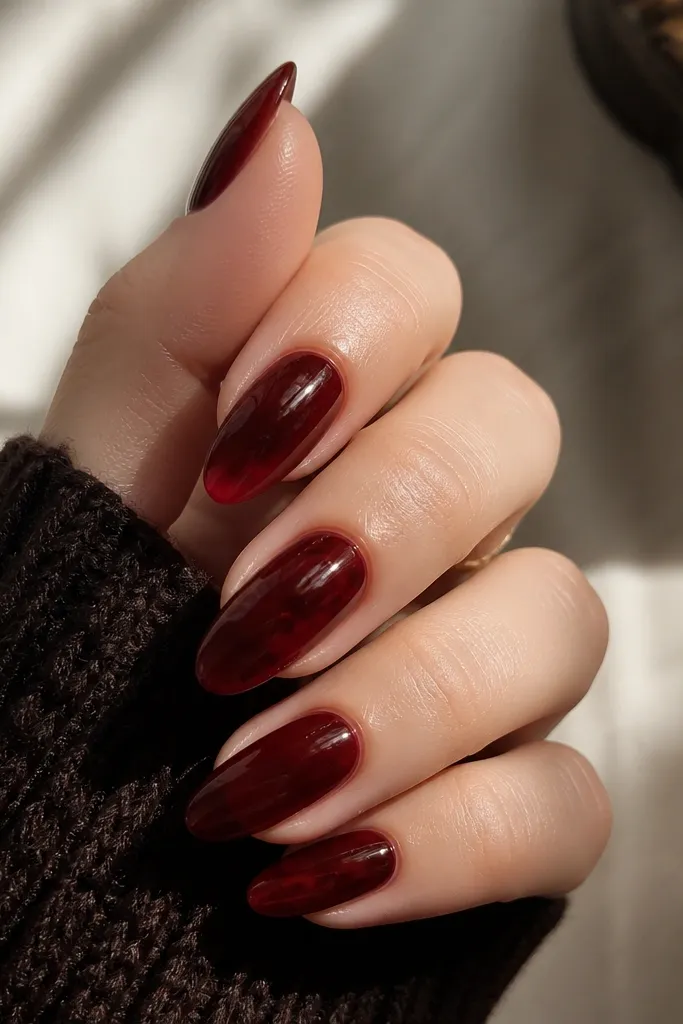
This look is for when you want dark cherry red to look juicy instead of opaque. Jelly bases catch light differently, so the color looks richer without needing thick layers. I love this on almond nails because the translucence makes the tip look like it’s lit from within. It flatters hands that have ridges too — a jelly layer can soften the look when you apply thin, even coats. It also photographs beautifully because the cherry tone shows depth rather than a flat pigment wall.
Apply a clear or sheer pink base, then add a jelly dark cherry red in two thin coats. Keep your brush light and let the jelly self-level; if you push too hard, you’ll get streaks. After curing, add a final opaque-ish layer only at the tip if you want extra vamp, then top coat with a high-gloss gel top. Cap the free edge and wipe the underside of the nail if you’re using gel.
If you use regular nail polish, choose a jelly formula and add a second coat only after the first is fully dry to prevent dragging.
Avoid piling jelly too thick; thick jelly can stay soft at the edges and chip sooner.
5. Micro Gold Foil Lines Over Dark Cherry
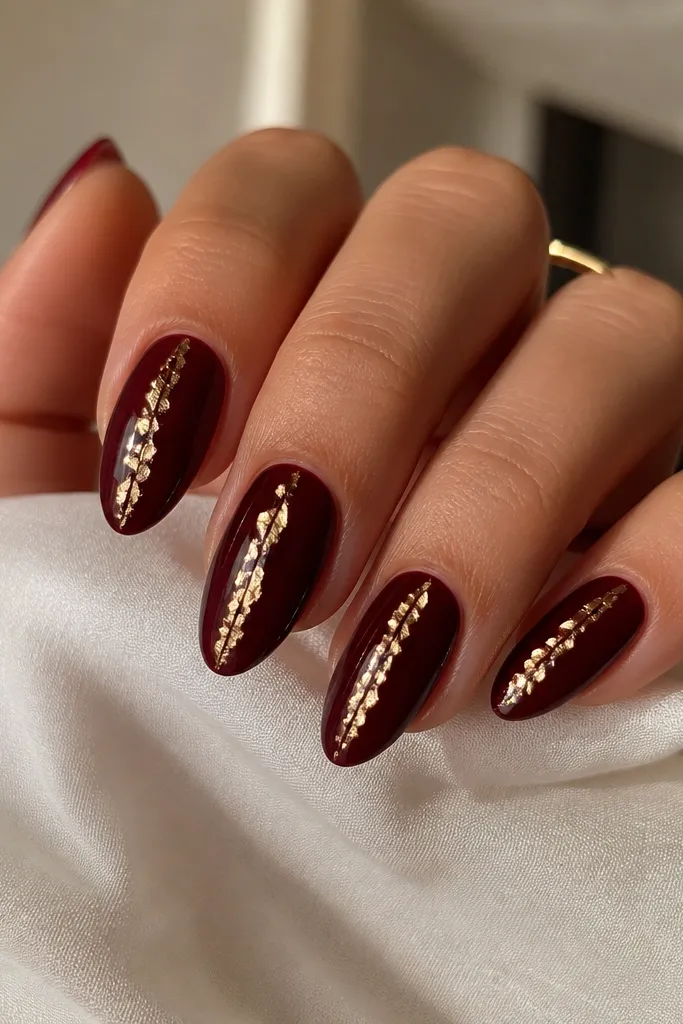
Gold foil lines turn dark cherry red into something that looks like jewelry. I keep the lines thin and slightly off-center so the nail doesn’t look like wallpaper. This flatters most hands because vertical placement draws the eye down the almond shape. It also looks great on medium skin tones where pure gold can sometimes feel too bright — the cherry grounds it. For special events, this is the look that gets compliments without needing rhinestones.
Editor's noteGold foil looks best when it’s imperfect — trim pieces to different lengths rather than repeating the same pattern nail to nail.
Paint two coats of dark cherry red and cure fully. Tear or cut micro gold foil into small pieces, then press a tiny strip of foil along the center line using a foil transfer adhesive or a thin layer of tacky gel. Add one more foil piece near the sidewall but keep spacing so you still see cherry underneath. Seal with glossy top coat; do a gentle top coat at first, then a second thicker layer to trap the foil.
Watch outDon’t cover more than 15-20% of the nail with foil or it turns flashy and heavy.
6. Cherry Marble Swirl Accent
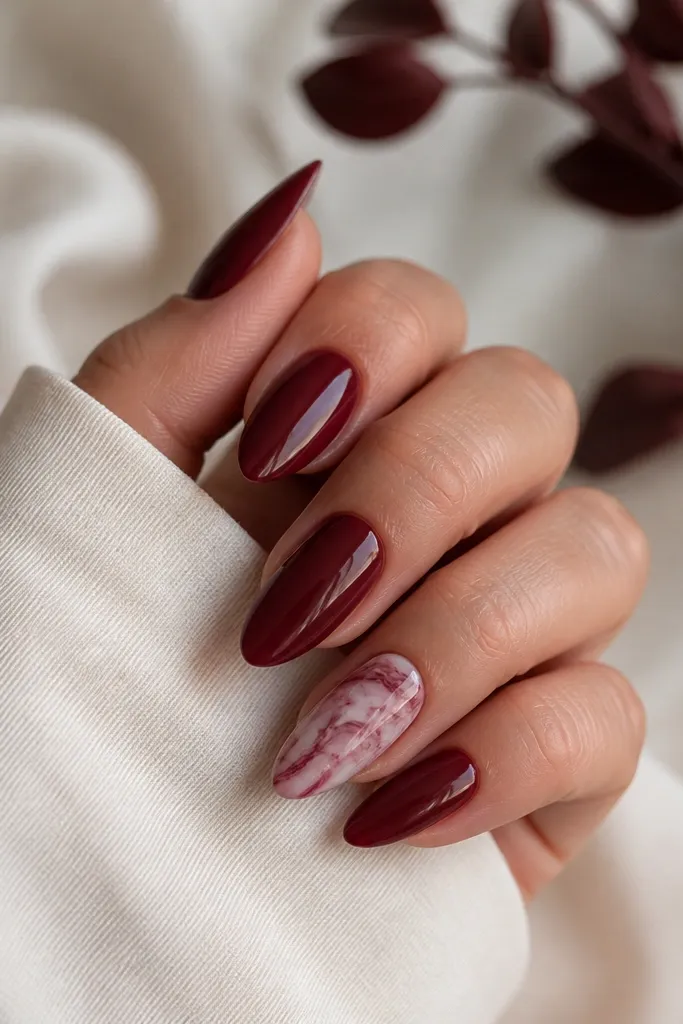
Marble is the quickest way to make dark cherry red feel custom. The trick is using thin white lines and keeping the marble mostly on one or two nails so it doesn’t overwhelm. Marble looks great on almonds because the swirls follow the nail curve and feel organic. I like it for winter parties and even holiday office days because it reads artsy but still polished. This version flatters shorter nail beds too since the marble lines create movement without needing lots of length.
Editor's noteFor crisp marble, use gel paint and a fine striping brush instead of nail polish — polish spreads too much on almond curves.
Start with solid dark cherry red on all nails. On your accent nail, drop a few micro dots of milky white gel and a darker burgundy shade, then drag them with a toothpick or nail art brush to create veining. Keep your lines thin, and wipe the brush often so you don’t flood the swirl. Cure, then apply glossy top coat over the whole hand to smooth the pattern.
Watch outSkip thick blobs of white; marble needs hairline veins to look expensive.
7. Dark Cherry Crisscross Negative Space
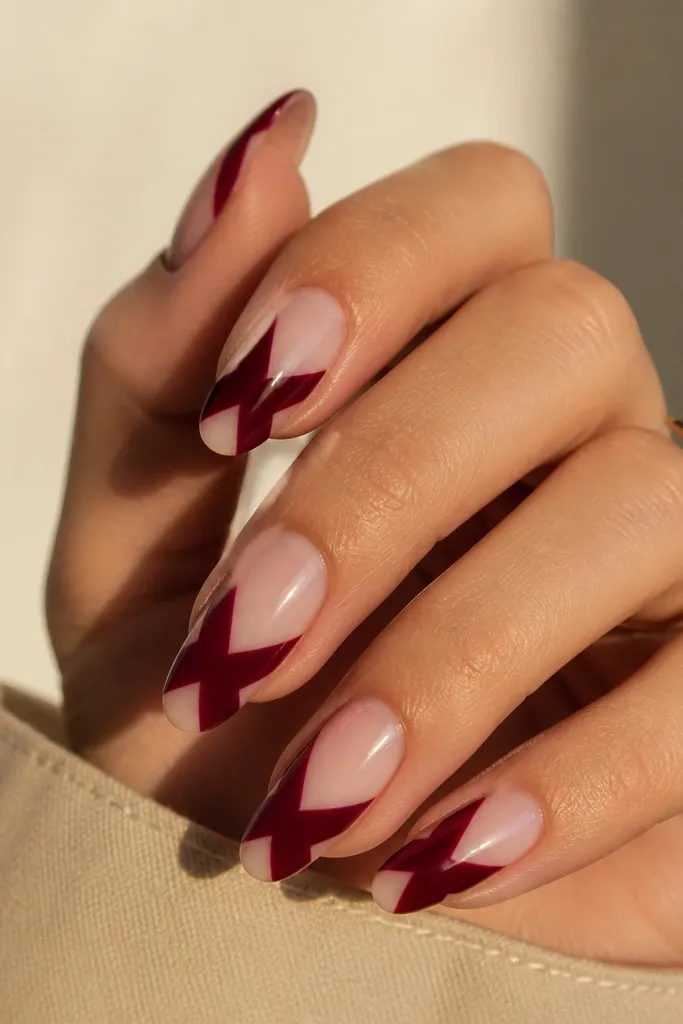
This design makes dark cherry red feel modern and lighter because you’re not covering the whole nail. The crisscross pattern also emphasizes the almond shape, since diagonals naturally guide the eye toward the tip. I like it on hands that feel “too plain” with solid color, but you still want the cherry drama. It works on any skin tone because the negative space is sheer nude, not white. For everyday wear, keep the lines narrow so it stays clean.
Editor's noteUse nail tape strips that are 1.5-2 mm wide; wider tape makes the negative space look too small.
Apply a sheer nude base and cure. Use striping tape or a steady brush to paint two diagonal dark cherry lines that cross near the center, leaving triangles of negative space at the cuticle. Add a second set of diagonal lines only if you want a tighter crisscross — keep them thin. Seal with glossy top coat and remove any tape carefully while the gel is still tacky.
Watch outDon’t let the red lines touch the cuticle — a crisp gap looks intentional.
8. Velvet Matte Dark Cherry With Glossy Edge
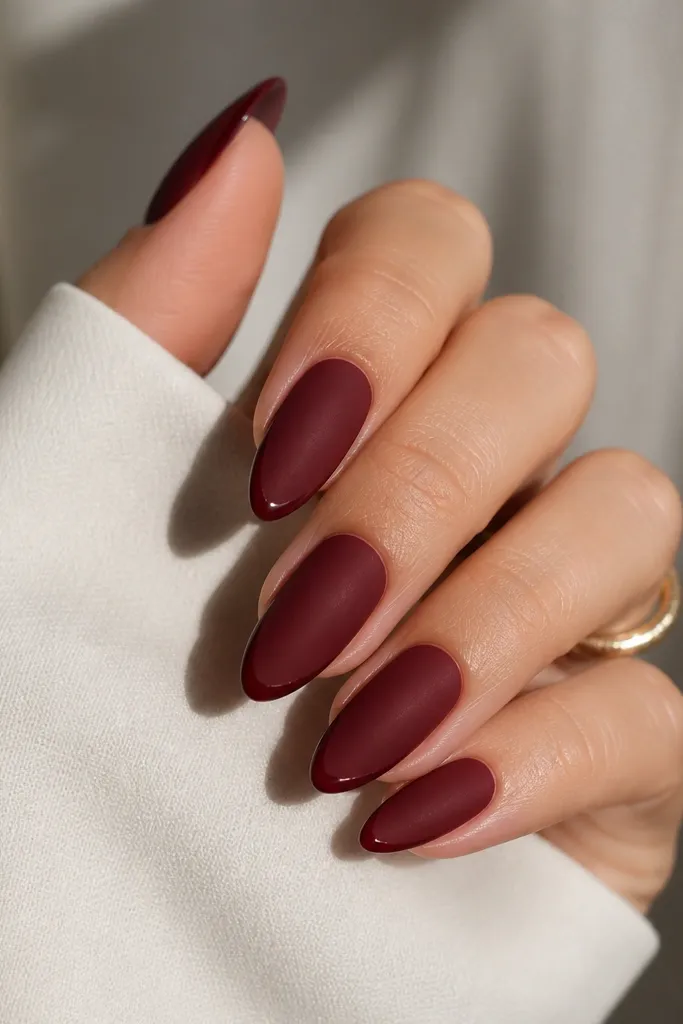
Matte can make dark cherry red look softer and more grown-up, like a coat rather than a mirror. The glossy edge is the trick that keeps it from looking flat or dusty. I do this on medium almonds when I want a “date night but calm” vibe. It flatters hands because matte hides tiny ridges, and the glossy tip frame adds length. On fair skin, the cherry looks rich; on deeper skin, it stays deep without turning black.
Editor's noteIf your matte top makes the color look patchy, buff the surface lightly before applying matte — oils cause dull spots.
Paint two coats of dark cherry red and cure until fully hard. Apply a velvet matte top coat across the nail, but leave the last 1 mm of the free edge untouched. Then, paint a thin line of glossy top coat along the very tip edge and cure again. Cap the sides lightly so the glossy line stays crisp under light.
Watch outDon’t skip the glossy tip line; fully matte dark cherry can look heavy in photos.
9. Dark Cherry Satin Shimmer (No Glitter Chunks)
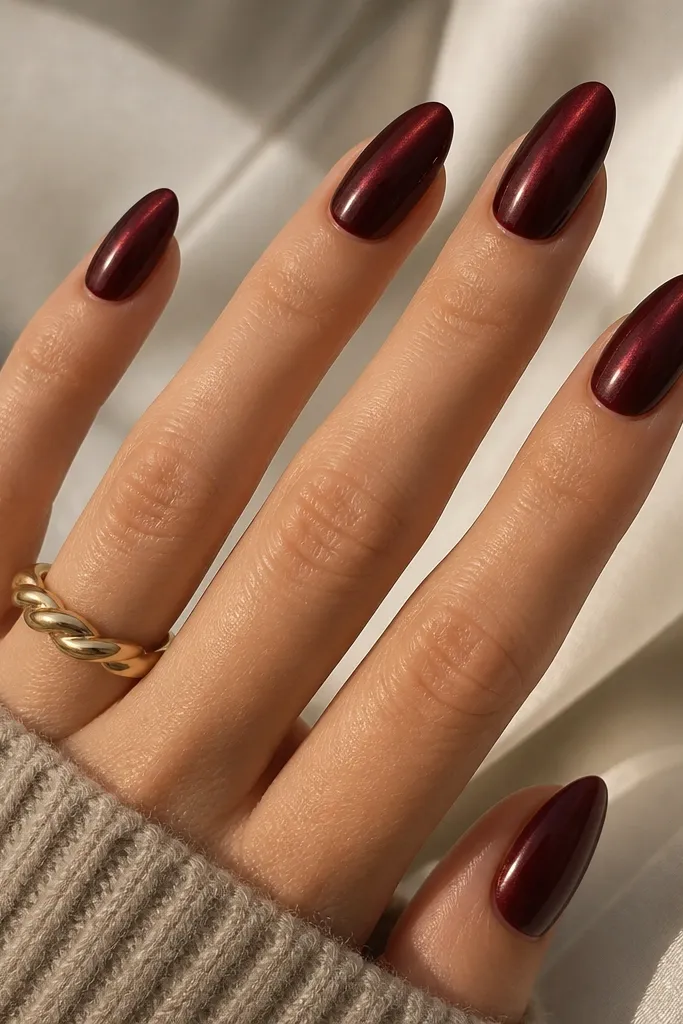
Satin shimmer gives dark cherry red a “lit from the inside” look without the sparkle feeling childish. This works because the shimmer particles are fine and dispersed, so they don’t create texture bumps. I like it for holiday dinners when you want something festive but still classy. Almond nails help the shimmer travel along the nail curve, which makes the color look smooth. It flatters short nails too because there’s no glitter fallout or glitter bulk at the tip.
Editor's noteUse a lint-free wipe to clean the brush before each nail so shimmer doesn’t clump into specks.
Start with a base coat, then apply one full coat of dark cherry red jelly or sheer cherry to anchor the color. Add a satin shimmer polish in one thin coat, focusing on the center and letting it spread to the sides. If you want more depth, add a second satin coat only at the tip. Finish with a smooth glossy top coat — satin polishes often look better under gloss than alone.
Watch outAvoid chunky glitter toppers — they catch on fabric and chip faster.
10. Dark Cherry Ombre With Black Tip
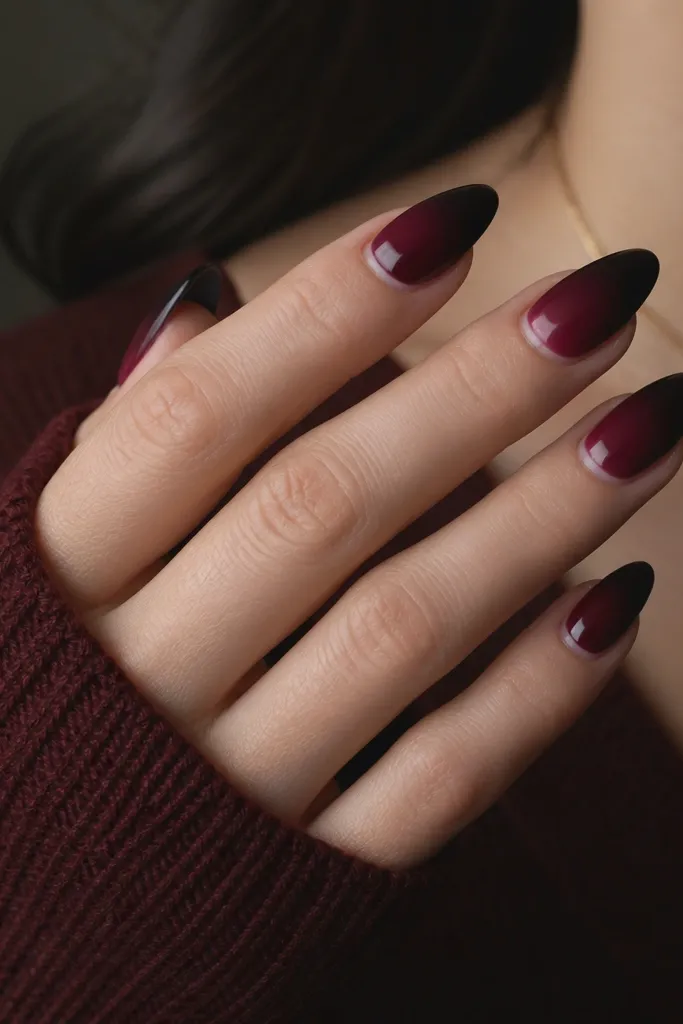
Adding a near-black tip makes dark cherry red look extra deep and dramatic. I do this when I want a vampy look that still feels refined rather than goth. The almond taper makes the black tip look intentional, like a highlight, not a dent. It flatters long fingers because it balances length with a strong finish at the tip. For fair skin, use a soft burgundy-black blend so it doesn’t read harsh.
Editor's noteBlend with a clean makeup sponge corner — one swipe per nail beats repeated pressing.
Apply two coats of dark cherry red and cure. Then sponge a small amount of blackened burgundy (or near-black gel) just at the tip, pressing lightly and blending upward halfway. Use a brush to smooth the edge after sponging so you don’t see a halo. Seal with glossy top coat and make sure the free edge is capped so the black doesn’t lift.
Watch outDon’t make the black tip too wide; keep it under 25% of the nail length.
11. Dark Cherry Almond With Tiny Rhinestone Crescent
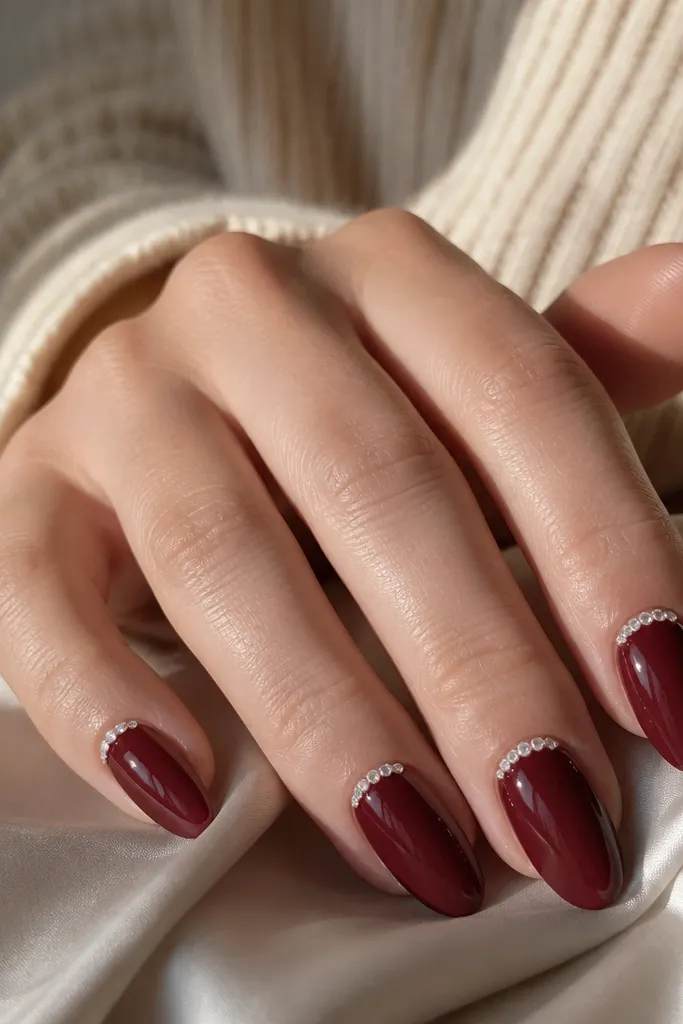
A tiny rhinestone crescent gives you sparkle without turning the nail into a full bling set. Placement matters: I keep the stones in a shallow arc about 2-3 mm wide, centered under the cuticle. This flatters almond nails because the crescent follows the curve and makes the nail look longer. It also looks good on hands that don’t want full rhinestones because you get the glam at the base only. Dark cherry keeps the stones from looking too bright.
Editor's noteUse flat-back micro stones sized SS3-SS5 for almond nails; bigger stones look bulky on the taper.
Paint two coats of dark cherry red and cure. For the crescent, use a dotting tool and rhinestone gel or nail glue, then place 6-10 tiny stones in a half-moon line. Leave a small gap between stones so the arc looks delicate, not packed. Cure, then apply glossy top coat around the stones carefully — I avoid flooding directly on top so the stones stay crisp.
Watch outDon’t place stones into the cuticle line — it lifts and catches fast.
12. Dark Cherry Half-Moon Negative Space
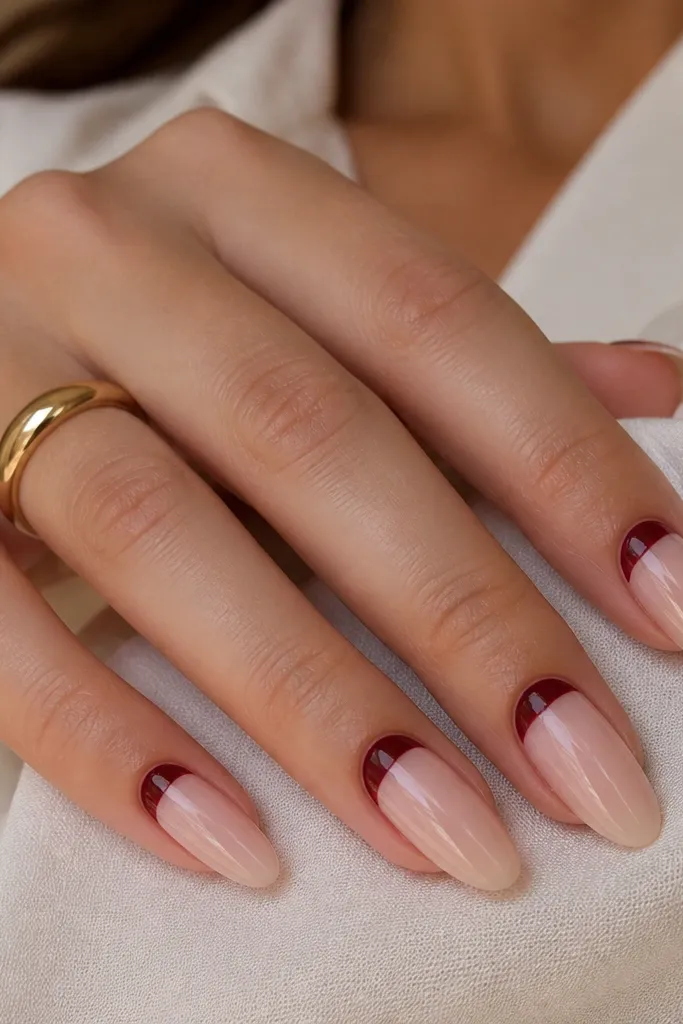
Half-moon negative space makes dark cherry feel graphic and clean. It’s also a cheat code for growth: as your nails extend, the design still reads intentional. I like this on almonds because the cuticle area is a natural place for contrast, and the almond taper keeps it from looking too “logo-like.” It flatters most skin tones because the nude base is sheer and the cherry sits only at the base. For office days, this looks classy without needing extra art.
Apply a sheer nude base and cure. Use a half-moon stencil or shaped tape to mask the cuticle area, then paint dark cherry red inside the mask. Keep the half-moon width about 2 mm tall and centered. Remove the stencil while the gel is still tacky, then seal with glossy top coat and cap the free edge.
Choose a nude base that matches your natural nail tint; if it’s too pale, the half-moon looks stark.
Avoid painting the half-moon too far down the nail — it disappears on almond curves.
13. Cherry Red Marble Tips
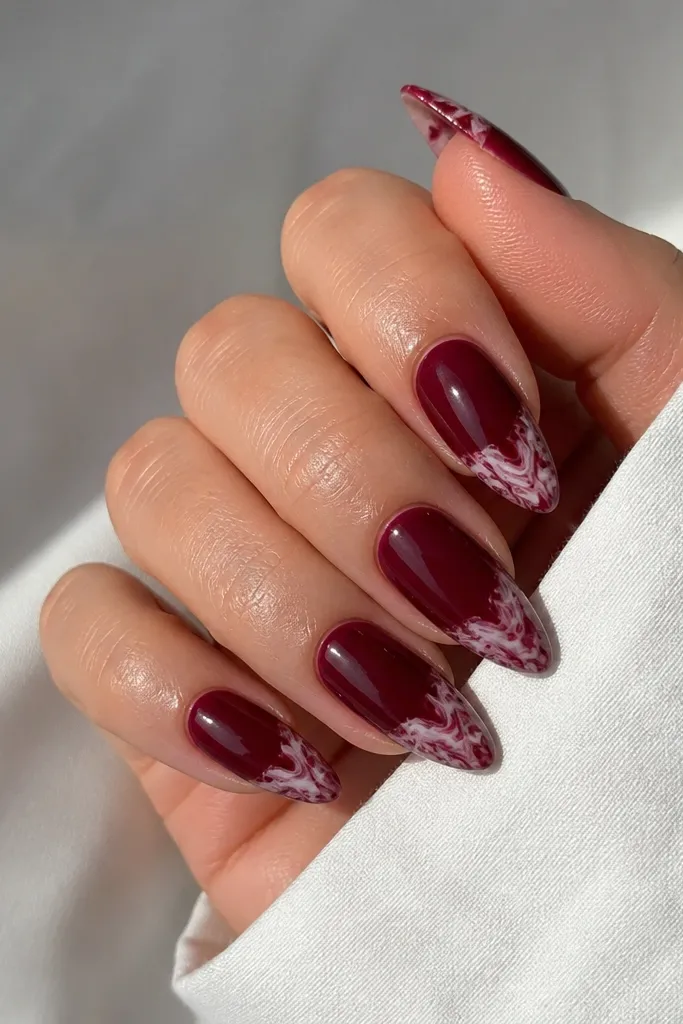
Putting marble only on the tips keeps the look fresh and prevents it from going busy. Dark cherry base anchors everything, and the marble adds movement where your eye already lands — near the free edge. This works especially well if your nails are medium length because the marble has space to show detail. It flatters hands with uneven nail beds because the base stays smooth and the marble is controlled. It’s great for photos because the marble catches light on the almond curve.
Editor's noteDo one accent nail at a time and cure between so the marble doesn’t smear while you work.
Paint two coats of dark cherry red and cure. For the tip marble, sponge or paint a thin band of milky white near the free edge, then add small dots of deep burgundy. Drag the dots into thin veins with a toothpick, keeping the pattern within the last 20-25% of the nail length. Cure and finish with glossy top coat to smooth the marble texture.
Watch outSkip marble that reaches the cuticle; it looks messy on almond taper.
14. Dark Cherry Glossy With Subtle Side Bevel
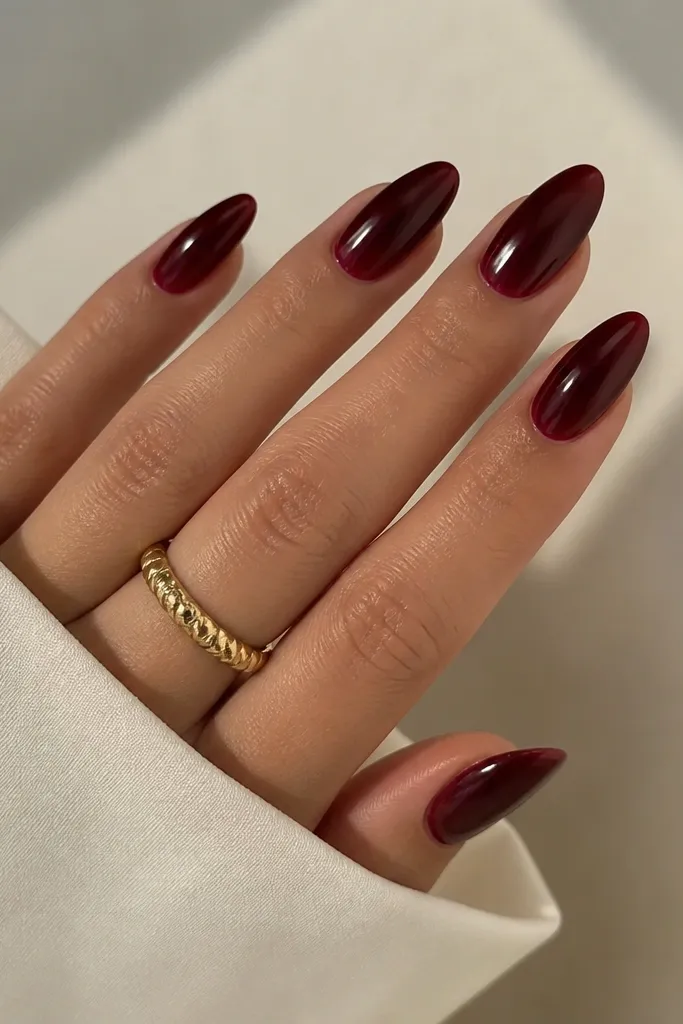
This design is low-effort but it makes dark cherry look like it has shape. The side bevel uses a slightly lighter cherry or a translucent red to create a contour effect that follows the almond sides. I use it when my clients want a “different but not obvious” manicure. It flatters wide nail beds because the contour visually narrows the nail. On camera, it looks smooth and intentional because the bevel sits under the gloss.
Editor's noteIf you can see the line under the gloss, it’s too thick — wipe the brush and try again with thinner product.
Start with two coats of solid dark cherry red and cure. Mix a slightly lighter cherry (or use a translucent wine gel) and apply a thin line along the left and right sidewalls starting just above the mid-nail and ending before the tip. Use a liner brush so the lines stay hair-thin, then blend lightly by tapping with a small sponge. Finish with glossy top coat and keep the top coat even across the side bevel.
Watch outDon’t add bevel lines too close to the cuticle; it makes the nail look shorter.
15. Cherry Red Chrome Dust Almond
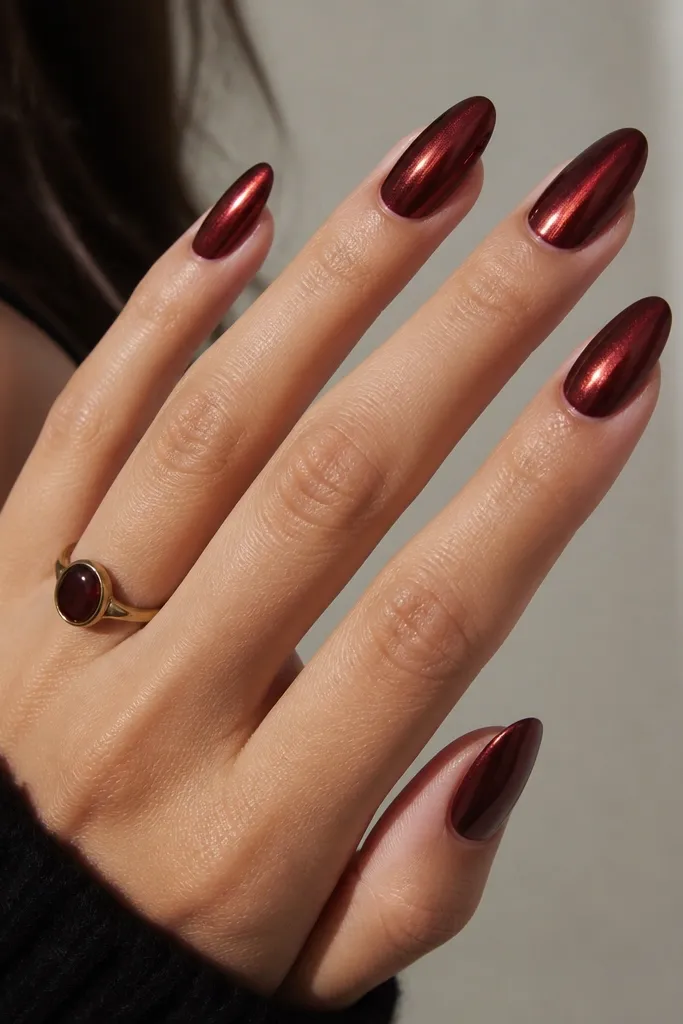
Chrome dust over dark cherry red gives you that “expensive salon” look without needing big designs. The key is using a red-burgundy chrome powder that shifts slightly copper, so it stays flattering rather than purple. Almond nails make chrome look extra smooth because the taper gives the light something to roll across. I use this for parties and nights out when you want something that catches flash photos. It also flatters hands because chrome can blur small imperfections when applied thinly.
Paint two coats of dark cherry red and cure. Apply a chrome base or tacky layer on top of the red (the tack needs to be slightly sticky, not wet). Rub red-burgundy chrome dust gently with an applicator sponge or eye shadow applicator, then buff lightly to remove excess. Seal with a thin top coat formulated for chrome if you want it to stay wearable, or leave it un-topcoated if your powder is stable.
Practice on one nail first — chrome dust looks different depending on how tacky the base is.
Don’t press hard; heavy pressure makes chrome patchy and shows bald spots.
16. Dark Cherry With Thin Silver Stripe
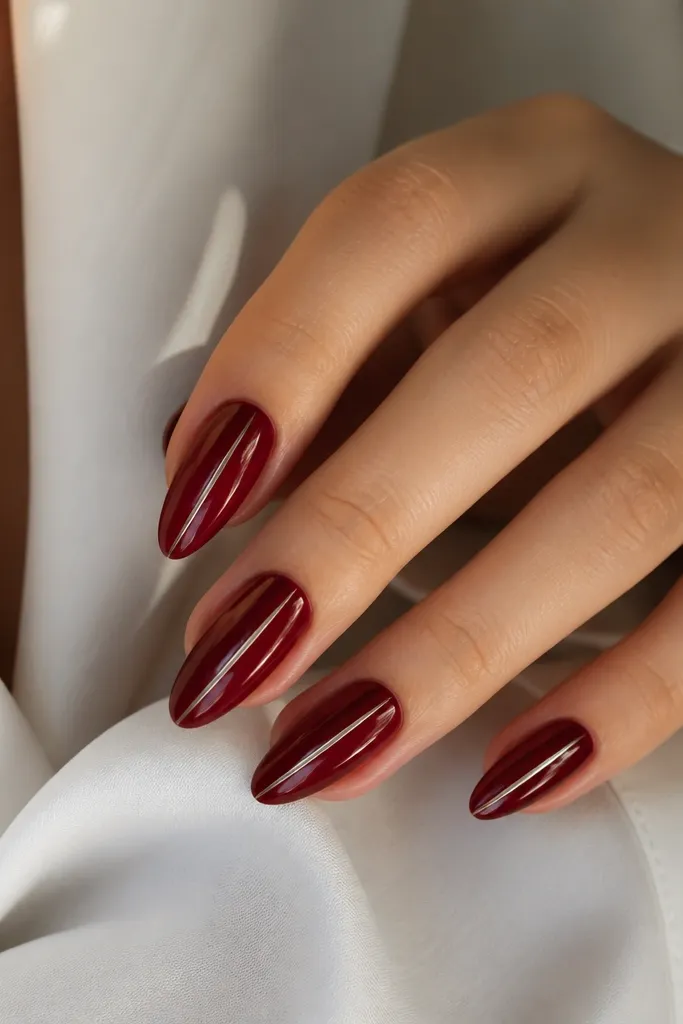
A thin silver stripe is clean, modern, and it makes dark cherry look sharper. I like silver instead of gold when the cherry is very deep and you want a cool contrast. This design elongates the nail because the stripe follows the almond taper. It flatters hands with shorter fingers because the vertical line pulls attention upward. For skin tones, silver looks great on warm and cool complexions because the contrast is controlled.
Editor's noteIf your silver looks dull, add a second silver coat only on the stripe after the first cures.
Apply your dark cherry red base in two coats and cure. Use striping tape or a liner brush to place a vertical line centered on the nail. If you’re using tape, press it firmly along the curve, paint silver gel or polish, then remove tape while tacky for a clean edge. Seal with glossy top coat, and cap the stripe edges with a careful brush pass so it doesn’t lift.
Watch outAvoid thick stripes — they make the nail look like it has a sticker seam.
17. Dark Cherry Floral Micro Lines
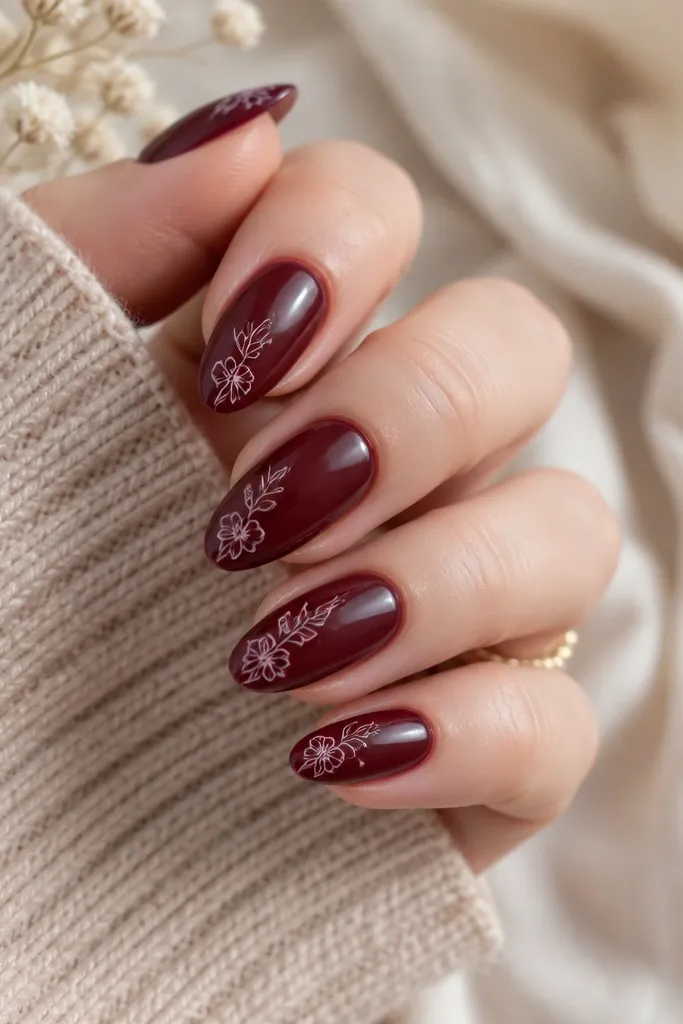
Micro floral line art turns dark cherry red into something delicate instead of heavy. The secret is using thin, sketch-style lines and keeping the flowers small — think 1-2 mm petals, not big blooms. I like placing the flowers along one side of the nail so the almond taper stays visible. This looks beautiful on medium skin tones because the white lines pop without screaming. For special events, it feels romantic while still grounded in the vampy cherry base.
Paint two coats of dark cherry red and cure. With a fine detail brush, paint tiny white dots and curved lines to form small petals along the sidewall — I keep them starting around mid-nail and ending before the tip. Add a pale pink center dot for dimension, then cure. Seal with glossy top coat, but apply slowly around the art so you don’t smear the lines.
Use a detail brush with a sharp tip and clean it often — dried gel on the tip ruins the petal shape.
Skip filled-in flowers; filled art makes the nail look crowded.
18. Dark Cherry Reverse French With Nude Tip
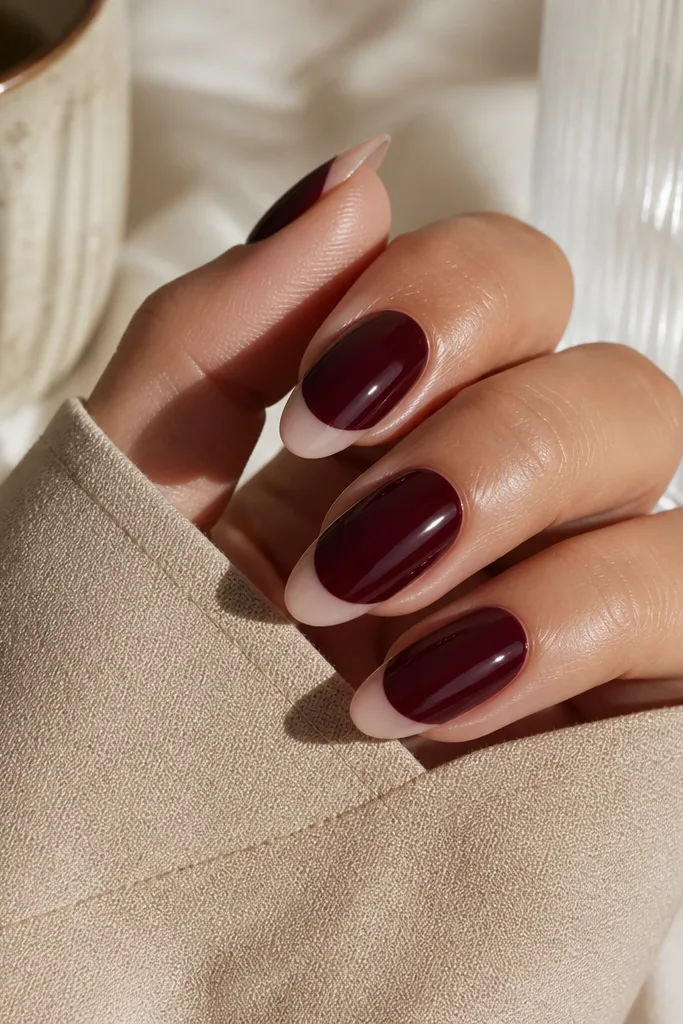
Reverse French flips the usual French and makes dark cherry look airy. The nude strip at the tip keeps the nail from feeling too dark and makes the almond look longer. I like it for days when you want a strong color but hate how full-coverage reds can make short nails look shorter. This design flatters every hand because the nude edge creates a built-in highlight. It also looks great with gold rings since the nude tip gives the light somewhere to land.
Editor's noteMark the stop point by holding your brush over the nail and eyeballing the 2-3 mm gap — consistency matters more than perfection.
Apply a nude base first and cure. Paint a dark cherry layer from the cuticle down, but stop 2-3 mm from the free edge. Use a striping brush to draw the boundary line crisp, then clean the edge with a brush dipped in acetone. After curing, top coat glossy and cap the sides so the nude strip stays clean.
Watch outDon’t blur the boundary line; reverse French looks cheap if the edge is wobbly.
19. Dark Cherry With Micro Glitter Dust at Tips
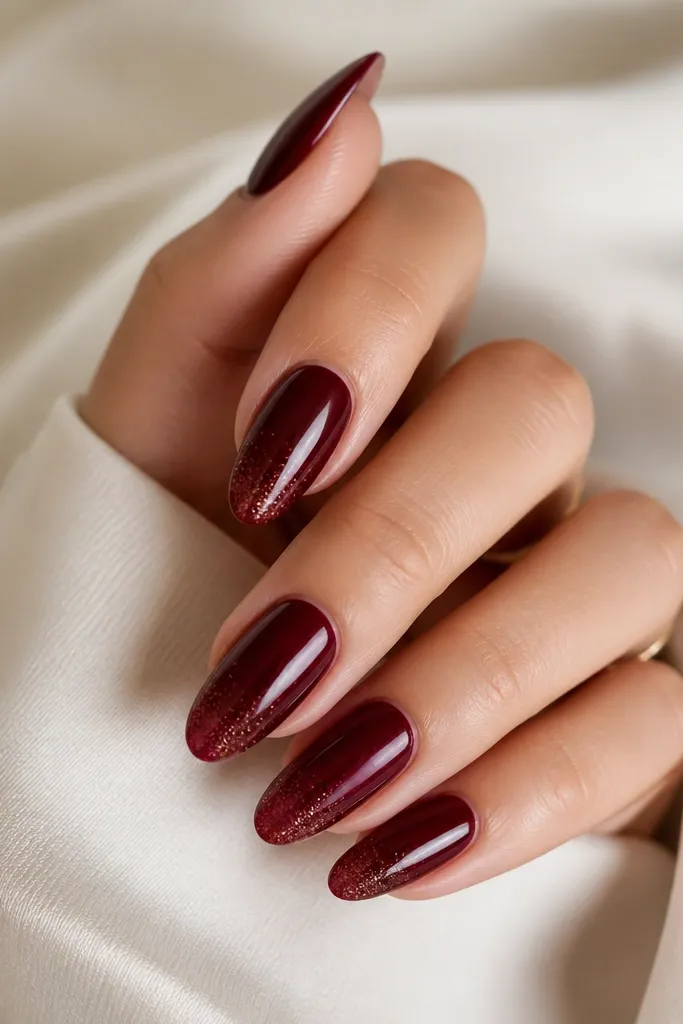
This is my favorite “party polish” version because it stays classy. Micro glitter at the tips adds sparkle where your nails naturally catch light, while the rest stays smooth and wearable. Almond nails make the fade look like a lit ombré without the hassle of blending gel. It flatters hands because the glitter doesn’t sit heavy in the center — it stays at the end where it lengthens visually. Dark cherry keeps the glitter from turning icy or silver-heavy.
Editor's noteTap off extra loose glitter on a paper towel before you press it on the nail.
Paint two coats of dark cherry red and cure. Dab a small amount of micro glitter top coat or loose micro glitter mixed with clear gel onto the last 15-25% of the nail. Use a sponge to press and fade it upward slightly so there’s no hard glitter line. Cure thoroughly, then seal with a glossy top coat that smooths the glitter texture.
Watch outDon’t use chunky glitter; it creates bumps that snag and lift.
20. Cherry Red Frame Outline on Almond
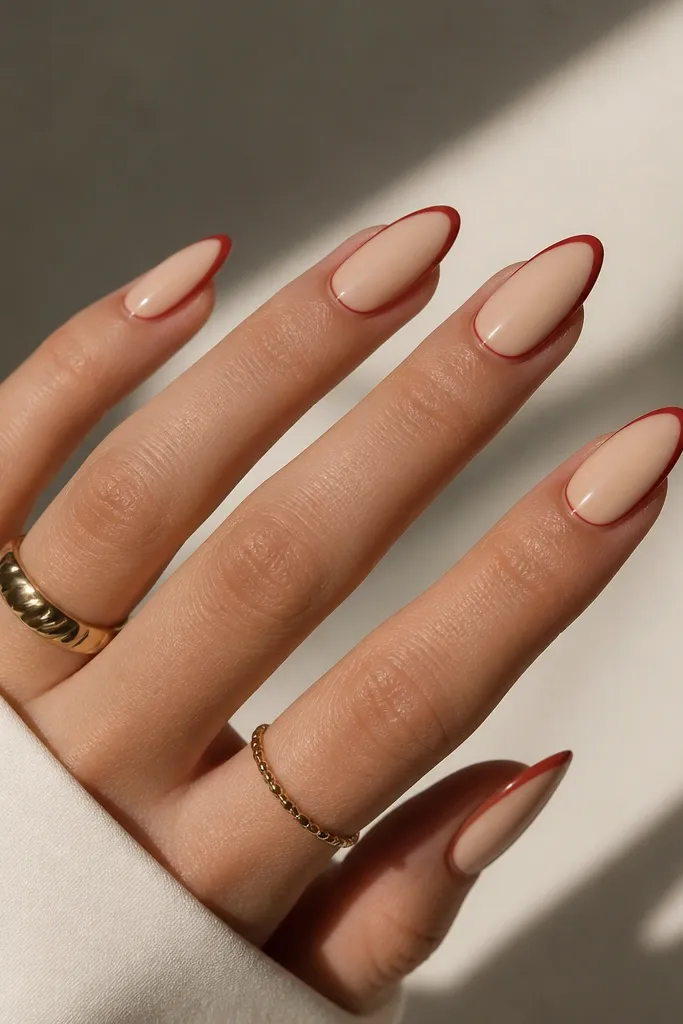
A frame outline makes dark cherry red look like it has clean architecture. I use a slightly lighter cherry or a translucent wine to draw the frame along the sidewalls and near the tip curve. This gives the almond a structured look and makes the nail appear more symmetrical. It flatters hands with uneven nails because the outline creates a visual boundary. For everyday wear, keep the frame thin so it feels like design, not makeup.
Editor's noteUse a light touch with the liner brush — if you press, the line gets too wide and looks messy.
Start with two coats of solid dark cherry red and cure. With a liner brush, draw a thin line along the left sidewall, then mirror it on the right, stopping about 1 mm before the cuticle. Add a curved line near the free edge to connect the side lines, forming a partial frame. Cure and top coat glossy to lock everything in.
Watch outSkip thick frames; wide outlines overpower dark cherry and look like a stencil mishap.
21. Dark Cherry With Half-Solid Half-Sheer Center
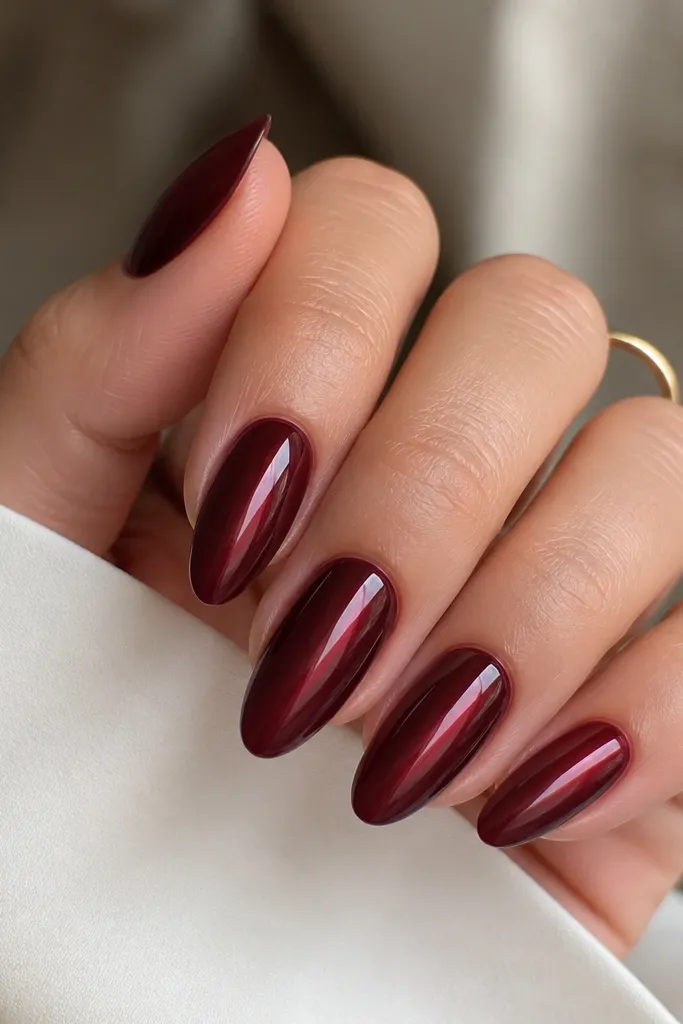
This design creates depth using the same color — it’s my favorite trick when you want “dimension” without extra art. The sheer center strip acts like a highlight, and the opaque sides feel grounded. Almond nails make the vertical highlight look even more slimming. It flatters hands that have a slightly wider nail bed because the highlight line draws the eye toward the center. This is also great for people who hate glitter and want something sleek.
Paint two coats of dark cherry red on the whole nail and cure. Then apply a sheer jelly dark cherry in a vertical strip centered on the nail, about 2-3 mm wide for medium almonds. Blend edges by lightly brushing clear top coat along the sides of the strip so the transition is smooth. Finish with glossy top coat; the glassy shine makes the sheer center pop.
If your sheer strip looks too transparent, add a third thin jelly coat only in the center, not across the whole nail.
Don’t leave harsh borders between sheer and opaque — blend with clear gel so it looks intentional.
22. Dark Cherry Almond With Double Line Cuticle Accent
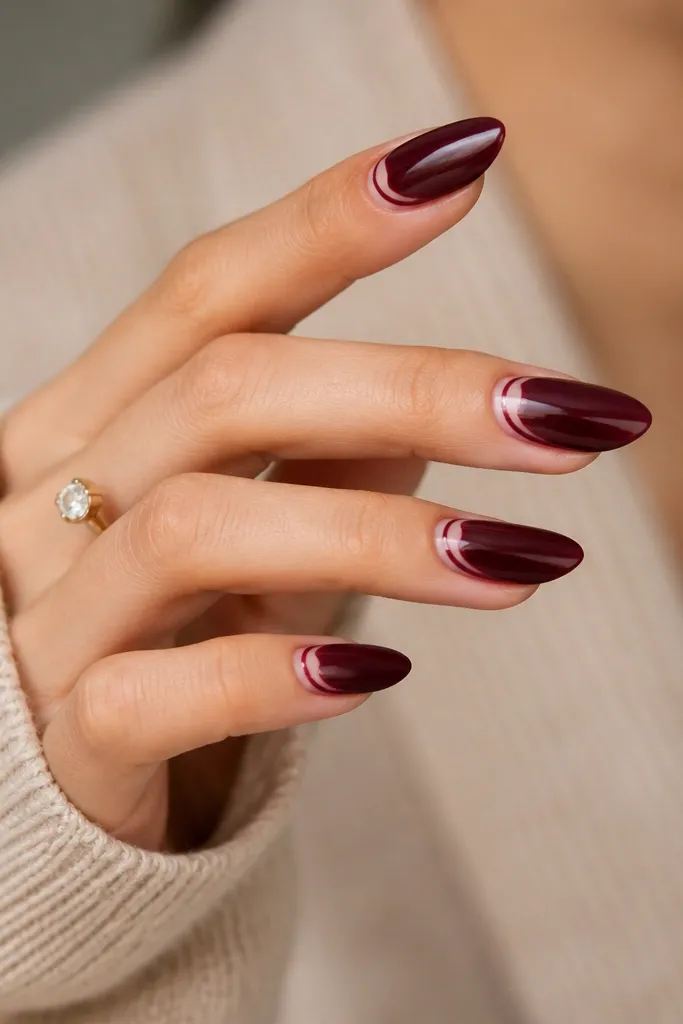
Double line accents make dark cherry red look like high-end nail art without needing big shapes. The two thin lines at the cuticle mimic jewelry chain detail and add a neat “frame” to the nail. I like gold plus silver together because it keeps the cherry tone from leaning too warm or too cool. This flatters every hand because the accent sits where the nail is widest, then the almond taper takes over. It’s a great choice for weddings, dinners, and holiday parties.
Apply two coats of dark cherry red and cure. Use striping tape to mask a narrow band 1-2 mm above the cuticle, then paint a thin gold line inside the band and cure. Remove tape, clean the edge, then repeat with silver just above or below the first line depending on your preference. Seal with glossy top coat, and cap the sides so the lines stay crisp.
Do your lines with gel striping polish so they level and stay sharp under top coat.
Avoid thick metallic gel — it spreads and blurs into the cherry.
23. Dark Cherry With Pearlized Dot Trail
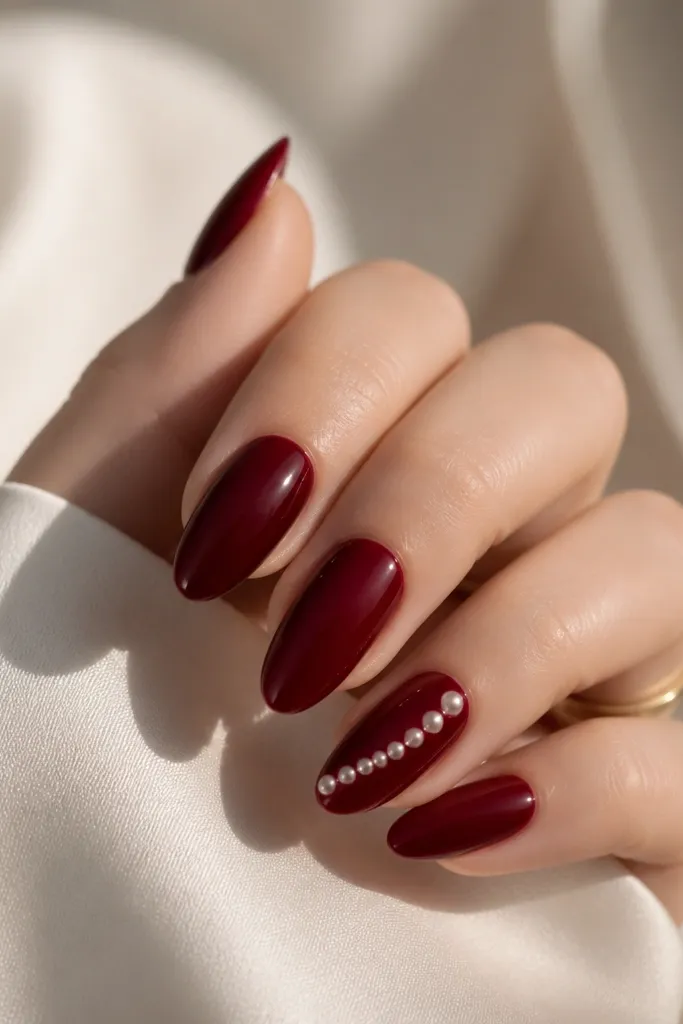
Pearlized dots give dark cherry a softer, expensive look. I keep the dot trail diagonal because it follows the almond curve and makes the nail look longer instead of shorter. This works well if you want something bridal-adjacent without full pearl clusters. The pearlized finish reads creamy on all skin tones, and it doesn’t fight with the vampy cherry — it balances it. It’s also easy to do neatly if you use a dotting tool with consistent pressure.
Paint two coats of dark cherry red and cure all nails. On your accent nail, place a few pearlized dots (white-pearl gel or pearl polish) starting around mid-nail and spacing them about 2-3 mm apart in a diagonal line. Add one or two dots closer to the tip for a tapered trail. Cure, then top coat glossy carefully so the dots look smooth and rounded.
If your dotting tool drags, wipe it with alcohol between nails so each dot forms a clean circle.
Skip uneven dot sizes; random big dots can make the design look like a smudge.
24. Dark Cherry Almond With Color-Shift Wine Top Coat
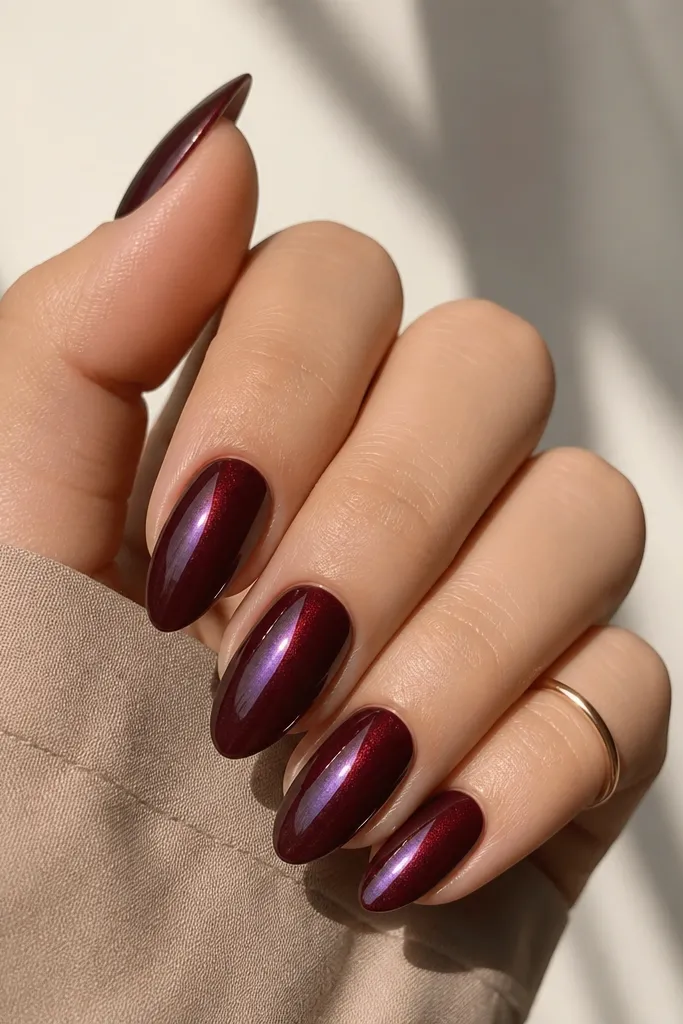
Color-shift top coats make dark cherry red look different in motion, like fabric that changes in light. I use this when I want the manicure to look plain straight-on but interesting when you move your hands. Almond nails are perfect for this because the light catches the taper and creates a rolling color effect. It flatters hands because the shift hides minor imperfections under a glossy layer. This is also the easiest way to get “wow” without complicated art.
Apply two coats of a true dark cherry base and cure. Then brush on a color-shift wine top coat — I apply it evenly with a slightly lighter first coat so it doesn’t pool at the cuticle. Cure, then apply a second thin coat only if you want stronger flash. Seal the edges with top coat and cap the free edge so the shift stays smooth over time.
Do the top coat in slow strokes — fast brushing can streak color-shift formulas.
Avoid applying color-shift over uneven gel thickness; it exaggerates bumps.
25. Dark Cherry Almond With Berry Gradient Side Swipe
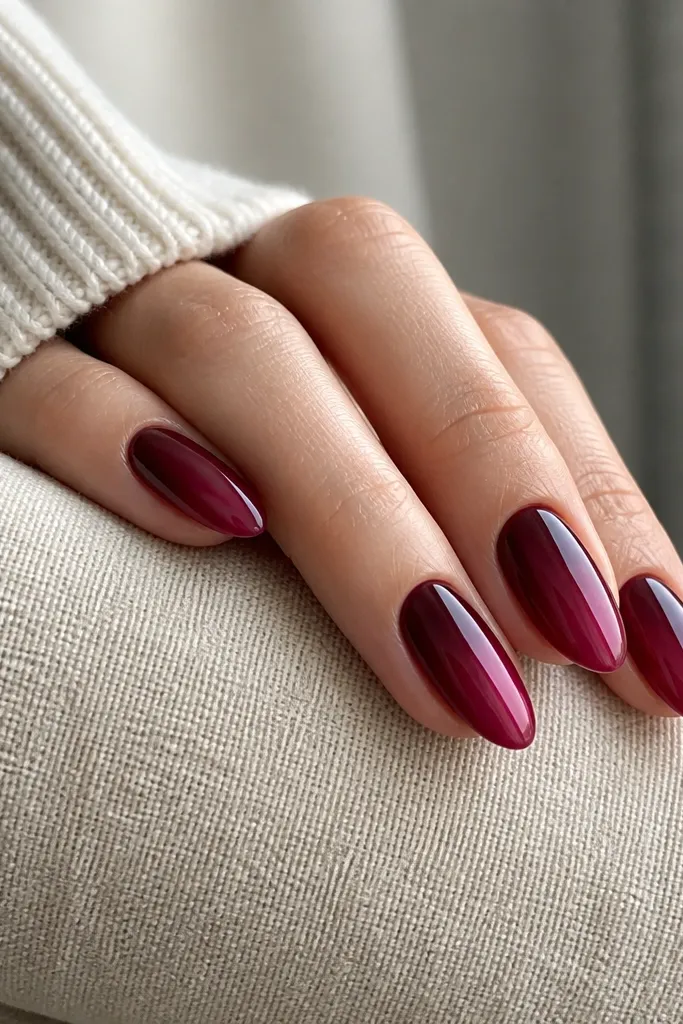
A side swipe gradient keeps the manicure modern and a little artsy, without turning into full ombré. The lighter berry shade on one side creates a subtle highlight that makes the almond look more sculpted. I like this for everyday because it doesn’t demand attention like glitter, but it still looks designed. It flatters hands with slightly crooked nail shapes because the highlight draws the eye along the curve. It also looks gorgeous under warm indoor lighting because the berry tones blend.
Paint two coats of dark cherry red and cure. Choose a lighter berry jelly (raspberry or rose-wine) and apply it with a sponge or brush to one side of the nail starting around the midpoint. Blend upward toward the tip by lightly tapping and then dragging a tiny amount — don’t cross over to the other side. Cure and finish with glossy top coat to smooth the transition.
Keep the swipe width narrow — about 1-2 mm on medium almonds — so it looks like a highlight, not a stripe.
Don’t blend too low toward the cuticle or the nail can look uneven and patchy.



