
1. Classic Glossy Wine Cherry Coffins
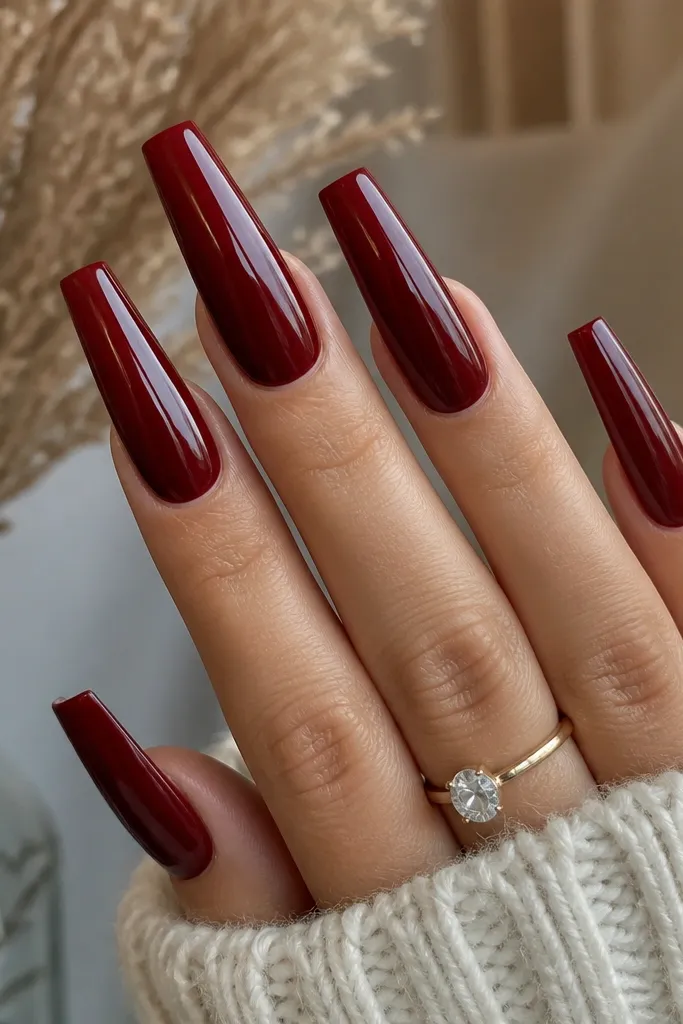
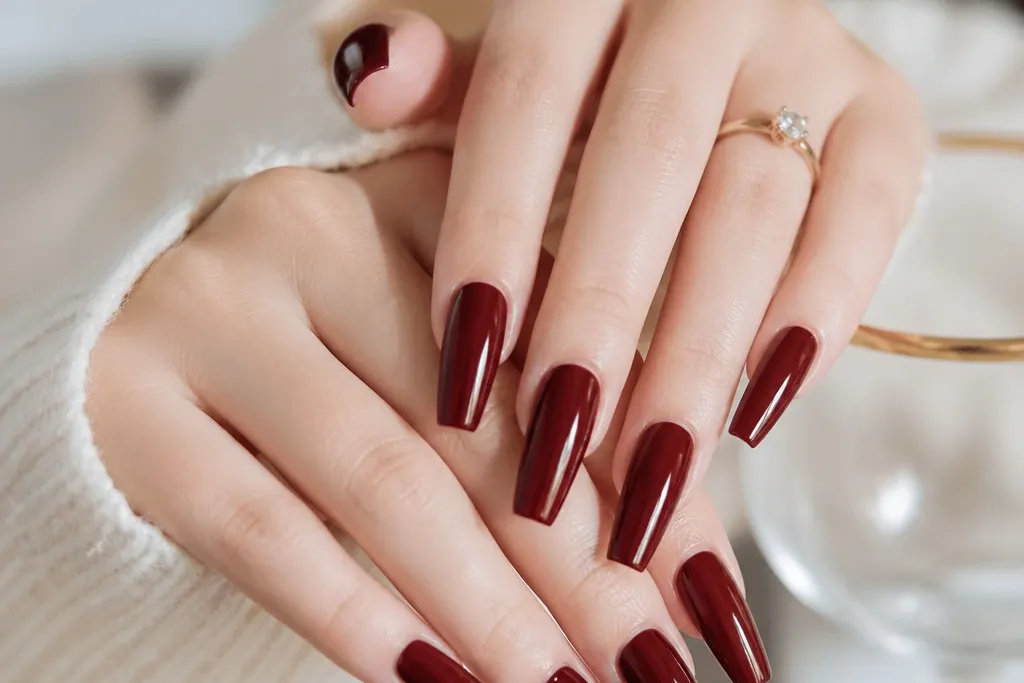
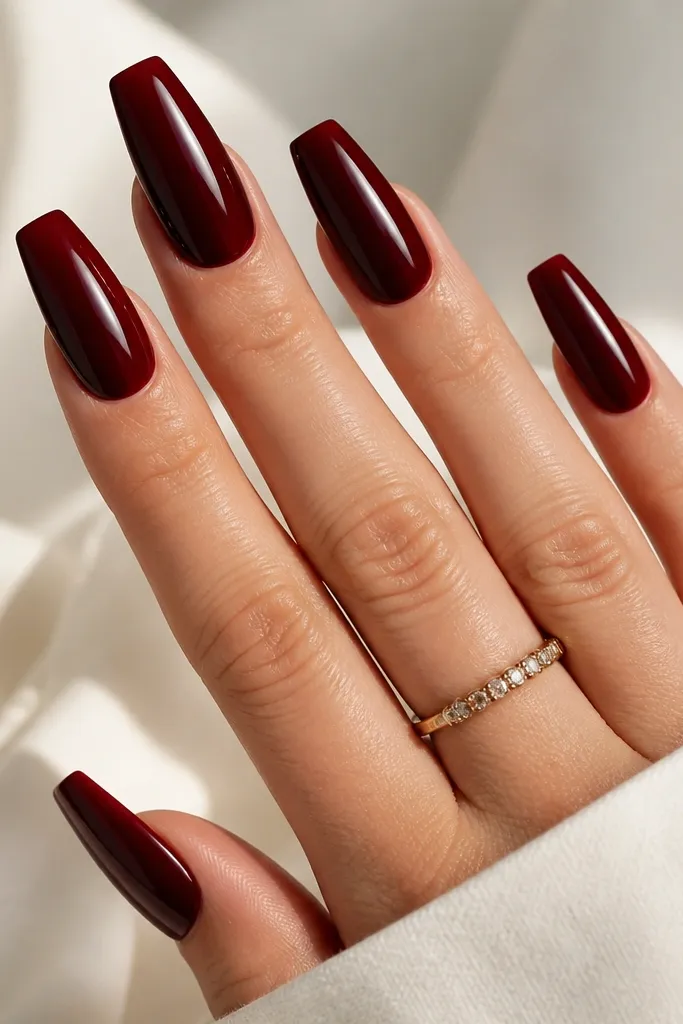
This is the version I reach for when I want “done” nails that still fit real life. The dark cherry red is almost black at the edges, but it stays true and red in the center, which is why it looks flattering on most skin tones. On fair skin it reads like a rich berry; on deeper skin it turns into a glossy jewel tone. The coffin shape makes the color look intentional because the tip narrows slightly and catches light in a clean line. If you like a sleek, salon-style finish, this one nails the vibe.
Editor's noteFor the “glass” shine, apply top coat slightly thicker at the center of the nail, then drag it out to the tip.
Start by pushing back cuticles and buffing the shine off the nail plate with a 180-grit block, then wipe with alcohol. Apply a rubber base or strong base coat and cure fully. Paint two medium coats of dark cherry red gel, keeping each coat off the cuticle line by about a millimeter. Cure between coats, then seal with a thick glossy top coat and cure again. Finally, clean the edges with a lint-free wipe and a tiny brush dipped in acetone around the sidewalls.
2. Dark Cherry Red Matte Velvet Coffins
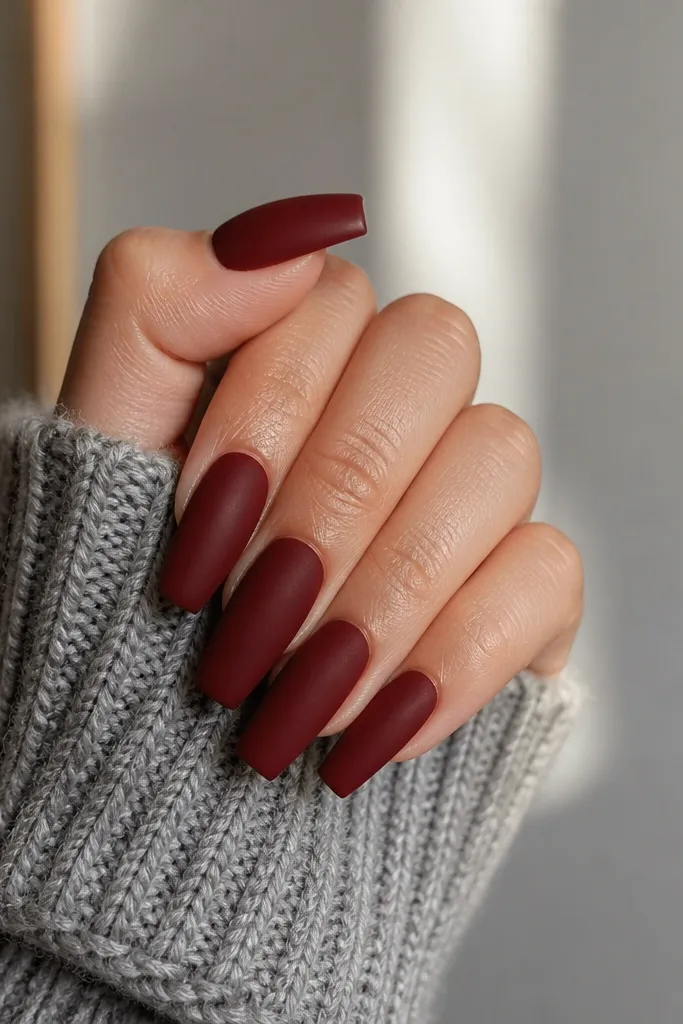
Matte makes dark cherry red feel more fashion-forward and less like a basic polish. It also hides tiny ridges and micro-surface imperfections that glossy can highlight. On hands with dry cuticles, matte looks forgiving because the finish softens the contrast. The coffin shape still matters here — the long taper gives the matte color a sleek silhouette. If you want your nails to look “thick” and plush instead of shiny, this is the move.
Editor's noteAvoid water exposure right after matte top coat curing; it can leave faint texture marks.
Prep and base like you would for gloss, then do two solid coats of dark cherry red gel. Cure thoroughly so the color looks even and not streaky. Apply a matte top coat in thin passes — you want full coverage, not pooling near the cuticle. Cure, then check under a bright lamp from the side to catch any patchiness. If you see dull spots, add a tiny dab of matte top coat only over that area and cure again.
3. Glossy Cherry Base With Micro-Glitter Tips
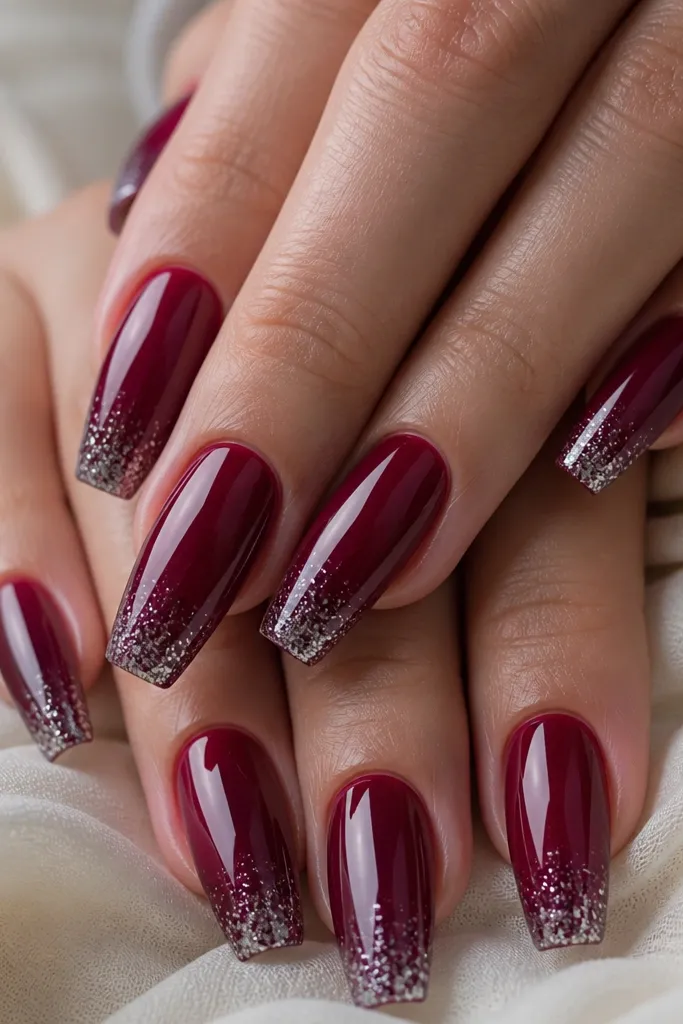
This one looks expensive because the glitter is controlled, not all-over. The dark cherry base keeps it rich, while the micro-glitter at the tip creates a soft sparkle that doesn’t scream party. I love it for birthdays and holiday dinners when you want a little extra without losing the classy red. It flatters nearly everyone because the tip placement elongates the nail visually. Coffin nails amplify the effect since the tapered tip gives the glitter a natural gradient.
Paint two coats of glossy dark cherry red and cure. For the glitter, use a fine silver micro-glitter gel or loose glitter mixed into a clear builder gel. Start the glitter about one-third down from the tip, then press the brush to spread it in a gentle fade. Cure, then cap the entire nail with a glossy top coat so the glitter feels smooth. Clean the sidewalls with a small detail brush and acetone.
Use a magnetized or angled brush for glitter placement; it keeps the fade from looking messy.
4. Dark Cherry Red Ombré Coffin With Black Fade
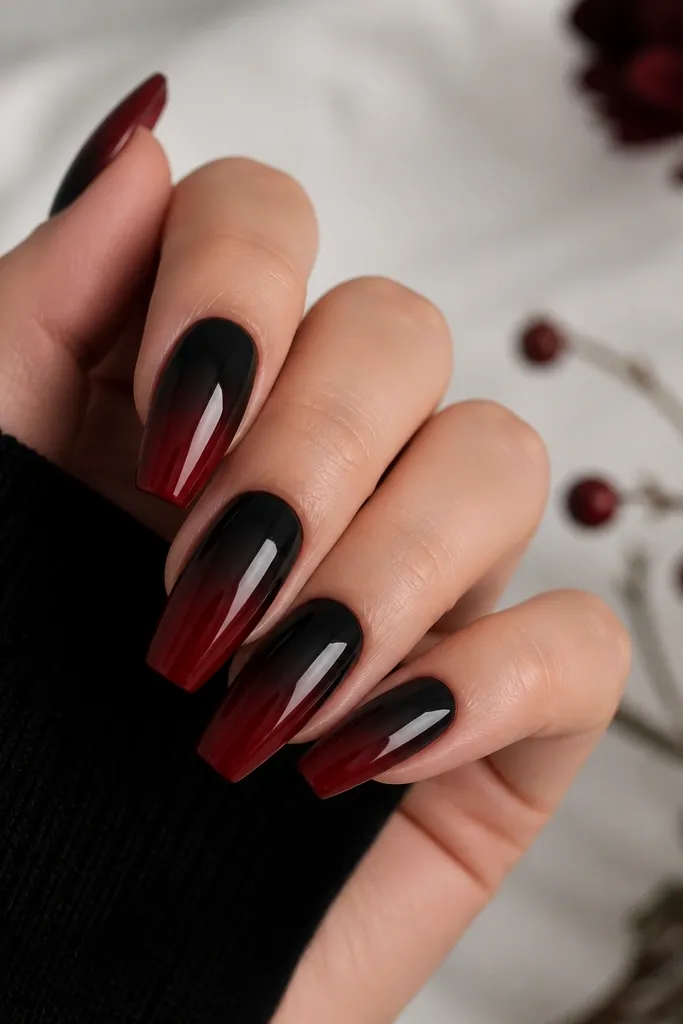
A black-to-cherry ombré makes dark cherry red look deeper and more dimensional, like stained glass. The darker cuticle area visually lengthens the nail bed and frames your finger. On fair skin, the black fade makes the red look extra bright; on deeper skin, it reads like a dark wine jewel. Coffin nails are perfect for ombré because the tapered tip gives a smooth transition zone. This is my go-to when I want the color to look “3D” without adding art.
Editor's noteDo the ombré in thin layers — one heavy layer makes the transition look chalky.
Apply a base coat and then a translucent nude or clear base if your nail plate shows through. Sponge-paint a very thin black near the cuticle, keeping it within the nail walls. Without wiping, blend it upward and then add dark cherry red to the center and down to the tip. Use a makeup sponge to tap and blend, then cure. Finish with a glossy top coat and cap the free edge so the gradient stays smooth.
5. One Nail Accent in Cherry Chrome Flakes
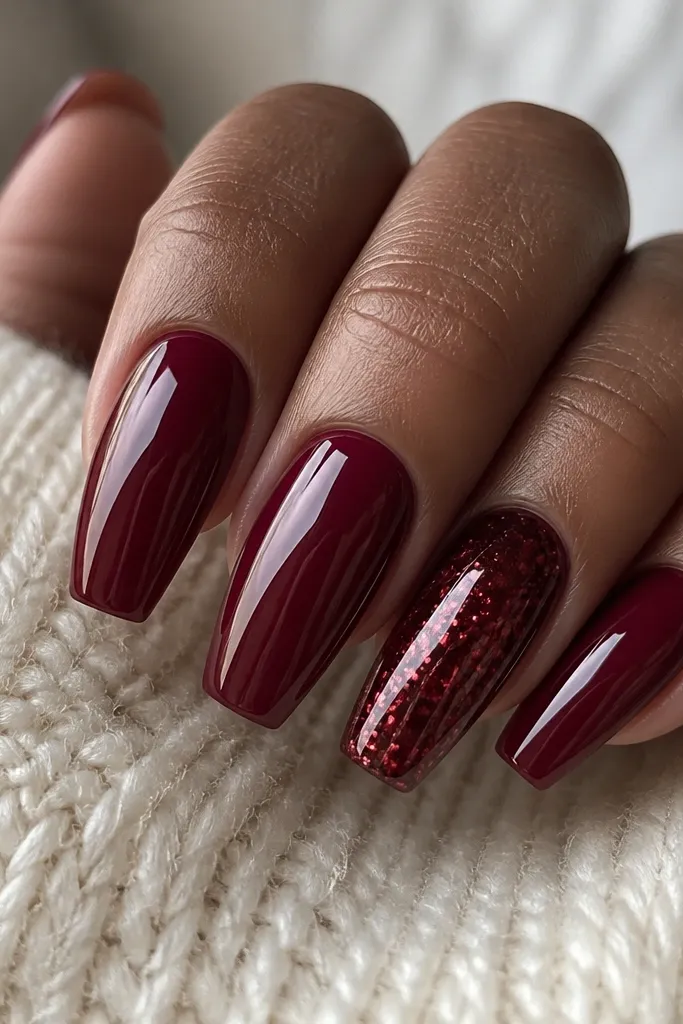
Accent nails are the fastest way to make dark cherry red feel fresh. I like doing chrome flakes on just one nail because it catches light every time you move your hand, but the rest stays clean and wearable. The cherry chrome sits between red and rose-burgundy, so it looks good with both gold and silver jewelry. Coffin shape helps because the flare of metallic flakes at the tip reads intentional. This is ideal if you want glam but don’t want full nail art.
Editor's noteIf you hate fingerprints, wipe the nail with slip solution before pressing flakes.
Paint all nails with two coats of glossy dark cherry red and cure. On the accent nail, apply a chrome-compatible base or a sticky layer top coat and cure. Press cherry-red chrome flakes onto the lower half of the nail, then use a soft brush to gently remove loose bits. Seal with a thin chrome-safe top coat, cure, then do a second top coat for durability. Finish by cleaning around the cuticle with acetone on a detail brush.
6. Dark Cherry Red Cat-Eye Magnetic Glow
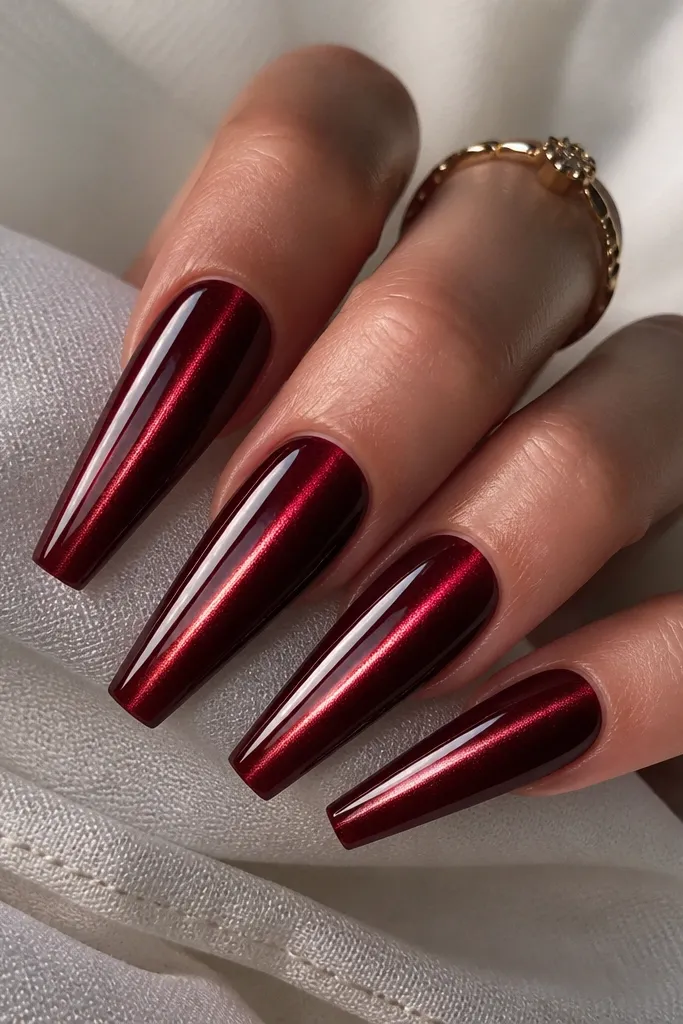
Cat-eye turns dark cherry red into a living color because it moves under light. The vertical magnetic line makes the nail look longer and slimmer, which is why it flatters short coffin lengths. I’ve worn this for nights out and got compliments because it looks like jewelry, not paint. With coffin nails, the eye line stays centered and the tip looks sharp. If you want a dramatic effect without hand-painting, this is the simplest way to get that “wow” shine.
Start with base coat and two thin coats of dark cherry red cat-eye gel. Don’t fully cure after the first coat if your product requires a magnet step — follow the gel’s instructions, but typically you cure after magneting. Apply a thick-enough layer of the cat-eye gel to cover evenly, then hold a strong magnet above the nail for 10-20 seconds to pull the line. Cure fully, then seal with a glossy top coat. Clean up side edges with a lint-free wipe and acetone.
Place the magnet straight above the center — tilt it and the line curves.
7. Cherry Red Gloss With Tiny Black French Tips
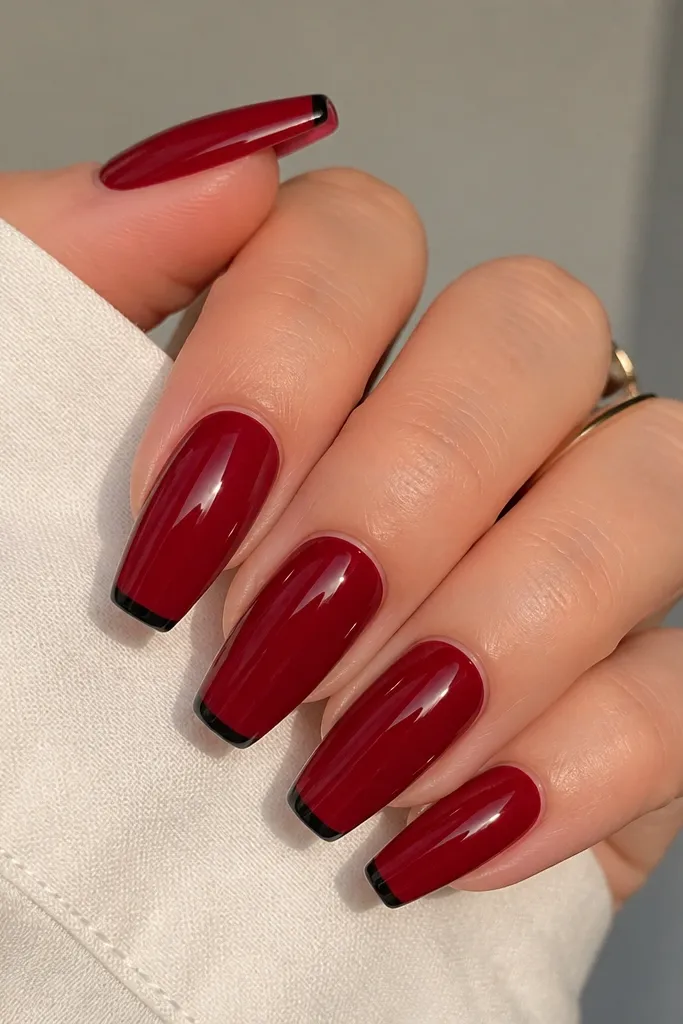
This looks sharp because it flips the usual French idea. A tiny black tip line adds contrast and makes the coffin shape look extra clean. It flatters hands that need structure, especially if your nail beds are slightly uneven — the tip line draws the eye. On lighter skin, the black reads bold; on deeper skin, it looks sleek and editorial. I like this for work because it’s still red, but it looks intentional and tidy.
Paint two coats of glossy dark cherry red and cure. Use a striping brush to draw a super thin black line where the free edge starts — you want it no thicker than the width of a gel brush hair. Leave a small gap between the line and the sidewalls so it doesn’t flood. Cure, then either cap with top coat or add a second thin black line if you want more definition. Finish by wiping tacky residue and cleaning the edges.
Use a guide strip under your finger to keep the French line even across both hands.
8. Reverse French in Dark Cherry With Nude Base
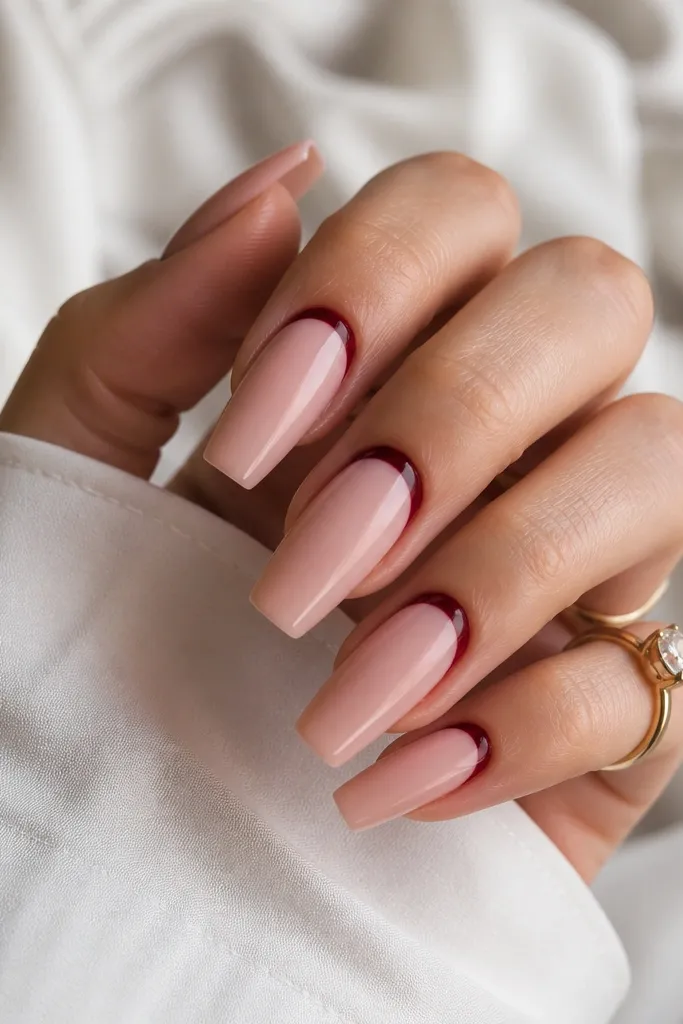
Reverse French makes dark cherry red feel delicate instead of heavy. The nude base keeps it airy, and the cherry arc around the cuticle gives a frame that looks clean on all skin tones. Coffin nails make the arc look longer and more elegant because the nail tapers. This is great if you want dark cherry red but you don’t want your nails to look too dark on your hands during the day. It also photographs beautifully because the cuticle frame catches light.
Apply a nude pink base gel and cure, then add a second nude coat if needed for opacity. Using a thin liner brush, paint a dark cherry red arc around the cuticle area, following your natural curve but leaving a tiny breathing space from the skin. Keep the arc symmetrical on each nail and avoid touching the sidewalls too hard. Cure, then add top coat over the whole nail and cap the free edge. If the arc looks too thick, use a fine brush with clear gel to thin the edges before curing.
If your cuticles grow fast, fill the arc slightly higher so it stays visible between fills.
9. Dark Cherry Red Marble Swirls in Black and Burgundy
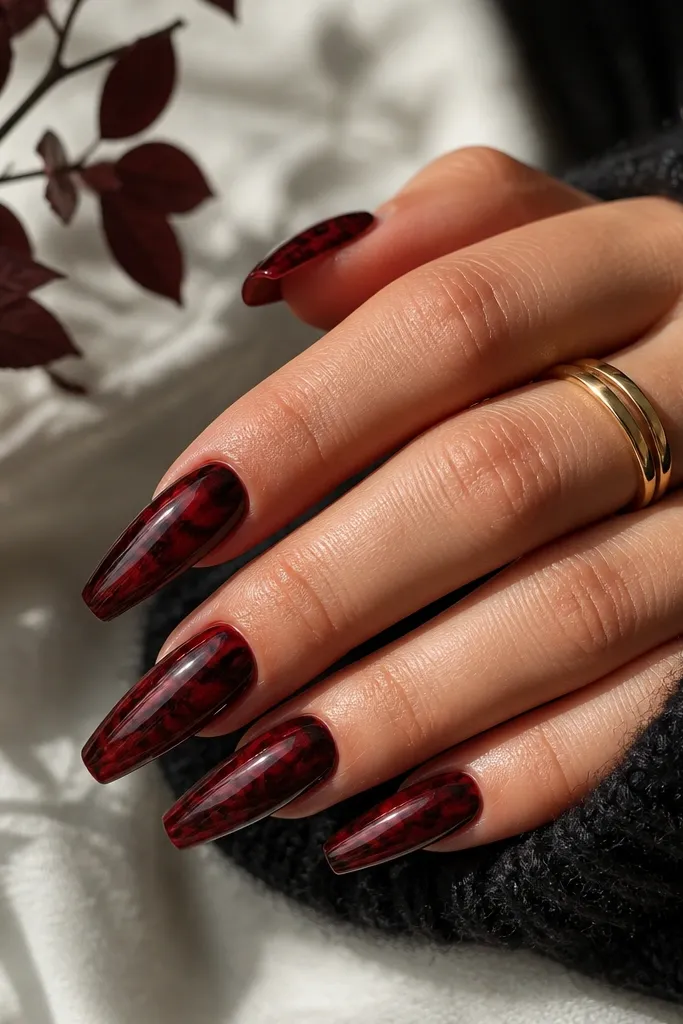
Marble makes dark cherry red look custom, not copy-paste. The black and burgundy swirls give depth without turning the nail into a busy design. This is flattering because the swirls follow the nail’s shape, pulling your eye toward the tip. On fair skin, the black lines make it look dramatic; on deeper skin, the burgundy tones feel rich and warm. I’ve worn this to events where I wanted something bold but still classy.
Editor's noteDo marble right after your second cherry coat — the tacky surface helps the lines blend without harsh edges.
Paint two coats of dark cherry red and cure. For marble, mix black gel with a little clear gel to make it fluid enough to drag. Use a thin nail art brush to pull wispy lines from the center toward the sidewalls, then add a few burgundy streaks for variation. Drag a dotting tool through the lines once or twice to break them up, then cure. Finish with a glossy top coat and cap the edges so the marble feels smooth.
10. Cherry Red Jelly Look With Red-Brown Depth
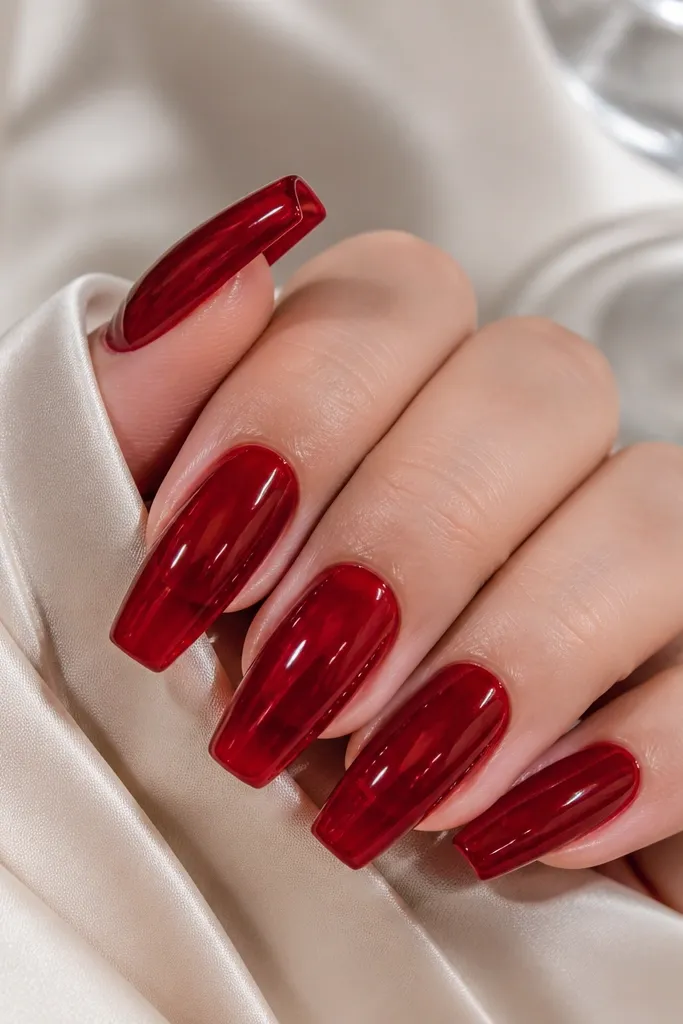
Jelly cherry red looks soft and expensive because it has that see-through depth like candy. Instead of hiding everything, it lets a hint of natural nail tone peek through, which makes the color feel lighter and more flattering. On fair skin it looks rosy-burgundy; on deeper skin it reads like a warm wine glaze. Coffin nails make jelly look smooth because the layered color doesn’t get thick at the tip. If you hate stiff, opaque reds, this is the one.
Editor's noteKeep the jelly coats thin. Thick jelly looks gummy and can shrink at curing.
Use a builder base or rubber base, then apply a red-brown tinted jelly gel as a first coat and cure. Add a second jelly coat of dark cherry red, keeping it thin but even so you preserve translucency. For more depth, add a third thin jelly coat only in the center and blend it outward with the brush tip. Cure and then apply a glossy top coat in two thin layers for a smooth, glassy finish. Check the sidewalls — jelly can flood them if you rush.
11. Dark Cherry Red Gloss With Gold Leaf at the Cuticle
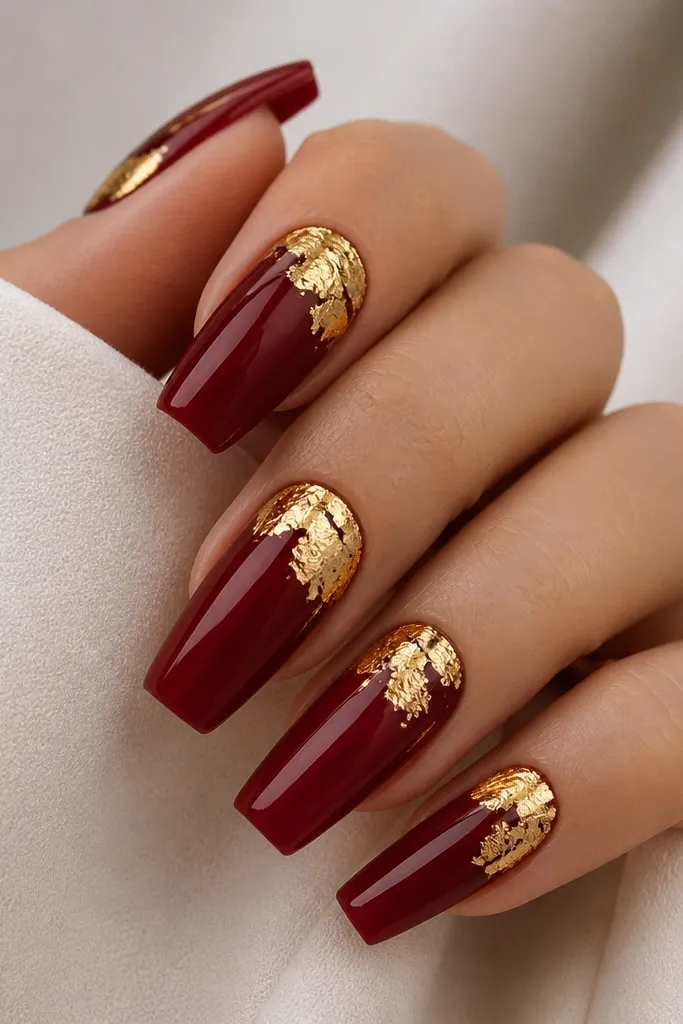
Gold leaf near the cuticle makes dark cherry red look like luxury without doing full nail art. It frames your nail bed and draws attention to your shape, which is what you want with coffin nails. Gold also plays well with both warm and cool jewelry tones, so your rings don’t clash. I’ve worn this to holiday parties and it looked like I had a salon nail tech for hours — but it’s really just placement and sealing. The key is leaving negative space so it looks intentional.
Paint two coats of glossy dark cherry red and cure. Apply a small amount of gold leaf adhesive or tacky gel near the cuticle area, staying a millimeter away from the sidewalls. Press gold leaf onto the tacky spots in small pieces, then gently pat down with a silicone tool. Seal with a thin layer of top coat, cure, then add a second top coat to smooth any edges. Clean around the cuticle with a detail brush dipped in acetone.
Use micro pieces of leaf. Big sheets look flat and heavy on coffin nails.
12. Black Cherry Red Gradient With Sparkle Dust
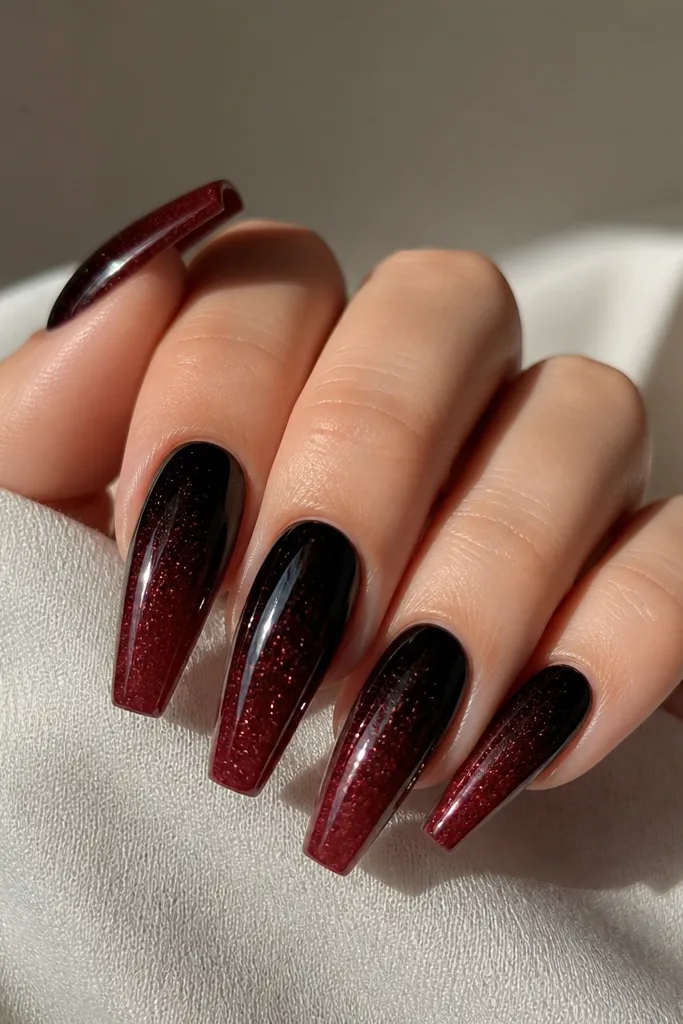
This is the “night out but still wearable” version of dark cherry red. The near-black base makes the gradient feel deep, while the sparkle dust gives it a soft twinkle instead of chunky glitter. It flatters short coffin nails because the darker cuticle visually stretches the nail length. On any skin tone, the shimmer reads warm and flattering rather than icy. I like this when I want something that looks different when you walk under lights.
Editor's noteDust shimmer lightly — you want sparkle, not glitter texture.
Start with a clear or nude base, then sponge a near-black gel at the cuticle area. Blend it upward into dark cherry red using a second sponge layer, then cure. While tacky, lightly dust fine shimmer gel or micro shimmer powder across the center and toward the tip. Cure, then seal with glossy top coat, making sure the dust is fully encased. Cap the free edge with extra top coat so it doesn’t snag.
13. Cherry Red Micro Studs on the Sidewall
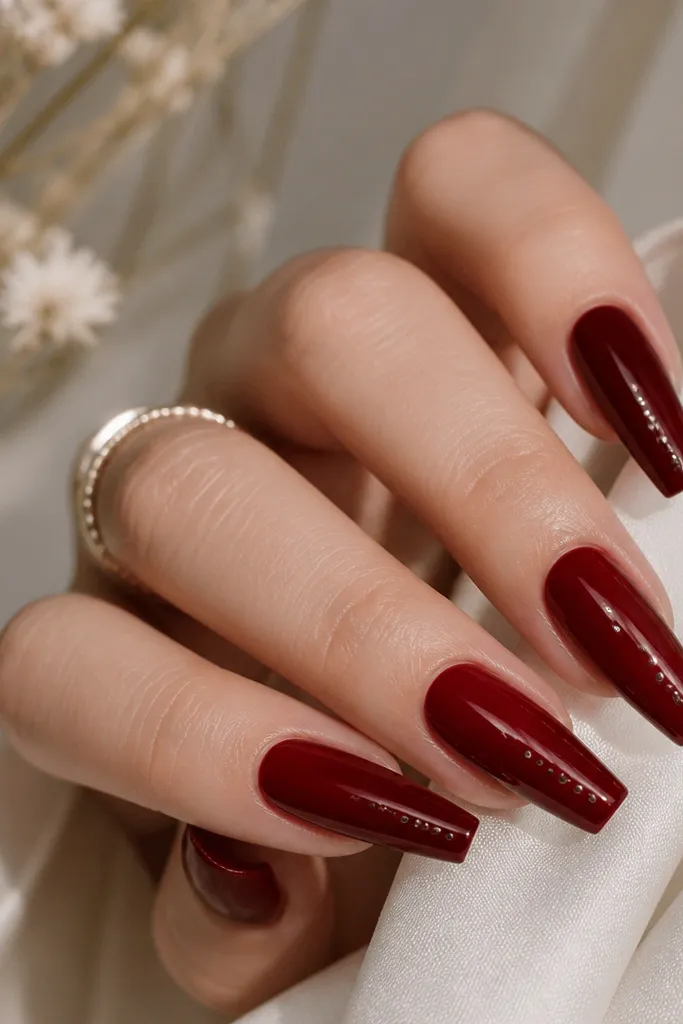
Side studs make coffin nails look like they have custom hardware. The dark cherry red background makes the tiny studs pop without looking costume-y. I like a vertical placement because it elongates the nail and makes the hand look slimmer. This is especially flattering if your nails are medium-length and you want a little texture that still looks clean. It also works well for formal outfits because the studs catch light more than rhinestones do.
Editor's noteUse a dotting tool to position studs, not fingers. Fingers smear adhesive and shift the line.
Paint two coats of glossy dark cherry red and cure. Mark a dot on one sidewall near the middle of the nail, then place a gel adhesive dot where the stud will sit. Press micro studs into the adhesive one at a time, then cure. Add a top coat carefully around the studs first, then cap the full nail with a thicker top coat to lock them down. Avoid flooding — it can blur the stud shape.
14. Dark Cherry Red Floral Accent on One Nail
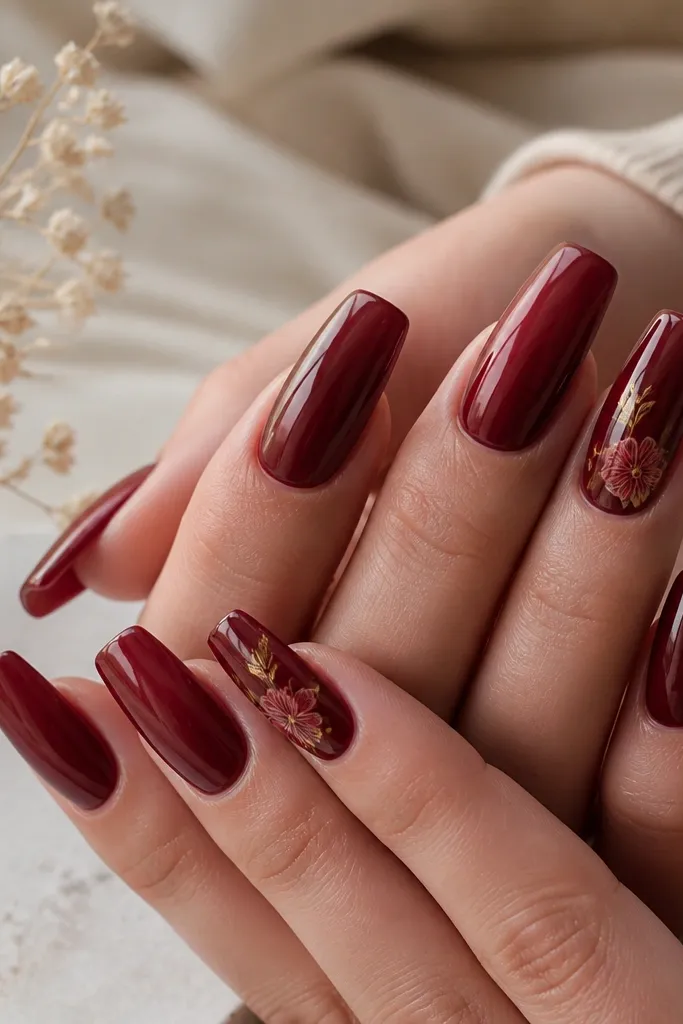
A small floral accent keeps dark cherry red from feeling too heavy. I like painting a tiny cluster — two petals and one leaf — near the tip because it stays elegant on coffin shape. The lighter reds (rose and cranberry) make the flowers look dimensional, and a touch of gold line makes it feel more finished. This is ideal for dates, bridal events, or whenever you want something feminine without losing the bold cherry base. It flatters hands because the art sits away from the cuticle, so regrowth isn’t obvious.
Editor's noteKeep the floral cluster small. If it touches the sidewalls it looks messy fast.
Do two glossy coats of dark cherry red on all nails and cure. On the accent nail, use a thin detail brush to paint two small petals in a lighter rose gel near the upper third of the nail. Add a tiny leaf in deep green-black or forest green, then outline the petals with a gold gel liner if you want extra definition. Cure, then apply top coat carefully around the painted lines. Cap the whole nail with one smooth layer so the floral art doesn’t catch.
15. Cherry Red Glassy Gel With Clear Negative Space Center
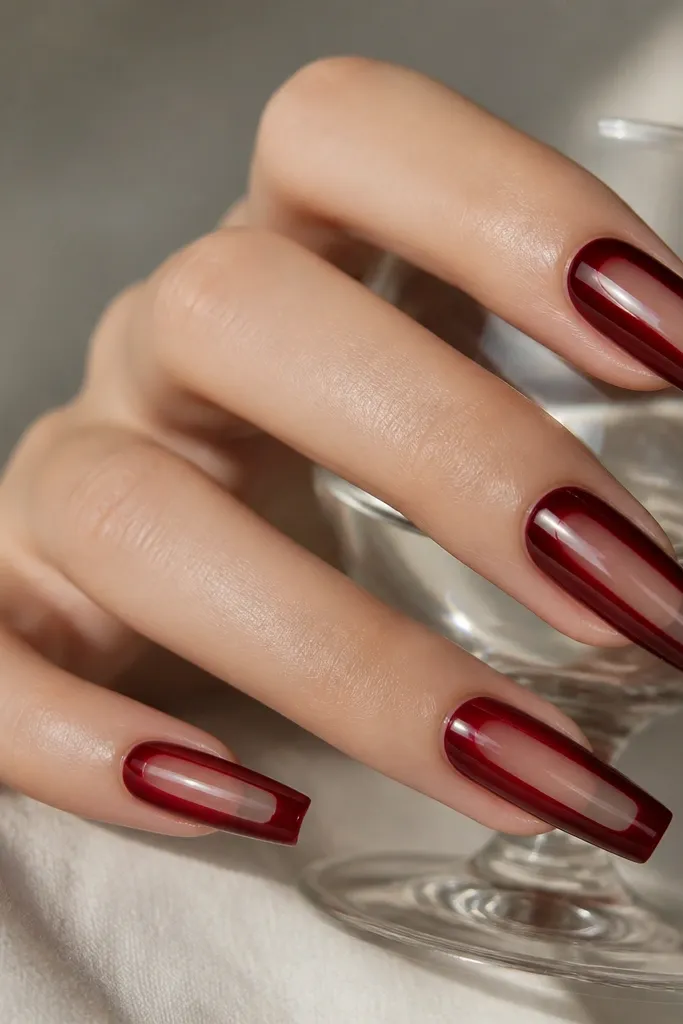
Negative space makes dark cherry red look modern and slightly edgy. The clear center strip draws the eye down your nail, which makes the coffin shape look extra long. This is flattering on hands where you want a slimmer look, because the clear strip reduces visual bulk. I’ve worn this with both casual sweaters and dressy outfits — it always looks intentional. If you’re tired of full-coverage color, this gives you the same shade but a fresh layout.
Editor's noteUse striping tape as a guide if your center line isn’t crisp yet.
Base coat first, then paint dark cherry red gel on the left and right sides of the nail, stopping at the center line. Use a thin liner brush to keep the negative space strip clean and straight. Cure, then add a second cherry coat to even out opacity on the sides and at the tip. Leave the center clear, then apply glossy top coat over everything — it will make the negative strip look like glass. Clean the strip edges with a fine brush dipped in acetone after curing.
16. Dark Cherry Red Marble French Tips
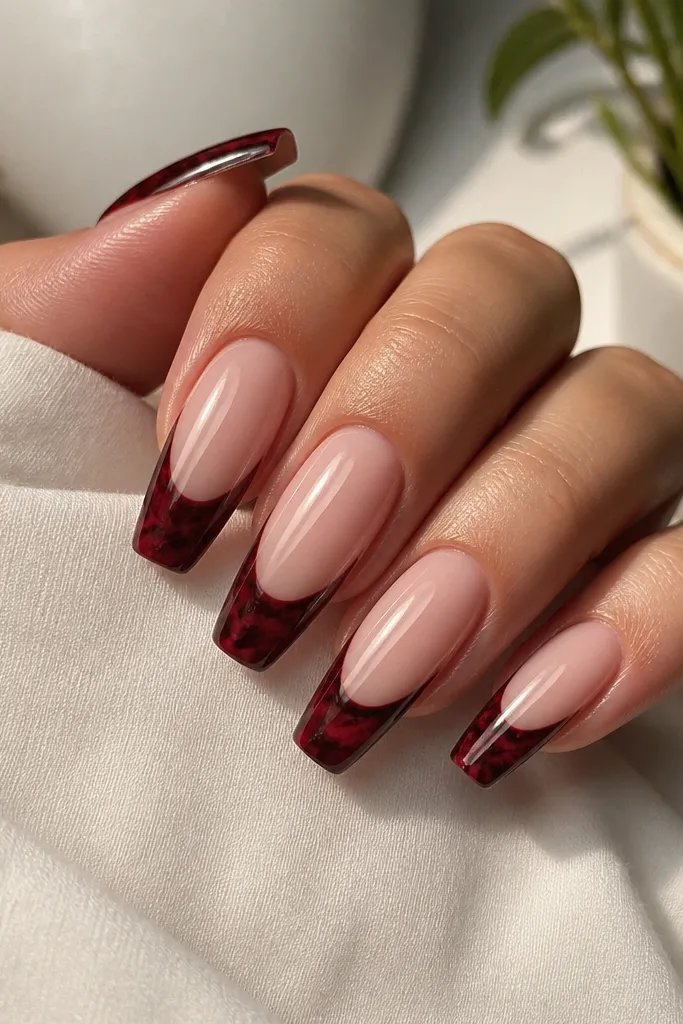
Marble French tips look like art without covering the whole nail. The nude base keeps it light, while the marbled cherry tips bring drama right where the coffin shape tapers. This works on any skin tone because it frames the nail bed and makes the color feel cleaner. I like it for events because it looks “styled” in photos even from far away. The key is keeping the marble inside the tip zone so it doesn’t spread.
Editor's noteKeep the marble lines thin. Thick lines make French tips look bulky.
Paint a nude pink base gel and cure. Create French tips with dark cherry red gel, then add black and deeper burgundy marbling on top with a thin brush while the gel is slightly workable. Pull a couple of wispy lines so it looks like stone, not stripes. Cure, then apply glossy top coat and cap the tip. Clean the French line with a small brush so the edges stay crisp.
17. Cherry Red Chrome Ombre
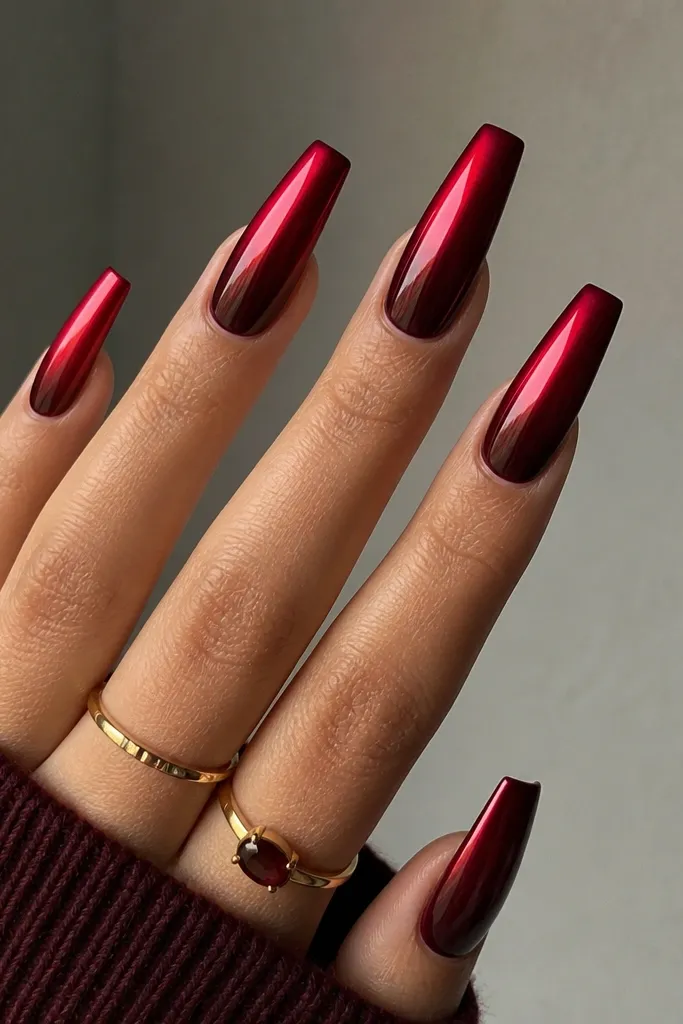
Chrome ombré makes dark cherry red look like it’s lit from within. The red-to-chrome transition adds dimension without needing nail art brushes. On fair skin, it adds a warm glow; on deeper skin, it looks like a polished jewel. Coffin nails are perfect for ombré because the tip is where the reflective effect concentrates. If you want a bold look that still feels sleek, this is it.
Editor's noteUse a soft sponge applicator. Hard rubbing makes chrome look patchy on coffin tips.
Paint two coats of dark cherry red and cure. For the ombré, apply chrome gel or a sticky layer top coat to the lower half of the nail, leaving the upper half solid red. Cure if your chrome system requires it, then buff and apply cherry-red chrome powder or chrome pigment with an applicator sponge. Blend the chrome upward slightly so it fades, then press gently to set. Seal with a chrome-safe top coat and cure again.
18. Dark Cherry Red With Tiny Crystal Halo
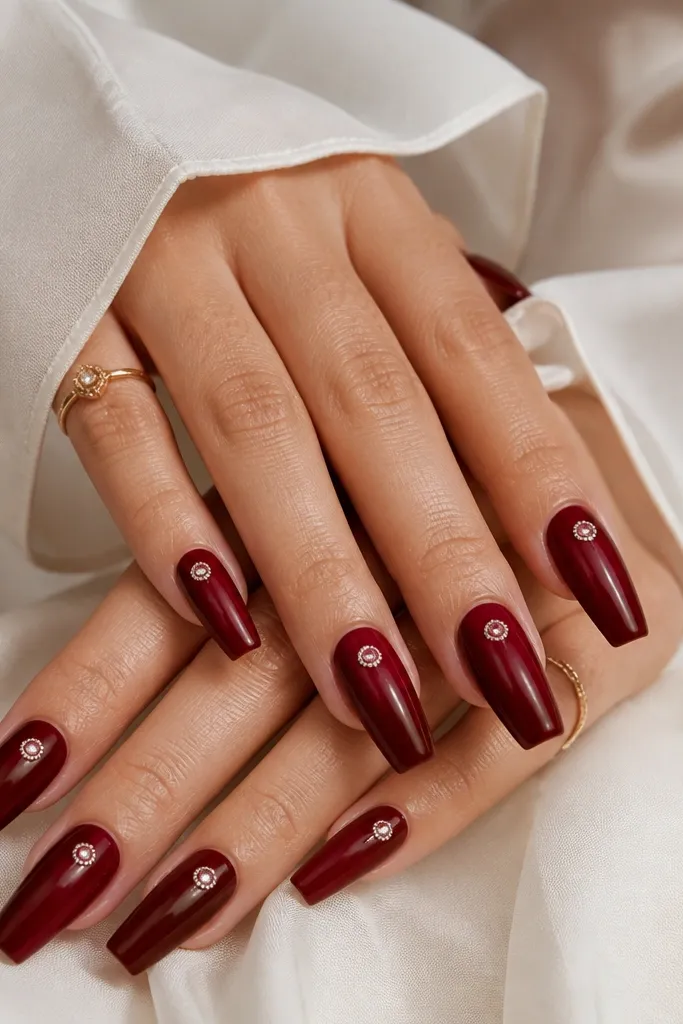
A crystal halo is a clean way to add sparkle to dark cherry red without turning it into a full rhinestone mess. I place the halo near the center of the nail because coffin tips already draw attention. The crystals catch light in a tight ring, which looks neat in close-up photos. This is flattering on hands with shorter fingers because it adds a focal point without widening the nail. It also works for weddings and parties because it reads elegant, not loud.
Editor's noteUse crystals that match the tone of the gel — silver crystals look best on cooler dark cherry shades.
Do two glossy coats of dark cherry red and cure. Apply a small gel adhesive dot where you want the crystal to sit, then place the center crystal first. Add smaller crystals around it to form a halo, keeping the circle tight. Cure, then seal with a thin top coat around the crystals first so they don’t lift. Add a final glossy top coat over the whole nail and cap the free edge.
19. Cherry Red Velvet Matte With Glossy Tip Cap
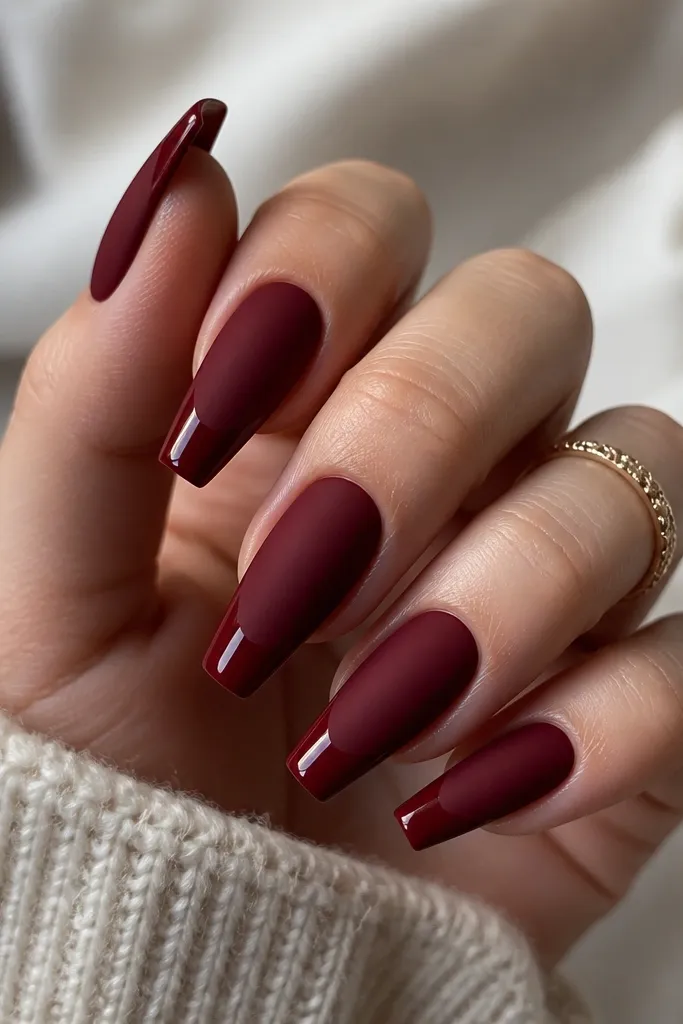
This two-finish combo looks like a designer manicure because it plays with texture. The matte body makes the color look soft and plush, while the glossy tip cap gives you that crisp light reflection at the free edge. It’s flattering because the glossy tip draws the eye outward and balances the tapered coffin shape. I wear this when I want my nails to look different in daylight and at night. The effect is subtle up close but obvious in photos.
Editor's noteUse a strip of tape as a guide for the glossy tip line if you want it razor-straight.
Paint two coats of dark cherry red and cure. Apply matte top coat to the whole nail, then cure. With the nail still matte, apply glossy top coat only on the last one-third of the nail — use a steady brush and keep it even across the width. Cure again, then wipe residue if your system requires it. Check the seam line between matte and glossy; if it’s rough, add a very thin glossy layer across the transition.
20. Dark Cherry Red With Silver Line Art on the Tip
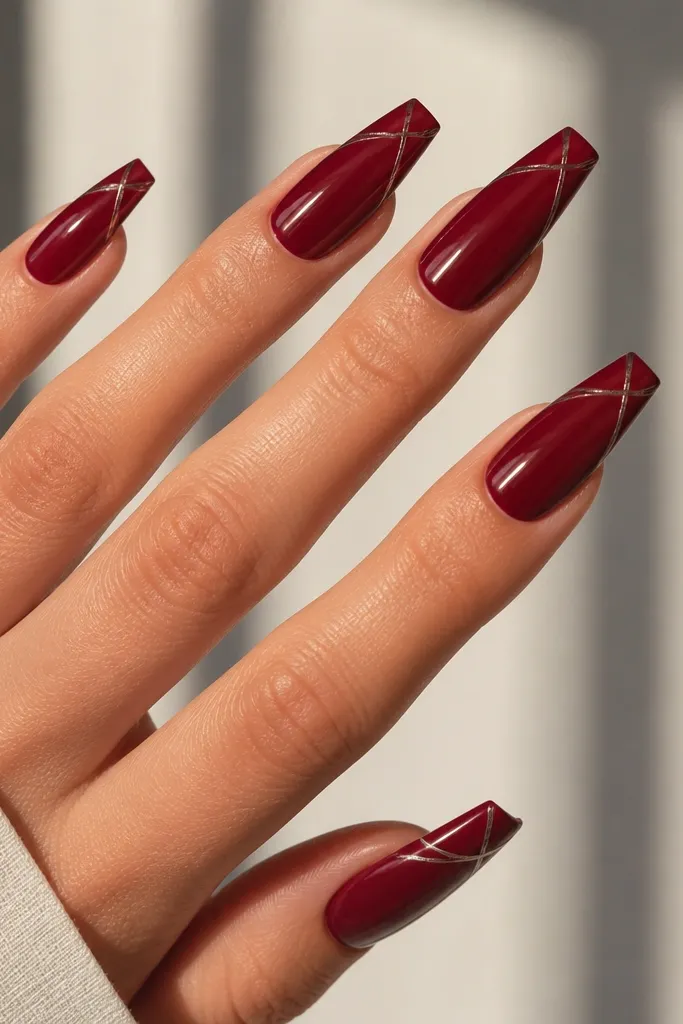
Thin line art is my favorite way to add detail to deep reds without making them look busy. Silver on dark cherry red gives a cool contrast that feels modern, especially on coffin nails where the tip has room to breathe. The diagonal placement lengthens the nail and makes your hand look more elegant. This is perfect if you want something you can wear to work but still get compliments. The trick is keeping the lines thin and leaving plenty of red visible.
Editor's noteDon’t flood the liner with gel. Thin gel strokes keep the lines crisp after curing.
Paint two glossy coats of dark cherry red and cure. Use a nail art striping brush and silver gel liner to draw a single diagonal arc near the tip, starting just inside one sidewall and ending near the opposite sidewall. Add one short line to connect the arc if you want a slightly more finished look. Cure, then apply glossy top coat carefully so the lines don’t blur. Cap the tip to lock everything down and smooth the surface.
21. Cherry Red Micro French With Nude Outline
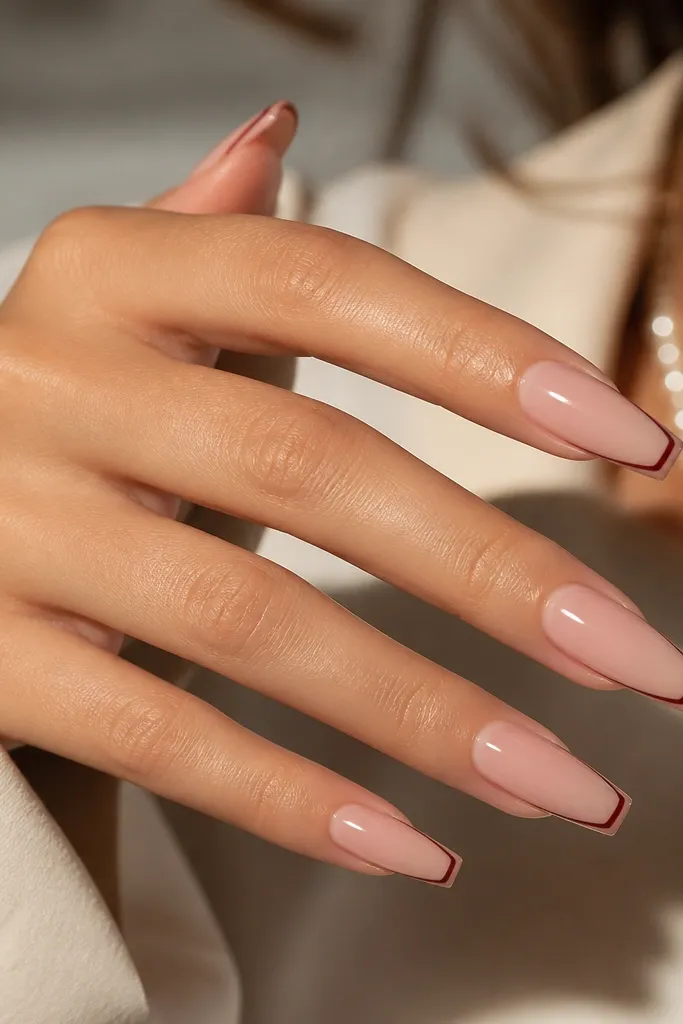
Micro French feels clean and grown-up, and the nude outline makes it look custom instead of store-bought. The dark cherry red stays the star, but the outline gives the tip extra separation from the base. I like this for hands that get photographed a lot because the lines stay sharp and readable. On fair skin, it looks rosy and refined; on deeper skin, it looks like a tailored wine manicure. Coffin nails make the micro tip look longer and more precise.
Apply a nude pink base gel and cure, then paint a thin micro French tip with dark cherry red — keep it close to the free edge. Cure. Use a nude gel or your base color and outline the red tip line with a very thin stroke, slightly inside the red edge. Cure again, then seal with glossy top coat across the whole nail. Clean up the edges with acetone on a detail brush so the outline doesn’t smear.
If your nail tips are uneven, build the micro French with two thin layers instead of one thick layer.
22. Dark Cherry Red With Foil Rub at the Tip
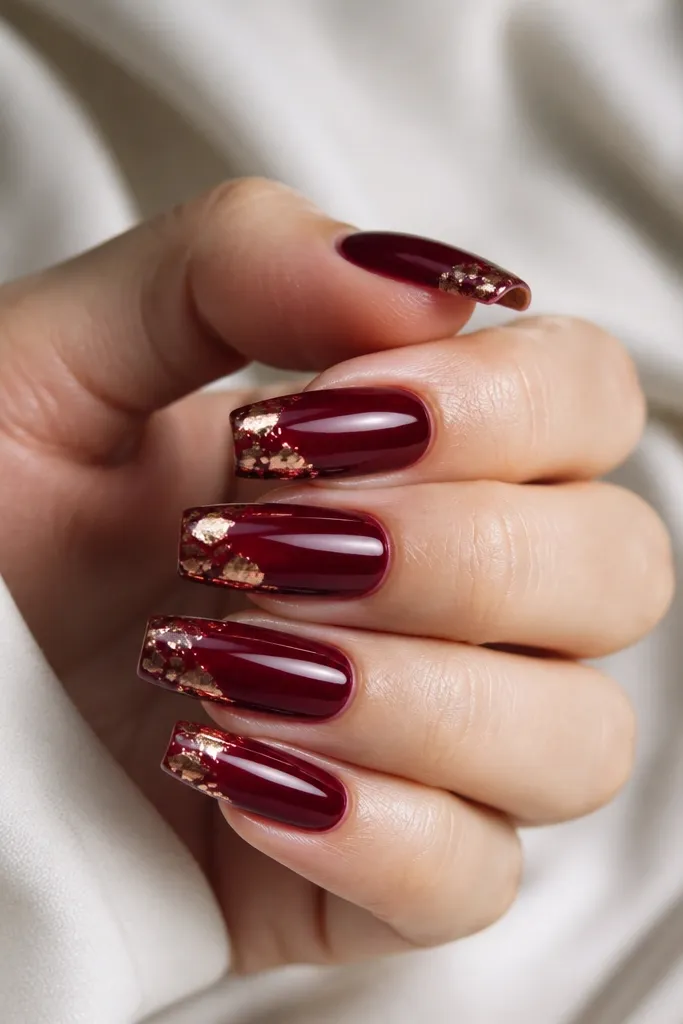
Foil at the tip gives you that high-end salon effect without needing a steady hand for full art. The foil fragments reflect in tiny flashes, which looks amazing on coffin nails because the tip moves the most. I like gold-rose foil on dark cherry red because it keeps the overall tone warm and wine-like. It flatters all skin tones because the foil adds brightness without changing the base color. This is a great option for nights out when you want nails that look like they’re catching light constantly.
Editor's noteUse a darker foil tone, like rose-gold or antique gold, so it doesn’t look too bright next to cherry red.
Paint two coats of glossy dark cherry red and cure. Apply foil adhesive or sticky gel to the last one-third of the nail, then cure if your foil system needs a tack stage. Press foil onto the sticky area and rub gently with a silicone applicator until you see coverage where you want it. Add one more small piece of foil for uneven texture so it doesn’t look flat. Seal with a glossy top coat in two thin layers to prevent foil edges from lifting.
23. Cherry Red Gradient With Clear Topcoat Swirl
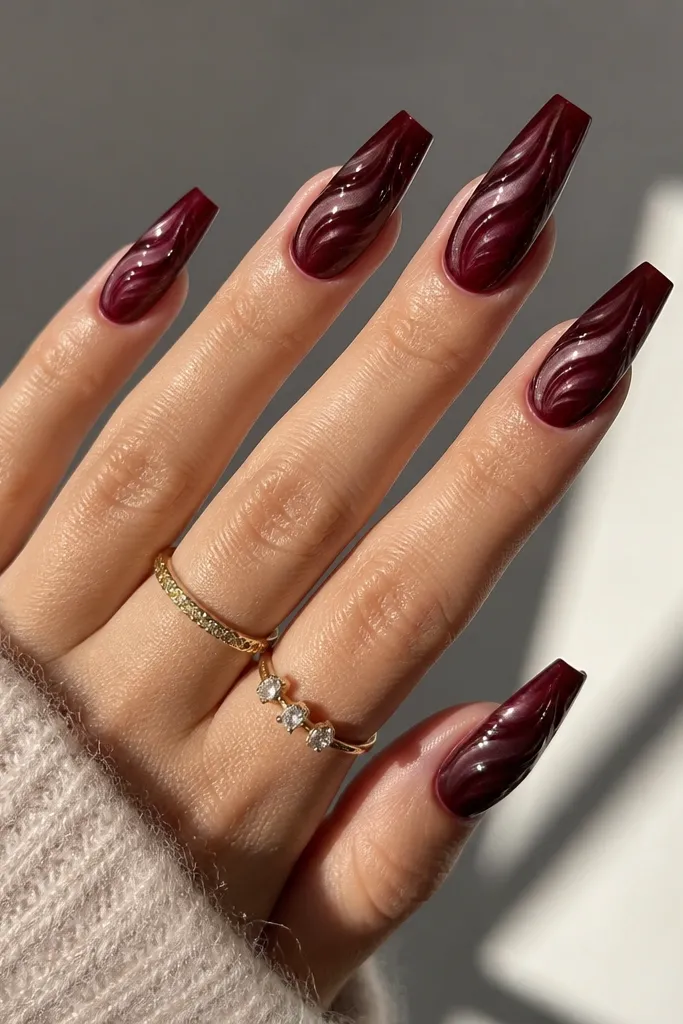
This look is subtle but it makes the manicure look hand-crafted. The gradient gives depth, and the clear swirl adds a raised shine pattern that reads like nail art even though you aren’t painting color. On fair skin it looks elegant and slightly romantic; on deeper skin it looks like glossy wine with a sculpted highlight. Coffin nails make the swirl feel intentional because the nail shape gives you a natural path for the curve. If you want something that looks “expensive” up close, try this.
Editor's noteKeep the swirl narrow. A wide swirl looks like a smear instead of a design.
Create a cherry gradient by blending dark cherry red gel from the tip upward into a slightly lighter cherry tone near the base, then cure. Apply a thick clear gel or builder gel swirl over the center — use a small brush to draw a soft S curve. Cure, then file lightly if needed so it doesn’t feel bumpy. Finish with a glossy top coat across the entire nail to unify the shine. Clean the cuticle area and sidewalls carefully since raised gel can smear if you rush.
24. Dark Cherry Red Reverse Cuticle Half-Moon With Gloss
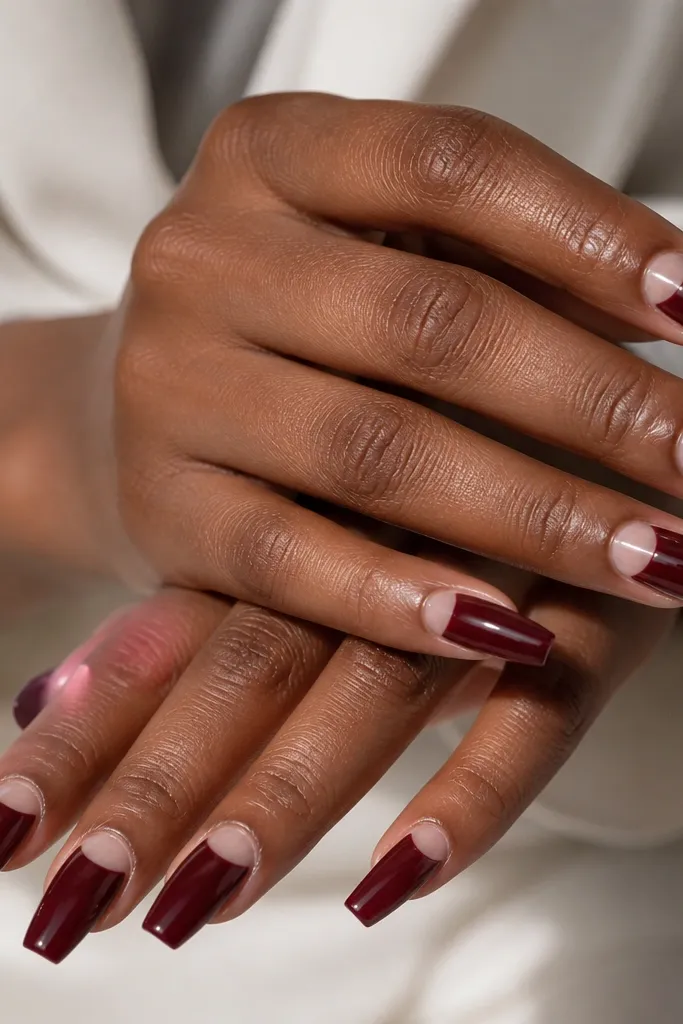
Half-moon negative space at the cuticle makes dark cherry red feel modern and crisp. The unpainted clear section highlights your natural nail curve and makes the color look cleaner. This is flattering when your cuticle area has a distinct shape because it frames it instead of covering it. Coffin nails emphasize the half-moon because the nail tapers and the cuticle area becomes a focal point. I wear this when I want dark cherry red but I’m tired of full cuticle coverage.
Base coat everything and cure. Paint dark cherry red around the cuticle, but leave a clear half-moon in the center — shape it with a liner brush so it stays symmetrical. Cure, then add a second cherry coat, again leaving that half-moon clear. Apply glossy top coat carefully, making sure it doesn’t pool over the negative space. If your half-moon edges look messy, clean them with a detail brush dipped in acetone before curing the top coat.
Use a tiny dotting tool to shape the half-moon — it gives a round edge without wobble.
25. Dark Cherry Red With Burnished Rose-Gold Foil Lines
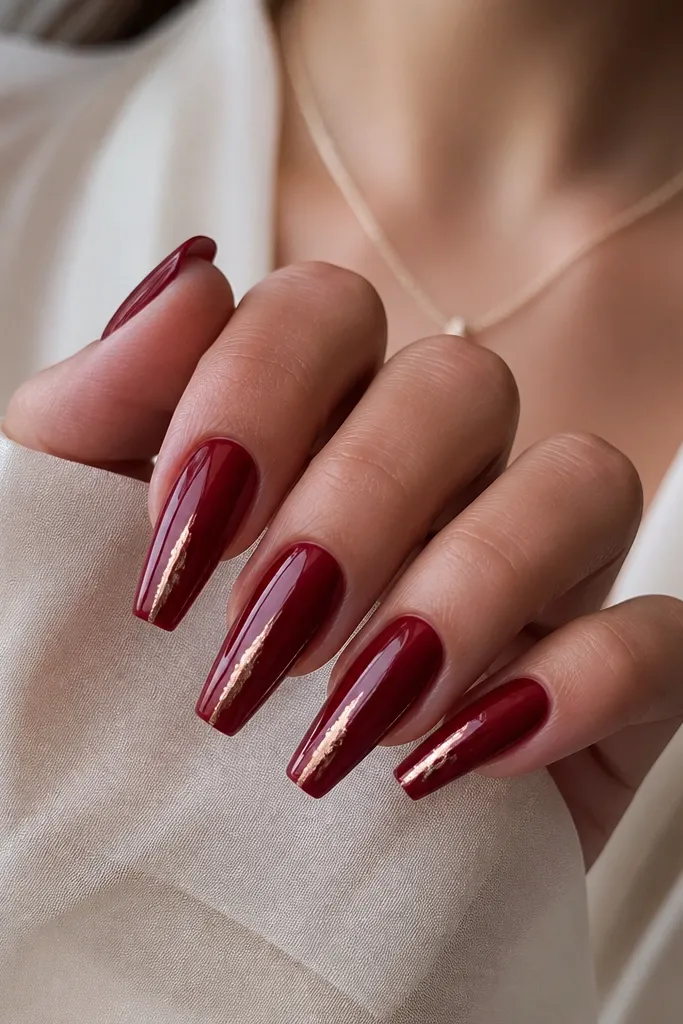
Foil lines make dark cherry red look like it has light streaks, not random glitter. The vertical direction elongates the nail and makes the coffin taper look extra sharp. Rose-gold foil looks warmer than silver next to cherry red, so the whole manicure feels cohesive. This is a good pick if you want a “glam but not loud” style for parties or date nights. It also works on short coffin lengths because the lines do the visual lengthening.
Paint two coats of glossy dark cherry red and cure. Apply a thin strip of foil adhesive gel in two vertical lines down the center area of each nail, leaving space between the lines and the sidewalls. Cure if needed for your adhesive system, then press rose-gold foil onto the adhesive strips. Press gently and leave some red showing so the lines aren’t too thick. Seal with glossy top coat, then cap the tip with extra top coat to keep the foil edges smooth.
Keep the foil lines uneven by a millimeter or two — perfectly straight lines look too harsh on coffin nails.



