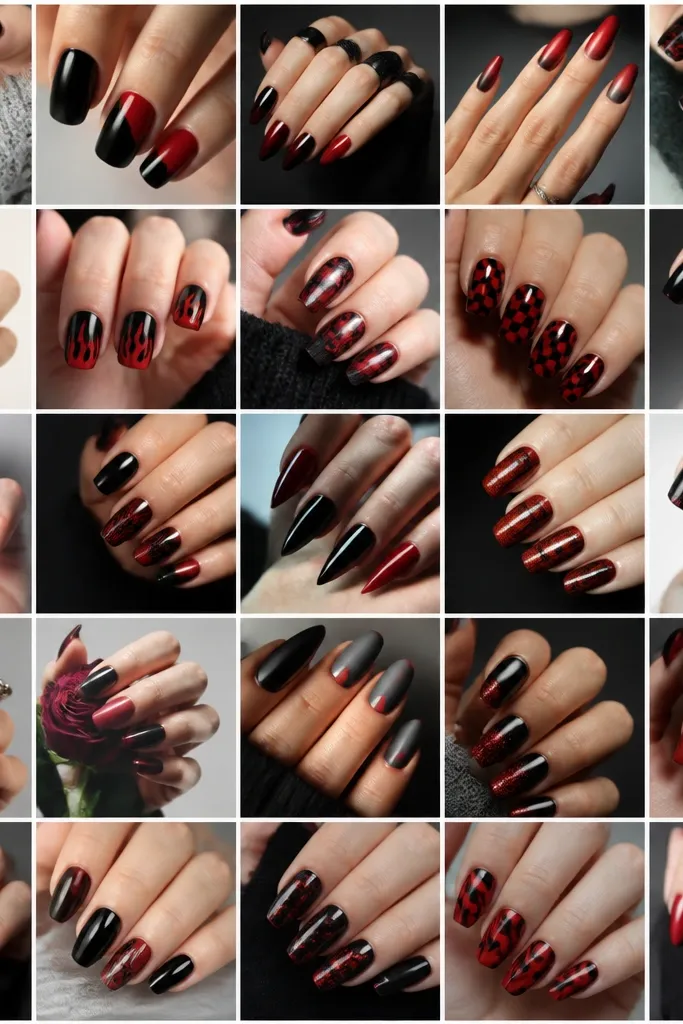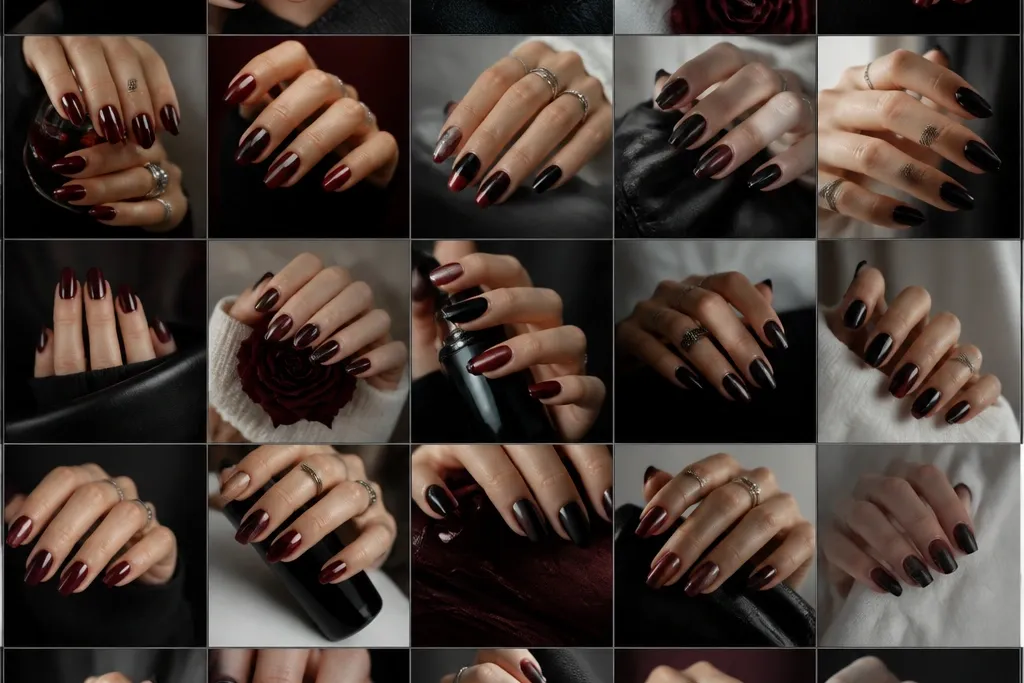

1. Oxblood Half-Moons With Black Micro Tips
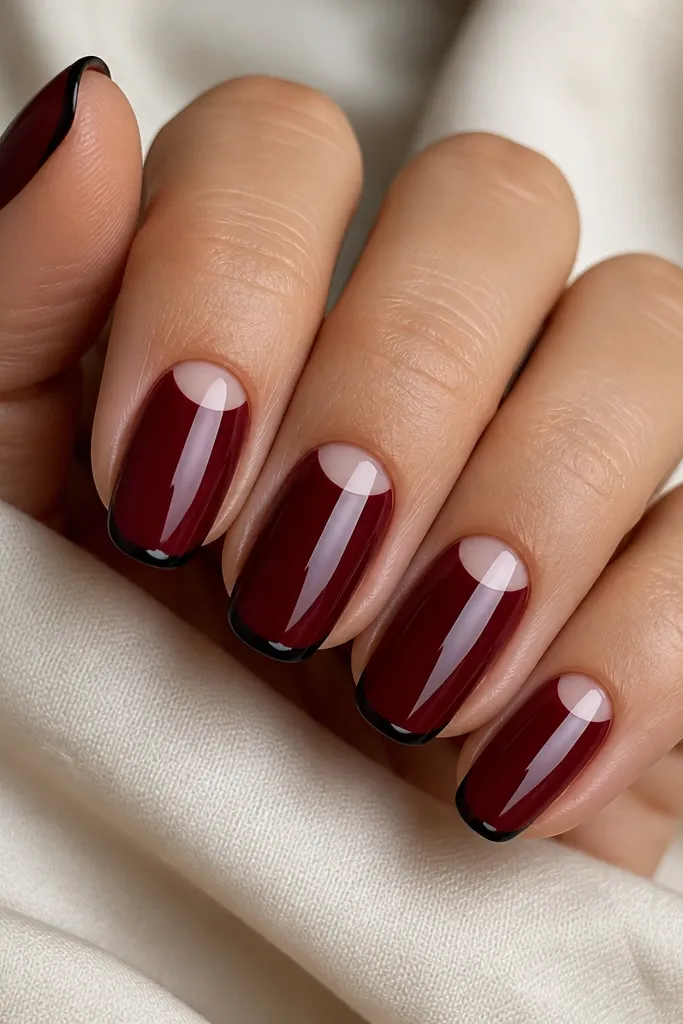
This look is moody but still tidy because the red stays dominant and the black is controlled. The half-moon shape near the cuticle makes your hands look freshly groomed, and the micro tip keeps the nail from looking heavy. I like it on medium and short almond nails because the negative space at the cuticle gives the illusion of length. Oxblood flatters warm and neutral skin tones; it also looks flattering on cool tones because the black anchors the red instead of letting it turn pink. The principle here is contrast without coverage - black outlines, not blocks.
Start by painting a full base coat, then apply two thin coats of oxblood red. Let it dry enough to keep edges crisp. Use a half-moon nail stencil or a small makeup sponge to lift the cuticle area for the half-moon, then paint the rest with black only at the tip using striping tape for a straight 1.5 mm line. Finish with a glossy top coat, and cap the free edge so the micro tip doesn't chip first.
Editor's noteIf your half-moon stencil lifts, press it down with a dry cotton swab so the edge stays sharp.
Watch outSkipping a second thin red coat makes the half-moon look patchy instead of clean.
2. Matte Black Skittle With Oxblood Center Stripe
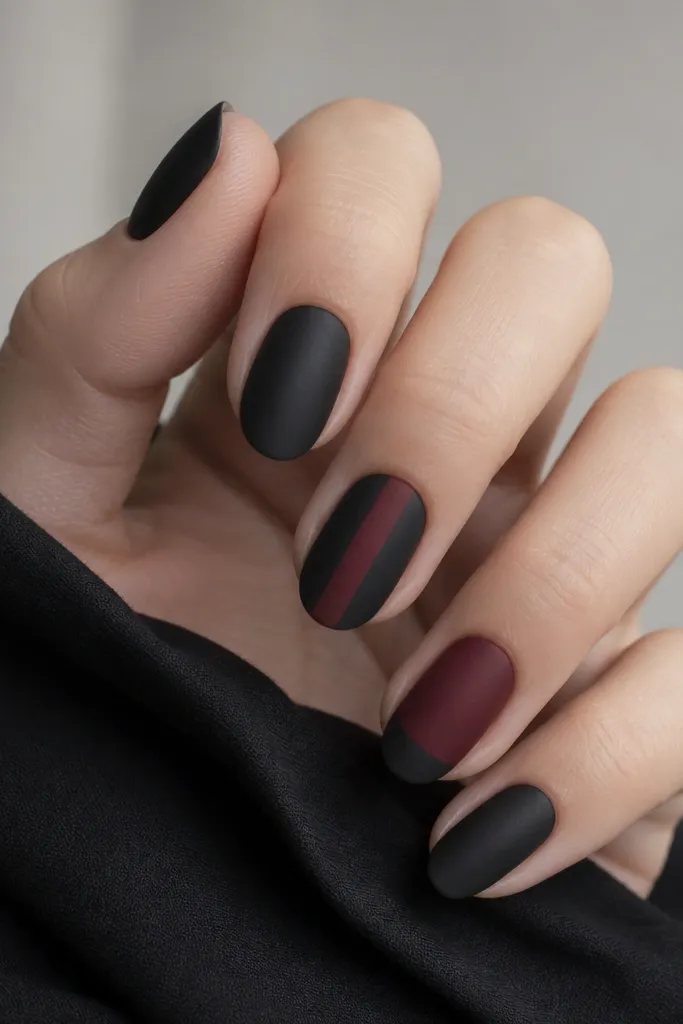
This is the "I want dark but not the same nail five times" option. Matte black reads expensive in daylight, and the oxblood center stripe gives that dreamy pull of red without making the whole set heavy. It flatters fingers that look a little wide because matte finishes hide tiny texture and the stripe adds a vertical line. I've worn this when I had uneven nail beds and the matte black masked the look better than glossy. Keep the stripe narrow - about 1/8 inch - so it looks intentional, not like a mistake.
Start with a matte black base on three nails, using two thin coats so the matte looks even. On the accent nails, paint oxblood as the base, then tape a narrow vertical strip down the middle and fill the tape gap with matte black. Remove tape while the polish is still slightly tacky so edges don't tear. Seal everything with a matte top coat, not glossy, so the contrast stays consistent.
Editor's noteUse a striping brush with a firm tip and wipe it on the side of the cap to avoid thick paint blobs.
Watch outDon't use a glossy top coat over matte polish - it turns the whole set shiny and kills the effect.
3. Black Cherry Gloss With Torn-Edge French
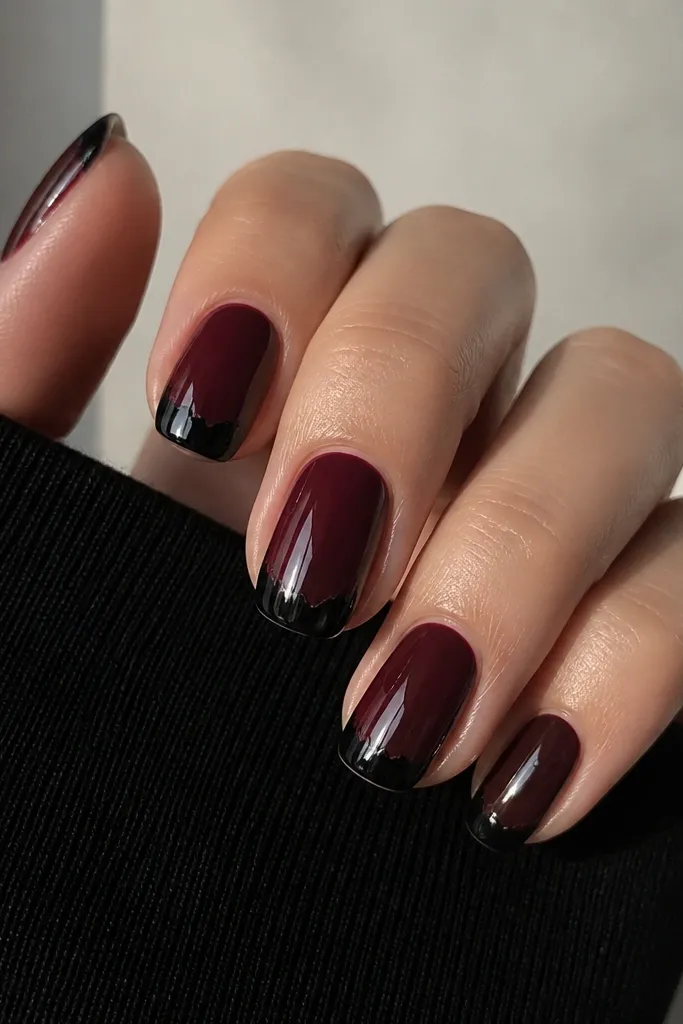
This design looks like a moodboard came to life - sharp, messy in the best way. The glossy red underneath makes the black tip pop, and the torn edge keeps it from looking like a generic French. I love it on oval nails because the uneven edge softens around the curve. It flatters most skin tones since the red is the main color and black just frames it. The principle is controlled chaos: jagged border, clean base.
Paint two coats of glossy black-cherry red, then let it fully set. Use a strip of torn plastic wrap or a stamping sponge to dab black along the tip area, then clean the edges with a small brush dipped in polish remover. Keep the black tip thickness around 2 mm at the center and thinner near the corners. Finish with a high-gloss top coat and cap the tip so the jagged edge doesn't snag.
Editor's noteIf your torn edge looks too thick, go back with a thin red brush to drag a highlight line back into the border.
Watch outDon't try to freehand the jagged edge when the base is still wet - it smears into a blob.
4. Oxblood Marble Over Black Base
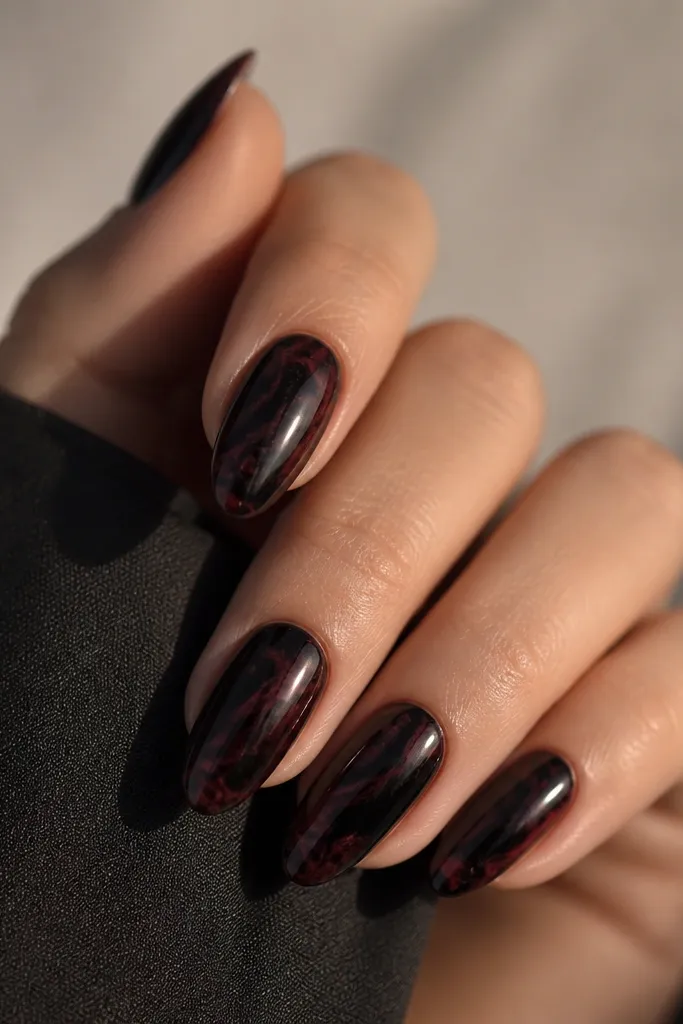
Marble is dreamy because it looks different every time you move your hand. Putting the oxblood over a black base makes the red look deeper instead of brighter, which is exactly what you want for an aesthetic that reads "moody," not "holiday." I like it on almond or coffin shapes because the swirls have room to breathe. This also flatters short nails because you can keep the marbling concentrated in the center and leave the edges darker. The principle is depth: black underneath, red swirls on top, then glossy for dimension.
Start by painting two coats of solid black and let it dry fully. Drop oxblood polish onto a silicone palette with a few drops of clear polish to thin it, then drag a thin toothpick through to create cloudy streaks. Use a small marbling brush to place the streaks across the nail, focusing the densest area near the center. Seal with glossy top coat, and add one extra layer on the marble lines so they feel smooth.
Editor's notePractice on one nail first - marble always looks better after you find your brush pressure.
Watch outDon't over-thin your oxblood - if it gets too watery, it turns into streaks instead of marble.
5. Black Lacquer With Oxblood Reverse French
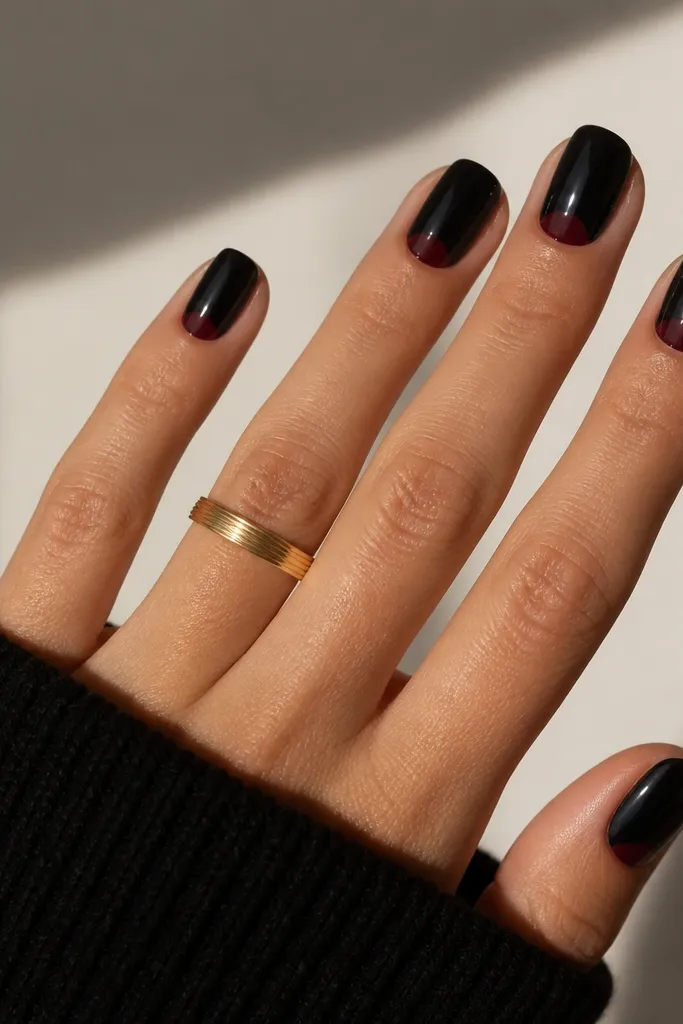
Reverse French makes your nails look clean and styled even when you only do one accent color. The glossy black hides small plate ridges, while the oxblood crescent draws attention to the cuticle area, which is flattering on hands with slimmer fingers. I like this on short square nails because it visually frames the nail bed. Oxblood works well on both light and medium skin tones; it gives warmth without turning neon. The principle is framing: black fills, red outlines the cuticle.
Paint two coats of glossy black and cure/dry fully. Then place thin striping tape along the cuticle line to create a crescent guide, leaving a small gap for the arc width (about 2 mm). Fill the crescent with oxblood, remove tape carefully, and clean the edges with a flat brush dipped in remover. Finish with a glossy top coat and cap the edges for long wear.
Editor's noteIf your cuticles are dry, do cuticle oil the night before so the crescent edge doesn't catch on flakes.
Watch outDon't make the crescent too thick - a wide reverse French can make nails look shorter.
6. Velvet Oxblood With Black Aura Glow
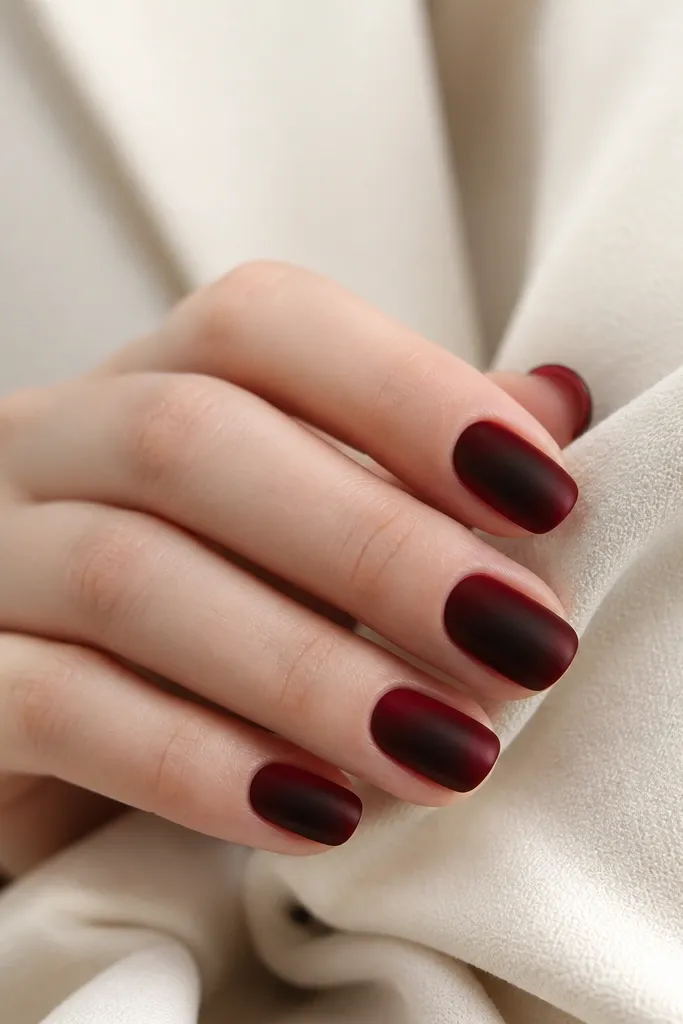
Aura nails look dreamy because the color fades instead of stopping in a hard line. A velvety oxblood base makes the whole set feel soft and moody, and the black aura adds depth without covering the entire nail. This flatters hands with longer nail beds because the aura sits centered, but it also works on shorter nails if you keep the aura confined to the middle third. I've found this set looks gorgeous in indoor lighting because the matte texture eats shine. The principle is gradient placement: fade the black around the center, keep the red as the main color.
Apply a velvety/matte base using a matte top coat over oxblood, then buff lightly once dry so it looks even. Use a makeup sponge to dab black polish mixed with a touch of clear on the center of the nail, fading outward with light taps. Keep the darkest point in the exact center, then soften the edges by tapping a clean area of the sponge. Seal with a matte or velvety top coat so the aura stays blurred, not glossy.
Editor's noteUse a small sponge cut into a wedge so you get a tight aura circle.
Watch outDon't drag the sponge - tapping only keeps the aura smooth.
7. Black Dot Grid Over Oxblood Gloss
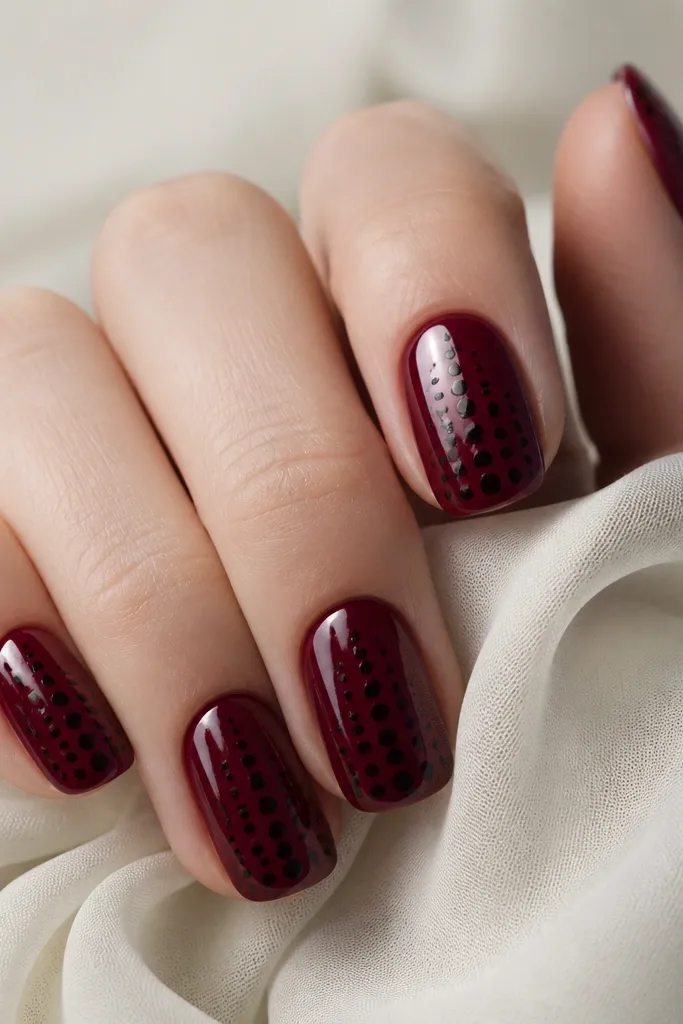
Dots feel graphic, not childish, when you use a tight grid and dark colors. The oxblood base stays rich, and the black dots add a punchy texture that still looks neat. This one flatters shorter nails because the pattern is concentrated lower down, pulling the eye toward the tip. I've worn it to work and it looked intentional, not flashy. The principle is spacing: keep the dots consistent in size and leave a little breathing room between them.
Paint two coats of glossy oxblood and let it dry until tack-free. Use a dotting tool to place black dots in rows starting near the middle of the nail, spacing them about the width of one dot apart. Vary the dot size slightly on the last row so it looks organic, not printed. Finish with glossy top coat, but go slow so you don't flood the dot texture.
Editor's noteIf your dots look smeared, clean the dotting tool between nails with acetone on a cotton swab.
Watch outAvoid random dot sizes across the whole nail - it turns into clutter quickly.
8. Oxblood Cat-Eye With Black Edge
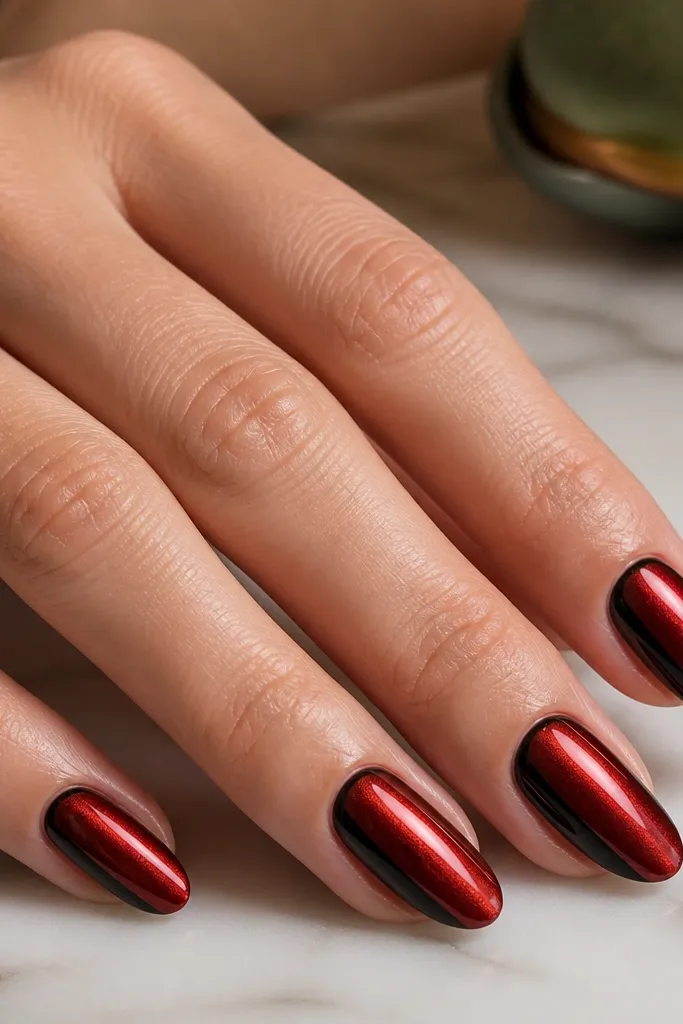
Cat-eye is the fastest way to make dark colors look expensive because the magnet creates movement. The oxblood ribbon looks like a glowing thread through black, and the thin black edge makes it feel sharp and intentional. This is flattering on almond nails because the central ribbon stretches the nail visually. On hands with cooler undertones, oxblood reads deeper and less pink, especially with the black edge. The principle is one magnet effect plus one outline - keep it clean.
Apply base coat, then two thin coats of oxblood magnetic cat-eye polish, magnetizing at the end of each coat according to the product timing. While the final coat is still workable, use a striping brush to paint a thin black line along one side of the nail, staying 1 mm away from the edge. Wipe any mistakes with a small brush and remover. Seal with glossy top coat, and cure fully so the ribbon stays crisp.
Editor's noteHold the magnet steady for the full time - rushing makes the ribbon look broken.
Watch outDon't pick a cat-eye shade that's too brown - it can read flat against black.
9. Black Ombré Fade Into Oxblood Tips
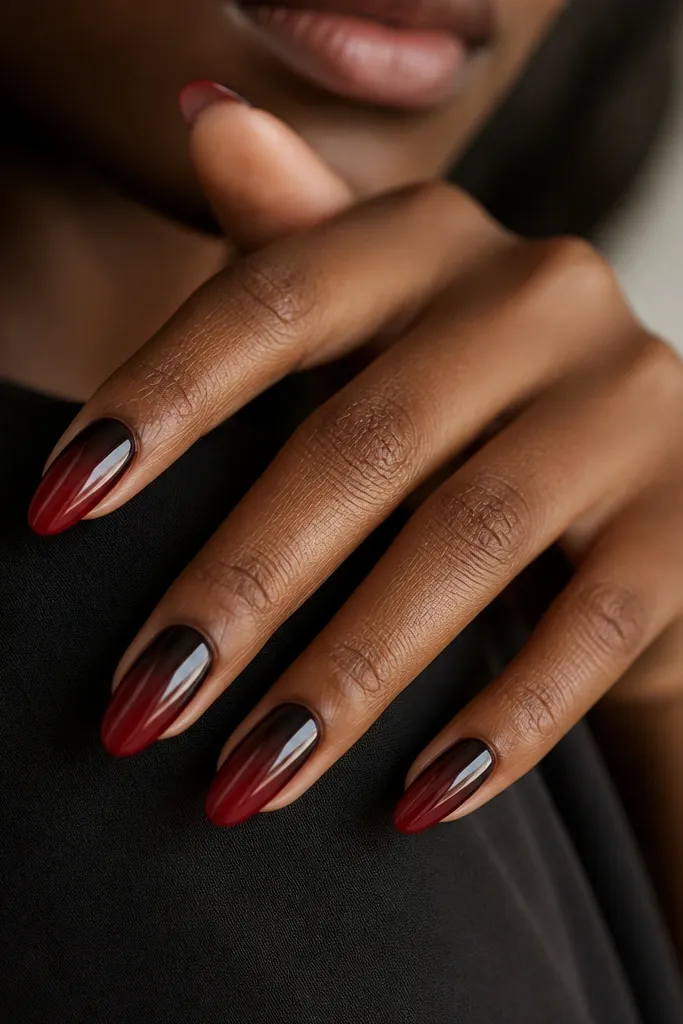
Ombré looks soft and dreamy because it removes the harsh border between colors. Here, black starts near the cuticle, which visually lengthens the nail bed, and oxblood hits at the tip where light catches first. I love this on medium-length oval nails because the fade has space to show. It also flatters hands with dry cuticles since the dark start hides minor dryness. The principle is smooth fade: build the gradient gradually instead of slapping on two colors.
Paint a black base around the cuticle area, leaving the top half clear. Sponge on oxblood starting at the tip and blending upward with light taps, using a makeup sponge you've lightly dampened with alcohol for smoother blending. Repeat with thin layers until the fade looks even. Once dry, clean the edges with a small brush and remover, then seal with glossy top coat and cap the tip.
Editor's noteDo two light sponge passes instead of one heavy pass - it keeps the ombré smooth.
Watch outDon't blend too close to the cuticle - you lose the length effect.
10. Oxblood Gloss With Black Brushstroke Corners
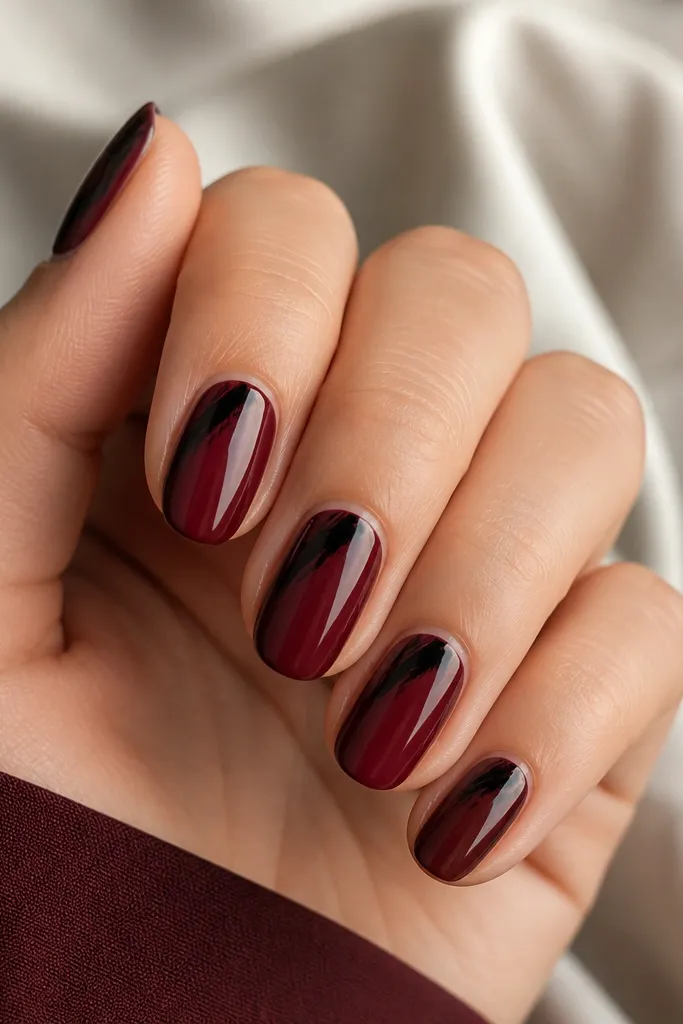
This is moody without feeling like a full black nail. The brushstroke corner gives you that "fashion manicure" vibe, and it photographs well because the black has sharp edges against glossy red. It flatters most nail shapes, but especially squoval, because the corners look intentional. On darker skin tones, the oxblood red pops with a wine glow; on lighter skin, the contrast stays dramatic. The principle is negative space: keep most of the nail red and let black sit in the corners.
Apply two coats of glossy oxblood. Use a striping brush to paint black diagonal brushstroke corners on both sides of the nail, starting 2 mm from the cuticle and ending 2 mm above the tip. Keep the center clear so the nail still looks open. Clean edges with a flat brush and remover, then finish with glossy top coat.
Editor's noteTilt the brush and pull in one direction so the stroke looks like a deliberate sweep.
Watch outDon't fill the whole upper area with black - it turns into a heavy cap.
11. Black Studded Lines on Oxblood V Tips
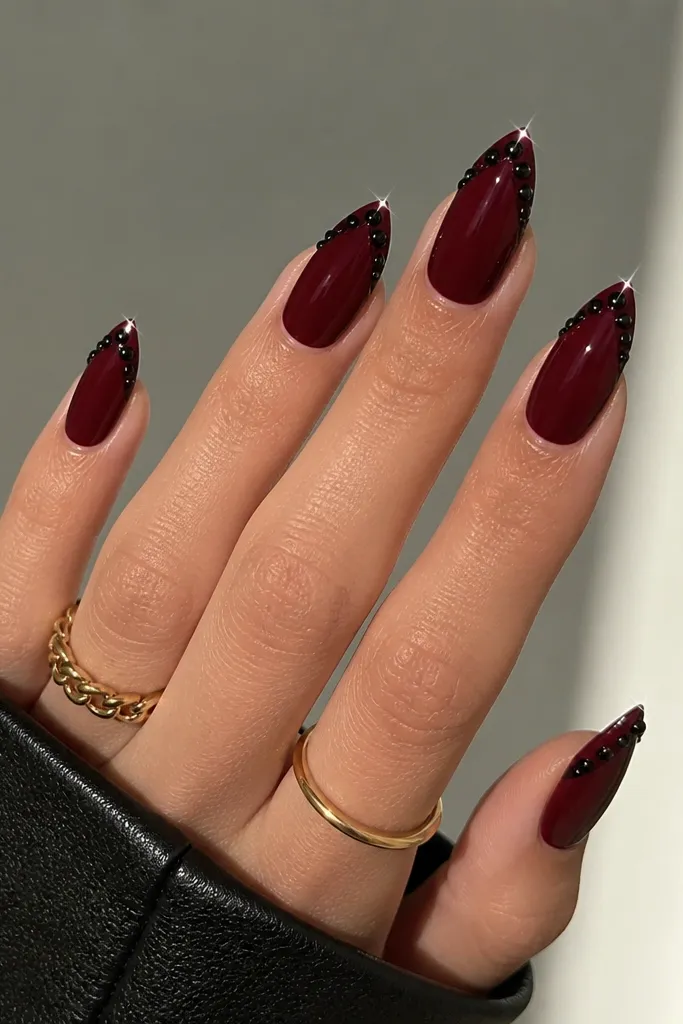
Rhinestones can look cheap fast, but on a V tip they look sharp and controlled. The V shape guides the eye to the center of your nail, and the black outline makes the stones feel crisp instead of scattered. I like this on long almond nails because the V has room, but you can scale it down for shorter nails by keeping the V only on the last third. It flatters hands with broader nail beds because the V narrows the look. The principle is geometry: define one shape and place stones only along the outline.
Paint oxblood as the base in two thin coats. Place a V guide using striping tape from each side of the tip toward the center, leaving a clean V gap. Paint the V gap black, remove tape, then apply tiny black rhinestones along the V line using nail glue. Seal carefully with a top coat that doesn't flood the stones - two thin coats work better than one thick coat.
Editor's noteUse tweezers with a fine tip and press each stone for 3-4 seconds so it sets flat.
Watch outAvoid big chunky stones - they make the V look bulky and uneven.
12. Matte Oxblood With Black Gloss Accent Nail
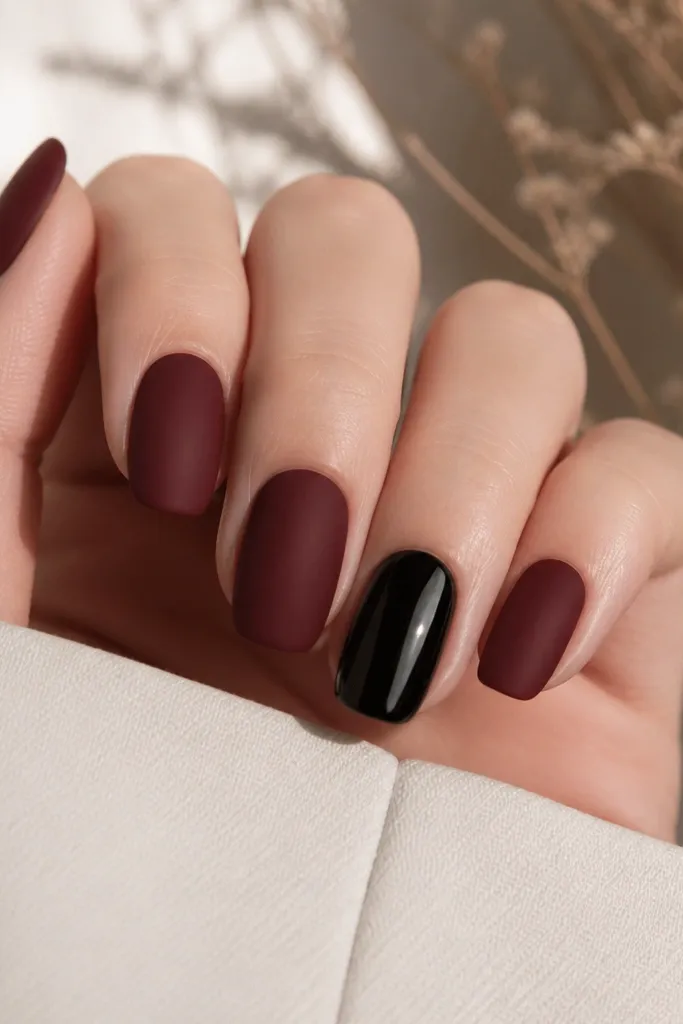
This is the easiest way to get the aesthetic with zero complicated art. Matte oxblood gives you that soft, velvety moody vibe, and the glossy black accent nail adds contrast for photos. I like it when I'm in a hurry because it still looks intentional. It works on any nail shape, but it looks especially good on short rounds where full art can feel too busy. The principle is contrast by finish, not by pattern.
Paint oxblood with two coats, then apply a matte top coat to four nails. On the fifth nail, skip matte and use glossy top coat over black gel polish or black regular polish. Keep the accent nail fully glossy - don't accidentally drag matte top coat over it. Clean edges after the top coat sets so the finish lines stay crisp.
Editor's noteIf you're using regular polish, wait longer between coats so matte doesn't patchy-dry.
Watch outDon't mix matte and glossy on the same nail by accident - it looks messy instead of styled.
13. Black Lace Tips Over Oxblood Base
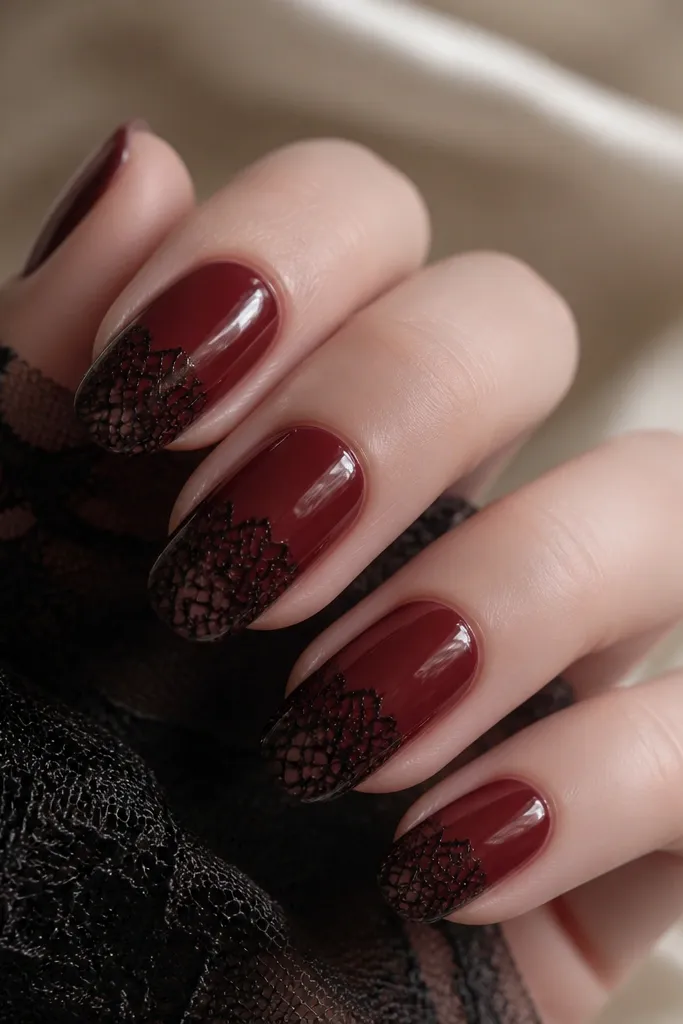
Lace tips look romantic, but the dark red and black make it moody instead of sweet. Concentrating lace at the tip keeps the nail from feeling busy, and it looks like real fabric when the light hits the glossy base. This flatters oval and almond nails because lace lines follow the curve of the tip. It also looks great on medium-to-deep skin tones because black lace reads high-contrast. The principle is placement: lace only where your nail naturally narrows.
Start with two coats of glossy oxblood. Apply black lace stamping polish or lace stencil paste only on the last third of the nail. If you're stamping, use a scraper and press firmly for crisp lace lines. Seal with glossy top coat, and add a second top coat layer so the lace feels smooth instead of raised.
Editor's noteIf the lace looks too heavy, use a thinner stamping polish or do one partial stamp and let it fade.
Watch outDon't stamp lace across the whole nail - it turns into a flat print.
14. Oxblood Chrome With Black Outline French
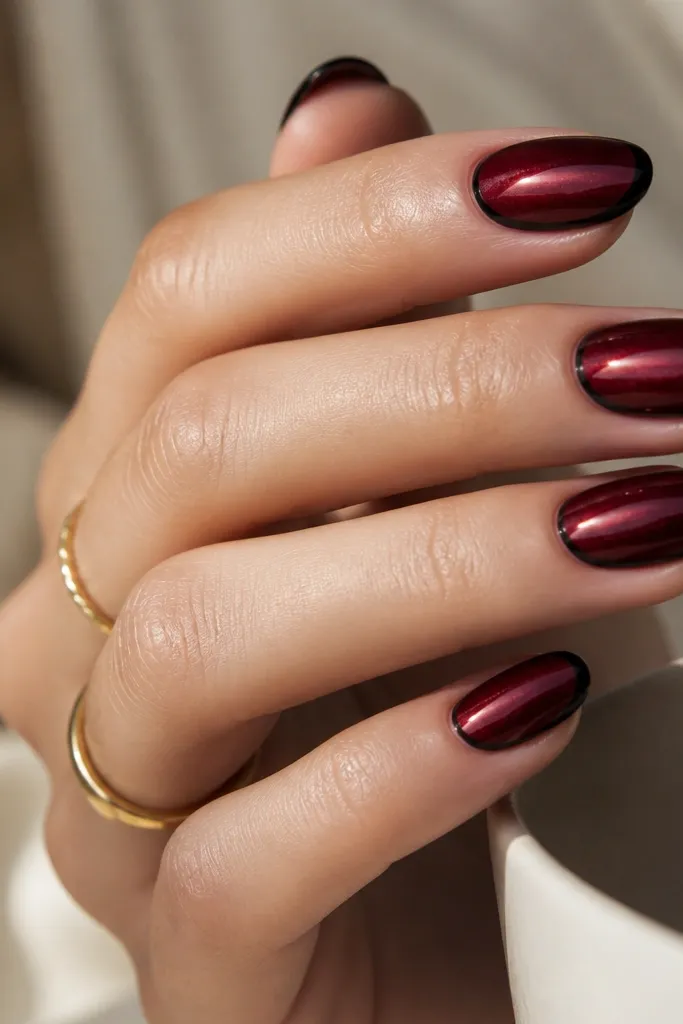
Chrome makes dark red look like it's lit from within, and the black outline keeps it from looking too "party." This is one of my favorite sets for events because it holds up in flash photos. It flatters hands with longer fingers because the chrome reflects and adds brightness, while the black outline keeps the shape defined. On fair skin, the oxblood chrome looks like a berry metallic; on deeper skin, it reads like deep garnet. The principle is frame the shine with black so the set looks intentional.
Paint oxblood base in two thin coats, then apply chrome powder or chrome gel in the oxblood tone. Wipe off excess so the shine is smooth, not dusty. Use striping tape to create a French outline at the very tip, then paint that outline black and remove tape right away. Finish with a chrome-safe top coat if your product requires it, or use a thin gel top coat that won't dull the mirror effect.
Editor's noteIf chrome looks streaky, buff lightly with a lint-free wipe before sealing.
Watch outDon't use a thick regular top coat over chrome - it dulls the mirror finish.
15. Black and Oxblood Diagonal Split With Negative Triangle
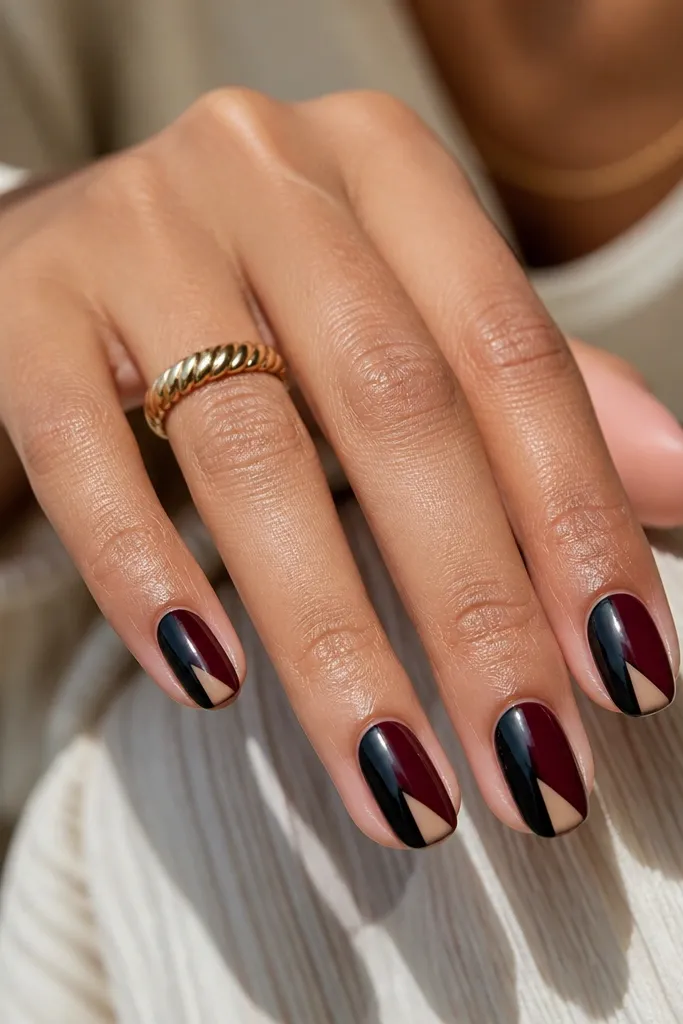
This design looks clean and modern because it uses geometry. The negative triangle adds that "designer" feel and keeps the nail from looking like two blocks of color. I like it on short almond or squoval because the diagonal line makes the nail look longer. It flatters warm and cool undertones since the split is stark and evenly balanced. The principle is symmetry control: keep the diagonal angle consistent and the triangle small.
Paint a base coat. Tape a diagonal guide from lower left to upper right (choose one direction and keep it the same on all nails). Fill one side with black and the other with oxblood, using two thin coats for solid coverage. Remove tape to reveal crisp edges, then add a small triangle of negative space by placing a tiny piece of tape where you want the triangle. Seal with glossy top coat.
Editor's noteUse thin striping tape, not painter's tape - thin tape makes cleaner diagonal lines.
Watch outAvoid a huge triangle - it can make the nail look thin and uneven.
16. Oxblood Gloss With Black Crackle Overlays
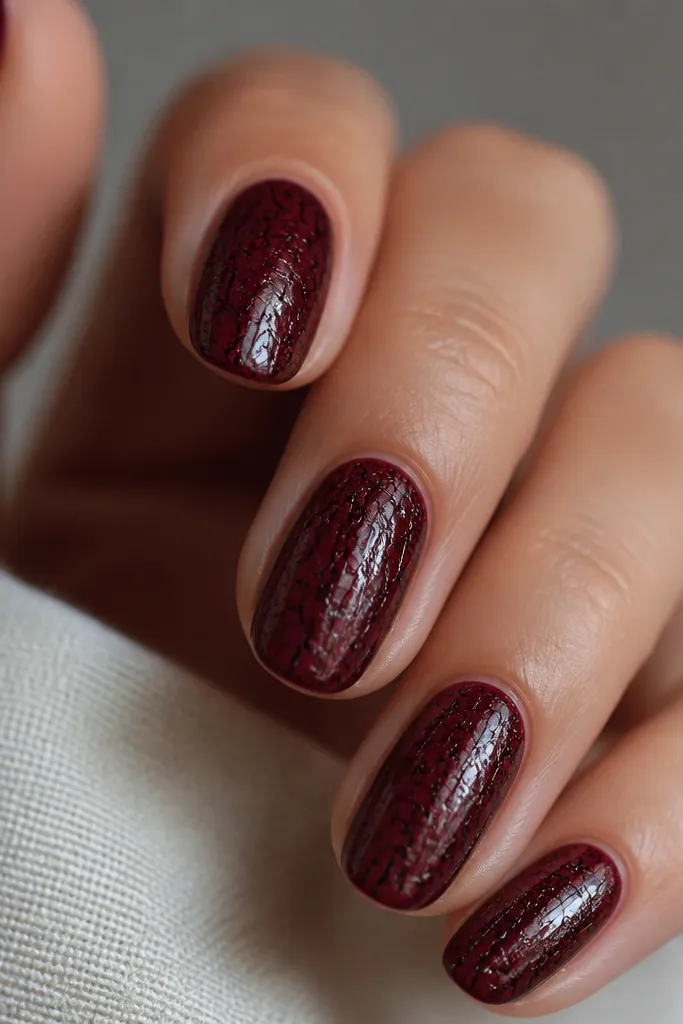
Crackle gives texture without needing hand-drawn art, and the black-on-oxblood combo reads like dark glass. The pattern looks different each time, which keeps it from feeling repetitive. I like it on medium length nails because the crackle lines have space to show their detail. This set flatters hands that need a little distraction from nail ridges since the crackle texture draws the eye. The principle is texture layering: glossy red base, crackle effect on top, then smooth top coat to seal.
Paint two coats of glossy oxblood and let it dry enough for crackle polish to set correctly (not fully cured, depending on your product). Apply a crackle polish in black as the top layer, watching the pattern form. If the cracks are too wide, use thinner coats of crackle polish next time. Finish with a glossy top coat to smooth the surface and prevent the crackle from snagging on sweaters.
Editor's noteWork fast and keep your brush strokes light so the crackle pattern spreads evenly.
Watch outDon't add extra layers of crackle polish - it can thicken and look muddy.
17. Black Ink Blot Accent on Oxblood Nails
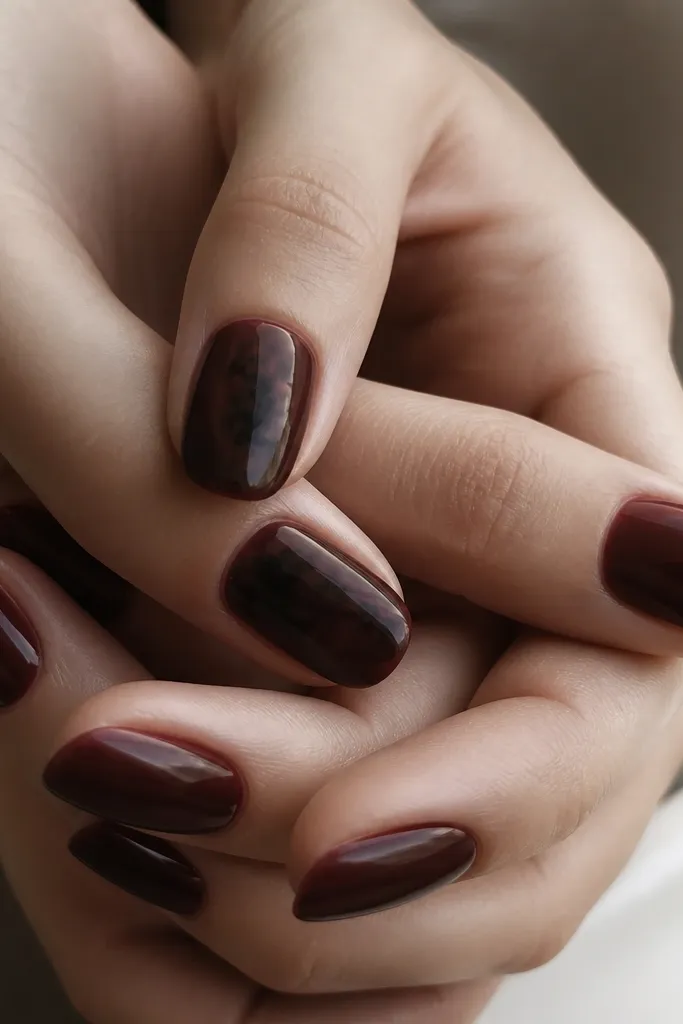
Ink-blot nails look dreamy because the edges fade like smoke. Keeping it as an accent keeps the set wearable, especially if you're not into full black coverage. This flatters short nails because the blot sits in the middle third and doesn't overwhelm the tip. It also looks good on any skin tone because black provides a strong contrast against oxblood. The principle is soft edge control: feather the black until it looks like it's dissolving into the red.
Paint two coats of glossy oxblood on all nails. On the accent nails, dab black polish onto a makeup sponge and lightly tap it onto the middle of the nail for a soft blot. Use a clean sponge corner to blend the edges by tapping around the blot until it fades. Seal with glossy top coat, and add a second thin coat on the blot area so it doesn't feel rough.
Editor's noteIf the blot looks too dark, dab once more with a clean sponge to lift pigment.
Watch outAvoid crisp, fully opaque blot edges - they make it look like a sticker.
18. Black Gloss With Oxblood Center Dot Mandala
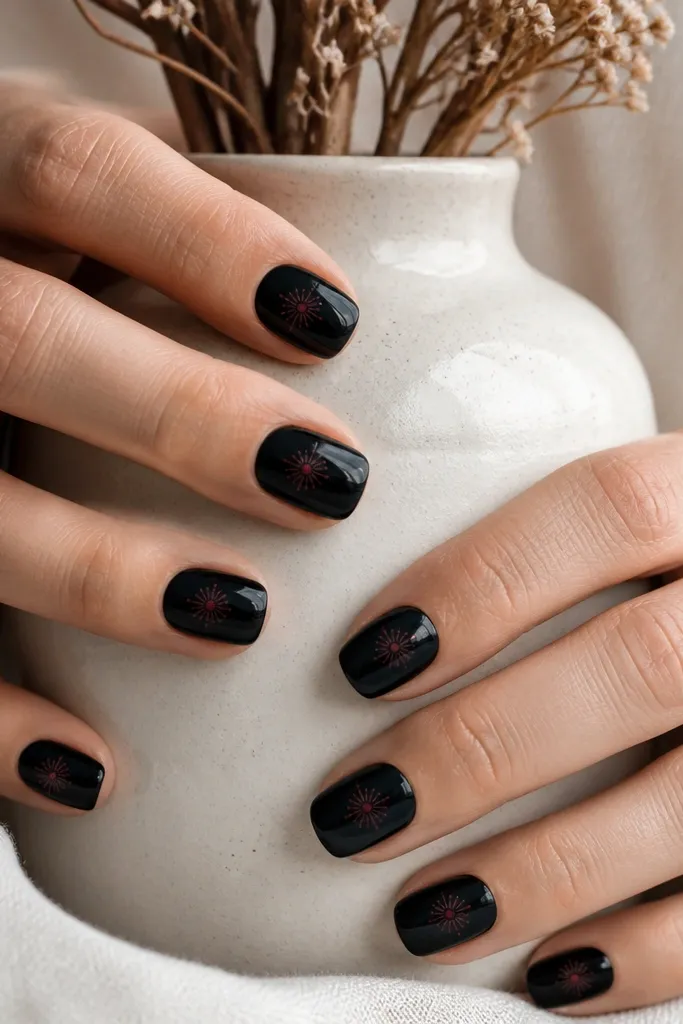
Mandala details can go wrong when the lines are thick, but dot mandalas work because they're delicate and controlled. Black base makes the oxblood dots stand out like tiny embers. I like this on medium almond nails because the center has space for the pattern to bloom. It flatters hands that want something artsy without being loud - you can keep it subtle by using small dots. The principle is tiny repetition: small dot sizes, consistent spacing, centered placement.
Paint two coats of glossy black and let it dry until tack-free. Use a dotting tool to place one oxblood dot in the exact center, then add small surrounding dots in a ring pattern. Add a second ring with fewer dots if you want more depth. Finish with glossy top coat, and cap around the design edges so the dots don't snag.
Editor's noteUse a smaller dotting tool than you think you need - it keeps the mandala refined.
Watch outDon't draw thick lines into the mandala - they make it look like a stamp.
19. Oxblood Bloom Flowers With Black Stems
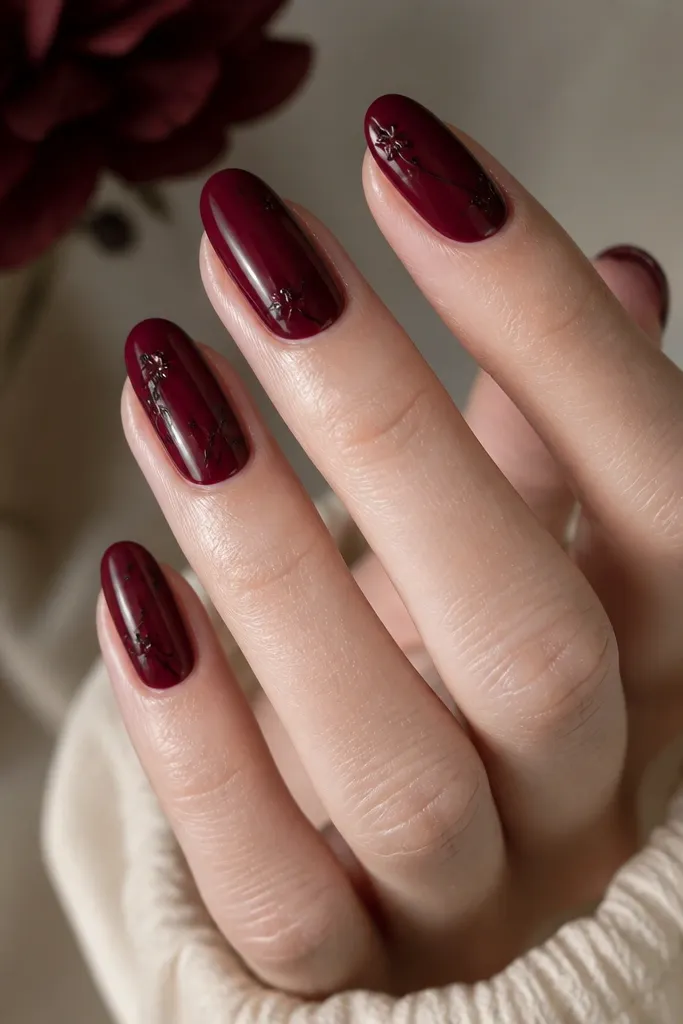
This is the "moody garden" look that still feels elegant. The black stems give structure, and the tiny oxblood blooms keep the set cohesive instead of turning into random art. I like it on short oval nails because the flowers can be placed in a vertical line that elongates the nail bed. It flatters light skin by adding depth, and it flatters darker skin by keeping the design high-contrast. The principle is line work first: stems define the layout, flowers fill the spaces.
Start with two coats of glossy oxblood. Use a liner brush to draw thin black stems from near the cuticle toward the middle of the nail. Add small bloom dots and petals using a dotting tool or a tiny nail art brush, keeping the petals close to the stem so they look connected. Let it dry, then seal with a glossy top coat in two thin layers.
Editor's noteFor crisp stems, wipe your liner brush on a paper towel once before painting each nail.
Watch outAvoid placing flowers too close to the tip - it makes the nail look crowded.
20. Black Tips With Oxblood Micro Glitter Fade
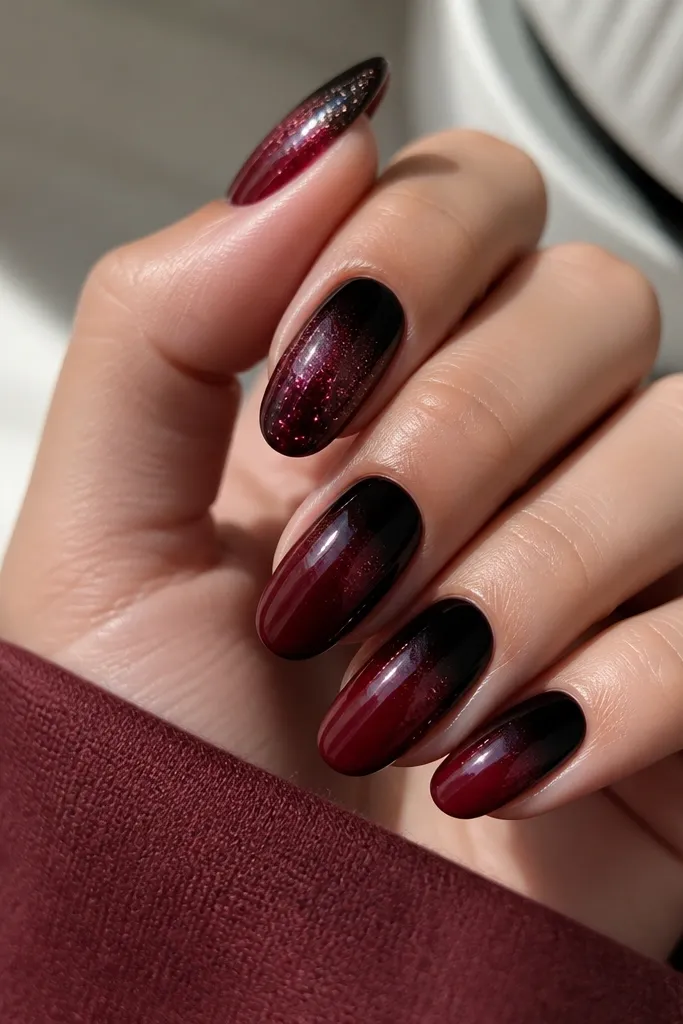
Glitter is tricky because it can look gritty, but micro glitter fade looks like light catching on velvet. The black tips keep it dramatic, while the oxblood glitter border makes it dreamy and dimensional. I like this for fall and winter because the glitter reads like frost instead of party sparkle. It flatters nails that have slight ridges because glitter texture hides imperfections. The principle is tiny sparkle, controlled placement - keep glitter only around the transition line.
Paint your base with glossy oxblood in two coats. Create black tips using striping tape at the top third, then remove tape once the black is set enough to stay crisp. For the glitter fade, sponge a small amount of oxblood micro glitter polish right at the border where black meets red, using a light tap technique. Seal with a glossy top coat to lock in glitter and smooth texture.
Editor's noteUse a glitter polish with fine particles, not chunky - chunky makes the fade look uneven.
Watch outDon't bury glitter under a thick coat - it can sink and look dull.
21. Black Shimmer Over Oxblood Negative Space
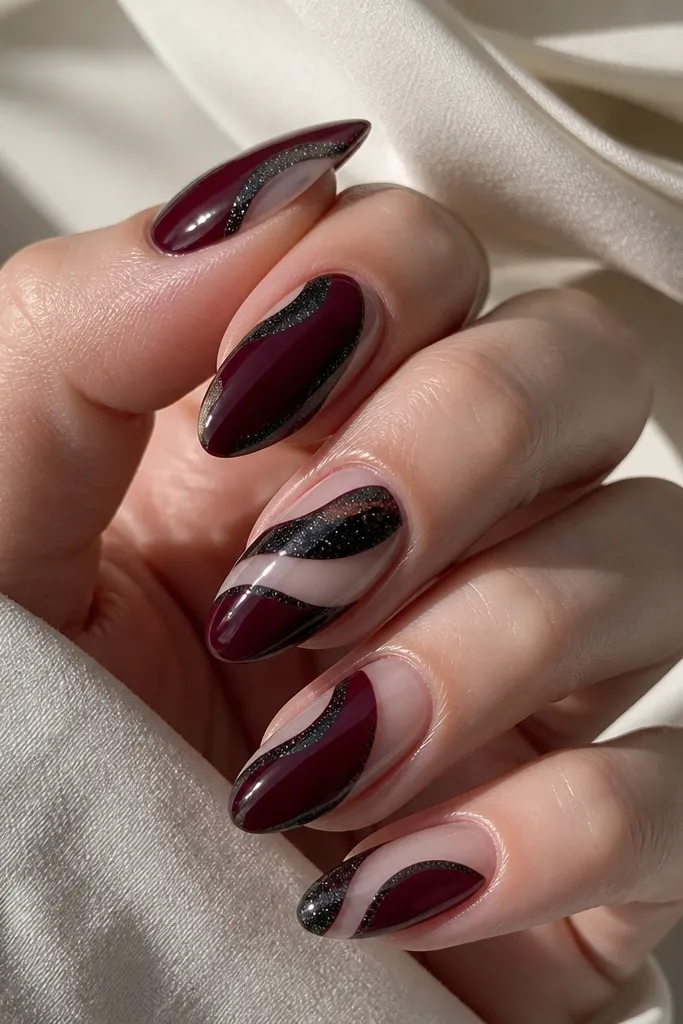
Negative space plus shimmer is the fastest way to make dark nails look airy. The oxblood base keeps everything warm, and the black shimmer bands add that moody glow when you move your hands. This works best on short-to-medium nails because the shimmer bands can be spaced to avoid crowding. I've worn this on days when my nails were short and it still looked styled. The principle is breathing room: don't cover the whole nail in shimmer, leave clear gaps.
Start with a sheer base or clear base coat if you want true negative space; then paint oxblood around the areas you want to keep clear. Use a thin brush to paint curved black shimmer bands across the nail, leaving gaps of clear base between bands. Keep the bands consistent in thickness - about 1 mm - for a clean look. Finish with glossy top coat, but keep it thin so the shimmer doesn't look flooded.
Editor's noteIf your shimmer is too sparse, build it in two thin layers rather than one thick layer.
Watch outAvoid random curved bands - inconsistent spacing makes it look accidental.
22. Oxblood Gloss With Black Outline Hearts
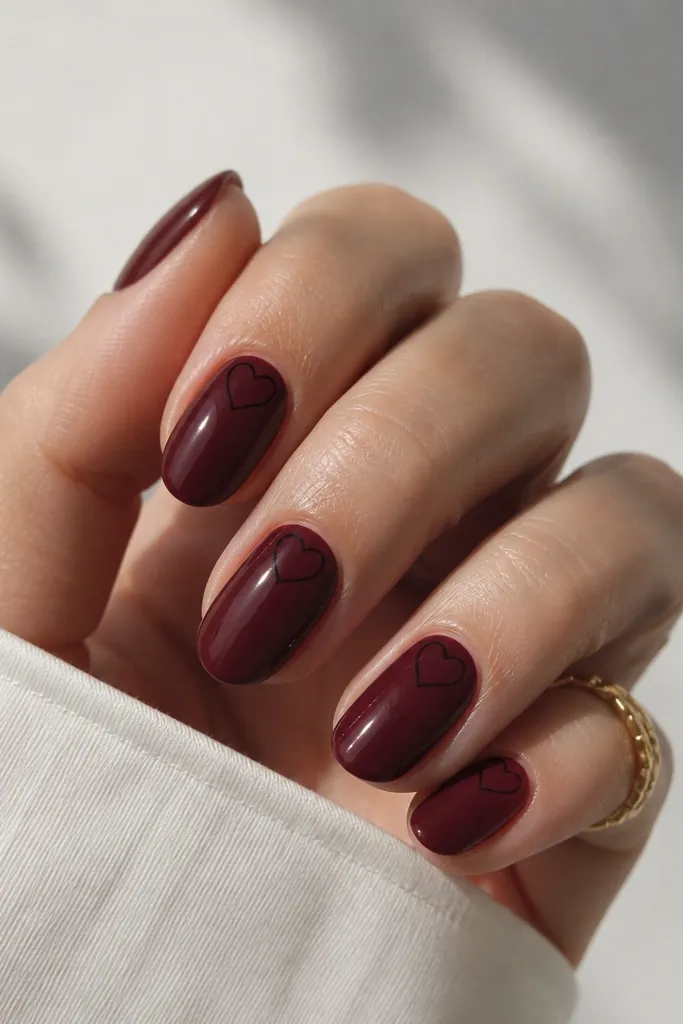
Hearts can look cheesy, but outline-only hearts in black keep it grown-up. Oxblood gives the heart line a deep berry background, so the hearts read like ink drawings. I like this on almond or short square because the heart outlines are tiny and deliberate. It's flattering on any skin tone, and it's a fun option when you want romance without going bright red. The principle is minimal line art: thin black strokes, no thick fill.
Paint two coats of glossy oxblood. Use a fine liner brush or a nail art pen to draw small heart outlines - start with a V shape, then add two curves to form the top lobes. Place one heart near the cuticle on two nails and keep the rest plain oxblood for balance. Seal with glossy top coat, and apply carefully around the lines so the outline stays sharp.
Editor's noteLet the heart line dry for a minute before top coat so it doesn't smear.
Watch outDon't fill the hearts in black - it makes the set feel heavy and less moody.
23. Black Crackle Tips With Oxblood Base
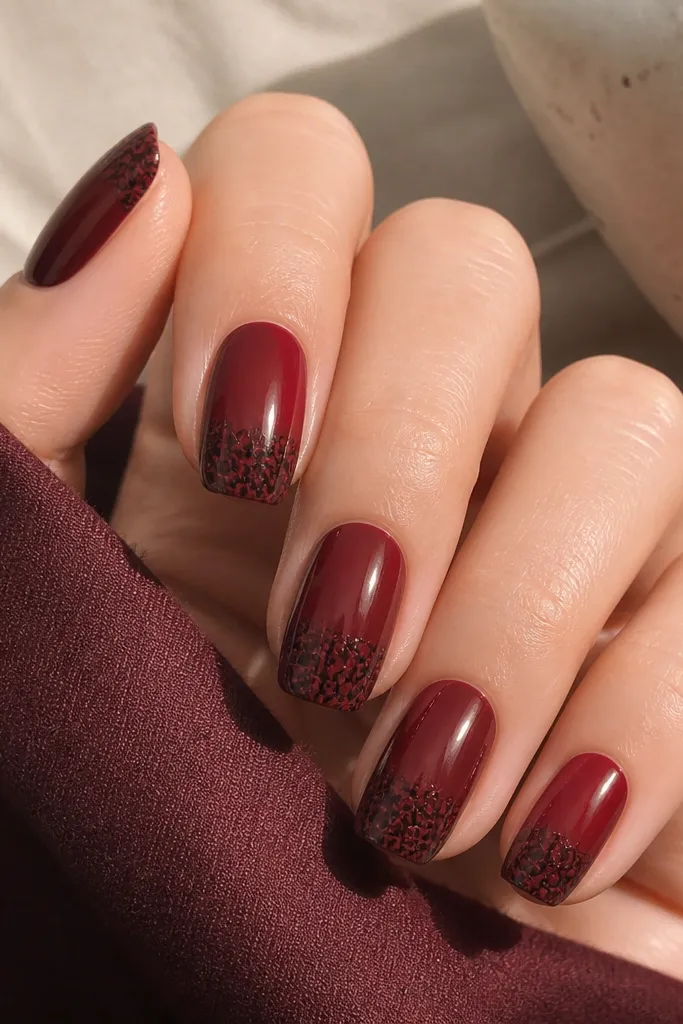
This is the half-and-half version of crackle, and it looks way more intentional. The oxblood base looks smooth and rich, and the black crackle tips add texture without taking over the whole nail. I like it on oval nails because the crackle pattern follows the tip curve. It flatters short nails because the crackle is only at the end, which visually keeps the nail looking tidy. The principle is texture on the tip, smooth color on the base.
Paint two coats of glossy oxblood. Use tape to mask the top edge of where you want crackle to start, leaving the bottom third exposed. Apply black crackle polish only in the exposed area, then remove tape after it sets enough to keep edges clean. Finish with glossy top coat over the crackle area so it smooths out and stays shiny.
Editor's noteIf the crackle spreads too high, reduce crackle polish amount and apply a thinner layer next time.
Watch outDon't let crackle polish sit too long before curing - it can thicken and look muddy.
24. Oxblood French With Black Sidewalls
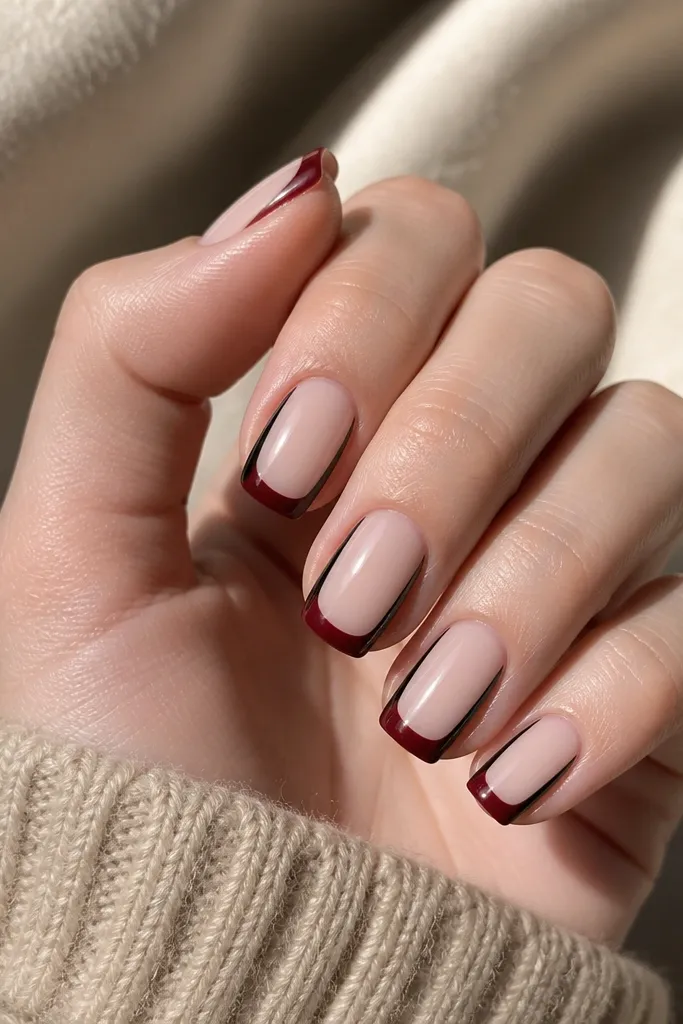
This design looks expensive because it uses negative space like a designer manicure. The oxblood French tip gives you the red pop, and the black sidewalls make the nail shape look sharper. I like it on short squoval nails because sidewalls add definition to the sides without adding bulk. This flatters hands with smaller nail beds because the sheer center prevents the set from looking crowded. The principle is shape control: define the tip and the sides, keep the center light.
Apply a sheer nude base (or clear base) and let it be fully even. Use striping tape to create oxblood French tips at the edge, then paint tip with oxblood in two thin coats. Without covering the tip, paint black along both sidewalls starting from just under the apex and stopping before the free edge. Remove tape carefully and seal with glossy top coat.
Editor's noteUse tape to mark the sidewall width first, then paint - it stops your black from creeping too wide.
Watch outAvoid thick black sidewalls - they can make the nail look heavy.
25. Black Outline Marble With Clear Negative Lines
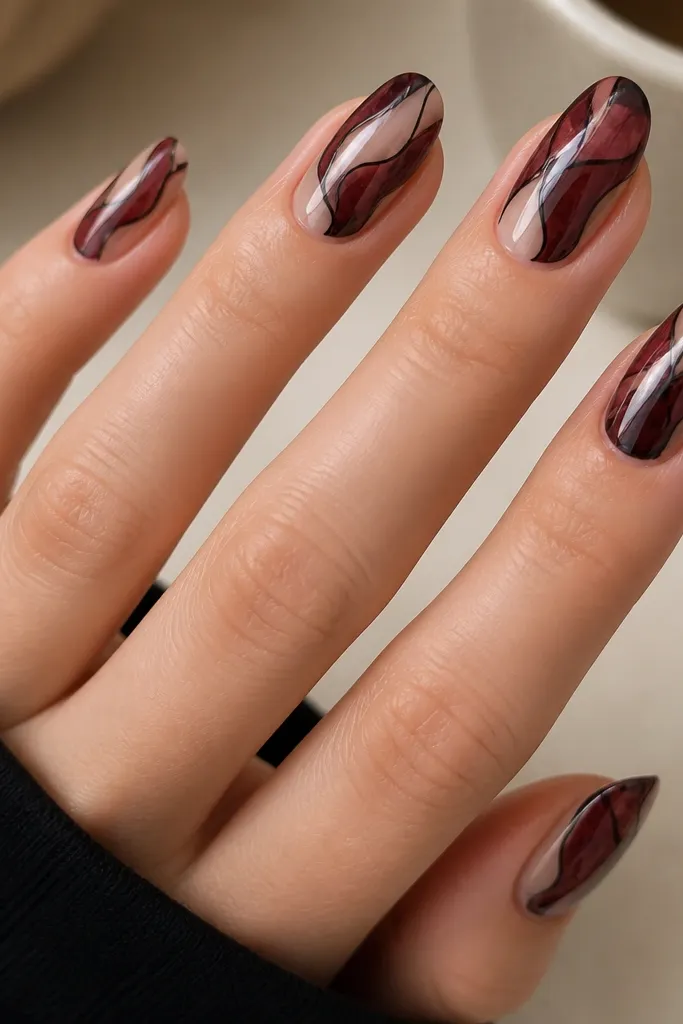
This is a stained-glass take that looks extra dreamy because you can see "windows" of clear in between. Thin black outlines make the marble look intentional, not messy, and the negative lines keep it from getting too dark. I like it on medium almond nails because the clear lines stretch the nail bed. It flatters hands with bitten sidewalls because the outline draws attention away from imperfections. The principle is crisp definition: marble inside lines, clear gaps outside.
Paint a clear base or sheer base coat across the nail. Add oxblood marble streaks using a sponge or marbling brush, but keep them mostly in the center. Use a thin liner brush to draw black outlines around the streaks and add extra vertical black line accents where you want the clear negative lines. Finish with glossy top coat, and do two thin coats so the lines look sealed and smooth.
Editor's noteOutline while the oxblood is slightly tacky so the black line doesn't lift at the edges.
Watch outDon't skip the clear gaps - full coverage turns the stained-glass look into regular marble.